ReSing is an AI voice conversion tool from IK Multimedia that transforms vocals into different voices or instrument sounds. It can turn a male vocal into a female vocal, a sung melody into an instrument such as violin, or help create natural chorus parts. Use it as a DAW plug-in or standalone application; in an ARA-compatible DAW, audio clips can be edited directly. Multiple voice models and adjustable parameters make it easier to experiment during production.
Can AI Change Your Voice? New Vocal Production Possibilities with ReSing
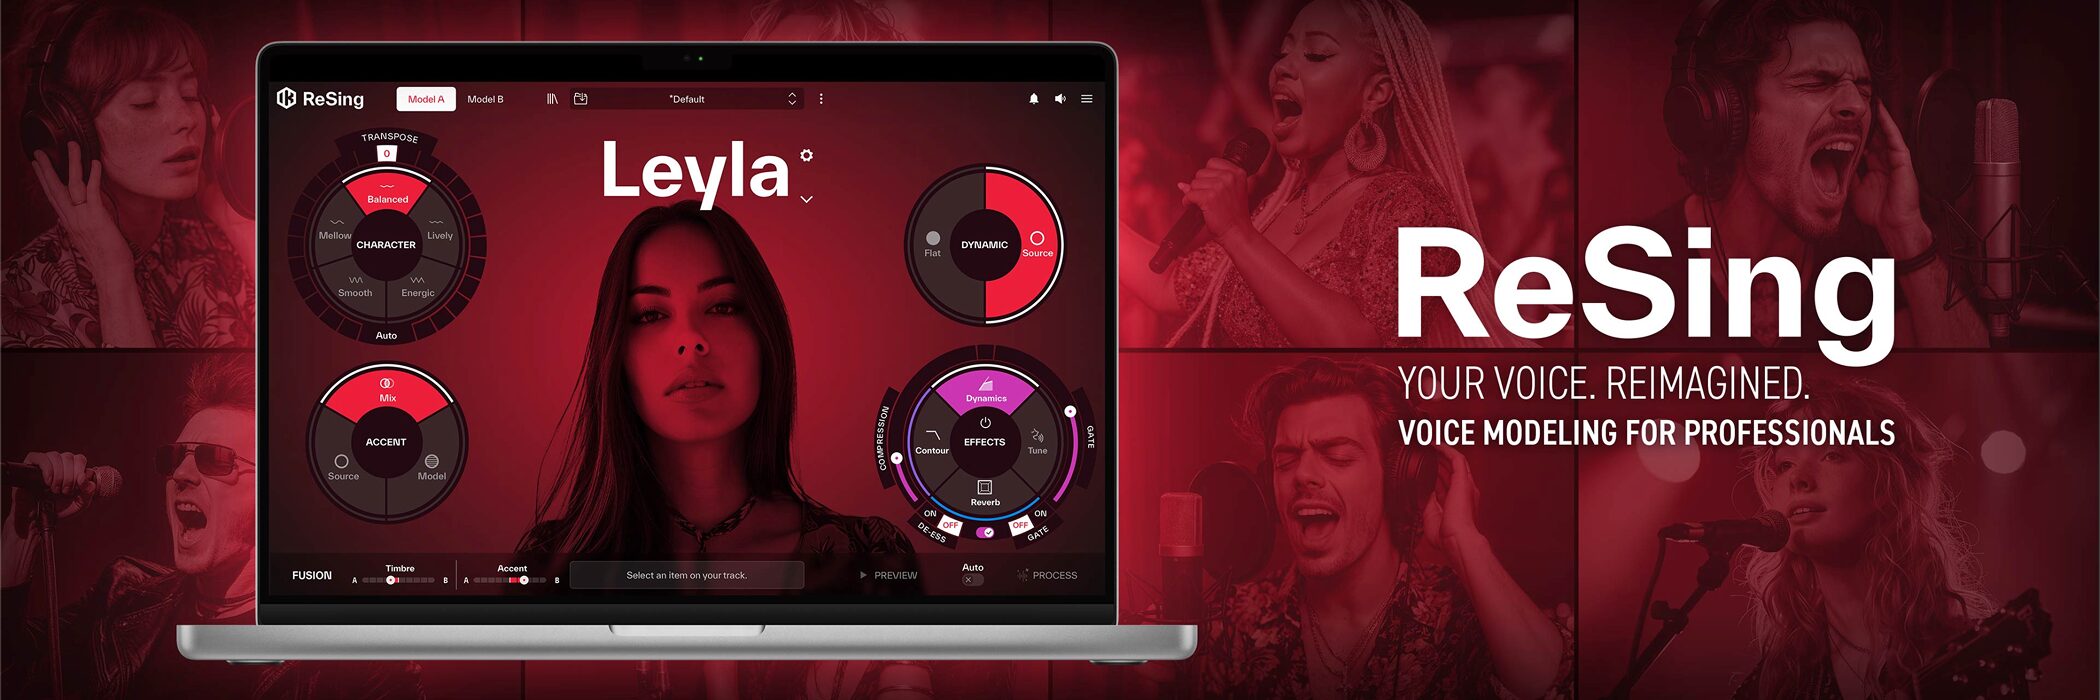
Imagine turning your voice into someone else’s or into an instrument. IK Multimedia’s ReSing makes that possible.
ReSing is a voice modeling tool using advanced AI that can transform imported audio into different voices or instrument sounds such as saxophone and guitar.
Its main features include:
- Transform voices using a range of voice and instrument models.
- Create an original voice model trained on your own voice.
- Use it as a DAW plug-in or standalone application.
- Edit audio clips directly in an ARA-compatible DAW.
This guide explains ReSing’s features and how to use them.
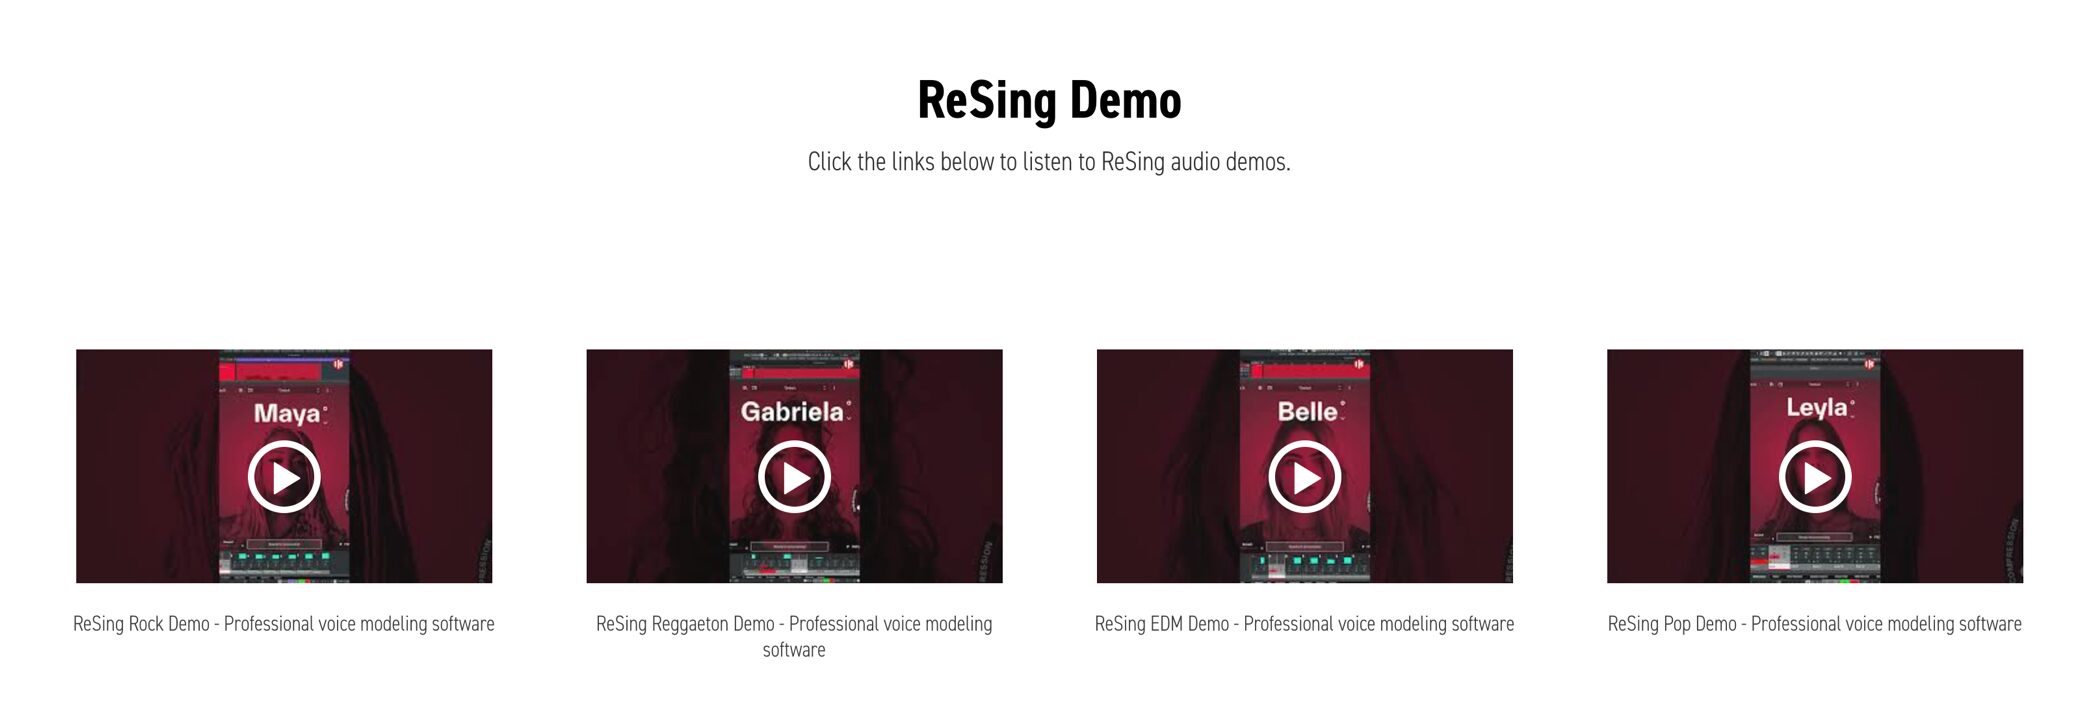
ReSing Demo
First, let’s hear what ReSing can do.
Here are some examples:
Turn a Voice into an Instrument

Create a realistic instrument part from a melody sung intuitively.
Turn a Male Vocal into a Female Guide Vocal

It is common for a male singer to record a guide vocal that will later be replaced by a female vocalist.
ReSing can create a female guide vocal during production, letting you work while hearing something closer to the intended final result.
Easily Create Unison and Chorus Parts from a Lead Vocal
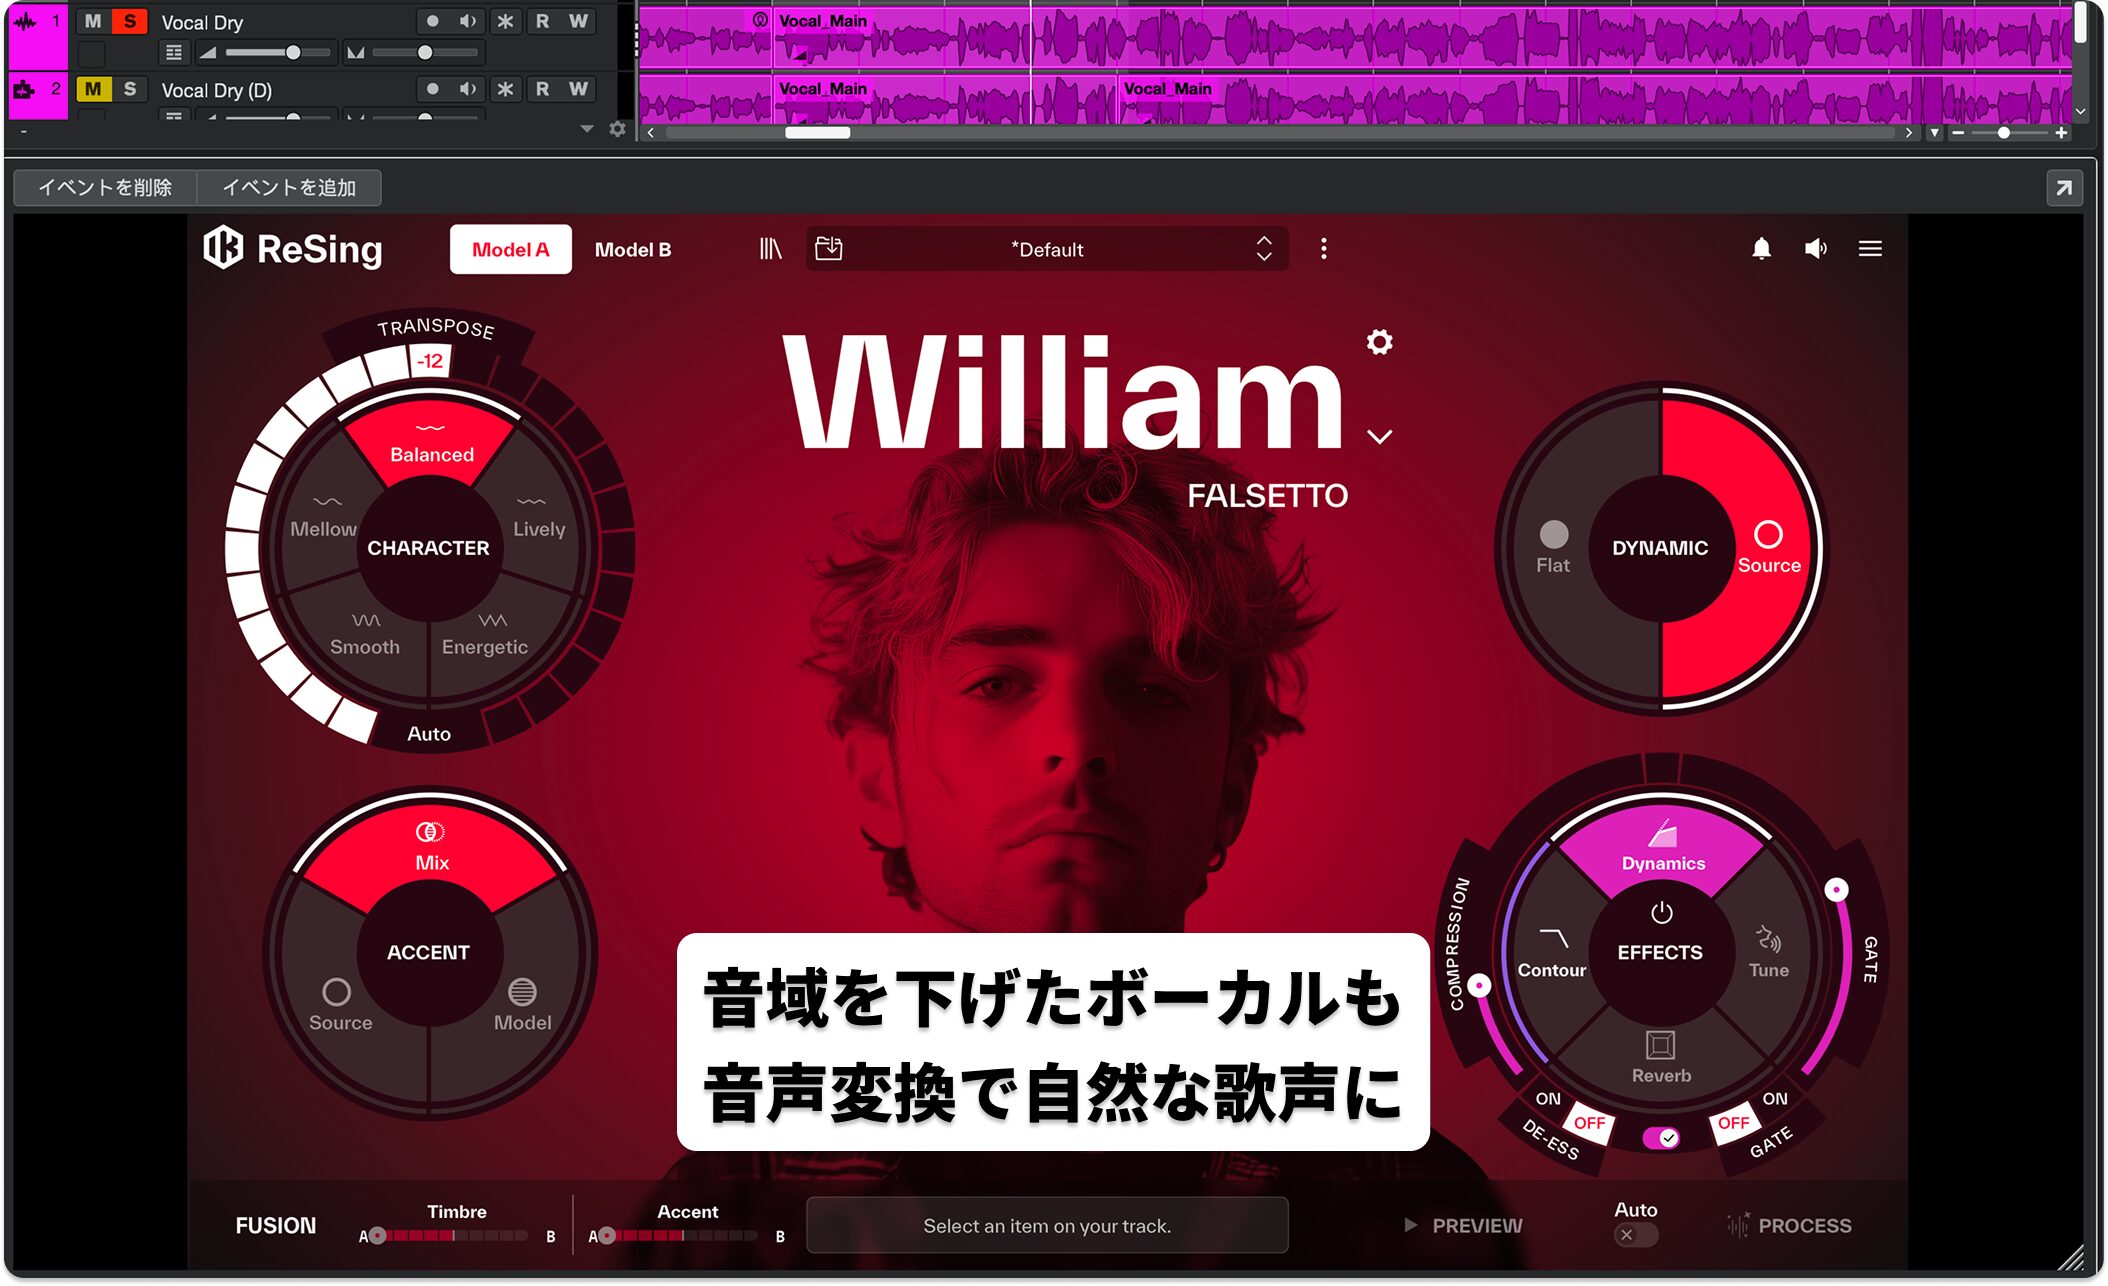
With ReSing, you can create natural unison and chorus parts.
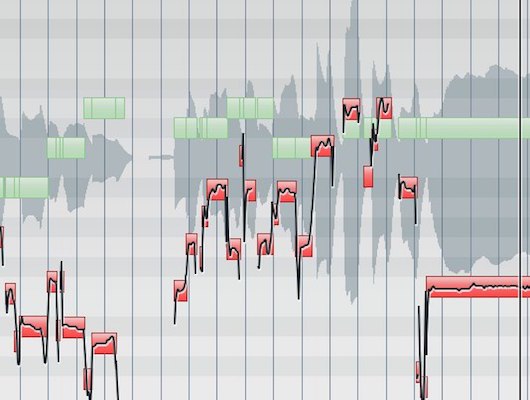
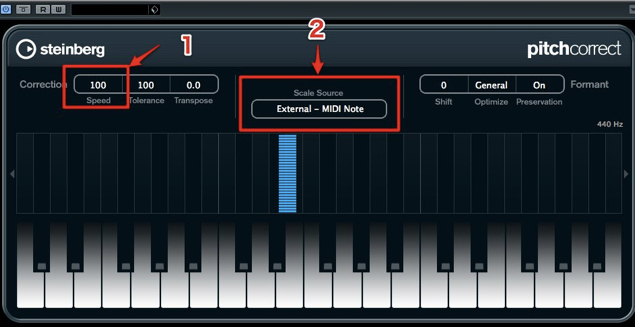
Large pitch changes made with a pitch correction tool can sound unnatural. Converting the result with ReSing can turn that mechanical quality into a more natural singing voice.
Basic ReSing Setup
Installation and Authorization
To use ReSing, first install and authorize it with IK Product Manager.
This dedicated application manages IK Multimedia downloads, installation and license authorization in one place.
For detailed installation and authorization instructions, see the following article:
How to Install and Authorize IK Multimedia Products
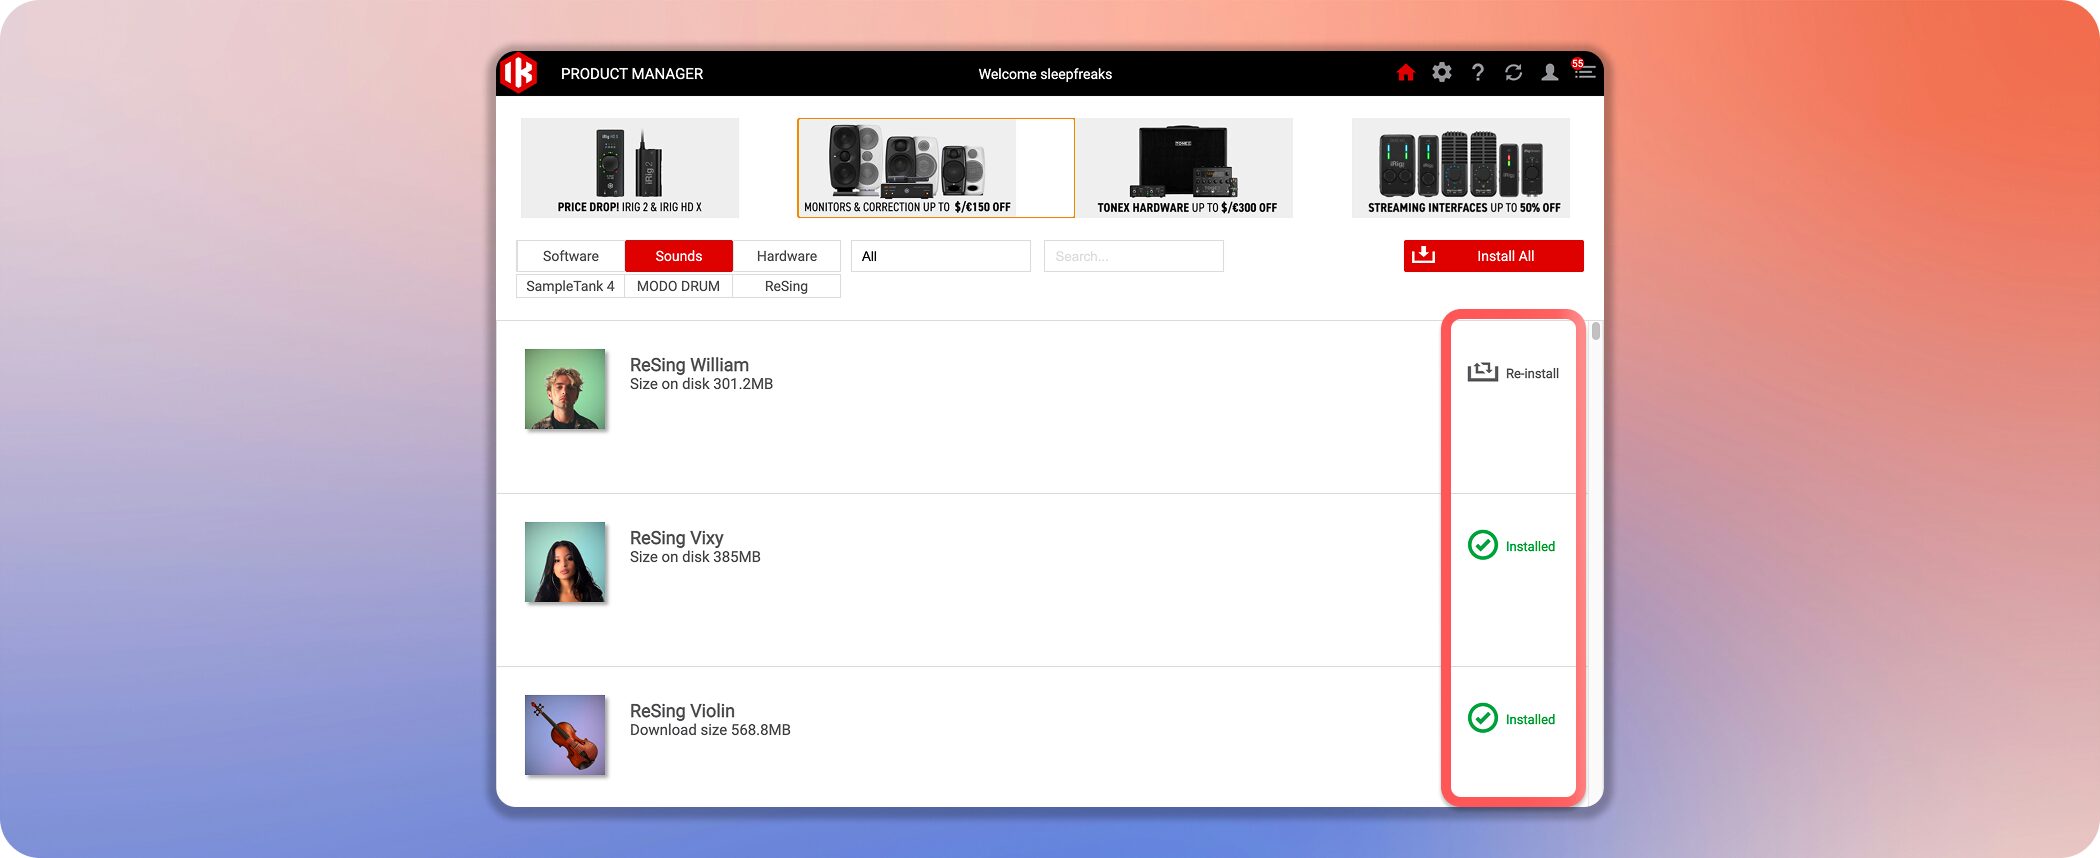
When installing, be sure to download the sound library (voice models) as well as ReSing itself.
It is required for presets and all ReSing features, including custom model creation.
Launching ReSing
ReSing also runs standalone, but this article uses it as a DAW plug-in.
In a DAW, you can launch it as a standard plug-in or in ARA mode.
Standard Mode: Insert Effect
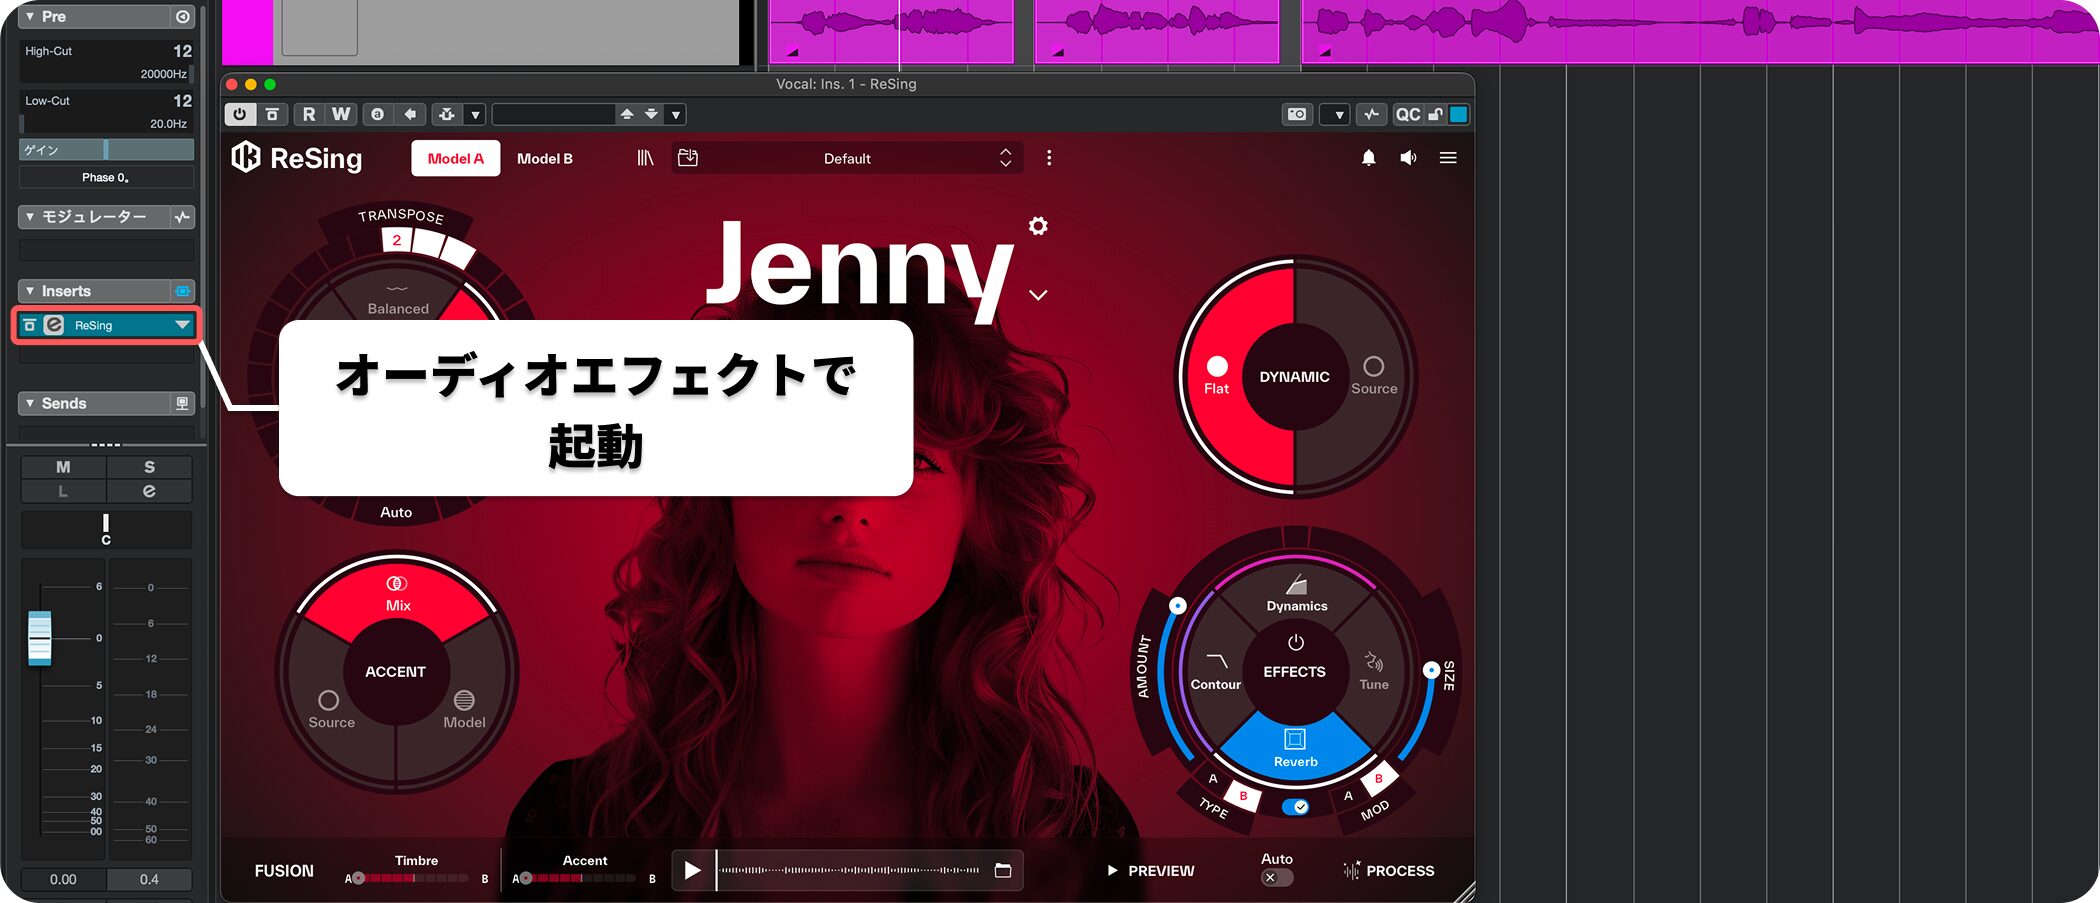
As with a regular plug-in, insert ReSing into an insert effect slot on the audio or instrument track you want to convert.
ARA Mode: Studio One, Cubase and Other Compatible DAWs
ARA (Audio Random Access) is a special integration available in supported DAWs.
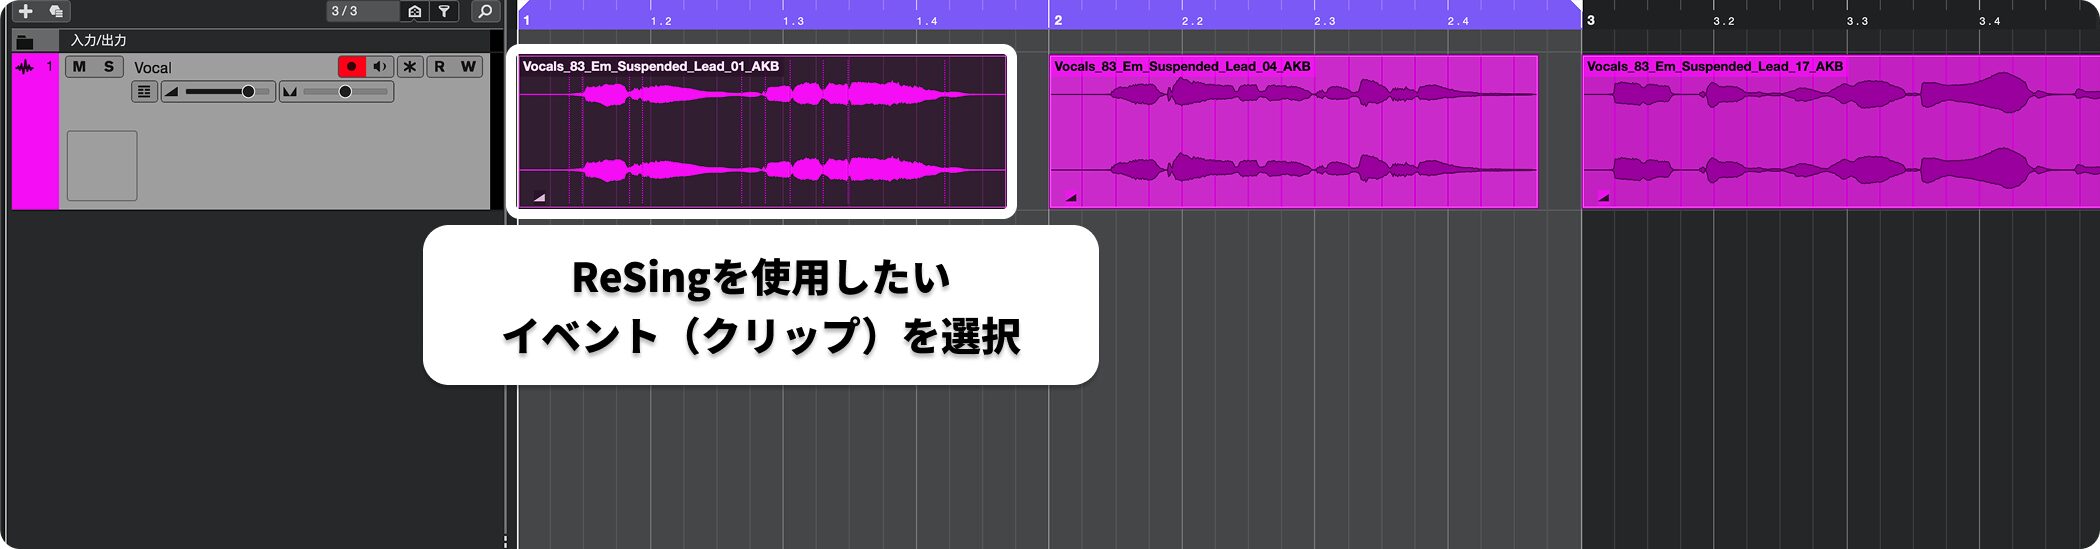
Select the audio event or clip you want to convert in the DAW.
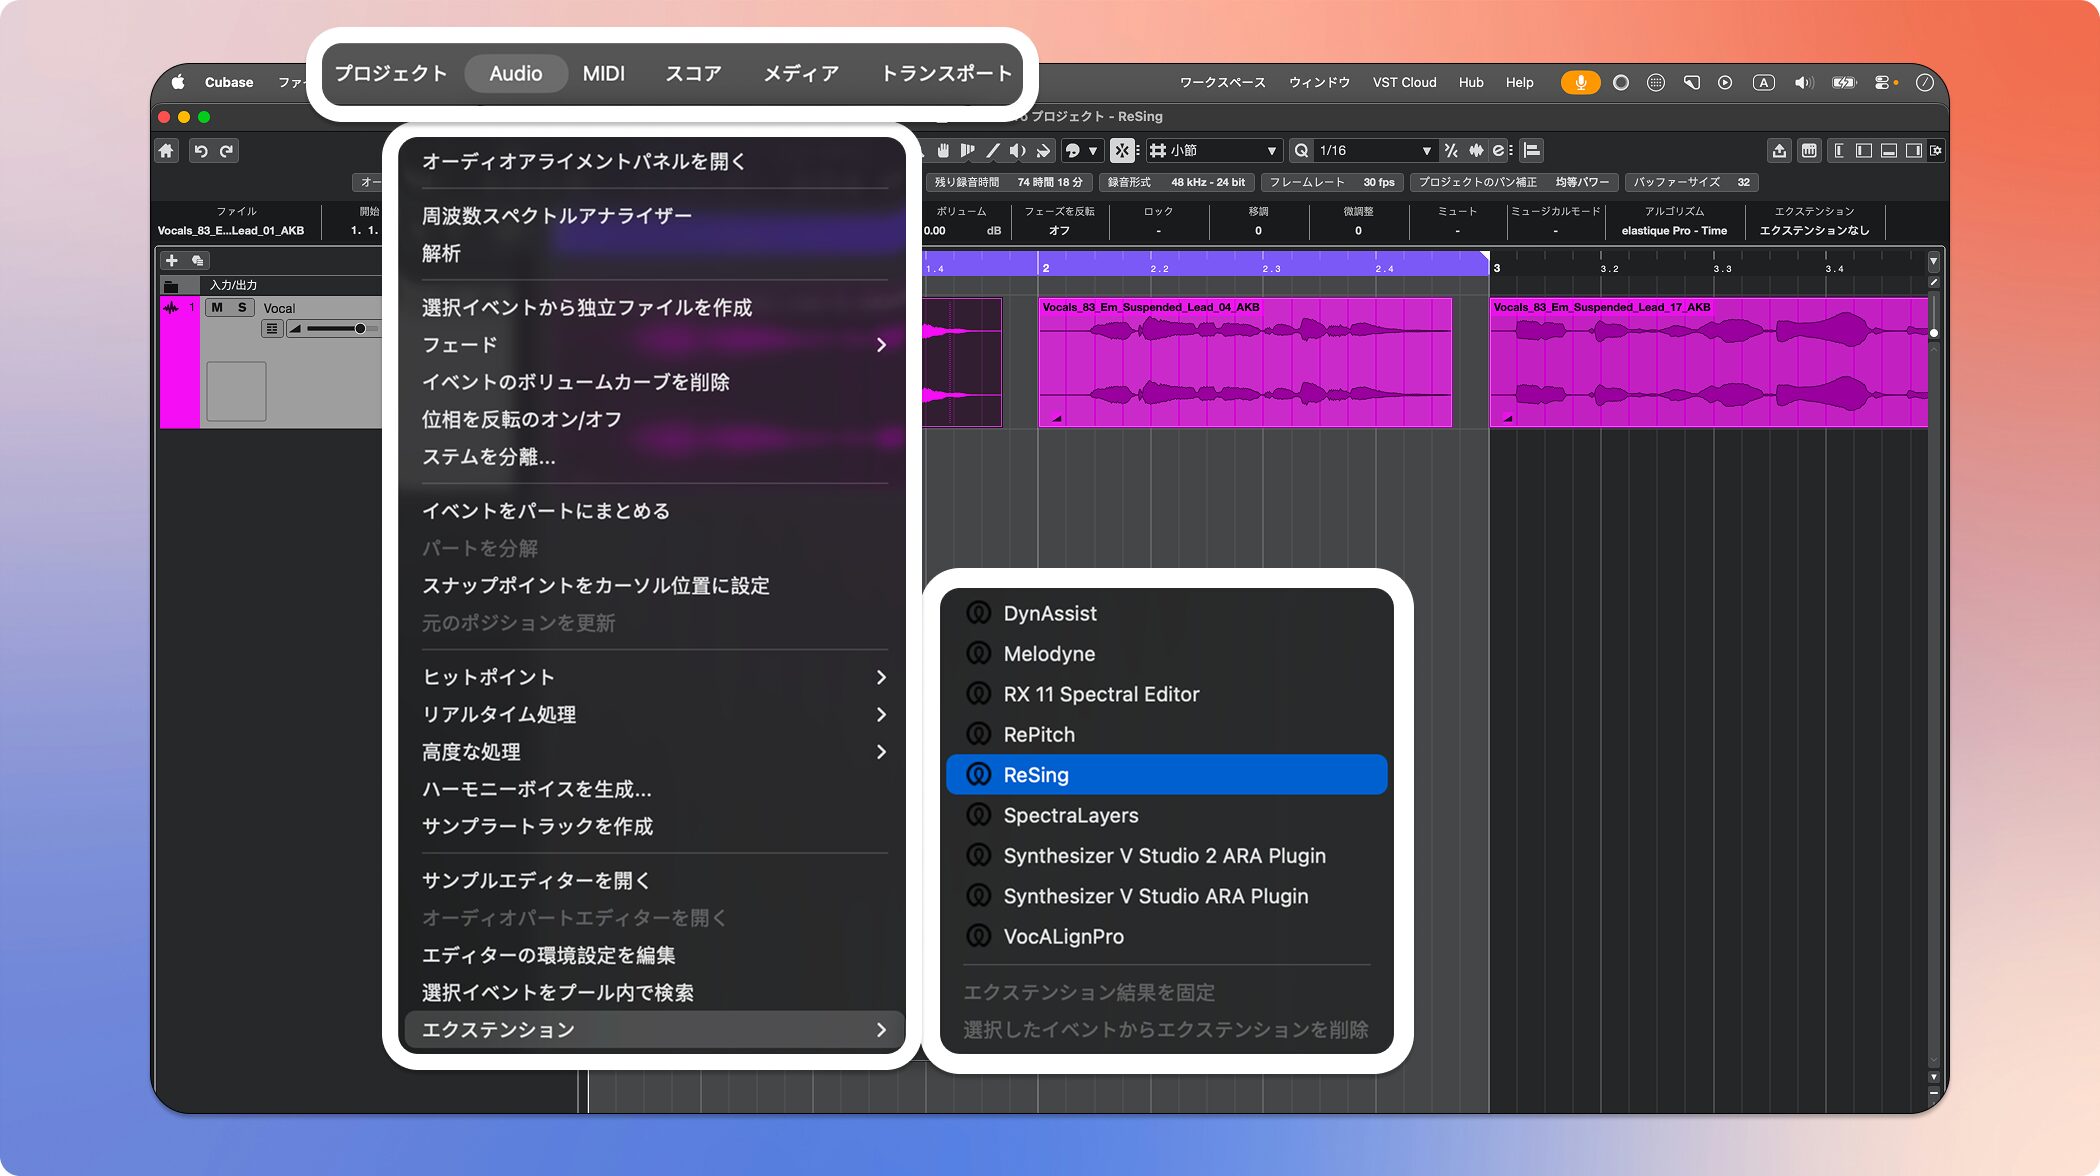
Choose ReSing from the “Extensions” menu to open it for direct editing of the audio clip.
ARA mode lets you edit while visually checking the audio range on the DAW timeline.
Loading and Converting Audio
To change a voice, first load the source audio into ReSing.
For best results, the article recommends audio with the following characteristics:
- Monophonic audio containing a single sound
- A single vocal or instrument track
- No overlapping sounds such as harmonies or chords
Files with overlapping sounds can also be processed, but a clean single track gives a more natural result.
In Standard Mode
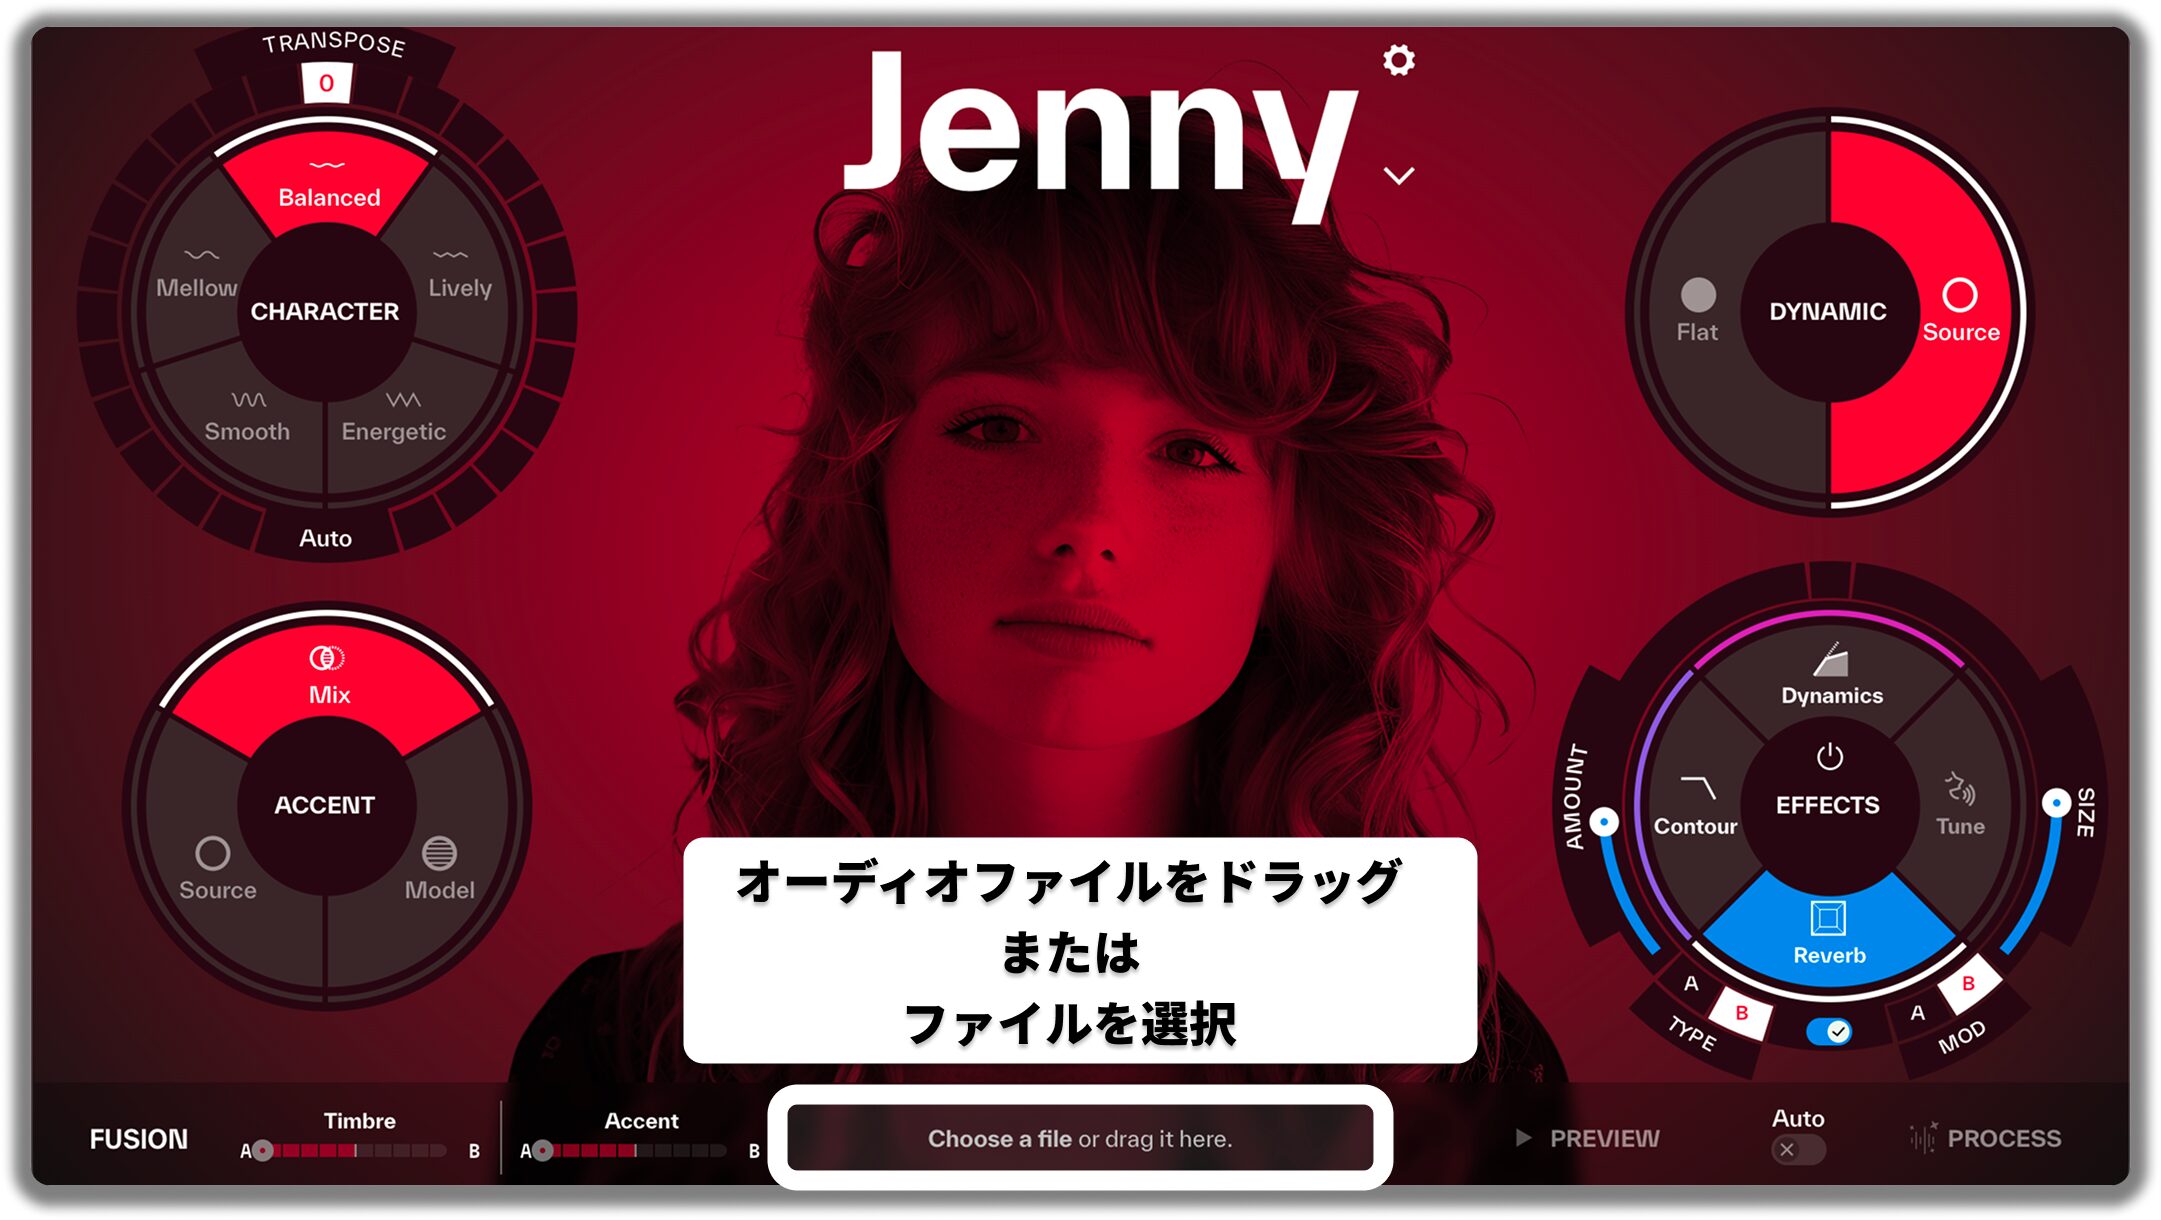
Drag the audio file you want to convert into “Choose a file or drag it here” at the bottom of the ReSing interface.
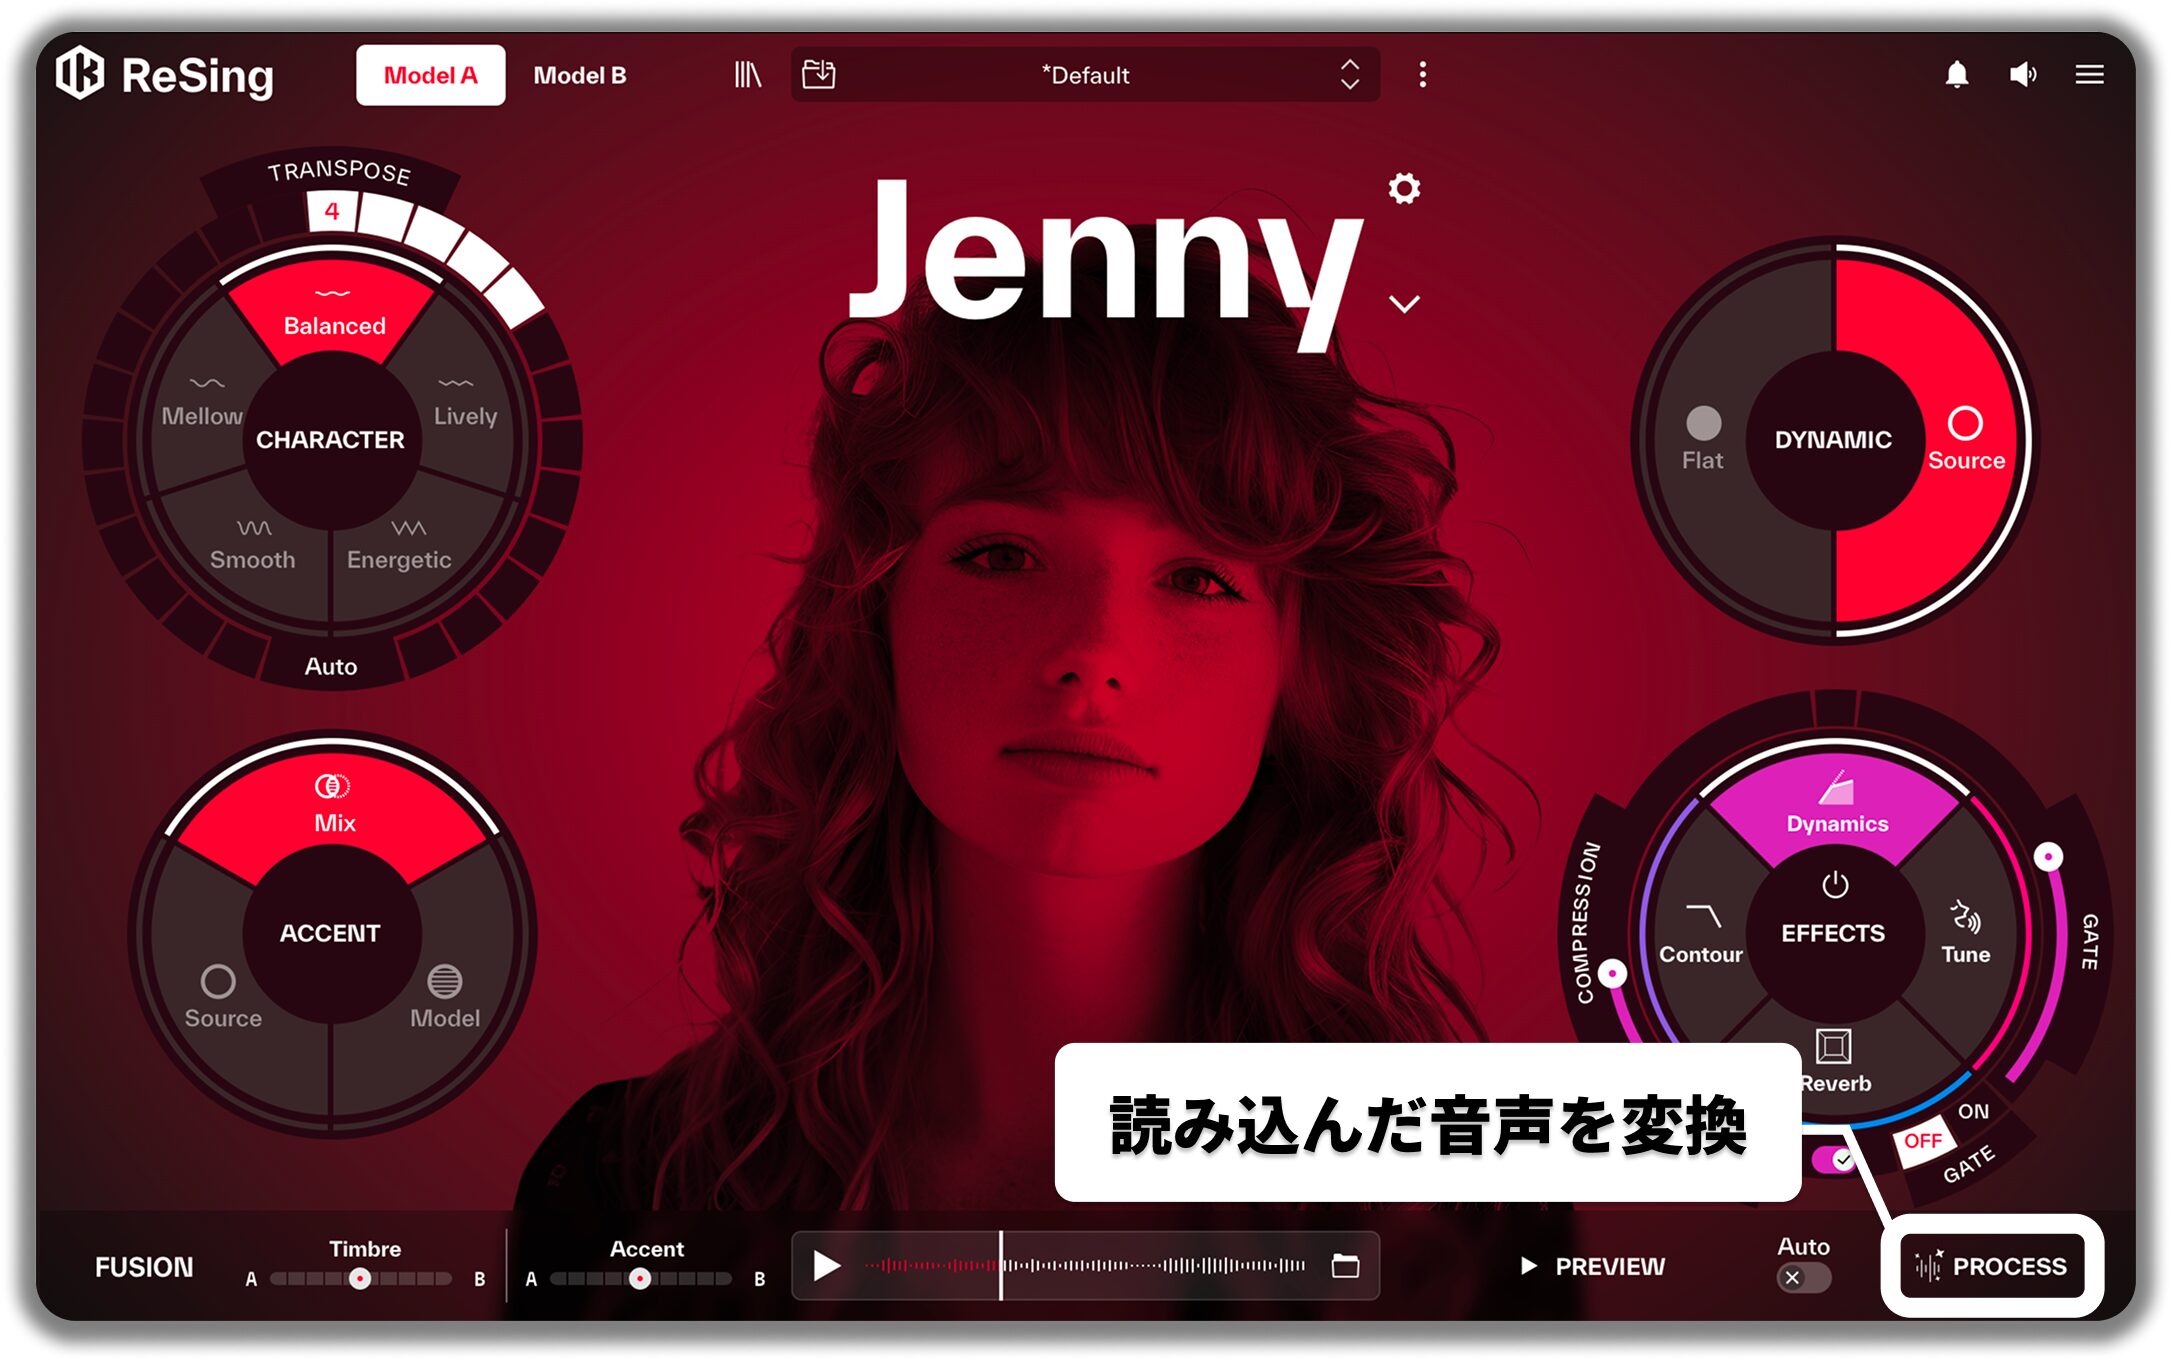
Choose a voice model, set the parameters and click “PROCESS” to run the conversion.
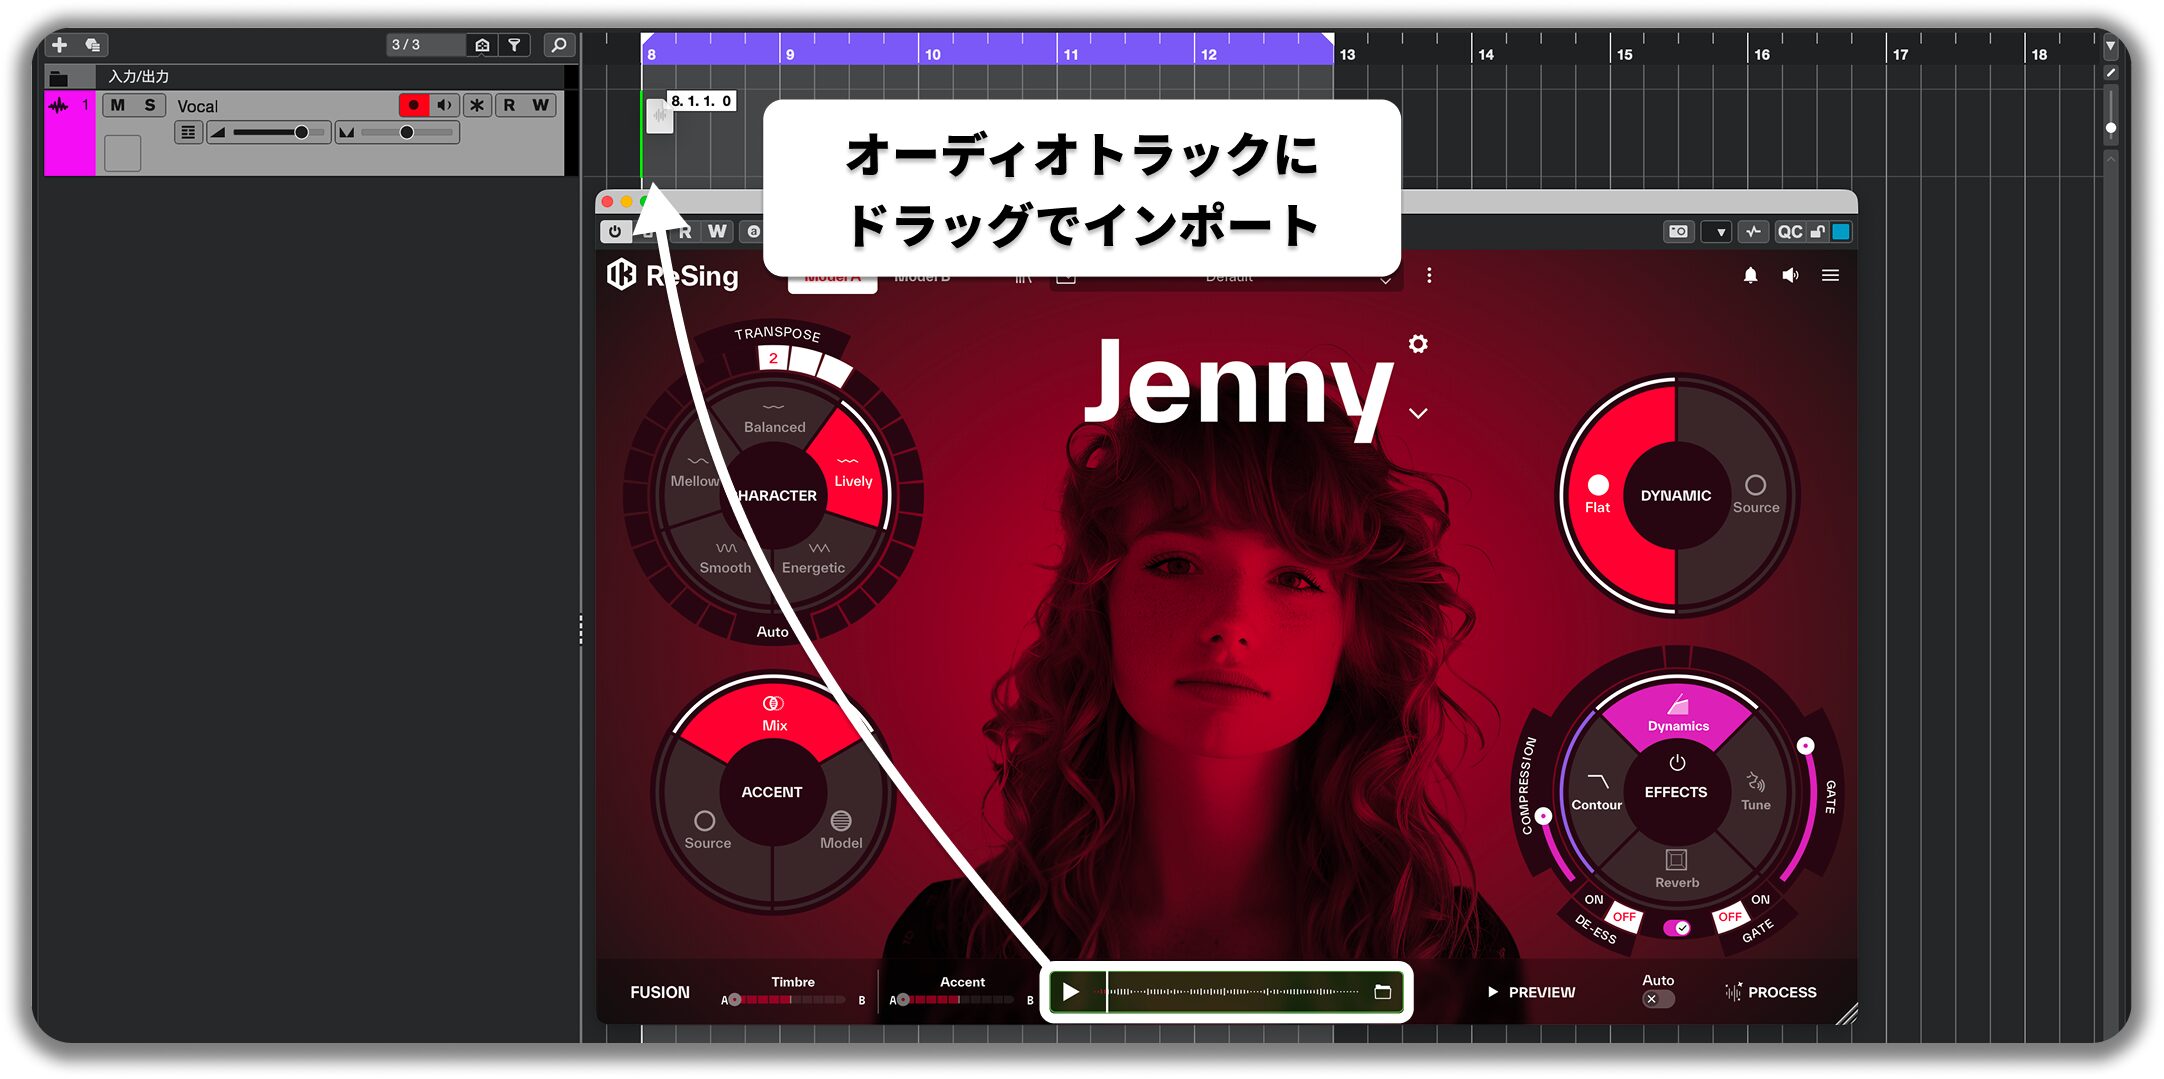
When processing is complete, the audio in that area is replaced by the converted audio. Drag it onto the desired track.
In ARA Mode

Select the event you want to convert, choose a voice model and set the parameters, then click “PROCESS.”
The selected event is replaced by the converted audio.
Auditioning Audio

The PREVIEW button converts just the first few seconds for auditioning before you run PROCESS.
It is useful for quickly checking whether the AI model’s tone and accent match your idea.

The EFFECTS section can be auditioned in real time without running PROCESS.
Choosing a Voice Model
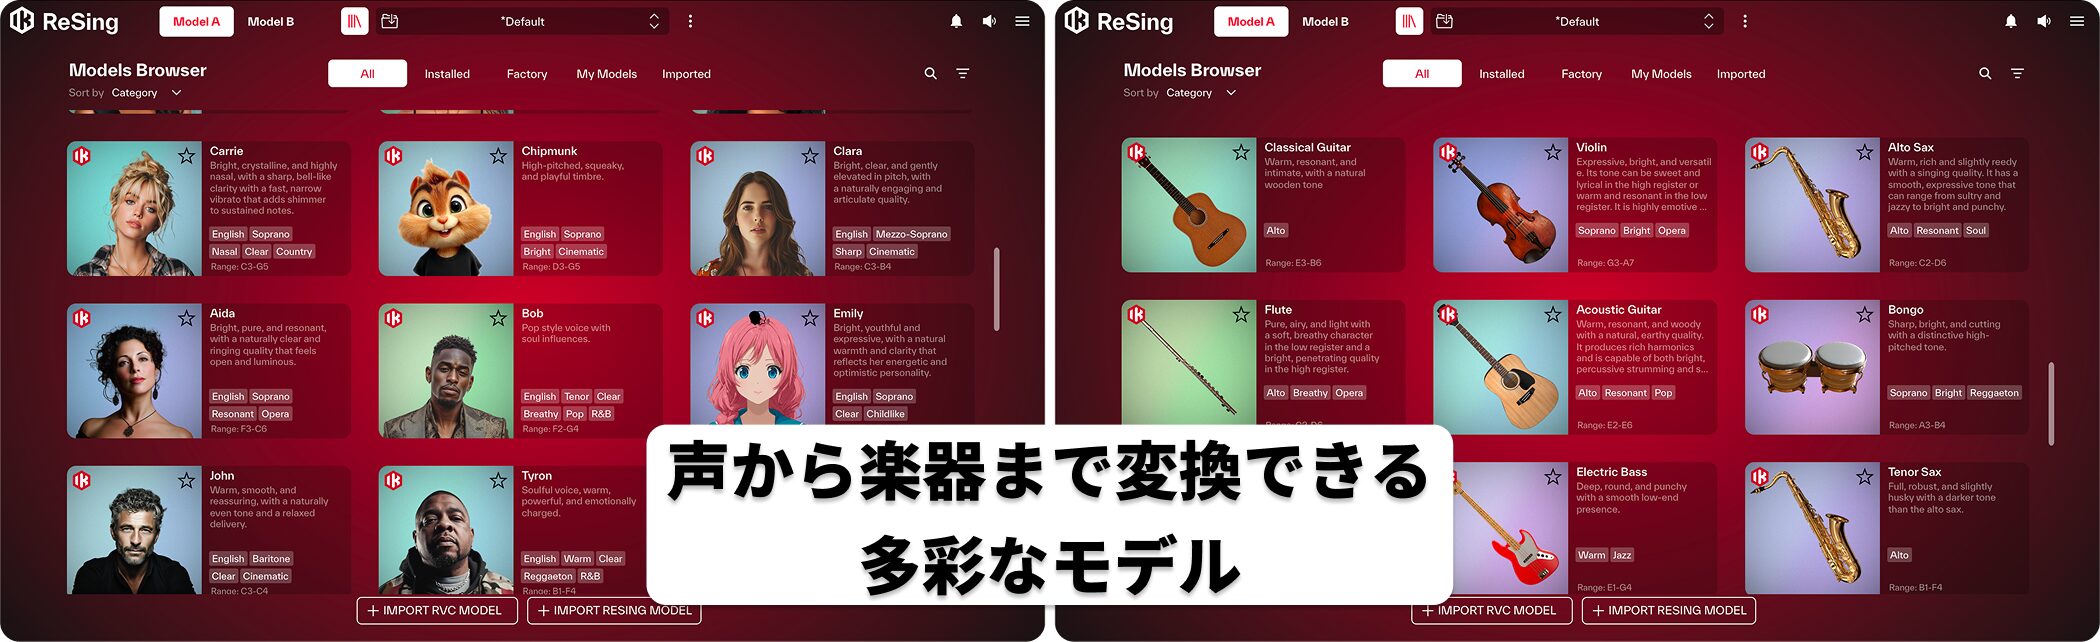
ReSing includes multiple voice models to choose from according to the voice you want.
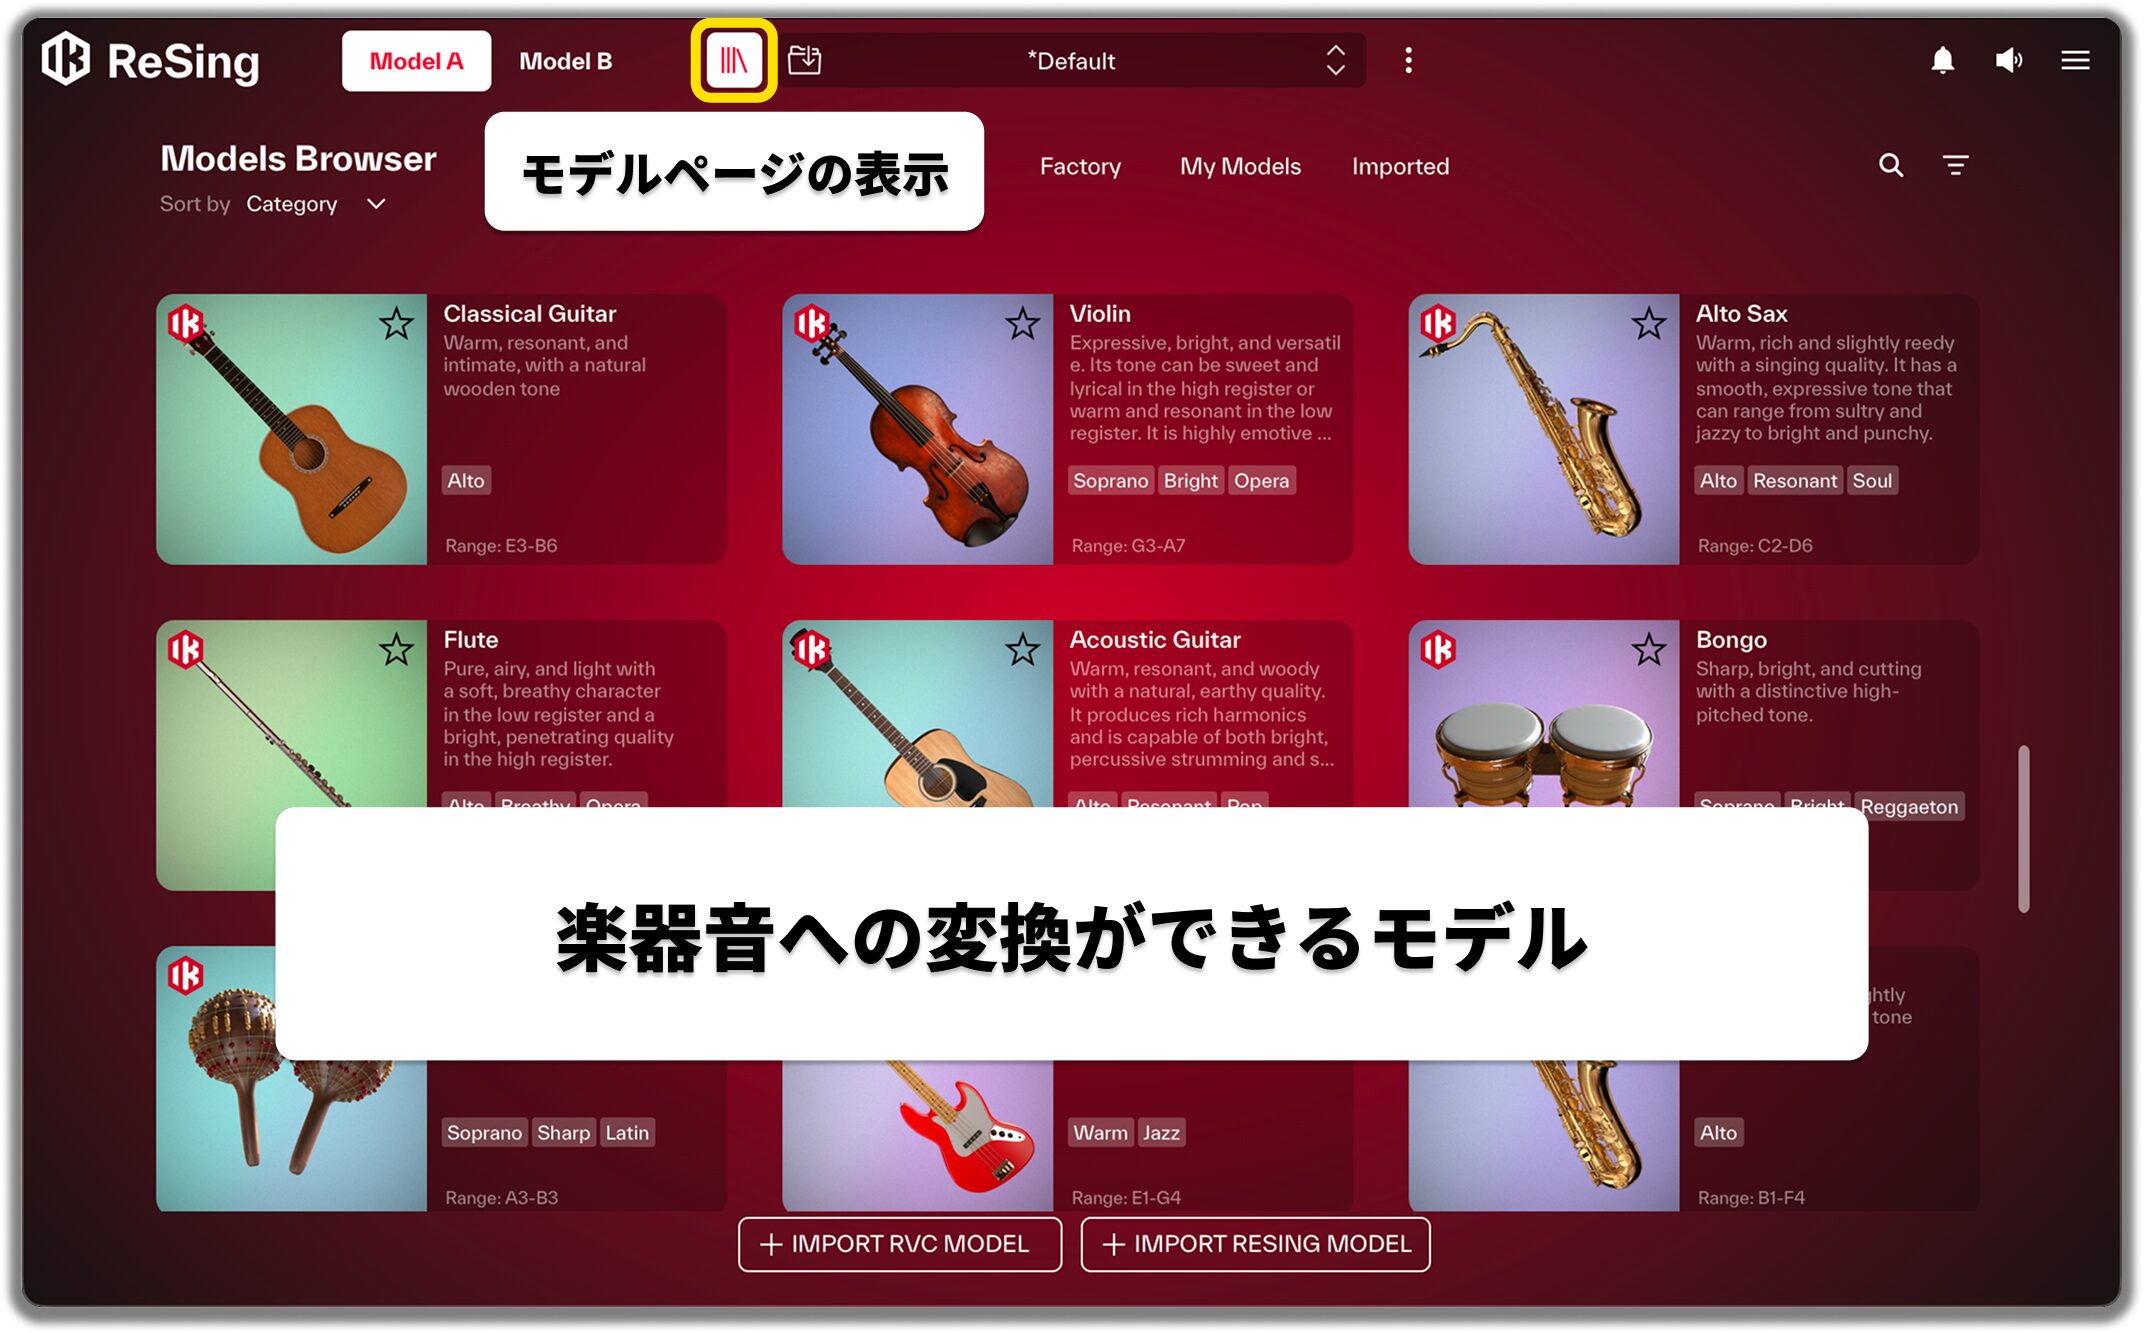
Select the model using the bookshelf icon at the top of the interface.
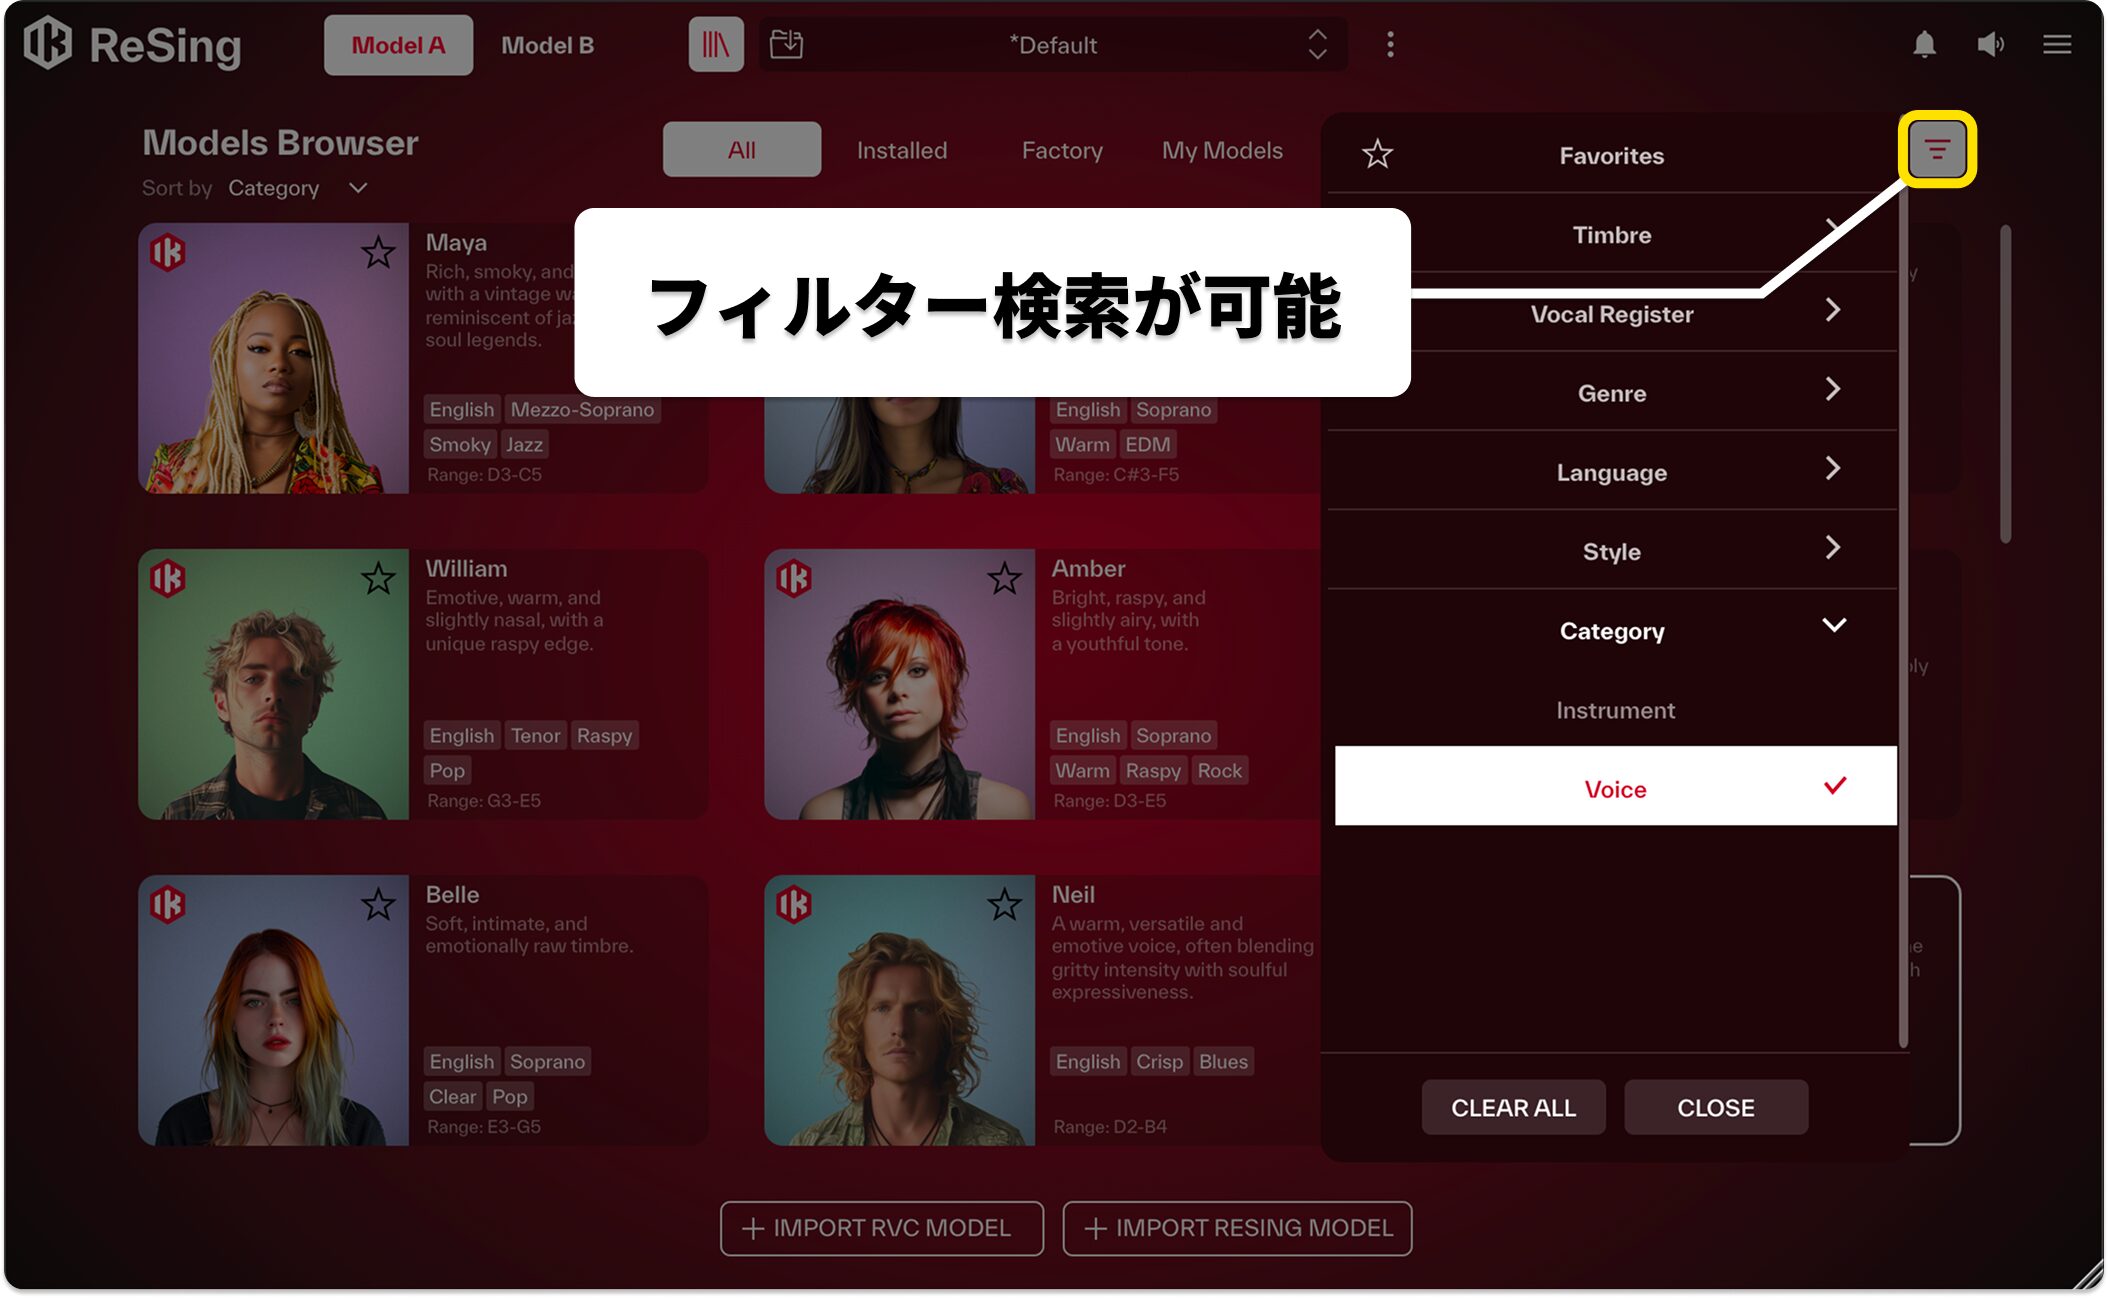
Use the filter at the upper right to find a model quickly.
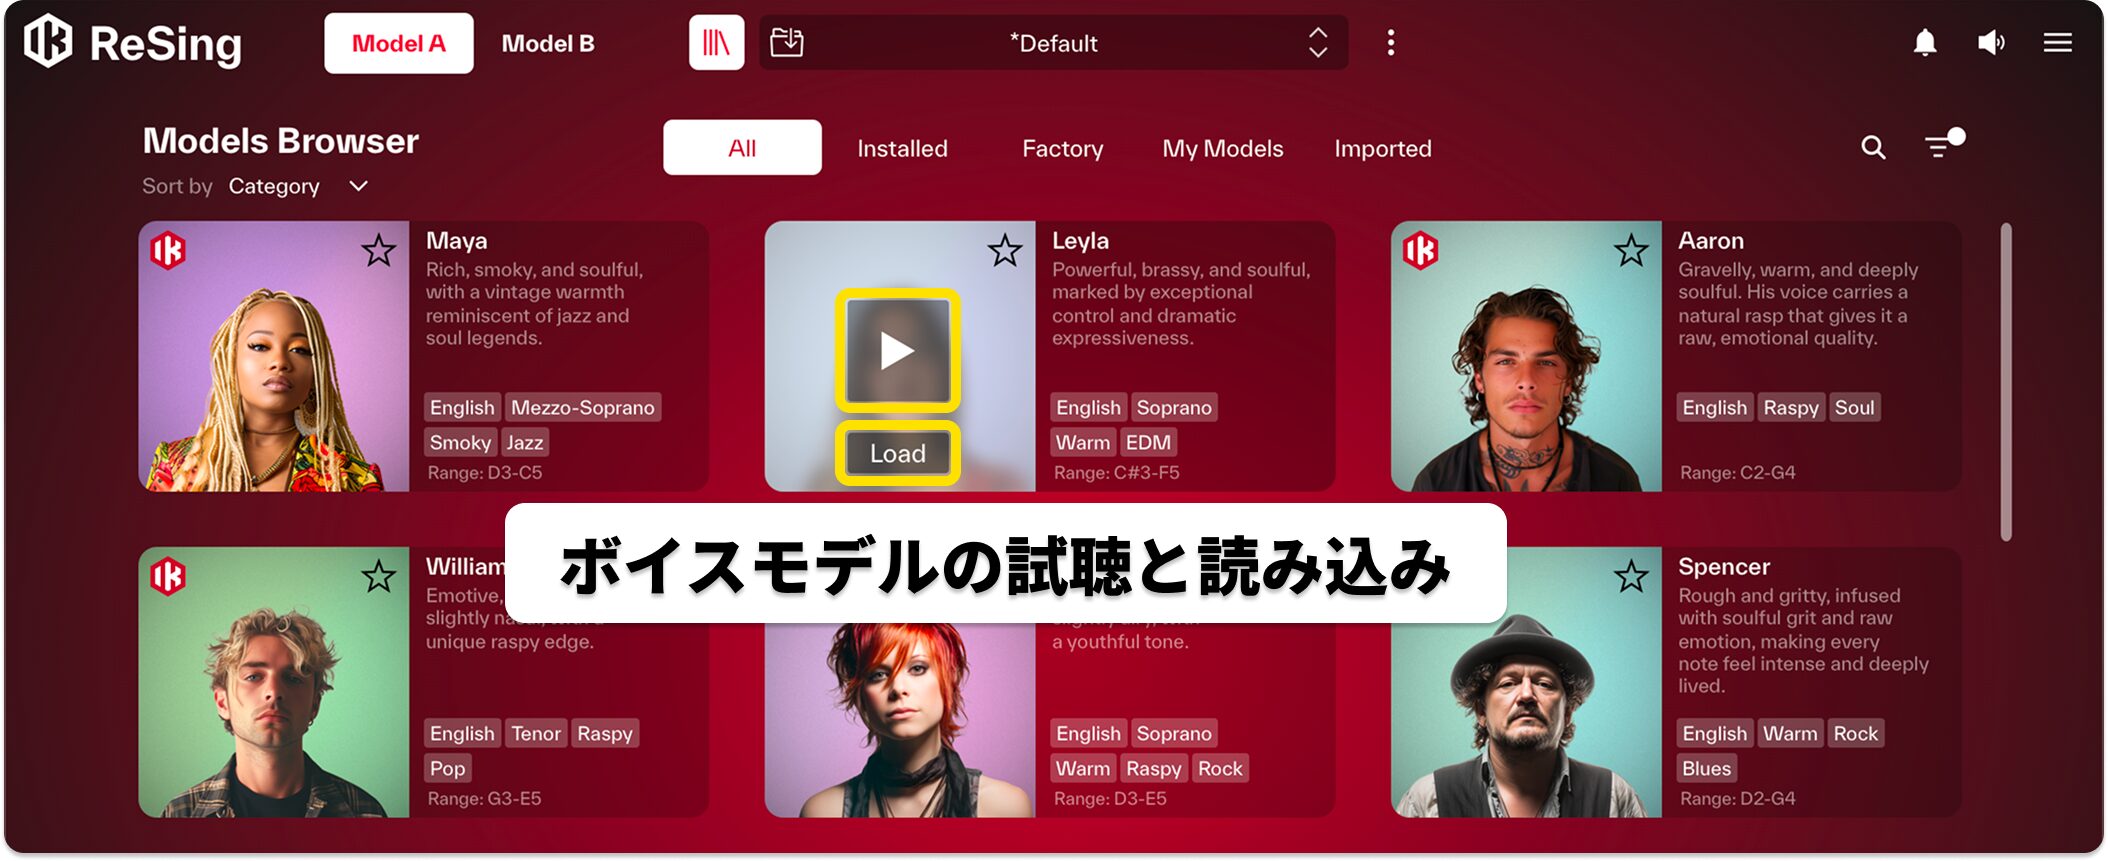
Click “Play” on a model to audition it, or “Load” to load the selected model.
Four Main Parameters
In addition to applying a voice model, you can fine-tune the conversion with four main parameters.
Character
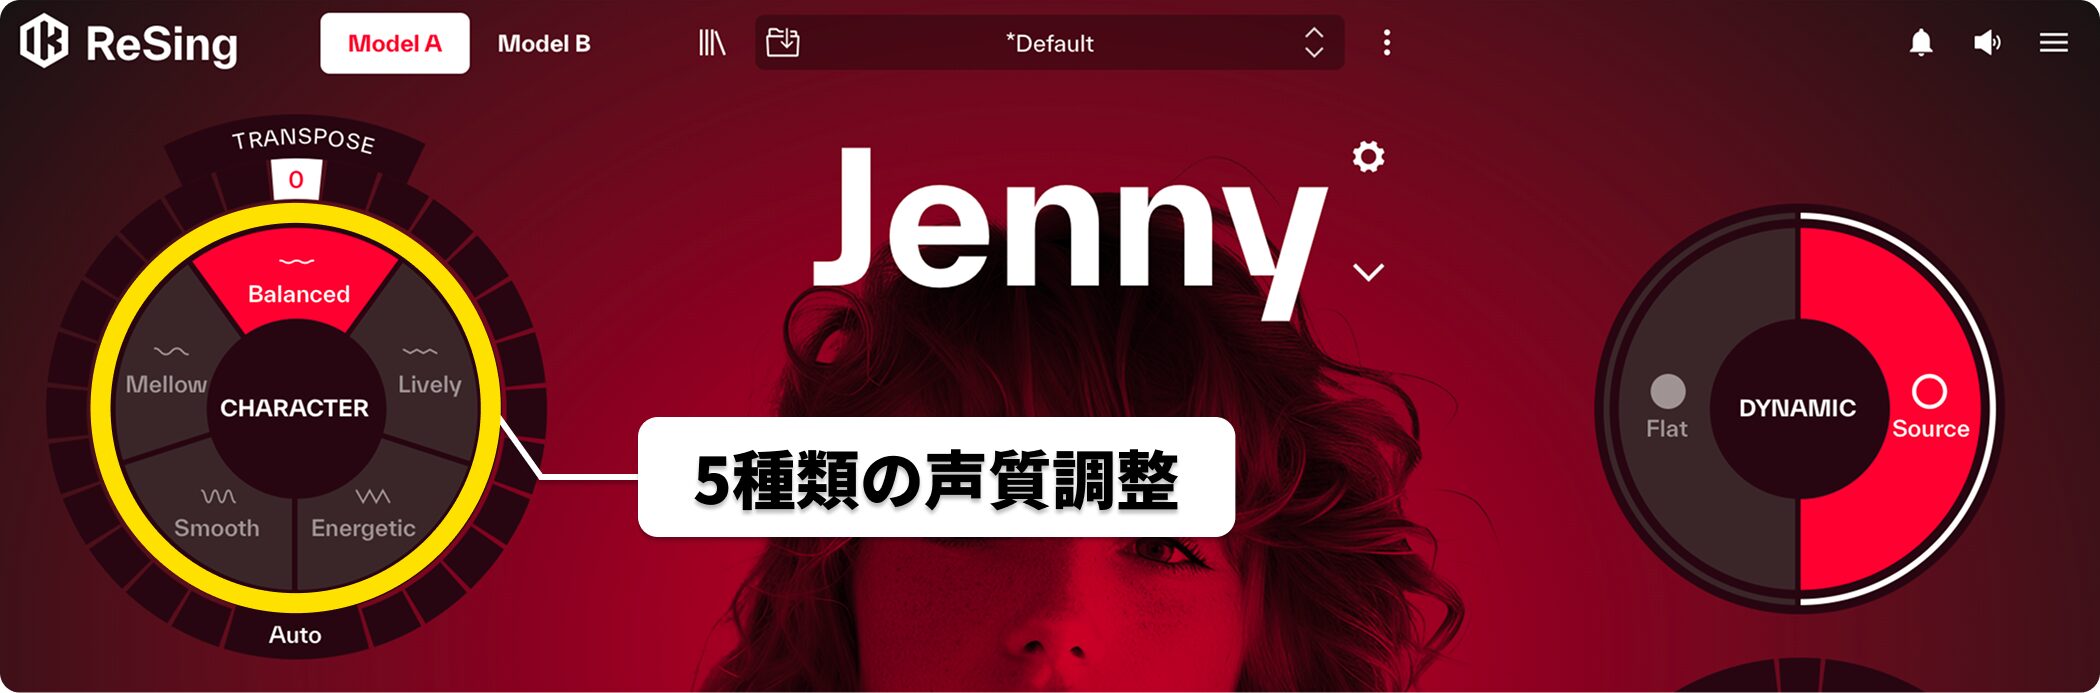
Character sets the expressive style of the converted voice.
- Balanced: a balanced, standard voice
- Lively: a lively, bright voice
- Energetic: a powerful, energetic voice
- Smooth: a smooth, soft voice
- Mellow: a calm, gentle voice
Switch between them to adjust subtle nuances for the song’s genre and desired mood.
Transpose
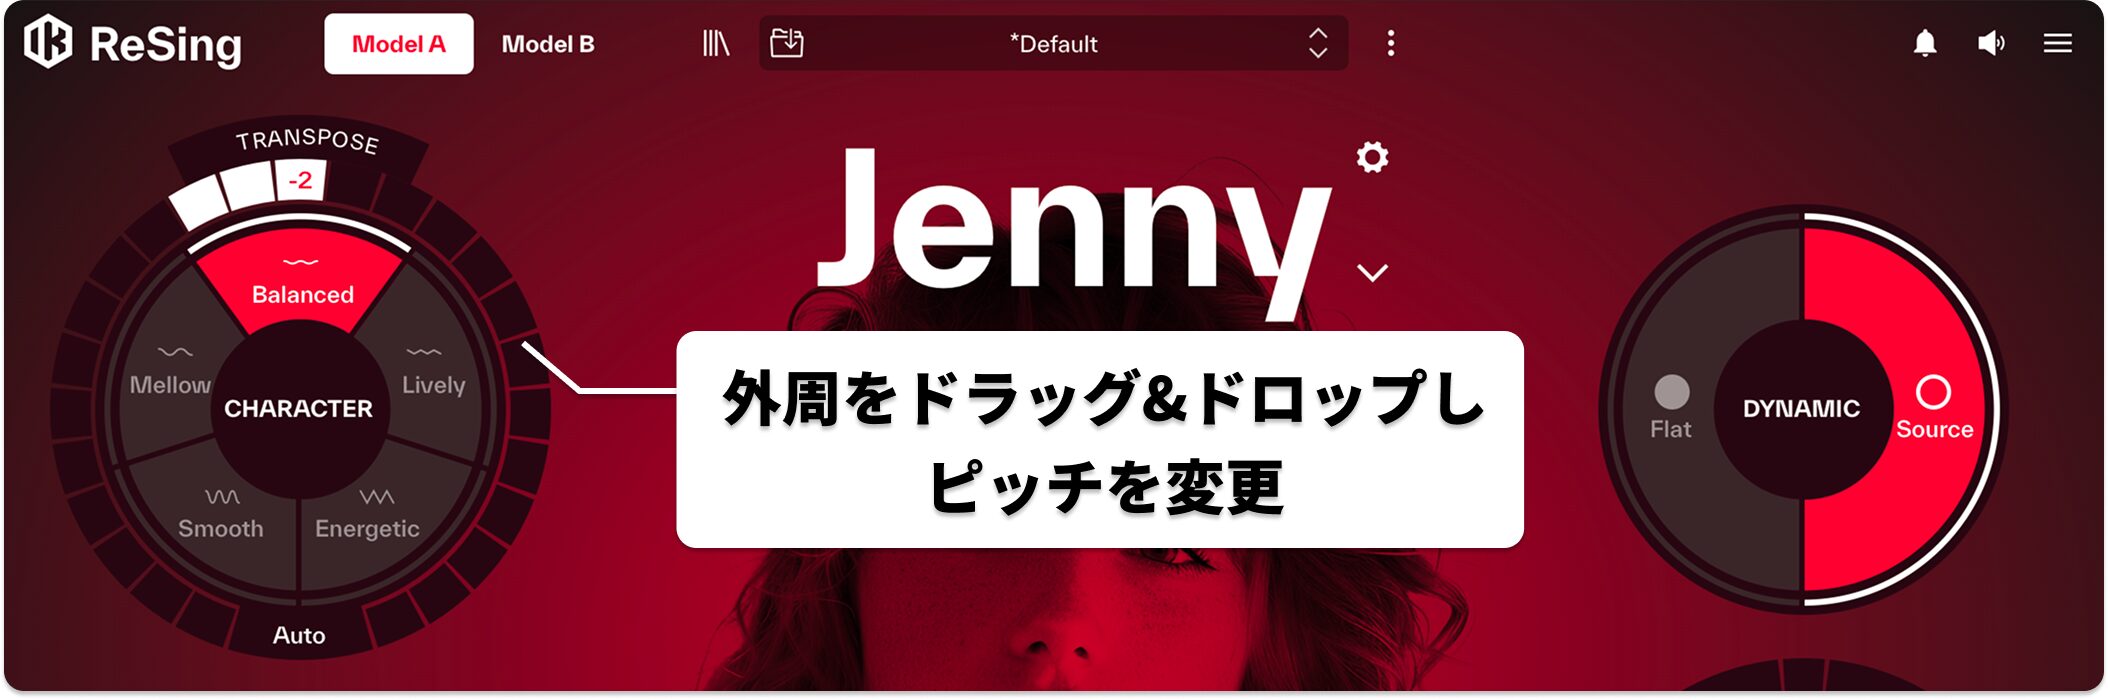
Transpose adjusts the pitch of the converted audio in semitone steps.
Unlike a simple pitch shift, ReSing changes pitch while preserving characteristics of the voice, making an unnatural mechanical sound less likely.
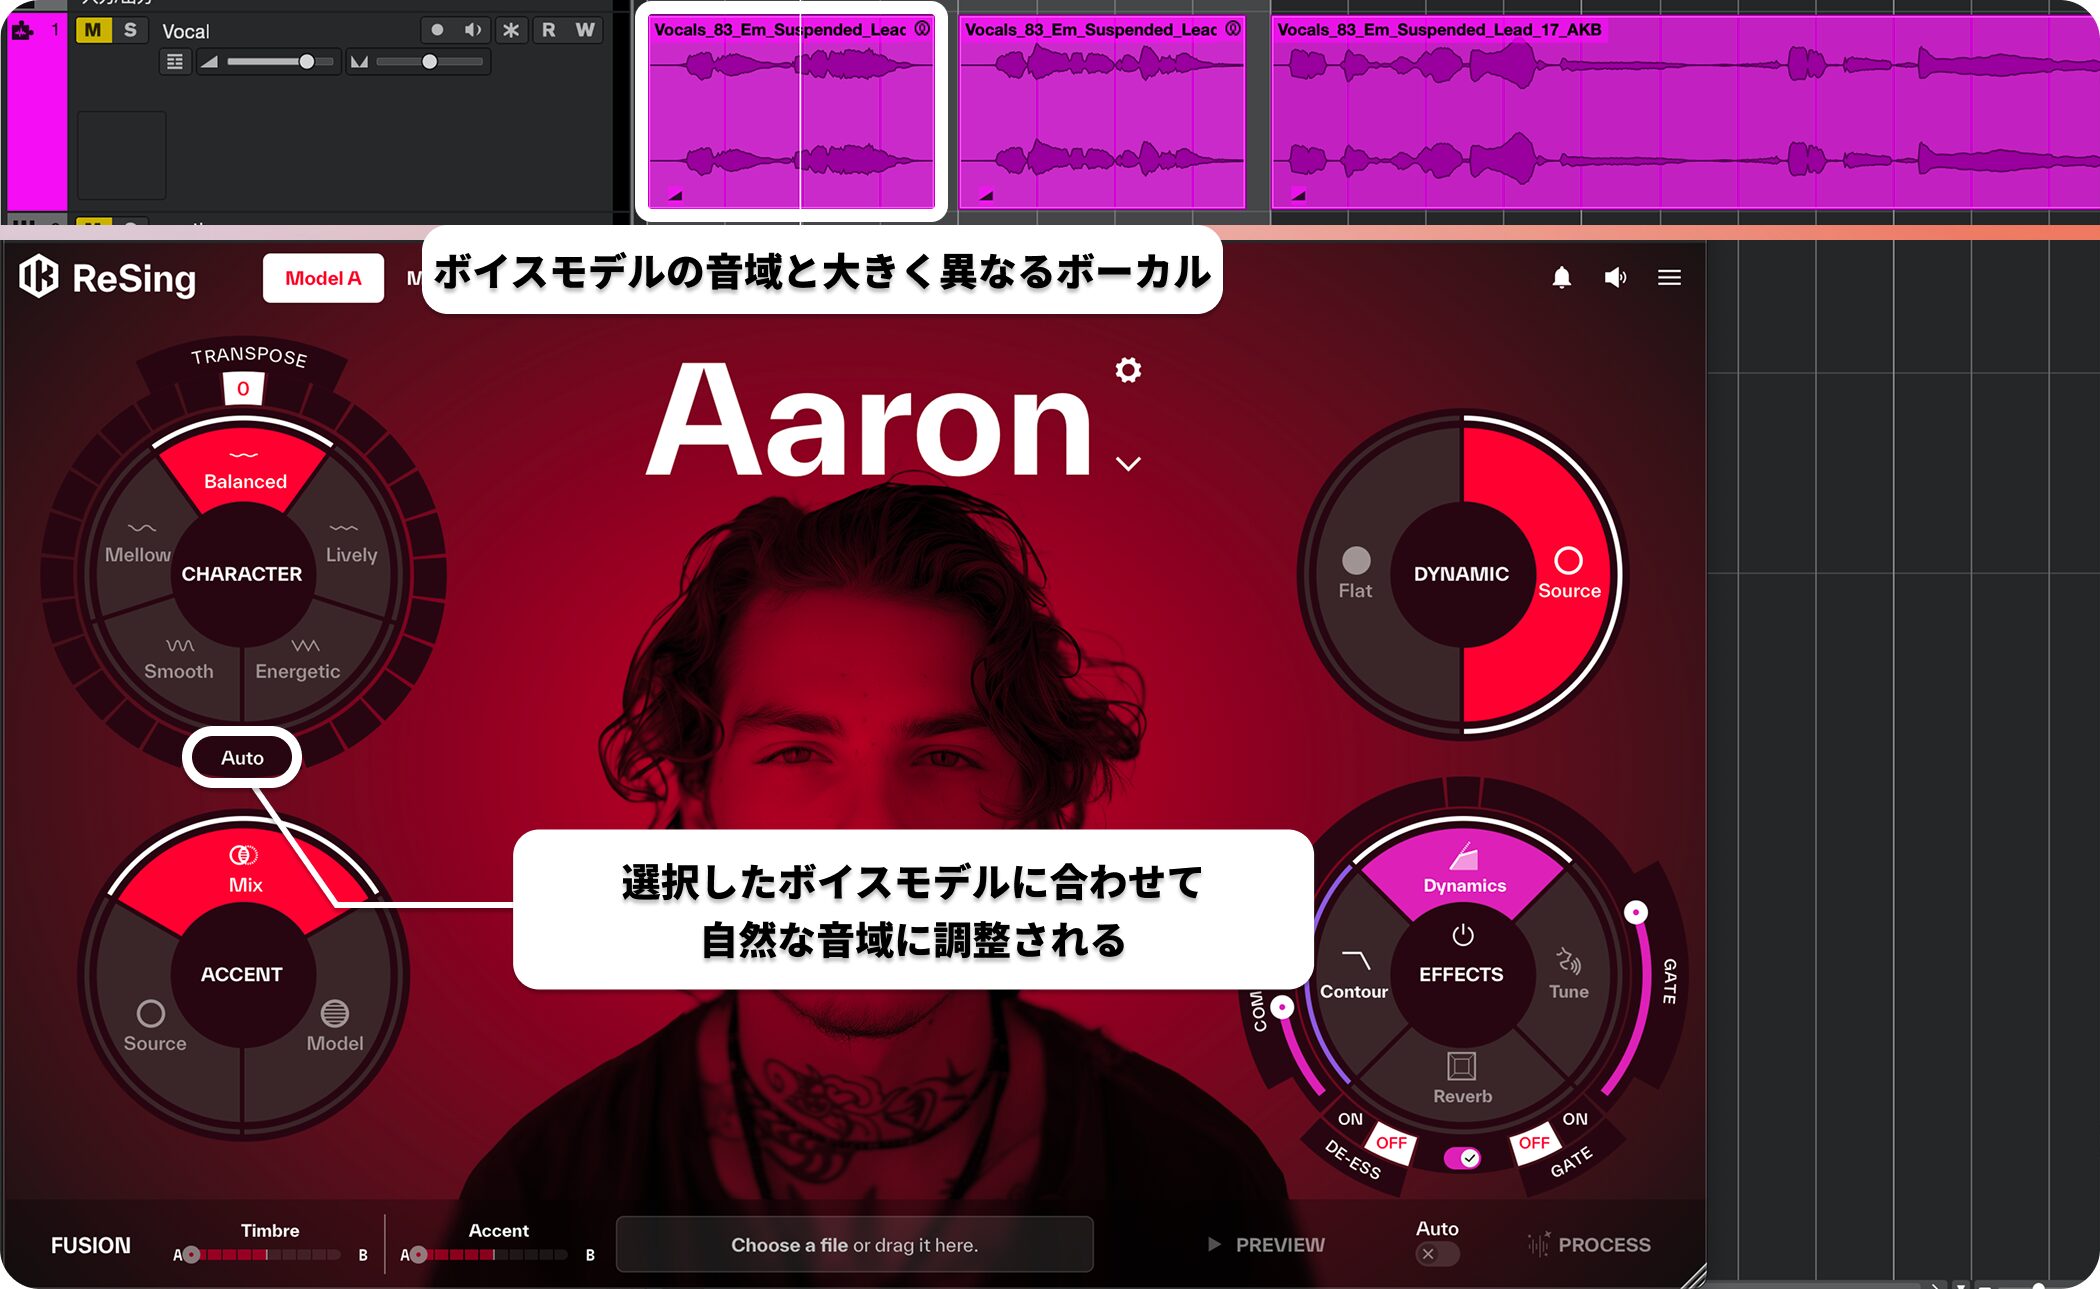
In Auto mode, it automatically determines a suitable pitch conversion based on the source and selected model.
For example, a female soprano processed with a male voice model is automatically converted an octave lower.
Auto mode chooses an appropriate amount of transposition, which can be reassuring for first-time users.
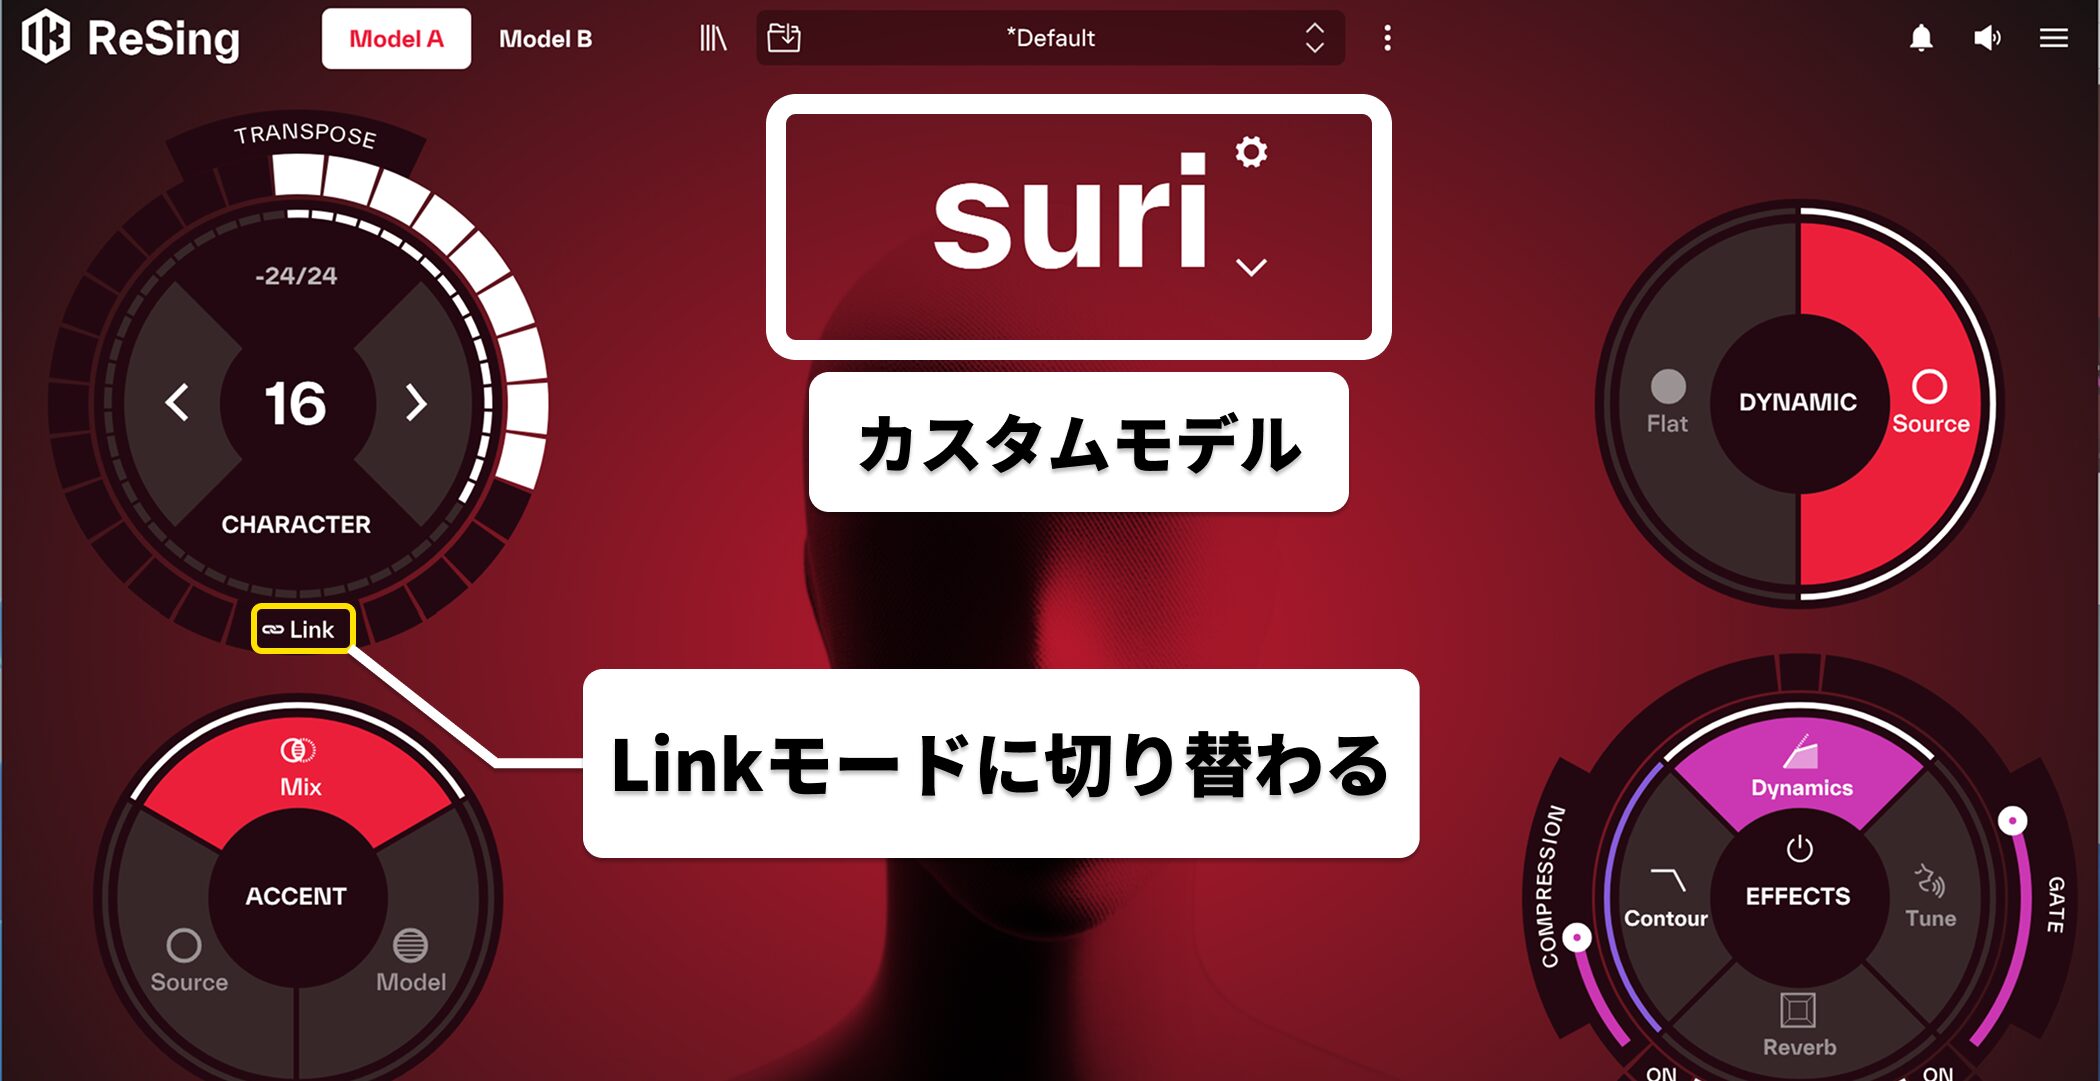
With a custom model, Auto switches to Link mode, linking Transpose and Character.
For example, a higher pitch automatically emphasizes energetic expression, while a lower pitch adjusts it toward a gentler, softer expression.
Accent
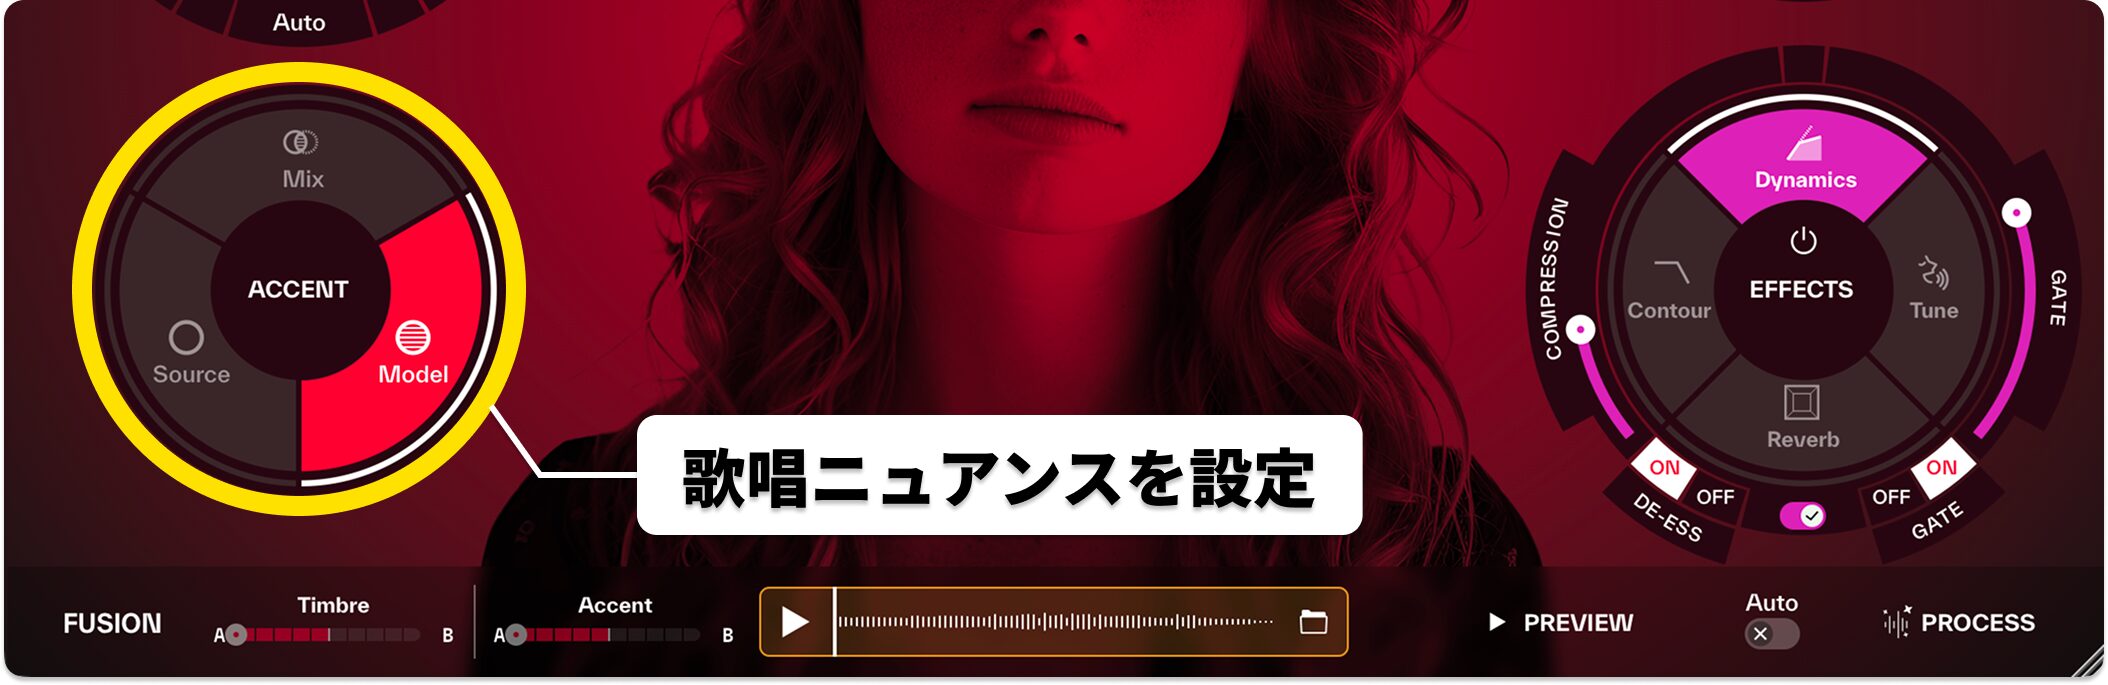
Accent offers three modes for adjusting pronunciation and intonation in the converted voice:
- Model: emphasize the selected voice model’s characteristics
- Mix: blend the model’s characteristics with the source voice
- Source: retain the greatest amount of the source voice’s characteristics
Dynamic
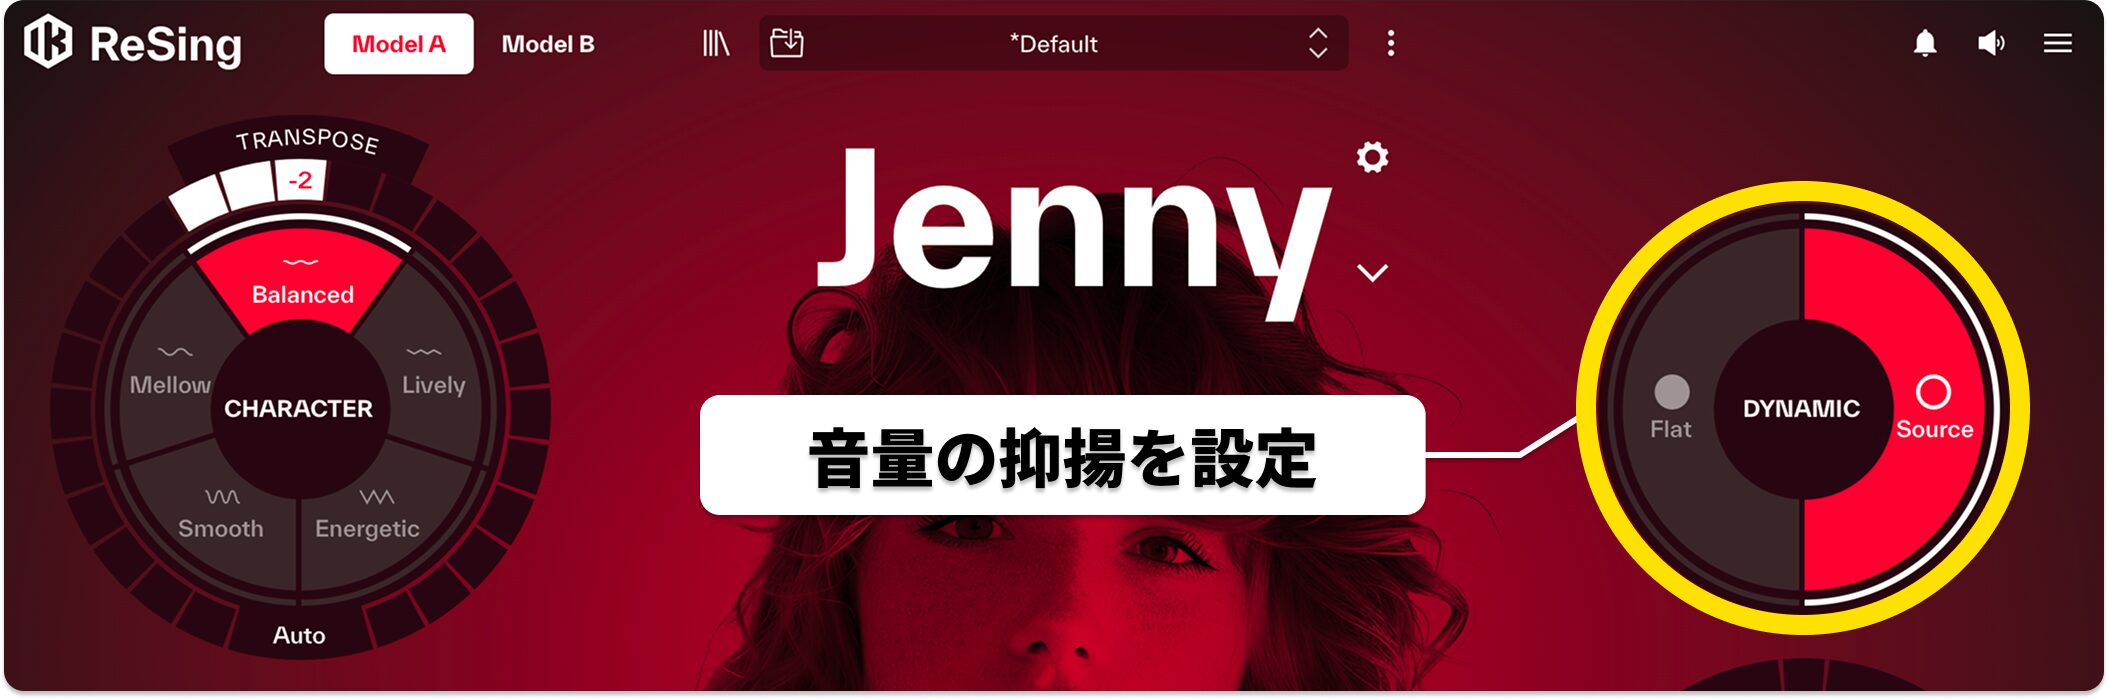
Dynamic offers two modes for adjusting the converted voice’s dynamics, or changes in volume:
- Source: faithfully retain the original audio’s dynamics
- Flat: flatten dynamics for a steadier level
Polishing the Result with Built-in Effects
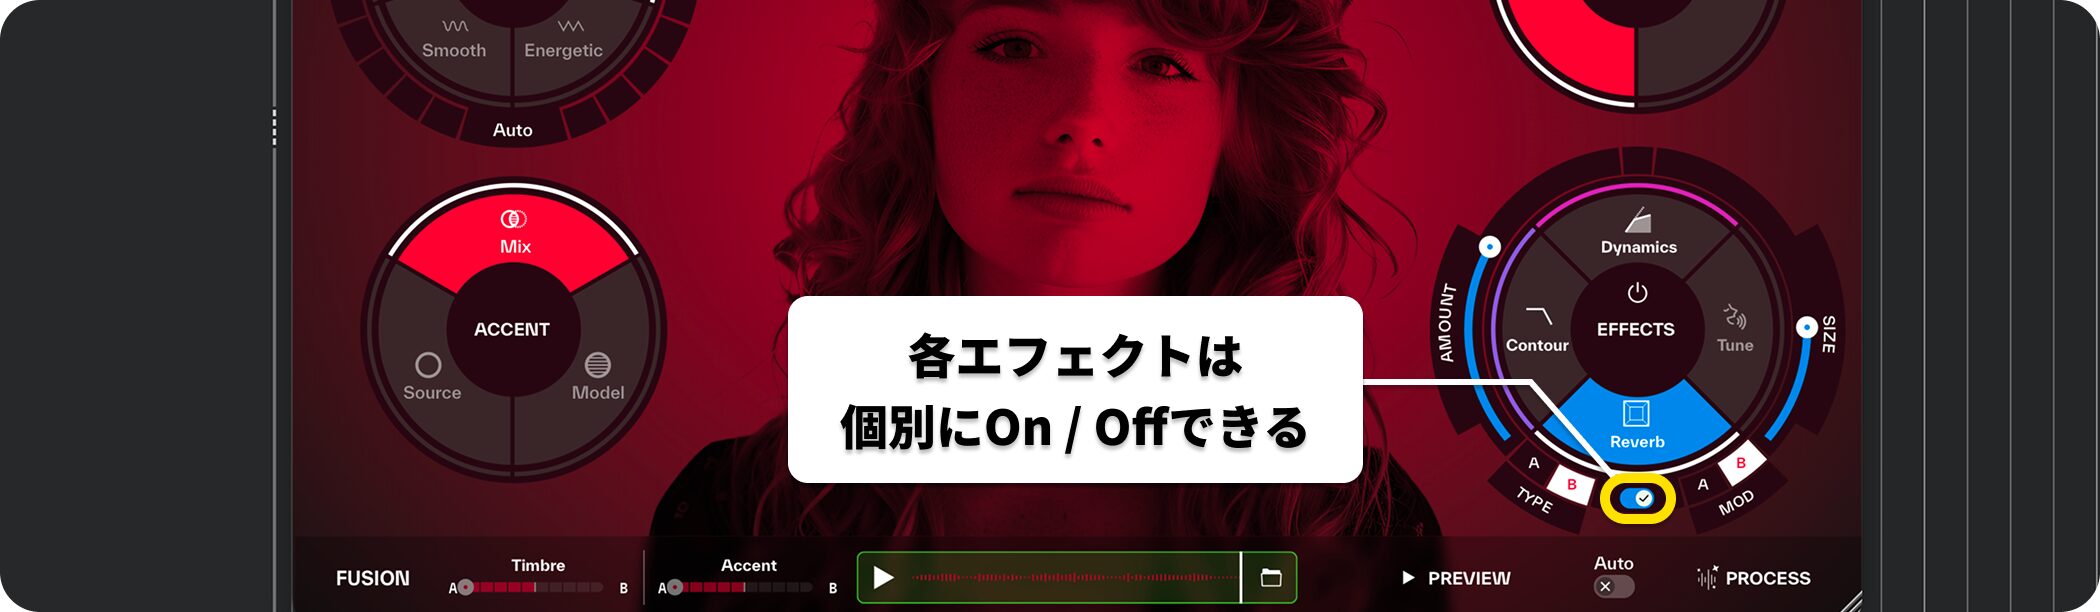
ReSing includes a range of effects to improve the converted audio.
Combine them to refine the sound before returning it to the DAW.
Each effect can easily be switched on or off.
Dynamics
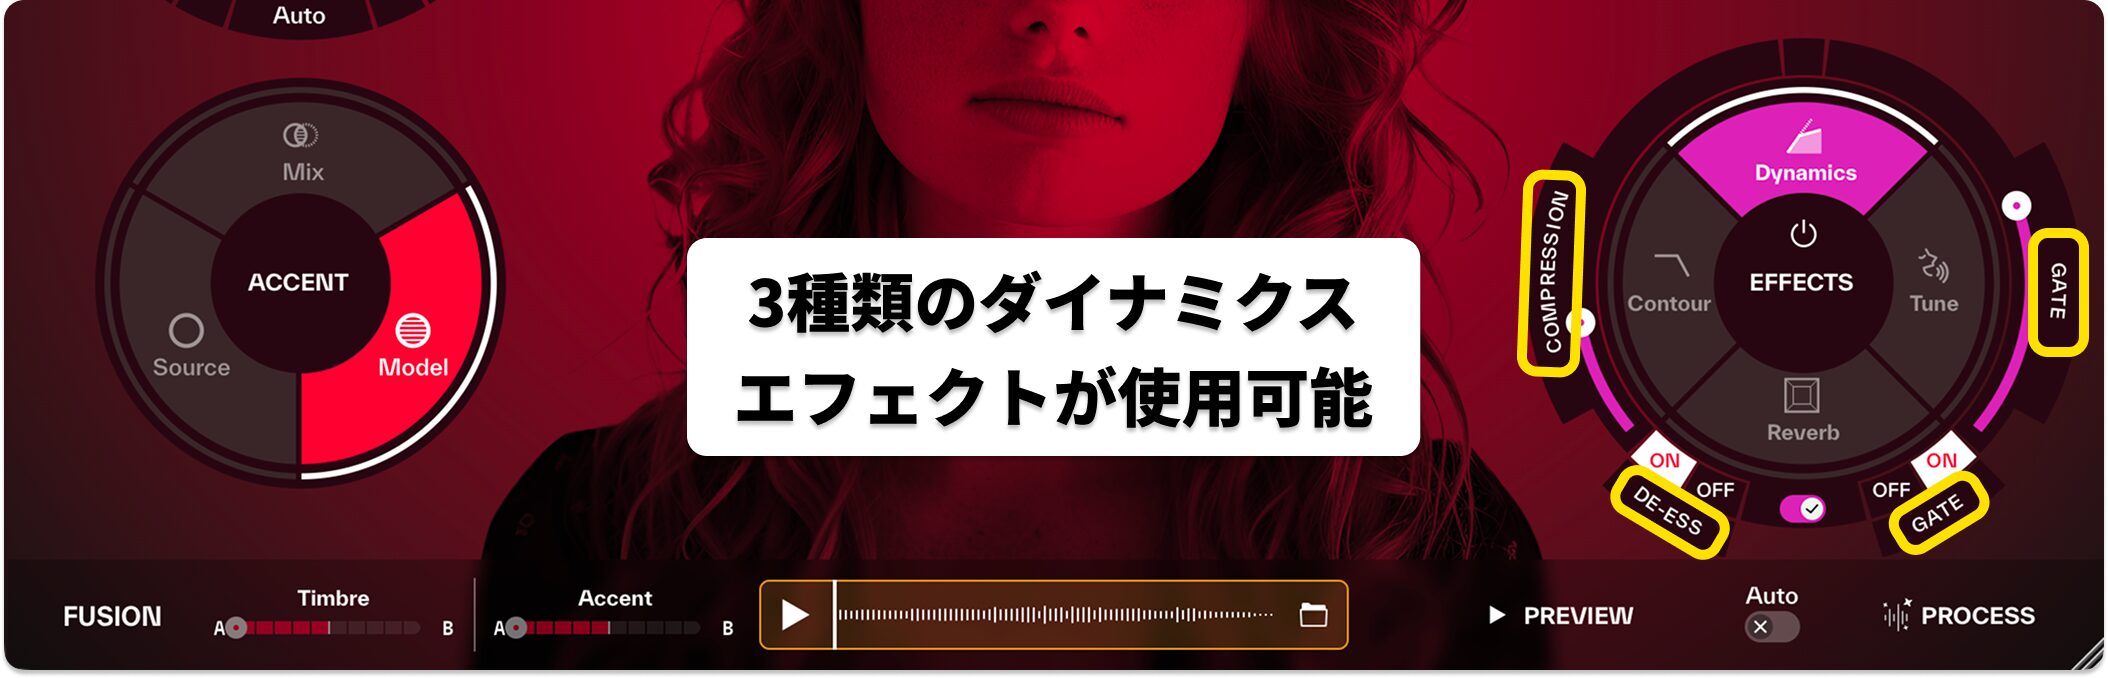
This group of effects balances level and tone.
- Compression: compress dynamics to even out the level
- De-Ess: reduce sibilance such as “s” sounds
- Gate: automatically cut quiet sounds
Tune
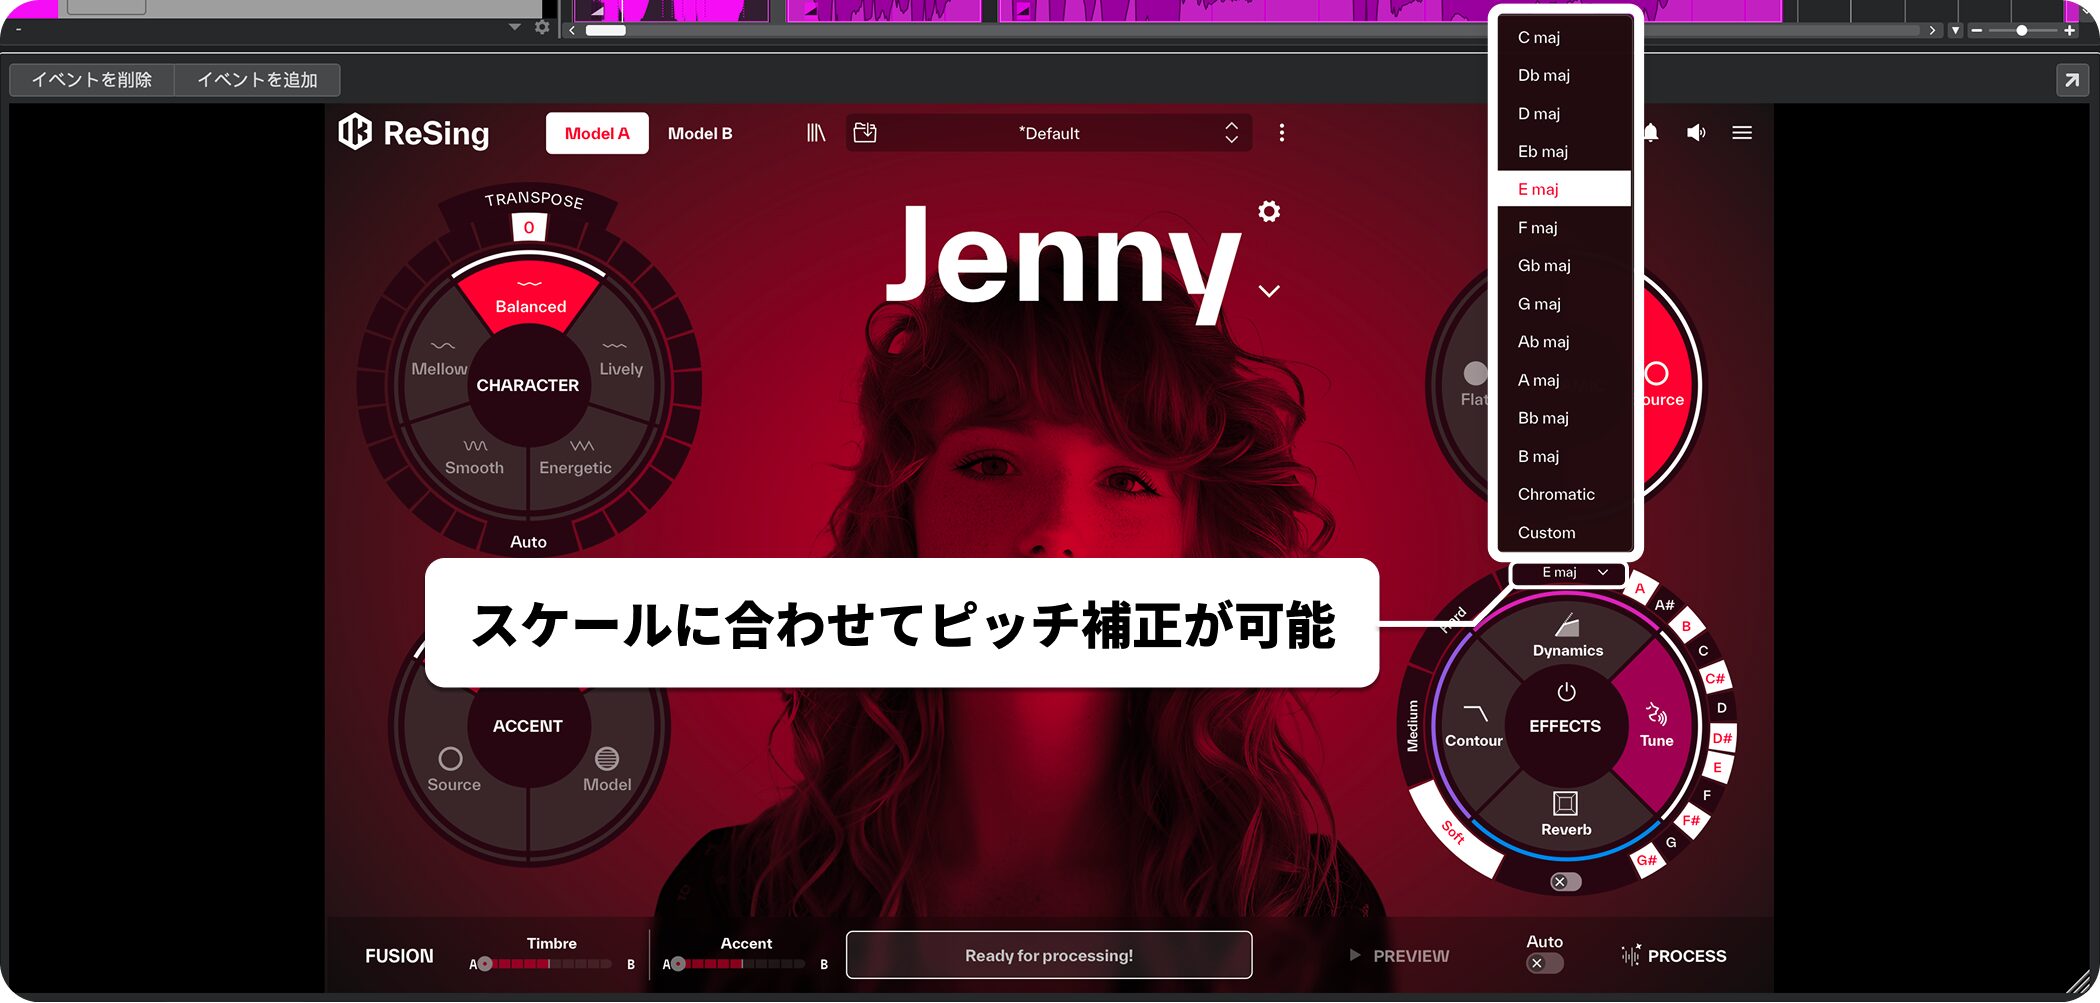
This pitch correction feature automatically adjusts pitch.
Choose Soft, Medium or Hard correction and set Scale and Key to align notes with the selected scale.
Reverb

This effect adds a sense of space.
- Type A/B: choose between reverb types
- Modulation A/B: add modulation
- Size: adjust the size of the space
- Amount: set the overall reverb output level
Contour

This effect adjusts tonal character.
- Body: adjust low-frequency richness
- Air: adjust high-frequency brilliance
Creating a Hybrid Voice with Fusion
Fusion lets you combine two different voice models to create a hybrid voice.
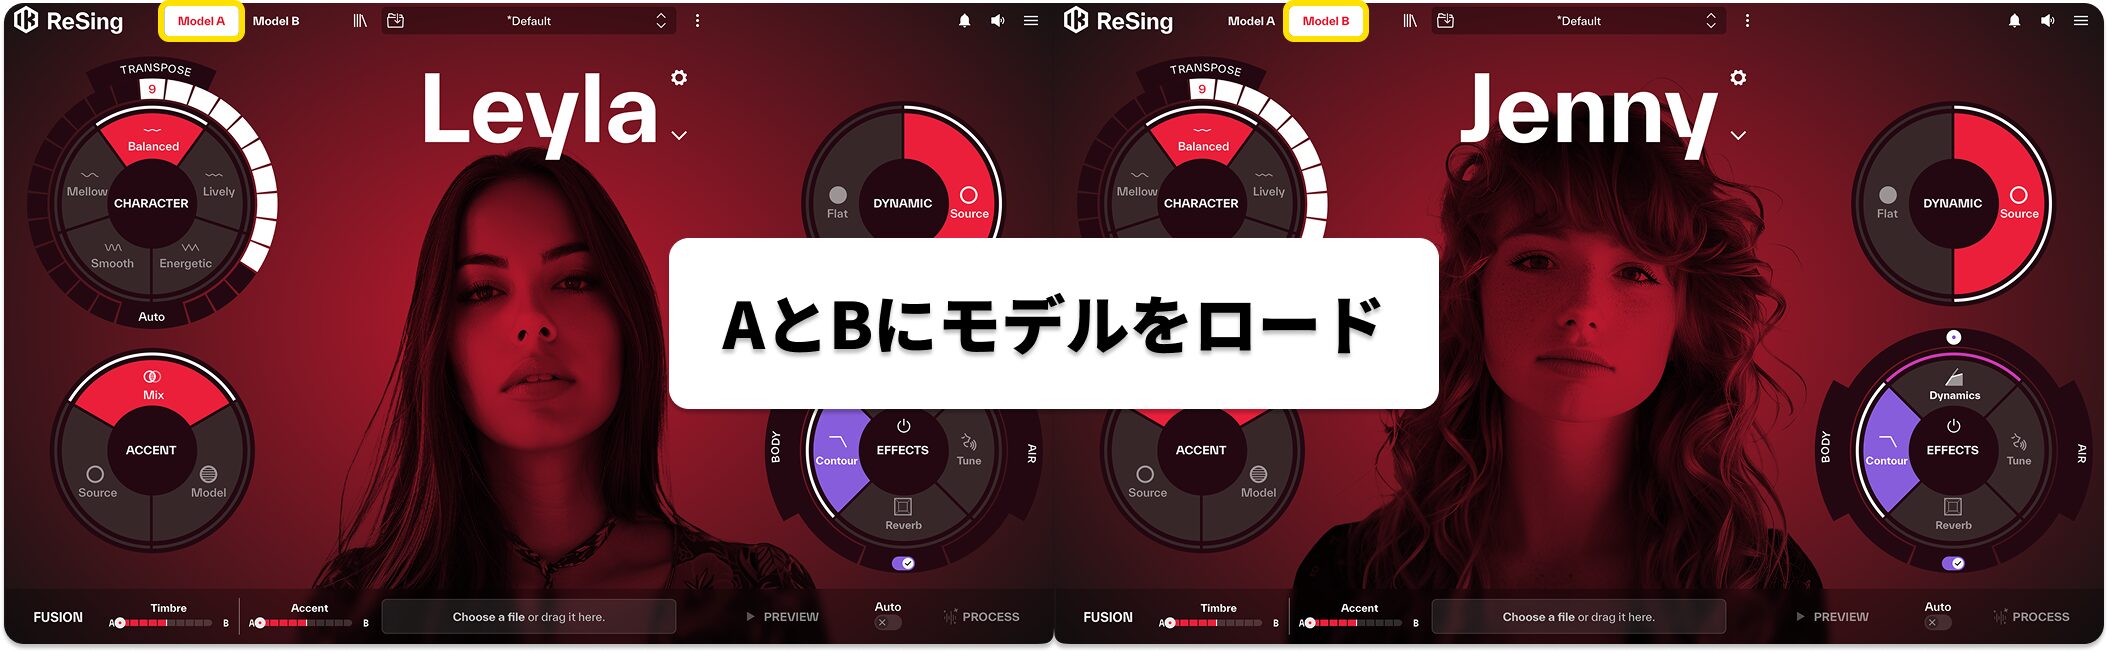
Select the “Model B” tab in the top bar and load Model A and Model B.
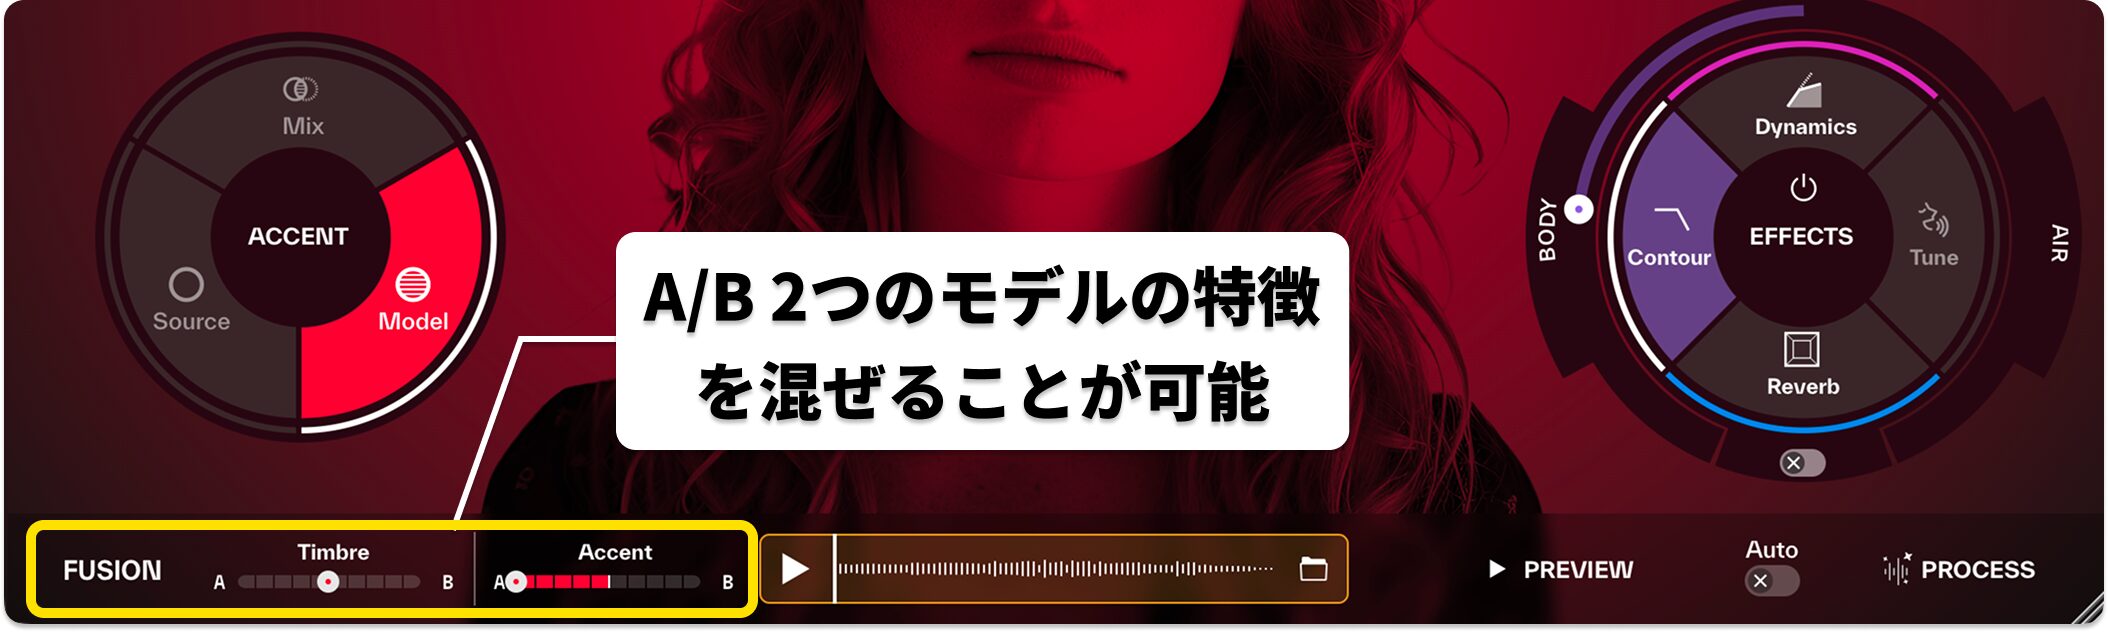
Adjust their relative proportions to create a voice unlike either existing model.
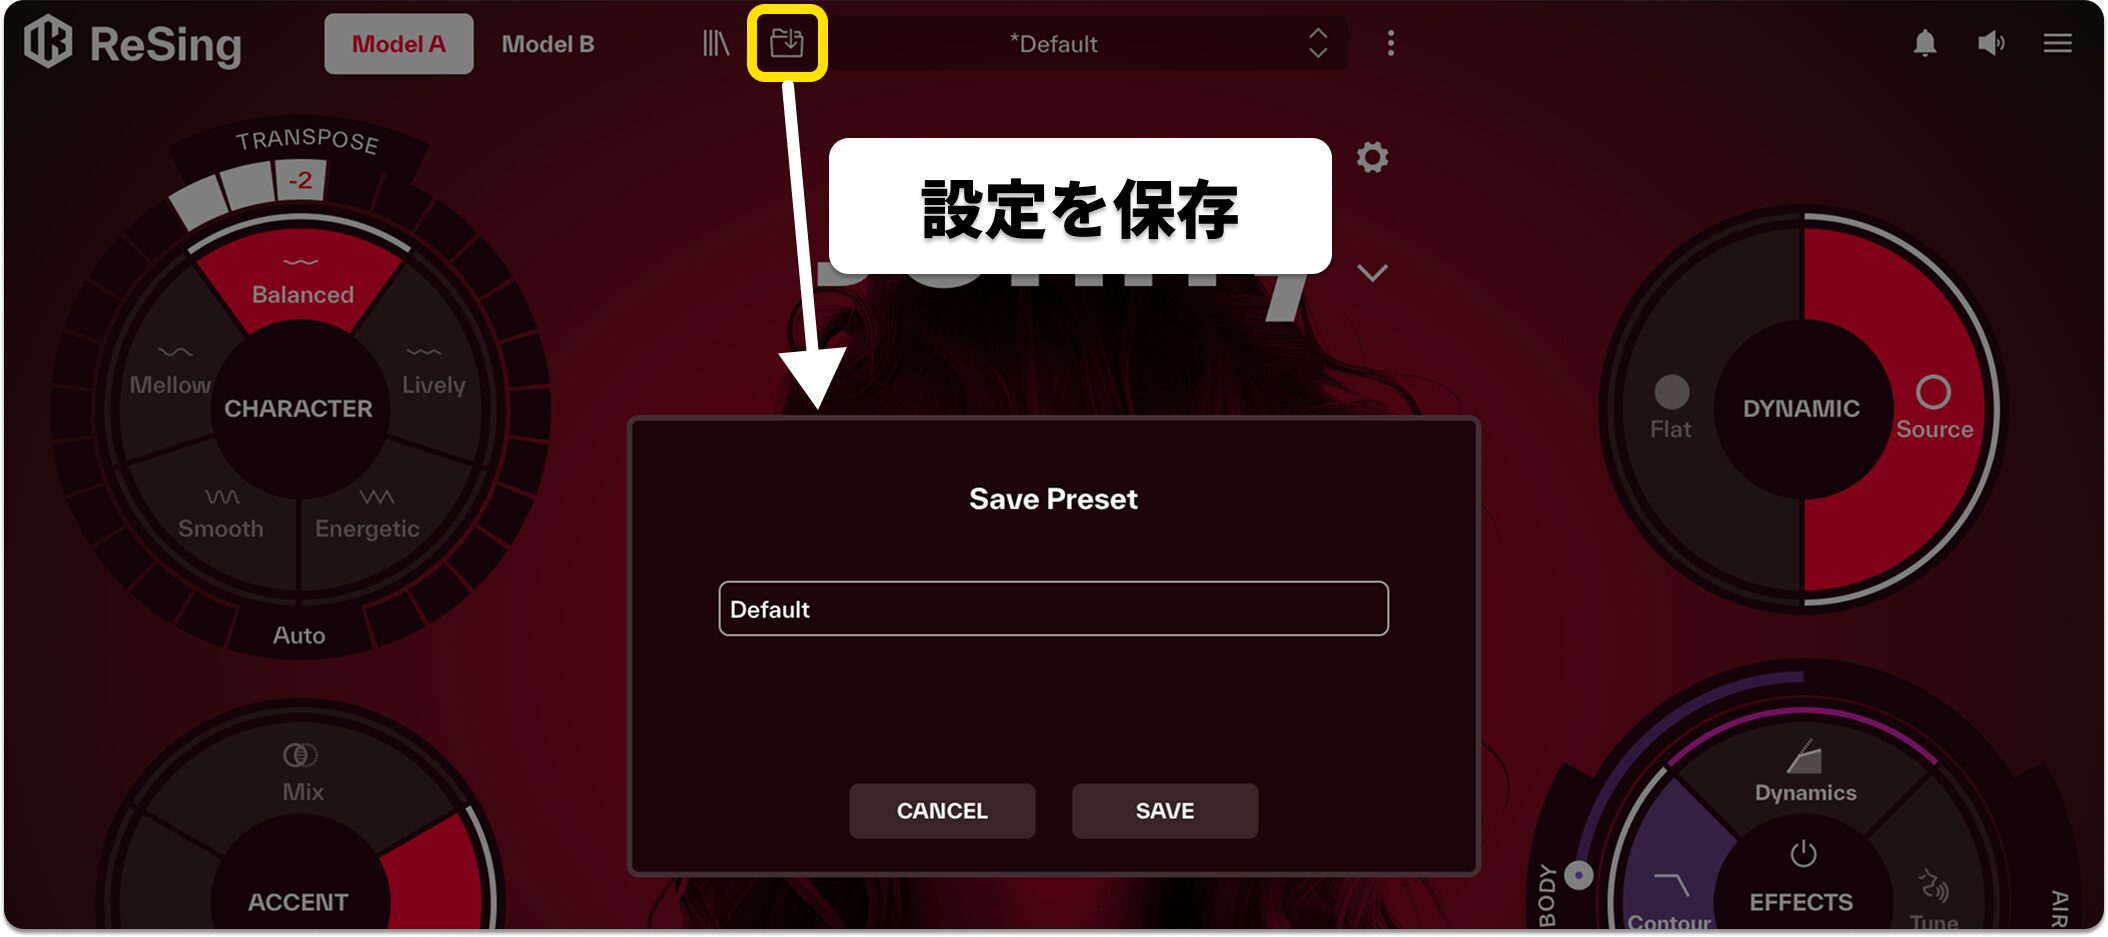
You can save the settings for repeated use.
ReSing Modeler: Creating a Custom Voice Model
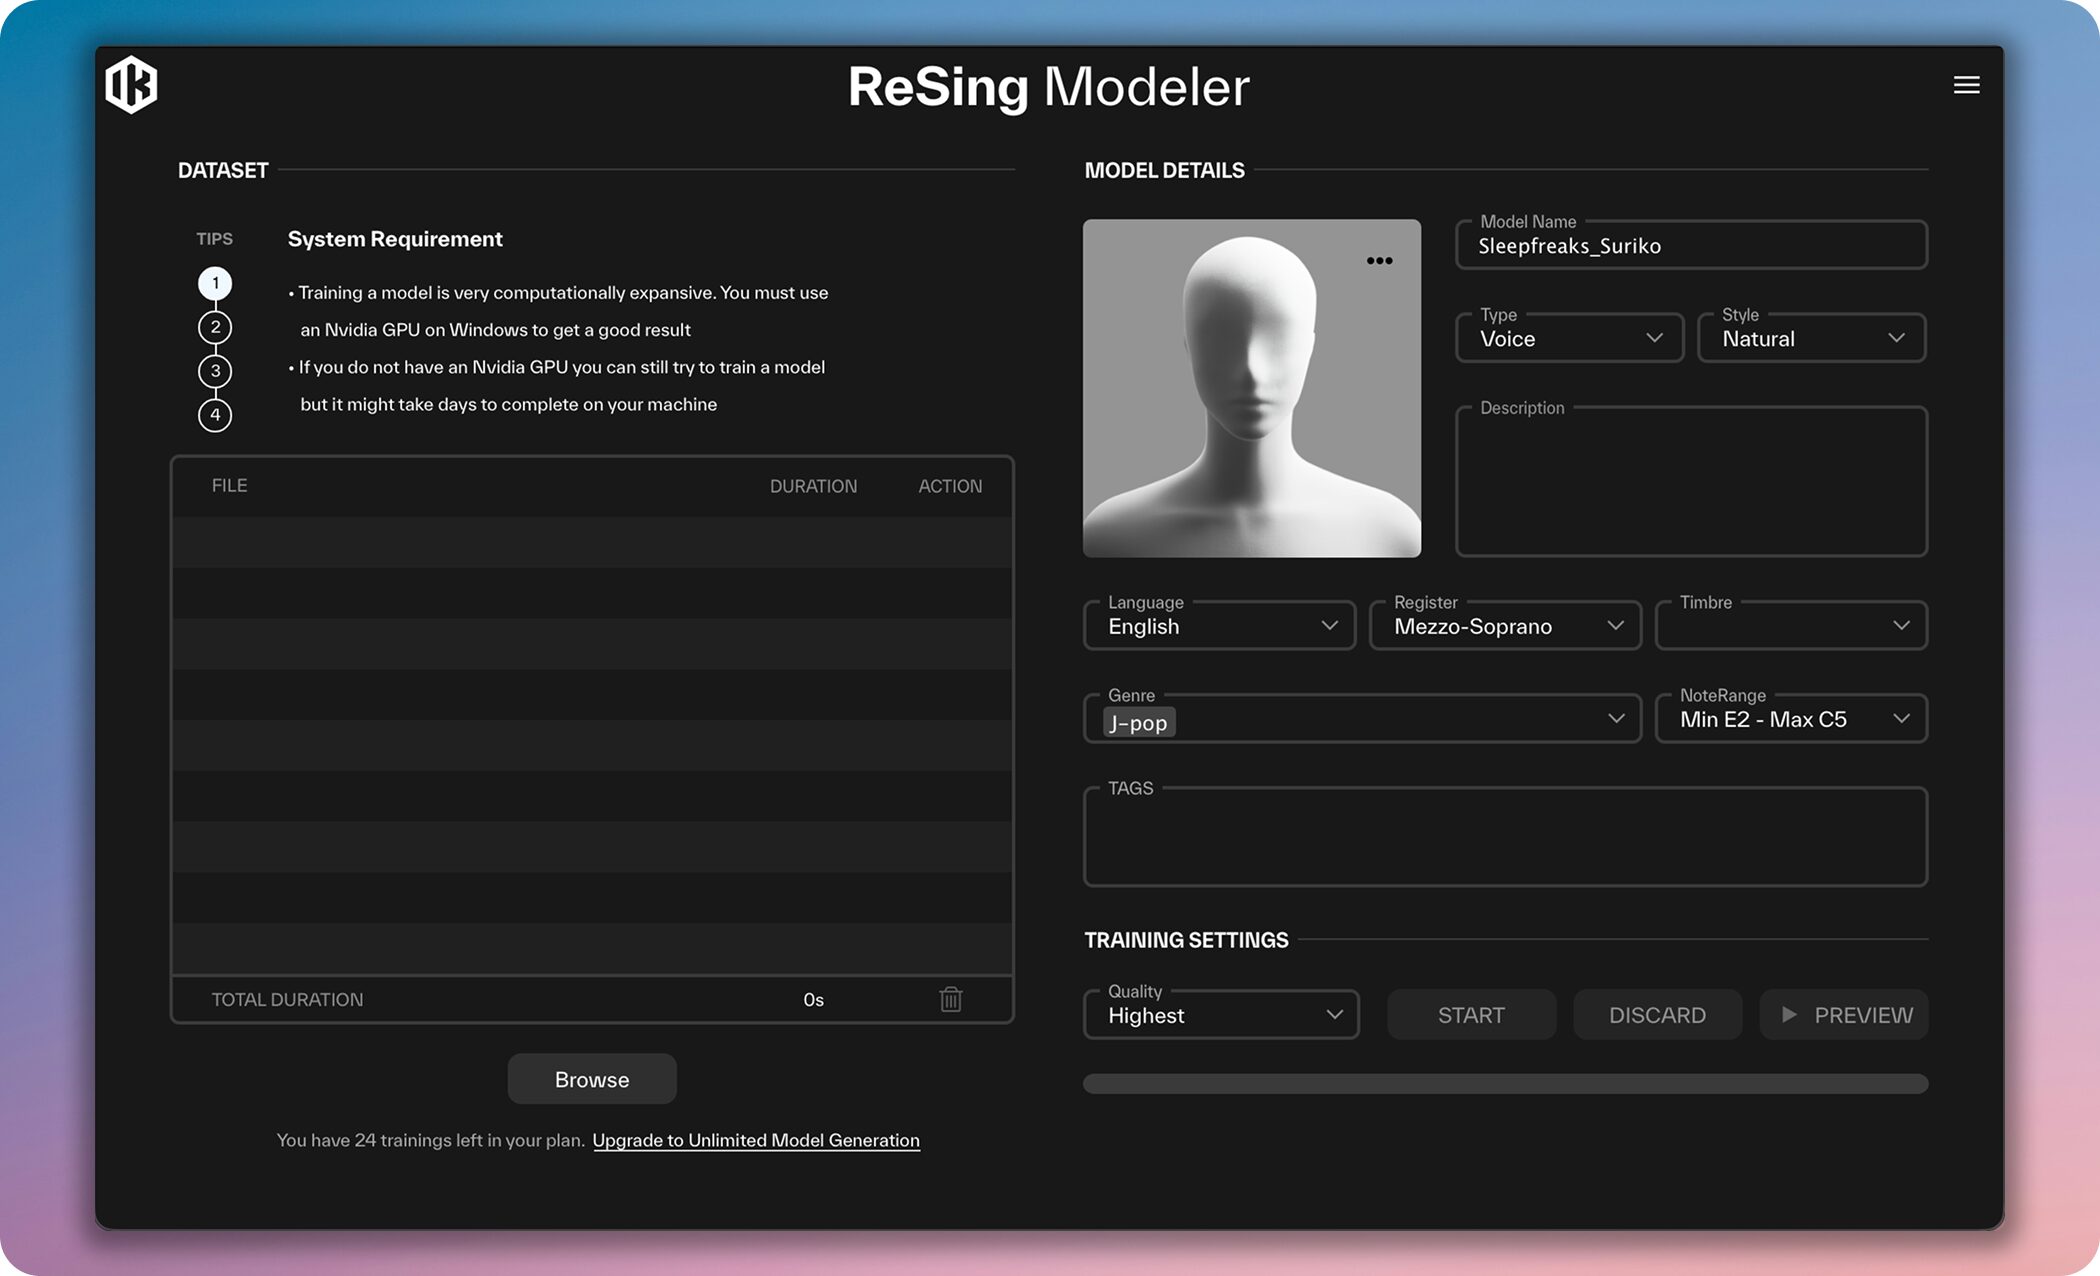
ReSing includes a standalone application called ReSing Modeler.
Use it to create an original voice model trained on your own voice or a particular vocalist’s voice.
Listen to the examples prepared here:
A custom model lets you convert audio into a distinctive original voice.
Creating a custom model requires samples of the target voice.
To create a high-quality model, prepare a dataset meeting at least these requirements:
- Audio duration: at least 15 minutes
- Recording format: mono, with a single voice
- Language: recordings in one consistent language
- Recording environment: clear recordings with little noise
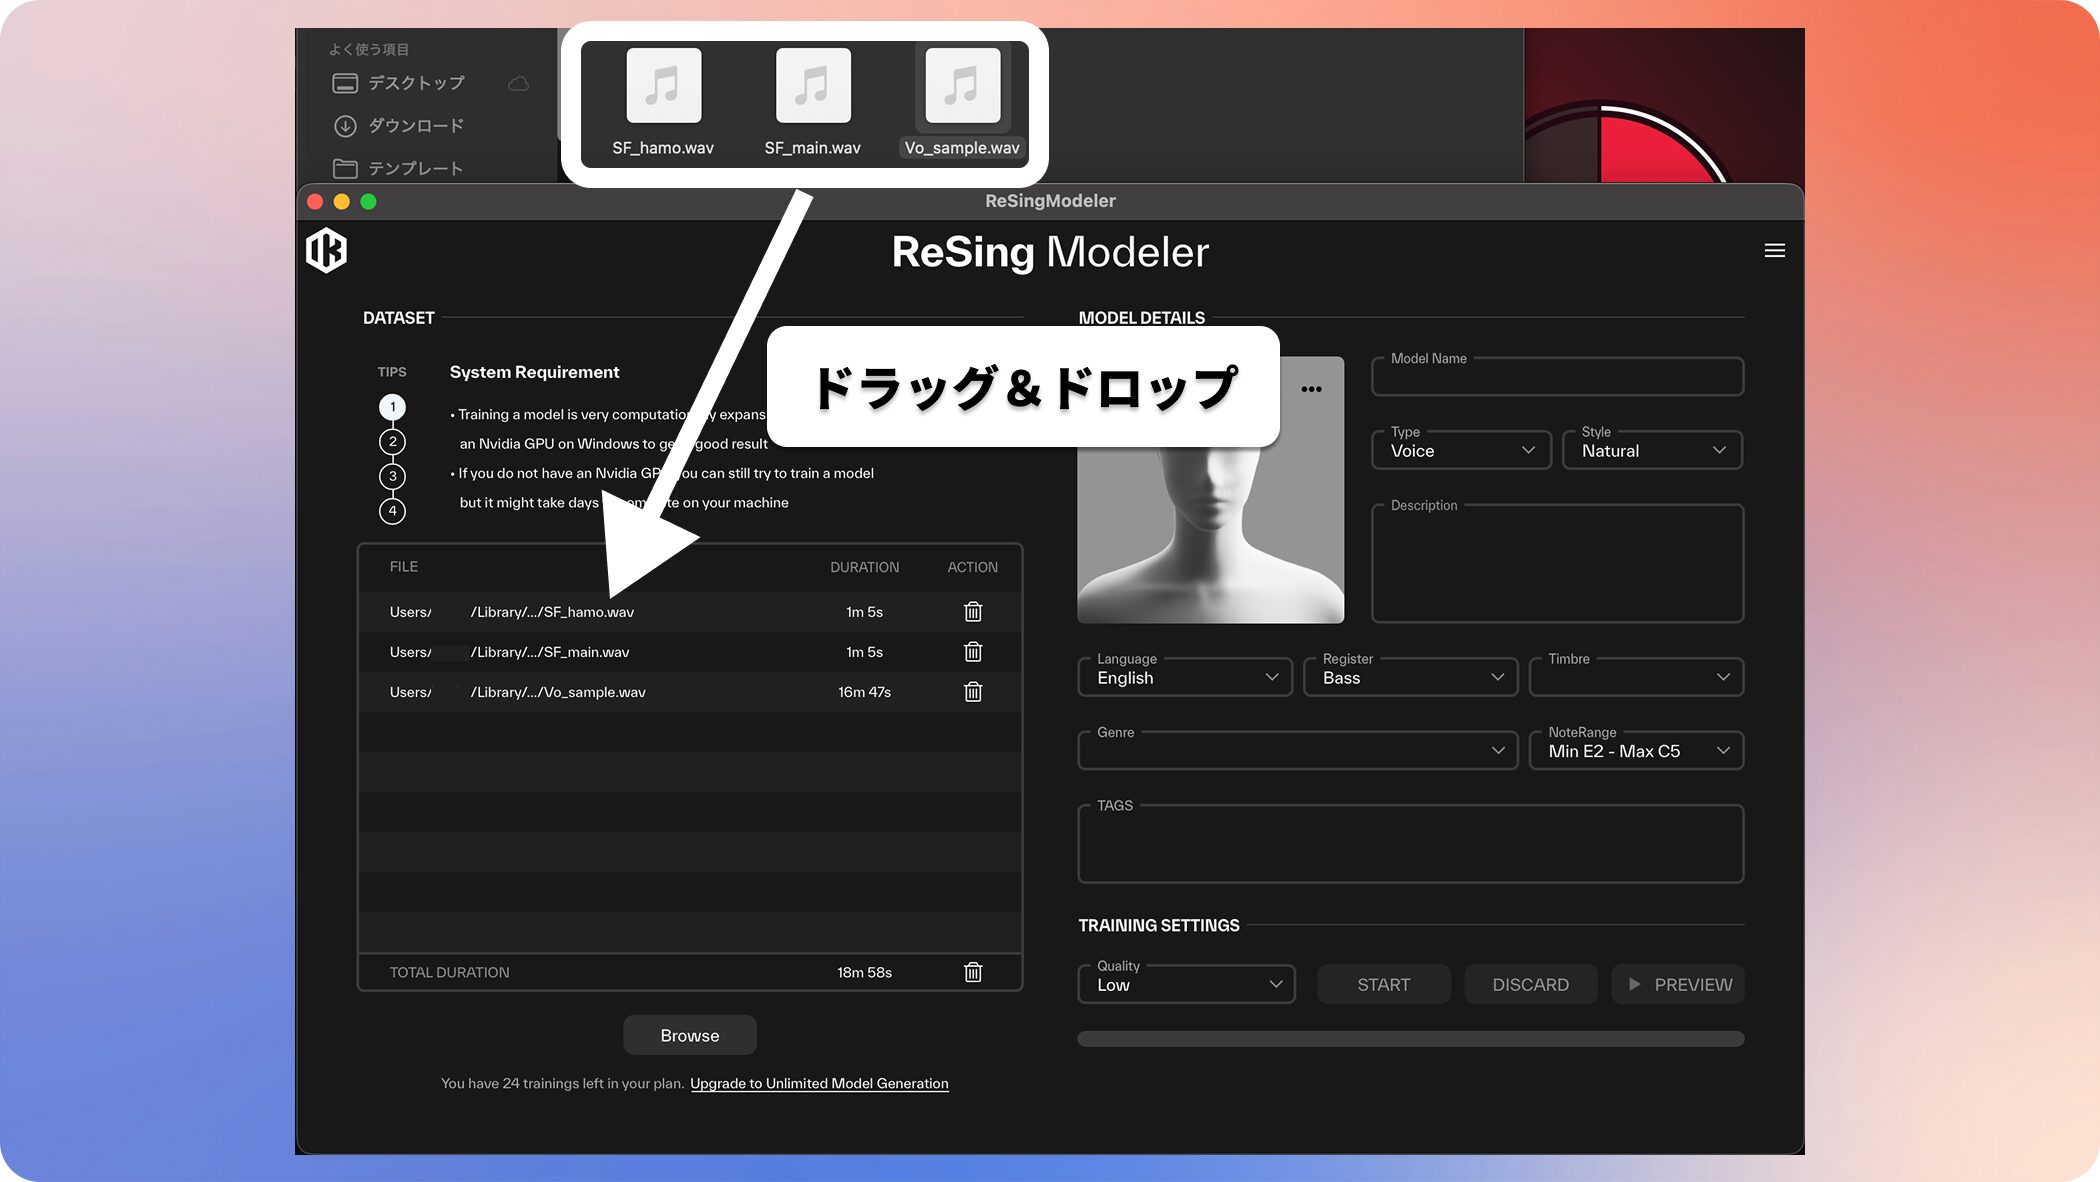
When ready, drag the audio files into the FILE area in ReSing Modeler.
Supported formats include WAV, AIFF and MP3; multiple separate files can also be loaded.
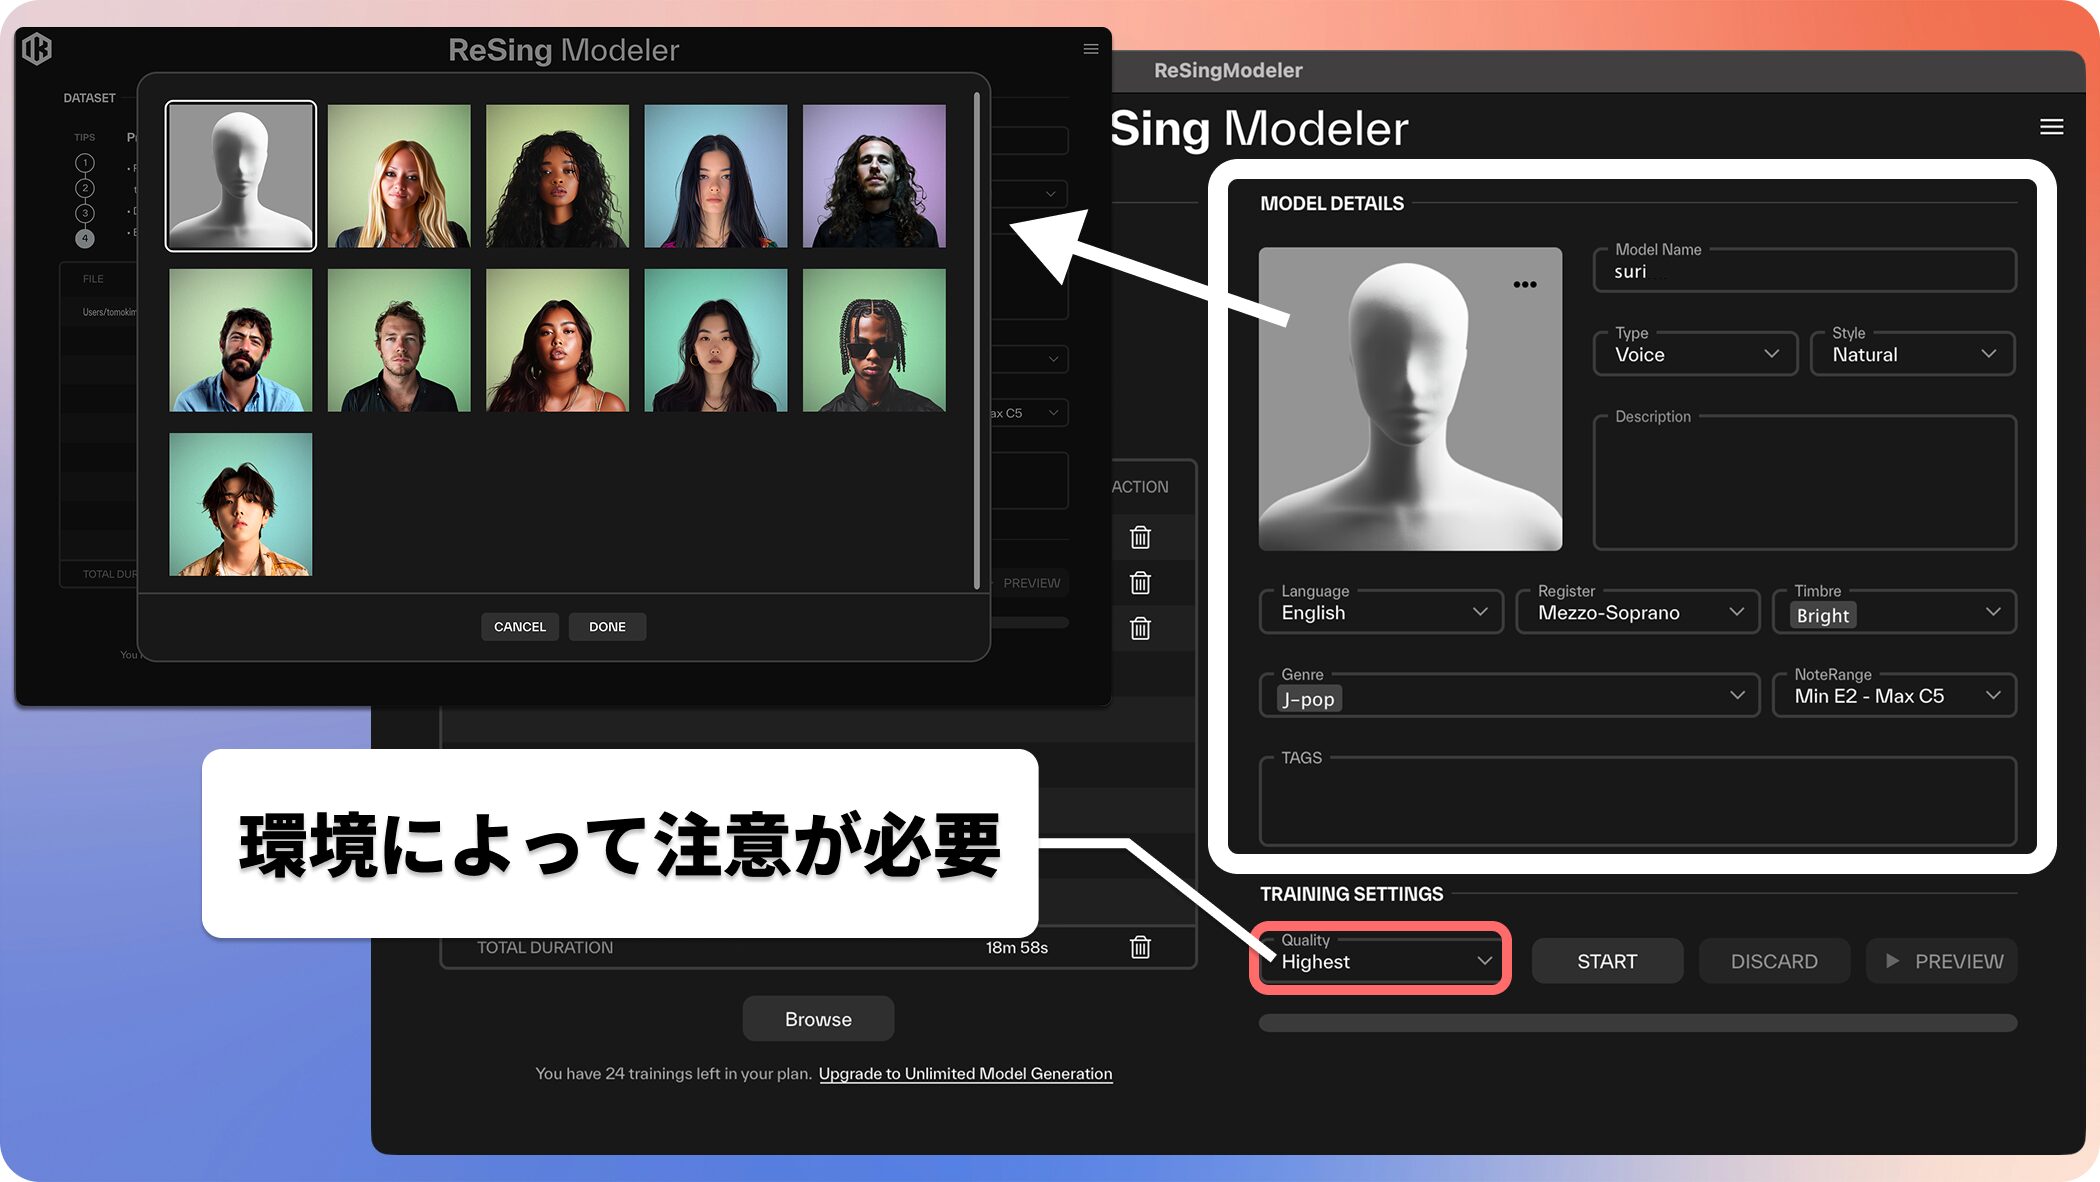
After loading the audio, configure MODEL DETAILS.
For better results, the article recommends choosing “Highest” under Quality in TRAINING SETTINGS.
Generation time varies with the system, and the recommended environment is a Windows computer with an NVIDIA GPU.
In our example, using Highest on the recommended system took about 10 hours to finish training.
This means using a CPU or unsupported GPU may take several days, so consider your system and available training time when choosing.
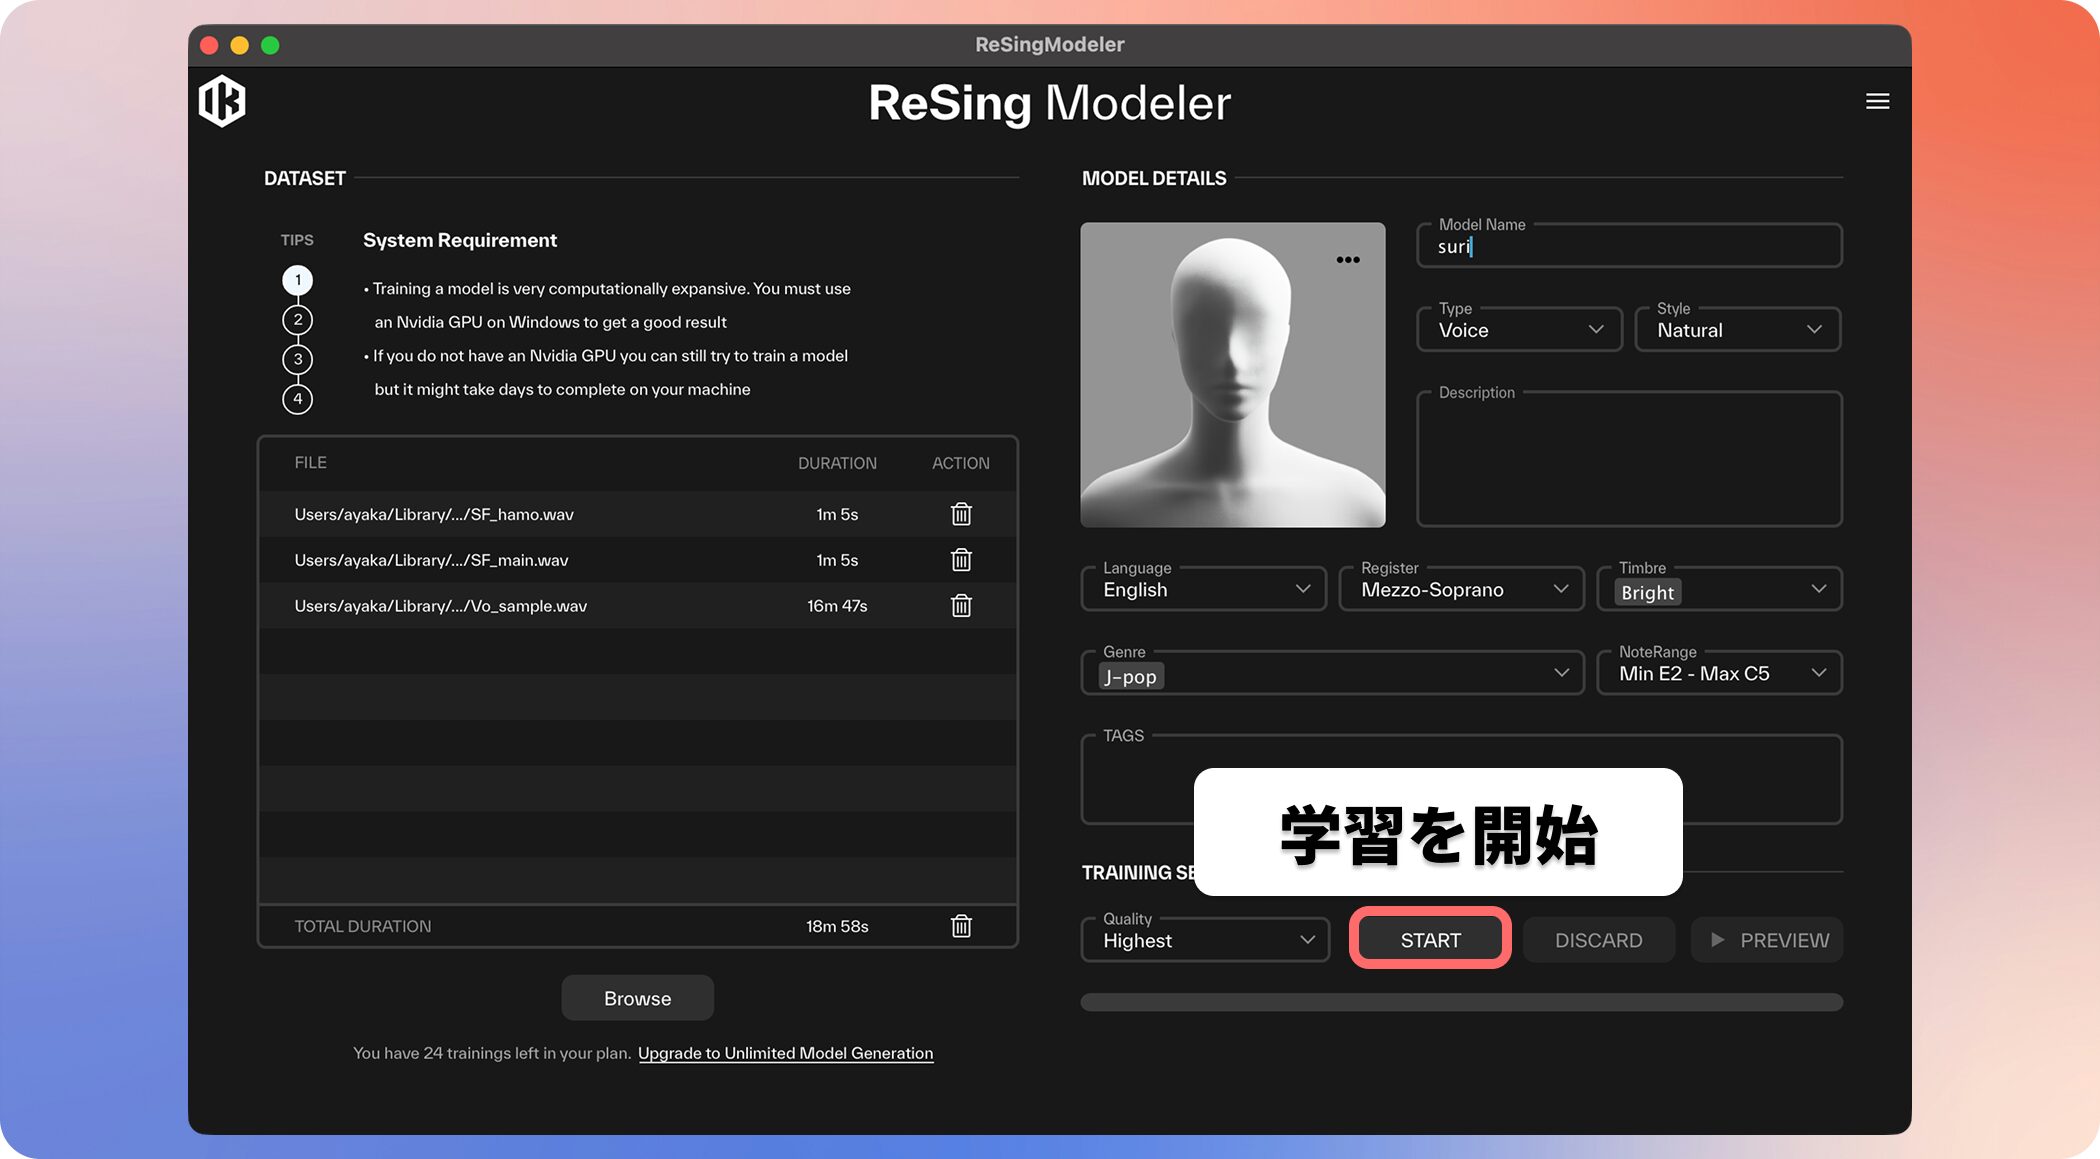
Click “START” to begin training.
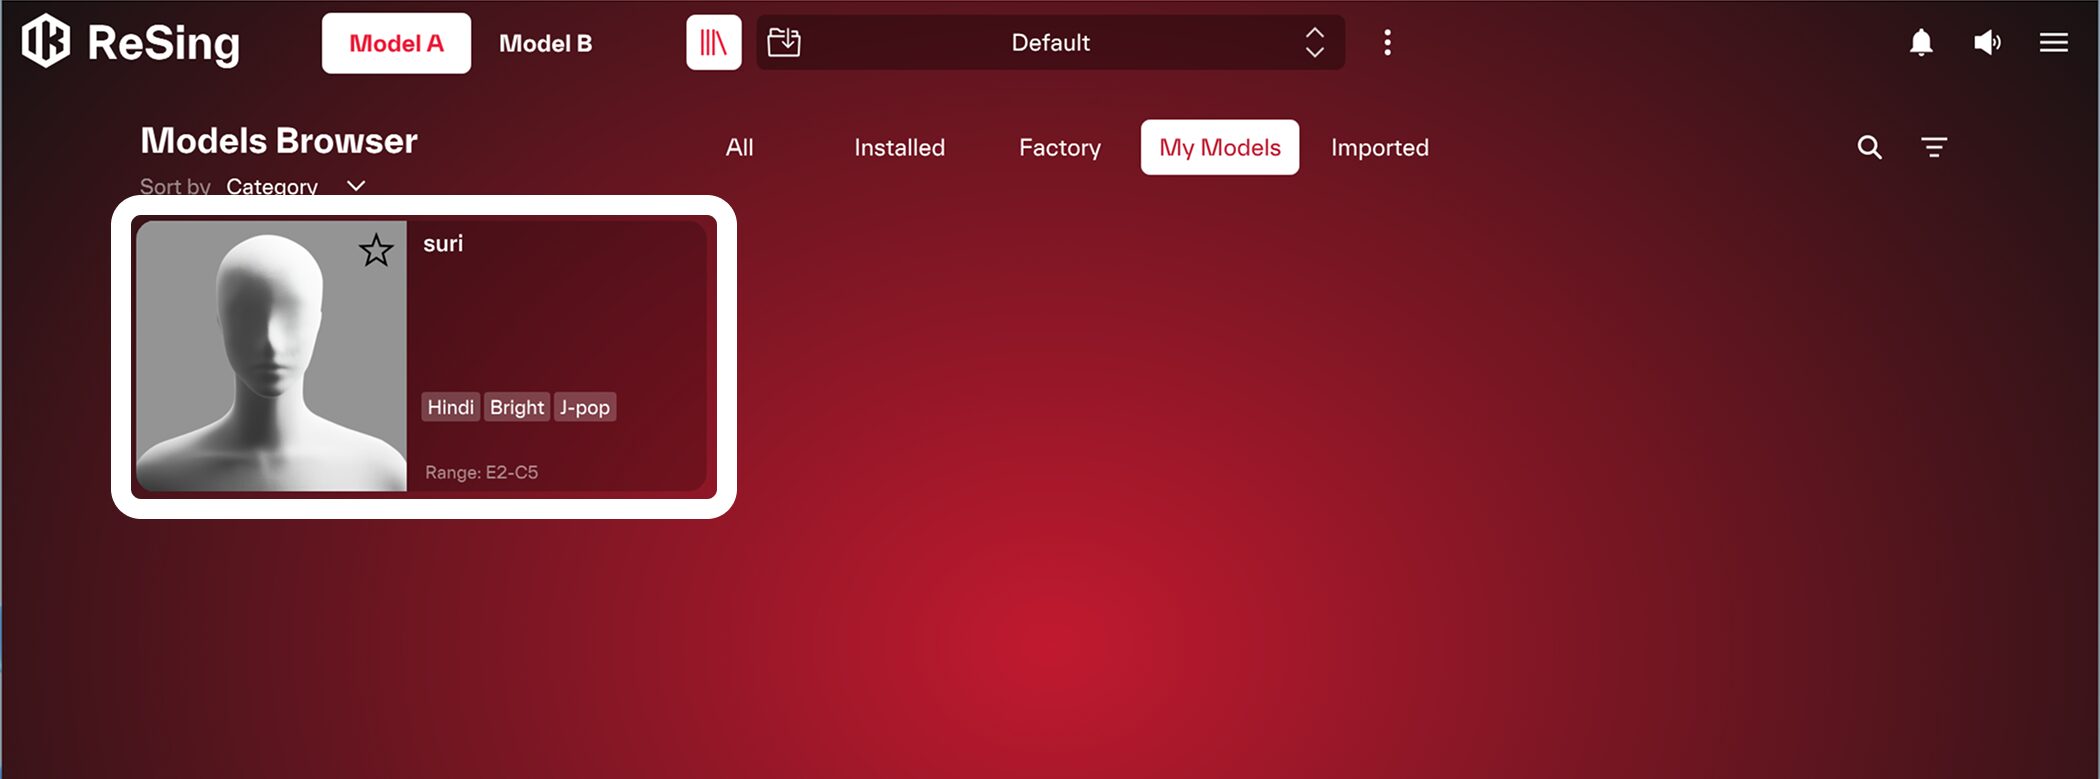
Once training is complete, the model is added to “My Models” in ReSing and can be used like a preset model.
System Requirements

Windows
OS: Windows 8 or later
Supported formats: VST3, AAX
Mac
OS: macOS 10.13 or later
Supported formats: AU, VST3, AAX
Native support for Apple Silicon (M1/M2 chips)
Pricing
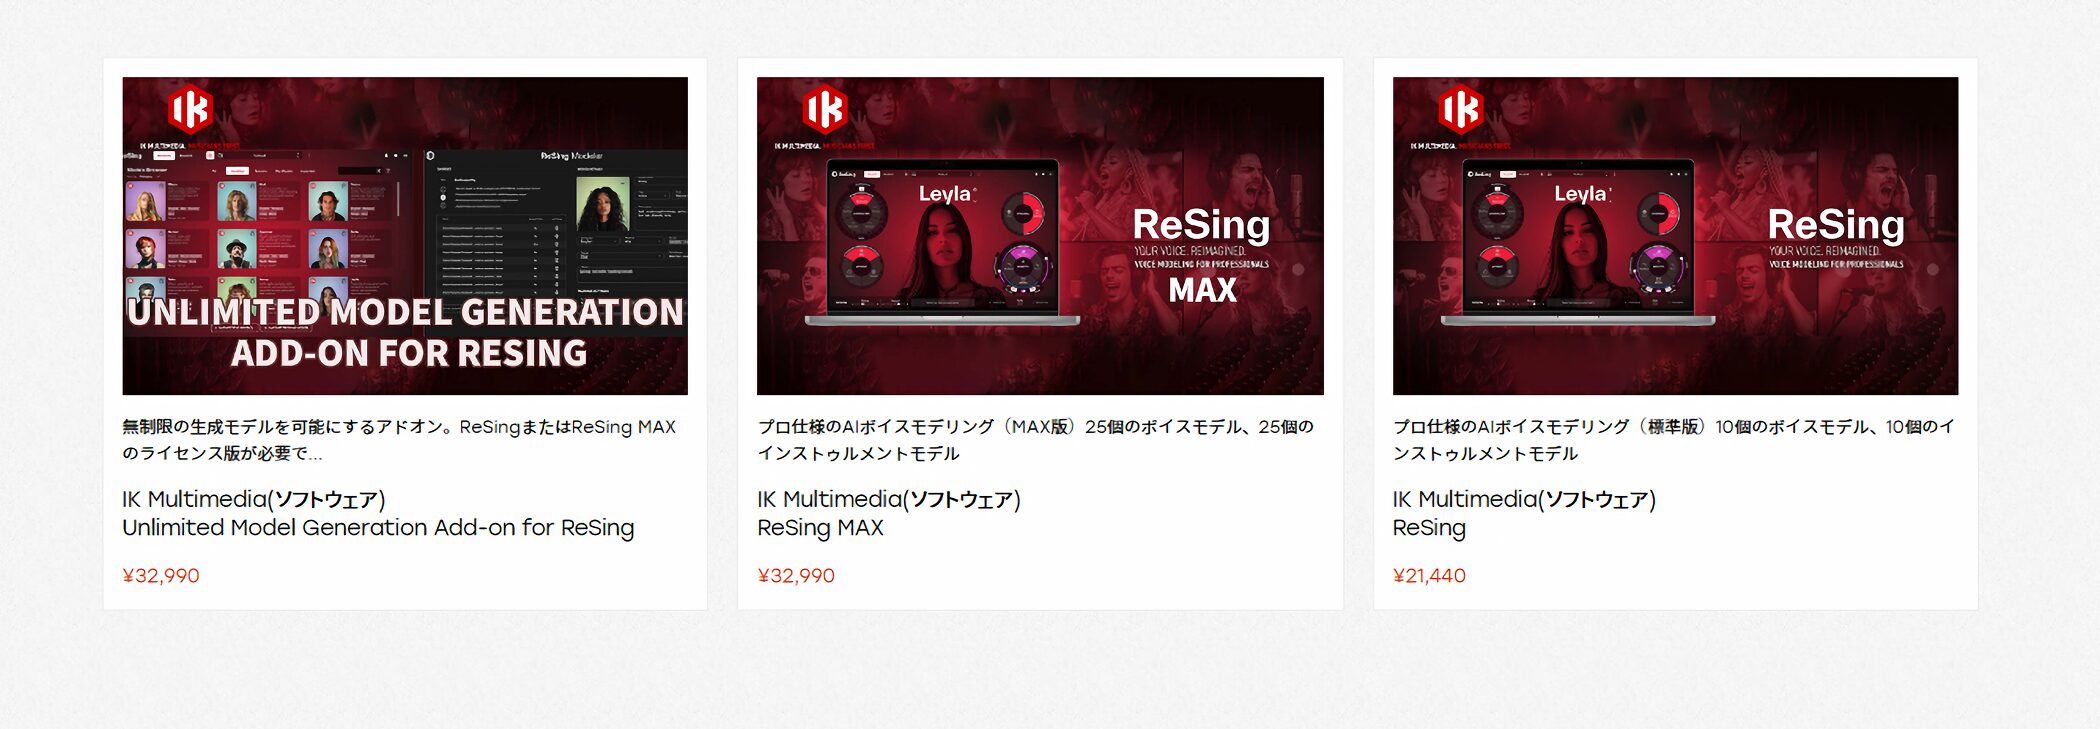
The article lists the following beatcloud prices:
ReSing (standard): ¥21,440 (10 voice models, 10 instrument models, 10 custom model generations)
ReSing MAX: ¥32,990 (25 voice models, 25 instrument models, 25 custom model generations, unlimited imports)
Unlimited Model Generation Add-on: ¥32,990 (upgrades custom model generation to unlimited)
These are regular prices including tax as of November 25, 2025.
Prices may change due to exchange-rate fluctuations and other factors.
Owners of ReSing or ReSing MAX can purchase the Unlimited Model Generation Add-on to generate custom models without a limit.
Conclusion
ReSing is recommended for:
- Producers who want to try guide vocals with different genders or voice qualities
- Composers who want to add instrument parts easily to demos
- Track makers who want to create chorus arrangements easily
- Creators exploring experimental sound design
- Producers who want to create their own voice models for music production
IK Multimedia’s official website provides video and audio examples of ReSing conversions.
Check them out to explore its possibilities.
Official ReSing Video Demo
Official ReSing Audio Demo
Considerations When Using ReSing
To avoid problems when creating a custom model, always obtain explicit consent from the owner of the source voice.
If you plan to use generated audio commercially or distribute it, check each platform’s terms for AI-generated content beforehand.
Follow the rules as you explore what ReSing can do.
Frequently Asked Questions
Q1. What kind of file gives the best voice conversion results?
A monophonic track containing only one vocal or instrument is best. Files with overlapping sounds such as harmonies or chords can be processed, but a clean single track gives a more natural, higher-quality result.
Q2. Which DAWs can use ReSing?
ReSing runs standalone or as a standard plug-in in DAWs. In ARA-compatible DAWs such as Studio One and Cubase, a dedicated mode also lets you edit audio clips directly.
Q3. Can I create an original voice model trained on my own voice?
Yes. ReSing supports custom models trained on your voice. Download the sound library (voice models) to use all features, including custom model creation.
Q4. When is the PREVIEW button useful?
PREVIEW converts only the first few seconds before you run PROCESS. It lets you quickly check a model’s tone and accent before deciding to process the full audio.
NEW ARTICLES
Latest English Articles