
Cubase Pro 10 Music Seminar 1. Creating Trap Rhythms
Using only sounds/effects included in “Cubase Pro 10”, we will take a look at the latest techniques in music production.
This time we’re putting together a Trap style beat with a gliding bass line!
In this article, we will be looking at making Trap rhythm techniques.
We will look at kick/snare placement according to tempo, as well as techniques for creating that distinct hi-hat rhythm.
Cubase Pro 10 Music Seminar 1 Video Access
Download the Cubase song project here!
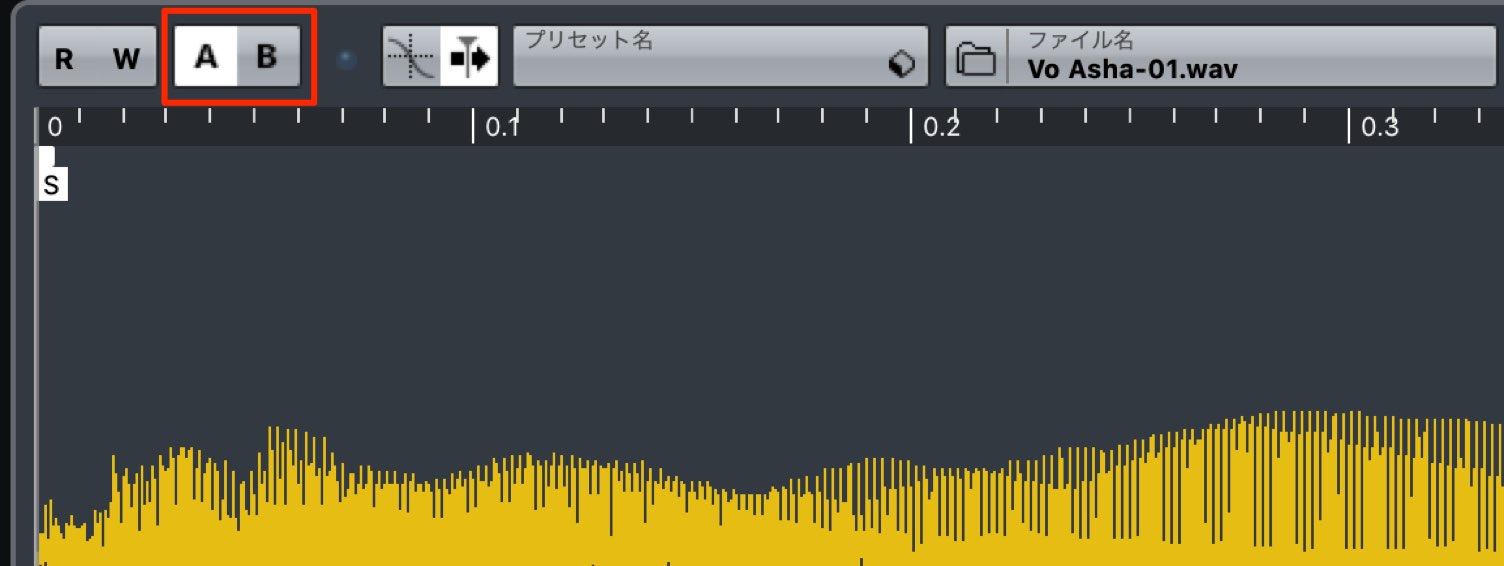 Please try playing after switching A/B within the sampler
Drum Sample placement
First we will start by creating a drum track.
We will be using newly added “Hip Hop / Trap Style” sound samples in Cubase10.
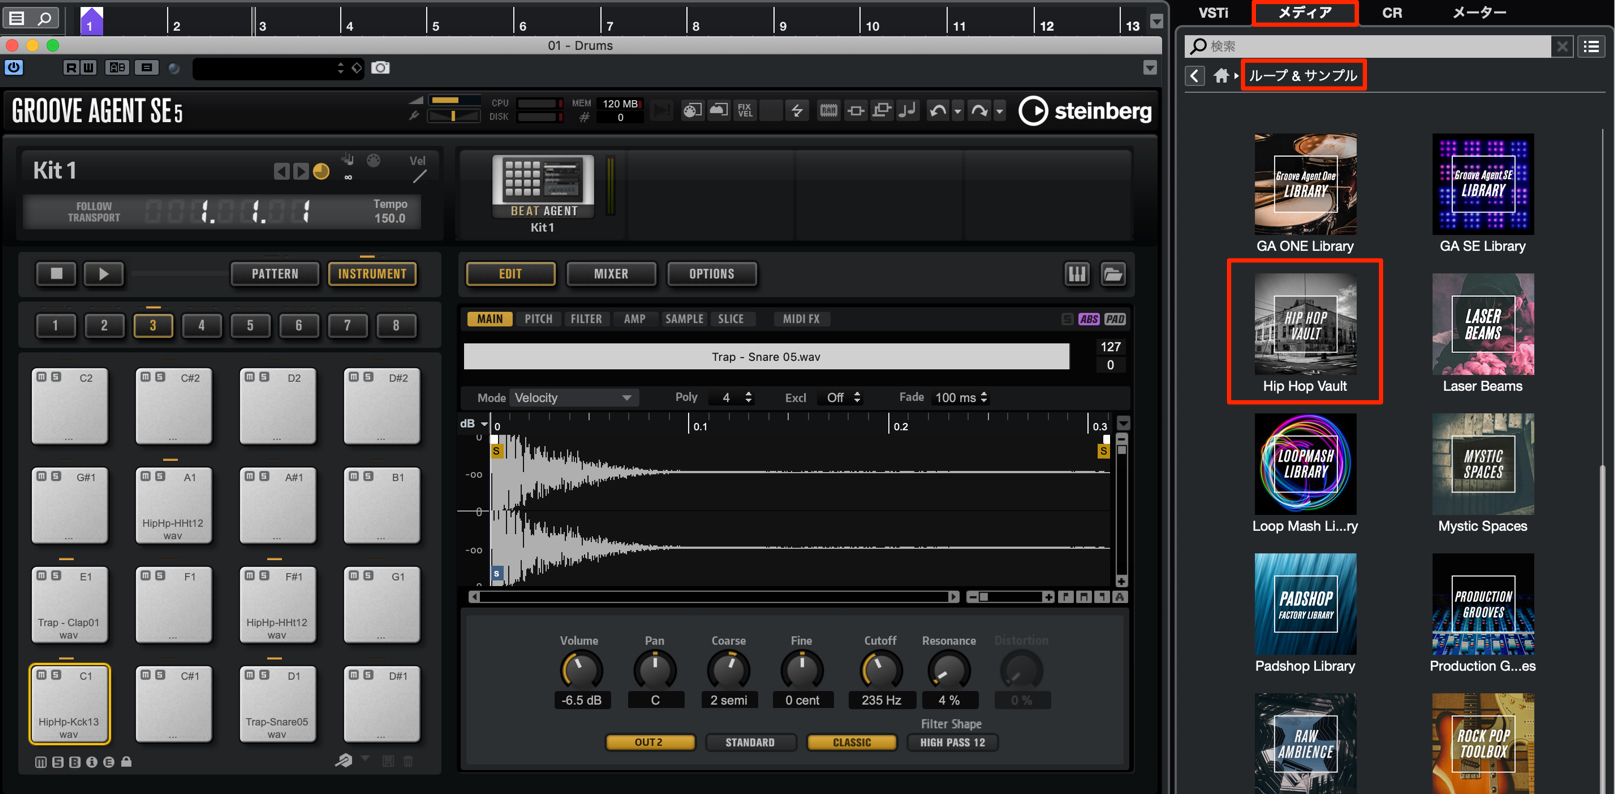
From the media tab in the right side of the screen, go from “Loops & Samples” and select “Hip Hop Vault” to bring up samples.
We will select samples like kick, snare, and hi-hat.
First we will select Kick, and set the Sub Category as Kick Drum, to display just the kick samples within the list.
As the name “Hip Hop Vault” implies, a variety of sounds that are great for Hip Hop are included, so find and select the samples you like.
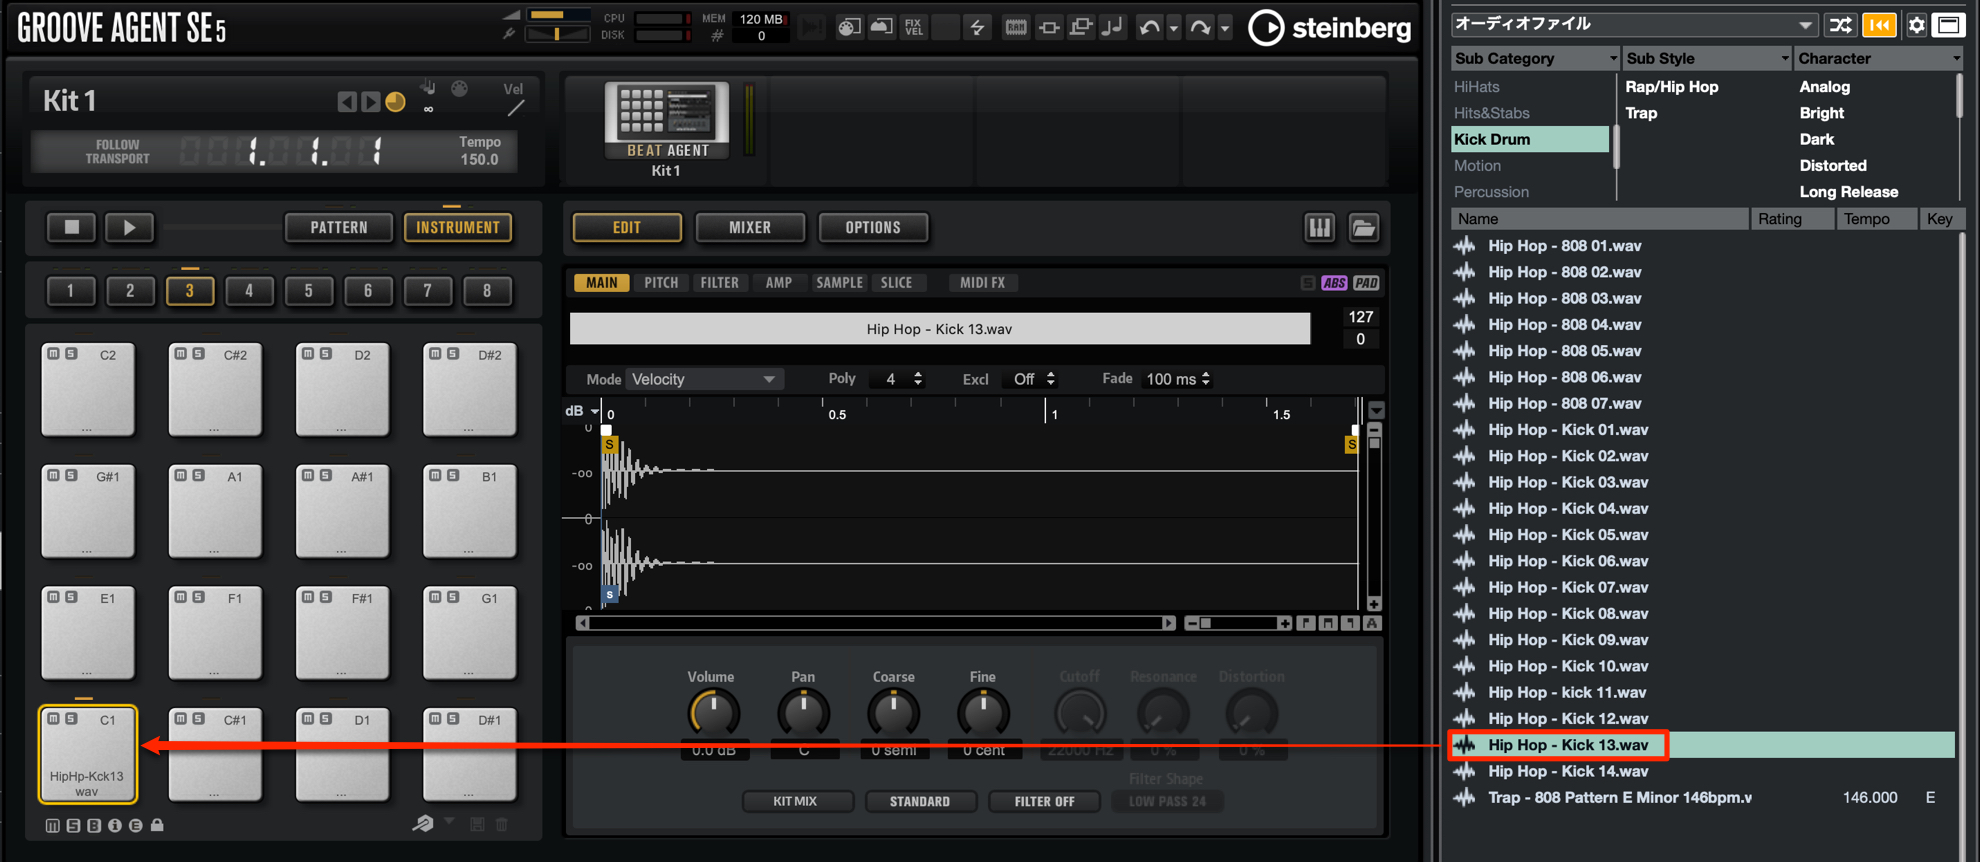
For this article, we will utilize the “Hip Hop – Kick 13” sample, and drag it into the Groove Agent SE.
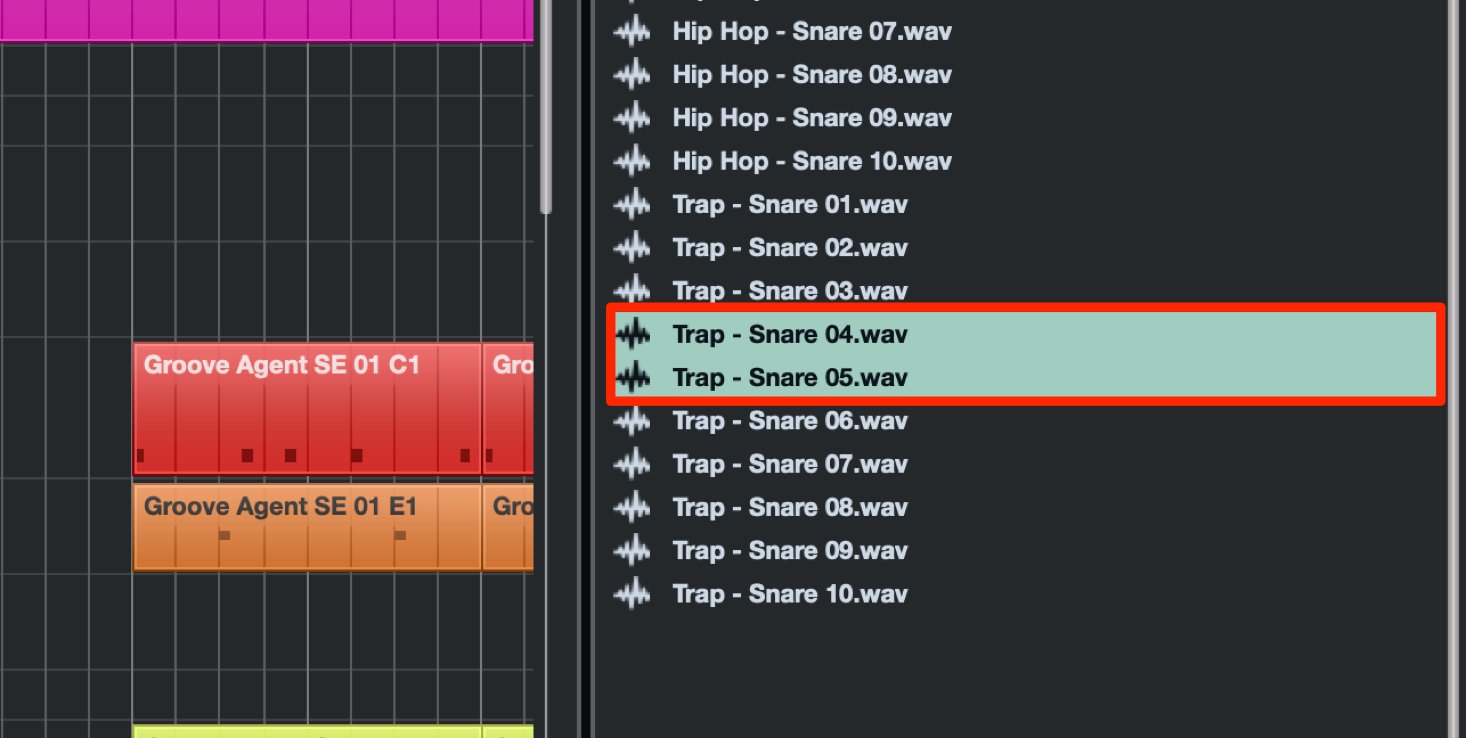
For the snare, we have chosen “Trap – Snare 04” and “Trap – Snare 05” to have 2 samples similar in tone with different pitches.
As a rule of thumb, we have selected TR808 style style analog drum machine samples used commonly in “Hip Hop/Trap”.
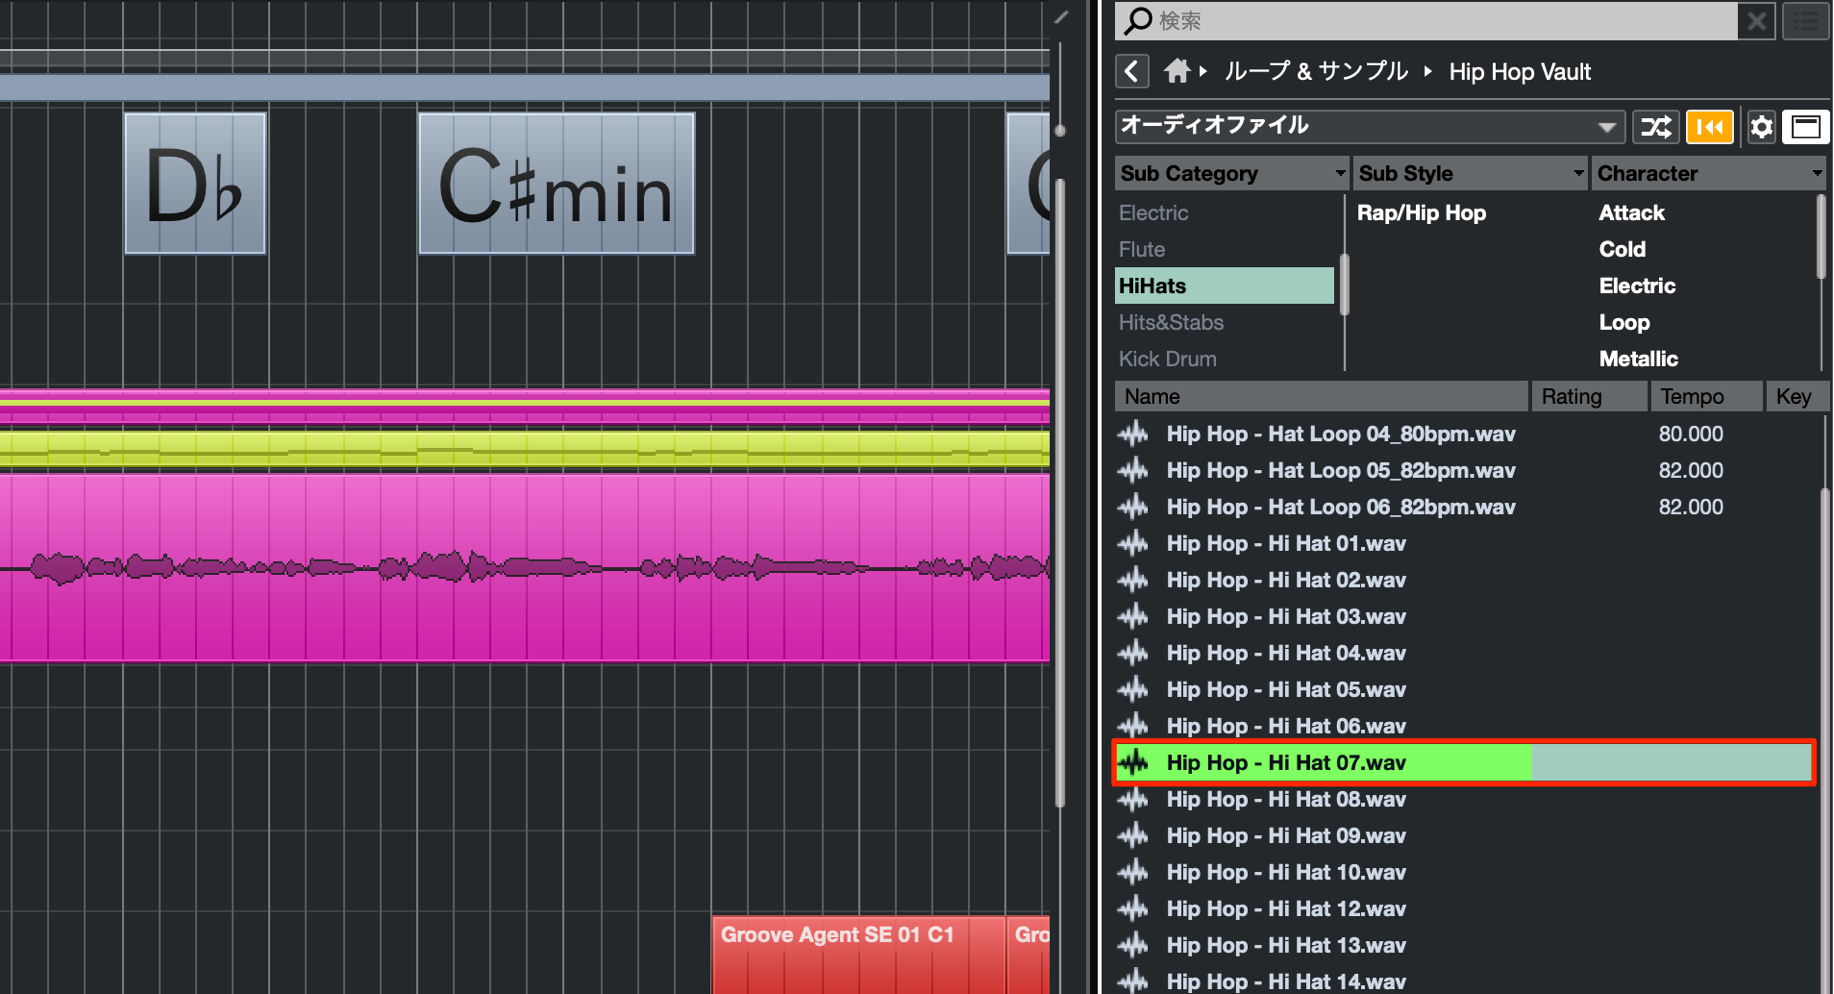
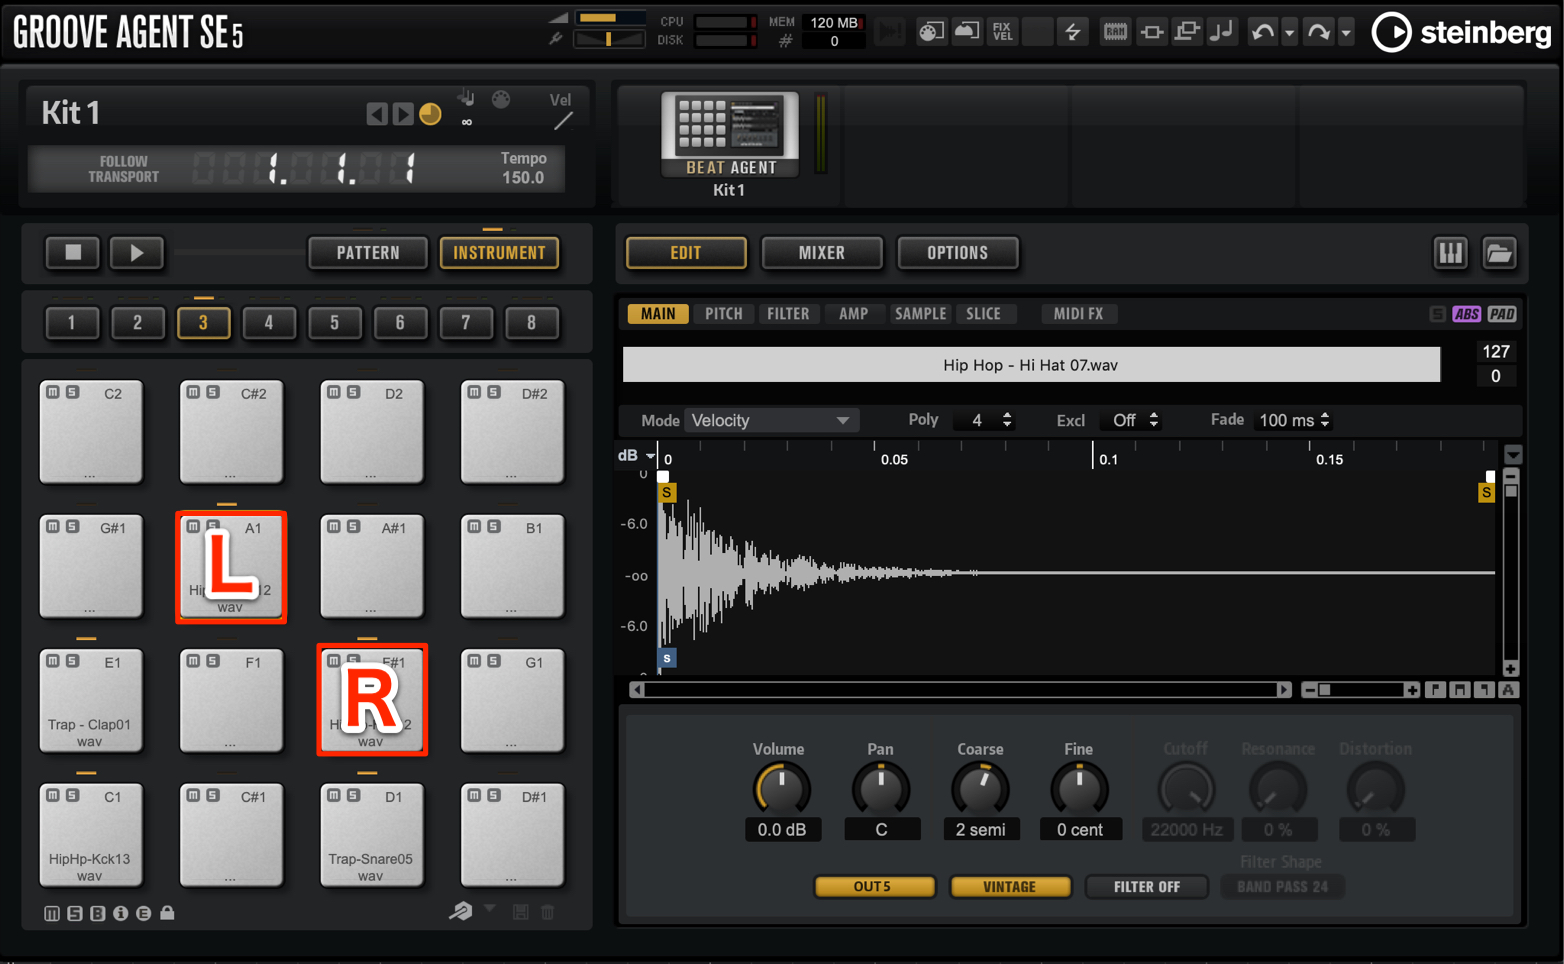
We will use “Hip Hop – Hi Hat 07” for our closed hi-hat sound.
To utilize a LR panned sound, we will place the same sample in 2 different pads in Groove Agent SE.
Creating drum patterns
Here we have created a drum pattern for the Chorus or “Hook” part of a song.
To create a Trap like feel for our beat, we have set the tempo to be “150” and double the feel.
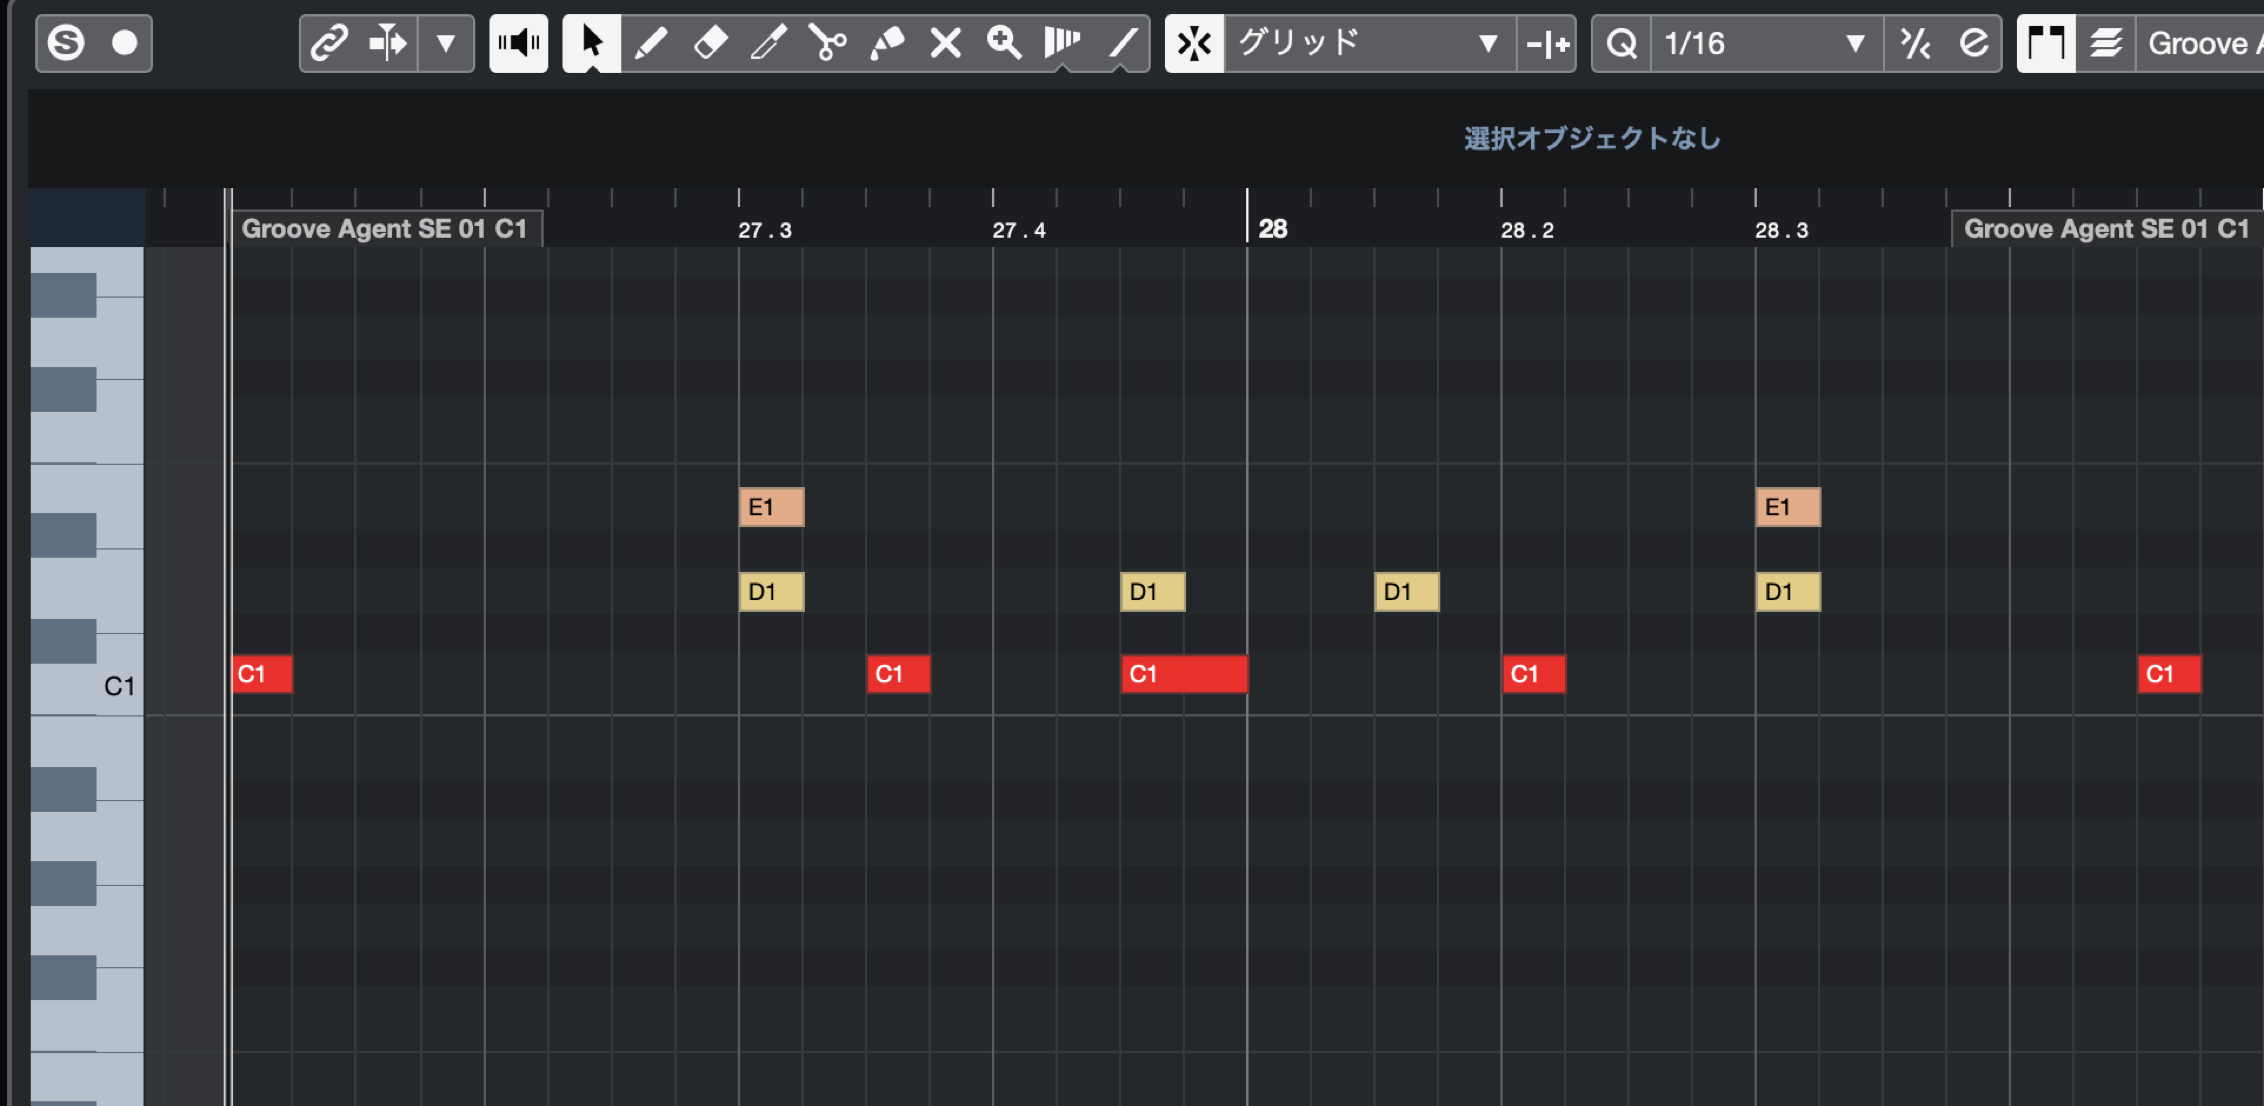
We will create a small 2 bar MIDI event, and create a basic beat first with just a Kick and Snare.
Kick input
The key point is inputting detailed notes for the hi hats, and to keep the Kick and Snare on the down beats and simple to help ground the beat.
Be sure that there aren’t too many Kick placements, at around 3~5 hits per 2 bars for this example.
In addition, we want the beat to syncopate into the next bar, so we have kept the first beat of the 2nd bar without a Kick sound.
By doing so, the 2 bars will sound more like 1 beat pattern.
Snare input
Because the tempo is half the feel of 150, we will place the Snare on 3 rather than 2 and 4.
Here we have placed a low pitched snare (Trap – Snare 04).
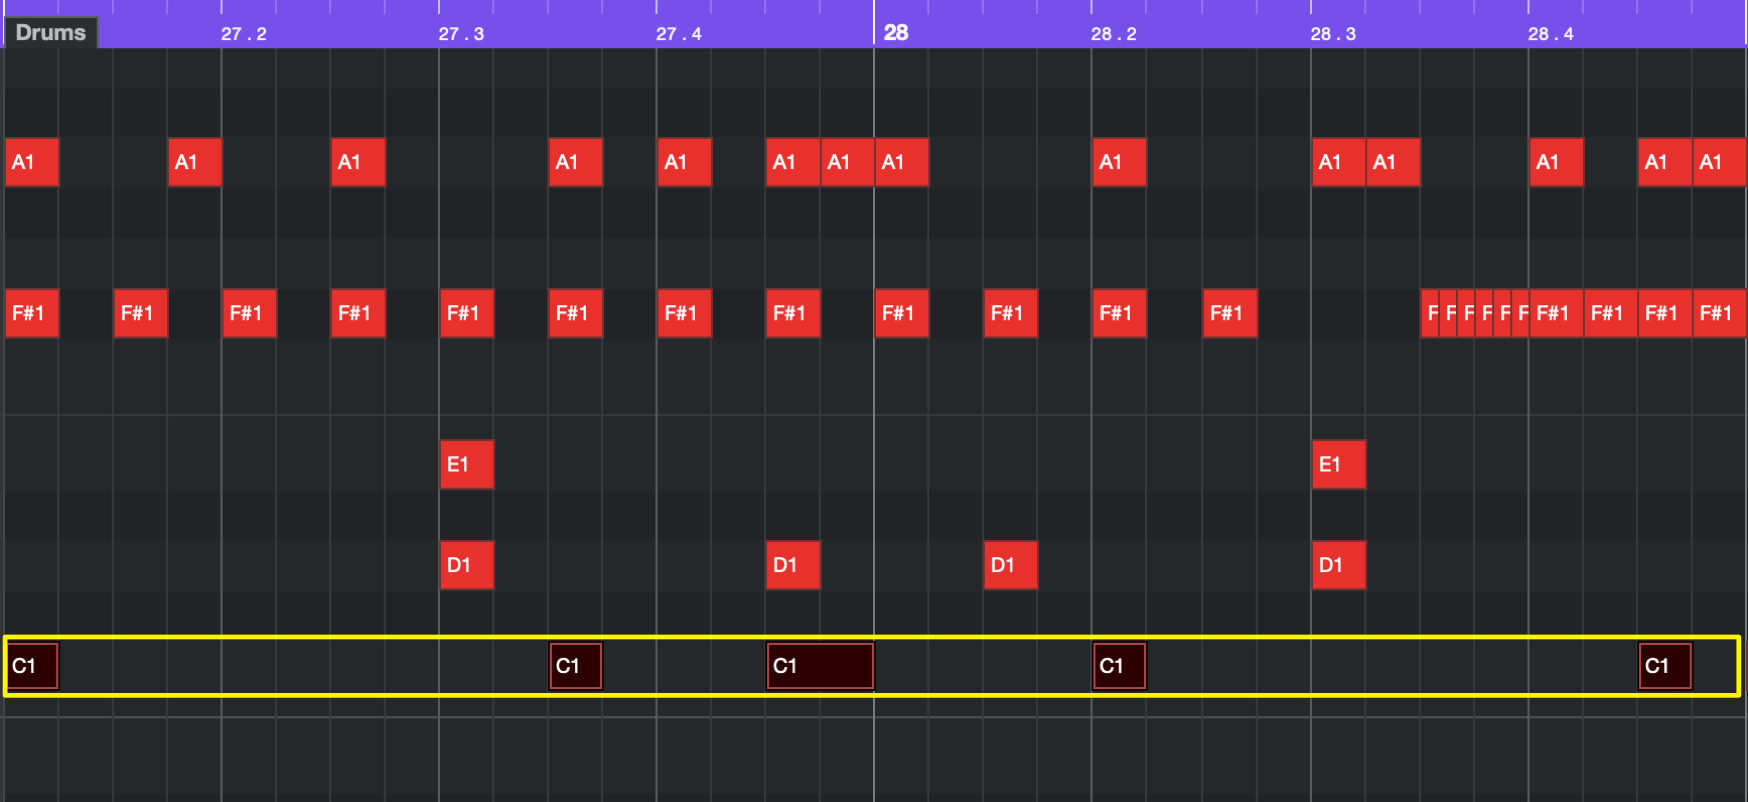
Next we will use the higher pitch snare “Trap – Snare 05” to create more detailed groove.
We will place it on the 4 upbeat (8th note), and the 1 upbeat (8th note).
Because the back beat snare on beat 3 begins to sound thin overall, we will layer the snare as well.
We now have a 2 layered snare accent, and a snare used to embellish and add groove to the beat.
Using rolls for hi hat patterns
The hi hat roll is a technique used commonly in Hip Hop and Trap, and adds that distinctive rush feel to a beat.
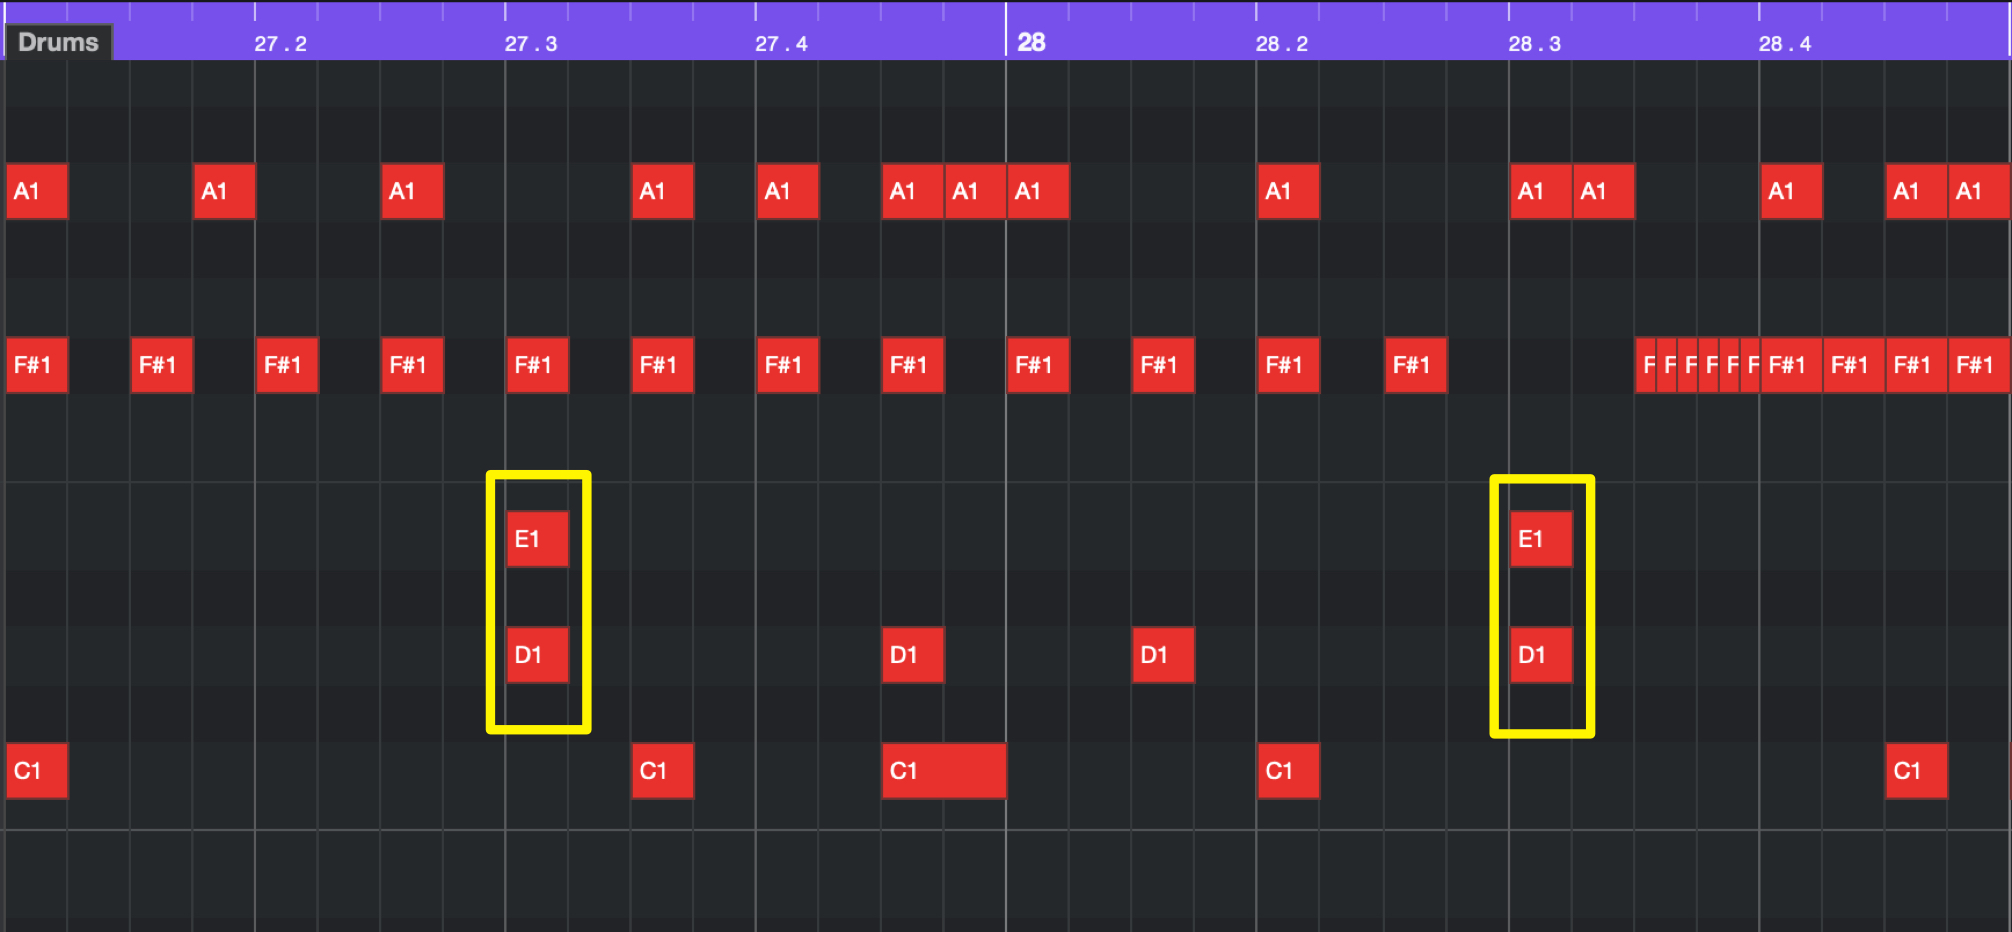
Here we have 2 hi hats prepared, panned L/R to add stereo width to the sound.
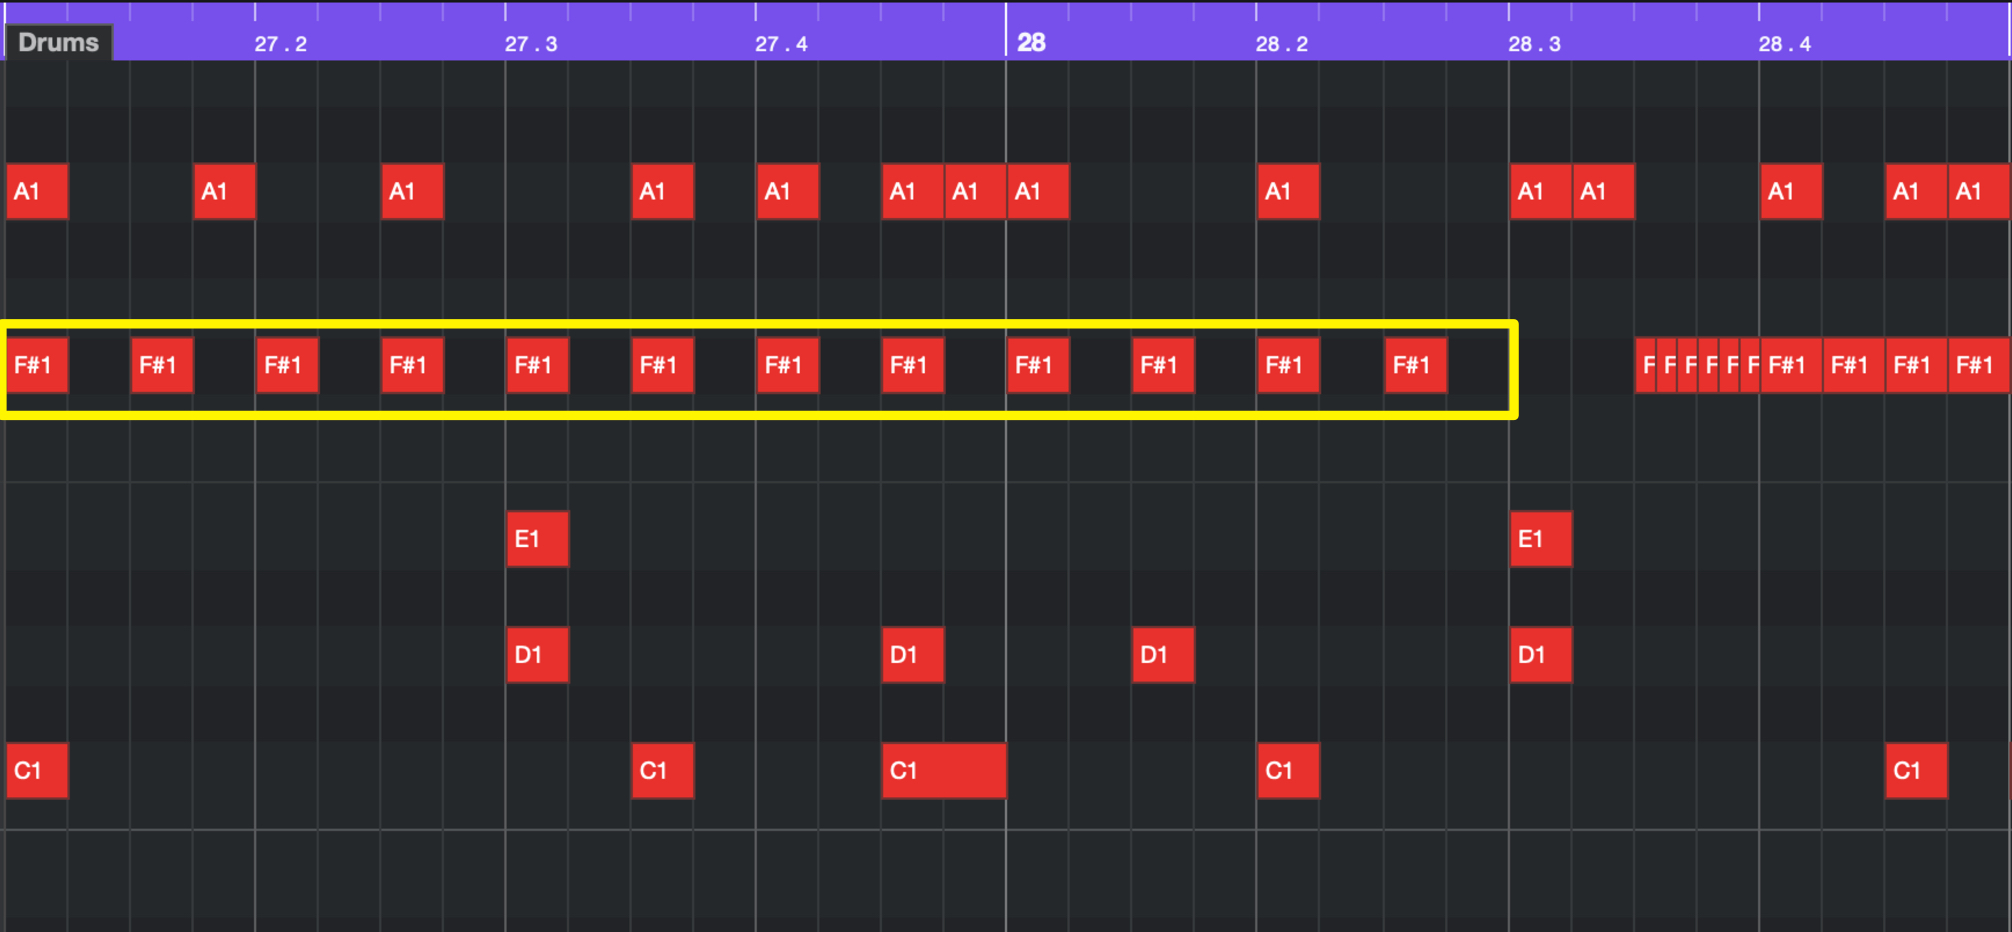
First we will enter a stable hi hat pattern on one side.
We will place 8th note hi hats on the right side hi hat.
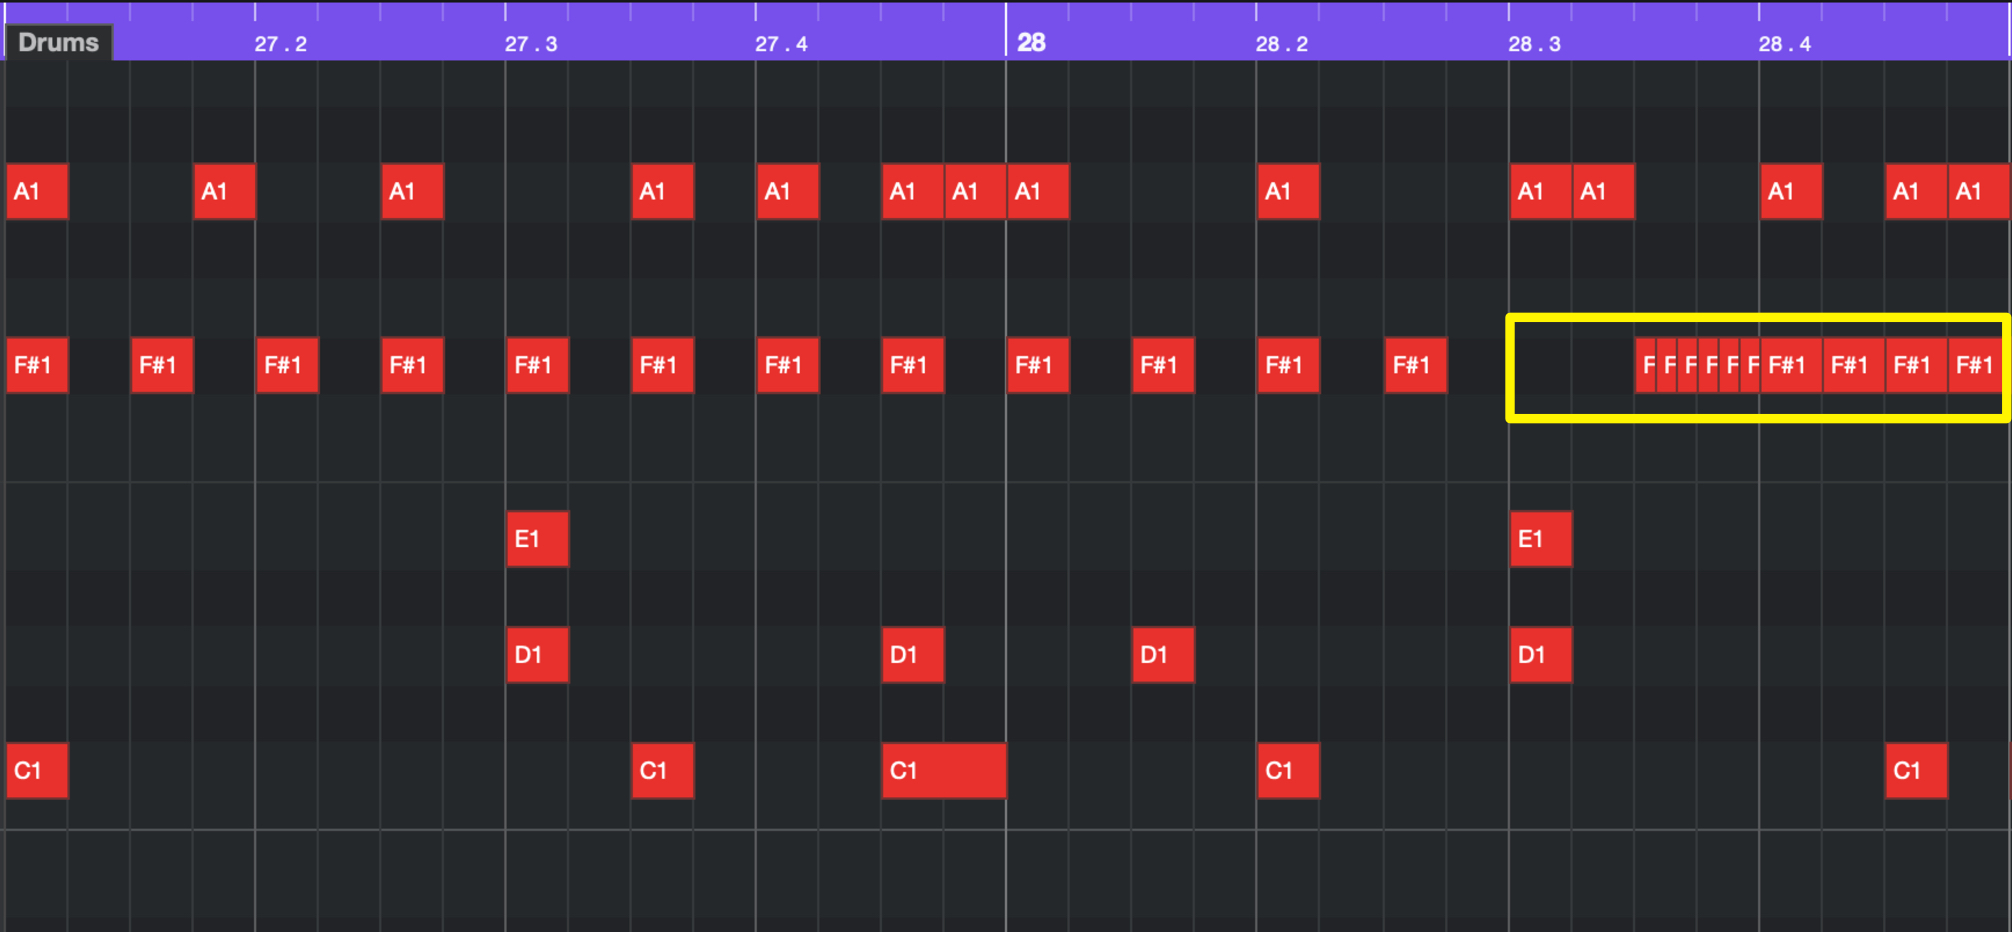
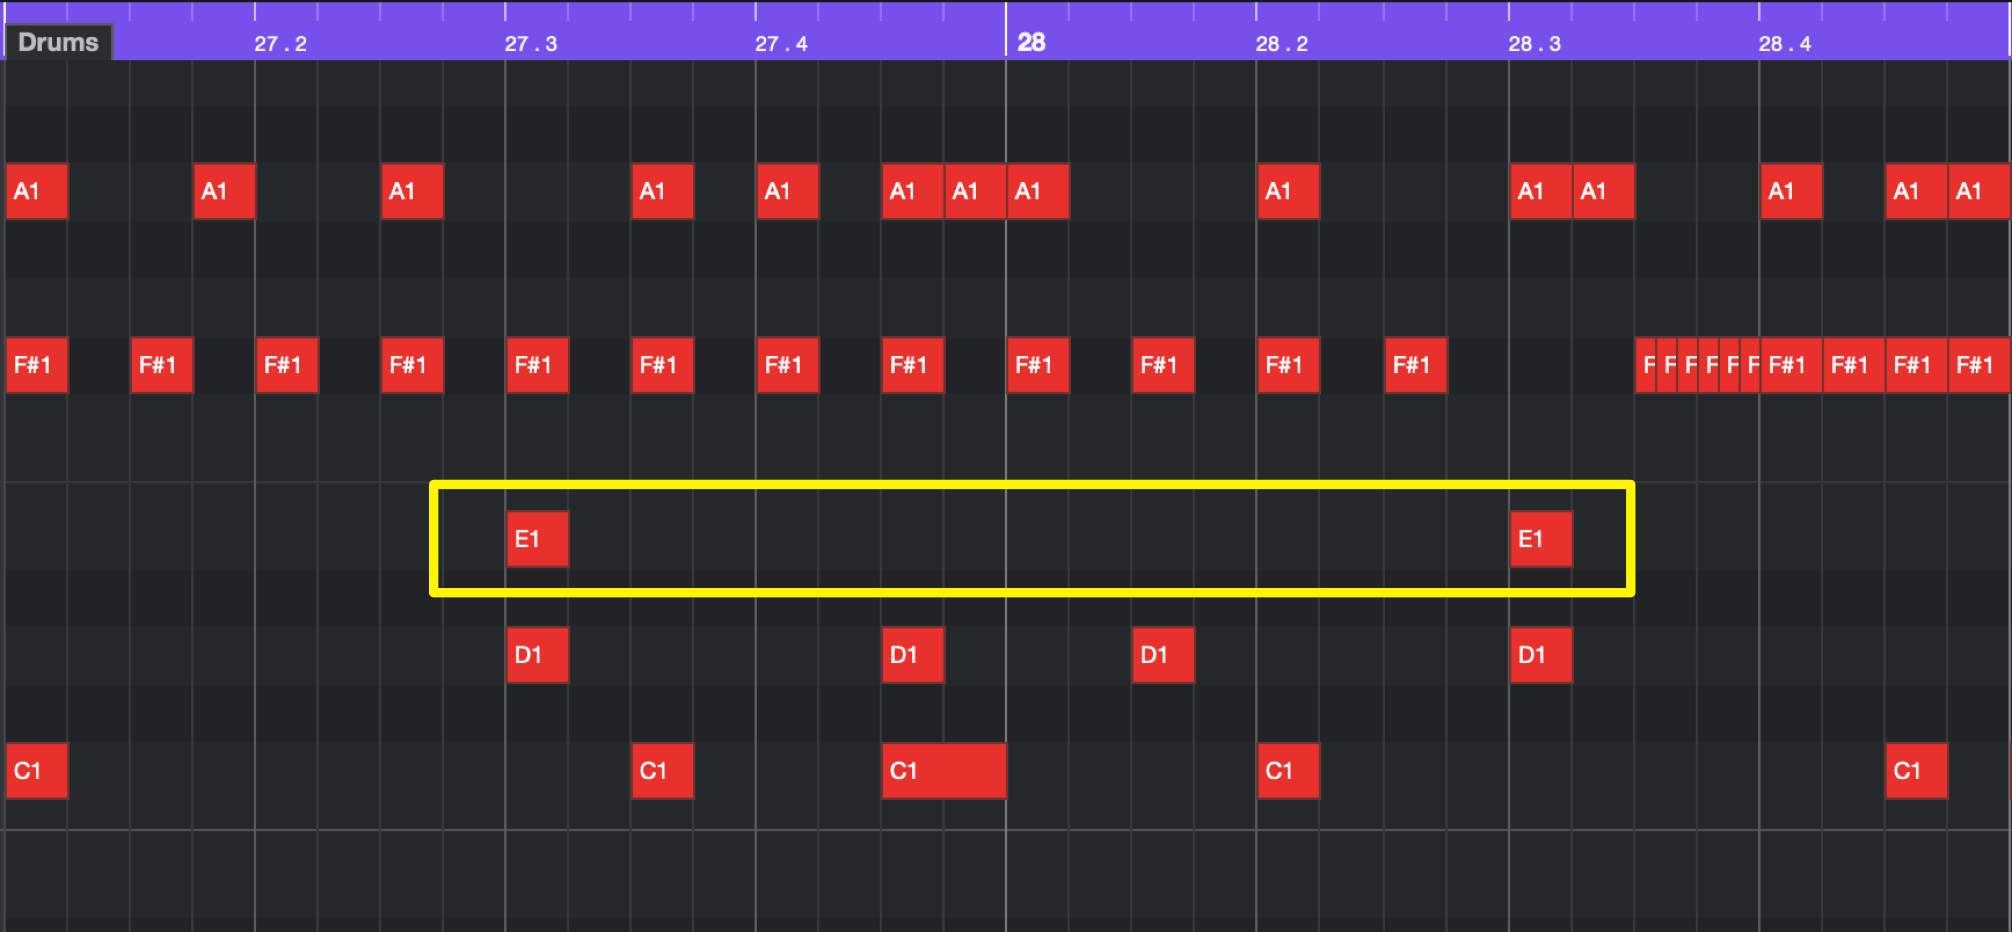
Next we will input the roll hi hat sounds.
To make the effect obvious, we will place it on points that don’t overlap with the Kick and Snare sounds.
Because of this, we will place the roll after the Snare placements.
Common subdivision for rolls include 32nd/32nd triplet/64th notes, and we will use 32nd note triplets for this example.
In addition, we will place 16th notes after the roll to keep the speed of the flow going, and connect it into the 8th notes.
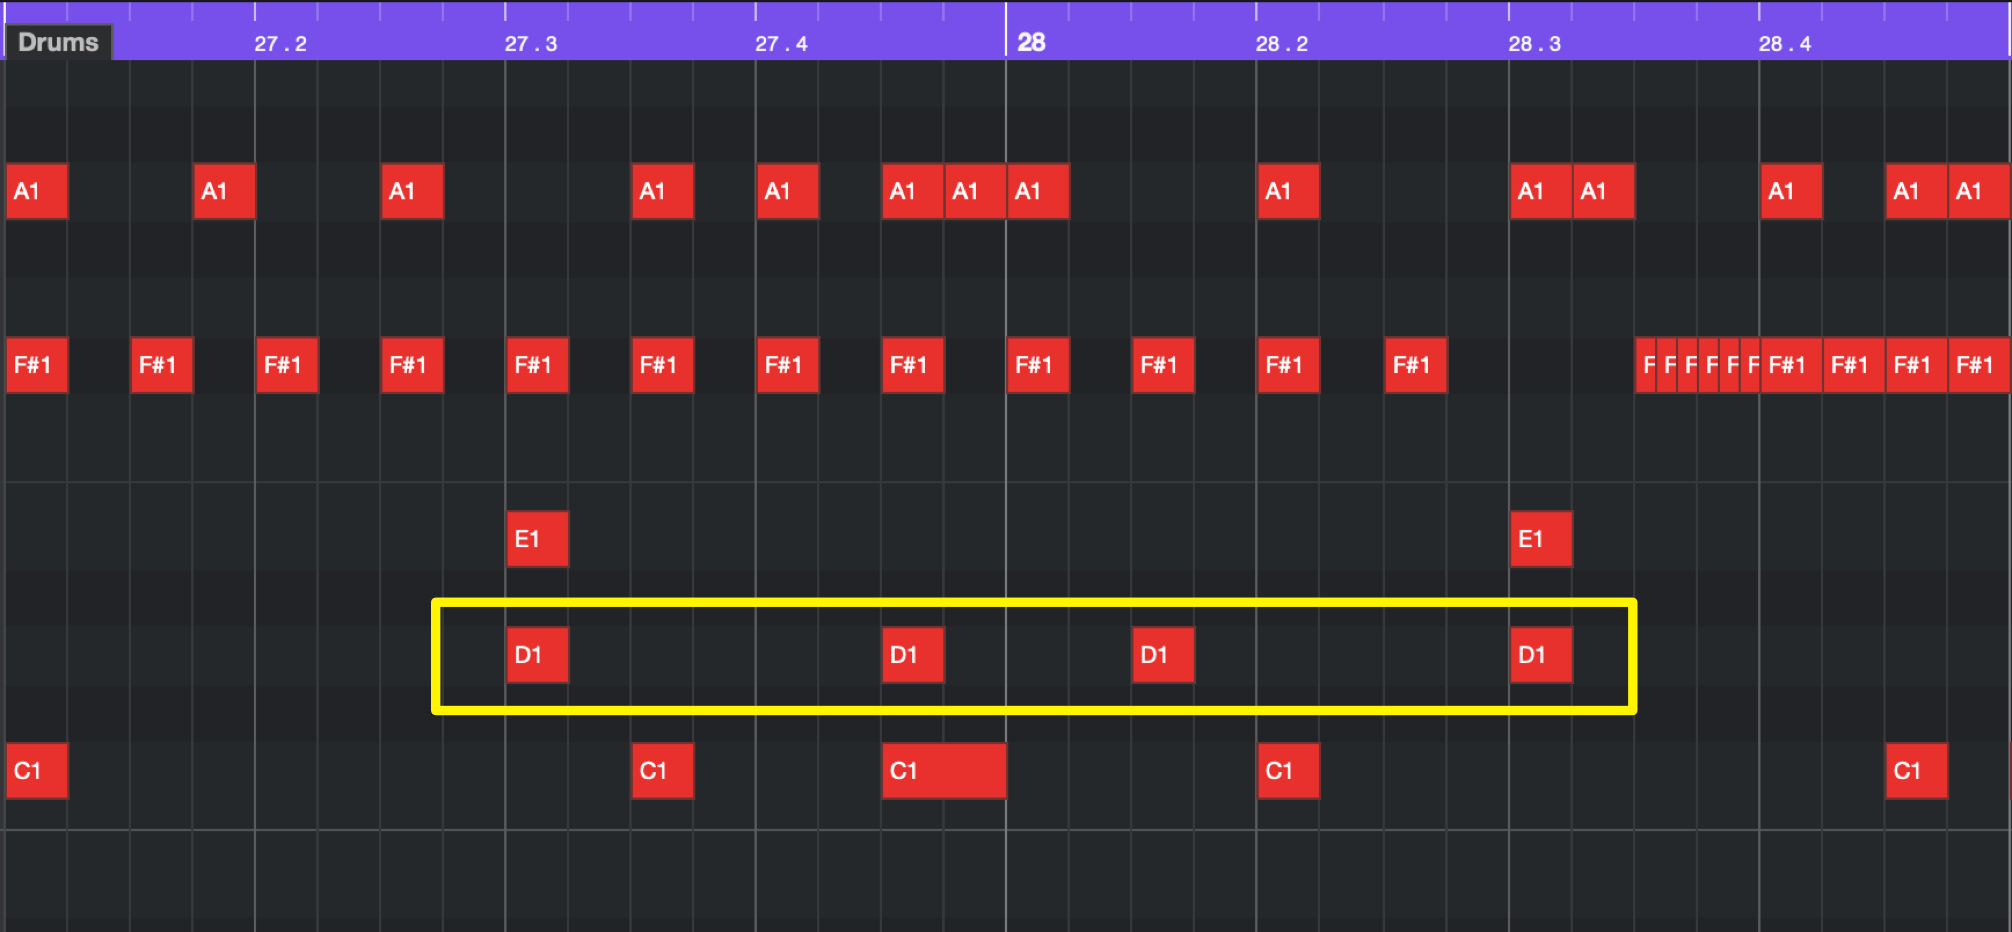
We will place the same sample in the other hi hat.
By playing the same hat sound on the L/R, the hat sound will be centered.
When only 1 sample is playing, the sounds will be heard on the L/R, allowing you to have sounds on the left, right, and center.