Mixing involves organizing tracks and adjusting volume, pan, and effects. Disable unused tracks and group them into folders to make the session easier to manage. Start balancing important tracks against a reference such as the kick, and check that the master does not clip. Bass, kick, and lead vocals often sit in the center, while other instruments can be panned to create width. EQ, compression, and other effects help bring the sounds together into a clear mix.
Balance the sound of the whole song
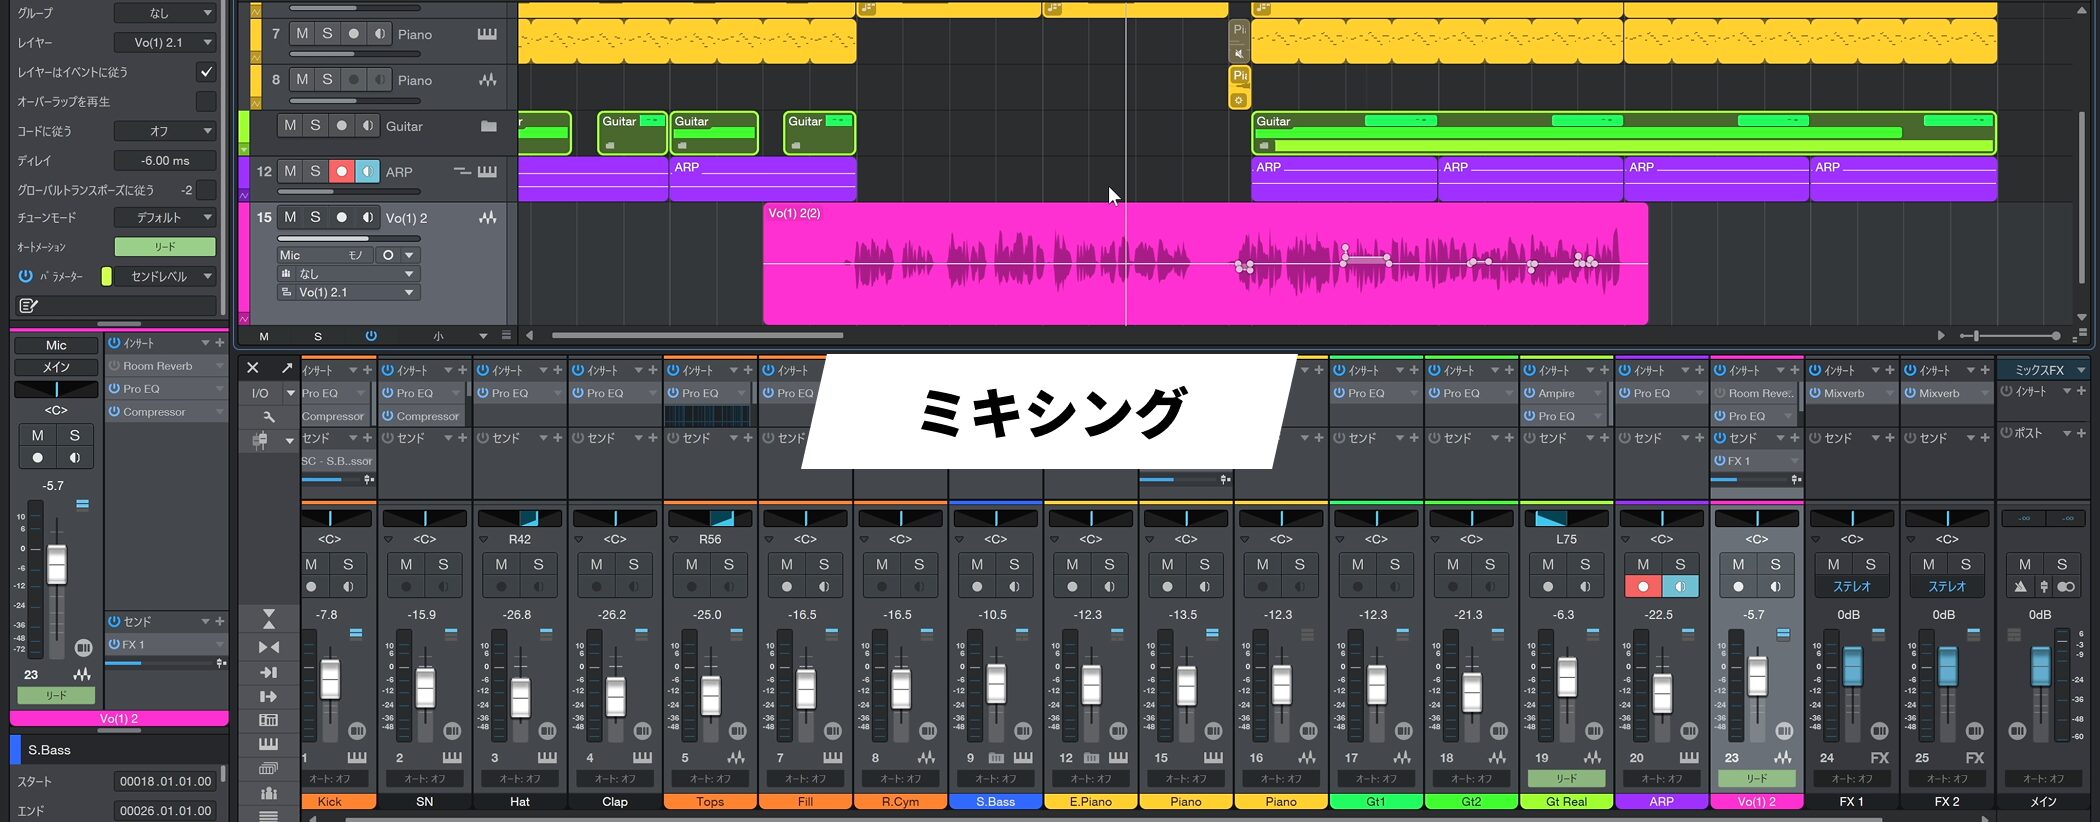
Mixing is an important stage in which you adjust each track’s volume, pan, and effects to shape the sound of the entire song.
Before you start mixing, organize your tracks.
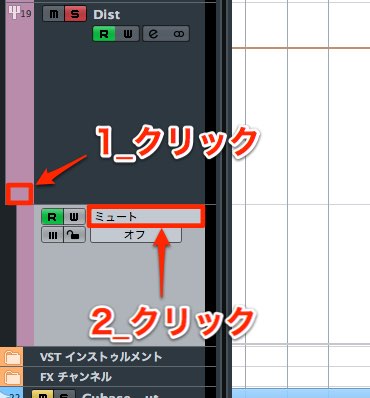
Disable unused tracks
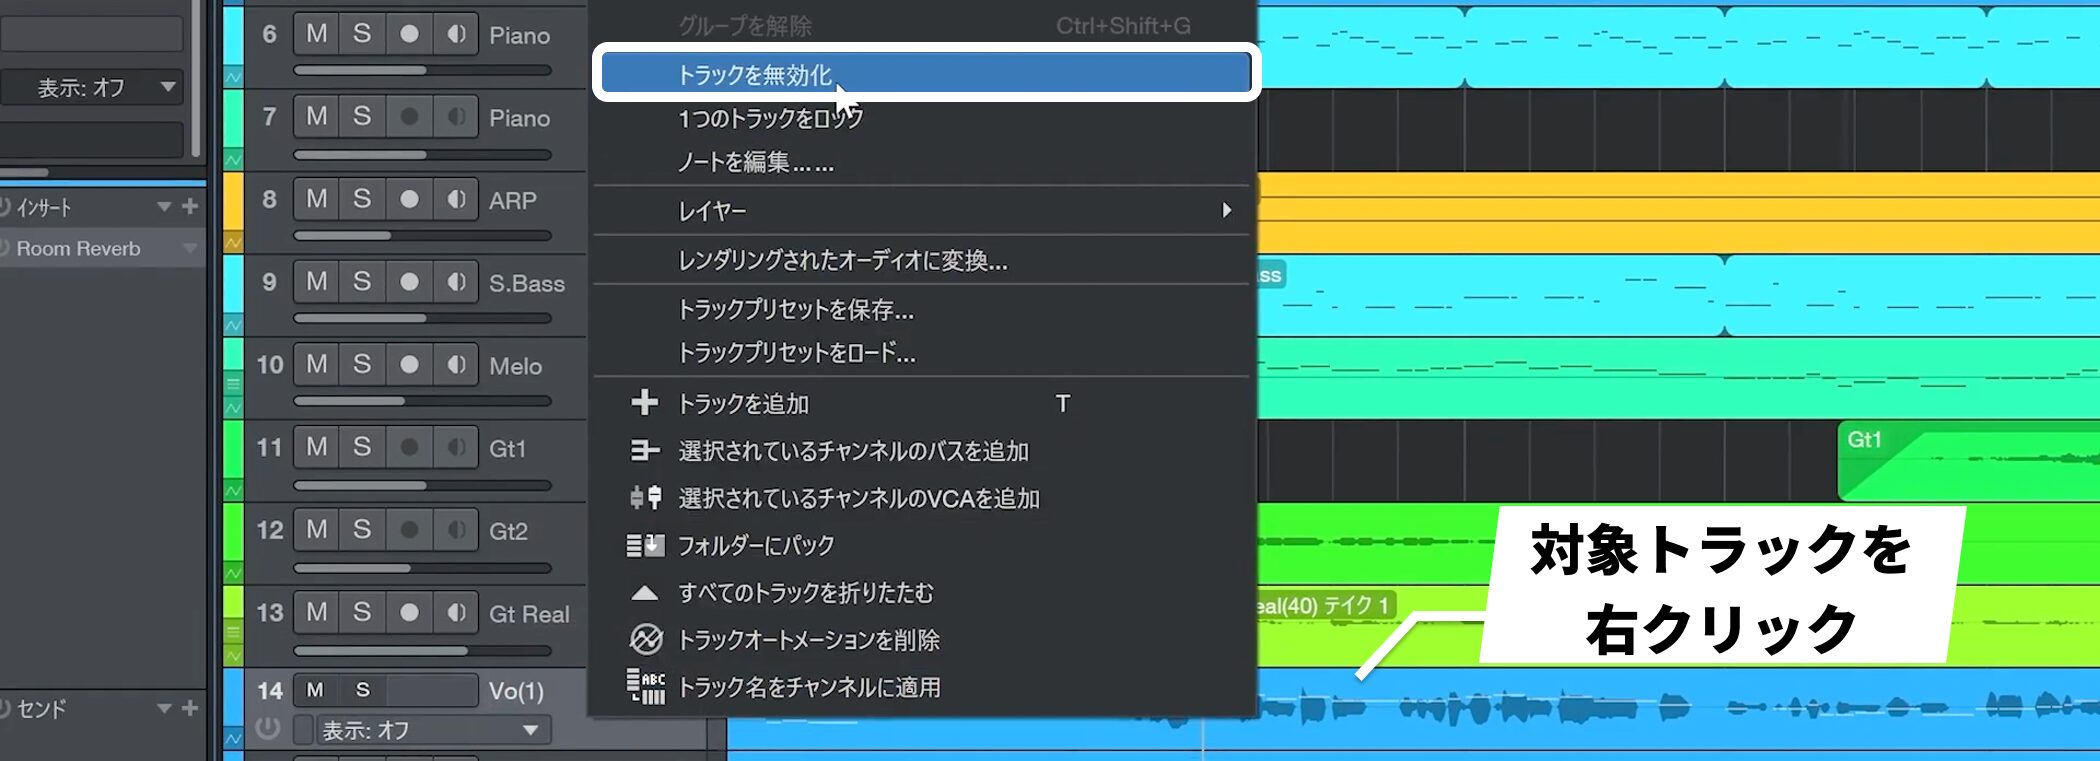
To disable a track you no longer need, right-click it and choose Disable Track.

The track turns gray and is disabled.
This also reduces CPU load.
You can right-click a disabled track to enable it again.
This is the difference between disabling and deleting a track.
Hide disabled tracks
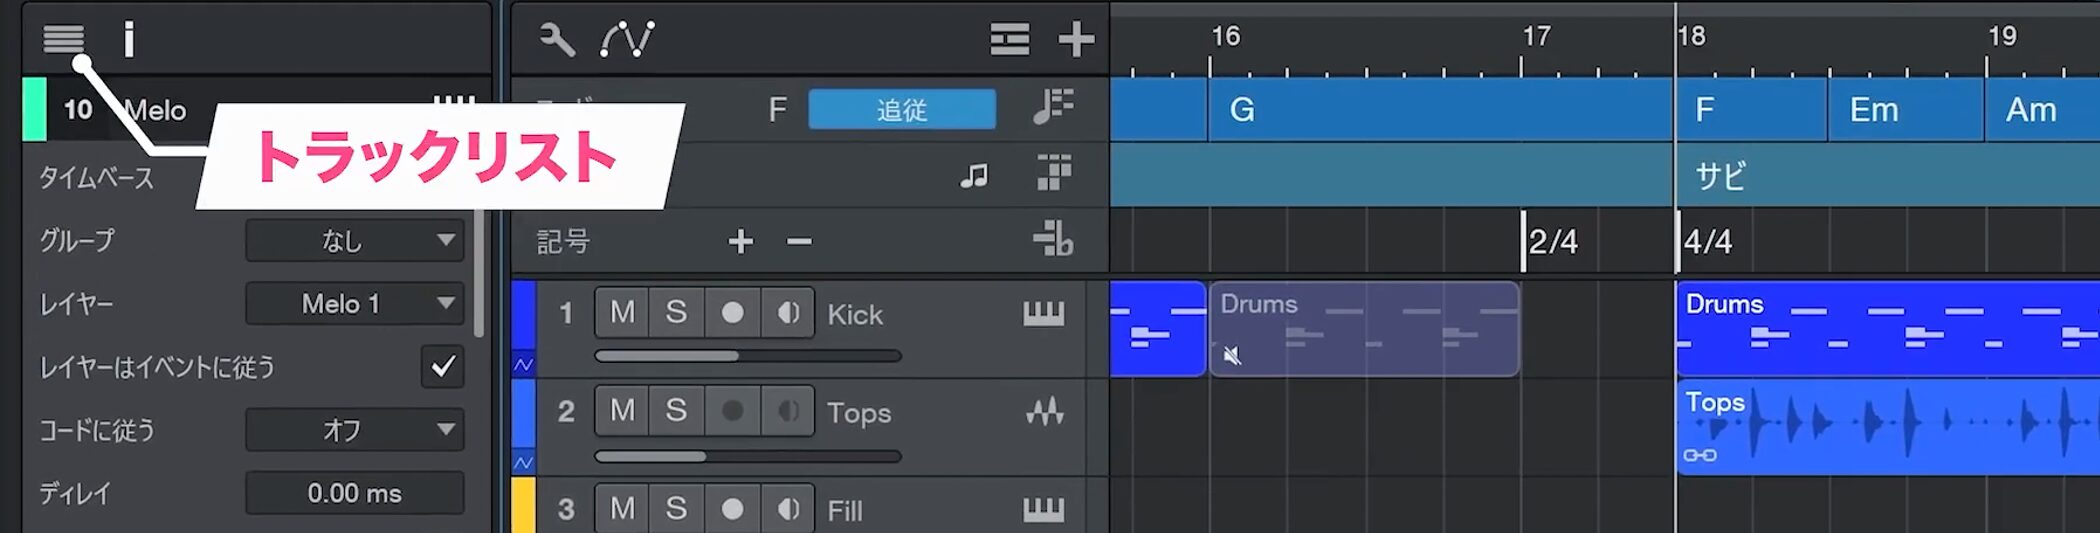
We recommend hiding disabled tracks.
Click the Track List icon on the left.
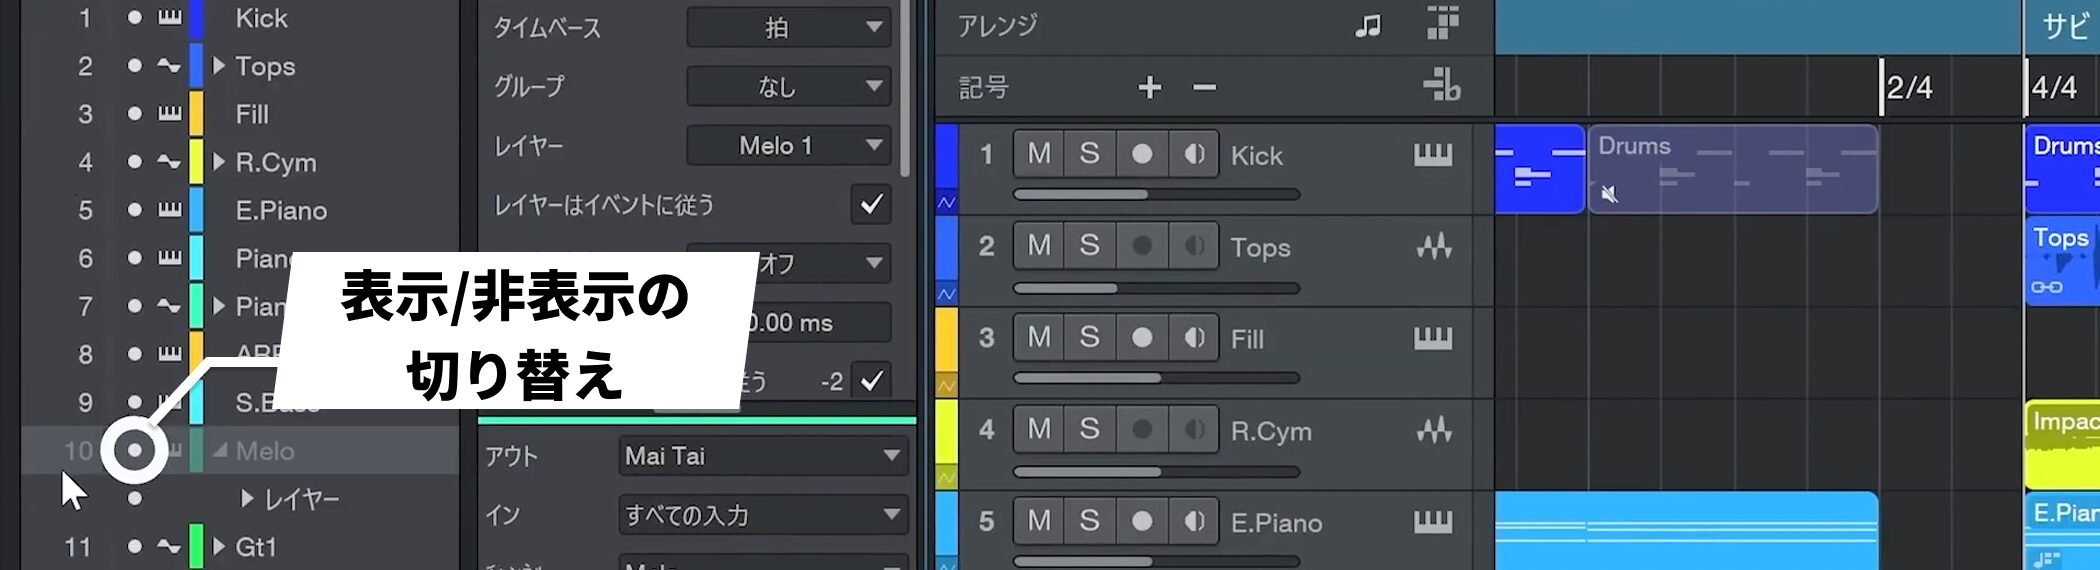
Click the white dot beside a track to toggle its visibility.
Group tracks into folders
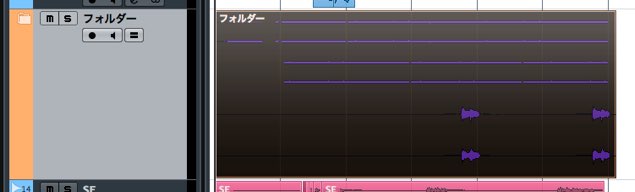
You can organize tracks into folders by category.
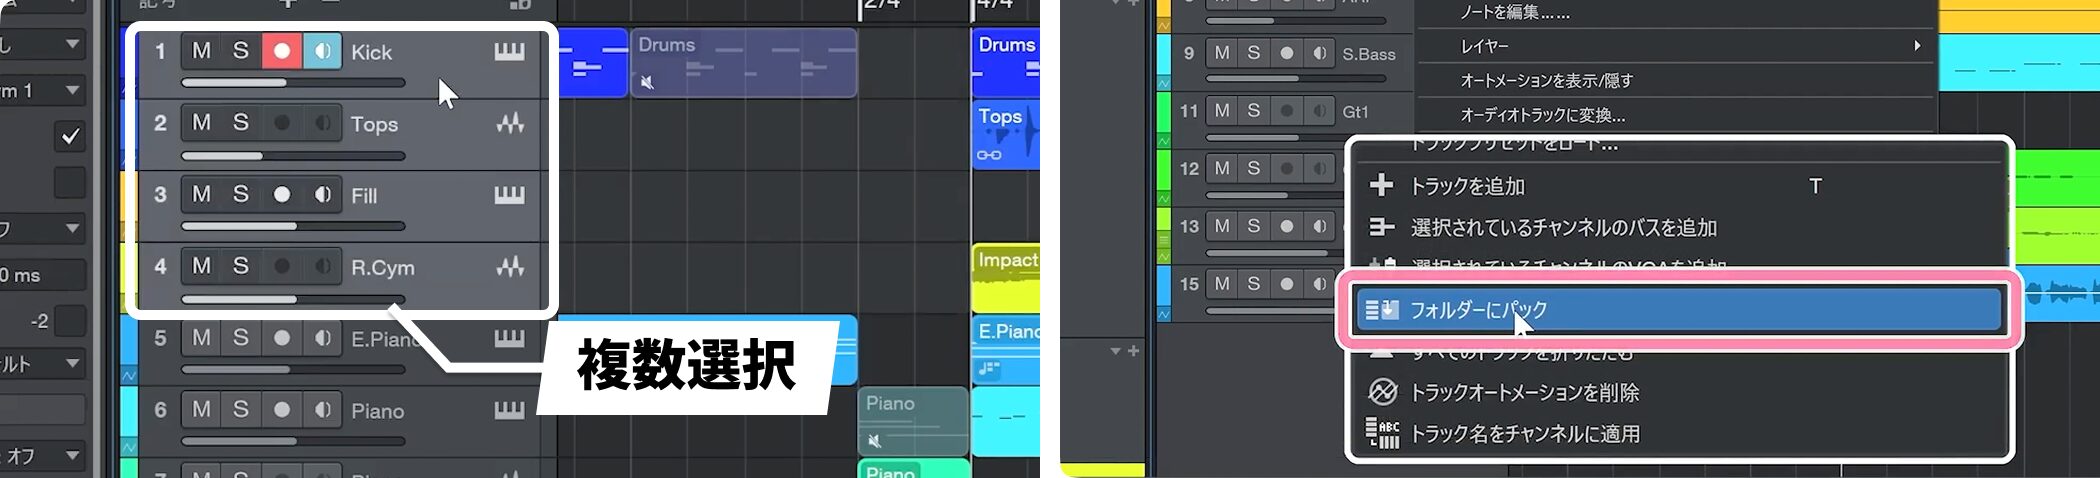
Select the tracks you want to group, right-click, and choose Pack Folder.
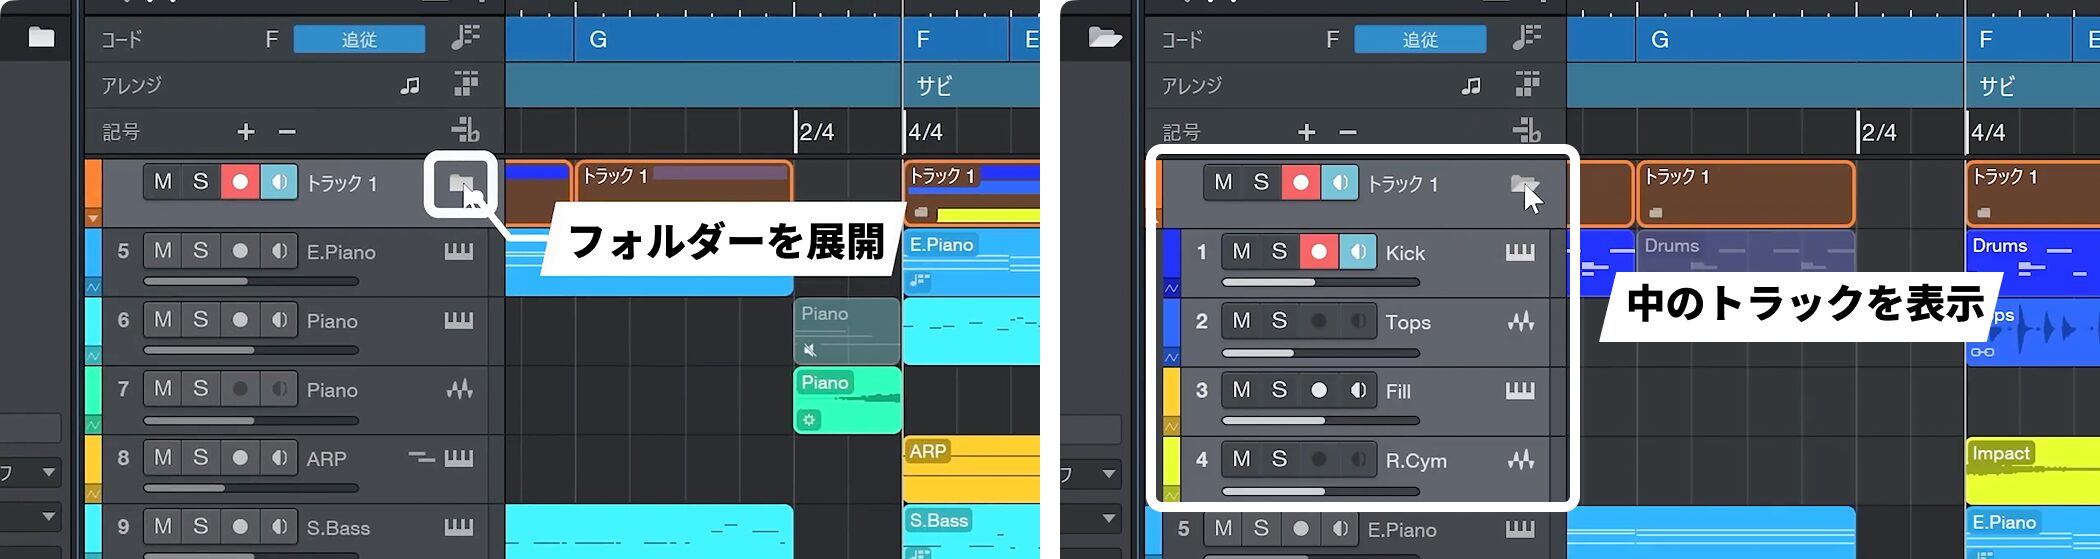
Click the folder icon to reveal its tracks.
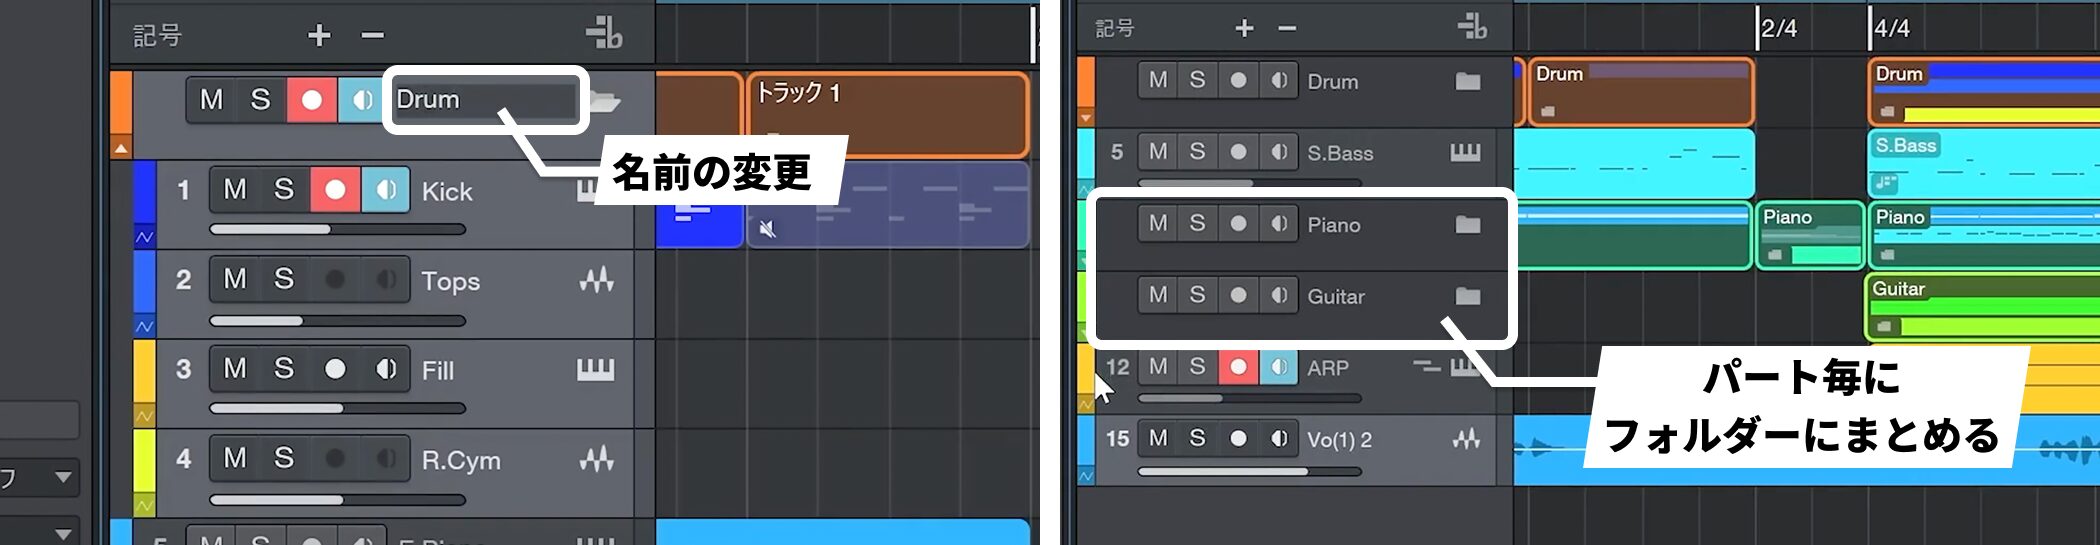
You can also name a folder track.
Grouping keyboard tracks and other categories in the same way keeps the session tidy.
Color-code tracks
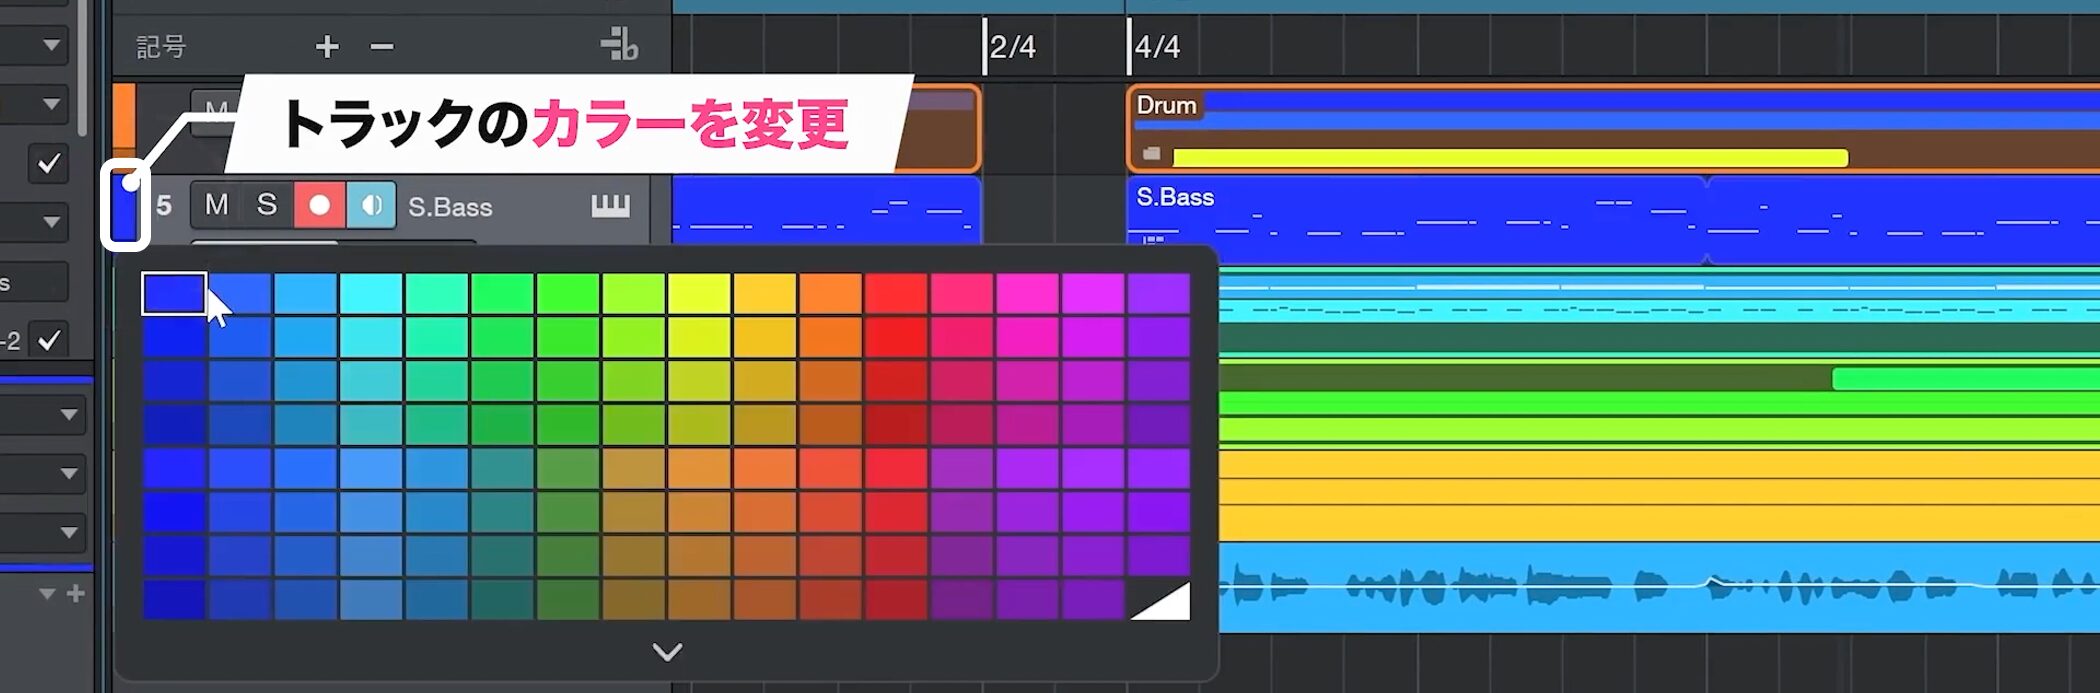
Click the left side of a track to change its color.
There are no fixed rules, but choosing your own scheme—such as blue for bass and yellow for keyboards—helps you find tracks quickly in any song.
Open the mixer
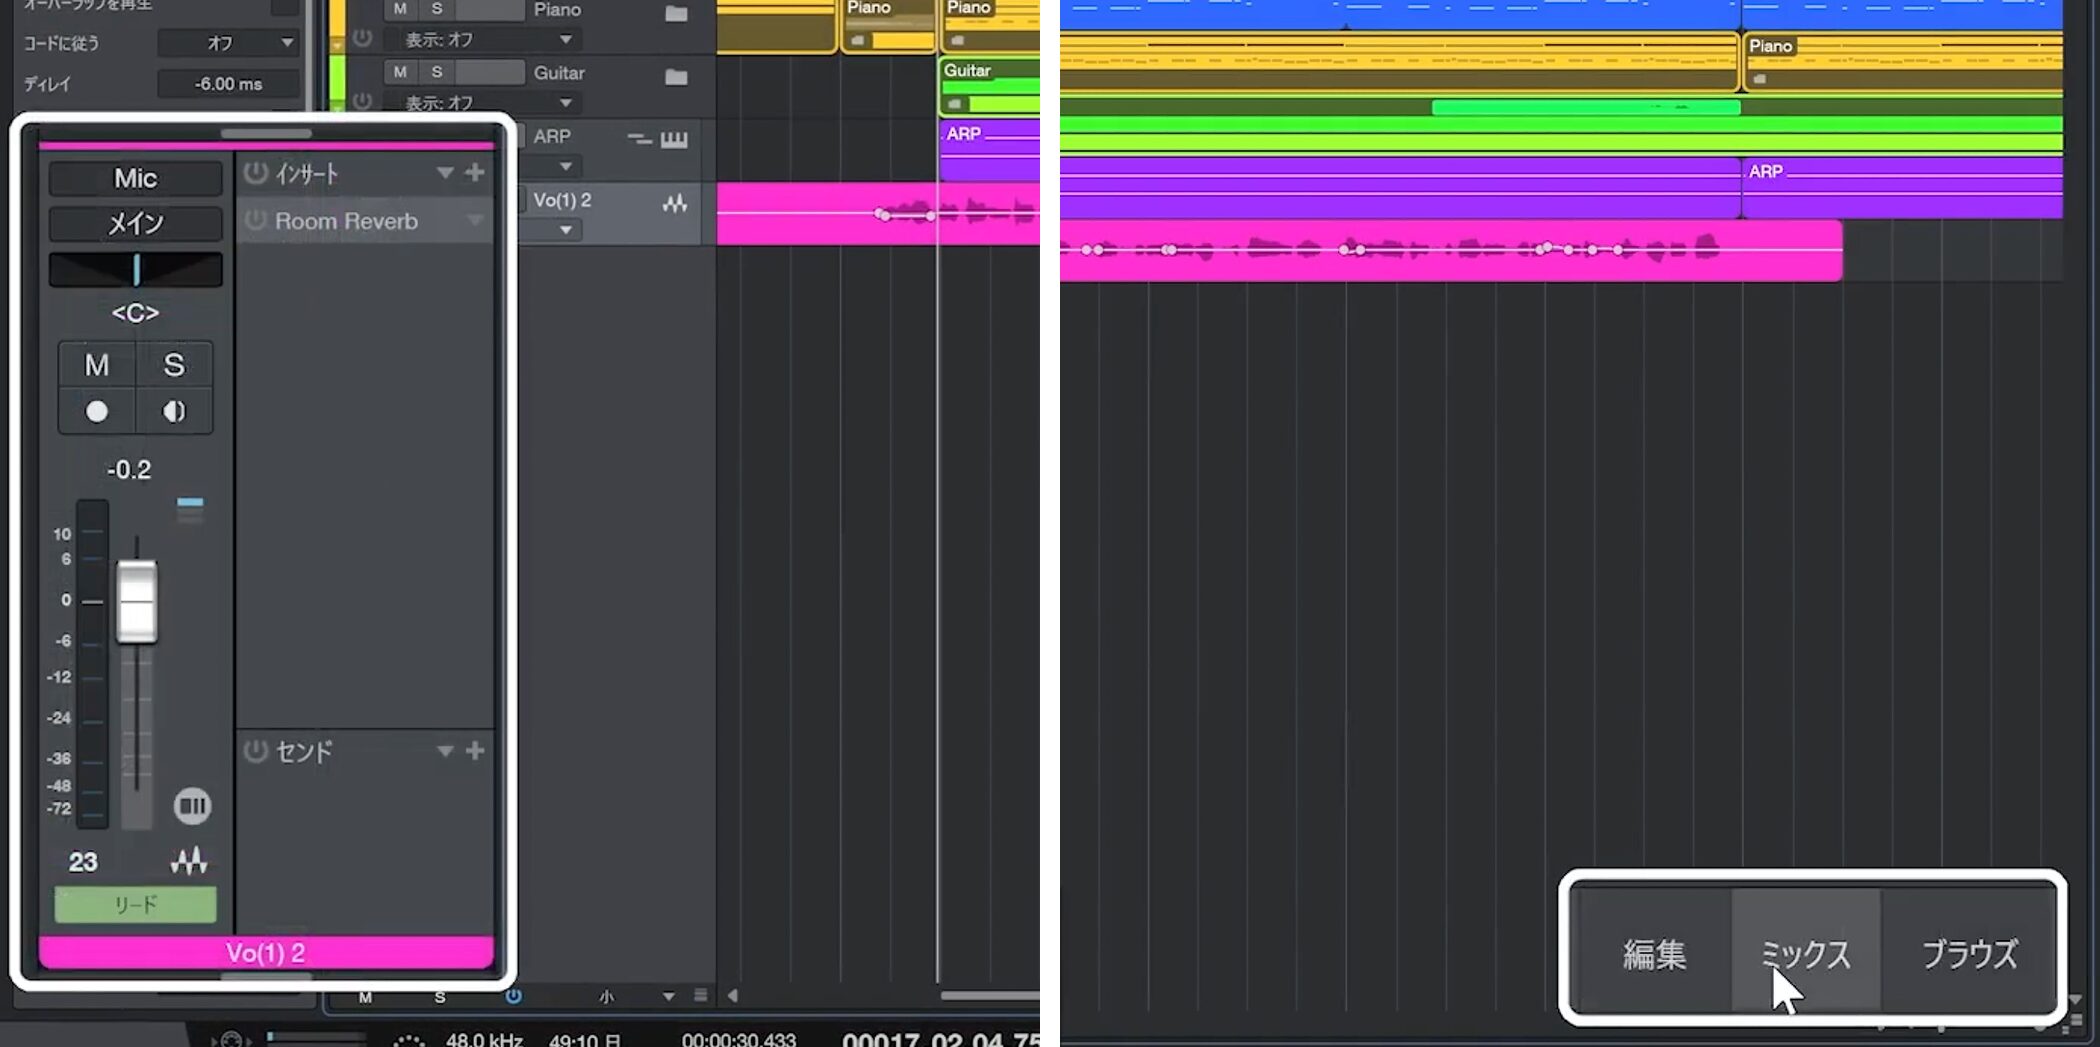
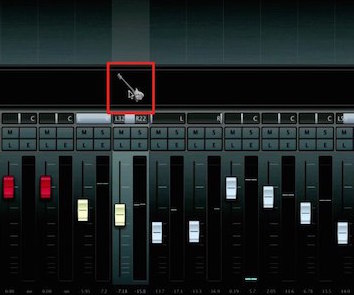
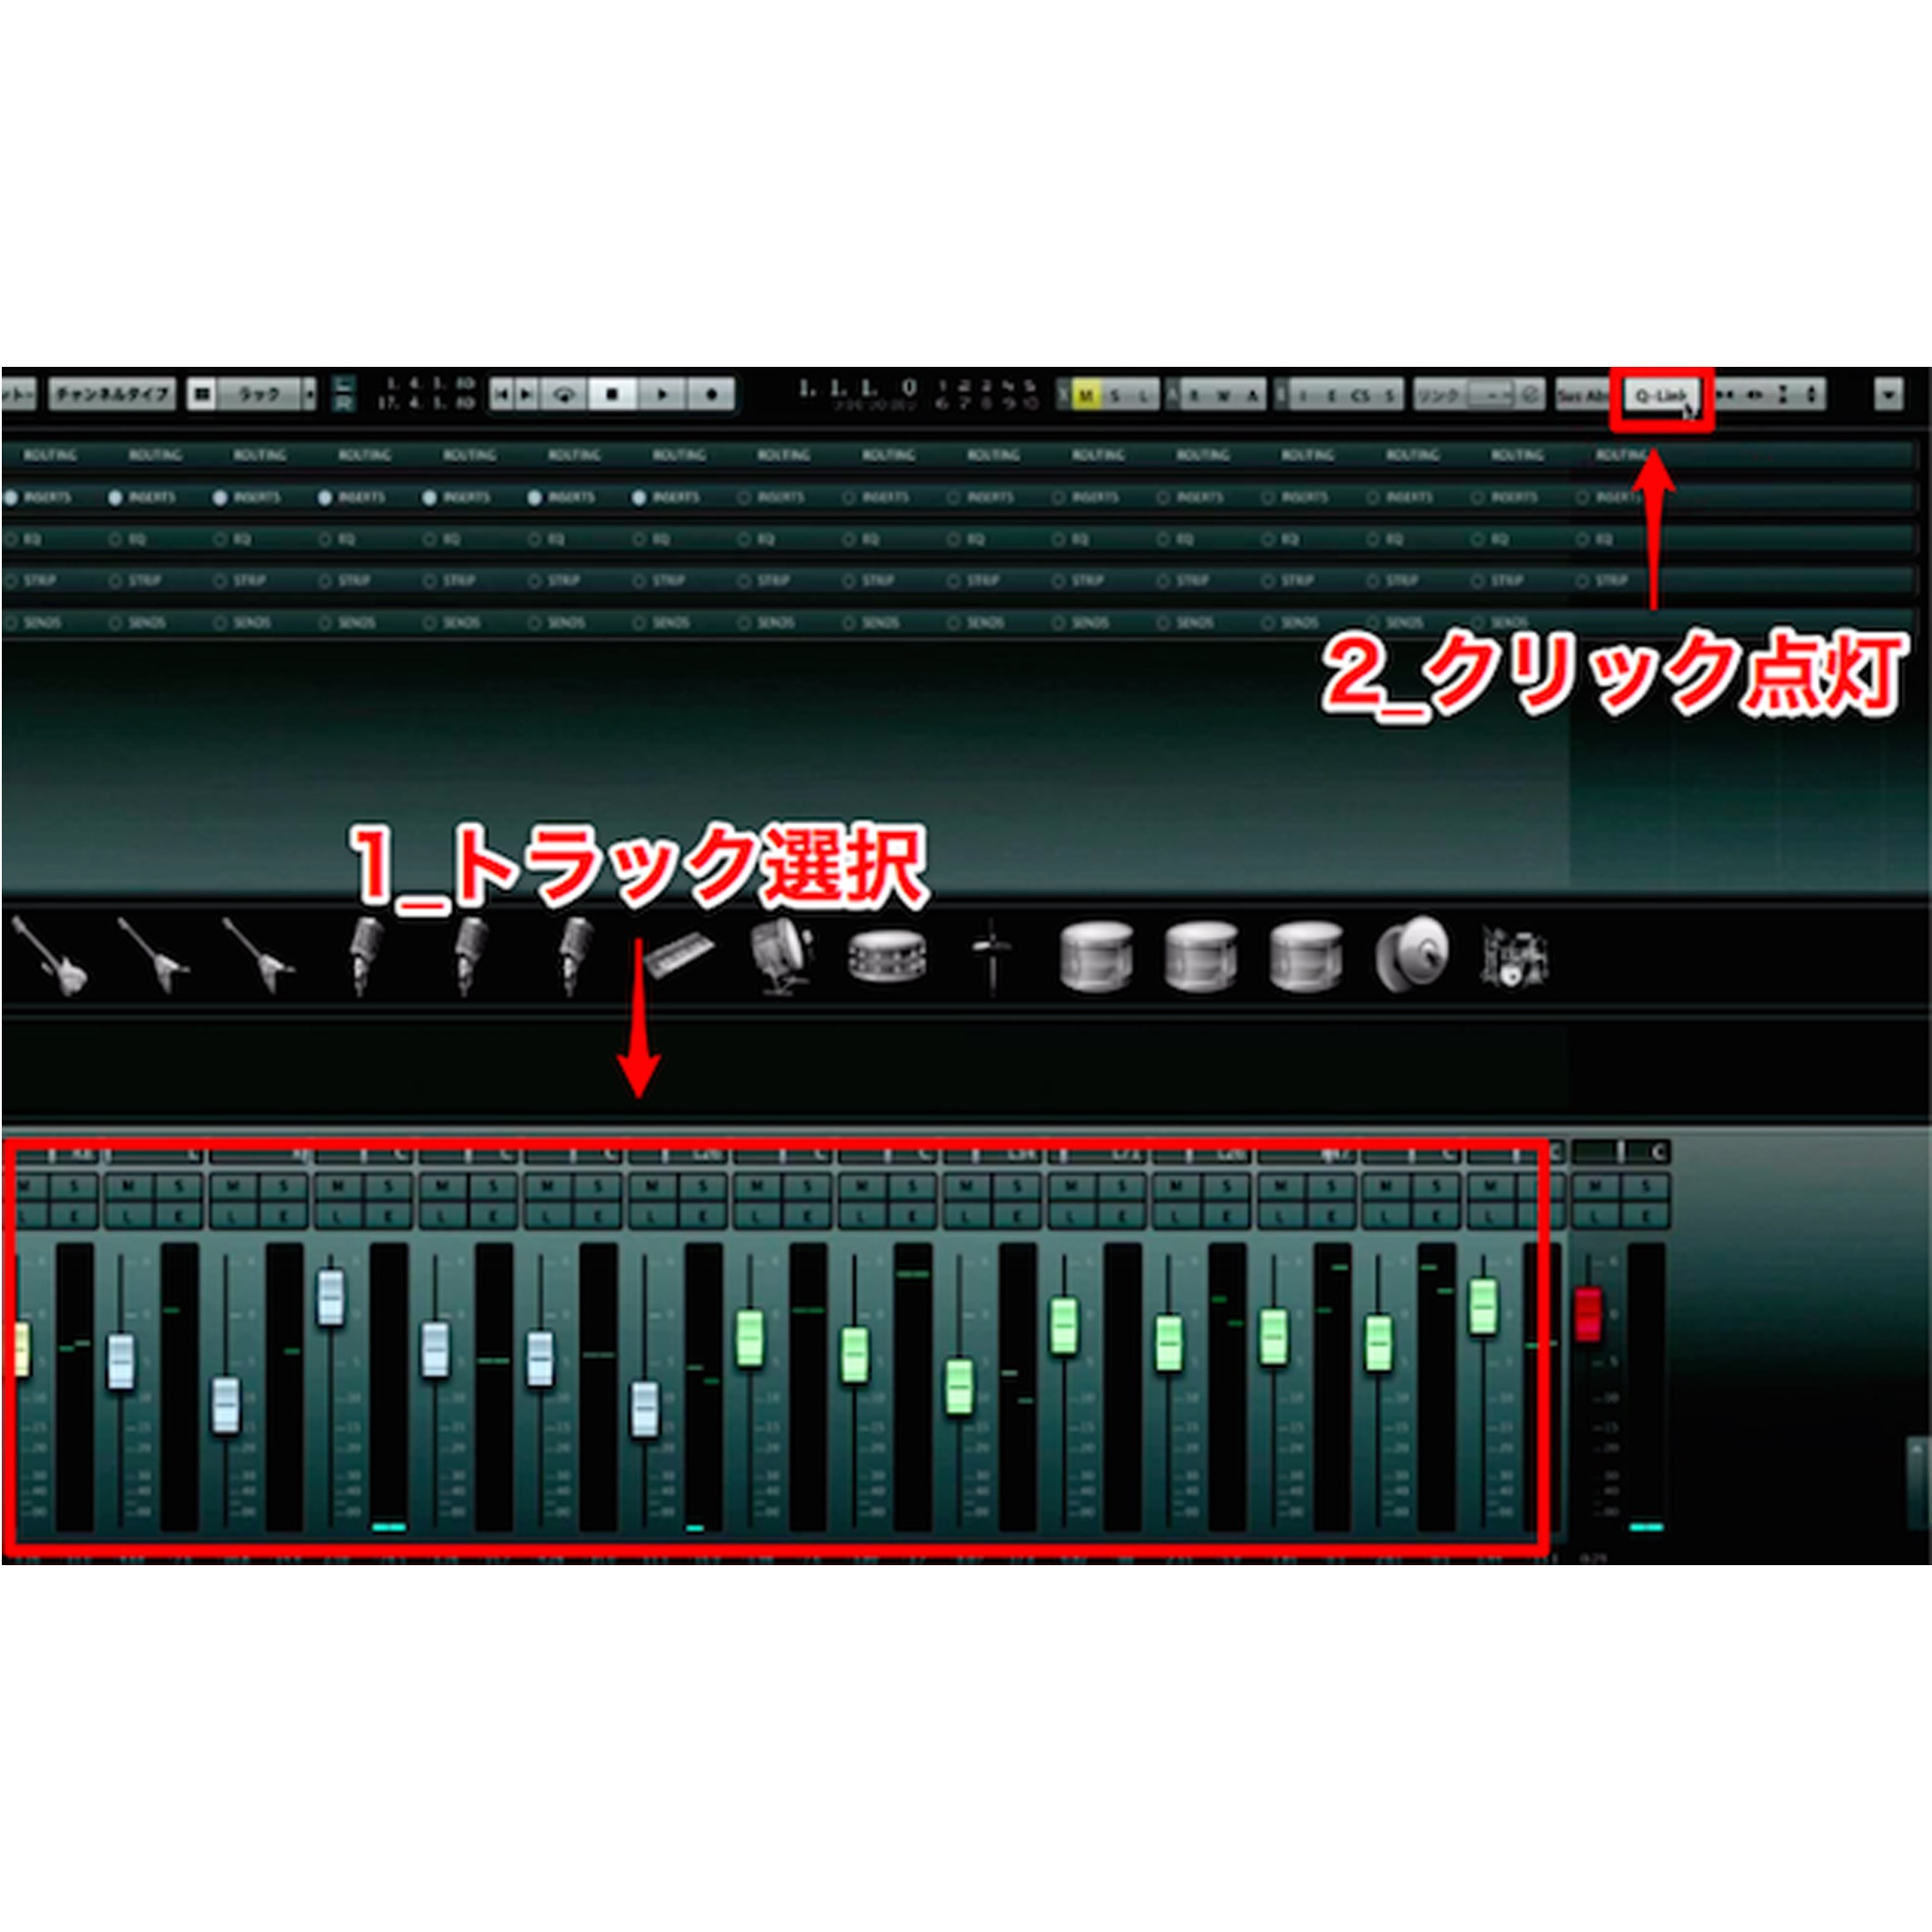
Individual tracks can be adjusted in the inspector. Enable the Mix button at the lower right to see all tracks at once.
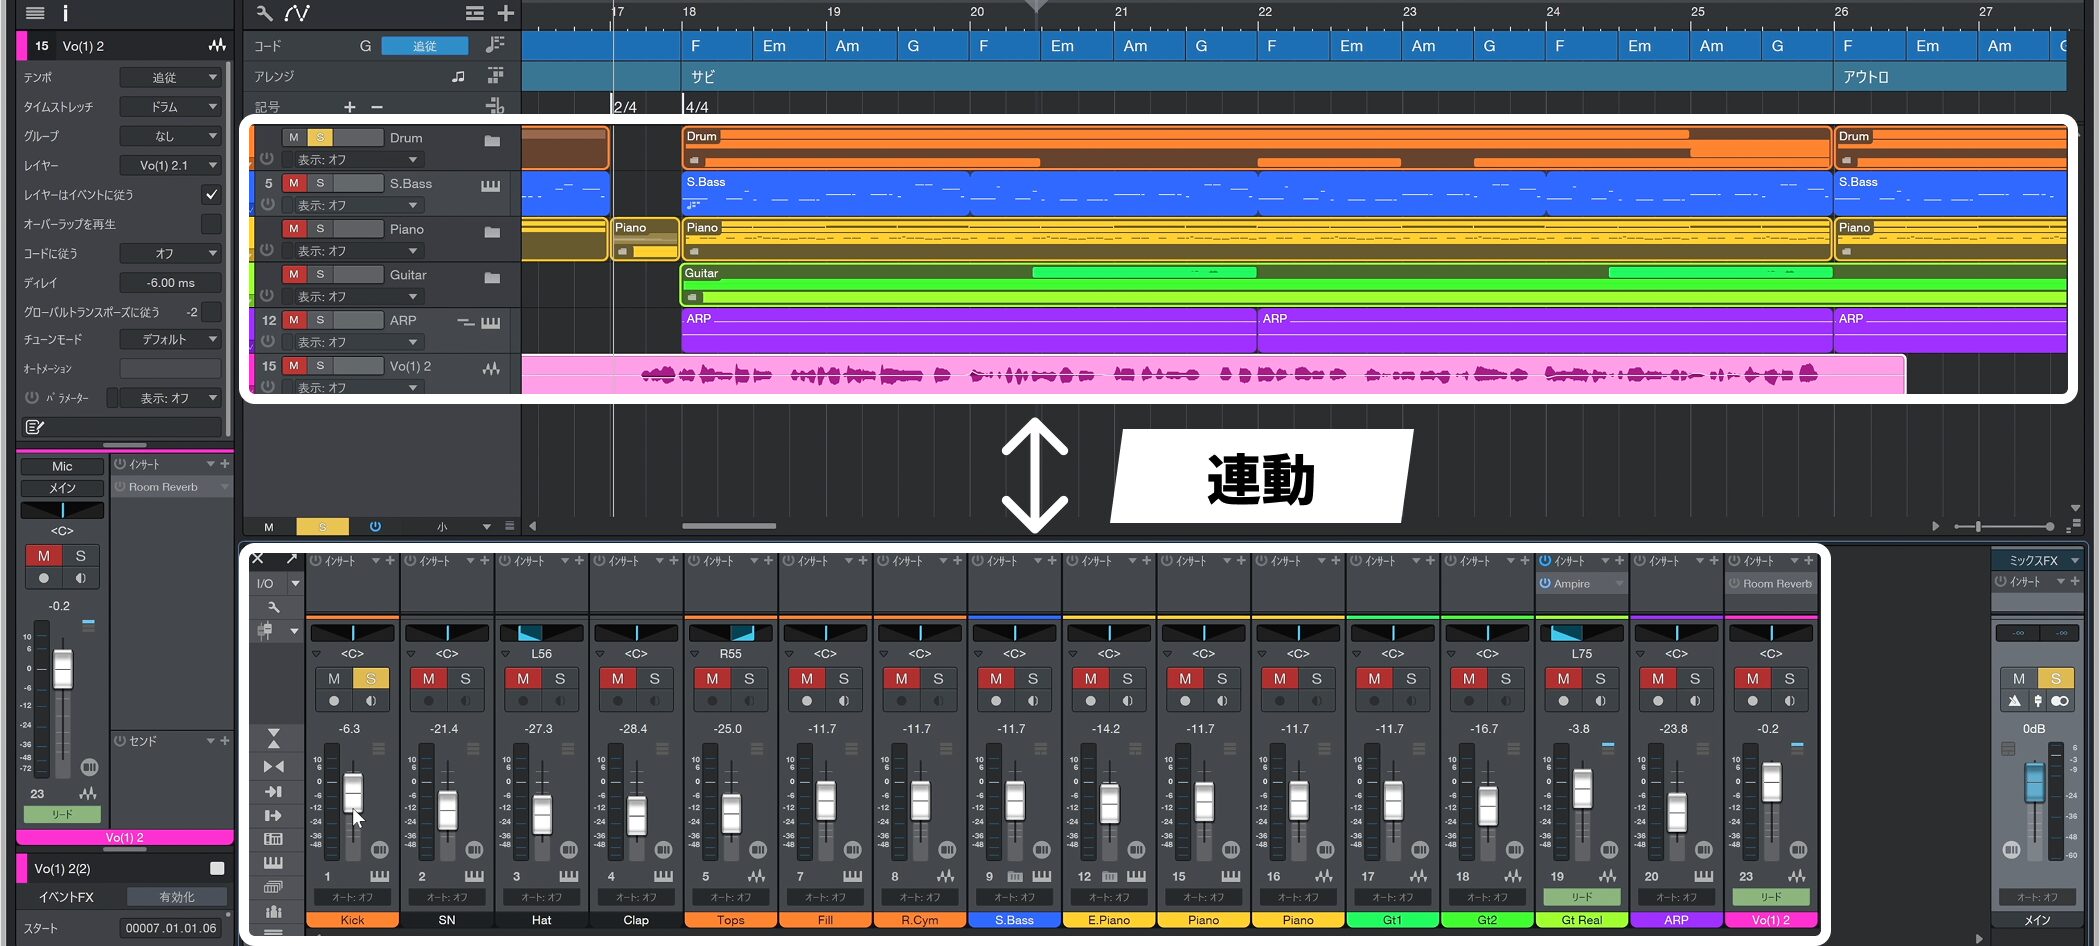
The channels below correspond to the tracks above.
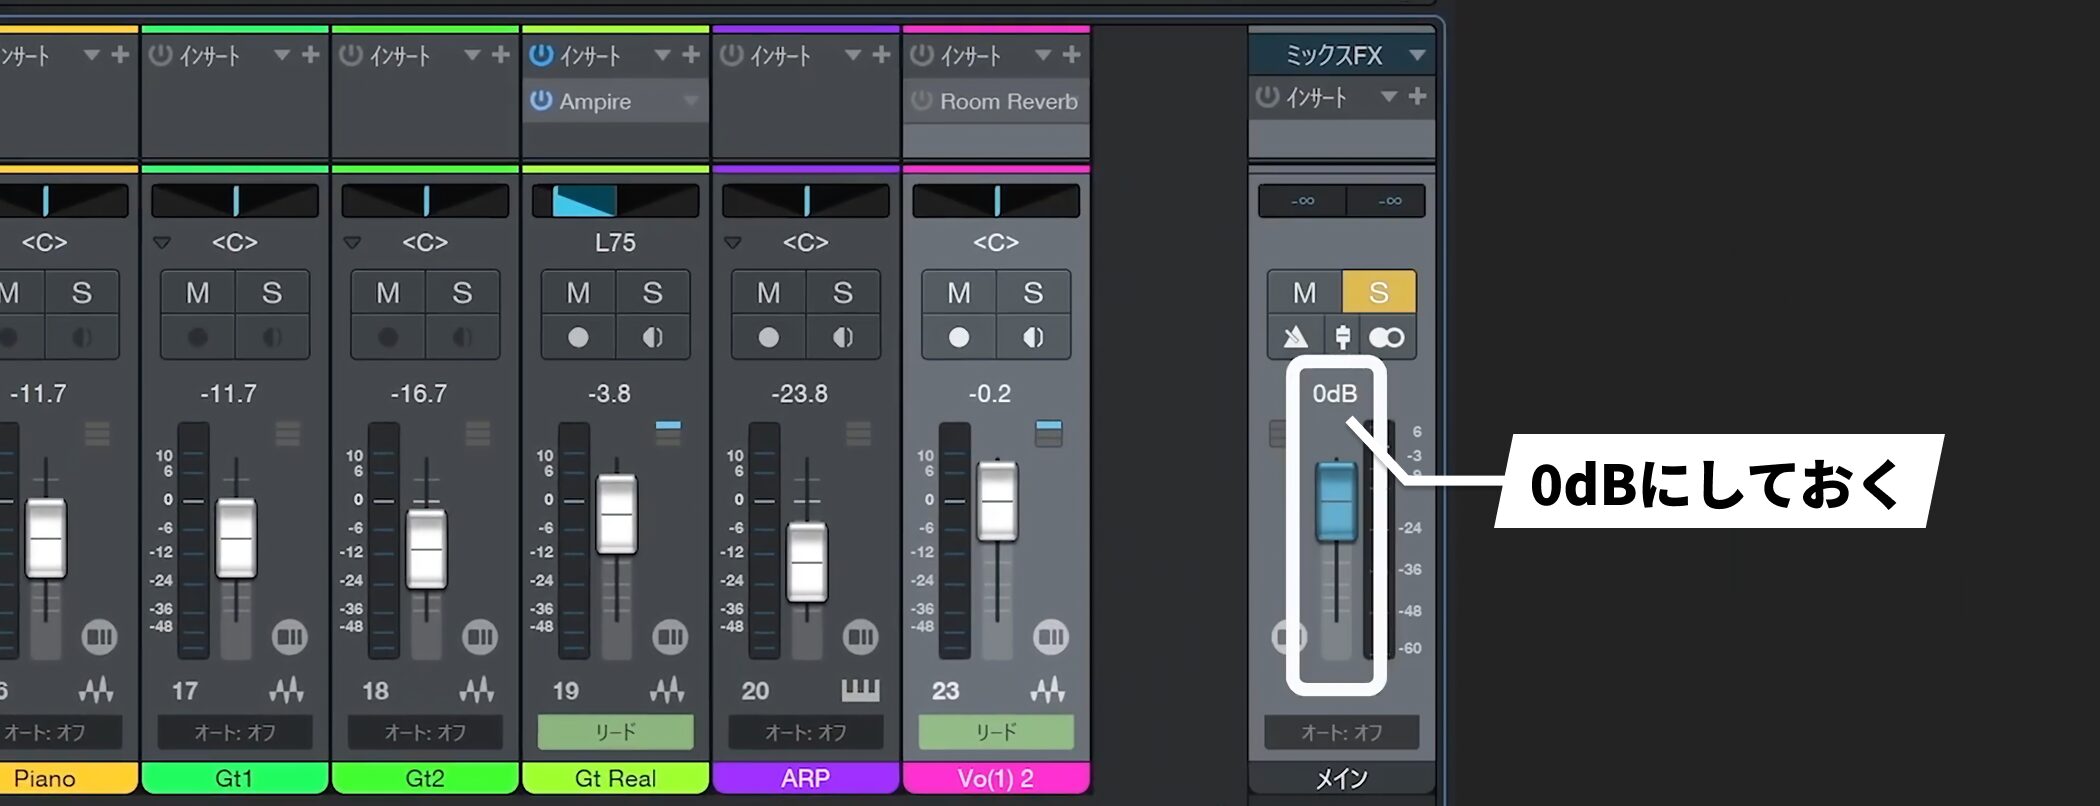
If the master fader on the right was moved during production, return it to 0 dB, its default position.
Volume-balancing basics
Choose one track as a reference, then adjust the other tracks against it.
For rhythm-driven music such as pop or EDM, it is often helpful to use the kick as your reference.
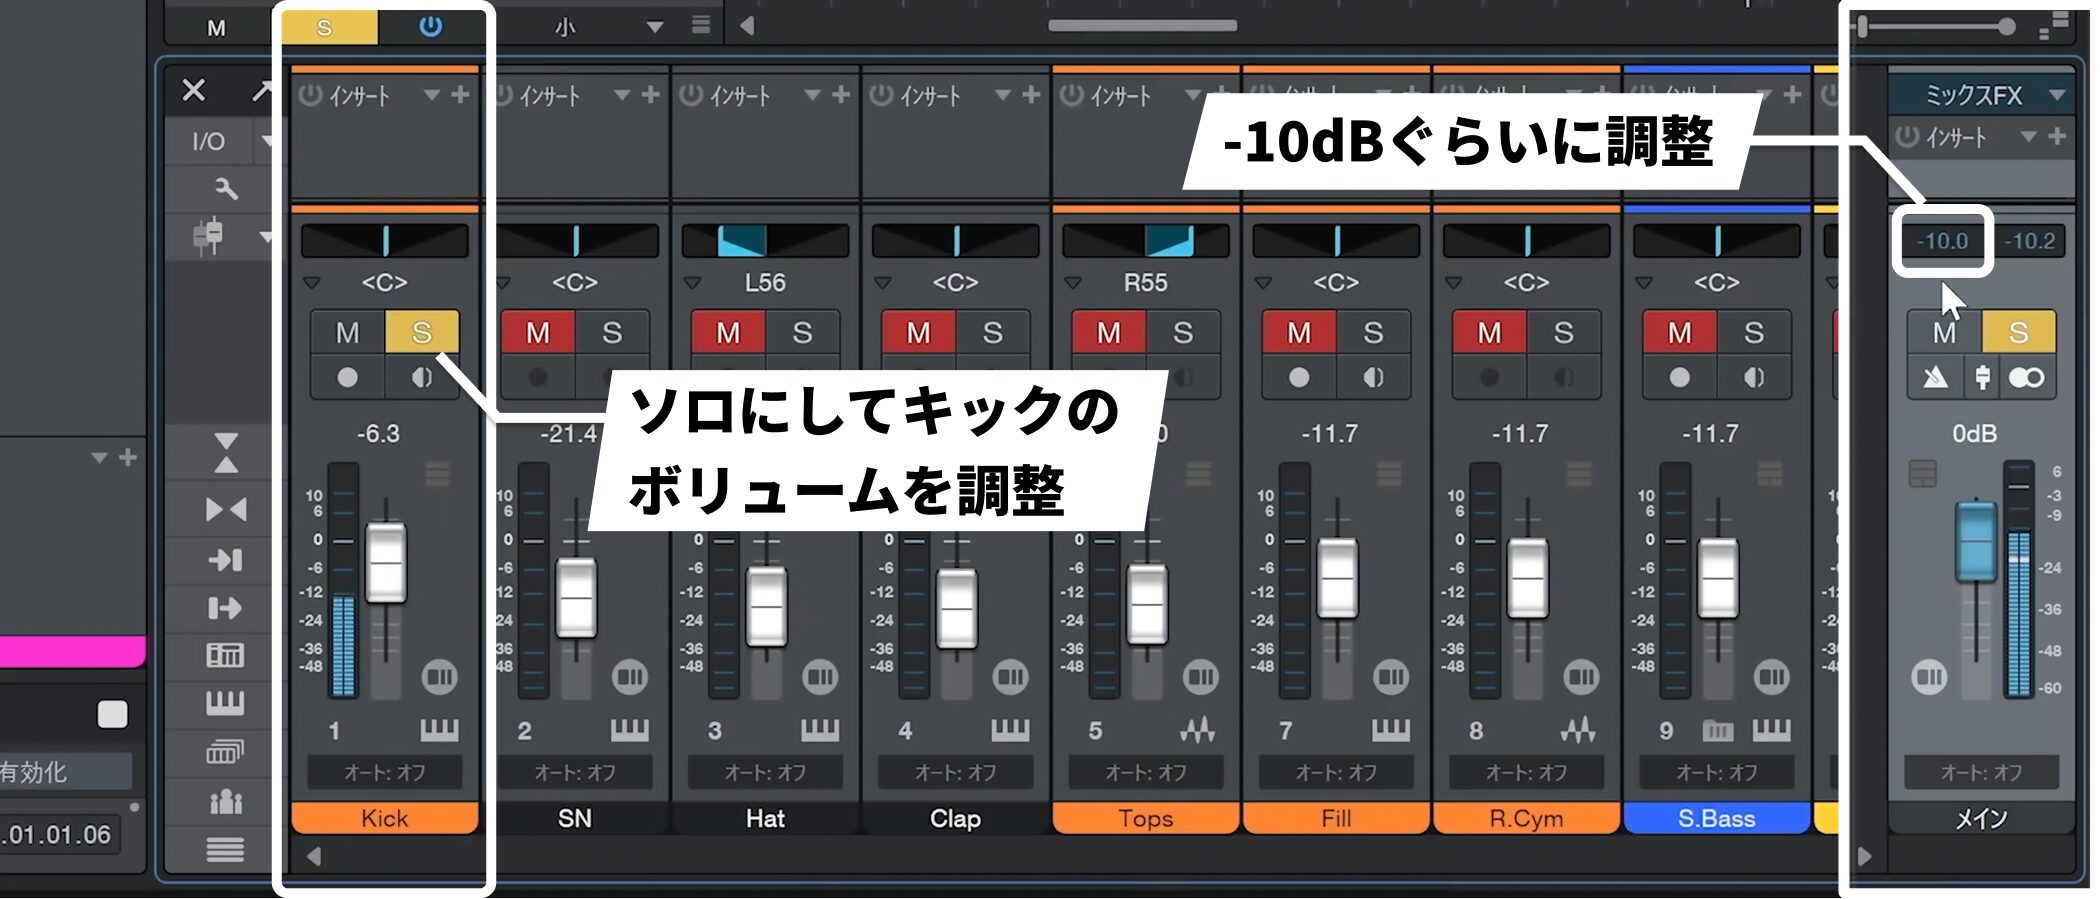
Solo the kick and adjust its track volume until the master meter reads around -10 dB.
Adjust low-frequency instruments
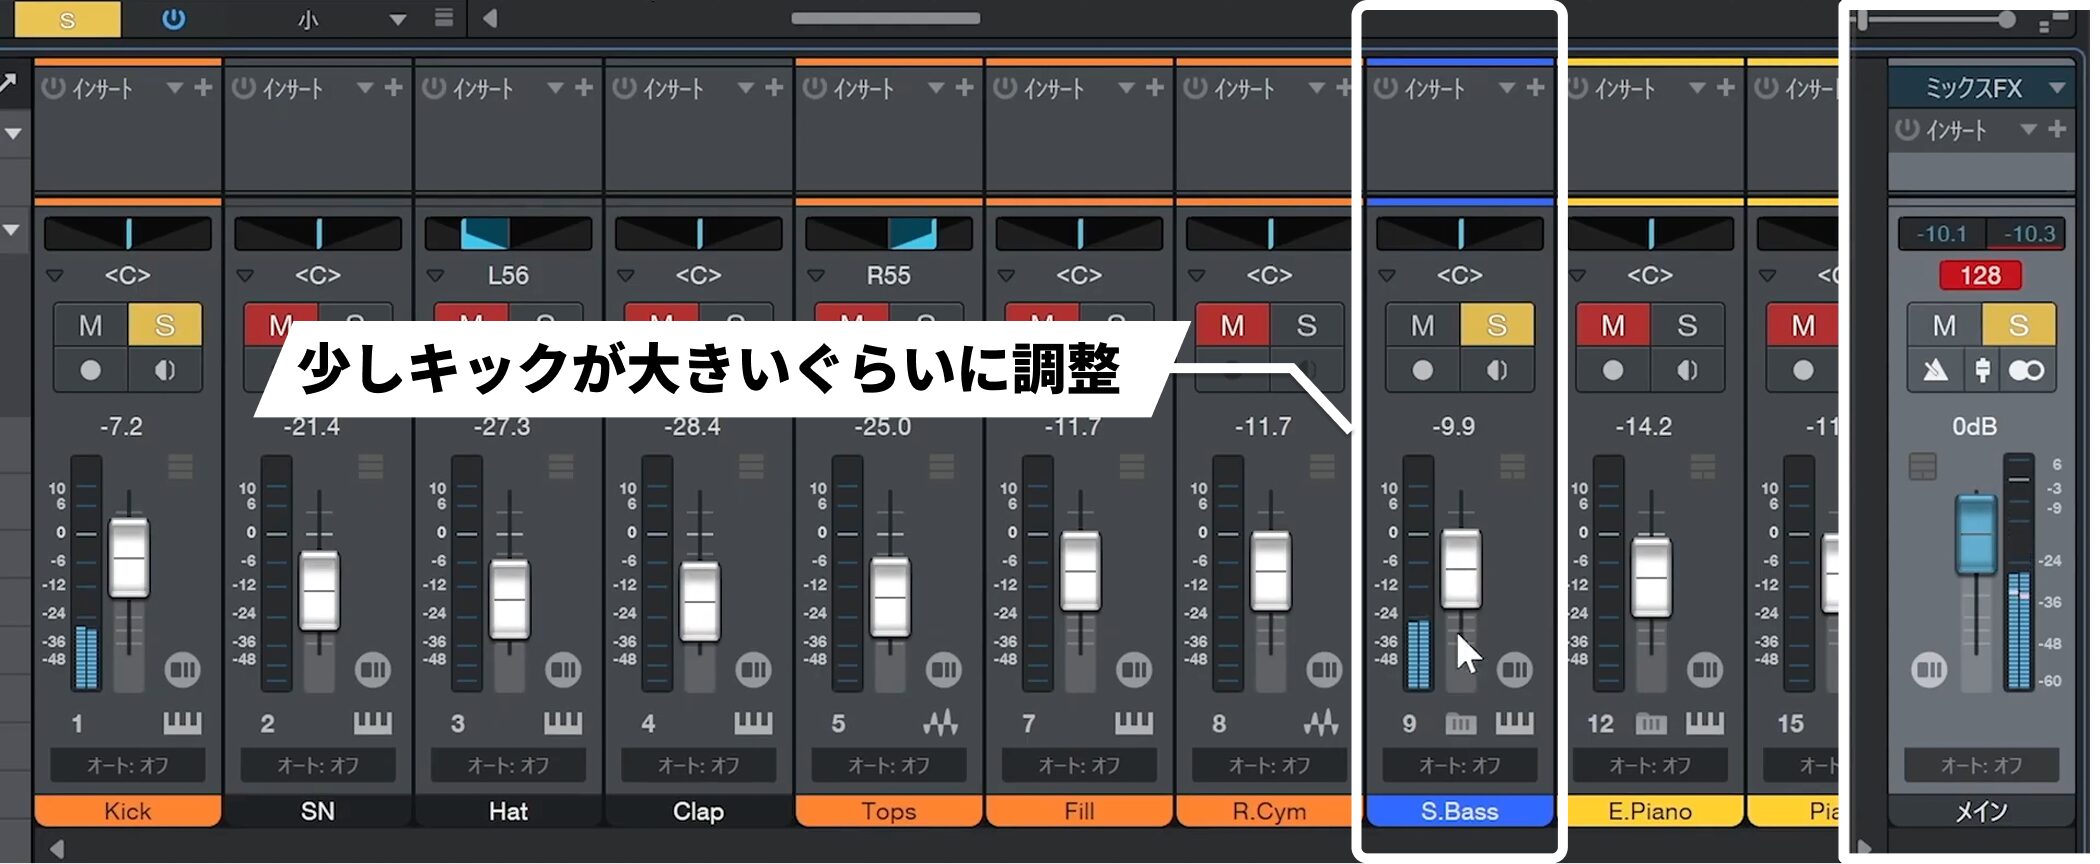
Once the kick level is set, adjust the bass, another low-frequency instrument.
The key is to avoid making the bass too loud relative to the kick.
Set the kick slightly louder.
Adjust important tracks first
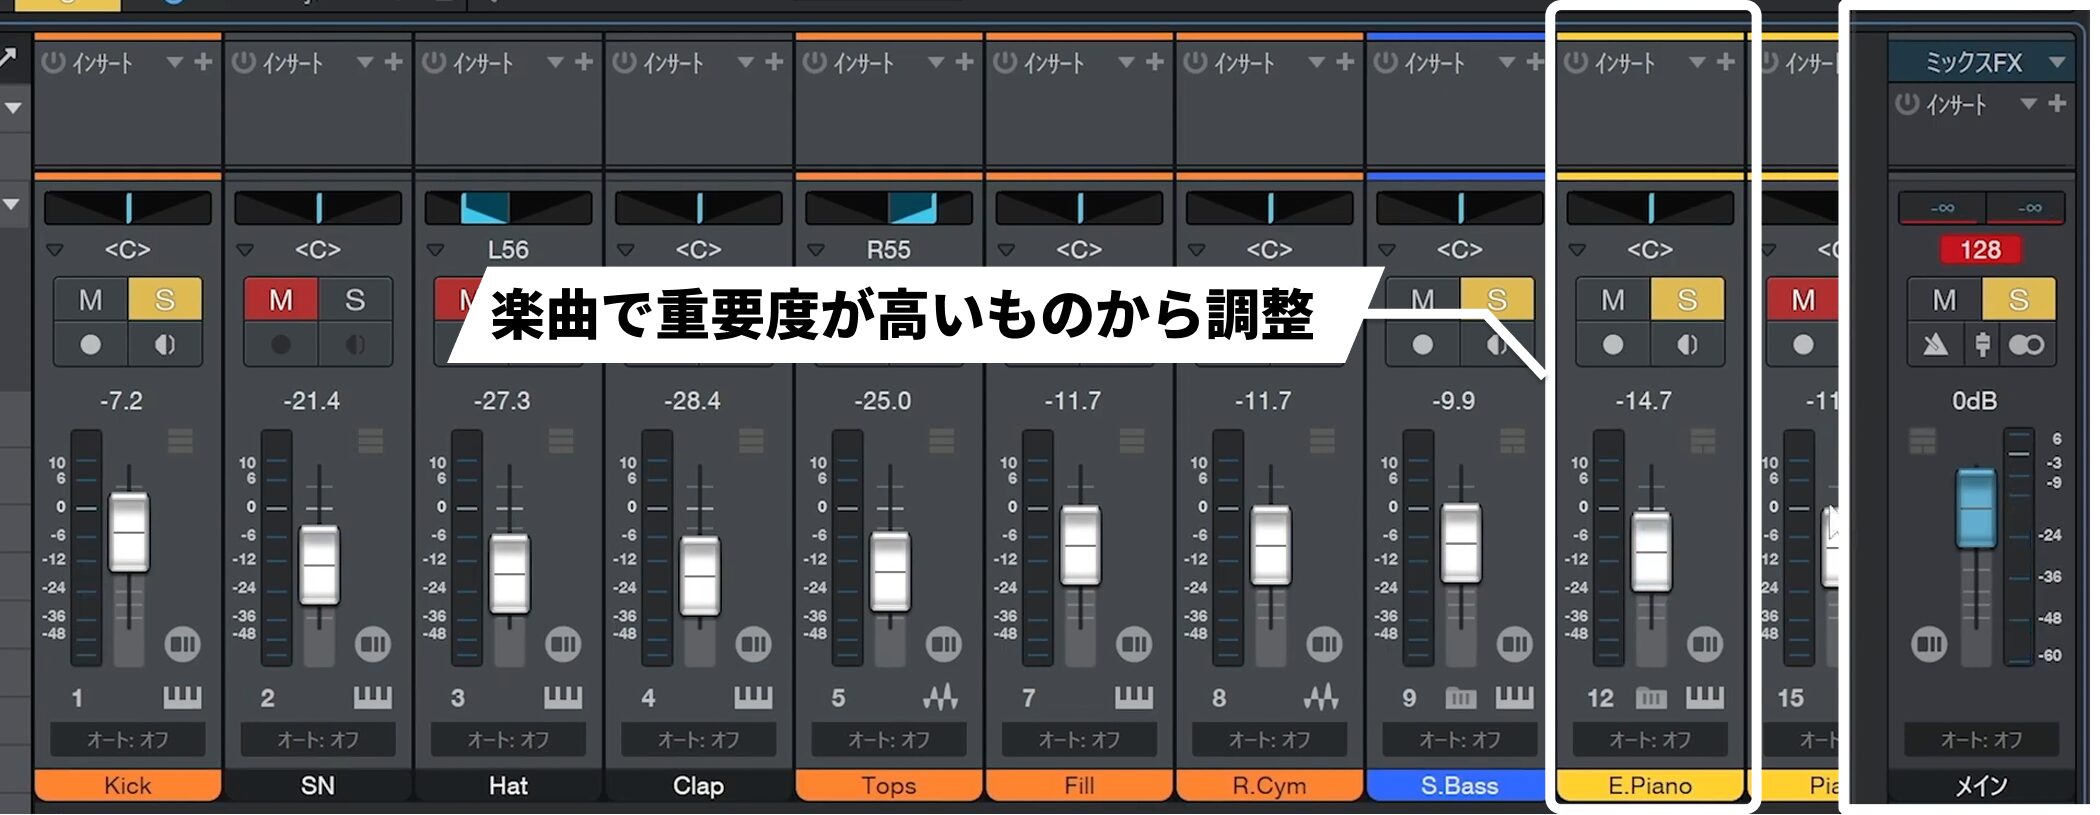
Next, adjust the electric piano track that carries the harmony.
Listen and avoid making it too loud relative to the kick and bass.
Working from the most important parts of the song outward makes the process smoother.
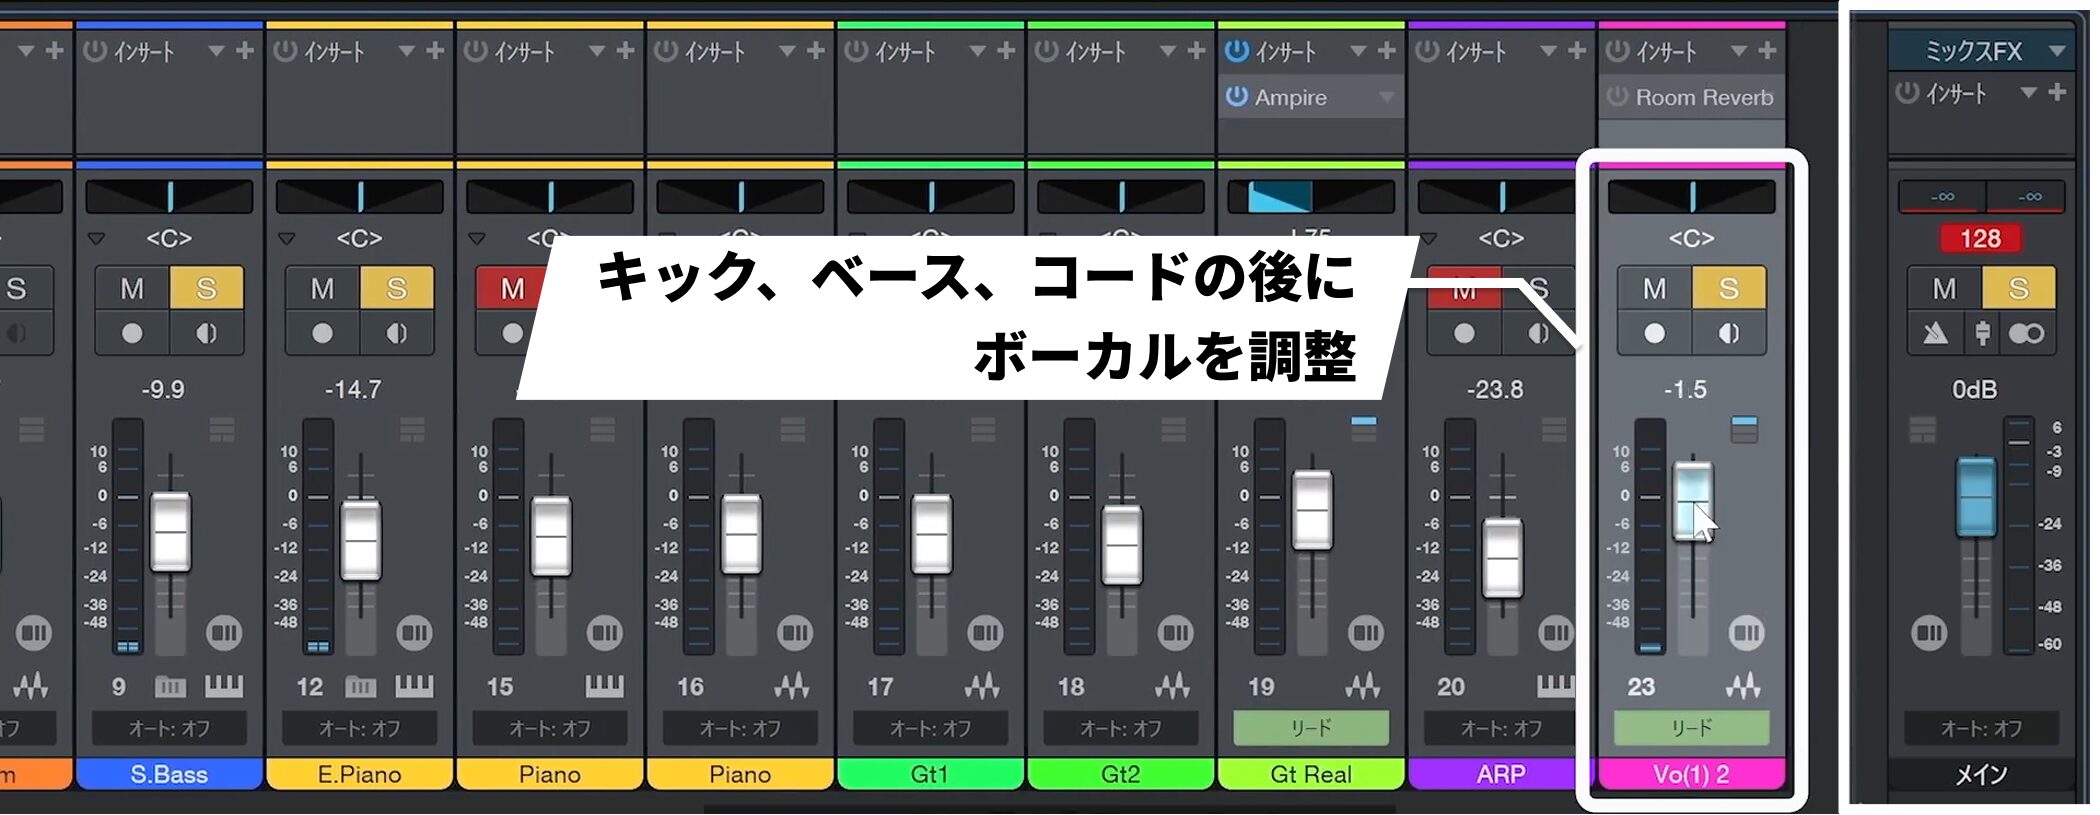
After balancing the chord part, adjust the next important element: the vocal.
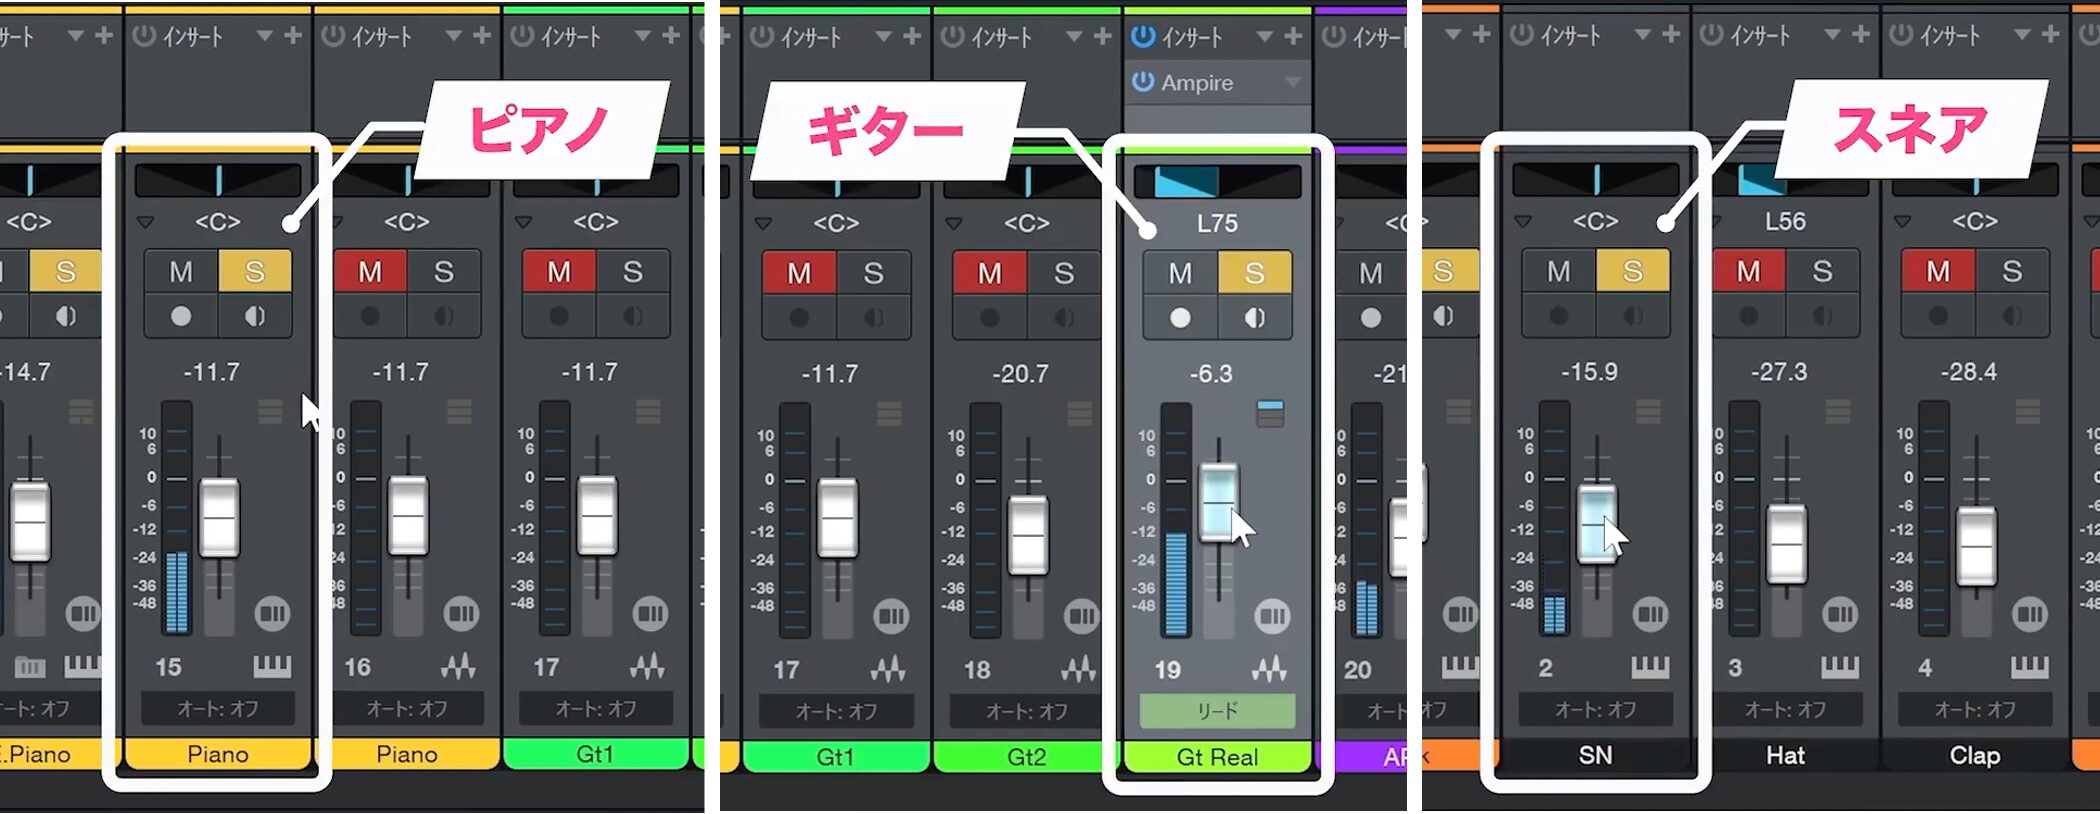
Add and adjust the remaining tracks in the same way.
Avoid clipping
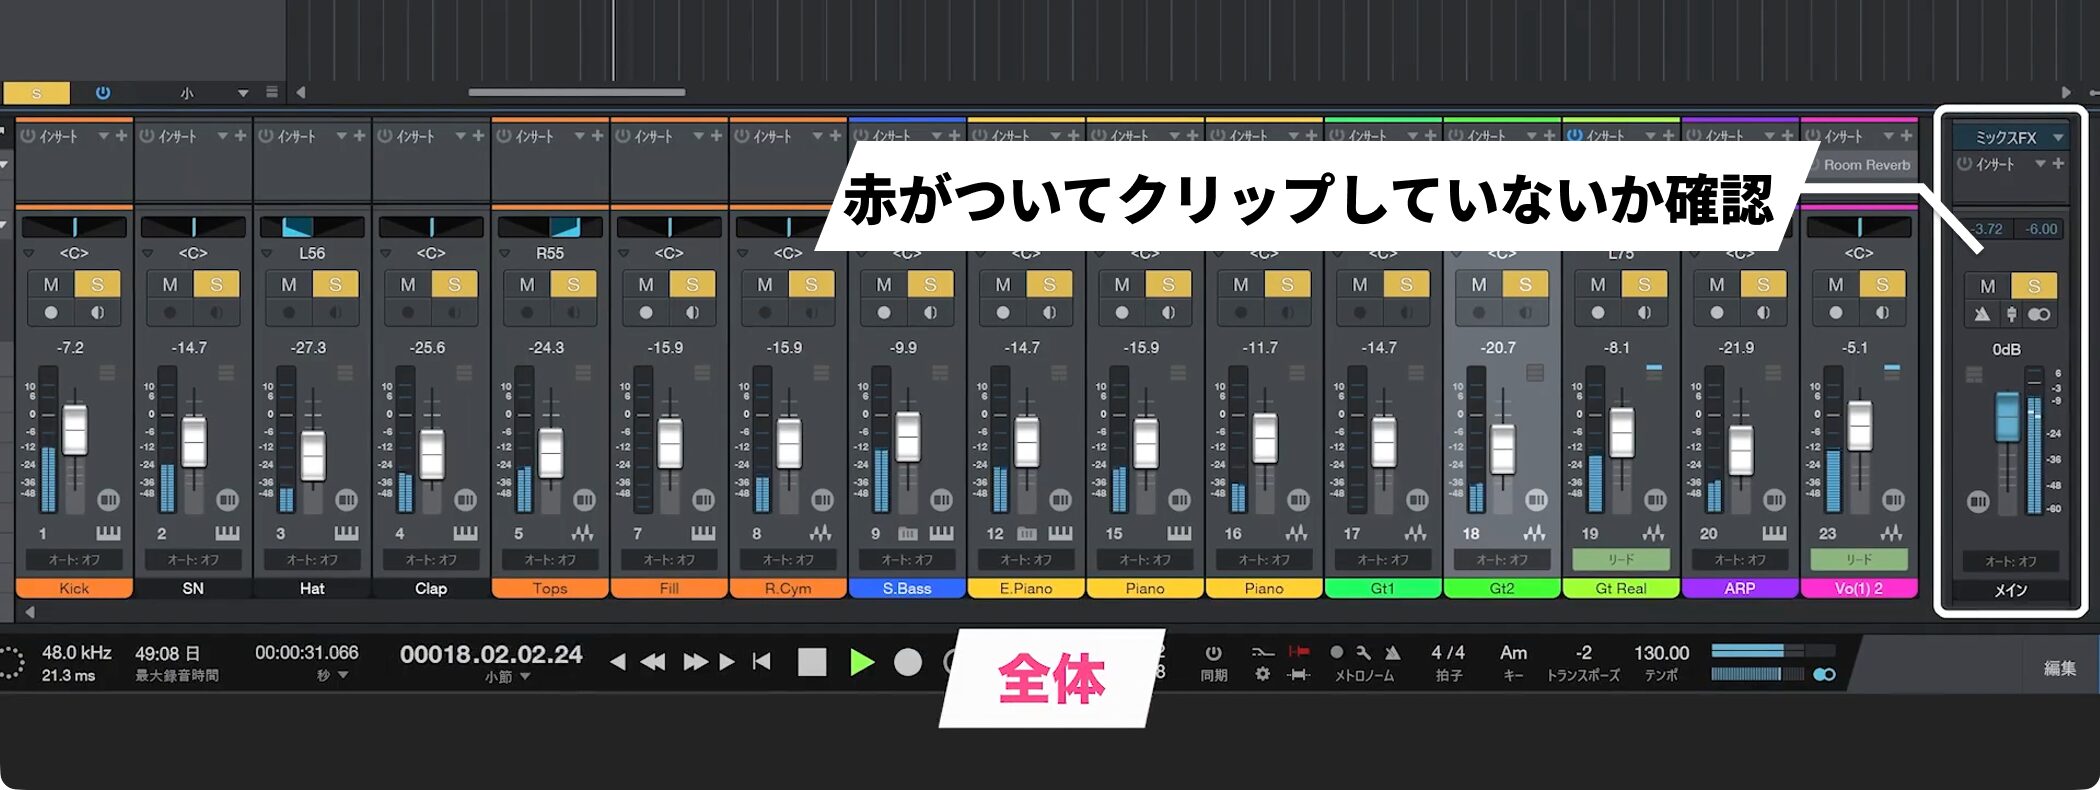
When all tracks are playing, check the master track to make sure its clipping indicator is not red.
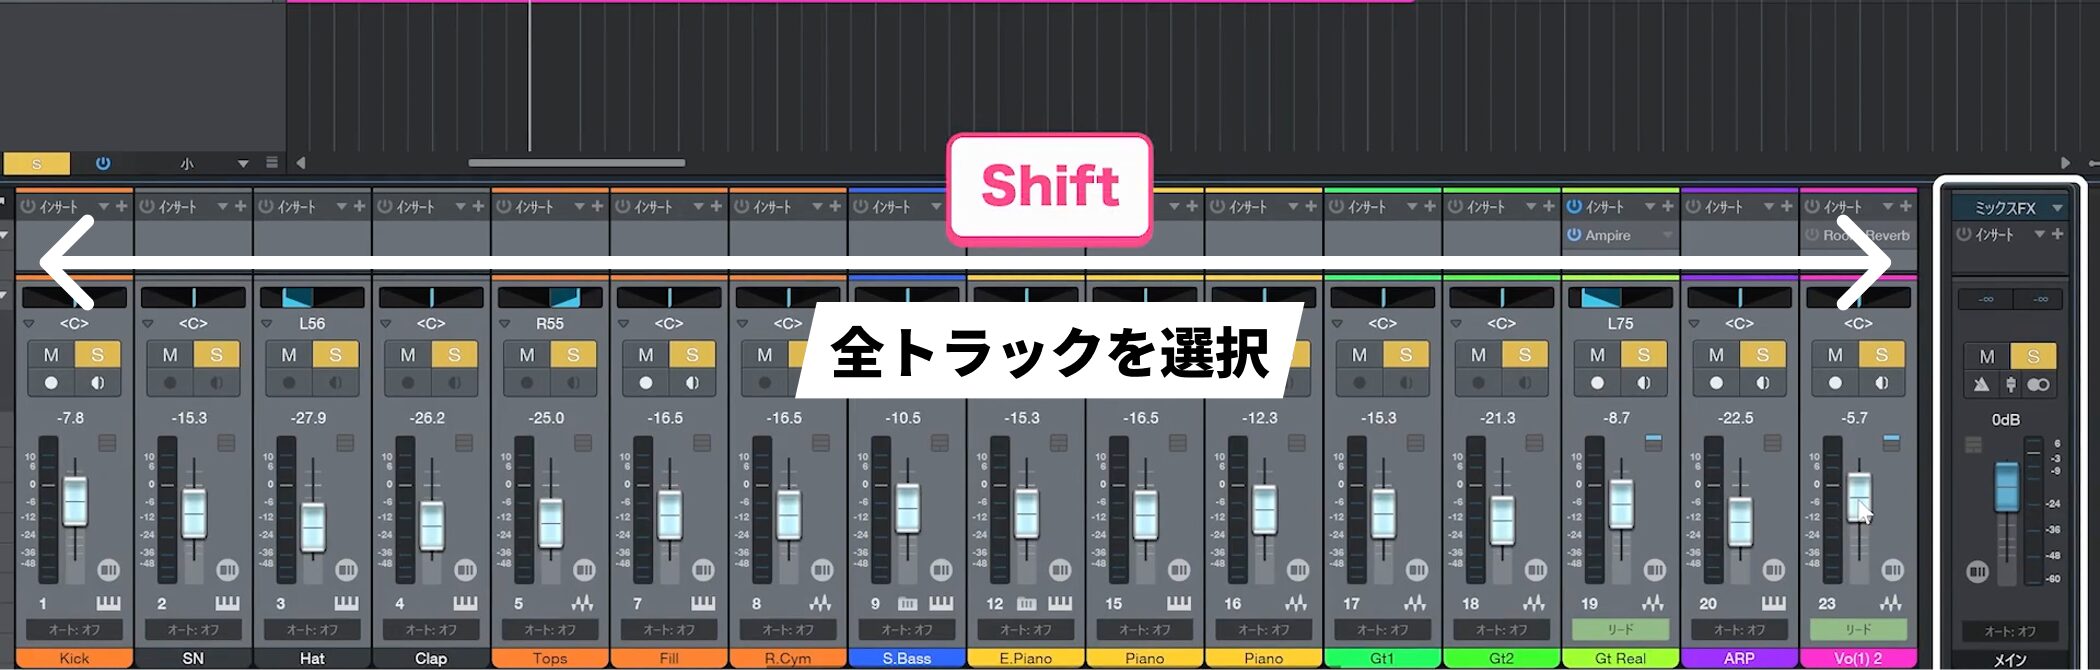
If clipping occurs while balancing, hold Shift and select all tracks from one end to the other.
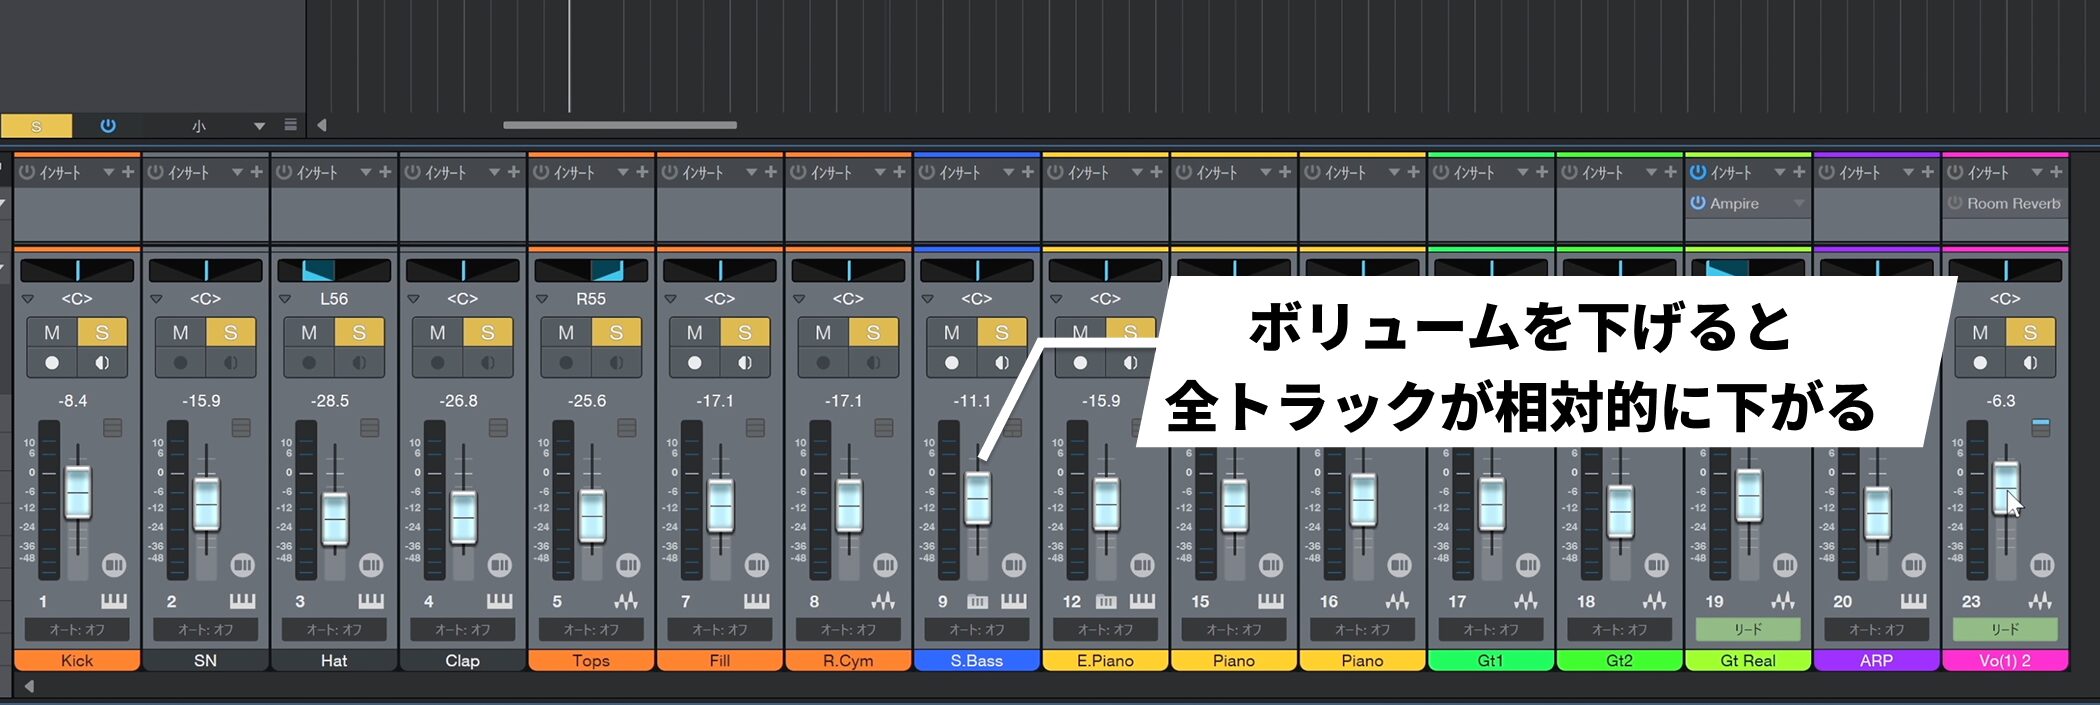
Lower one track’s volume and all selected tracks move together, preserving their relative levels.
Adjust pan
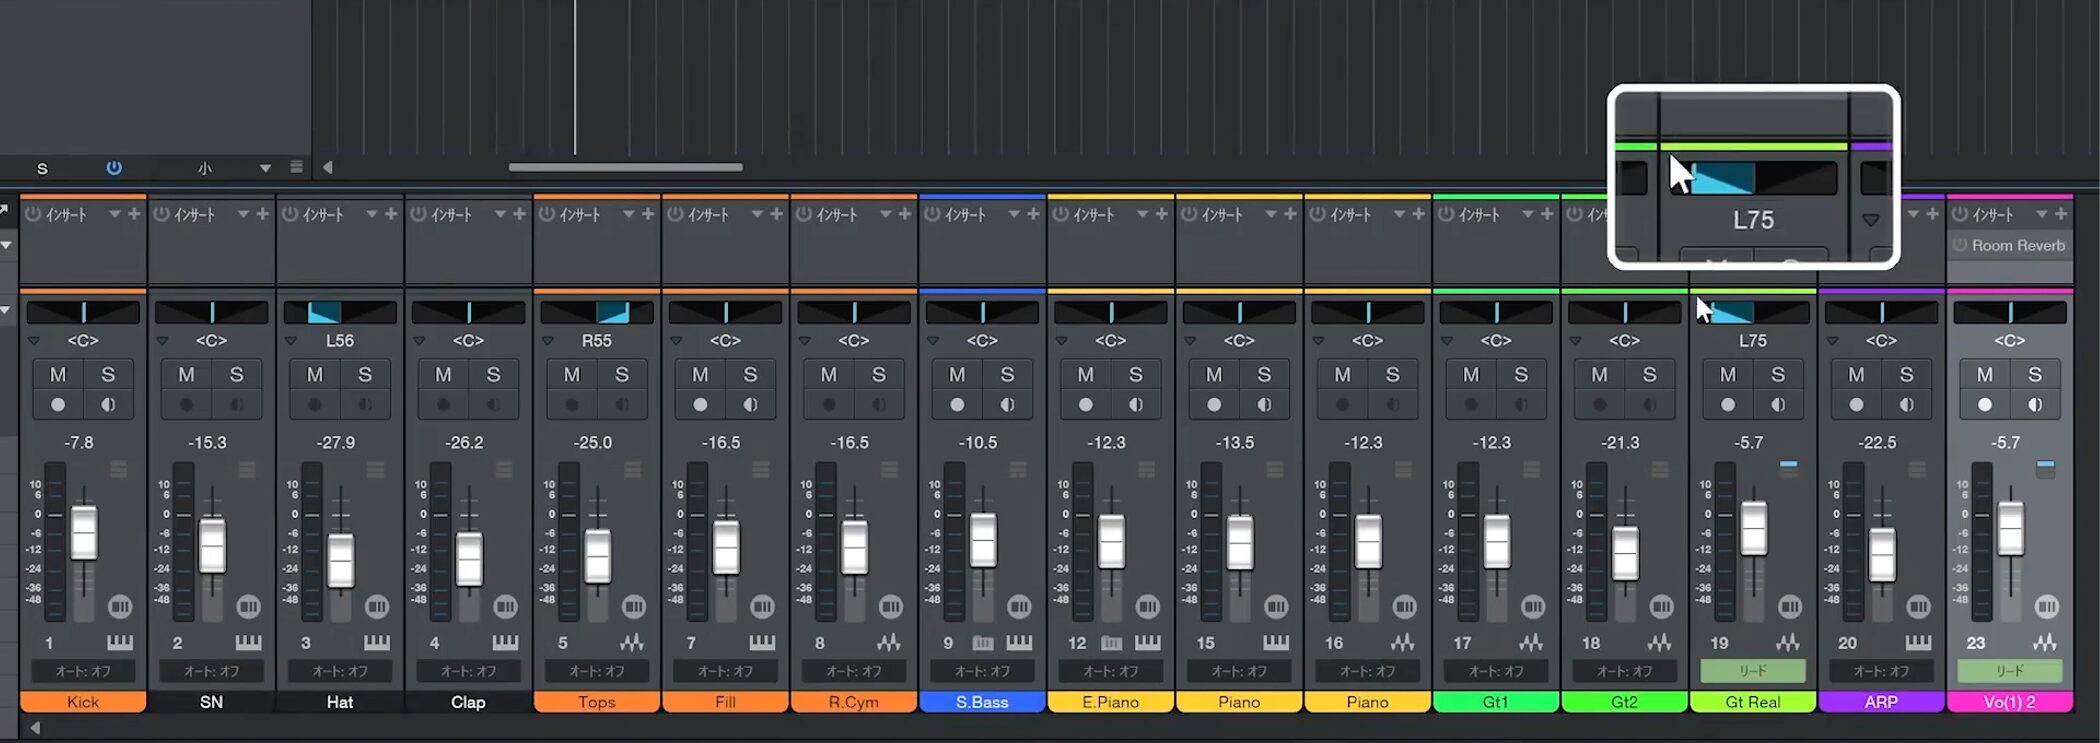
Once the volume is balanced, adjust left-right panning.
There are no strict rules, but a few guidelines can help.
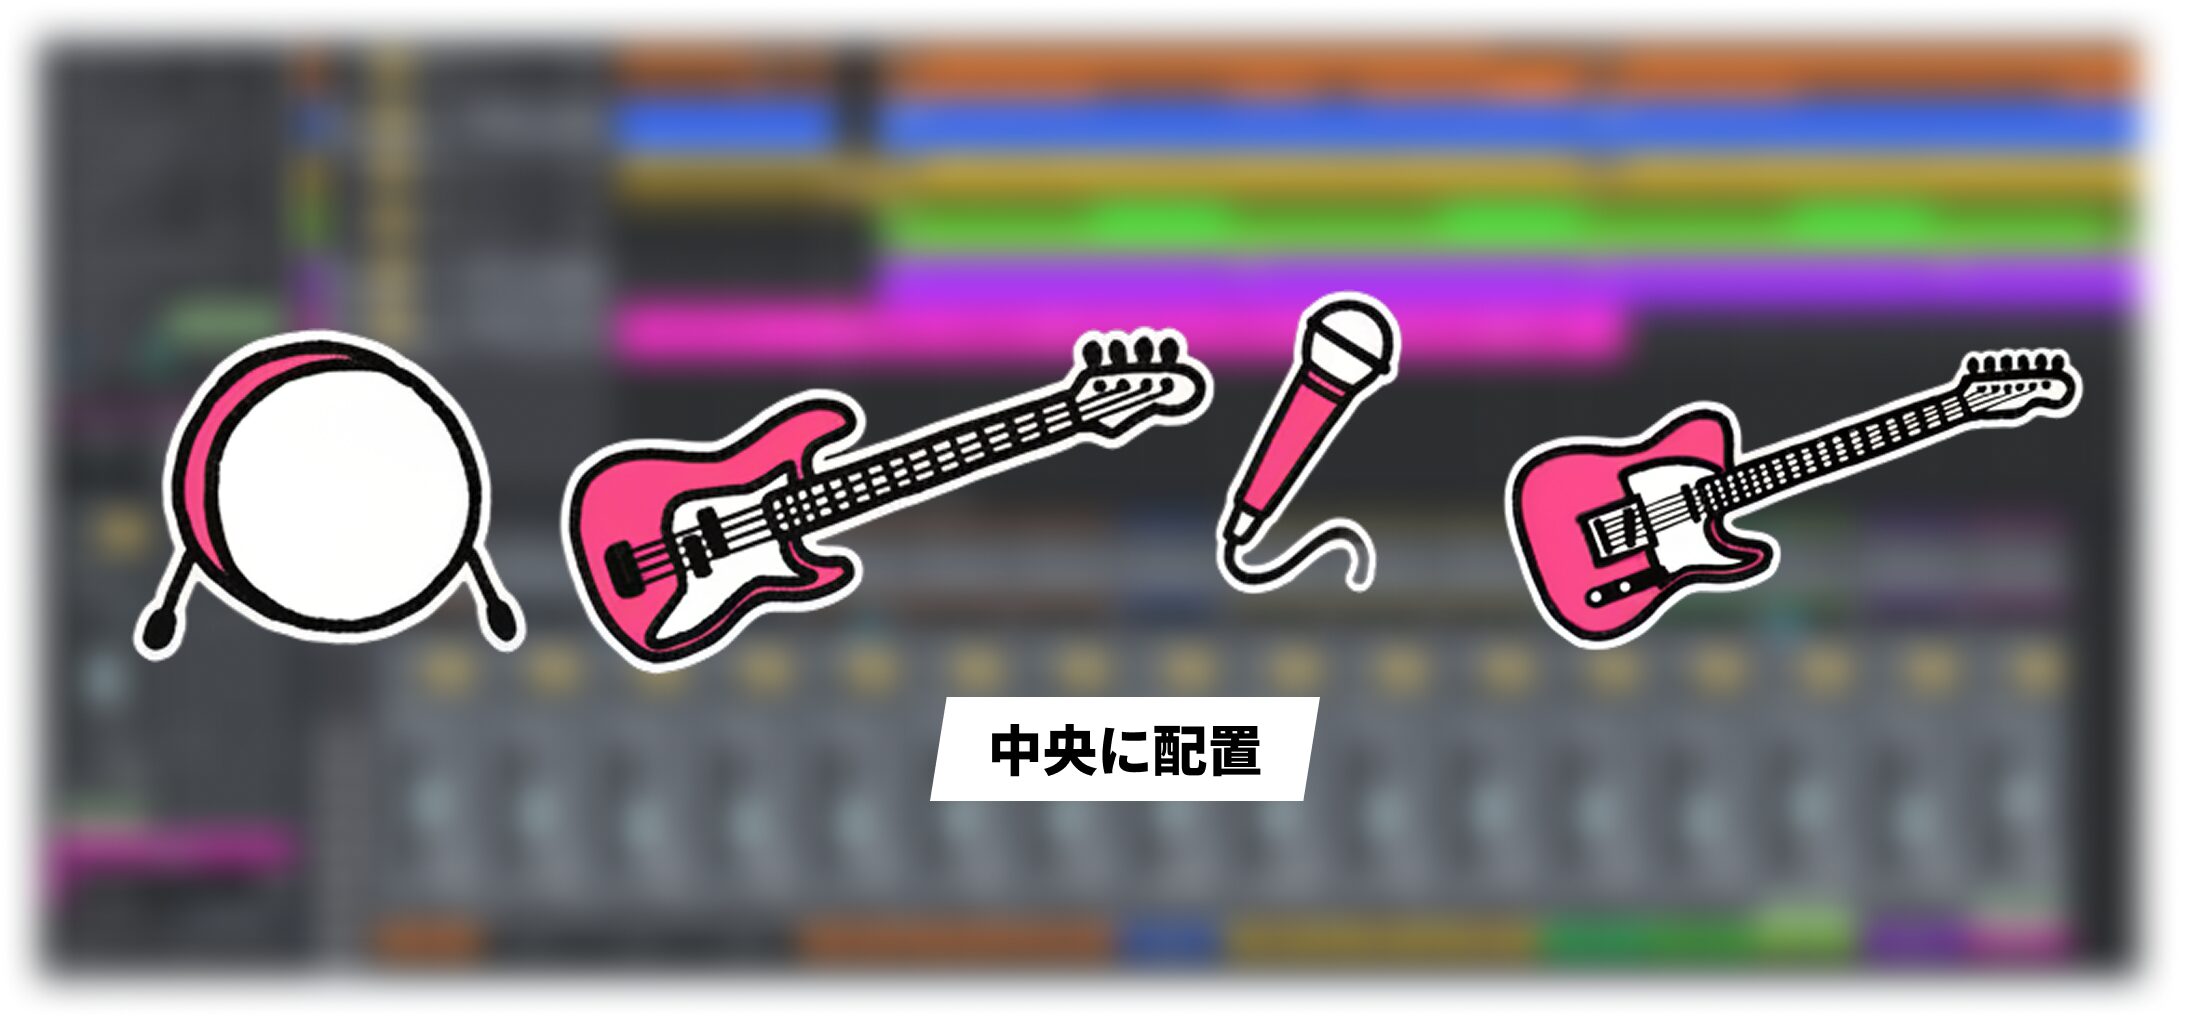
Low-frequency foundations such as the bass and kick, as well as prominent elements such as the lead vocal or guitar solo, are often placed in the center.
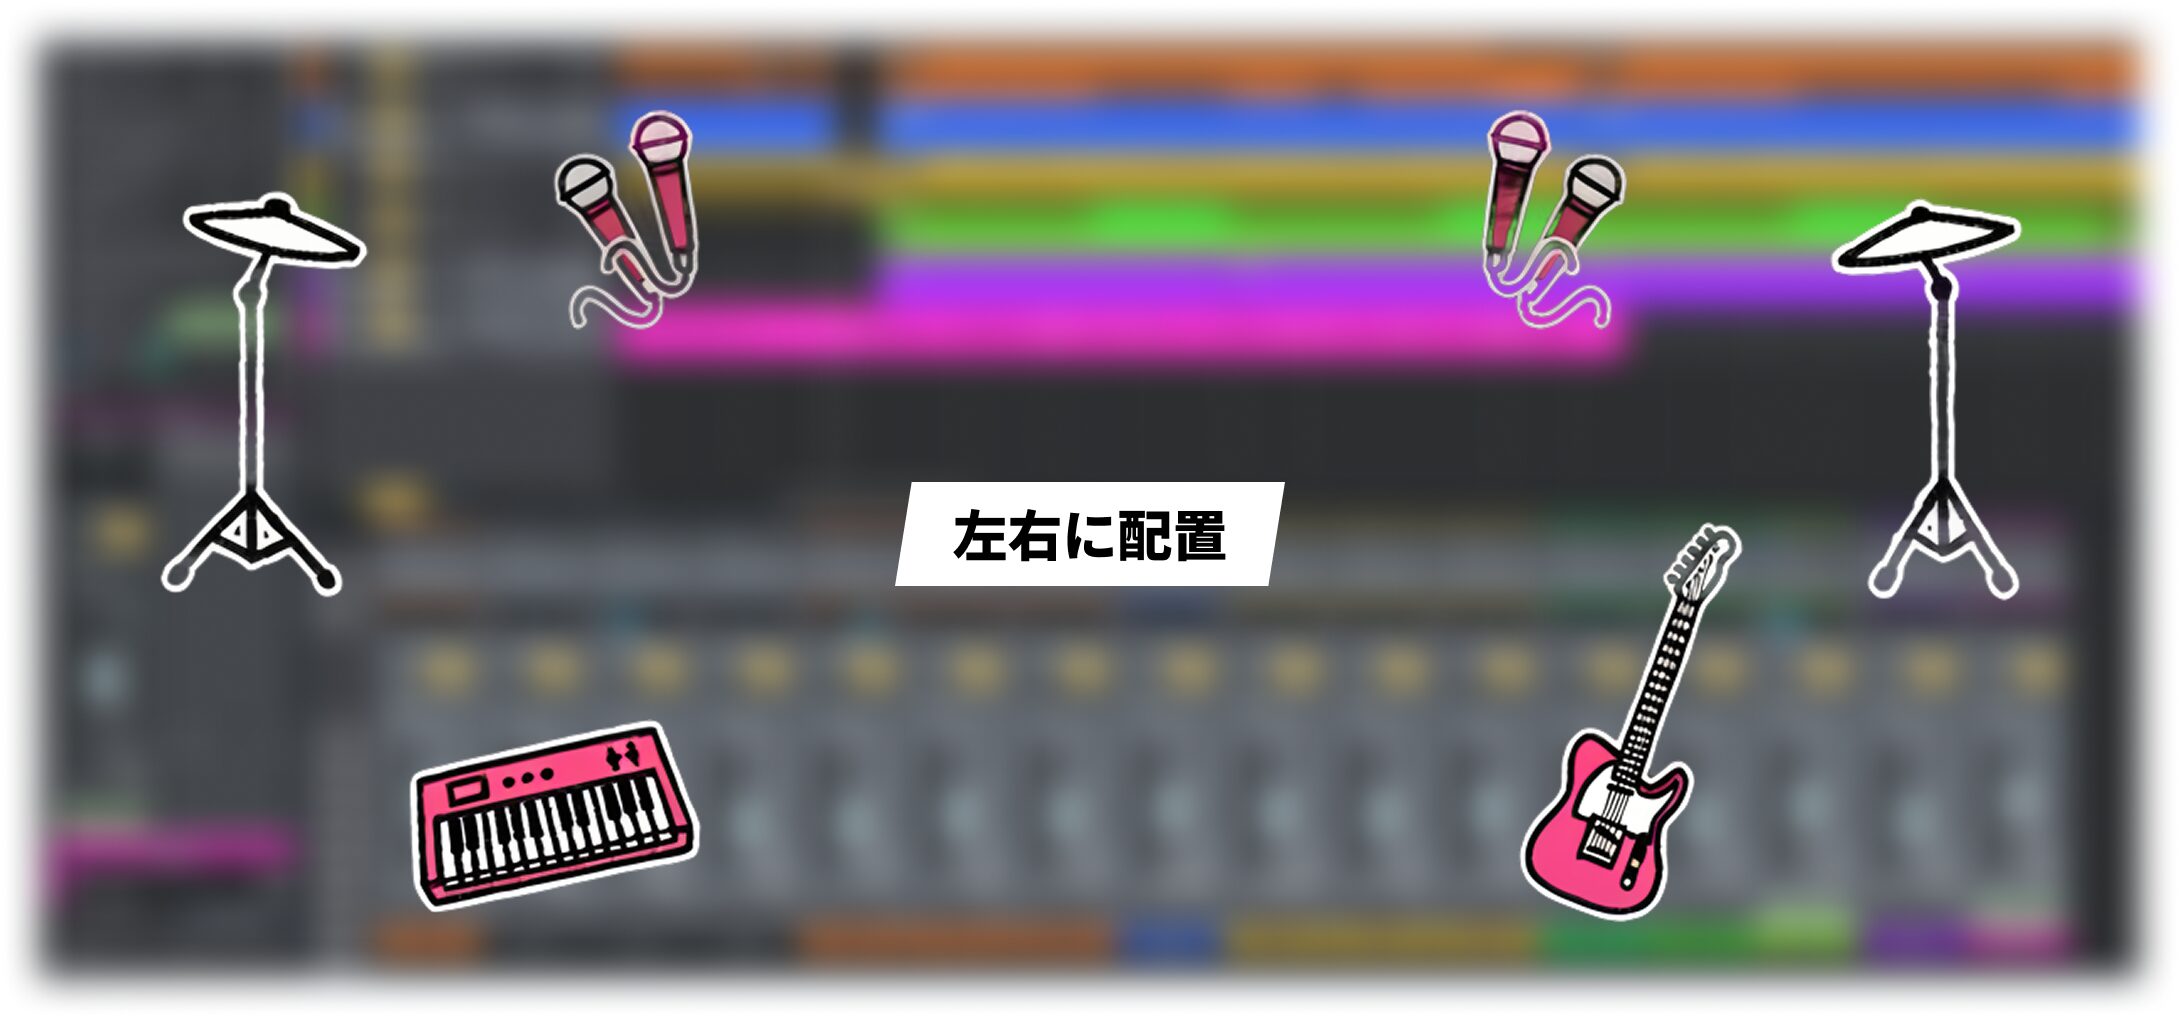
Other mid- and high-frequency elements, such as electric piano, guitar, hi-hats, cymbals, and backing vocals, are often placed to the left or right to leave room for the central vocal and add width and color.
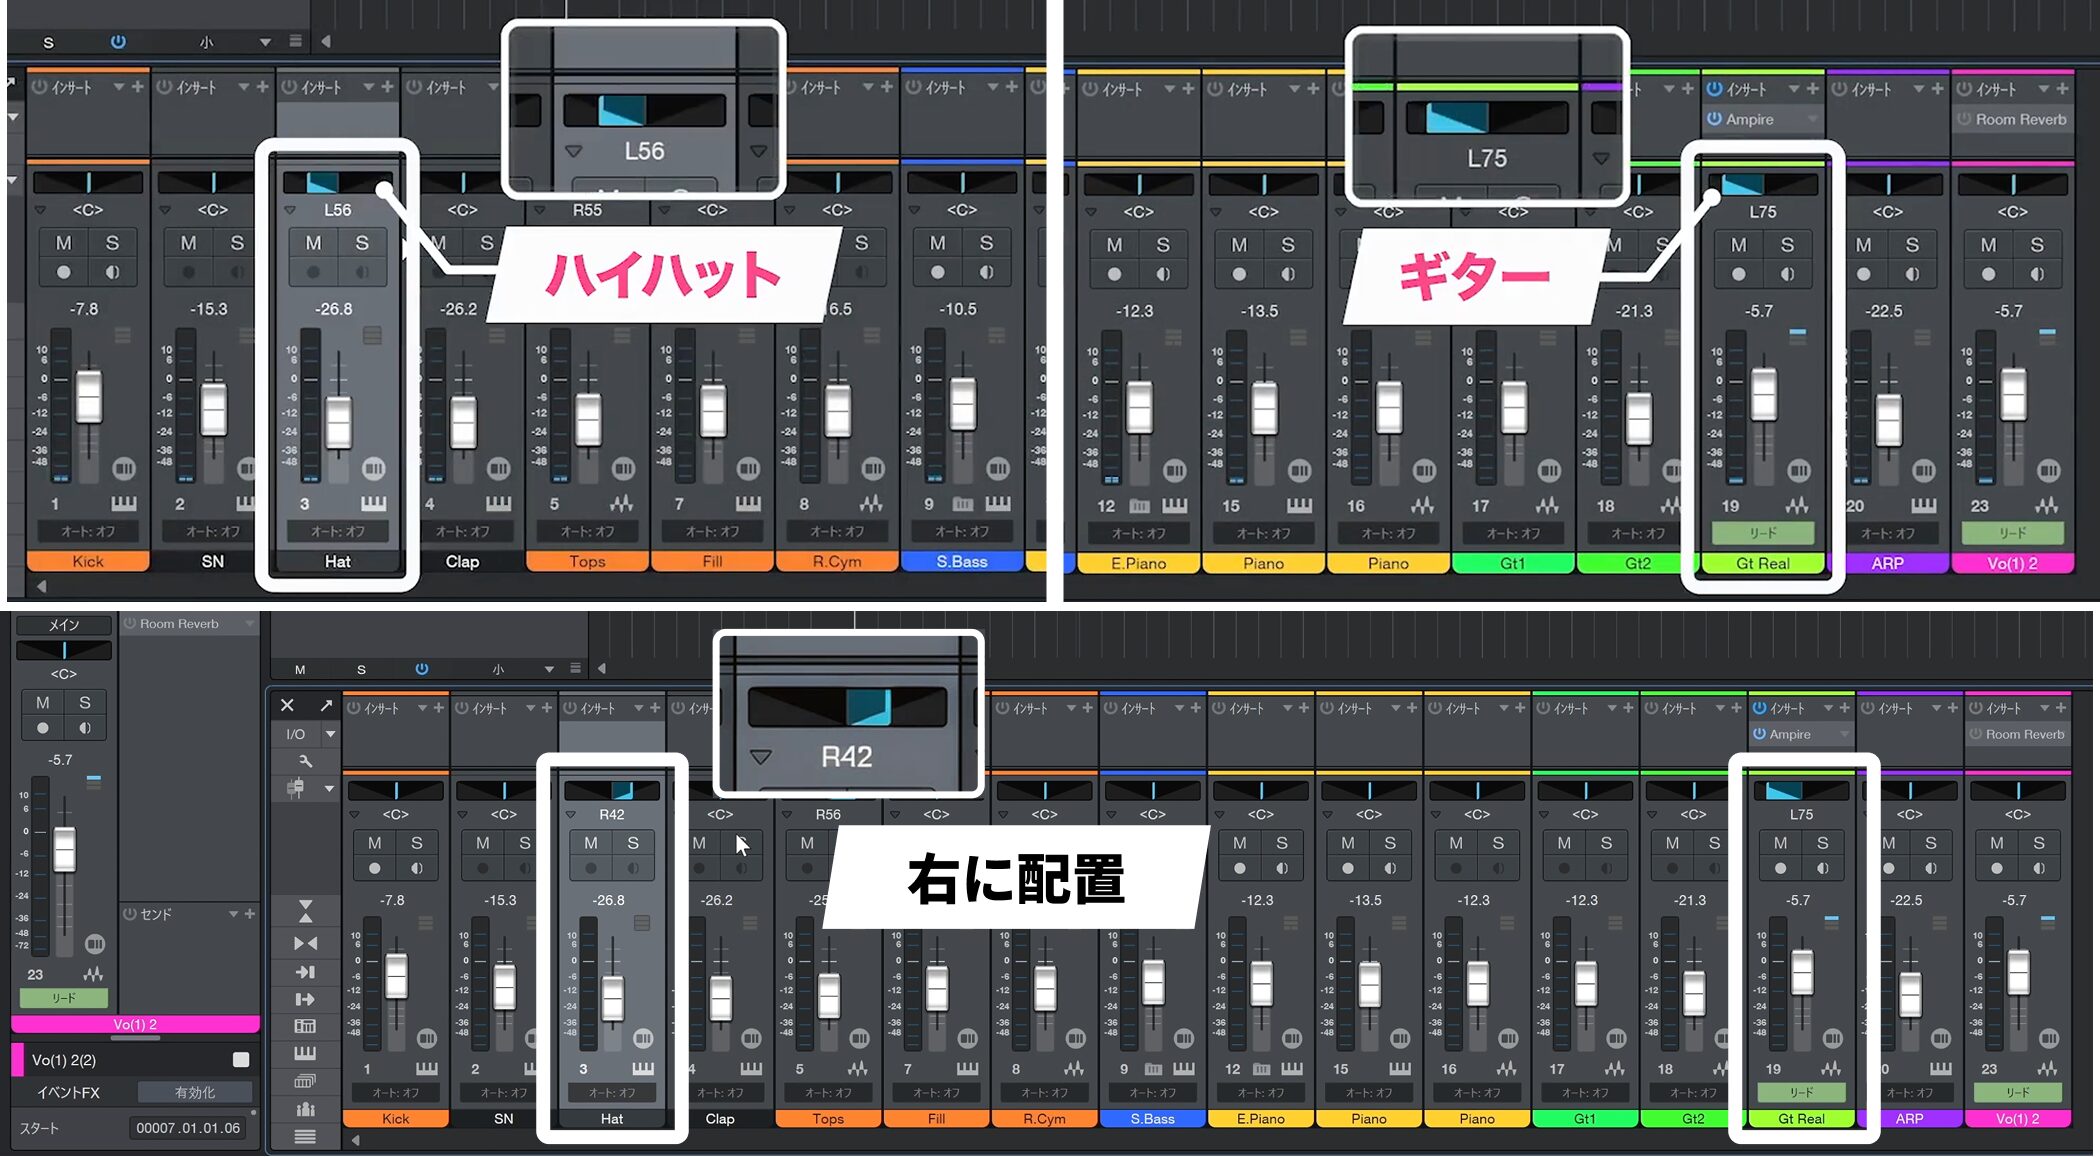
For example, if a hi-hat and guitar both panned left compete with each other, moving the hi-hat right can make both easier to hear.
Panning conventions vary by genre, so try studying the placement in songs you like.
Apply an equalizer
Effects can change a track’s sound in many ways.
We will start with an equalizer, a common mixing tool.
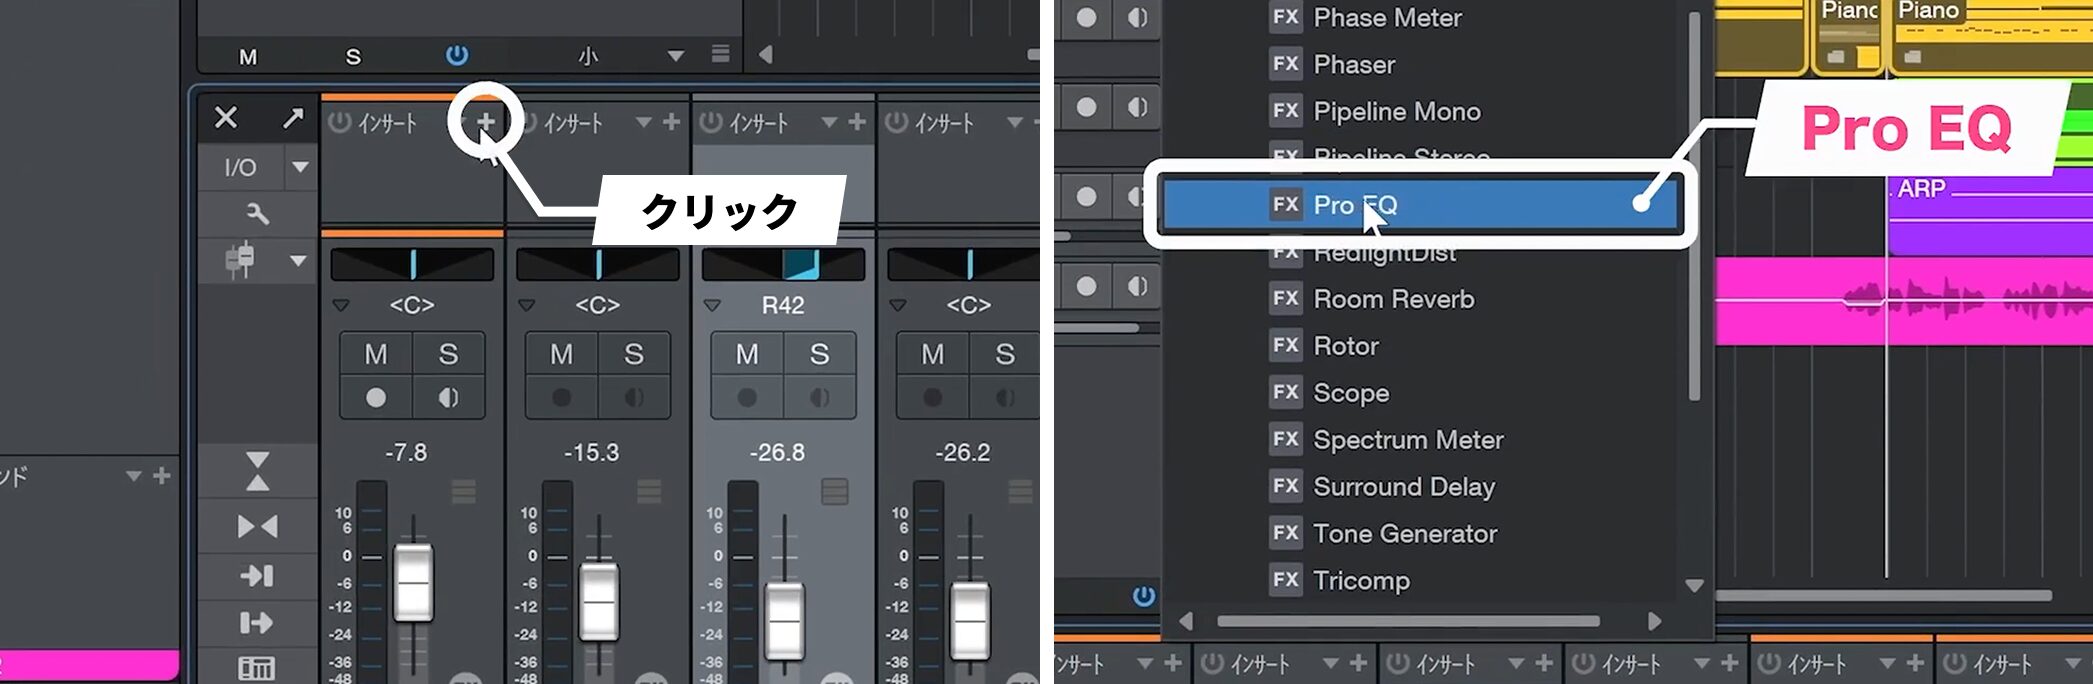
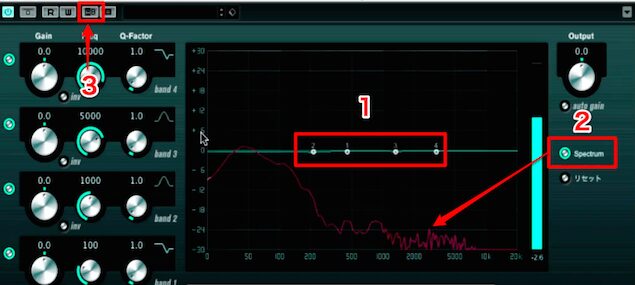
Click the plus button in the inserts and select Pro EQ.
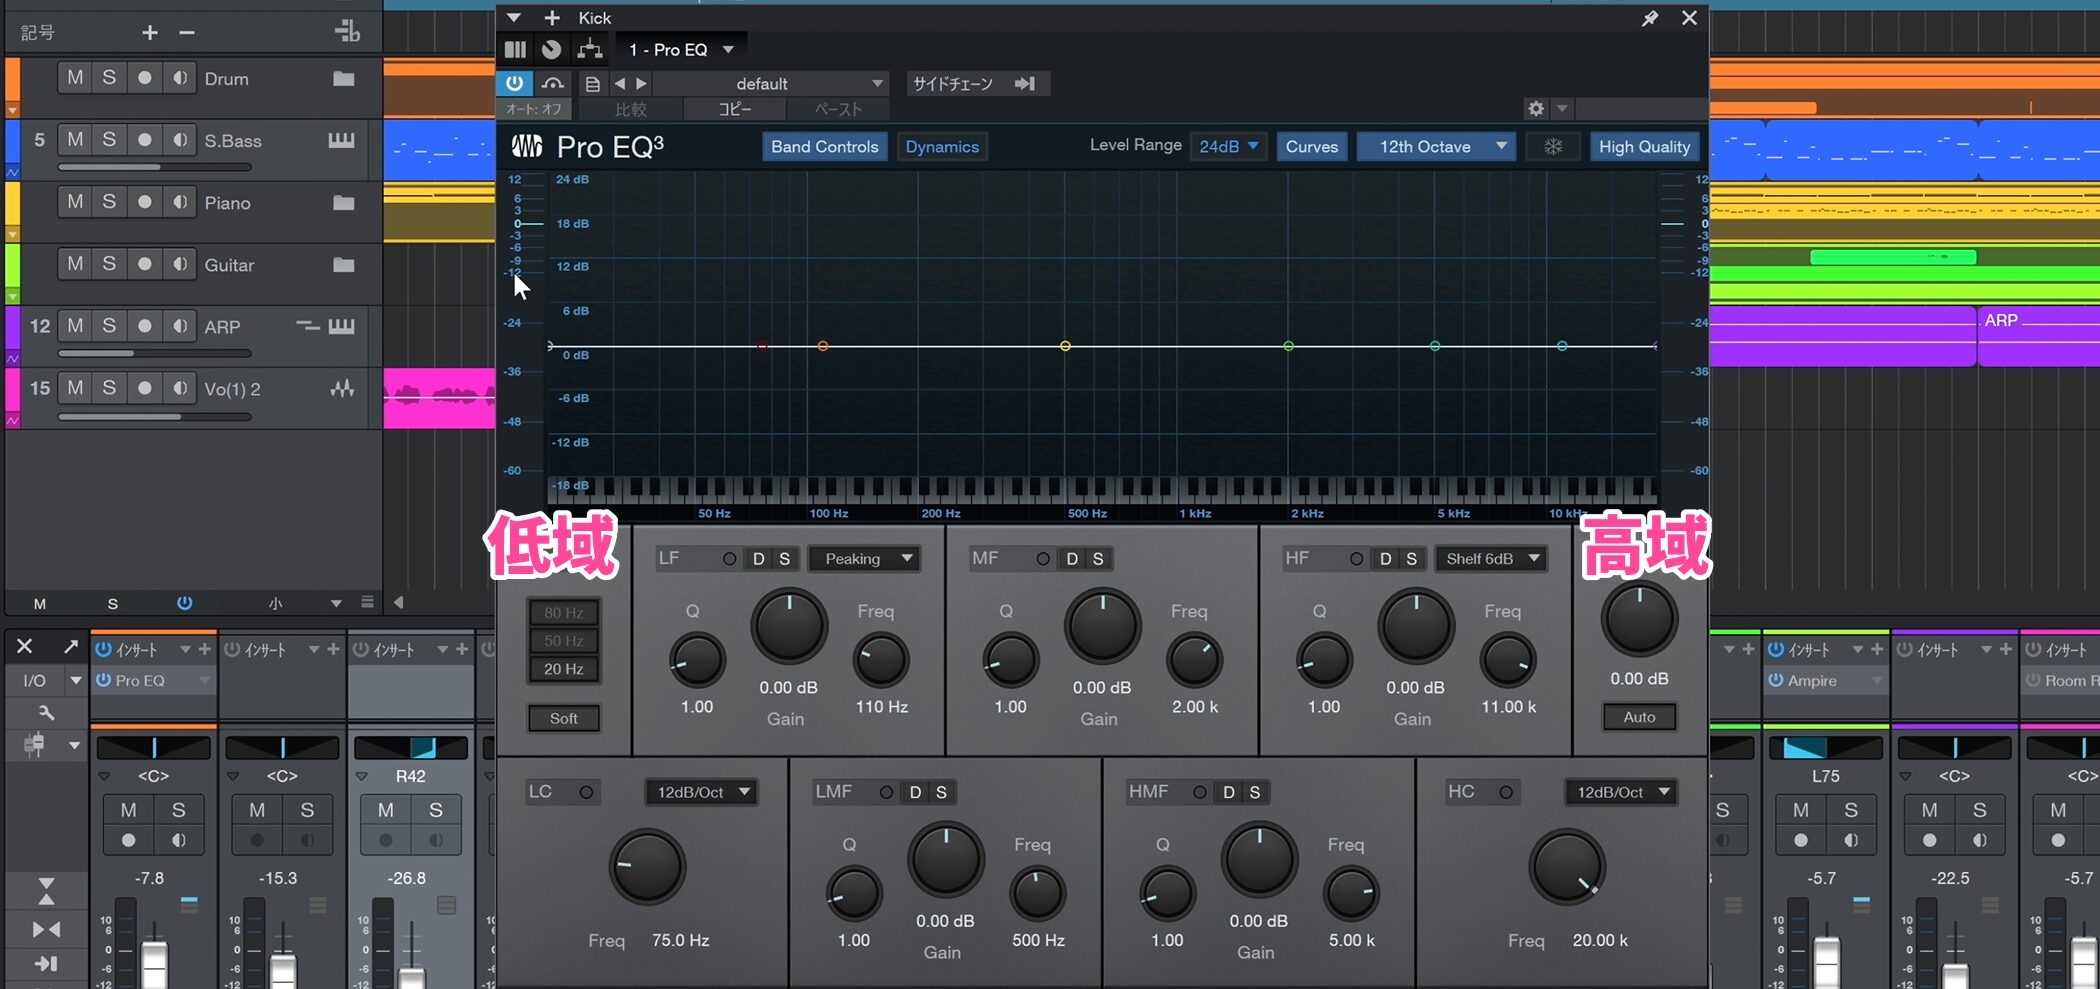
Low frequencies are on the left and higher frequencies toward the right. Raise or lower the desired bands to shape the sound.
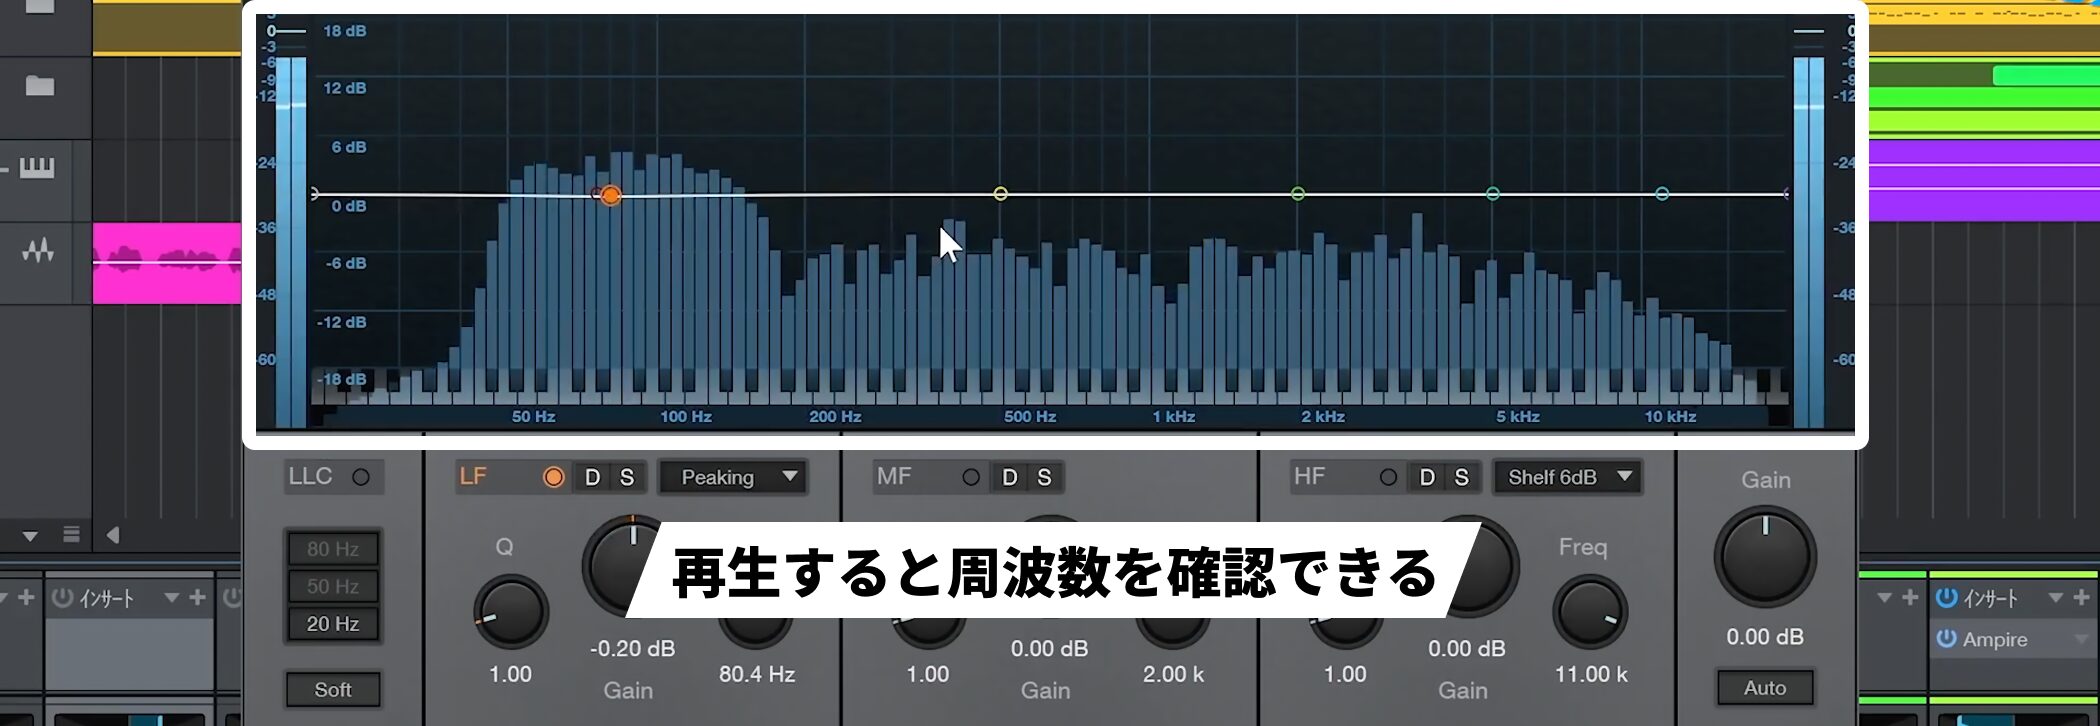
During playback, you can see the frequencies of the track being processed.
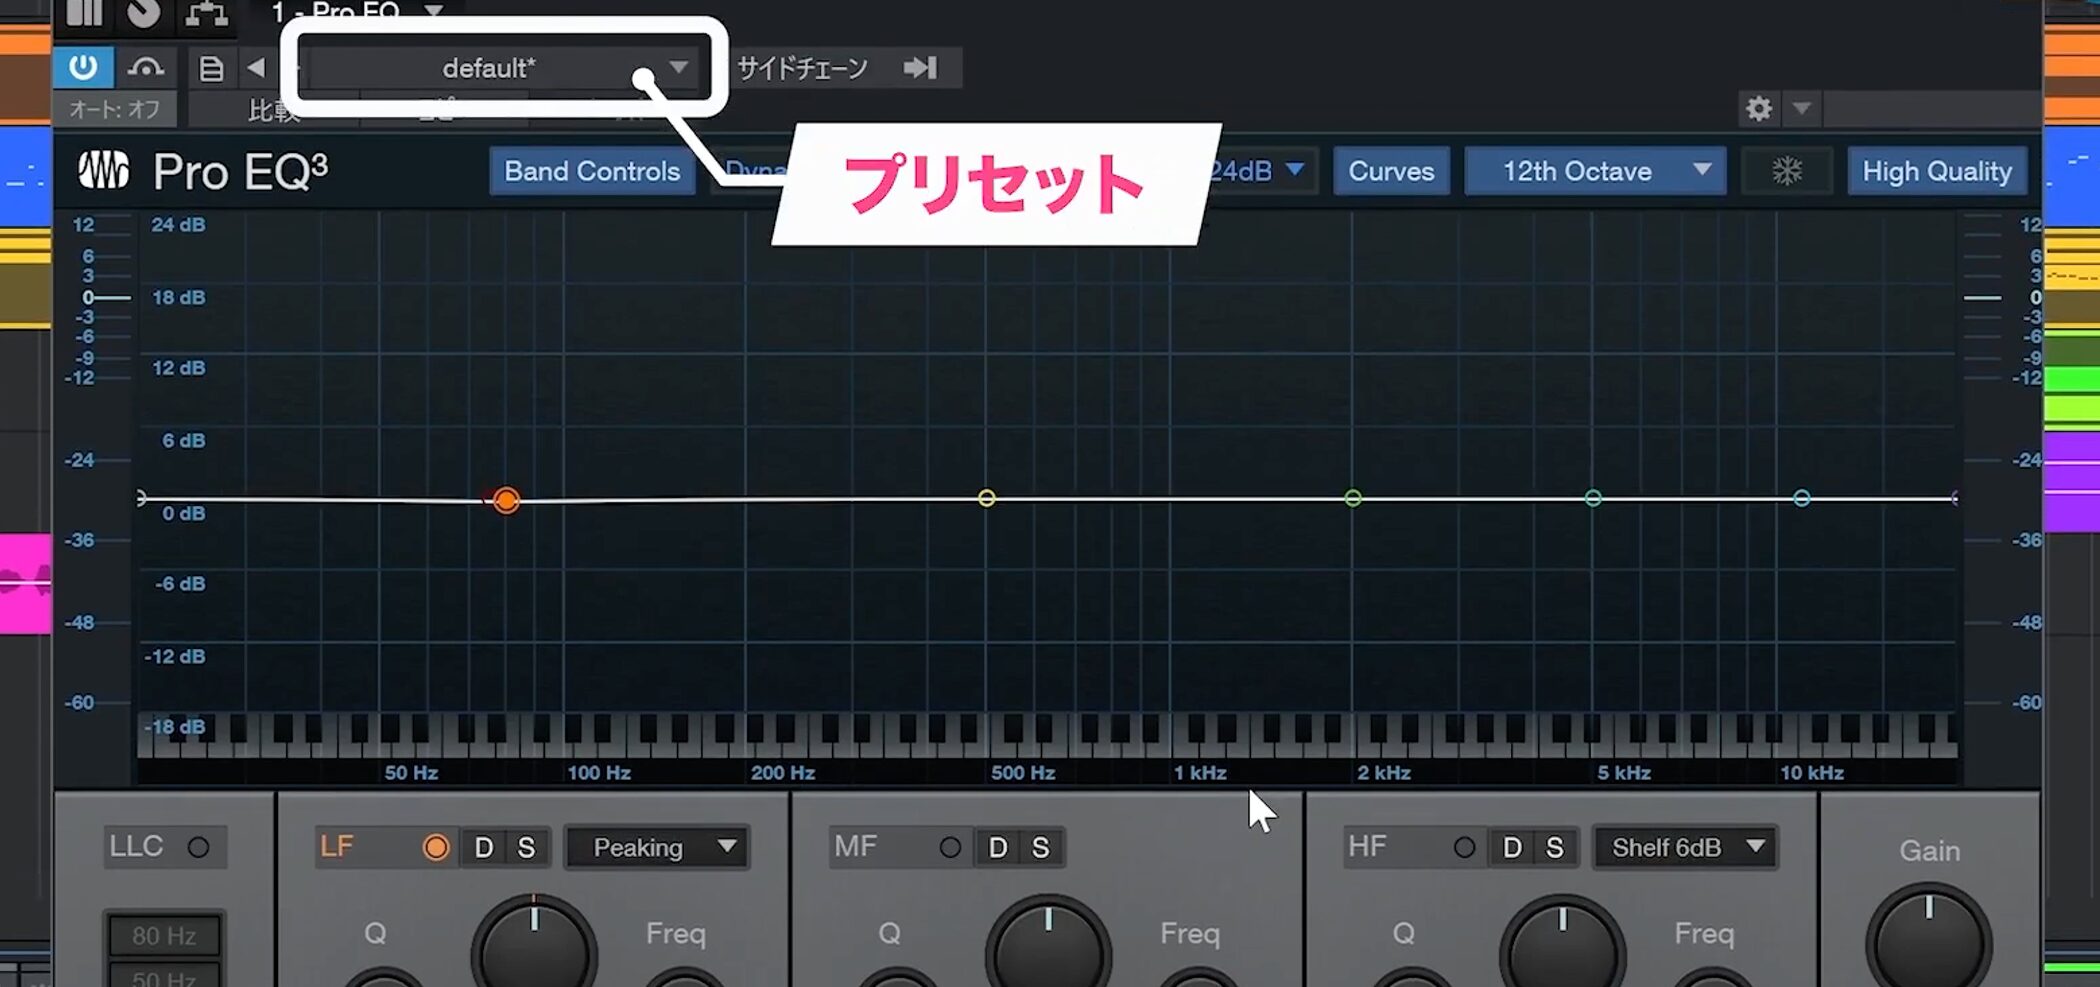
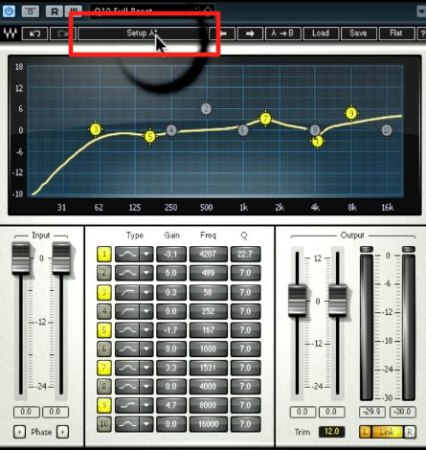
If you are unsure what to boost or cut, use presets.
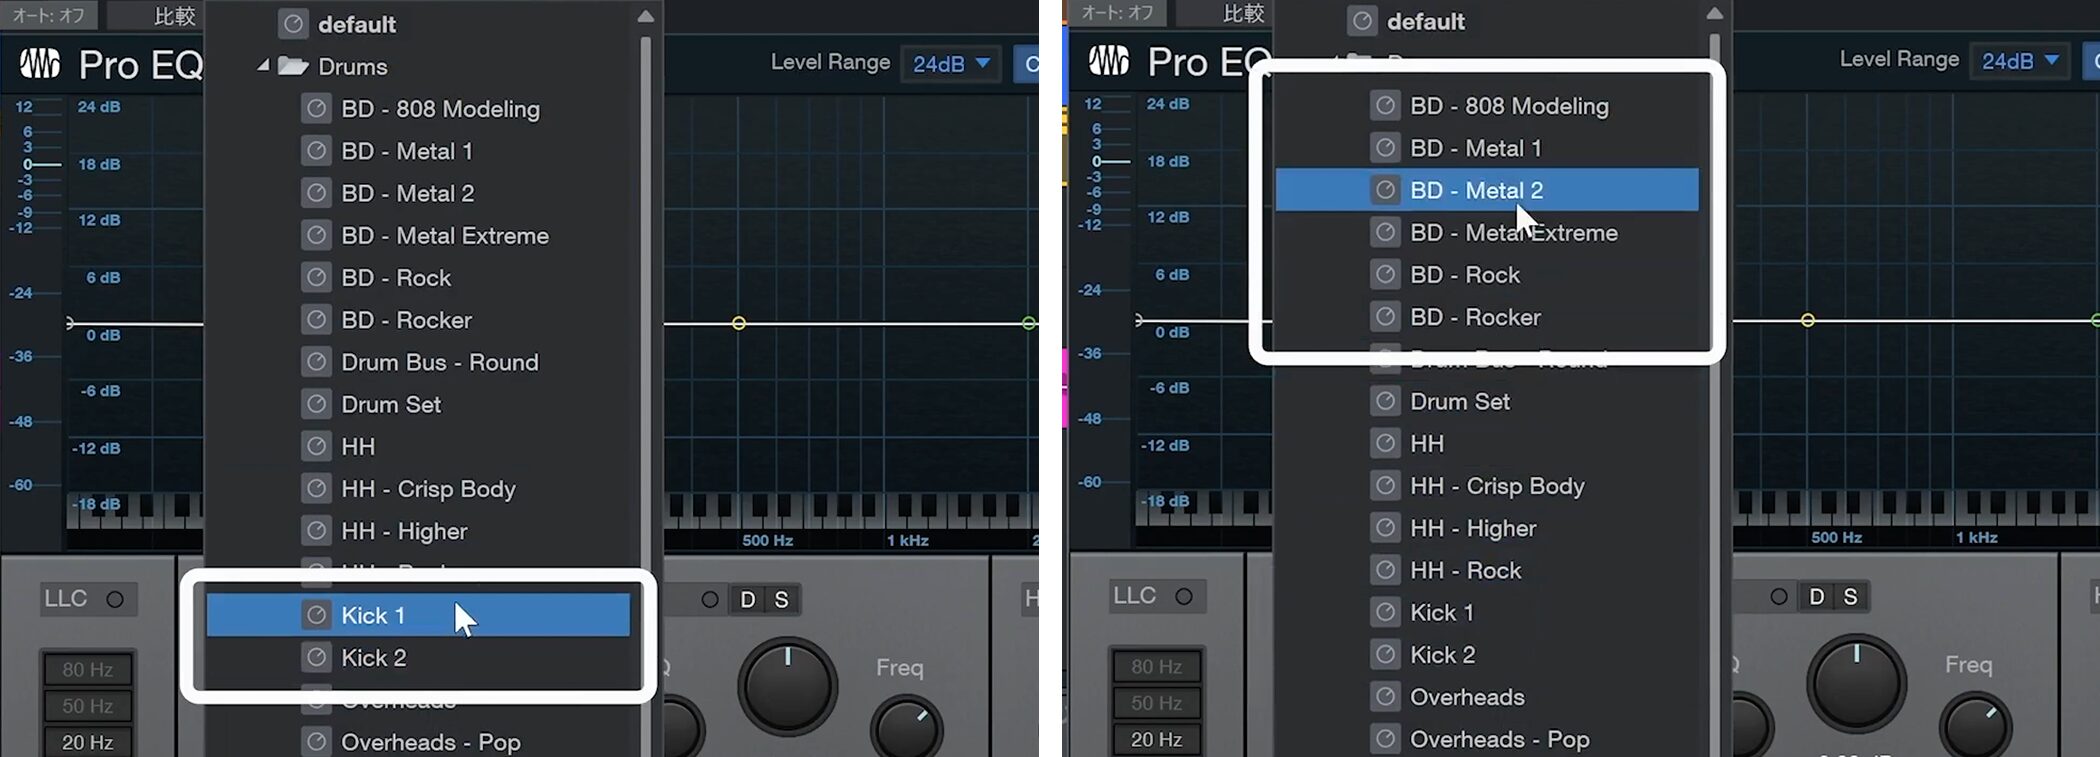
For a kick, for example, look for Kick in the Drums preset category.
BD stands for bass drum, so those presets can also be used.
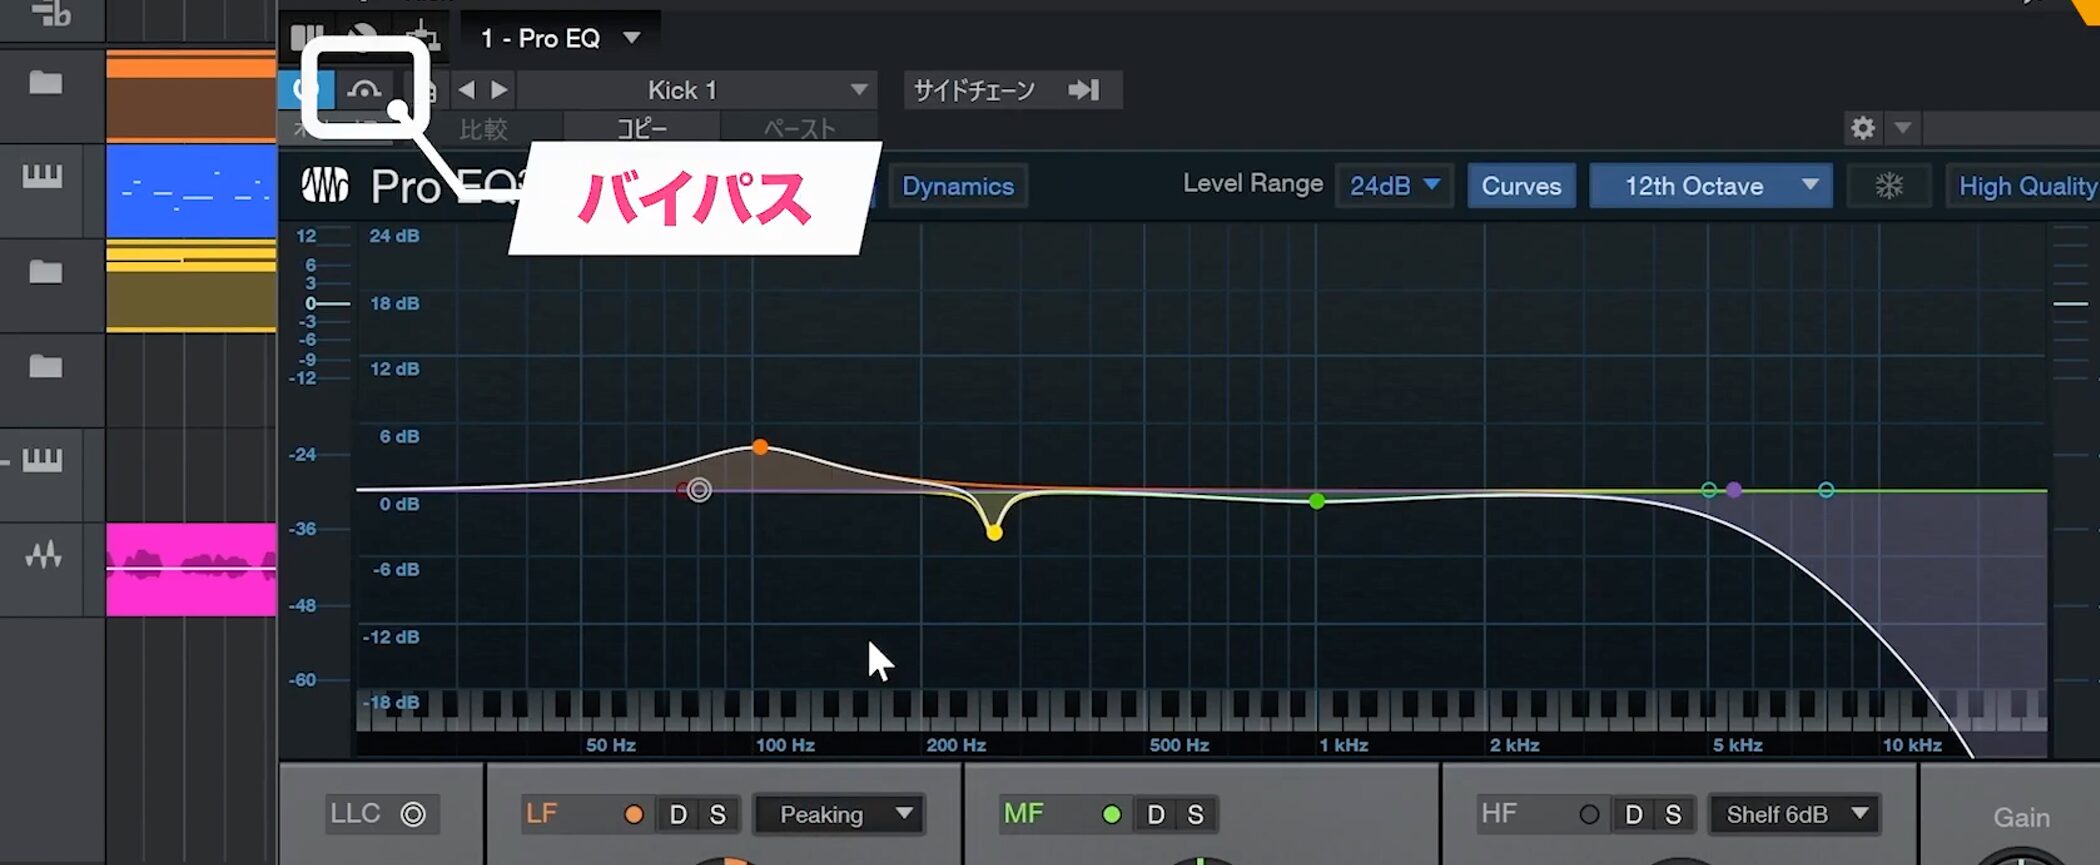
After applying a preset, listen to its effect.
Use the bypass button at the upper left to compare the sound before and after processing.
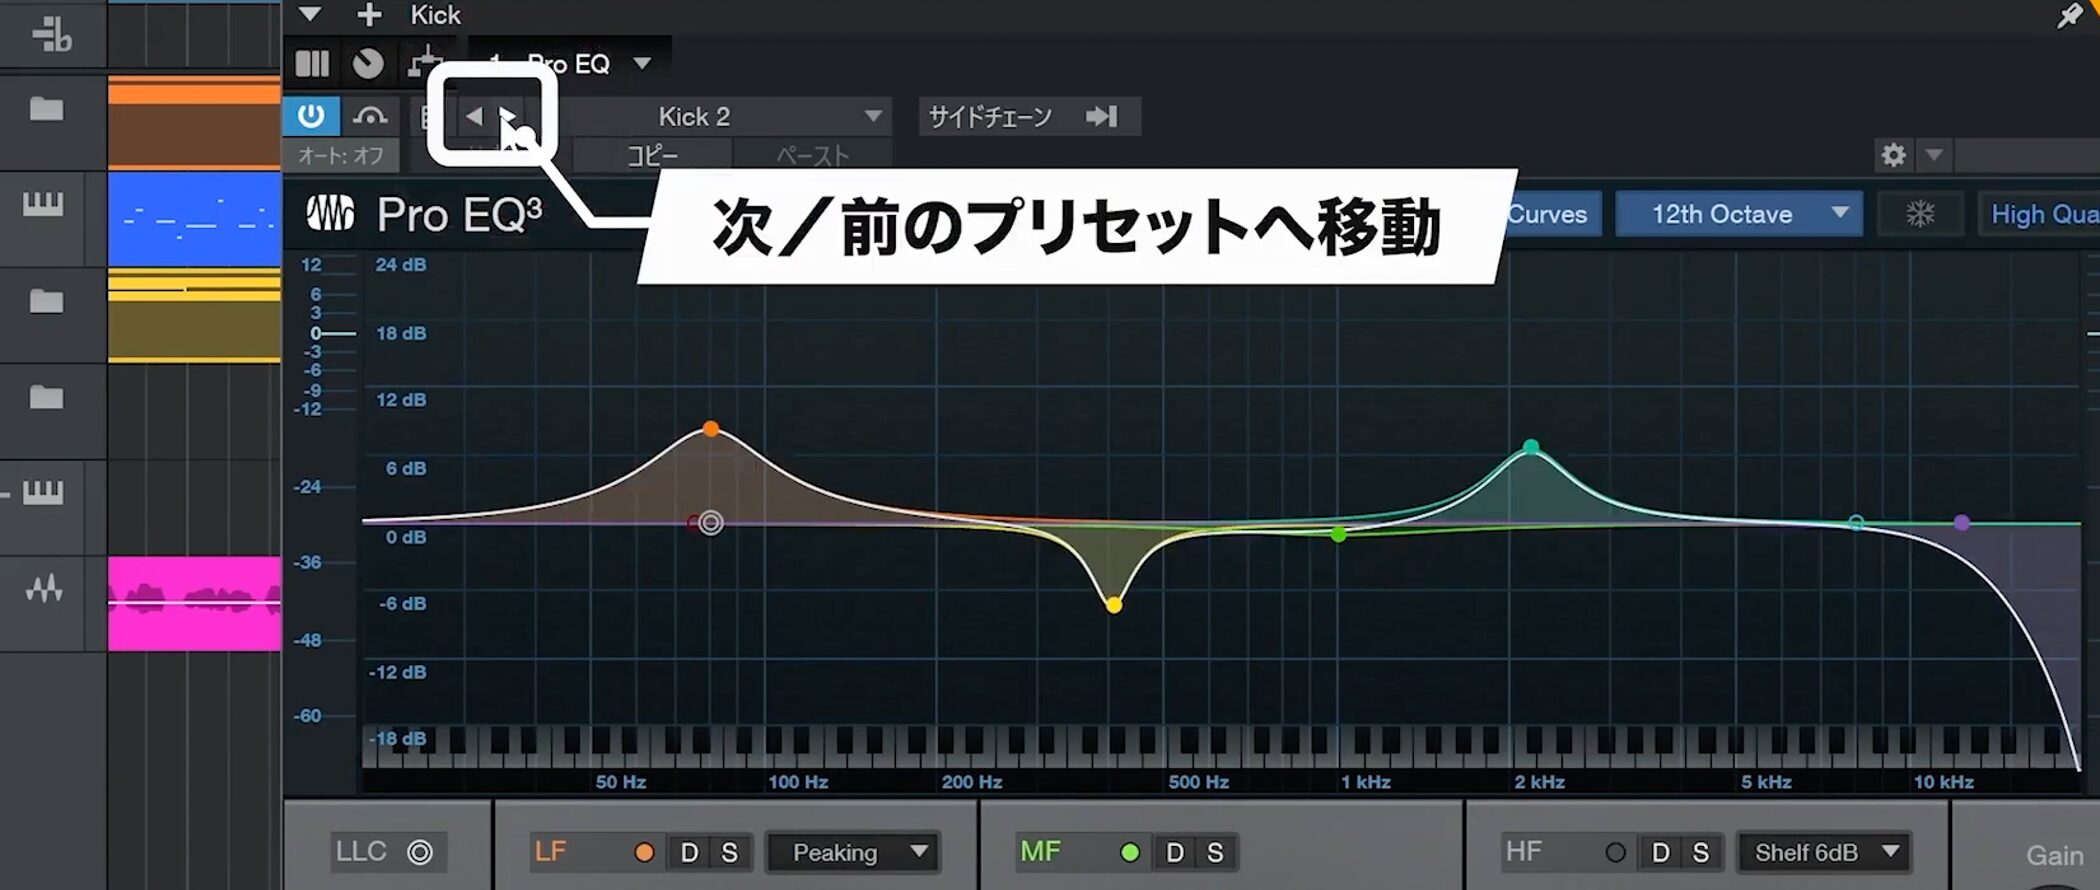
The arrows let you move quickly to the next or previous preset.
Apply a compressor
Next, add a compressor, another common mixing effect.
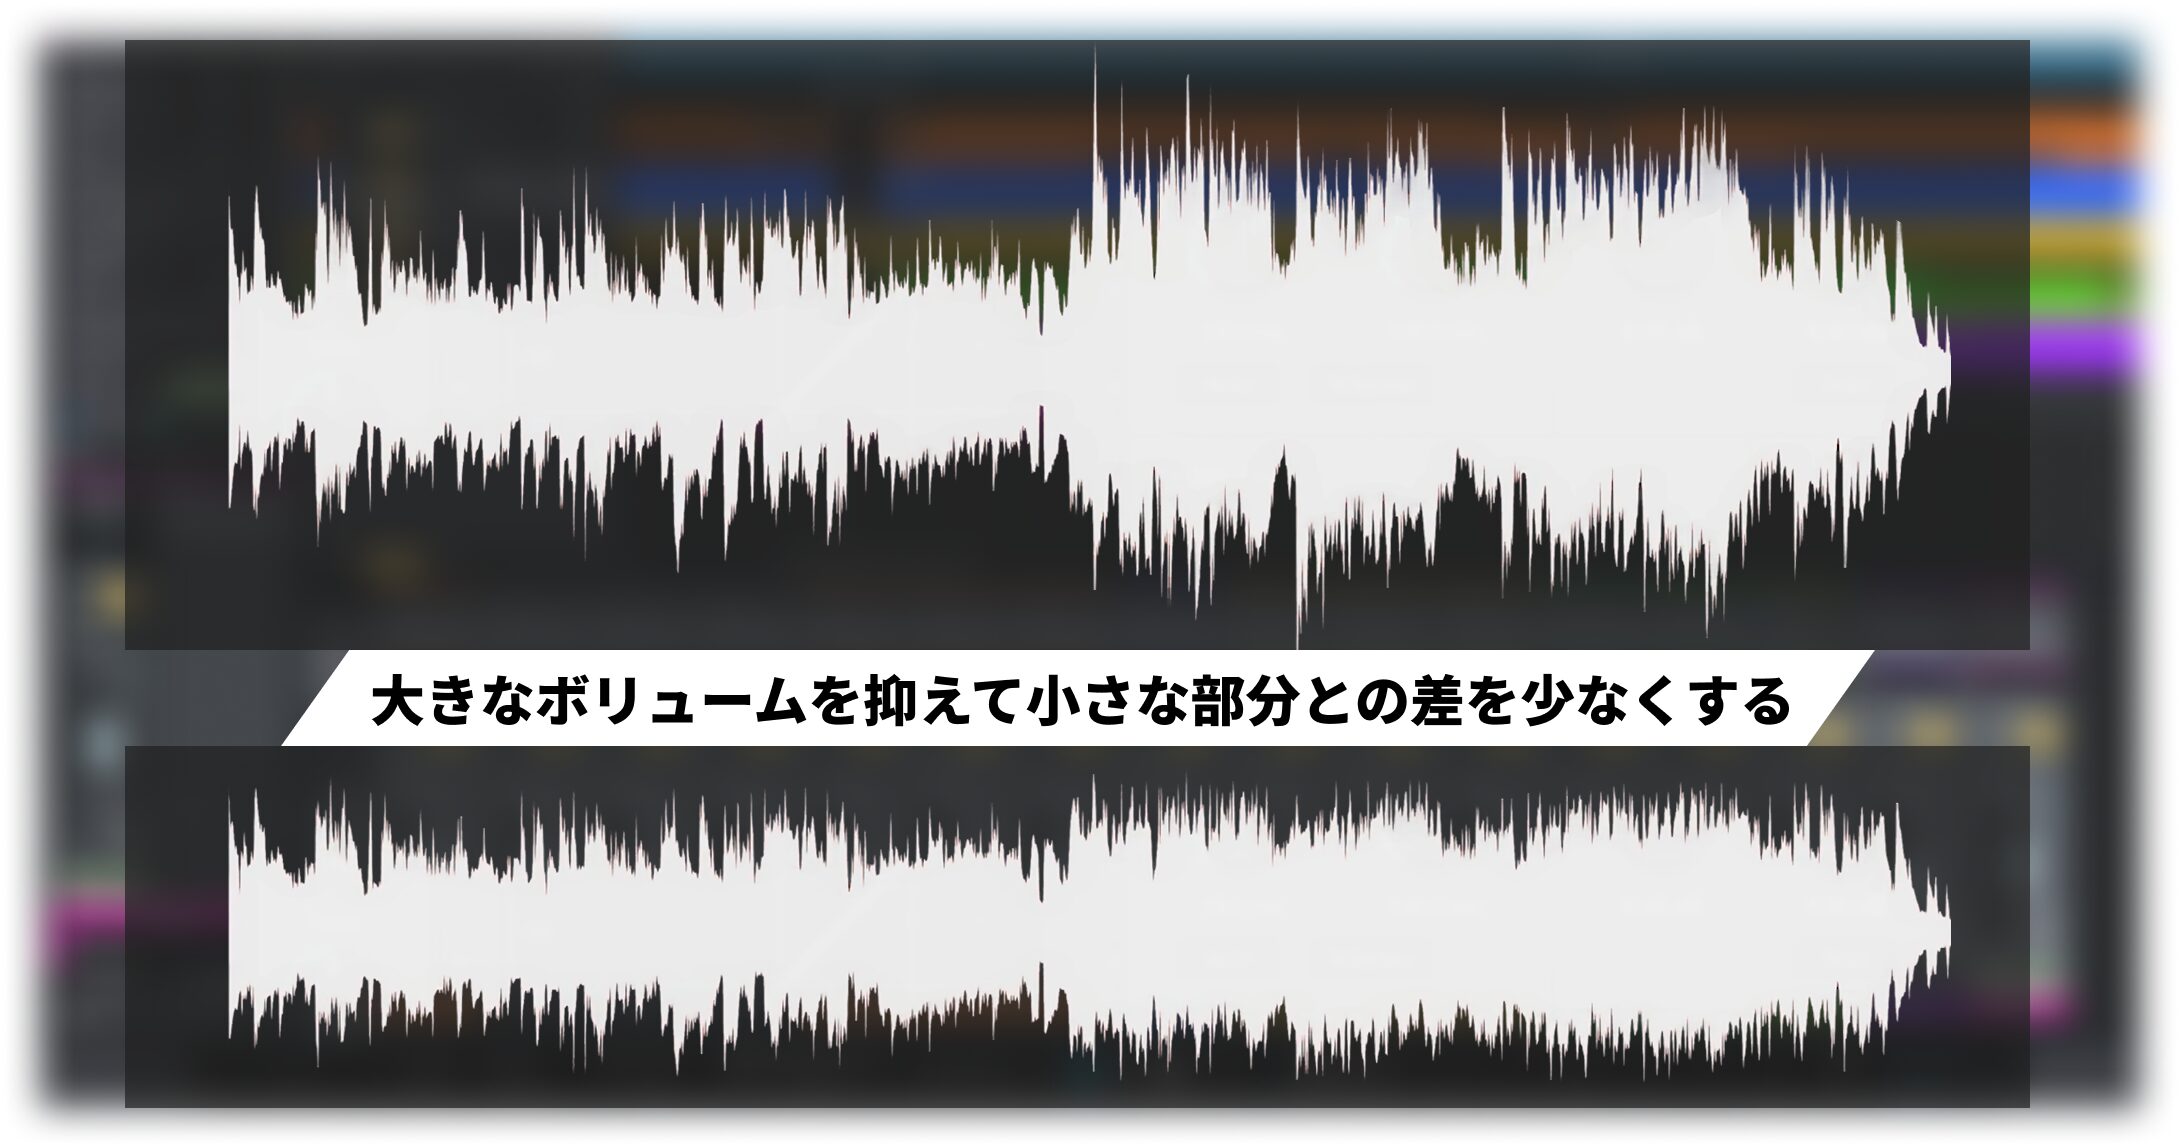
A compressor controls volume by reducing louder parts of a track, narrowing the gap between loud and quiet parts.
This can make the sound more consistent and easier to hear.
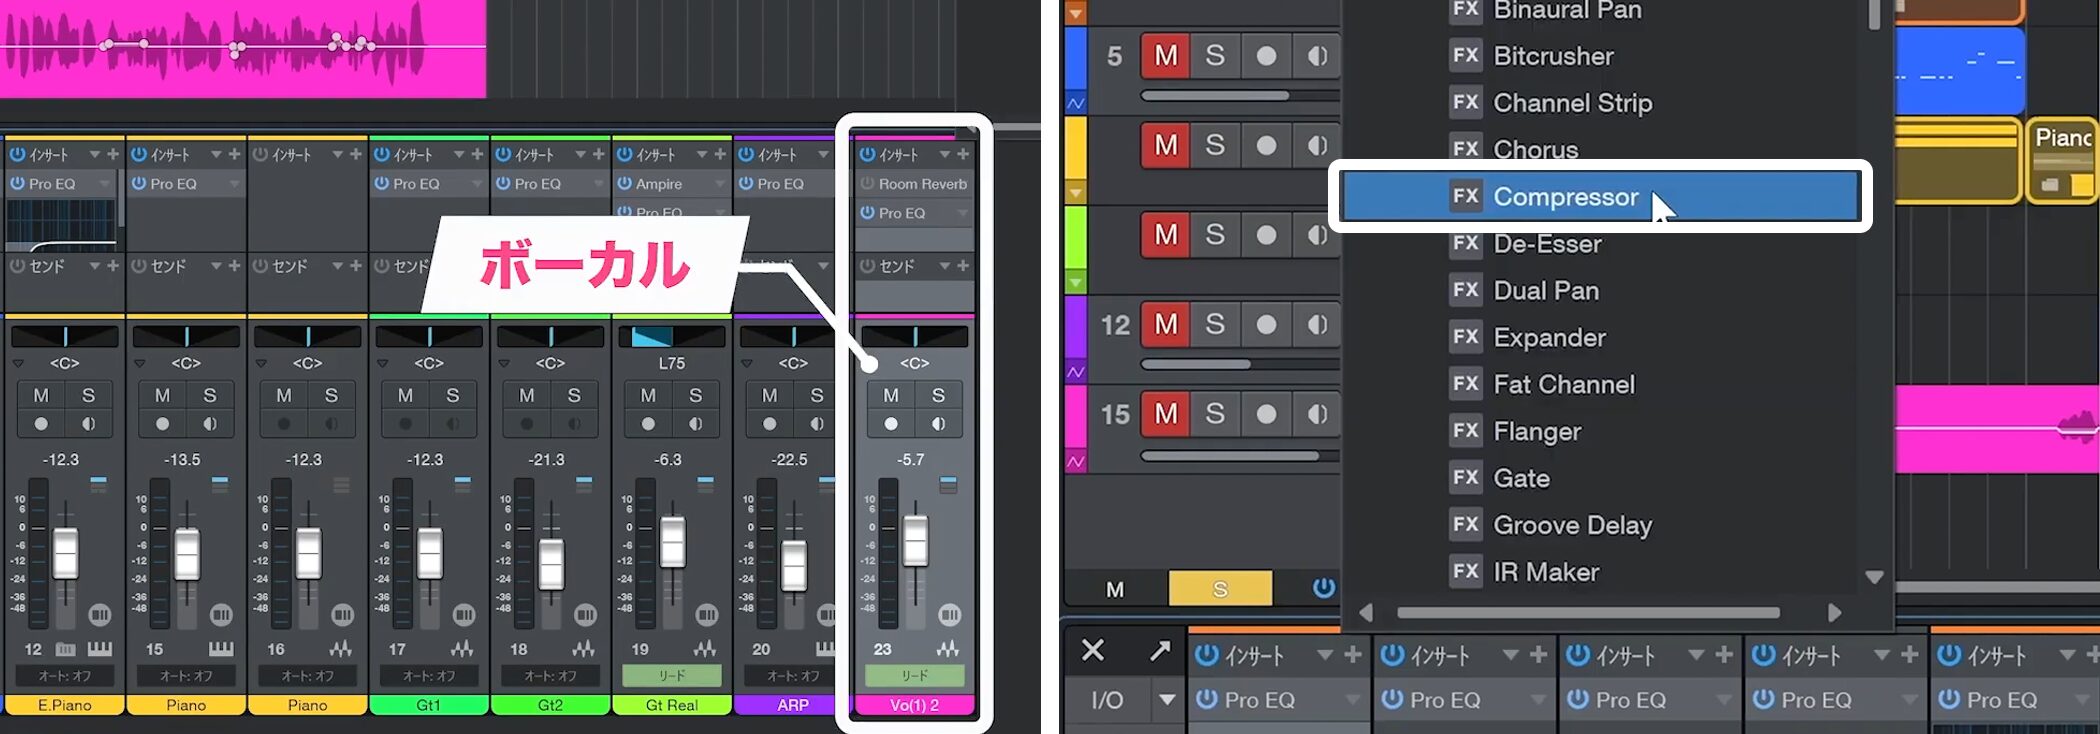
Here, insert Compressor on the vocal track to control variations in its level.
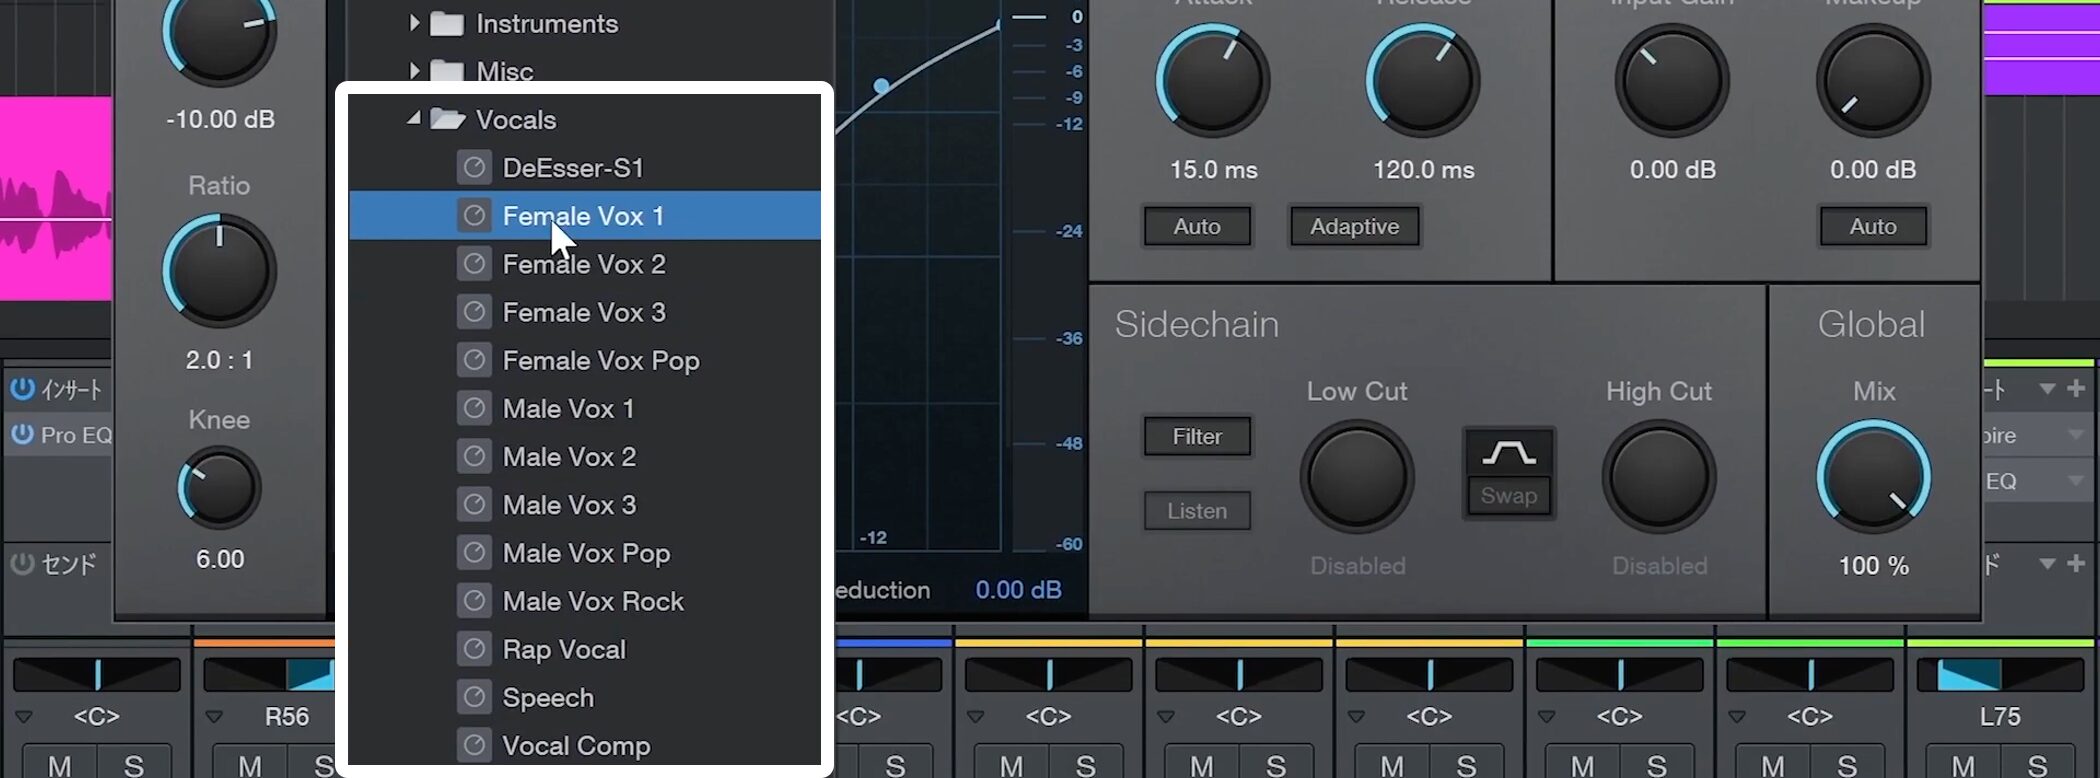
Choose a preset from the vocal category.
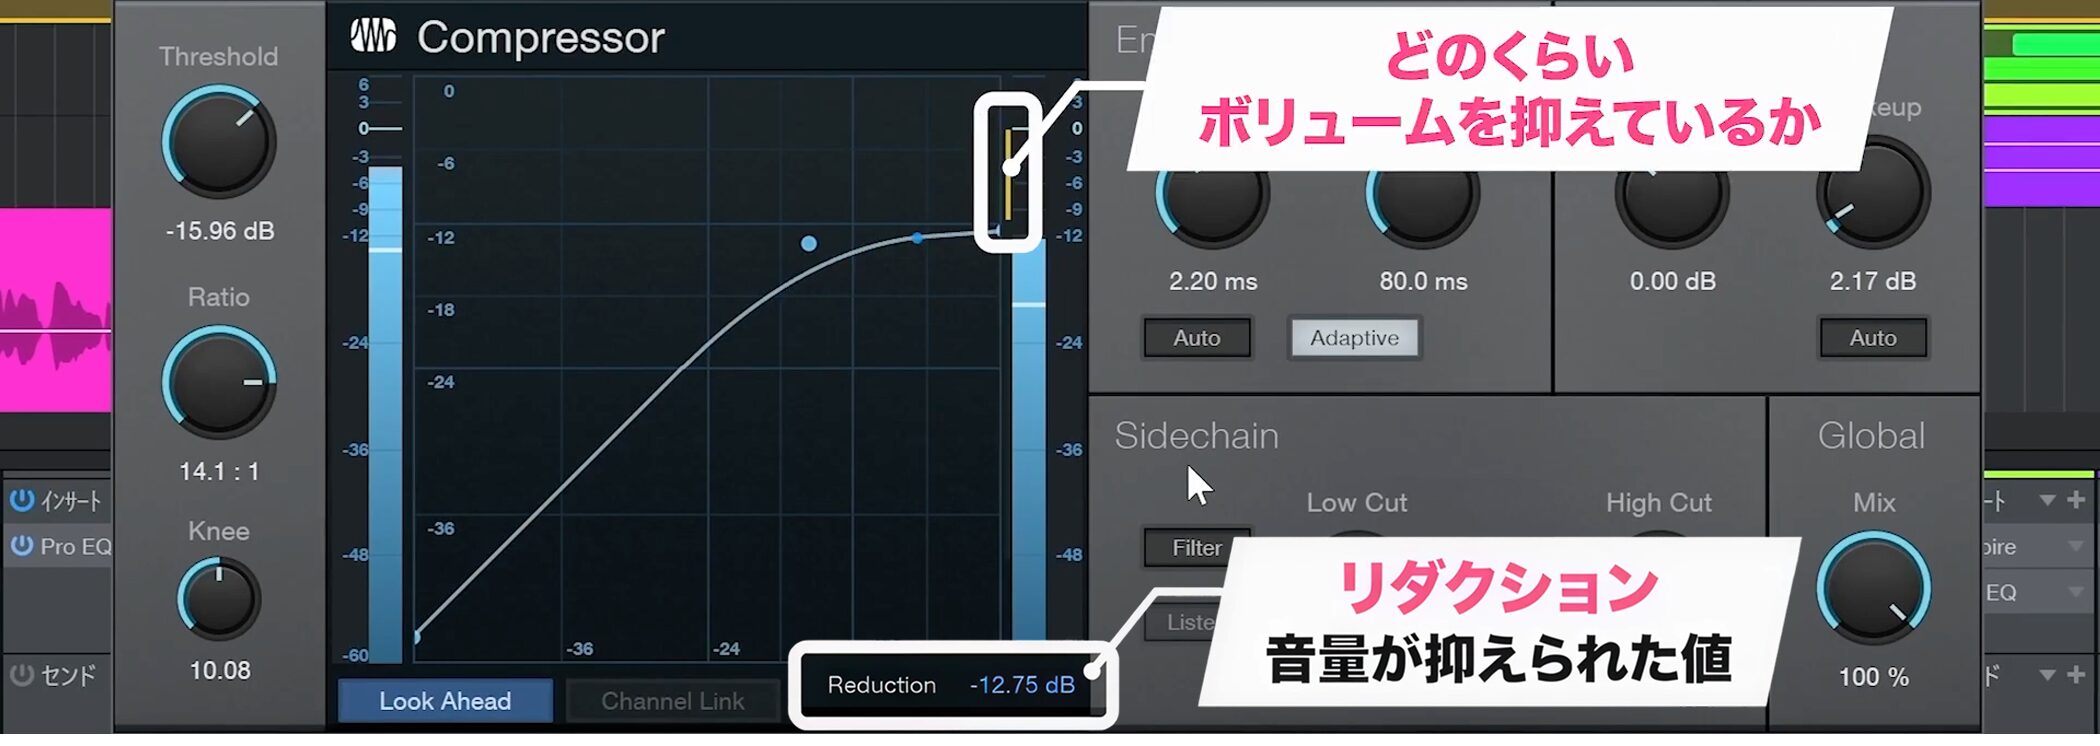
The yellow line in the meter on the right shows how much the volume is being reduced.
The Reduction display below also shows the numerical value.
Be careful: too much gain reduction can change the character of the source or make it sound unnatural.
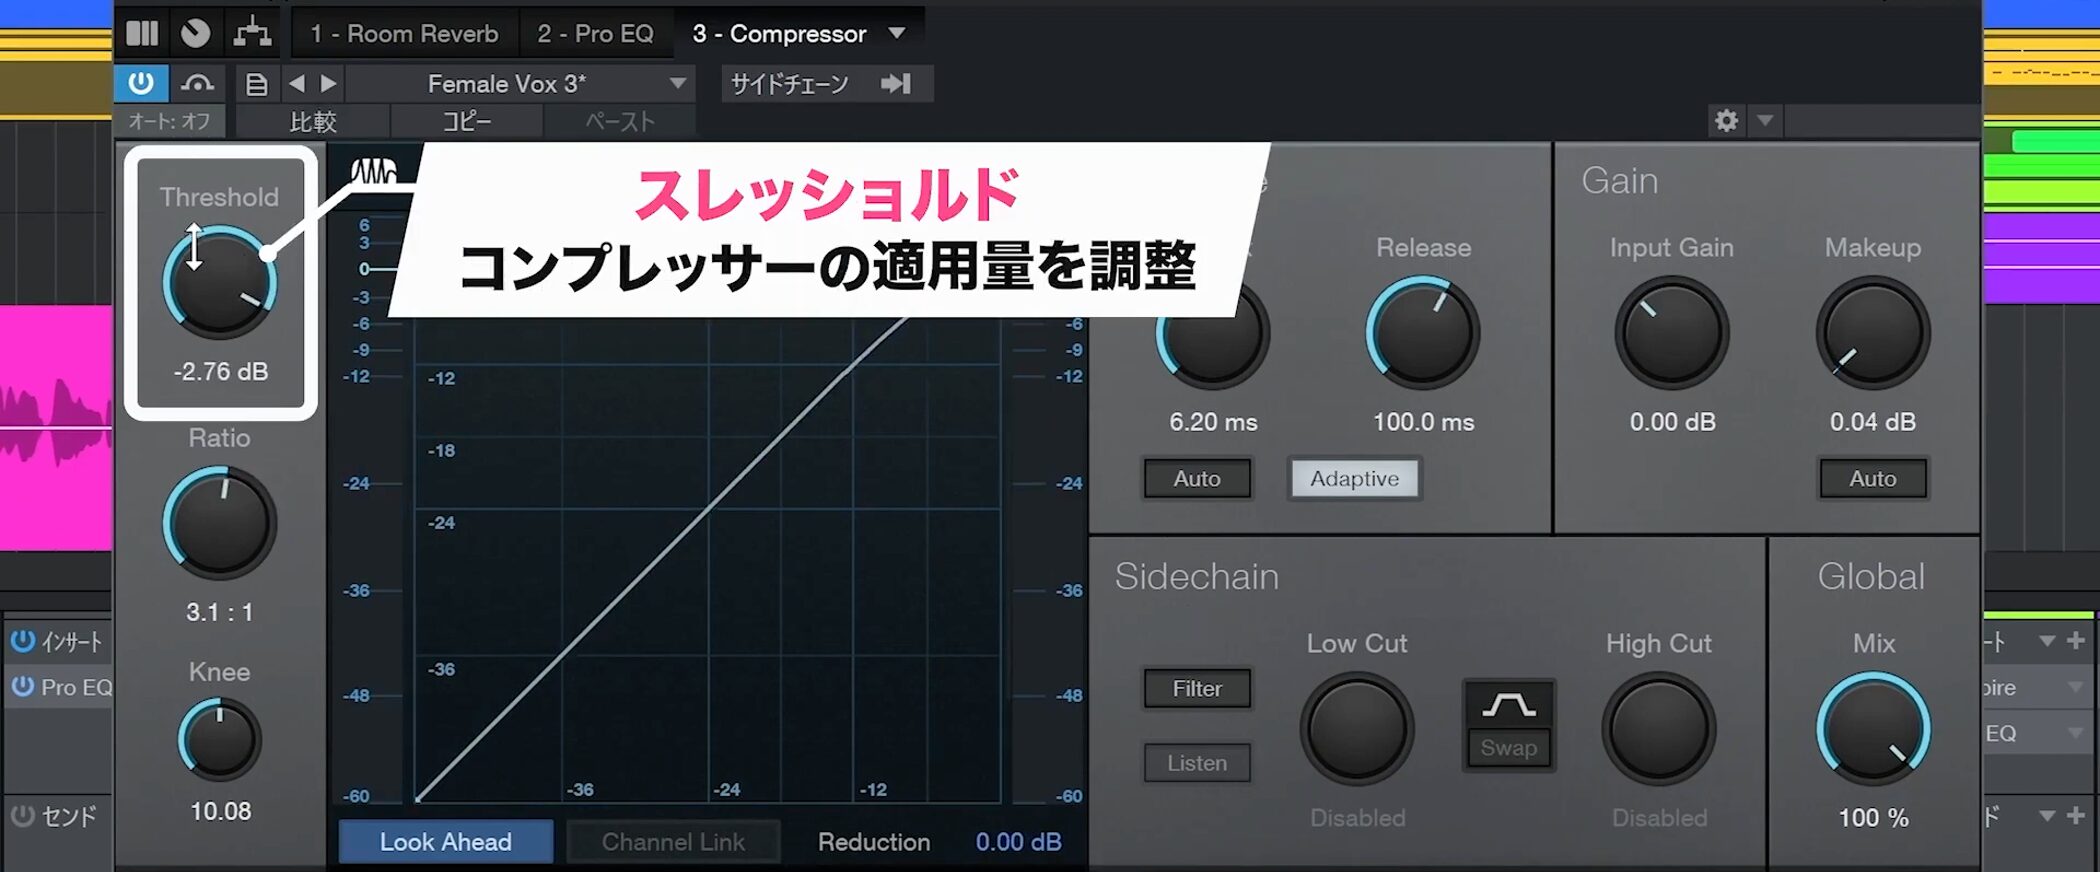
If it sounds unnatural, adjust Threshold to change the amount of compression.
Set up sidechain compression
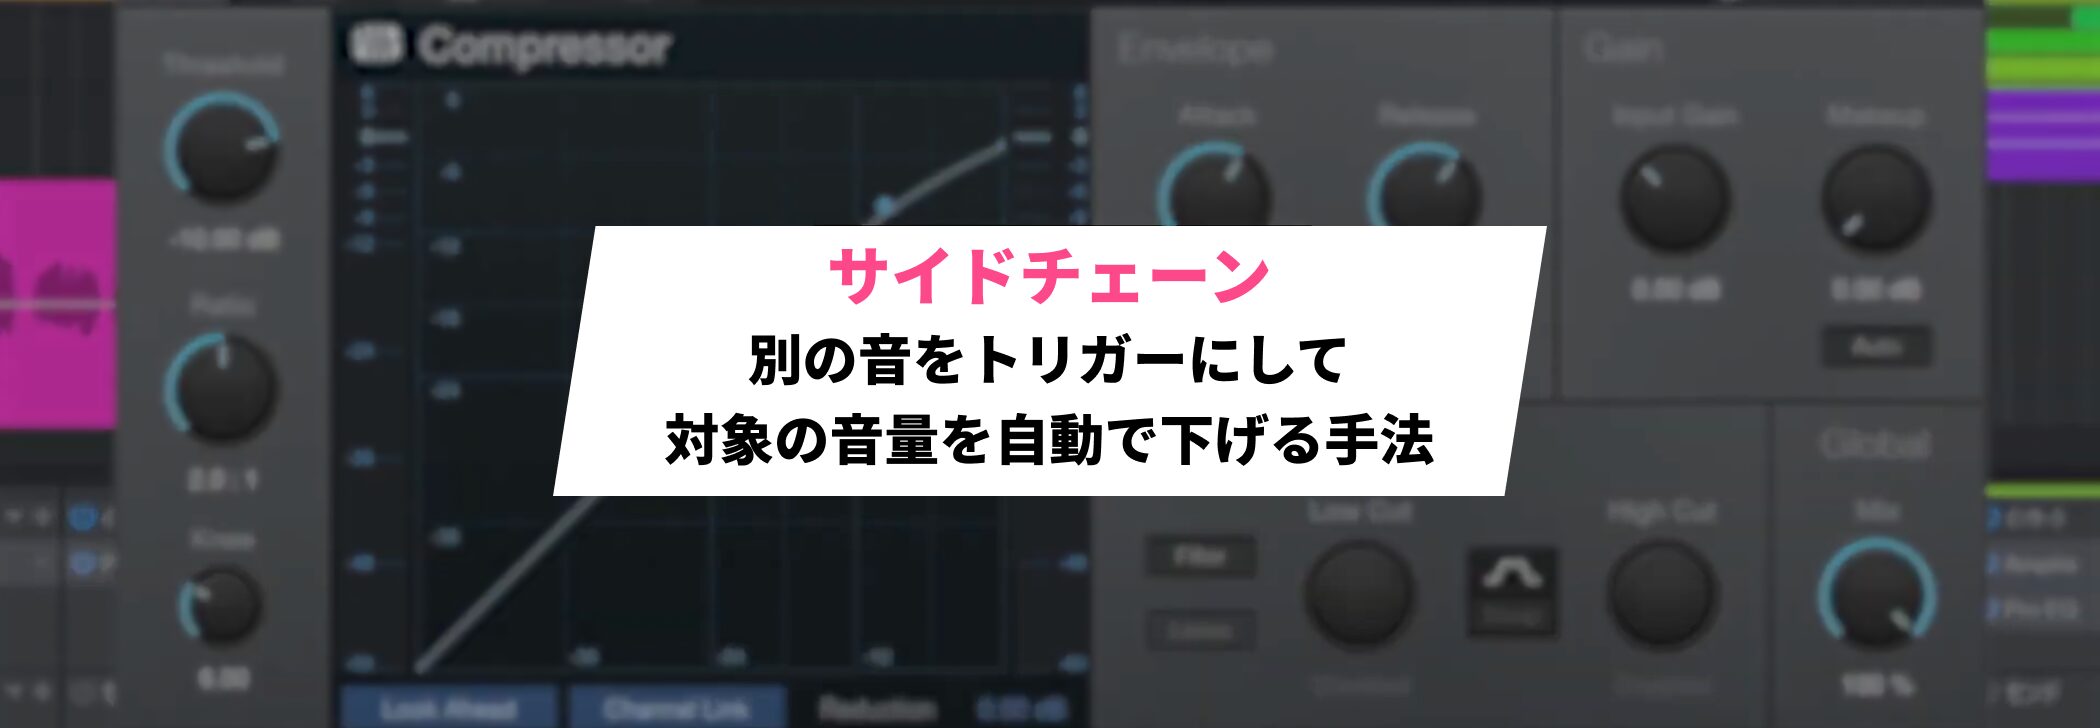
Sidechaining is a technique that uses another sound as a trigger to automatically reduce a target’s volume.
A common example is lowering the bass whenever the kick plays, creating a pumping effect in time with the rhythm.
This is especially common in dance music and can emphasize the groove.
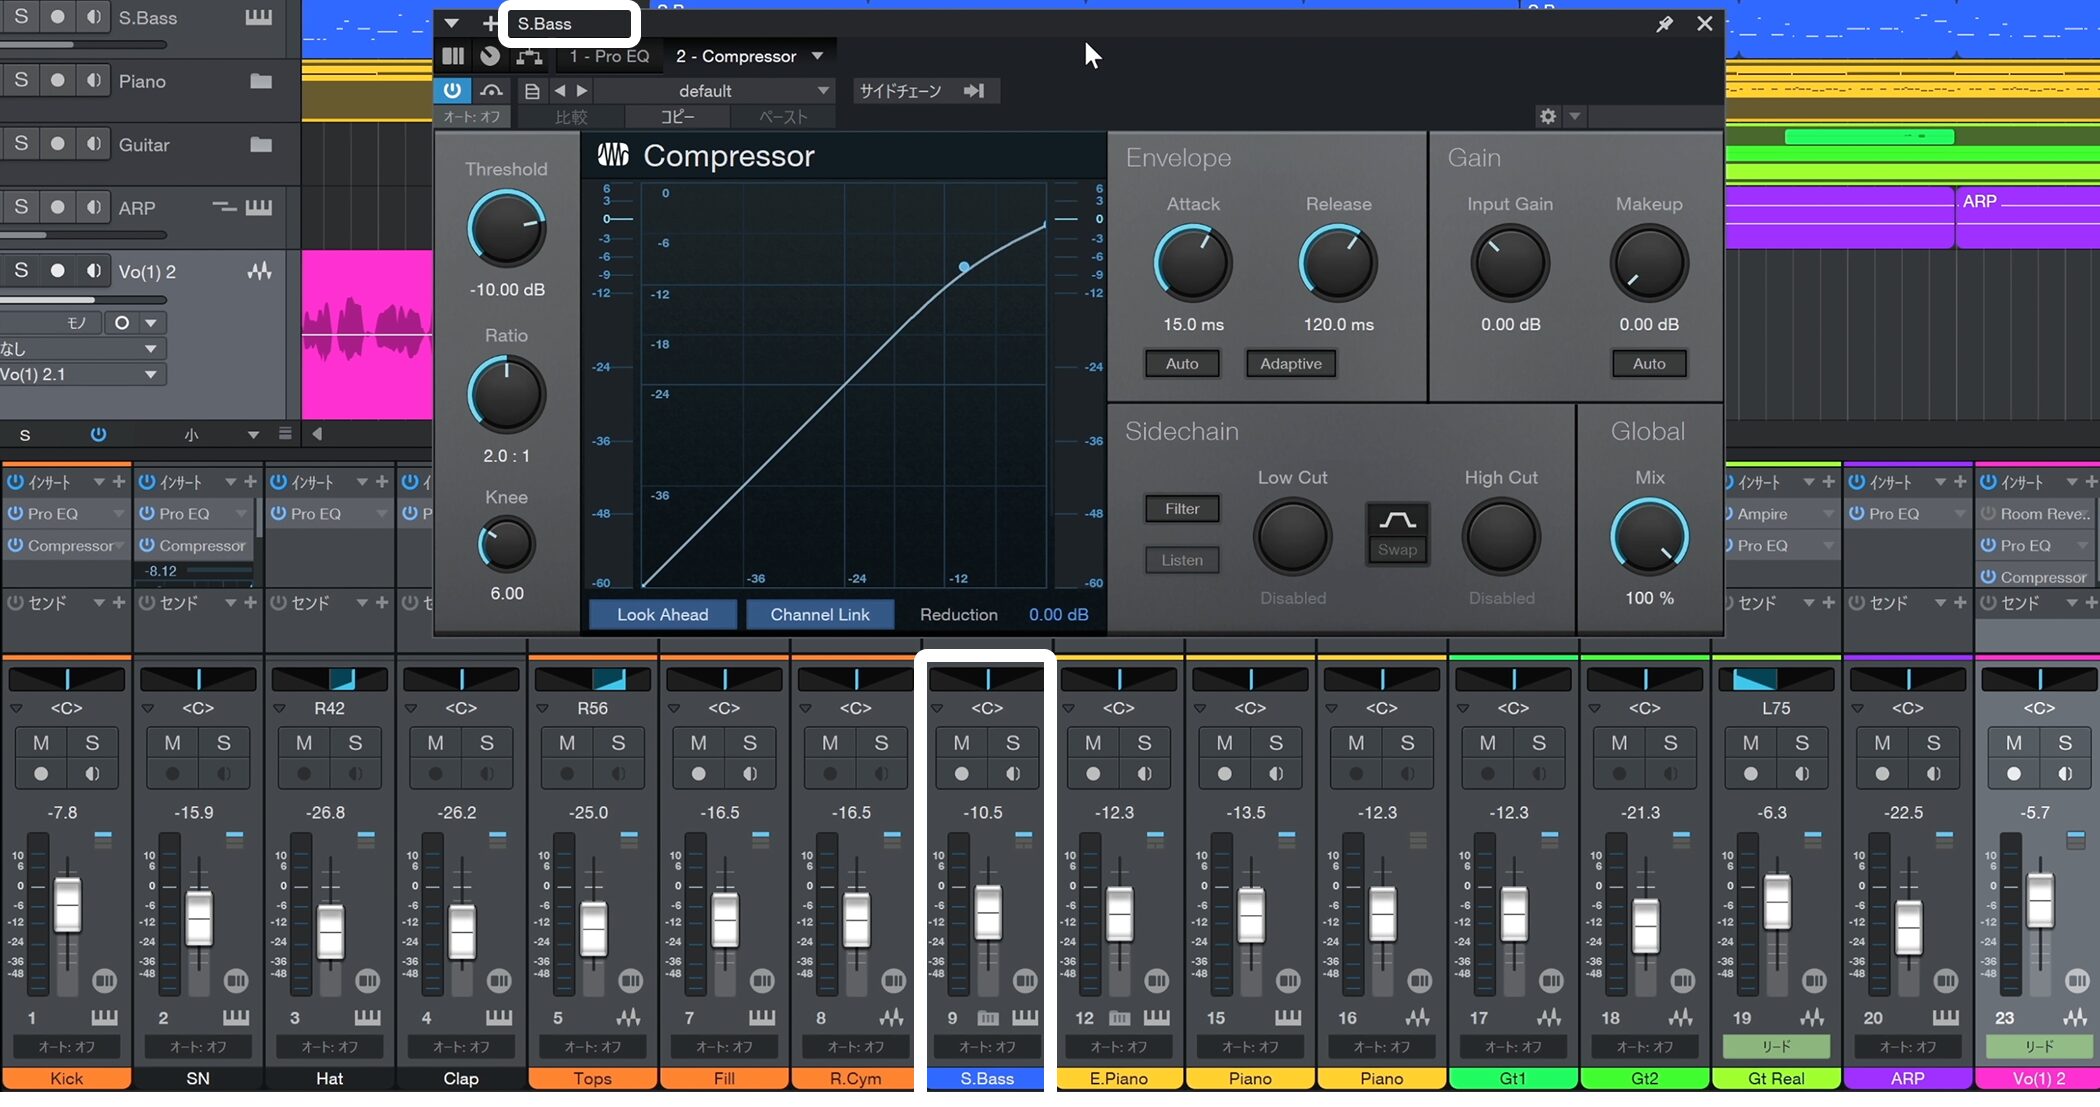
First, insert a compressor on the track you want to make pump—in this case, the bass.
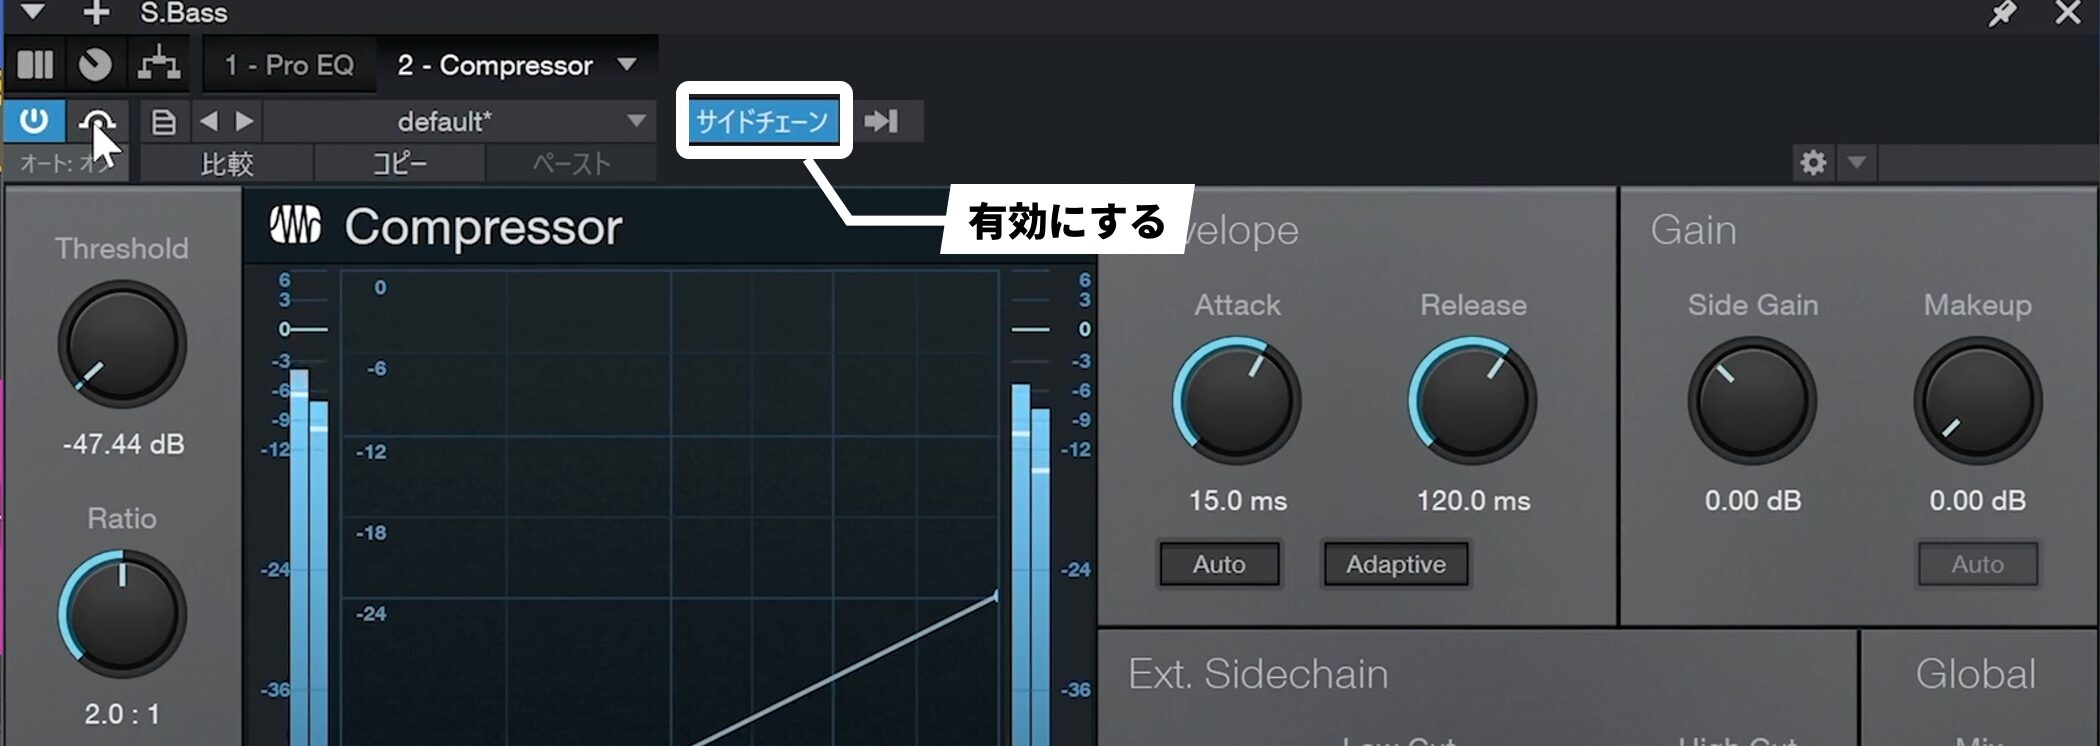
Click Sidechain at the top to enable it.
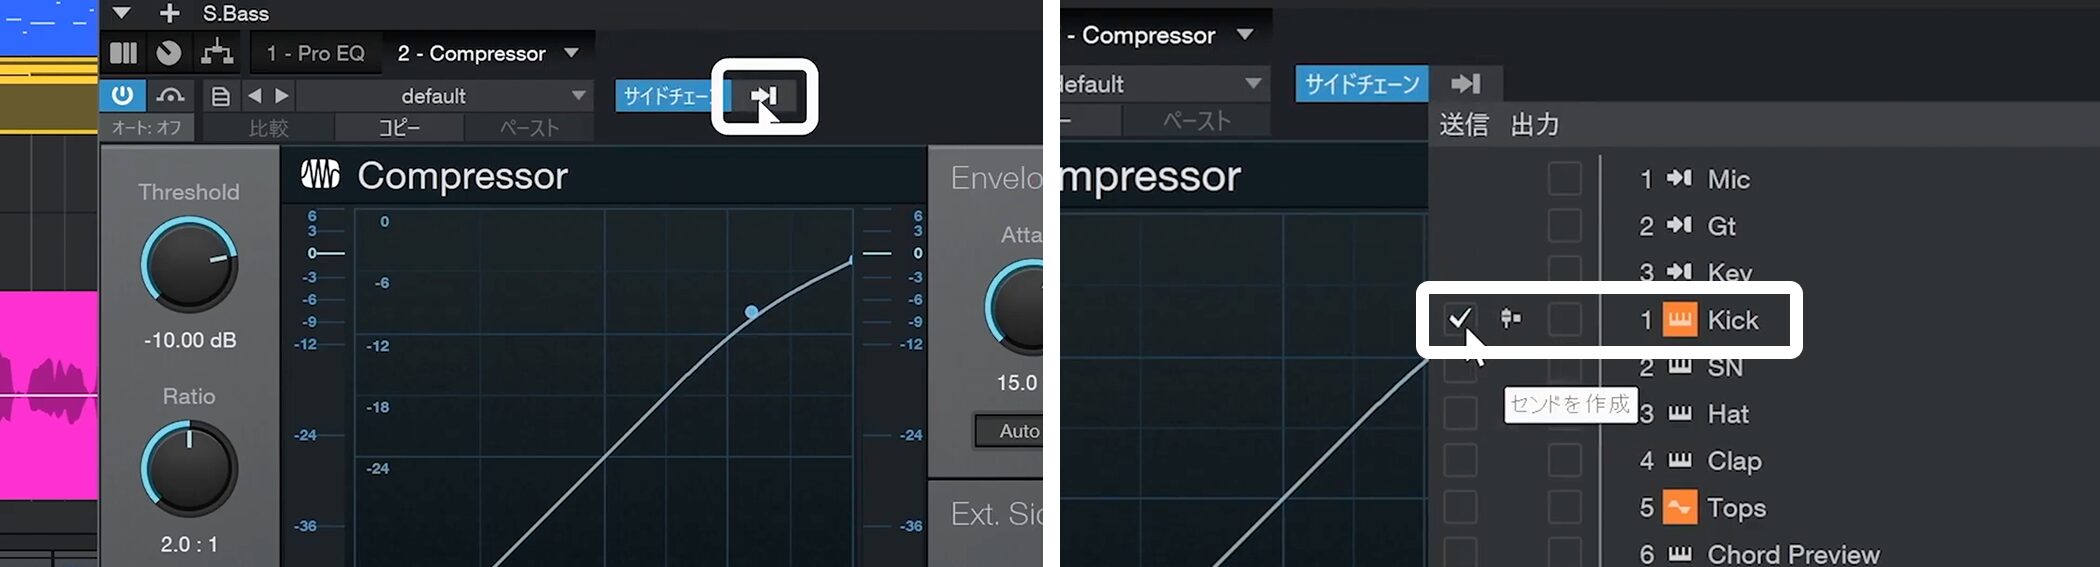
Click the arrow to its right to choose which track will supply the trigger.
Because we want the kick as the trigger, check the send for Kick.
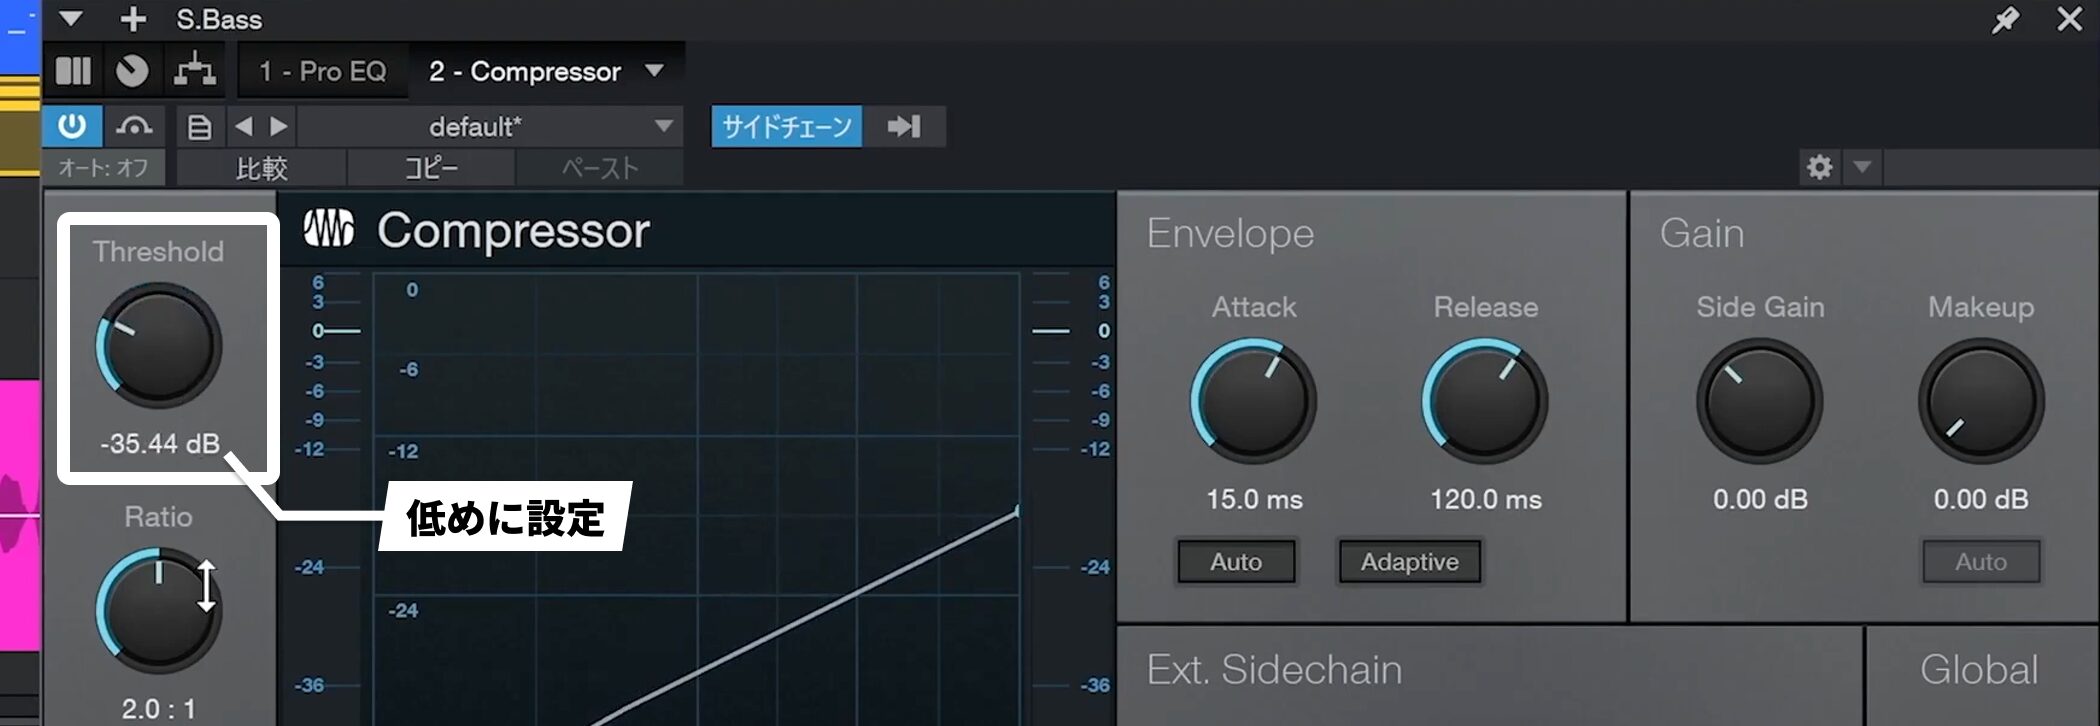
Lowering Threshold causes the bass to drop each time the kick plays and return to its original level afterward.
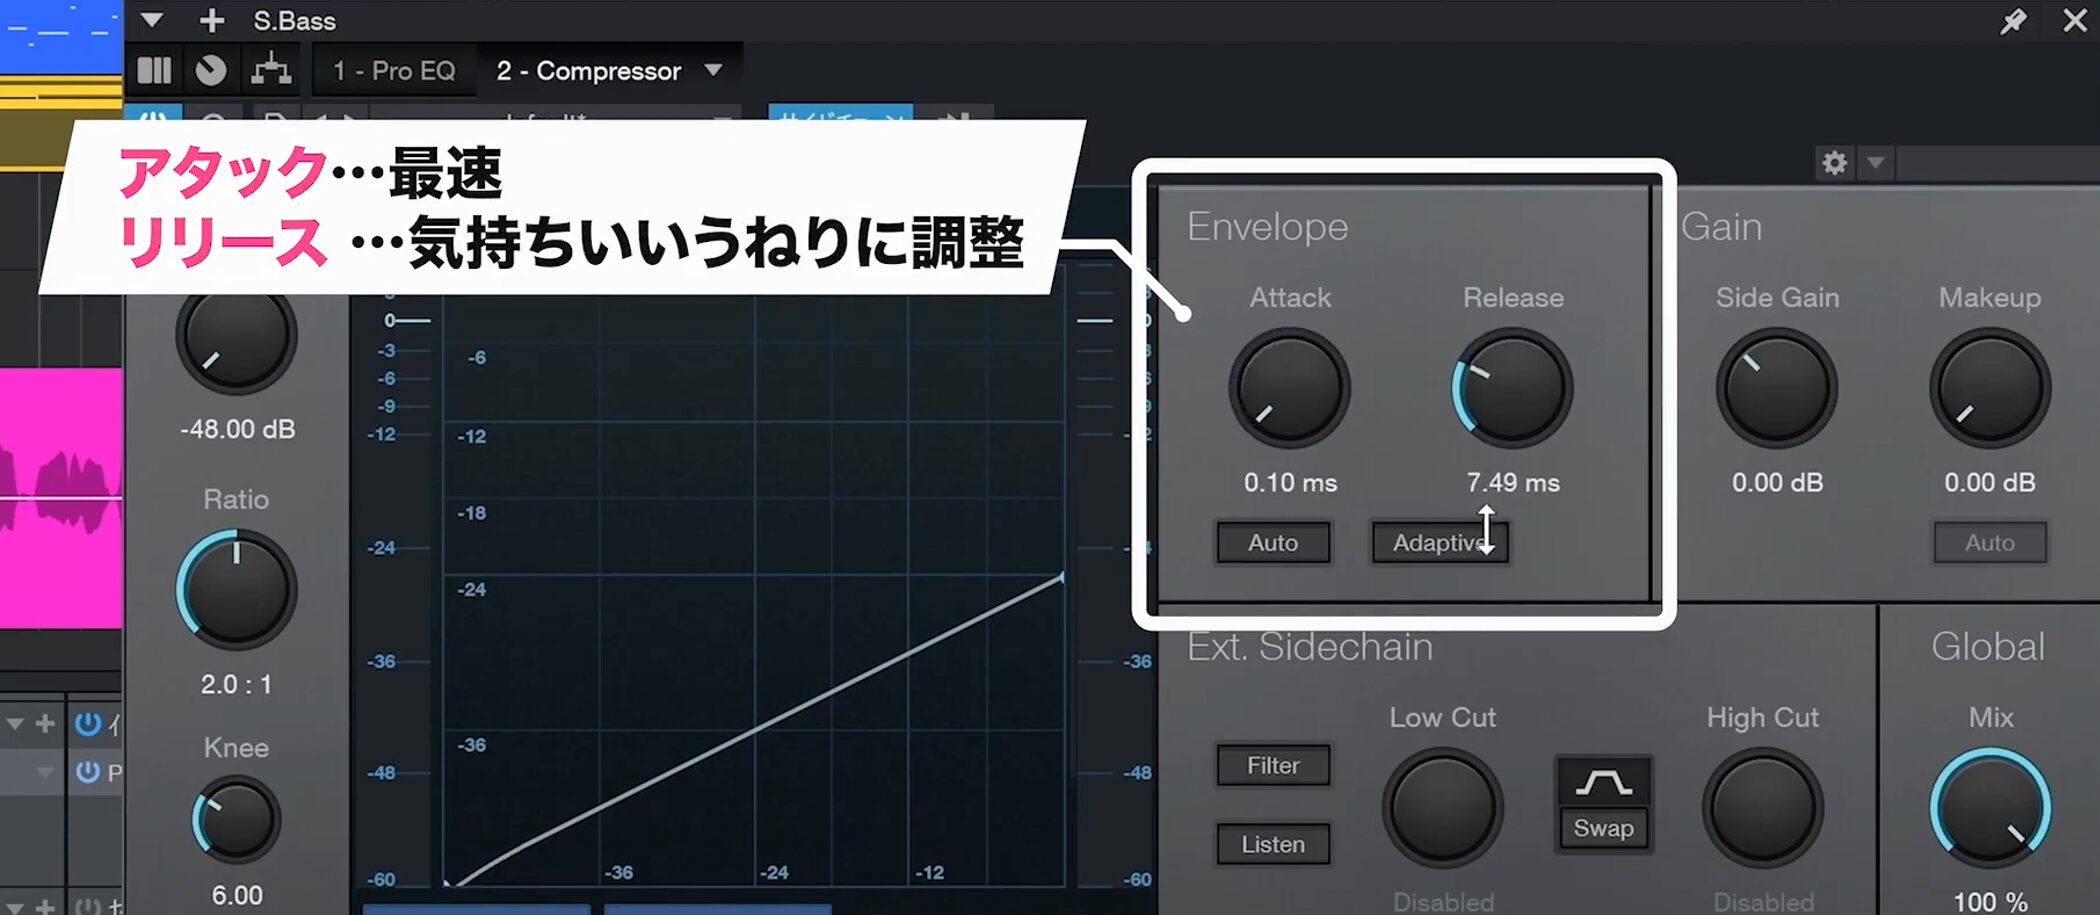
As a starting point, set Attack to its fastest value under Envelope, then fine-tune Release until the pumping feels right.
Create a bus channel
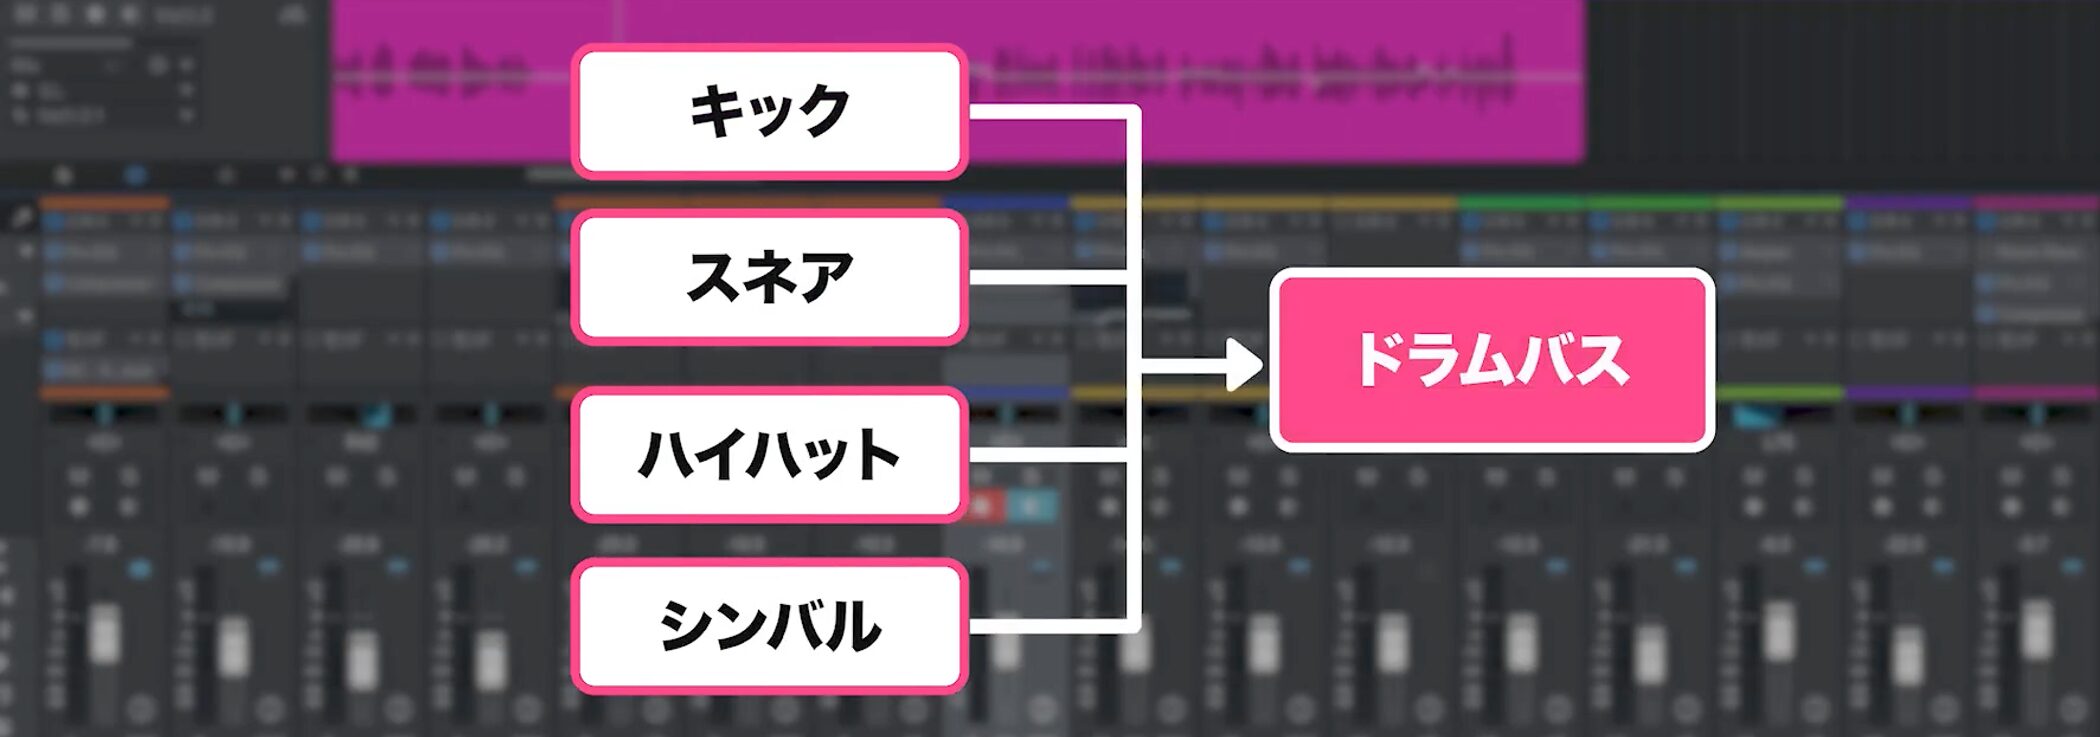
A bus can group multiple channels, such as the kick, snare, hats, and cymbals of a drum kit.
It resembles a folder track but offers more detailed control over the sound and applying effects to the group.
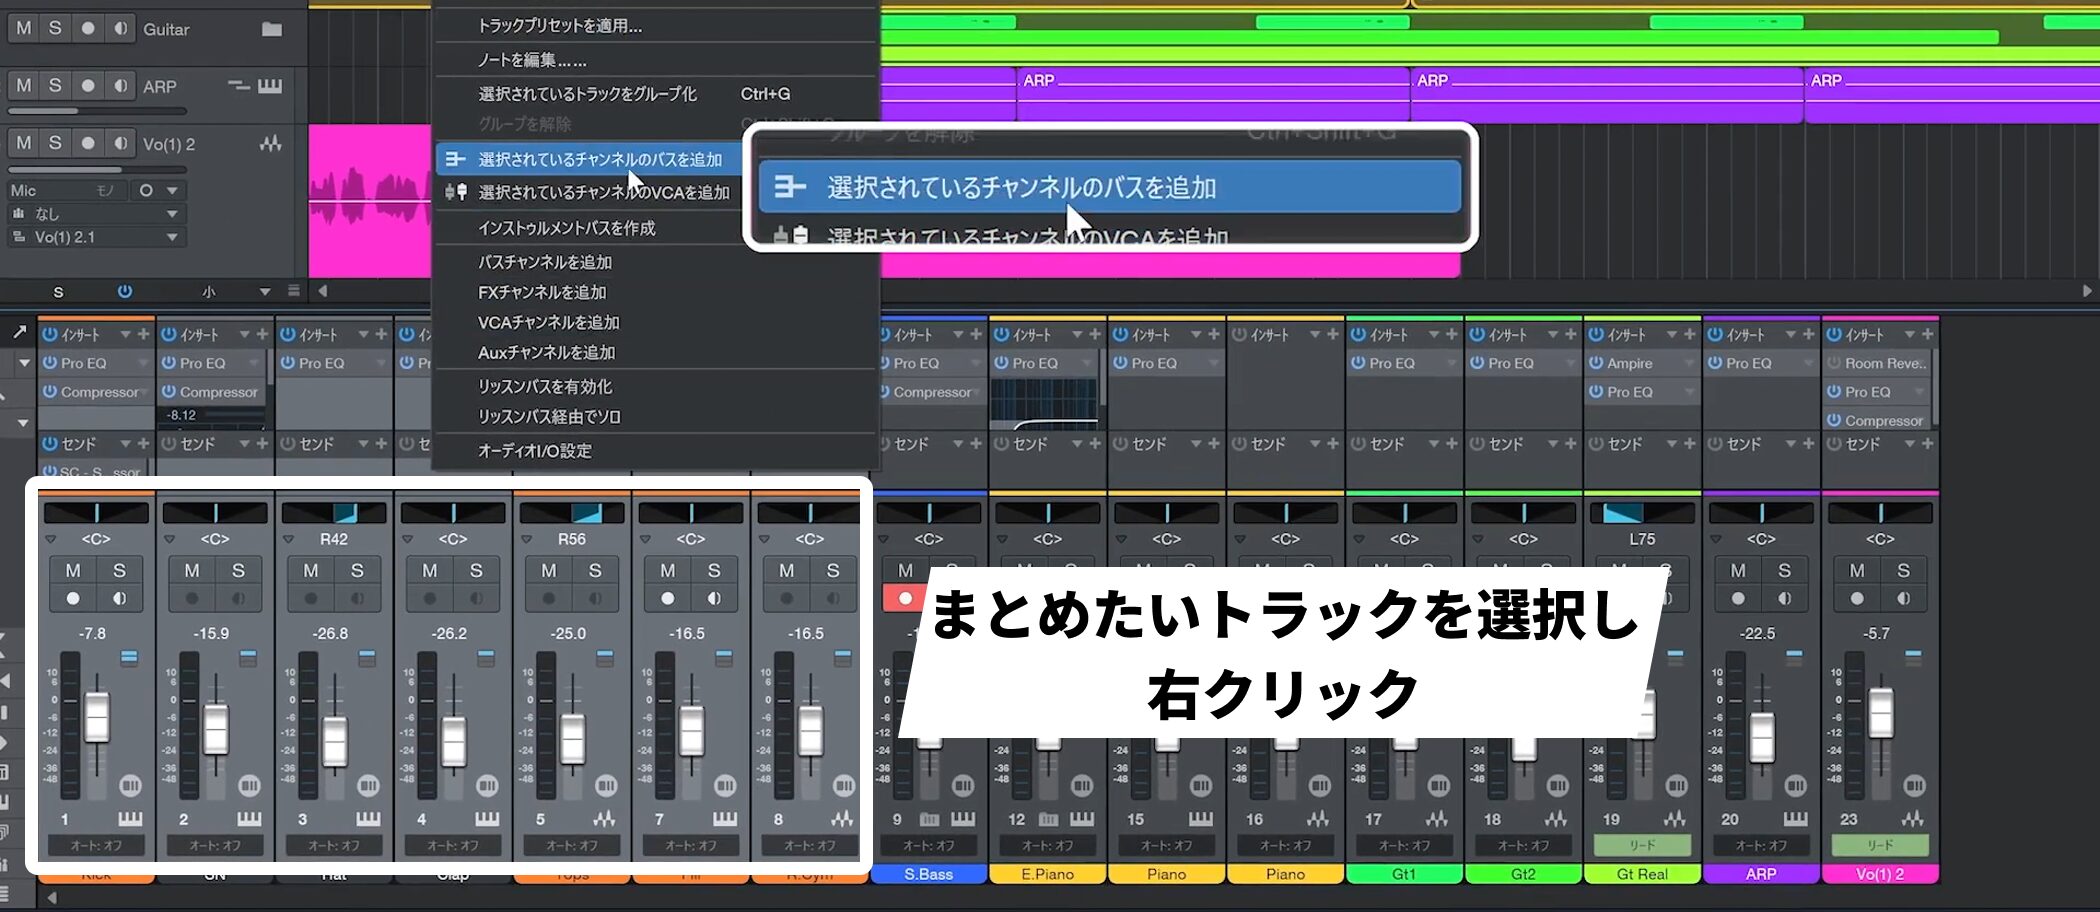
Select all the tracks you want to group and right-click an empty area in the track section.
Choose Add Bus for Selected Channels from the menu.
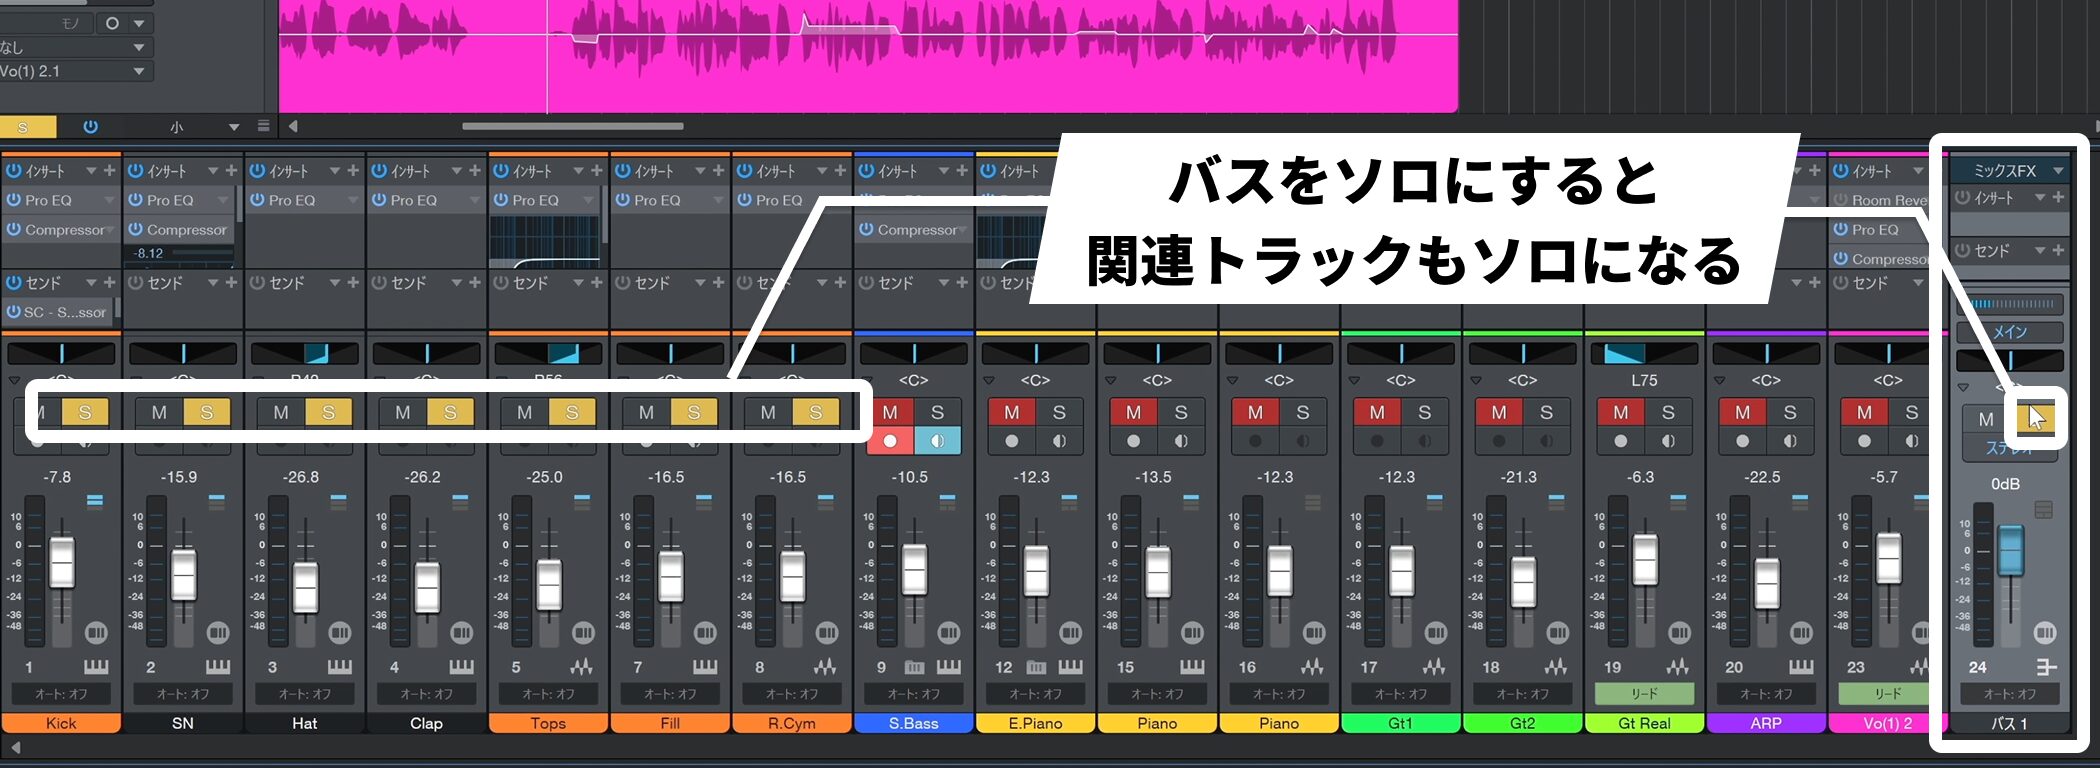
A channel with a blue fader—the bus—appears on the right.
Its Solo button lets you hear only the tracks routed to that bus.
Lower the bus fader during playback to adjust the level of the whole drum group together.
You can also group backing vocals, guitars, and other related parts to make final balancing easier.
Apply reverb with an FX channel
Spatial effects such as reverb can be used efficiently with an FX channel.
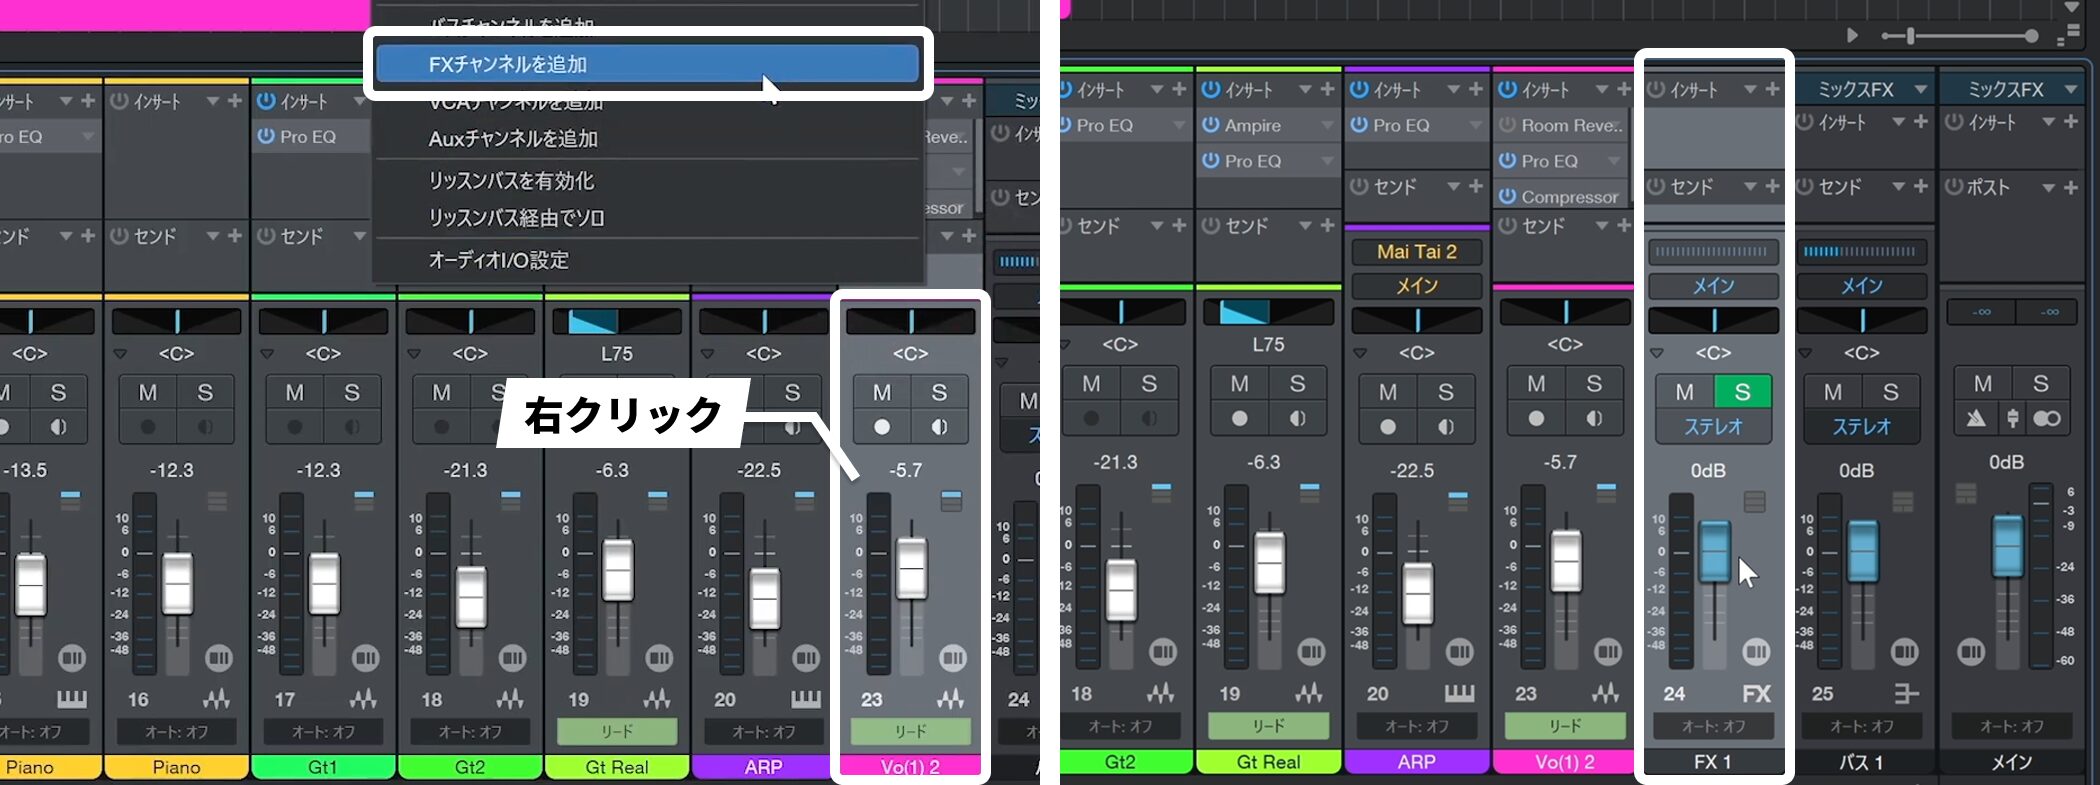
Right-click an empty area of the mixer and choose Add FX Channel.
This creates an FX channel.
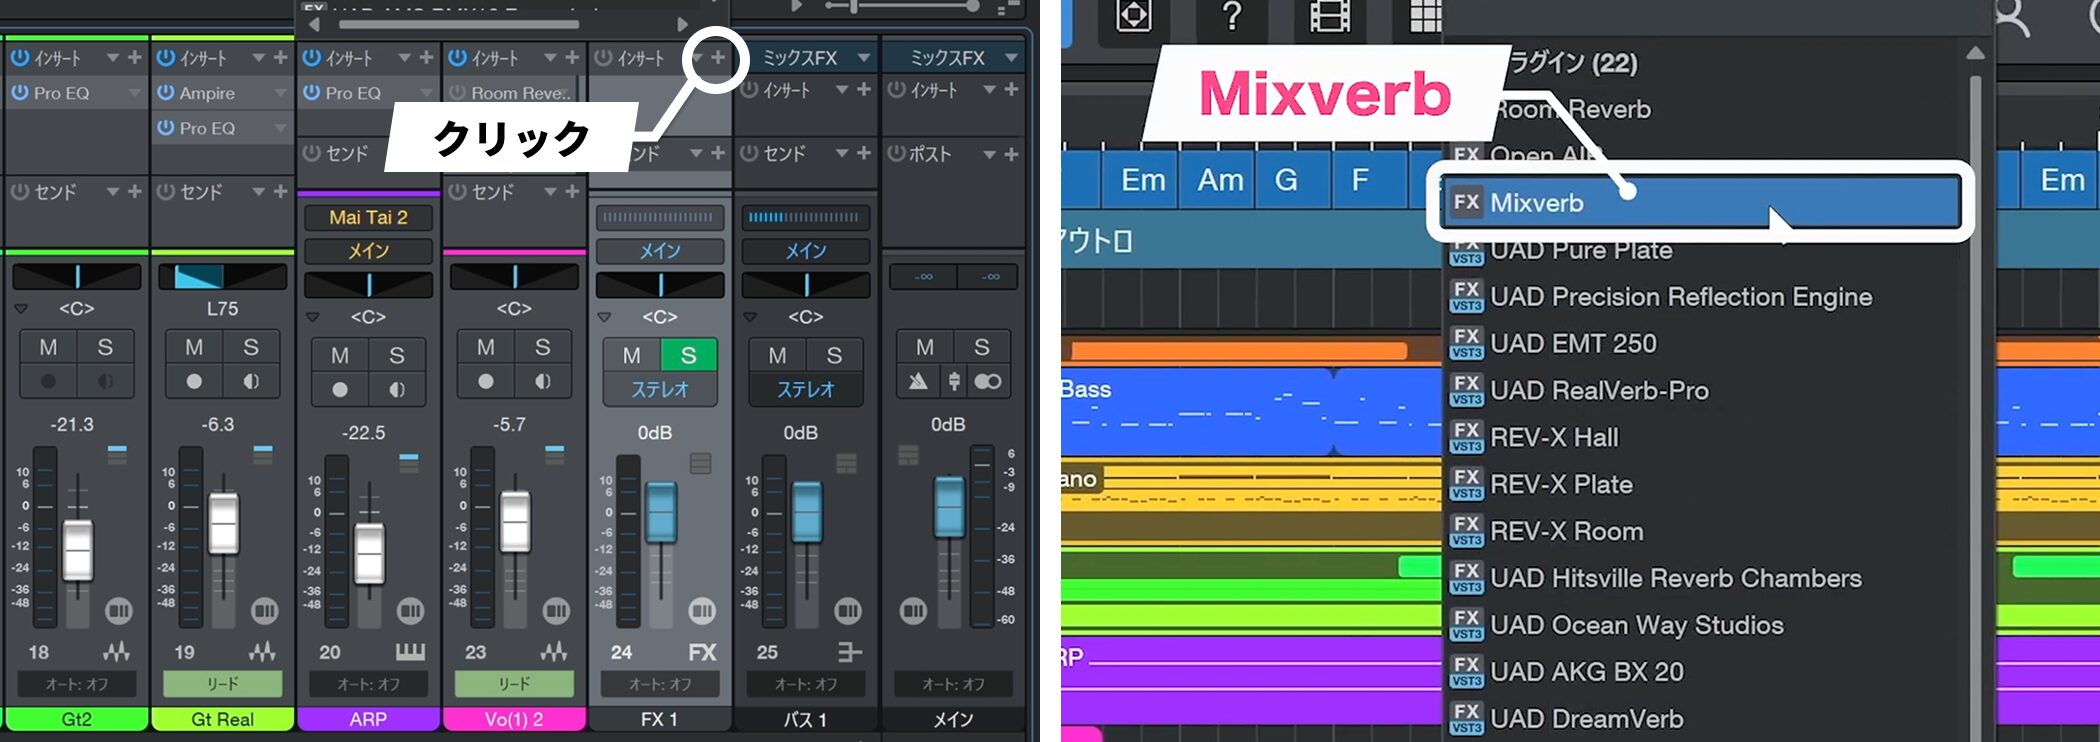
Insert a reverb into the FX channel.
Here we use the standard Mixverb.
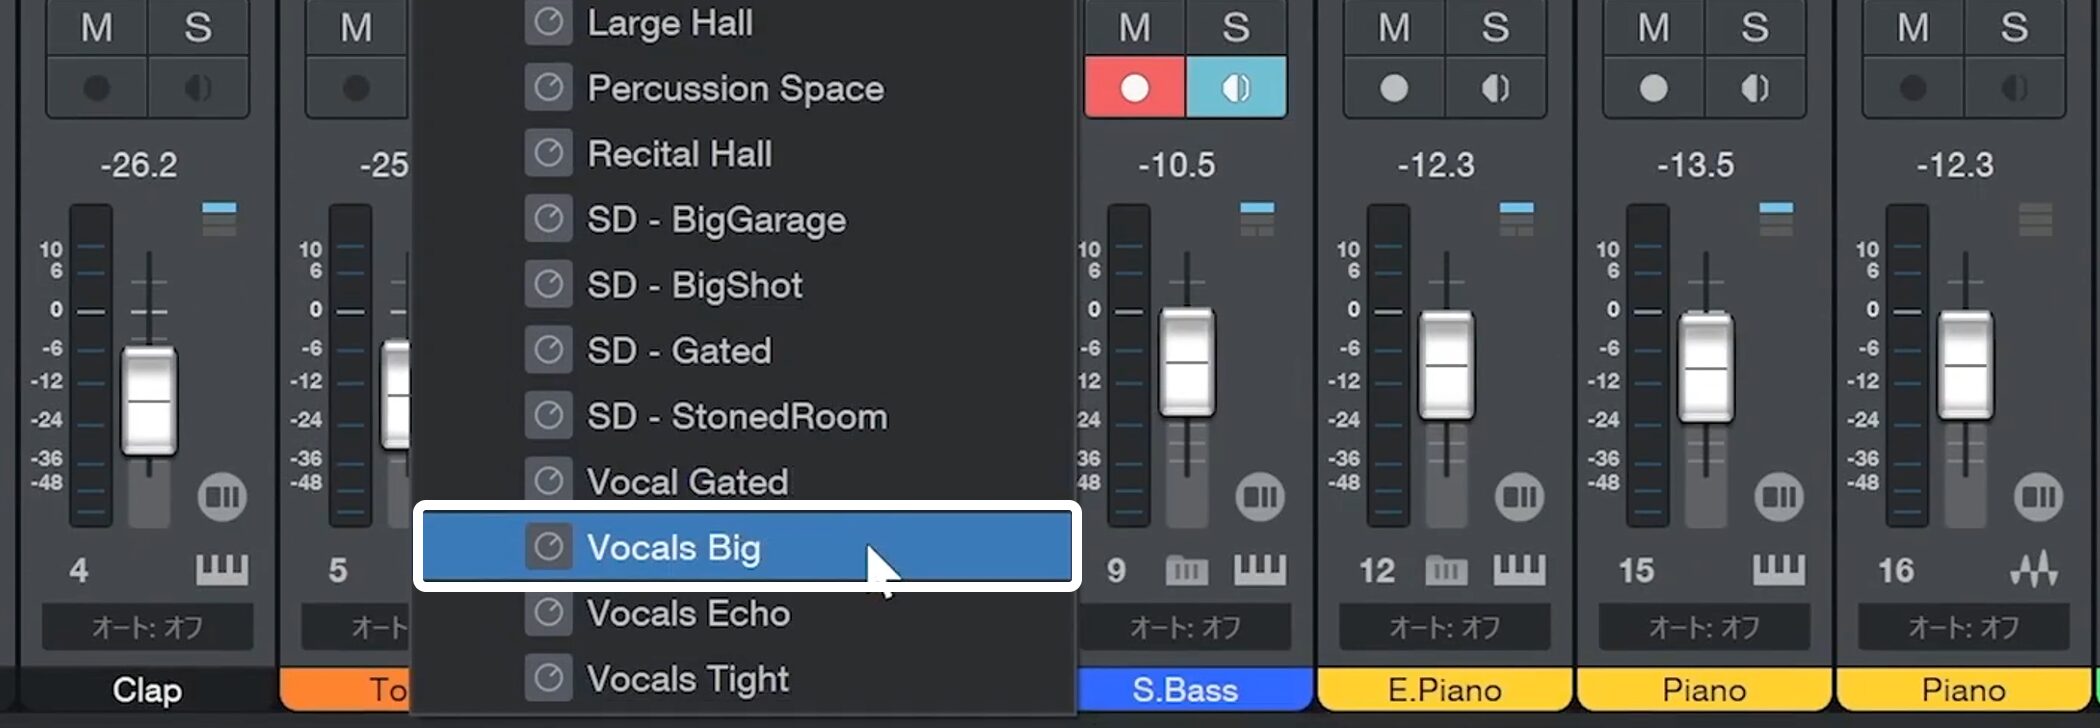
For a vocal, choose a suitable vocal preset and adjust the reverb.
Connect tracks to the FX channel with sends
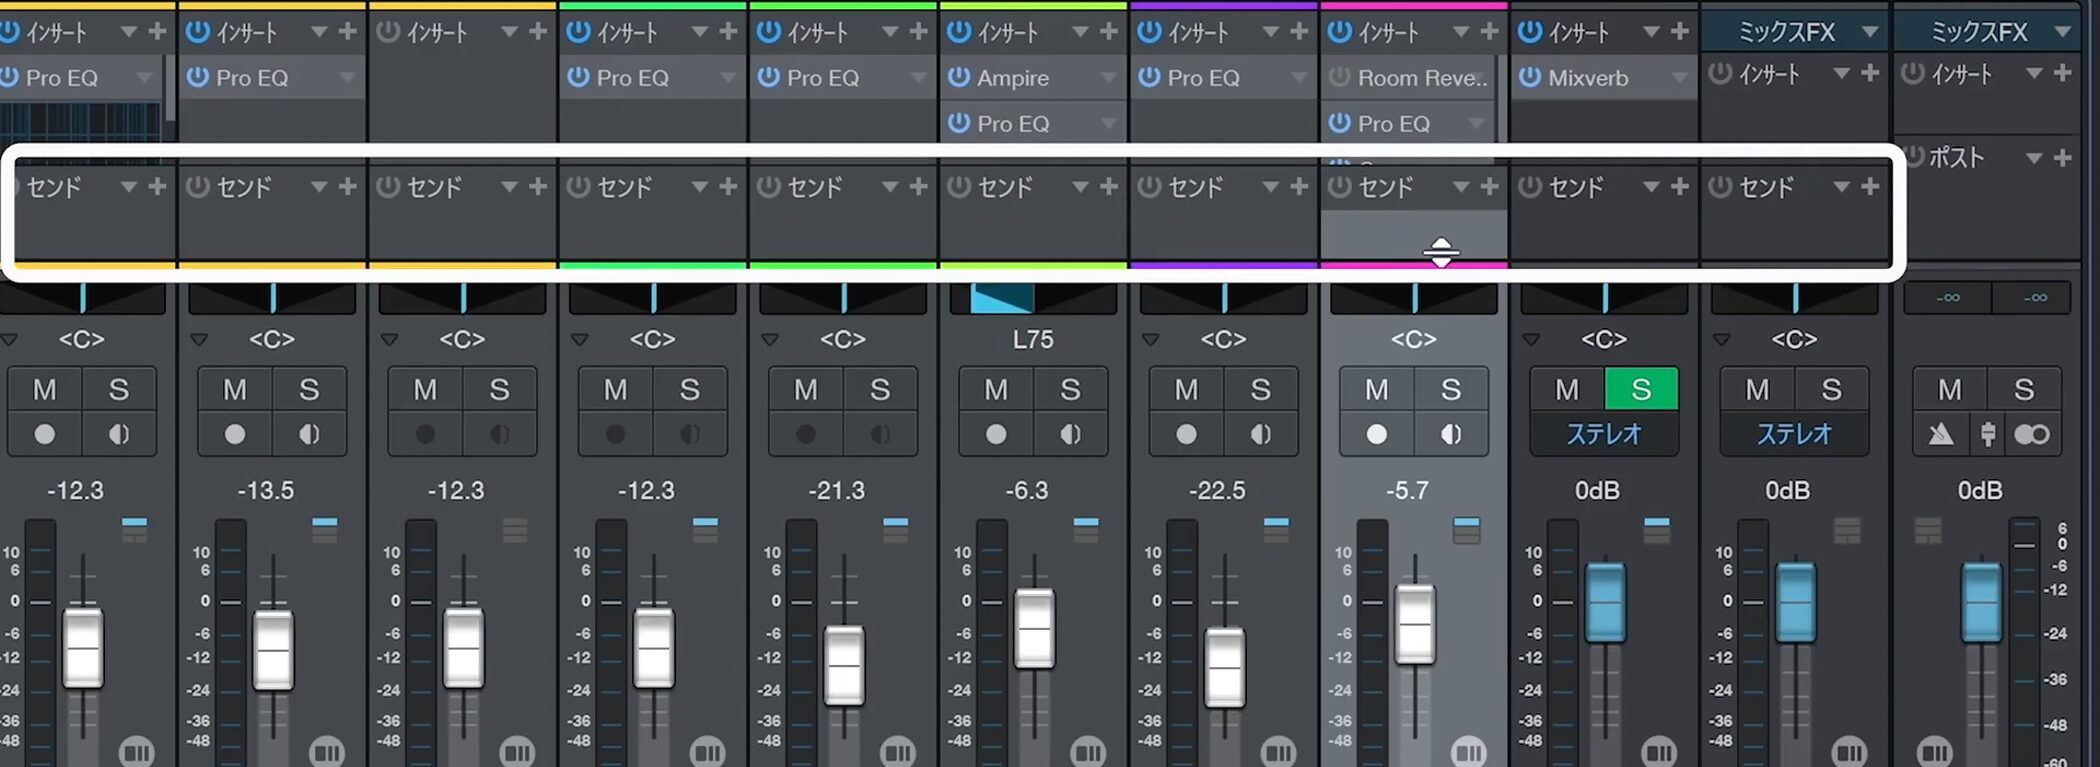
At this point, the FX channel is not yet connected to the vocal.
Use each channel’s sends to route signal to the FX channel.
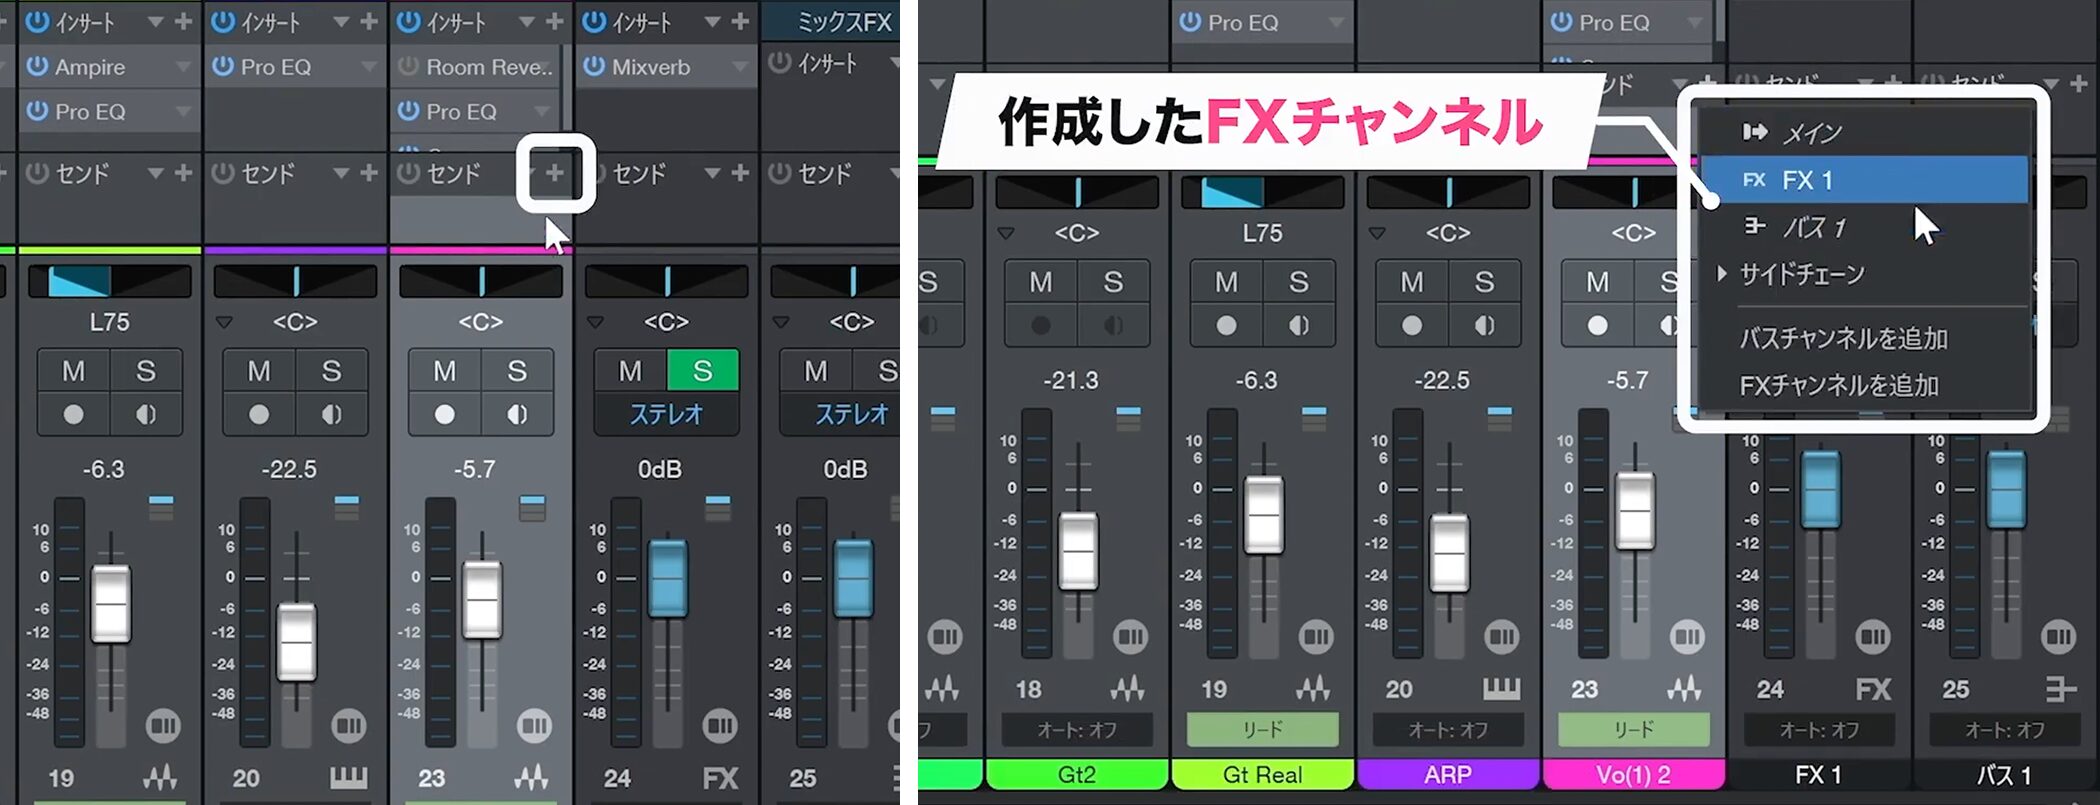
Click the plus button in the Sends section of the track you want to process—the vocal in this example.
Select FX1, the FX channel you created, from the menu.
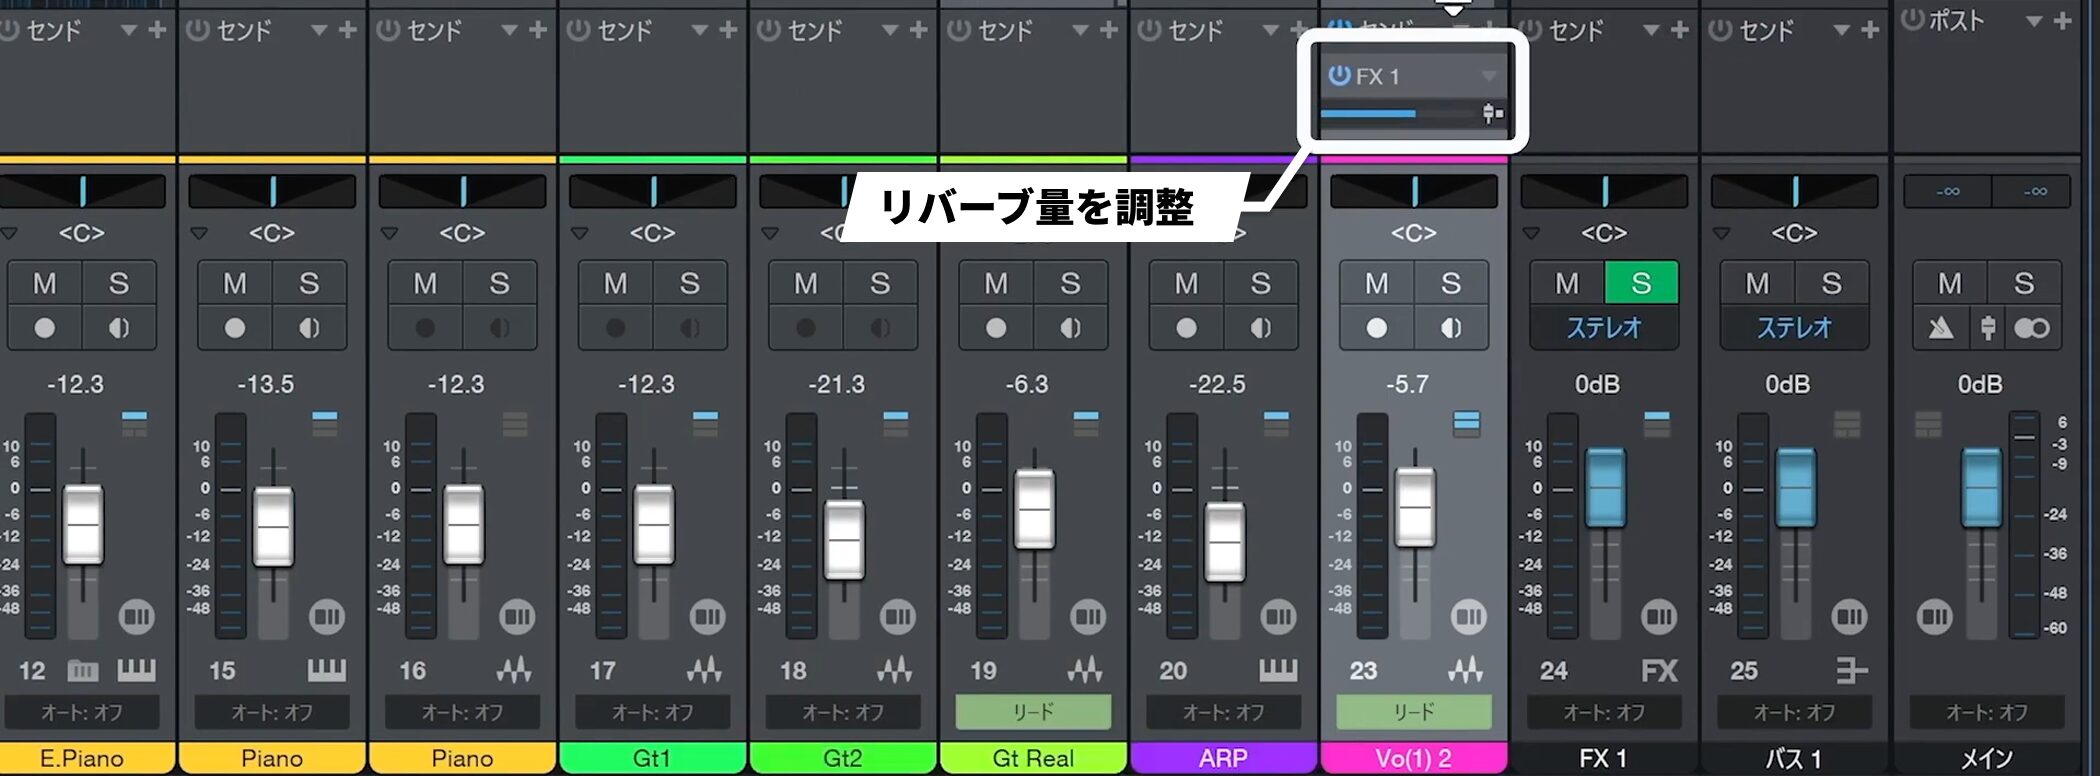
Raise the slider to adjust the amount of reverb.
FX channel mix setting
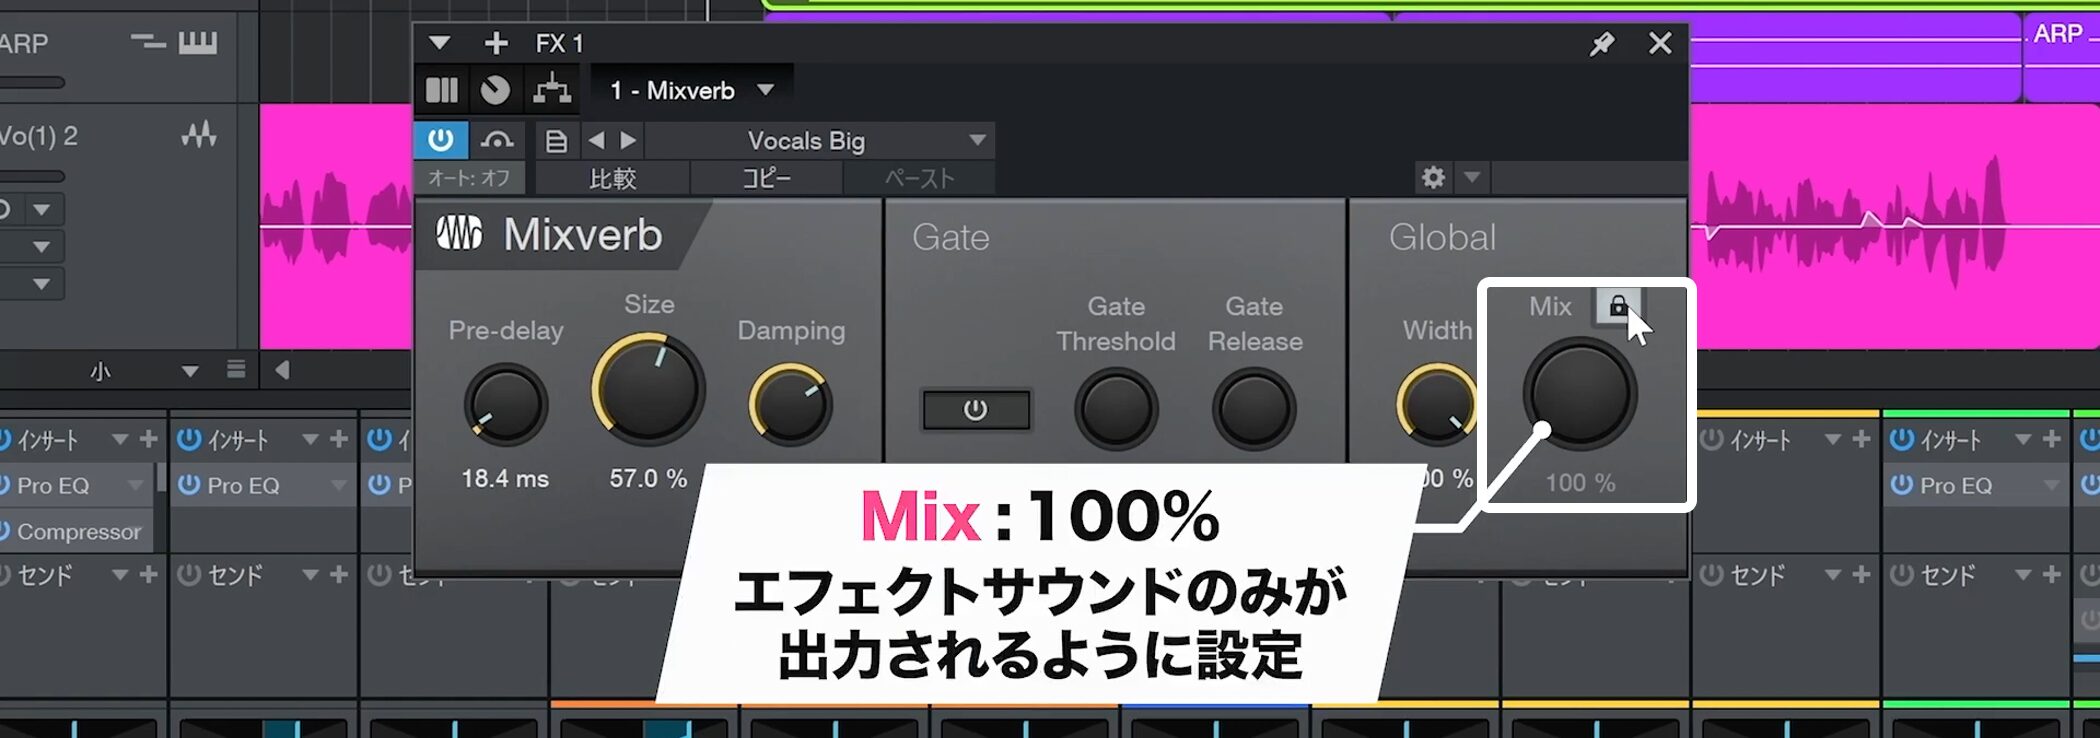
Pay attention to the reverb’s Mix knob.
Because the FX channel supplies the effect signal, set Mix to 100% wet as a general starting point.
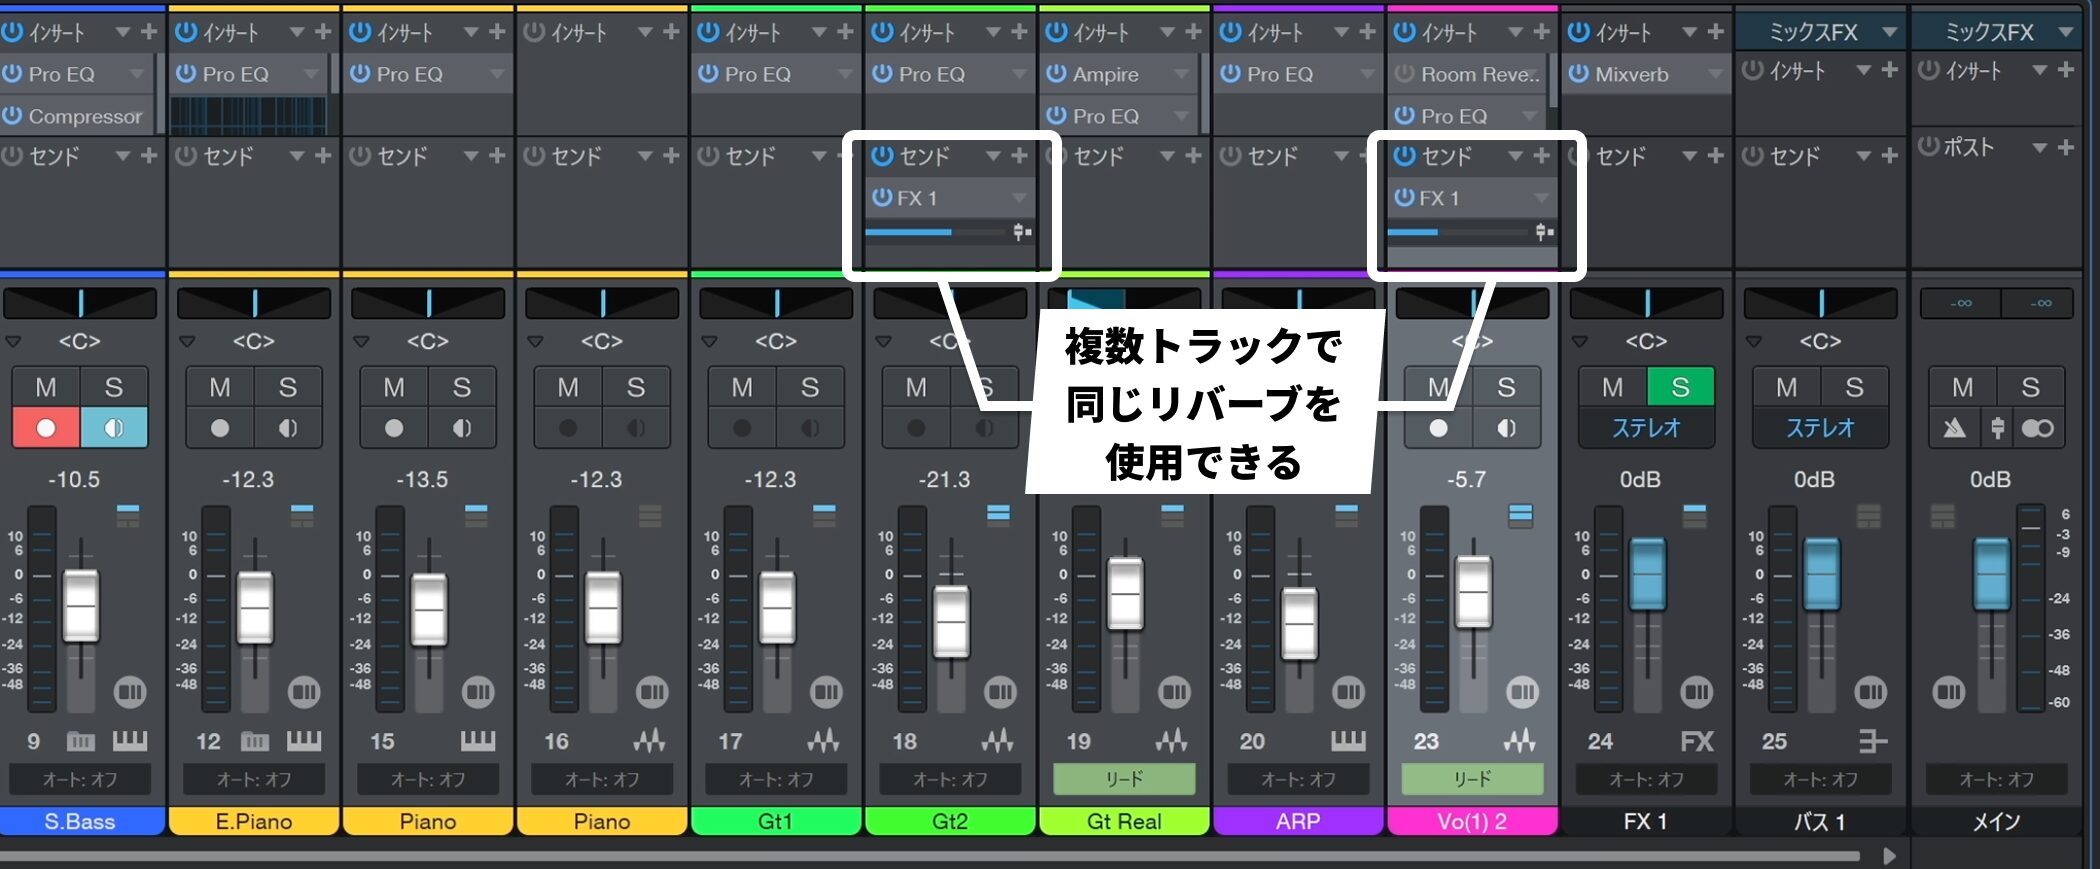
Another benefit of an FX channel is that other tracks can use the same reverb.
You do not need a separate reverb on every track, making it easier to save CPU and manage the sound.
Automate the send level
Reverb that feels too strong in a verse may sound just right in a chorus once other tracks enter.
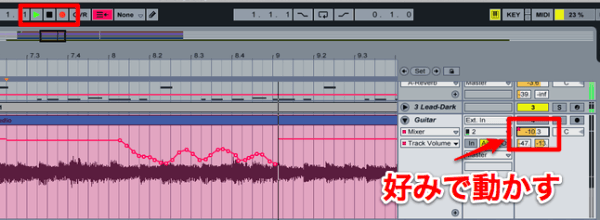
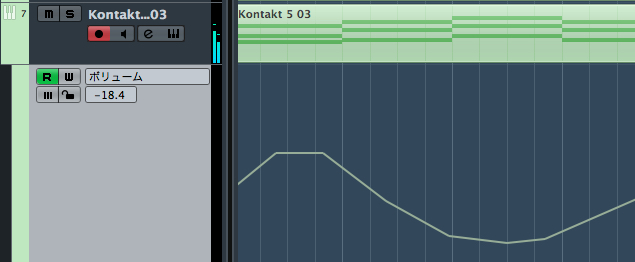
In that case, use automation to adjust the send level for each section.
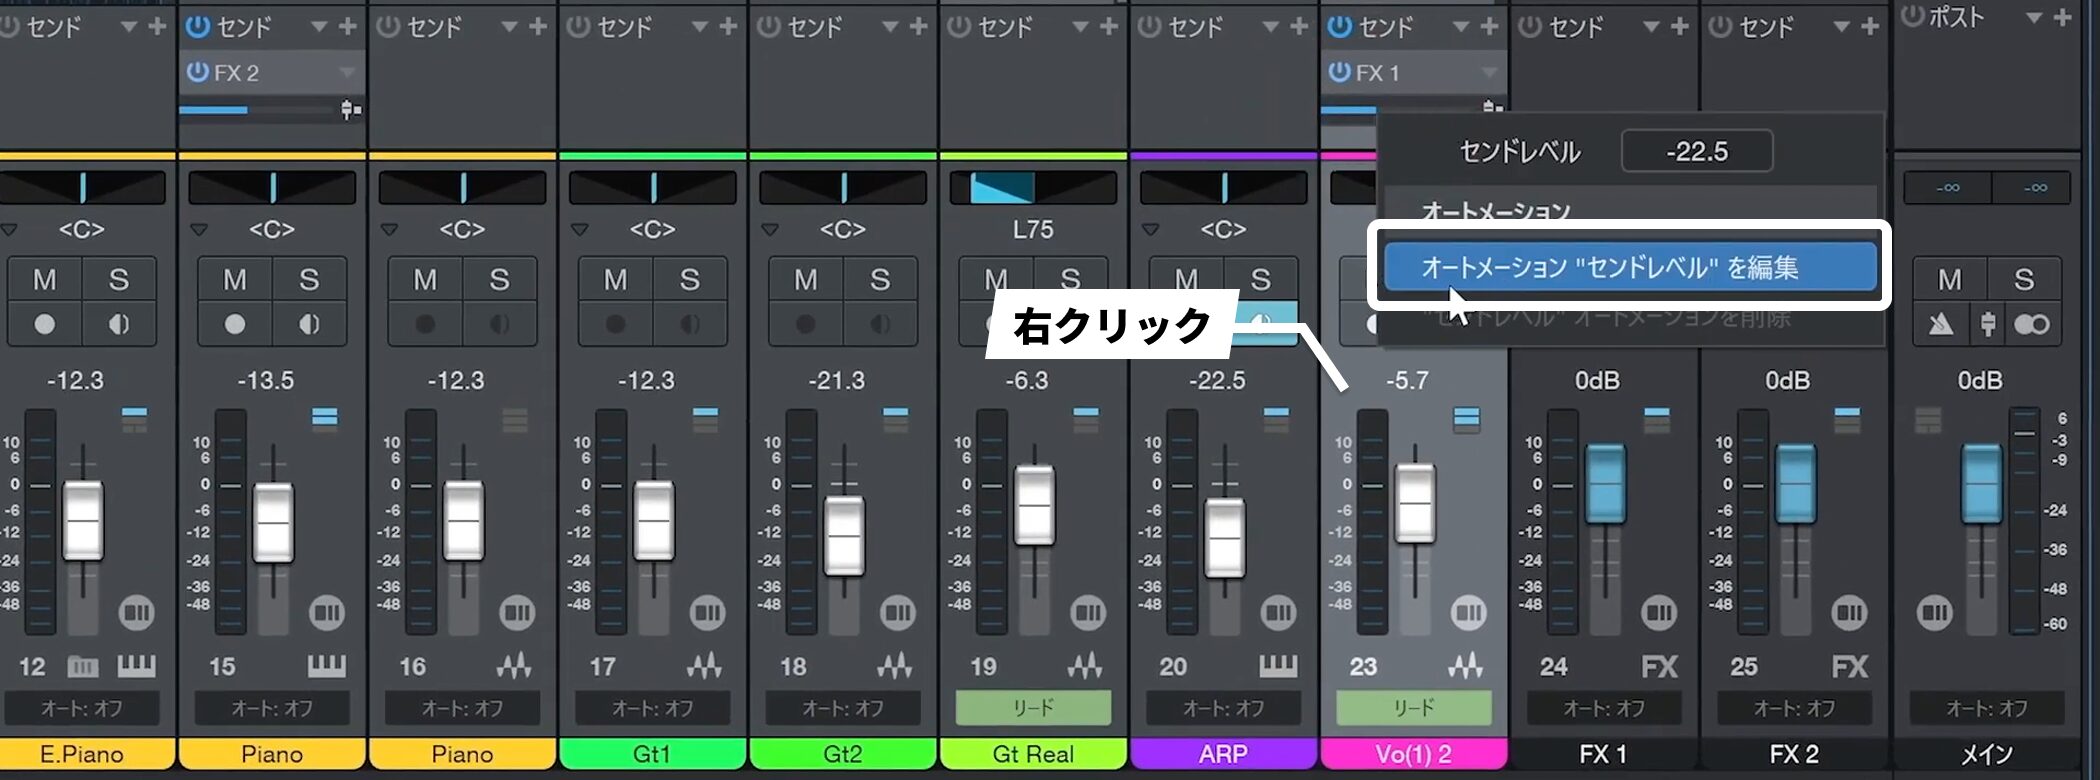
Right-click the parameter and choose Edit Automation “Send Level”.
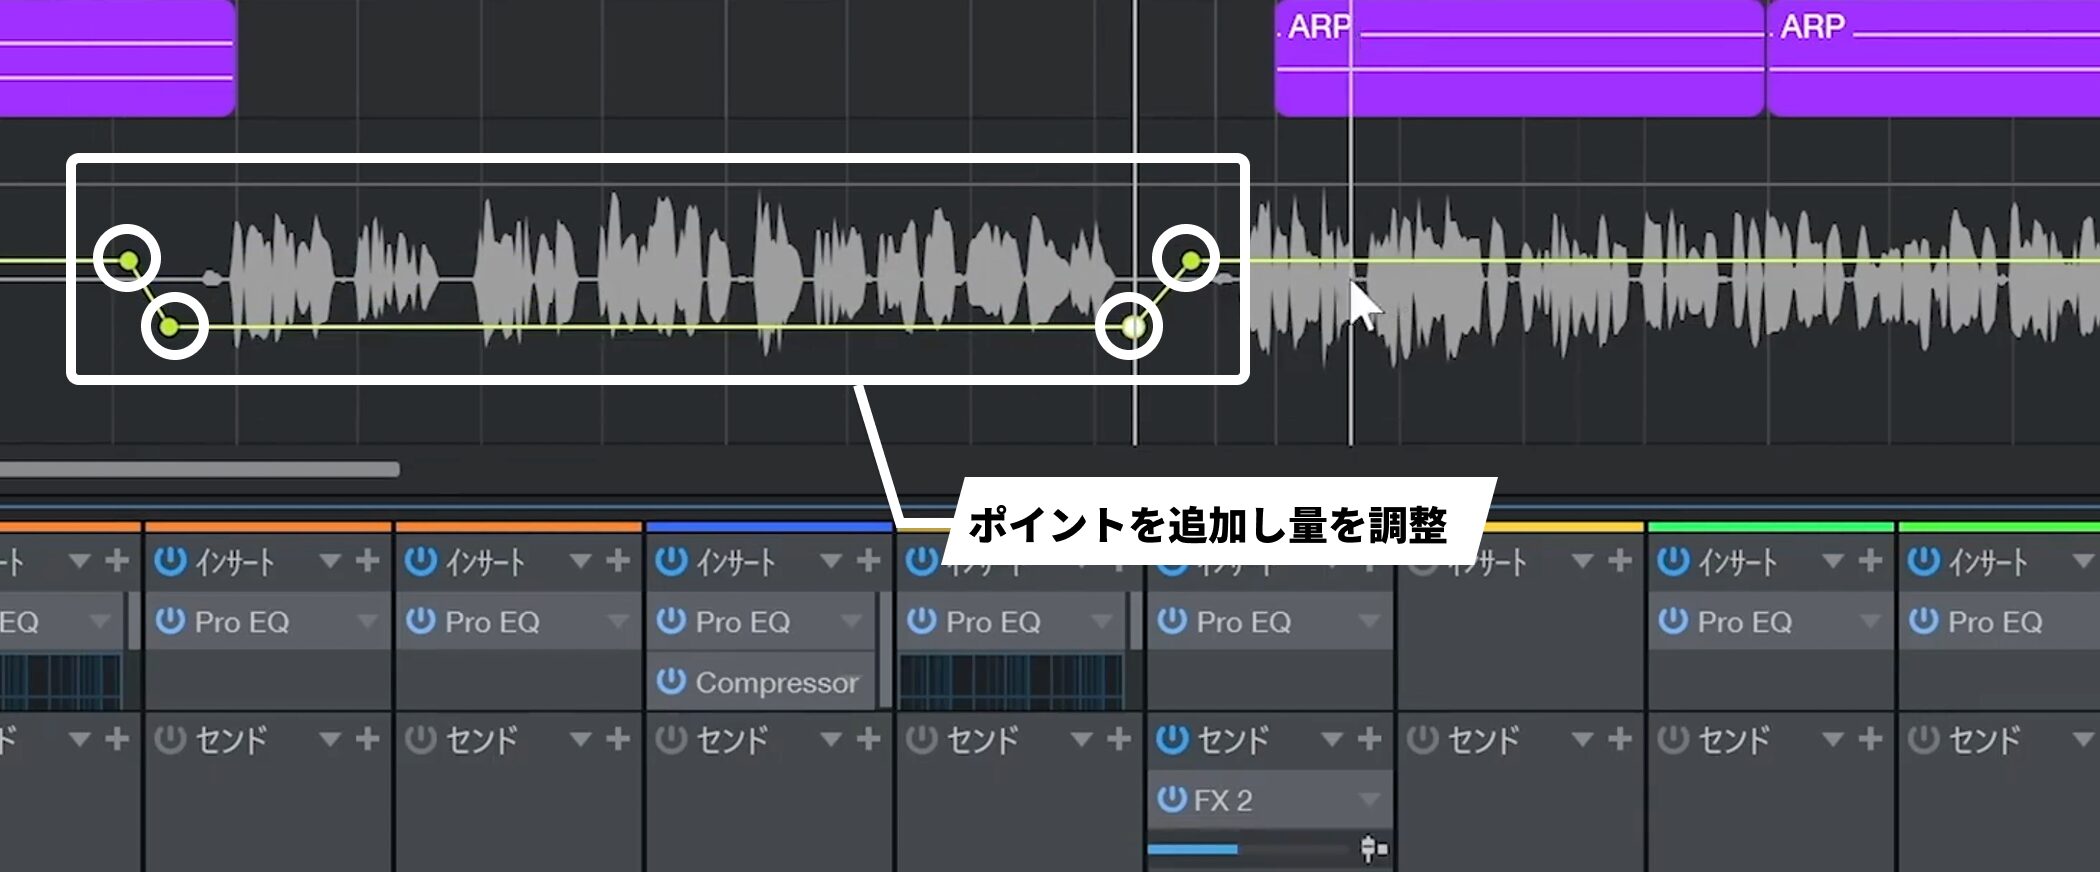
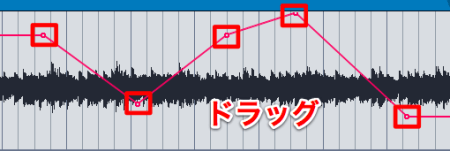
First place points at the outer edges, then add points inside them and adjust the level.
This lowers the reverb slightly in the verse and restores it in the chorus.
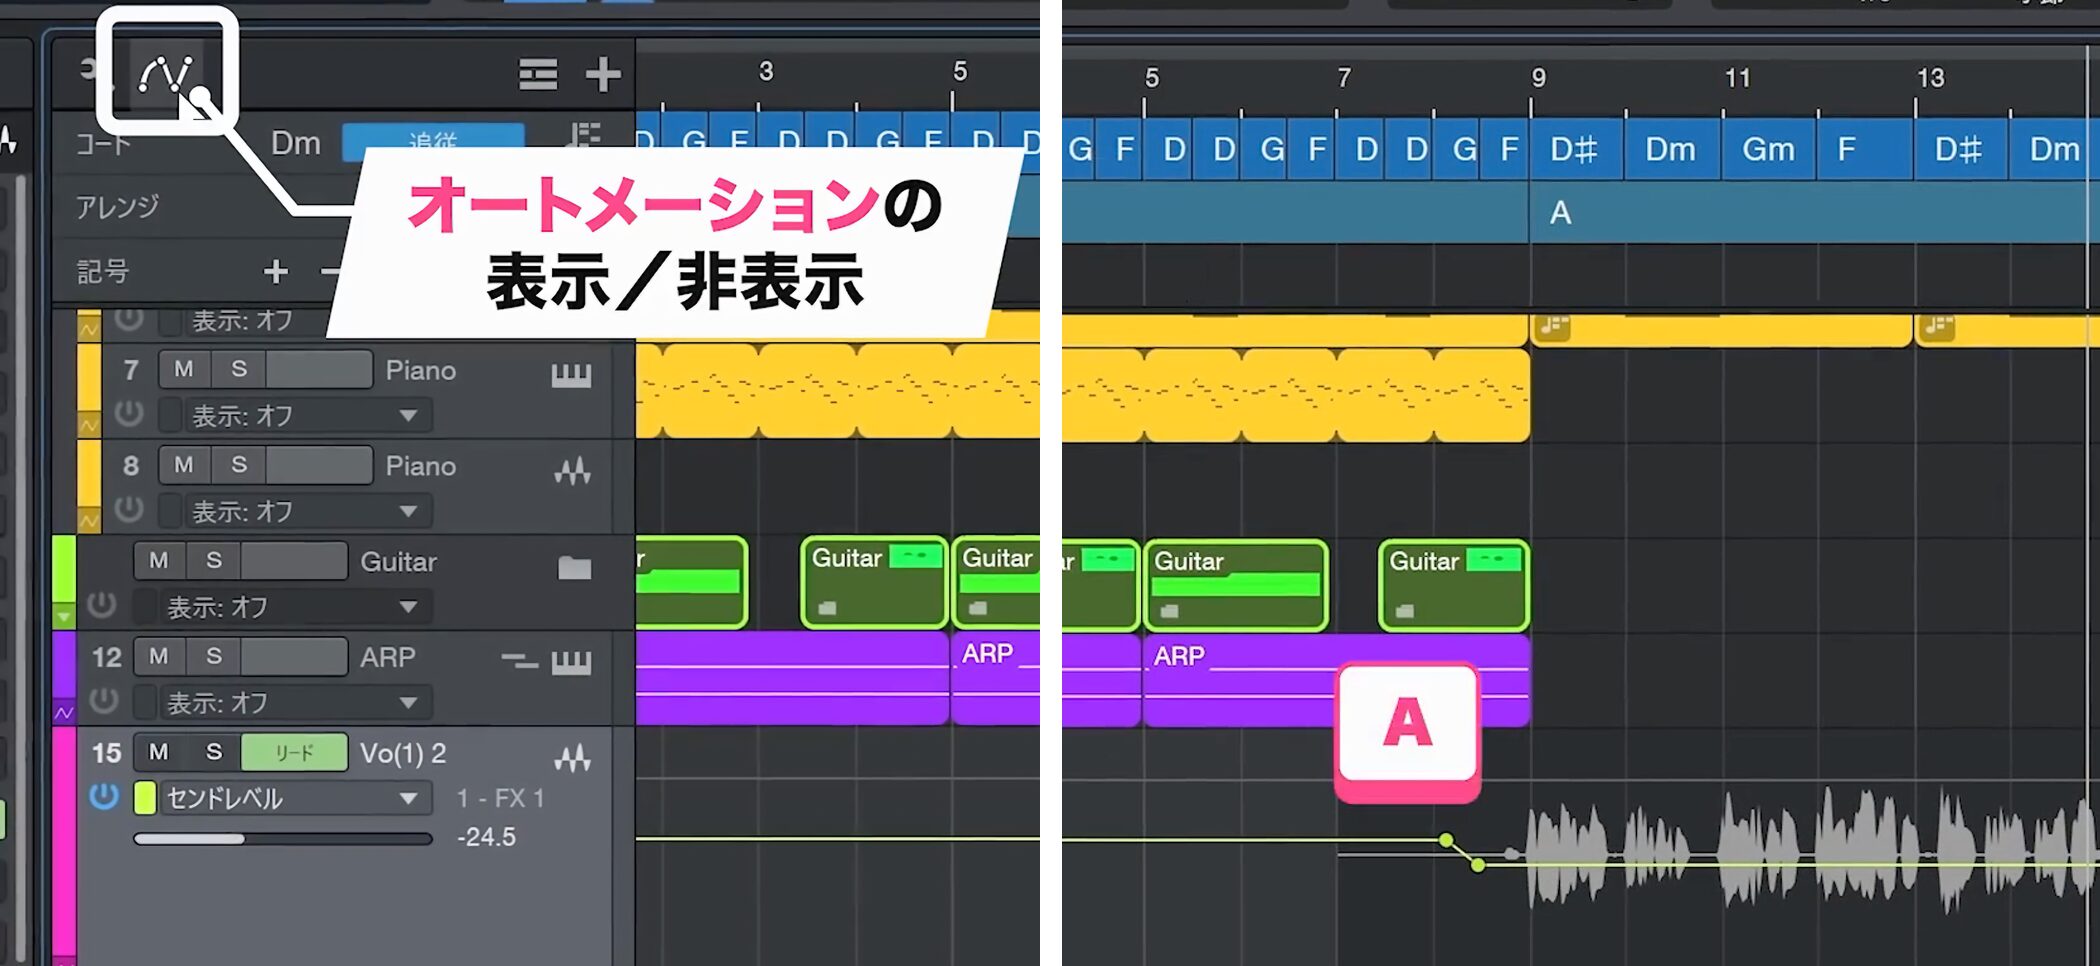
Use the button at the upper left to show or hide automation.
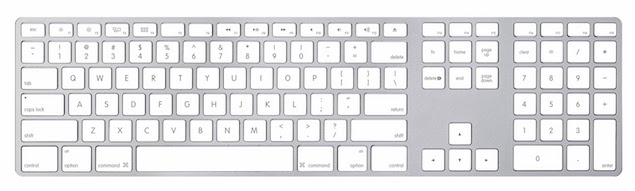
You can also toggle it with the A keyboard shortcut.
Automation can flexibly control volume, pan, effect bypass, and more, as well as send levels.
Frequently asked questions
Q1. How should I organize tracks before mixing?
Disable and hide unused tracks, then group tracks by category in folders. Color-coding makes tracks easier to find across songs; disabling unused tracks can also reduce CPU load.
Q2. Which track should I use as a volume reference?
For rhythm-driven pop or EDM, try using the kick. Set it so the master meter reads around -10 dB, then balance the bass and other important parts against it.
Q3. How should I approach panning?
The kick, bass, and lead vocal are often centered. Other mid- and high-frequency instruments can be placed left or right to make room for the main parts and create width.
Q4. What if I do not know how to set EQ or compression?
Try the DAW’s presets for the instrument or task. Compare the processed and unprocessed sound with the bypass button, then fine-tune the settings as needed.
NEW ARTICLES
Latest English Articles