

「32bit float」basics (a must!)
Understand and utilizing「32bit float」
When producing music on a DAW,「32bit float」is a term you are sure to have heard at least once.
Because of the name, you may think「higher bit rate = better sound」,
but this isn’t necessarily the use for 32bit float.
In this article, we will take a look at the characteristics of 32bit float, and how to use it in production.
This knowledge is a must for production and mixing processes, so please give it a read!
32bit float – Tutorial video
What is「32bit float internal processing」?
When first hearing 32bit float you may think of
the bit rate in a DAW production.
Another term we want you to keep in mind is used in DAWs,
called「32bit float internal processing」.

First, keep in mind that these are 2 different things.
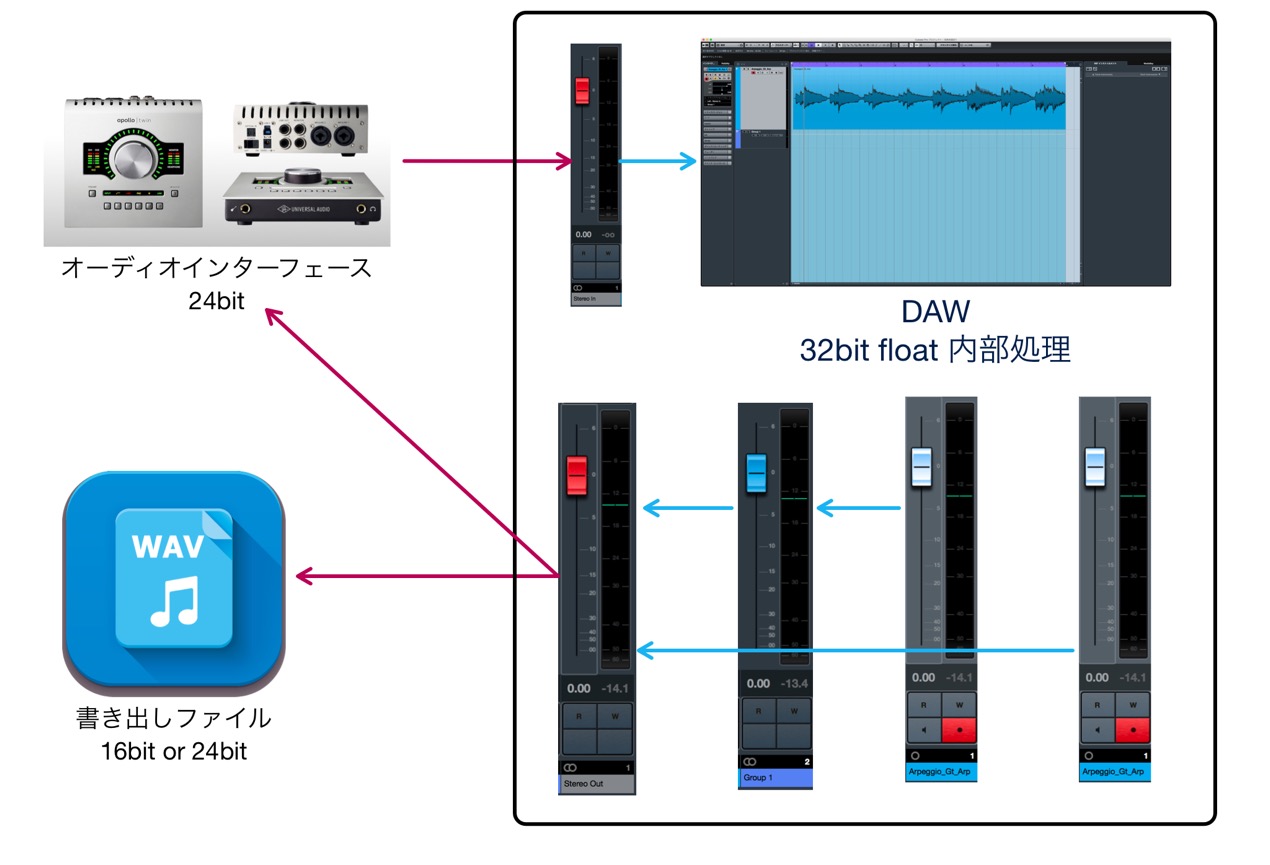
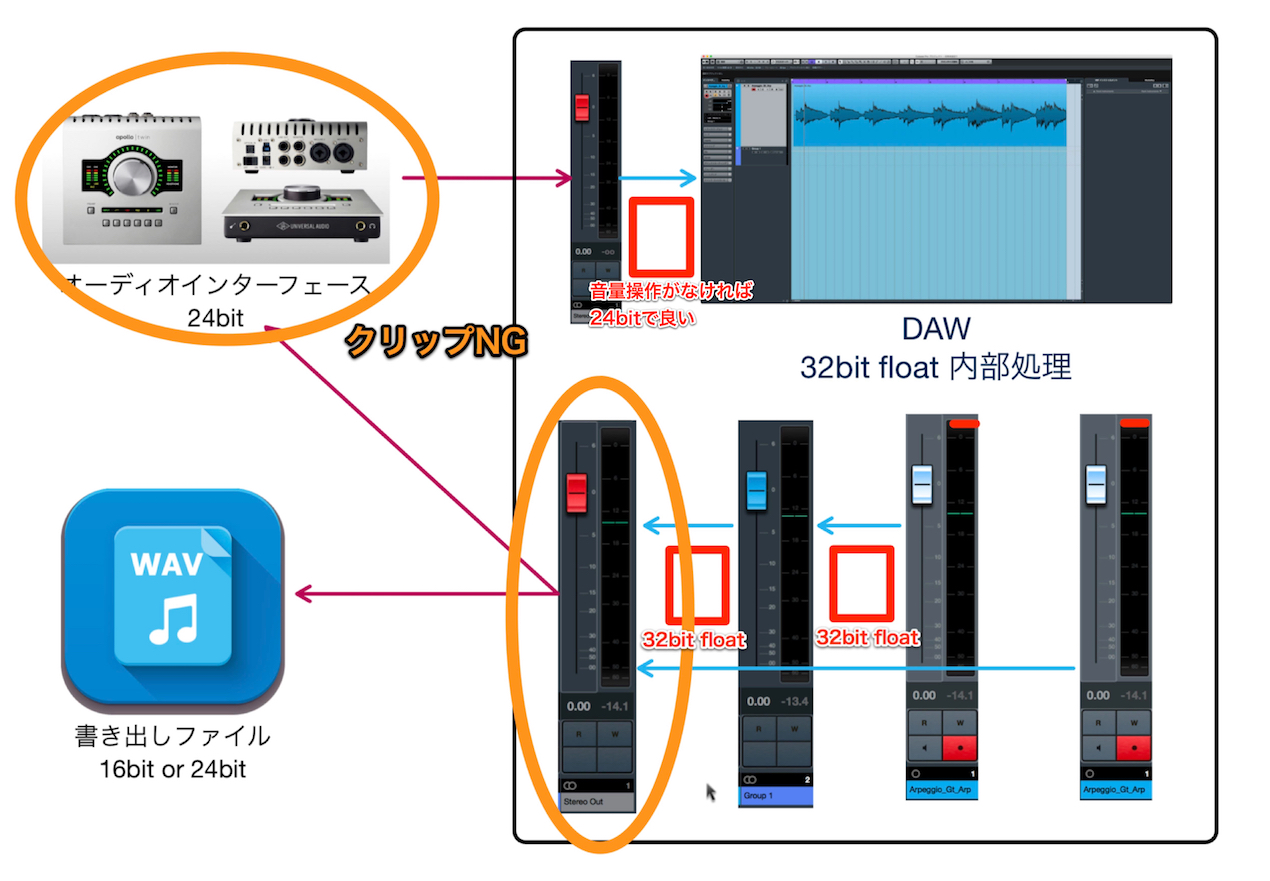
For most 32bit float internal processing on DAWs,
regardless of bit rate, it is being internally processed at 32bit float.
The 2 biggest factors of 32bit float internal processing are as follows:
- Even if each tracks levels go over, as long as the level doesn’t go over in the master track, there won’t be any clipping.
- Even when individual tracks are lowered in volume, there’s hardly any decrease in sound quality
The benefit of 32bit float internal processing is the ability to do these without much set up.
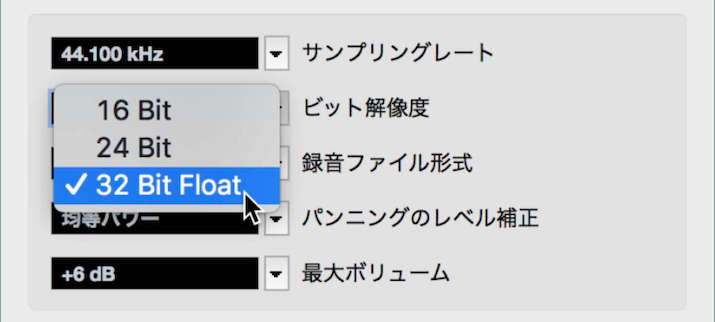
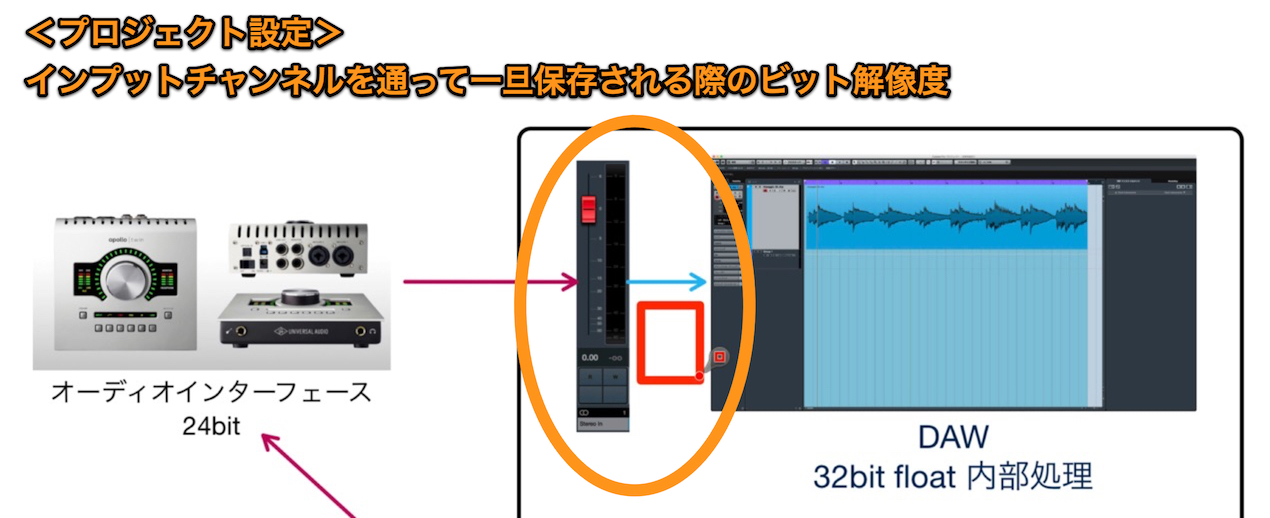
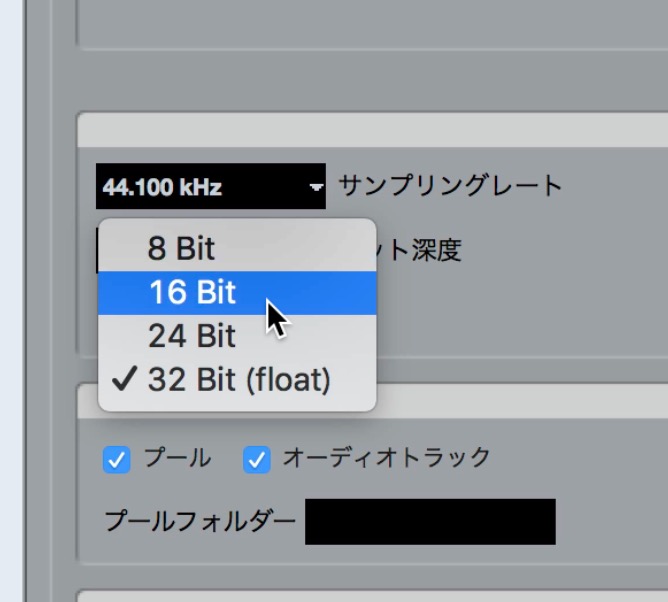
The purpose of setting bit resolution in projects
Now, the purpose of selecting bit resolution in projects, is to
select the bit resolution of sounds entering and being saved via the input channel.
You may feel keeping it set constantly to 32bit float is best, but this isn’t necessarily the case.
If you aren’t adjusting volume on the input channel, there isn’t much purpose to using 32bit float, and doesn’t differ much from 24bit in terms of sound quality.
32bit float files are also very large,
so it is not optimal for every project.
The best situation to use 32bit float are as follows:
- When you are moving the input channel fader apart from 0
- When you insert effects on a recorded sound
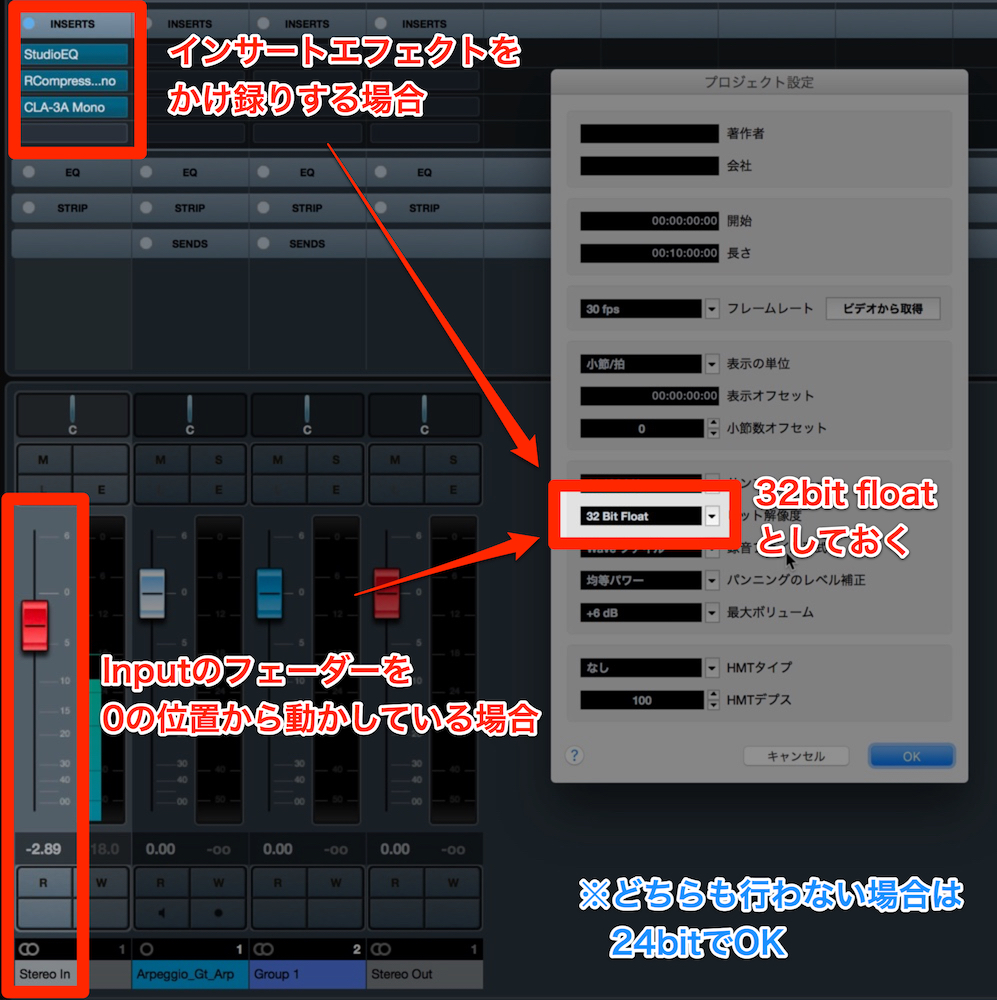
If you aren’t doing either (no volume editing during the recording process),
using a 24bit setting will prevent using more disk space than necessary.
Understandign 32bit float with an experiment
In order to help understand 32bit float, we created two experiments.
Those who are curious can try it out on their own as well.
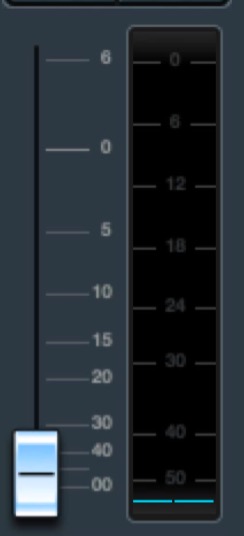
Deliberately have your input level go over level
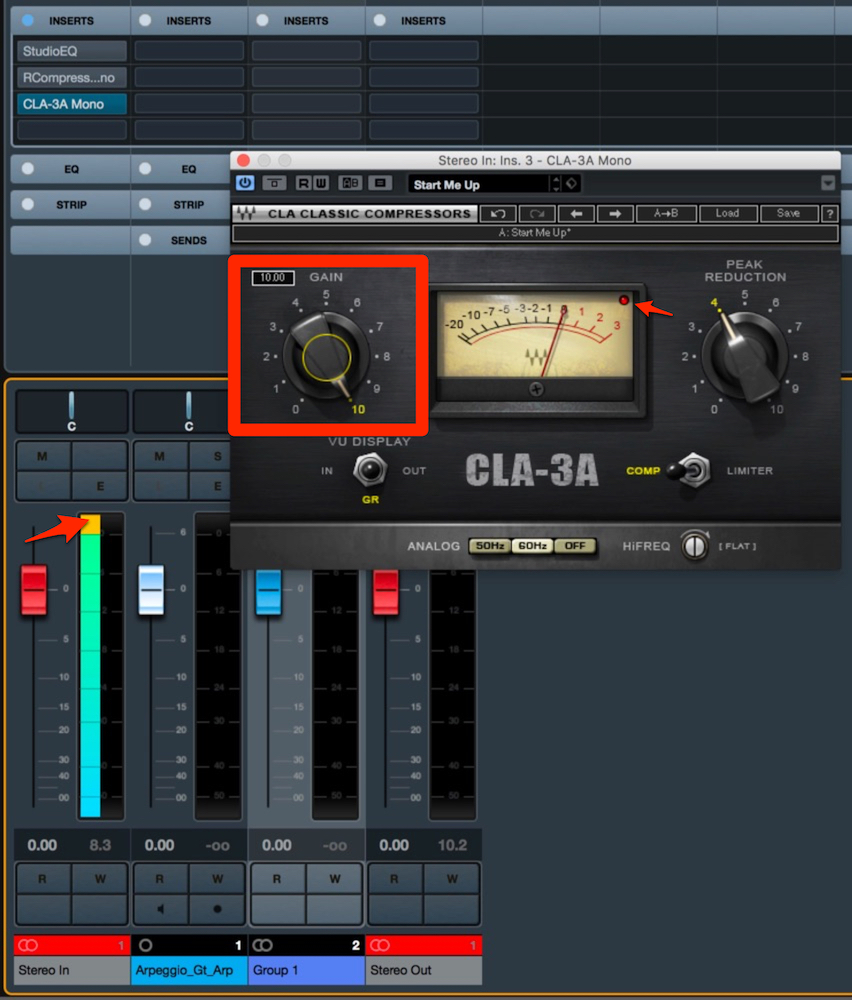
We added an insert effect to a 32bit project and deliberately set the level to go over.
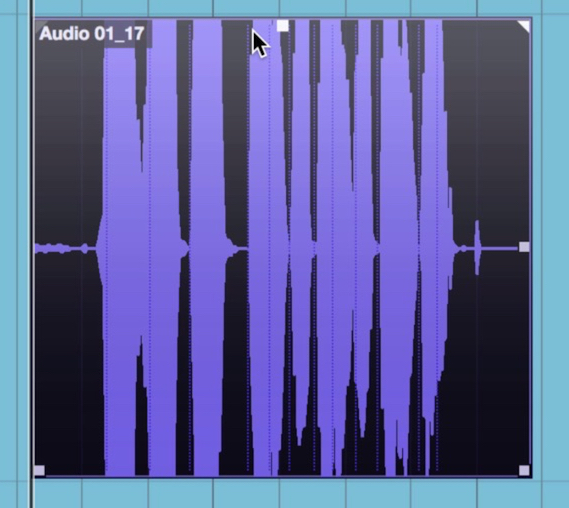
When recording in this situation, the waveform is obviously past the limit, but when the sound volume is lowered…
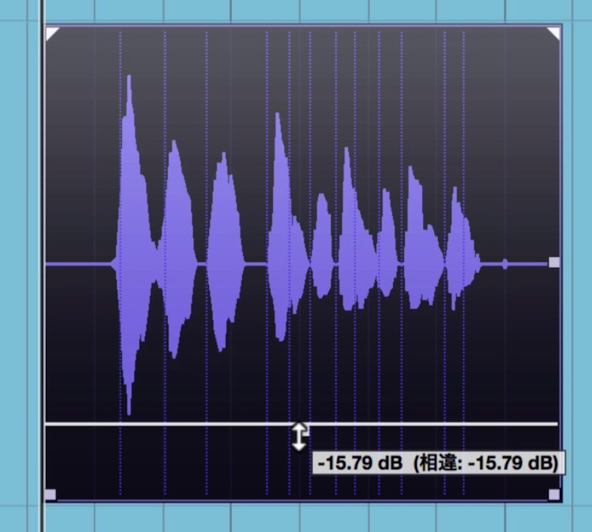
The recording dynamics have properly been recorded.
Think that this same process is happening internally when mixing (on tracks).
This helps show how 32bit float internal processing prevent clipping.
On the other hand, what you must absolutely avoid, is clipping within your audio interface.
When your hardware clips as opposed to your DAW,
even 32bit float will be unable to recover your sounds.
When the sound clips in your audio interface, the waveform will look as shown.
When recording, pay attention not only to the input channel meter,
but also on the audio interfaces meter.
Lowering the volume and exporting in 16bit
The second experiment is when you want to bounce audio during production.
We set a fader very low to the following guitar sound –
– and exported it in 16 bit.
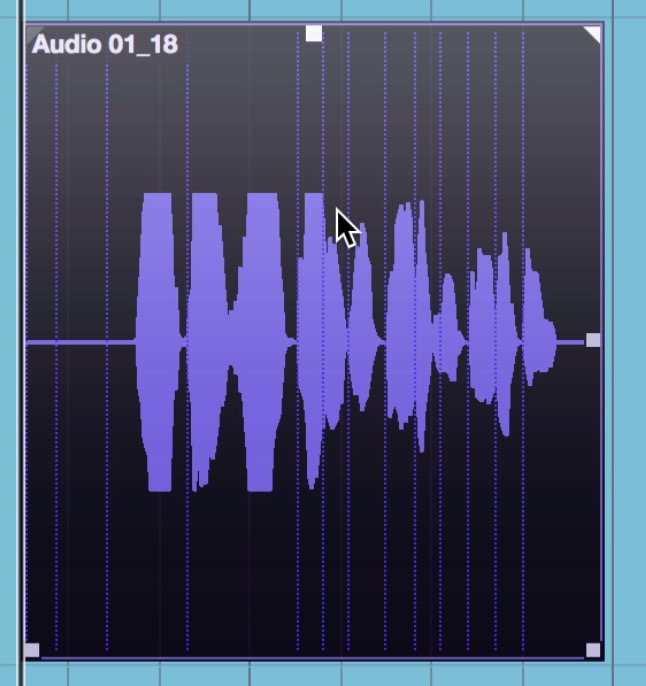
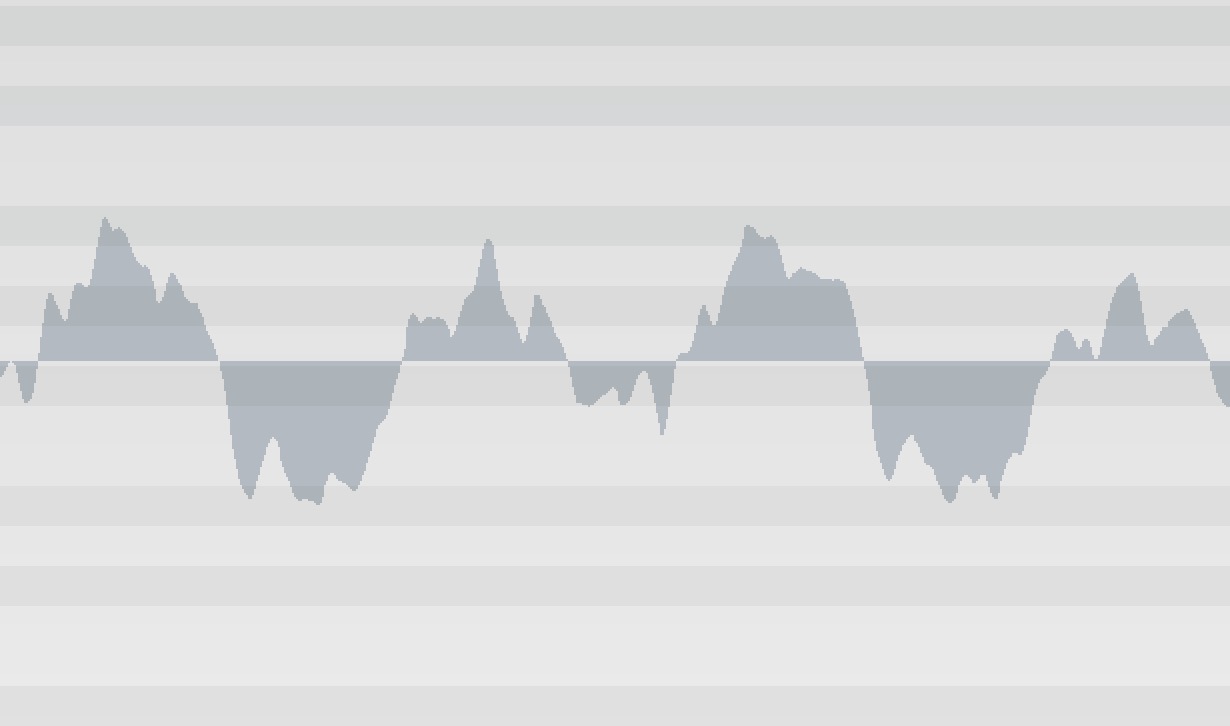
After doing so, when importing it back into your DAW and raising the volume, it will look as follows:

Certain part of the waveforms are especially rugged.
When listening to the sound, its full of noise and unusable…
In 16bit and 24bit, the smaller the volume, the less detail in the sound.
Because of this, raising a quiet 16bit audio files in your DAW yields this result.
What happens when we export a 32bit float file in the same way?
You can visually see that the clarity has been kept.
Of course, even the sound –
hasn’t changed from the original source.
This was a very basic example, but even small volume lowering in 24bit leads to some loss in quality.
32bit float allows you to keep the quality of sound even when the volume is lowered.
For internal processing, this processing is done between tracks,
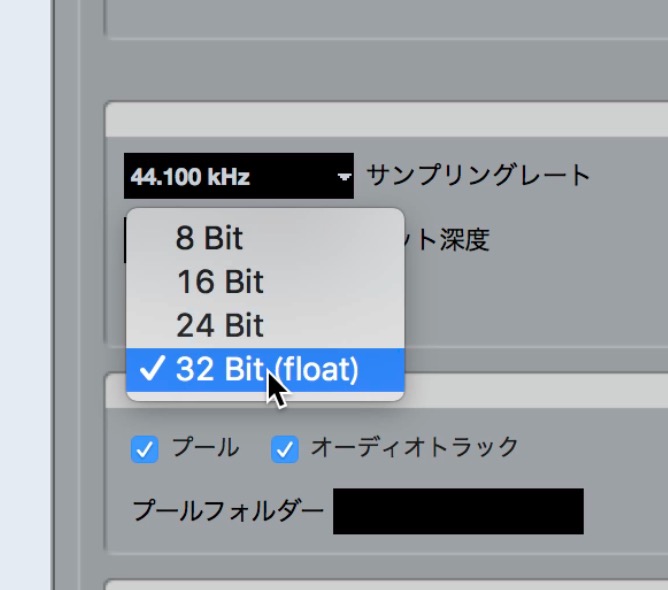
but when exporting audio and re-importing it, you must select the bit resolution again.
There is no reason to select any other bit rate when doing so. Be sure to select 32bit float.
In addition, when importing it may ask if it should change to match your project, but there is no need to do so.
Conclusion
We have compiled some precautions when using 32bit float for production/mixing.
- If the input channel volume wont be moved, keep bit rate at 24bit
- Even if tracks go over level, its OK as long as the master track doesn’t
- Be sure that the audio interface and master don’t go over
- When exporting a file in the project, be sure to select 32bit float (don’t change when importing as well)
By keeping these in mind, you can optimize your work flow and disk space,
and keep your audio quality high.
Though 32bit float is a complicated concept to grasp,
understanding the results of use are important.
It was a slightly long article but thank you for your time!