Loopmasters 無料なのに即戦力!Loopcloud 4 使い方② サンプル素材の取り込み・追加購入・編集方法について
サンプルの拡張や波形編集でLoopcloud 4を使いこなす

前回に続いてLoopcloud 4の解説を行なっていきます。
ここではサンプル素材のエディット、そしてオリジナル素材の追加について確認していきましょう。
サンプルから好みに合わせてパターン、フレーズを素早く構築できるエディター機能。
そして、オリジナルサンプルを自動的に仕分けし、整理してくれるタグ機能は、作業のスピードが加速する強力なツールとなります。
Loopcloud 4 動画解説
- 1サンプル素材を効率的に管理する Loopmasters「Loopcloud 4」ダウンロード方法
- 2サンプル素材管理ソフト Loopcloud 4 の使い方 ① 基本概要
- 3Loopcloud 4 使い方② サンプル素材の取り込み・追加購入・編集方法について
- 4トラックメイキングが更に捗る有料版も登場!! Loopcloud 5 新機能の解説


波形エディットの活用
選択した波形を組み替えてリズム/演奏パターンを作成することができます。
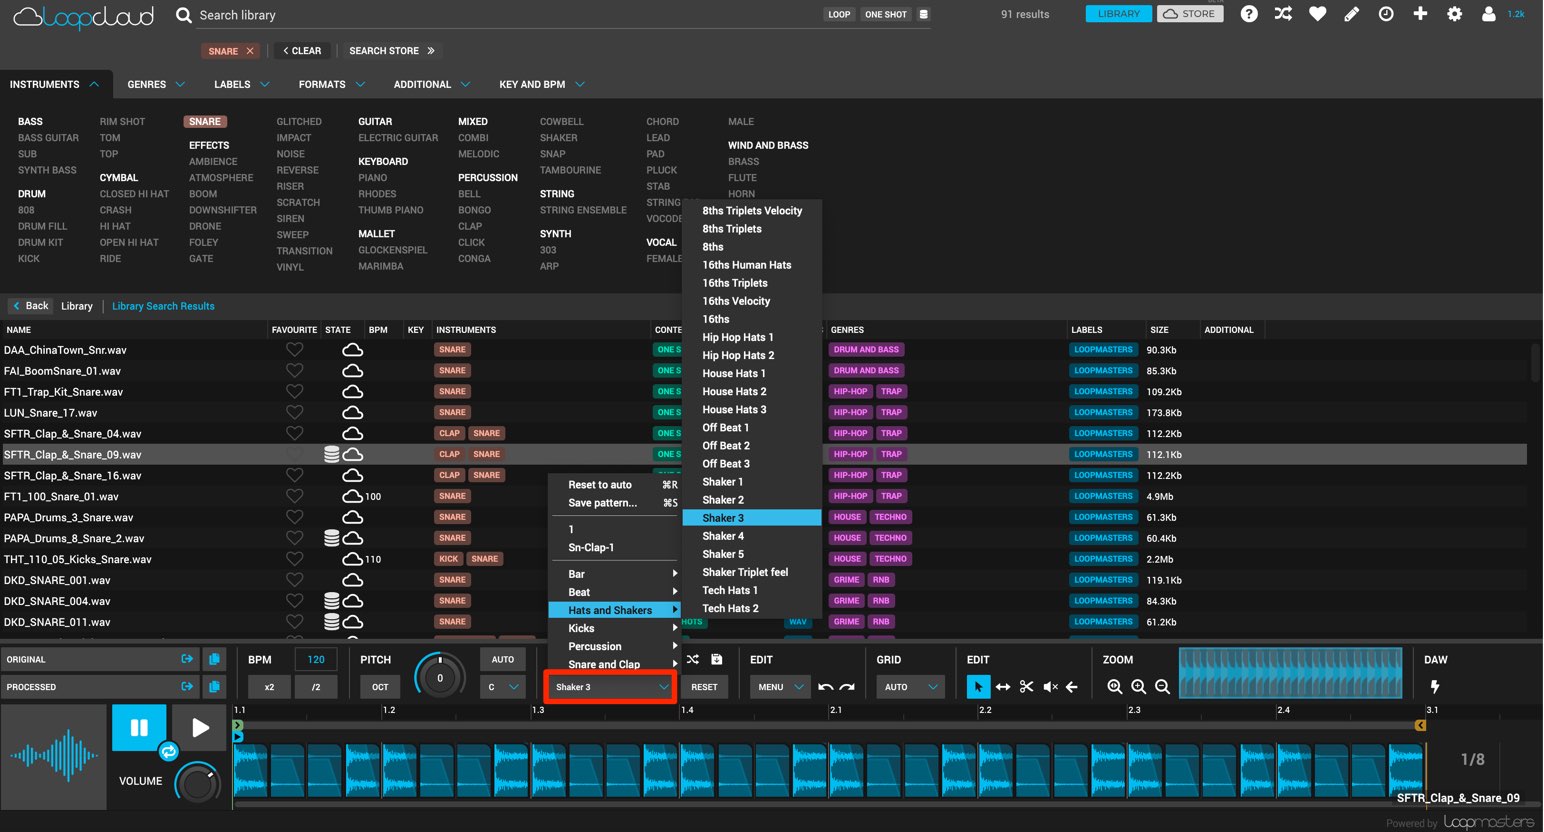
キック、スネア、パーカッションなど豊富なパターンが用意されており、ここからアイディアを得られることも多いでしょう。
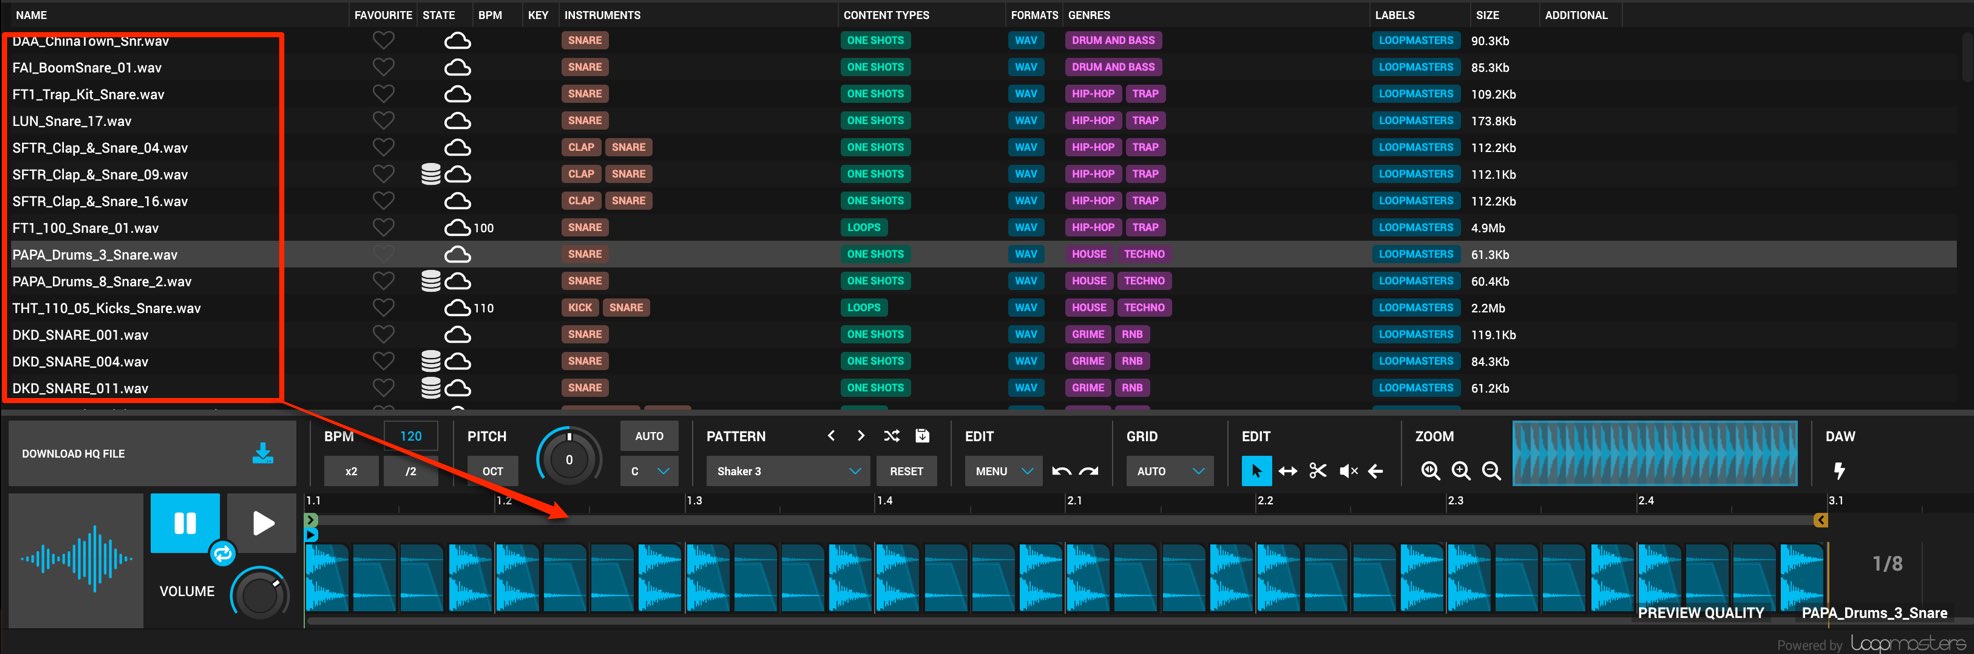
この際、サウンドを変更したとしてもパターンが残ります。
同じパターンで異なるサンプルを次々に視聴していくという使い方も便利です。
また、選択したサンプルから、ご自身でパターンの編集を行うことも可能です。
ズームの設定
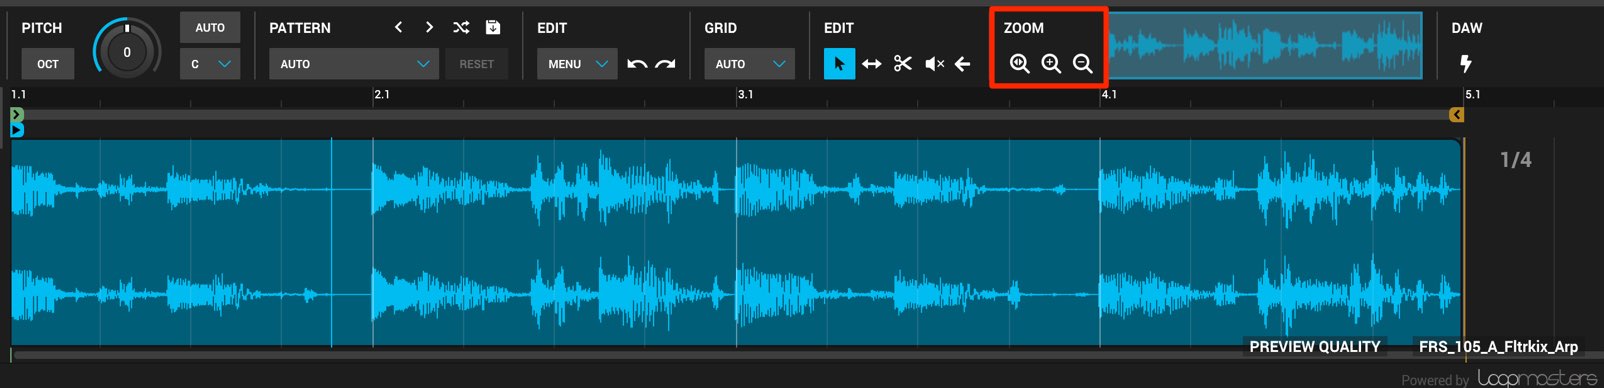
エディットの用途に合わせてズームの最適化も行えます。
「-」で縮小、「+」で拡大となっており、一番左のアイコンは波形全体を表示させます。
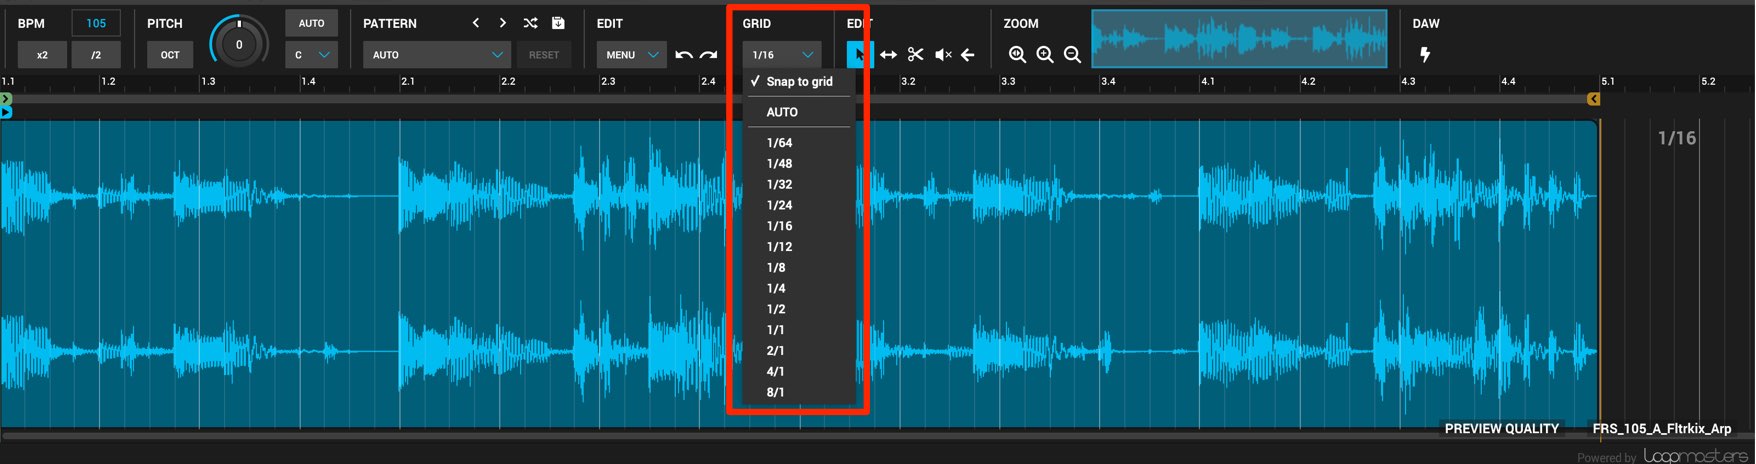
編集はDAWのテンポと同期しますが、編集を行う細かさを音価で指定することができます。
「GRID」のメニューをクリックして目的の音価を指定するだけです。
- Snap to grid : このチェックを外すことで音価に縛られず、より細かな調整が行えます
- AUTO : ズームの倍率によってGRIDの細かさ(音価)が変化します
リージョンのカット
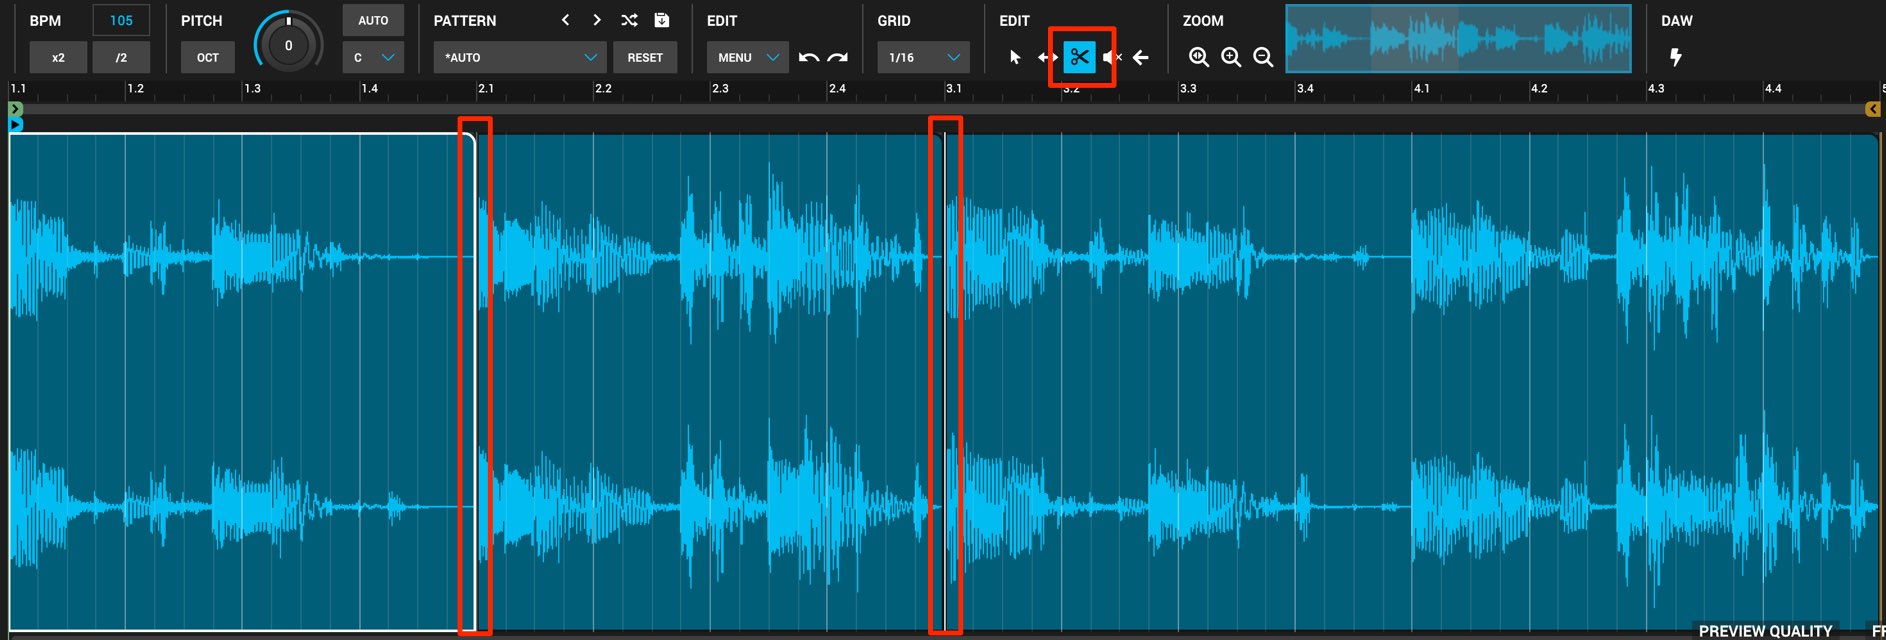
ハサミツールを使用することで、リージョンを分割して各リージョンへ特定の編集を行うことができます。
ボリュームの調整
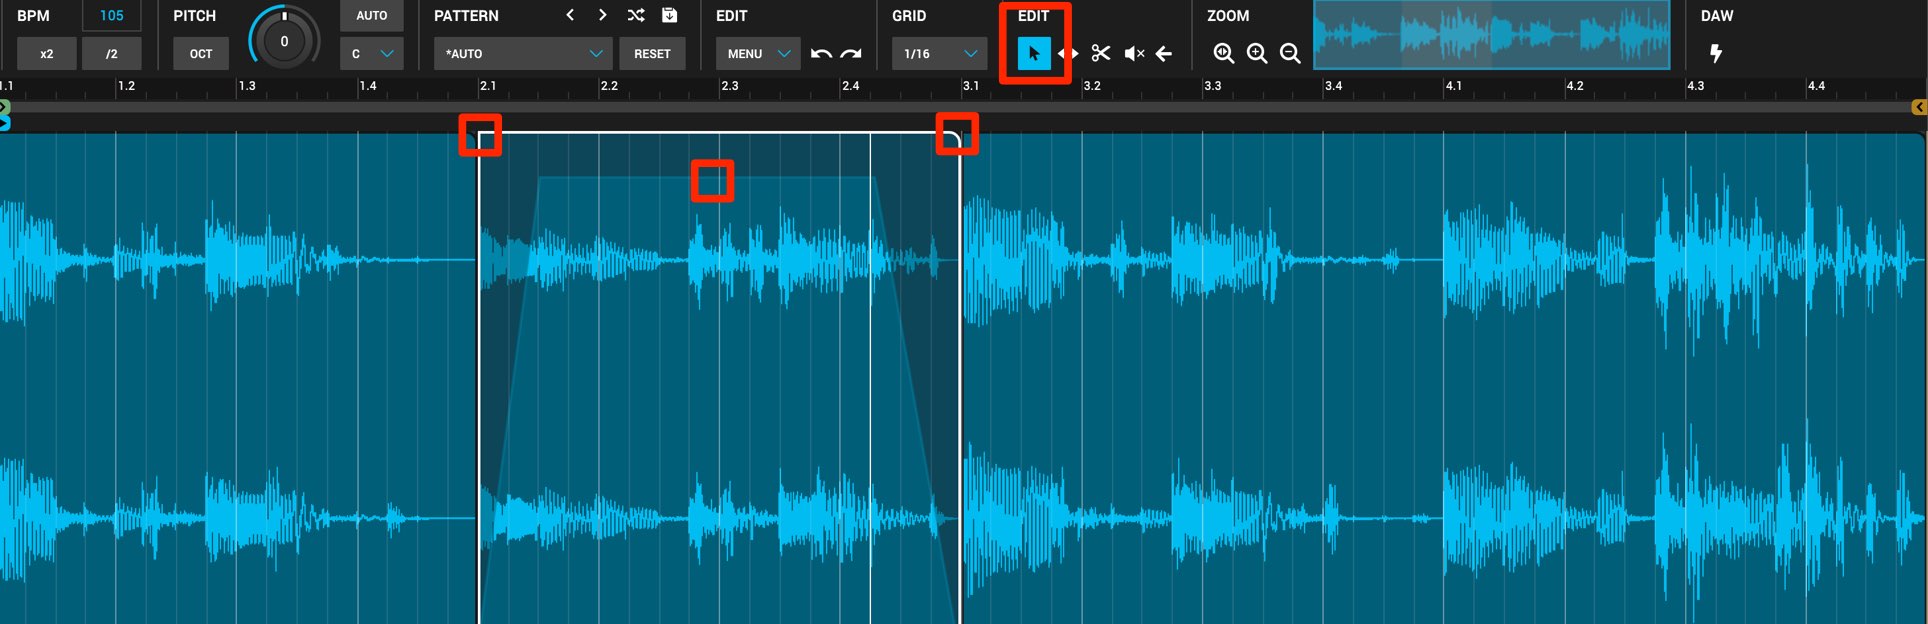
矢印ツールを使用してリージョンのボリュームを変更したりフェードイン/アウトを行うことができます。
また、リージョンの移動や、コピー&ペースト編集も可能です。
ミュートの設定
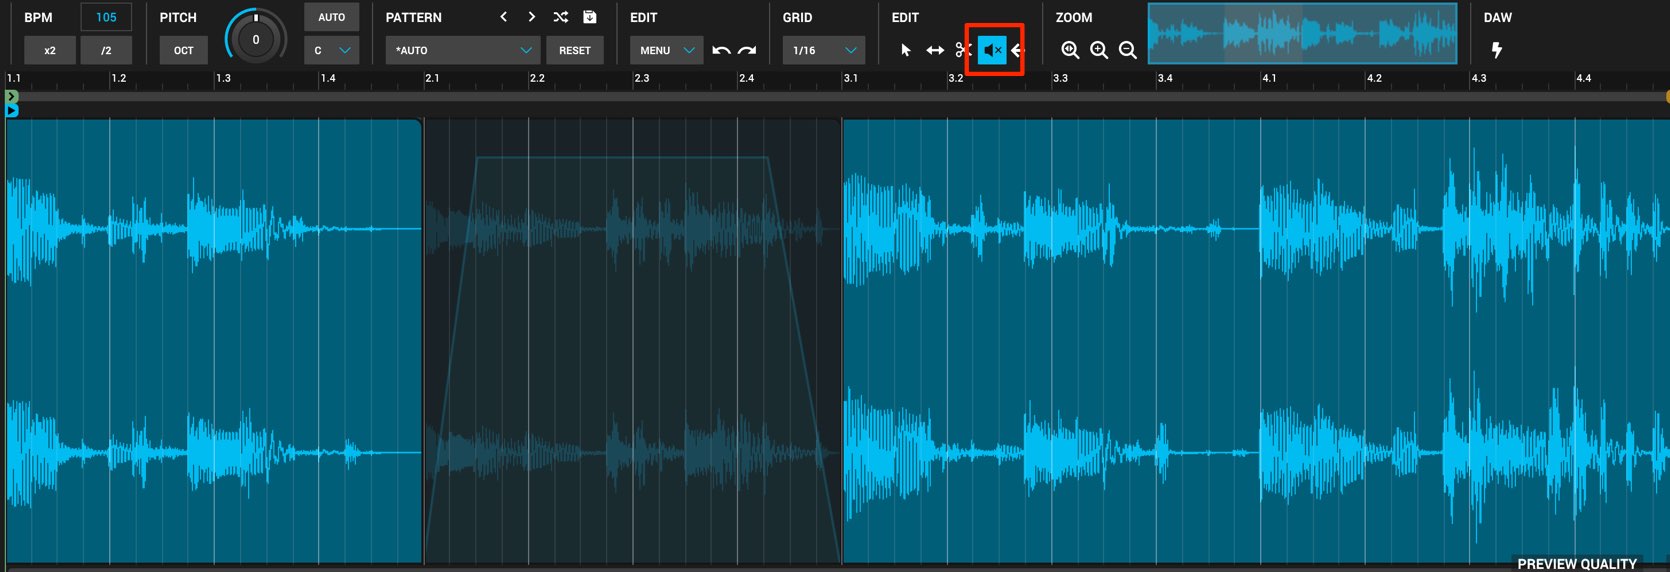
ミュートツールを使用することで、特定のリージョンを消音します。
フレーズに空白を作成する場合に便利です。
リバースの設定
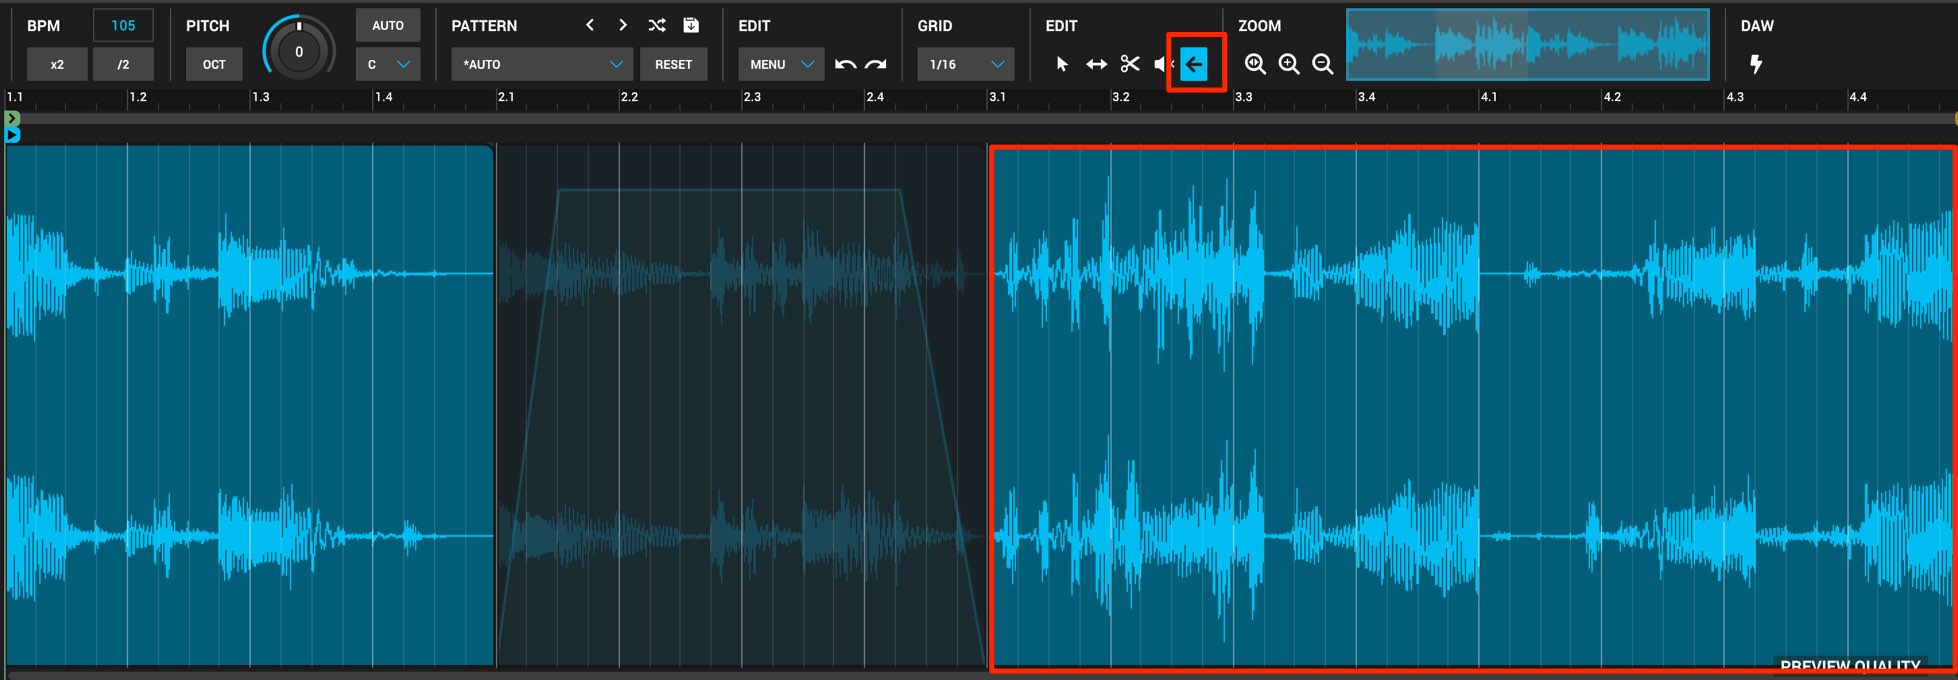
指定したリージョンをリバース再生します。
リバースシンバルはもちろん、フレーズの一部にリバースを取り入れてトリッキーなサウンドを作成することもできます。
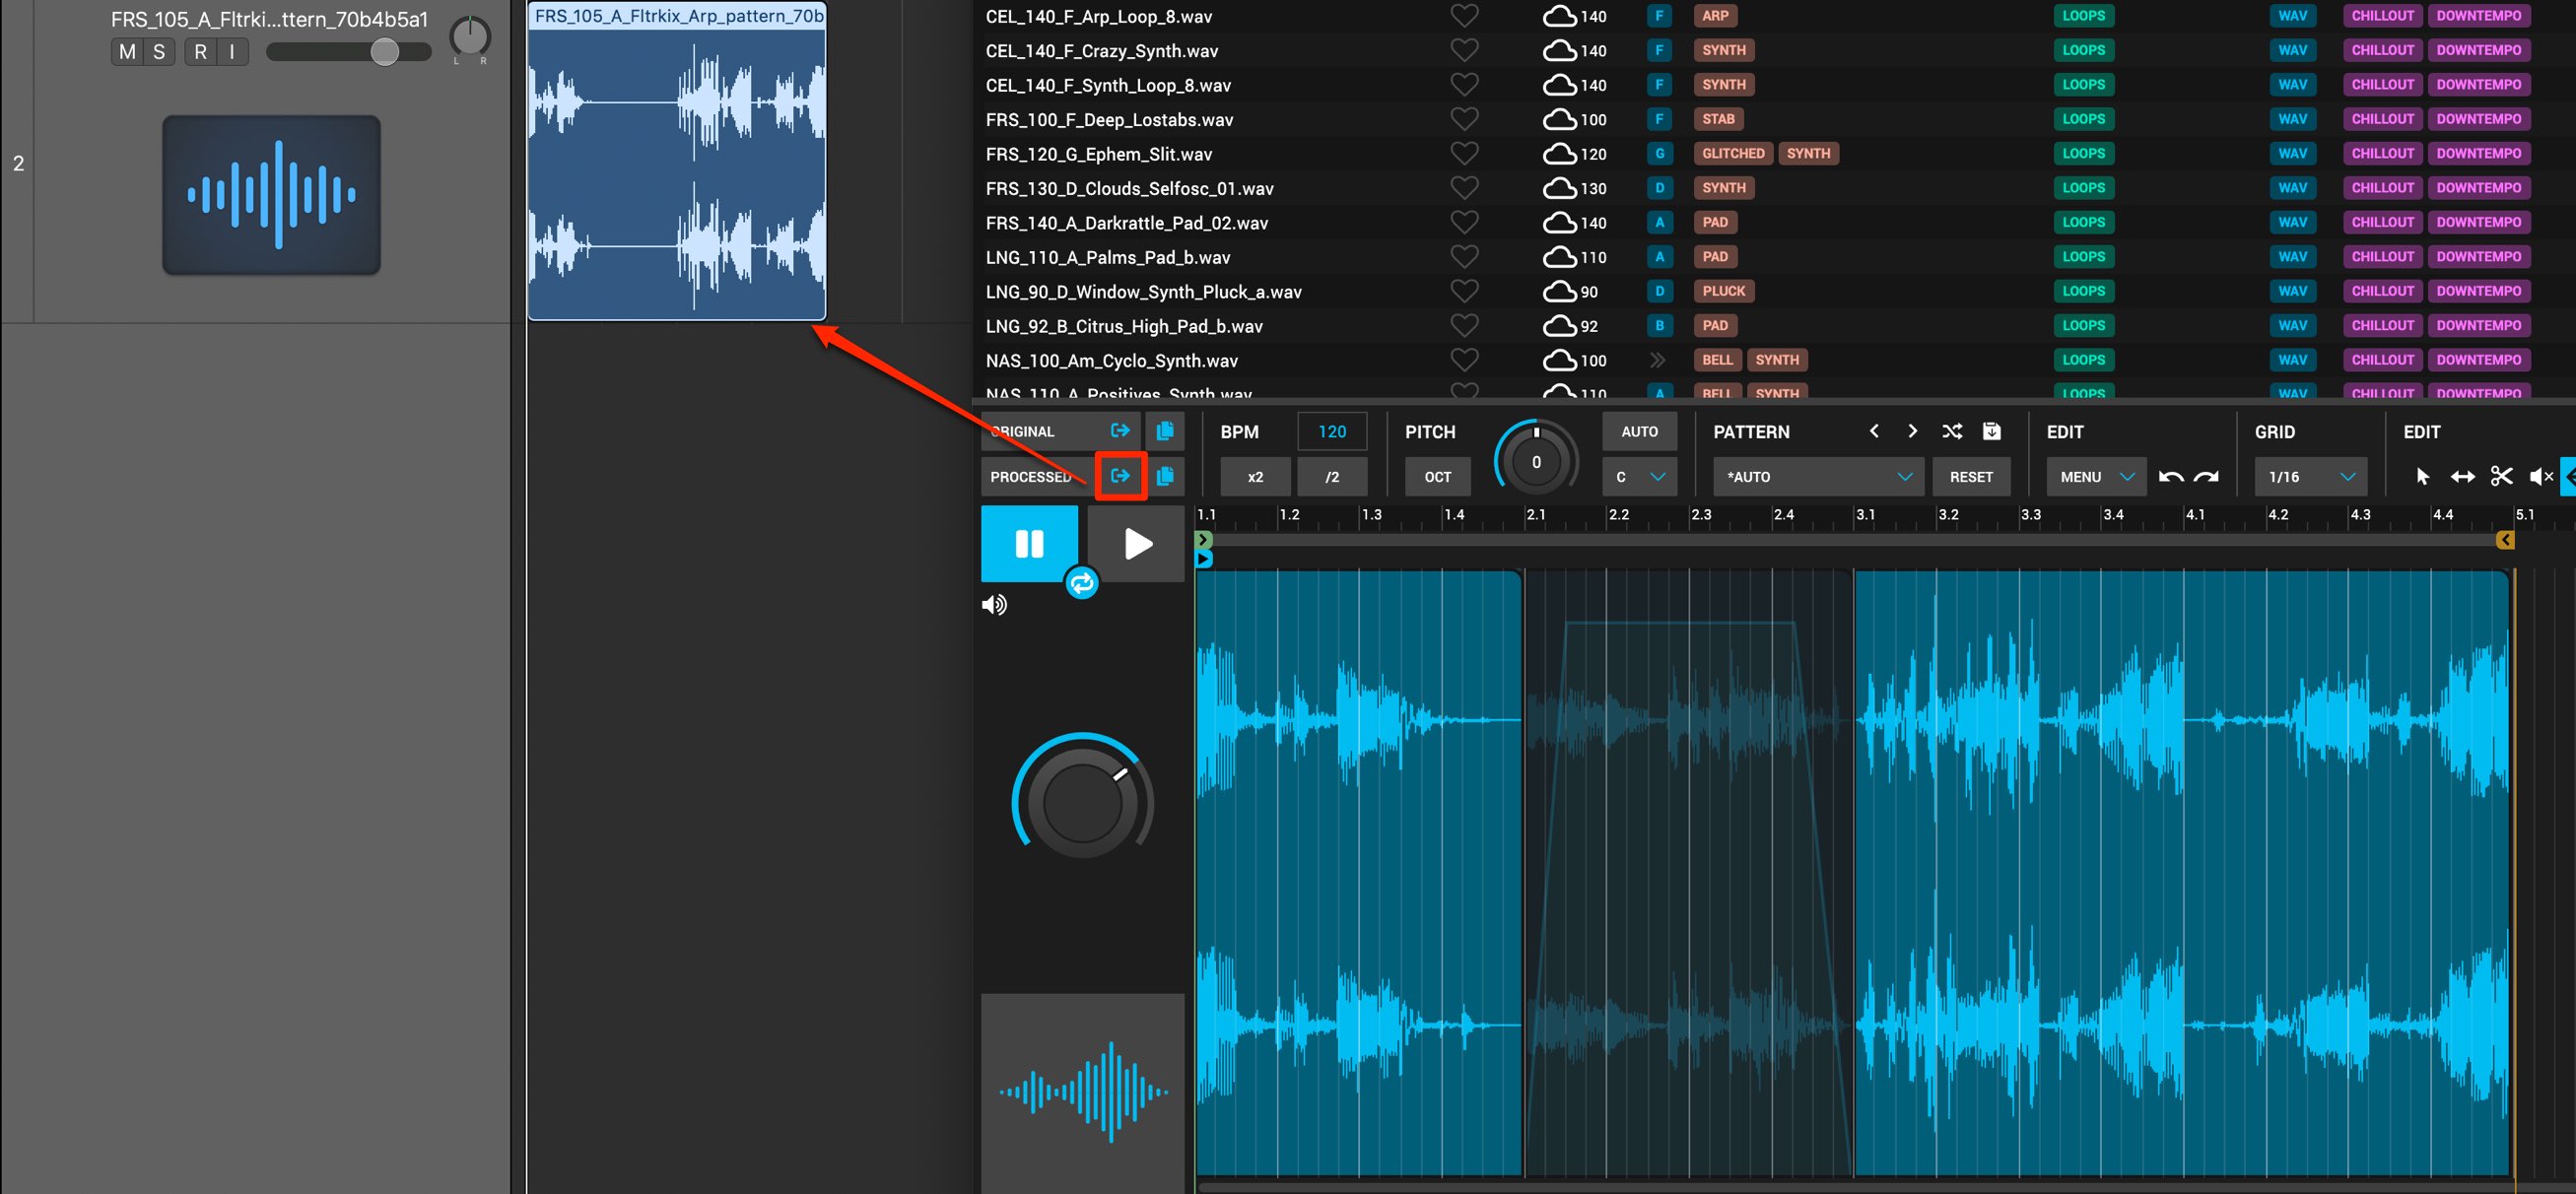
もちろん、これら編集結果はそのままDAWヘ書き出すことができます。

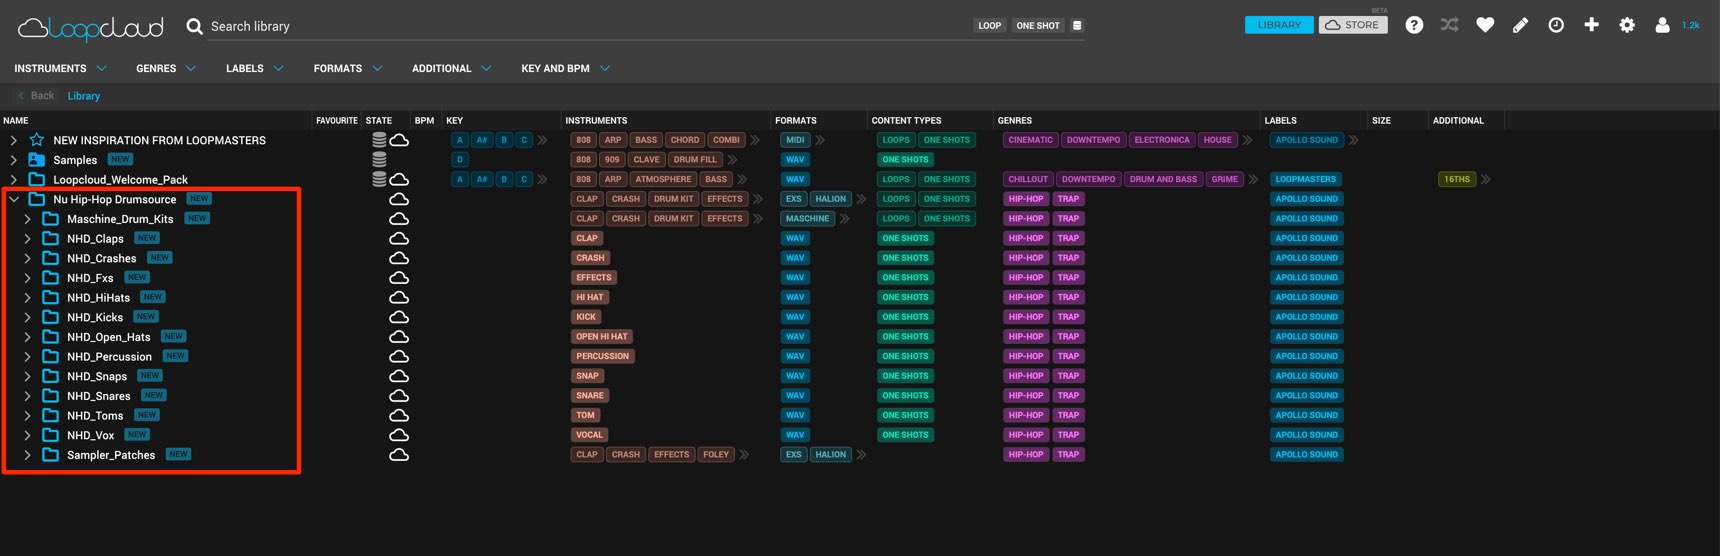
オリジナルサンプルの追加
お持ちのサンプル素材をLoopcloudへ取り込んで管理することができます。
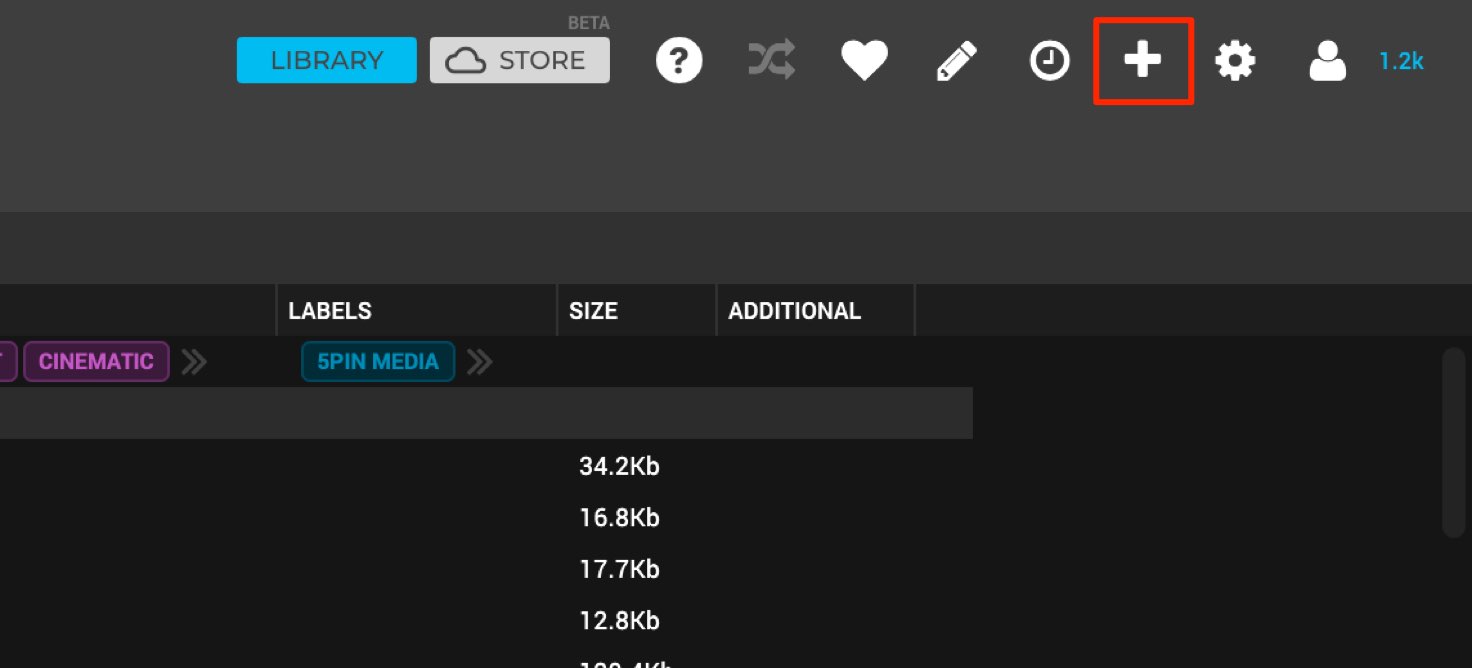
上部のプラスアイコンをクリックして、サンプルが含まれるフォルダを指定します。
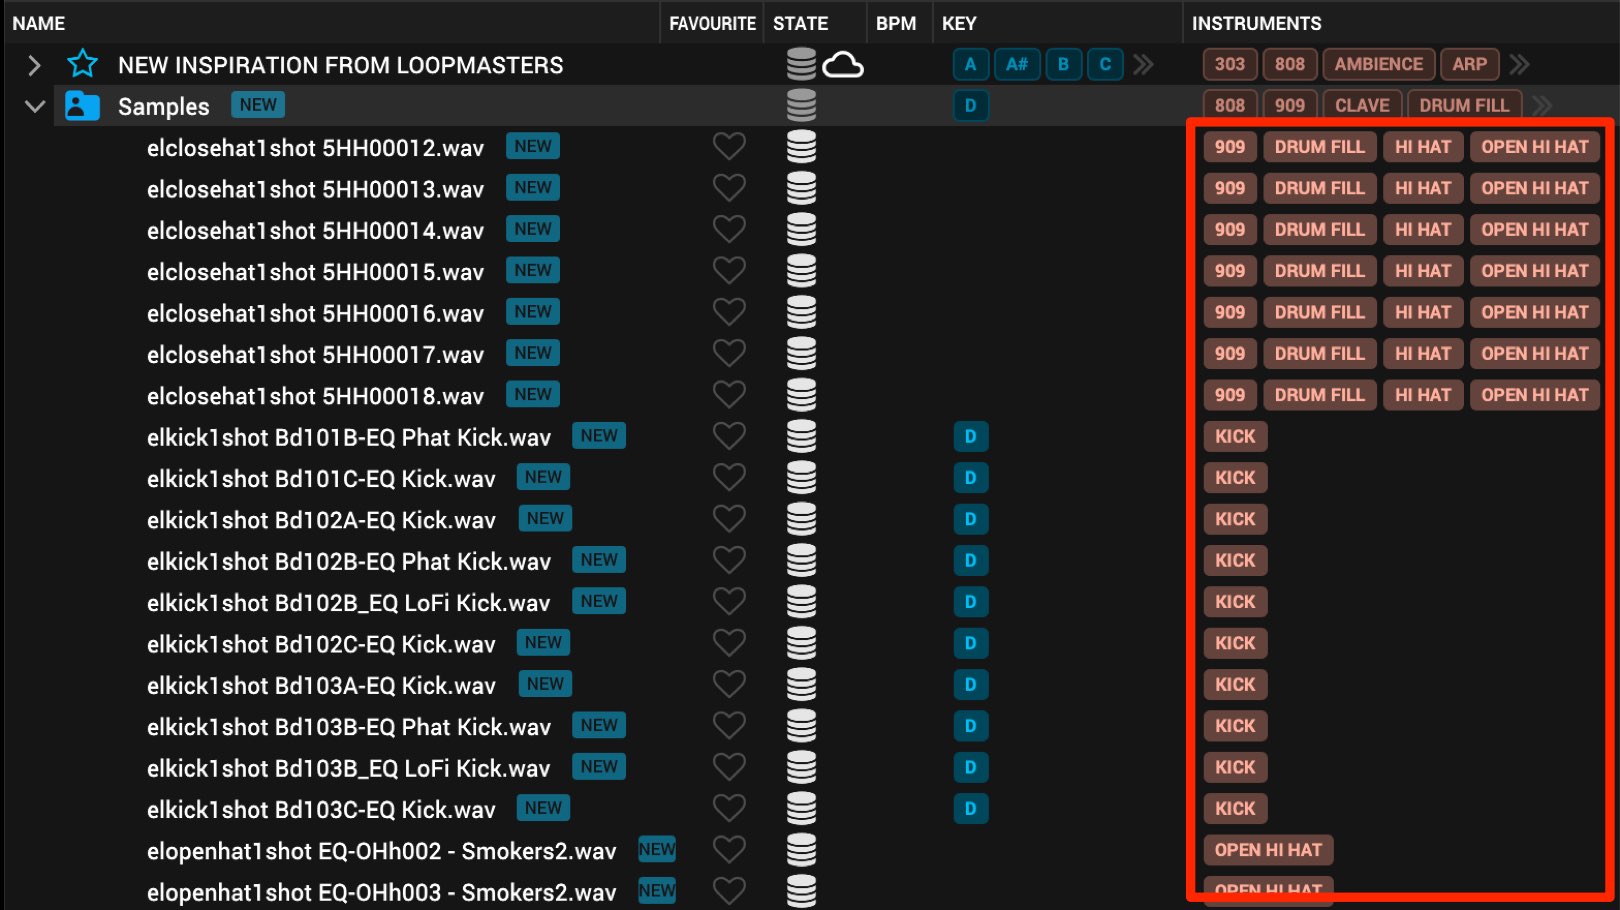
この機能の素晴らしい点は、追加した素材を解析して自動的にタグを割り当ててくれるところです。
サンプルの仕分け作業が必要なく、これら作業の手間を大幅に節約できます。
この解析はかなりの高精度で行われますが、ファイルによって上手くいかないという場合は、
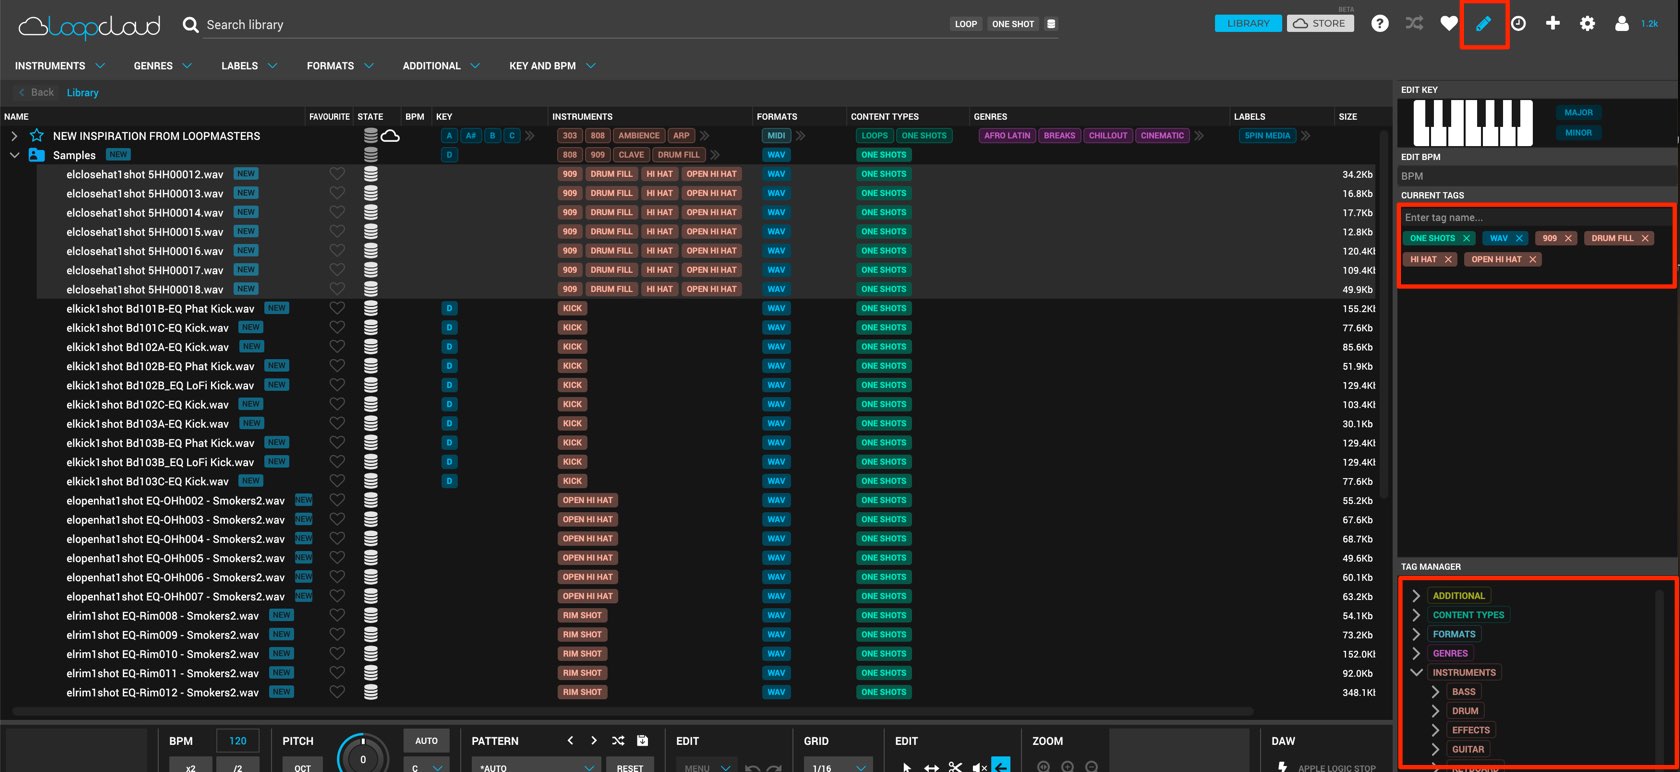
目的のサンプルを選択し、上部のエディットアイコンをクリックします。
サンプルに対してタグの削除や追加が行えます。
サンプル素材の購入
LoopcloudにはStoreが用意されており、サウンド素材を購入してLoopcloudを拡張することも可能です。
製品の購入はポイントを使用します。
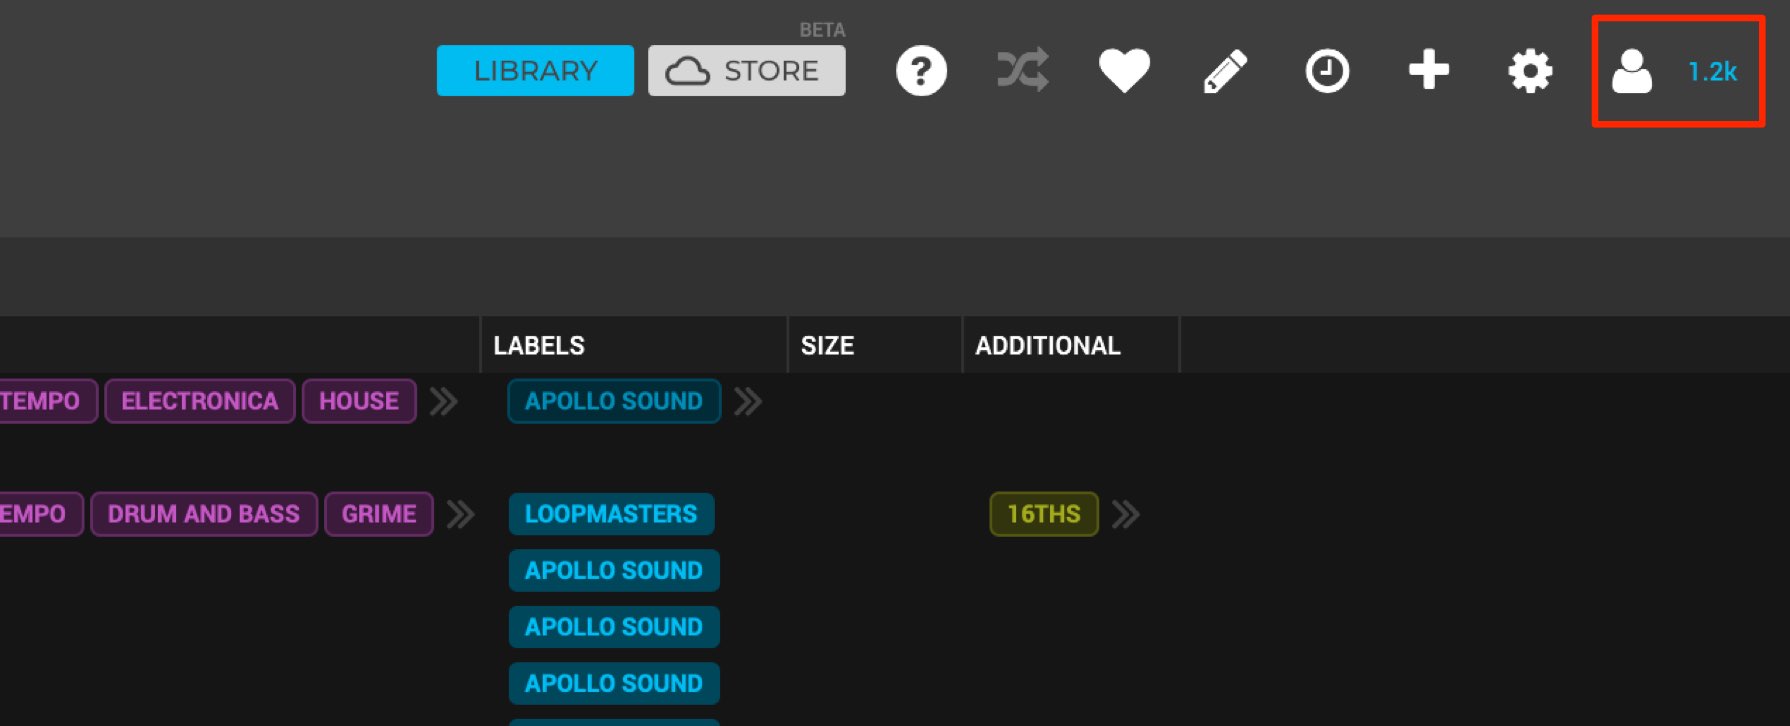
アカウントアイコンをクリックし、

現在のポイント確認と、購入を行います。
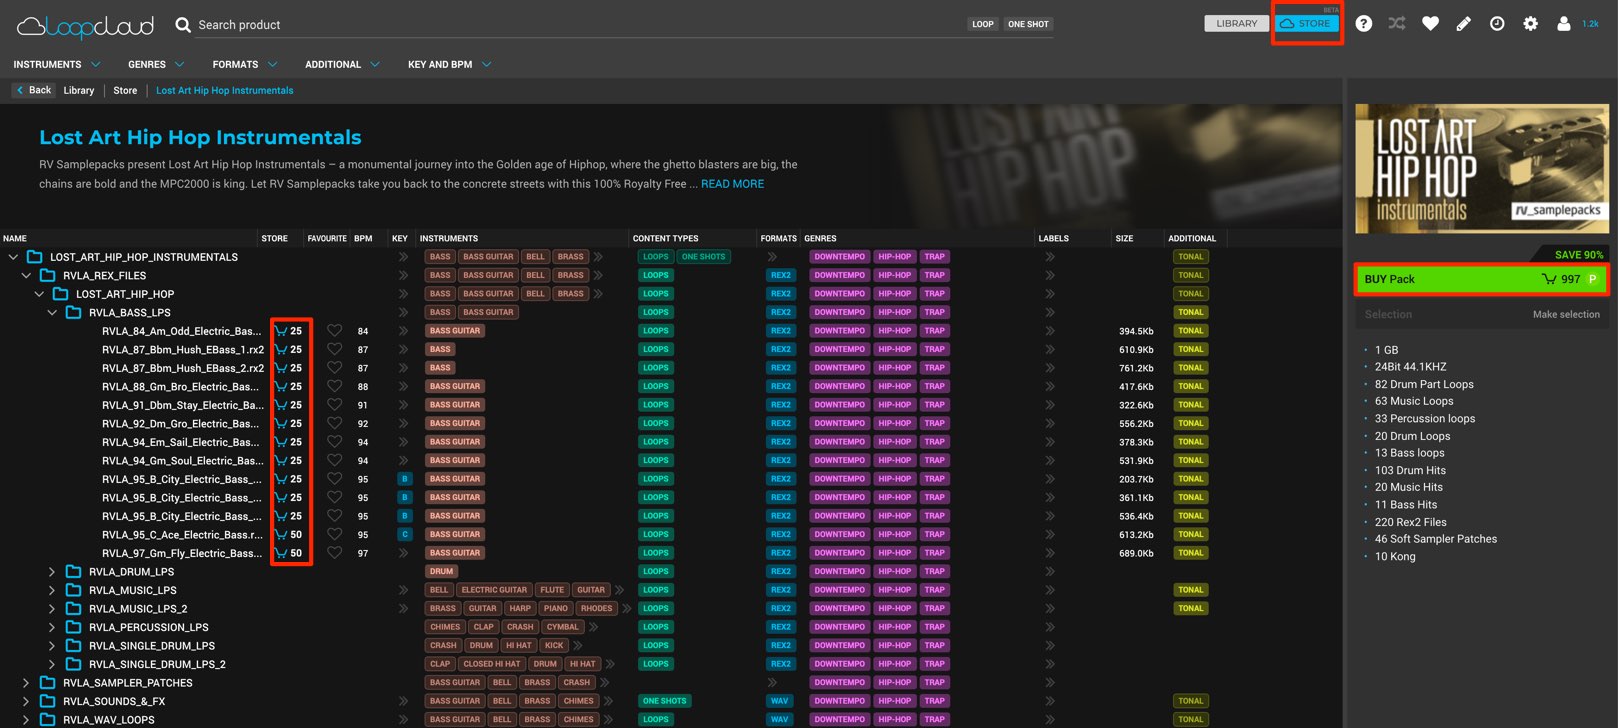
Storeからは目的の製品を選択して、サンプル単体、もしくはパックとしてまとめて購入することができます。
パック購入の方が圧倒的にコストパフォーマンスが良くなっています。
製品の購入後はLoopcloudのライブラリに追加され、これまで解説した管理や編集が可能です。
ここまで2回に分けてLoopcloudの解説を行ってきました。
膨大なサンプルを効率良く管理できる非常に有能なツールということを感じていただけたと思います。
特にオリジナルサンプルを自動的に仕分けしてくれる機能は感動的とも言えます。
製品は無料で使用できますので、ソフトを使いこなして楽曲クオリティをアップさせてくださいね!
Loopmasters社のサンプル素材管理ソフト「Loopcloud 4」の解説第2弾。
今回はサンプル素材のエディット、オリジナル素材の追加、購入方法について確認していきます。
膨大なサンプルを効率良く管理できるツールです!🎥YouTube:https://t.co/P3CAAtcHNR
📝使い方-記事:https://t.co/9BpIr7DkSX pic.twitter.com/k01w9gtNg7
— SLEEP FREAKS (@SLEEPFREAKS_DTM) 2019年5月2日