This article explains how to create a riser and uplifter—essential FX sounds in EDM and dance music—from scratch with the free synth Vital. Four steps cover oscillator waveforms, LFO-driven pitch movement, added noise, and effects. Making the sound yourself instead of relying on a ready-made sample lets you tailor its rise and texture to your song's tempo and style.
What Are Risers and Uplifters? Essential FX Sounds for Building Excitement
Selected Questions and Answers from the YouTube Video

You assigned the LFO to cutoff and resonance, but I have trouble imagining how that changes the sound. Could you explain? I would also like to know why you set cutoff to its maximum and resonance to 50%.

Connecting the LFO to the filter cutoff makes the tone change automatically over time. The sound starts dark and muffled, then gradually becomes brighter and clearer. Setting the LFO's modulation range to the maximum makes that shift more dramatic. Resonance emphasizes the tonal change as the cutoff frequency moves, creating a flashier effect. But raising resonance close to its maximum can cause self-oscillation and drastically change the sound's character, so this example keeps it around 50%. Together, these settings create a smooth transition from a subdued, dark sound to a bright, striking one.

Risers and uplifters are standard FX sounds used to build excitement in EDM and dance music.
First, listen to an example of the sound.
Sounds like this are widely sold as audio samples.
If you can create one from scratch, however, you can fine-tune when it rises and adjust its texture to suit your taste and your track.
Let's build the sound.
Step 1: Set Up the Oscillator
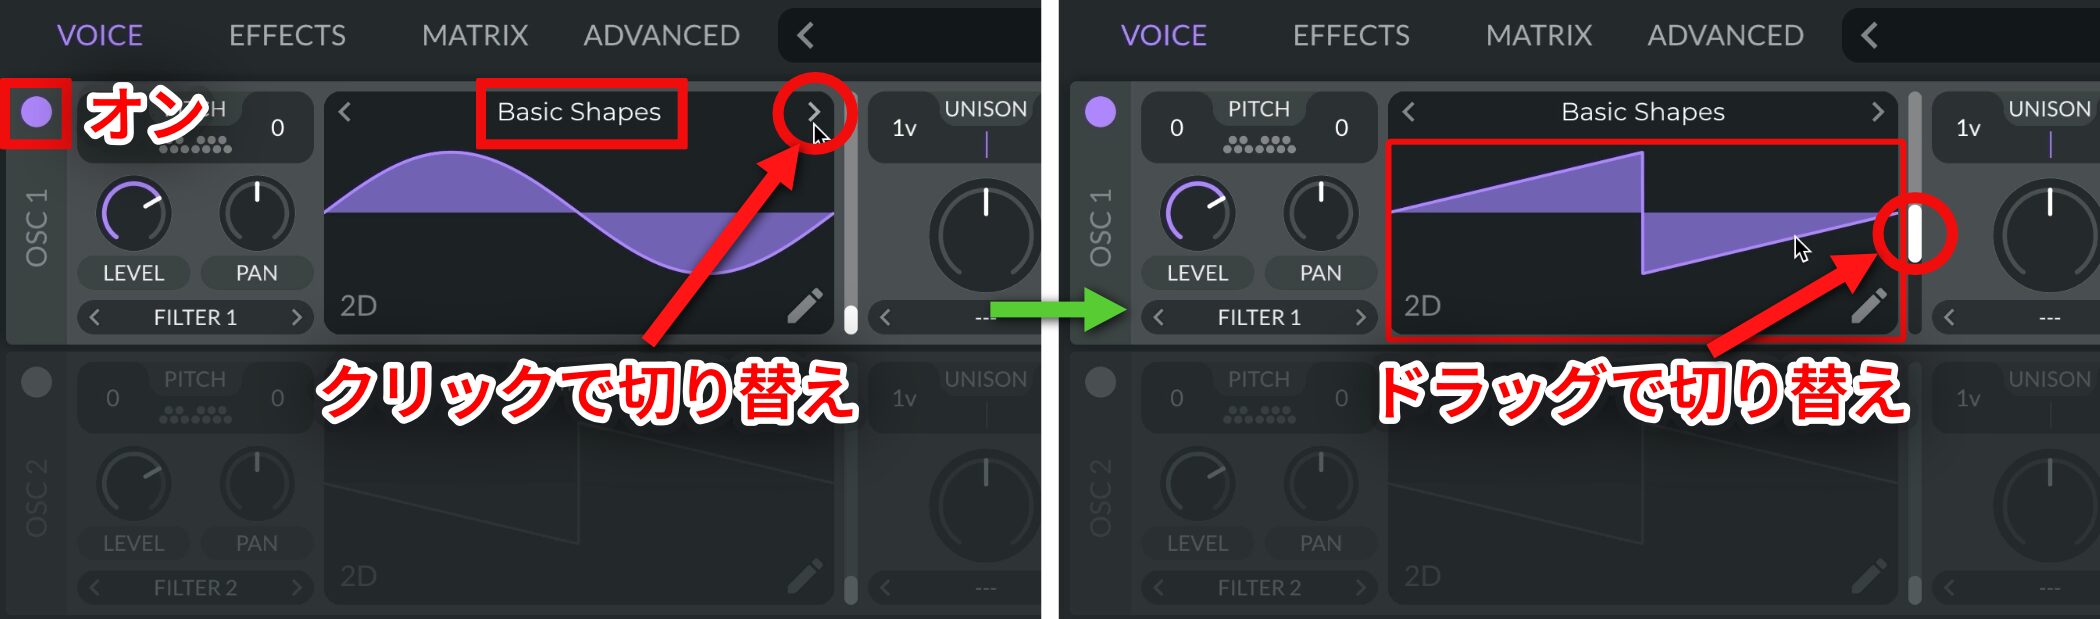
For Oscillator 1, choose the Sawtooth waveform from Basic Shapes.
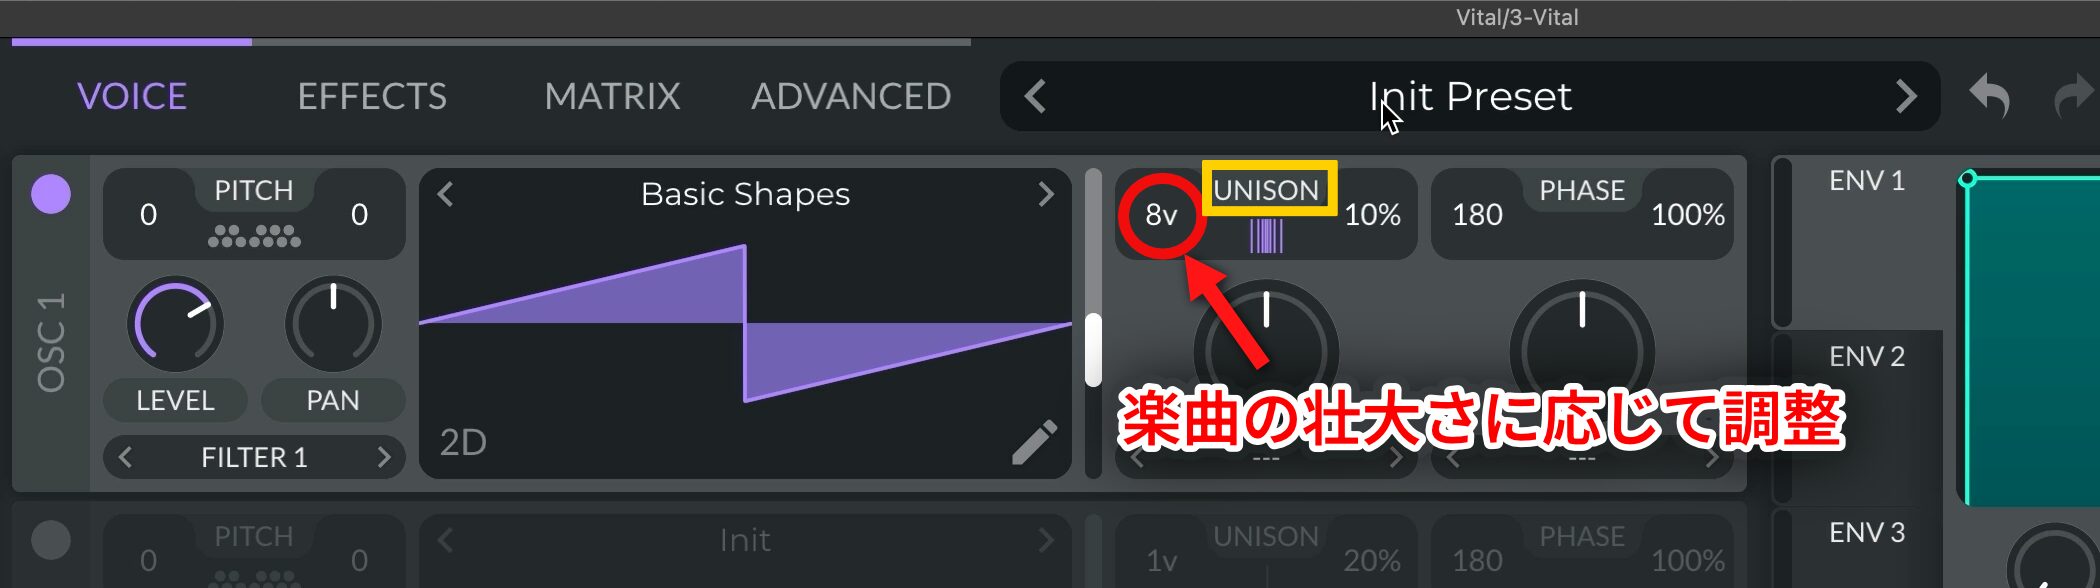
Next, to layer the sound and add thickness, use UNISON.
Adjust the number of layered voices to suit the scale of the track; this example uses 8.
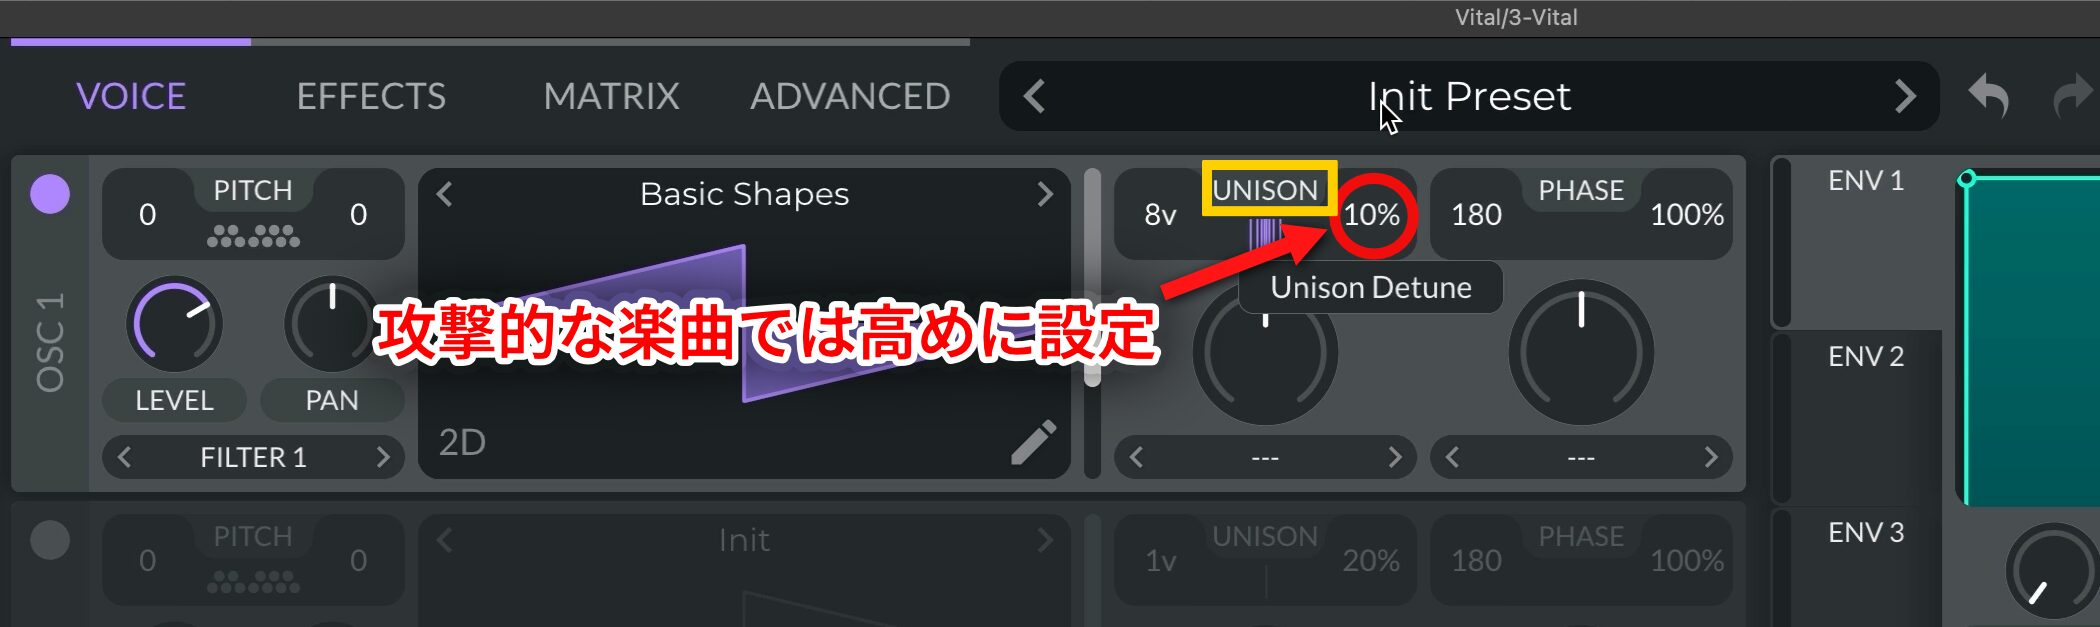
To offset the pitch of the layered waveforms, set Detune to about 10%.
A higher value can work for a more aggressive track.
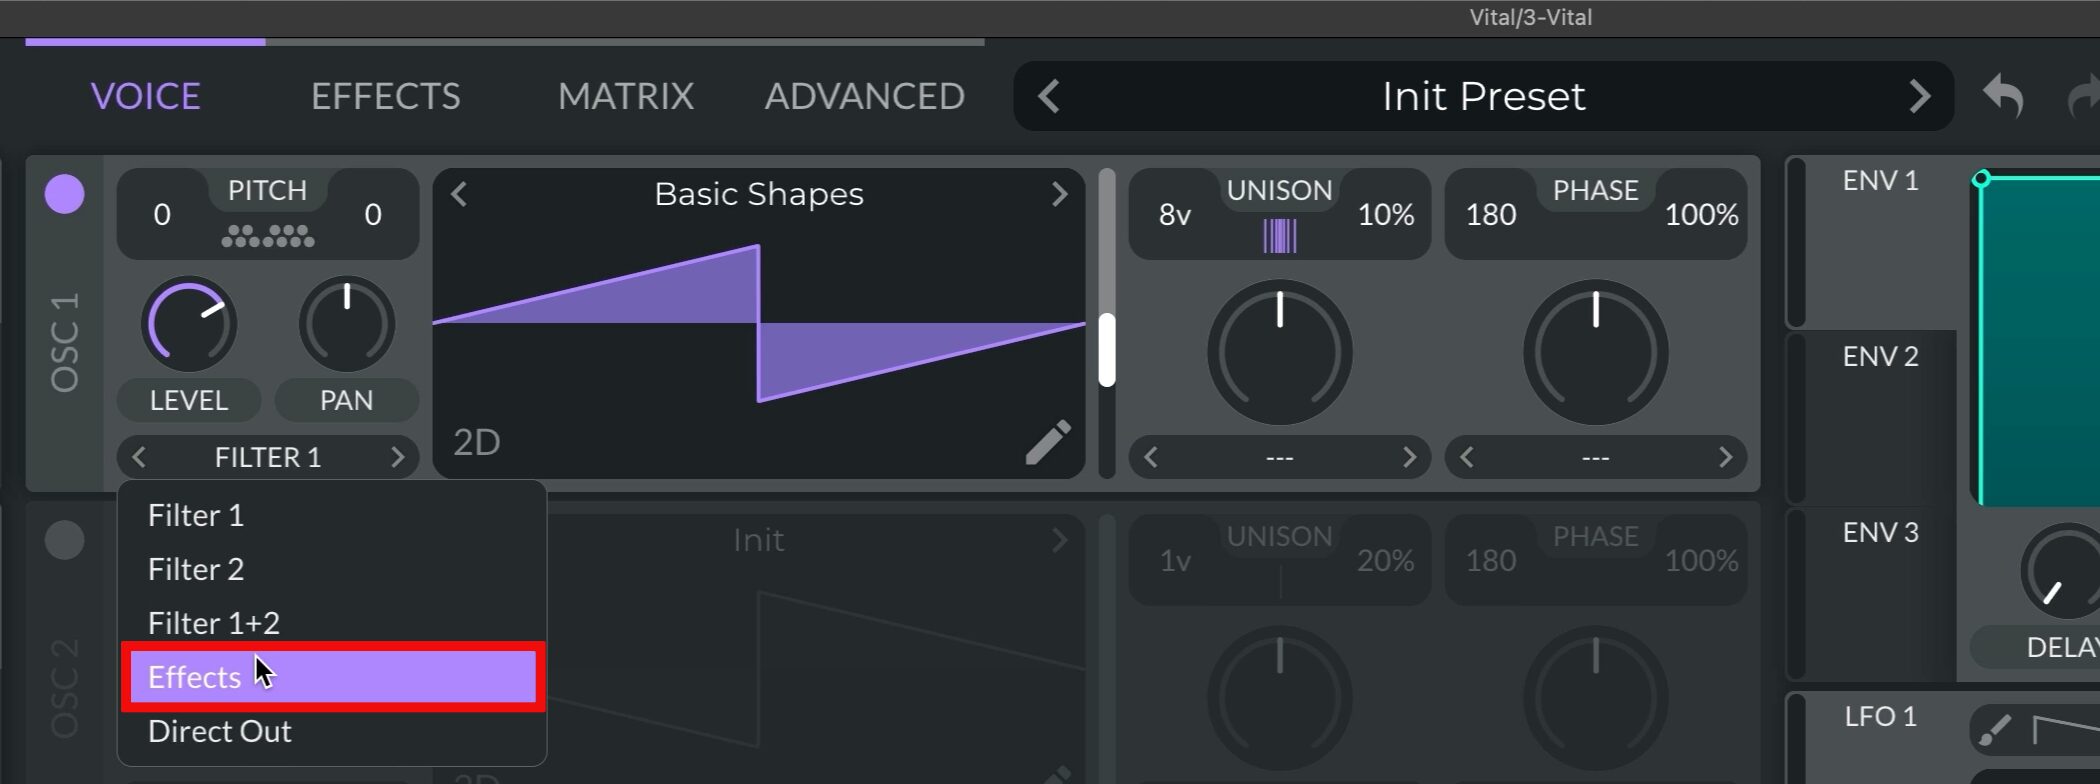
This oscillator will not use the filter, so set its audio output to Effects.
Step 2: Use LFO 1 to Make the Pitch Rise
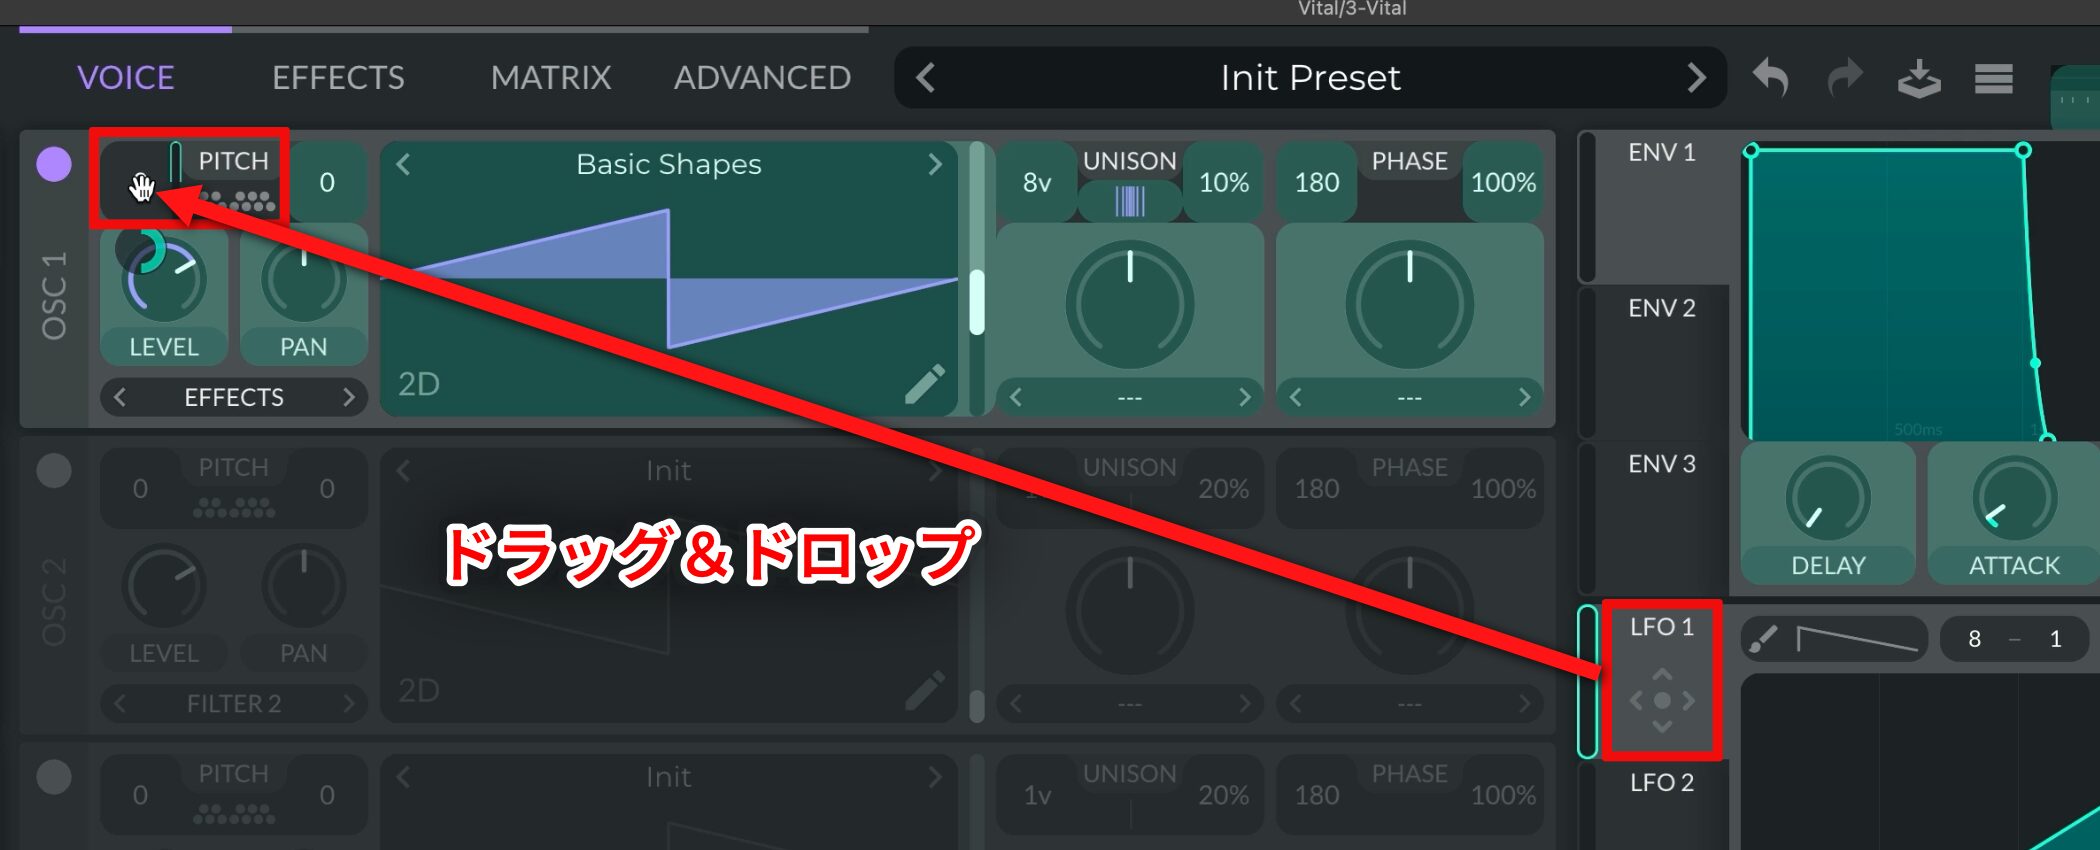
Assign LFO 1 to Oscillator 1's pitch.
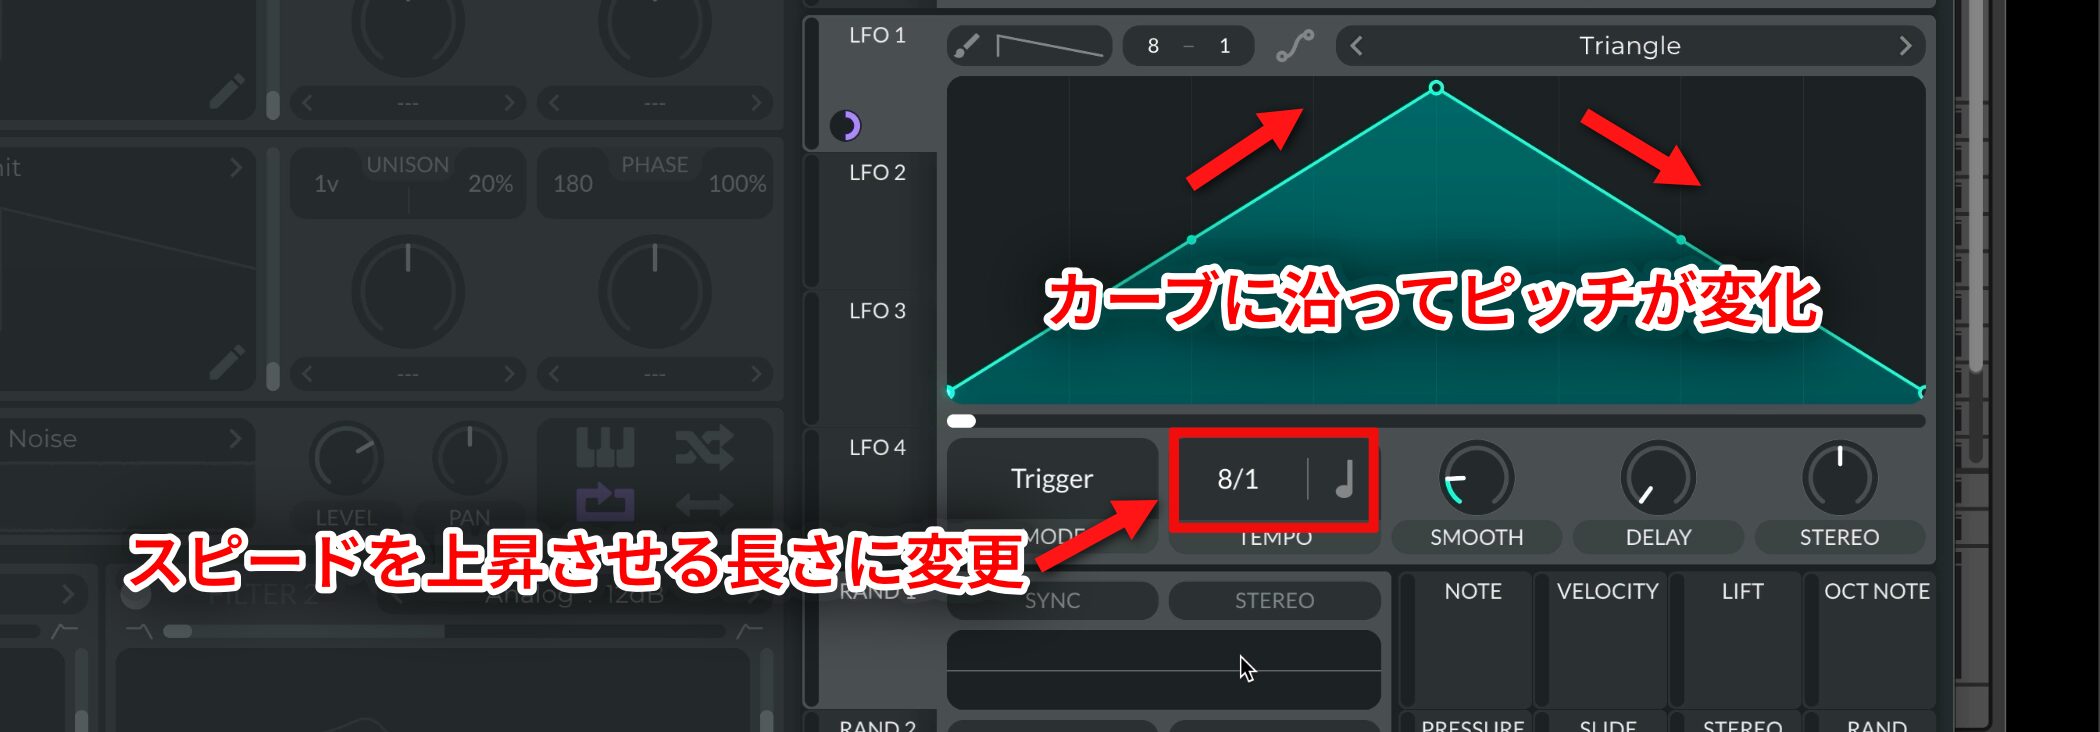
The pitch follows the LFO curve, so set the LFO speed to match the length of the rise.
For an eight-bar rise, choose 8/1.
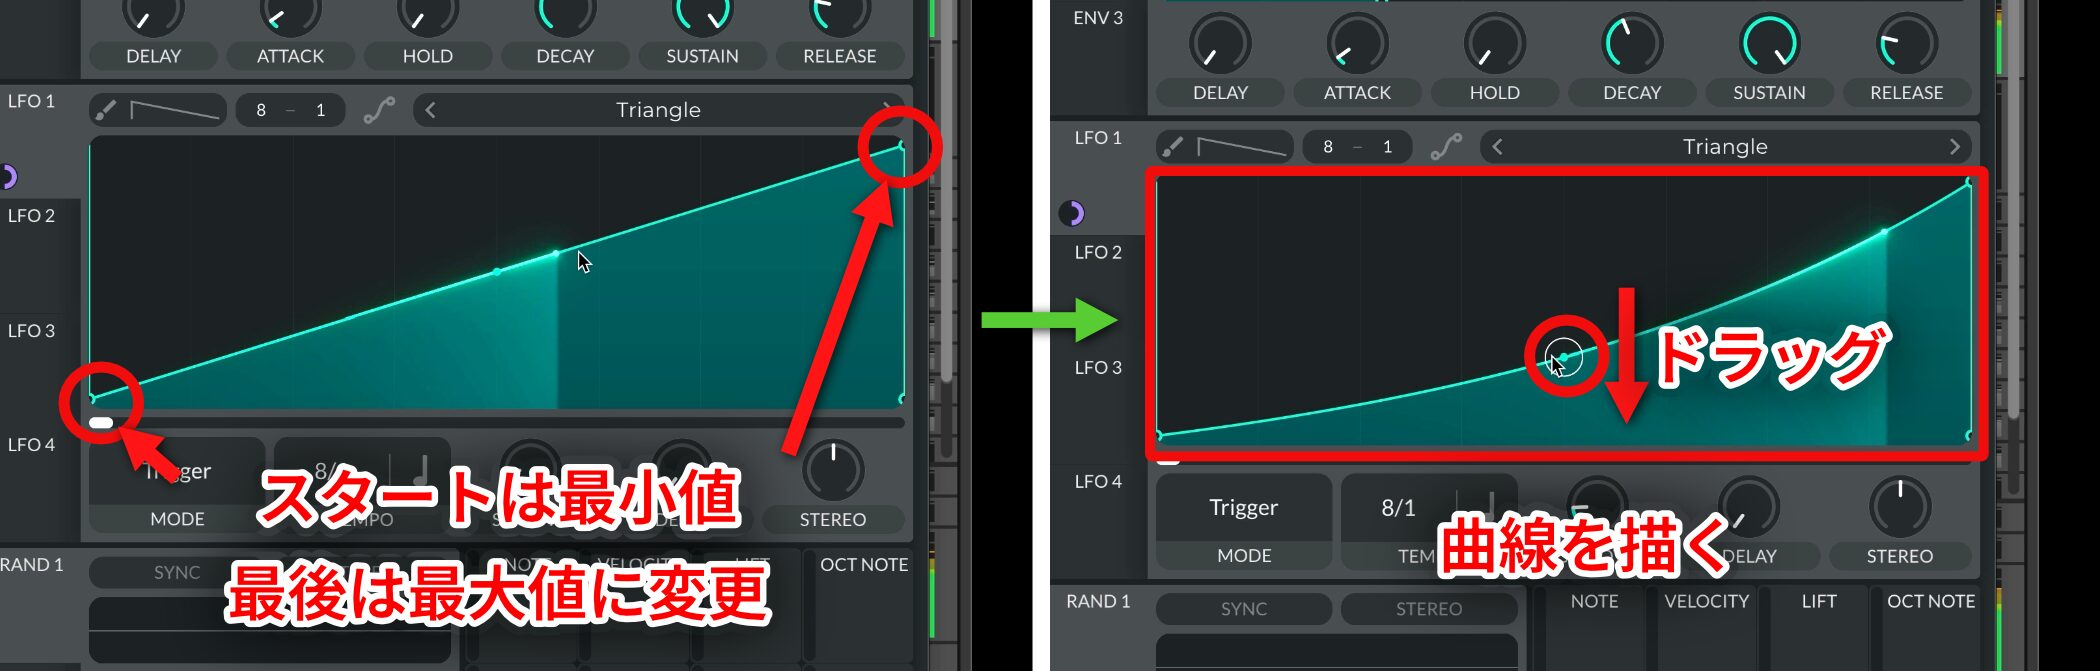
Drag the curve points so the curve starts at its minimum and ends at its maximum.
The key is to shape the curve so the rise feels stronger toward the end.
Step 3: Add a Noise Sound
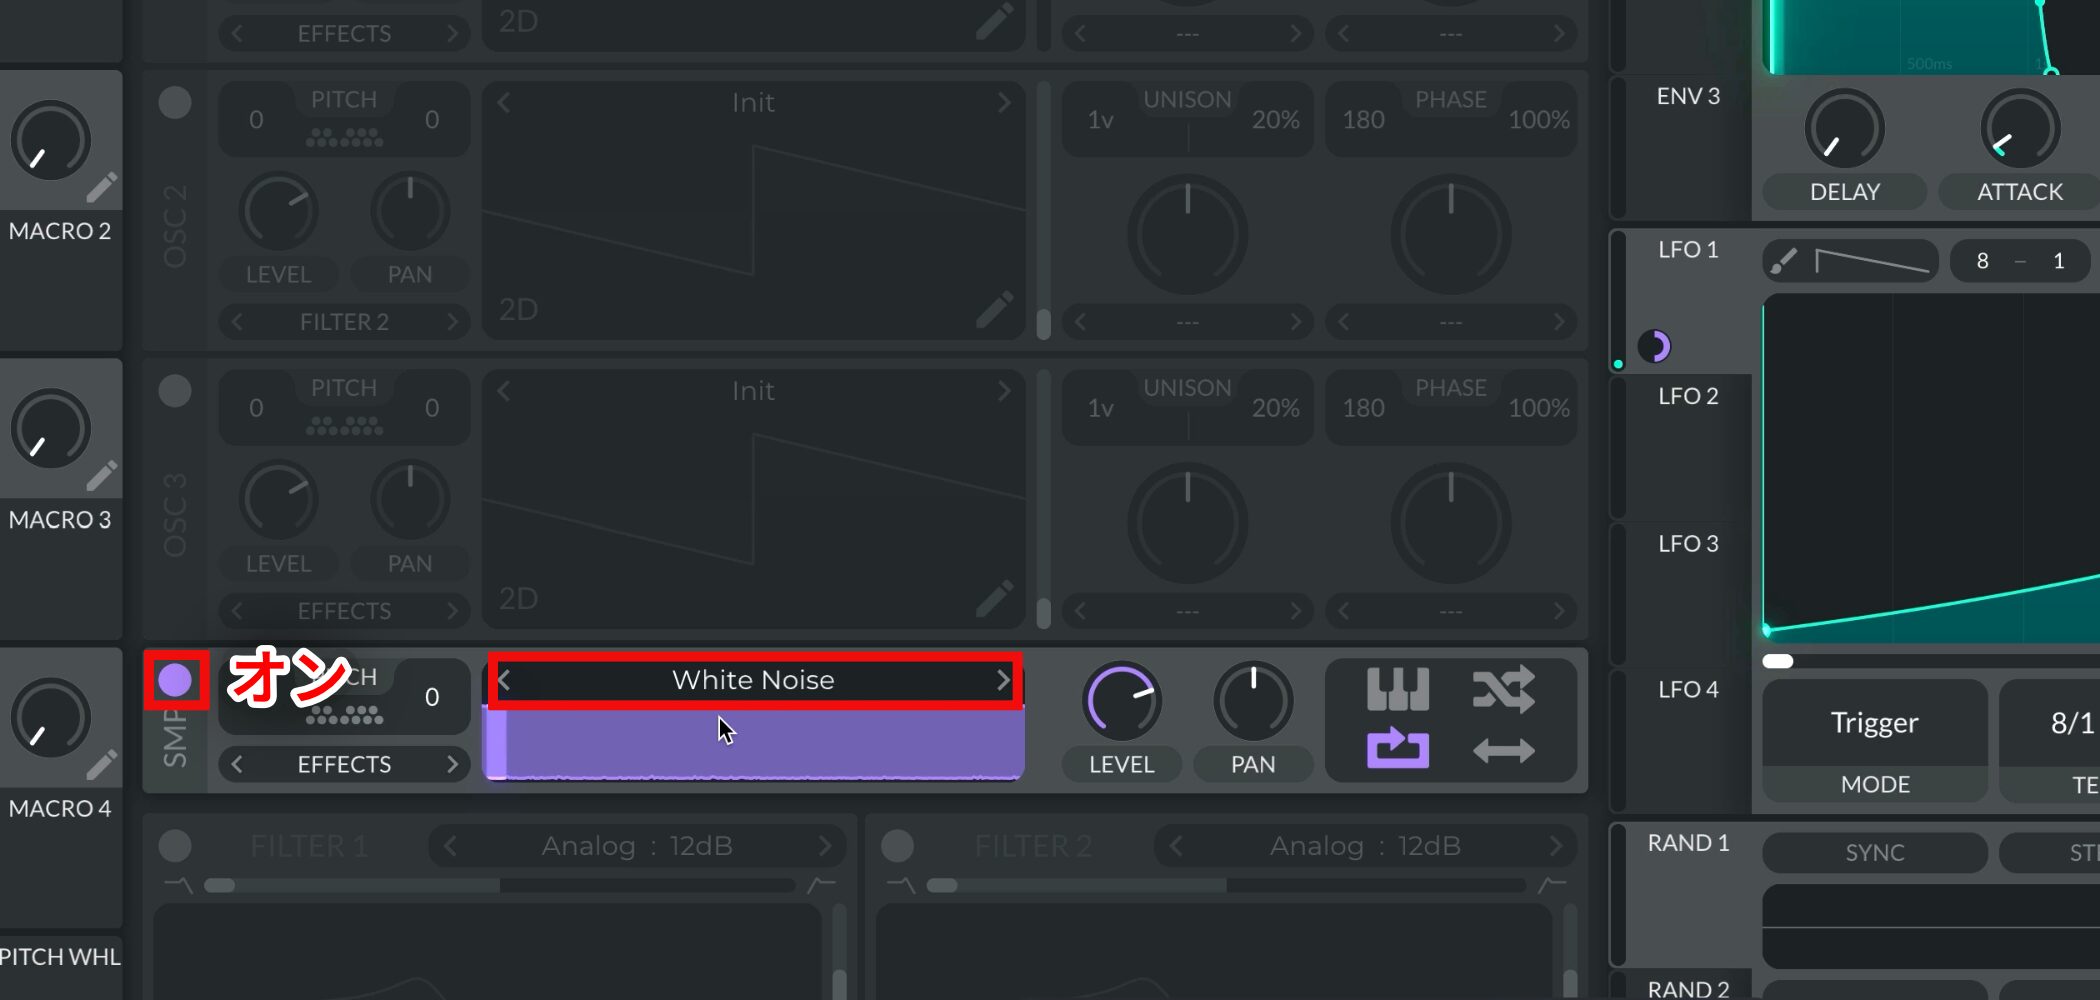
Add noise to build the excitement further.
Enable the Sampler and use the default White Noise.
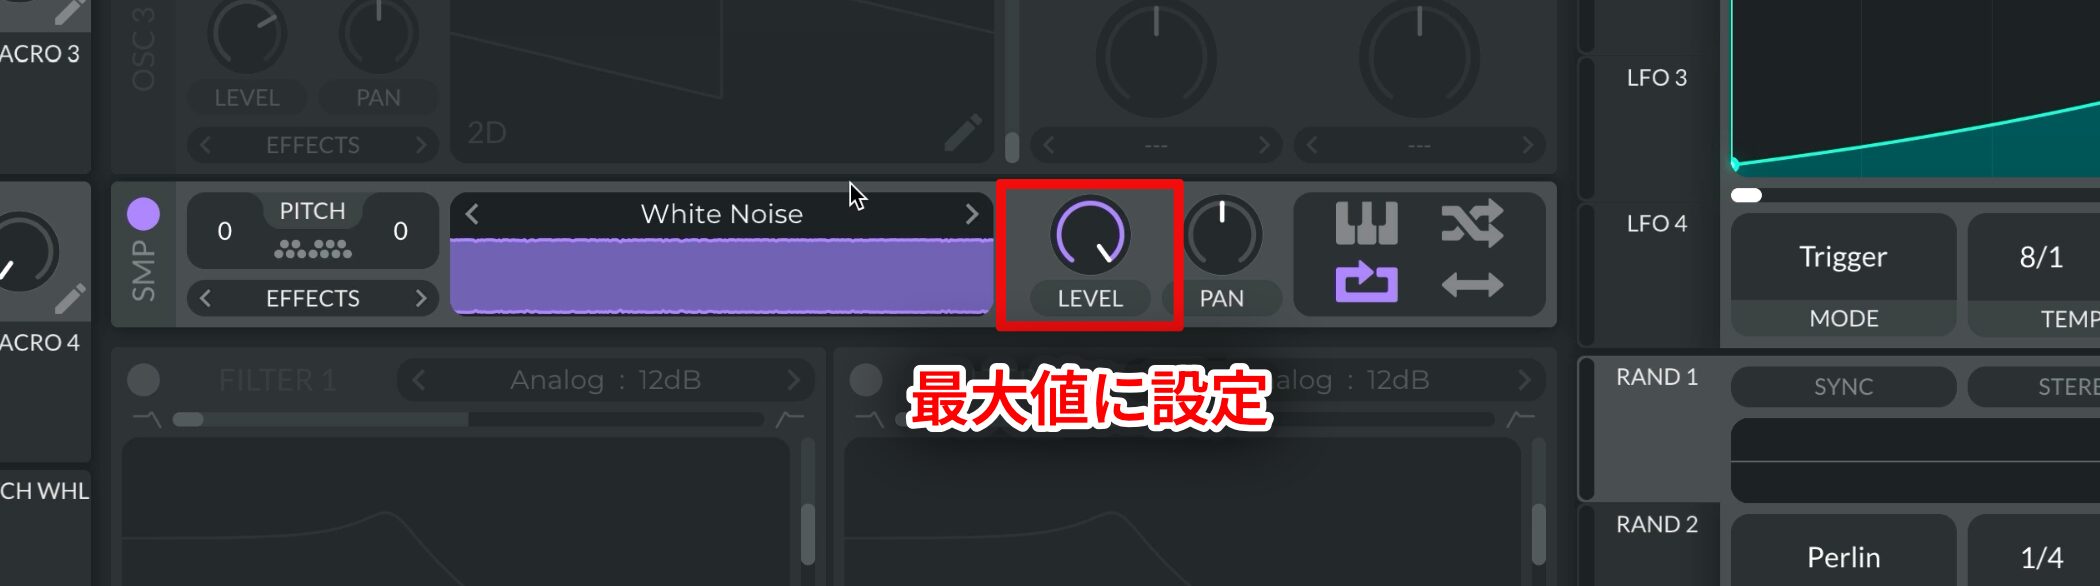
The level is a little low, so set LEVEL to its maximum.
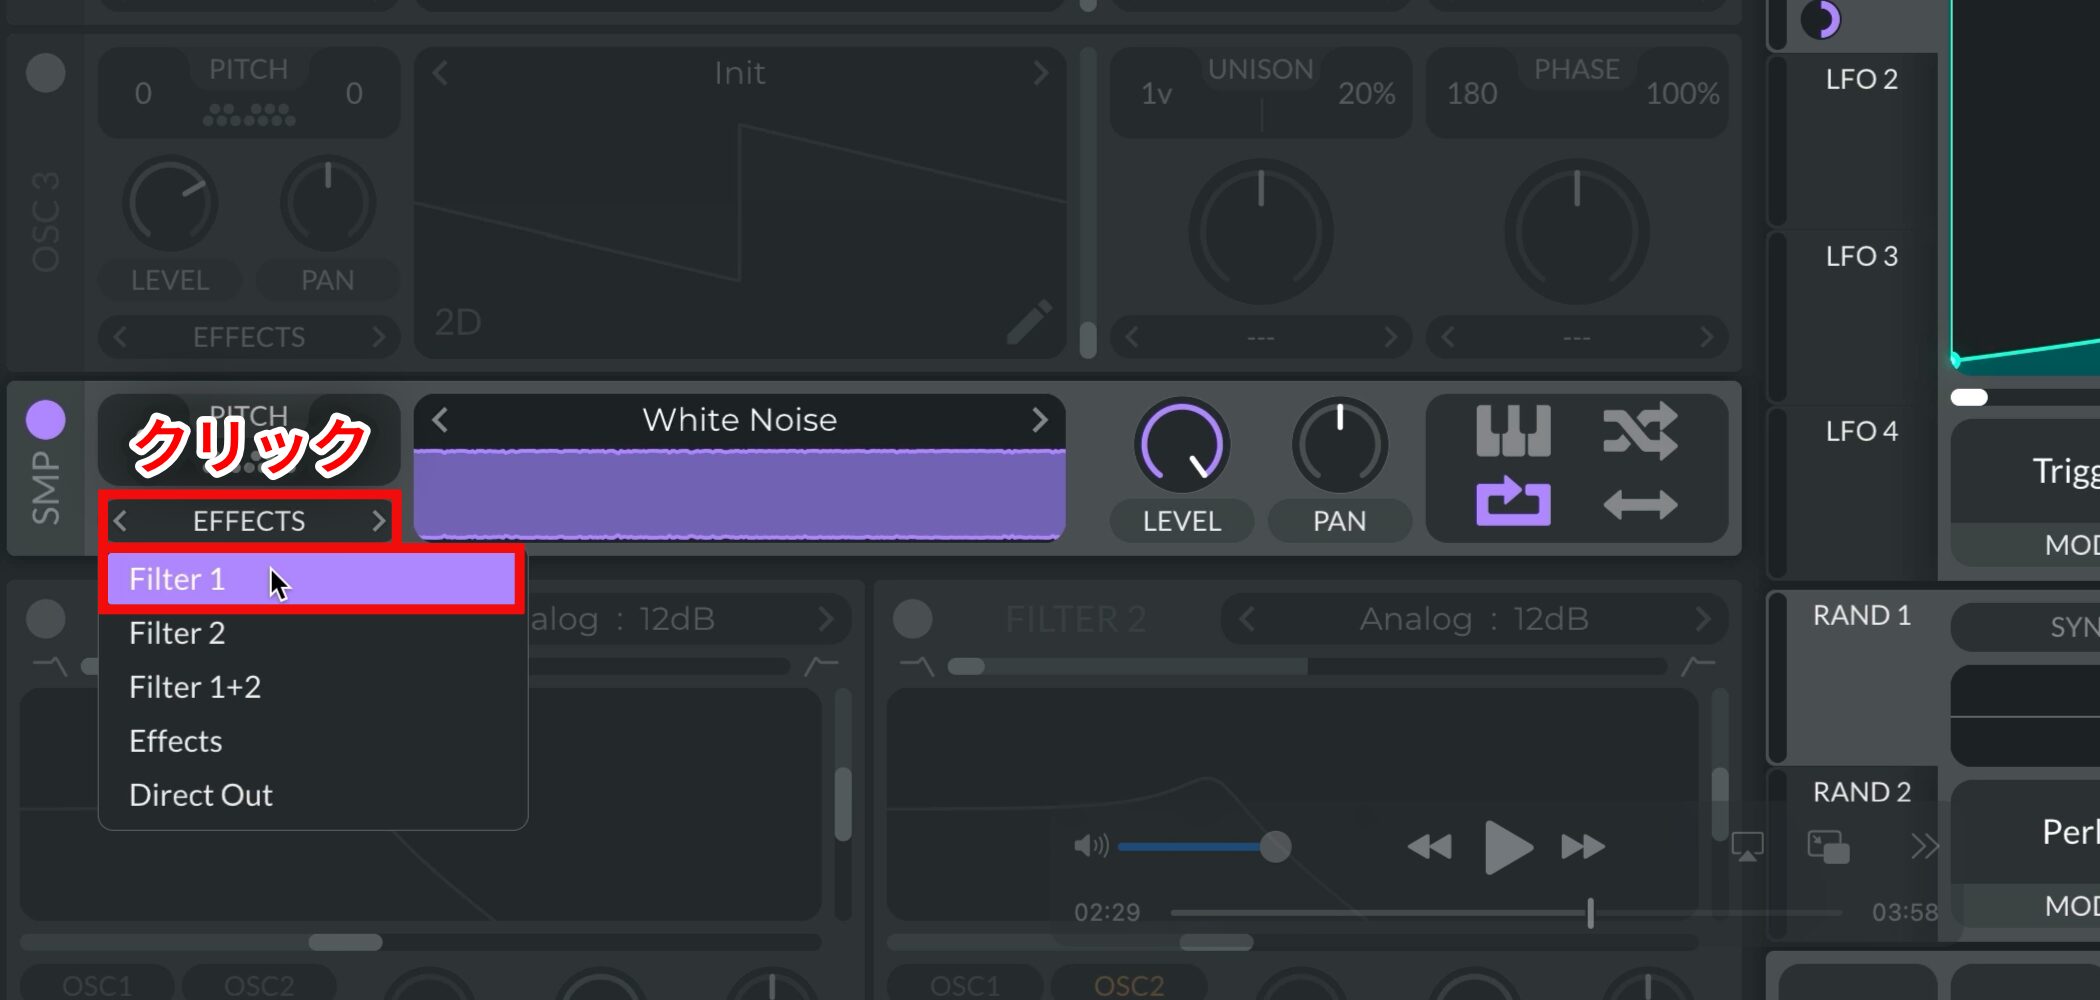
Set the audio output to Filter 1.
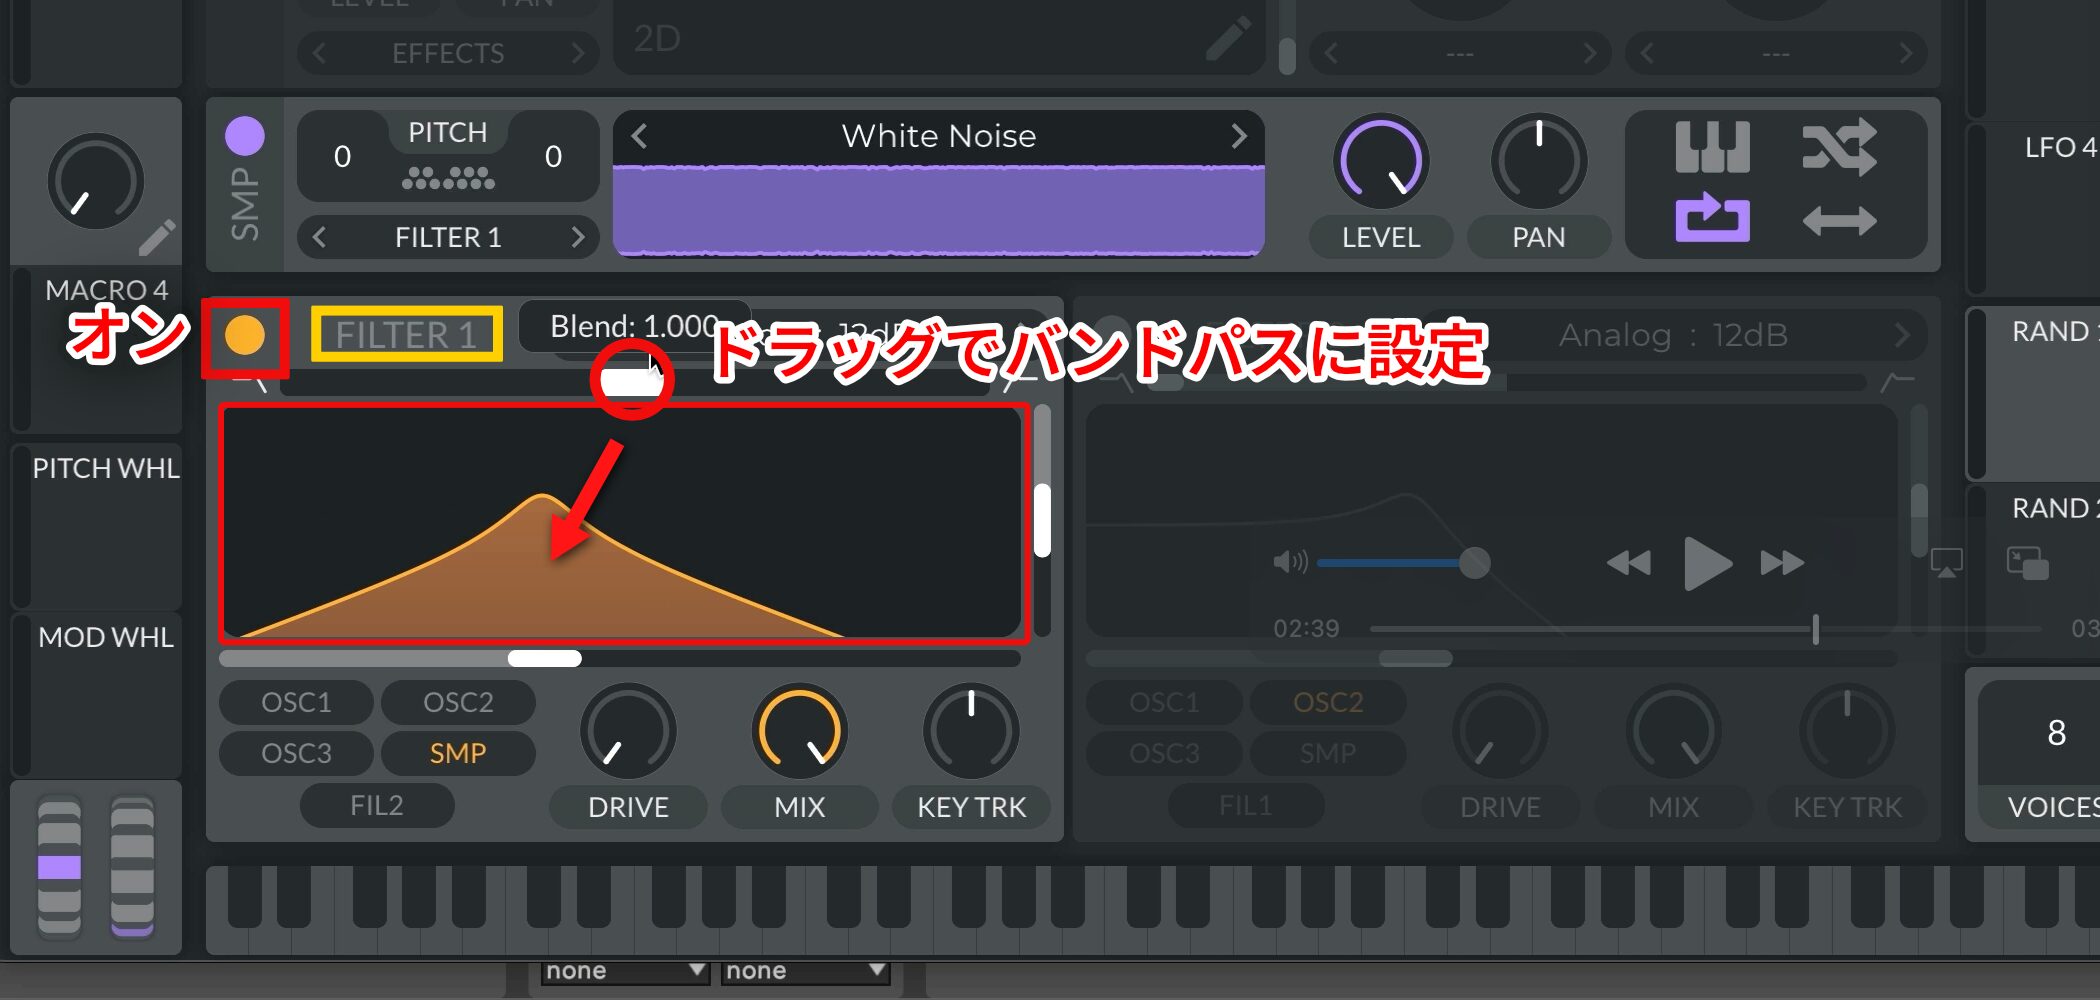
At this point the noise has no movement, so enable Filter 1 and add motion.
Drag the bar beside the waveform icon to the center to set the filter to band-pass.
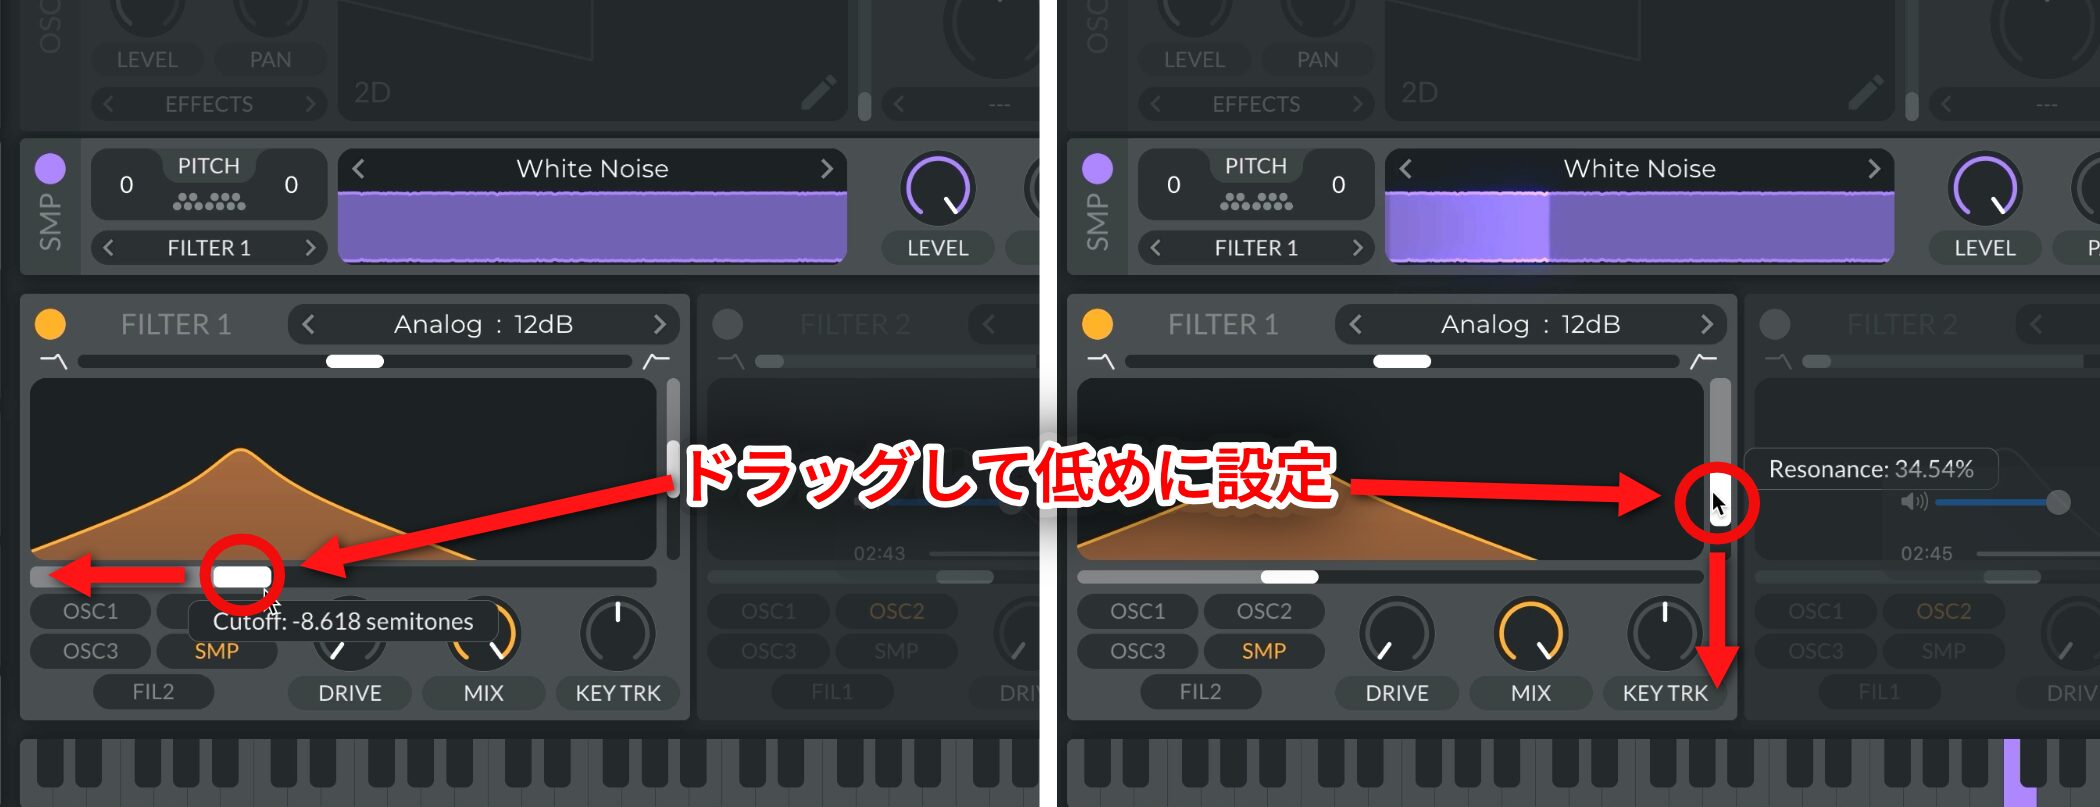
For Filter Cutoff and Resonance, picture how the sound should start and set both low.
Then give both parameters motion by assigning LFO 1 as follows.
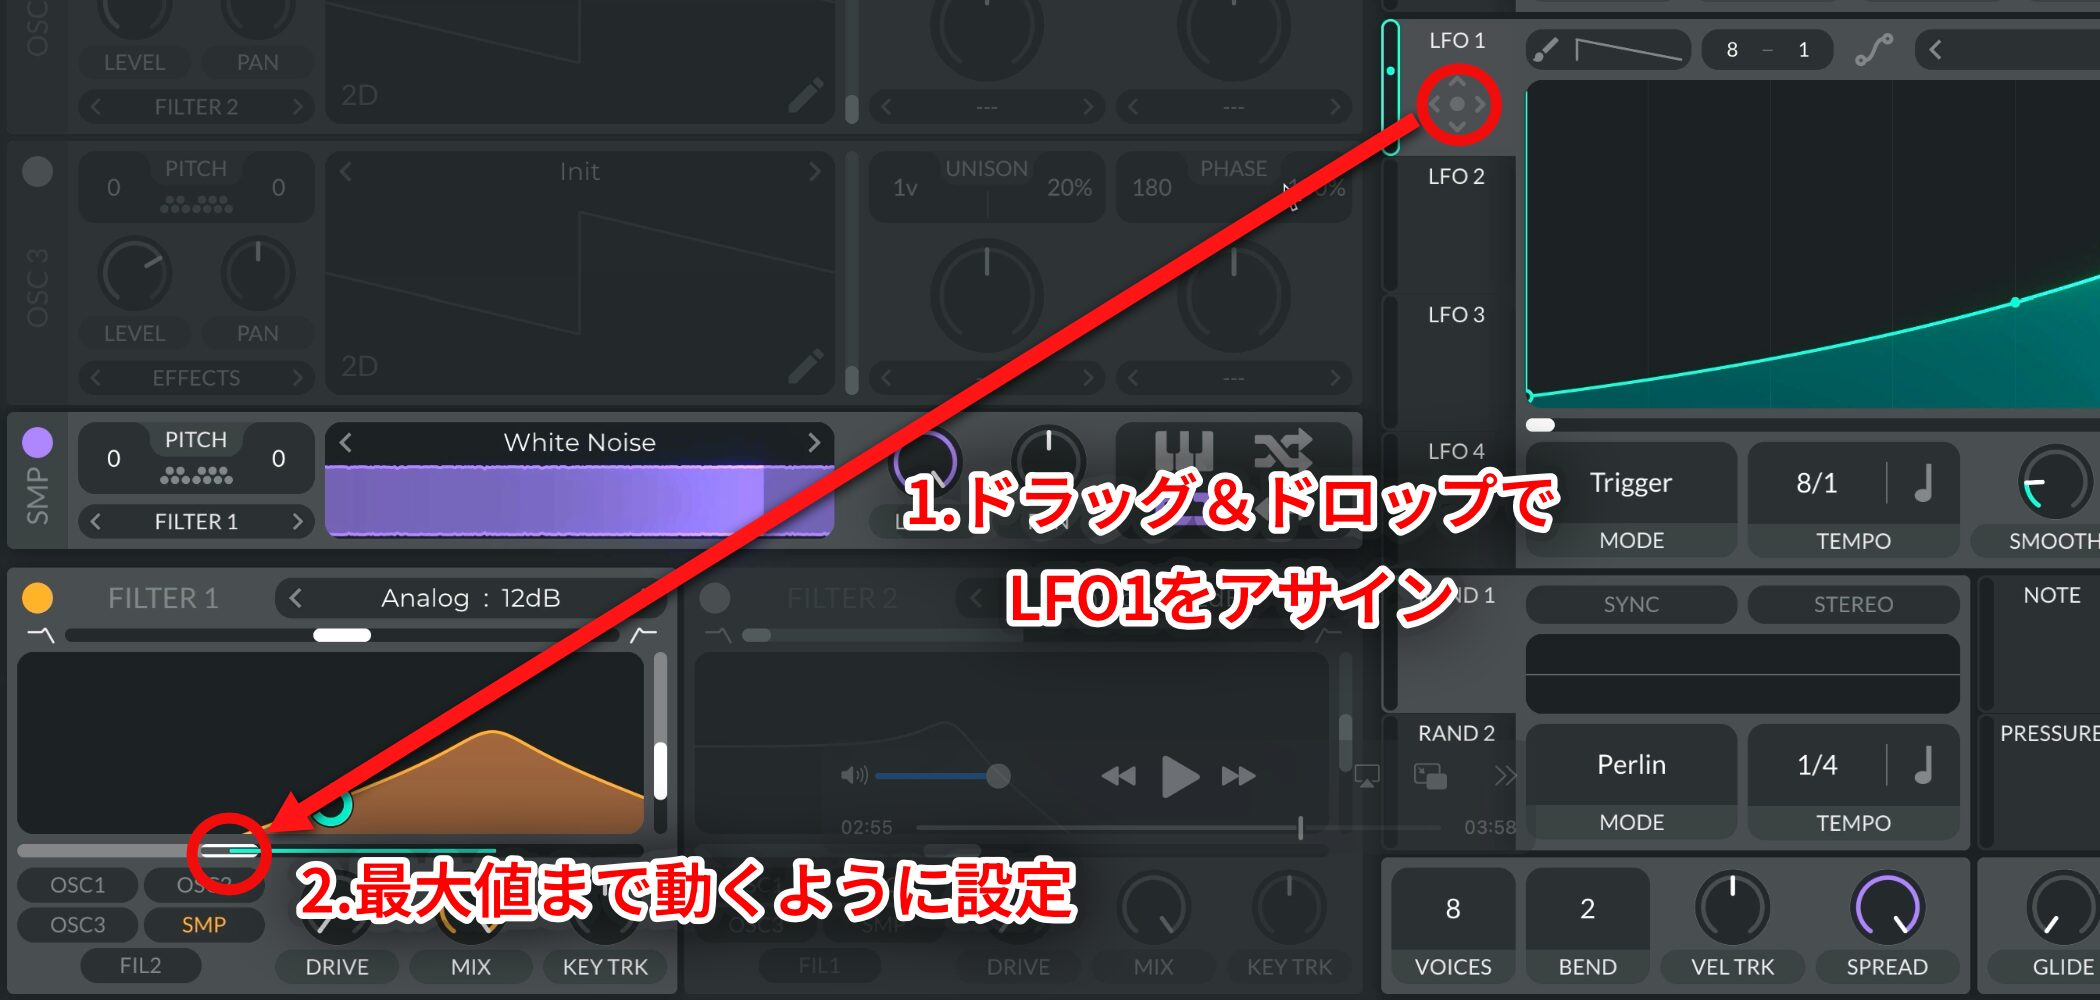
Set Cutoff to move all the way to its maximum.
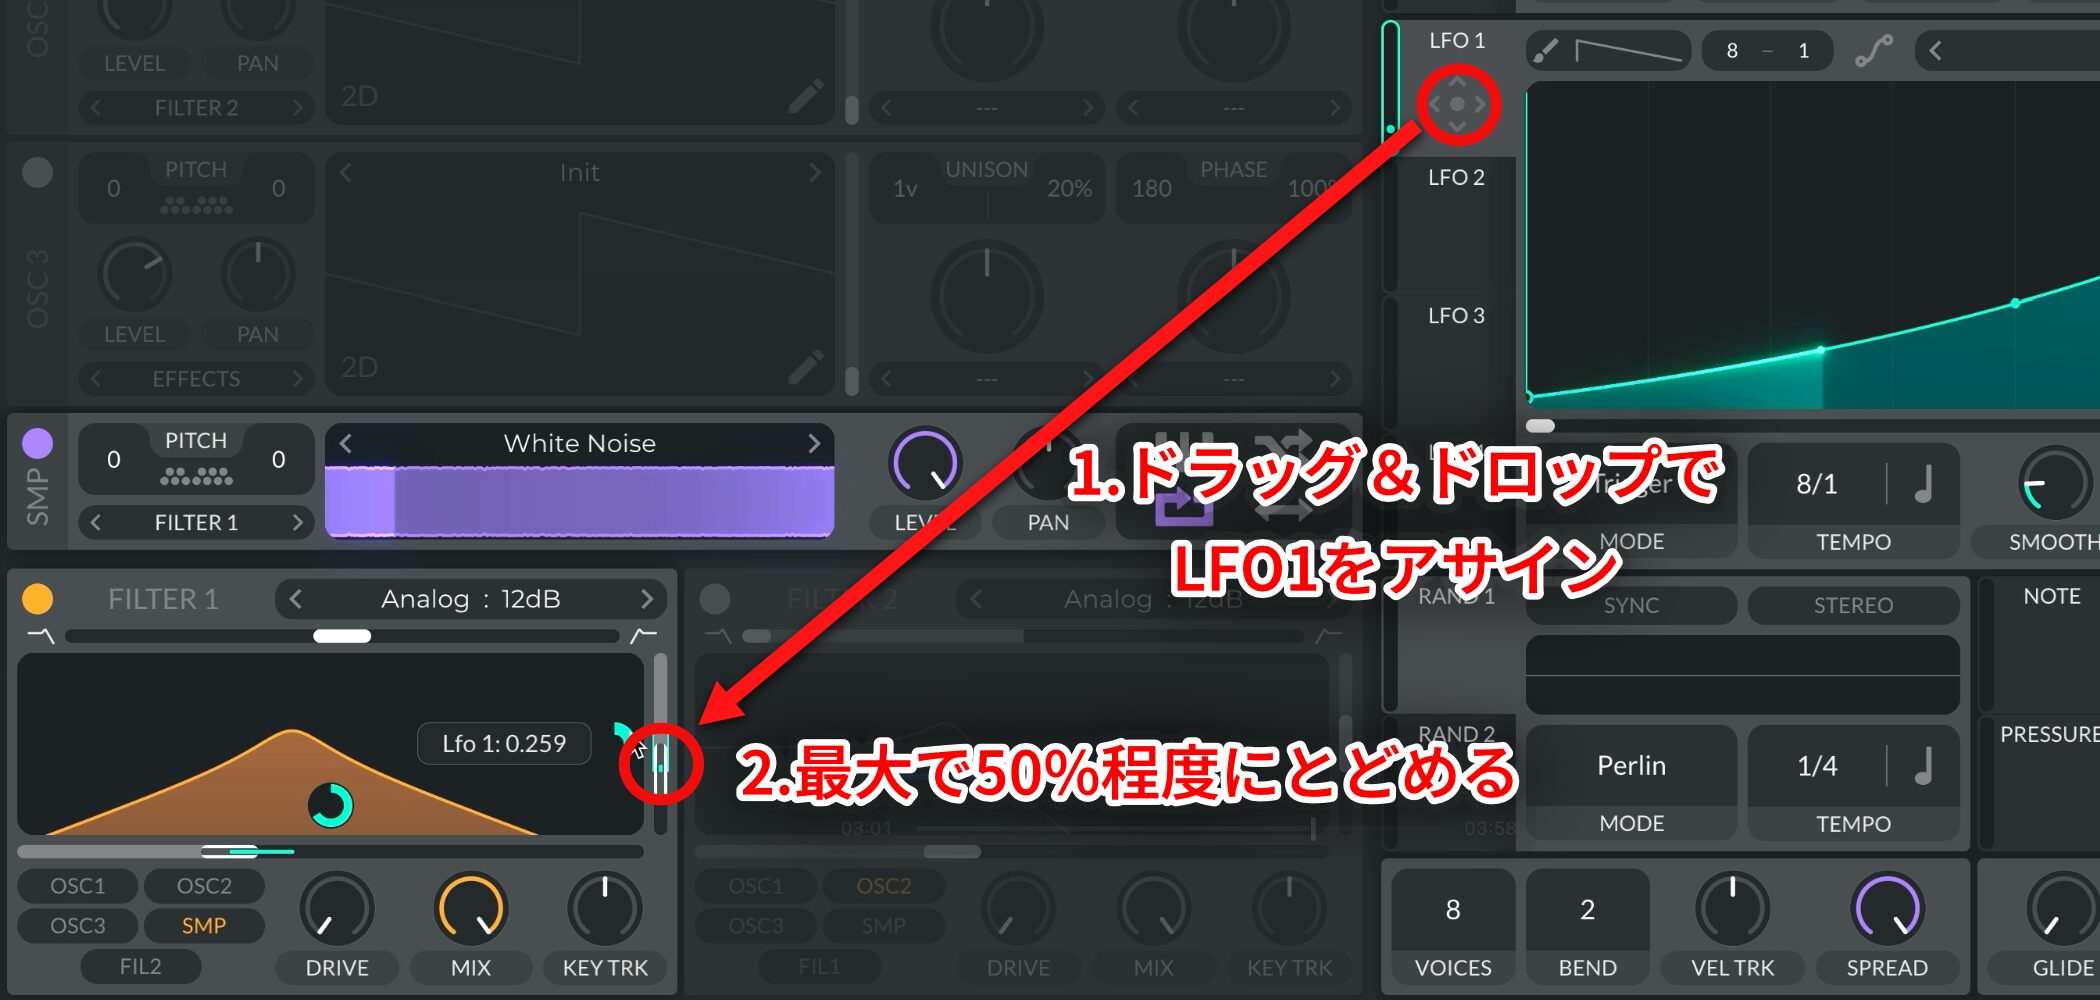
Keep Resonance at about 50% at most.
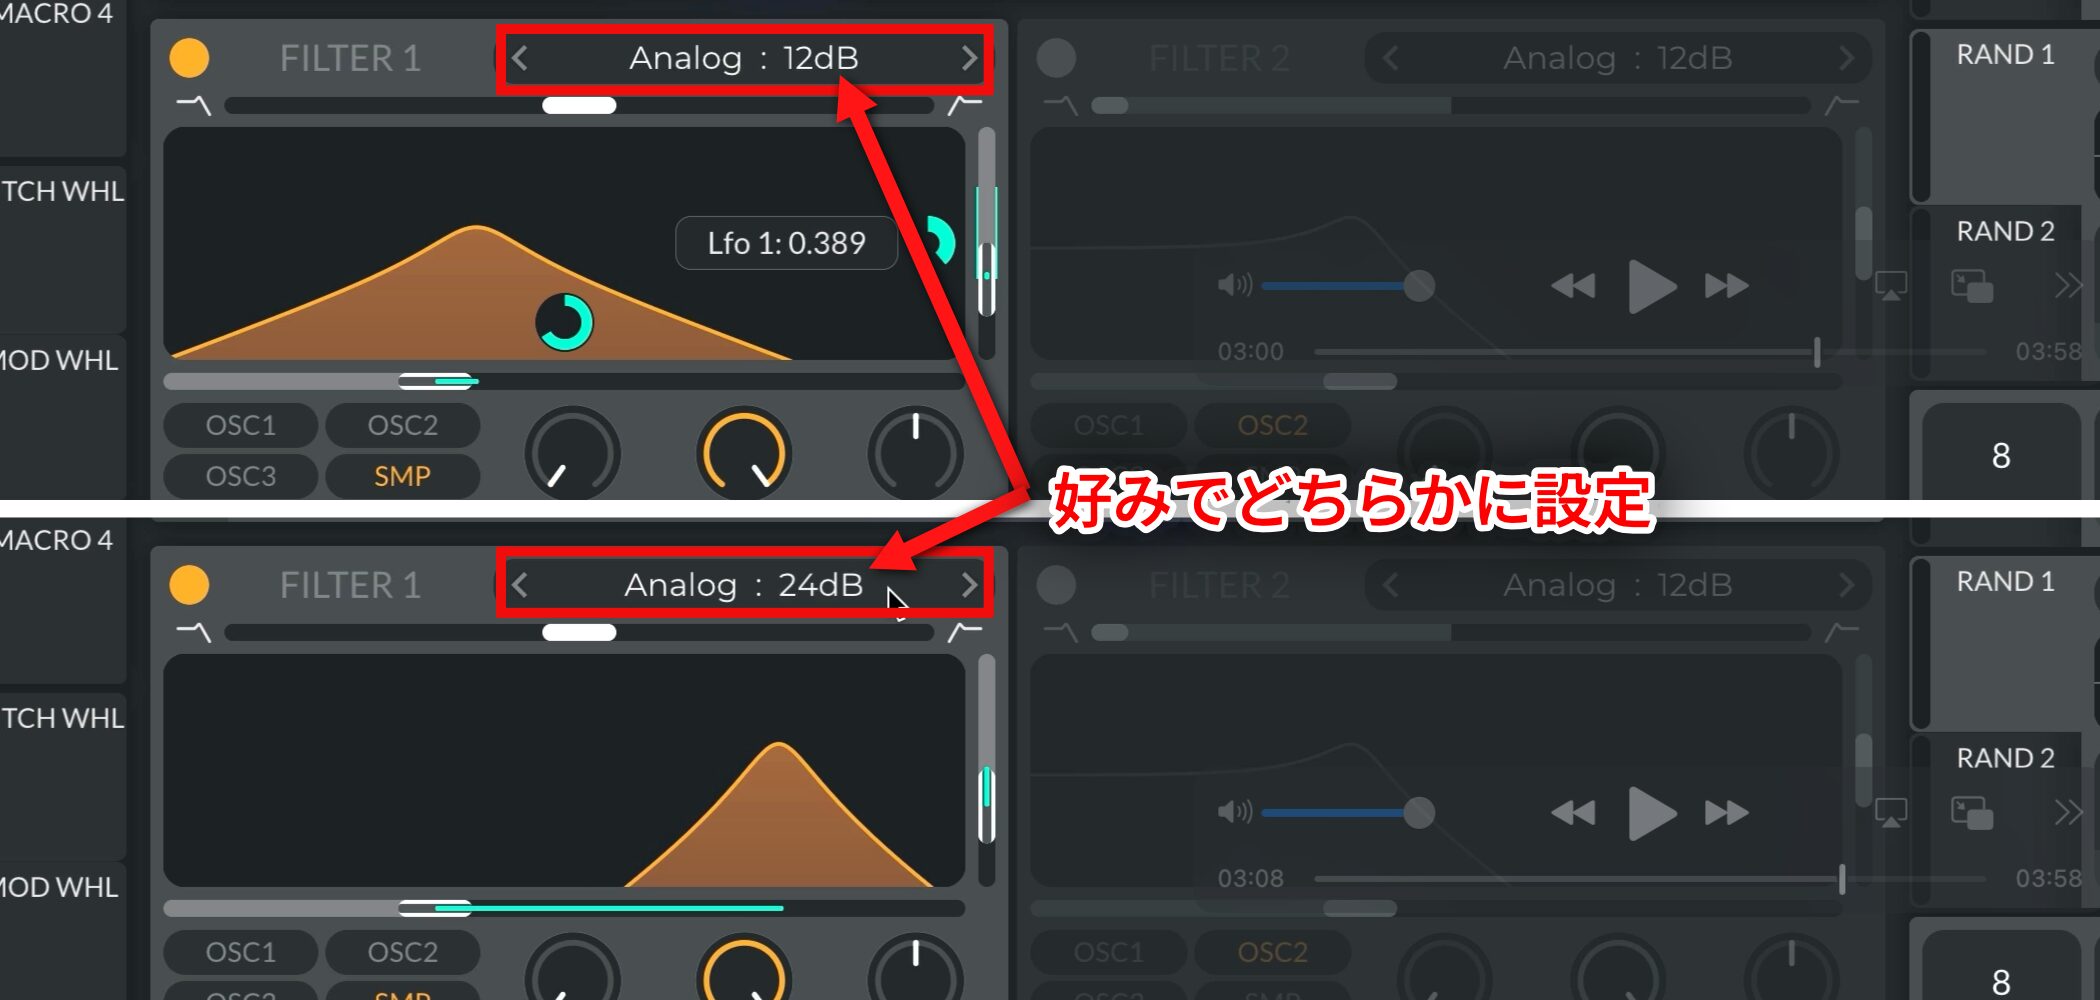
To fit the character of the track, try switching the filter mode between 12 dB and 24 dB.
Step 4: Add Effects to Fit the Sound into the Track
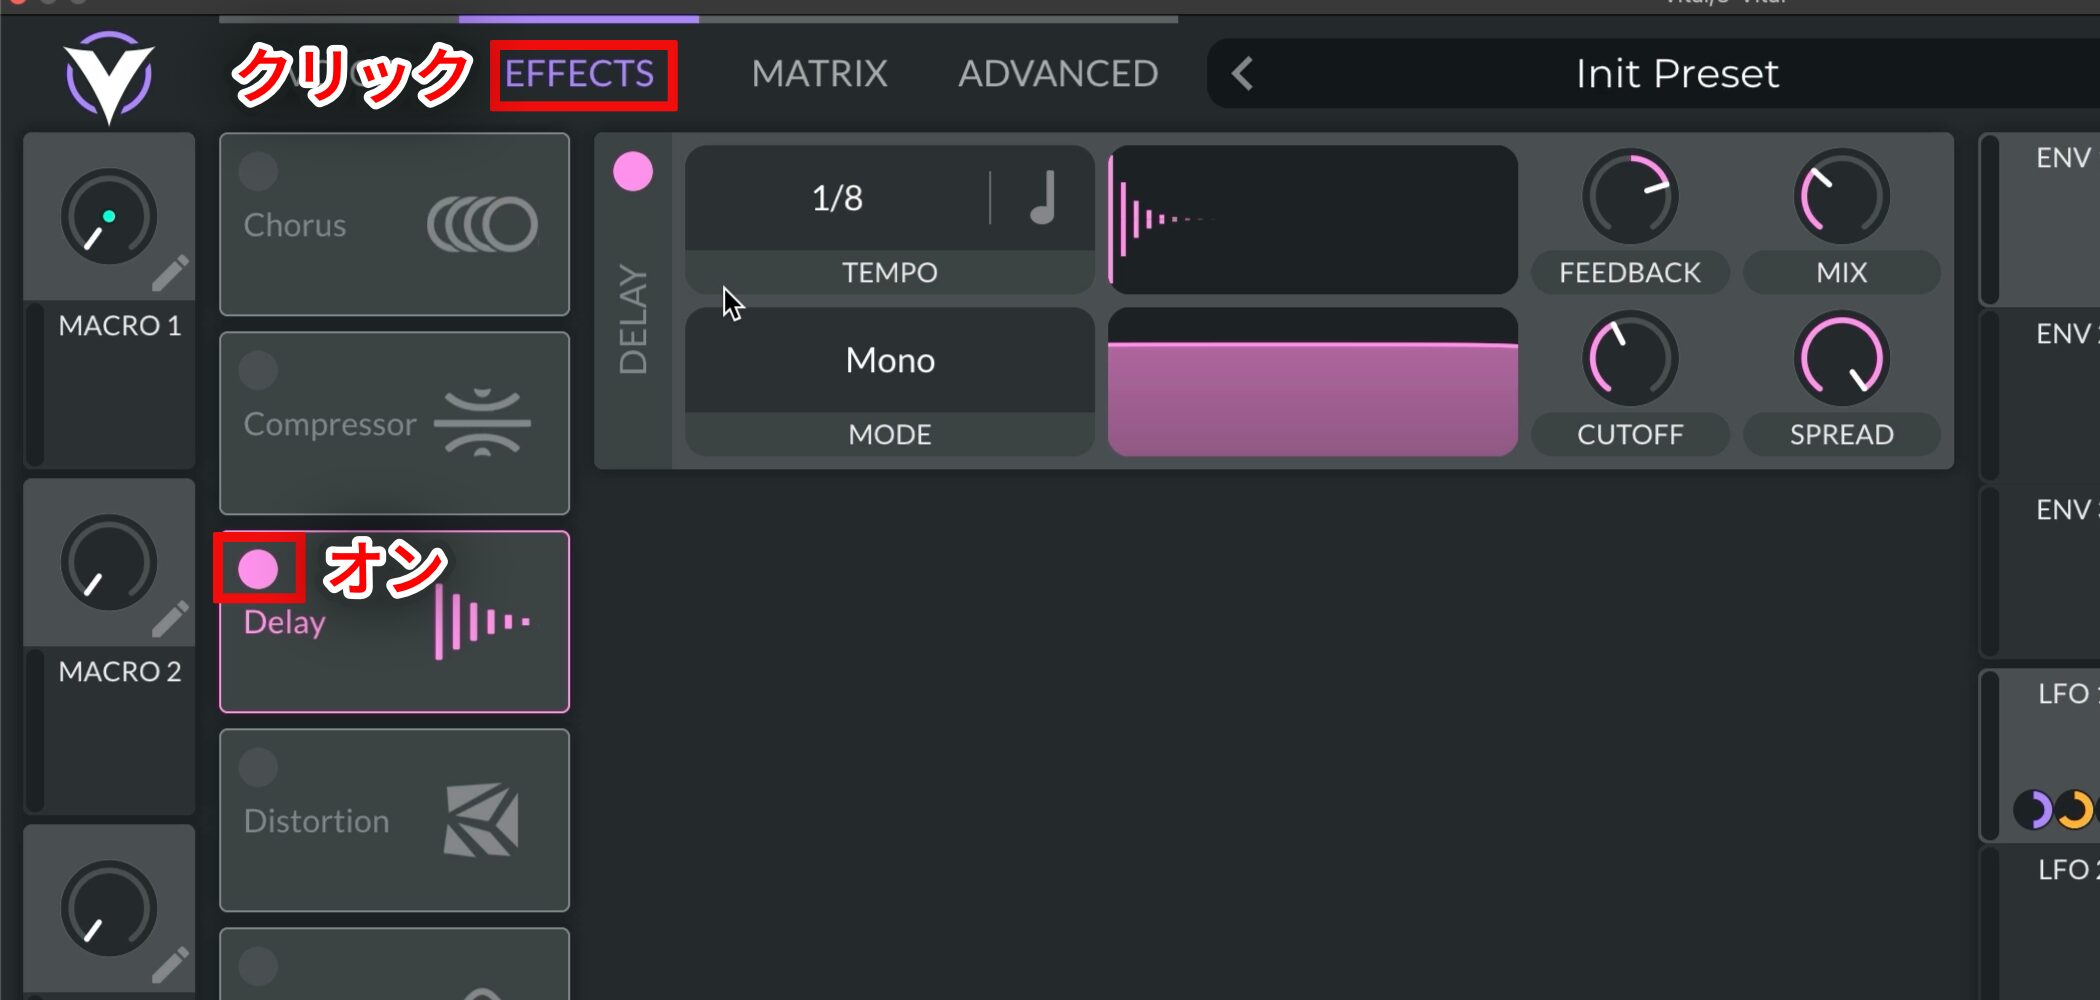
For a sense of depth, use Delay to add a lingering tail.
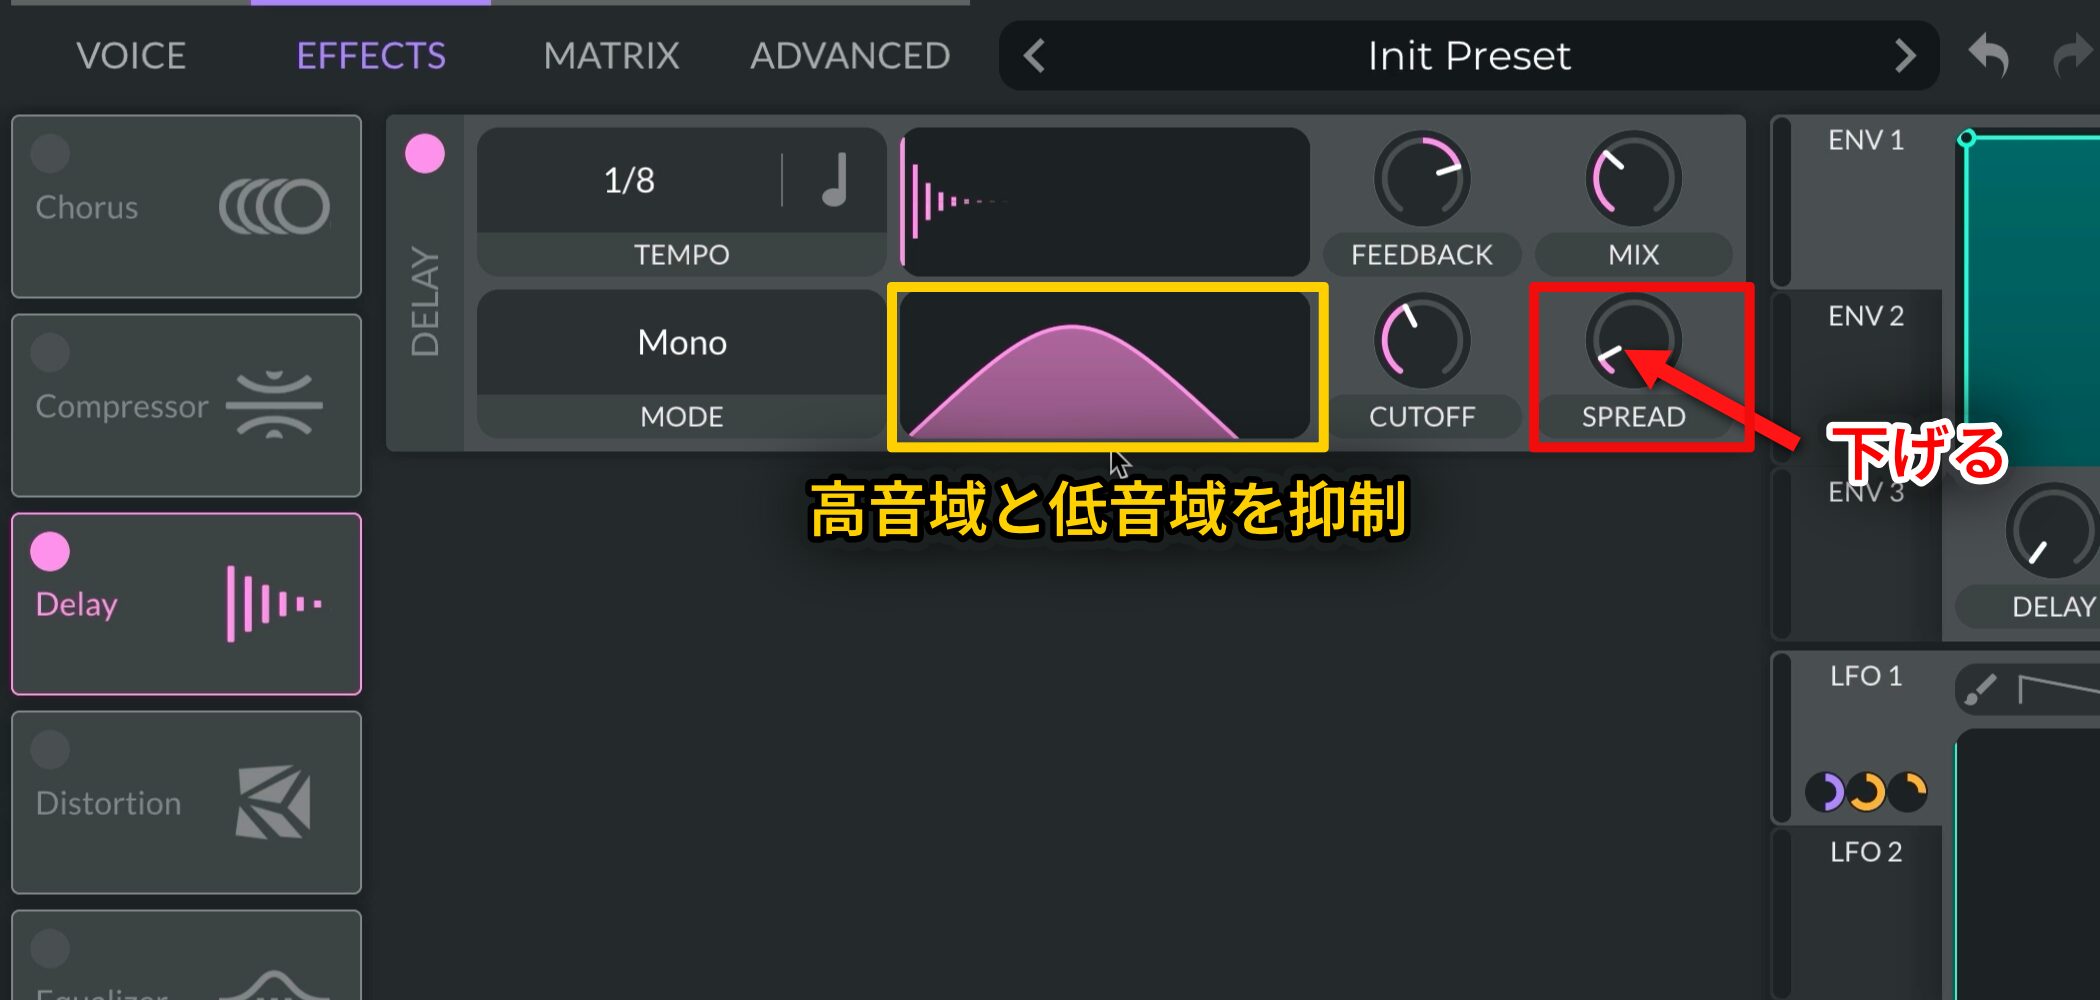
To stop the delayed sound from becoming excessive, turn down the SPREAD knob and reduce the high and low frequencies in the delay.
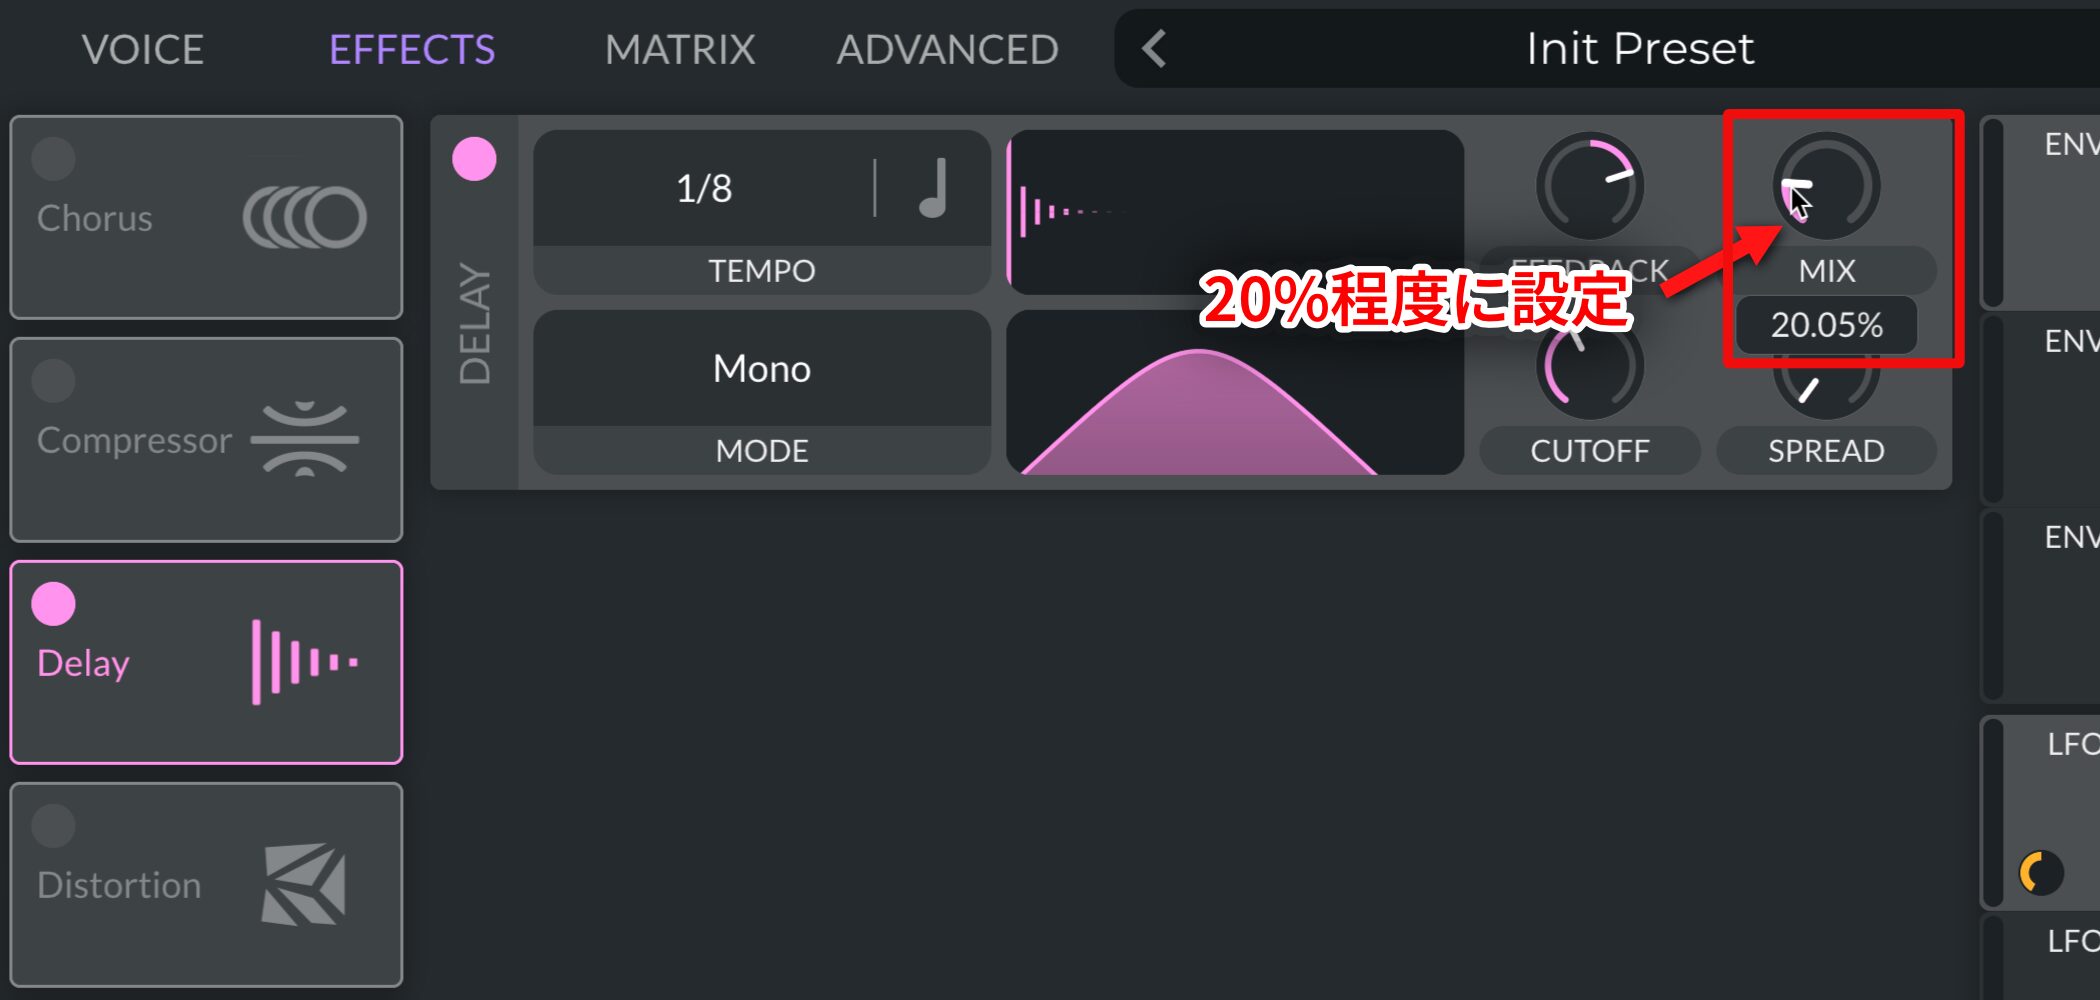
Set the MIX knob to about 20%.
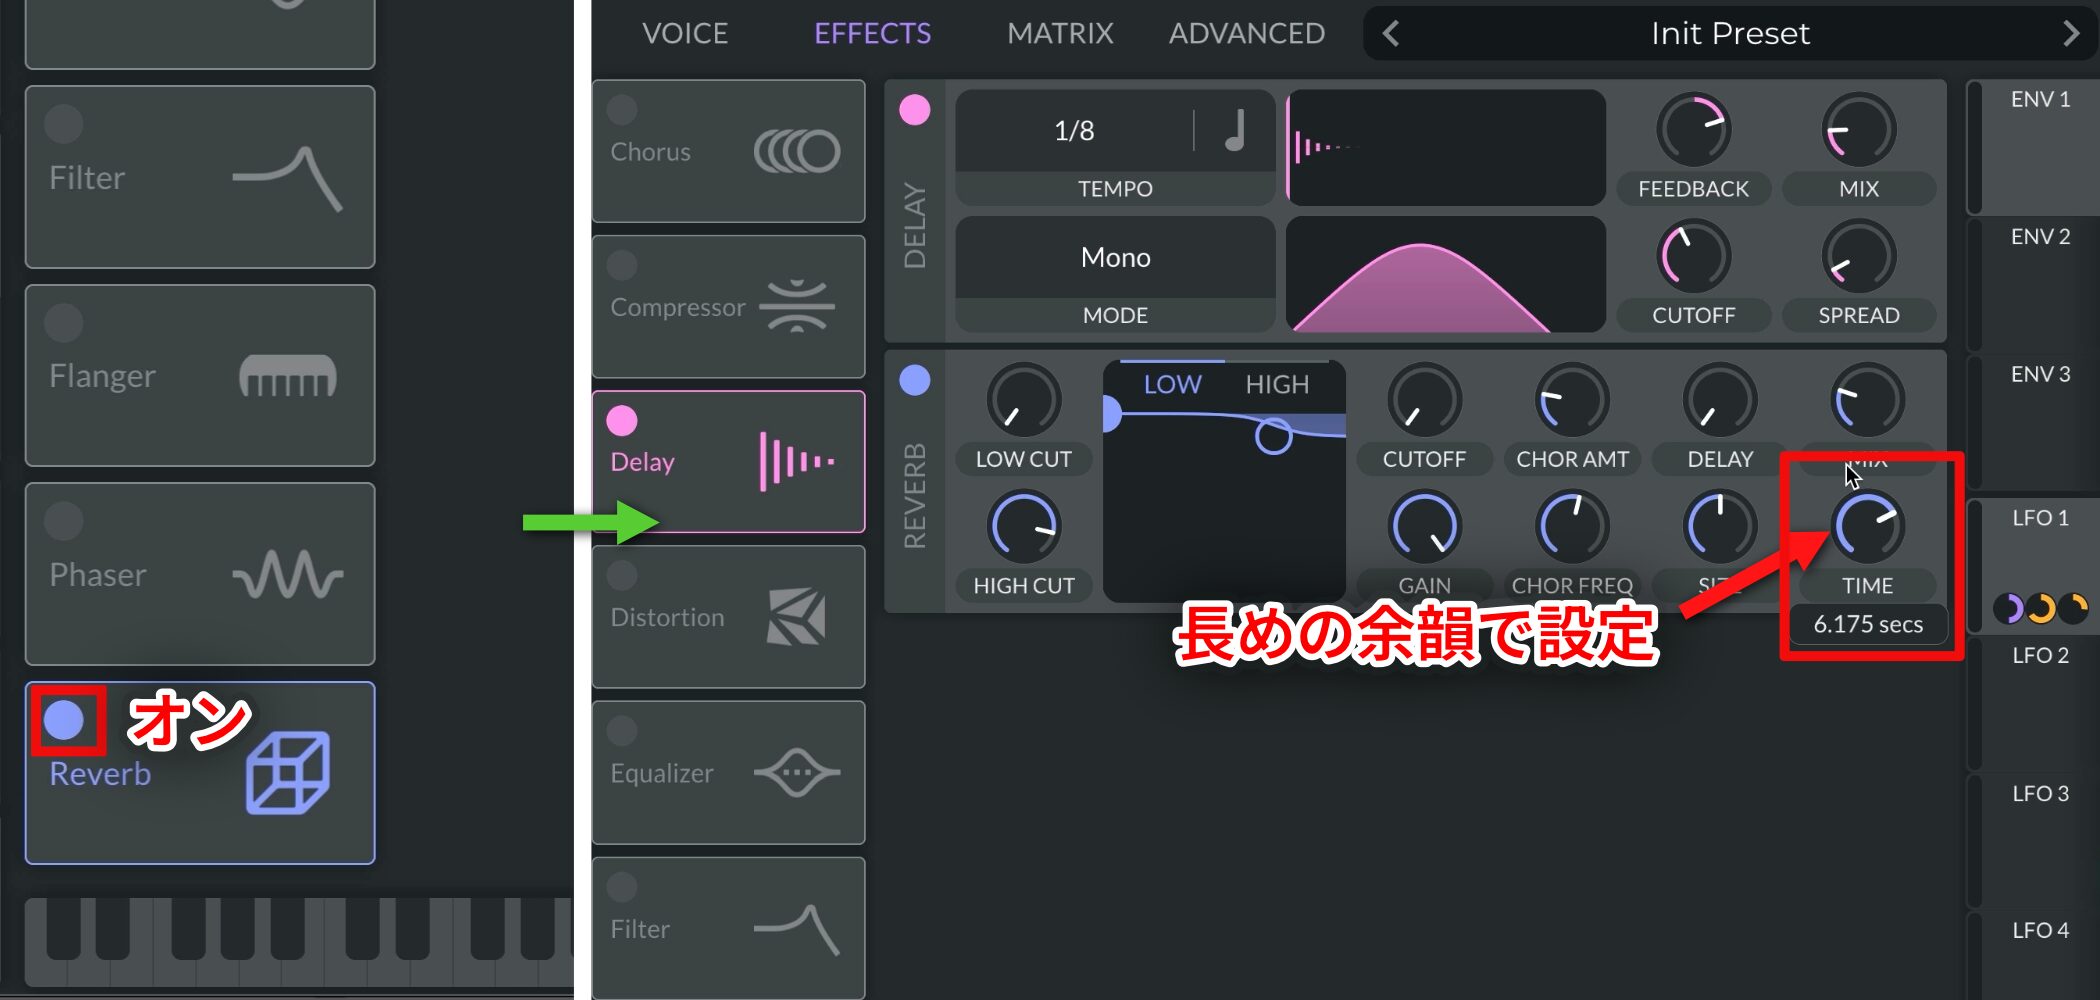
Finally, adjust Reverb's TIME knob to make a longer tail and finish the sound.
Once you know this basic recipe, you can create countless variations by changing the oscillator and LFO. Try making it your own.
Here is a recommended playlist featuring risers and uplifters for more examples.
Recommended Playlist: Hear Risers and Uplifters
Frequently Asked Questions
Q1. Which oscillator waveform should I choose for a riser in Vital?
We recommend the Sawtooth waveform. Set UNISON to around 8 voices for thickness and Detune to around 10% to offset their pitches, creating rich harmonics and a stronger build.
Q2. Which parameter changes the length of the riser's climb?
Change LFO 1's speed. For a rise over eight bars, set it to 8/1. Shape the LFO curve so it climbs more steeply toward the end to emphasize the build.
Q3. What should I watch for when setting the filter on the added noise?
Use a band-pass filter and assign LFO 1 to Cutoff and Resonance to add motion. Keep Resonance at about 50% or below so the sound remains controlled rather than becoming overly harsh.
Q4. How can I add depth to the finished riser?
Use Delay and Reverb. Set Delay's MIX to around 20% to prevent an excessive echo, turn down SPREAD to reduce its high and low frequencies, and set a longer Reverb time for a spacious tail.
NEW ARTICLES
Latest English Articles