This guide explains practical vocal recording techniques in Studio One 7, from creating a track and setting the input to reducing latency, changing key with Global Transpose, and recording with less CPU load. It also covers exporting a backing track to a new Song and using stem separation to adjust the balance of an audio file’s components.
Key changes, punch-in recording, and stem separation
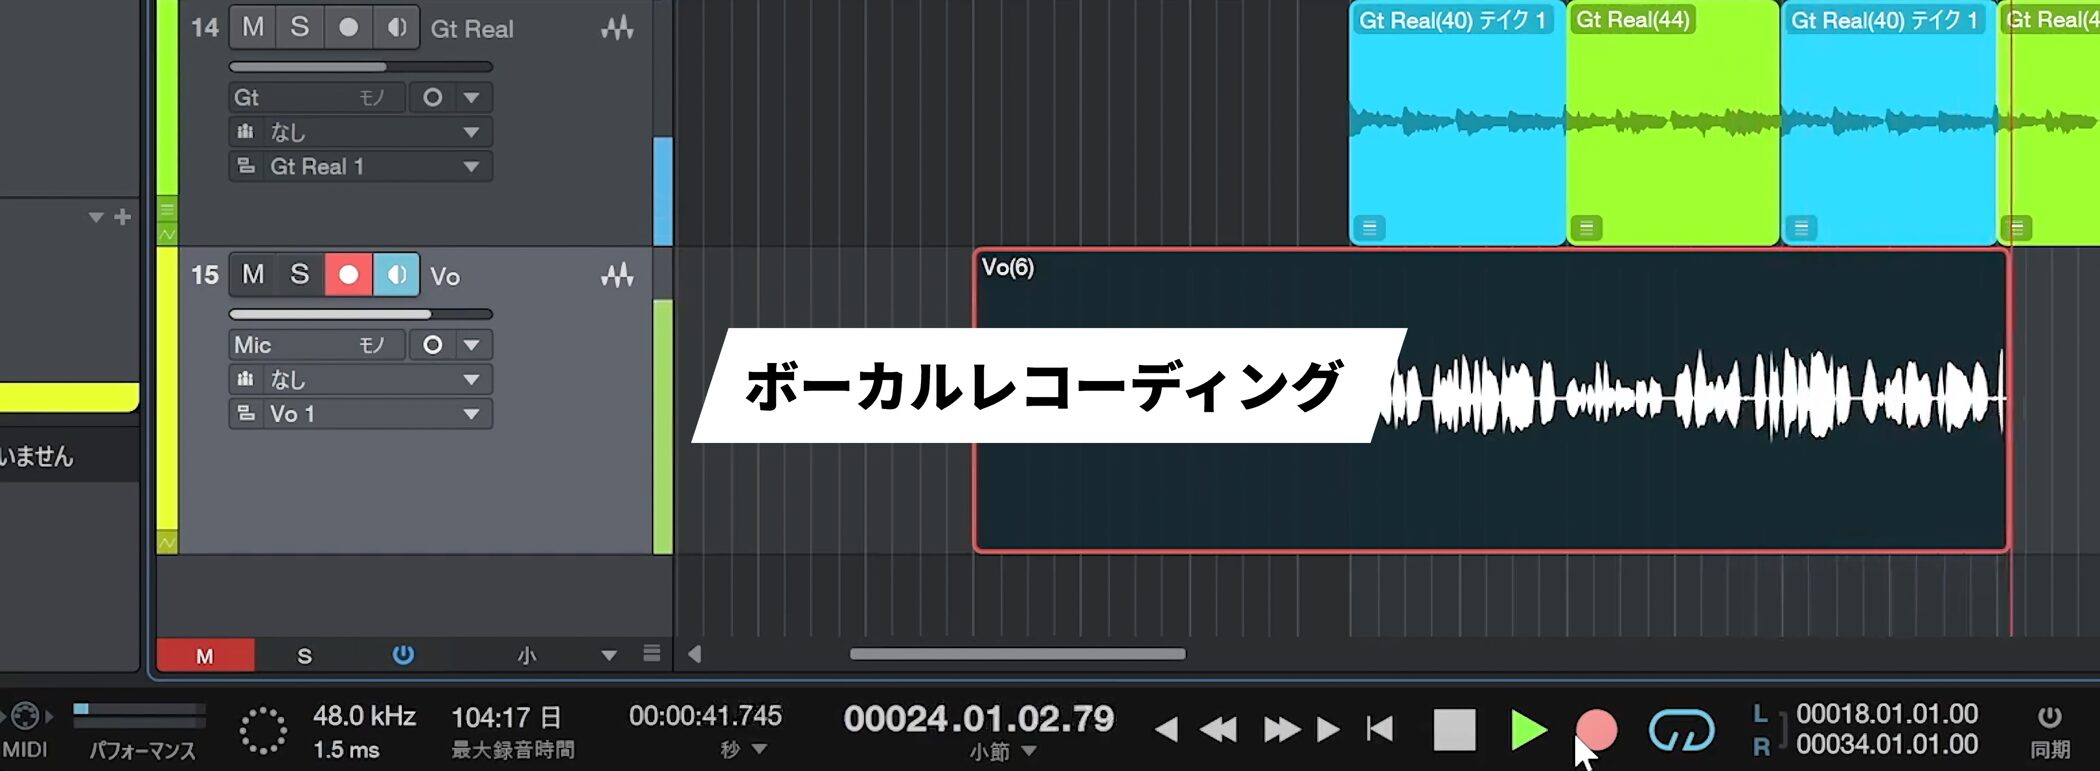
Let’s look at vocal recording in Studio One 7.
We will cover the basics, adjusting the key, reducing CPU load, and punch-in recording step by step.
Create a vocal track and set the input
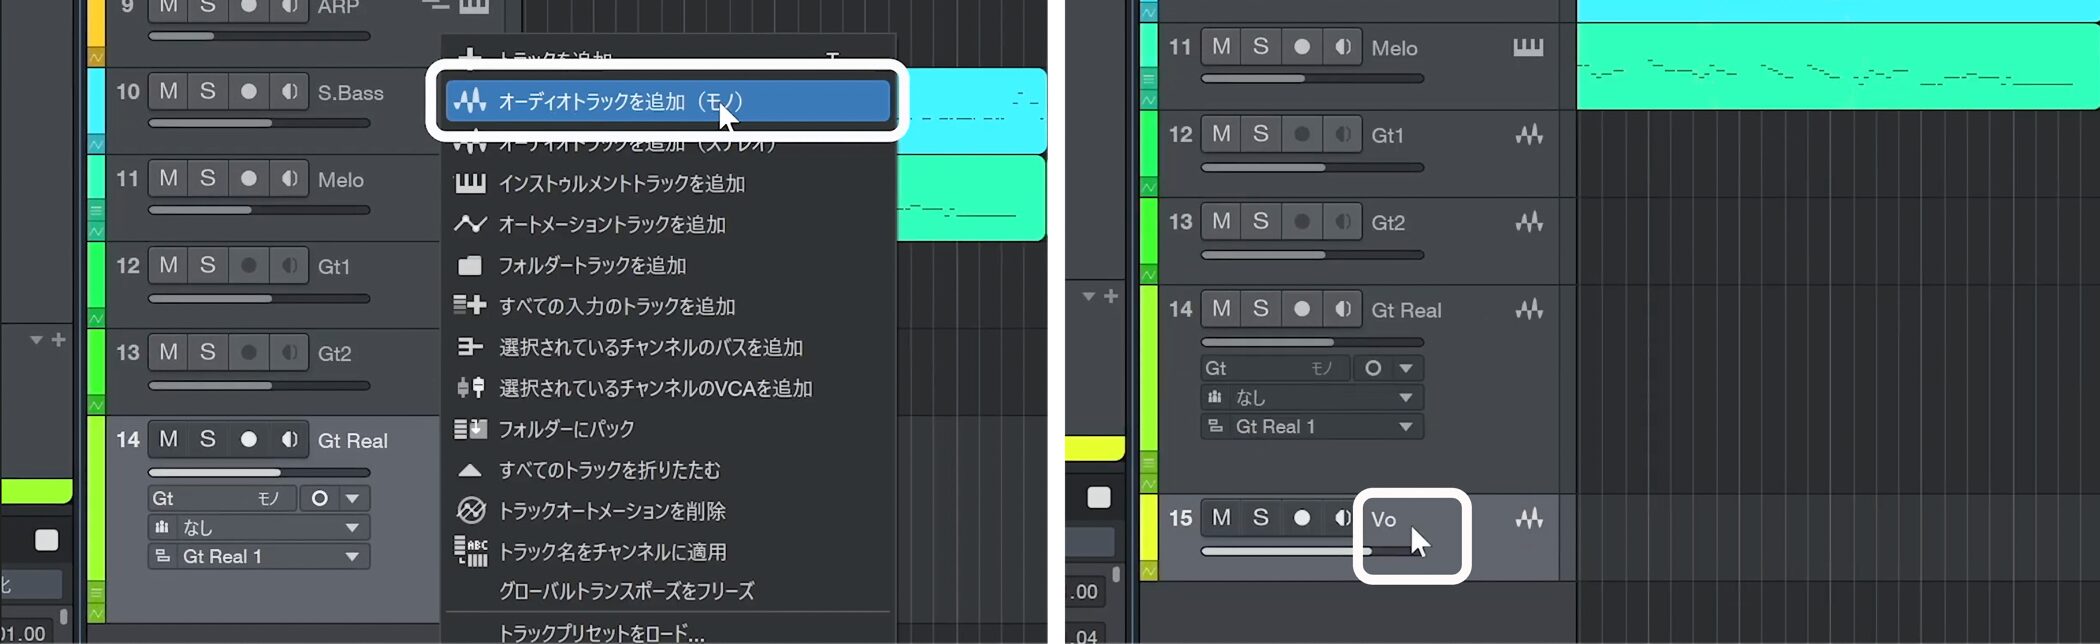
To record vocals, first use Add Audio Track (Mono) to create an audio track.
Naming the track now makes it easier to manage.
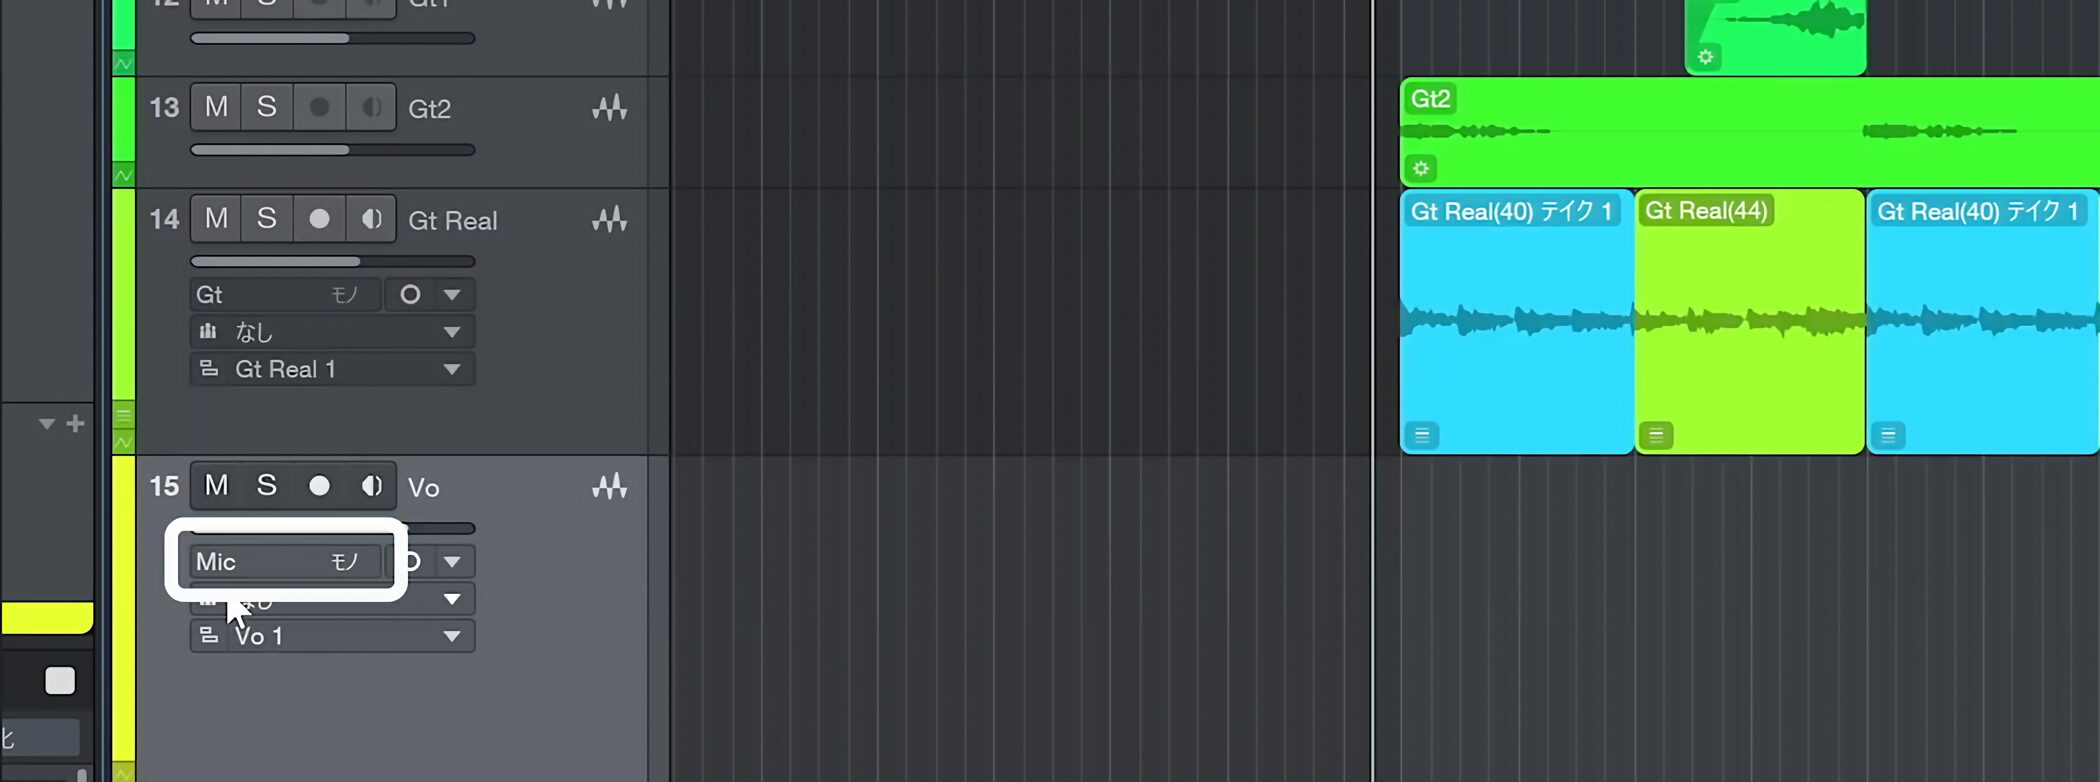
Once the track is created, check that the audio input is set correctly.
Because we are using a microphone, select the channel to which it is connected.
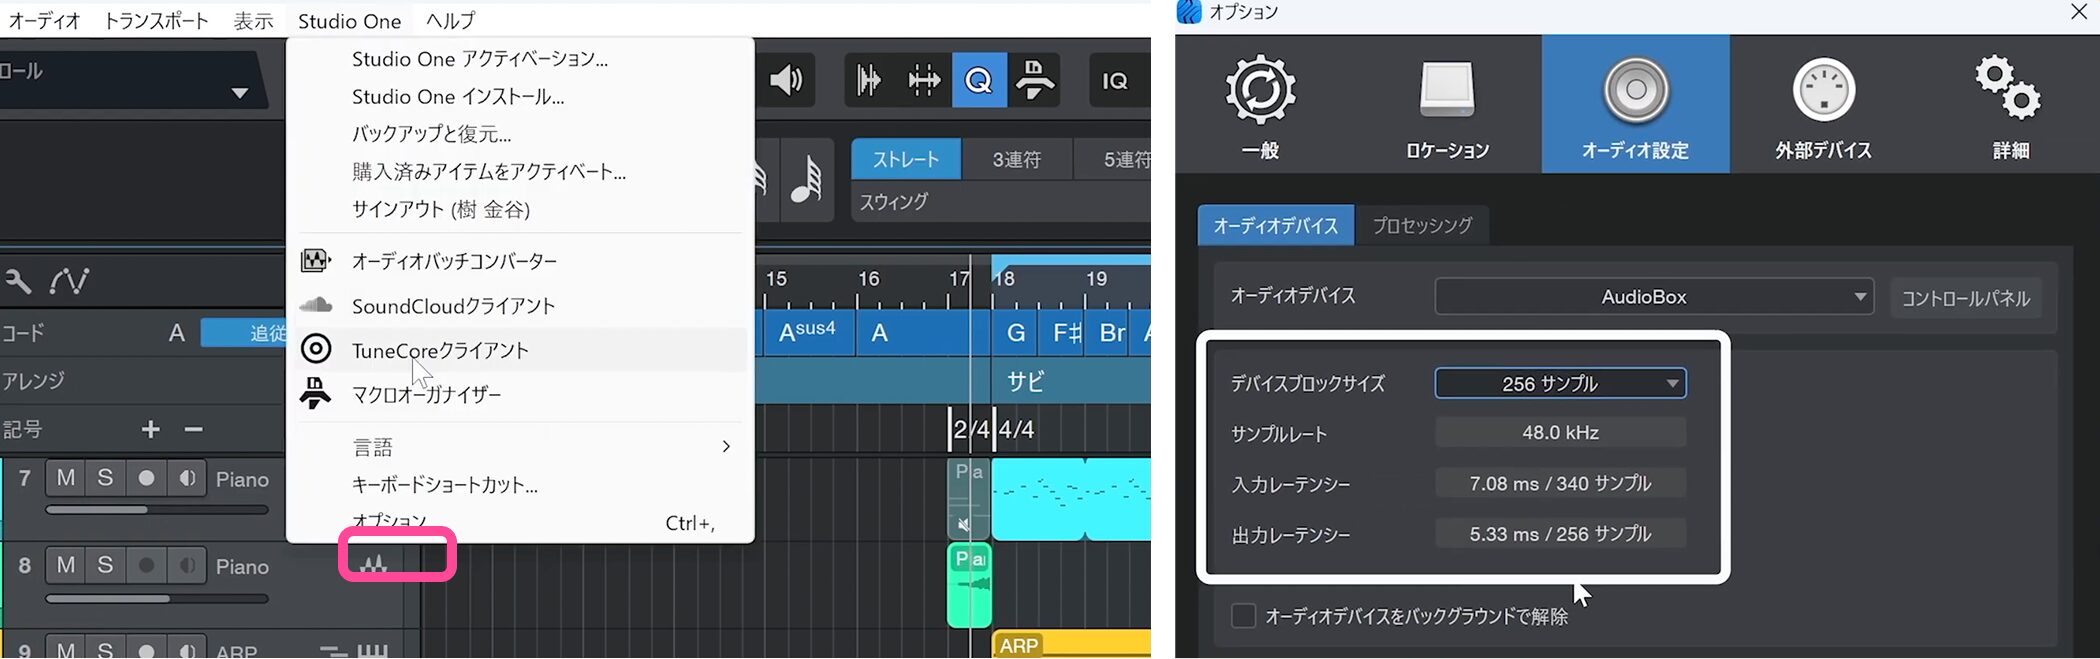
Next, check that latency is low in the audio device settings.
High latency delays the voice you hear, making it harder to sing in time.
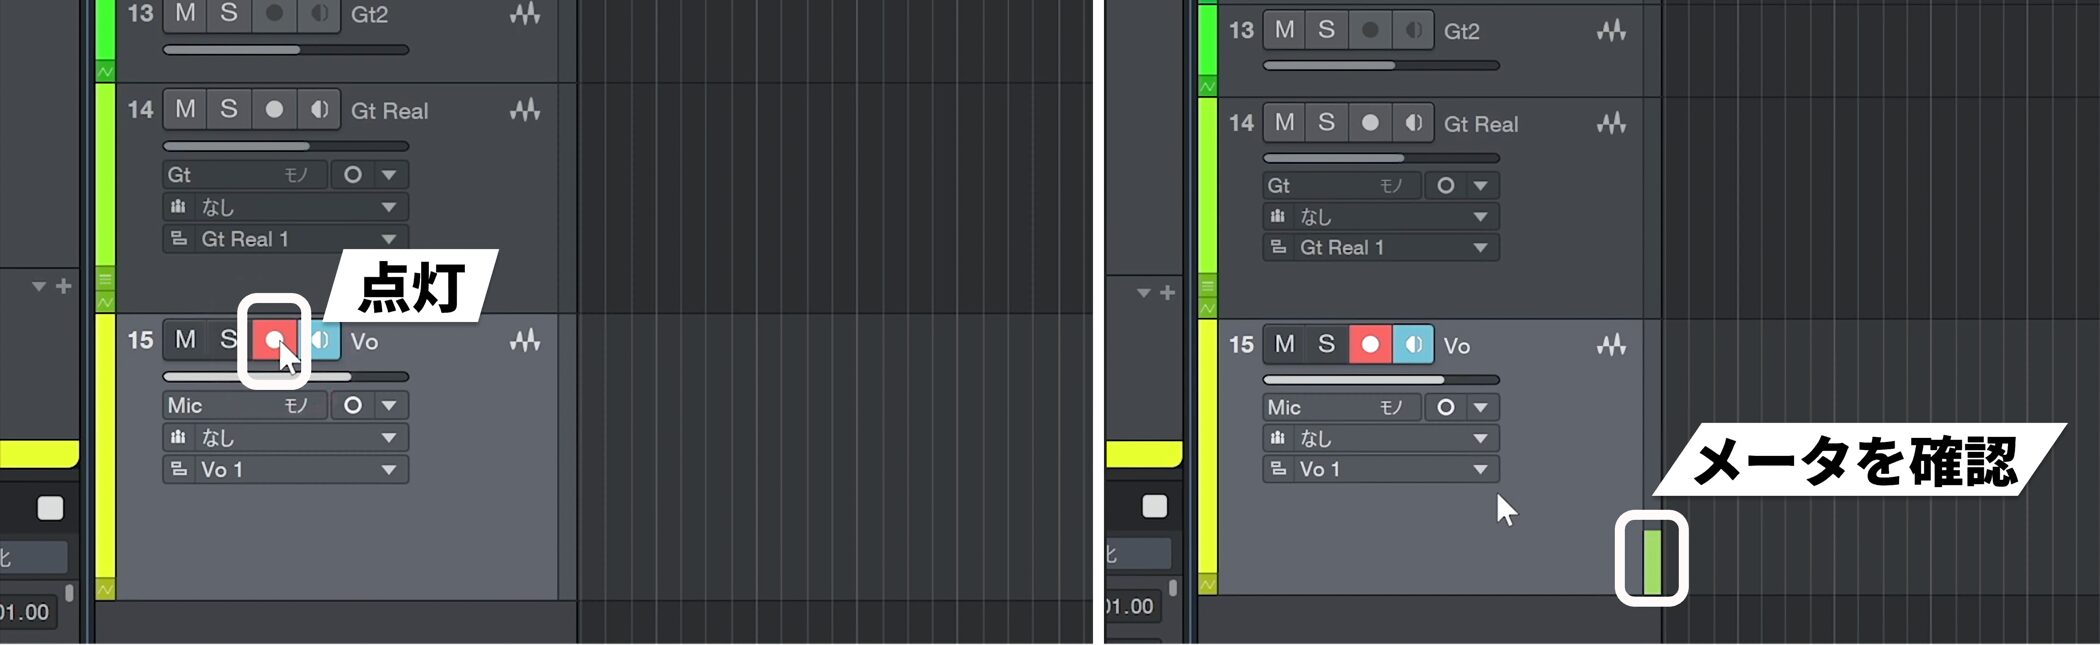
When the settings are ready, enable the track’s record button and check that the microphone signal is reaching it.
Speak or sing into the mic. If the meter responds, you are ready.
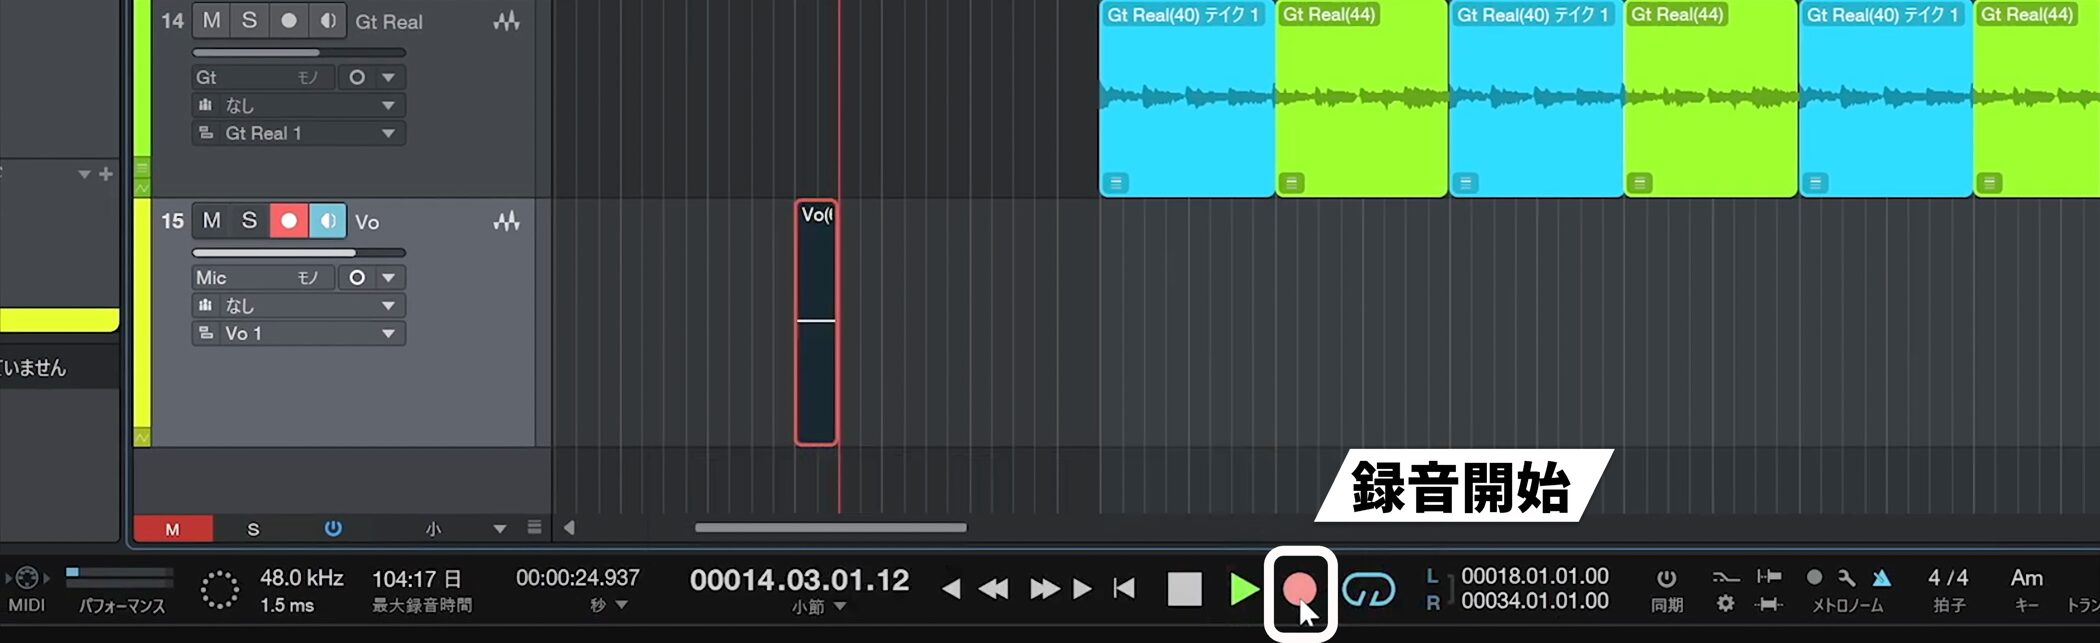
Press Record on the transport bar to start recording.
Adjust the microphone input level on the audio interface to achieve an appropriate recording level.
Change key with Global Transpose
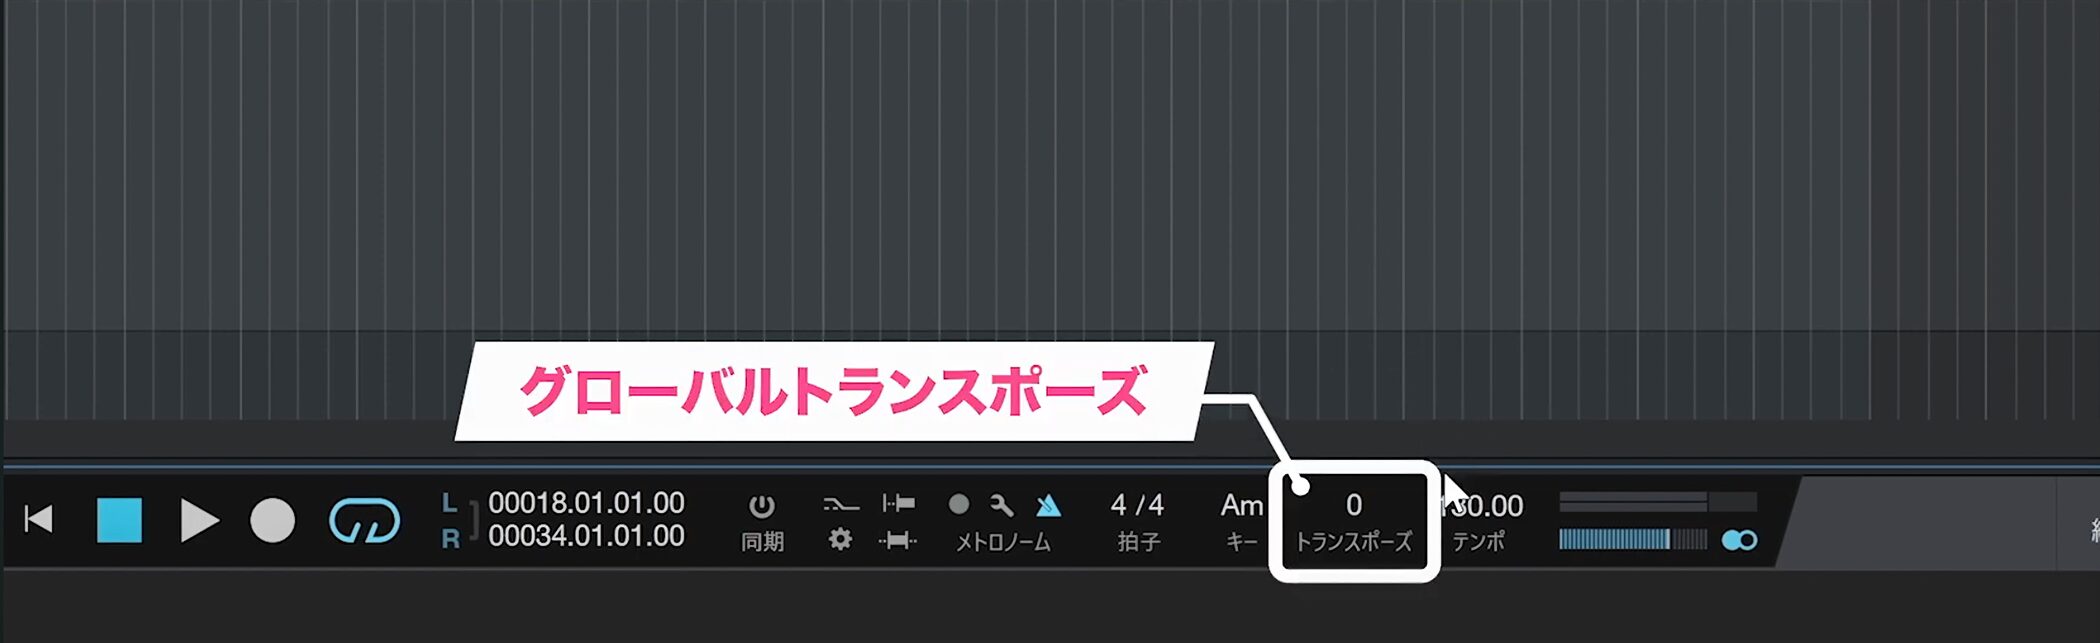
If the key feels too high or too low after recording, Global Transpose can change the song’s key across selected tracks.
The control is in the transport bar at the bottom.
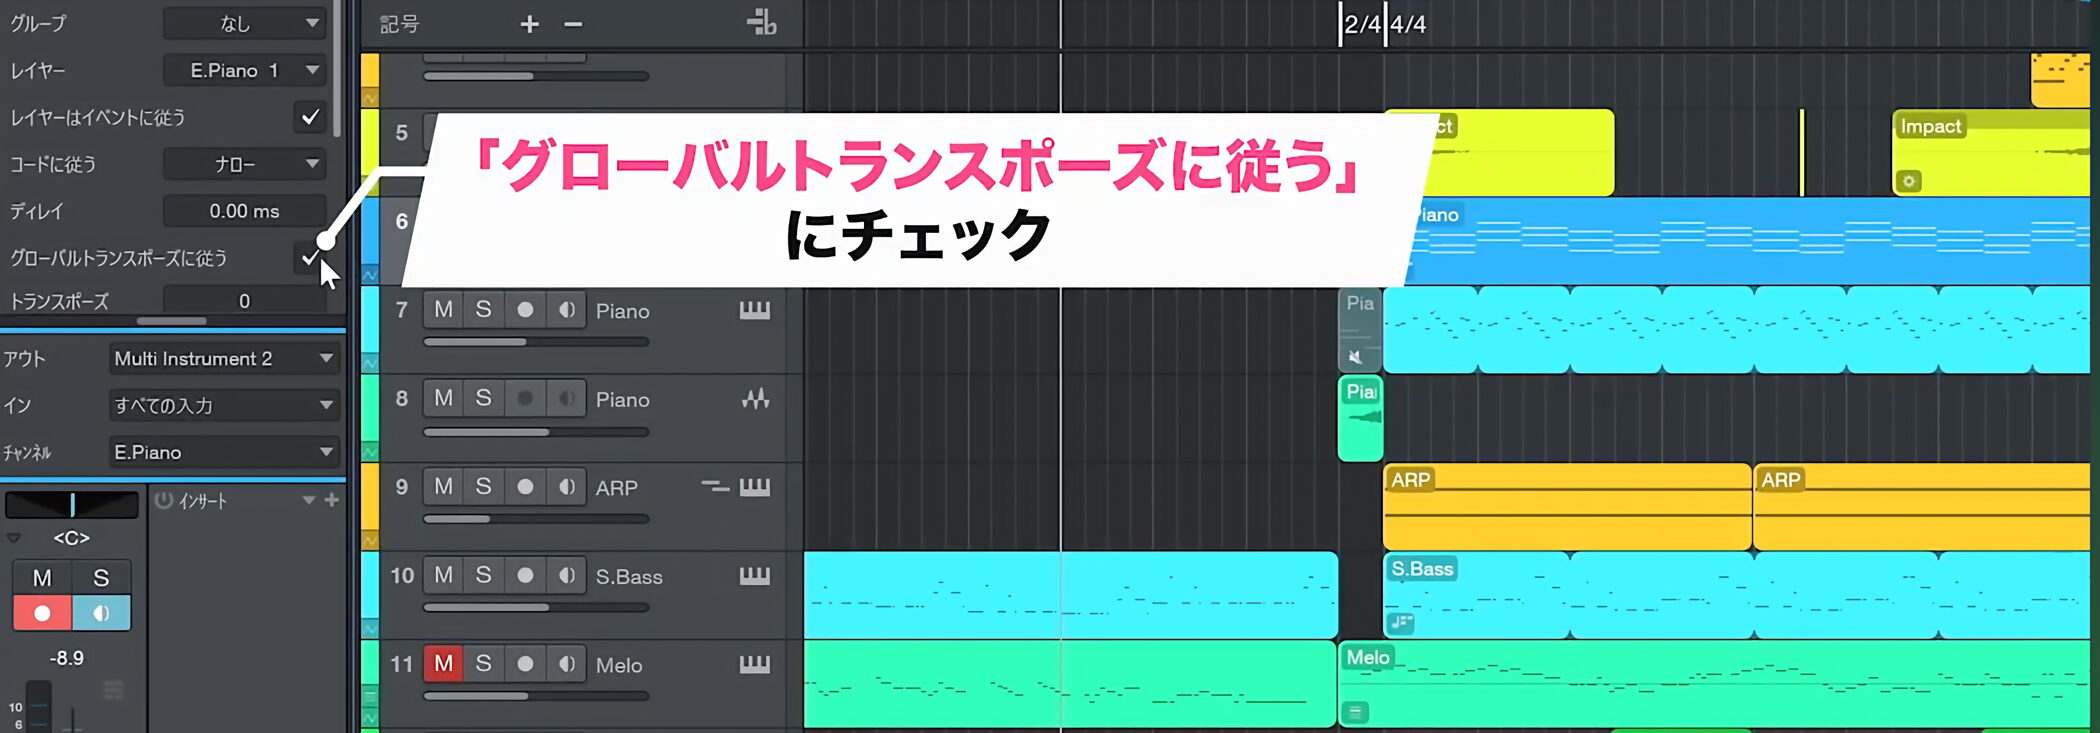
Select a track and check Follow Global Transpose.
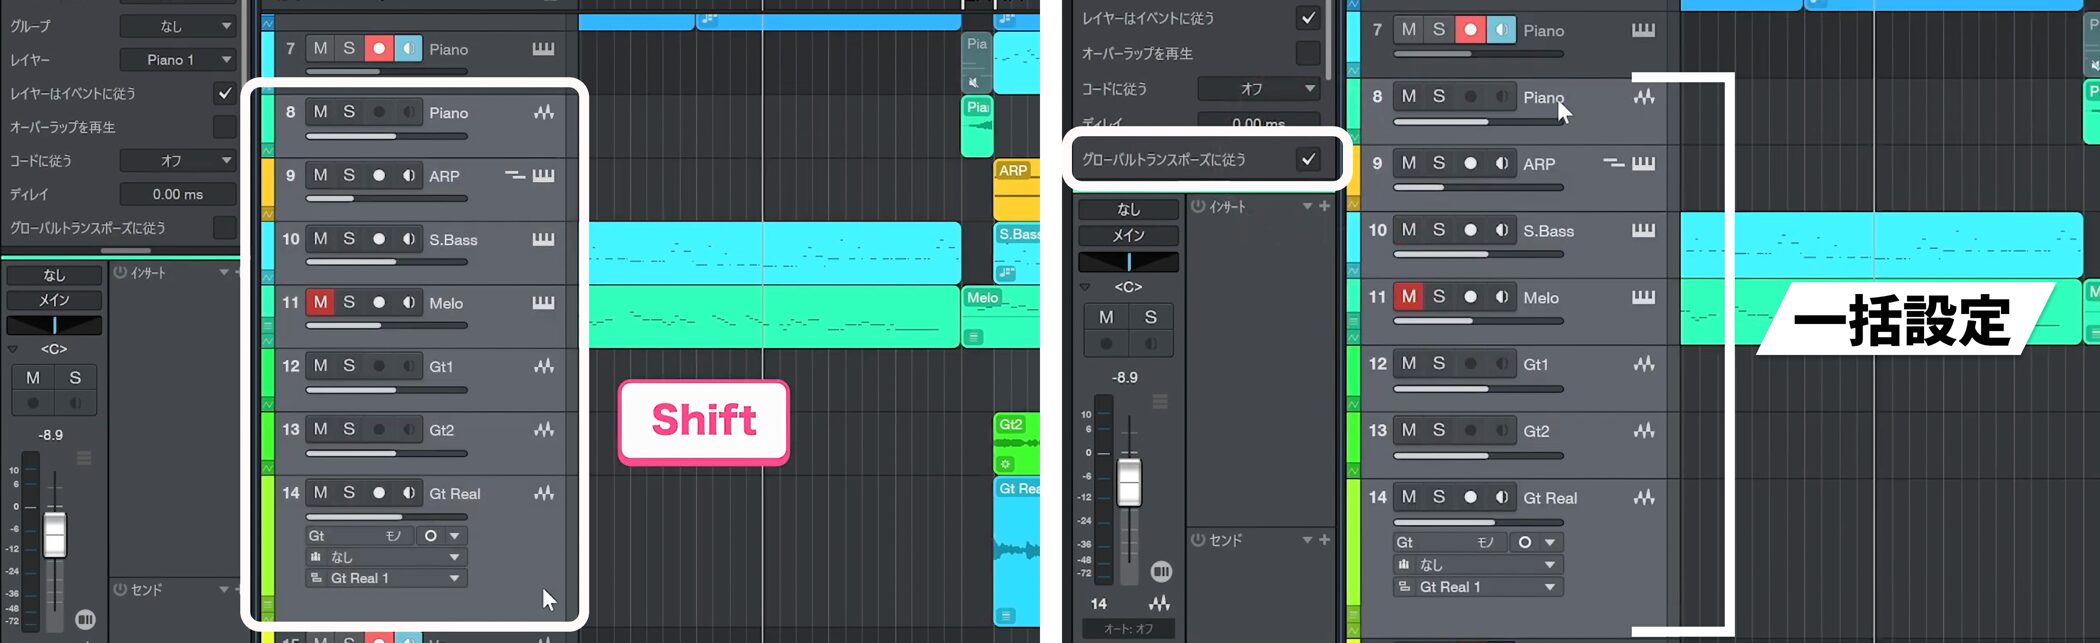
You can set multiple tracks at once.
Hold Shift to select multiple tracks and enable the option for the selection.
Before changing key, it helps to reorder tracks so that drums, percussion, and other tracks you do not want transposed can be excluded.
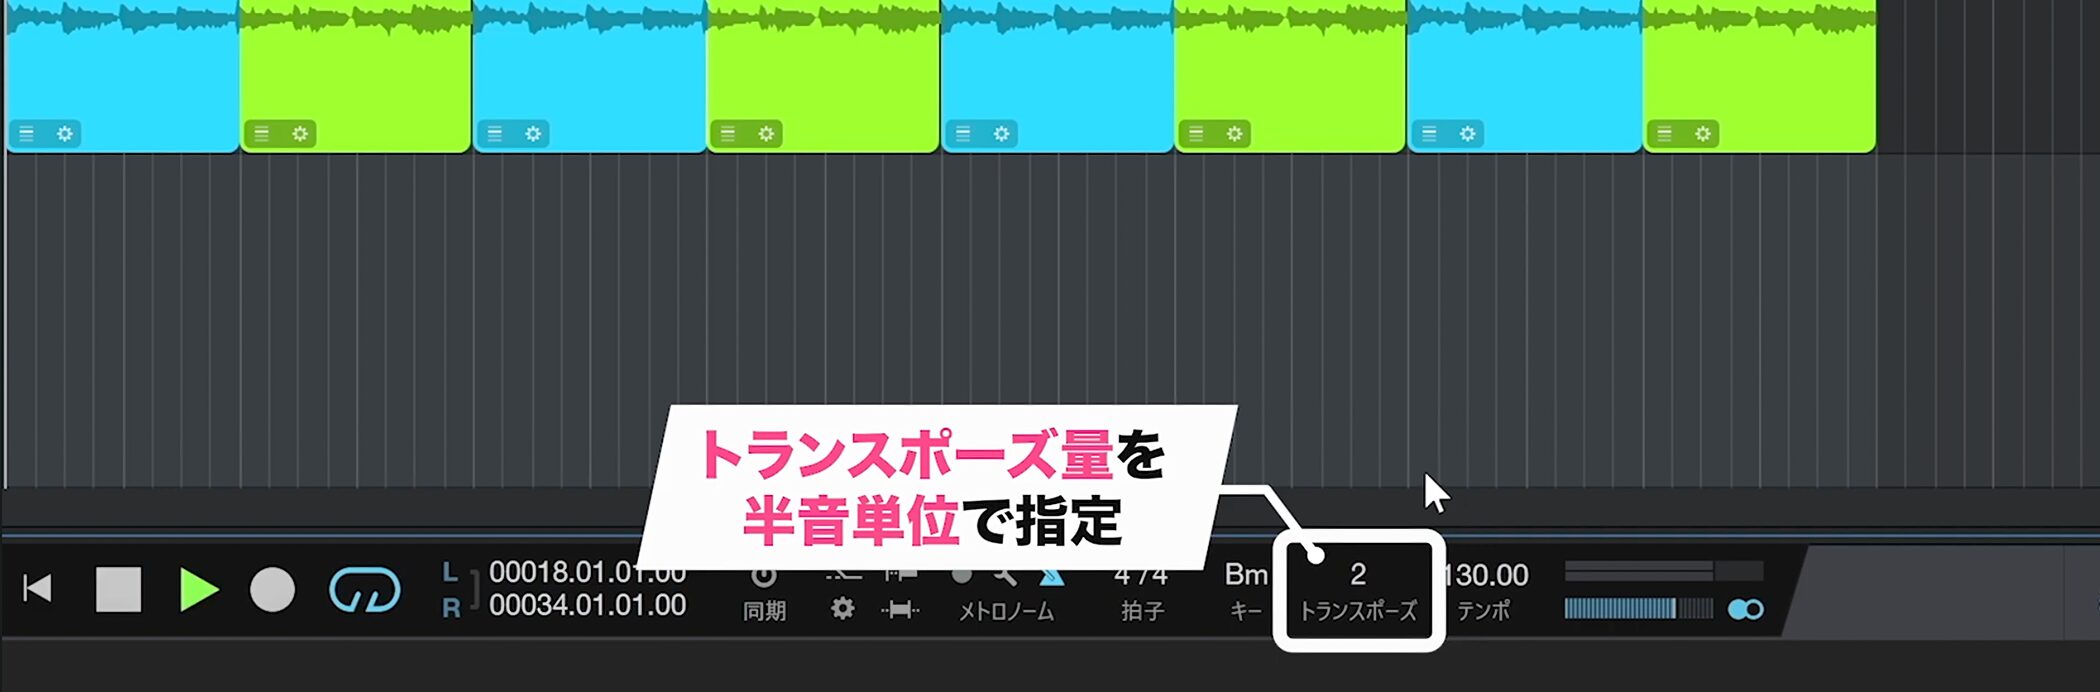
Adjust Global Transpose in semitone steps.
Positive values raise the key; negative values lower it.
For example, +2 raises it by two semitones and -2 lowers it by two.
Choose a comfortable key for the vocalist and record again.
Record with less CPU load
A Song with many instruments and effects may have a high CPU load, making low-latency operation difficult.
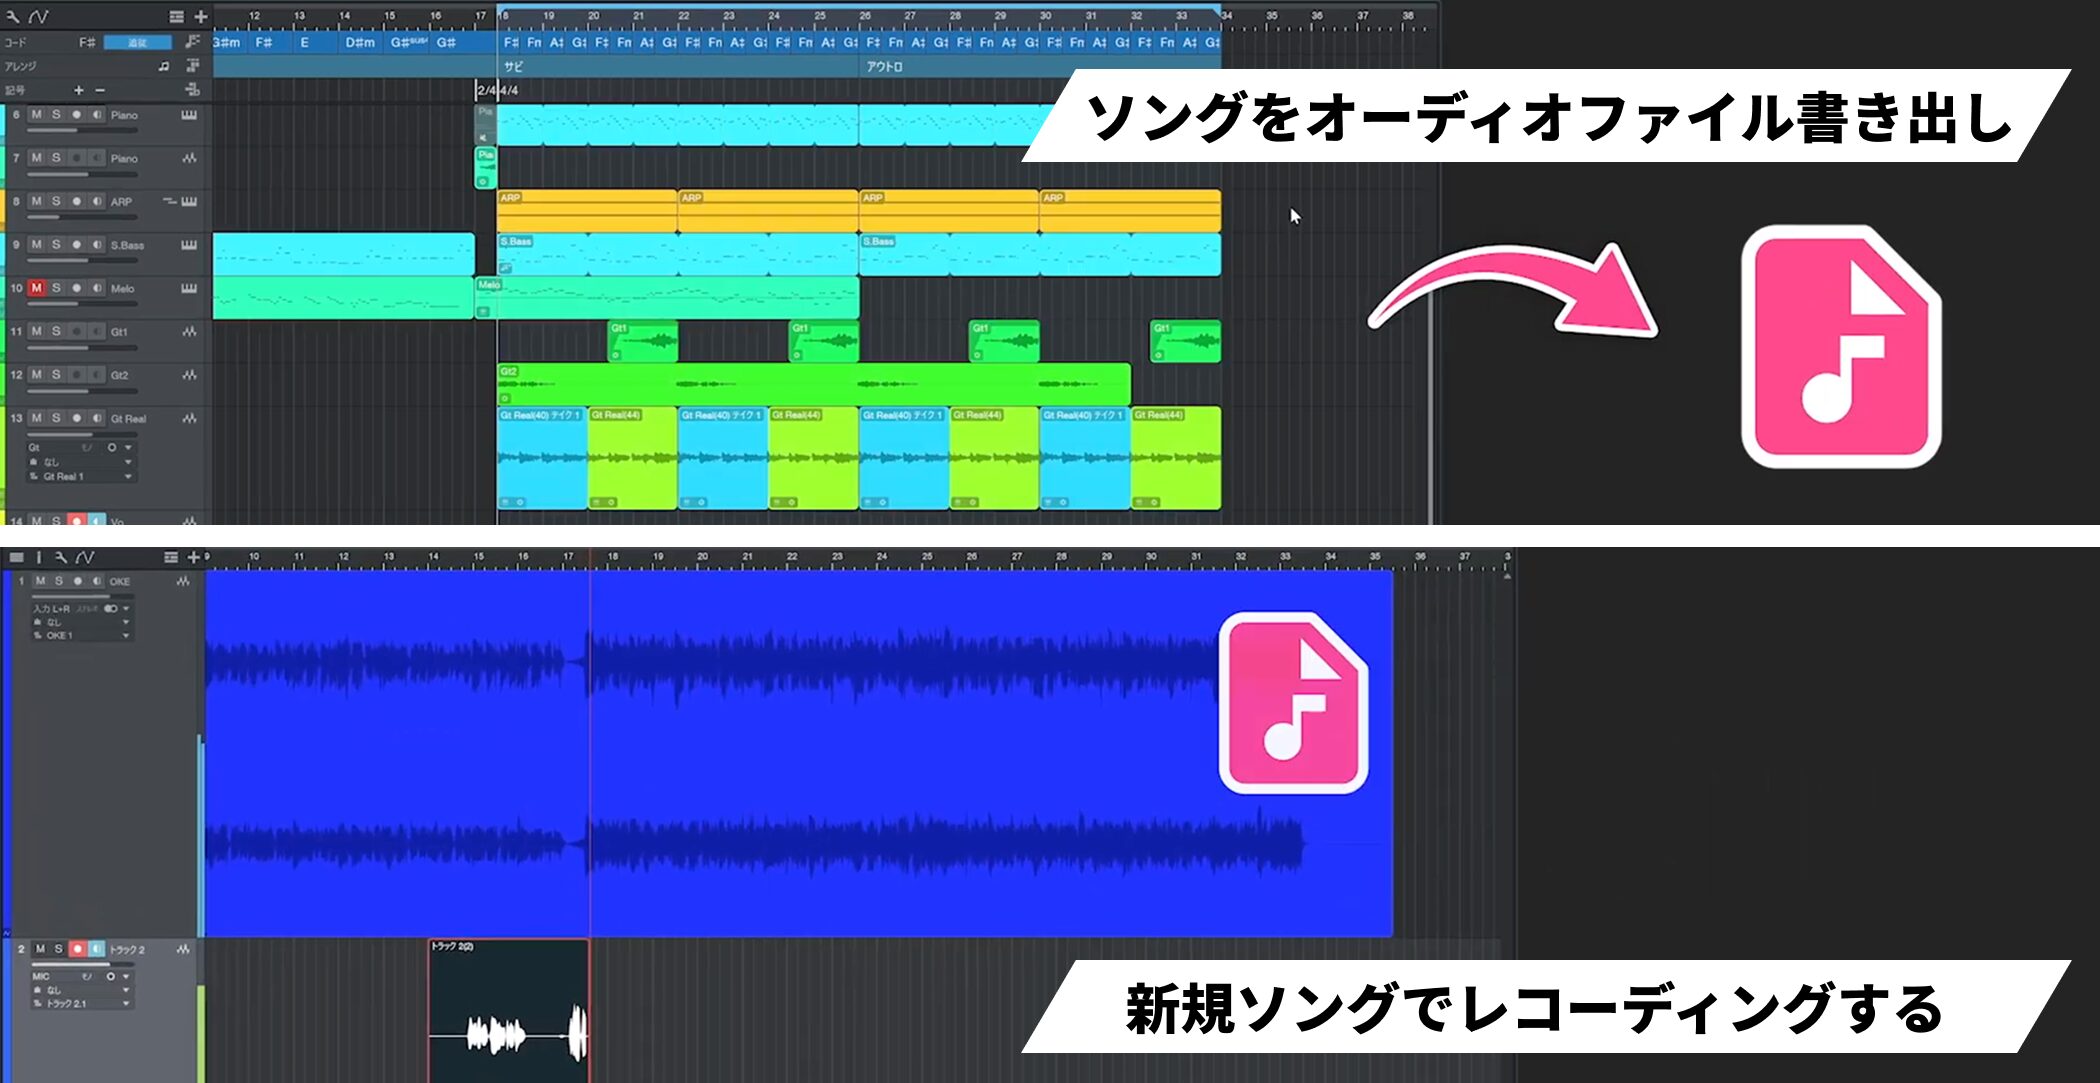
One useful solution is to export the Song as audio and record in a new Song.
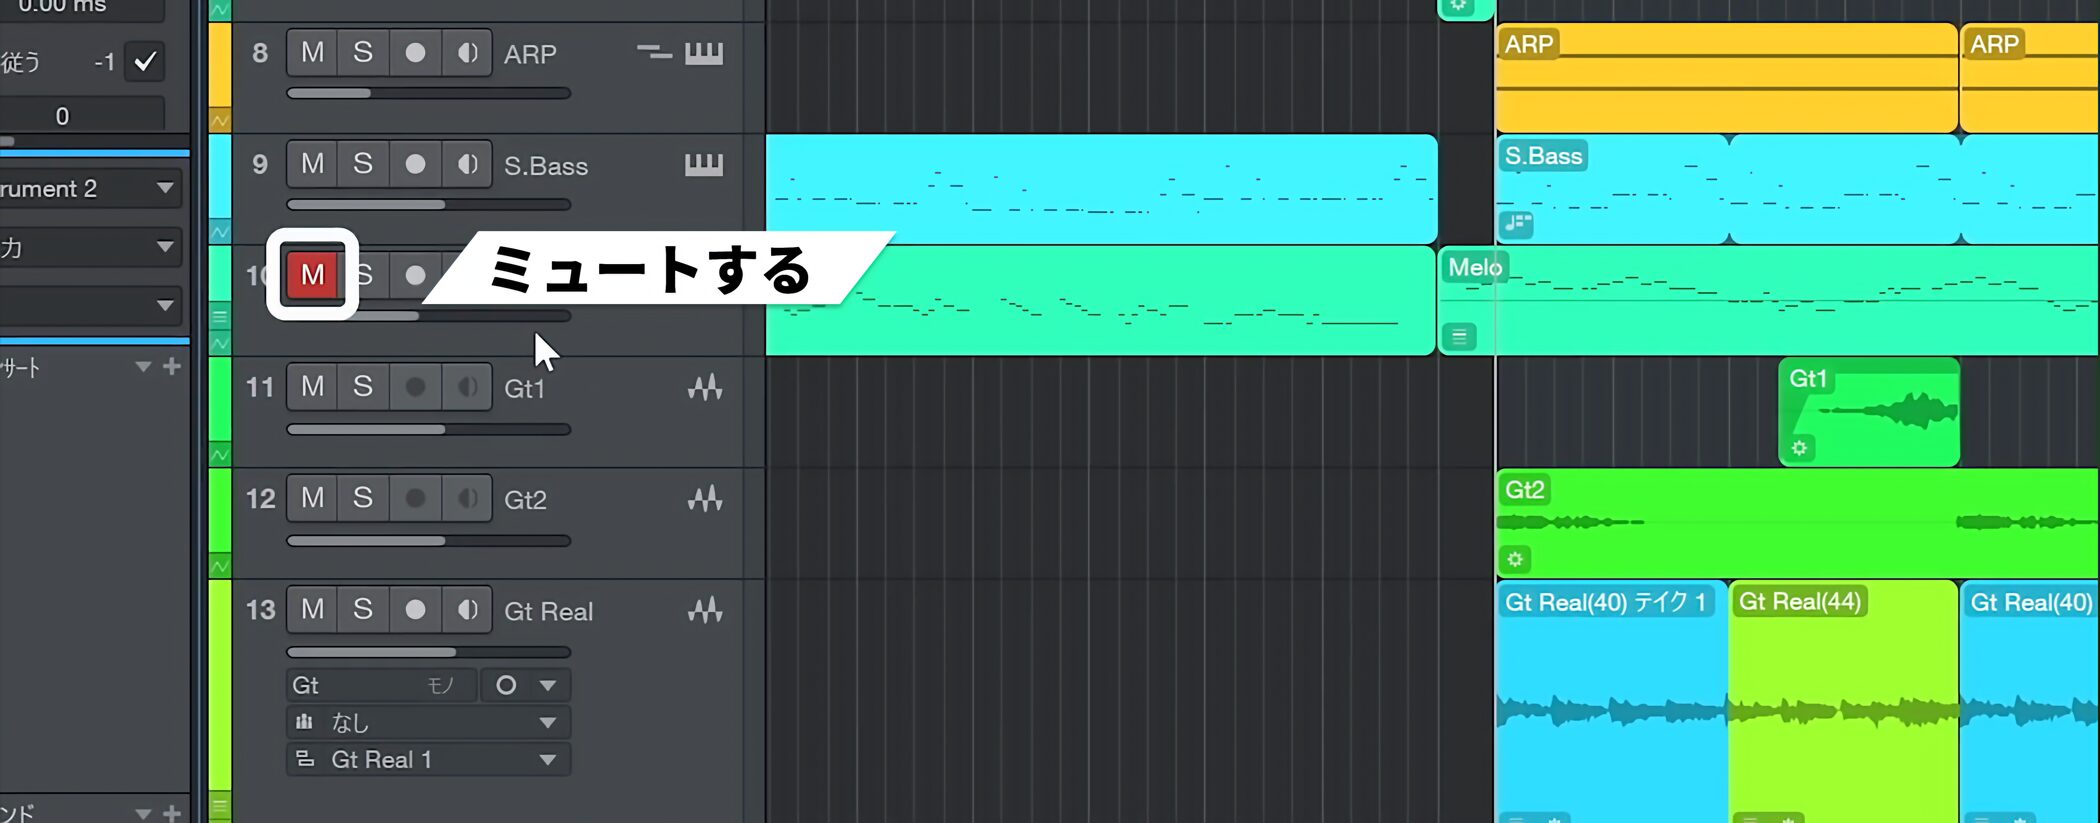
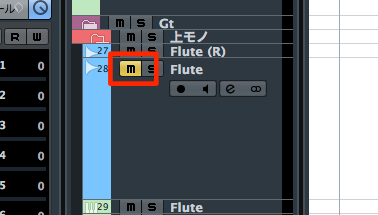
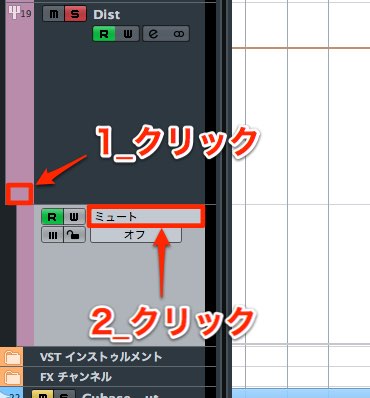
Before exporting, mute any tracks you do not need, such as a guide melody.
Then set the loop range to the section you want to export.
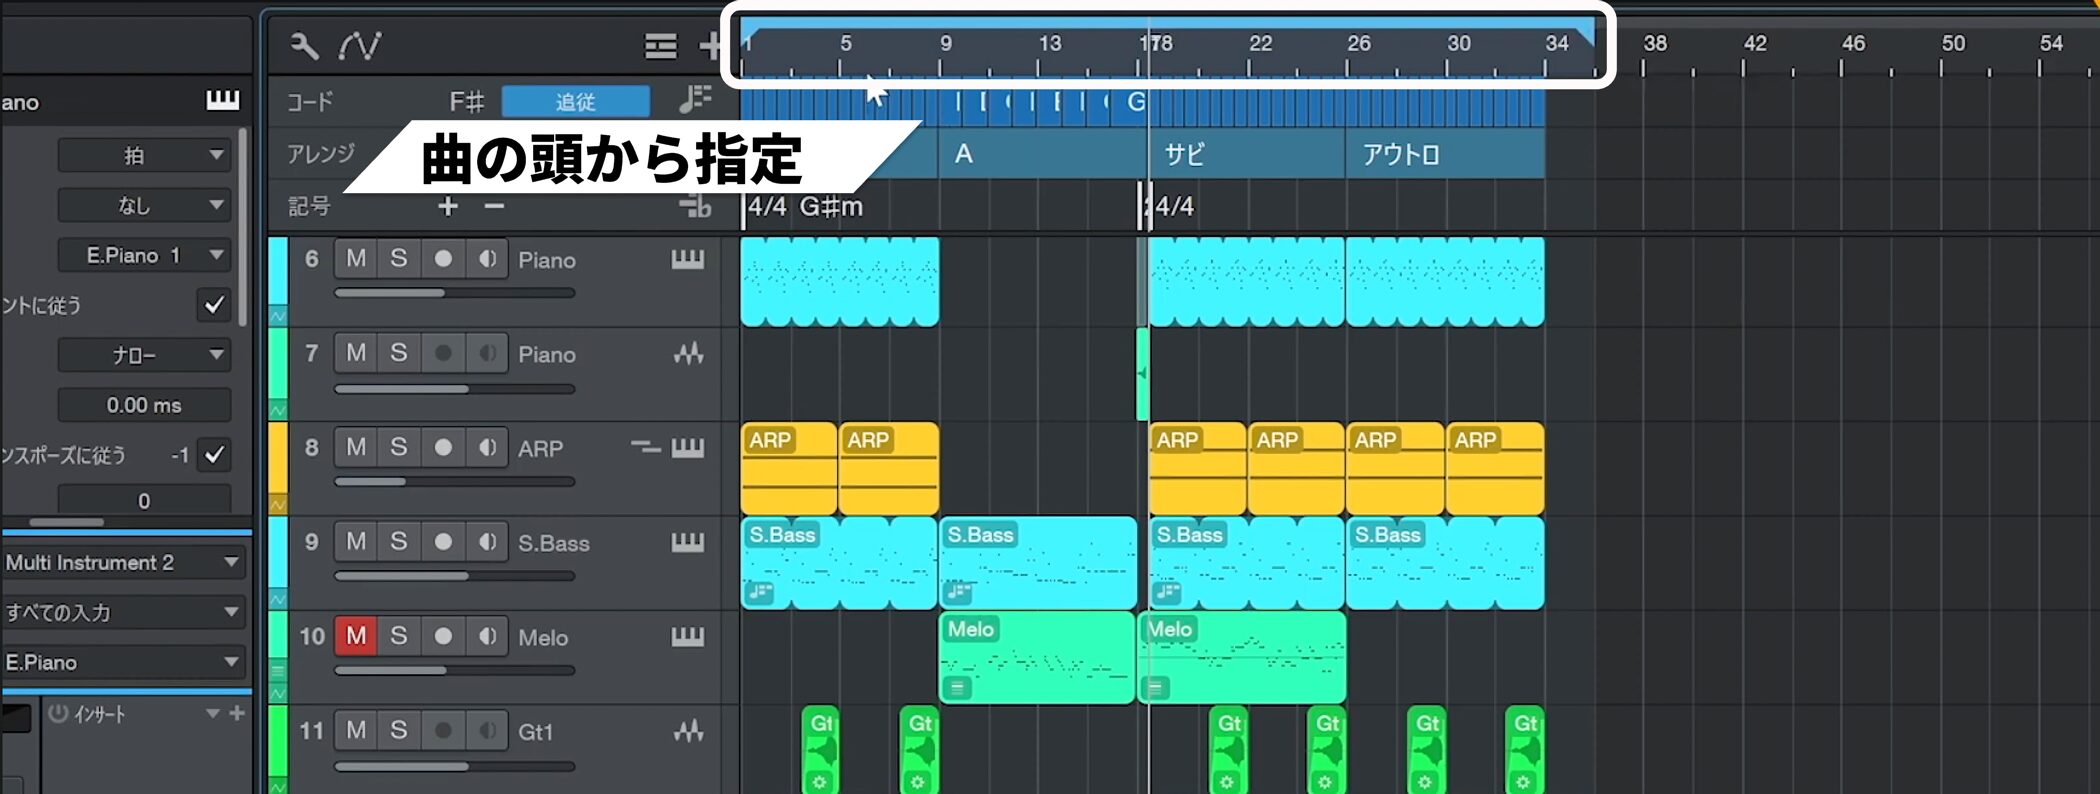
Make sure to export from the beginning of the song.
If you export from the middle, the recorded vocal may be out of alignment when you bring it back into the original Song.
If you want to preserve the tail, set the end of the range slightly beyond the song’s ending.
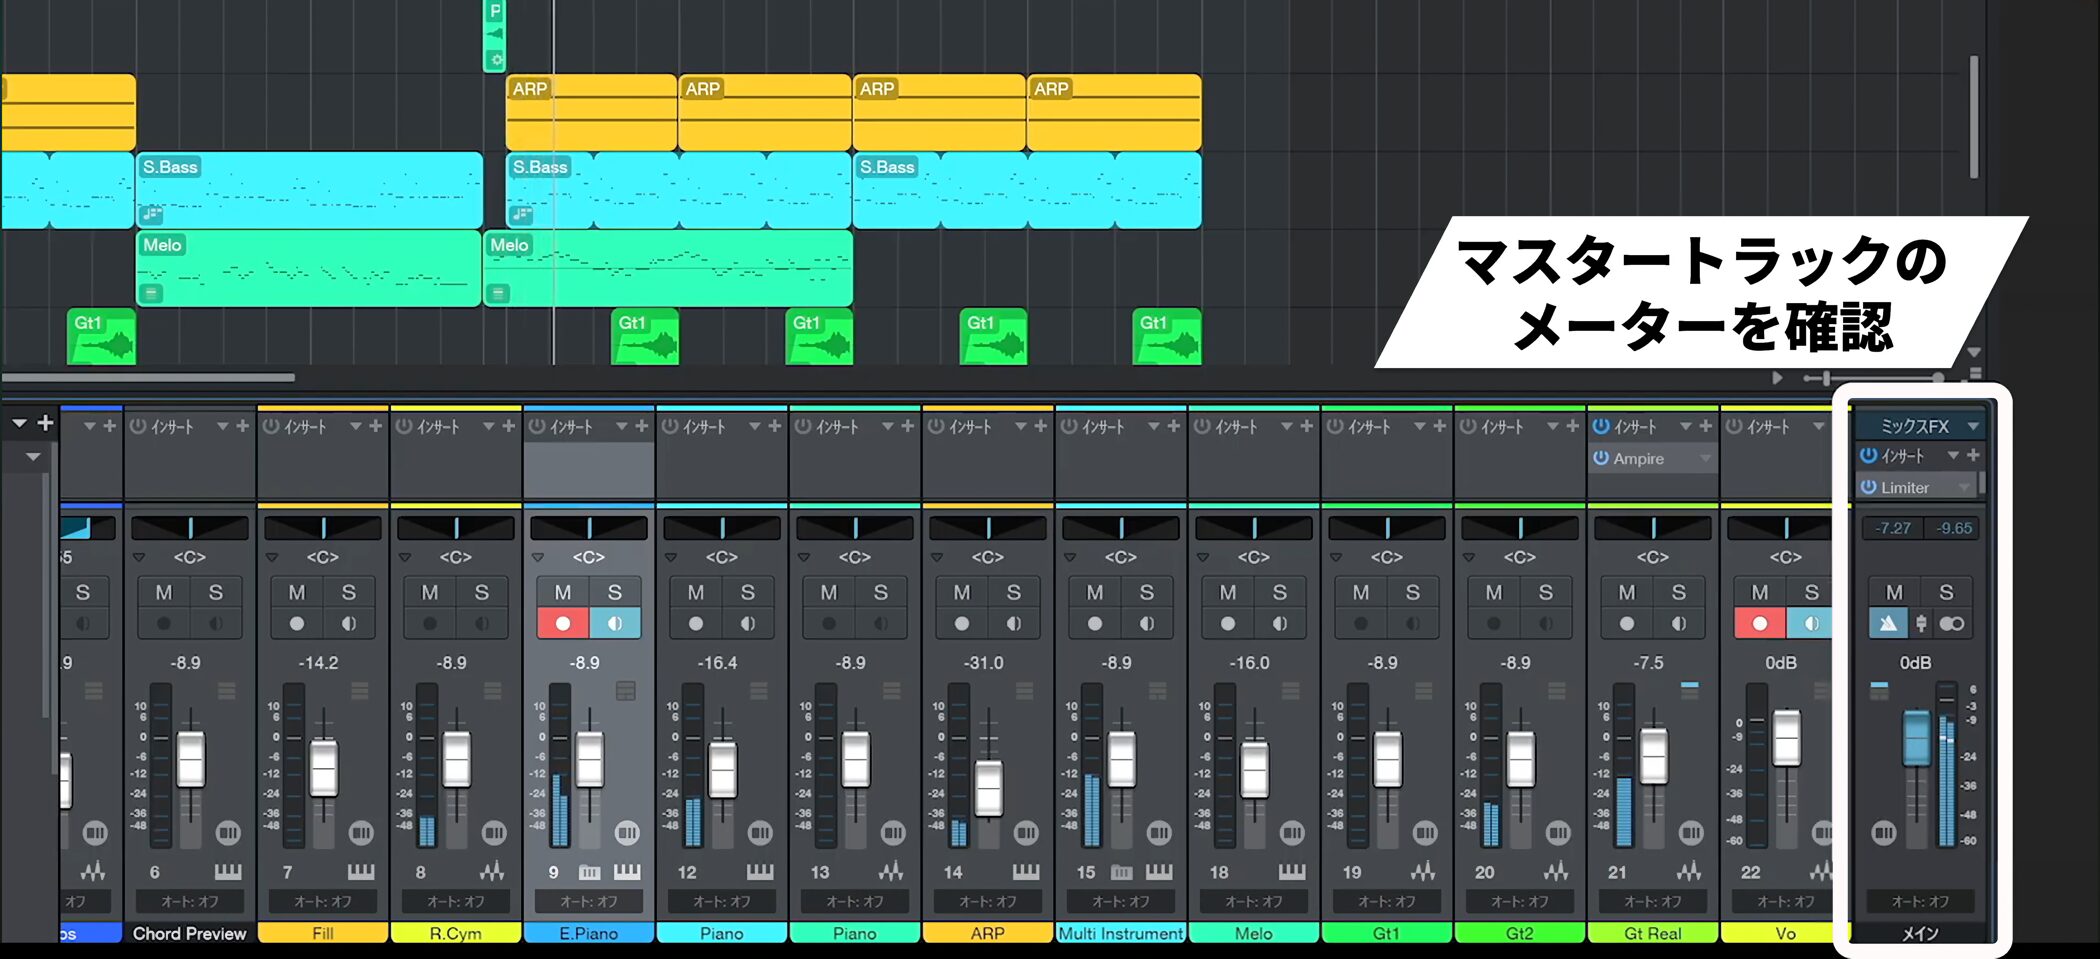
Play all tracks and check the master meter before exporting.
Make sure the meter does not turn red.
If it does, lower the master level before exporting.
Export the mixdown
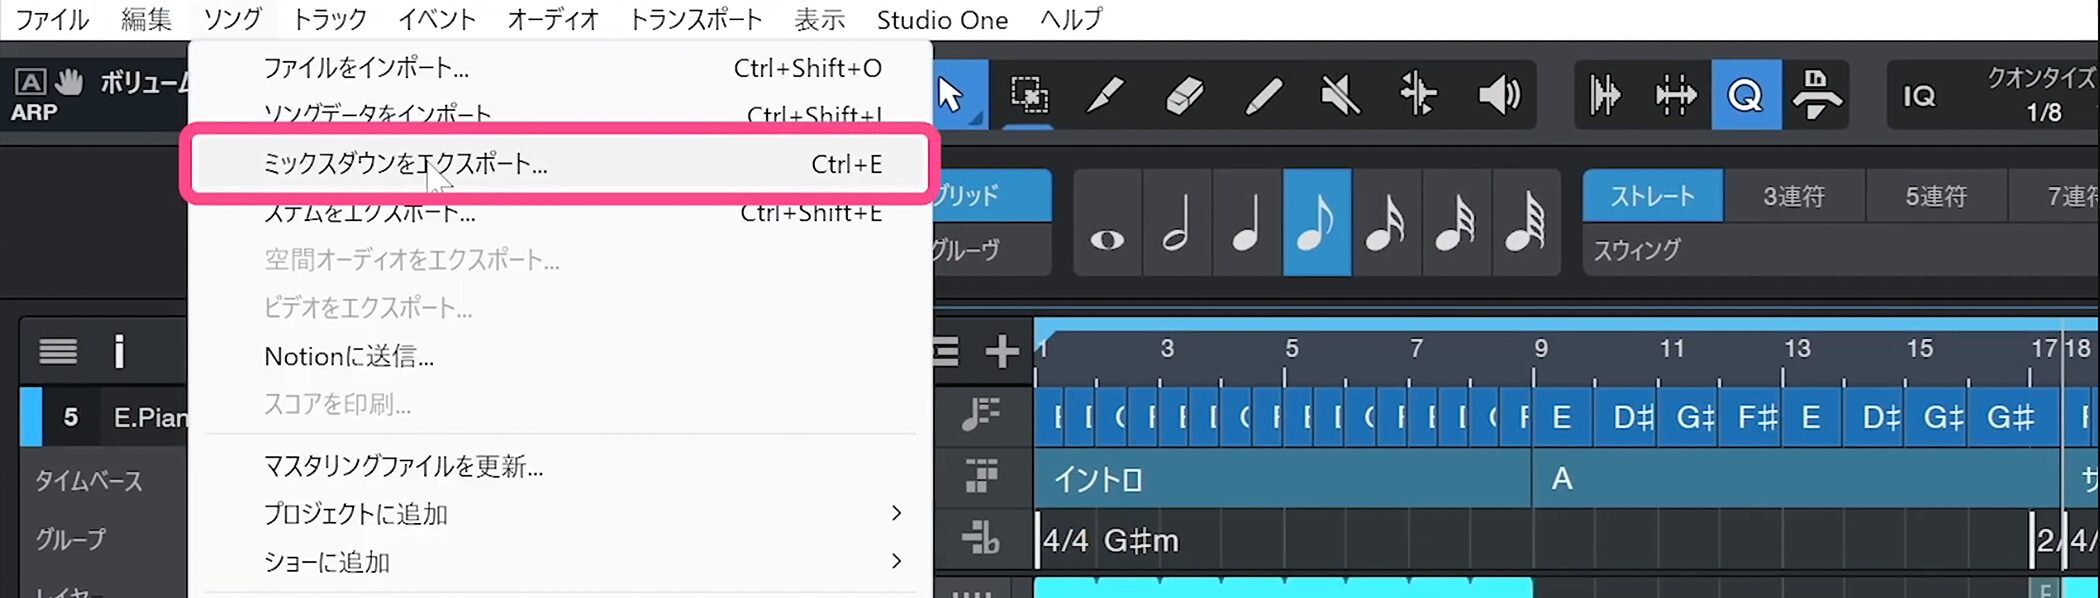
Choose Song → Export Mixdown from the top menu.
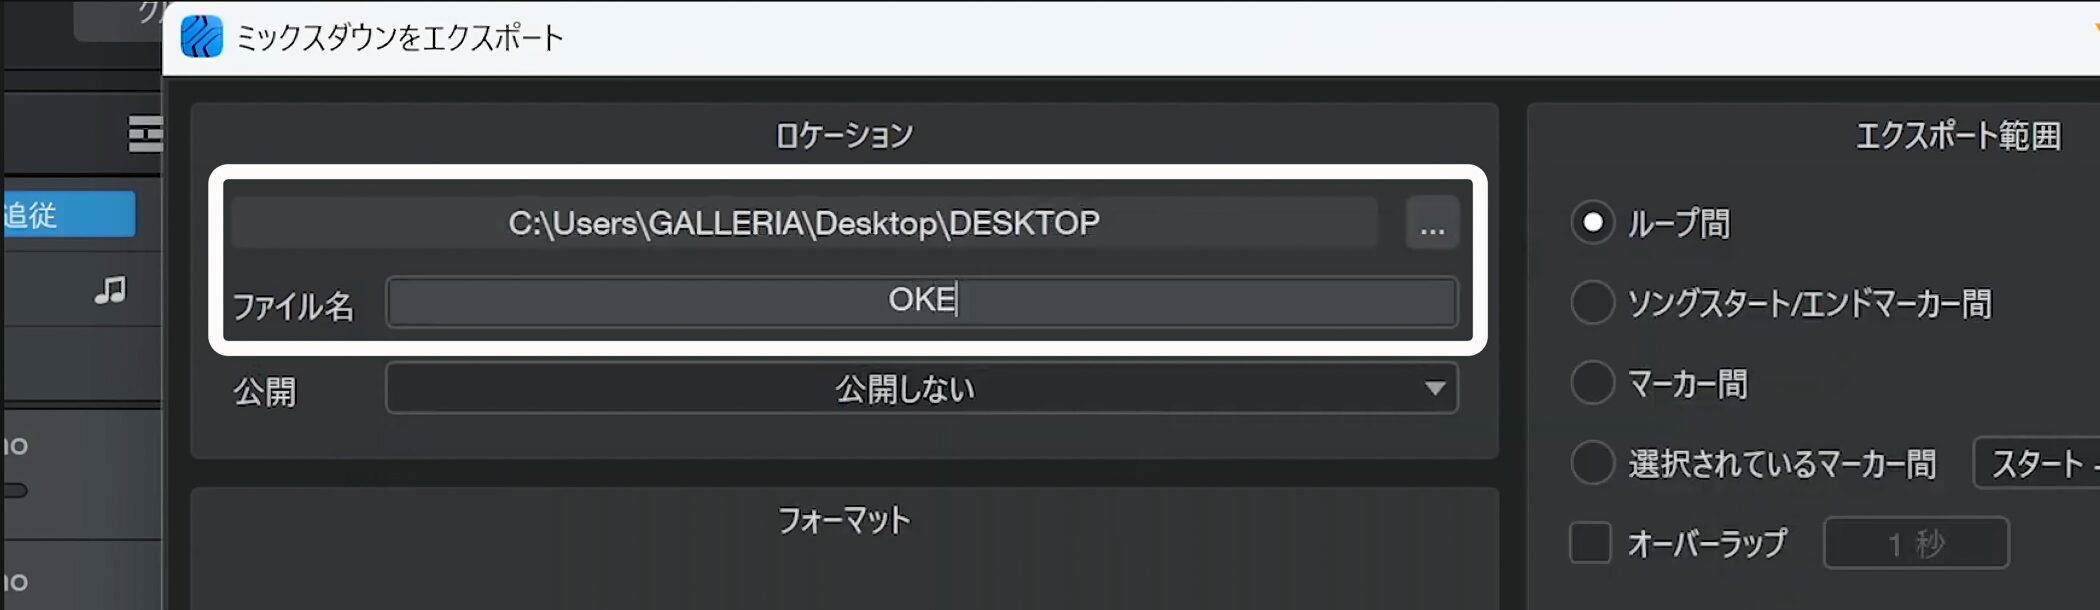
First choose where to save the file.
Here we select the desktop and give the file a clear name such as “Backing.”
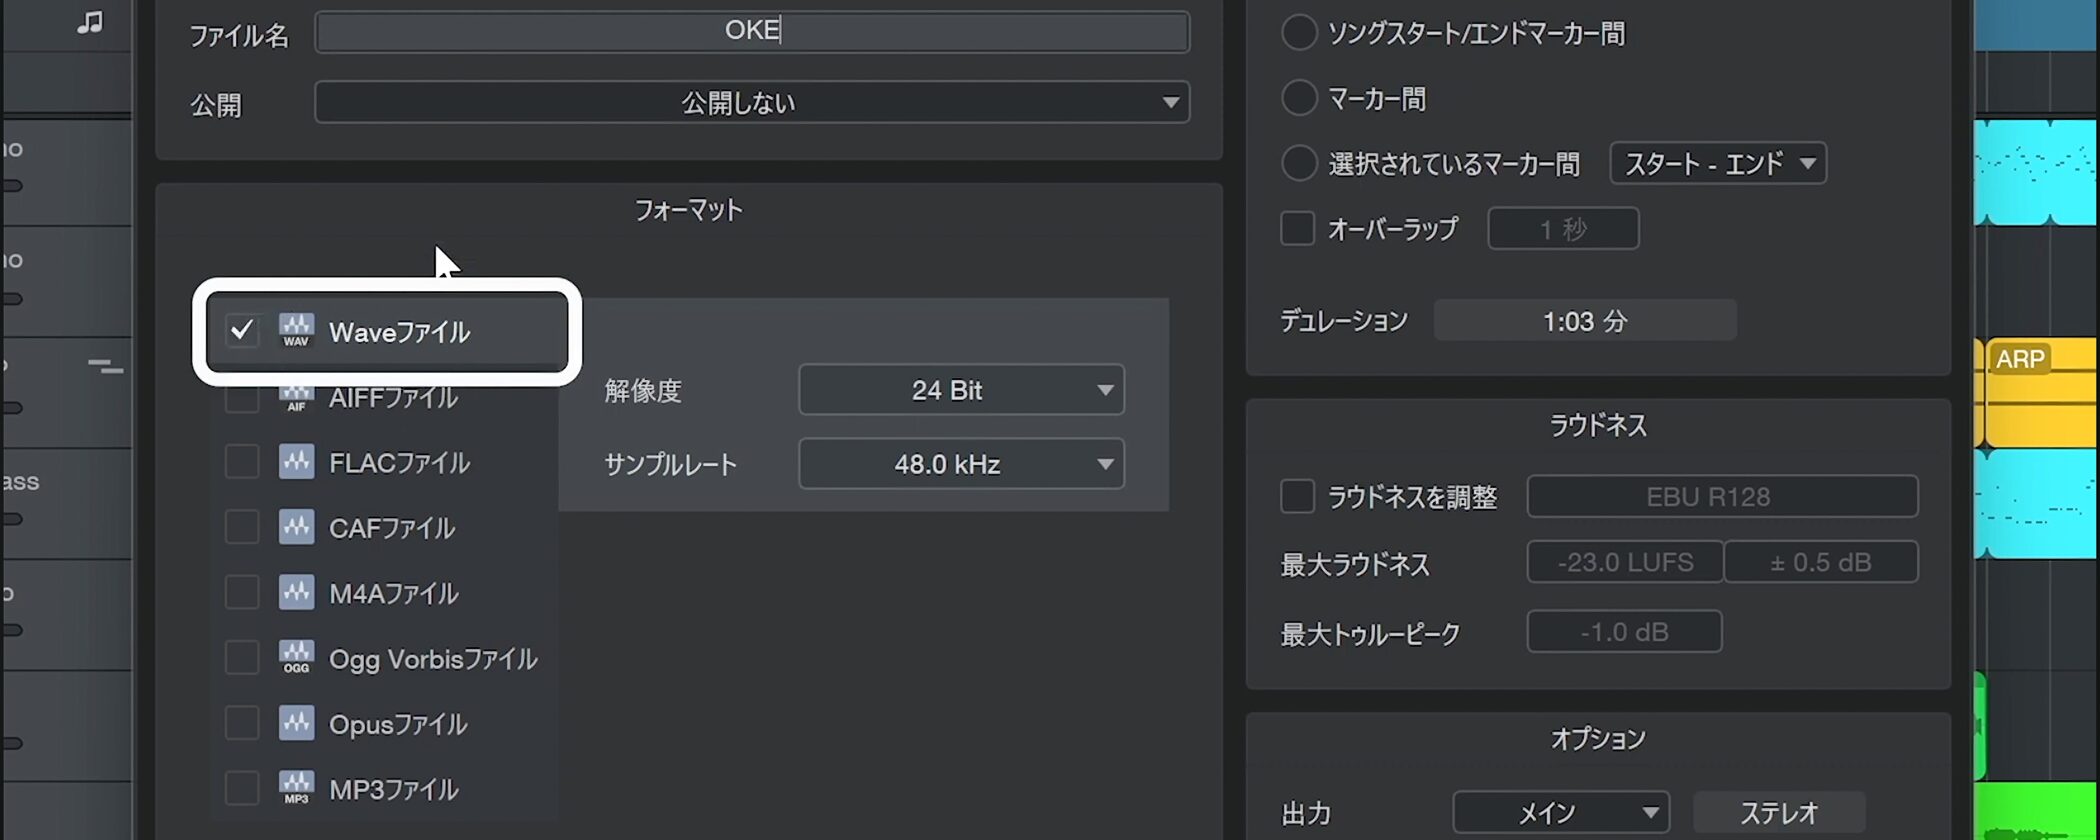
Choose uncompressed WAV as the file format.
Compressed formats such as MP3 are also available, but WAV is recommended when sound quality is the priority.
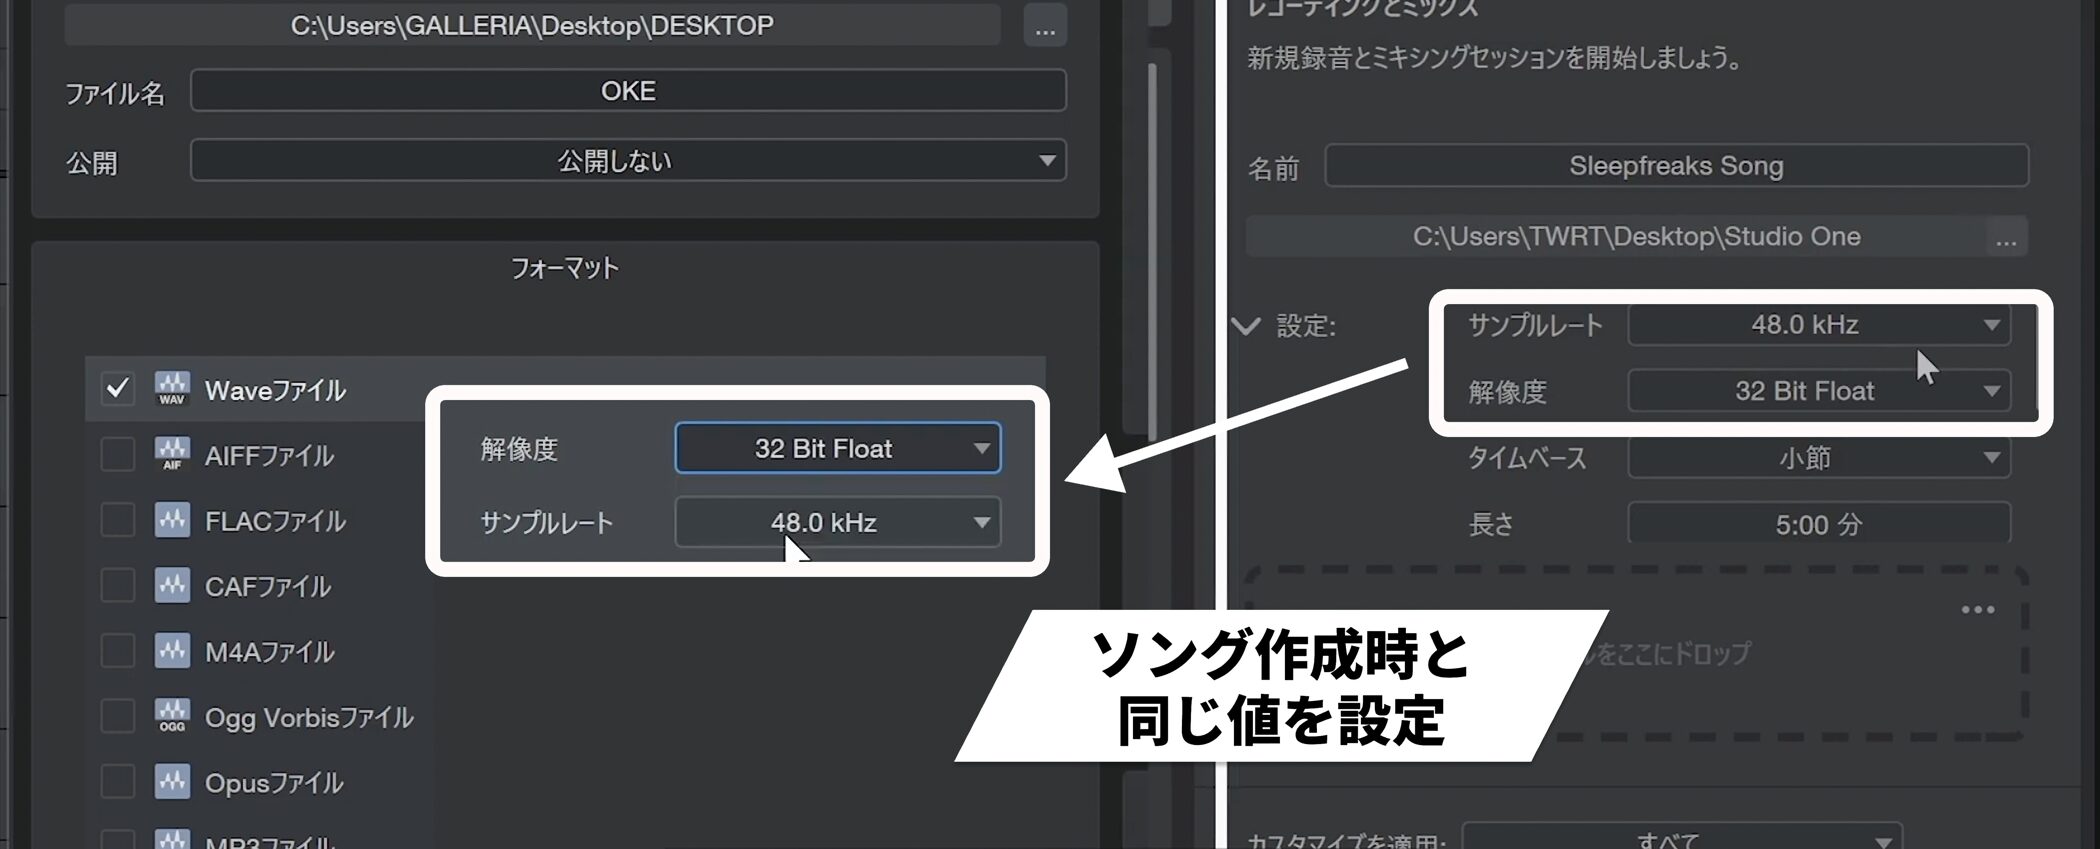
Set the sample rate and bit depth to the same values used when creating the Song.
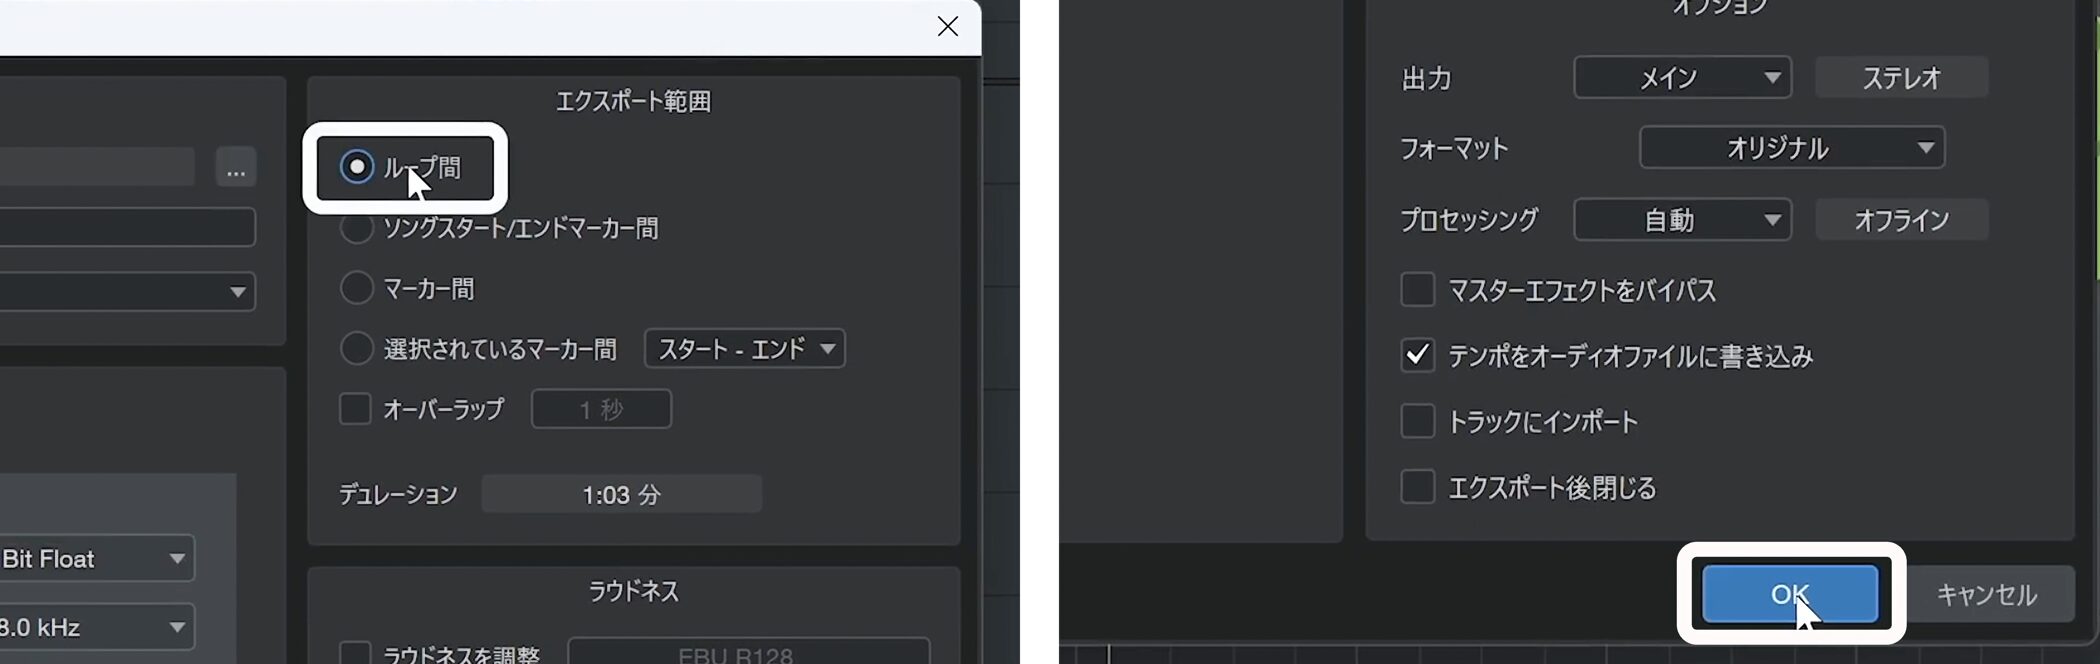
Because the range has already been set, select Between Loop for the export range and click OK.

When the export completes, the audio file is created at the chosen location.
Record vocals in a new Song
Create a new Song to record over the exported backing.
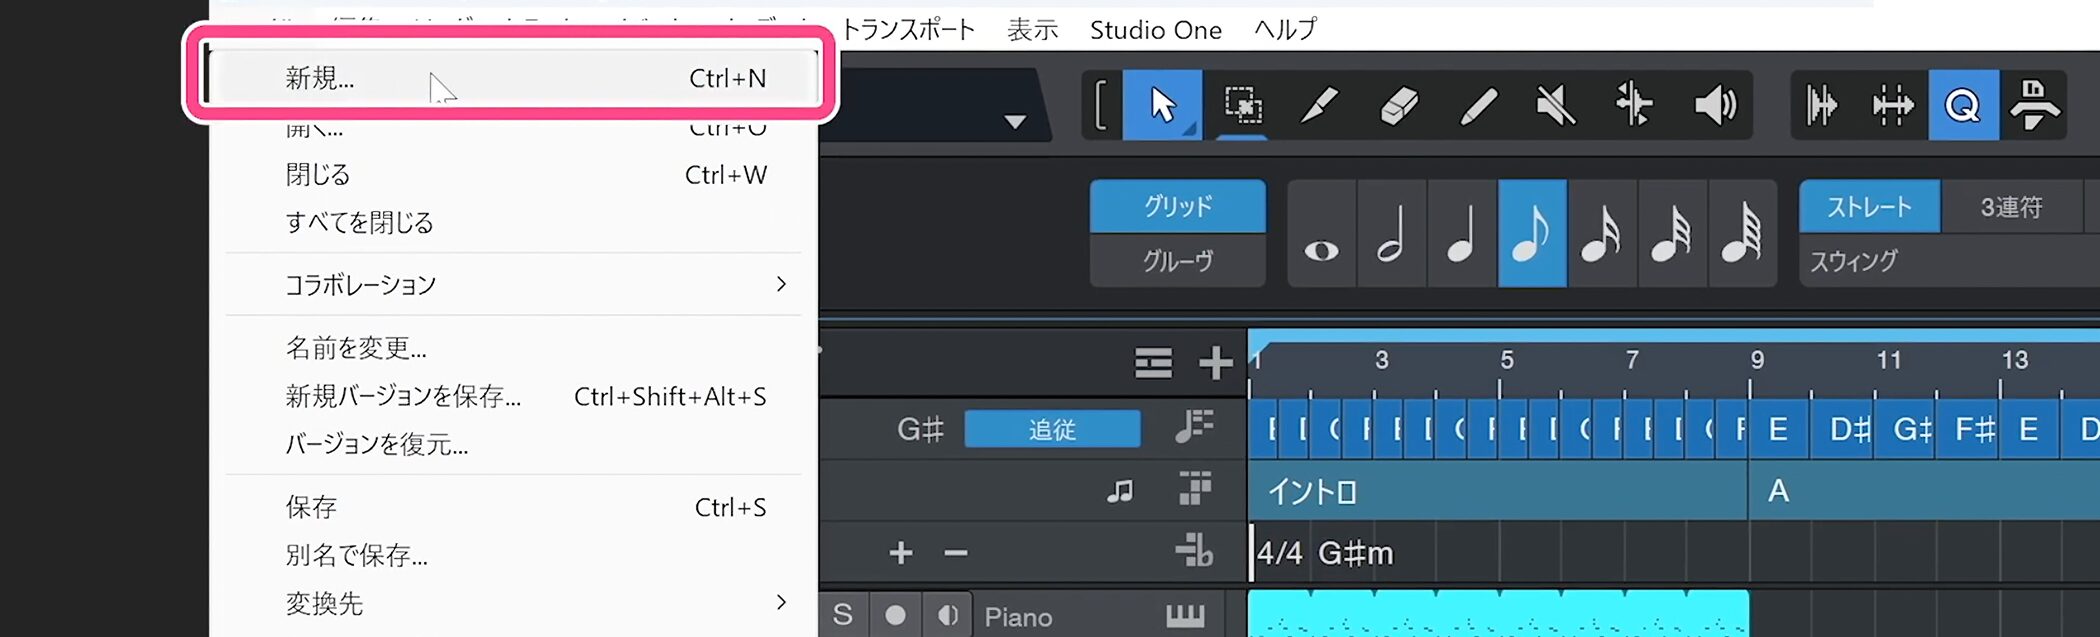
Choose File → New from the top menu.
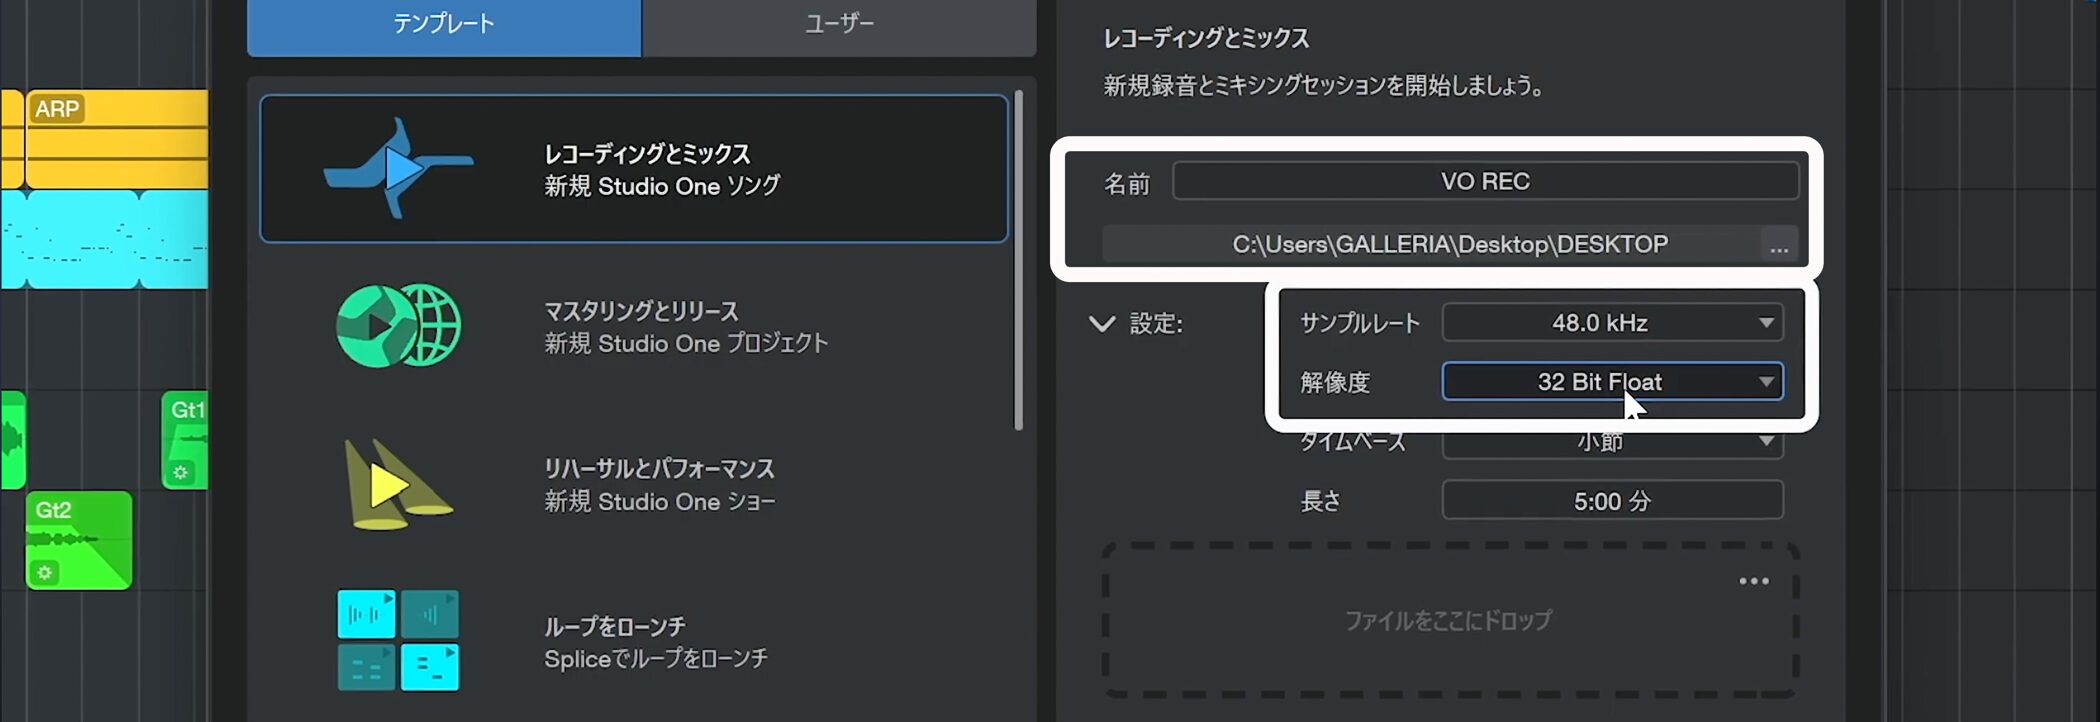
Enter a Song name and choose a save location.
Use the same audio settings as the original Song.
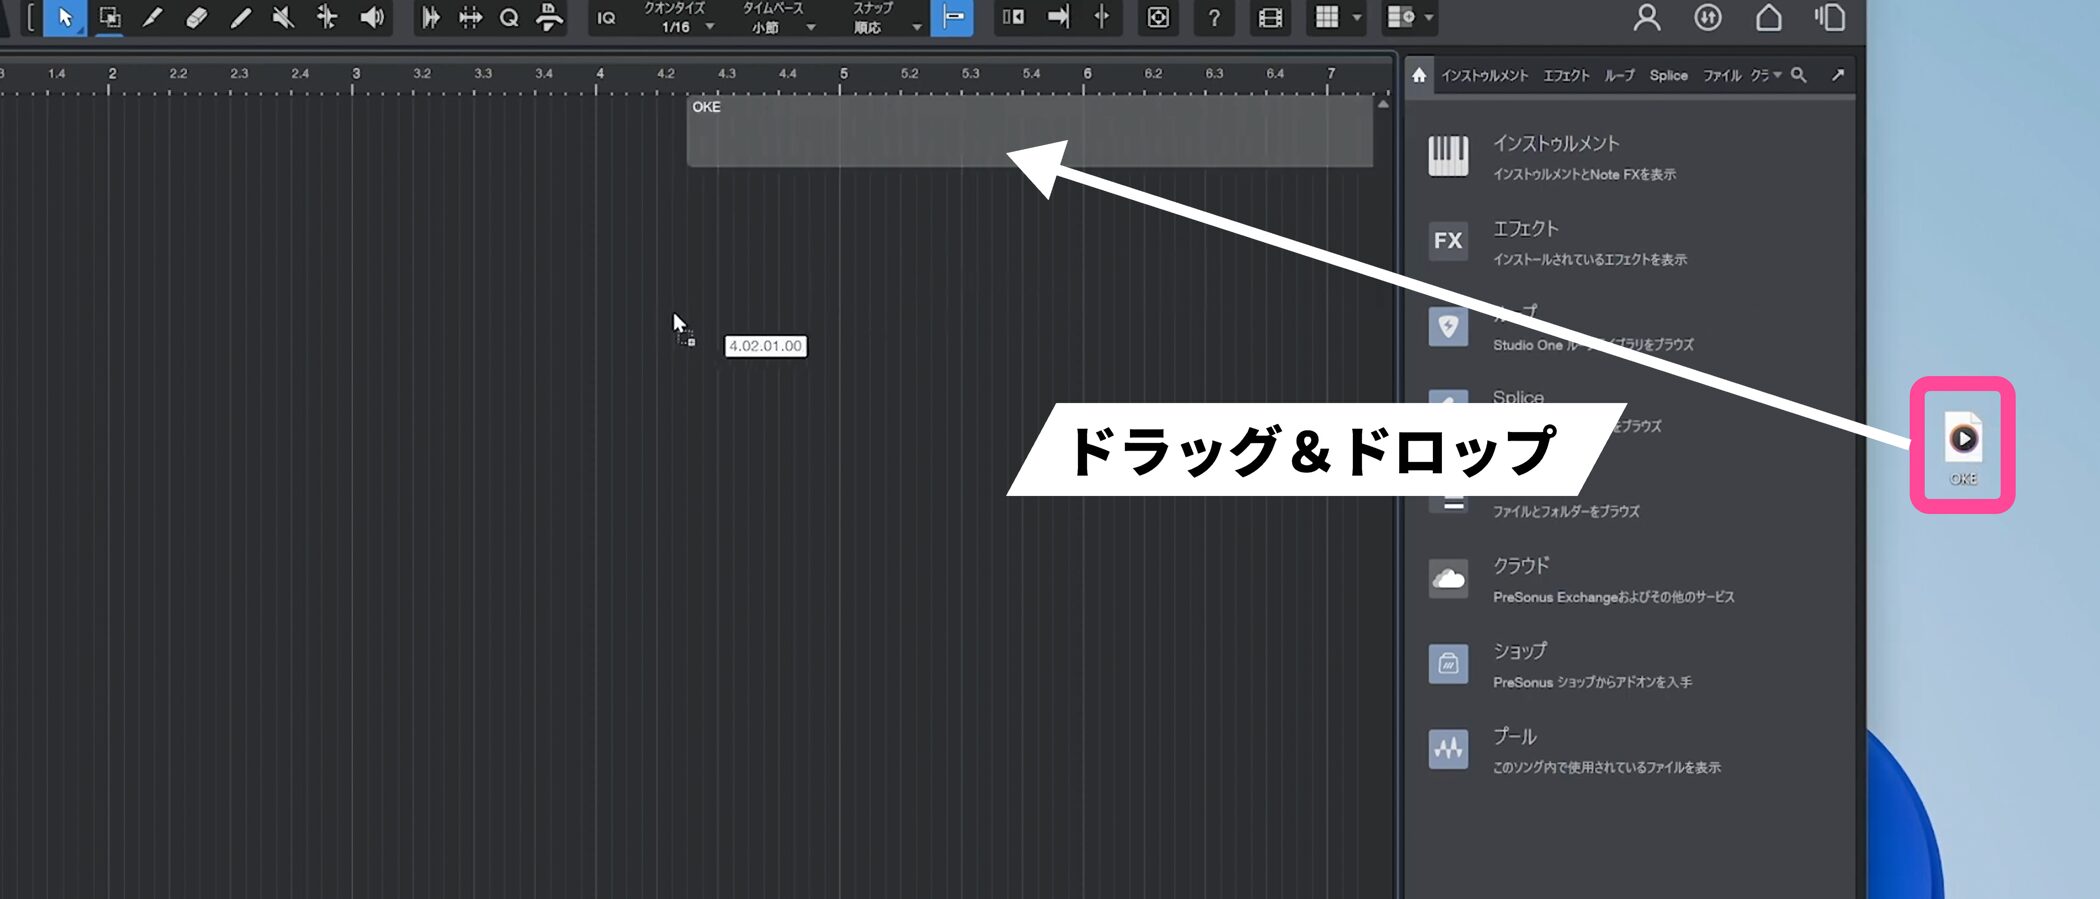
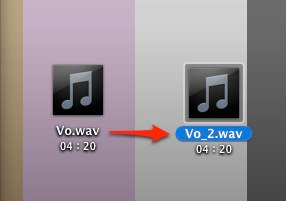
Drag and drop the exported backing file into the new Song.
Using just one audio file significantly reduces CPU load.
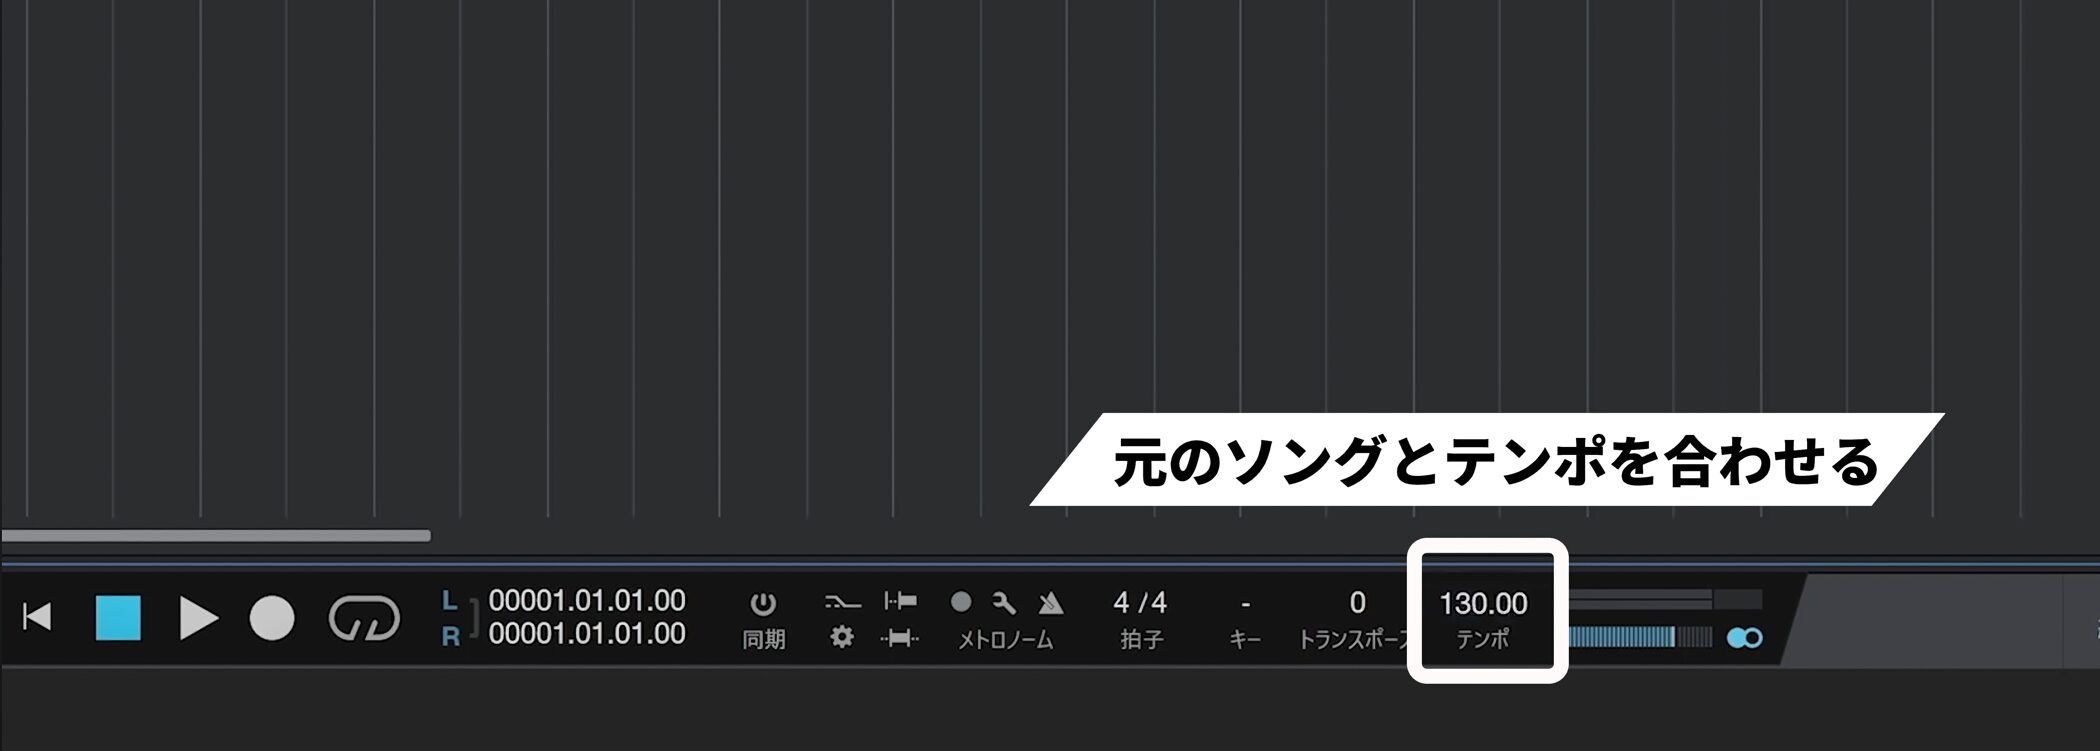
Set the tempo to match the original Song.
The tempo can be set in the transport bar.
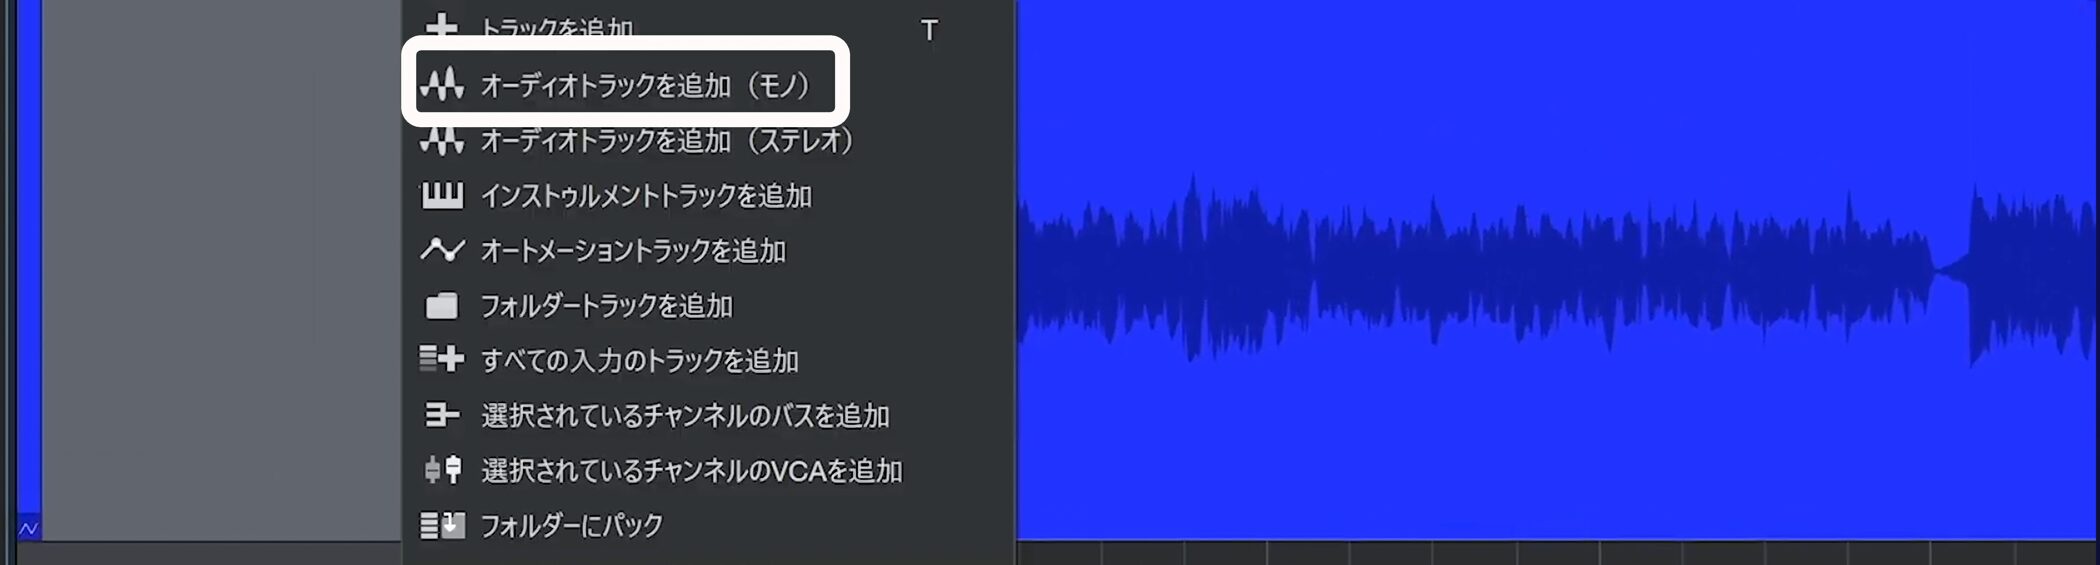
As before, create a mono audio track, check the input, and start recording.
Separate an audio file into stems
If you want to adjust the backing balance while recording, the Split Stems feature is useful.
It can separate one audio file into vocals, drums, bass, and other material.
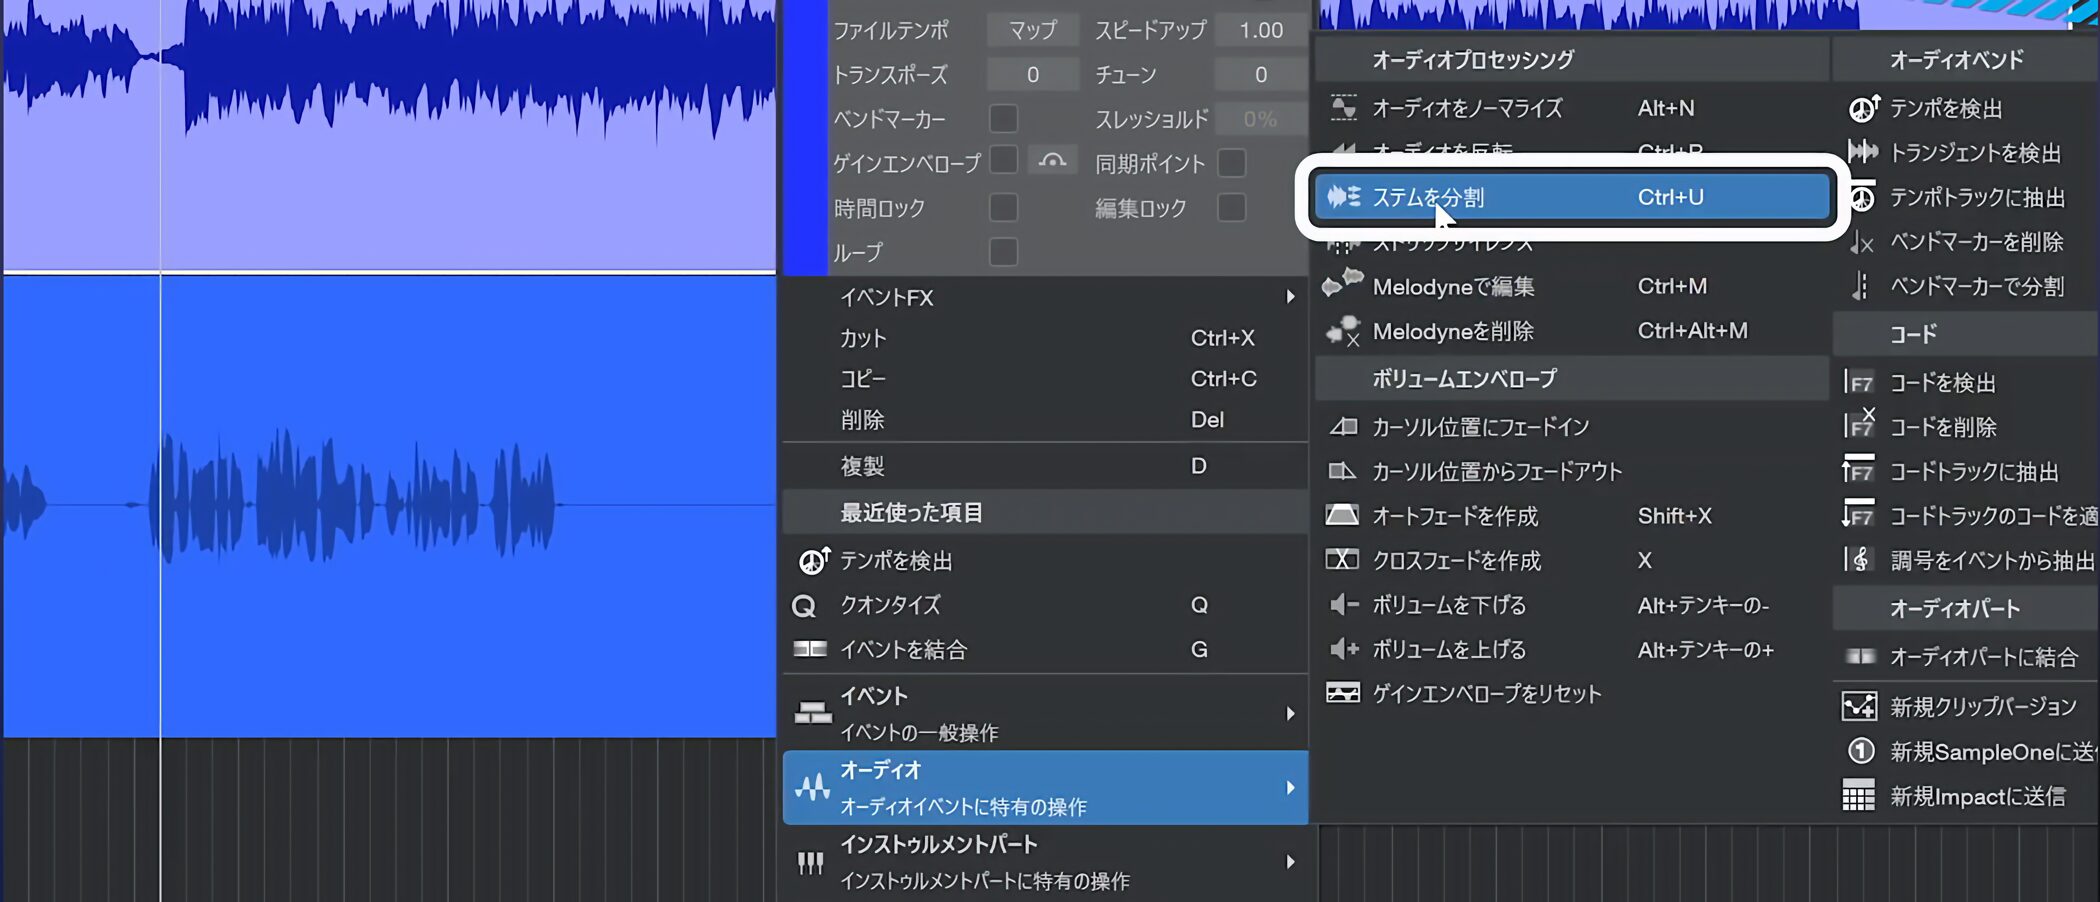
Right-click the audio event and choose Audio → Split Stems.
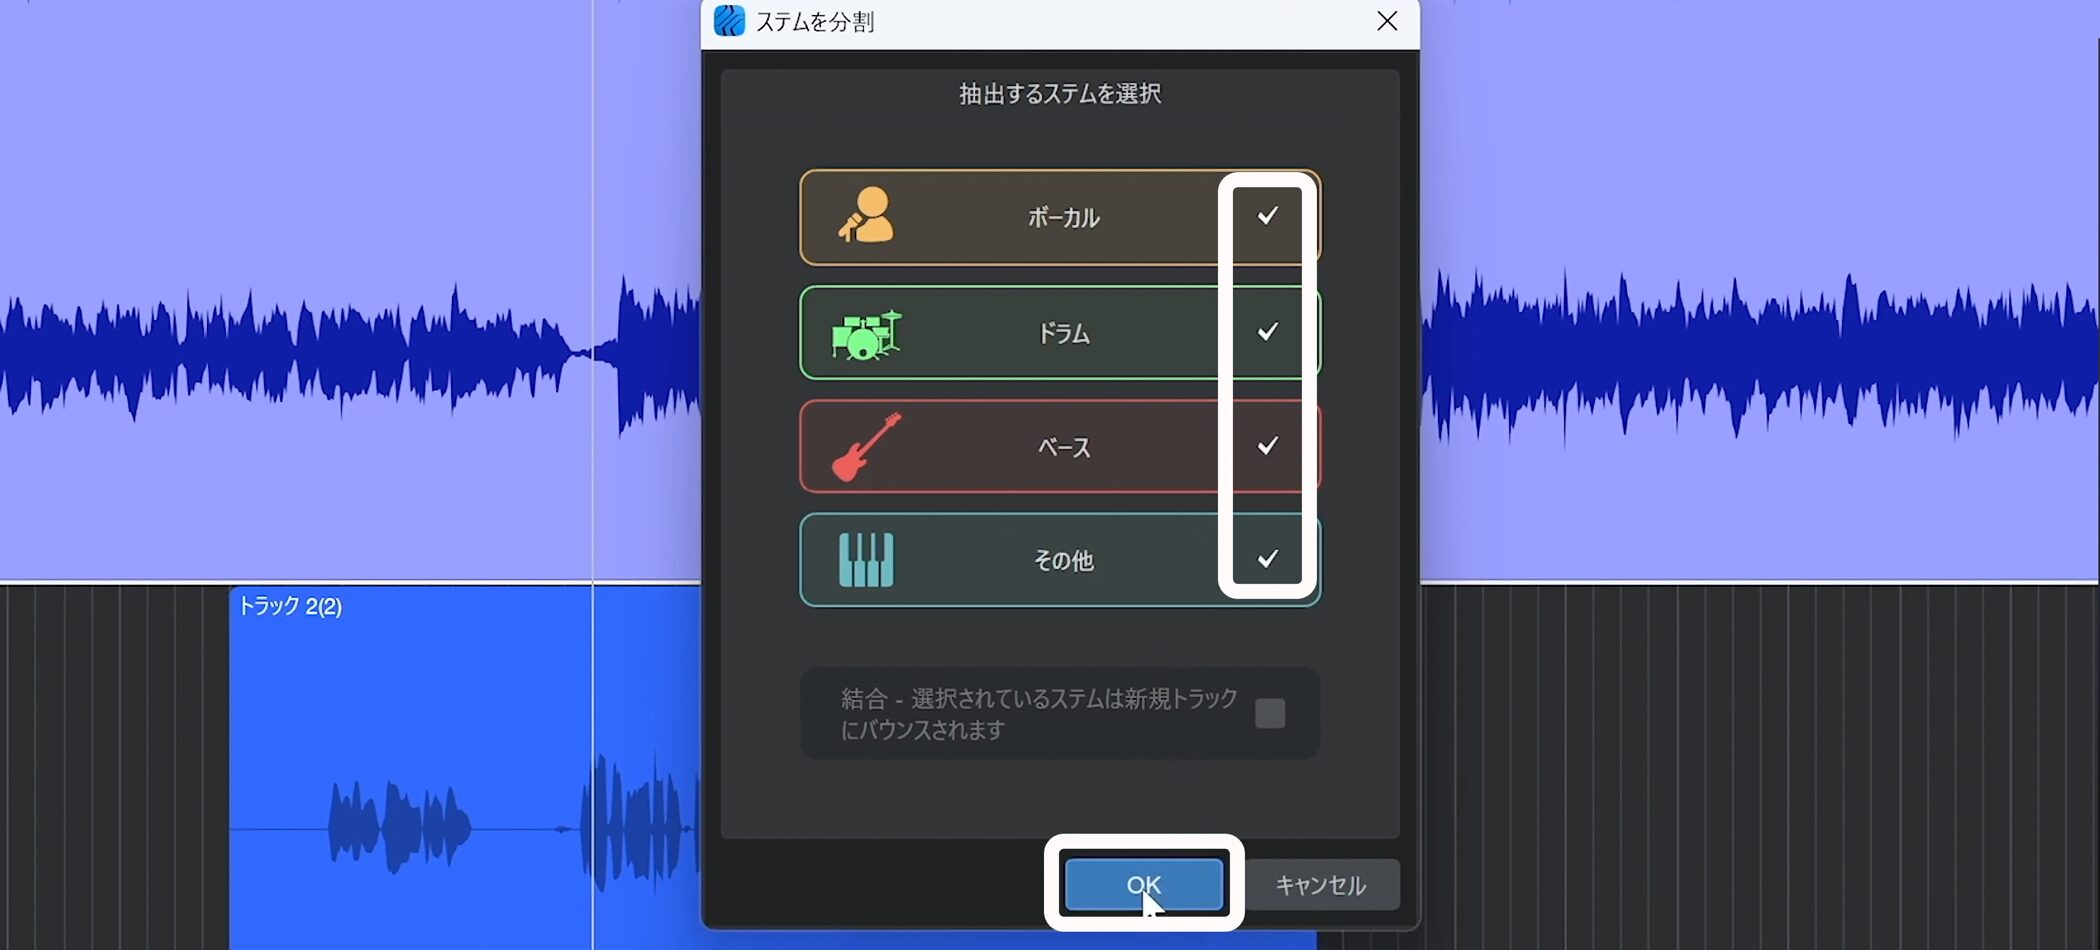
Select the components you want—vocals, drums, bass, or other—and click OK to start analysis.
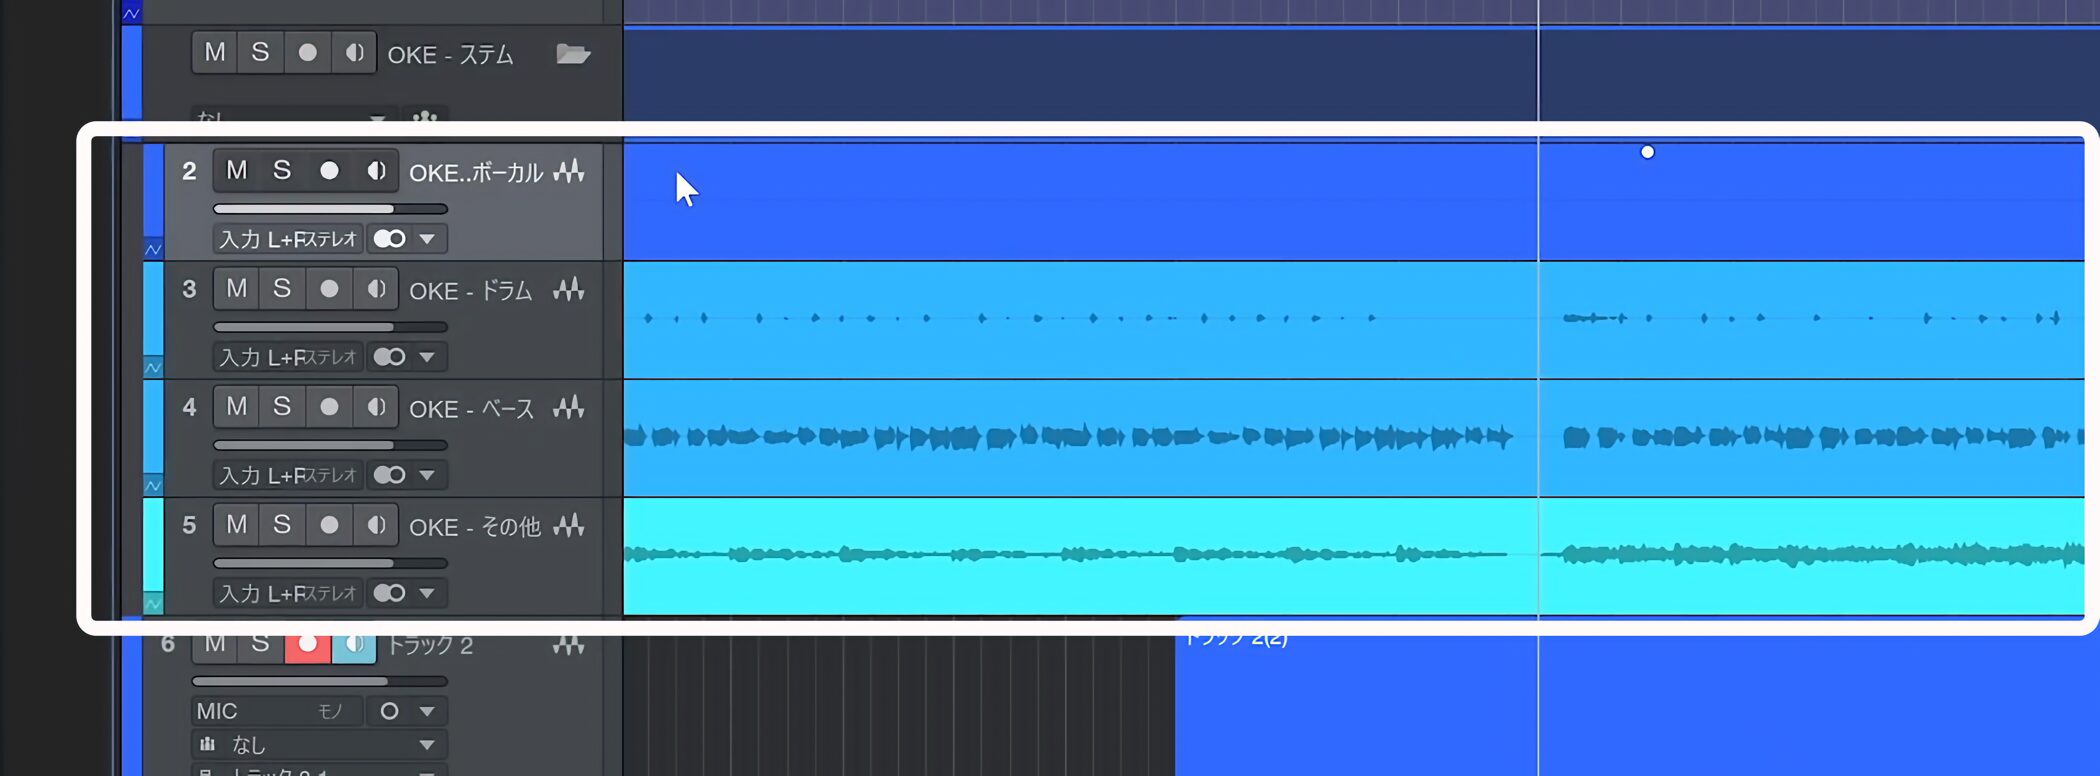
When analysis is complete, the components appear on separate tracks.
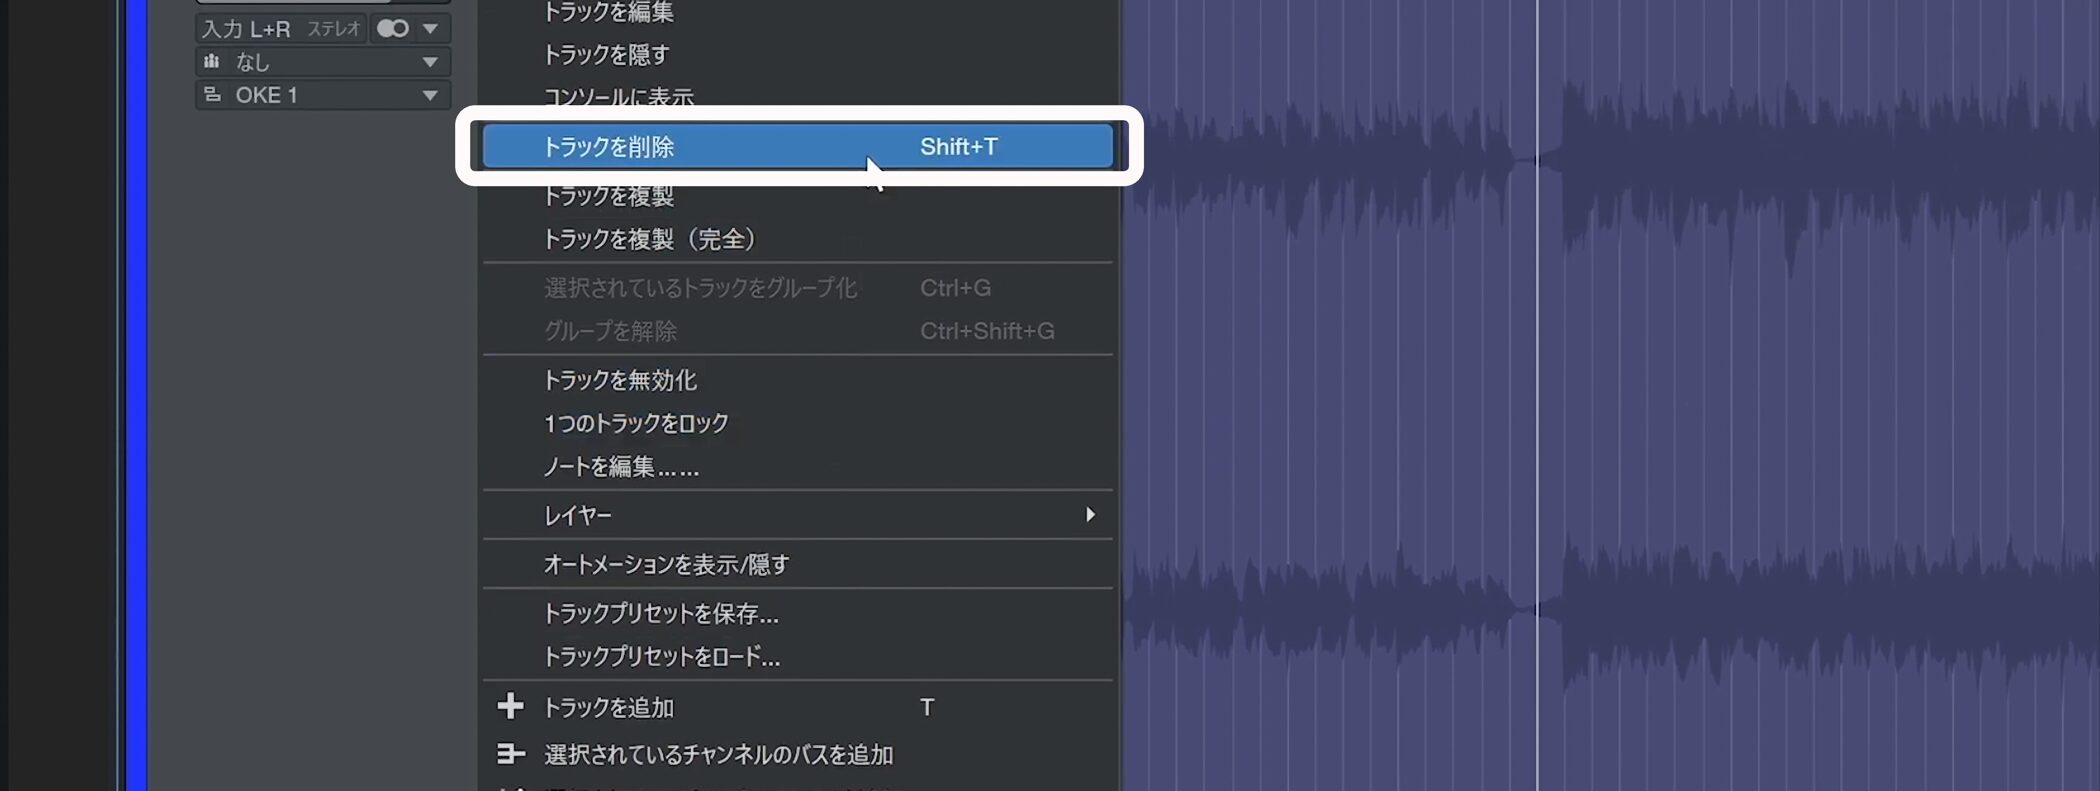
You can right-click and delete individual tracks you do not need.
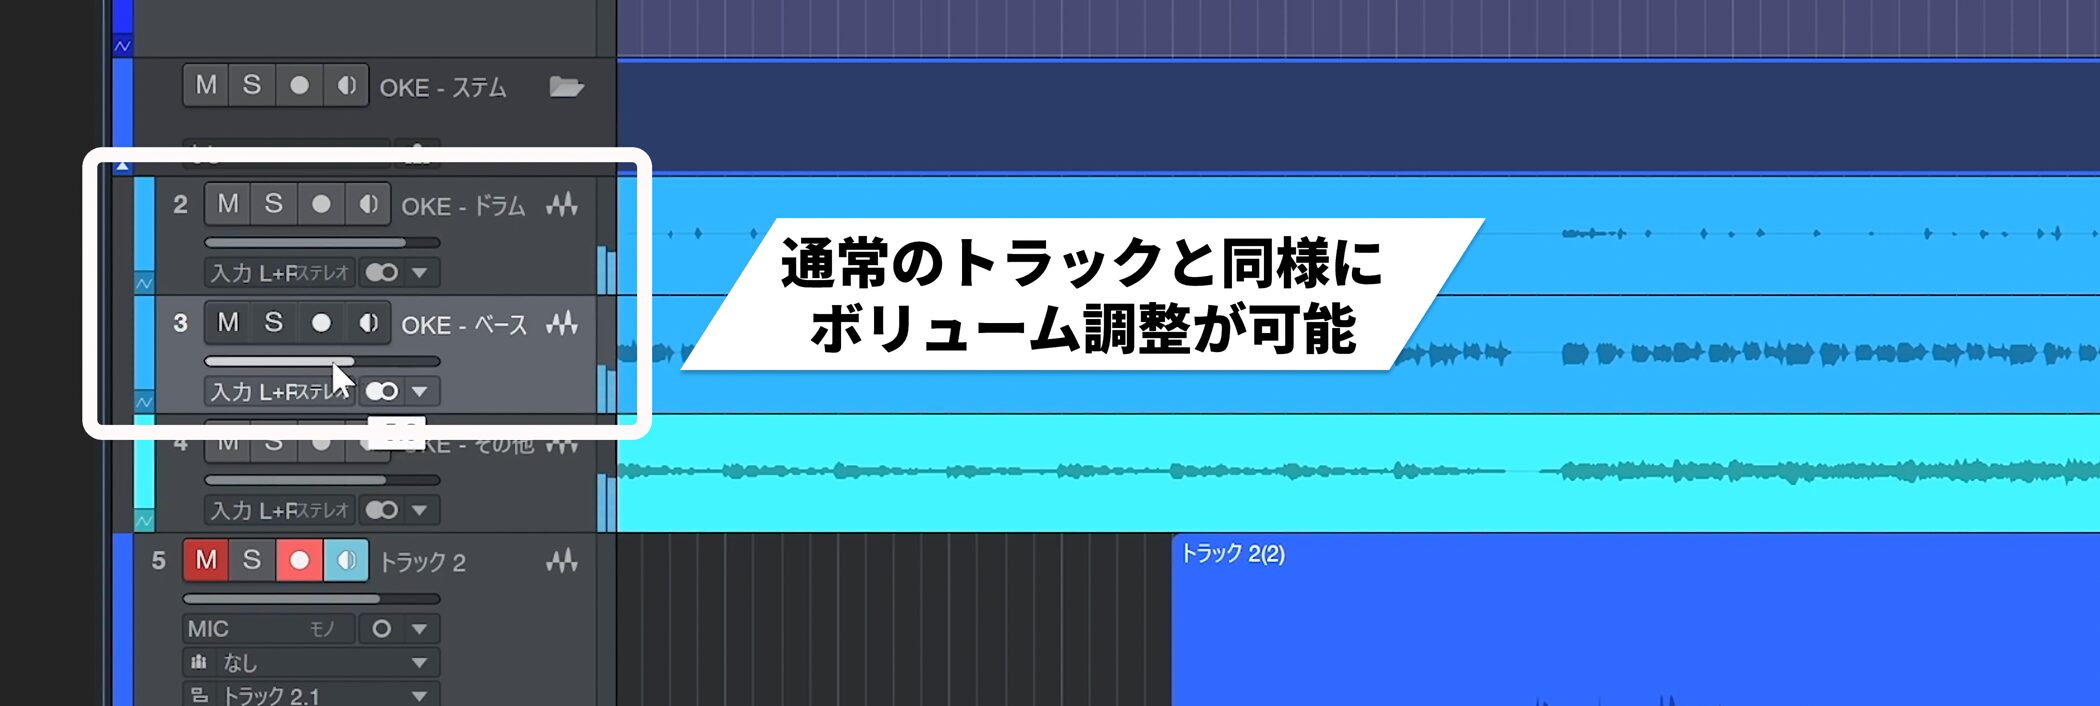
Adjust each separated track’s volume like any other track, for example to raise the drums or lower the bass. This lets you change the balance.
The feature can also be useful when creating a remix from an existing song.
Add reverb for monitoring
You can add reverb to the monitoring signal to make the vocalist more comfortable.
In this setup, the effect is not applied to the recorded input; it is heard only while monitoring.
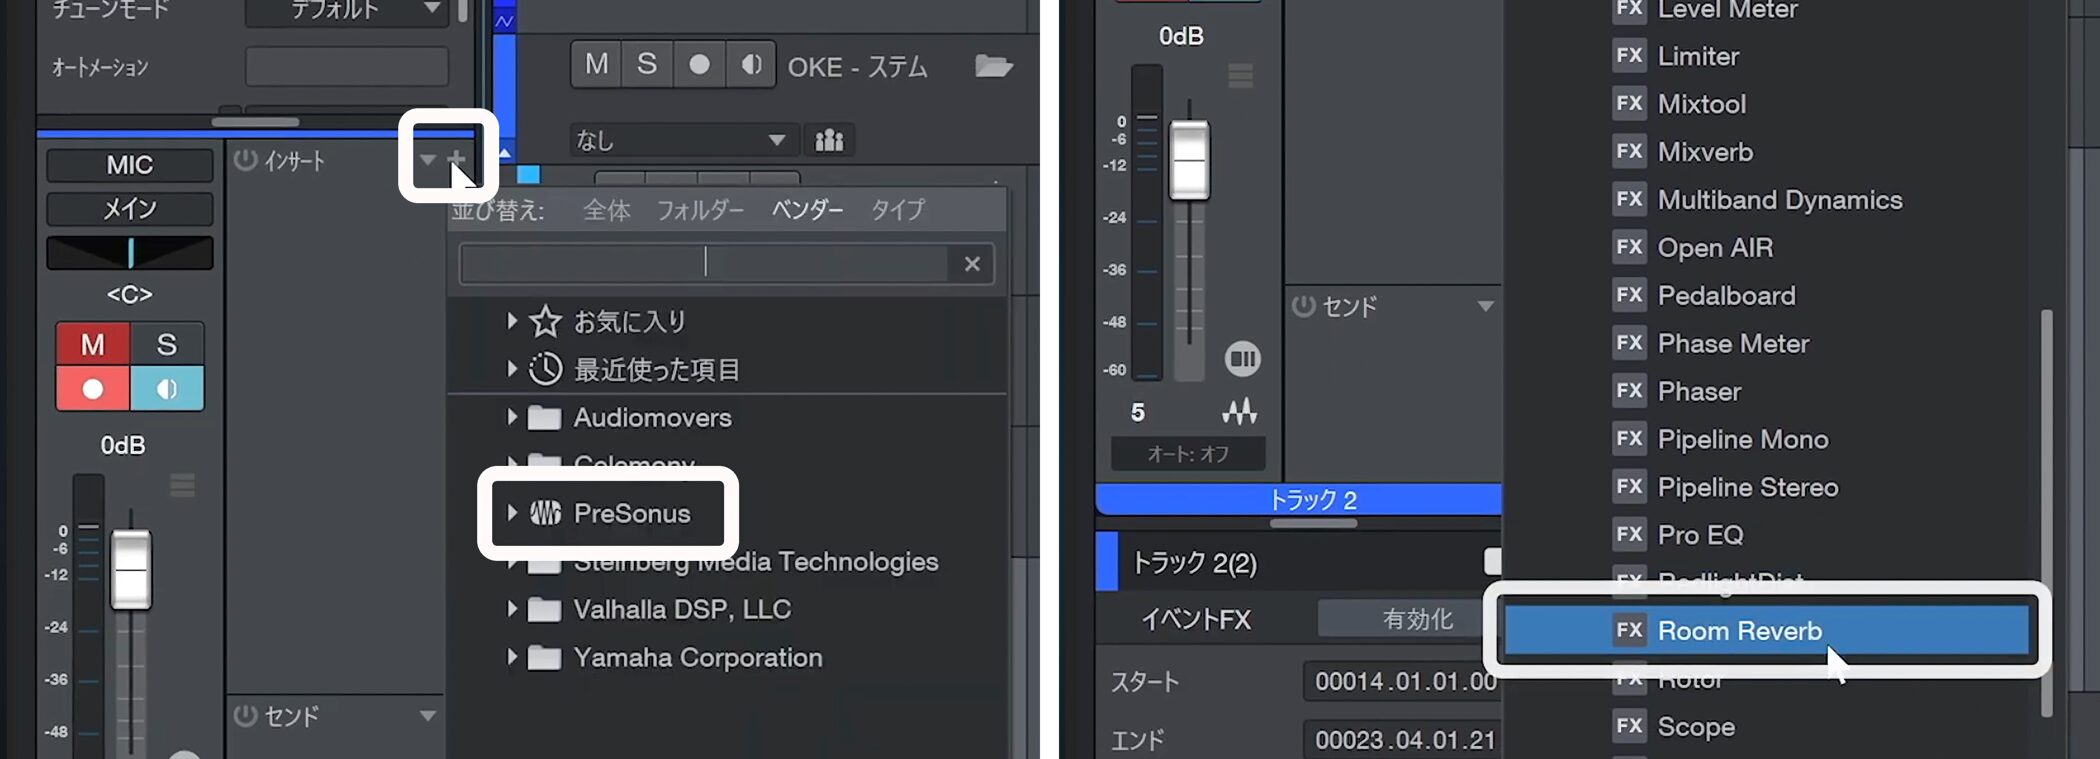
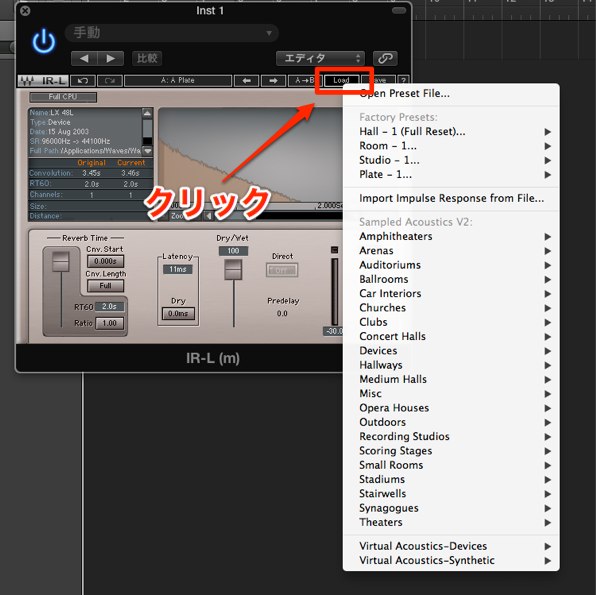
Click the track’s insert slot and choose a reverb plug-in.
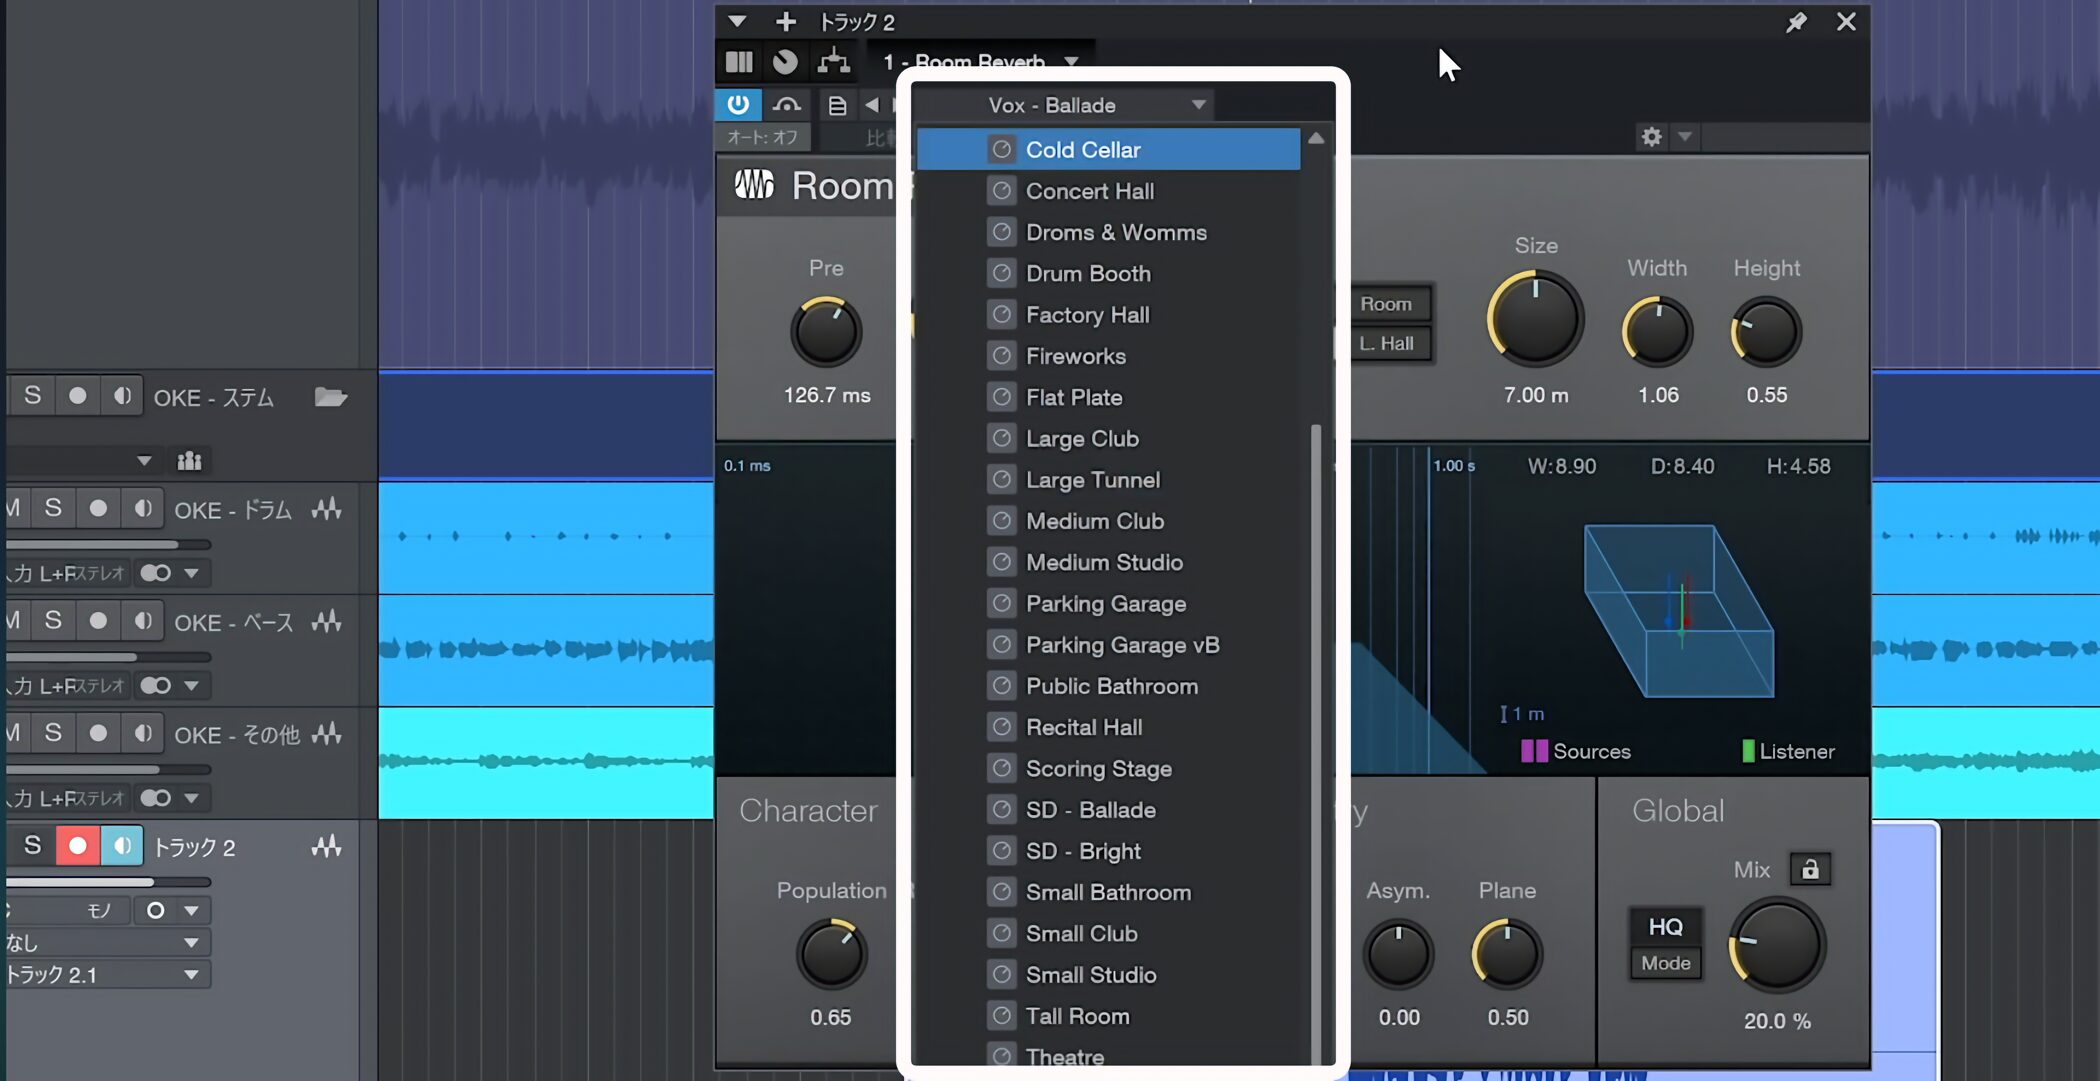
Studio One provides many presets; choose one you like.
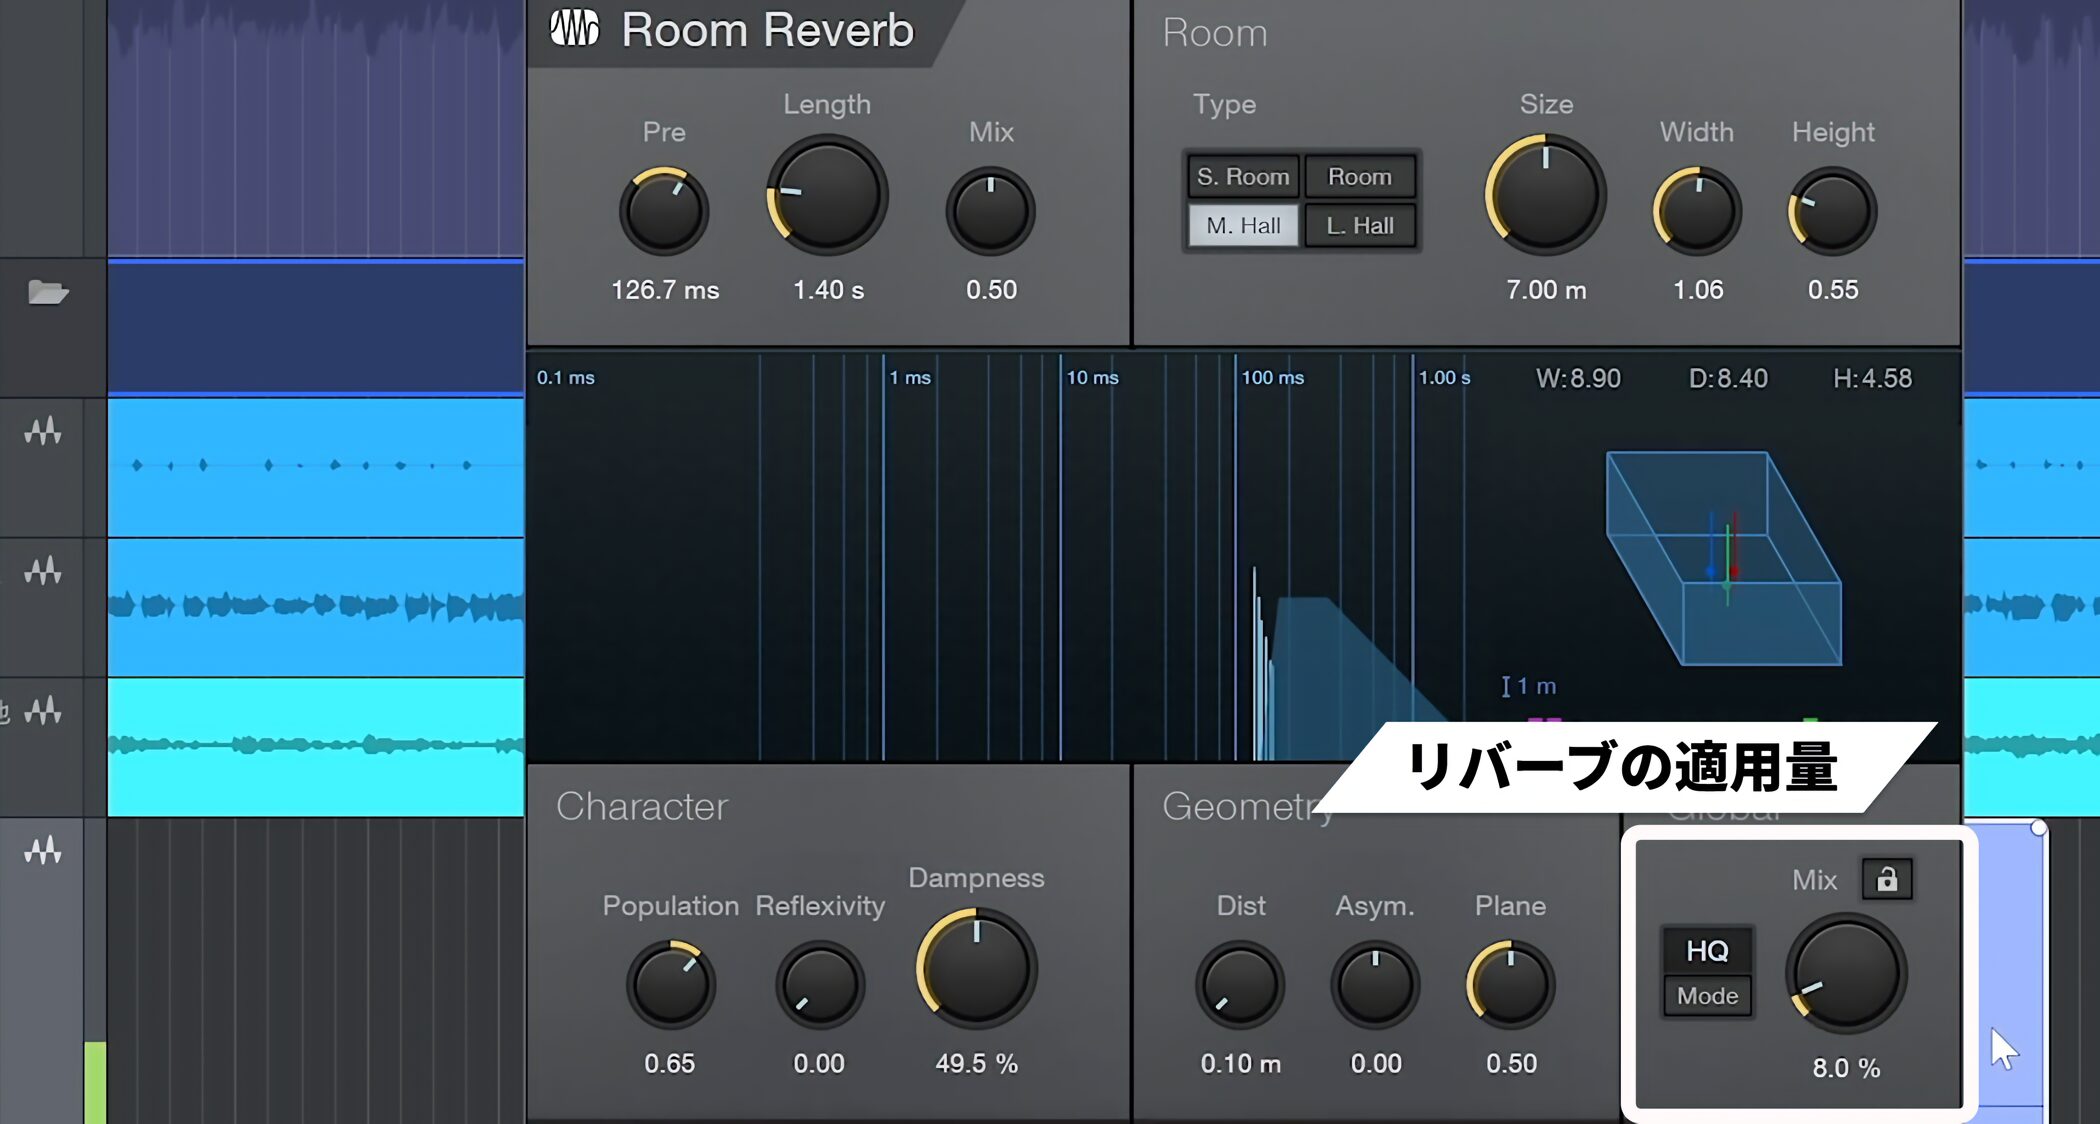
Adjust the reverb amount with the Mix knob.
Re-record a section with punch-in
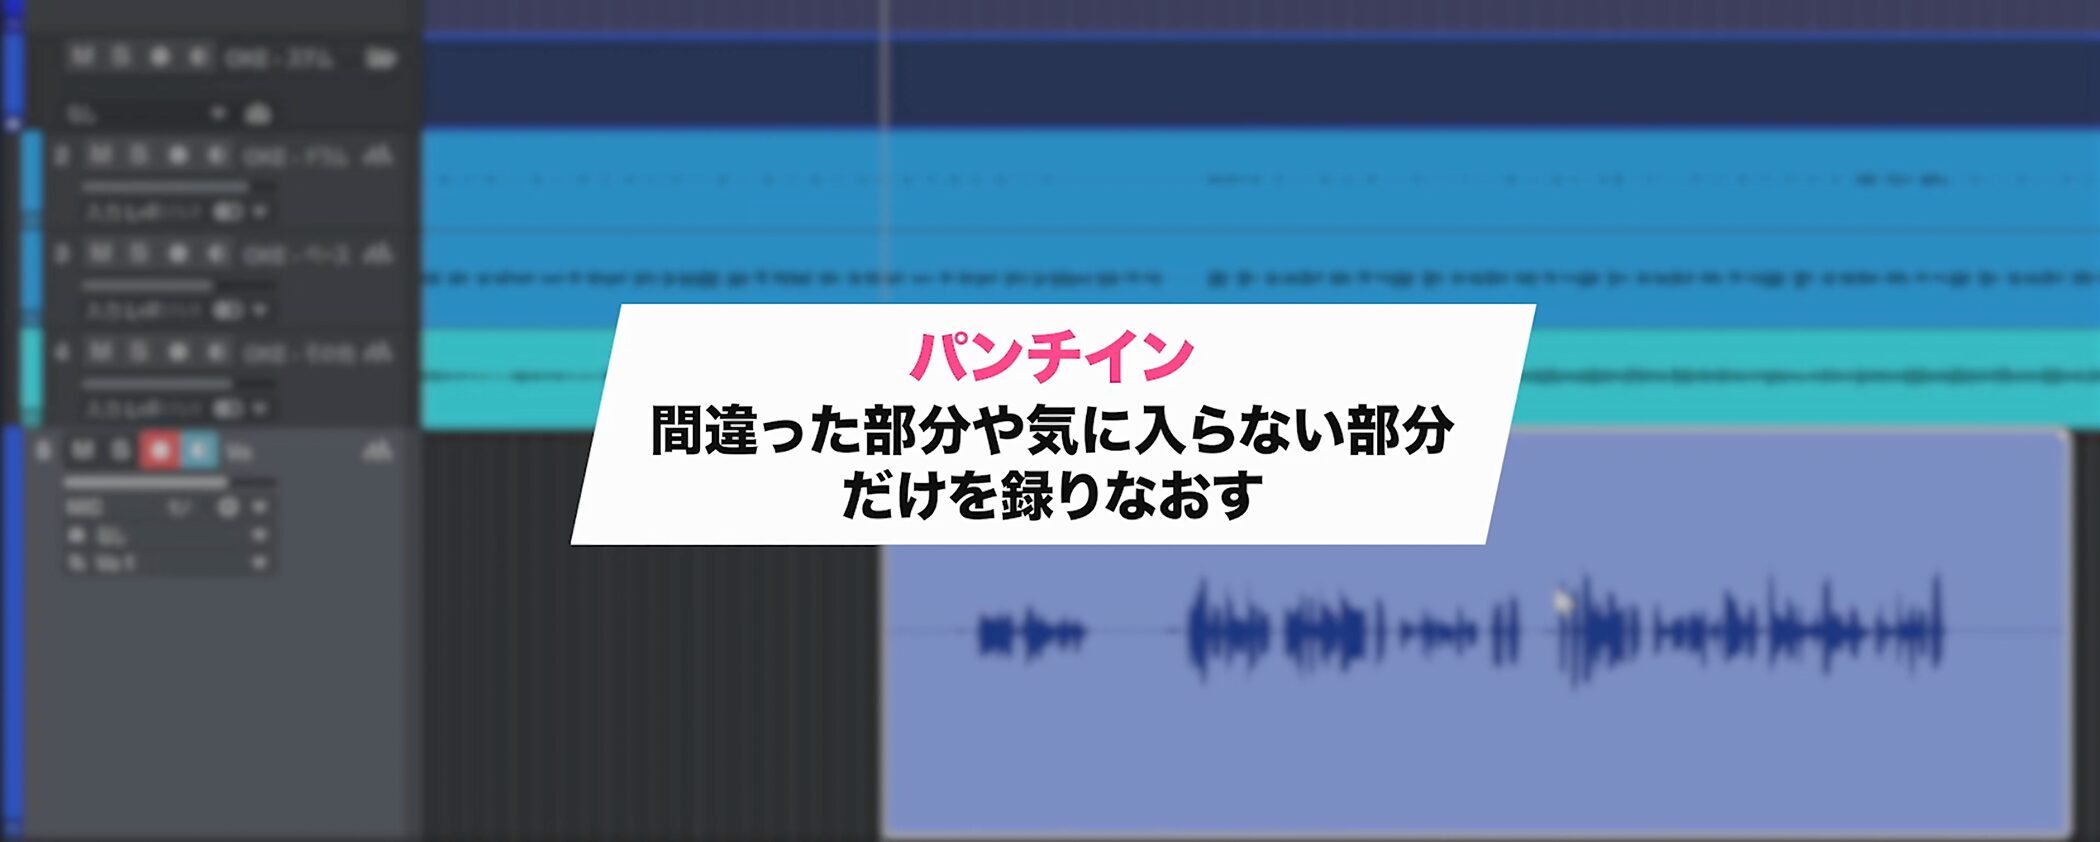
If you make a lyric mistake or dislike a section, punch-in recording lets you record just that part again.
There is no need to re-record the entire performance, making it easier to obtain a good take.
Start playback and begin singing a little before the section you want to replace.
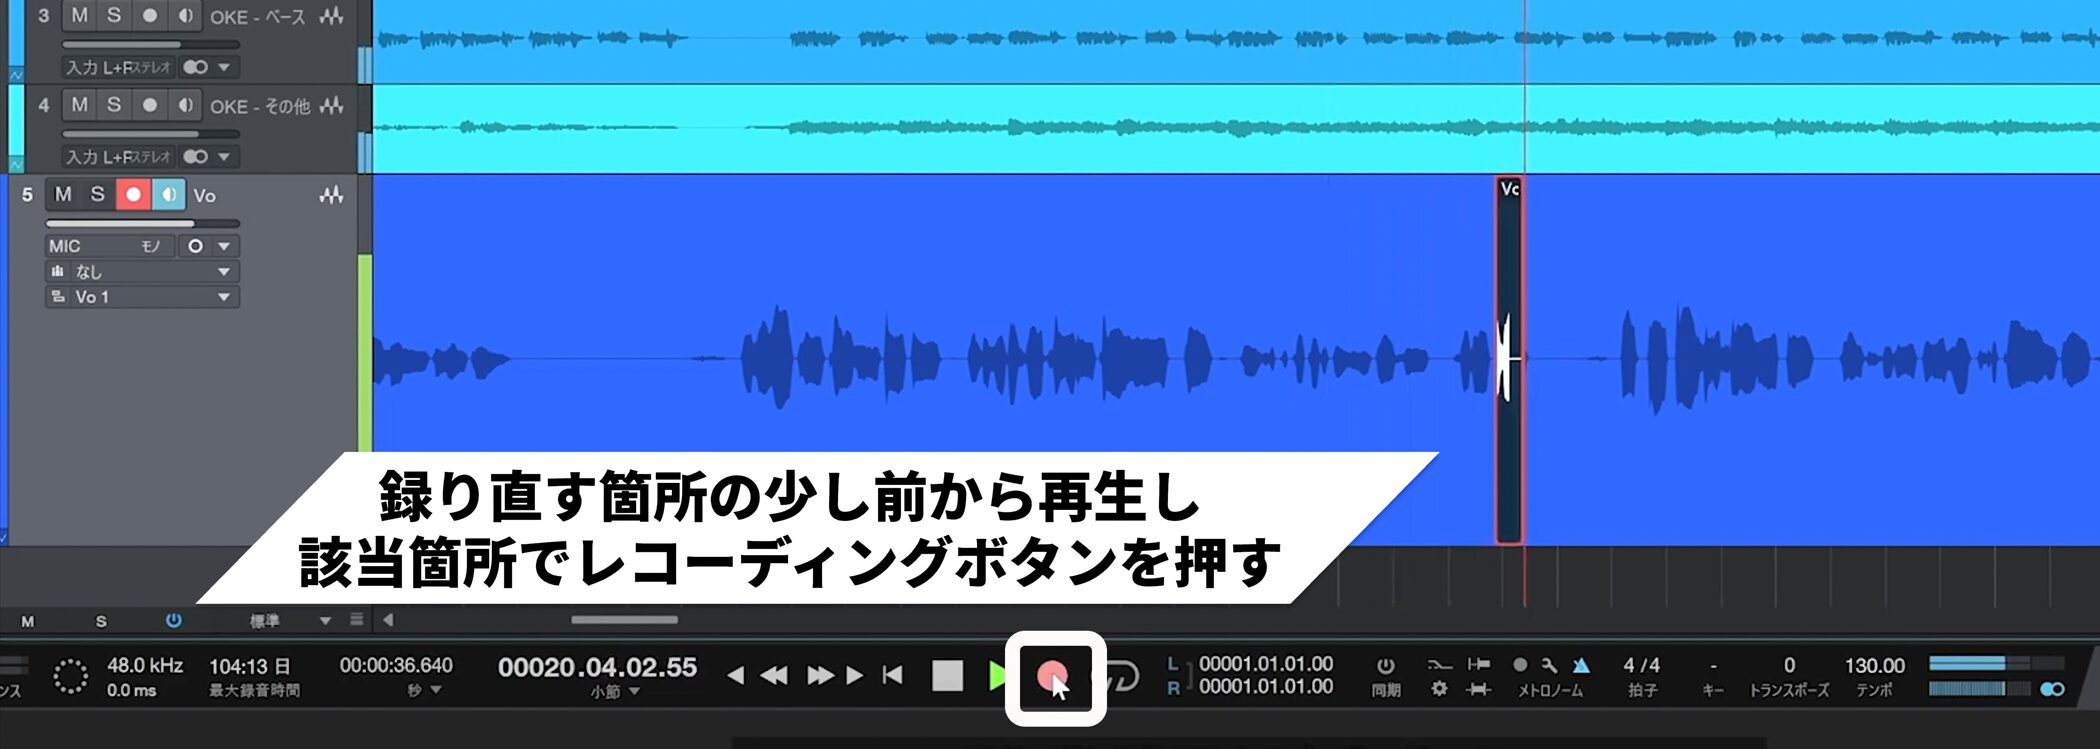
When you reach it, press Record to start recording.
Press Record again when finished to exit recording.
This lets you replace only the necessary section while preserving the good parts.
Import the recorded track into the original Song
Once recording is complete, move the recorded vocal track to the original Song.
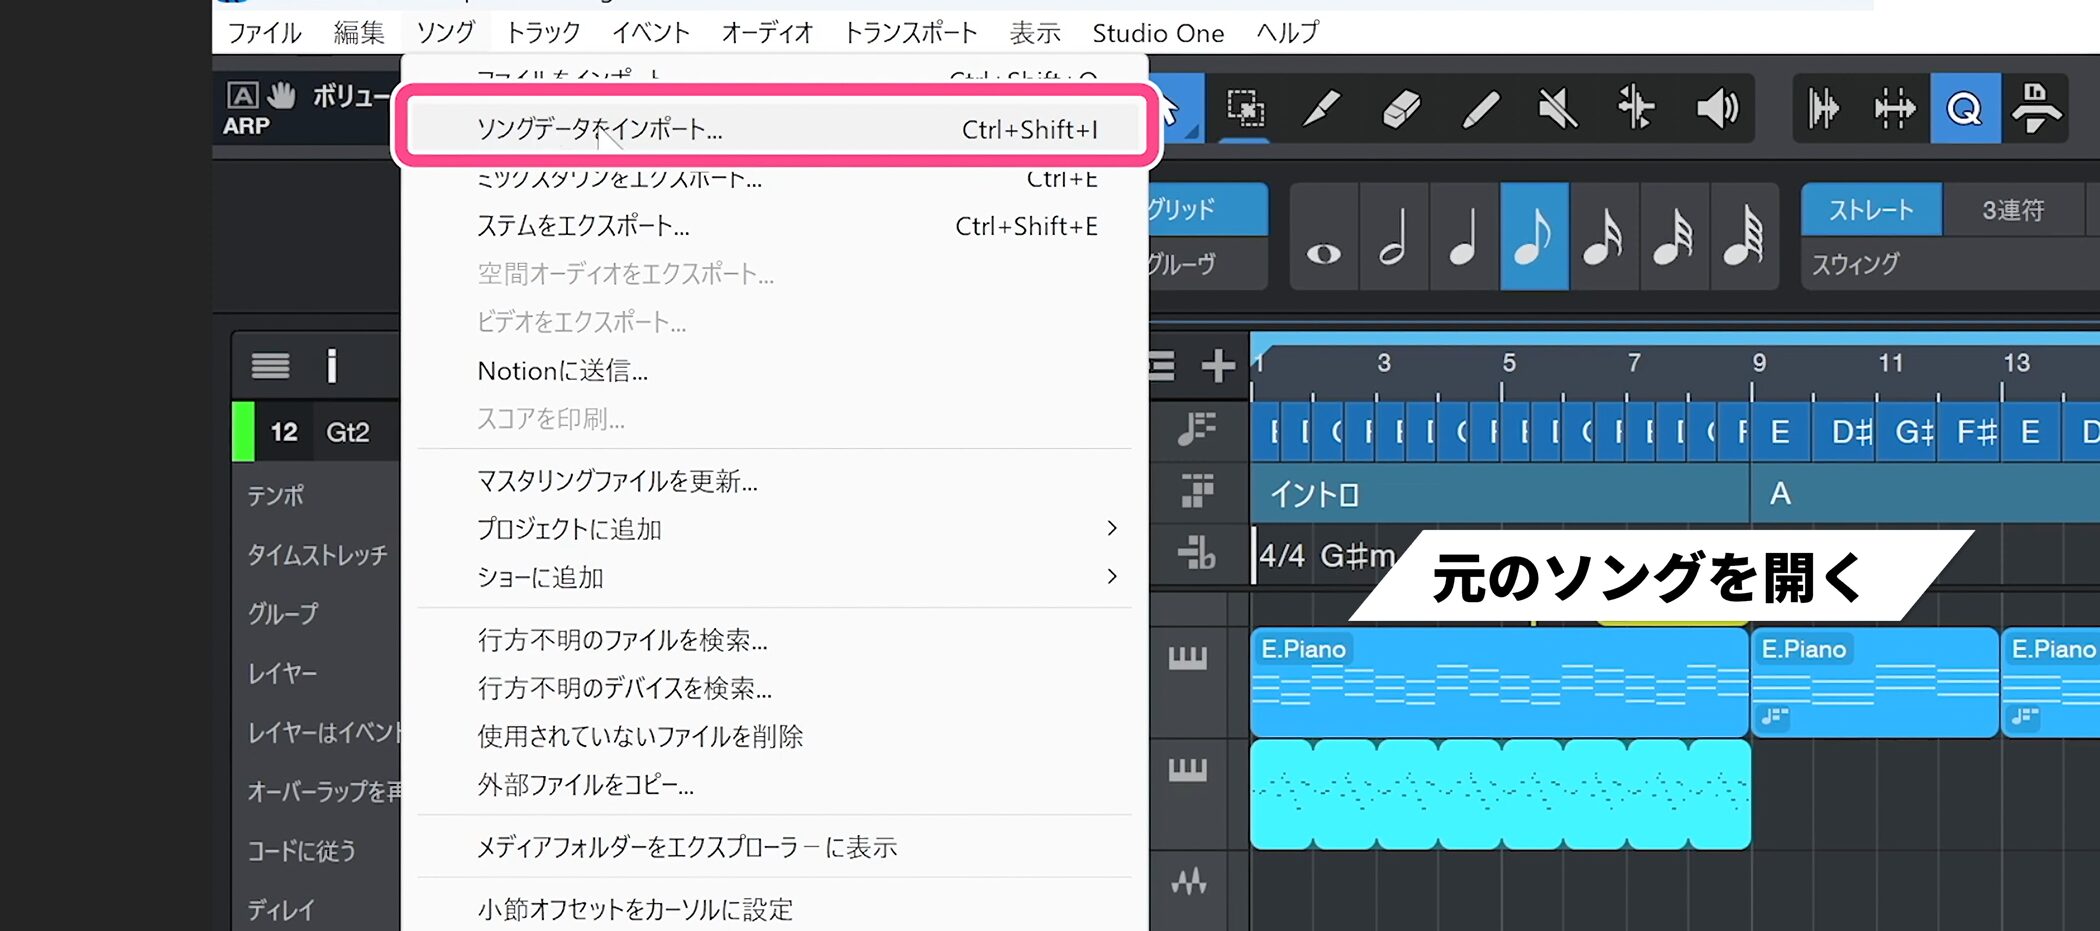
Open the original Song and choose File → Import Song Data.
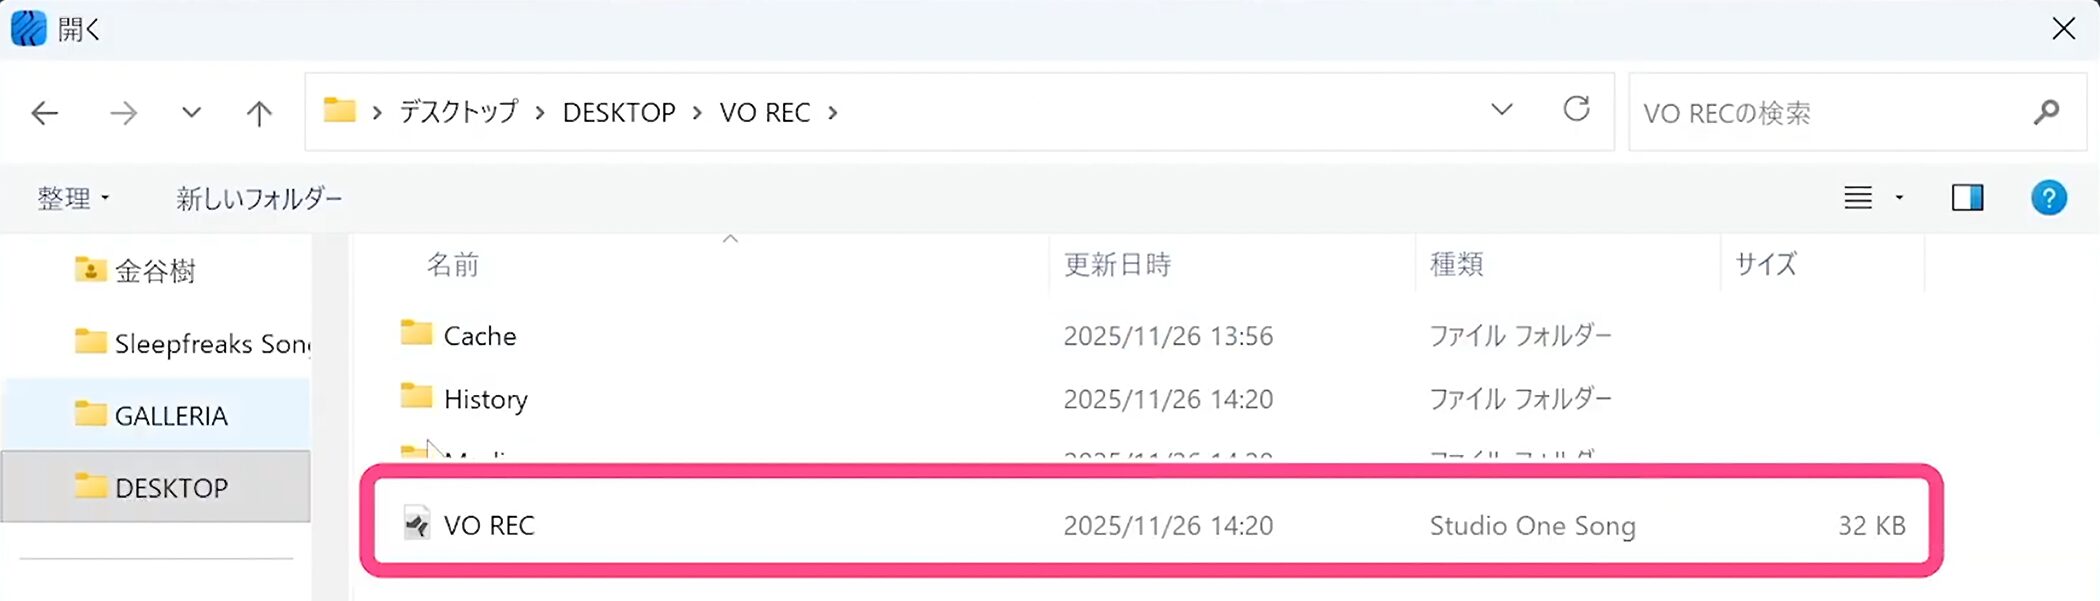
Select the Song used for vocal recording; a screen appears where you can choose which tracks to import.
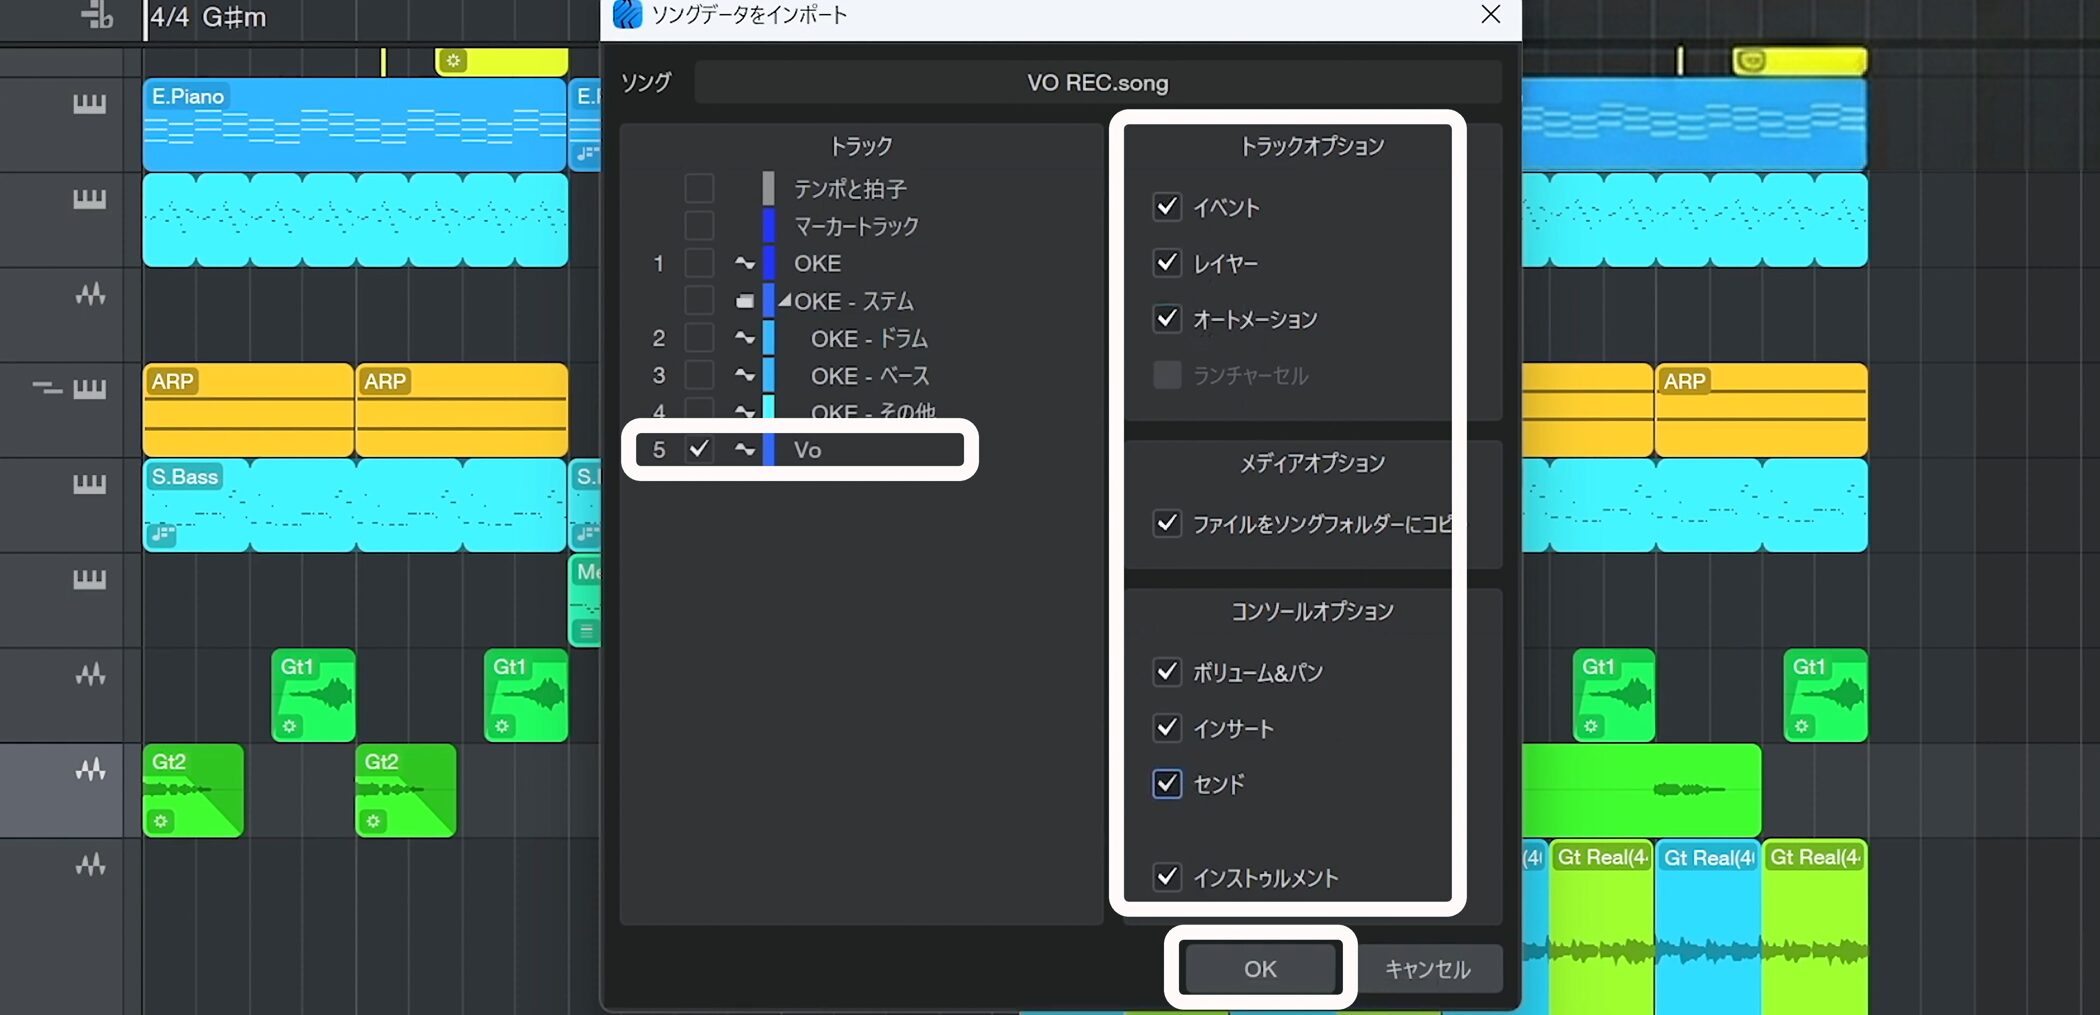
Select the vocal track and the data to import, such as events, effects, and volume.
To reproduce the track’s complete state, check all the options.
Click OK to bring the track settings across from the other Song.
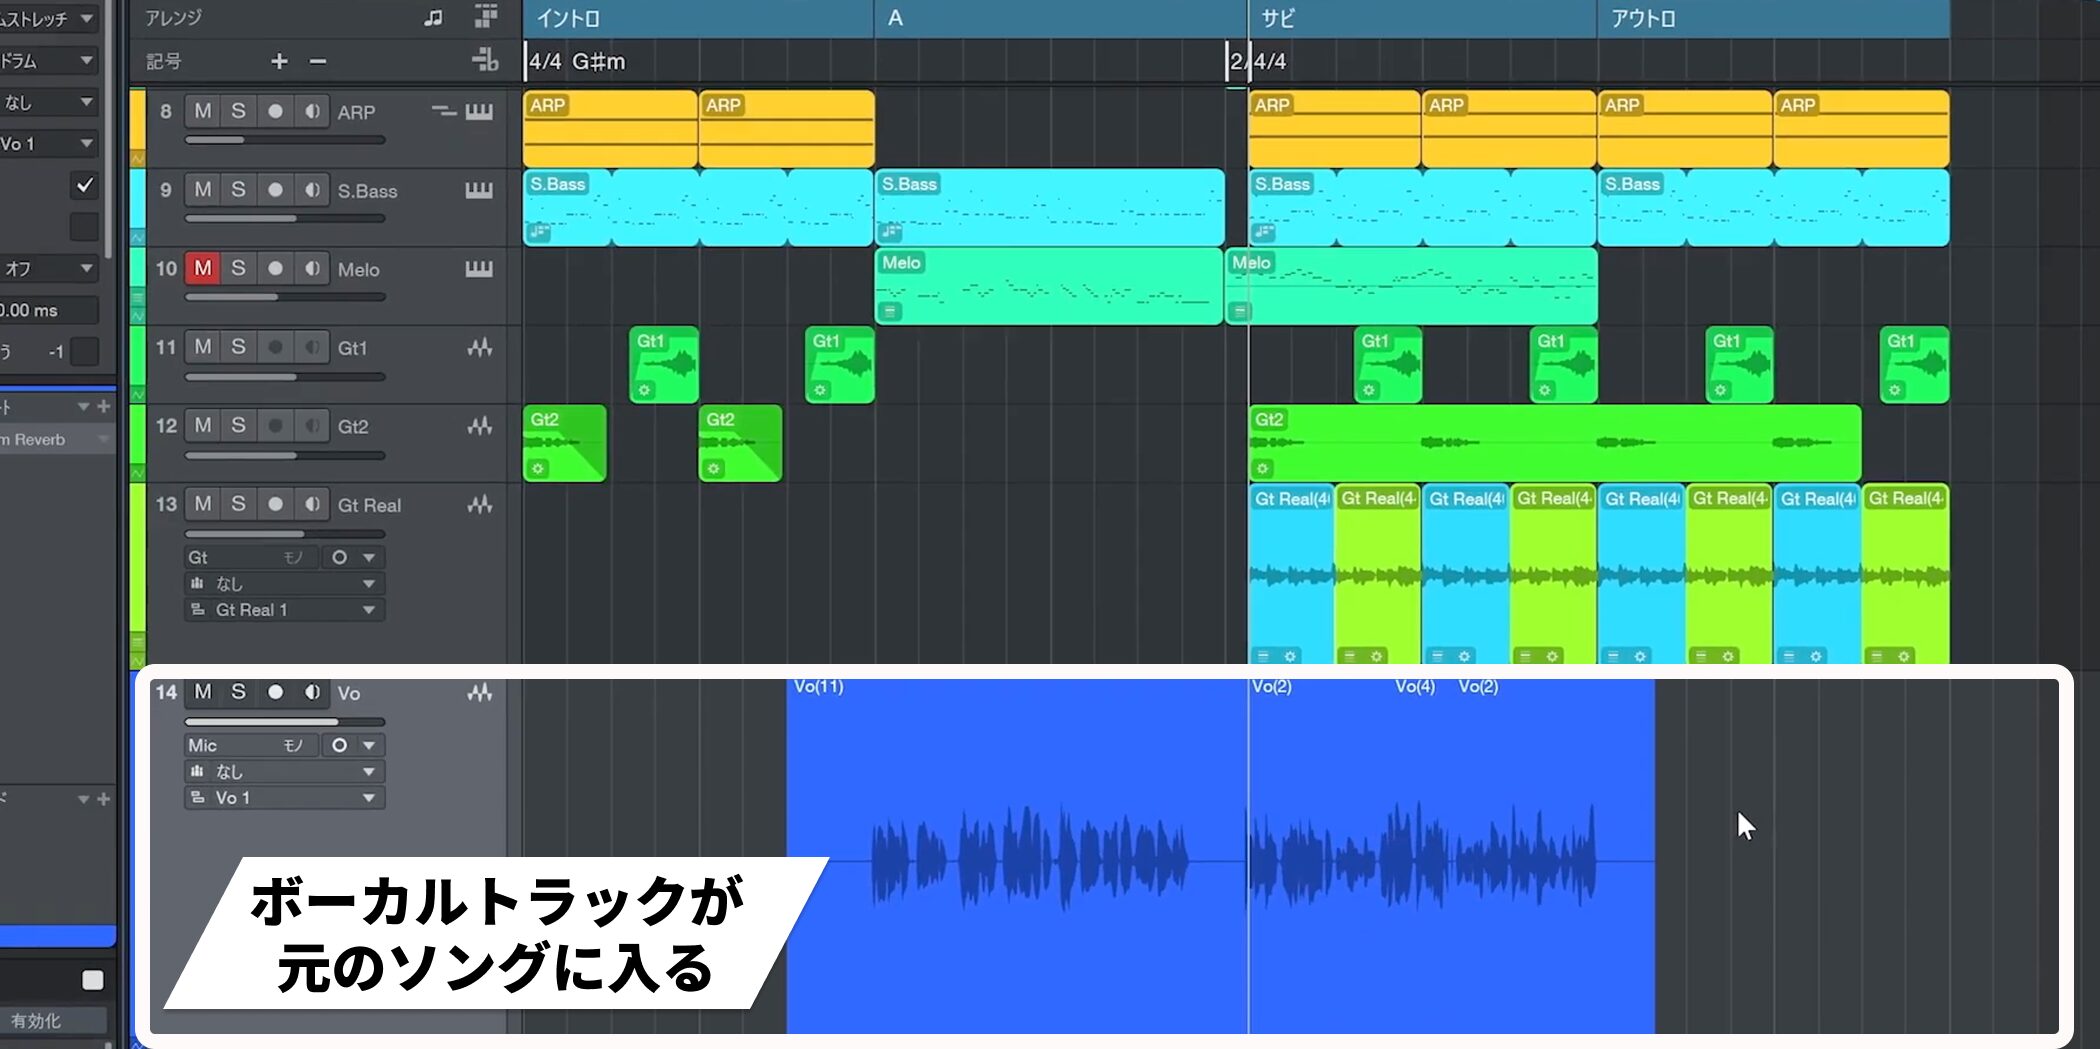
This makes it easy to integrate a track recorded in a separate Song into the original project.
Frequently asked questions
Q1. How can I reduce latency while recording vocals?
Start by lowering latency in the audio device settings. If that is not enough, export the backing to audio and record in a new Song with a lower CPU load.
Q2. How can I change key without affecting every track?
Enable Follow Global Transpose for the tracks you want to transpose and exclude tracks such as drums that should remain unchanged.
Q3. Can I separate one audio file into drums and bass for individual adjustment?
Yes. Split Stems can separate an audio file into vocals, drums, bass, and other material on individual tracks. You can then adjust their volume and effects like ordinary tracks.
Q4. Can I hear reverb while monitoring without recording it into the vocal?
Insert a reverb plug-in on the vocal track. In this setup it affects the monitored signal while the recorded input remains dry.
NEW ARTICLES
Latest English Articles