This guide covers practical volume and pan adjustments, two essential parts of mixing. Starting with the Console, solo and mute, it explains multi-output routing for separate drum control, then shows how to build a balance and use panning to create a sense of space. Learn how to manage the master channel, avoid clipping, and work efficiently with multiple tracks for a balanced mix.
Basic steps for balancing a mix
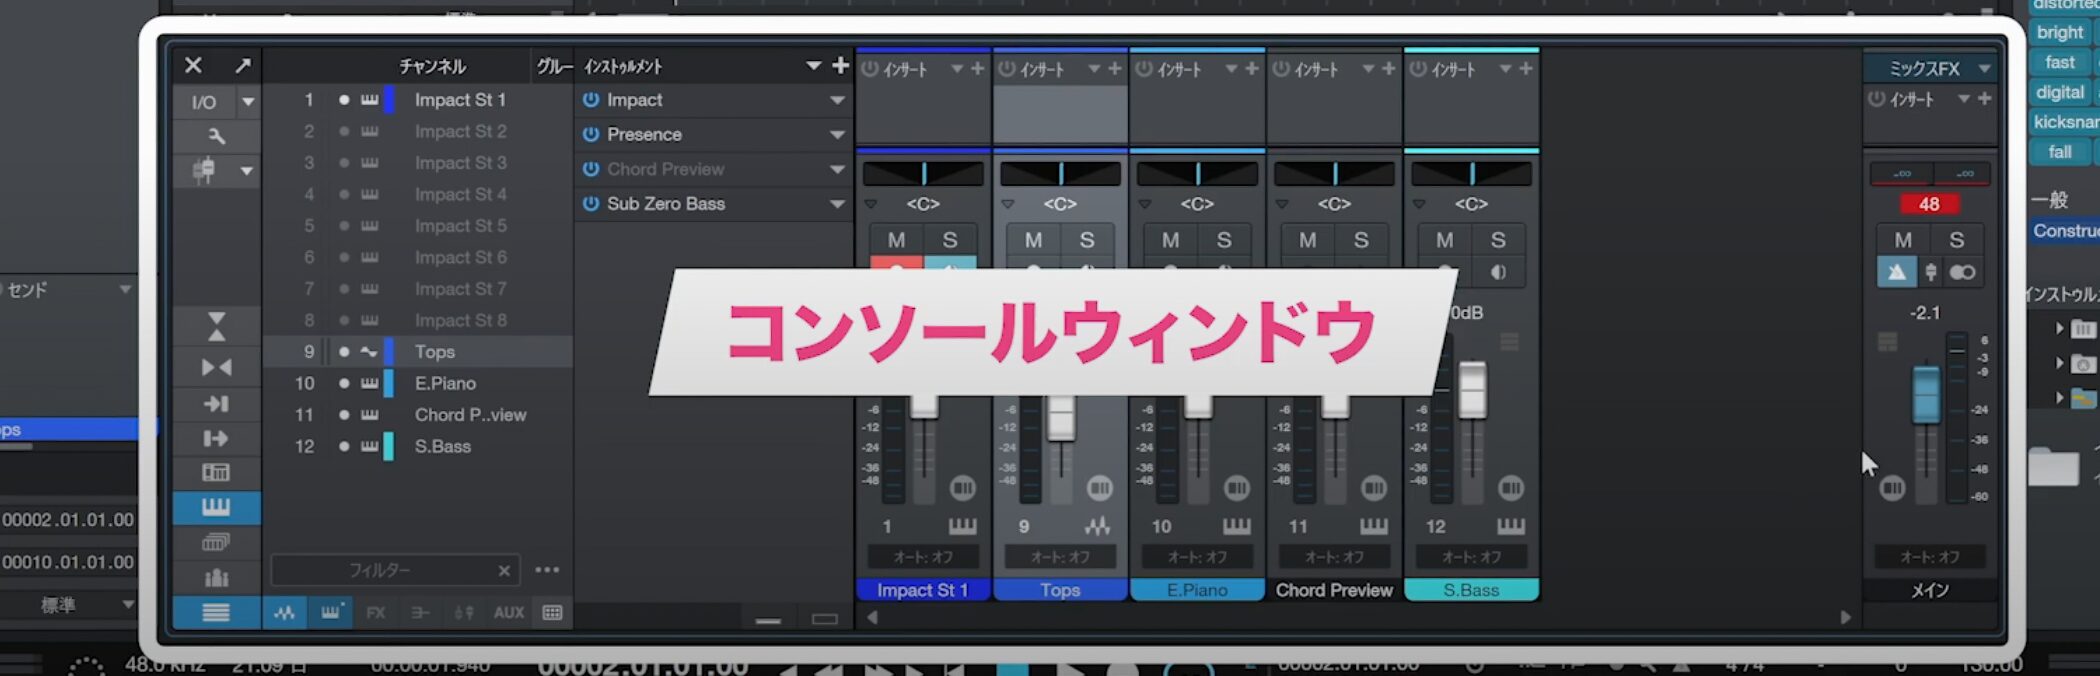
Once the overall arrangement has taken shape, balancing the volume of each track becomes important.
Here we will use the Console to control multiple tracks efficiently.
Opening and understanding the Console
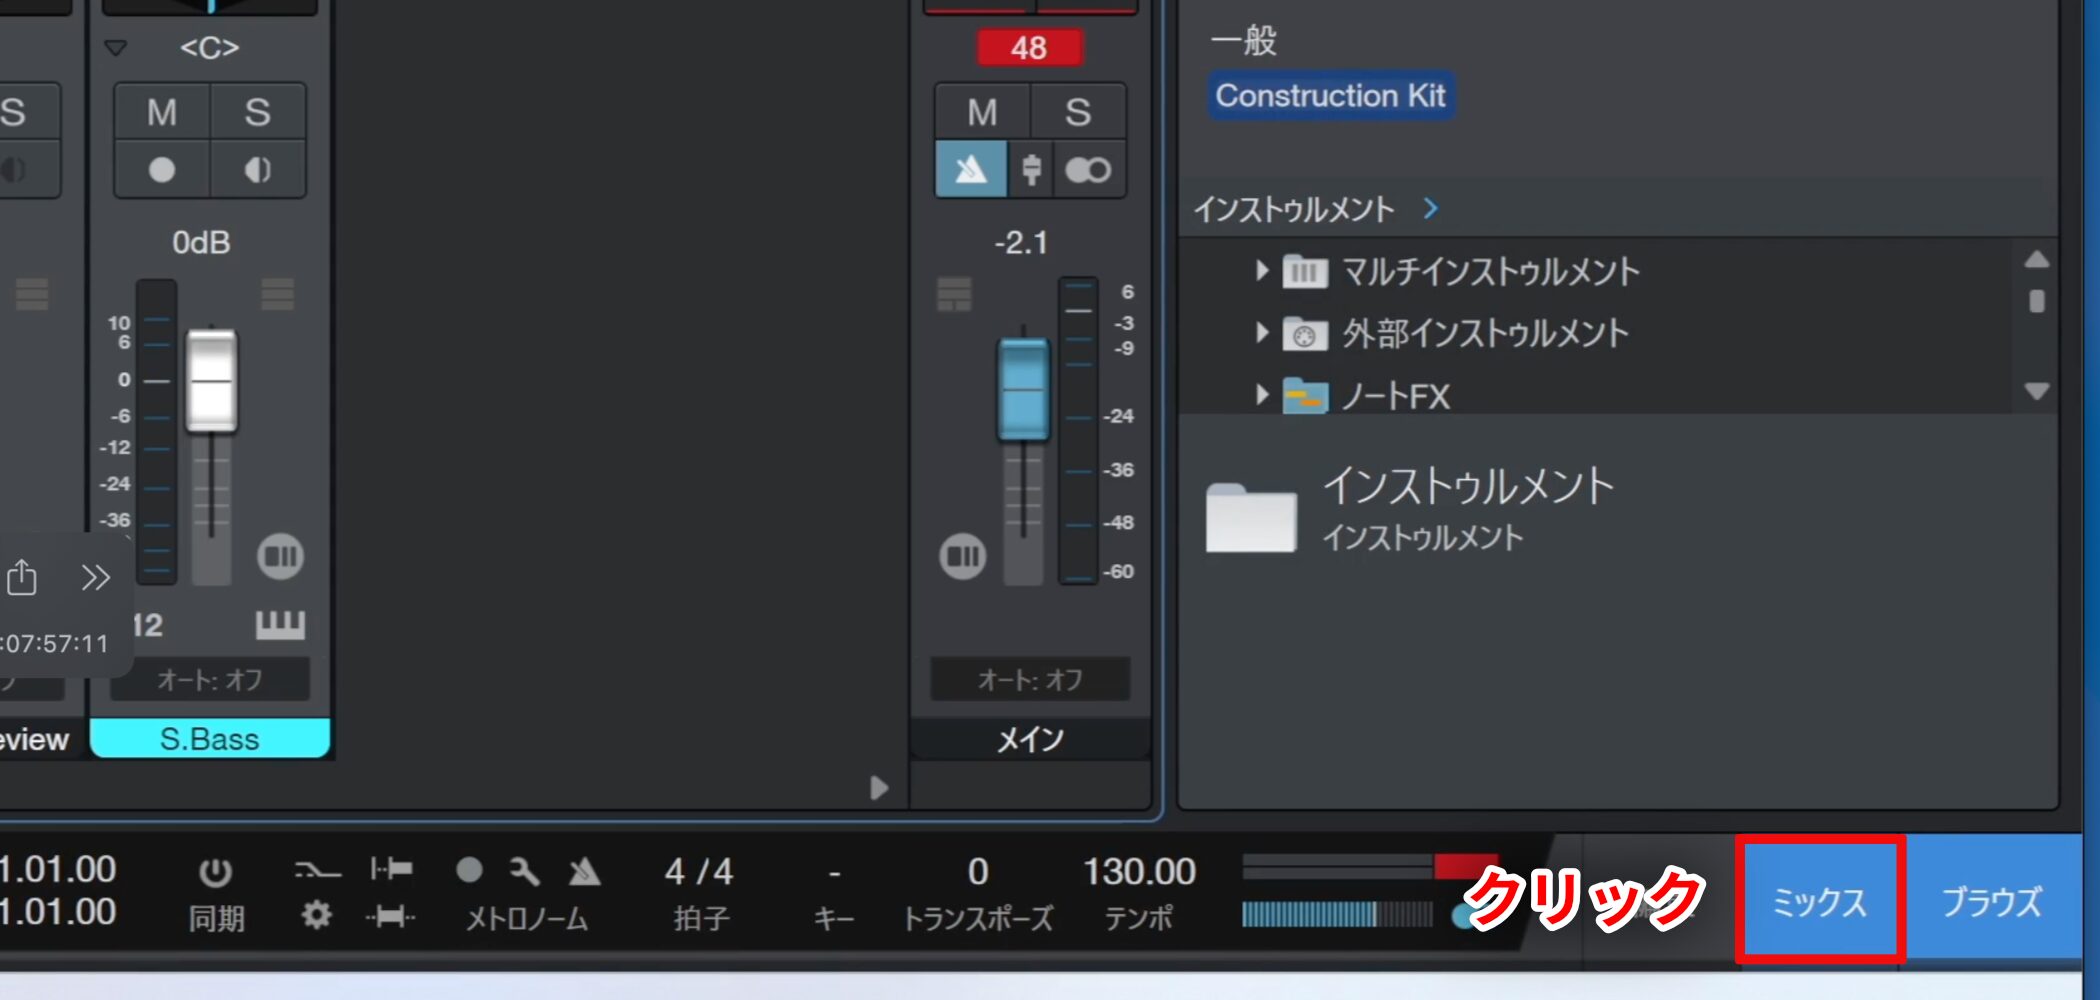
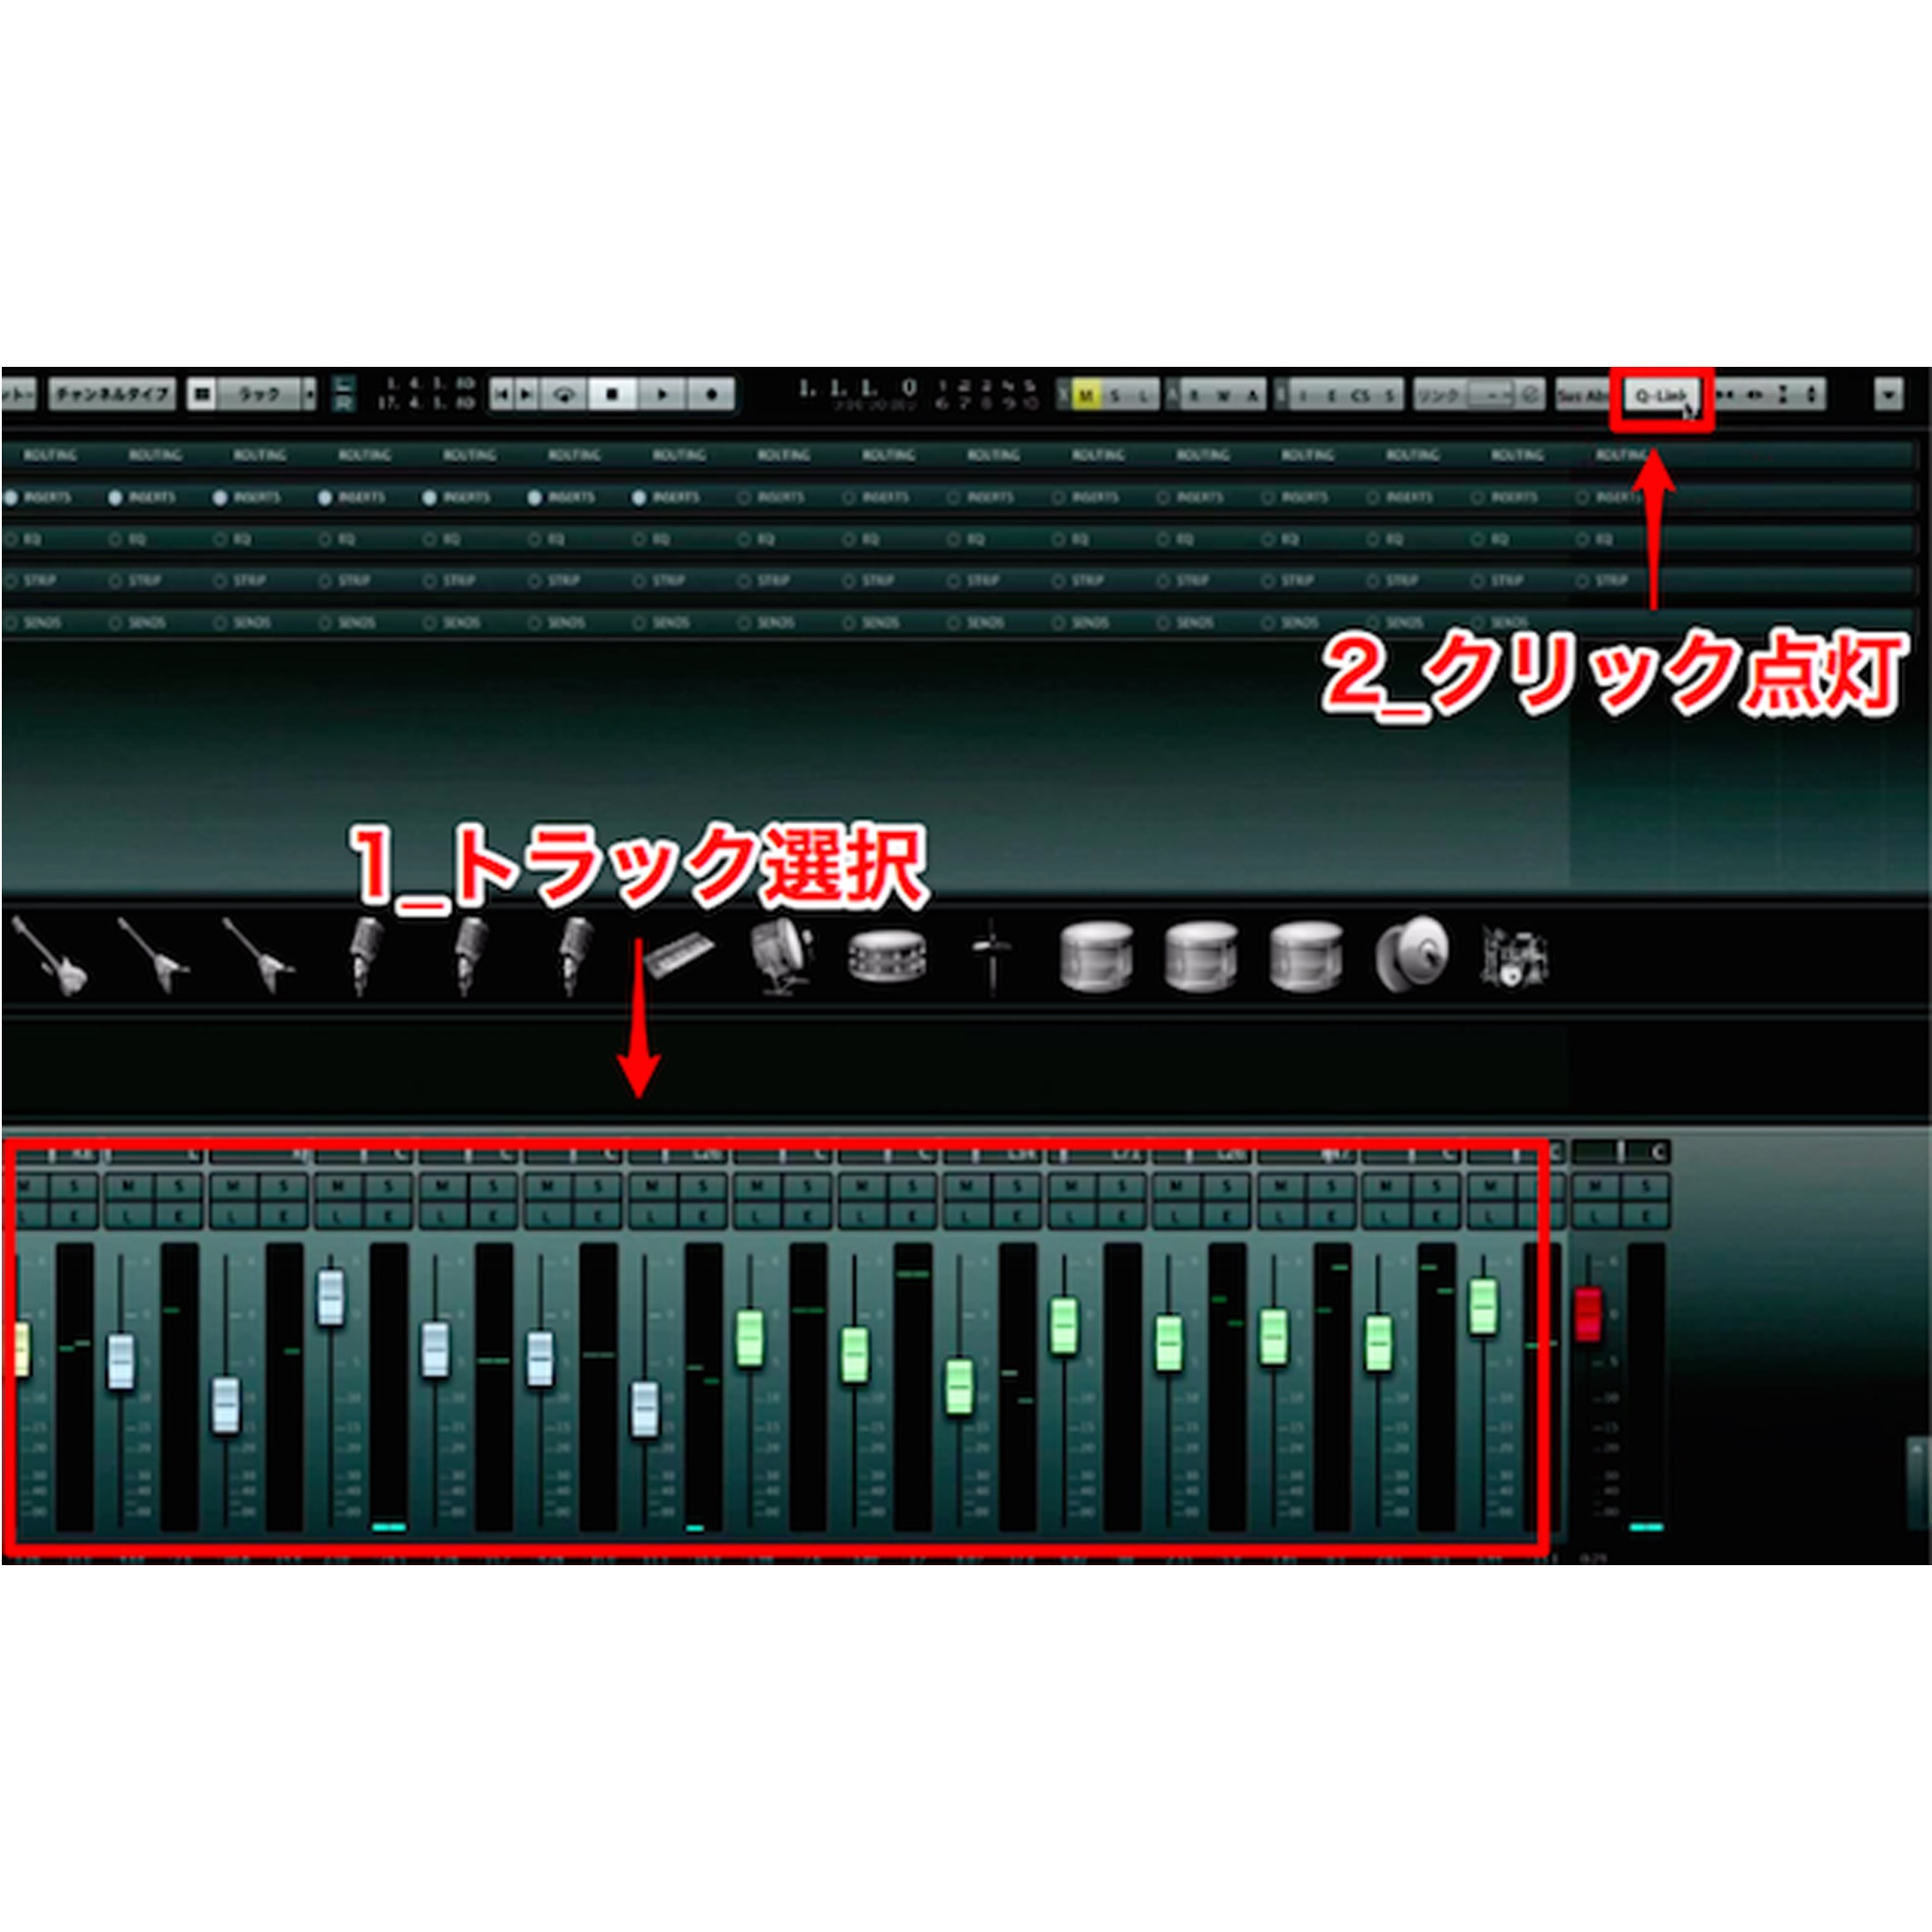
Click Mix to open the Console.
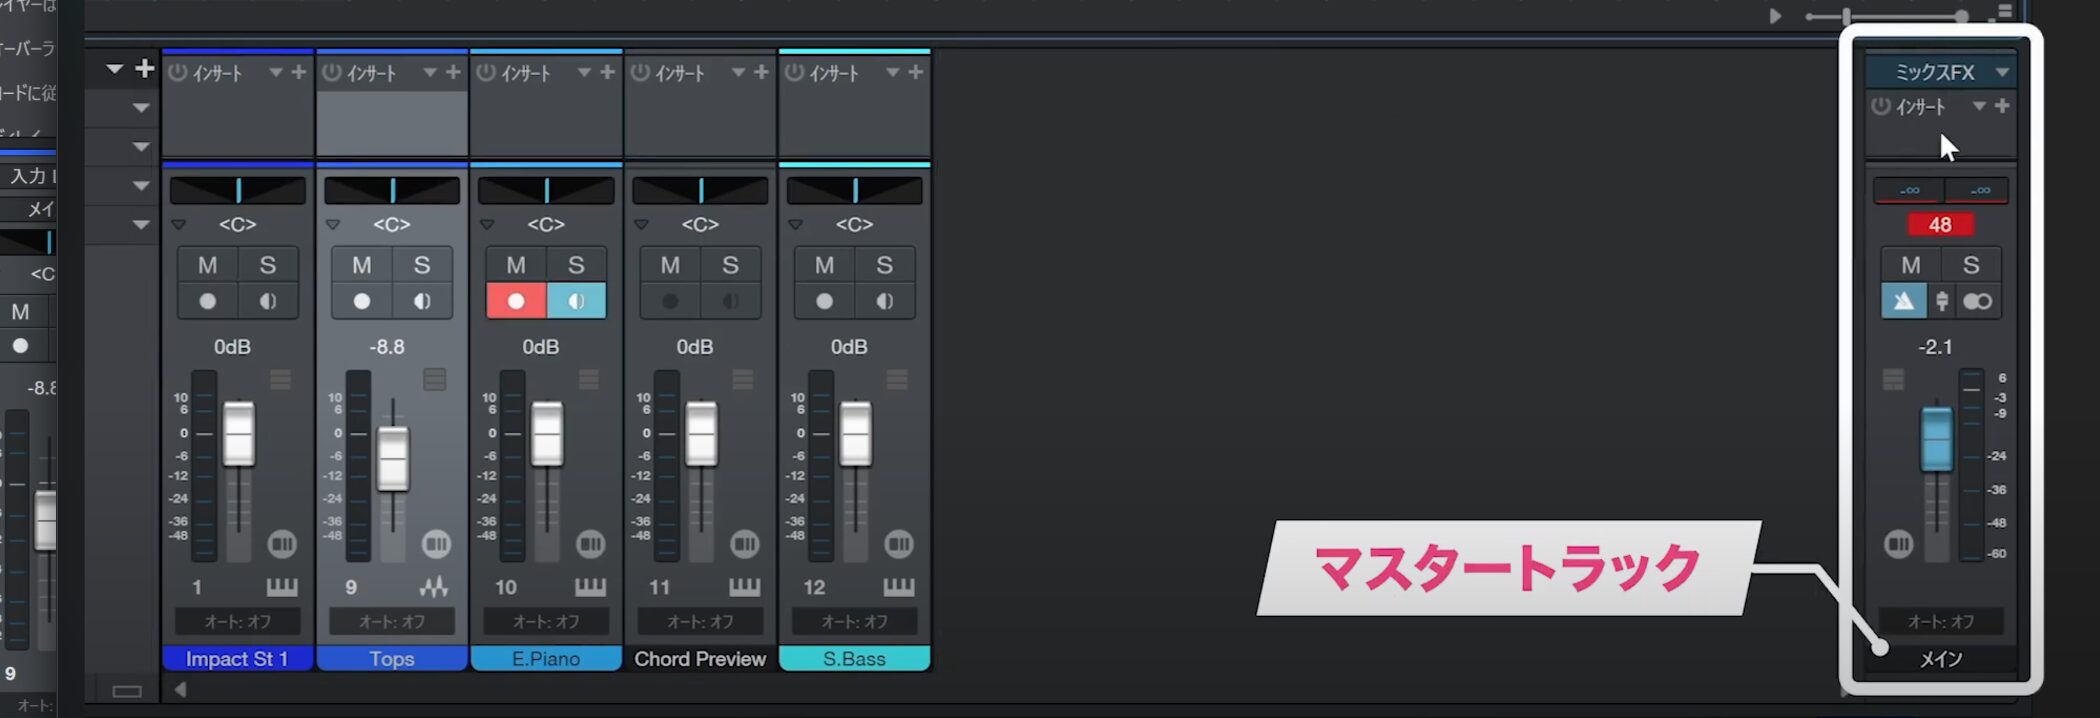
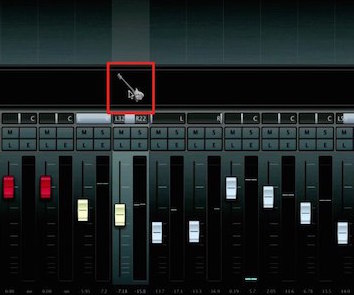
The tracks appear side by side in the Console.
The channel labeled Main, set slightly apart on the right, is the master channel.
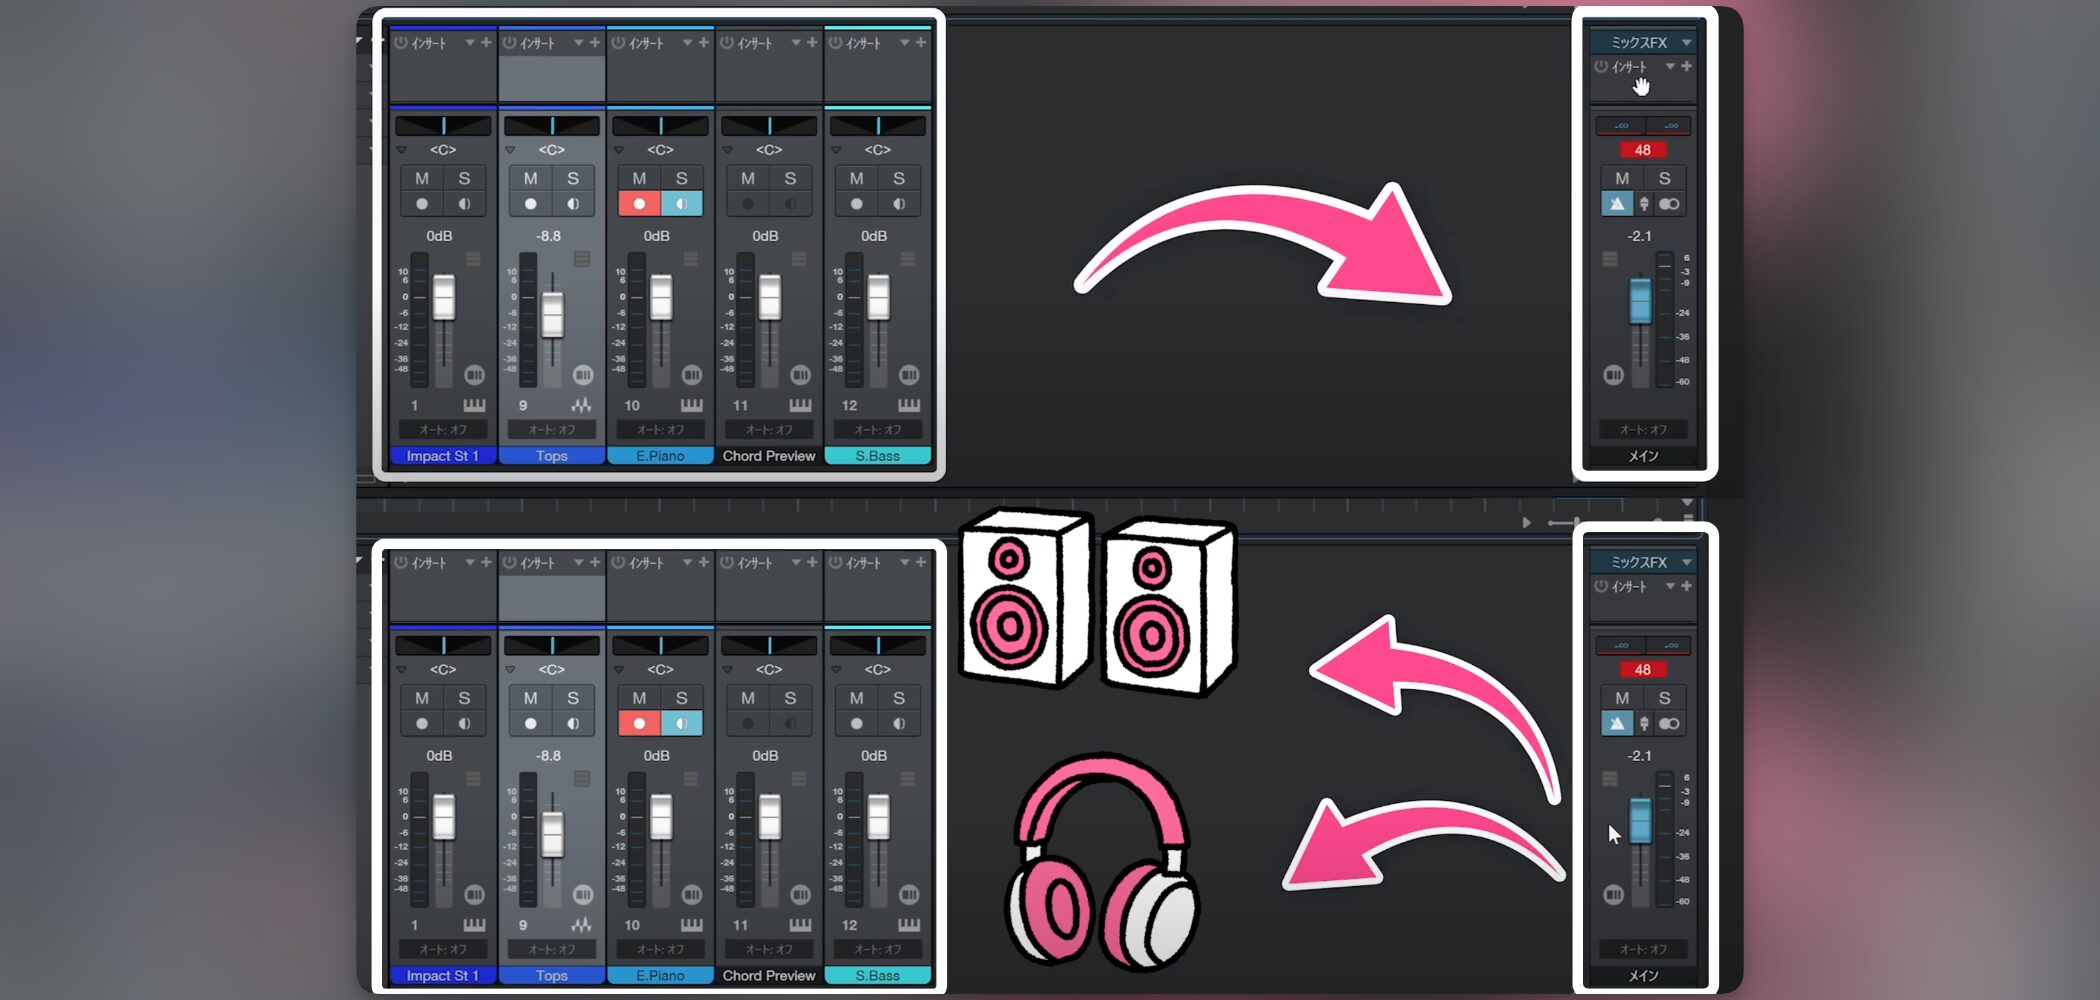
All track sounds are combined at the master channel and sent to your speakers or headphones.
Lowering its fader therefore lowers the overall volume.
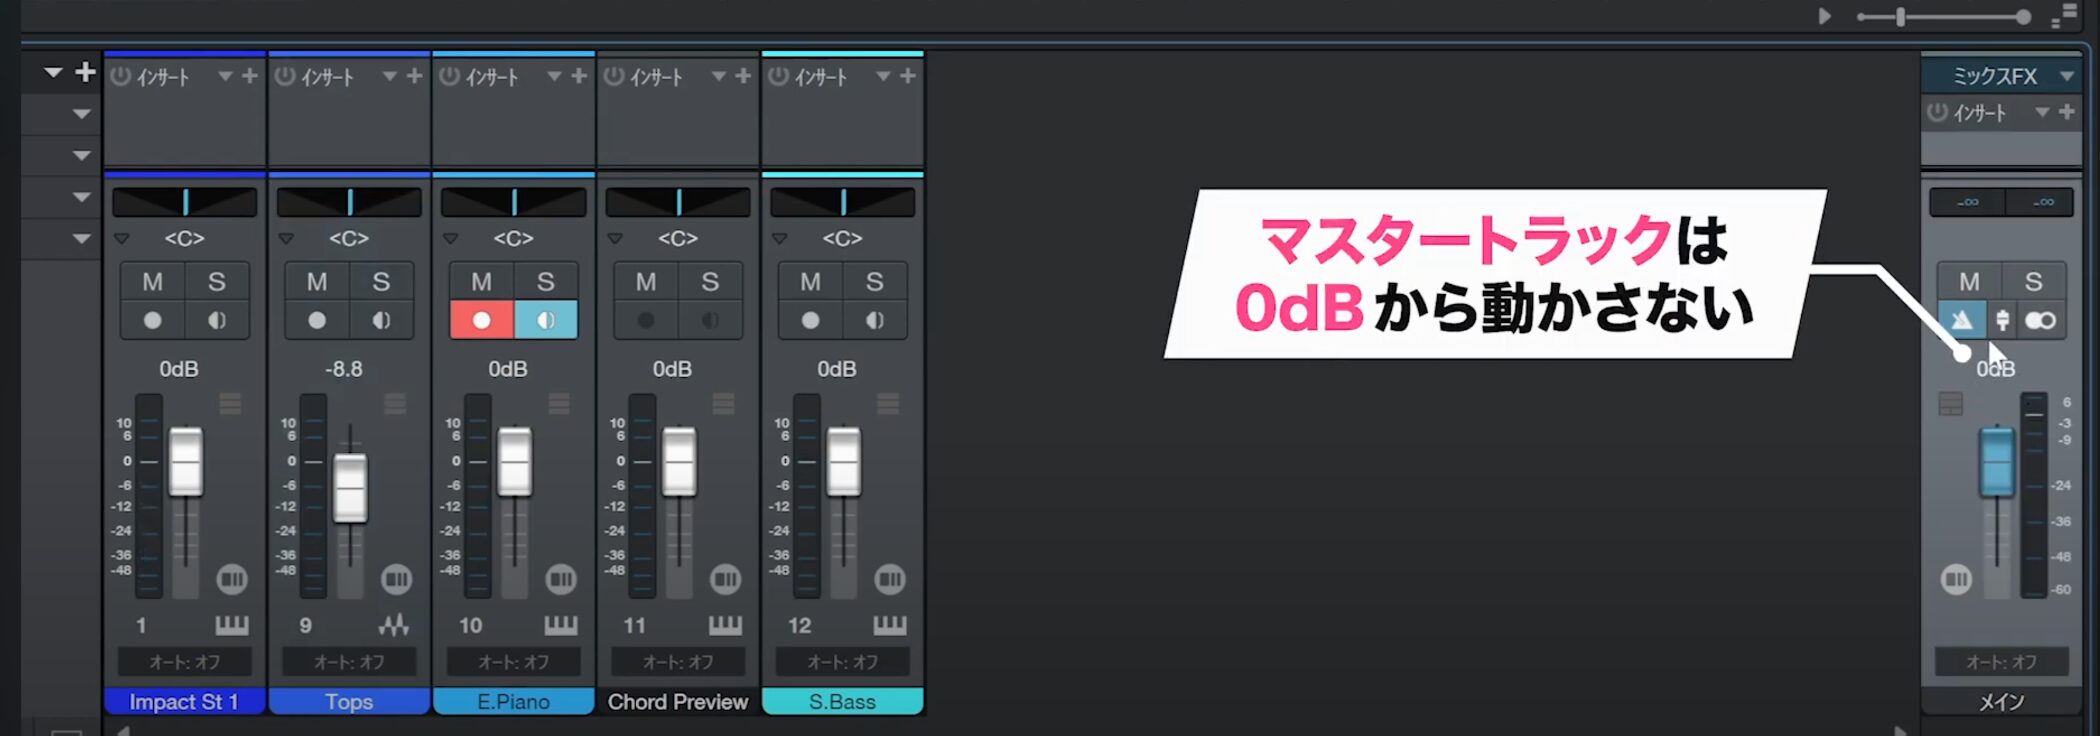
As a basic practice, leave the master fader at 0 dB while working.
Checking for and addressing clipping
To check for distortion, simply play the song.
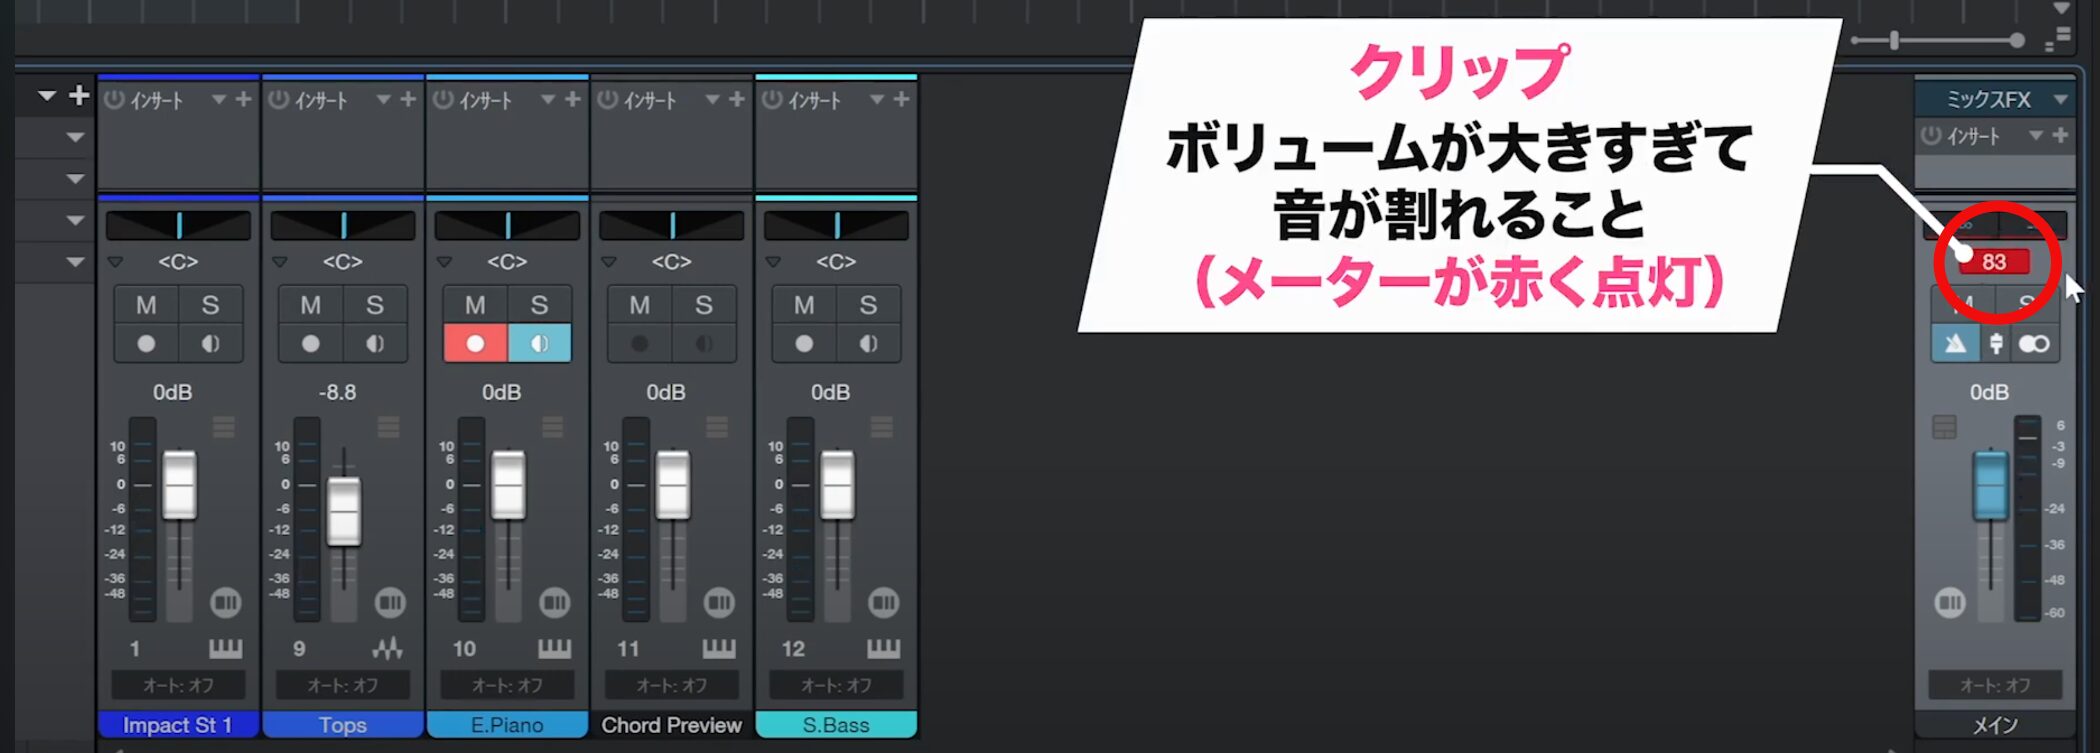
A red indicator means the overall level is too high and the song is clipping.
This distorted state is often called clipping.
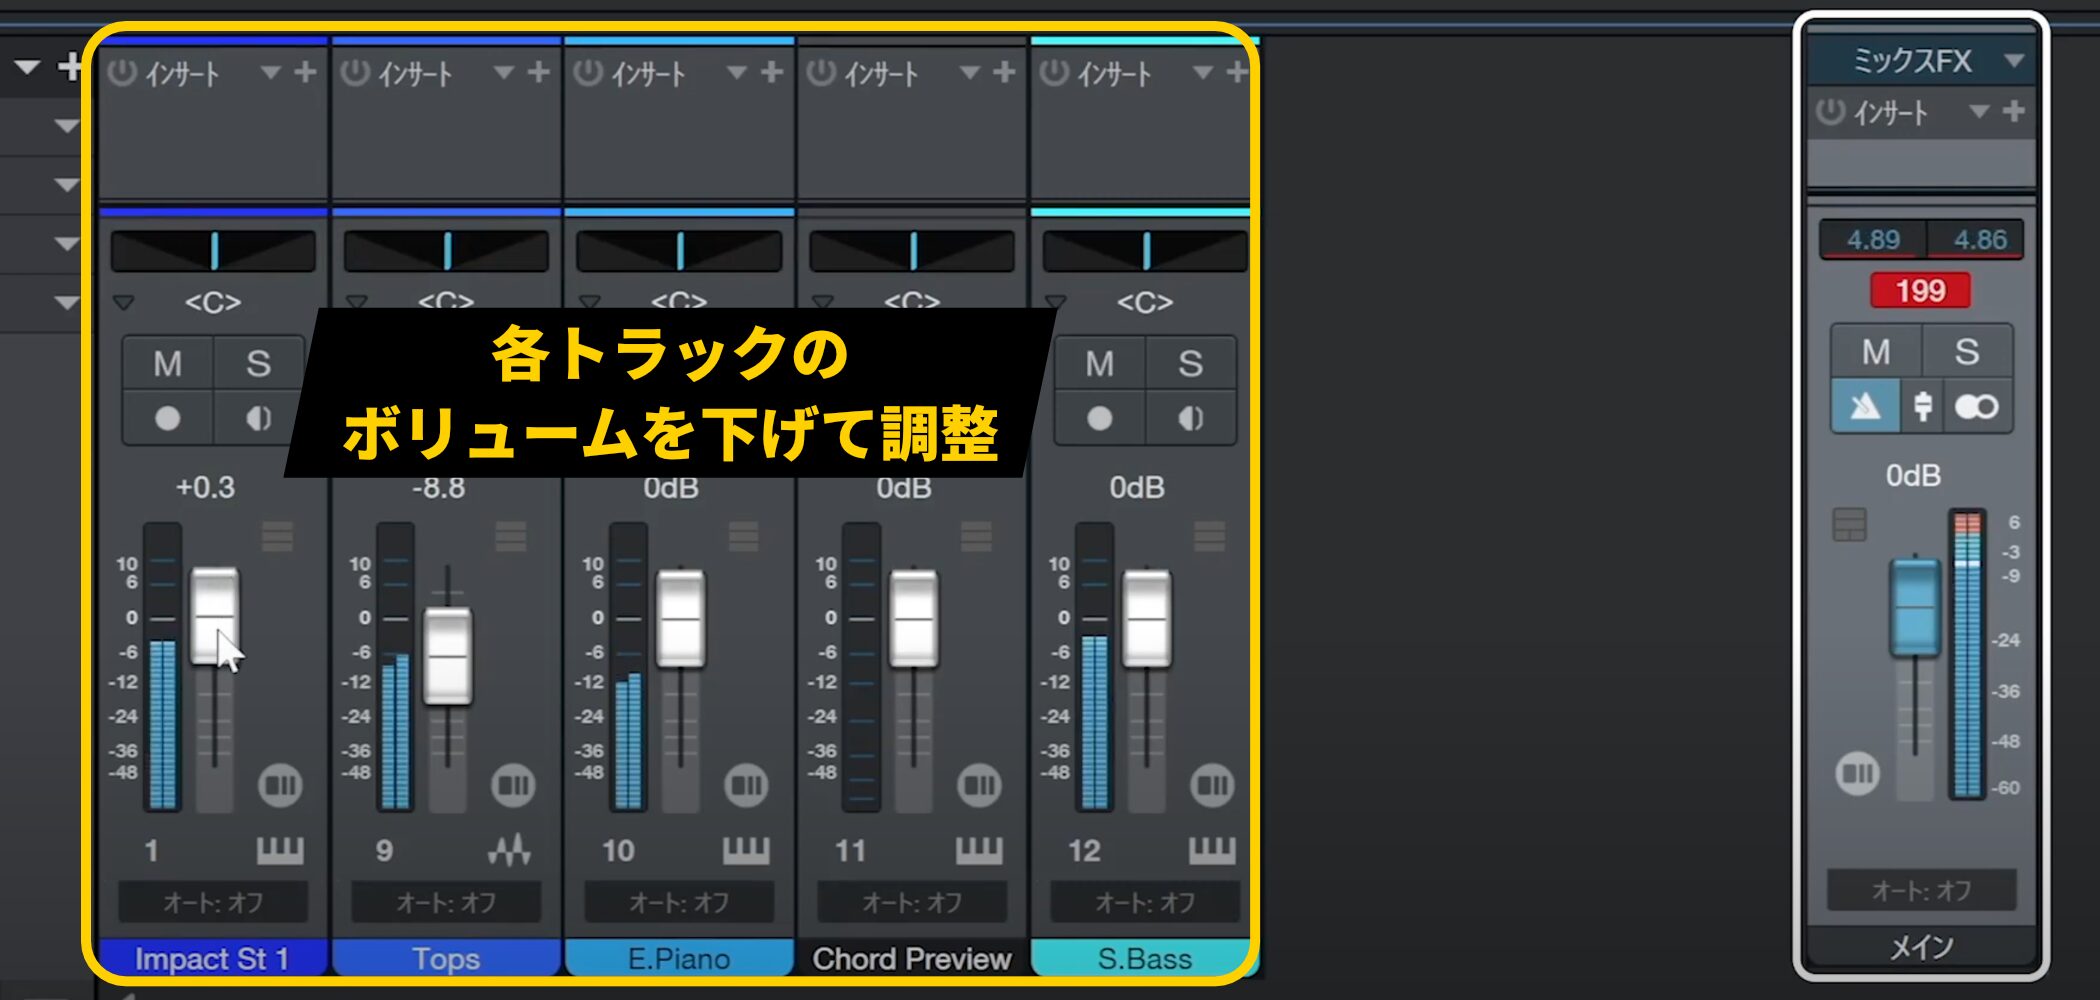
It is difficult to judge the sound accurately if you keep working while it is clipping.
To address the problem, lower the volume of the individual tracks.
Using solo and mute
When adjusting one track, hearing all the other tracks at once can make it difficult to focus.
The Solo button is useful here.
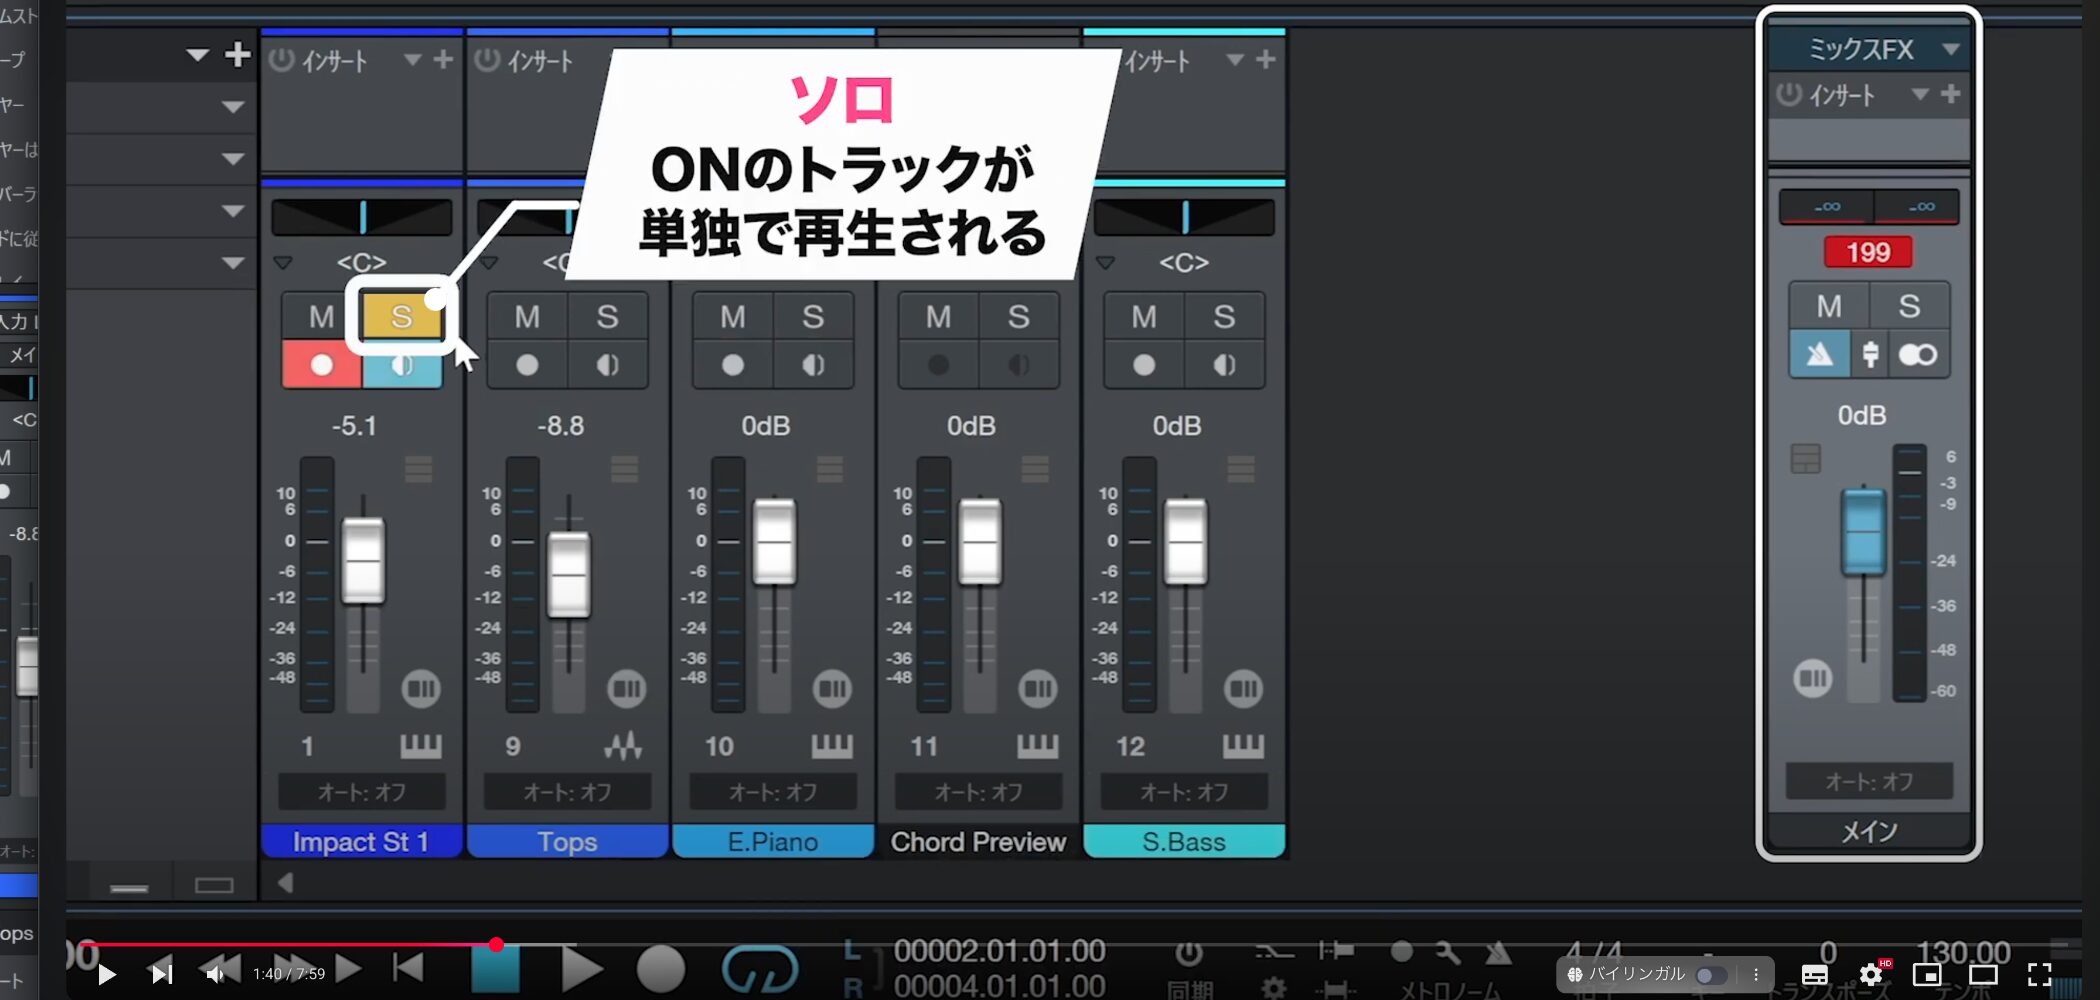
Press Solo to play the selected track on its own.
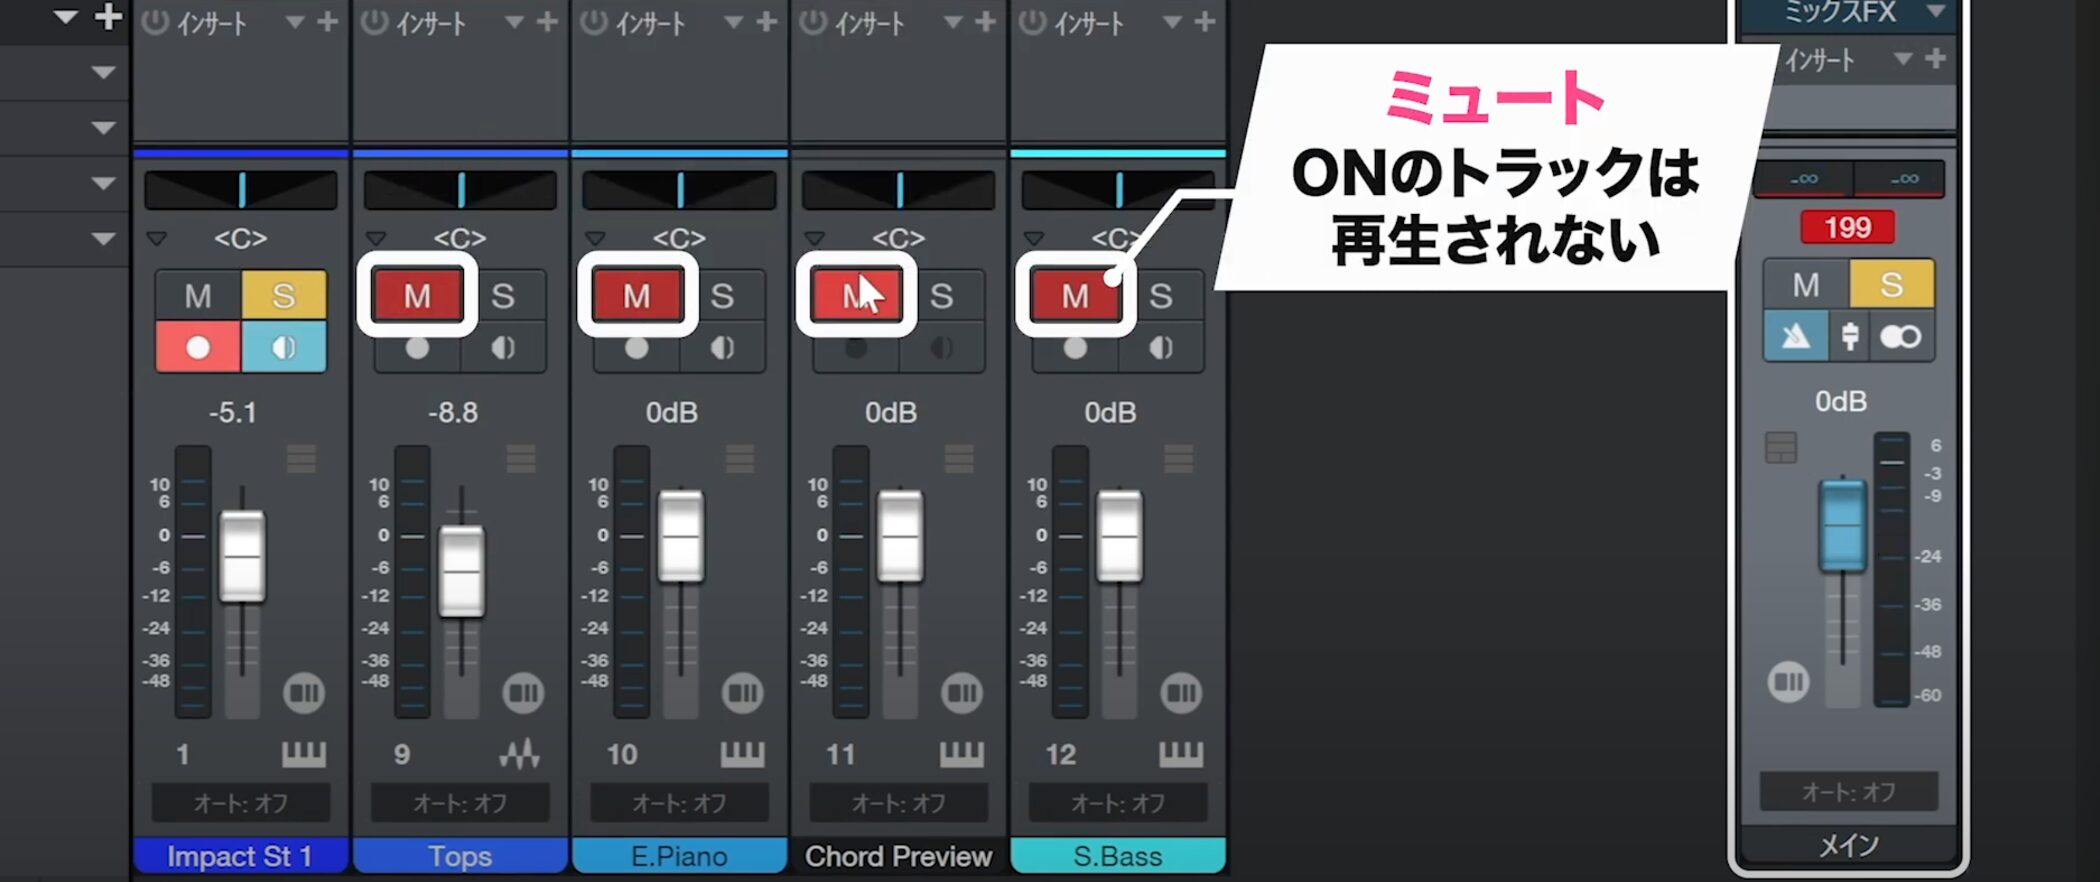
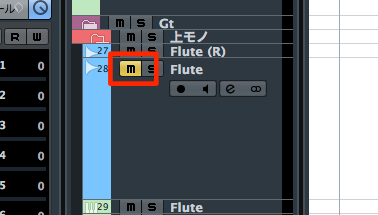
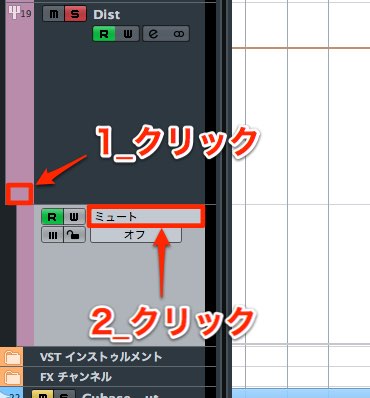
The other tracks are automatically muted and their Mute buttons light up.
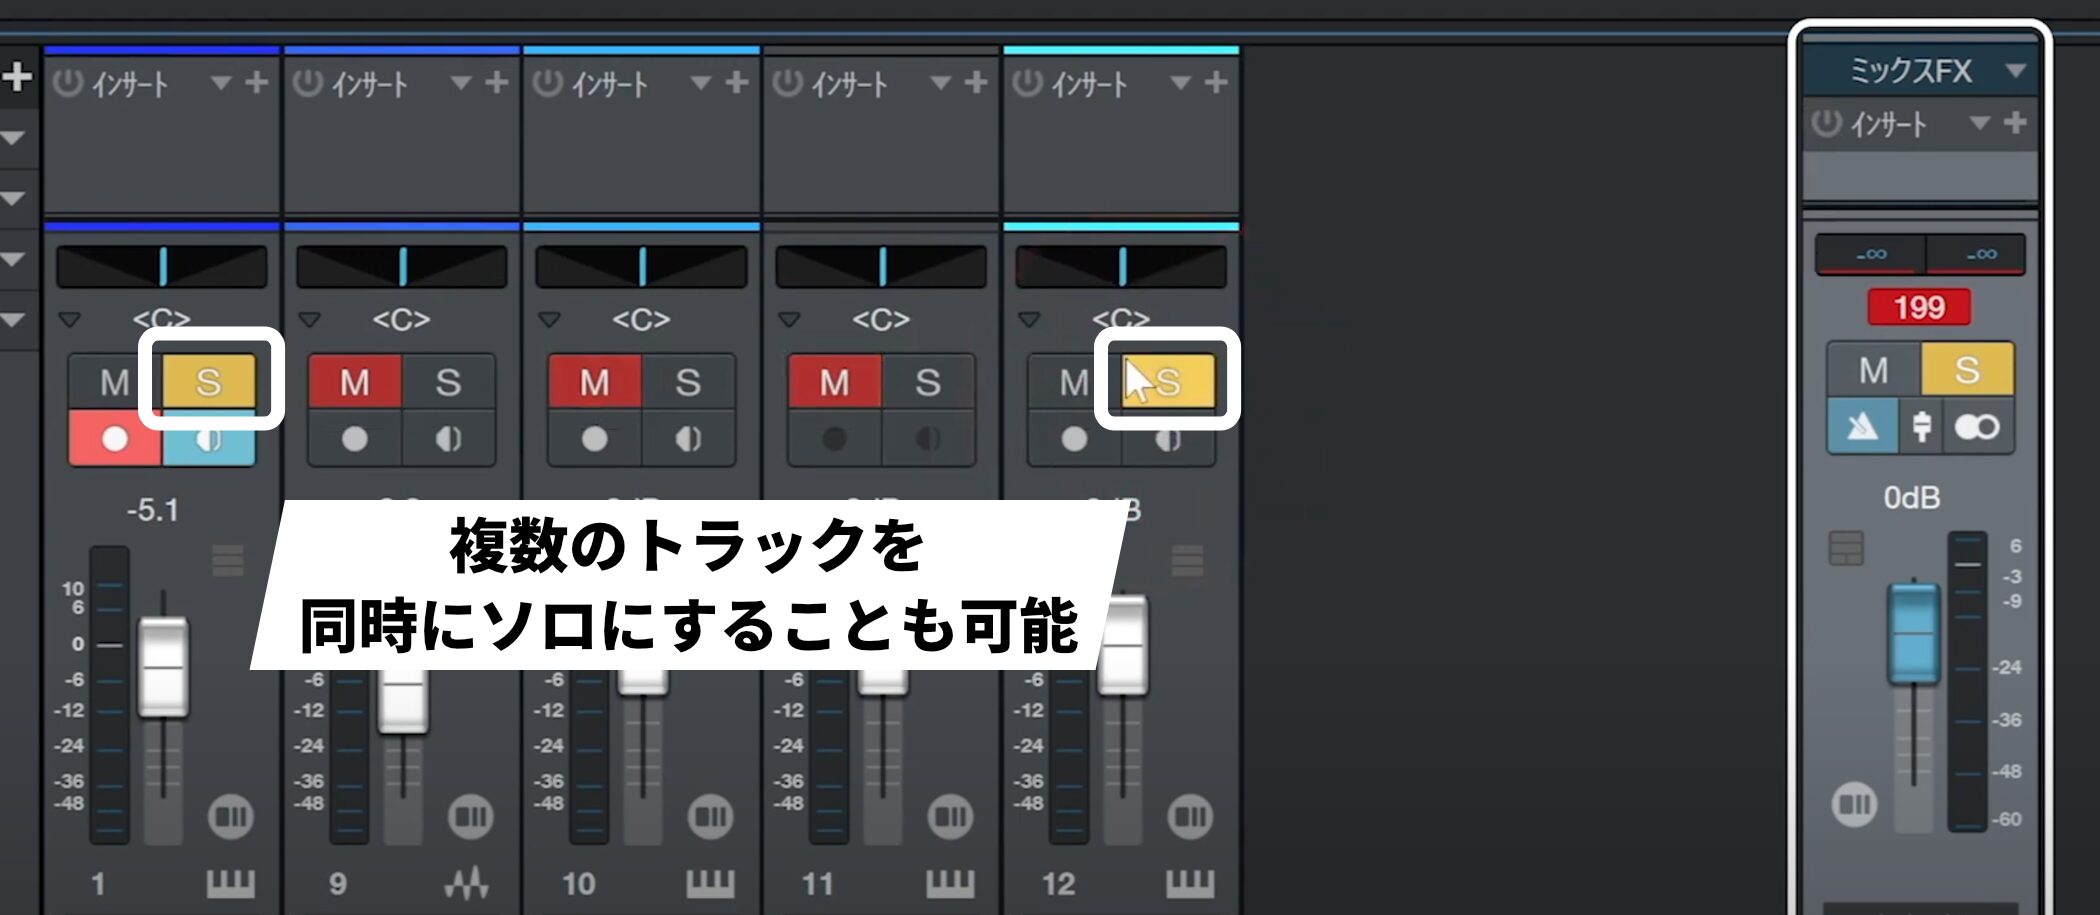
You can also solo multiple tracks at once.
Solo and mute are used frequently during production.
The keyboard shortcuts are useful to remember:
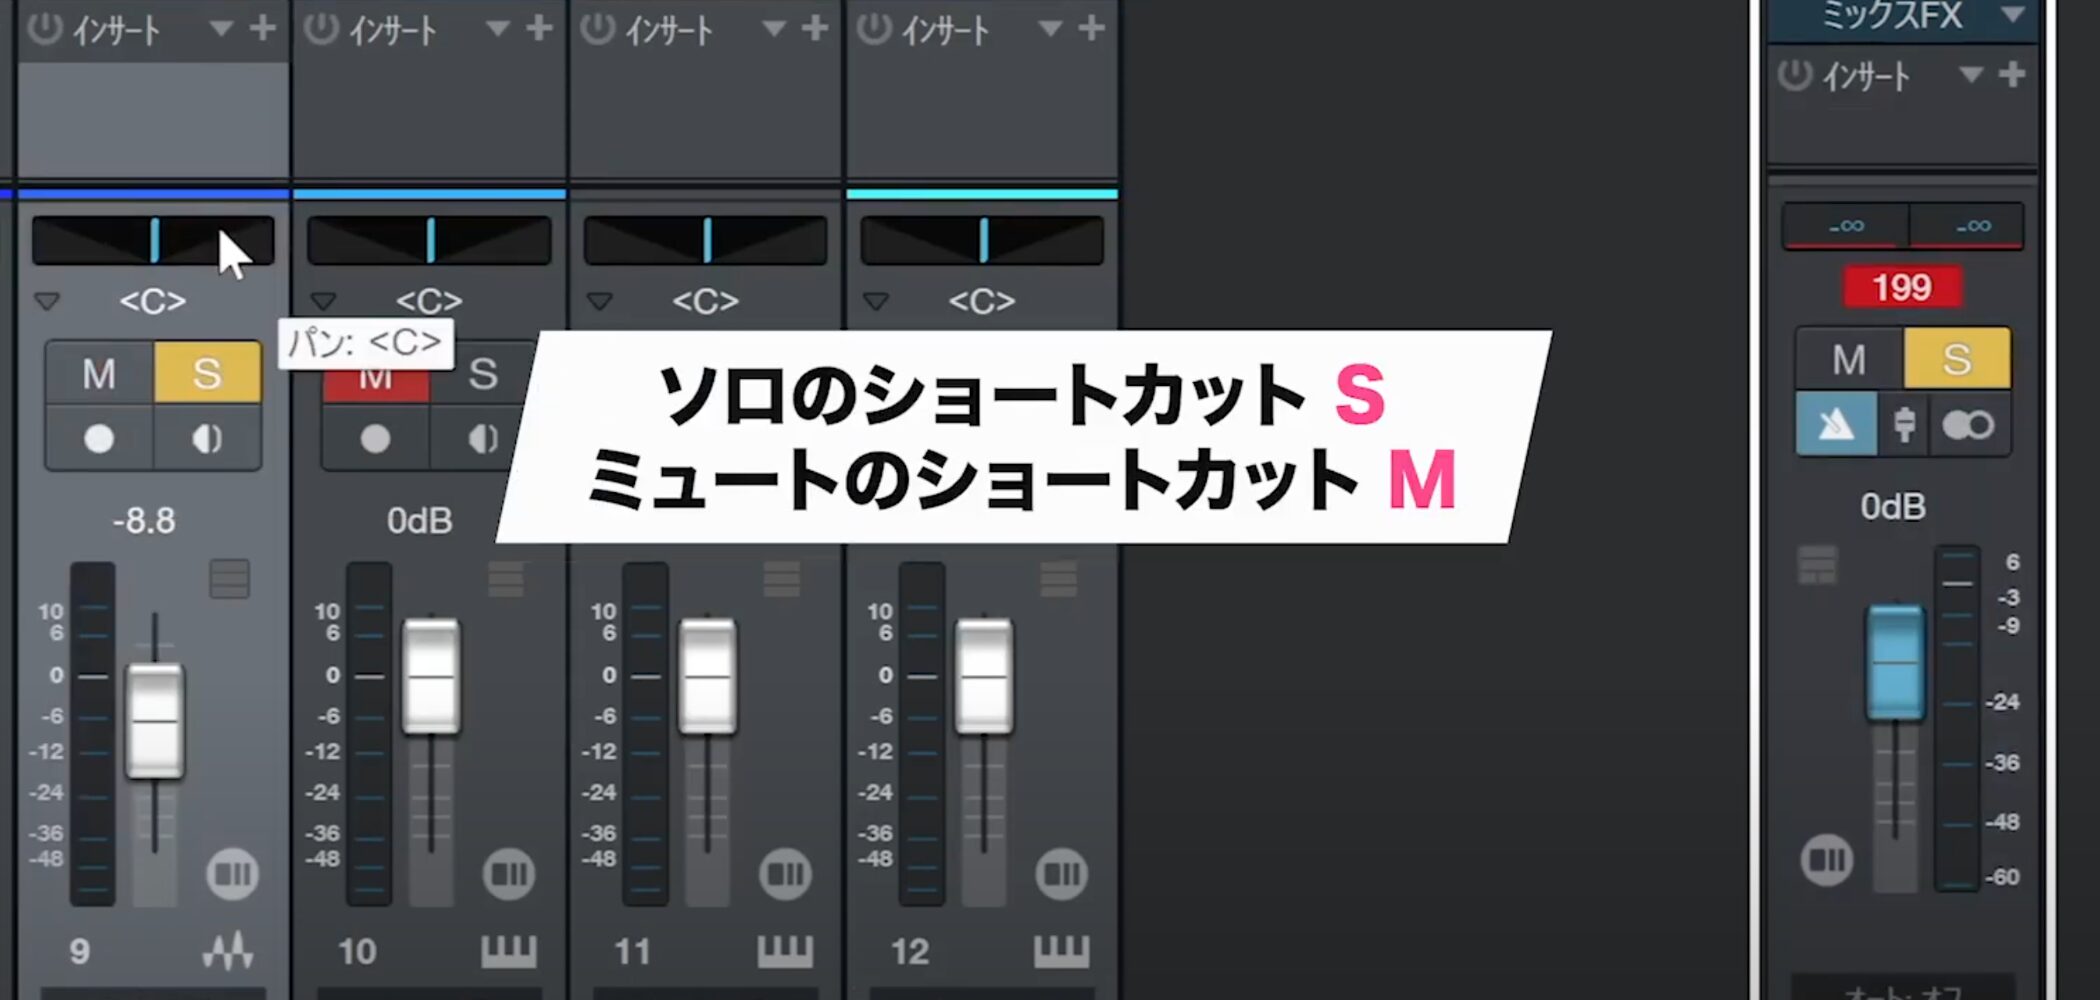
press S for solo or M for mute on the selected track.
Setting up individual drum outputs
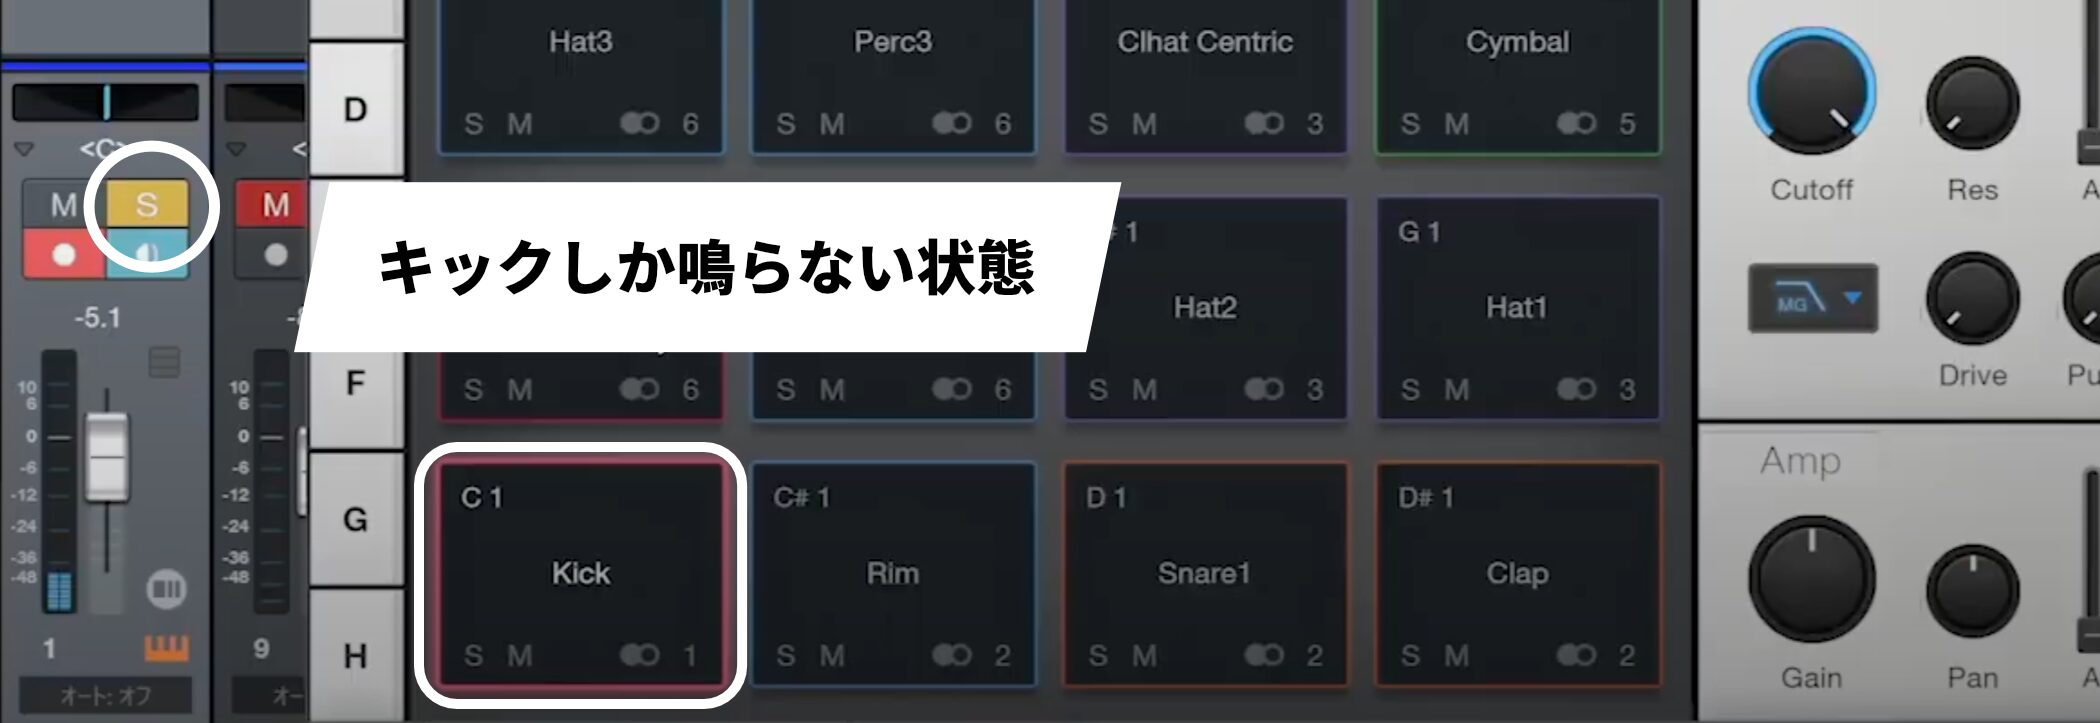
When you solo the drum track, you hear only the kick because the rhythm part contains multiple instruments with different characteristics, including kick, snare, and hi-hat.
The loaded preset is configured so these instruments can be adjusted individually.
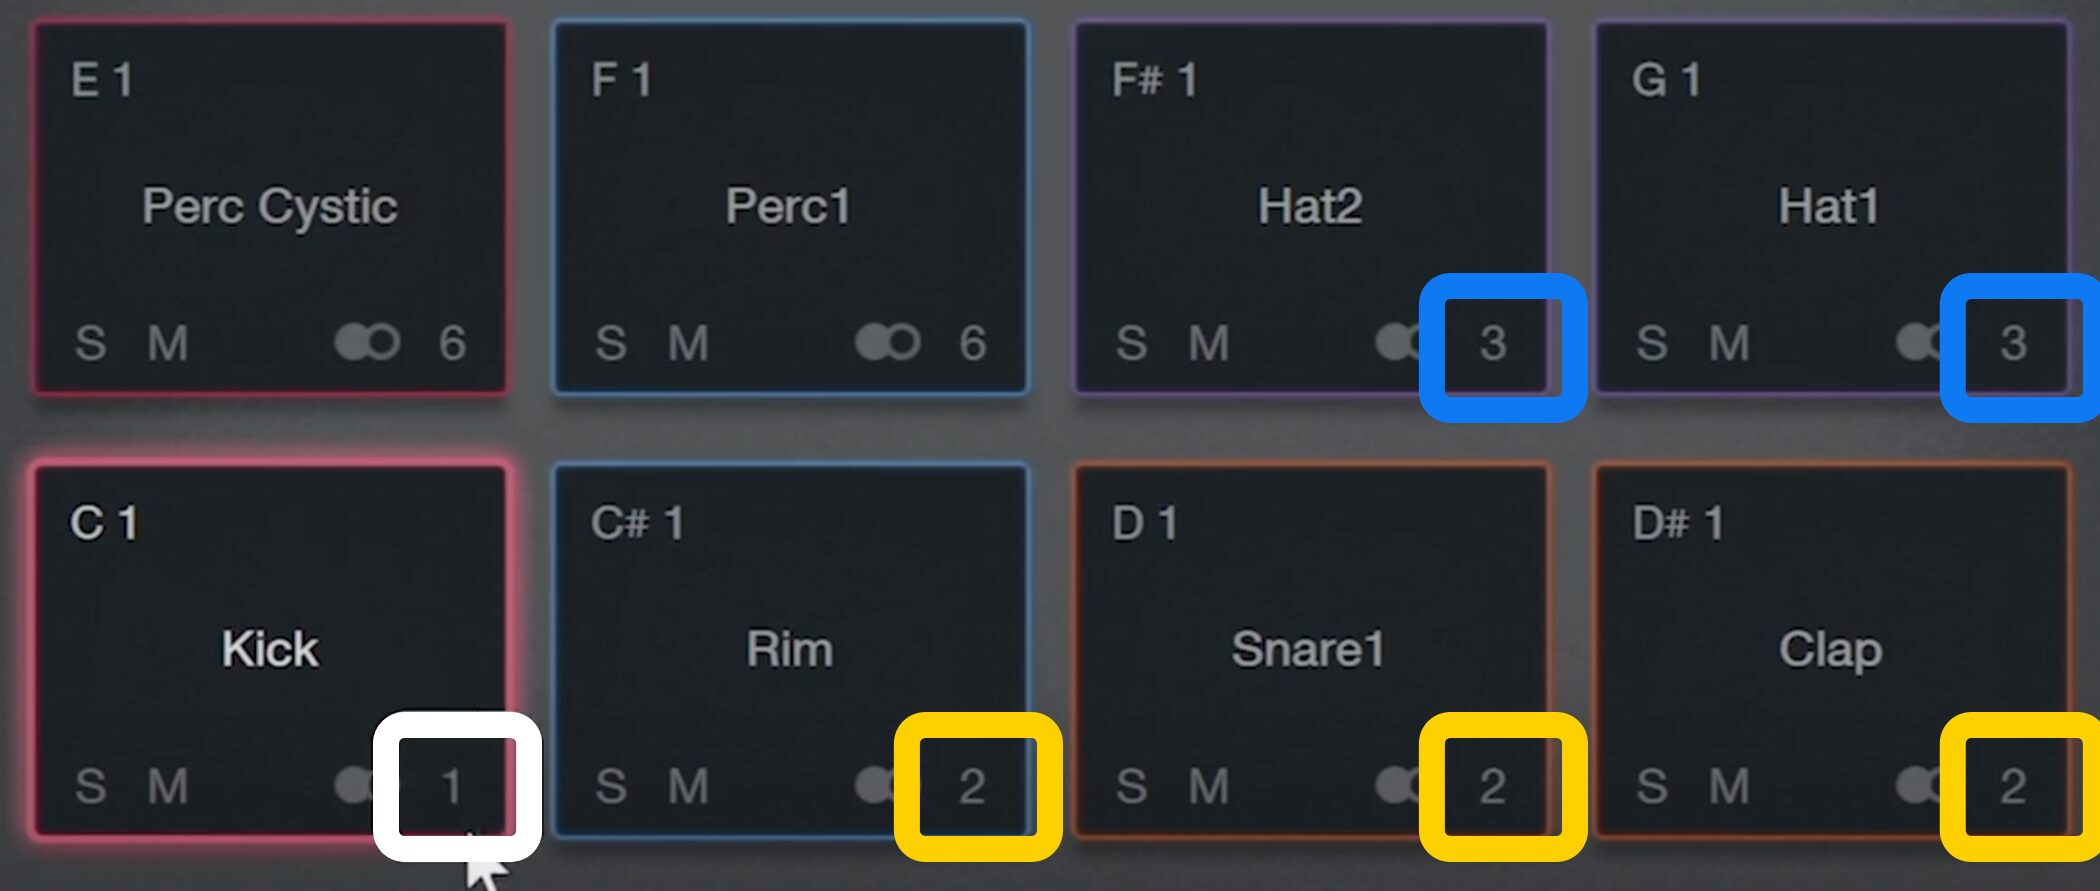
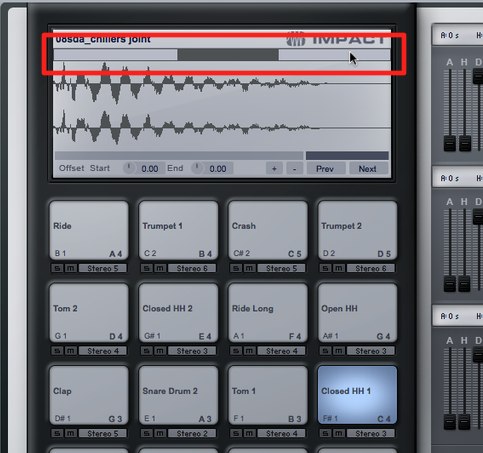
The lower-right corner of the kick pad shows “1”; rim, snare, and clap show “2”; and hi-hat shows “3.”
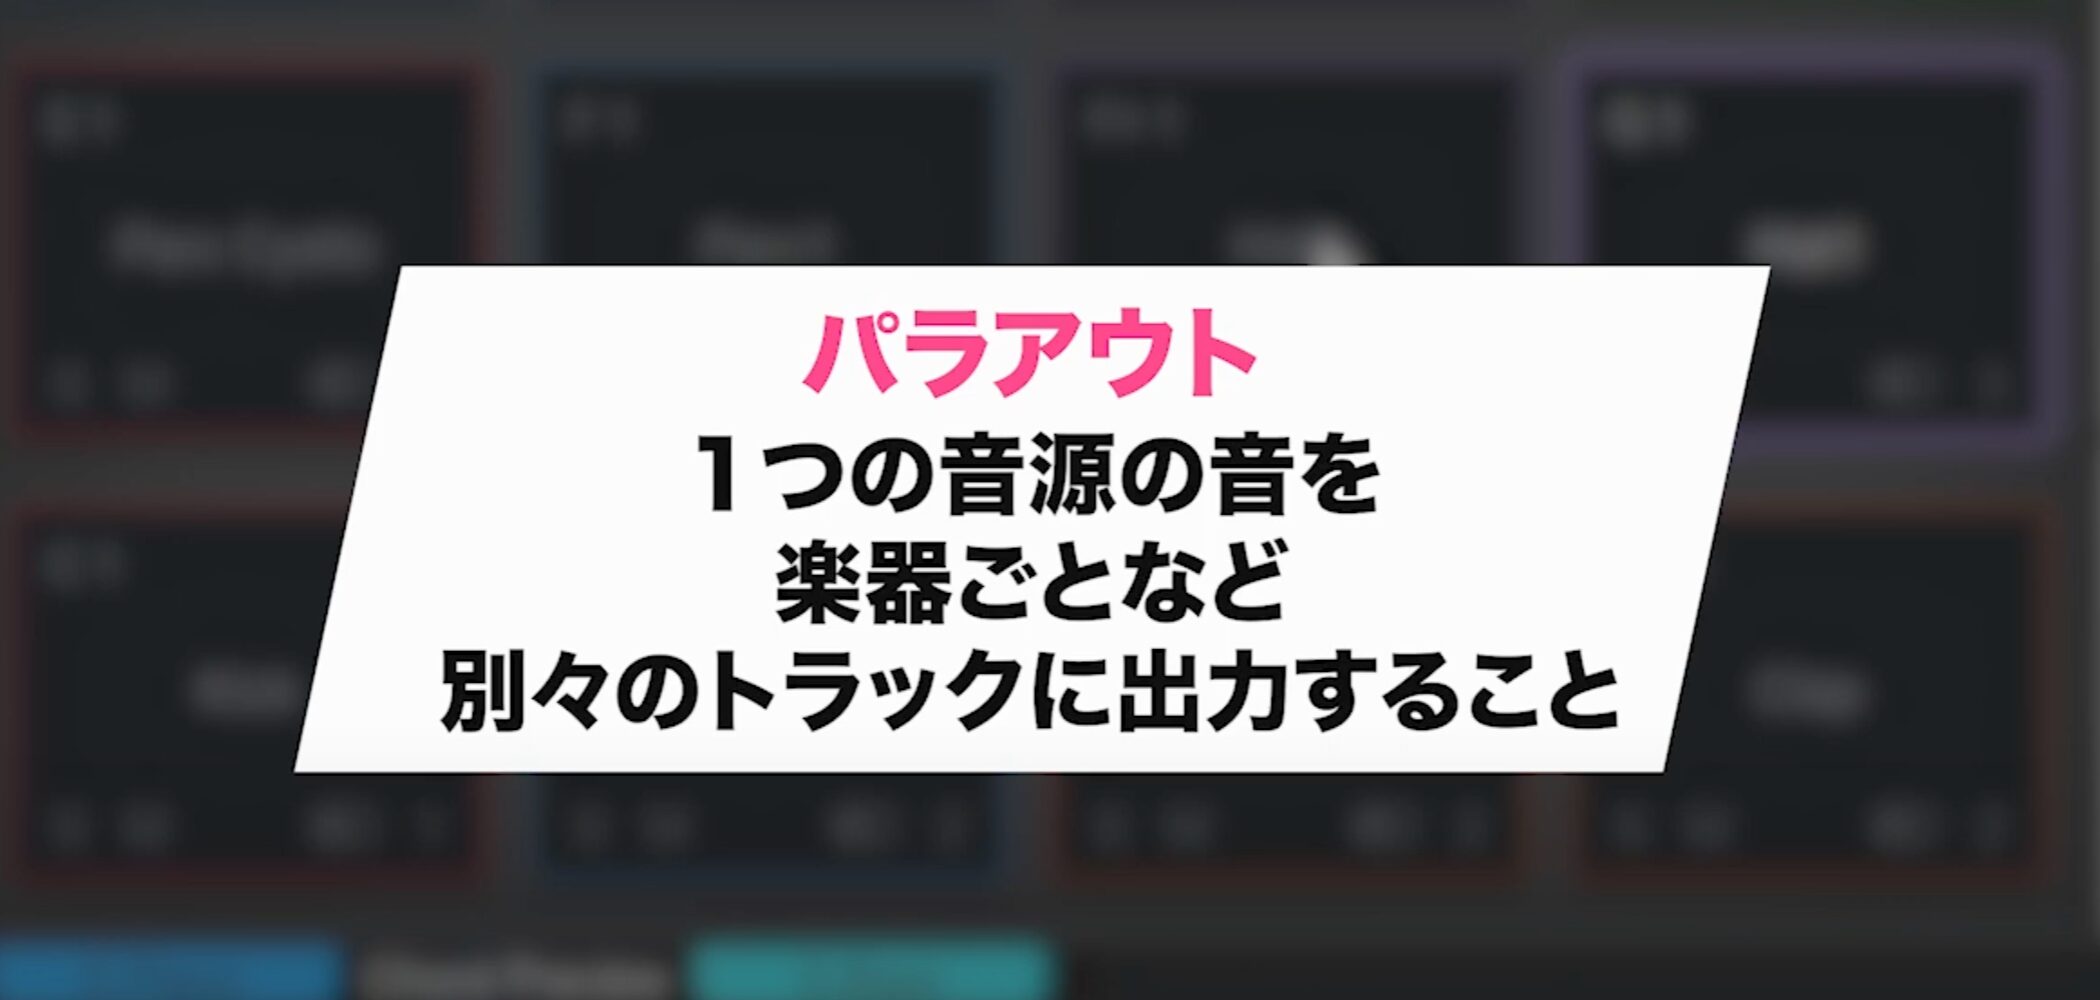
Assigning different outputs to groups of instruments like this lets you control each track individually.
This method is called multi-output routing.
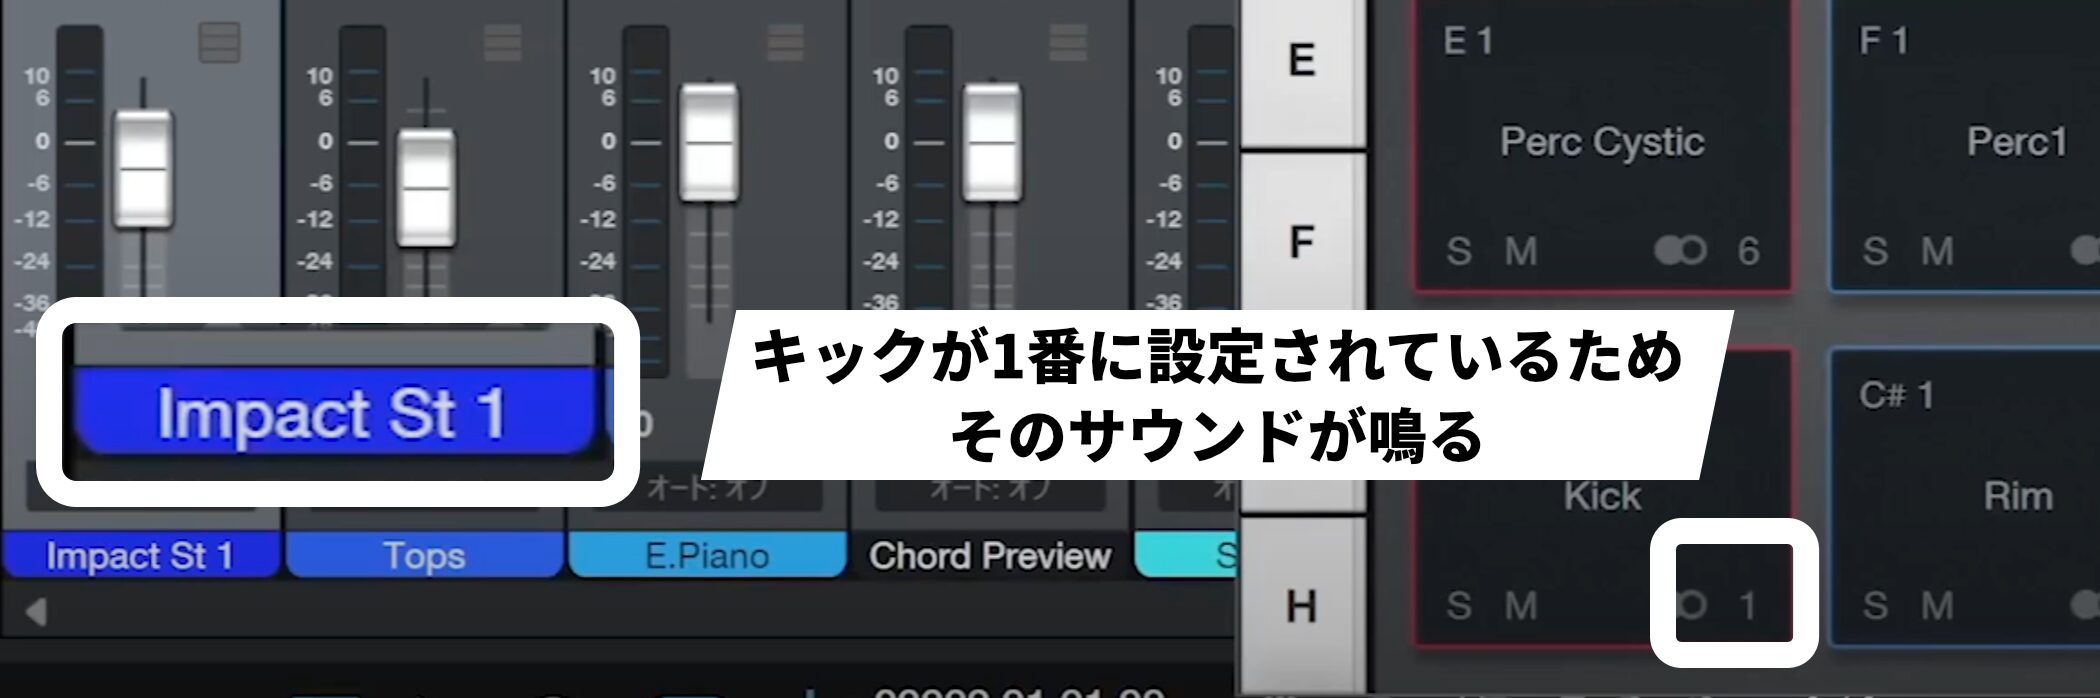
In the Console, the channel is labeled Impact St 1. The number corresponds to the number shown in Impact.
Because the kick is assigned to output 1, its sound is heard on this channel.
Enabling other outputs, such as 2 and 3, lets you control the other sounds separately as well.
Setting up multiple outputs
Multiple outputs are often configured by default, but two things need to be checked to set them up correctly.
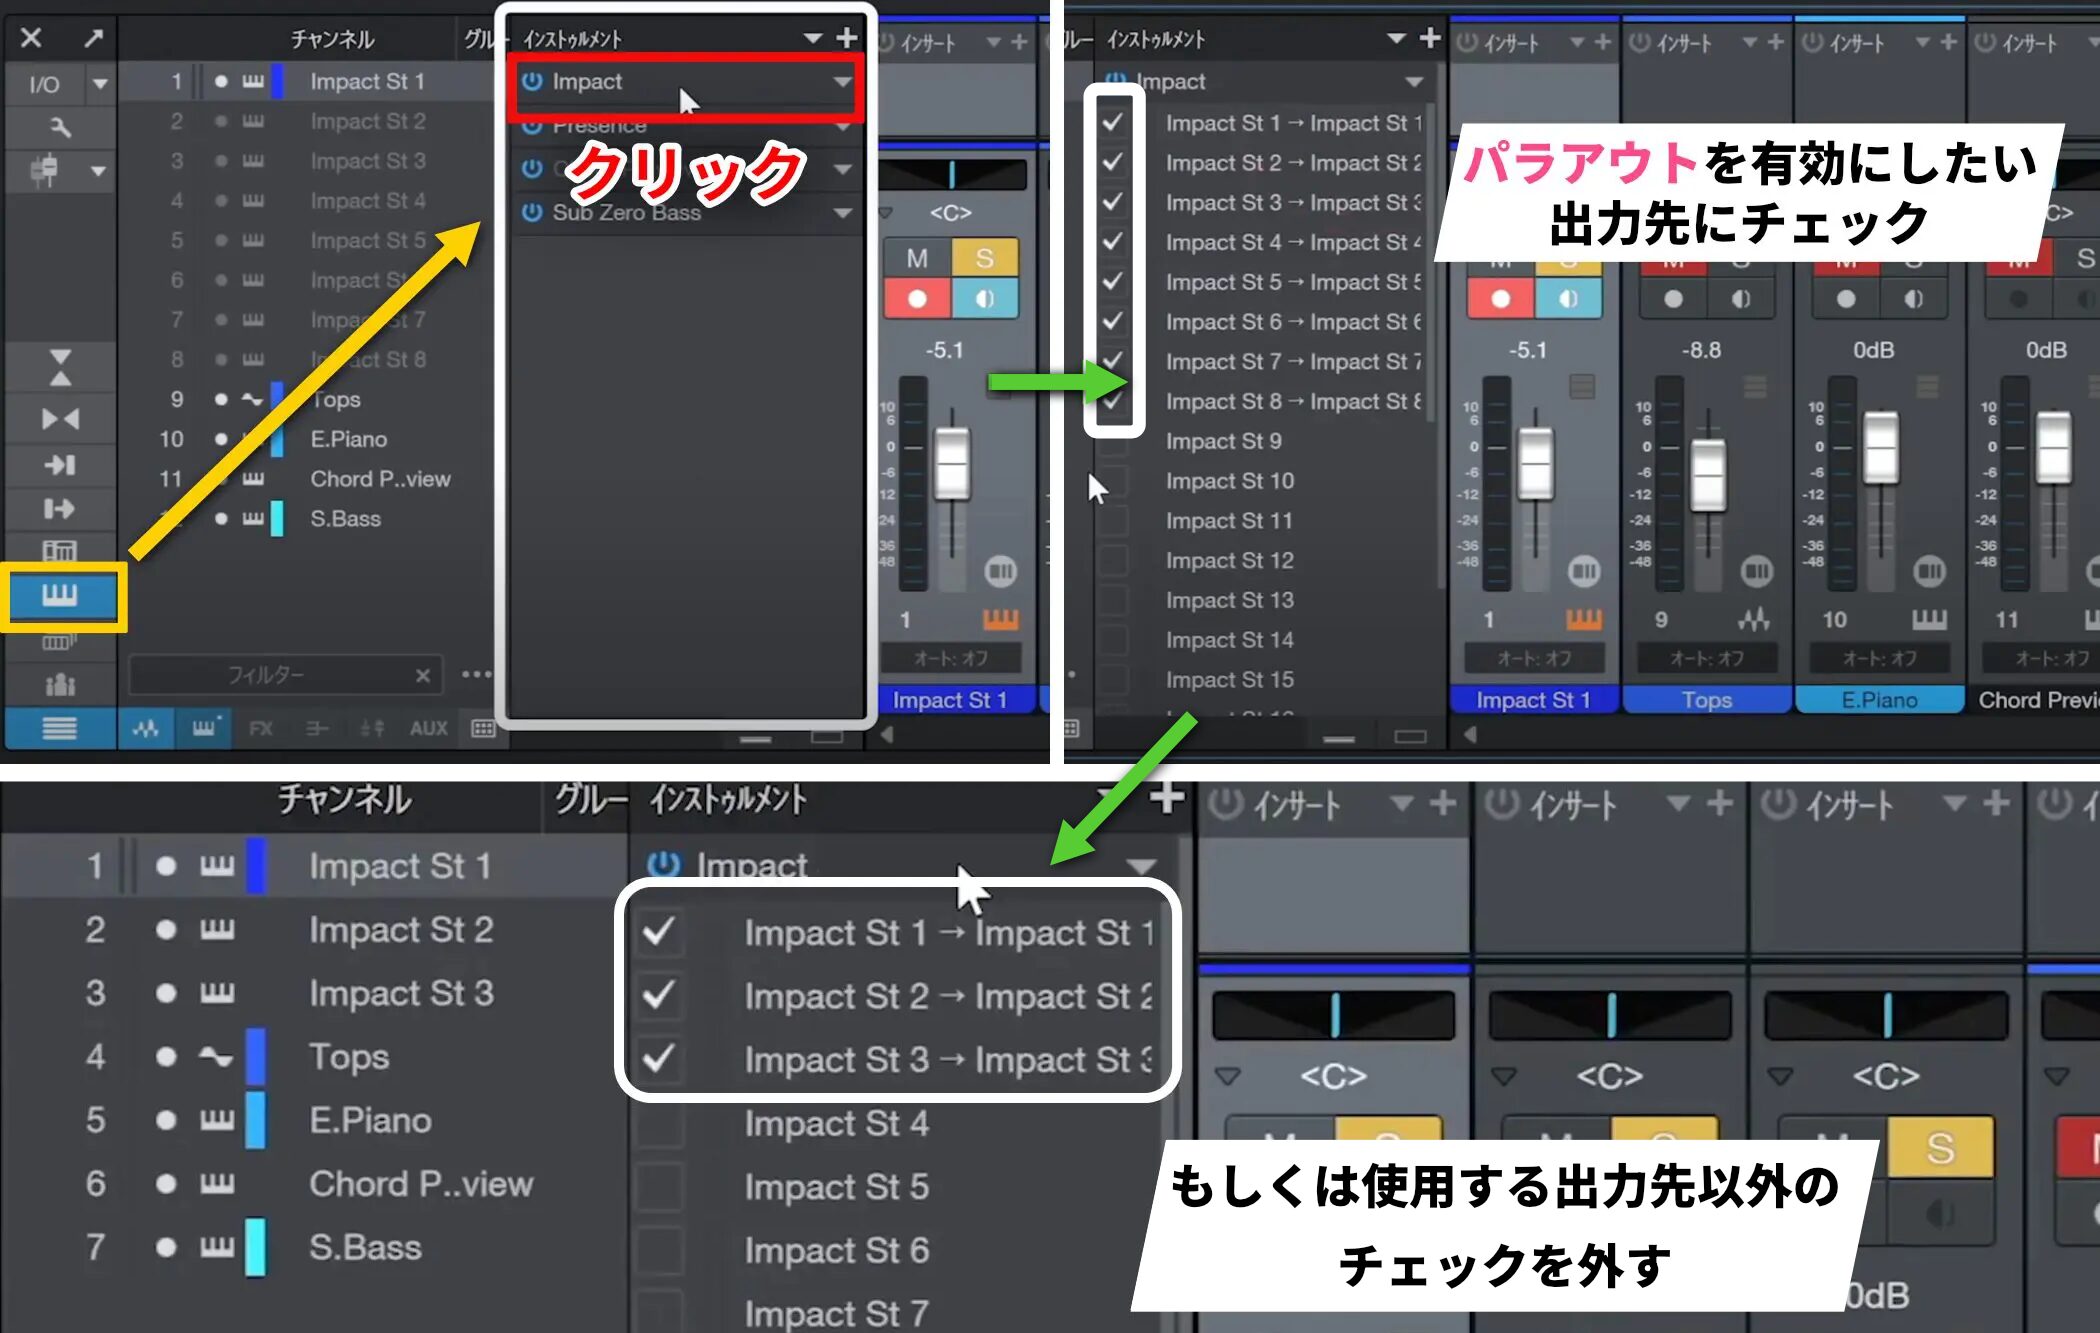
First, in the instrument, check the outputs you want to enable.
Here we use kick, snare, and hi-hat, so enable those outputs and uncheck the others.
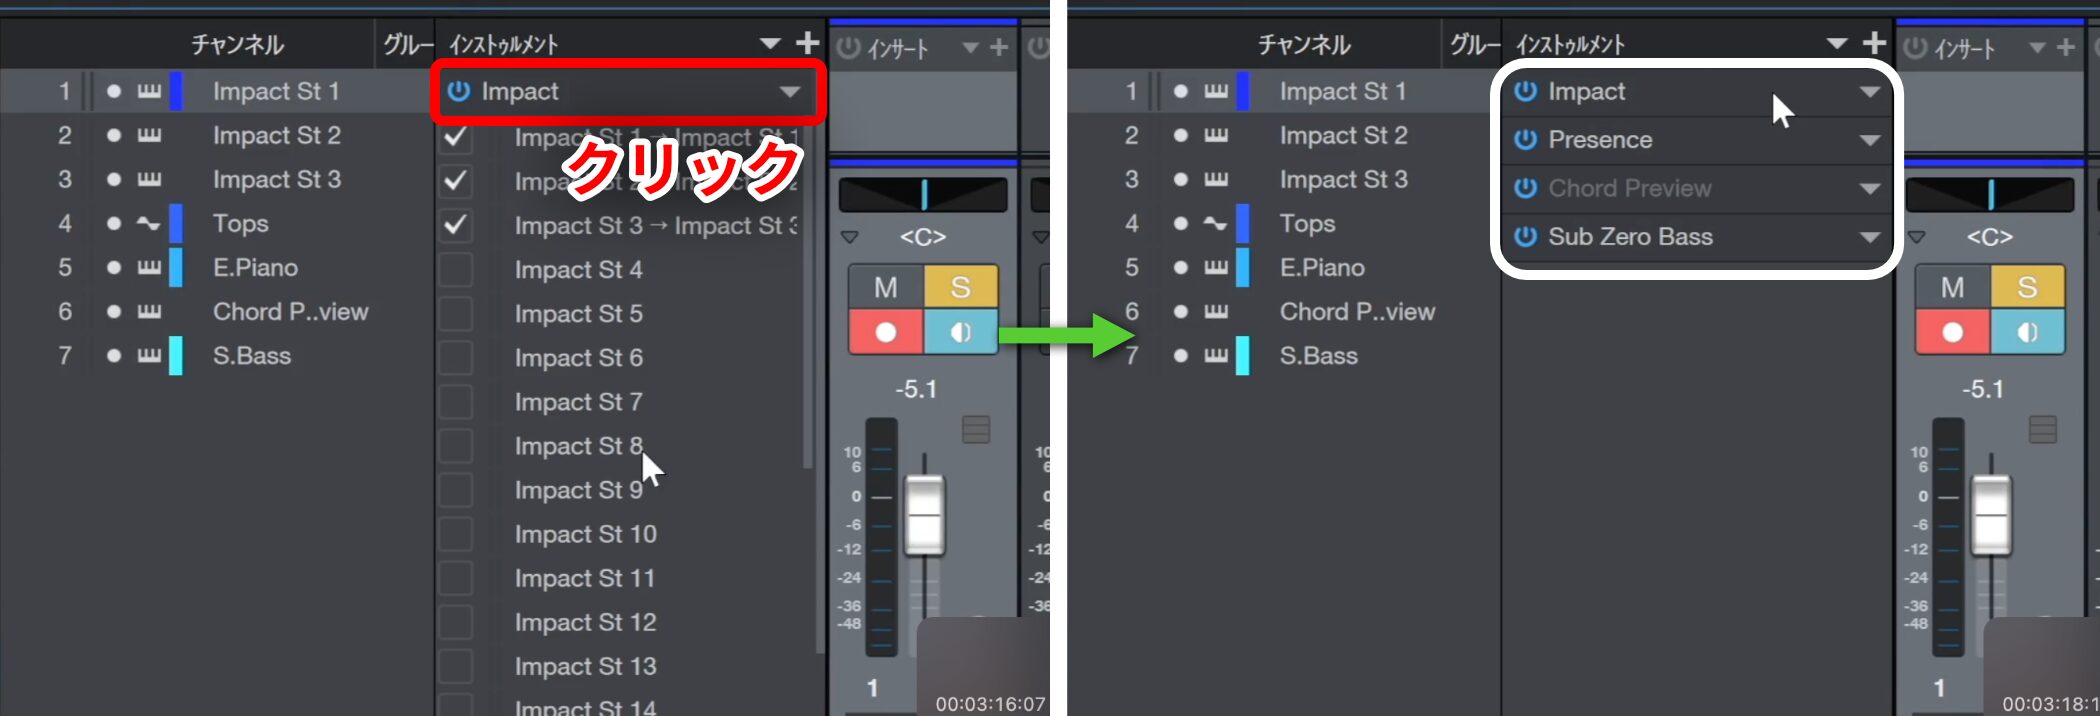
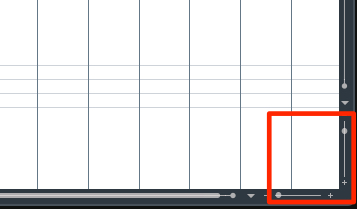
Once finished, click the area shown to reduce the window.
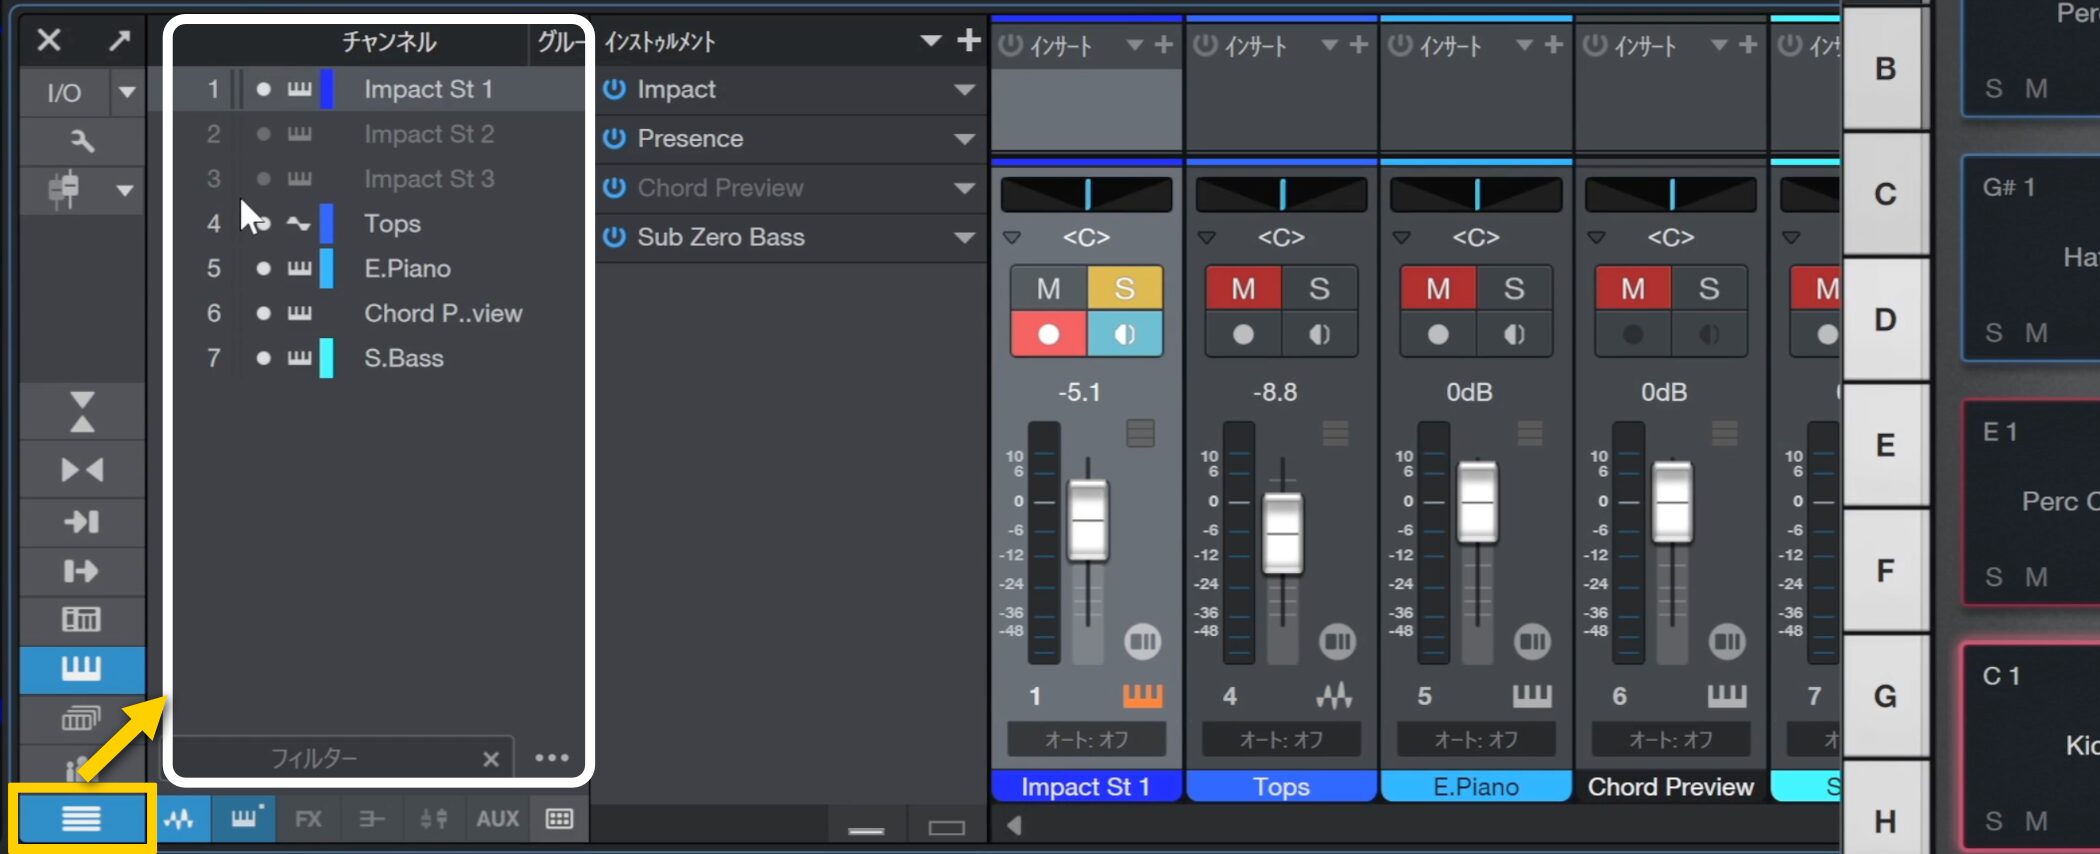
Next, check the channel list on the left.
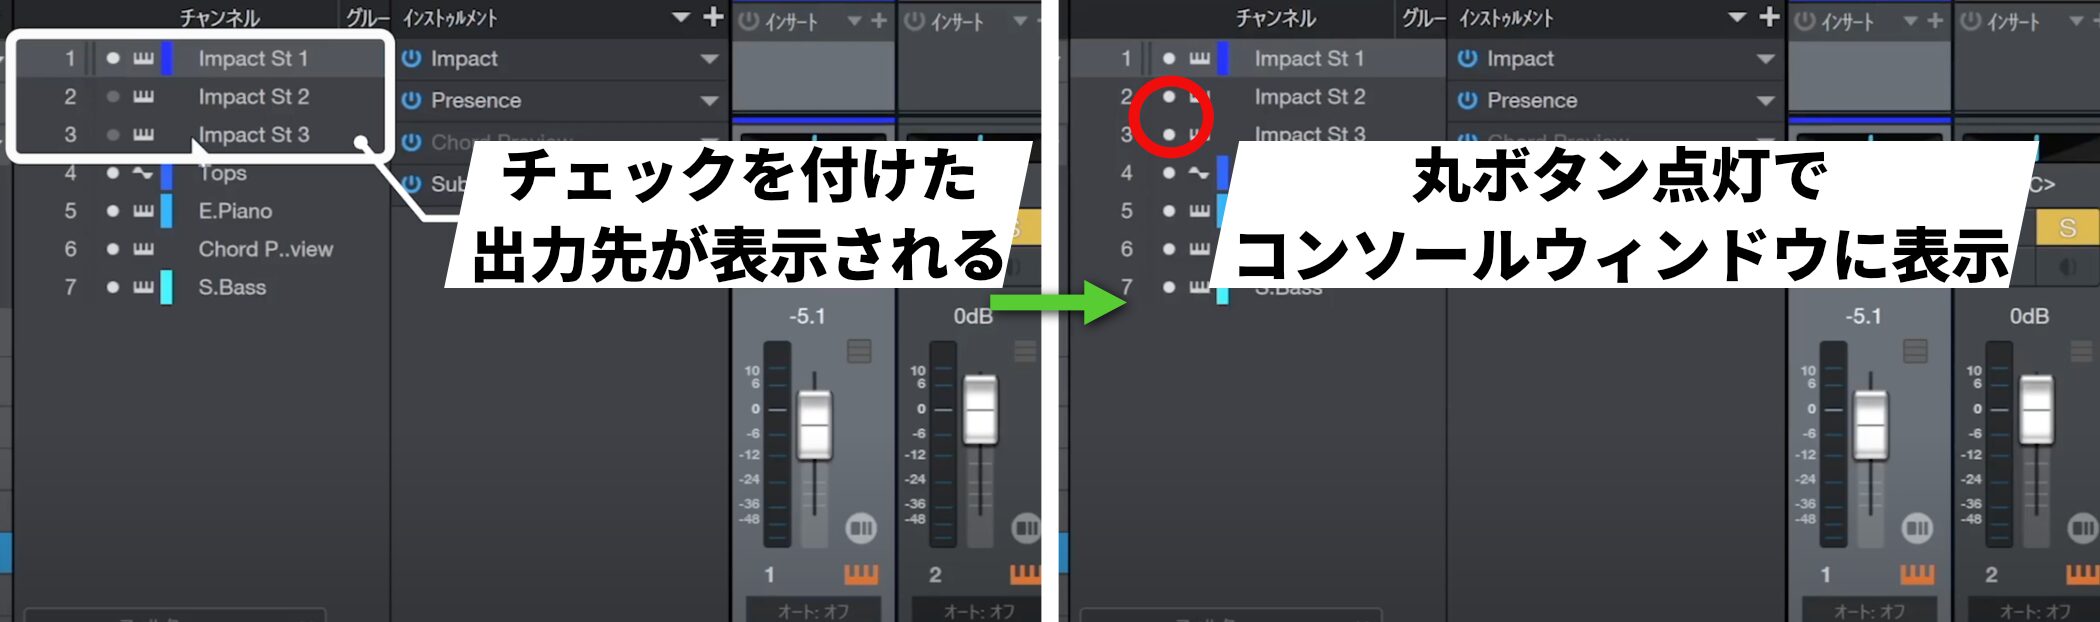
The numbers of the checked outputs appear there. Turn on the round button for each one to display its channel in the Console.
That completes the setup.
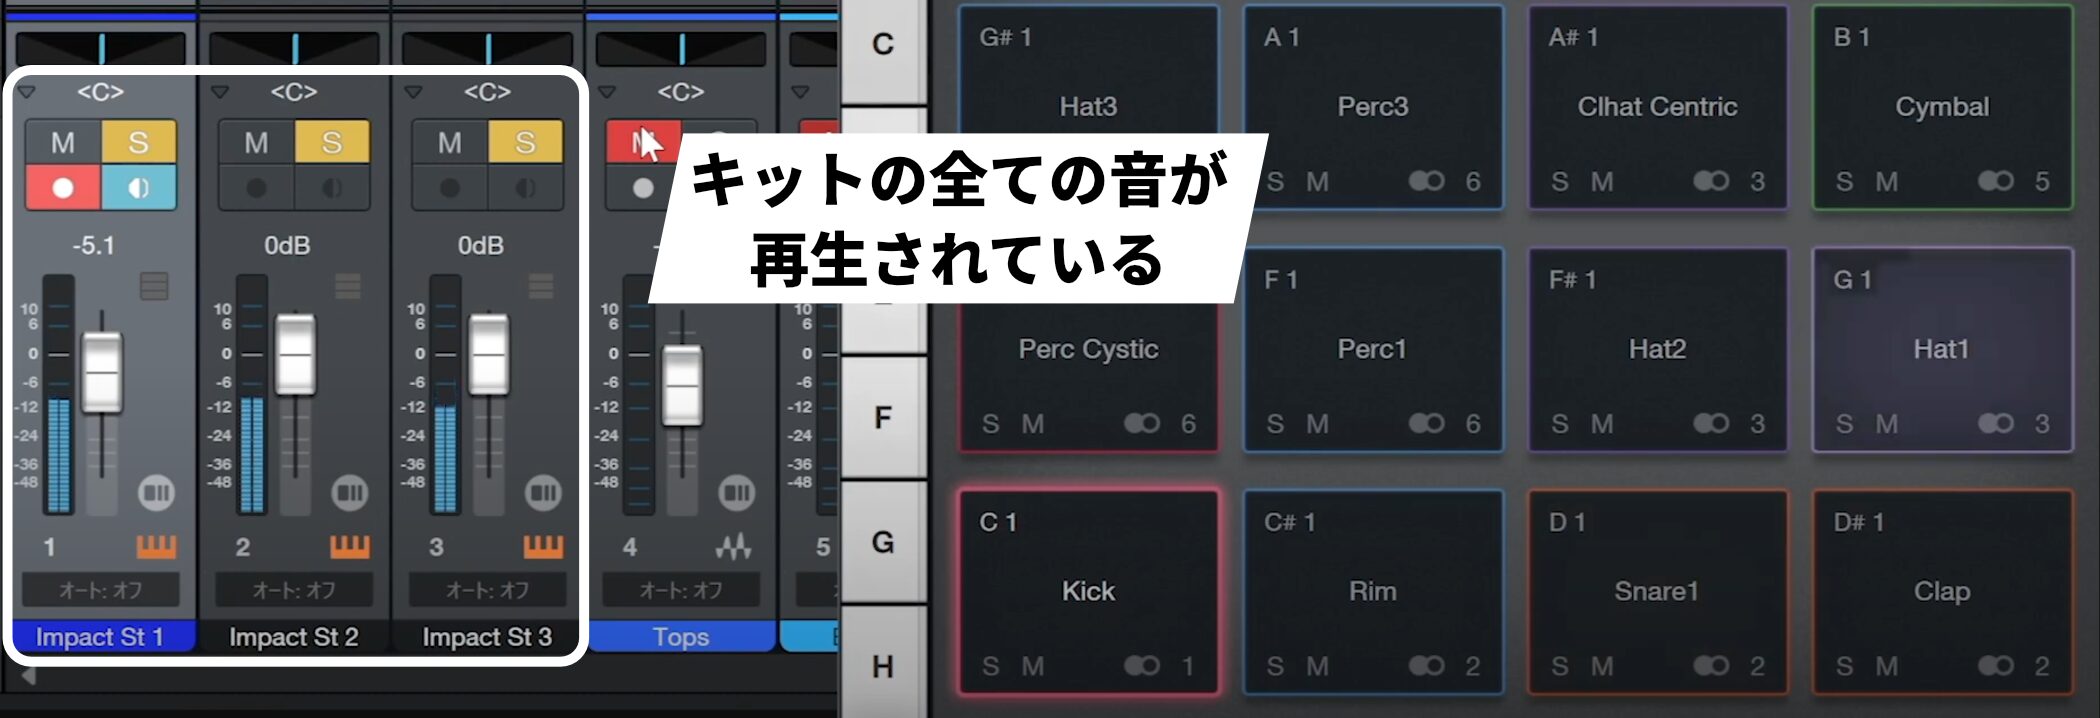
Solo the three channels and play them back to hear all the sounds in the kit used here.
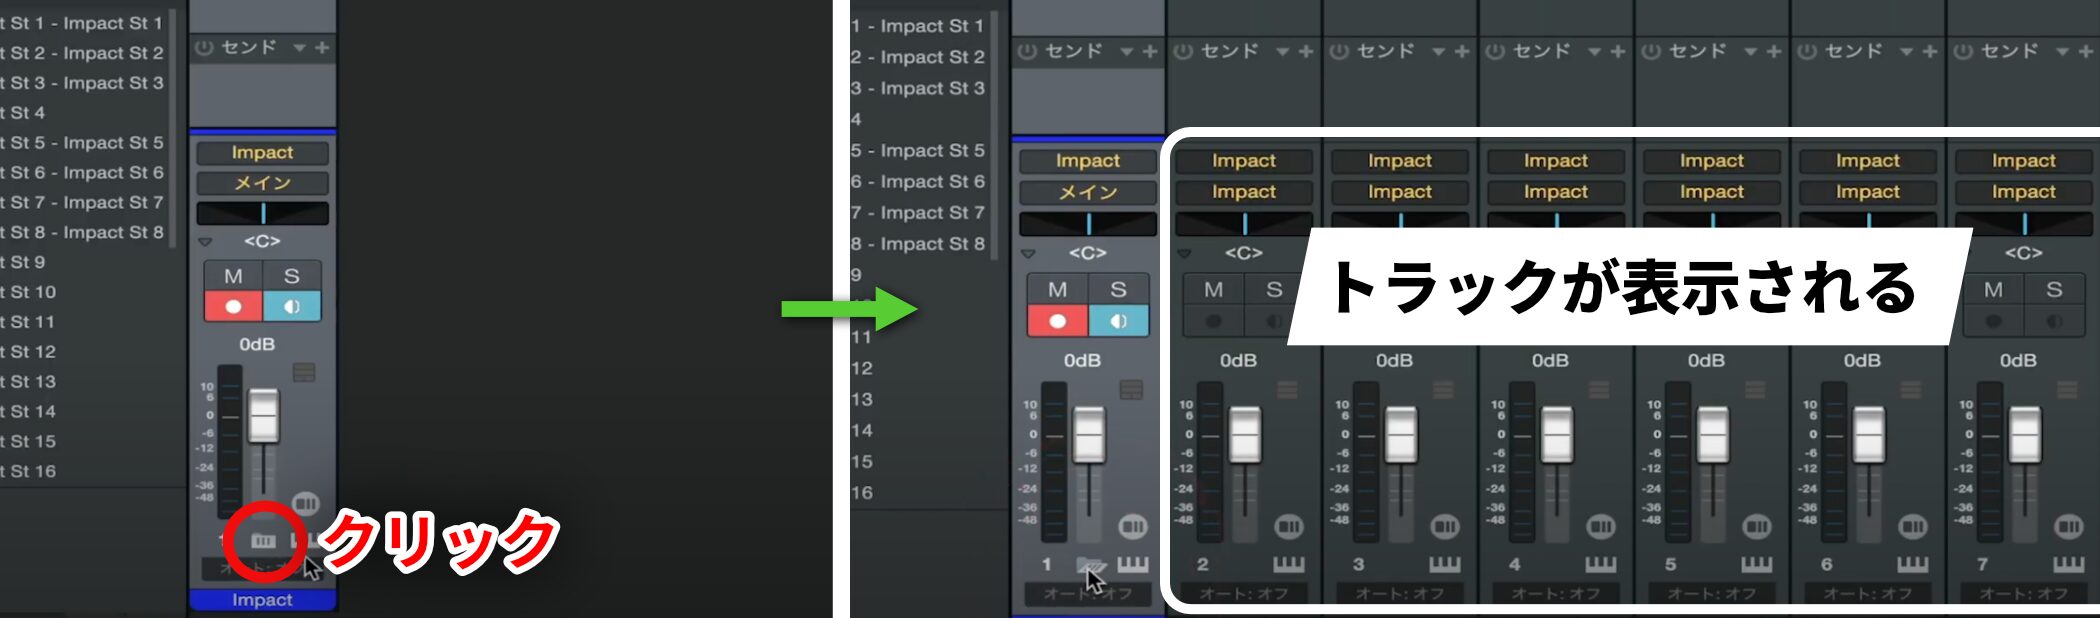
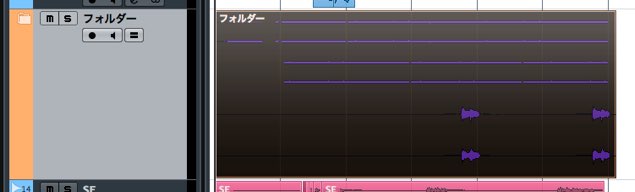
On a Mac, the channels may be stored inside a folder.
Click the area shown to reveal them.
Changing output channels
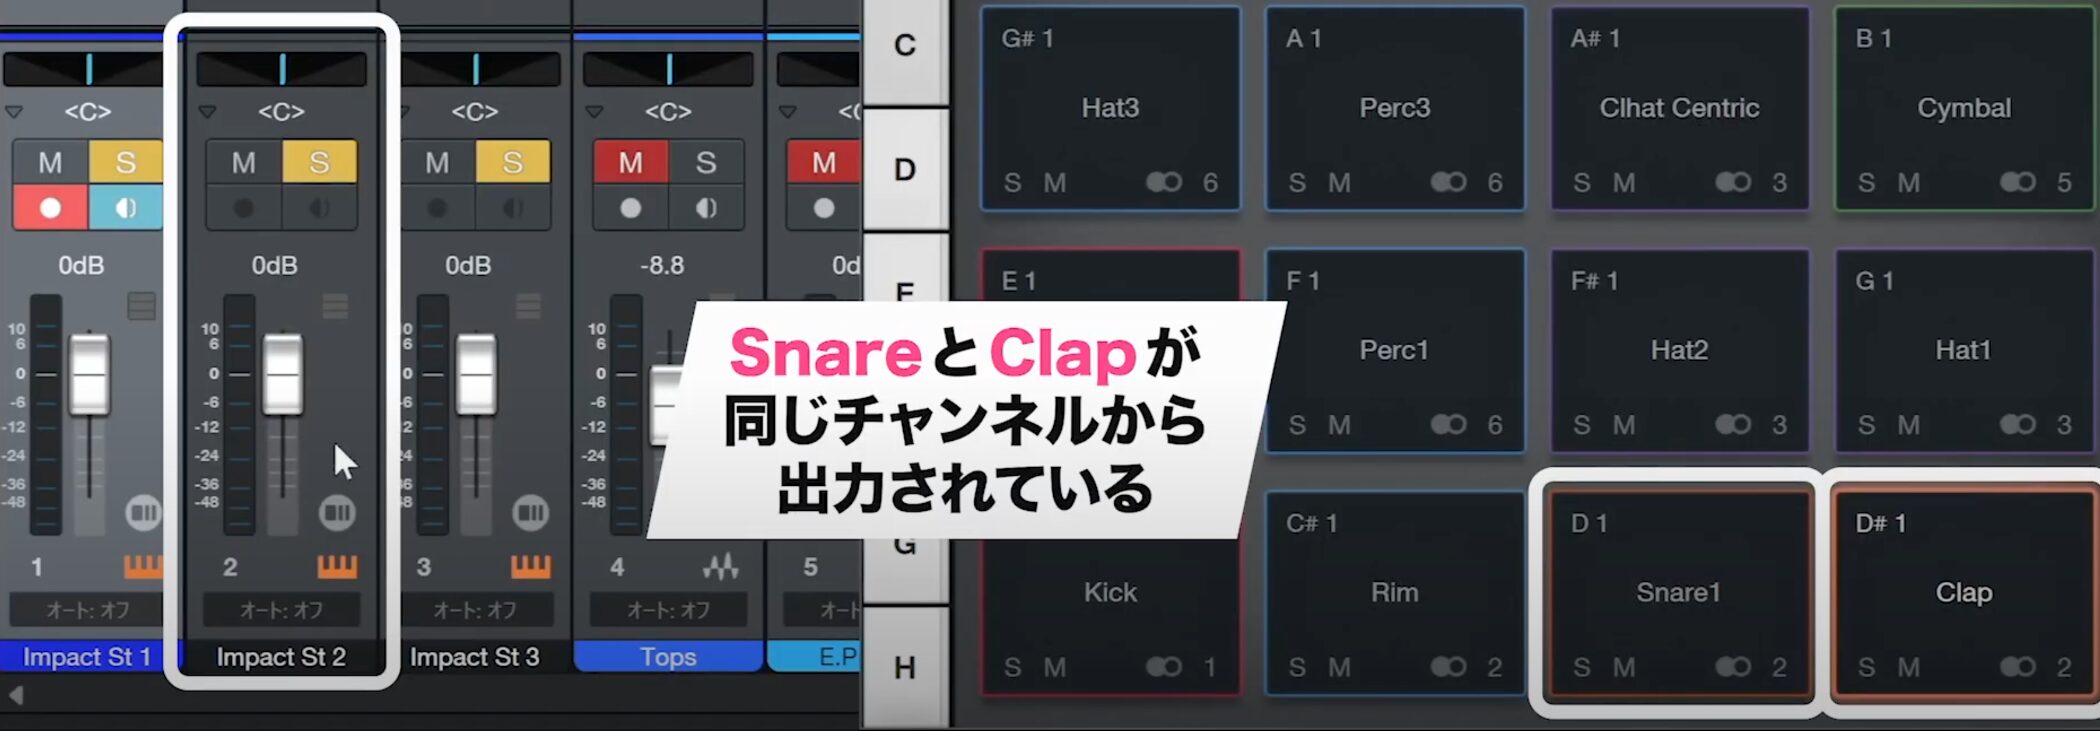
The snare and clap currently share output channel 2, making them difficult to control separately.
We will route them to different channels for finer adjustment.
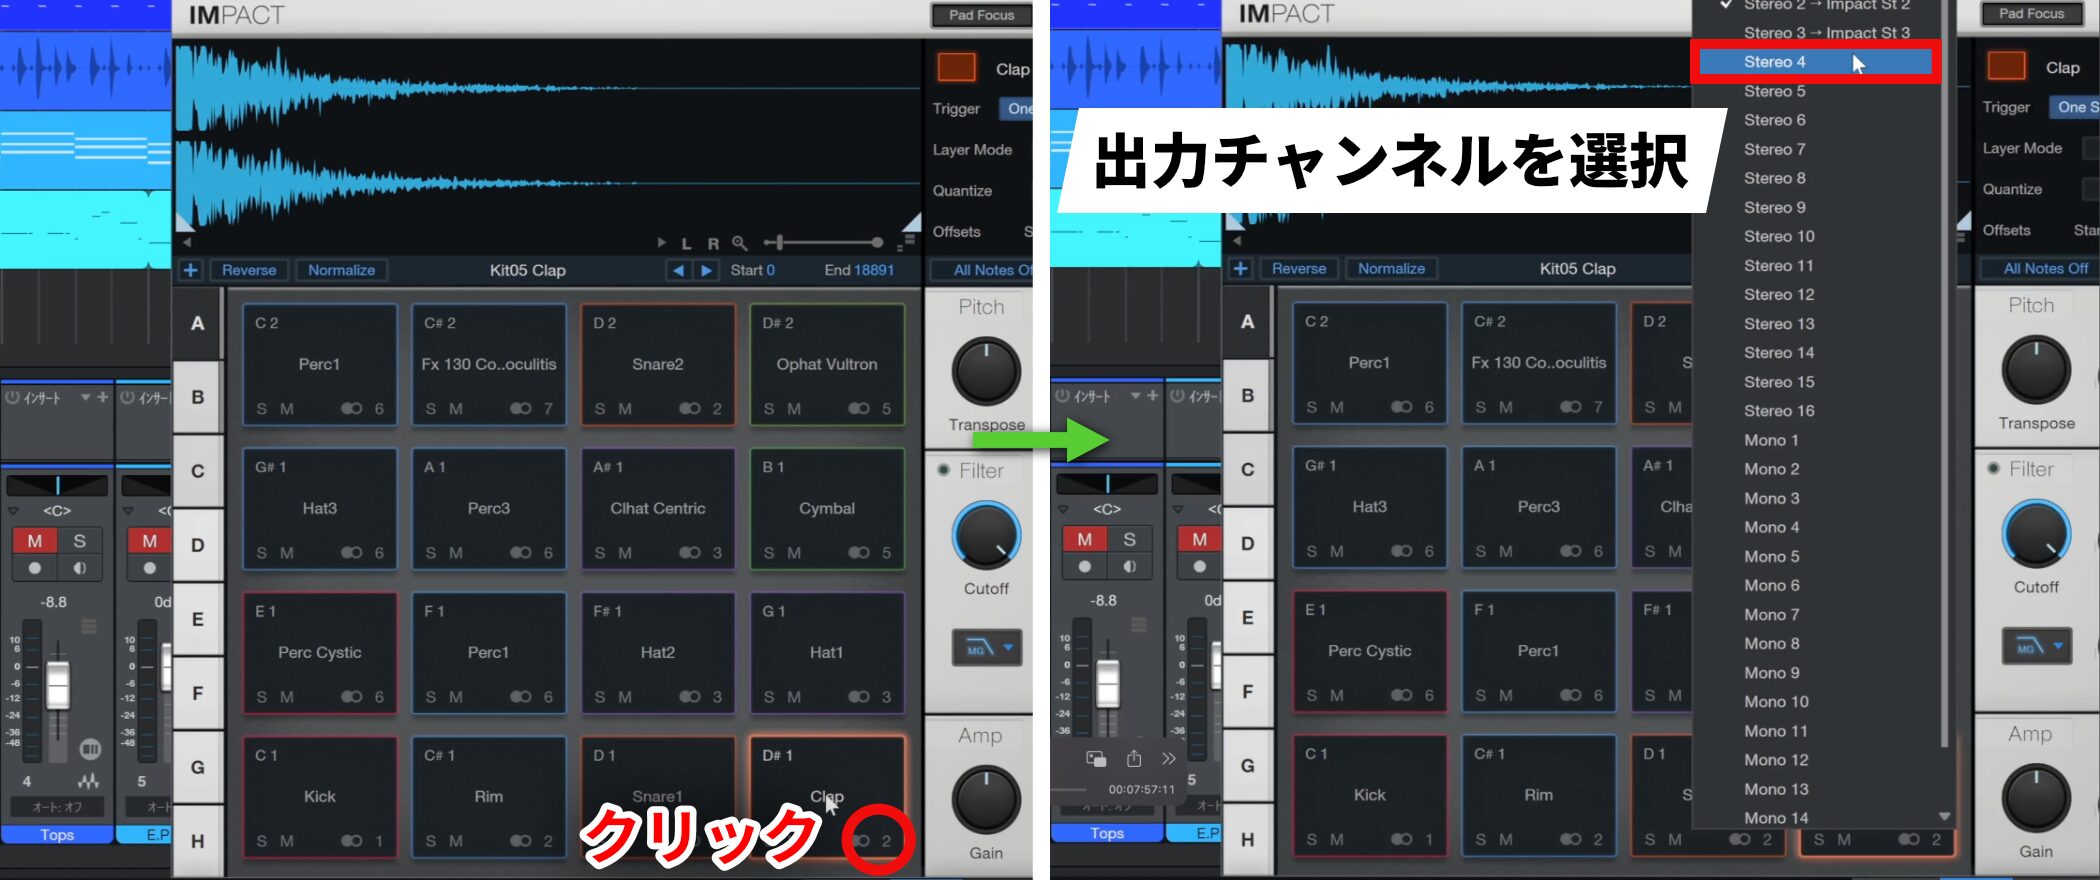
Keep the snare on channel 2 and change the clap’s output.
Click the output channel display on the slot you want to change, then select channel 4 for the clap.
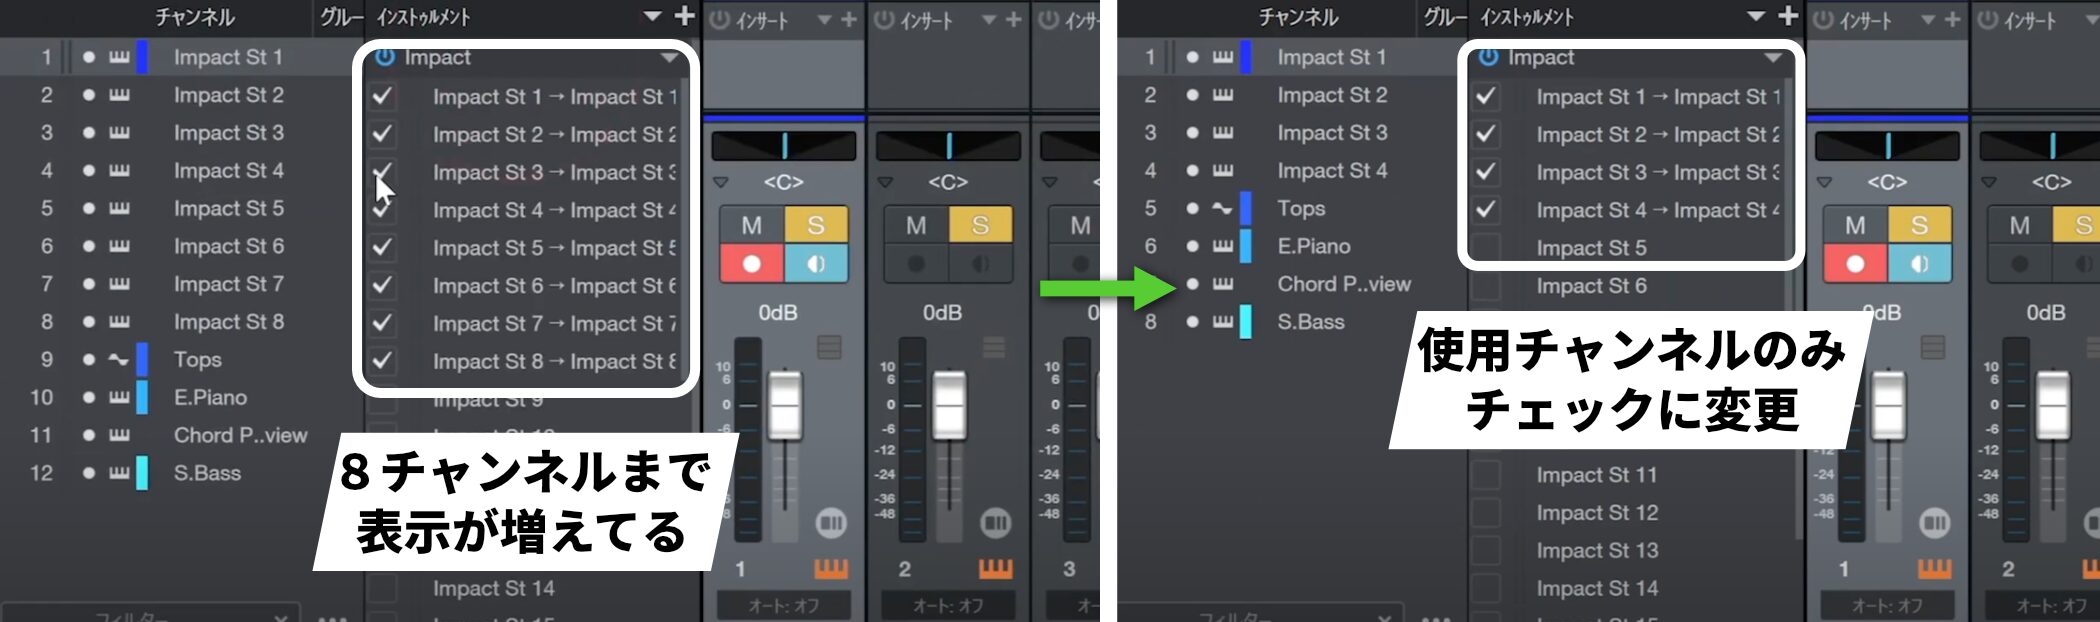
After this assignment, the available outputs shown increase from three to eight.
We will not use channels 5 onward in this example, so uncheck them again.
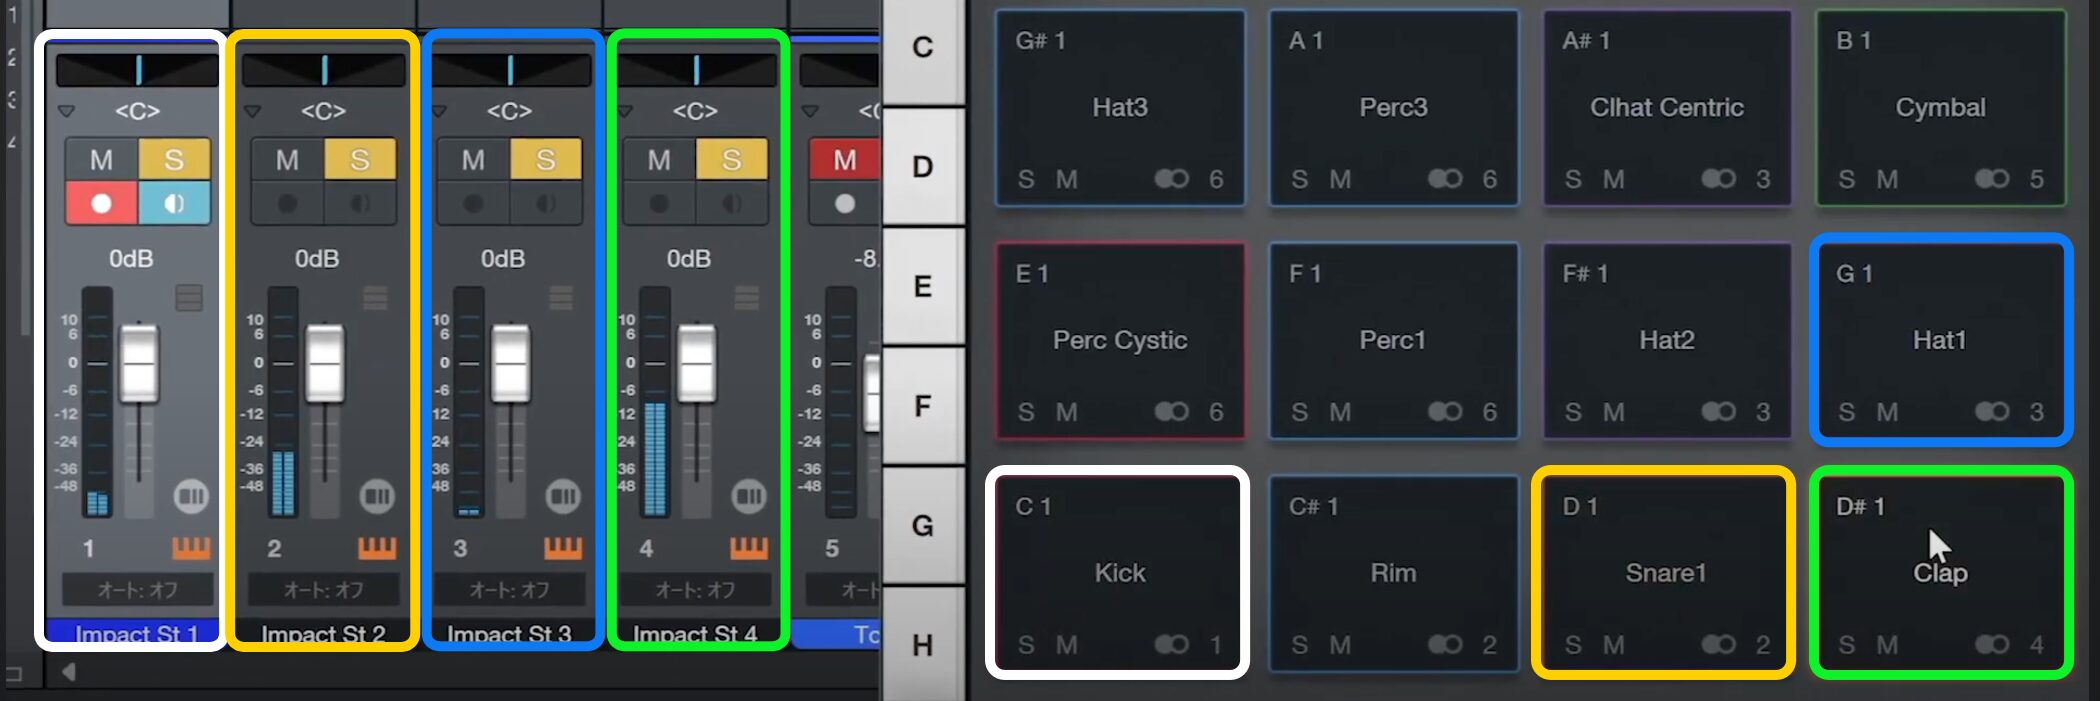
The kick is now on channel 1, the snare on 2, the hi-hat on 3, and the clap on the newly assigned channel 4.
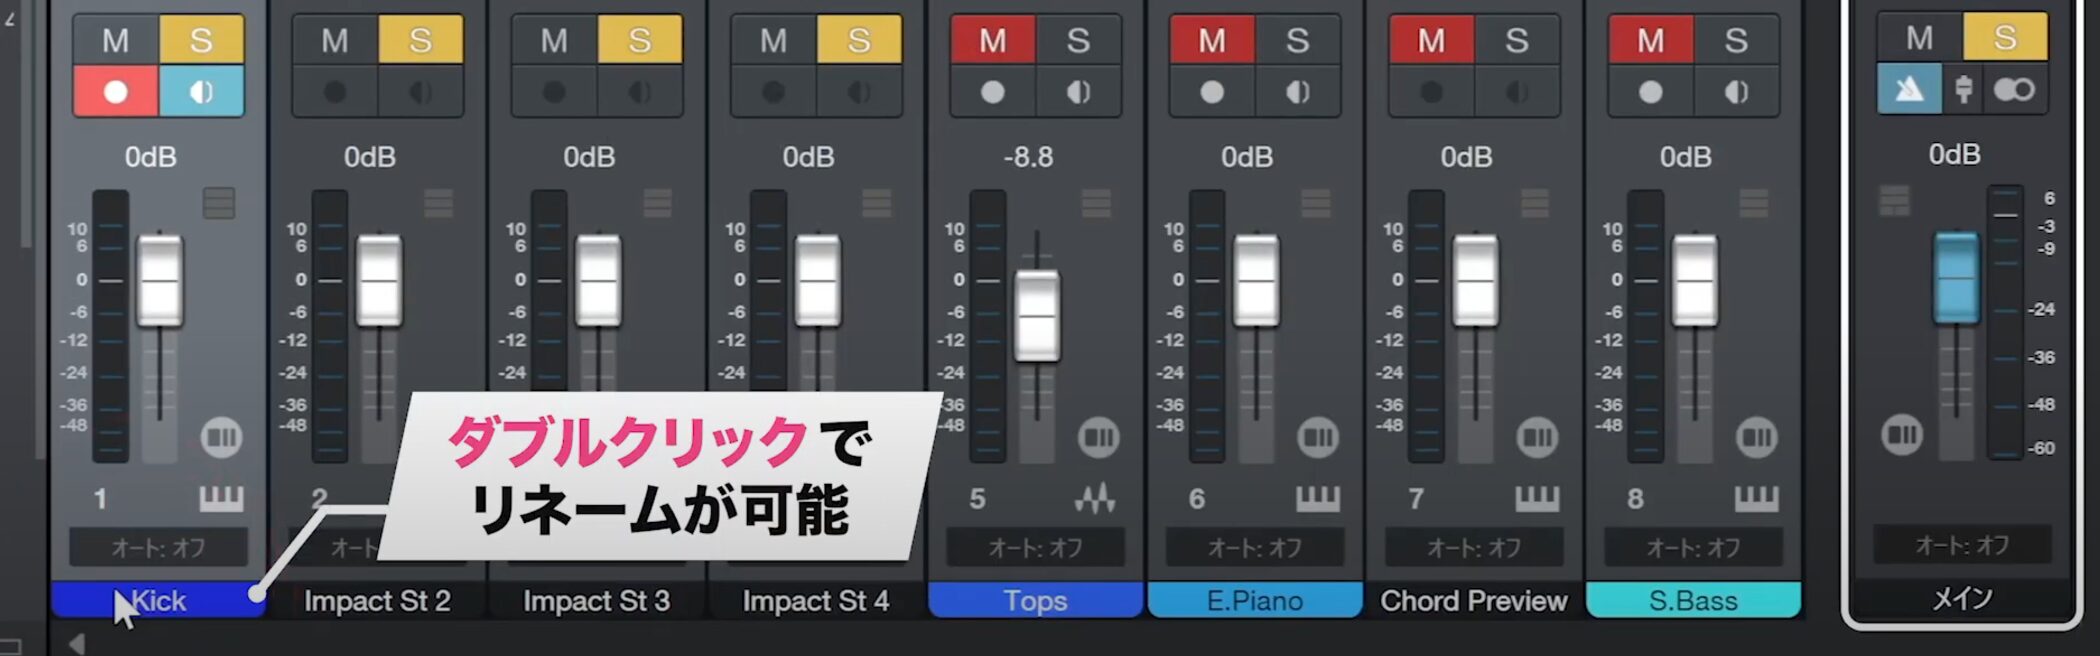
Double-click each channel’s name area to rename it just like a regular track. Clear names make the session easier to navigate.
Adjusting volume
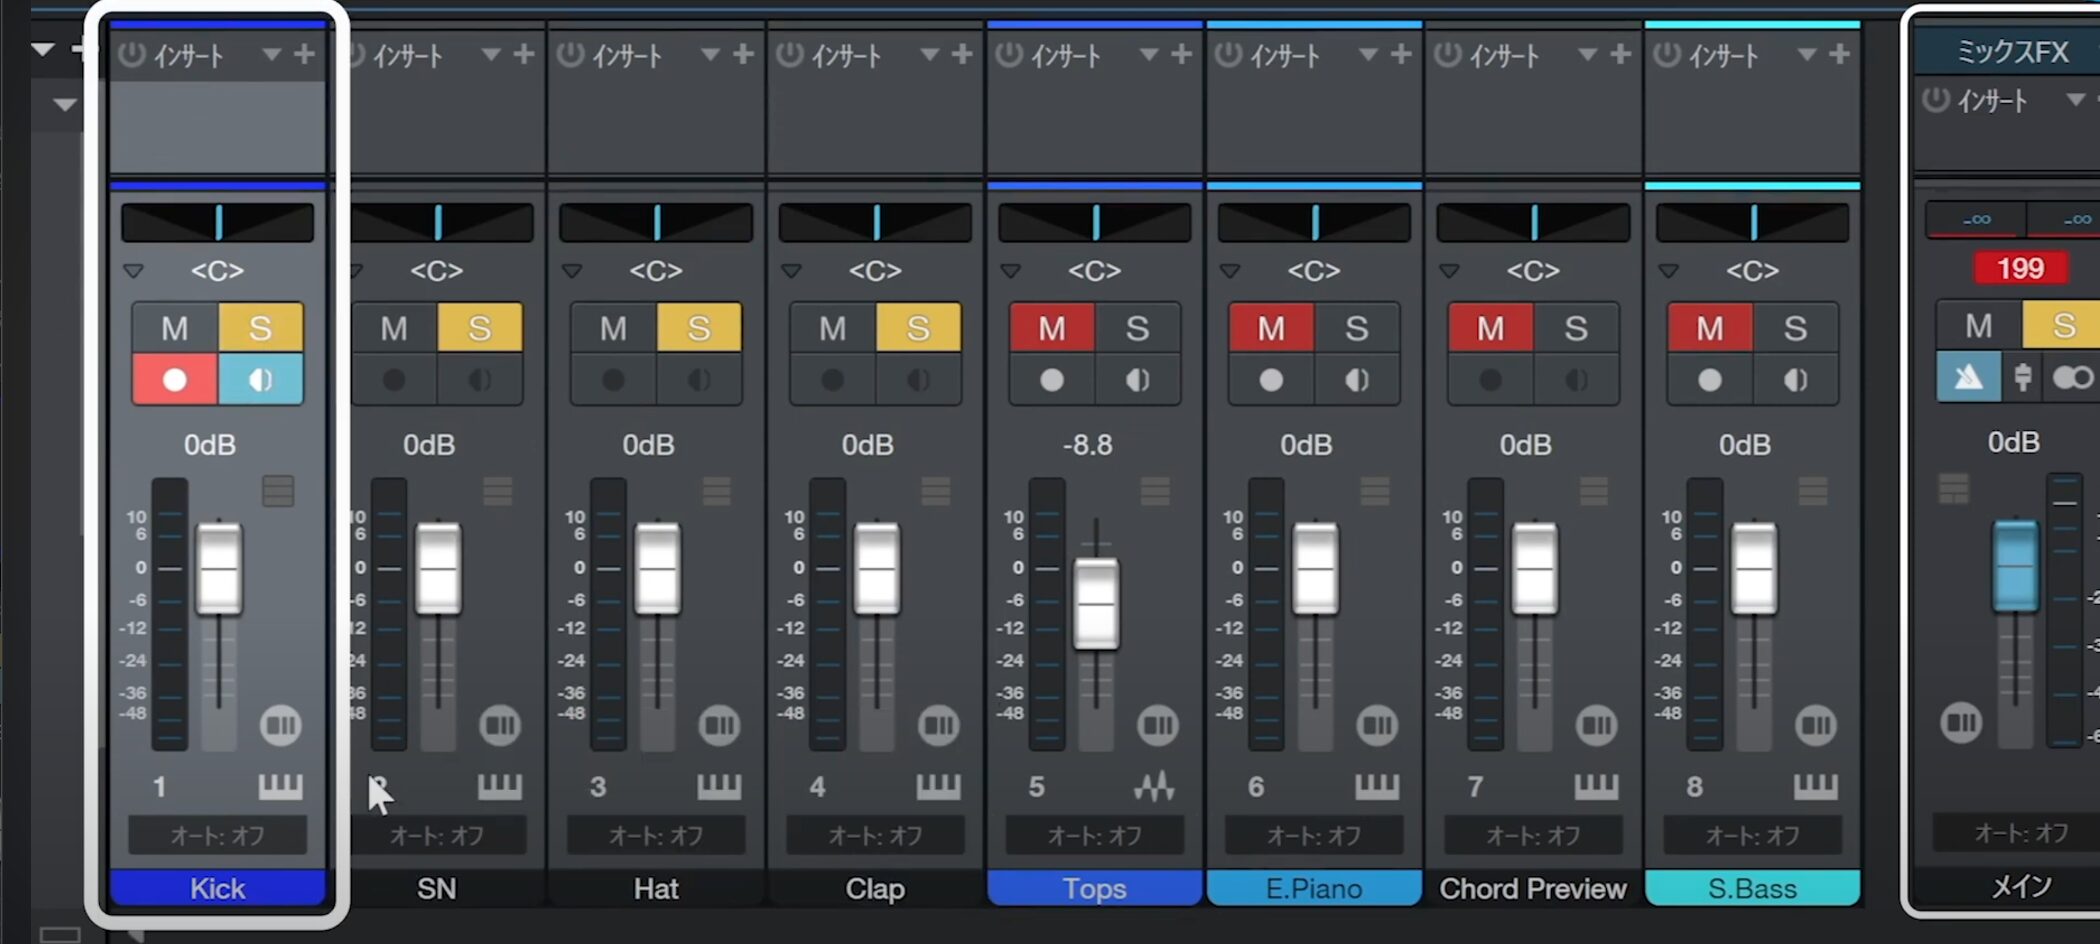
Start balancing the volume with the kick.
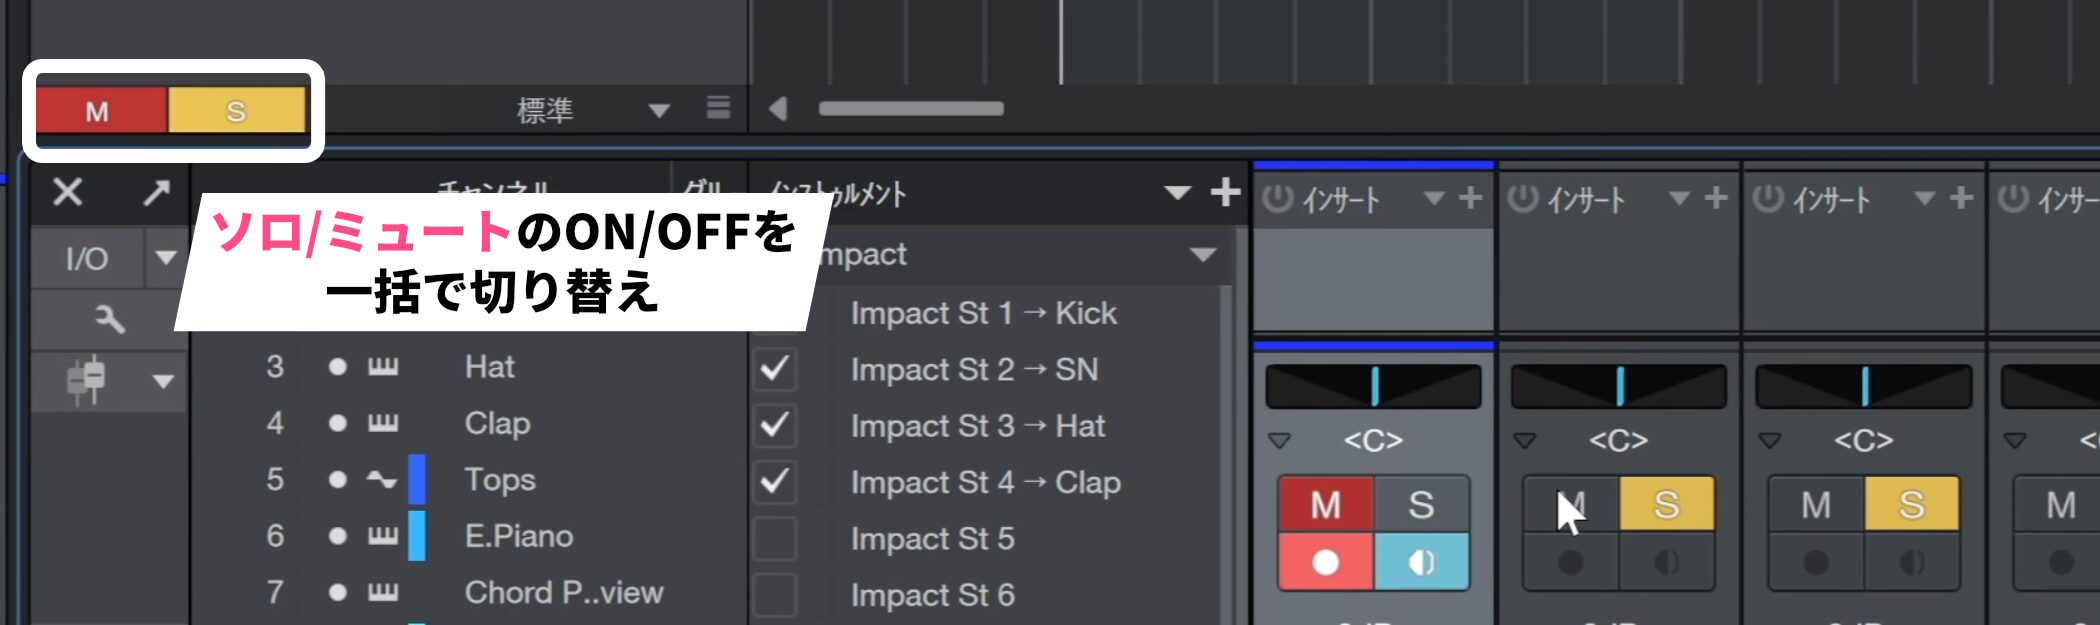
If turning off solo on each channel individually is tedious, use the M/S (mute/solo) controls at the upper left of the Console to switch them together.
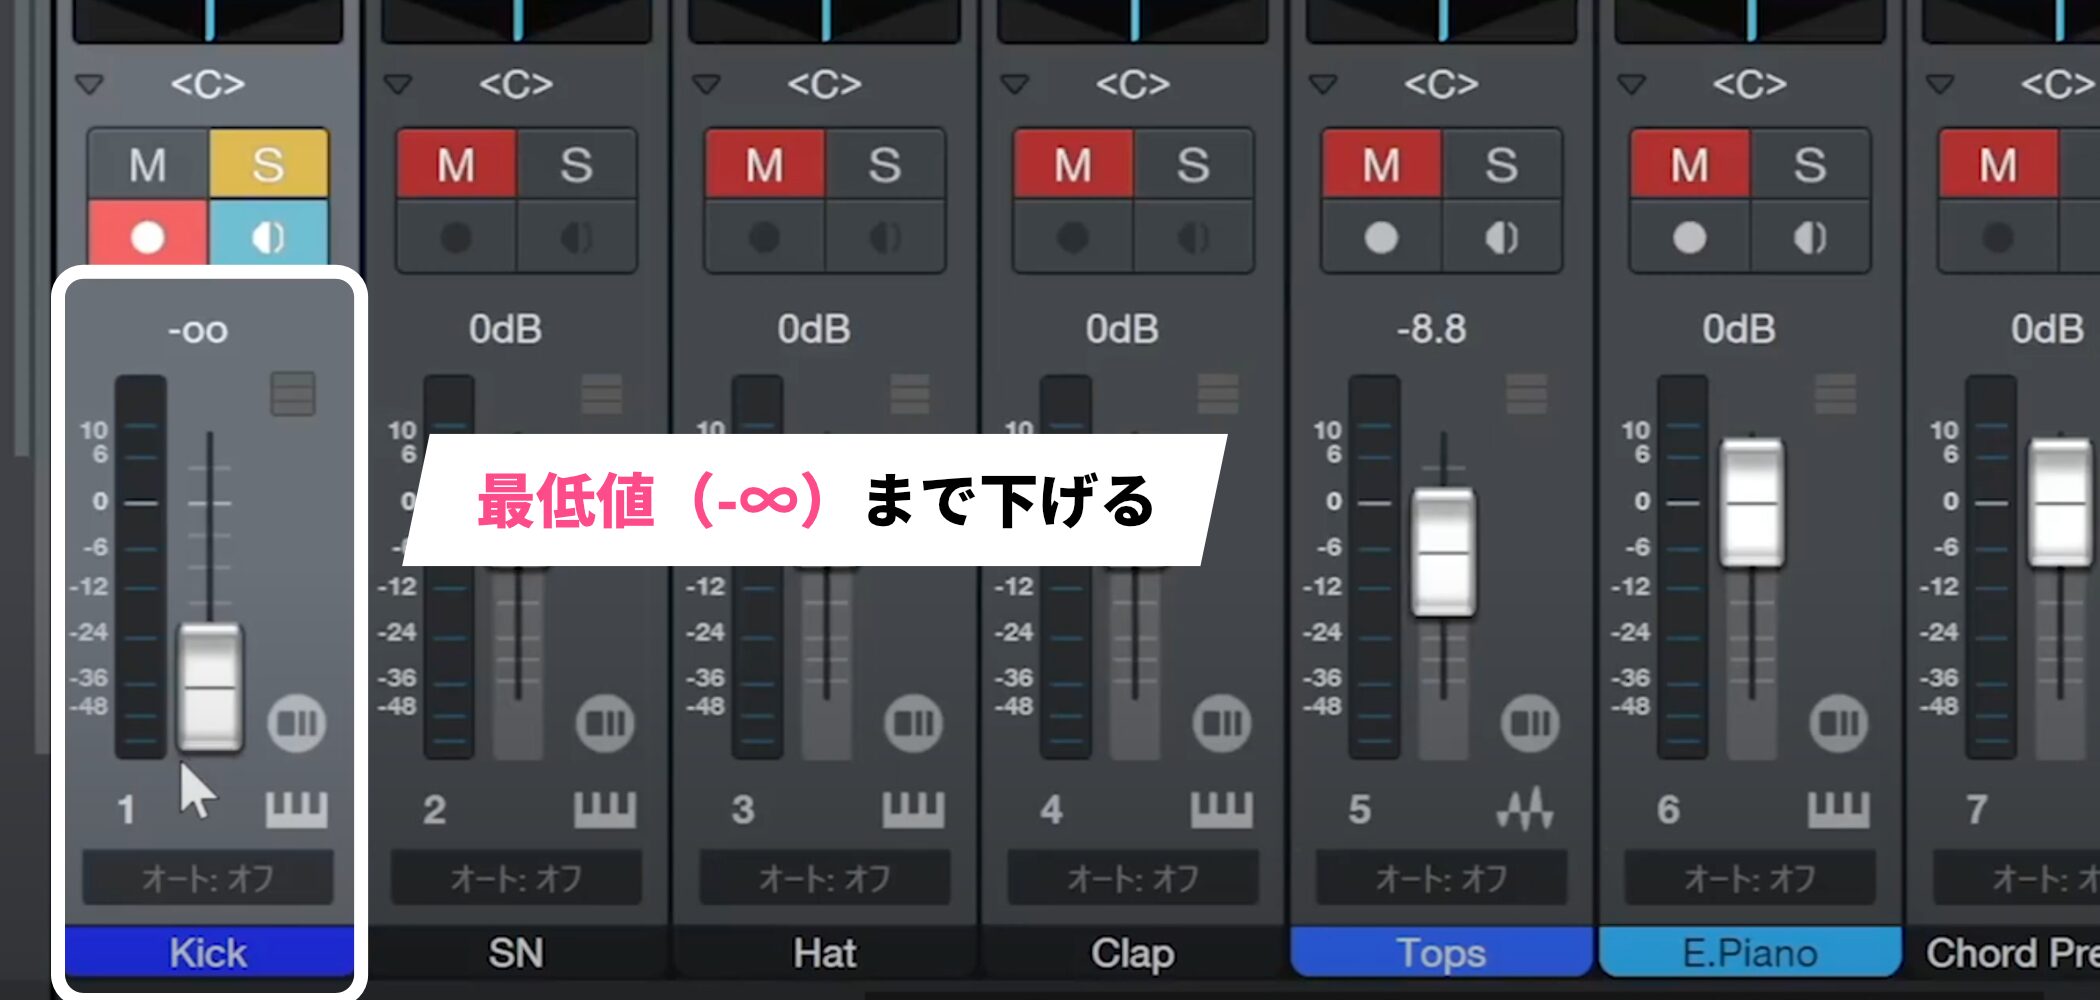
First lower the fader to its minimum (−∞), then raise it gradually.
It is easy to overshoot.
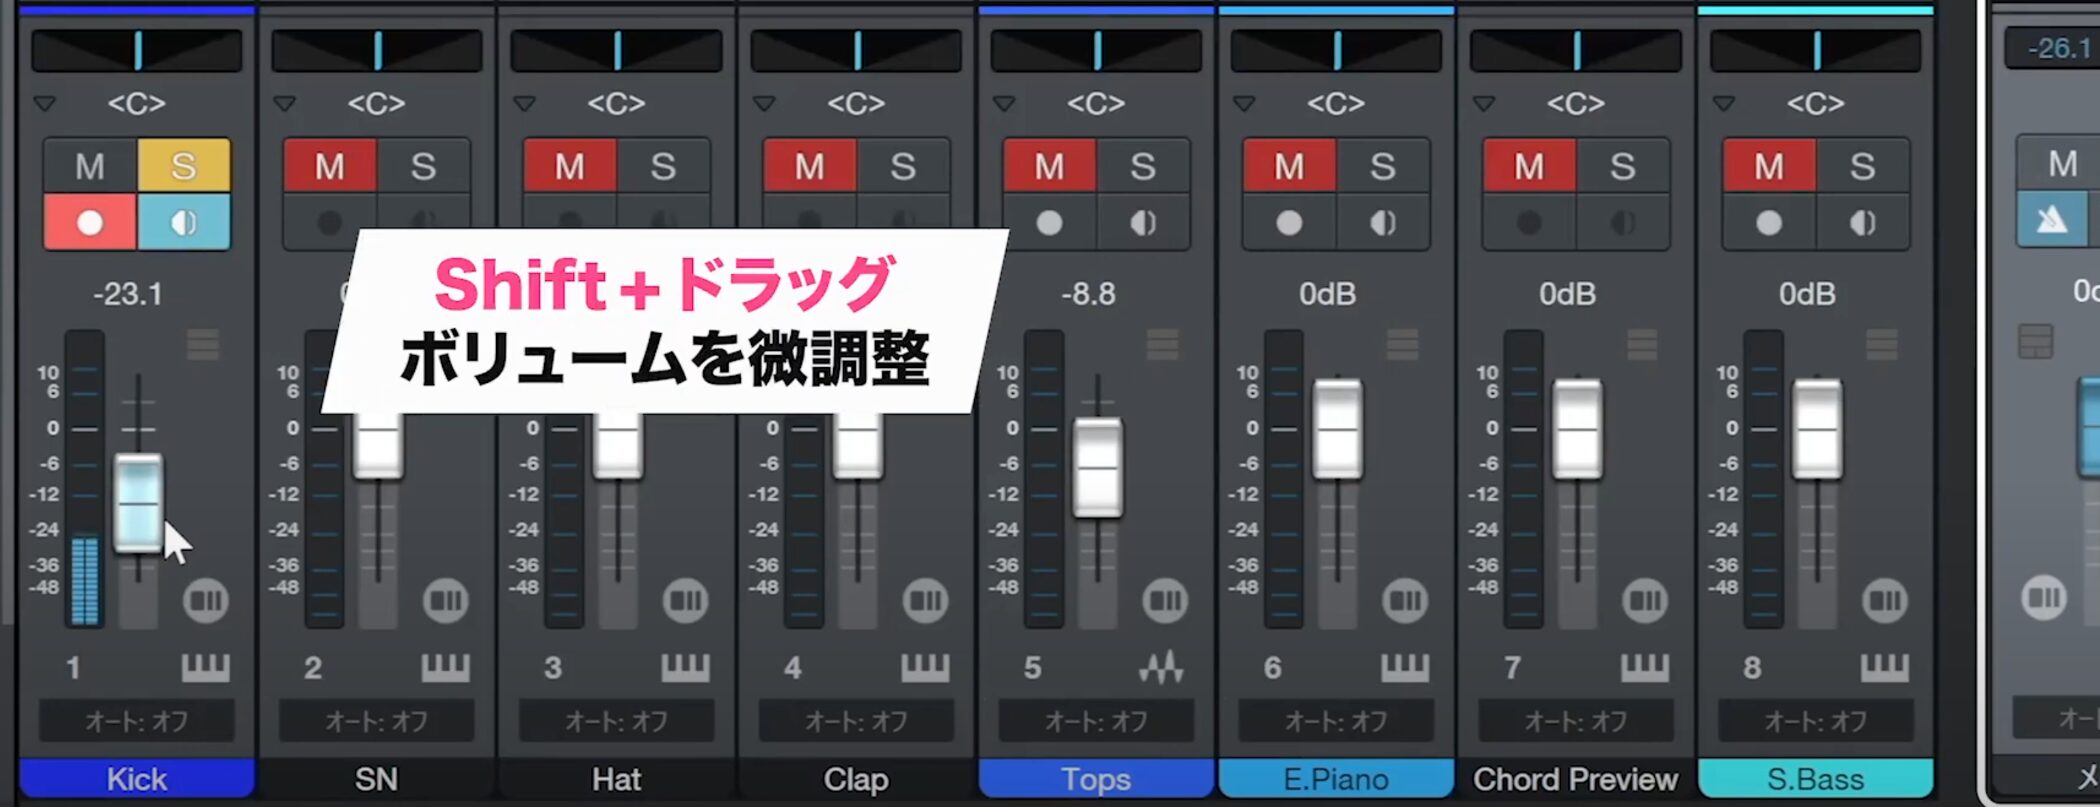
When that happens, hold Shift while dragging up or down to make fine volume adjustments.
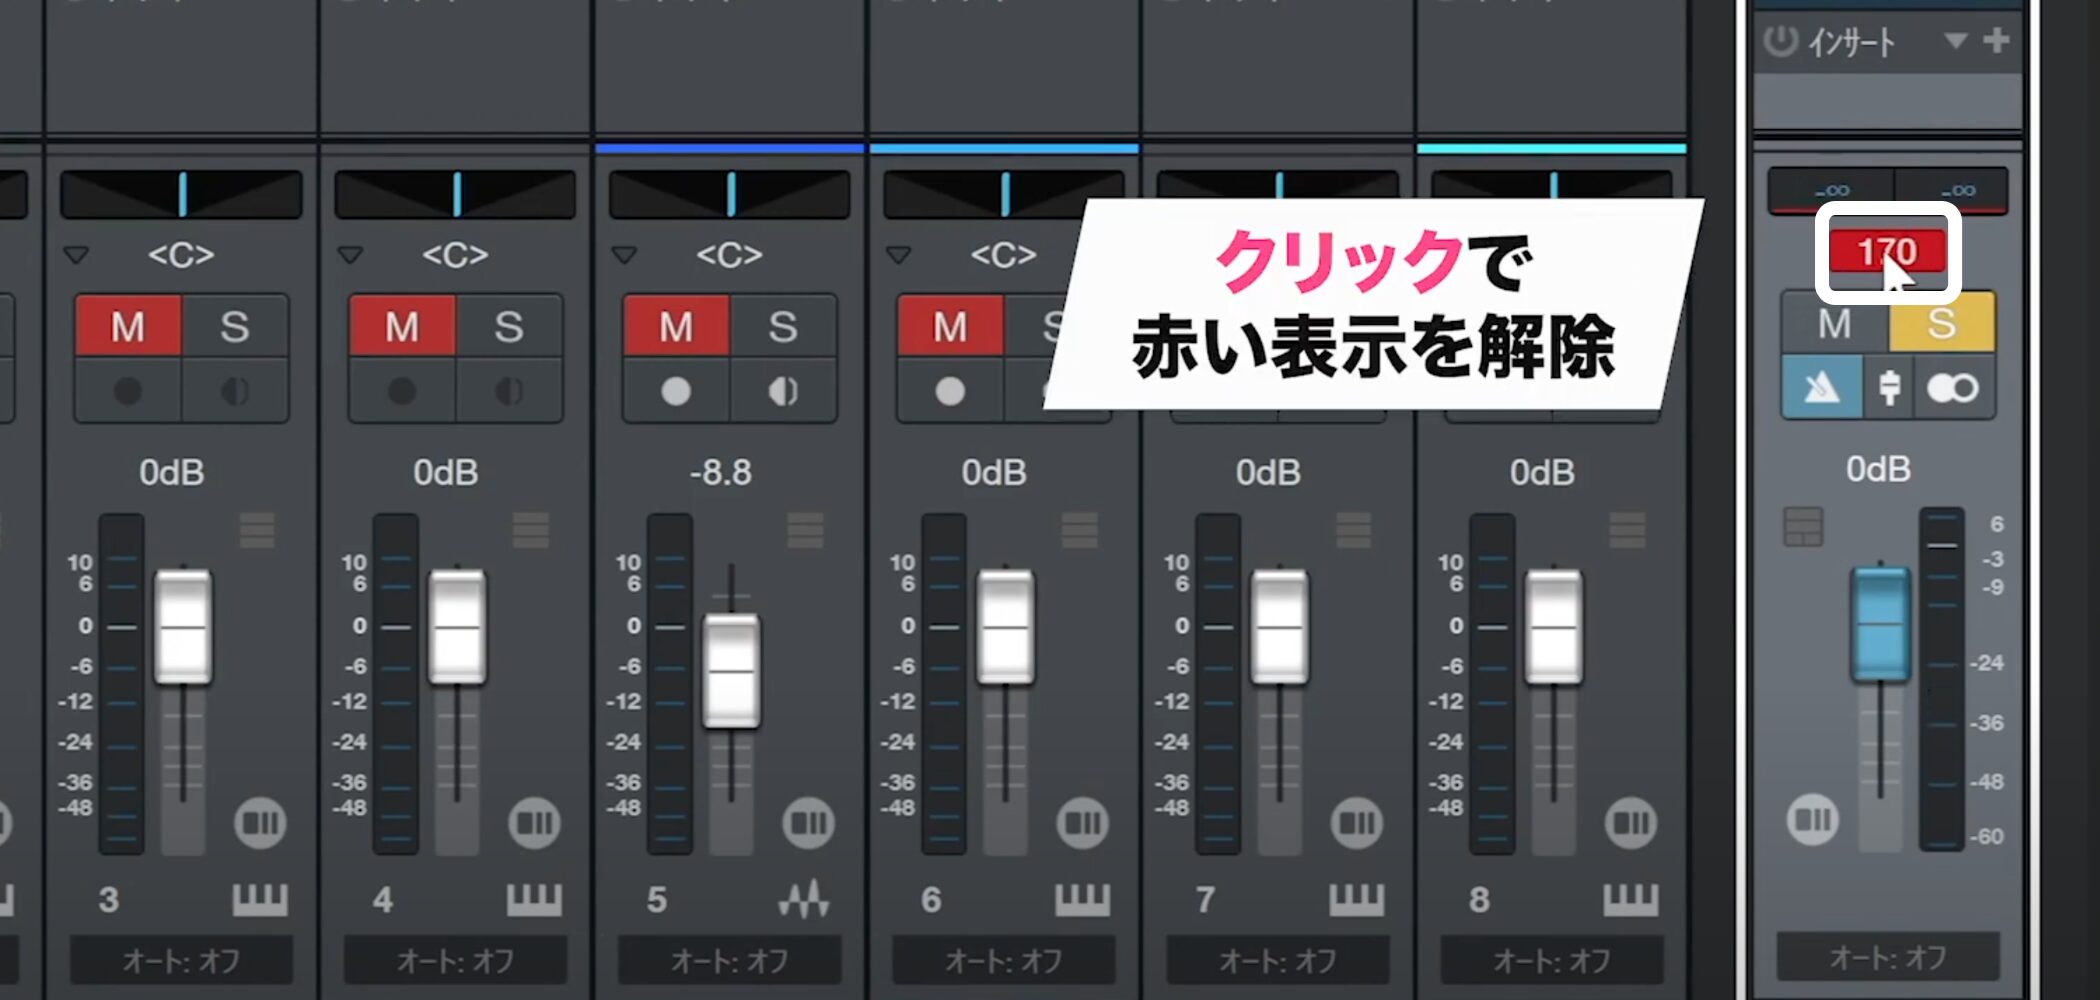
If the level is too high and clips, click the clip indicator to clear it.
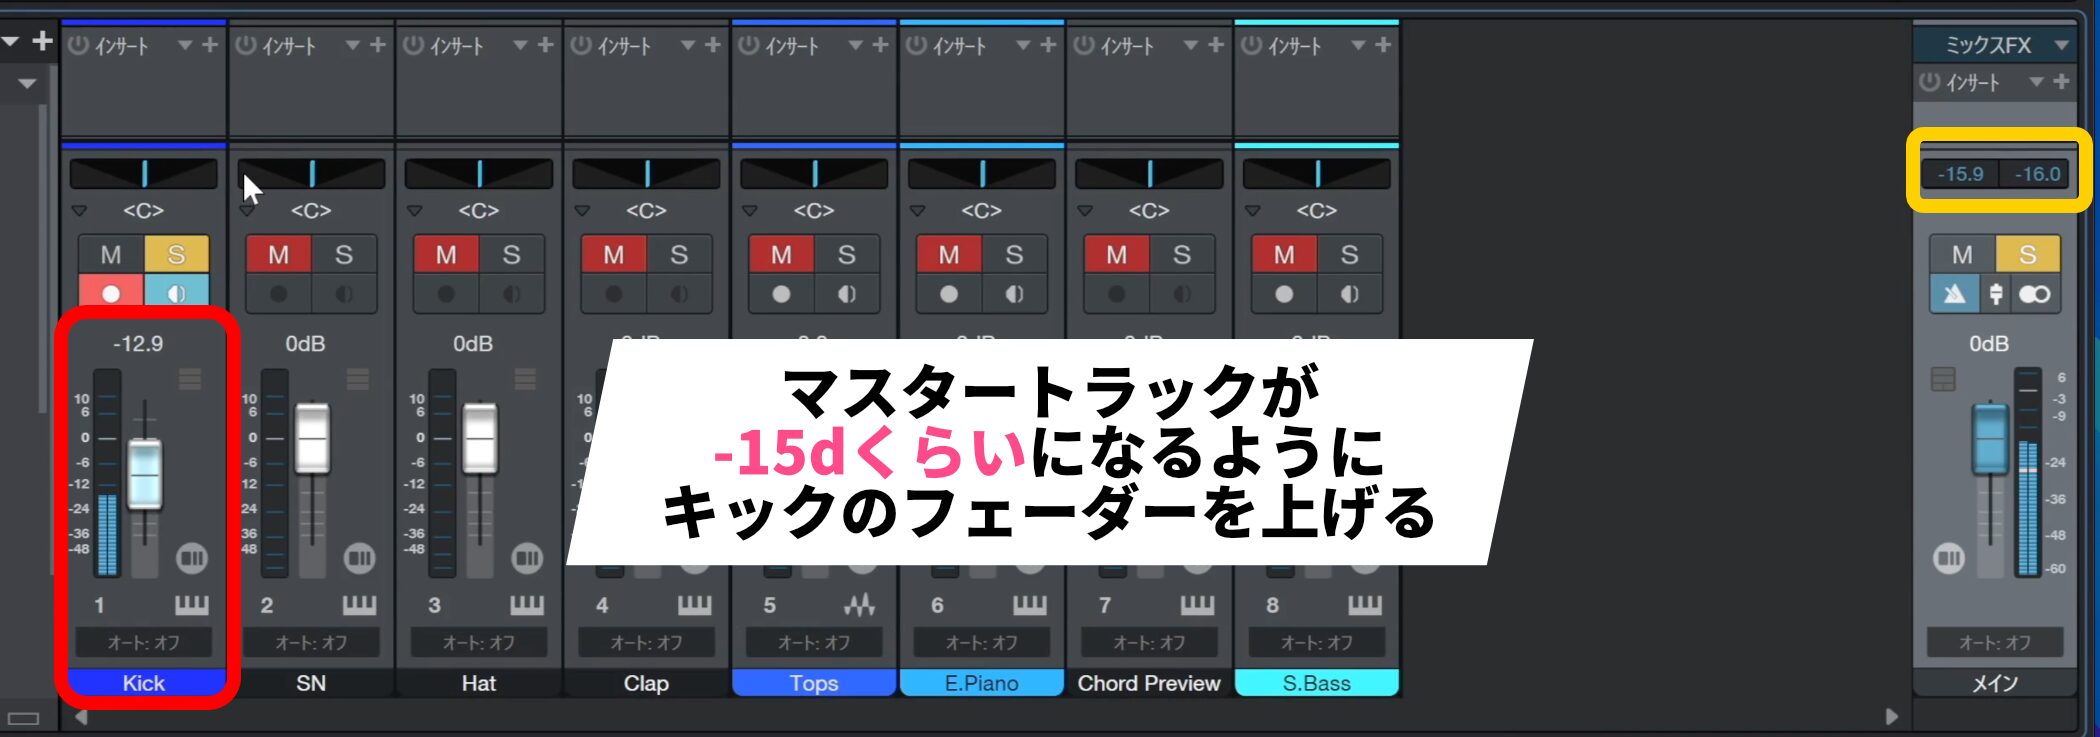
Raise the fader gradually and adjust it so the master channel peaks at around −15 dB.
Using this as a starting point when adding tracks makes clipping less likely.
Once the kick—the foundation of the song—is set, listen to it while adding the other tracks one at a time and adjusting their balance.
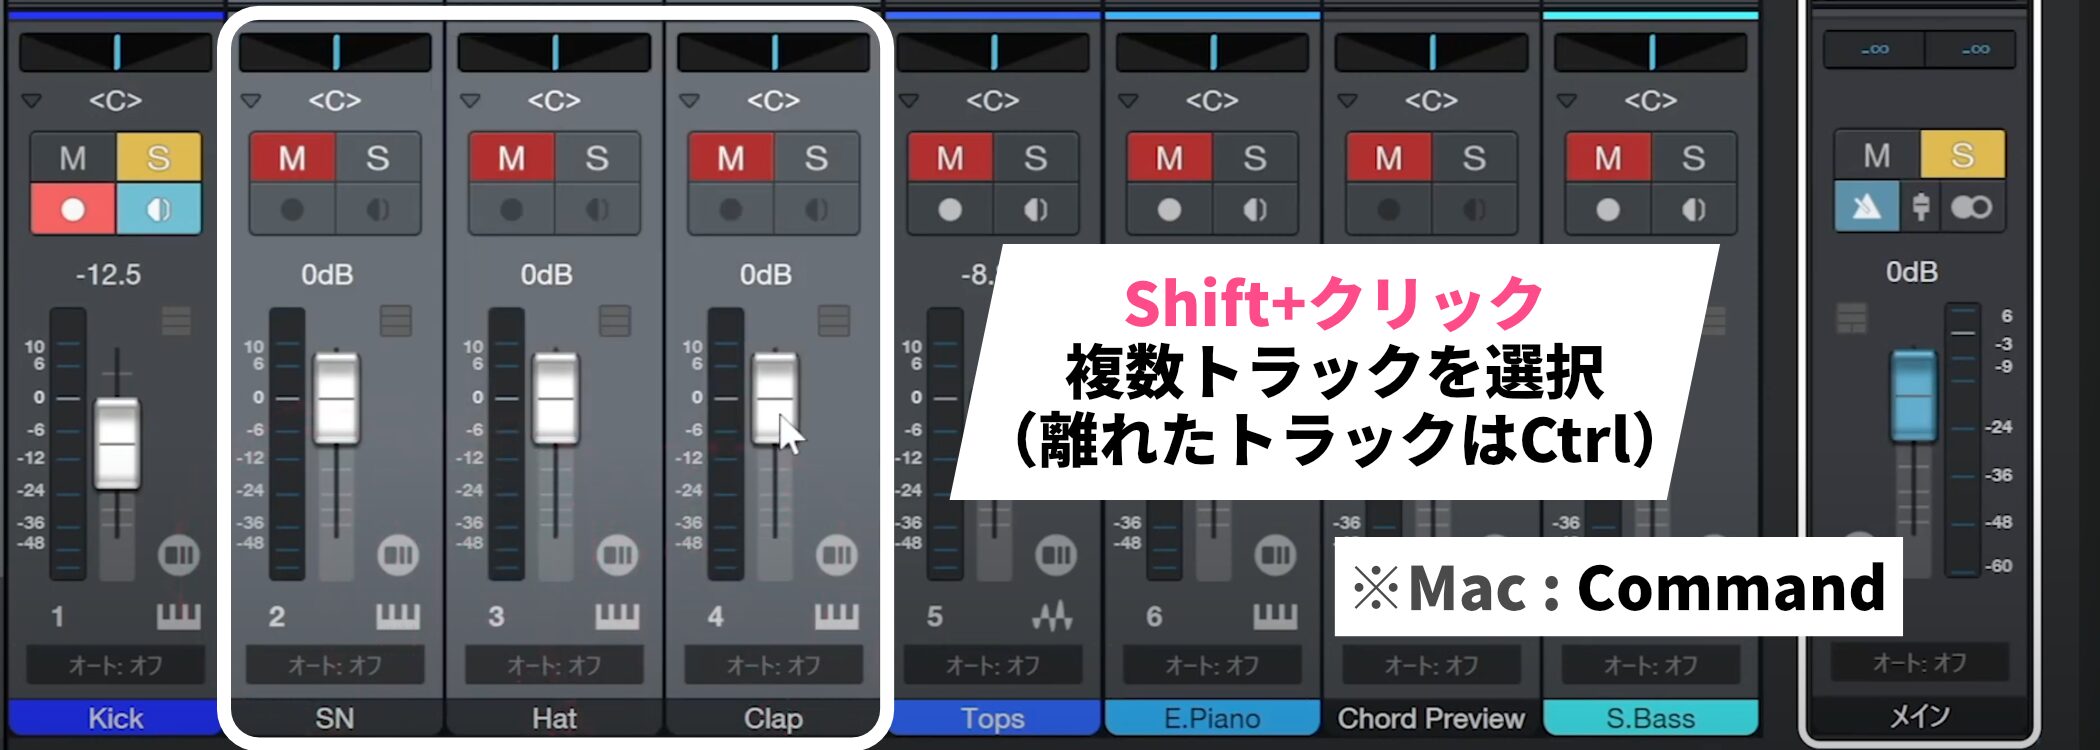
You can also operate several tracks at once.
Hold Shift while selecting tracks to select a contiguous range.
To select tracks that are not adjacent, hold Ctrl (Command on Mac) while clicking.
After selecting them, drag any one fader to adjust all selected tracks together.
Creating a sense of space with panning
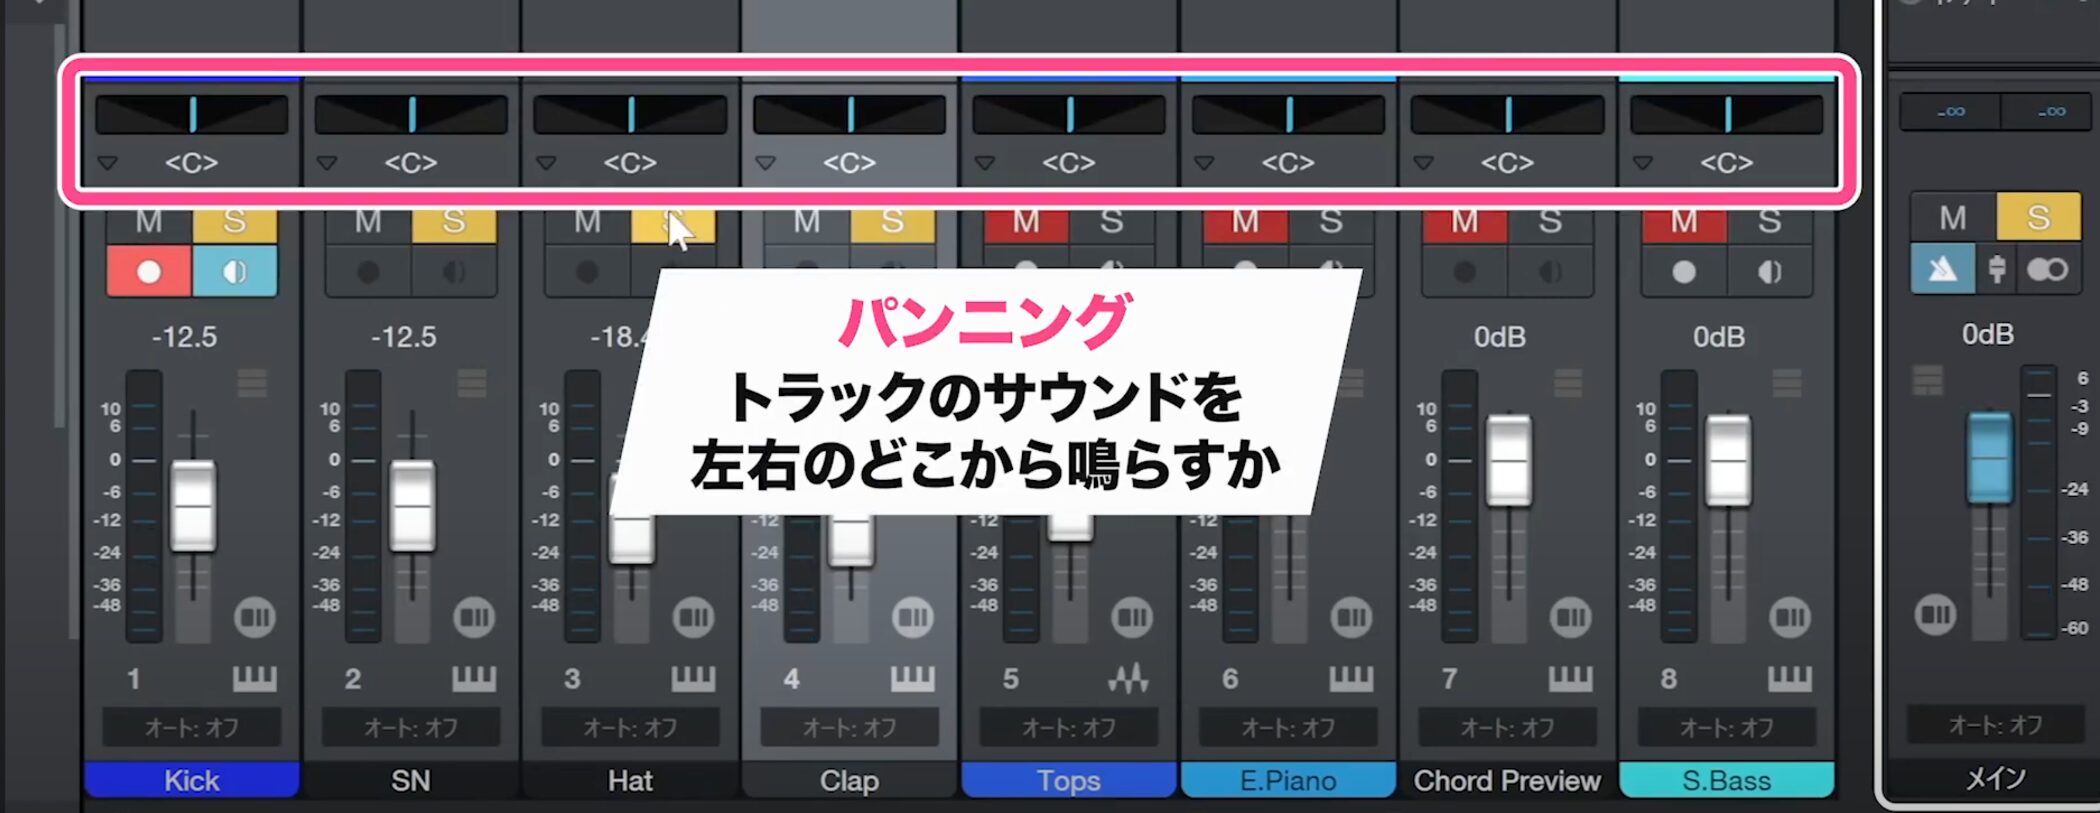
Alongside volume balance, adjust the panning.
Panning lets you place the sound of each track at a chosen position between left and right.
This clarifies where each instrument is heard and gives the overall sound a sense of space.
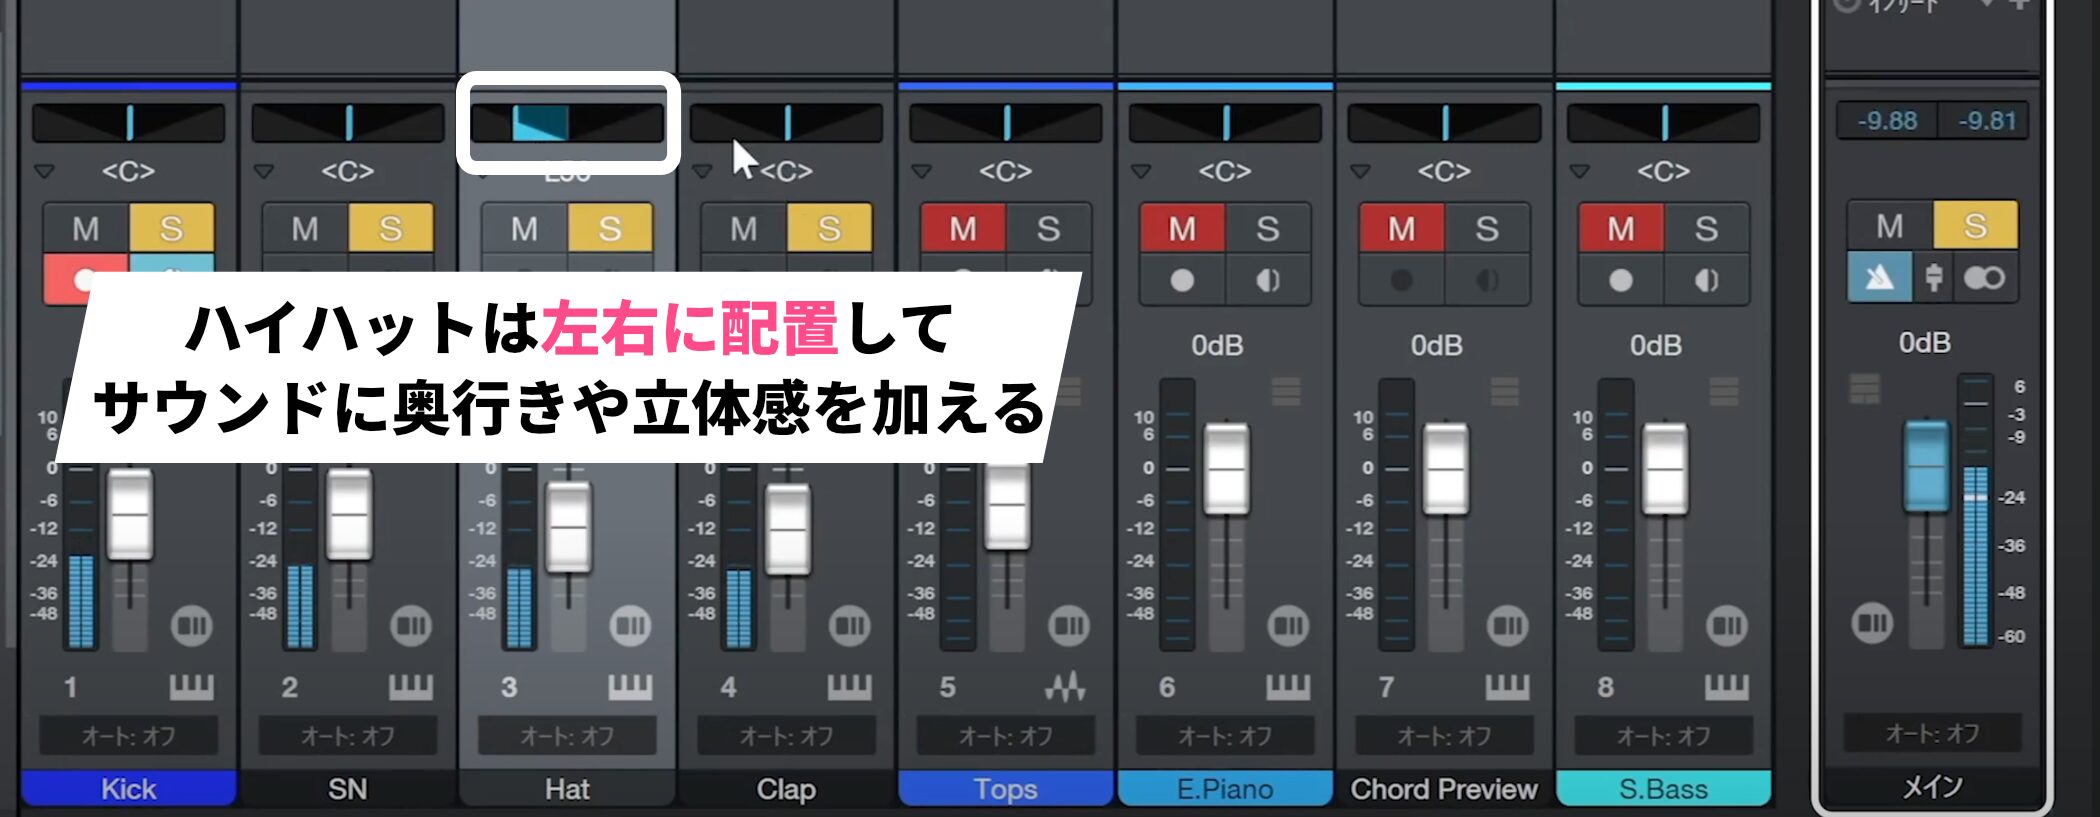
Hi-hats are often panned to the sides to add depth and spatial interest.
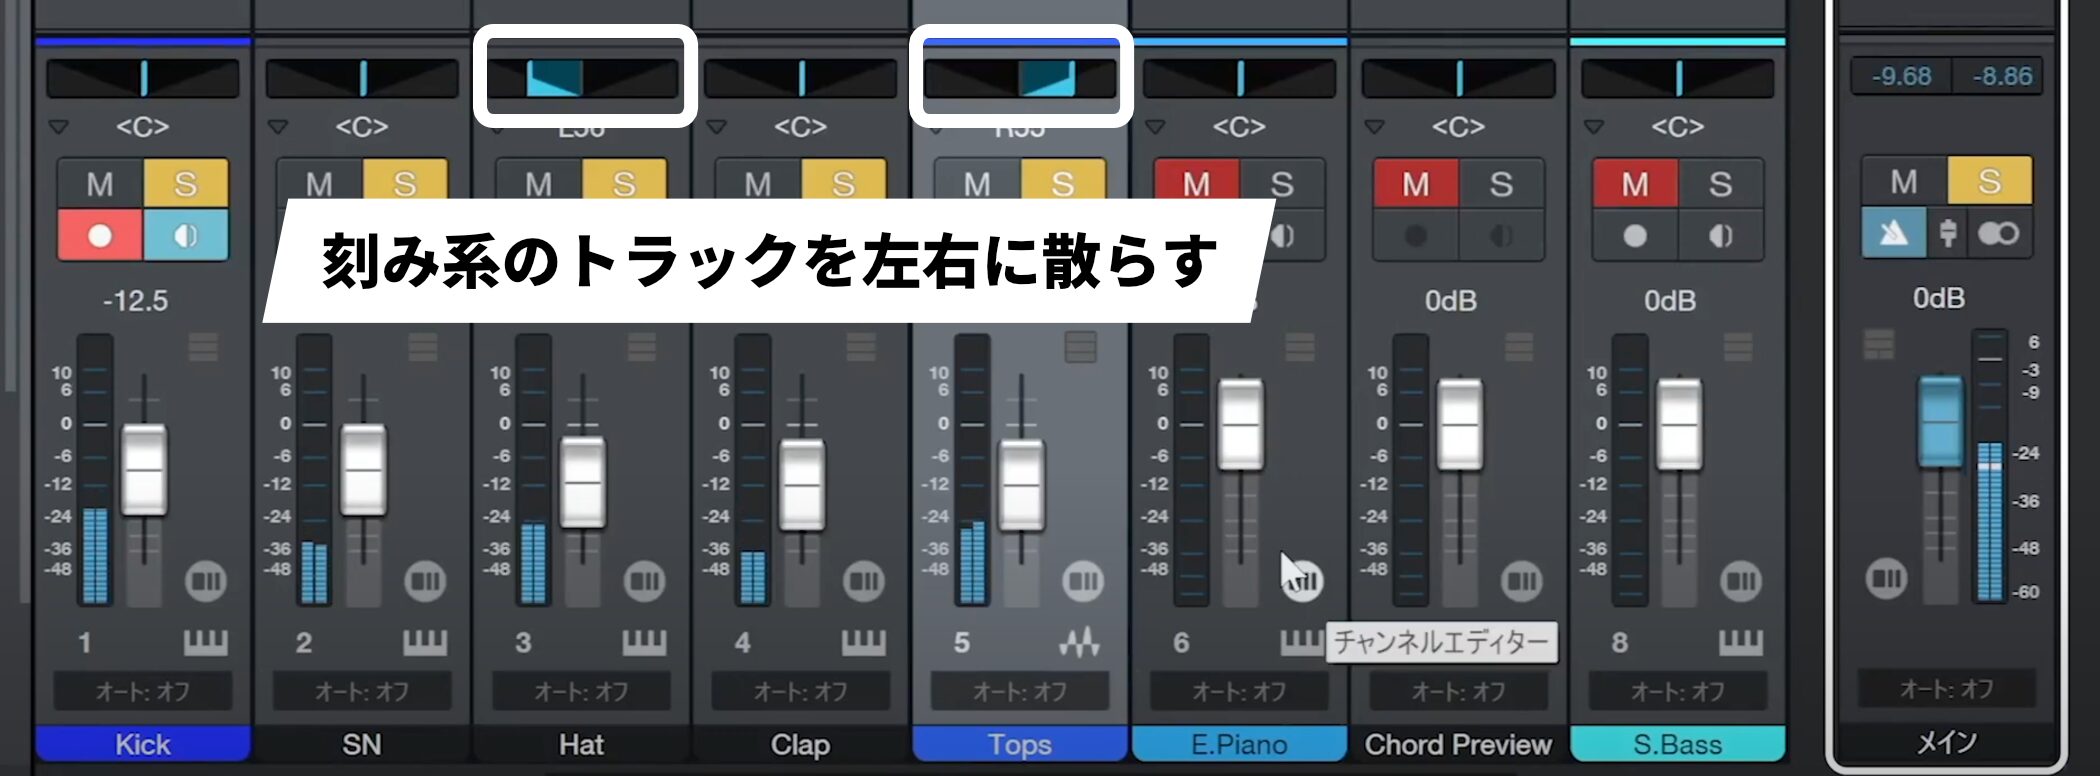
As shown, spreading rhythmic parts across the left and right is another common technique.
A note on overall listening volume
Lowering the overall mix level also reduces the sound coming from your speakers or headphones.
In that case, the usual approach is to raise the volume on your audio interface or computer instead of turning up Studio One.
Frequently asked questions
Q1. What is the Console used for in music production?
The Console is a mixer that shows tracks side by side so you can efficiently adjust their volume and pan and use mute and solo. The master channel manages the overall level, helping you balance the mix while avoiding clipping.
Q2. When should I use solo and mute?
Solo plays the selected track alone and automatically mutes the others. It is useful for checking and adjusting a particular track. Use S for solo and M for mute on the keyboard.
Q3. What is multi-output routing?
It assigns instruments within one sound source—such as a drum kit’s kick, snare, and hi-hat—to different outputs, allowing independent control in the Console. This gives you finer volume and effects control.
Q4. How should I set the master fader?
As a basic approach, leave it at 0 dB. Adjust the individual track faders and aim for a master peak around −15 dB to maintain headroom while balancing the mix.
Q5. What are the basic steps for setting volume?
Start with the fader at its minimum and raise it gradually, beginning with the kick. Use the kick as a reference, add the other tracks one by one, and balance them while keeping the master peak around −15 dB. Hold Shift while dragging for fine adjustment.
NEW ARTICLES
Latest English Articles