Tracking through a compressor means placing a hardware compressor in the recording signal path between the microphone and audio interface to control level differences as you record. Unlike applying compression afterward in the DAW, it can make monitoring easier, speed up mixing, and add a distinctive analog character. Used on vocals and other sources, it is a practical intermediate technique that can stabilize dynamics and expand your sound-shaping options.
Recording with compression: tracking through a compressor
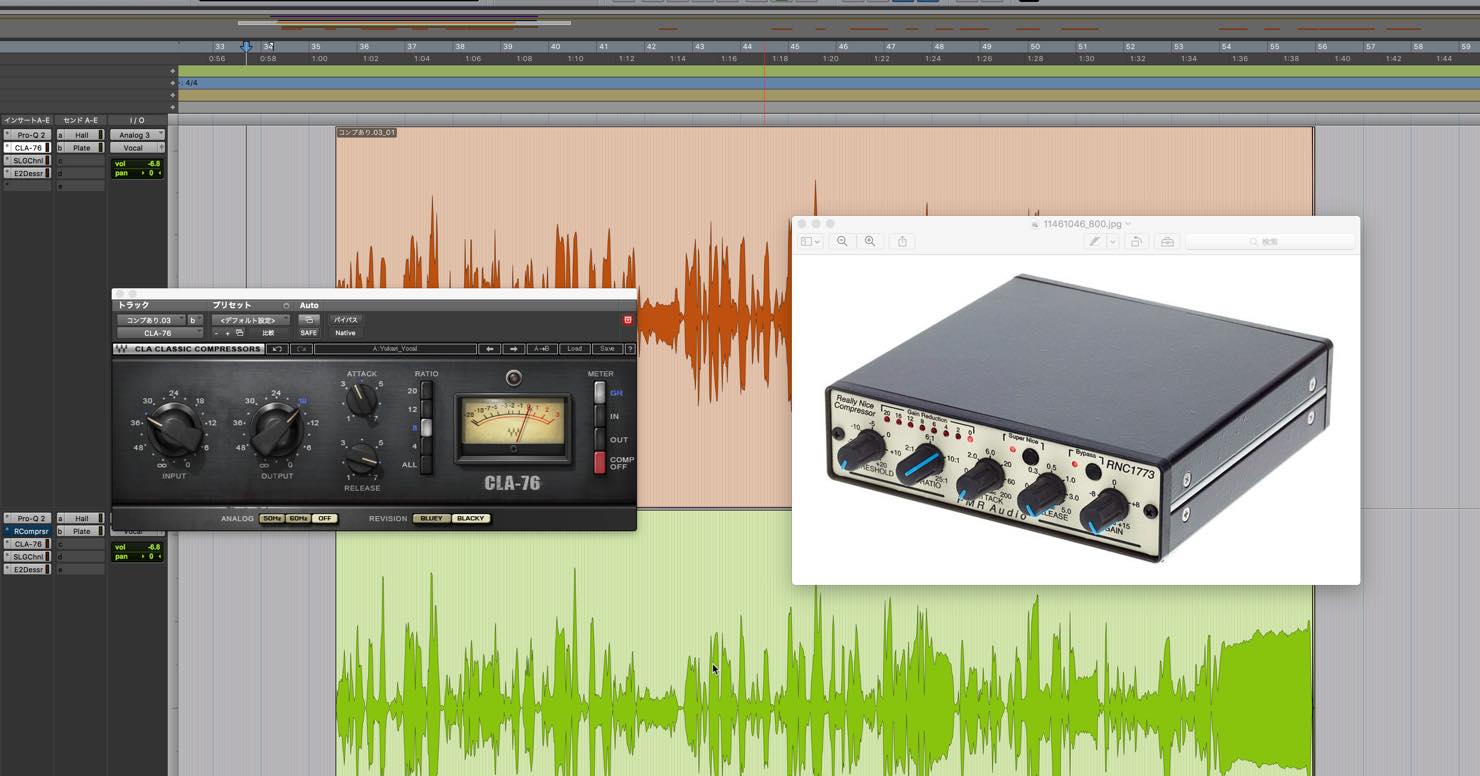
In response to many requests, we will explain how to record through a compressor.
In an age dominated by digital effects in the DAW, many people may wonder what the benefit of recording with compression already applied is.
We will explore that question and how to use hardware compressors, which are commonly used for this technique.
Video tutorial: recording through a compressor
Selected questions and answers from the YouTube video

Is there an advantage to using a hardware compressor because you can record louder without worrying about excessive gain?

Be careful: excessive input can cause distortion inside the equipment. The advantage is not simply a louder recording, but capturing a more controlled level in the DAW.
Hello. I am finally considering buying an RNC1773, but I currently use a UR22mk2 audio interface. What cables and routing do I need to connect the compressor?
The original answer suggested TRS cables like these, with two for stereo. The required cables and signal path depend on the equipment and its available connections; check the manuals and use a suitable mic preamp or insert rather than assuming a direct microphone connection: https://www.soundhouse.co.jp/search/index?s_category_cd=697&i_type=c
Depending on the DAW, if you record both a compressed and an uncompressed signal in parallel, can you make any changes afterward?
Yes. Recording both versions can be a safer option. Here are examples of the approach: Logic: https://sleepfreaks-dtm.com/for-advance-logic/aux-rec/ Cubase: https://sleepfreaks-dtm.com/for-advance-cubase/rec-rooting-cubase/
The RNC1773 has no XLR inputs or outputs. How do you connect a condenser microphone? If you use an XLR-to-phone cable, the interface cannot supply phantom power through it, can it?
For a condenser microphone, use a mic preamp with phantom power, or an interface insert where available. A tube microphone with its own power supply is another option.
Tracking with compression versus applying it afterward
First, let’s briefly review what a compressor does.
It reduces large differences in level when recording acoustic instruments or vocals, making them easier to hear and helping them sit in the mix.
What is the difference between applying compression afterward in a DAW and recording through it?
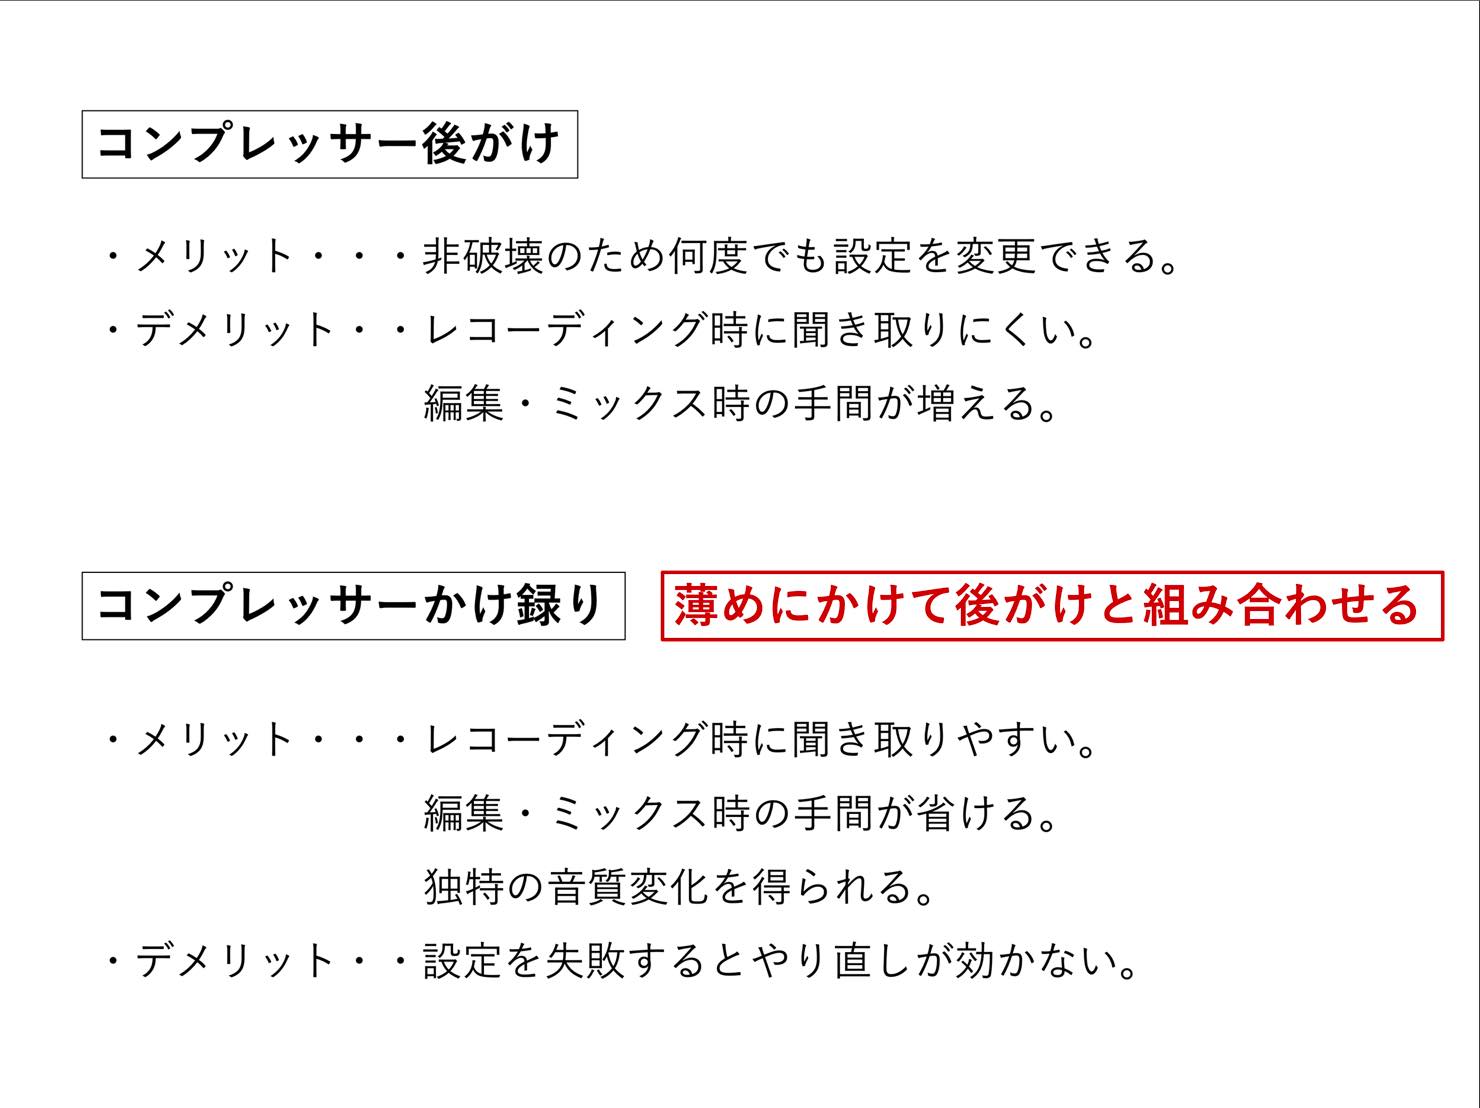
The two approaches have largely opposite strengths and weaknesses.
It may be difficult to appreciate without trying it, but easier monitoring and faster mixing when tracking through a compressor can turn out to be surprisingly valuable.
Also, the distinctive character of a hardware compressor can be hard to replace when it suits the sound, although the result depends on the device.
To reduce the drawbacks of recording with compression, apply it gently and combine it with compression afterward.
Connecting a hardware compressor
Let’s look at the connections for recording through a hardware compressor.
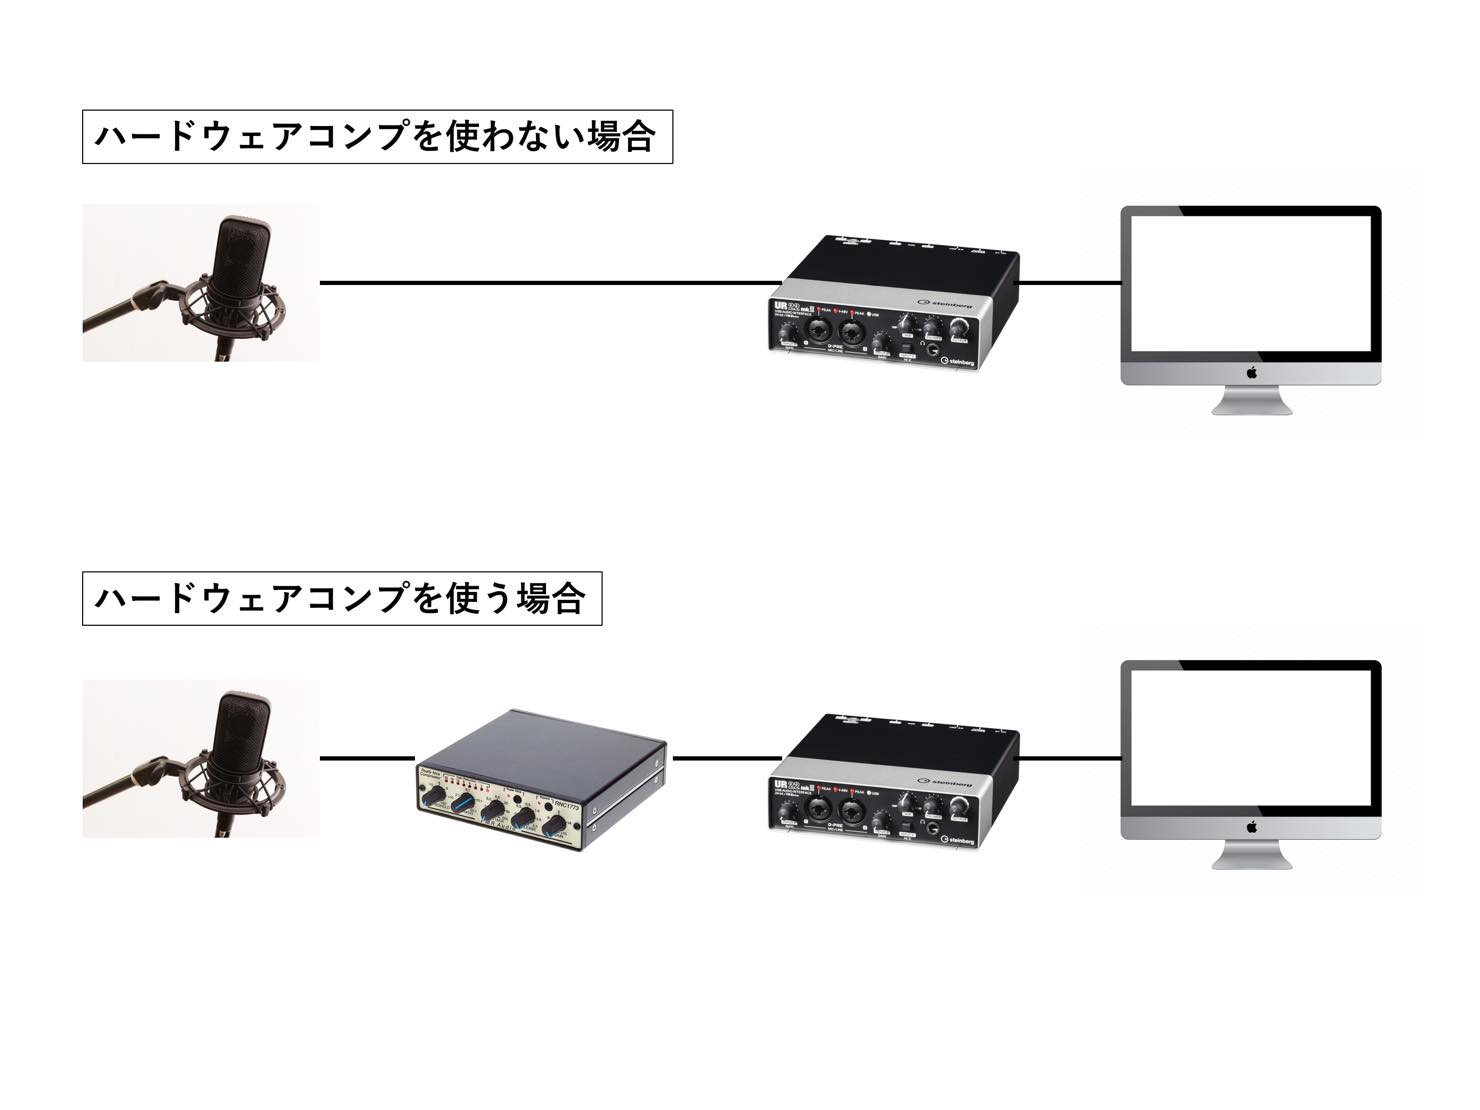
The diagram shows a simple signal path with the compressor between the microphone and the audio interface. Use a suitable microphone preamp before a line-level compressor; do not assume that the microphone can connect directly to it.
When using a microphone preamp, the compressor is often placed between the preamp and the interface.
Alternatively, some interfaces have an INSERT connection for the compressor.
An example of recording with compression
What difference does it make in practice?
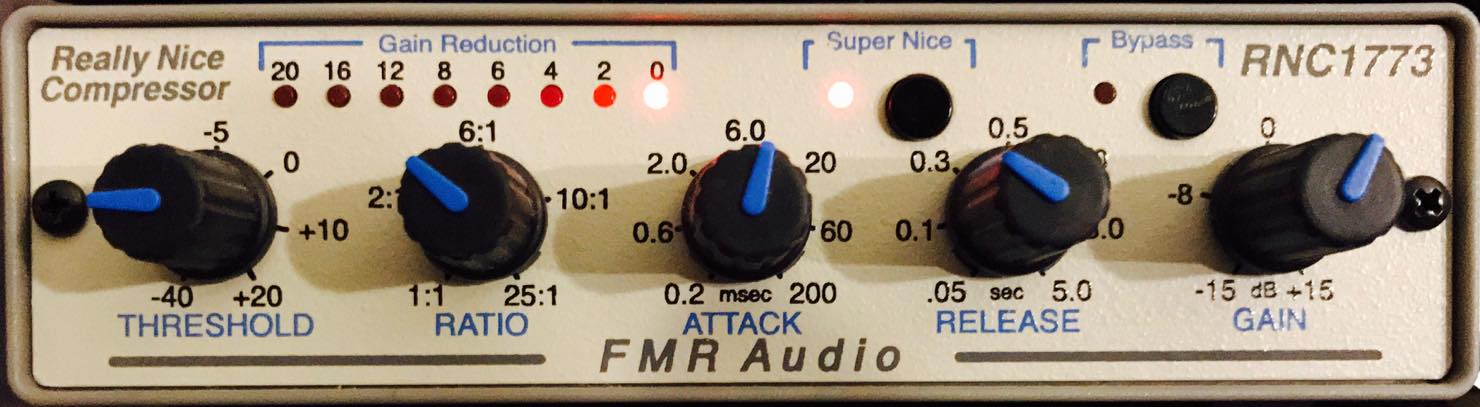
For this vocal example we used the FMR AUDIO RNC1773, an affordable unit suitable for home recording.
The settings are shown below.
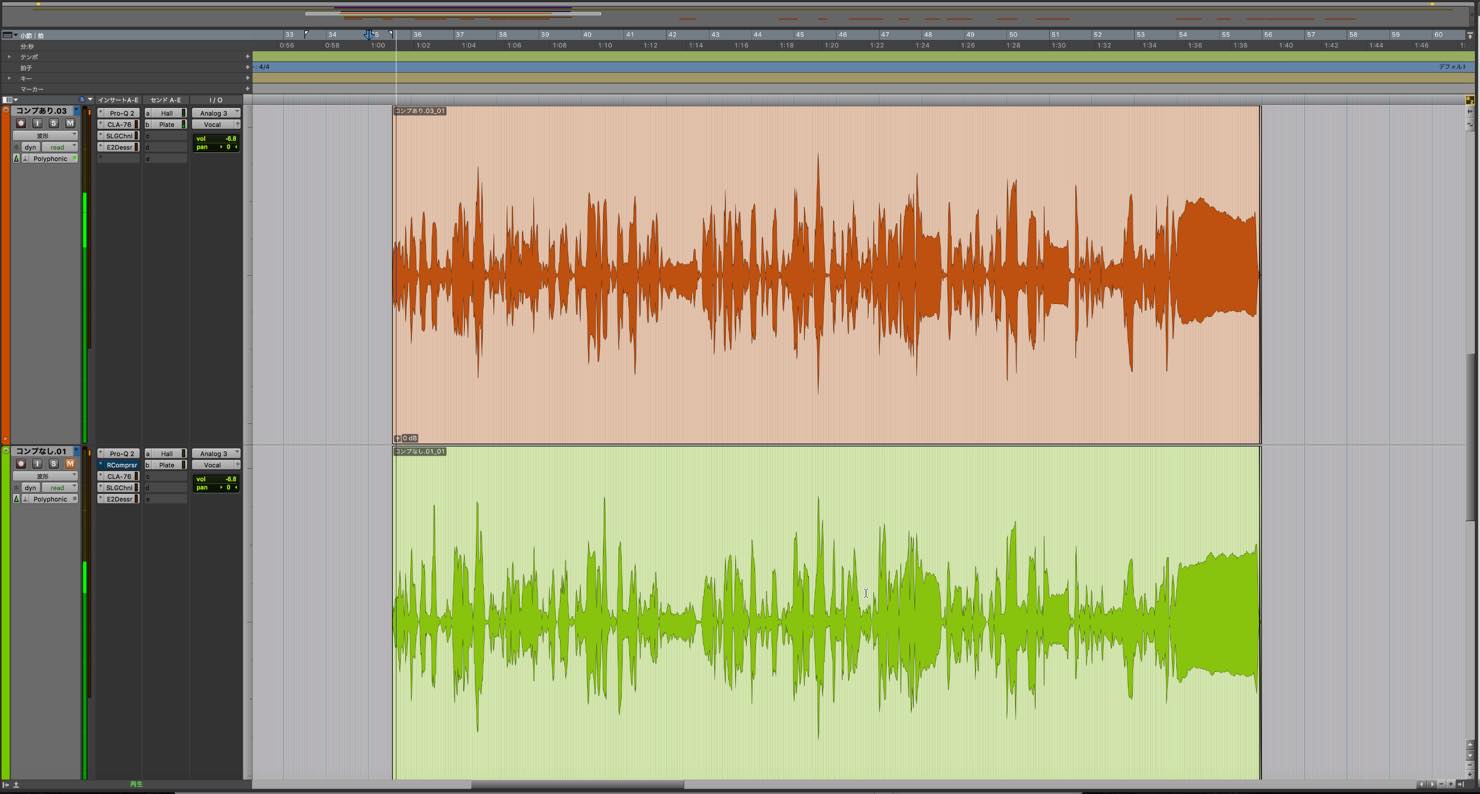
We processed both the compressed and uncompressed recordings through exactly the same plug-ins and matched their levels.
- Recorded without compression
- Recorded with compression
As expected, the compressed recording has more consistent dynamics.
The recording made without compression would likely need a little more detailed attention.
To examine the effect of the hardware, let’s also listen to the uncompressed recording with a compressor plug-in added afterward.
- Uncompressed recording with a compressor plug-in added
What do you think?
Taste plays a part, but you may hear the distinctive character added by the analog hardware.
Recording through a compressor is not essential for every session, but it is a technique worth trying once you have some recording experience.
It can improve workflow and expand your sound-shaping options.
Frequently Asked Questions
Q1. What is the main difference between recording with compression and applying it afterward?
Recording with compression can make monitoring easier and mixing faster, but the recorded compression cannot be adjusted afterward. Applying it later offers more flexibility, although mixing dynamic variation may take more work. Combining the two can be effective.
Q2. Can I record through a compressor at home?
Yes. A cost-effective device such as the FMR AUDIO RNC1773 can make the technique accessible in a home studio without a large initial investment.
Q3. Do hardware and plug-in compressors sound different?
They can. Analog hardware can add its own character, resulting in a different texture from a plug-in. Choosing according to the sound and the song can expand your options.
Q4. What does applying compression gently mean?
It means using a low degree of compression for a subtle effect. This makes it easier to combine with later compression and limits the loss of flexibility that comes from committing compression during recording.
NEW ARTICLES
Latest English Articles