
Introduced in Cubase 7, CurveEQ is an equalizer that supports up to 60 EQ points. This article covers adding, removing and adjusting points, using shortcuts for precise edits, and analyzing a reference track to generate a matching EQ curve. Applying the spectral characteristics of a favorite track to your own work can help you approach a target sound when mixing or mastering vocals and instrumentals.
A Powerful Equalizer with Up to 60 EQ Points
A notable addition in Cubase 7 is CurveEQ.

It lets you place up to 60 EQ points,
giving you detailed control over your sound.
It also offers an interesting way to use those points:
you can apply the sound characteristics of a favorite track to your own song.
Let’s take a look.
Cubase 7 CurveEQ Video
Harmony Voice
Chord Assistant
MixConsole Setup
MixConsole: Reverb and Pan Techniques
MixConsole: Inserts and Channel Strip
MixConsole: Vocal Processing and Routing
Loudness and RMS Meters
CurveEQ (this page)
Video Highlights: Adding and Removing EQ Points
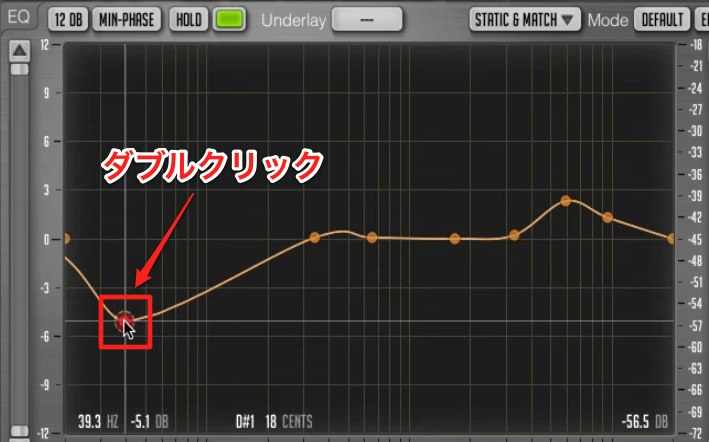
Double-click the desired position to add an EQ point.
Double-click an existing point to remove it.
Video Highlights: Adding Points in Freeform Mode
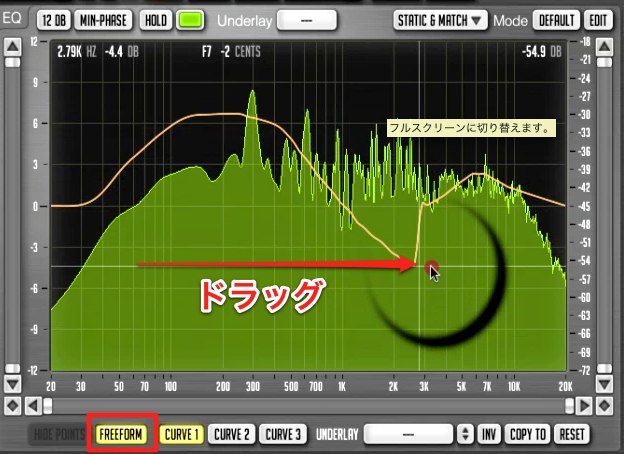
Enable FREEFORM to add EQ points as if you were drawing.
Simply drag across the display.
Video Highlights: Adjusting EQ Points
Drag an added point to edit it.
As with a standard EQ, the vertical axis represents level and the horizontal axis represents frequency.
Shortcuts are available when moving points.
Fine Adjustment
- Mac and Windows: Shift
Hold Shift while moving a point to slow its movement for more precise adjustments.
Adjusting Level Only
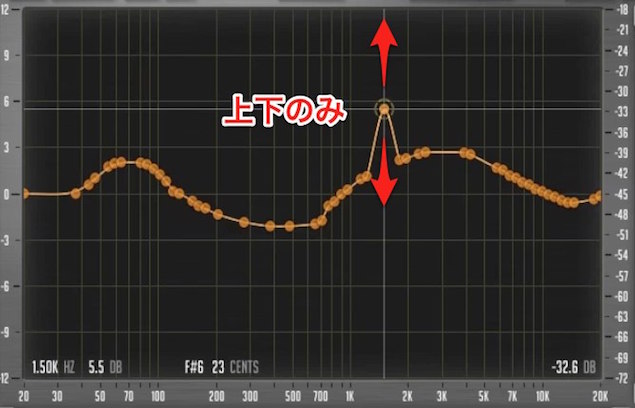
- Mac: Command
- Windows: Control
The frequency on the horizontal axis is locked, so only gain (level) can be adjusted.
Adjusting Frequency Only
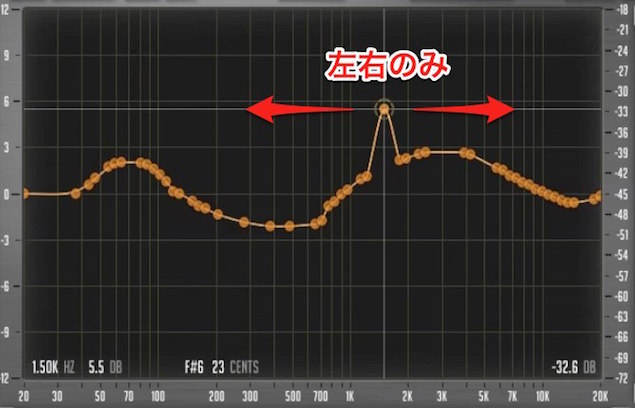
- Mac: Option
- Windows: Alt
Gain (level) is locked, so only frequency on the horizontal axis can be adjusted.
Using Zoom
Zooming lets you adjust points more precisely.
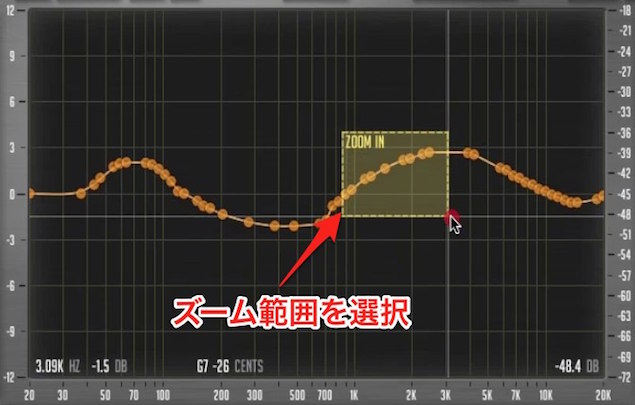
- Mac: Option
- Windows: Alt
Hold the appropriate key and drag over the area you want to enlarge.
To exit zoom,
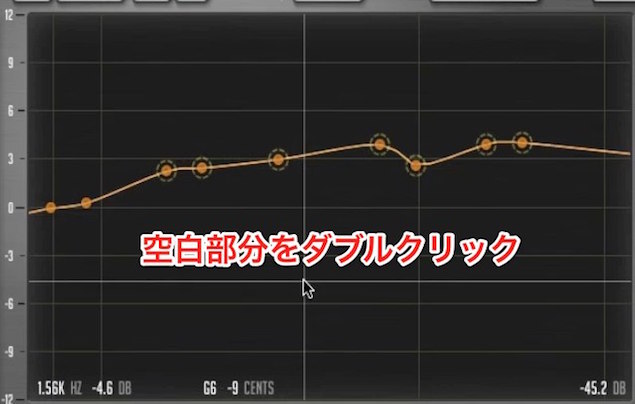
hold Option or Alt and double-click an empty area.
Video Highlights: Analyzing a Reference Track
You can analyze the frequency spectrum of a track whose sound you want to approach and apply a matching curve to your own track.
In this example, two songs are loaded and CurveEQ is inserted on Stereo Out.
1. Change the Mode to AVG
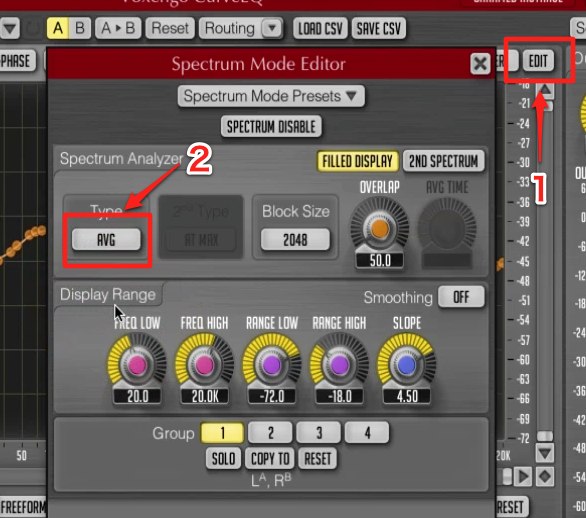
Click EDIT, outlined in red.
In the menu, change Type to AVG.
2. Analyze the Frequency Spectrum
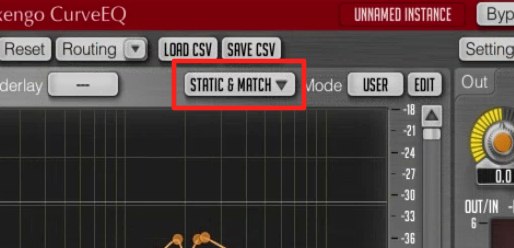
Click STATIC & MATCH.
The following window opens.
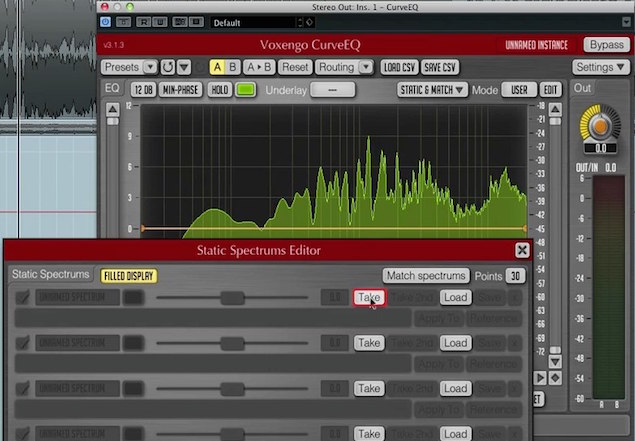
Play the reference track.
Play it for about 10 seconds to capture its average spectrum.
Mute all tracks except the reference while doing this.
Then press Take.
Next:
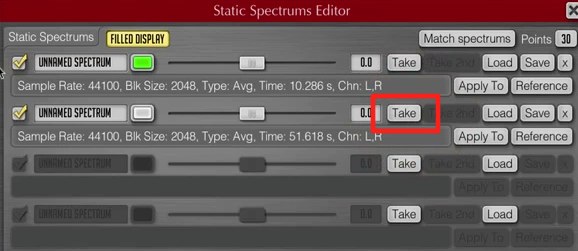
Play the track you want to process and press the lower Take button.
Mute all tracks except the track being processed while doing this.
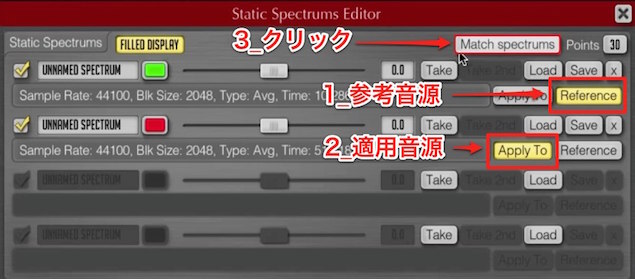
- 1. Set the reference recording as Reference.
- 2. Set the recording to be processed as Apply to.
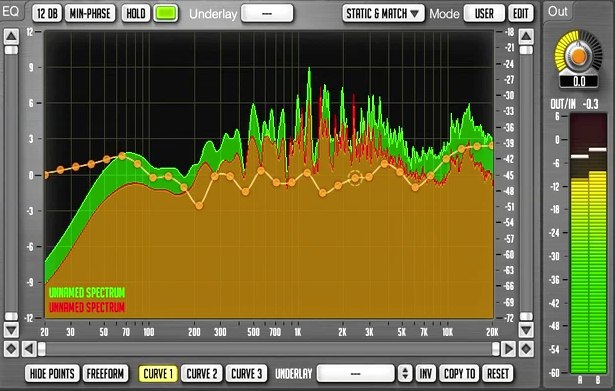
- 3. Click Match spectrums.
An EQ curve is generated to bring the processed track closer to the reference.
Frequently Asked Questions
Q1. How many EQ points can CurveEQ use?
CurveEQ supports up to 60 EQ points, allowing detailed adjustments to complex frequency curves.
Q2. How do I apply a reference track’s spectrum to my own track?
In STATIC & MATCH, play and capture roughly 10 seconds of each track, assign the reference recording to Reference and your track to Apply to, then click Match spectrums. CurveEQ generates a matching EQ curve.
Q3. How can I adjust only gain when moving an EQ point?
Hold Command on Mac or Control on Windows while dragging to lock frequency and adjust gain. To adjust only frequency, use Option on Mac or Alt on Windows.
NEW ARTICLES
Latest English Articles







































































































































































































































































































































































































































































































































































































































