ミックスが上手くなるTIPS Waves Horizon Bundle 活用術
さらなる高みを目指す方へ

今回は前回のWaves Platinumから、Horizonにアップグレードした際に、追加されるプラグインにフォーカスして、Tipsをお送りしていきます。
その中でもぜひ持っておきたい魅力的なプラグインをピックアップしましたので、どうぞ最後までご覧ください。
それでは、各プラグインの詳細を見ていきましょう。
ミックスが上手くなるTIPS Waves Horizon Bundle 活用術 動画


ビンテージ機材のモデリング・プラグイン
まずは、Horizonで追加された各種ビンテージ機材のモデリング製品についてです。
今回はその内3つをピックアップし、それぞれの使い所などについてご紹介したいと思います。
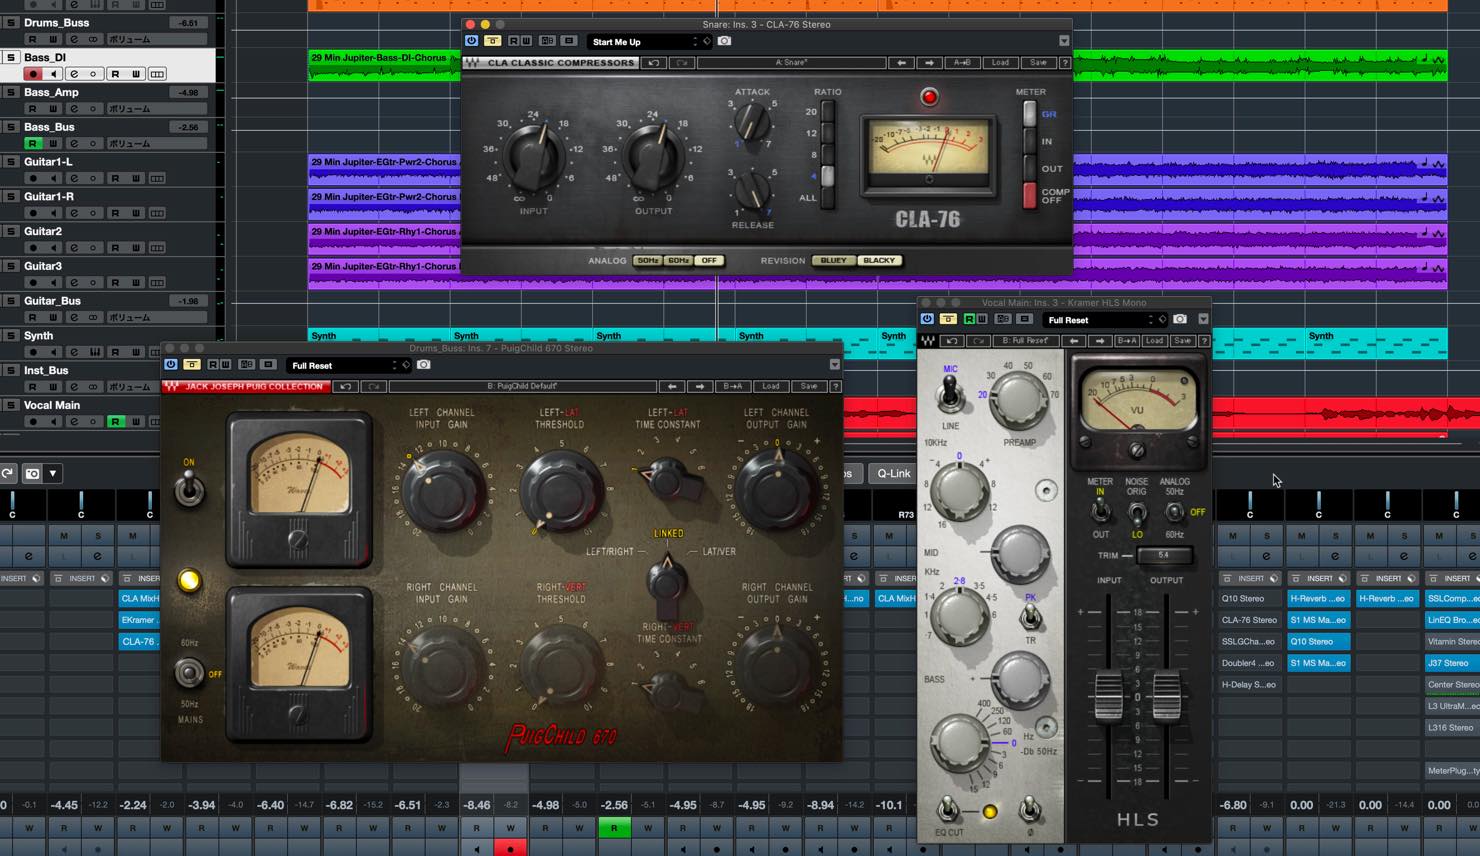
CLA-76
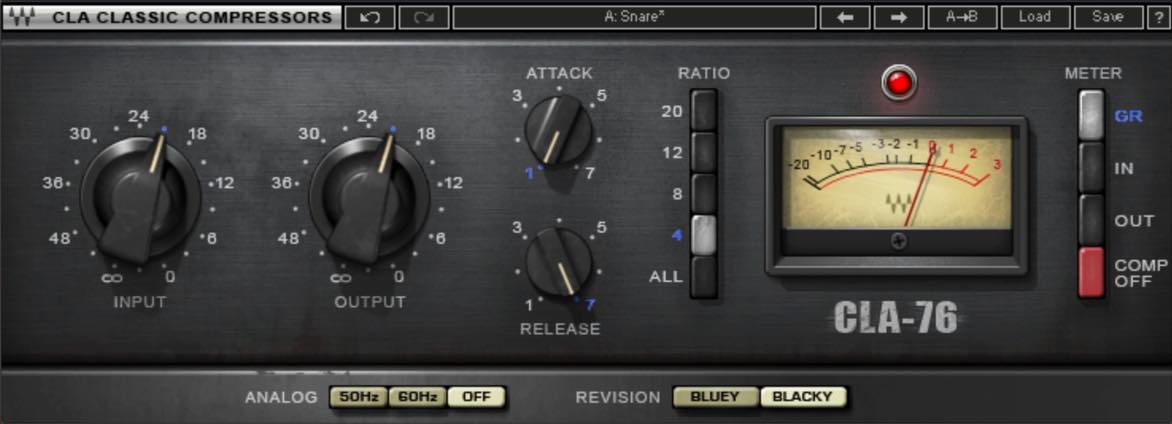

こちらは、グリーン・デイやアヴリル・ラヴィーン、サンタナなどを手がけた著名なエンジニア、クリス・ロード・アルジ氏が所有する1176を忠実にモデリングしたプラグインです。
1176系コンプの使用方法やFETコンプの特徴についてはこれまでの動画でも触れてきたところですが、やはりこの高速なアタックはドラムなど鋭いトランジェントの楽器に向いています。
CLA-76に特徴的なのは、BlackyとBlueyという別の個体が一つにパッケージされており、すぐに切り替えられる点です。
例としてスネアに適用してみます。
まずはバイパスと比べてみましょう。
▶︎バイパス
▶︎Blacky
太く力強いスネアになりますね。
次にBlackyとBlueyの違いを聴き比べてみましょう。
▶︎Blacky
▶︎Bluey
Blueyの方がアタックが鋭く、サスティンの粘りも出ていて、アグレッシブなサウンドですね。これはどちらが良いというわけではなく、楽曲の雰囲気や好みでチョイスすべきものでしょう。
こういった比較を手軽にできる点が、CLA-76の優れているところだと思います。
PuigChild 670
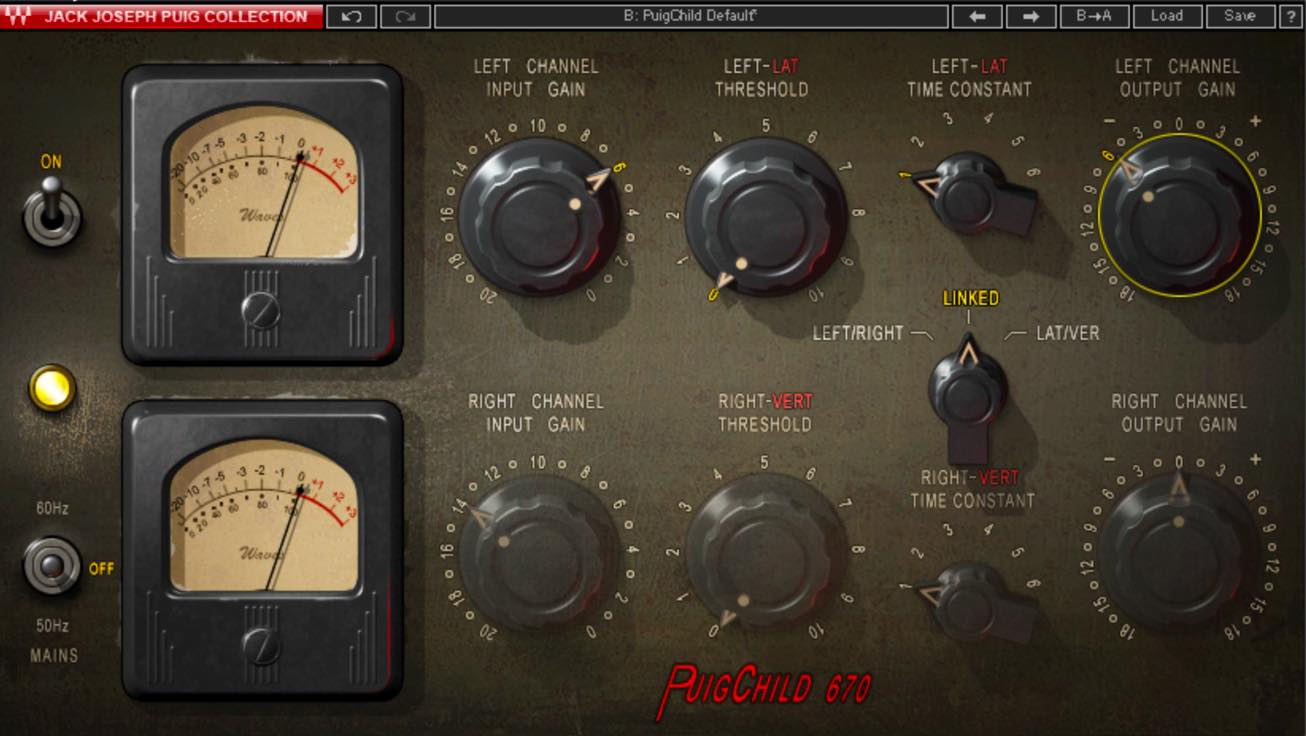
こちらはジャック・ジョセフ・プイグ氏が所有するFairChild670を忠実にモデリングしたプラグインであり、通すだけでも得られる独特の質感が特徴です。INPUT GAINとTHRESHOLDが分かれていますので、欲しい倍音の質感を容易にコントロールすることができます。
例としてドラムバスに適用してみます。今回はコンプレッションは行わず、あくまで音質の変化だけを検証してみましょう。
デフォルトのINPUT GAINでも、やや音質は変化します。バイパスと比べてみましょう。
▶︎バイパス
▶︎INPUT GAIN -14db(デフォルト)
スネアは高域に伸びが出てカラッとした印象になり、ハイハットには若干ざらつきが加味された感じがしますね。
この傾向をもっと顕著にしたい場合、INPUT GAINを上げていくことになります(INPUT GAINをあげると当然音量が上がりますので、OUTPUT GAINを下げて調整します)。
▶︎INPUT GAIN -6db
さらに倍音が付加されて派手な印象になってきました。
▶︎INPUT GAIN 0db
スネアやハイハットの変化もさることながら、キックにも重さが加わり、全体的にビッグな印象になりましたね。
これらも、どの設定が一番というわけではなく、楽曲に合わせて決めていきましょう。
Kramer HLS Channel
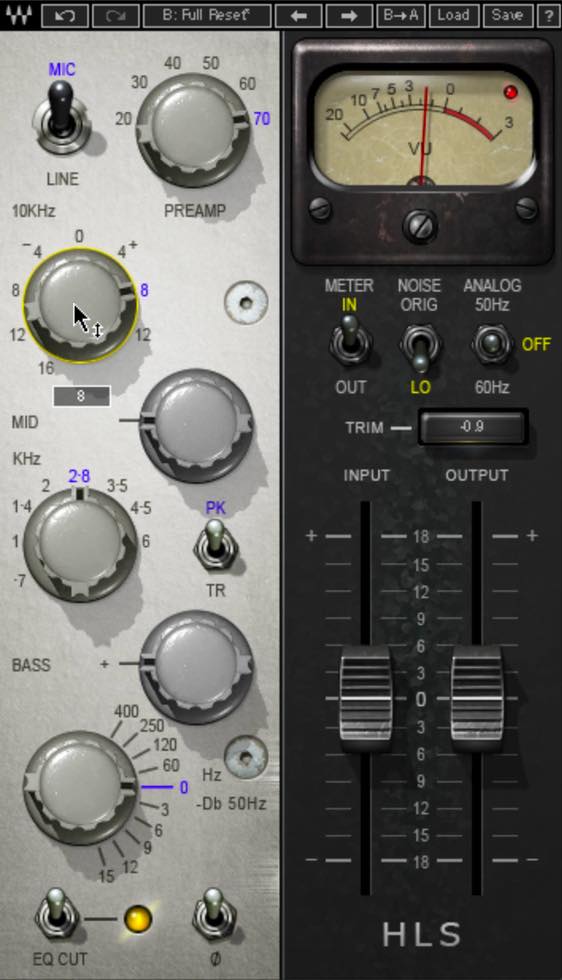
これは、 エディ・クレーマー氏との共同開発で、ロンドンの有名なOlympic Studioで使用された、HeliosコンソールのEQ部をモデリングしたものです。
チャンネルと名の付く通り、単なるEQではなくプリアンプが備わっている点が特徴です。
このプリアンプは上げていくと倍音が付加されるだけでなく、中域に何とも言えない温かみが加えられるように感じます。音量が変わらないのも便利です。
EQは非常にスムーズで繊細な効き方をするのですが、中でも気に入っているのがHigh Frequency Gainです。これを上げていくと、明瞭感が上がりながら、まさにザ・アナログといったサウンドに変化し、耳に刺さることがありません。
ボーカルに適用してみましたので、違いを確認してみてください。
▶︎バイパス
▶︎適用後(PREAMP 70, High Frequency Gain +8)
この、プリアンプと高域の組み合わせて、エンハンサー的に使うと、心地よく一歩前に出るサウンドを作れると思います。
Vocal Rider
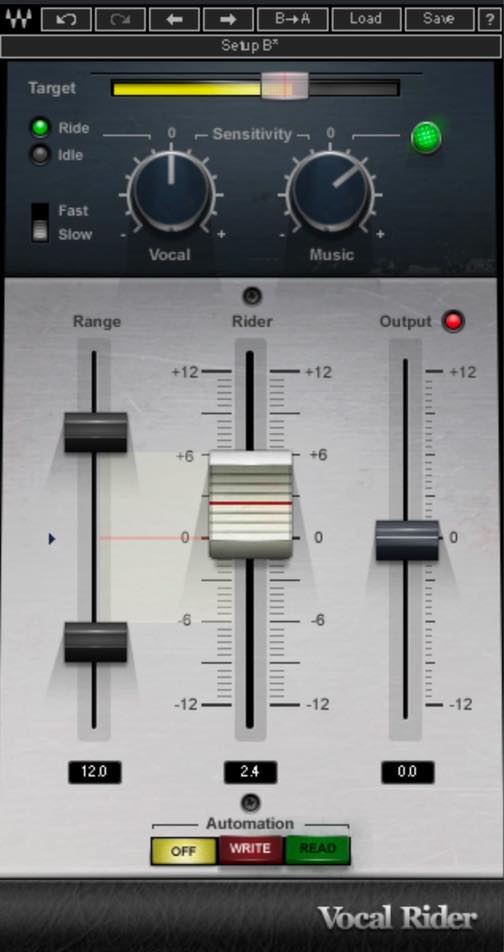
こちらは以前動画解説を行ったものになりますので、詳細な操作方法はそちらの動画もご参照ください。
今回は改めてこちらのプラグインの魅力、特にMusicツマミの機能について触れておきたいと思います。
Musicツマミは、オケからのサイドチェインを受けて、オケのボリュームも考慮に入れつつボーカルのダイナミクスを調整してくれるというものです。
サイドチェインを入れてMusicツマミを有効にするとどう変化するか、聞いてみましょう。
▶︎サイドチェインOFF
▶︎サイドチェインON
サイドチェインオンとオフを比べると、オンの方が若干ボーカルのボリュームが上がったように感じます。
これは、こういったラウドなオケに対してボーカルが負け気味なので、それを考慮して音量の底上げをしてくれていると考えられます。ある意味、Vocal Riderから、フェーダーの基準値を提案されているようなものですね。
Musicツマミはもちろん単純に底上げしてくれるだけのものではありません。曲中のオケの音量の変化に合わせて、ボーカル音量の基準を最適化してくれます。
今回はシミュレーションとして、ギターをミュートした時との差を比べてみましょう。
▶︎ギターミュート
▶︎ギターあり
若干ですが、ギターなしの時の方がフェーダーの上がり方が小さく、オケに対して大きくなりすぎないように調整してくれています。
このように、オケの変化に合わせてフェーダーをコントロールしてくれる点が、Musicツマミを使用することの大きなアドバンテージと言えます。
Bass Rider
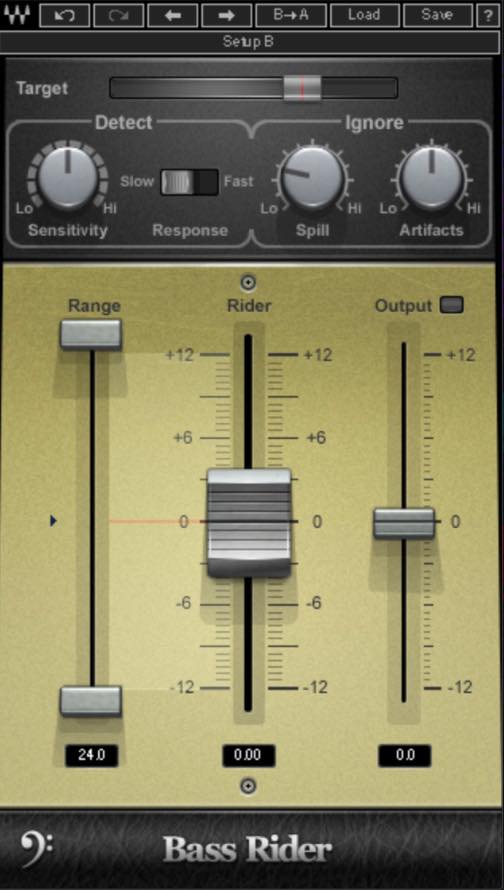
こちらはベースのフェーダーを自動的に調整し、ダイナミクスを整えてくれるプラグインです。
コンプだけでは対応しきれない部分をカバーしたり、コンプによる音質変化を最小限に抑えながら音量調整をしてくれる点が特徴です。
また、ベースの特性に最適化されているため、Vocal Riderとは違う独特の動き方をします。
設定項目は以下の通りです。
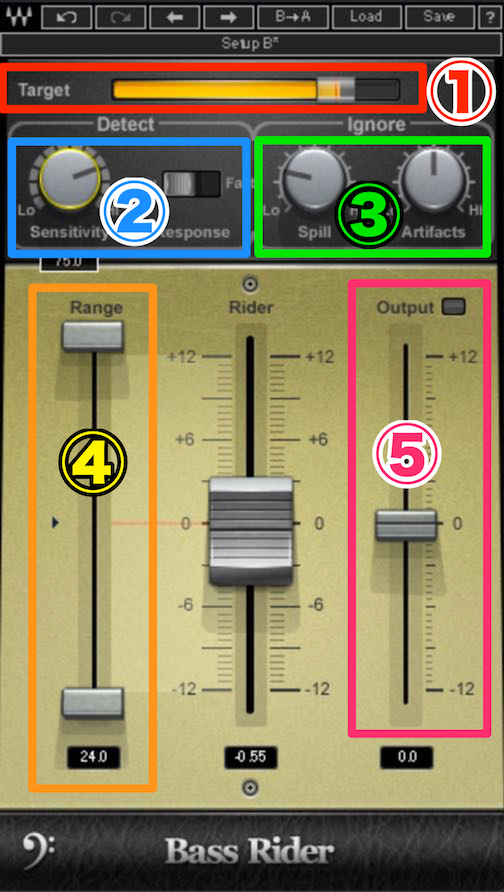
- ①Target:フェーダーを動かす際の基準となる音量を決めます。通常メーターのピーク付近を狙います。
- ②Detect:音量変化に追従する感度とスピードを決めます。フェーダーが小刻みに震えない程度に設定するのがコツです。
- ③Ignore:演奏部分以外の音をどの程度無視するかを決めます。なければ設定の必要はありません。
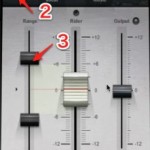
- ④Range:フェーダーの可動範囲を決めます。
- ⑤Output:最終的な出力音量を決めます。
再生してフェーダーを見てみると、一音一音を正確にBass Riderが検知してフェーダーを動かしているのがよくわかると思います。
ミックス全体の中で聞きながらバイパスと比べてみましょう。
▶︎バイパス
▶︎適用後
弦やポジションによる音量の違いが解消されて、低域がしっかりと安定しました。このような安定感は、ミックスにおいて非常に重要な要素となります。
聴き分けやオートメーションを書くのは中々熟練の技が必要なので、手軽に効果を得られるBass Riderは、ミックス初心者にとっても非常に心強いプラグインと言えます。
Center
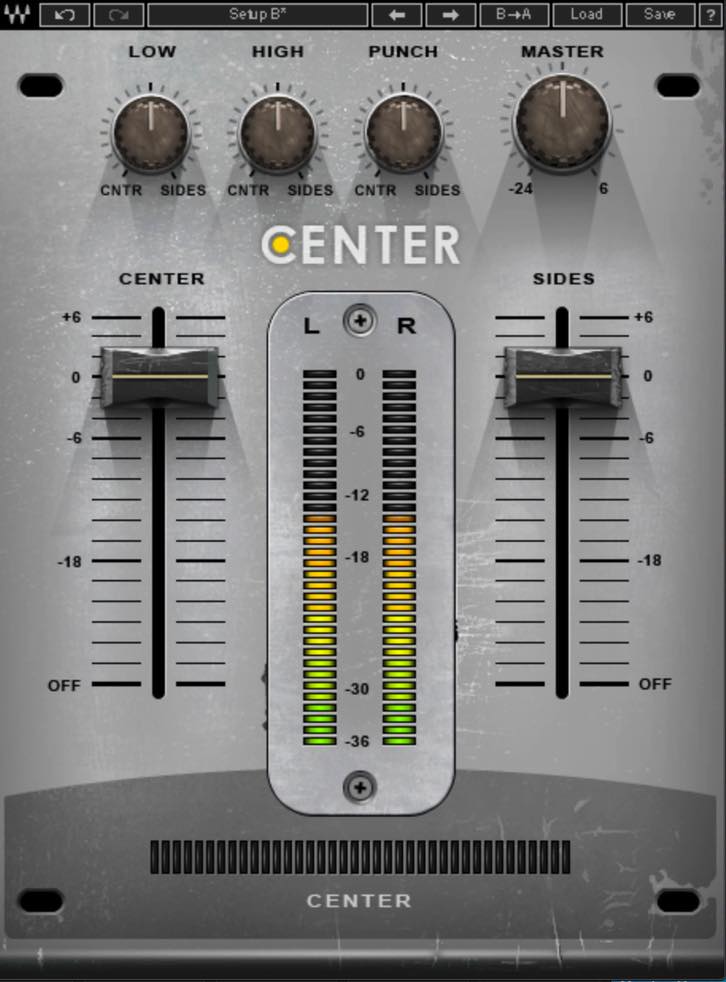
Centerと言えば代表的な使い方は、マスターに挿してサイドを上げる、というものですが、今回はそれ以外の活用方法をご紹介したいと思います。
こちらも、以前動画解説を行っていますので、詳細な操作方法はそちらもご覧ください。
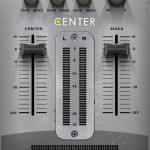
一つは、両サイドに振っている楽器のバスにインサートし、CENTERを下げてボーカルのスペースを作るという使い方です。今回はギターバスに適用してみます。
やり方は非常にシンプルで、CENTERのスライダーをやや下げるだけです。この際、質感が変わりすぎない程度のレベルにとどめるのがポイントとなります。
ボーカルの抜け具合に注目しながら、バイパスと聴き比べてみてください。
▶︎バイパス(ギターバス)
▶︎適用後(ギターバス)
仕組み的な話になりますが、CENTERスライダーはそもそも中域を中心に効きますので、こういった作業との相性が非常に良いです。
手軽にMS処理が完結する点が魅力ですね。
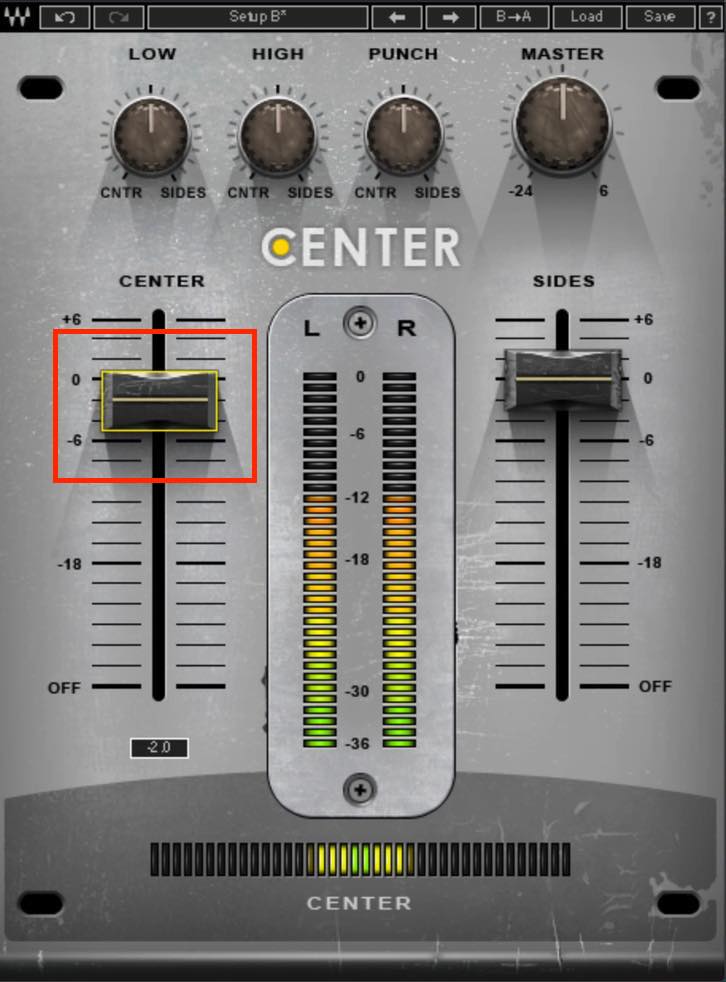
二つ目は、マスターに適用し、スライダーを使わずに、上のLOW、HIGH、PUNCHツマミのみを使用するという方法です。
これらのツマミを上手くセッティングすると、マスターの分離を良くすることができます。
- LOWについては、低域を鳴らしているのは主にCENTER側ですので左に振ってみましょう。CENTERの低域が増強されるとともにSIDESの低域は低減されます。振りすぎるとボーカルが引っ張られて重たくなりますので注意しましょう。
- HIGHは聴感上の影響が大きい帯域ですので、SIDE寄りに振ってやや広がりを出してみます。こちらも振りすぎるとボーカルが引っ張られて散ってしまいますので気をつけてください。
- PUNCHはキックやスネアの存在感を出すのに適しています。CENTER側に振ってややアタック感を出してみましょう。あまりバチバチと言わないくらいにとどめておくのがポイントです。
これでバイパスと比べてみましょう。
▶︎バイパス(マスター)
▶︎適用後(マスター)
不自然にならない程度に分離感が出て、やや広がりも出ましたね。大胆にMS処理をするほどでもないけれど微調整をしたい、といった場合に便利だと思います。
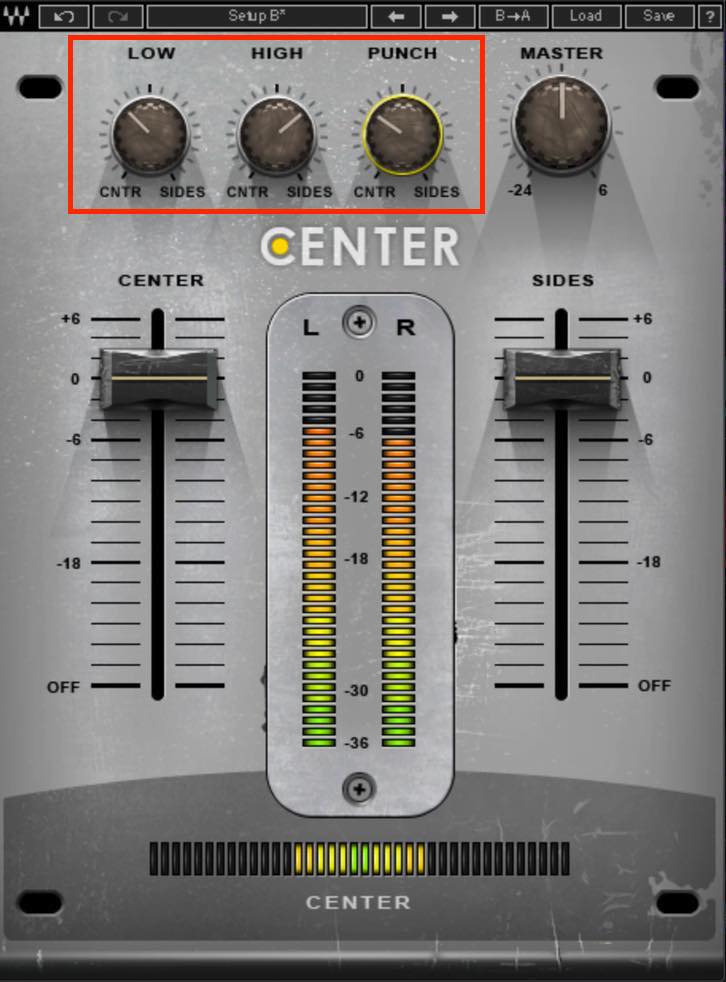
L3-16
Horizonにこれが入っているのは大きいですね。
コントロールするのは6バンドですが、裏側では16バンド個別の処理が行われています。更に自然なマキシマイズが可能になったとともに、積極的な音作りも行えるようになりました。
ThresholdとOut CeilingでマキシマイズするところはL1やL2と同じですが、最大の違いはこの右にあるマルチバンドコントロールです。Linear Phase EQも備えているのですが、何と言っても特徴的なのはPriorityというパラメーターです。このPriorityを上げると、その部分が潰れにくくなります。
実際にセッティングしてみましょう。
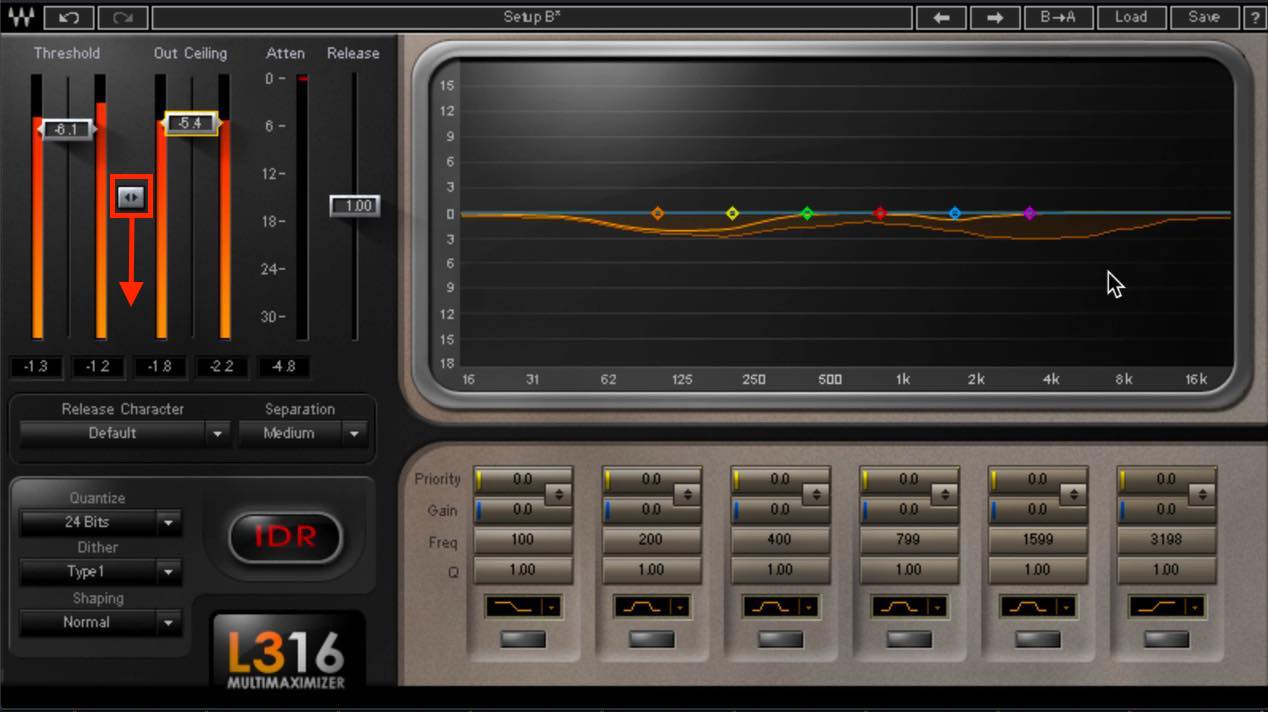
ThresholdはAttenuationが-3dB程度出るところまで下げたいのですが、今回は真ん中のリンクをドラッグしてOut Ceiling も下げておきましょう。その上で若干メイクアップしておきます。これはバイパスとの音質変化を比較しやすくするためです。
右のマルチバンドセクションを見ると、帯域ごとにかかり方が違うのがおわかりいただけると思います。
ここで潰したくない帯域のPriorityを上げてみましょう。
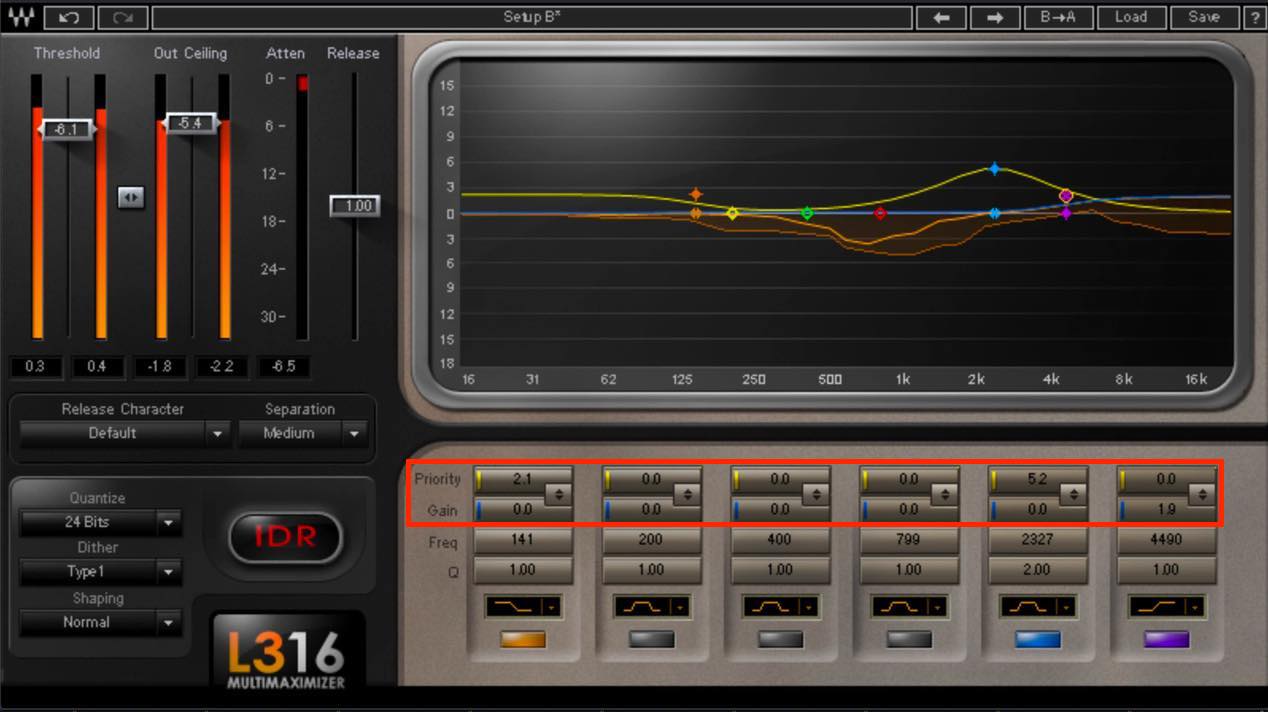
例えば、ボーカルやスネアの倍音に相当する中高域ですね。ローエンドも潰したくないので、少しPriorityを上げておきます。仕上げに空気感を足したいので、高域は少しGainを上げてみてもいいですね。
このように、一見複雑に見えるUIですが、まずはPriorityとGainに的を絞ってサウンドメイクしていけば、比較的わかりやすく使うことができます。
それではどのようにサウンドが変化したか、バイパスと比べてみましょう。
▶︎バイパス
▶︎適用後
適度に締まりながら豊かな低域となりましたが、ボーカルが低域に引っ張られず安定していますね。また、全体的にレンジ感と躍動感のあるサウンドになりました。
マキシマイザーと言えば潰してミックスを劣化させてしまうイメージがありますが、少し工夫すればトータルコンプ的に有効活用することもできます。
このようにHorizonには、スタジオ定番機材のモデリングや、先進の技術を活用したプラグインが多数収録されています。僕個人も愛用しているものが多いので、非常にお勧めです。
さらにミックスやマスタリングを前進させたい、合わせて作業を効率化したいといった方は、Horizonへのステップアップを検討してみてはいかがでしょうか?
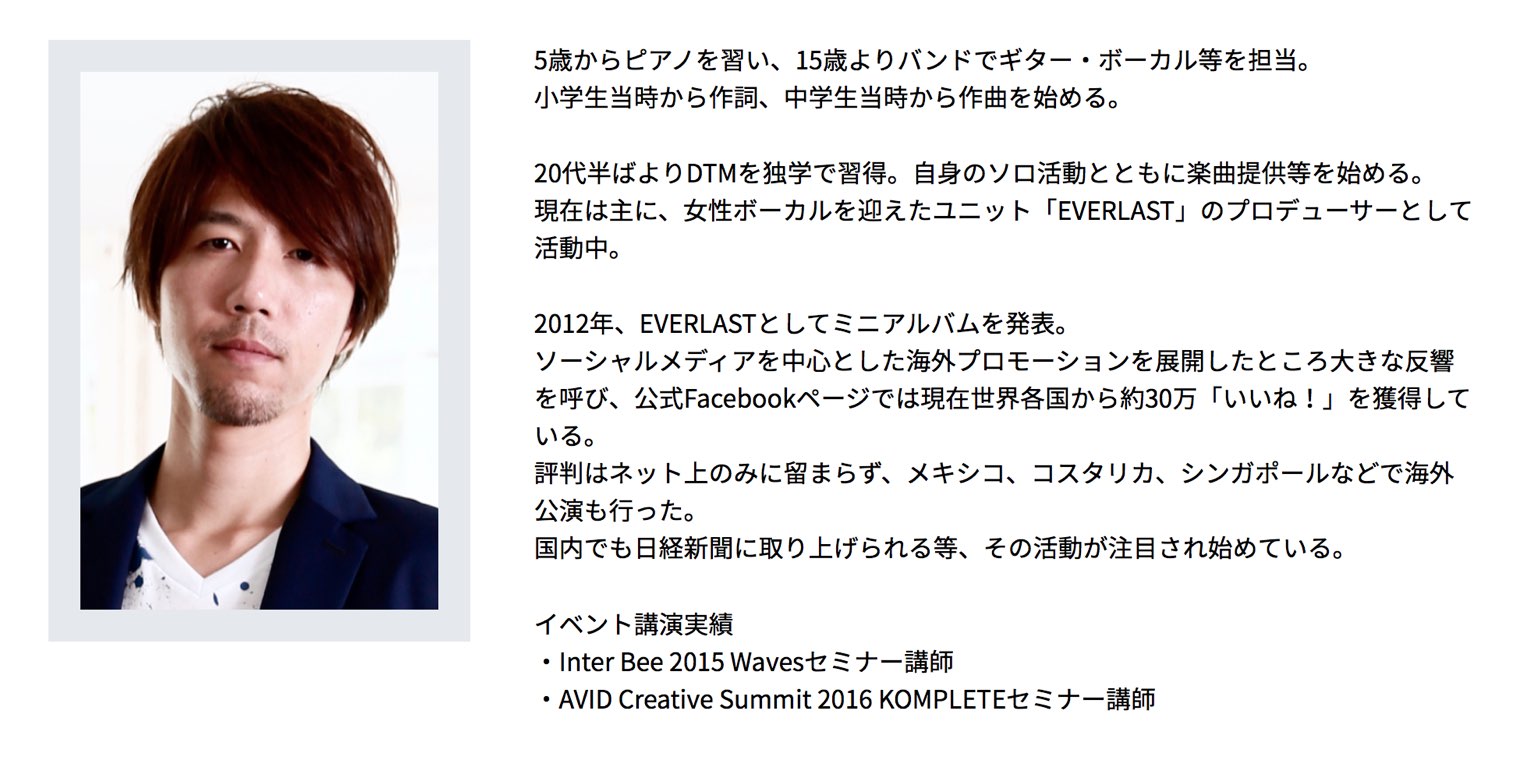
記事の担当 大鶴 暢彦/Nobuhiko Otsuru