
Native Instruments’ Session Strings Pro lets you program strings using features ranging from automatic performance to articulation switching. This article explains how the sections differ in sound, how to select sound types such as Contemporary and M-Town, and when to use the Animator, Performance, and Production preset types. It also covers practical programming techniques including keyswitches, legato, portamento, and accents for expressive string arrangements.
Shape Your Strings, from Phrases to Articulations

Session Strings Pro lets you program strings freely, using automatic performance and articulation switching.
Its sounds include individual instruments as well as retro-style strings.
In this article we will cover its basic concepts and practical programming techniques.
Video: Basic Features
Presets
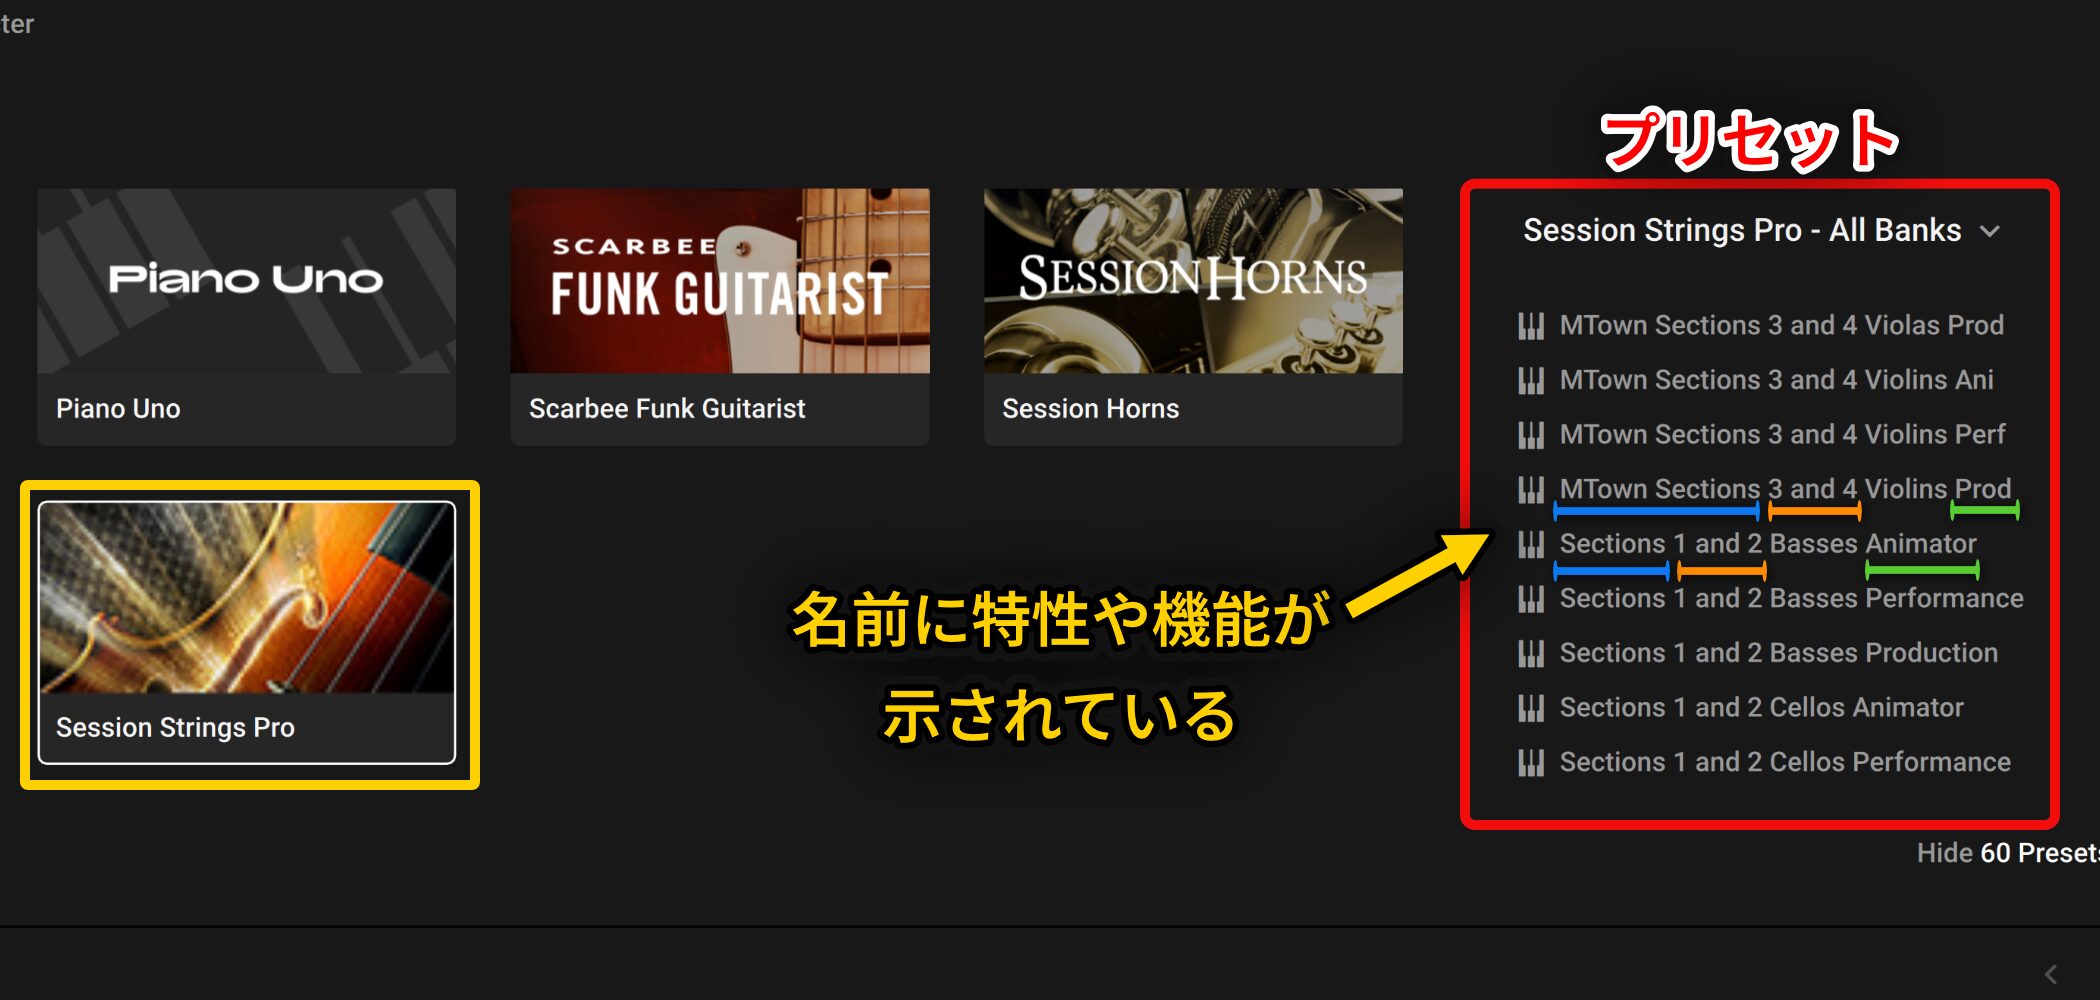
To use Session Strings Pro, first select a preset.
Presets are divided into types according to their sound and features; you can identify these by looking at the preset name.
Below we explain the elements in the name to help you choose the preset you need.
Sections
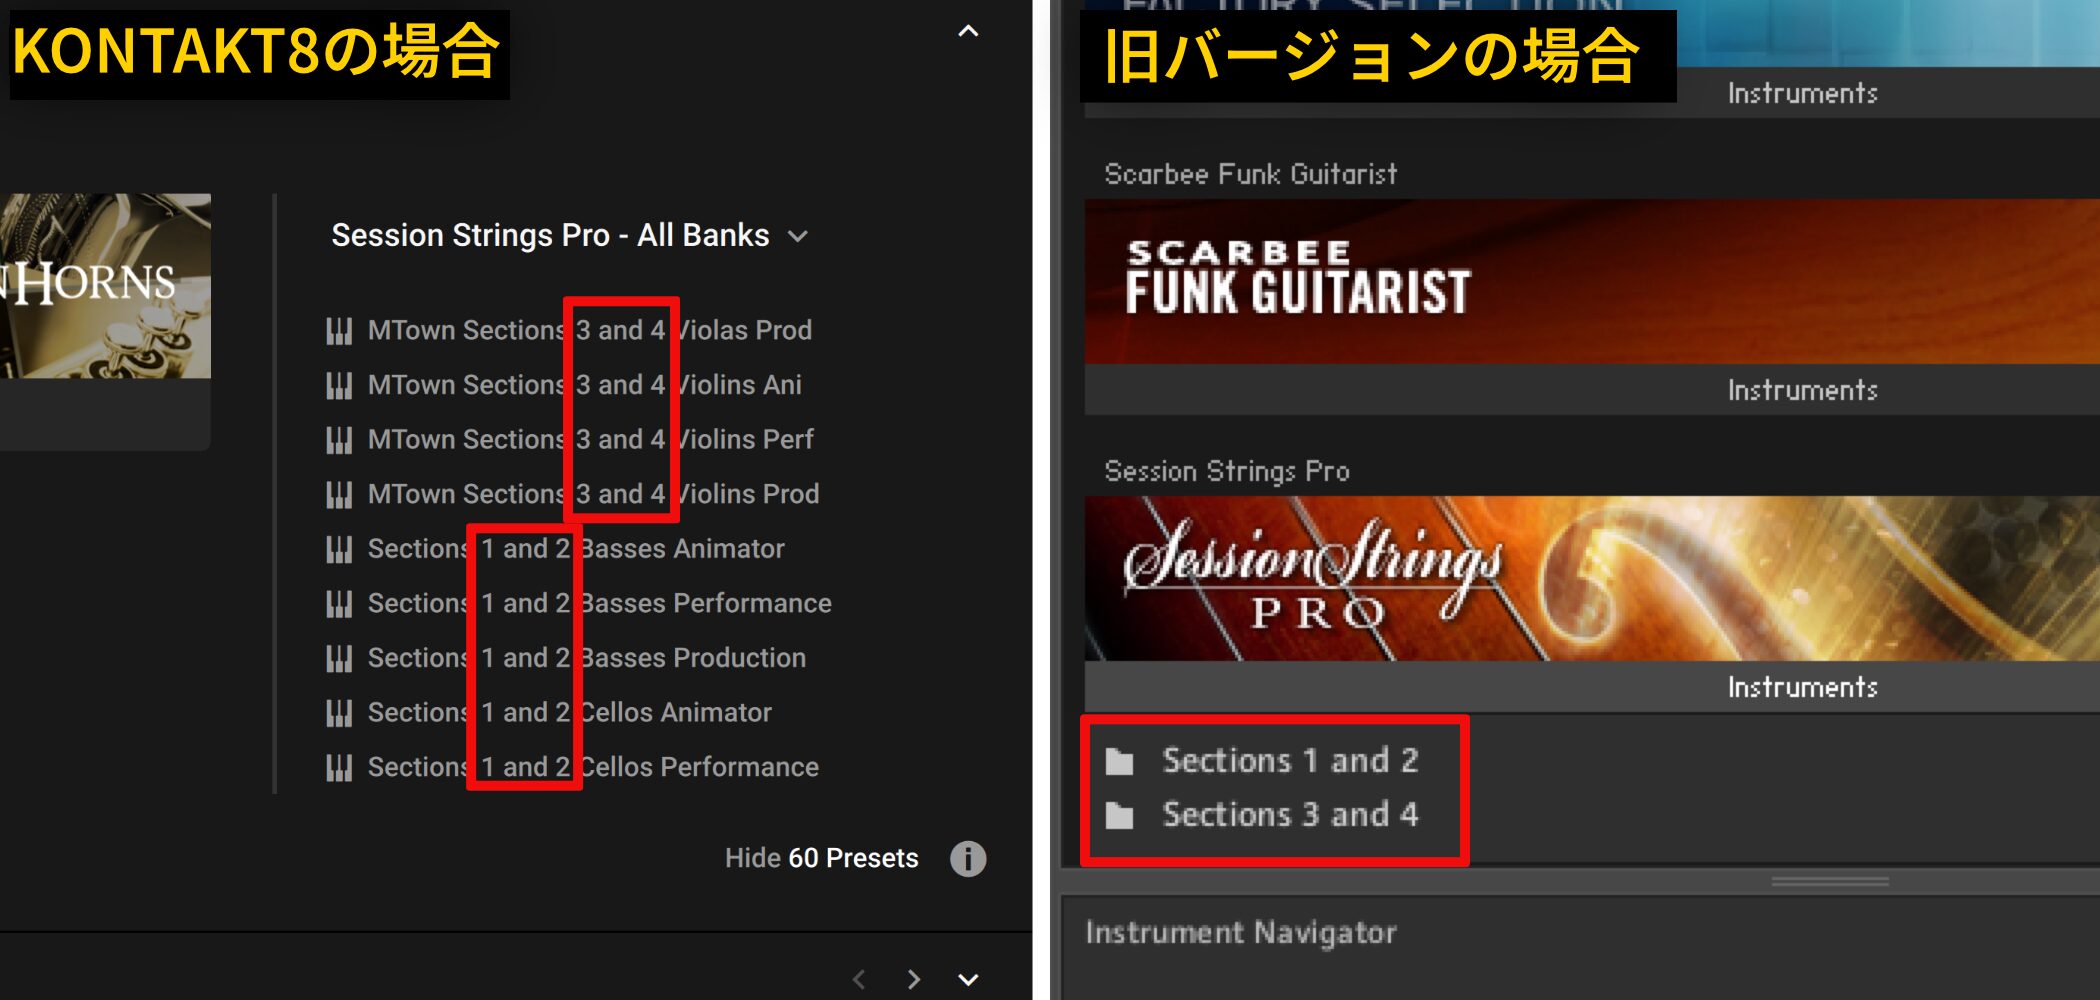
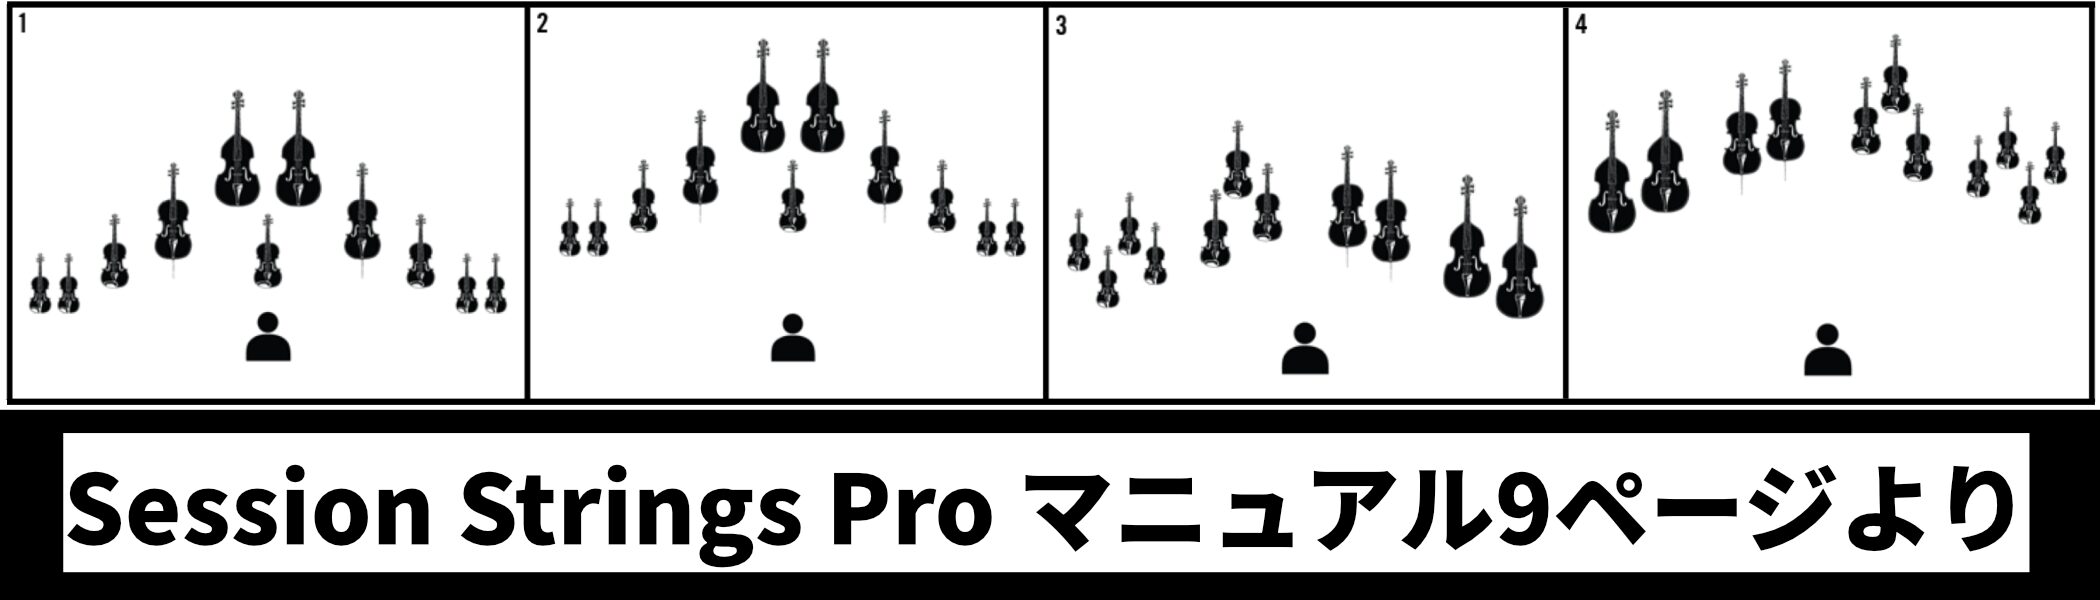
There are two section groups, Section 1 and 2 and Section 3 and 4, with different microphone placement and stereo positioning.
- Section 1 and 2: Recorded with a closer sound and evenly distributed stereo positions.
- Section 3 and 4: Recorded from slightly farther away with orchestral positioning.
Sound Characteristics (Contemporary / M-Town)
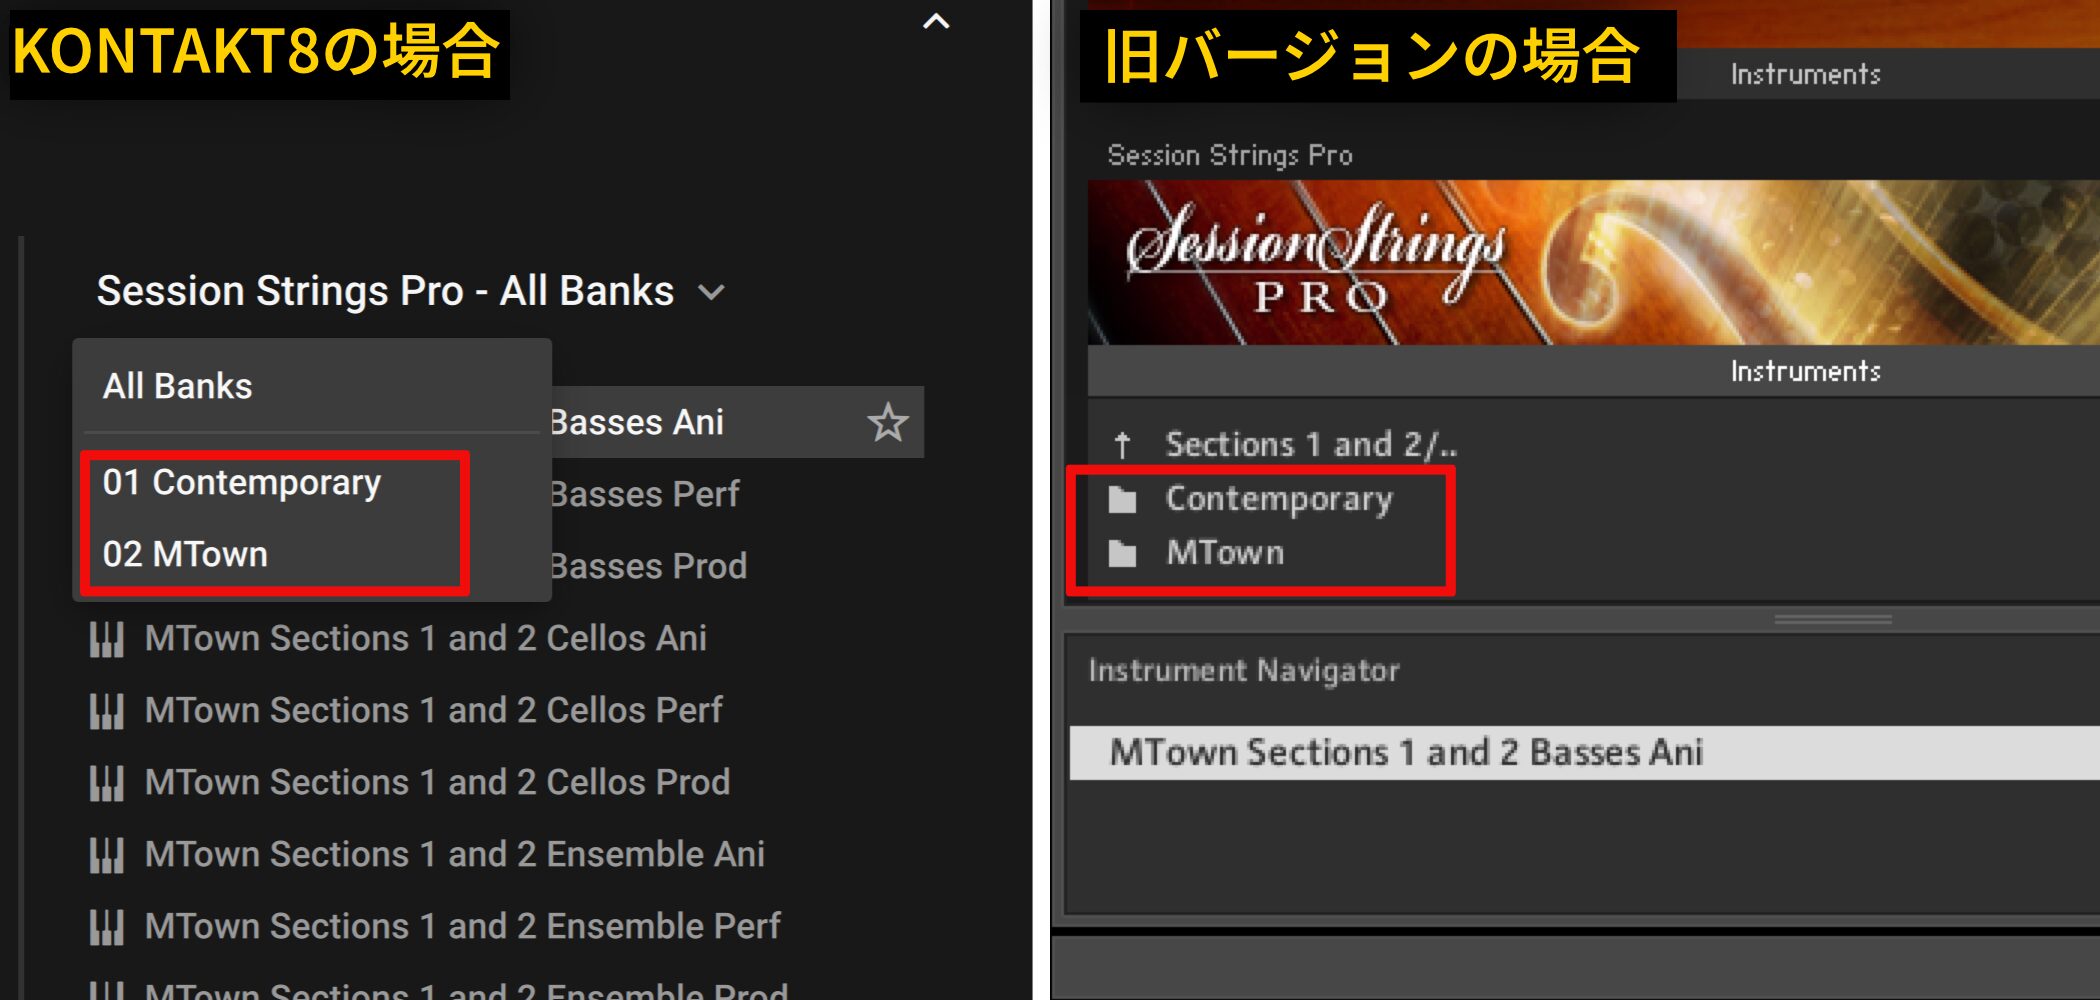
You can choose from two sound types:
- Contemporary: A modern sound suited to many genres.
- M-Town: A retro sound.
Preset Types (Performance / Production / Animator)
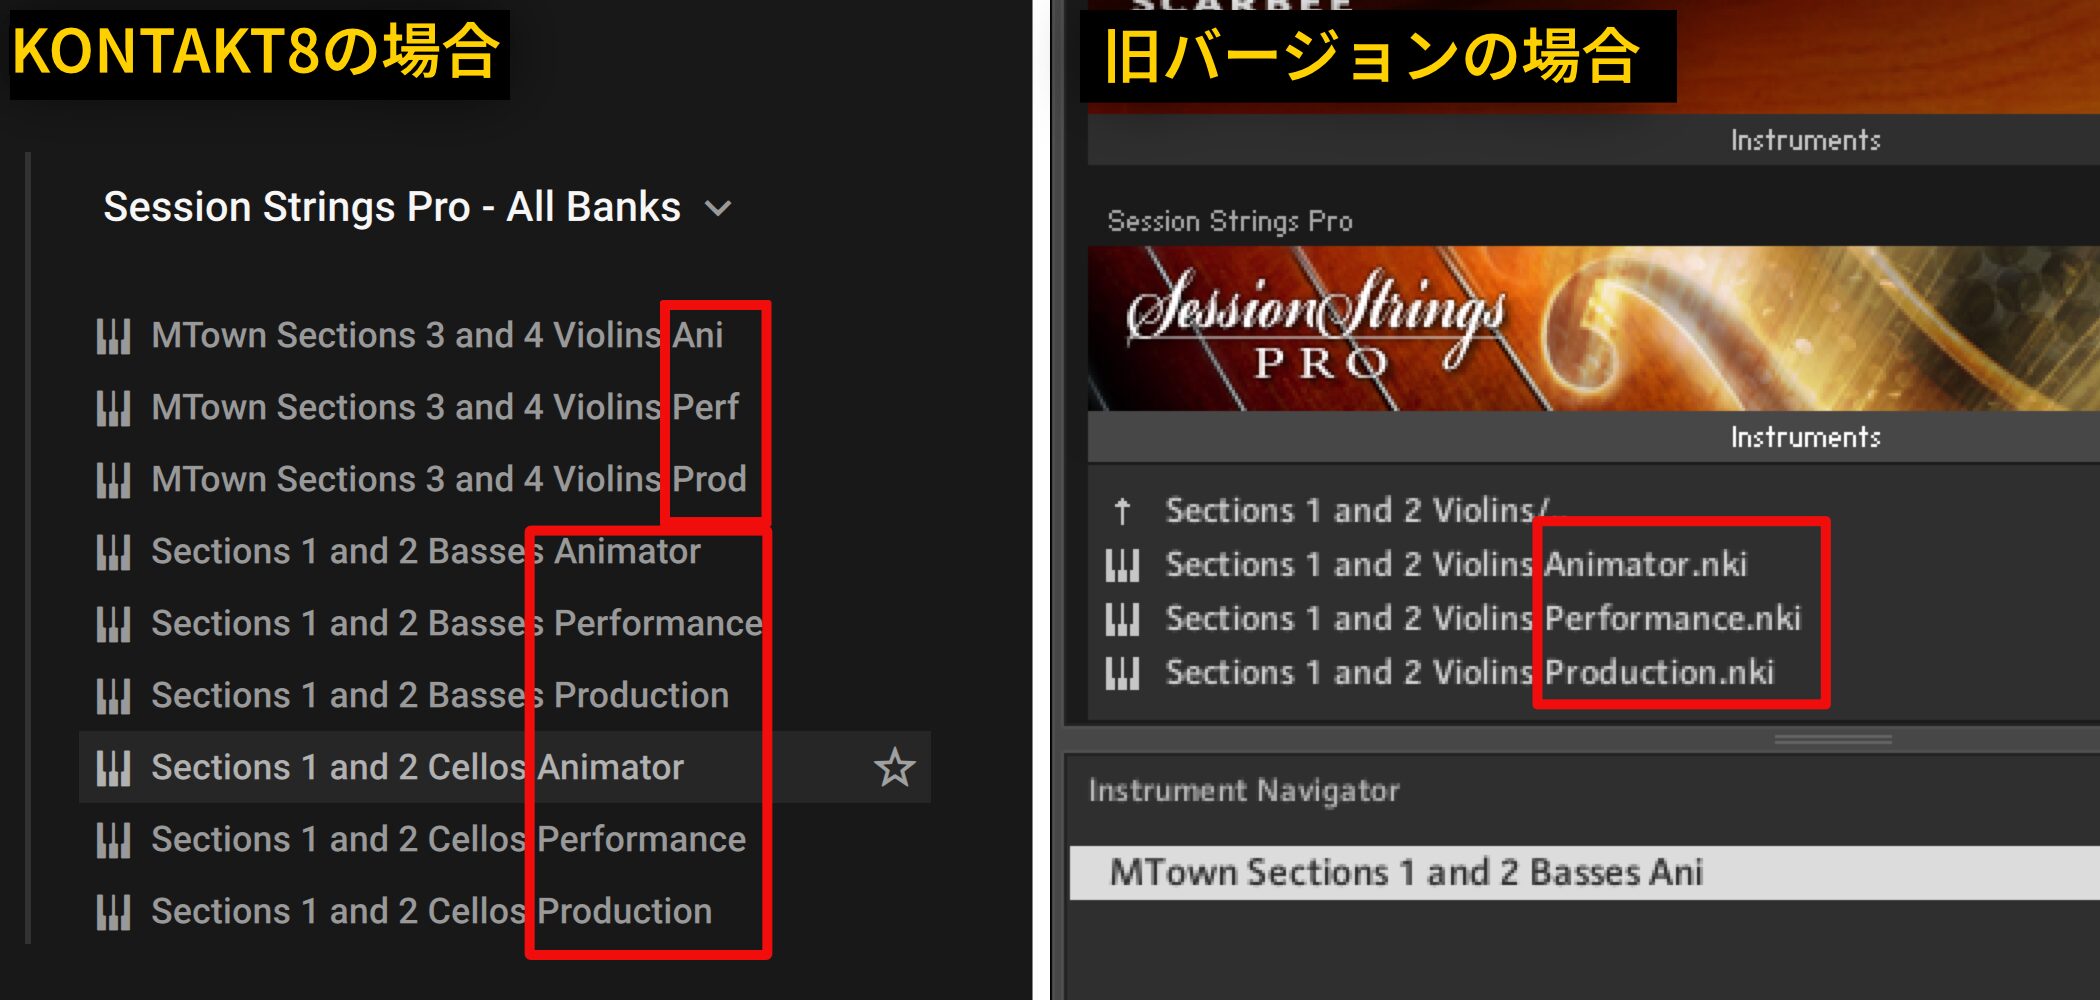
Each instrument offers three preset types for different uses:
- Animator (Ani): Automatically plays phrases, making them easy to incorporate.
- Performance (Perf): Switch articulations with velocity, pedals, and other controls; suited to real-time performance.
- Production (Prod): Focuses on keyswitches for changing articulations and is suited to DAW programming.
Sound Parameters
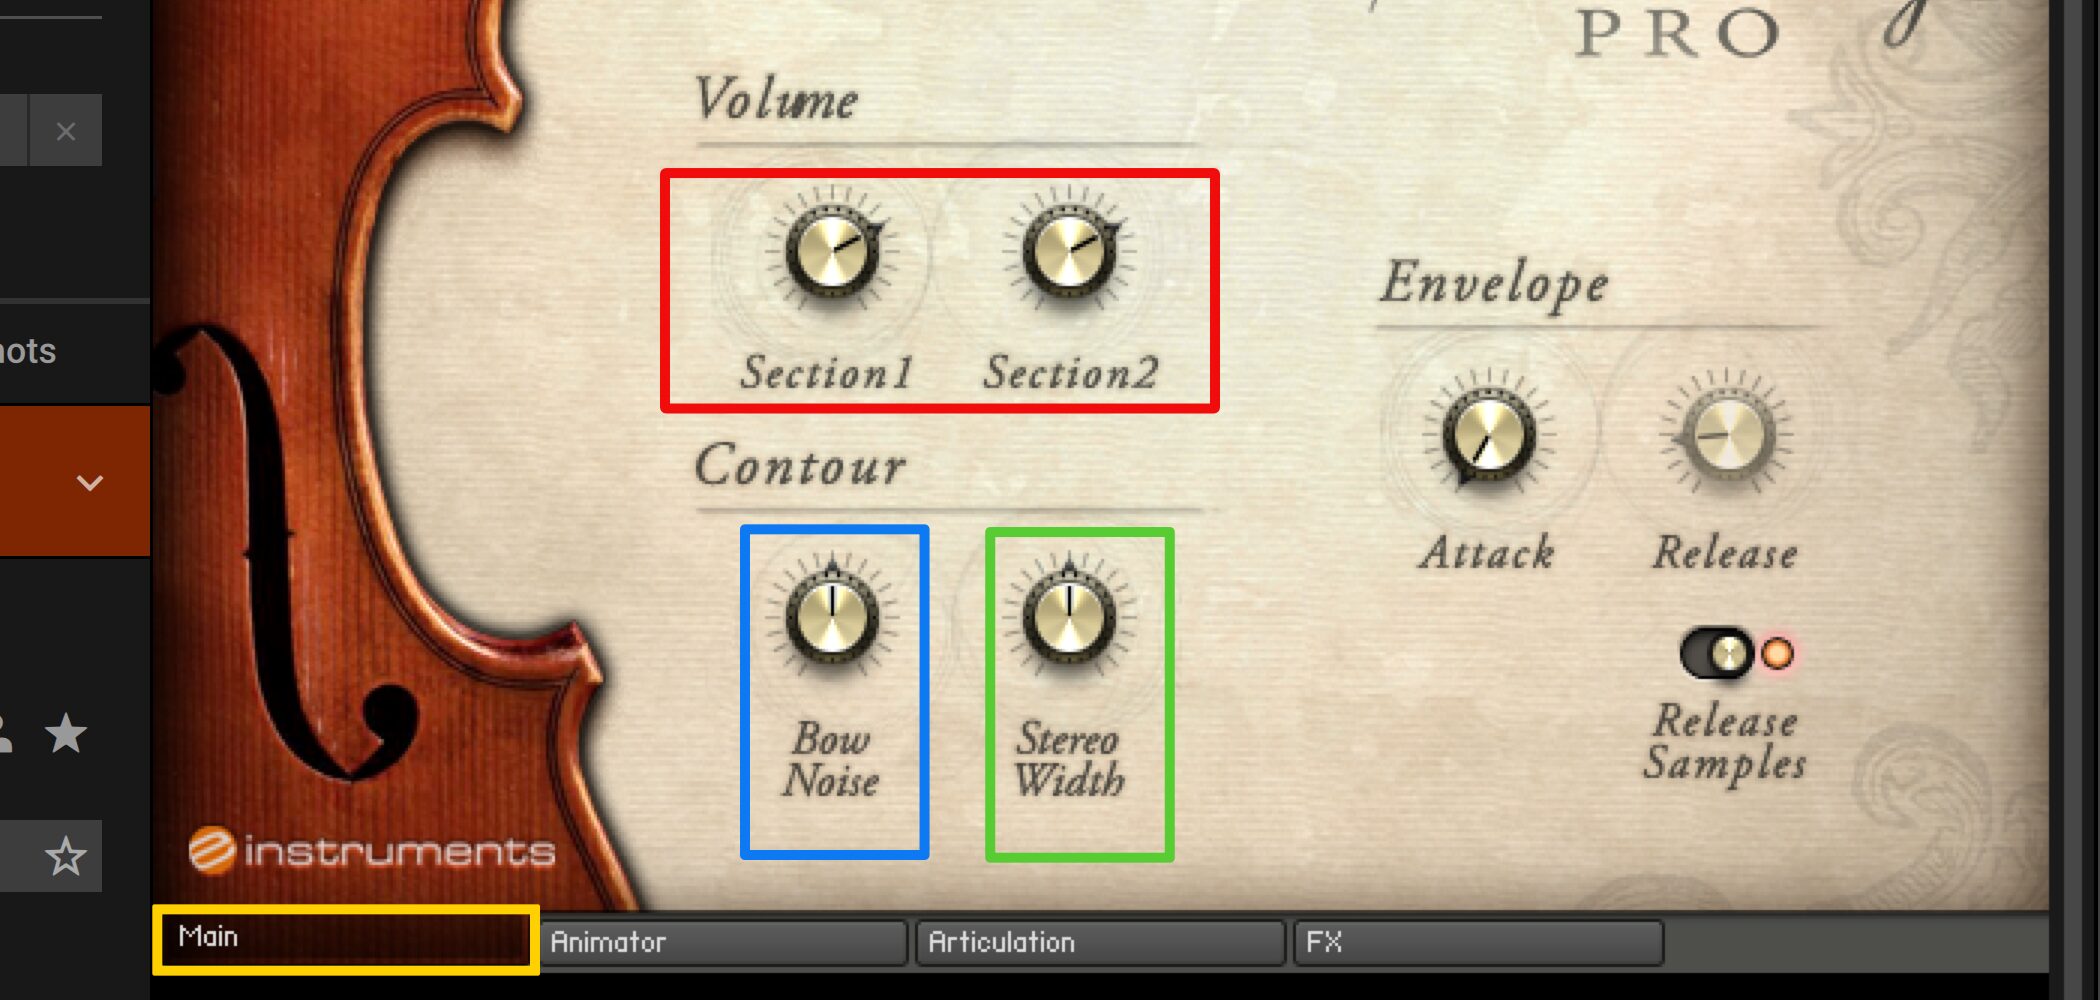
Once you have loaded a preset, you can fine-tune its sound.
Let’s look at the basic parameters in the Main window.
- Section 1.2 (red): Adjusts the volume balance between the two sections.
- Bow Noise (blue): Adjusts the level of the sound of the bow moving against the strings.
- Stereo Width (green): Adjusts the sound’s left-to-right spread.
Improve Your Phrases with Articulations
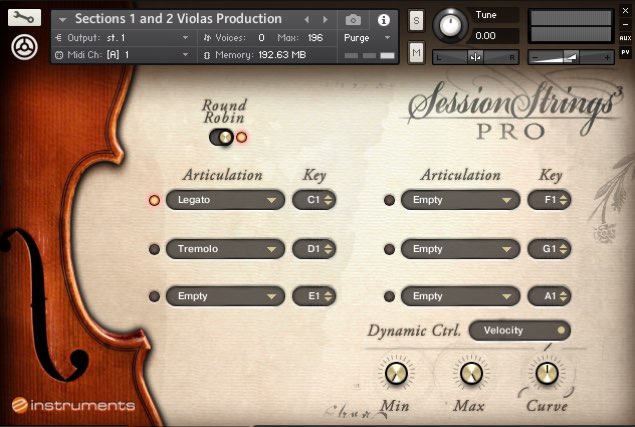
Once you understand the basics, it is time for some practical programming.
Session Strings Pro includes a variety of articulations that you can switch freely throughout a song.
Video: Practical Programming Techniques
Keyswitches for Changing Articulations
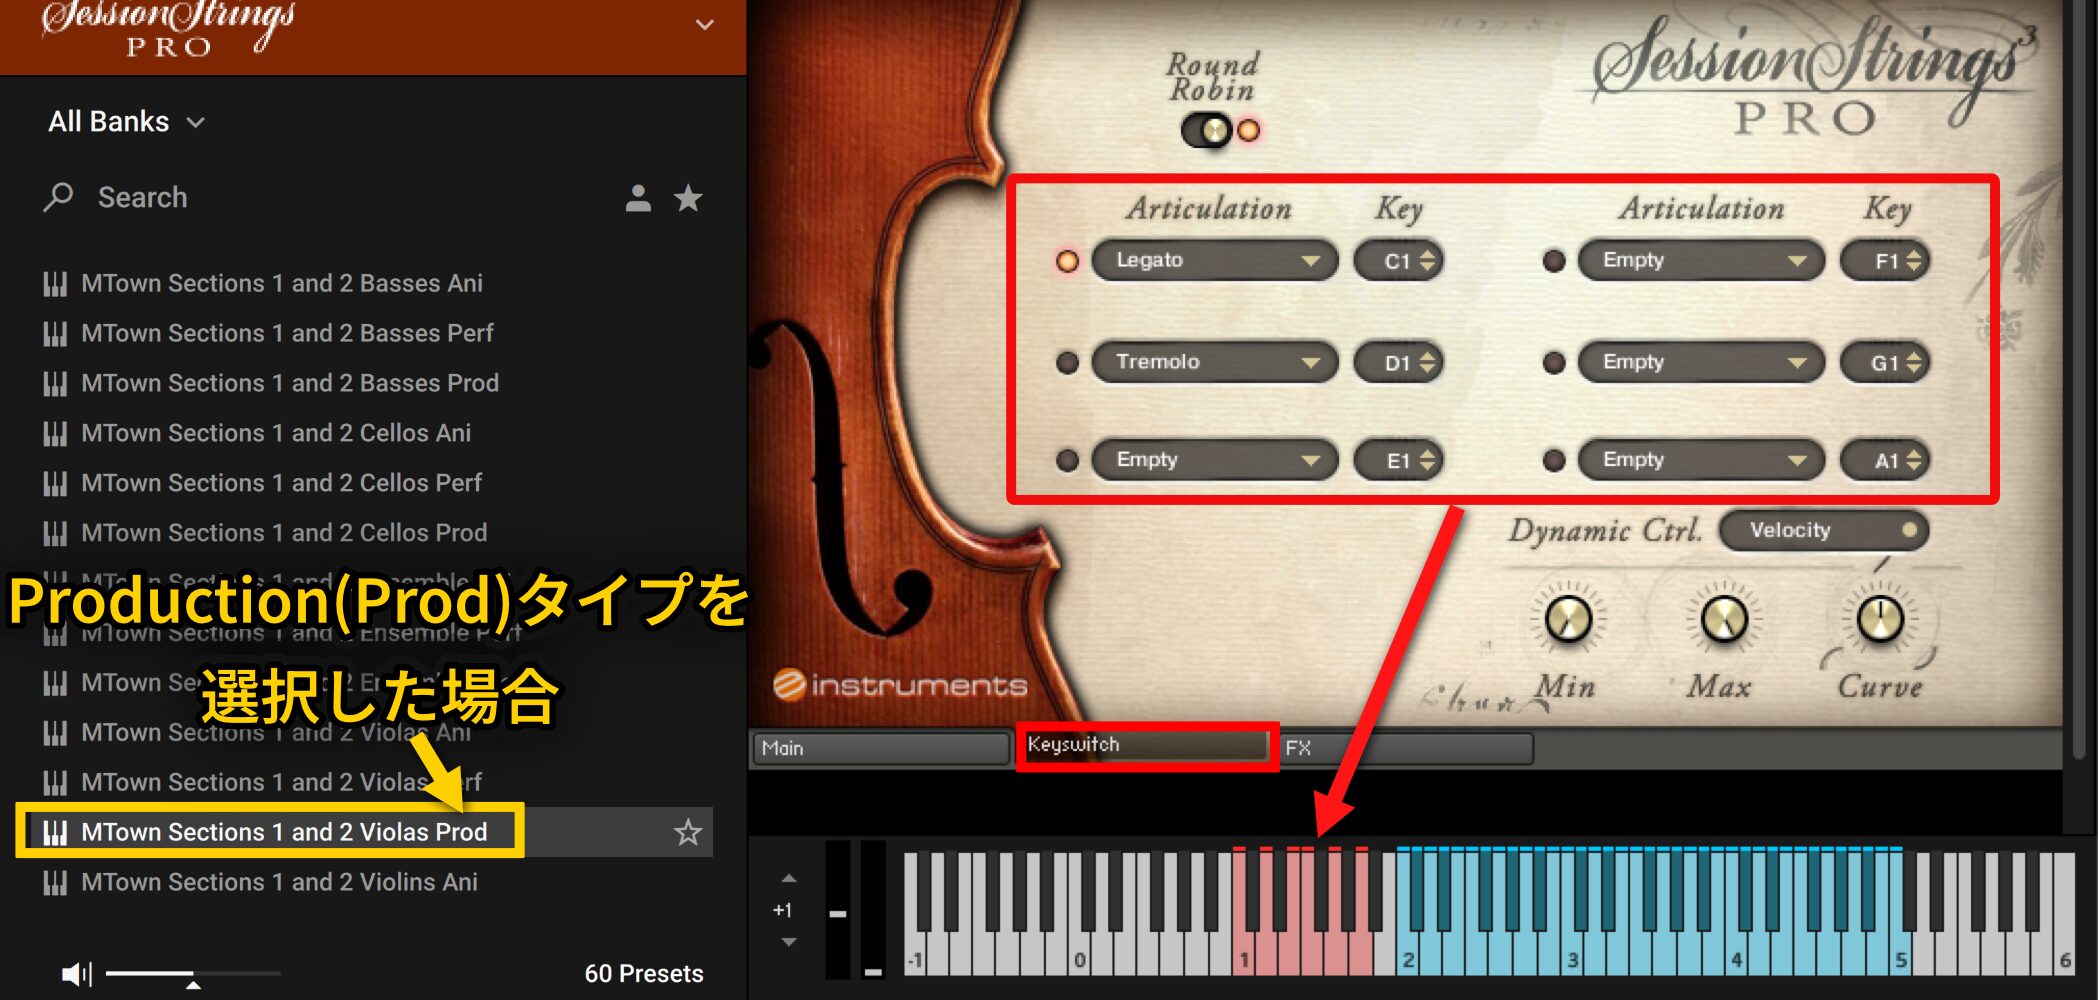
When you select a Production (Prod) preset, the Keyswitch window appears, allowing you to change articulations with keyswitches.
These correspond to the red keys on the keyboard.
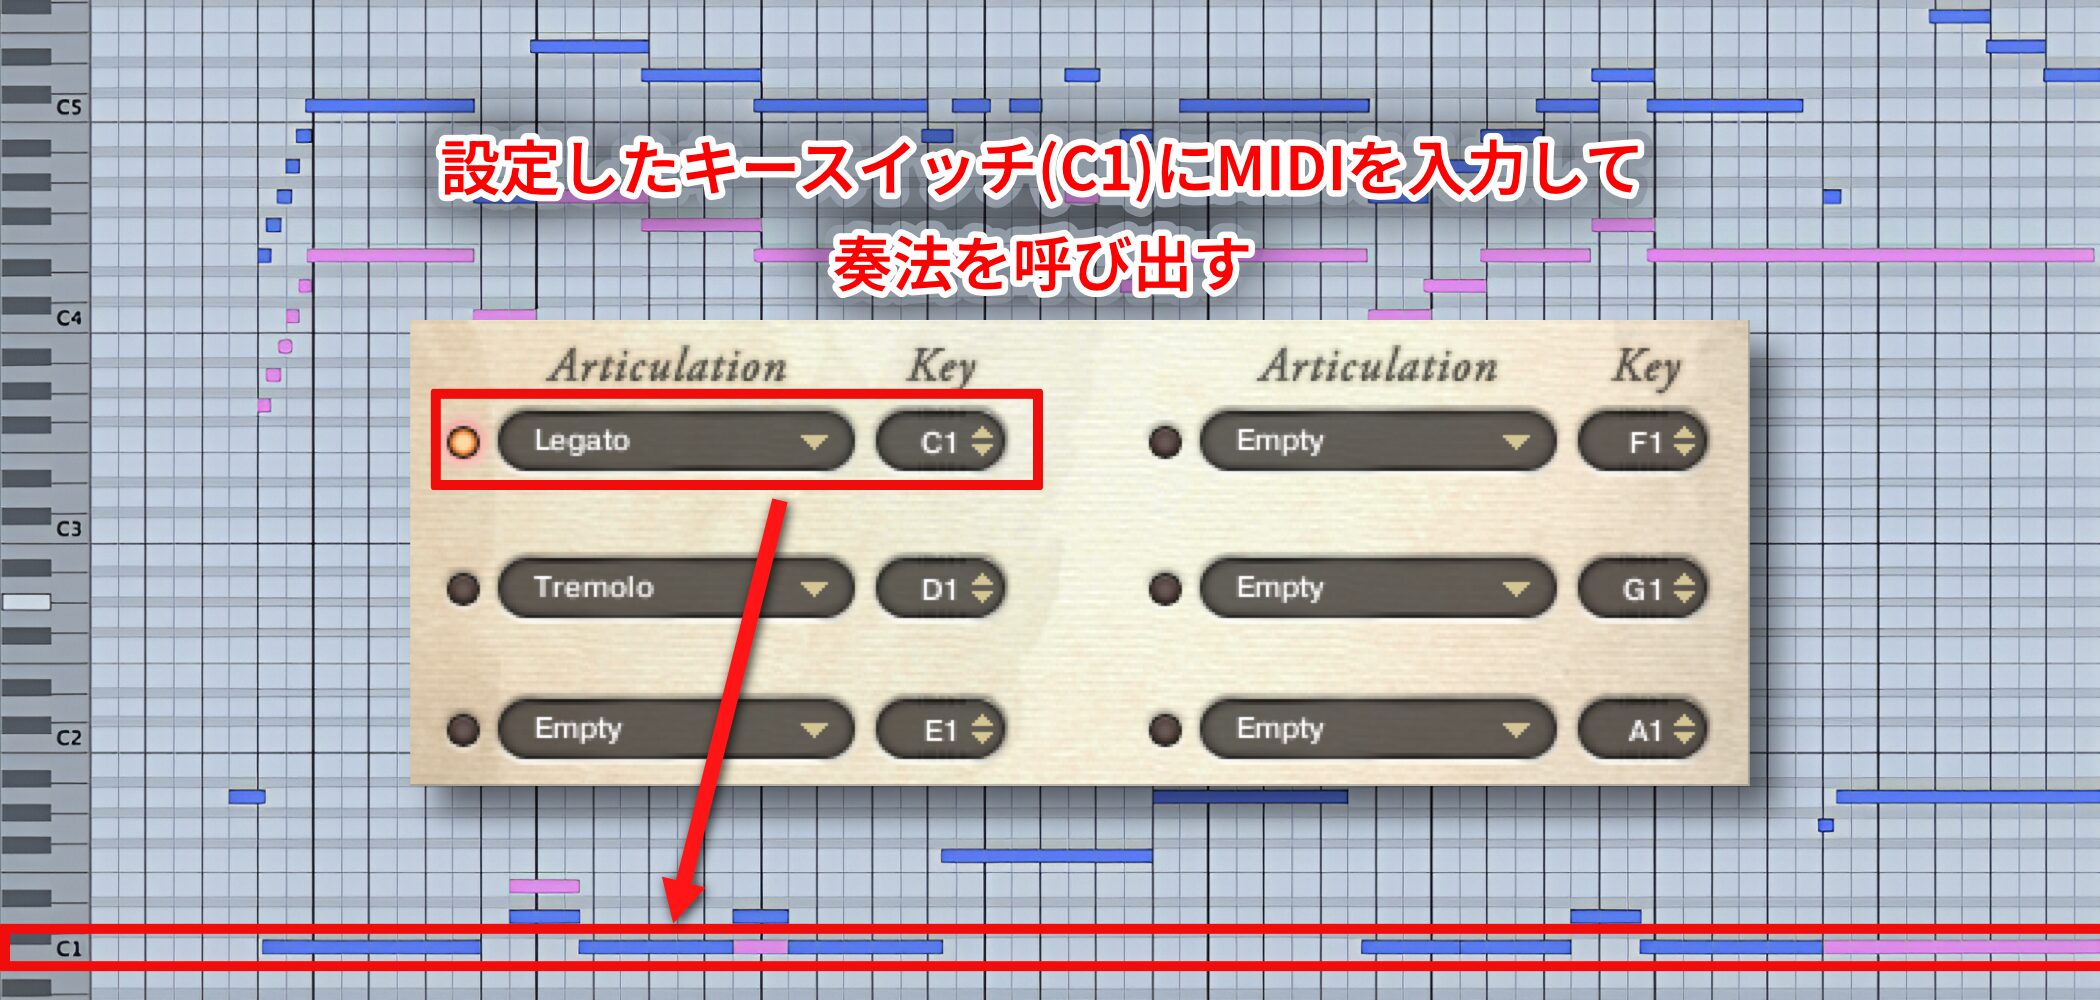
Enter a MIDI note at the assigned keyswitch position (C1 in the image) to call up the desired articulation instantly.
Tips for Legato
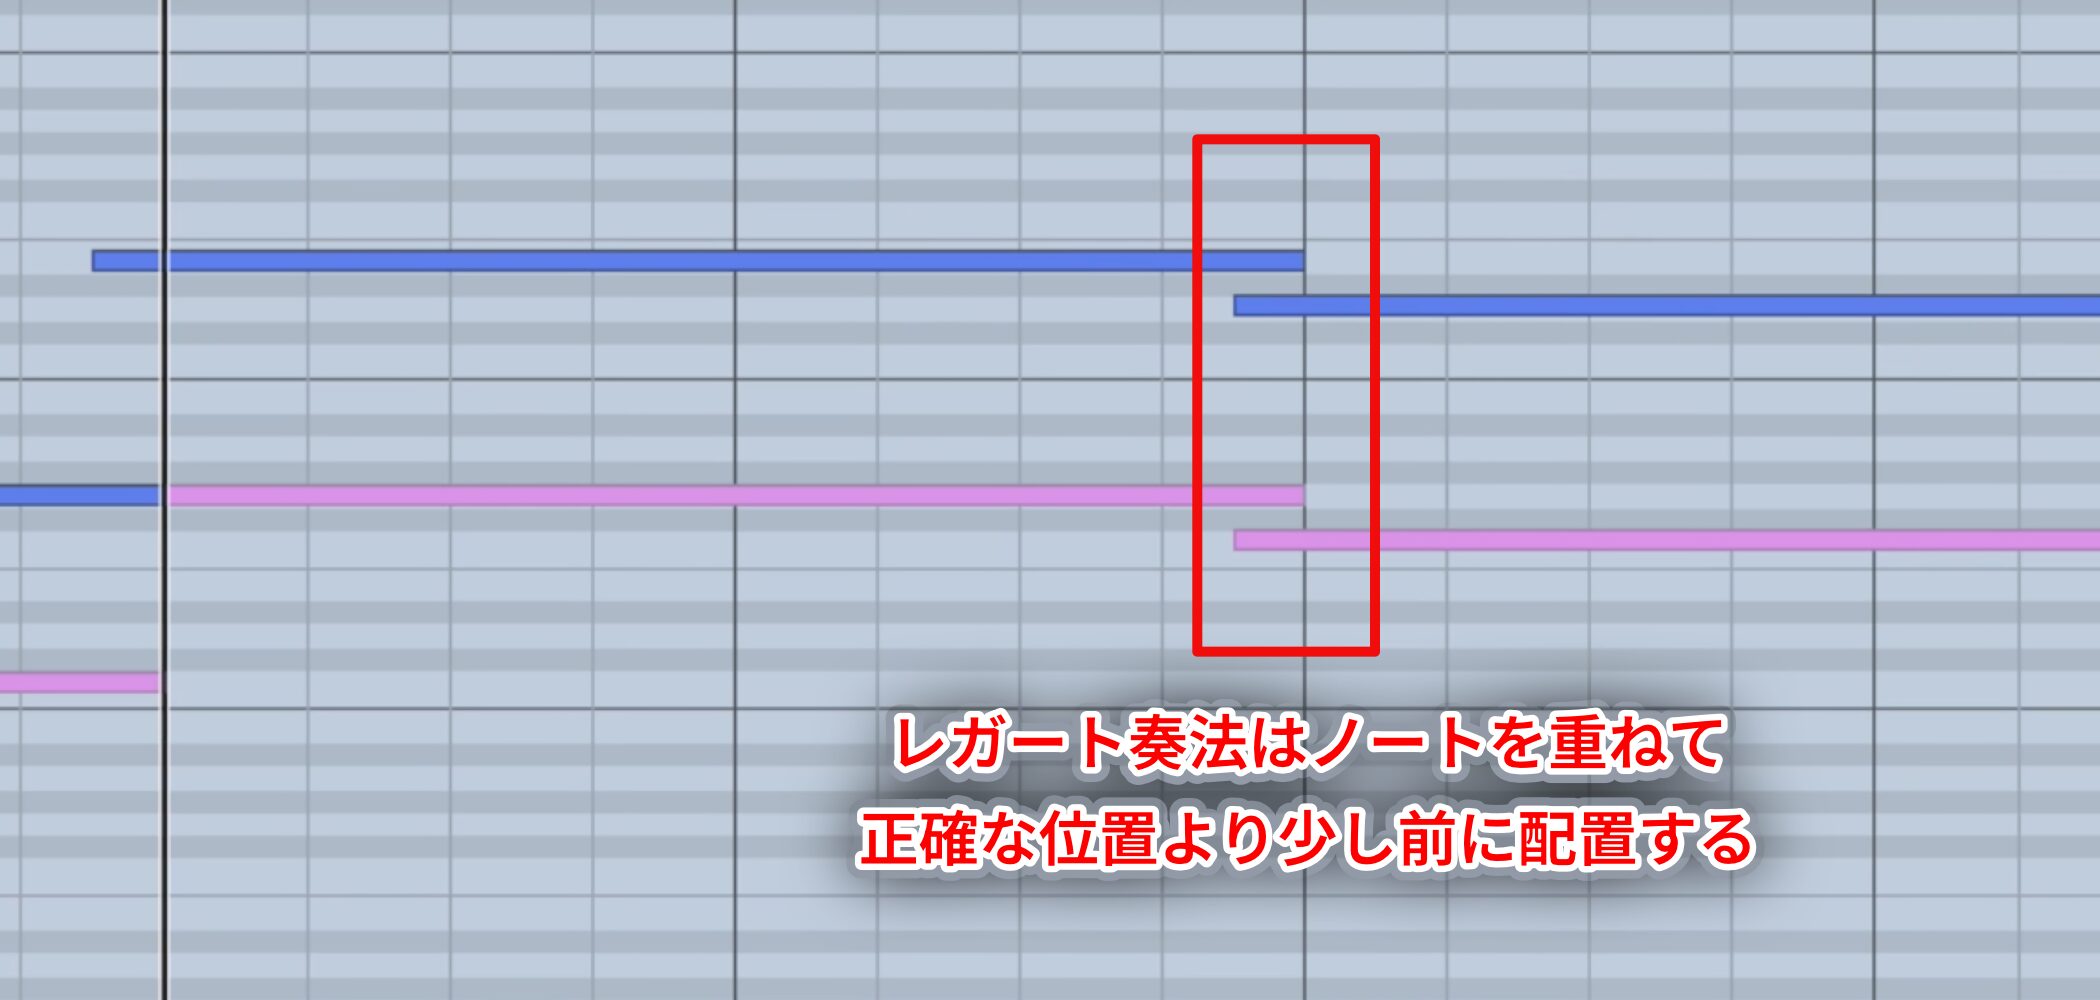
For a smooth connection between notes when using the legato articulation, overlap the MIDI notes.
The sound also has a slightly delayed onset, so placing notes slightly before their intended position can be effective.
Portamento Technique
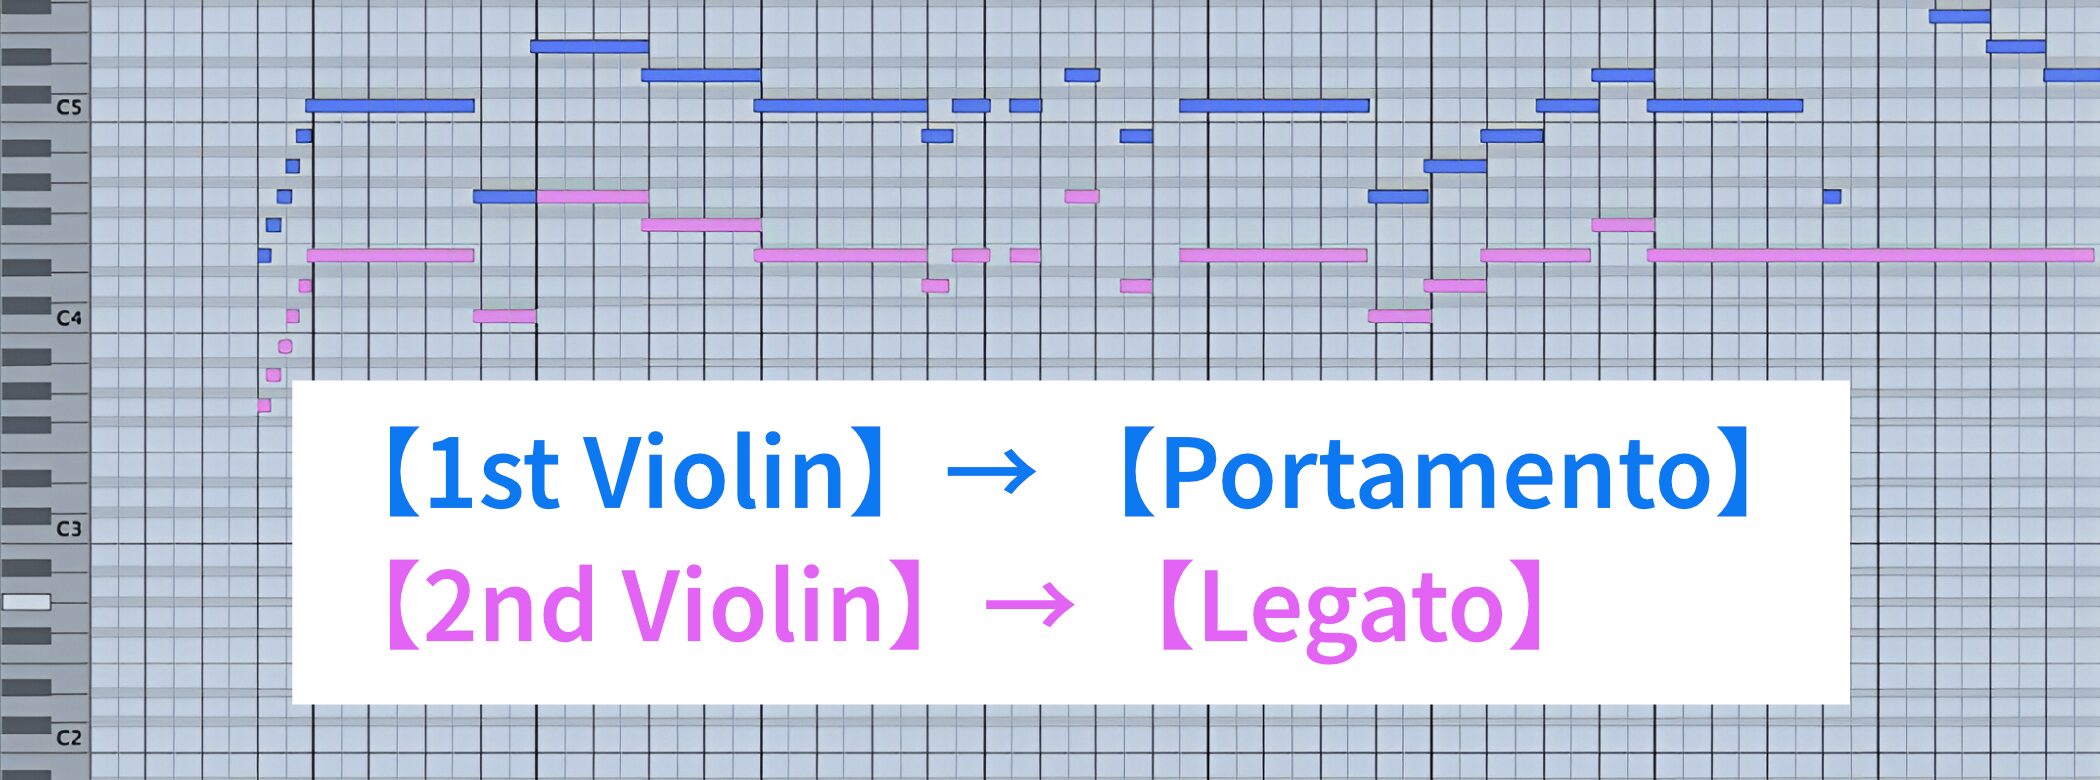
Portamento creates a smooth transition from one note to another. Applying it to both sections (1st and 2nd) can sometimes make the pitch sound unstable.
To create a more natural performance, try applying portamento to only one section.
Accent Technique
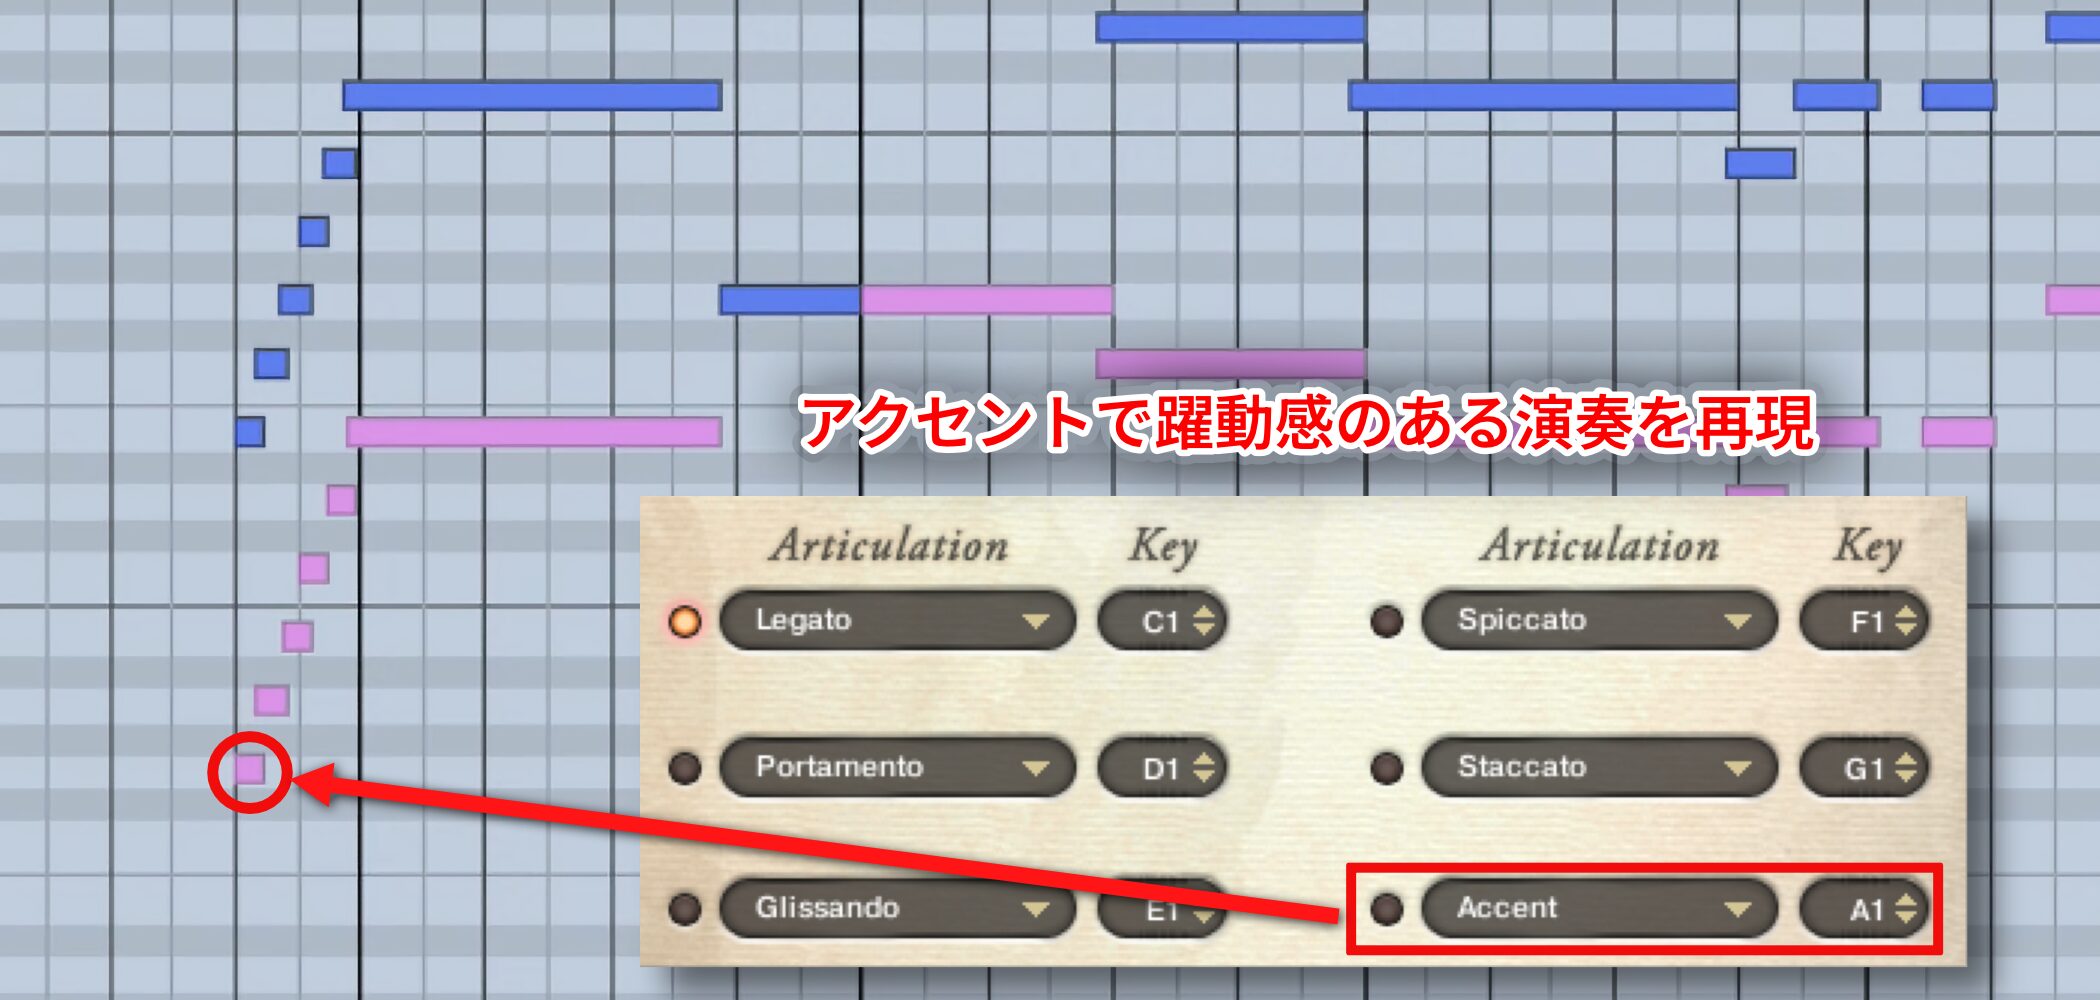
Accents can emphasize the attack of a performance.
For example, applying one only to the first note of an ascending run can make the performance more energetic.
Frequently Asked Questions
Q1. Which Session Strings Pro preset type should I use for DAW programming?
The Production (Prod) preset is well suited to DAW programming: its keyswitches let you specify different articulations throughout a song.
Q2. How should I choose between Section 1 and 2 and Section 3 and 4?
Section 1 and 2 have a closer sound and even positioning, creating a more intimate impression. Section 3 and 4 have a more distant sound and orchestral positioning, creating a grander impression. Choose according to the genre and concept of your song.
Q3. What should I keep in mind when using legato?
Overlap MIDI notes so they connect smoothly, and try placing them slightly ahead of the intended timing to compensate for the delayed onset.
Q4. How can I make portamento sound more natural?
If portamento on both sections makes the pitch sound unstable, try applying it to only one section for a more natural result.
NEW ARTICLES
Latest English Articles




































































































































































































































































































































































































































































































































