Mastering adjusts a song’s sound and loudness for playback across different platforms. In Studio One’s Project page, you can balance frequencies with an equalizer, control volume variation with a compressor, and aim for Spotify’s -14 LUFS reference level. A spectrum analyzer and loudness meter help you make a natural-sounding master for speakers, earbuds, headphones, and other listening environments.
What is mastering? Preparing sound and loudness for streaming
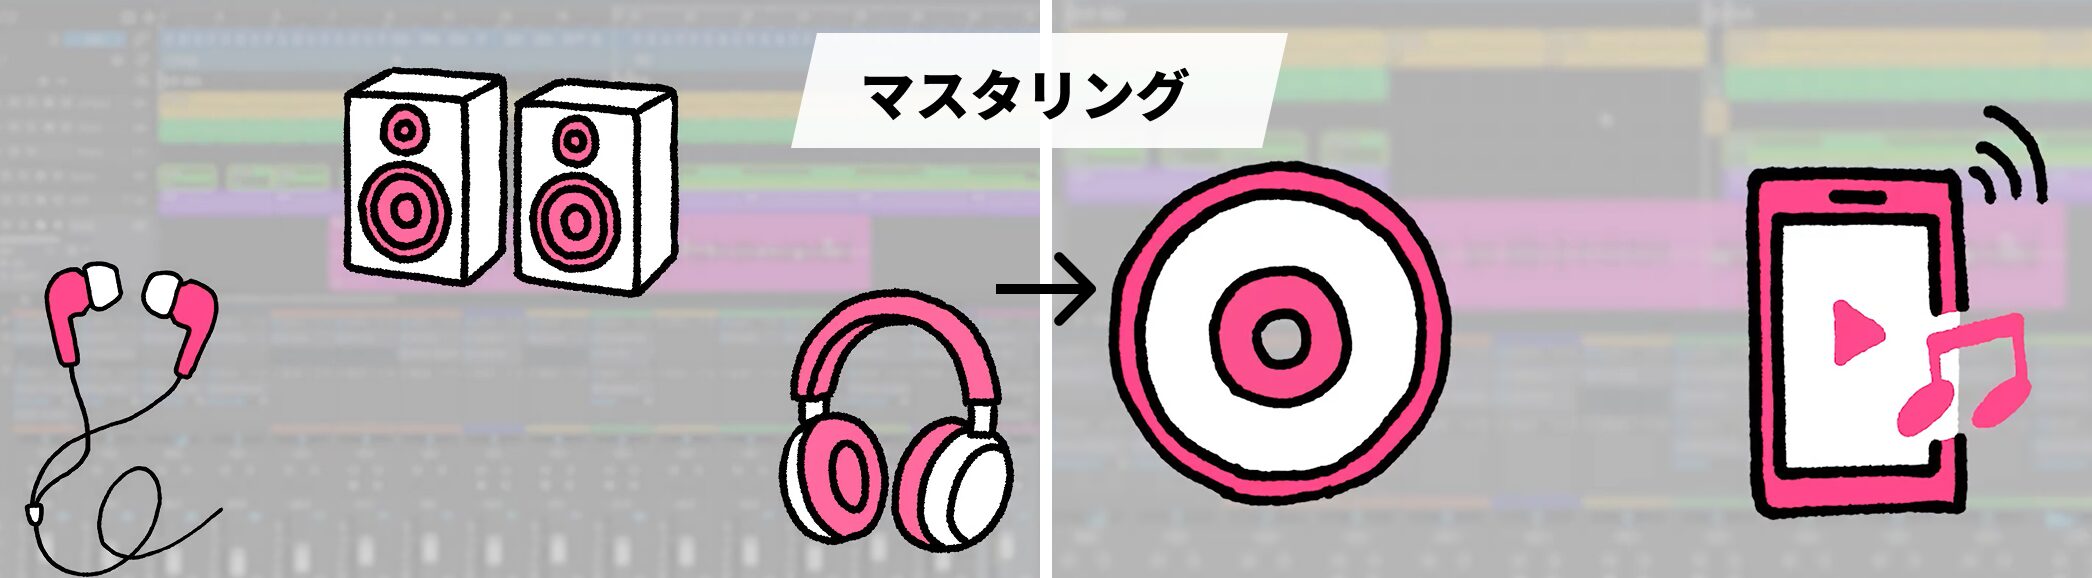
Mastering is the process of adjusting a song’s overall volume and sound.
The goal is to reduce unwanted tonal imbalances across speakers, earbuds, headphones, and other listening systems, and to prepare an appropriate level for platforms such as CD and streaming.
As an introduction, we will adjust the sound with Spotify distribution in mind.
Add a Song to a Project
Studio One includes a Project page designed for mastering.
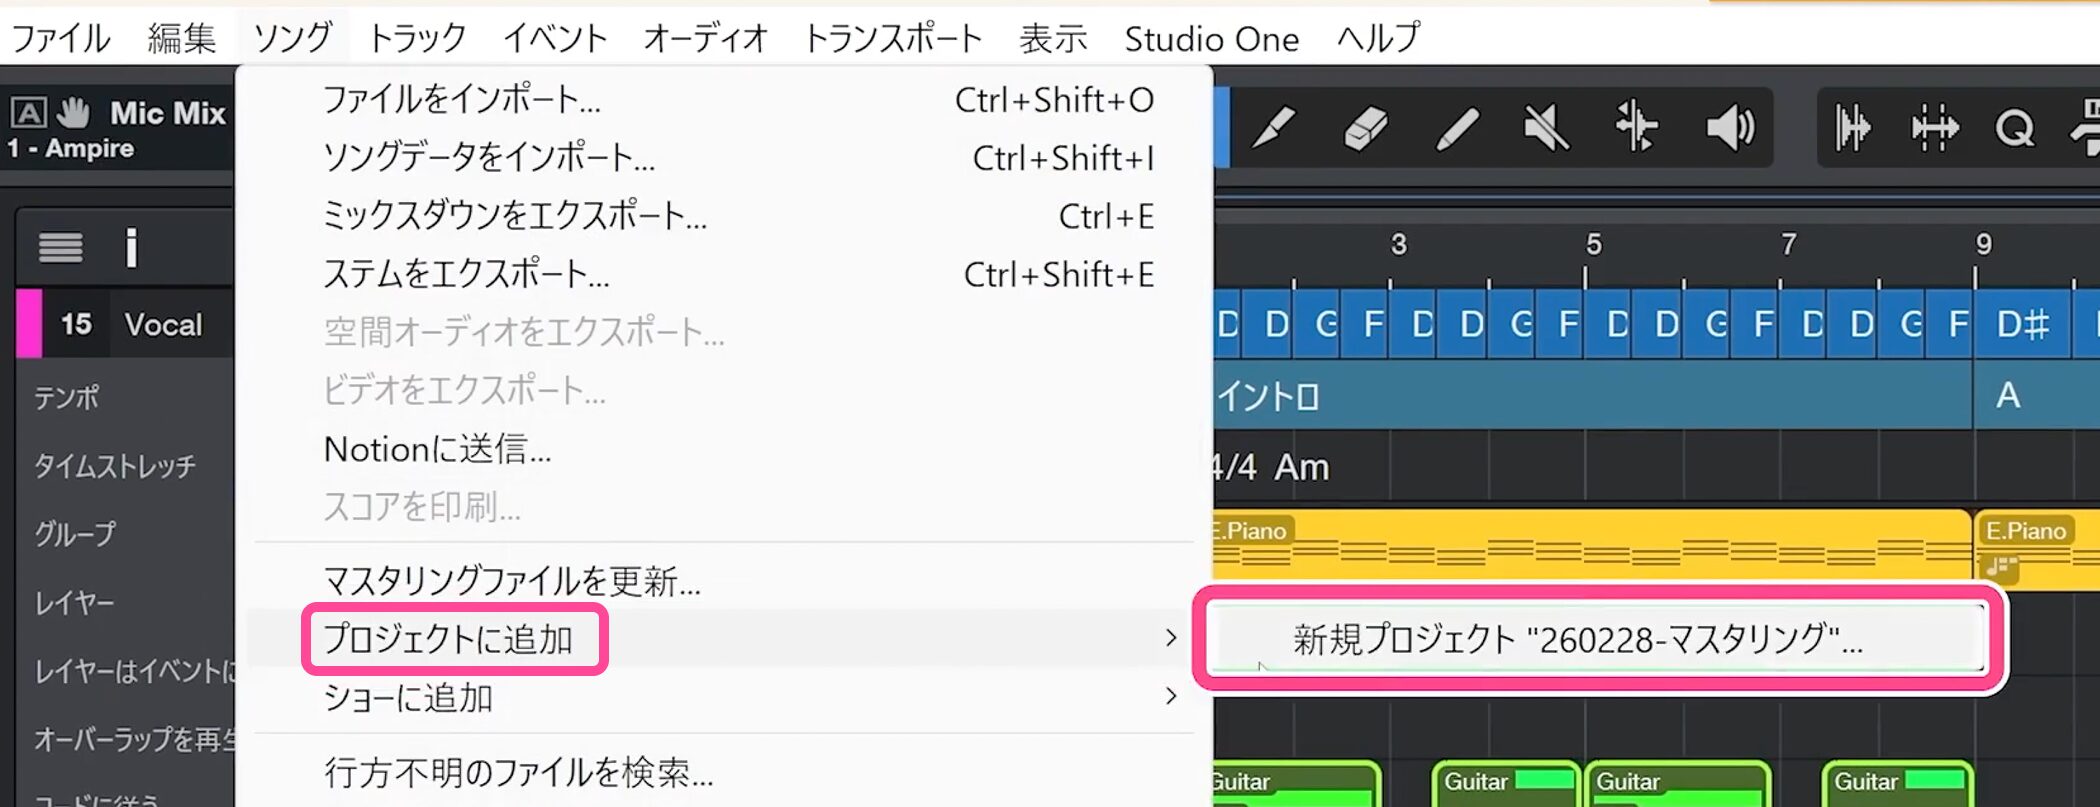
To move the current Song to a Project, choose Song → Add to Project → New Project.
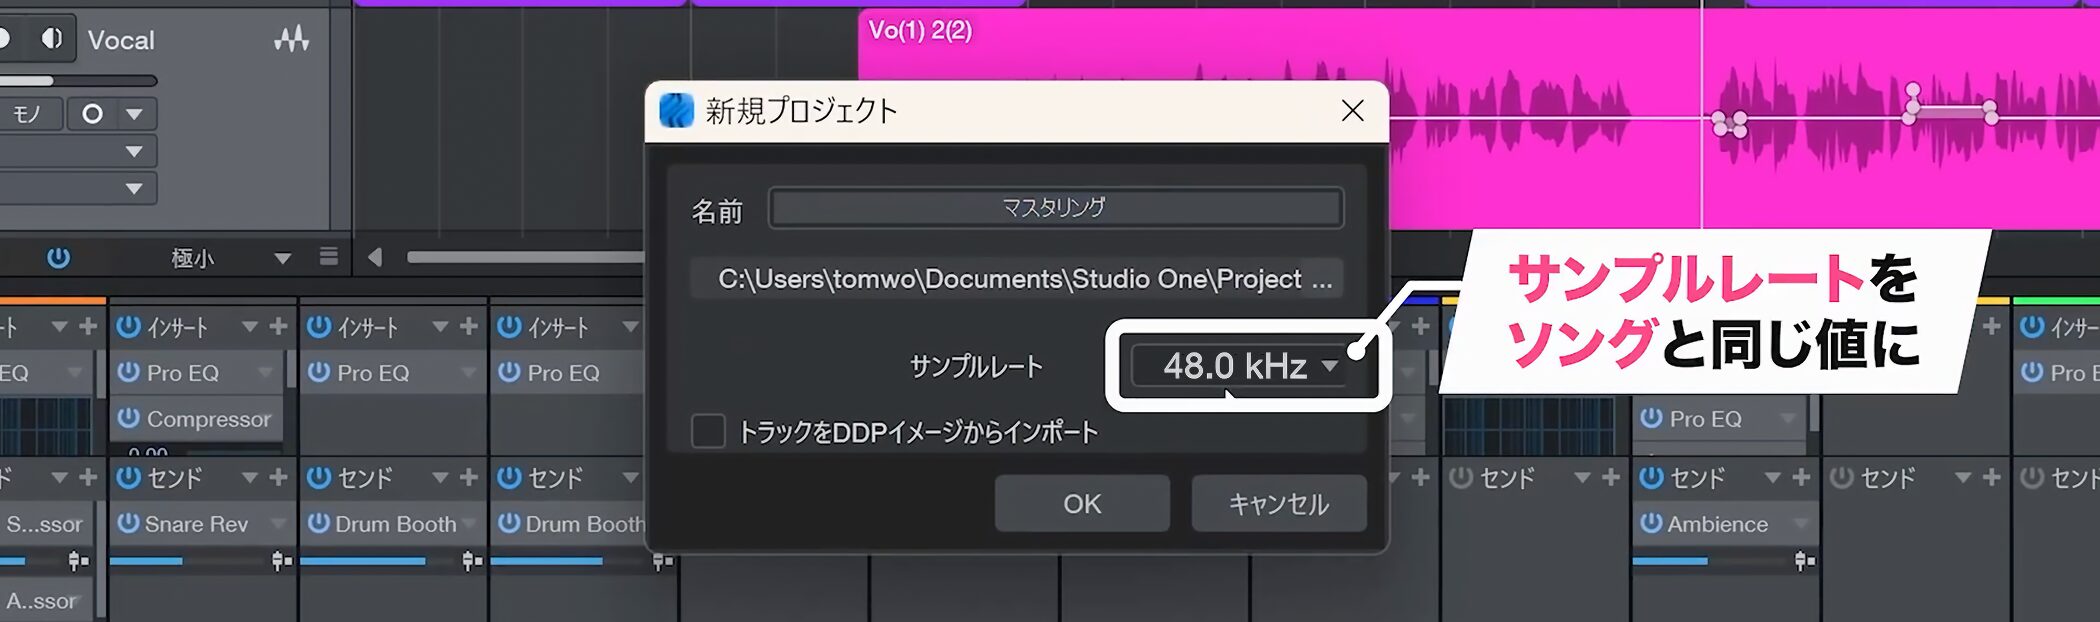
Give it a clear name and set the sample rate.
Use the same value as the Song you have been working on.
Here we choose 48 kHz and click OK.
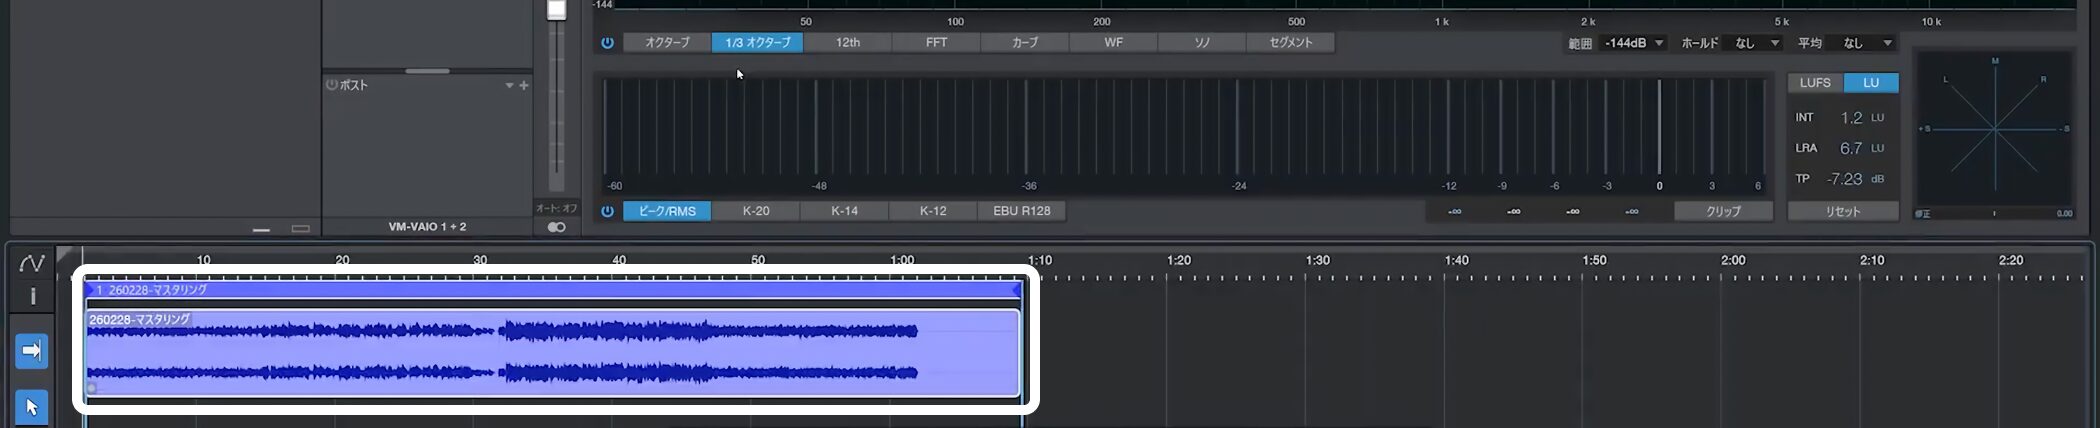
Select the Song to master and click OK.
The Song is automatically exported and added to the Project when the export finishes.

By default, the Project is saved in the Projects folder inside the Studio One folder.
How Songs and Projects work together
Songs and Projects work closely together.
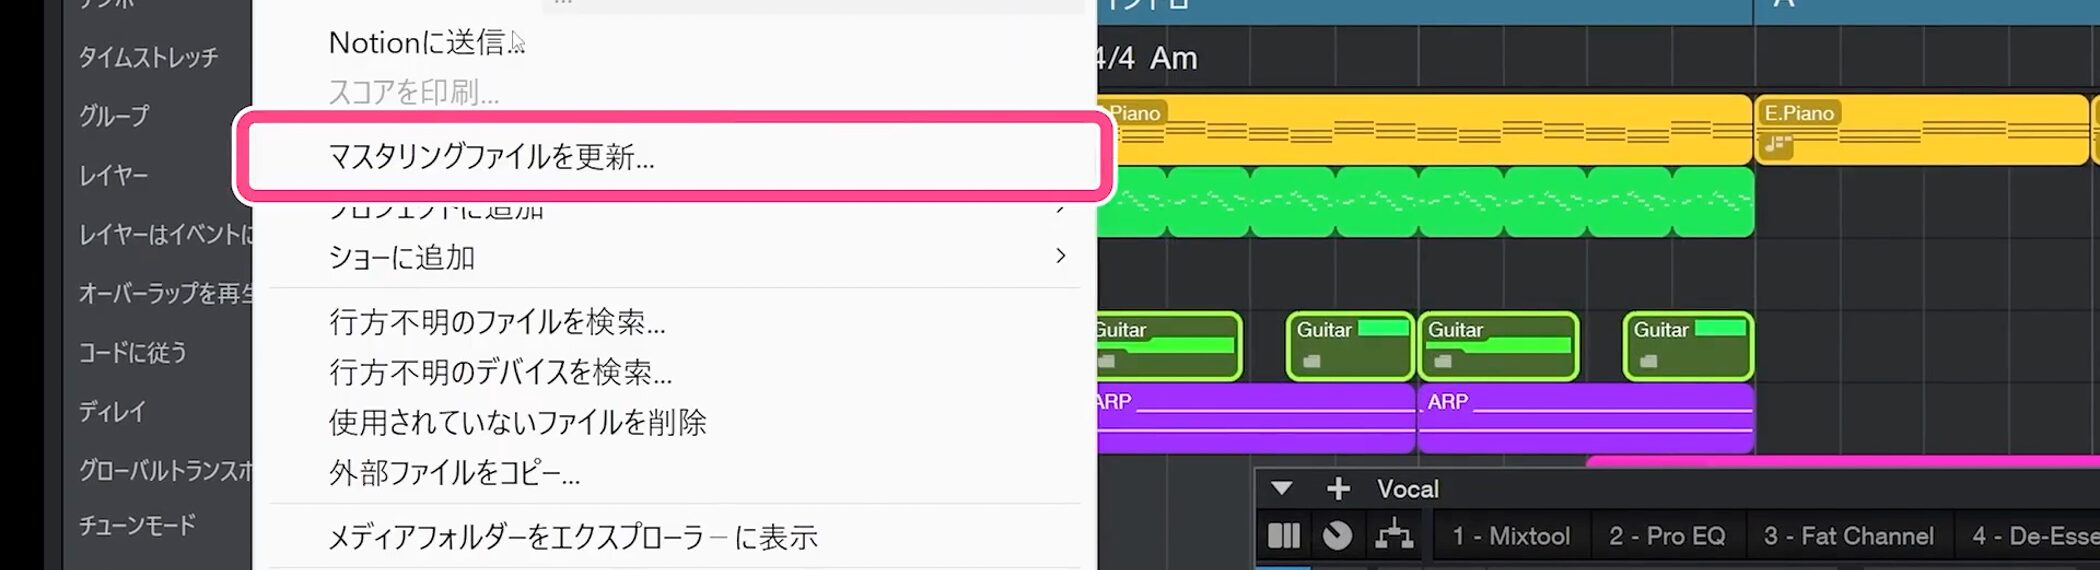
For example, if you edit the Song while mastering, choose Song → Update Mastering File.
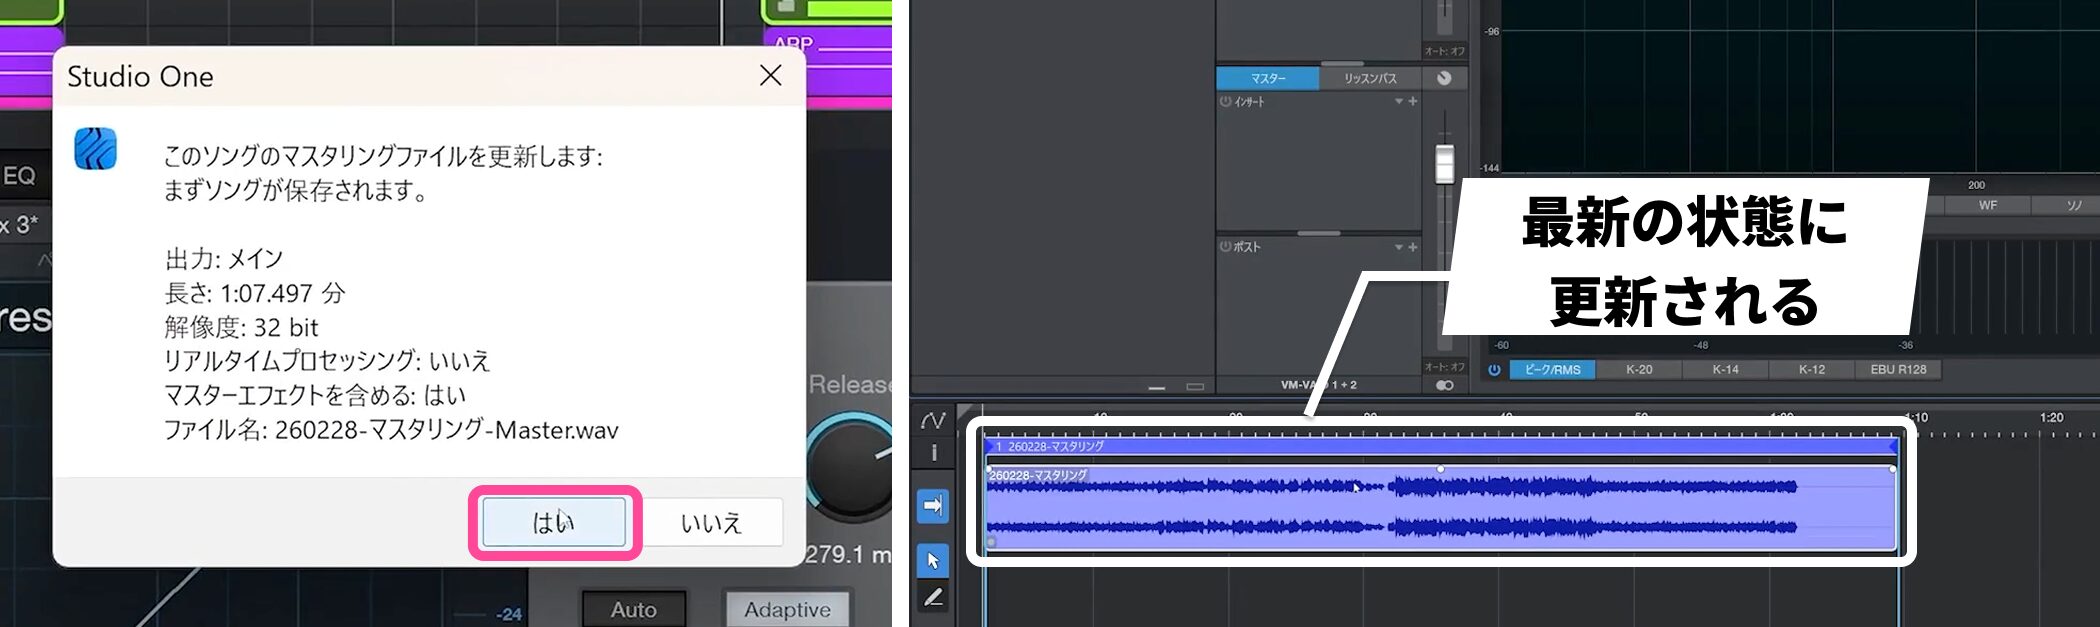
The Song is exported again and the sound in the Project is updated.
Import multiple songs
You may want to master several songs to create an album.
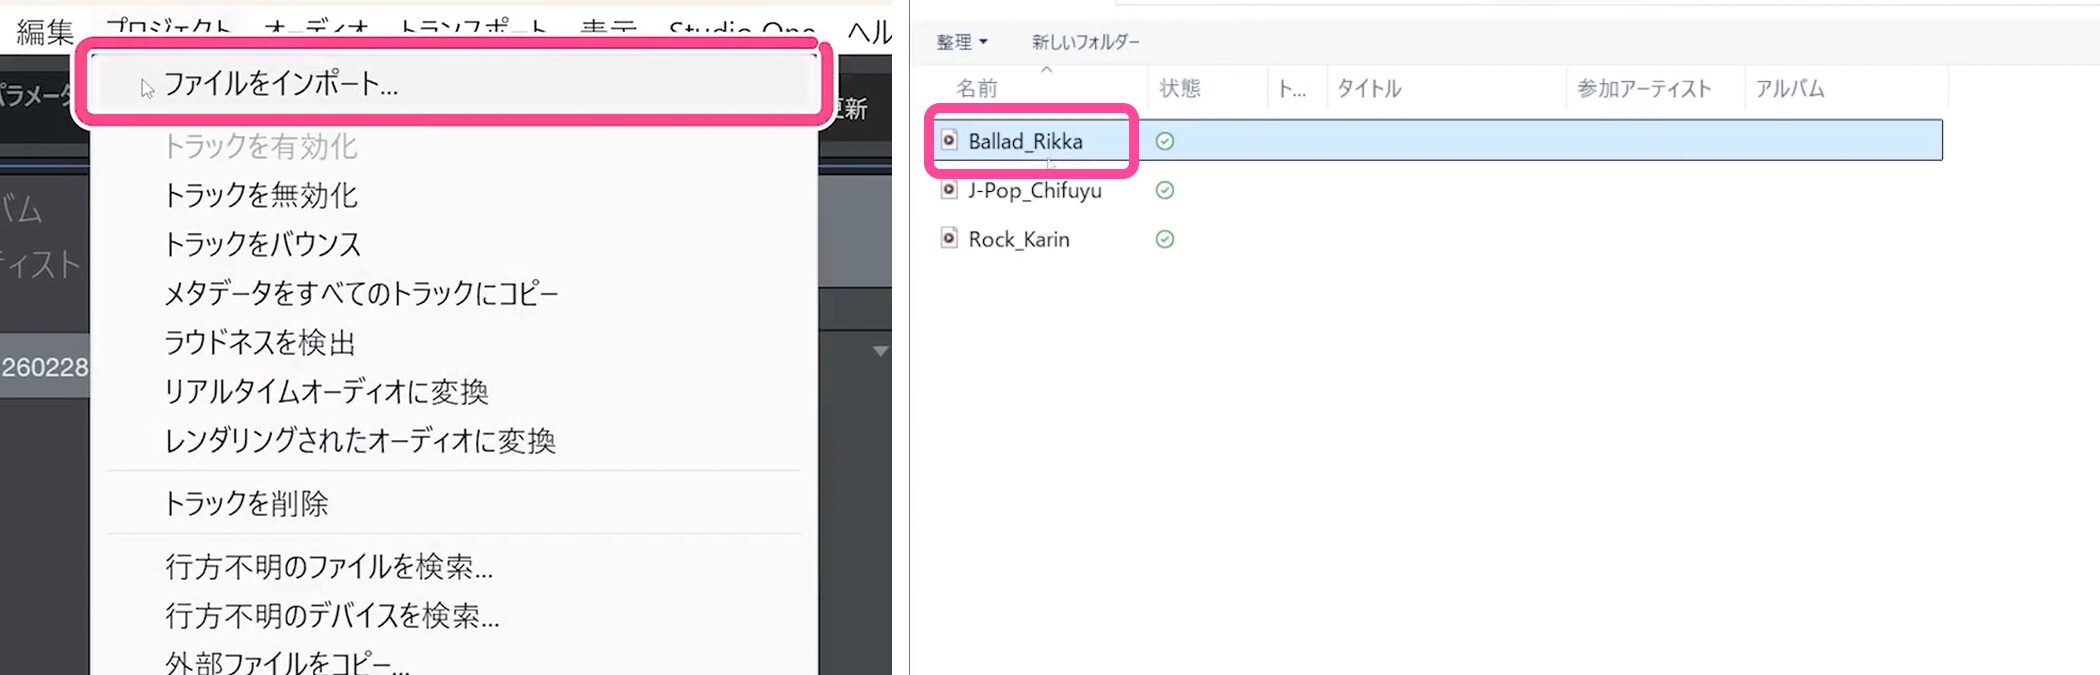
Choose Project → Import File to add exported audio files or Song files.
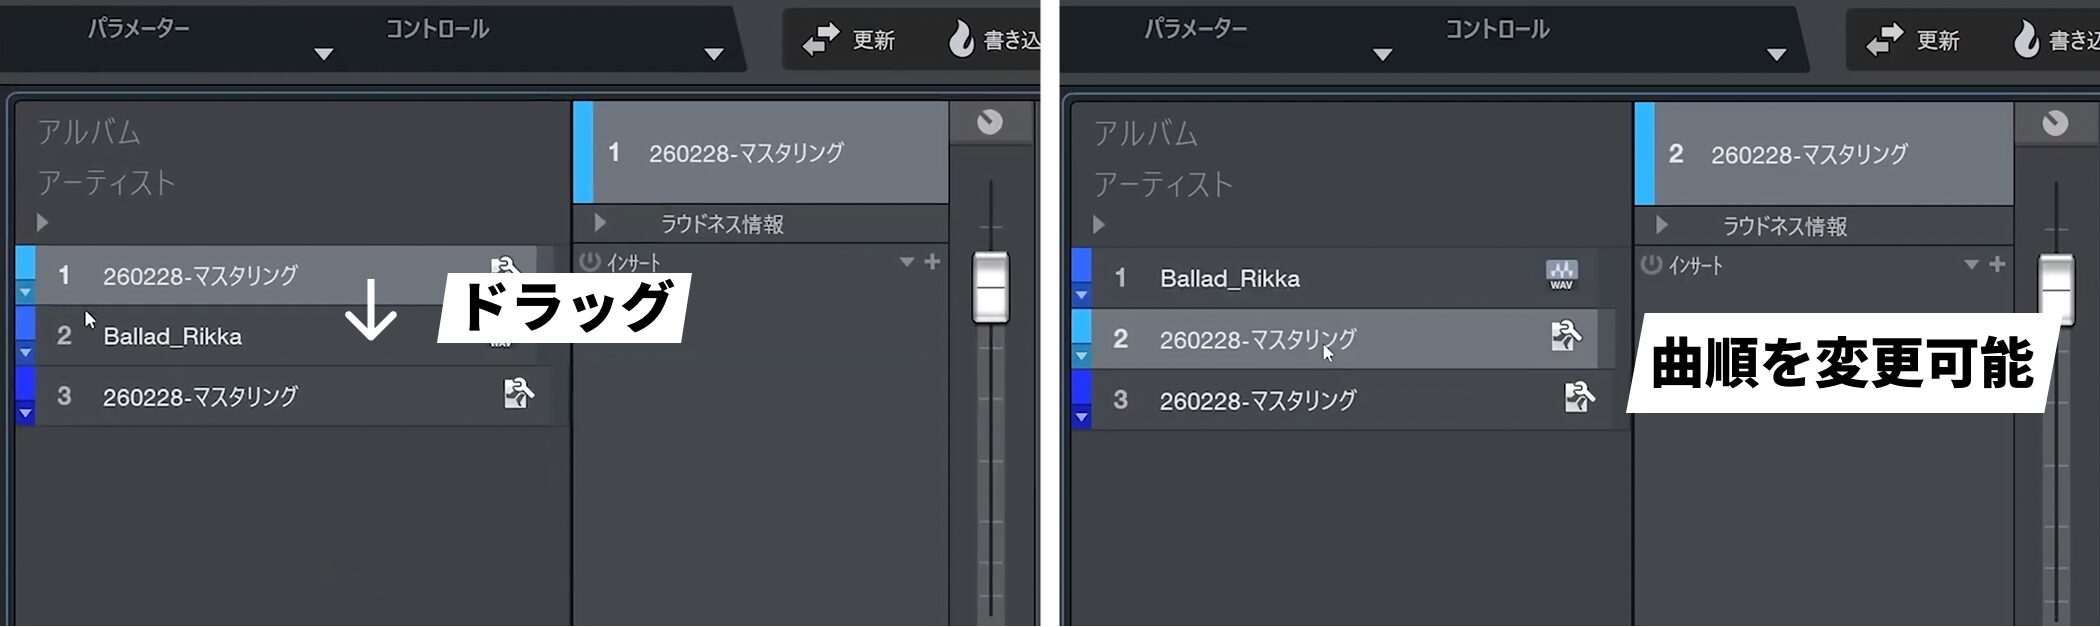
After importing multiple songs, you can change their order in the track list.
Understanding the Project page
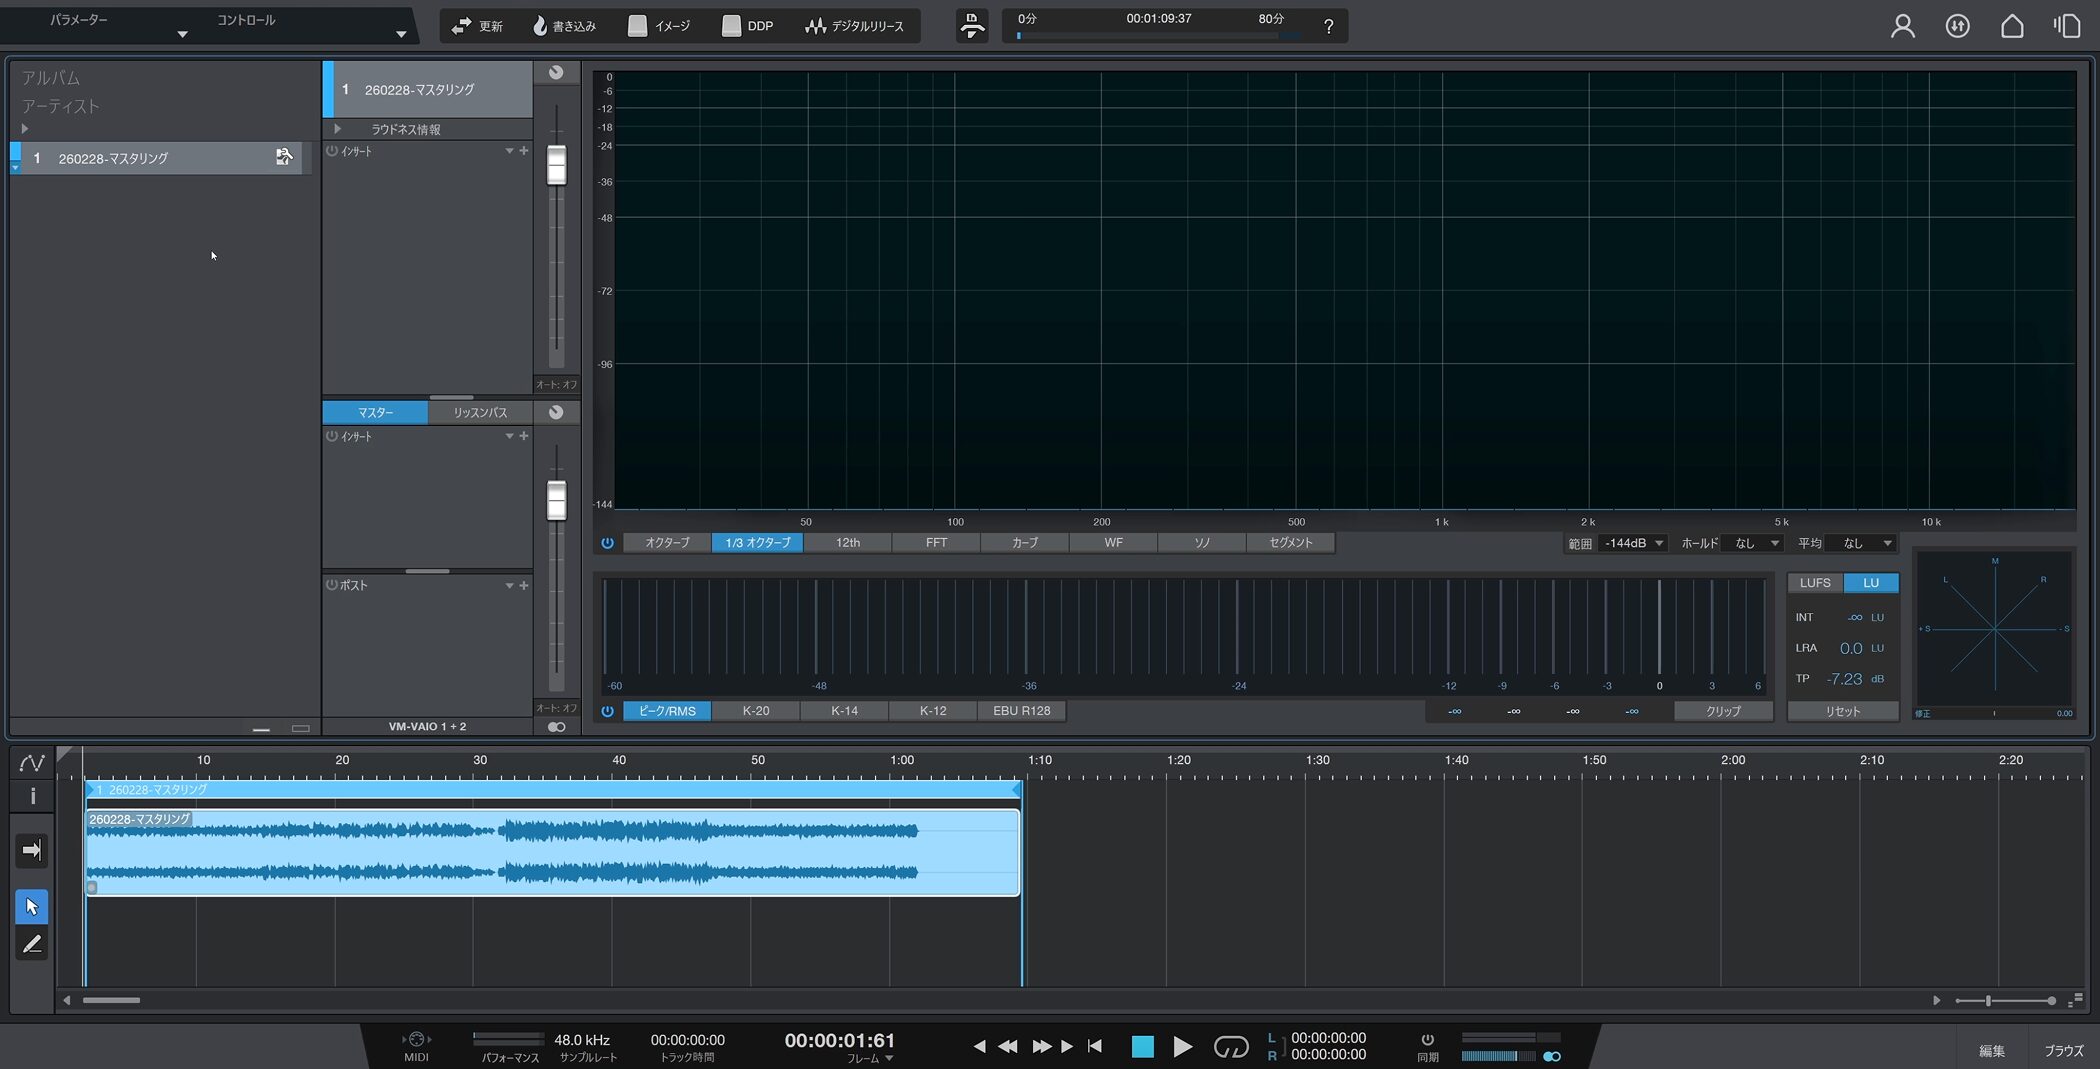
The Project page looks quite different from the Song page, so let’s first look at its layout.
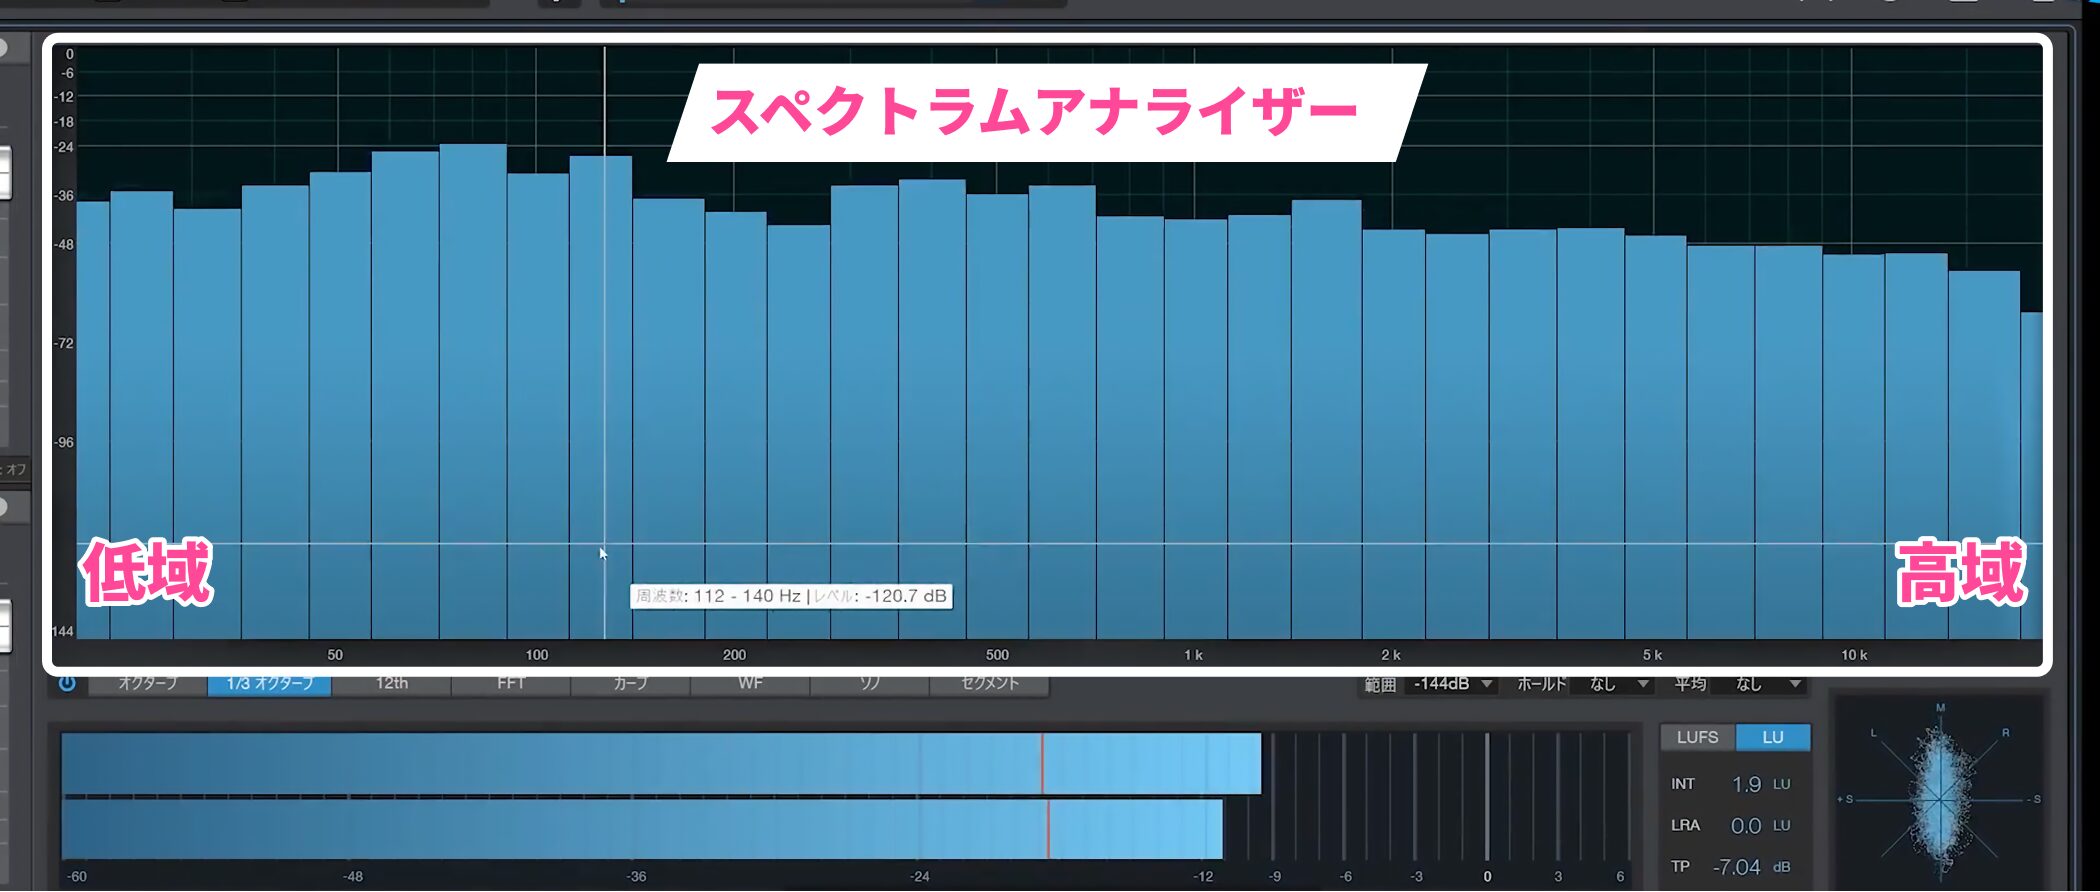
At the center is the spectrum analyzer.
During playback it shows low frequencies on the left and high frequencies on the right, letting you see the level of each frequency range at a glance.
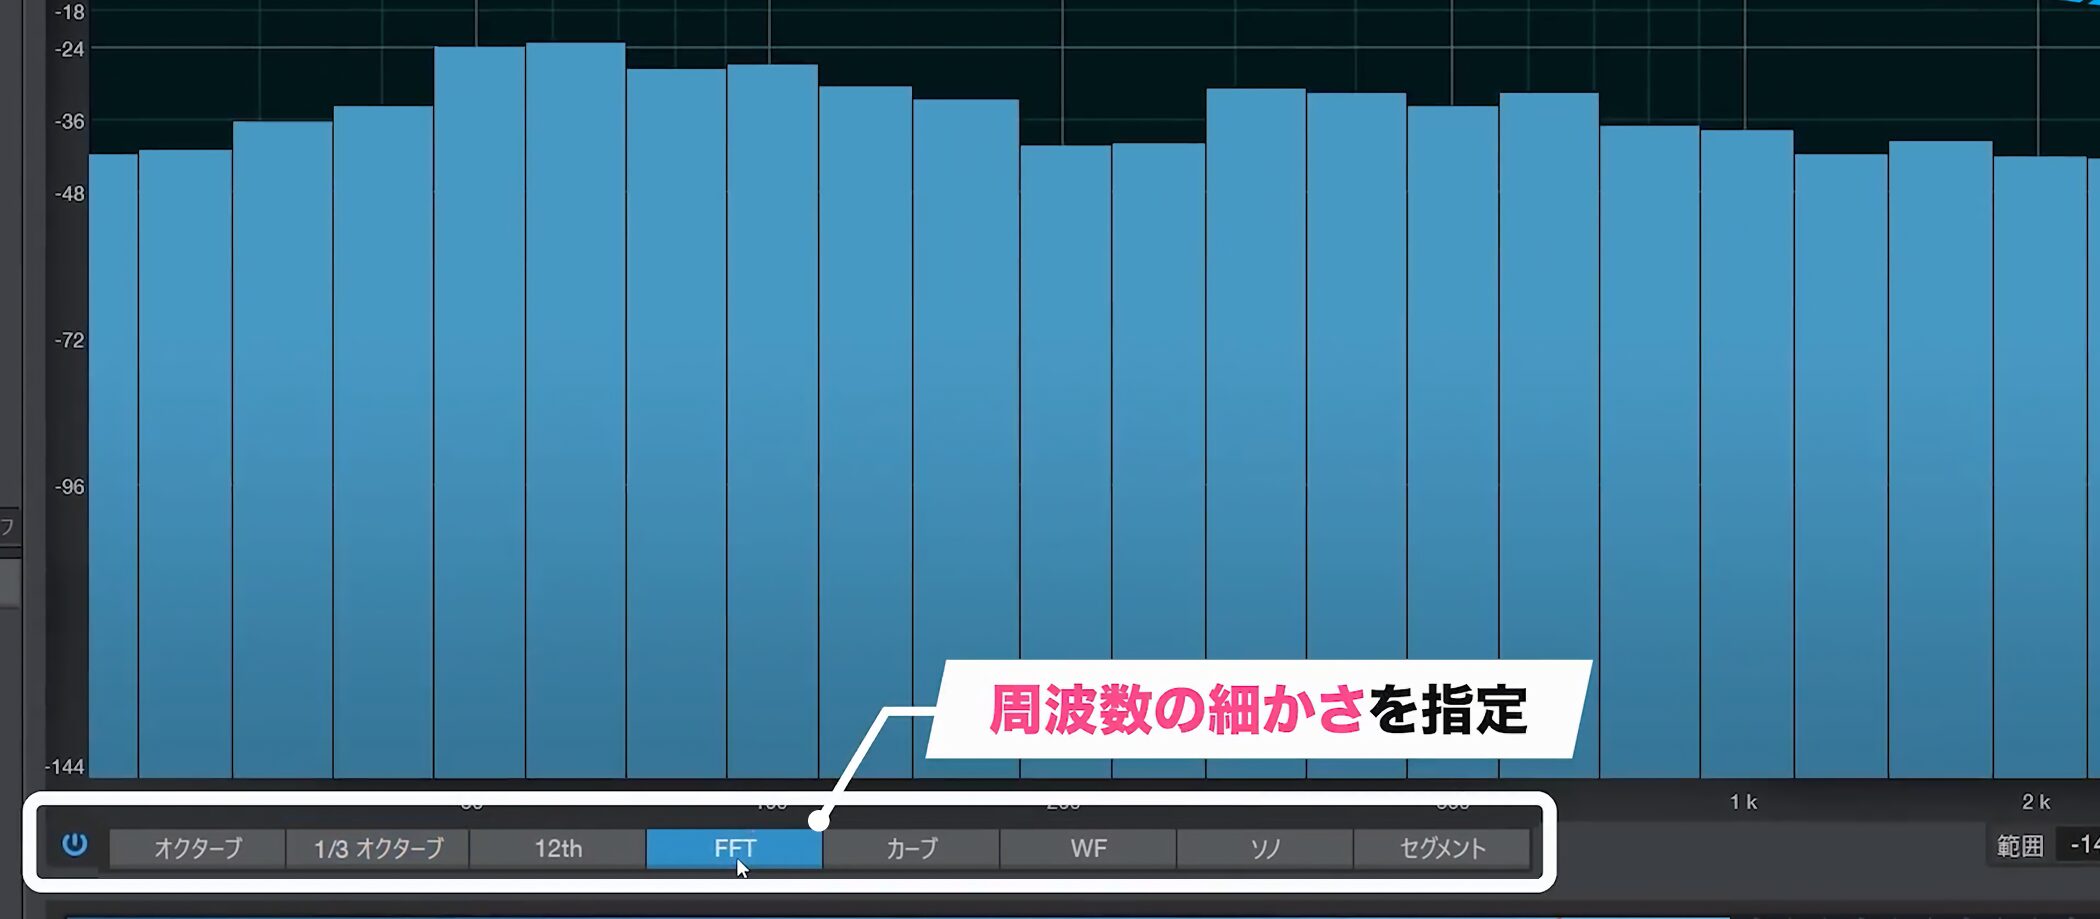
The controls below set the frequency detail.
Here, select FFT for the most detailed display.
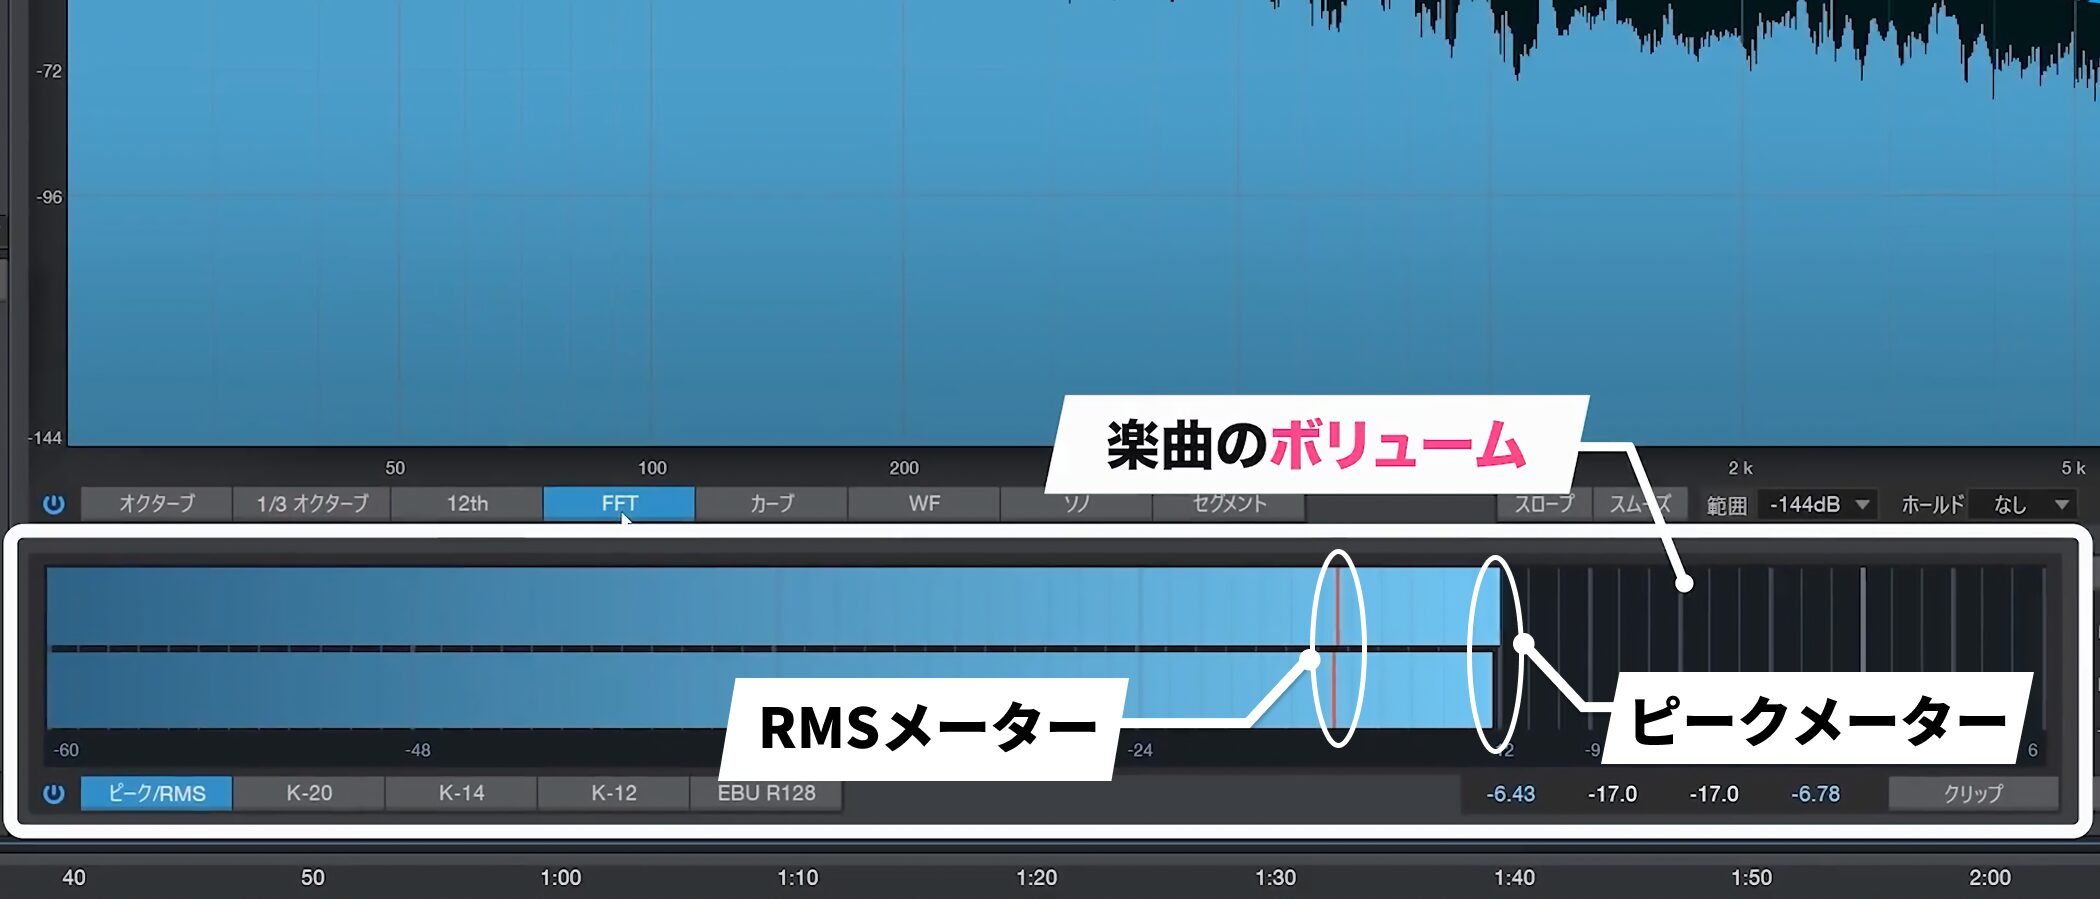
The meter below indicates the song’s volume.
There is a peak meter for instantaneous level, and an RMS meter whose red line shows the short-term average over approximately 0.3 seconds.
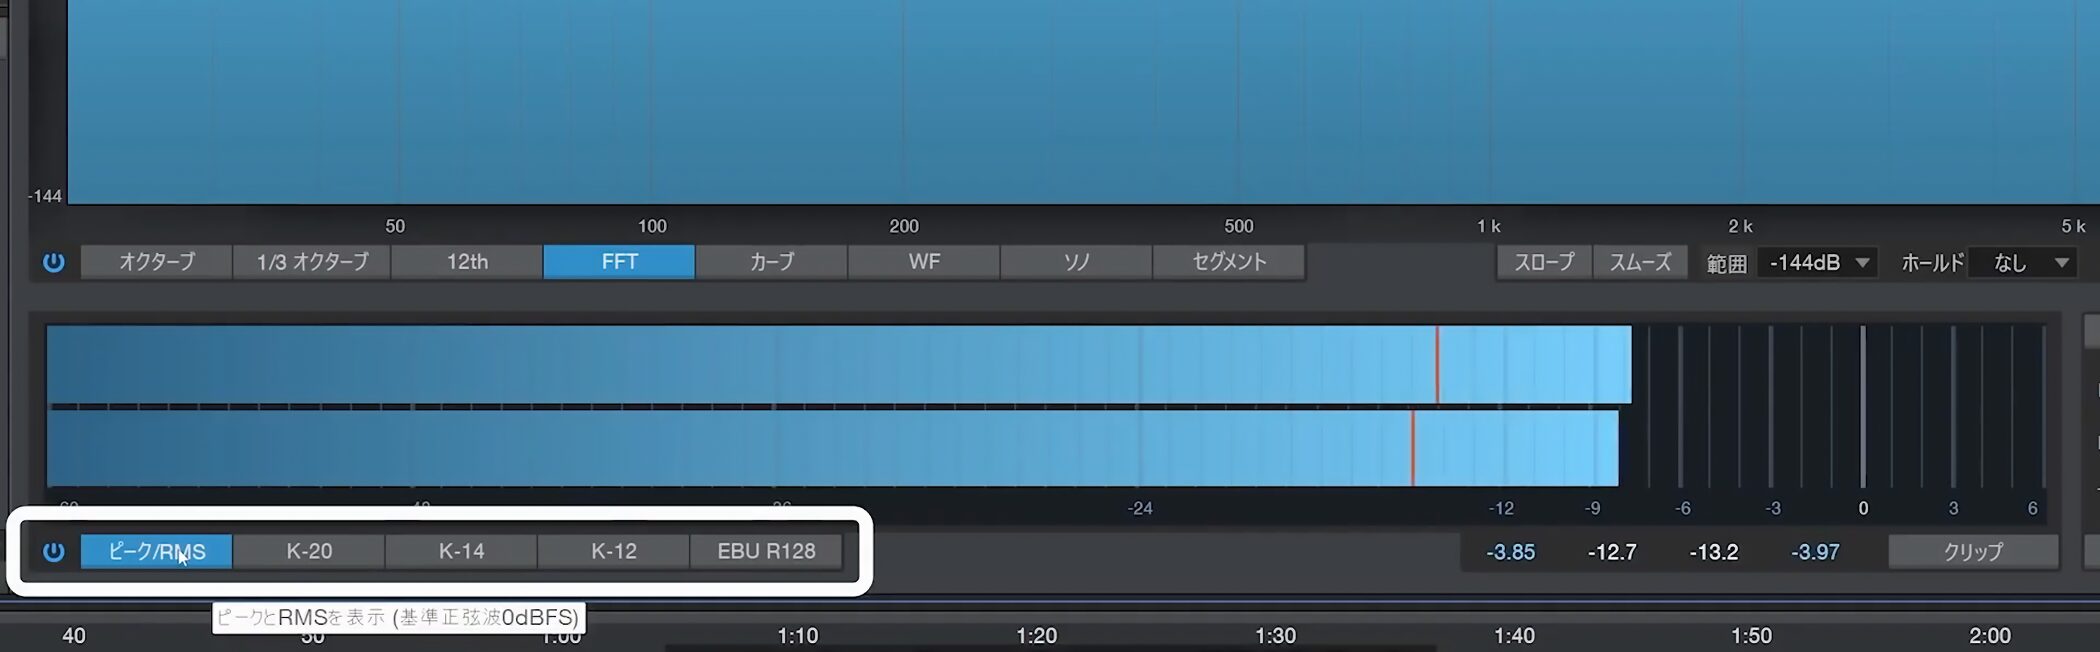
The display can also be changed below the meter. Use Peak/RMS to make peaks easy to see.
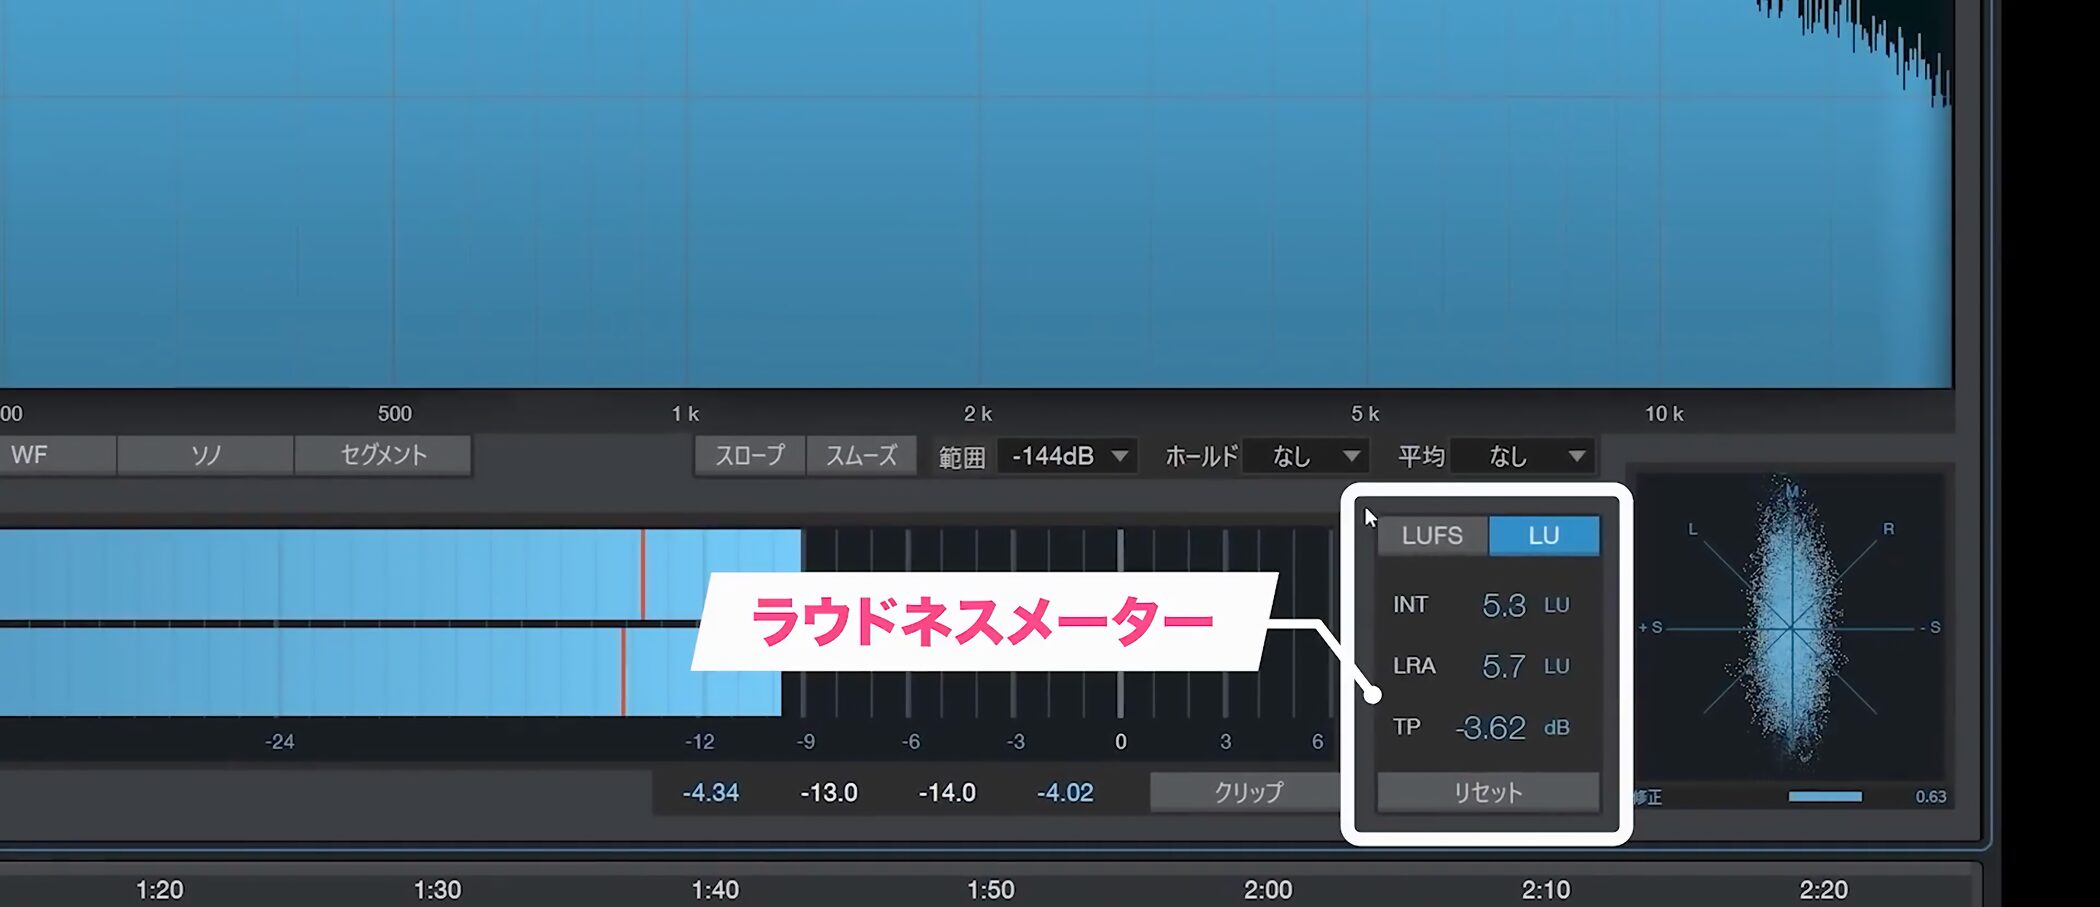
The meter on the right is the loudness meter, which indicates a level closer to perceived loudness.
Streaming services such as Spotify, Apple Music, and YouTube use loudness as a basis for normalization.
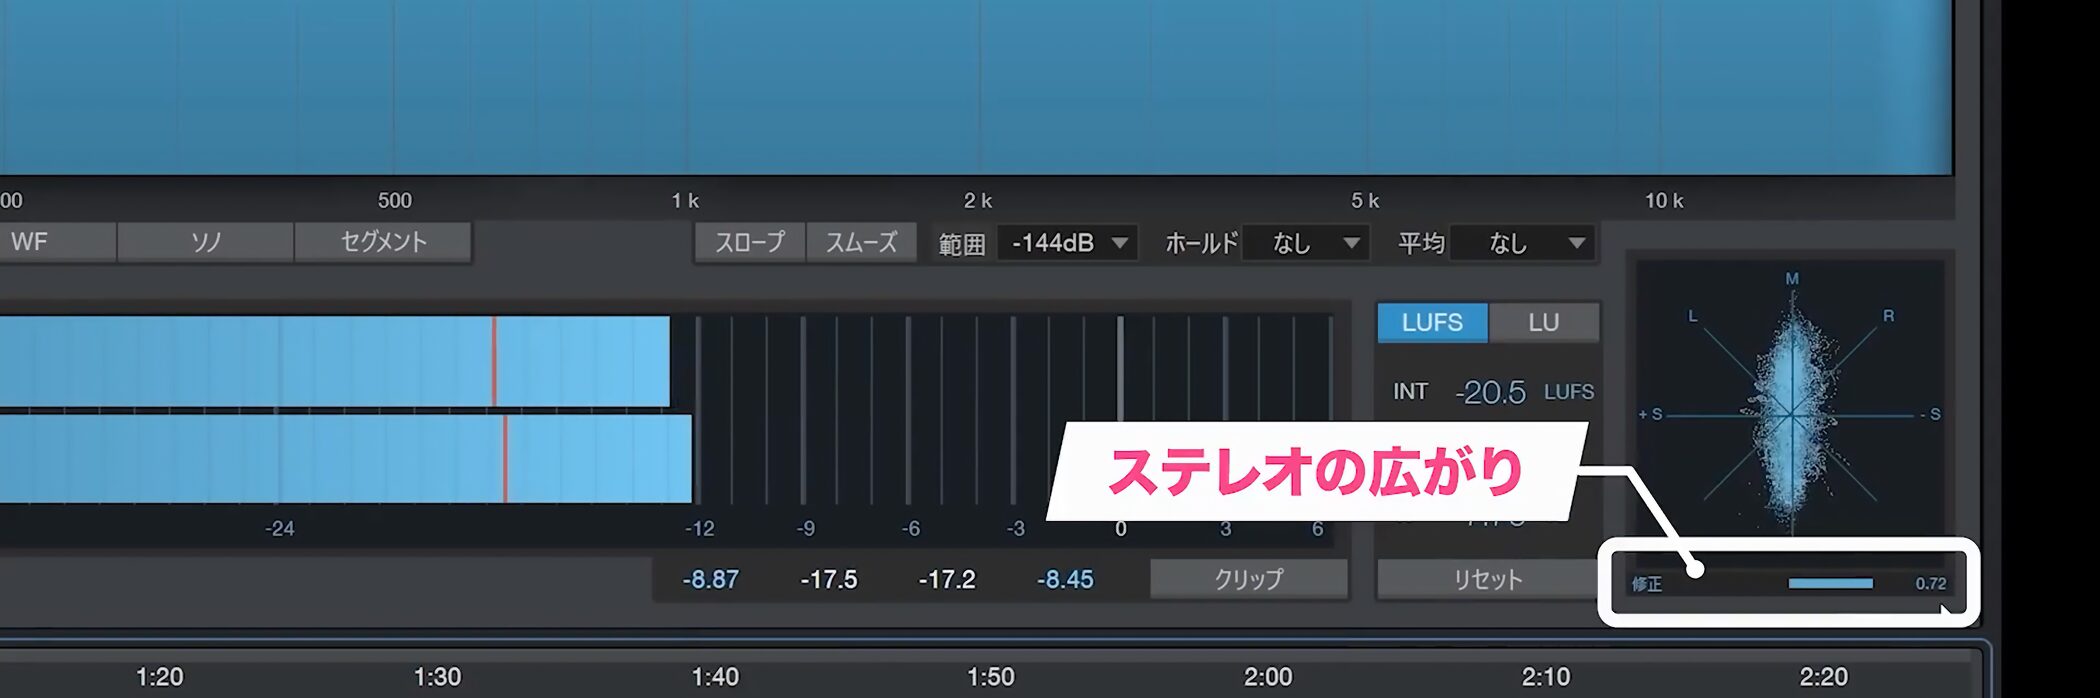
The meter farther right shows stereo width, or phase correlation.
- A reading farther to the right of center indicates a stronger mono component.
- A reading near the center indicates mainly independent left and right stereo components.
- A reading to the left may indicate cancellation between left and right; return to the mix to investigate and correct it.
Balance frequencies with an equalizer
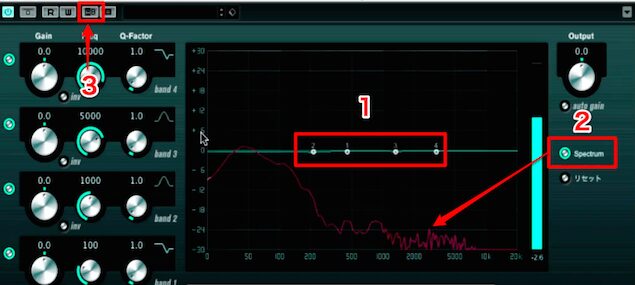
Use an equalizer to adjust the song’s frequency balance.
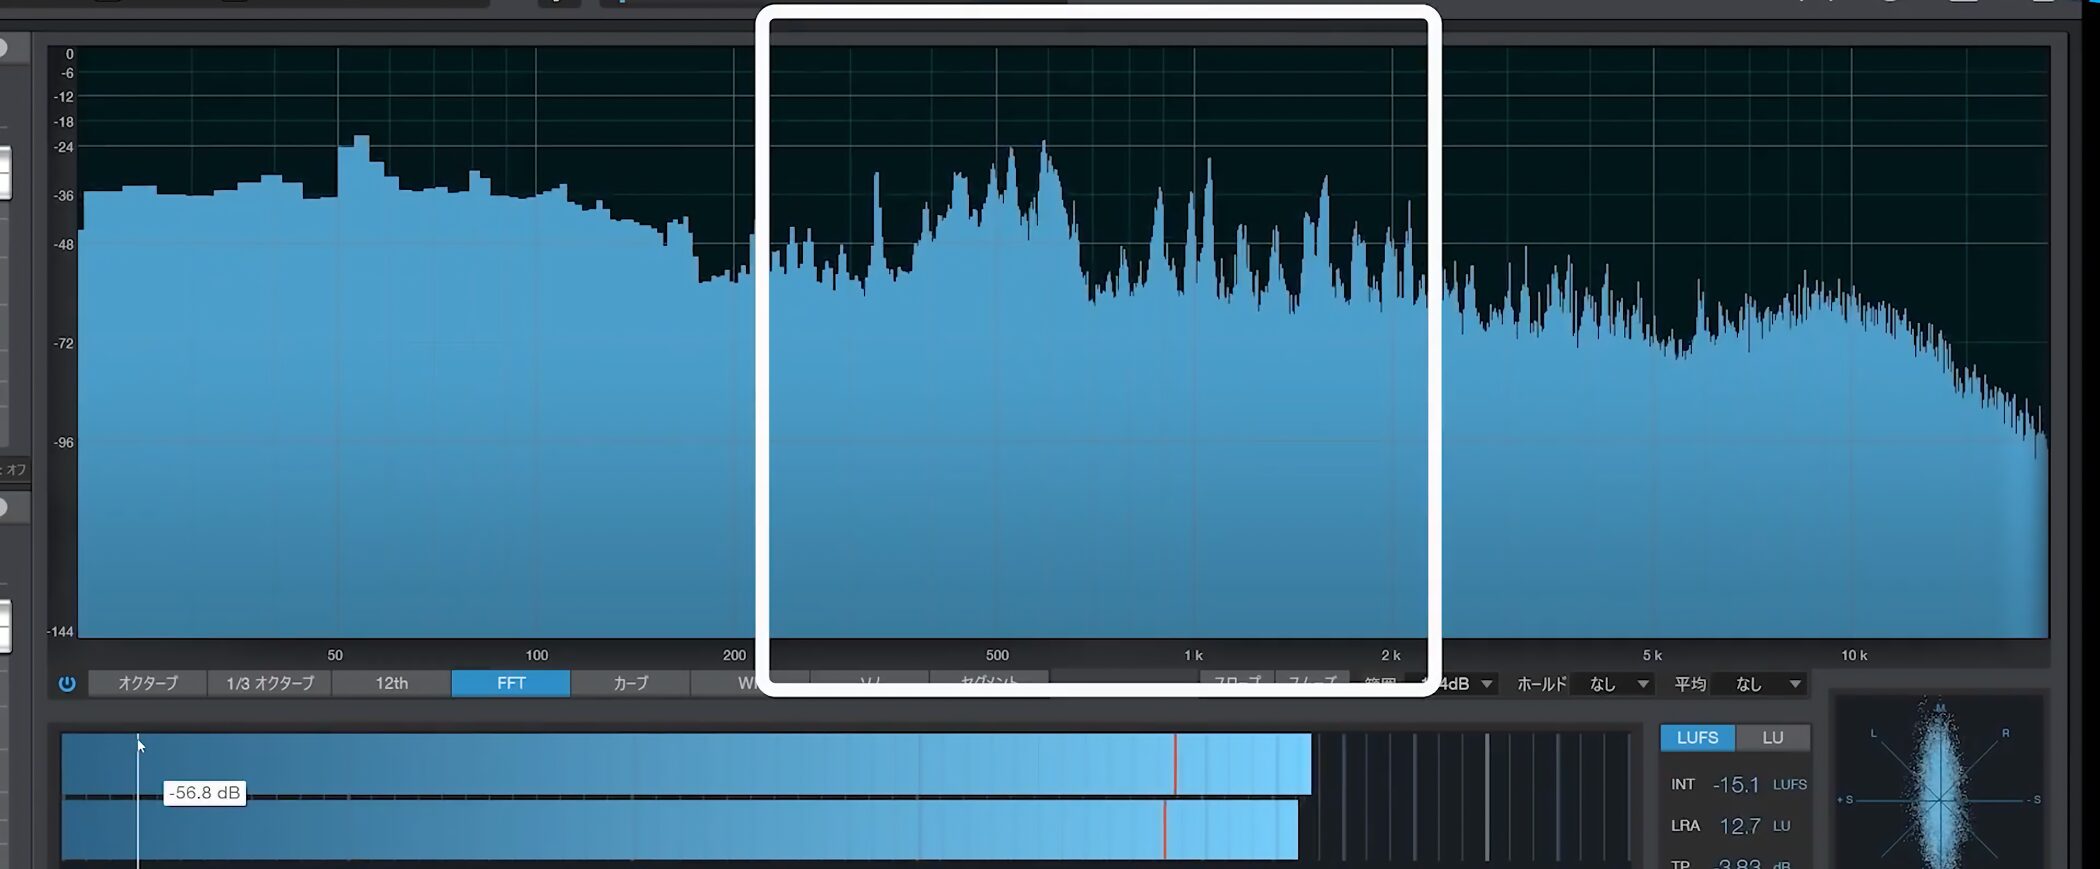
Play the song while watching the central analyzer. In this example, part of the midrange is prominent.
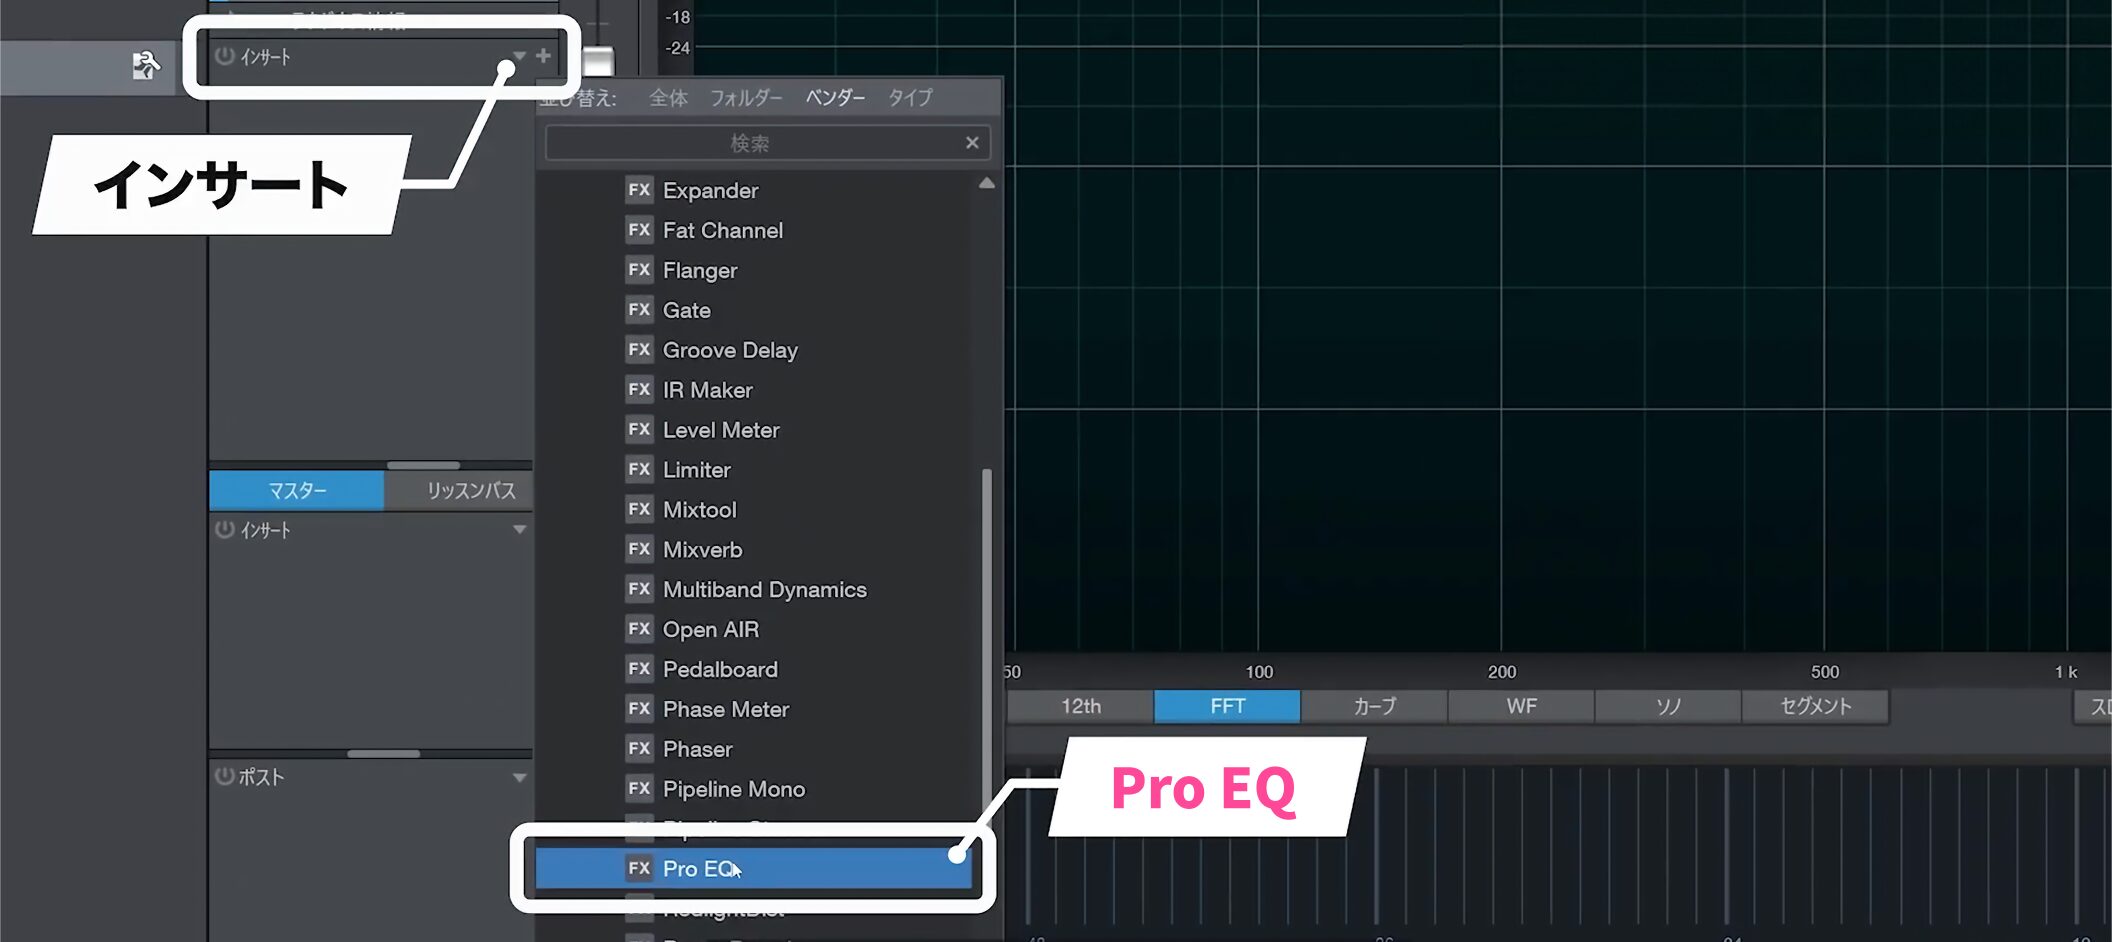
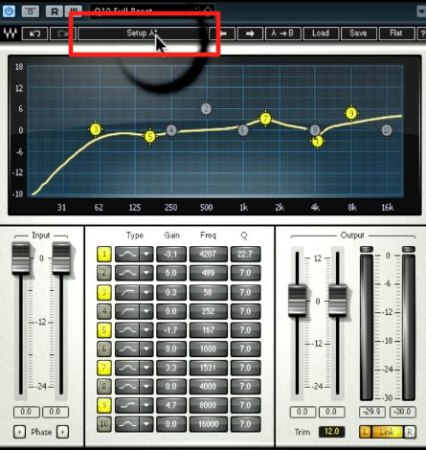
Open Pro EQ from the inserts at the top.
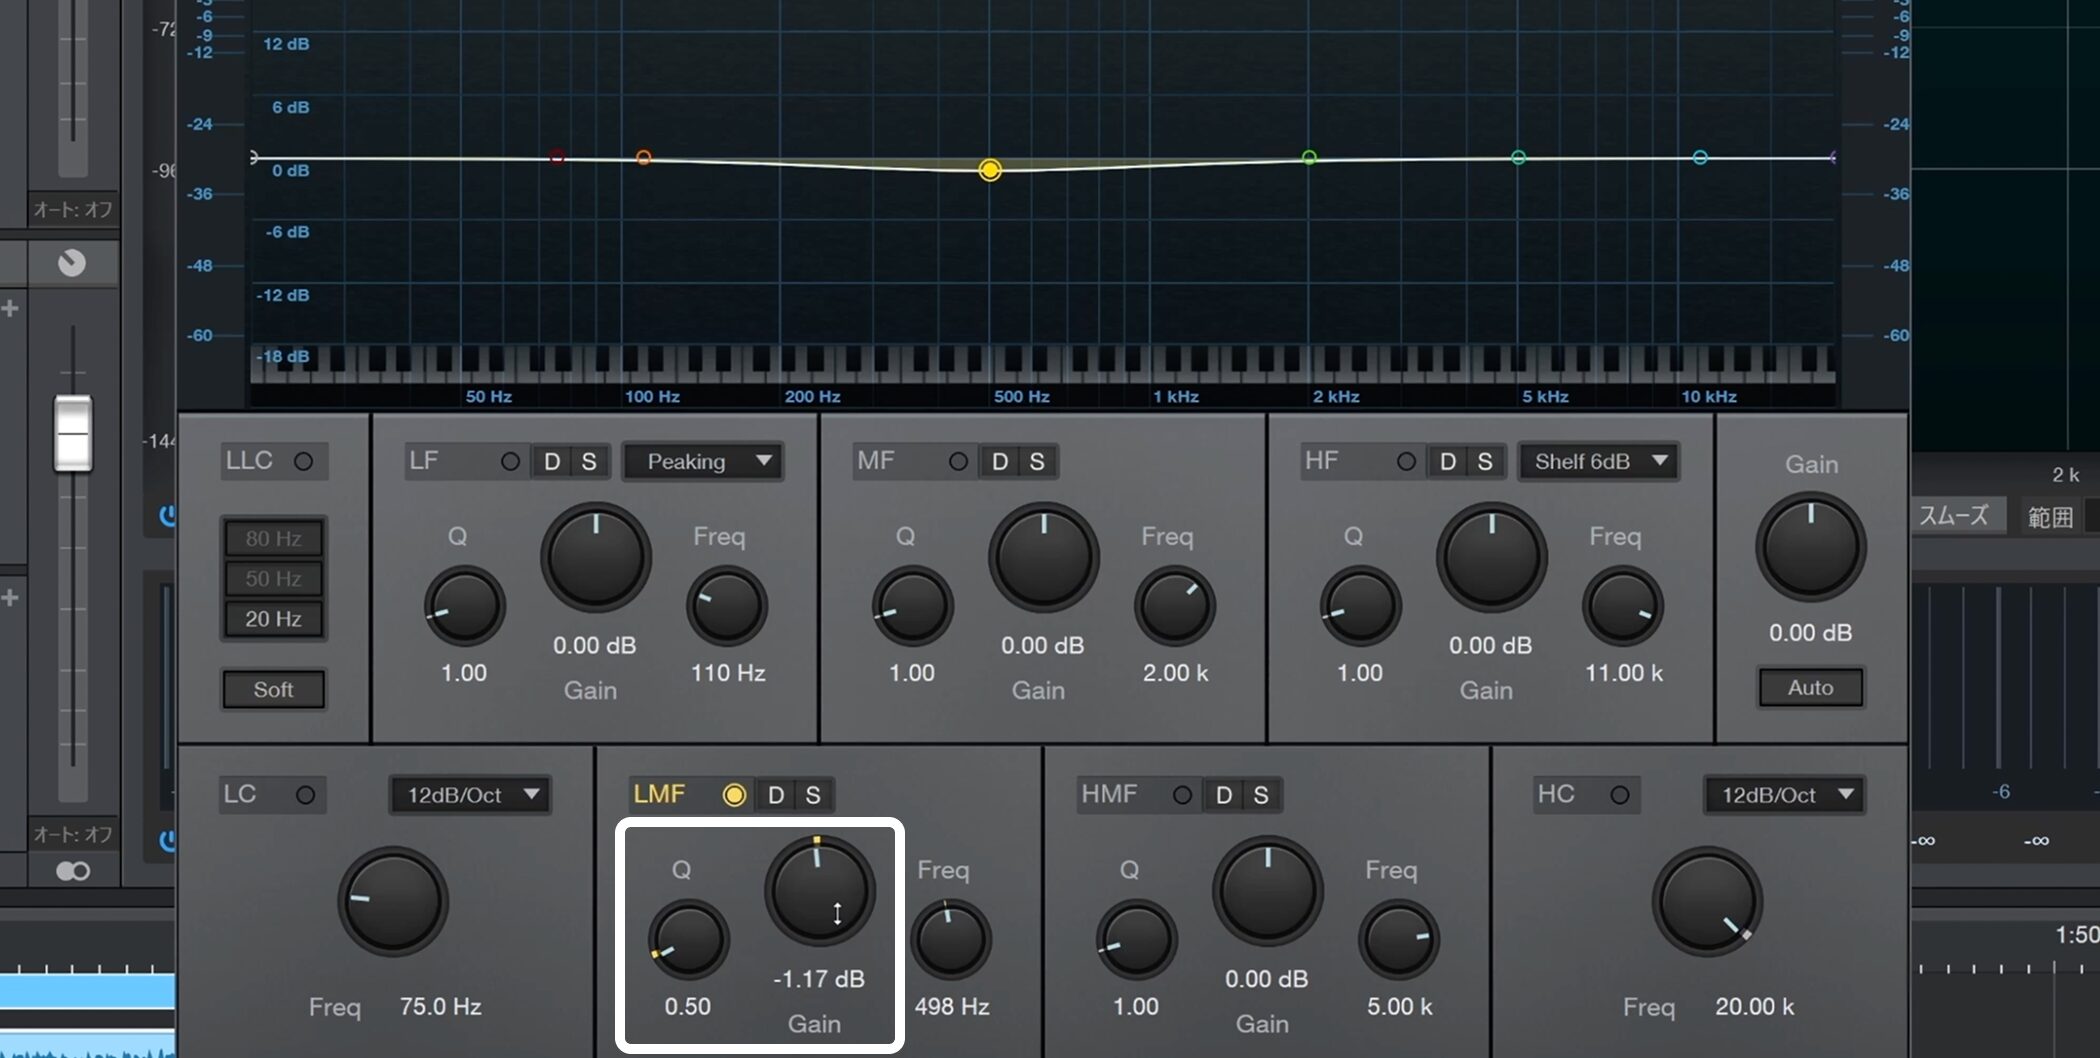
To avoid excessive tonal changes when mastering, use a wide Q.
Keep gain changes to around 2 dB and aim for a natural result.
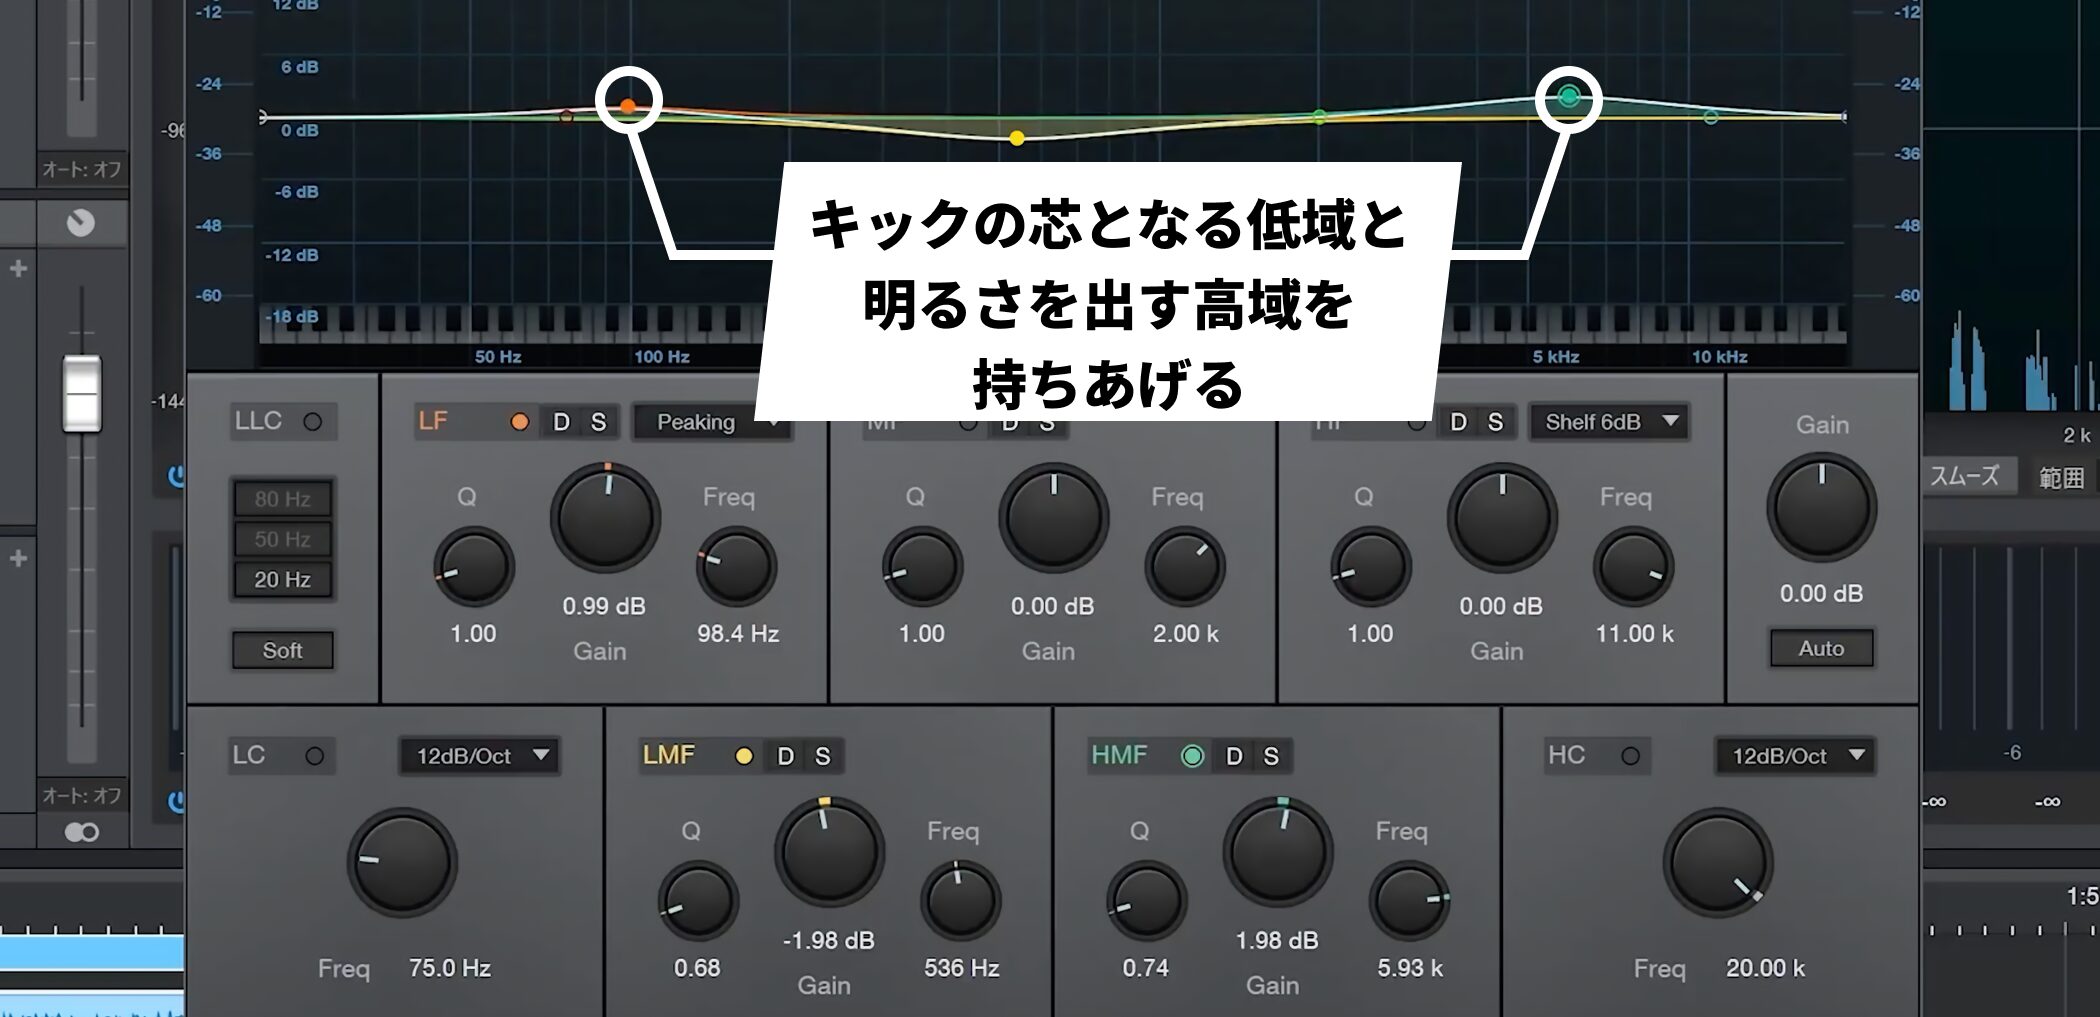
Along with adjusting the midrange, raise the lows that give the kick its body and the highs that add brightness and sparkle.
These settings are only an example. The appropriate adjustments depend on the song, so always listen while making changes.
Control volume variation with a compressor
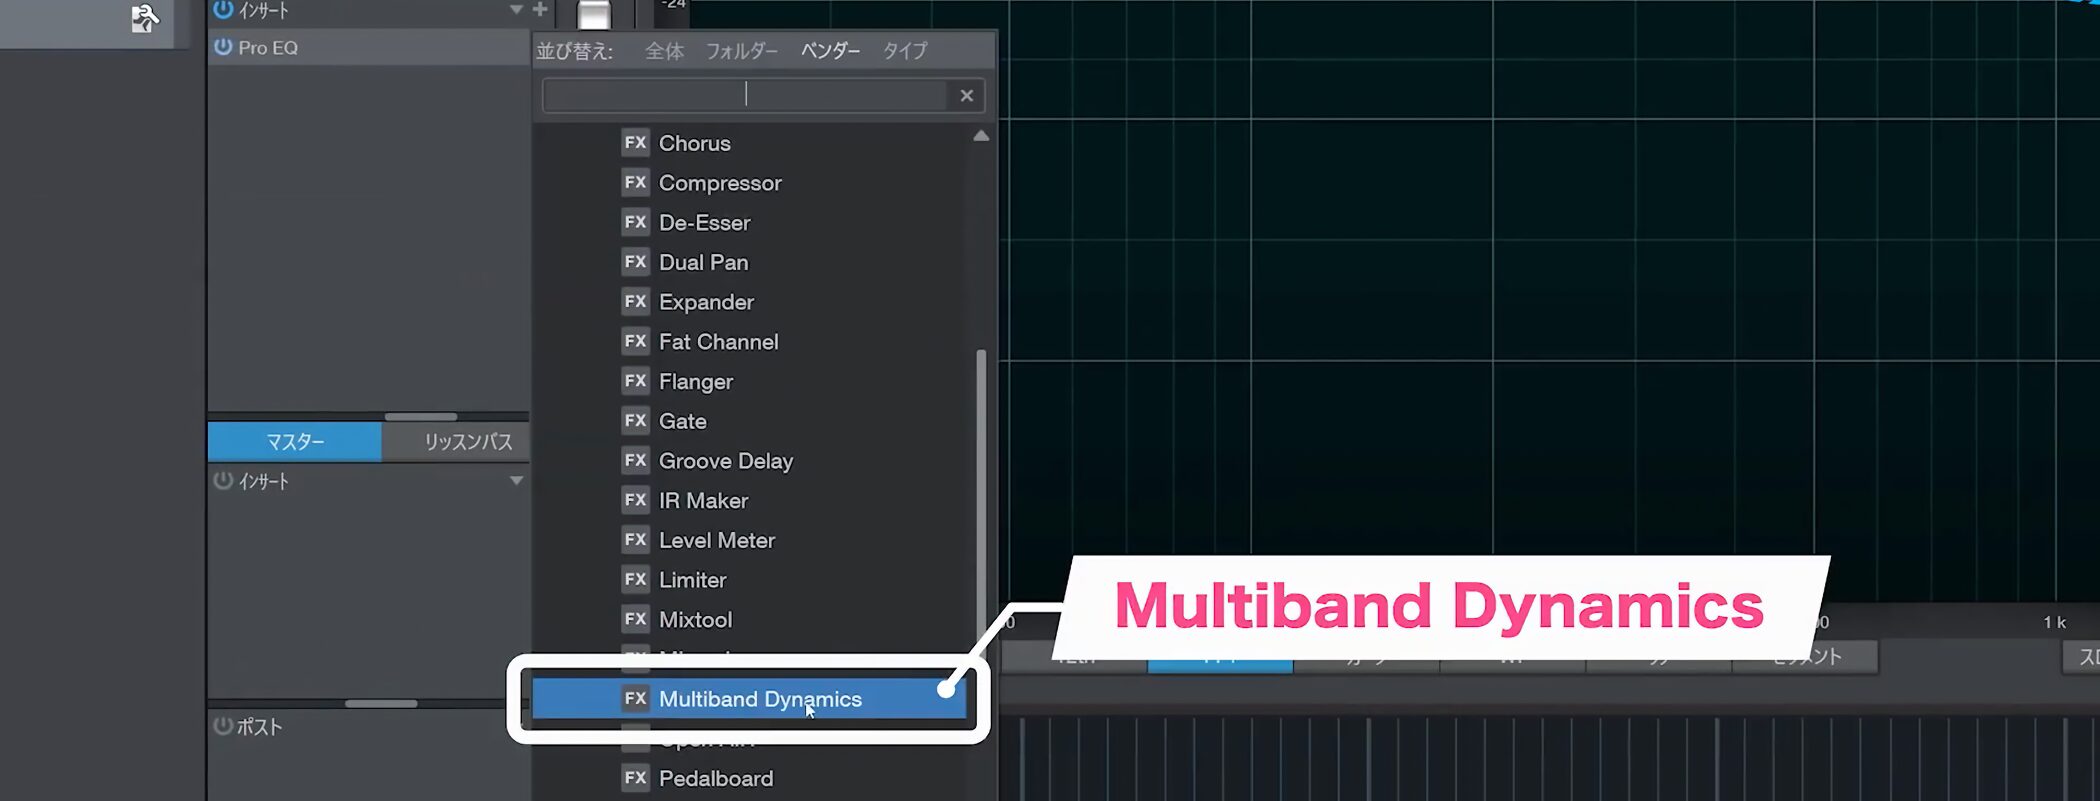
From the inserts, select Multiband Dynamics, a compressor that processes frequency bands separately.
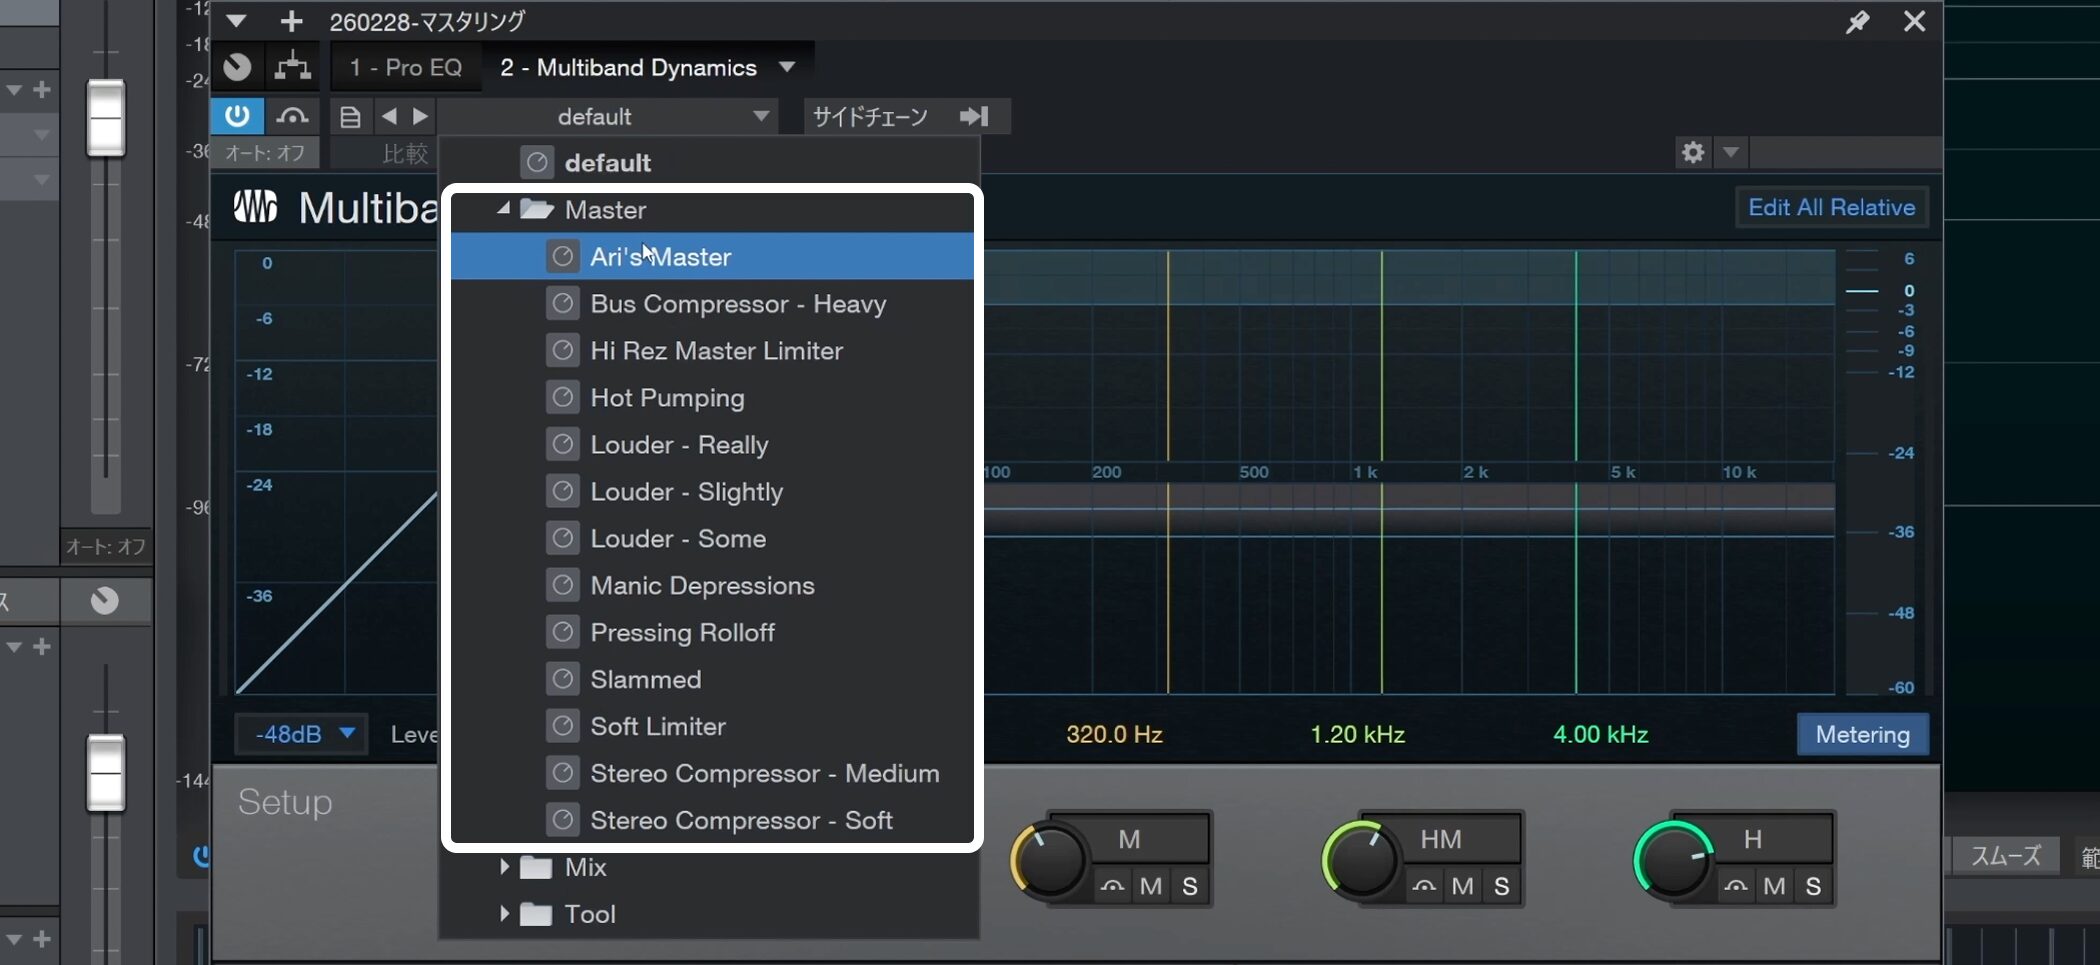
It offers many mastering presets, each with a different character.
Compare them by ear and choose one that suits the song.
When using a preset, remember that the amount of compression varies greatly with the incoming signal level.
A louder signal is compressed more strongly, while one that is too quiet may not trigger compression at all.
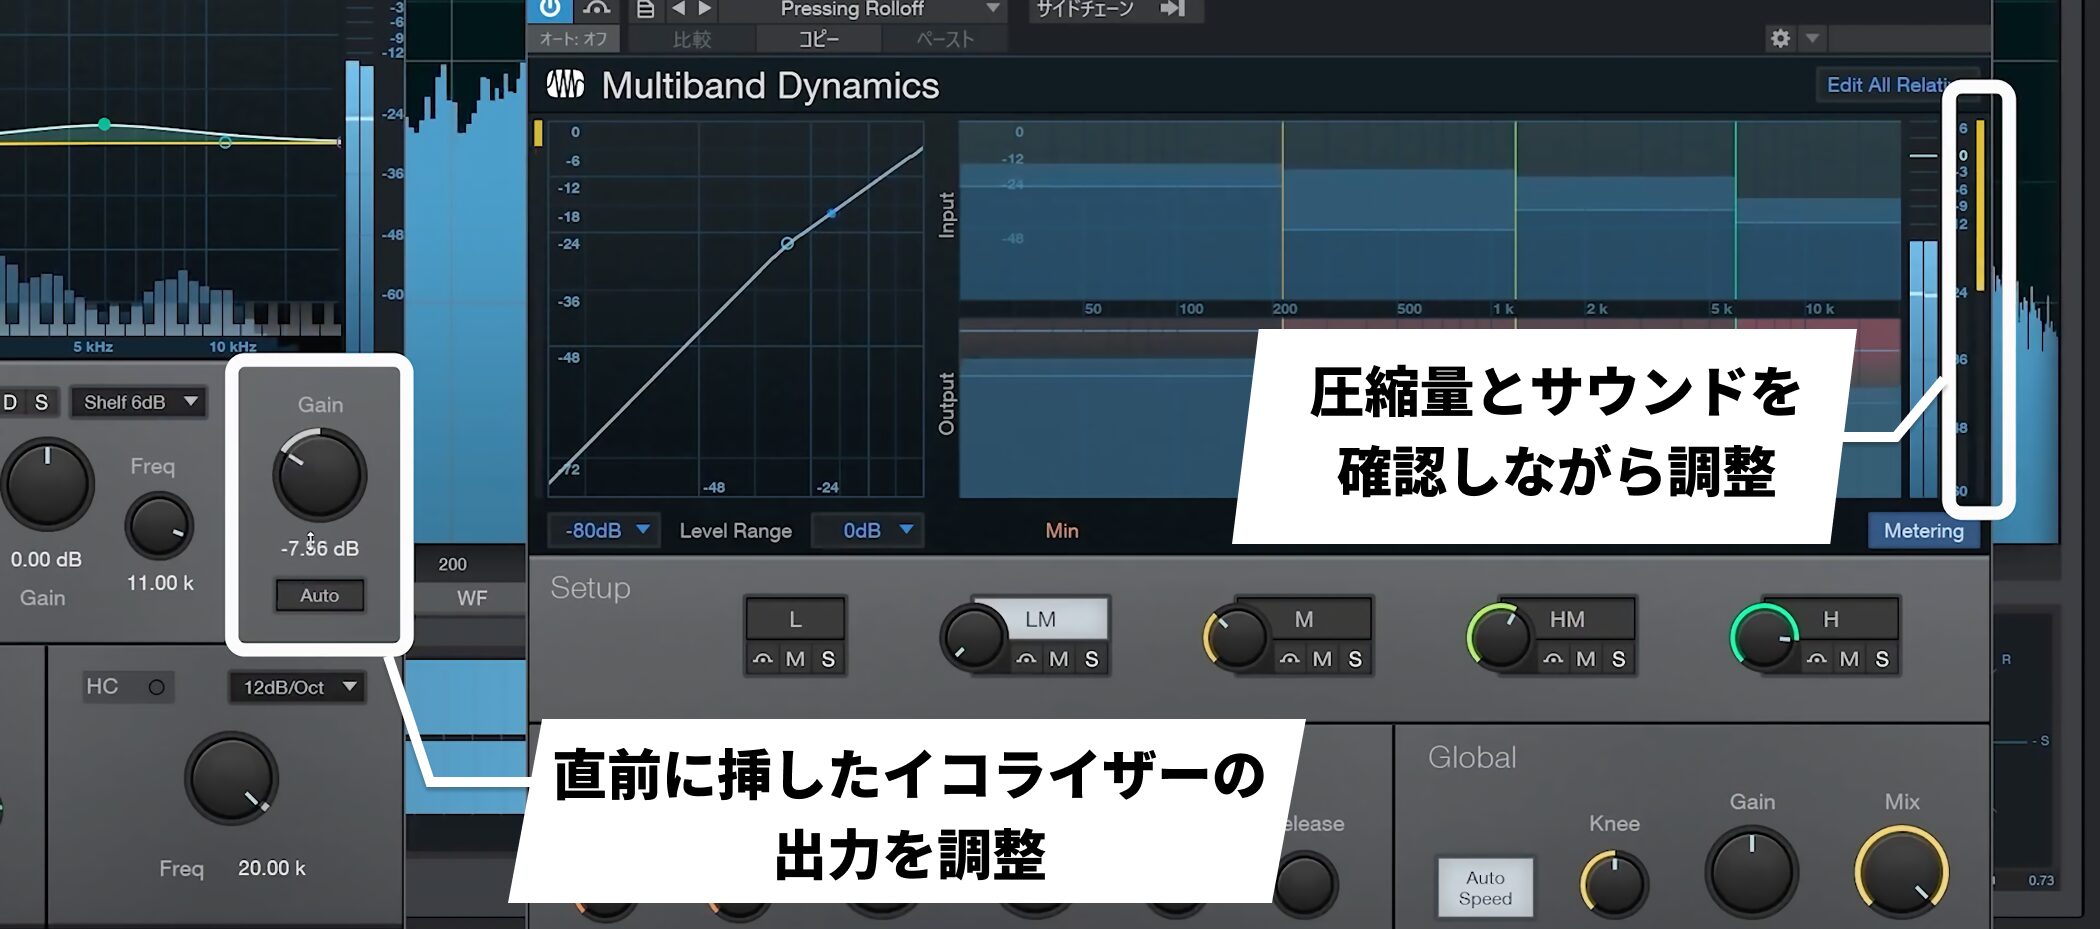
There are many ways to adjust this. One simple method is to adjust the output of the EQ immediately before the compressor, controlling the level fed into it.
Lowering it weakens the compression; raising it makes compression stronger.
Watch the amount of gain reduction on the right and listen for a natural result.
Set the loudness using Spotify’s reference
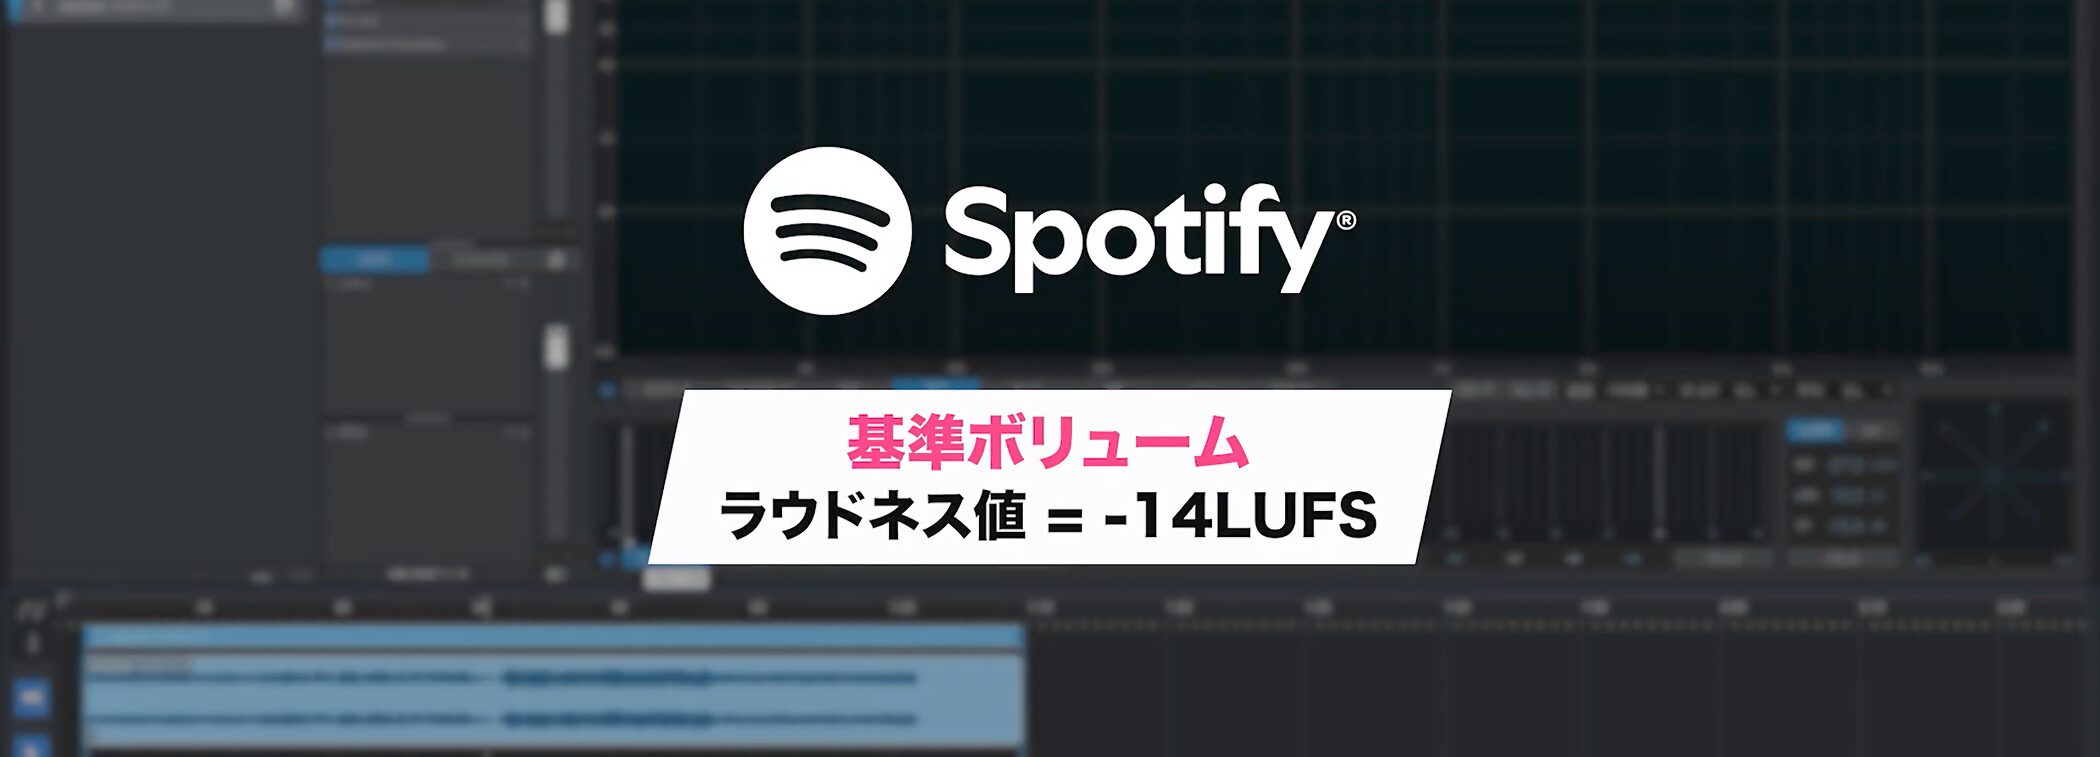
Finally, adjust the volume.
Aim for Spotify’s reference loudness of -14 LUFS.
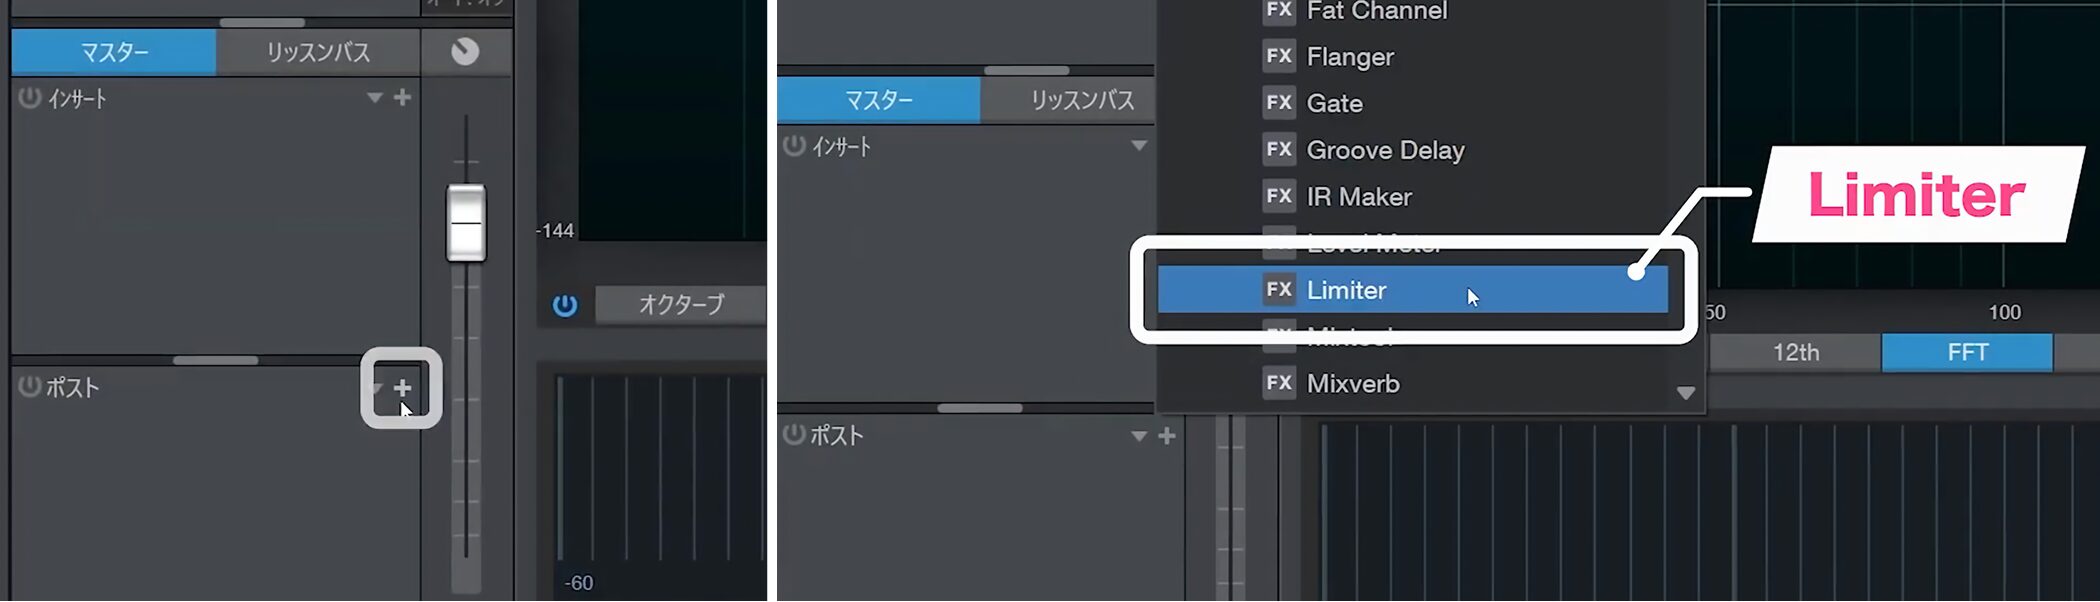
First, click the post section and add a Limiter to control volume.
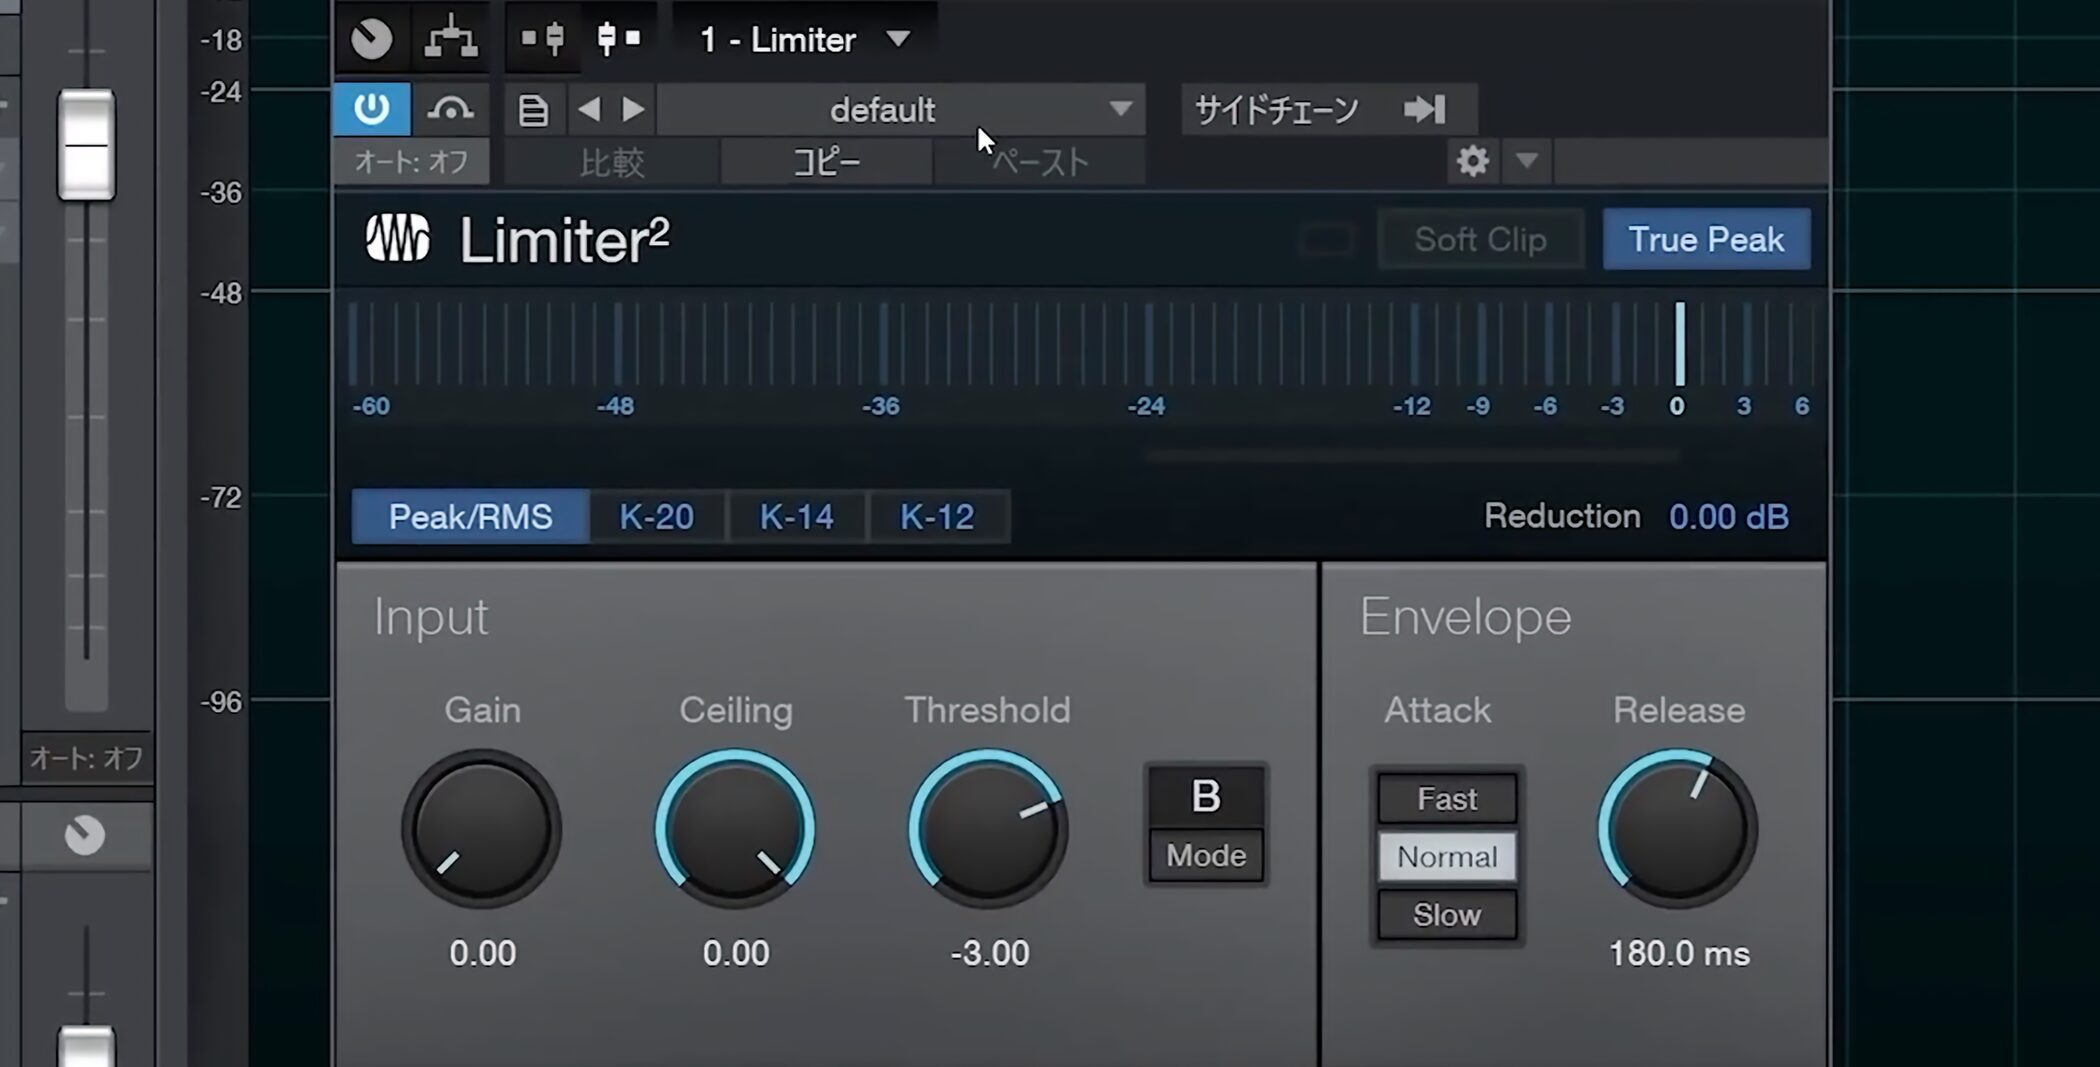
The limiter can also help prevent distortion and clipping.
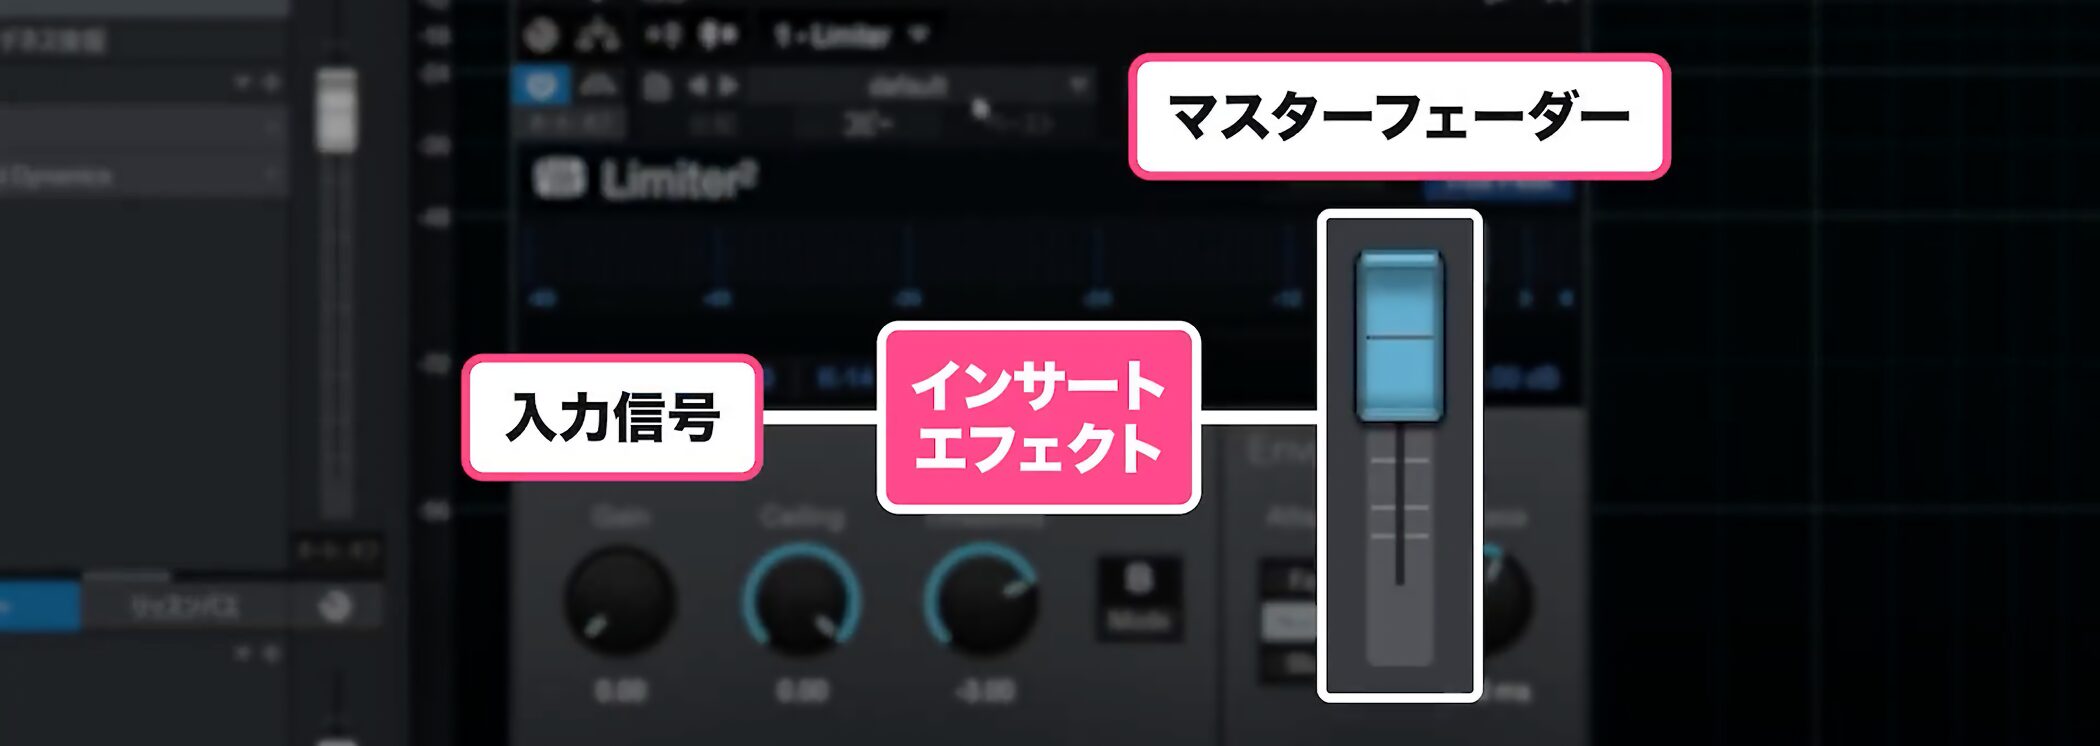
The insert effects used so far are applied before the master fader.
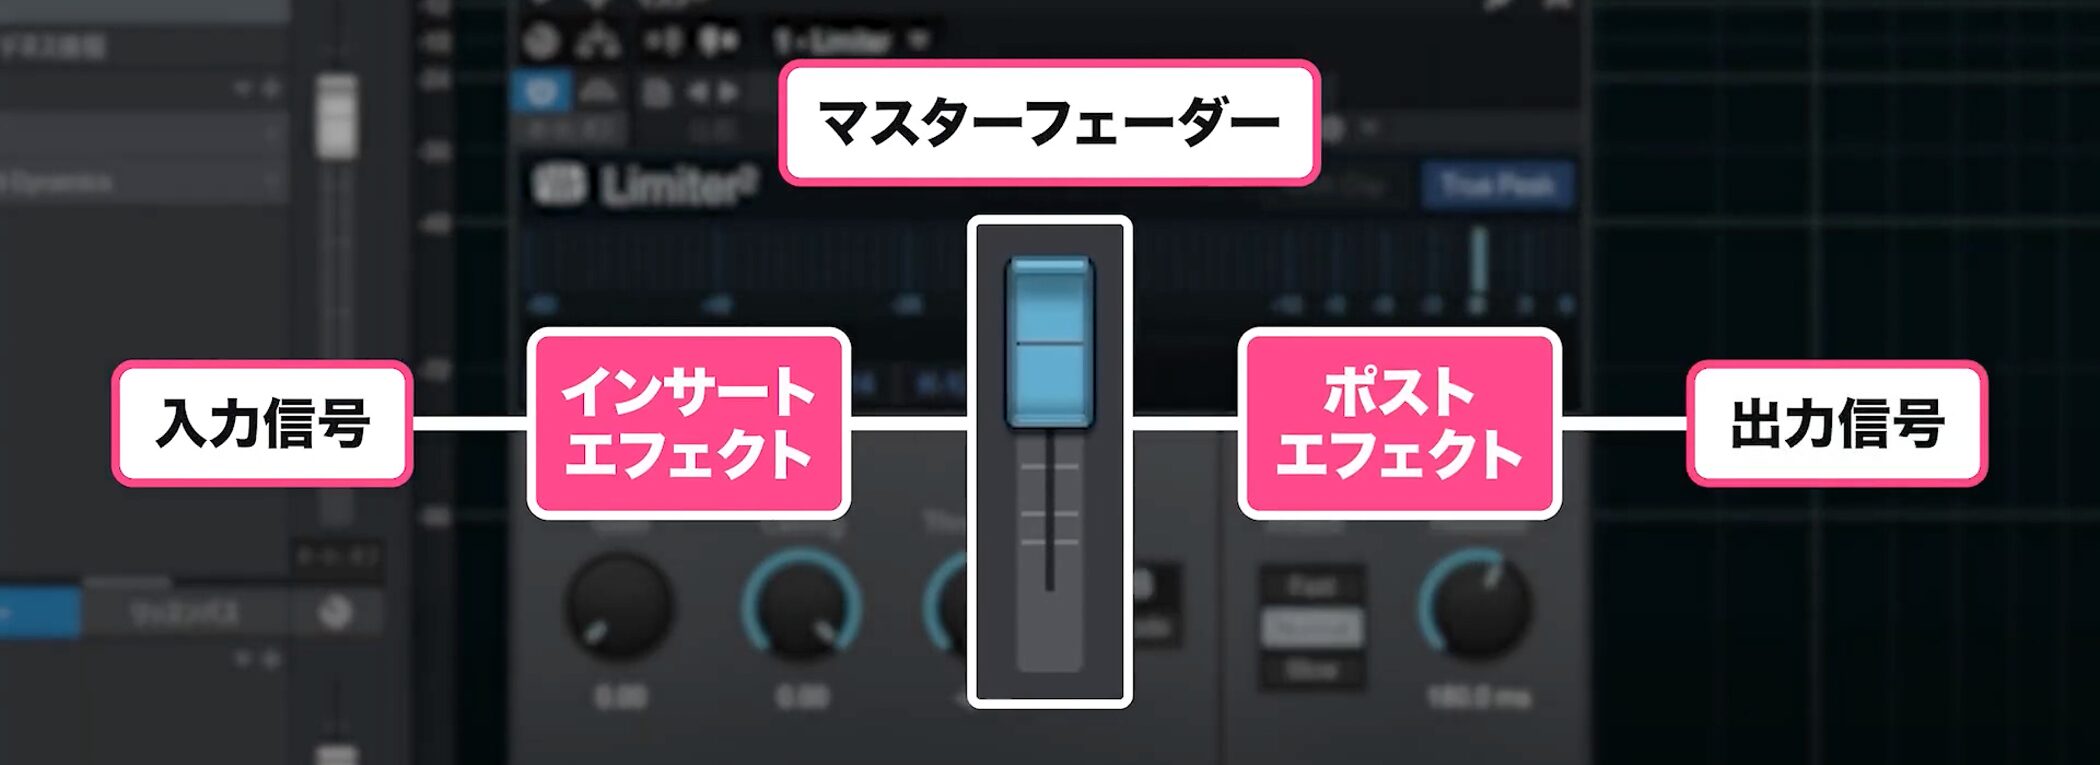
The post section is applied after the fader.
Placing the limiter in the post section as the last stage helps reduce the risk of clipping.
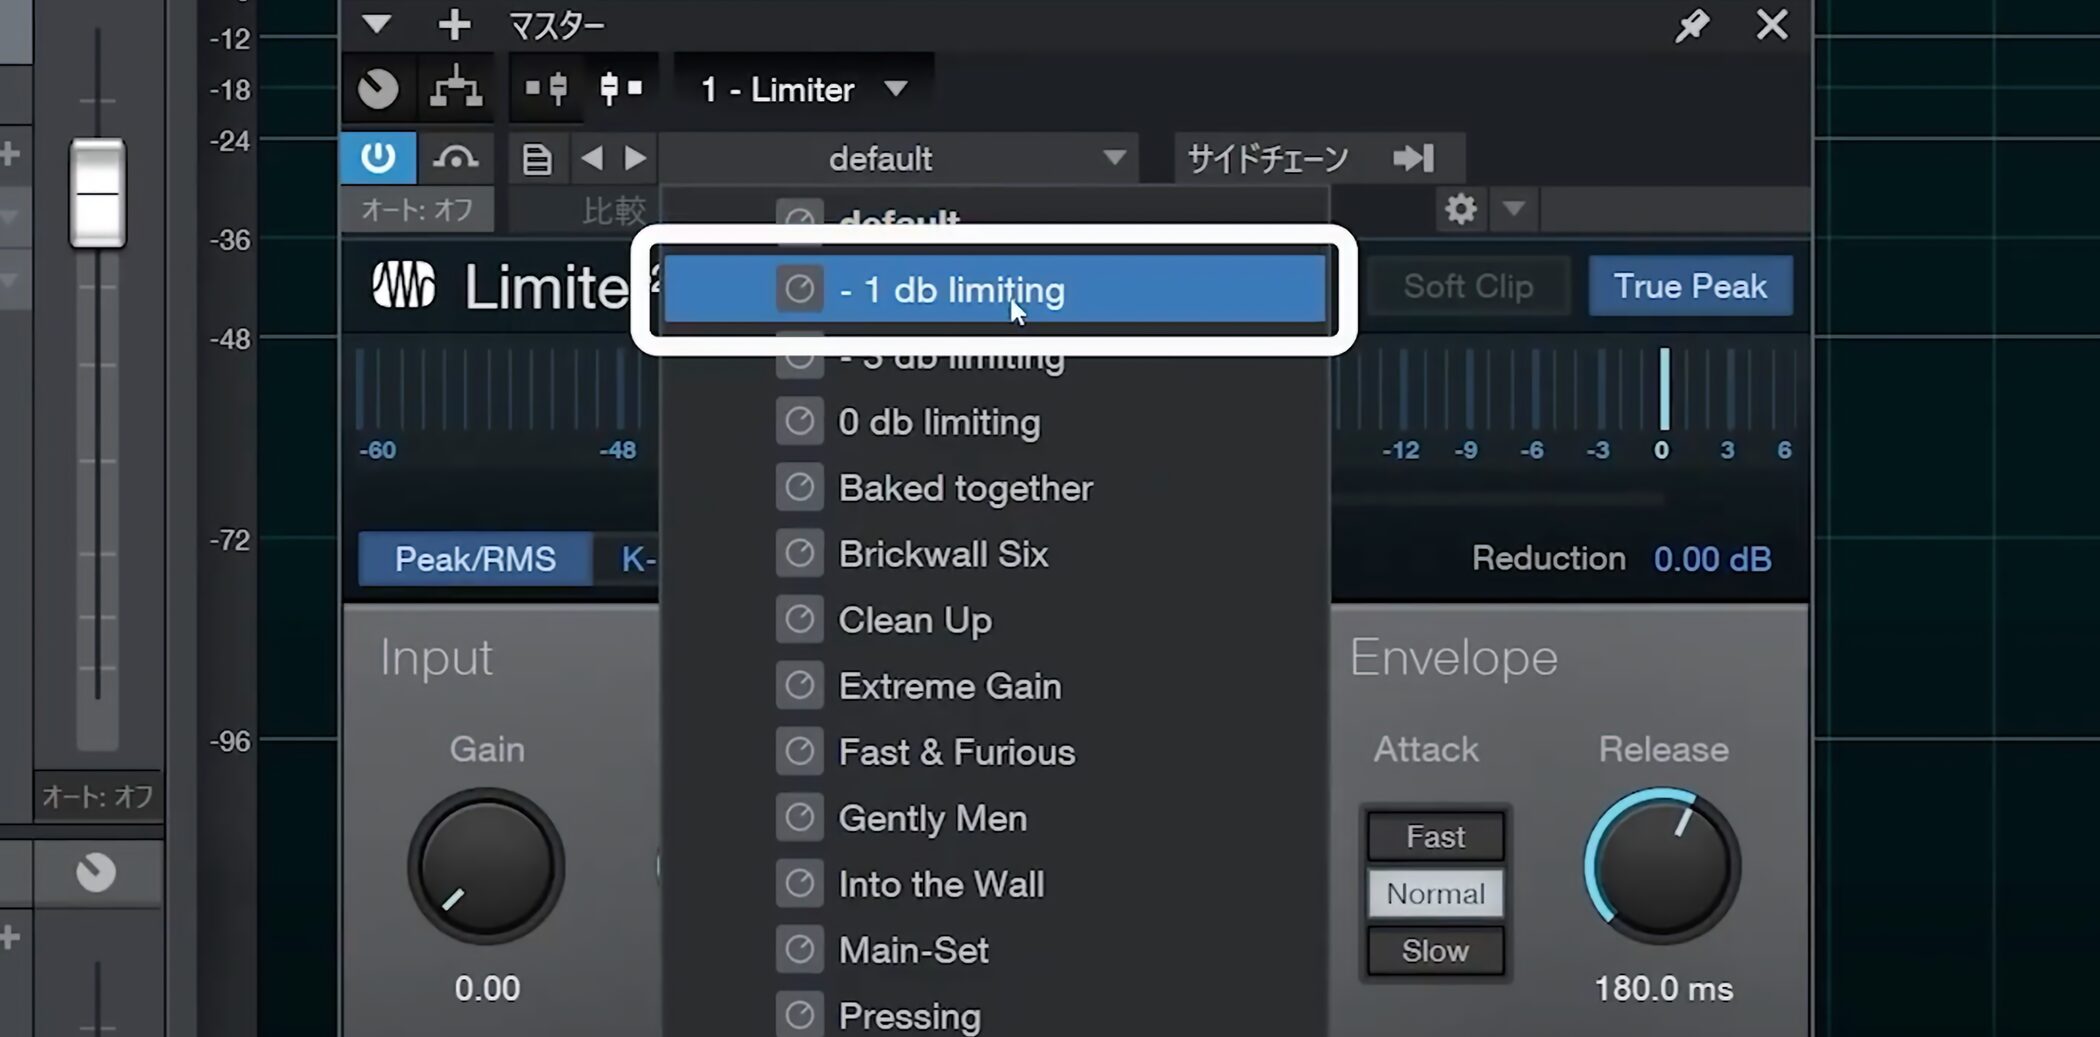
Select the “-1db limiting” limiter preset.
This setting provides a margin against clipping.
Check and adjust the loudness information
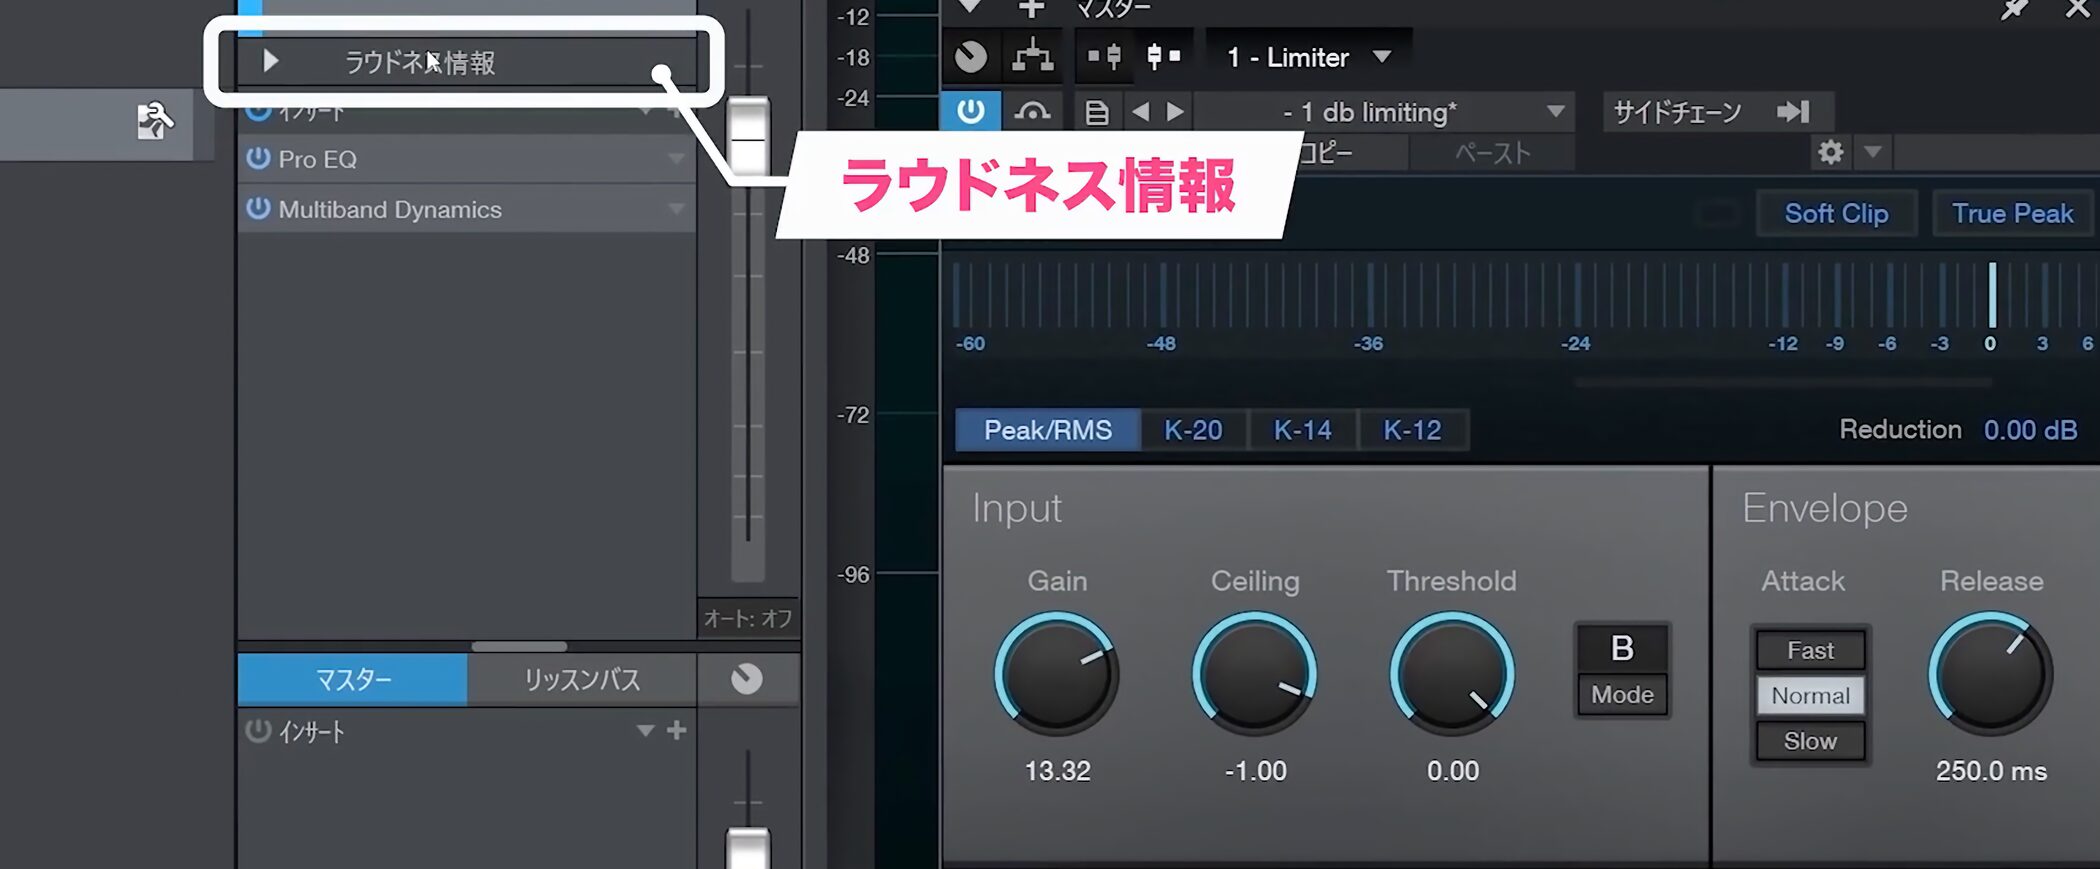
Click Loudness Information above the inserts.
The song will be analyzed.
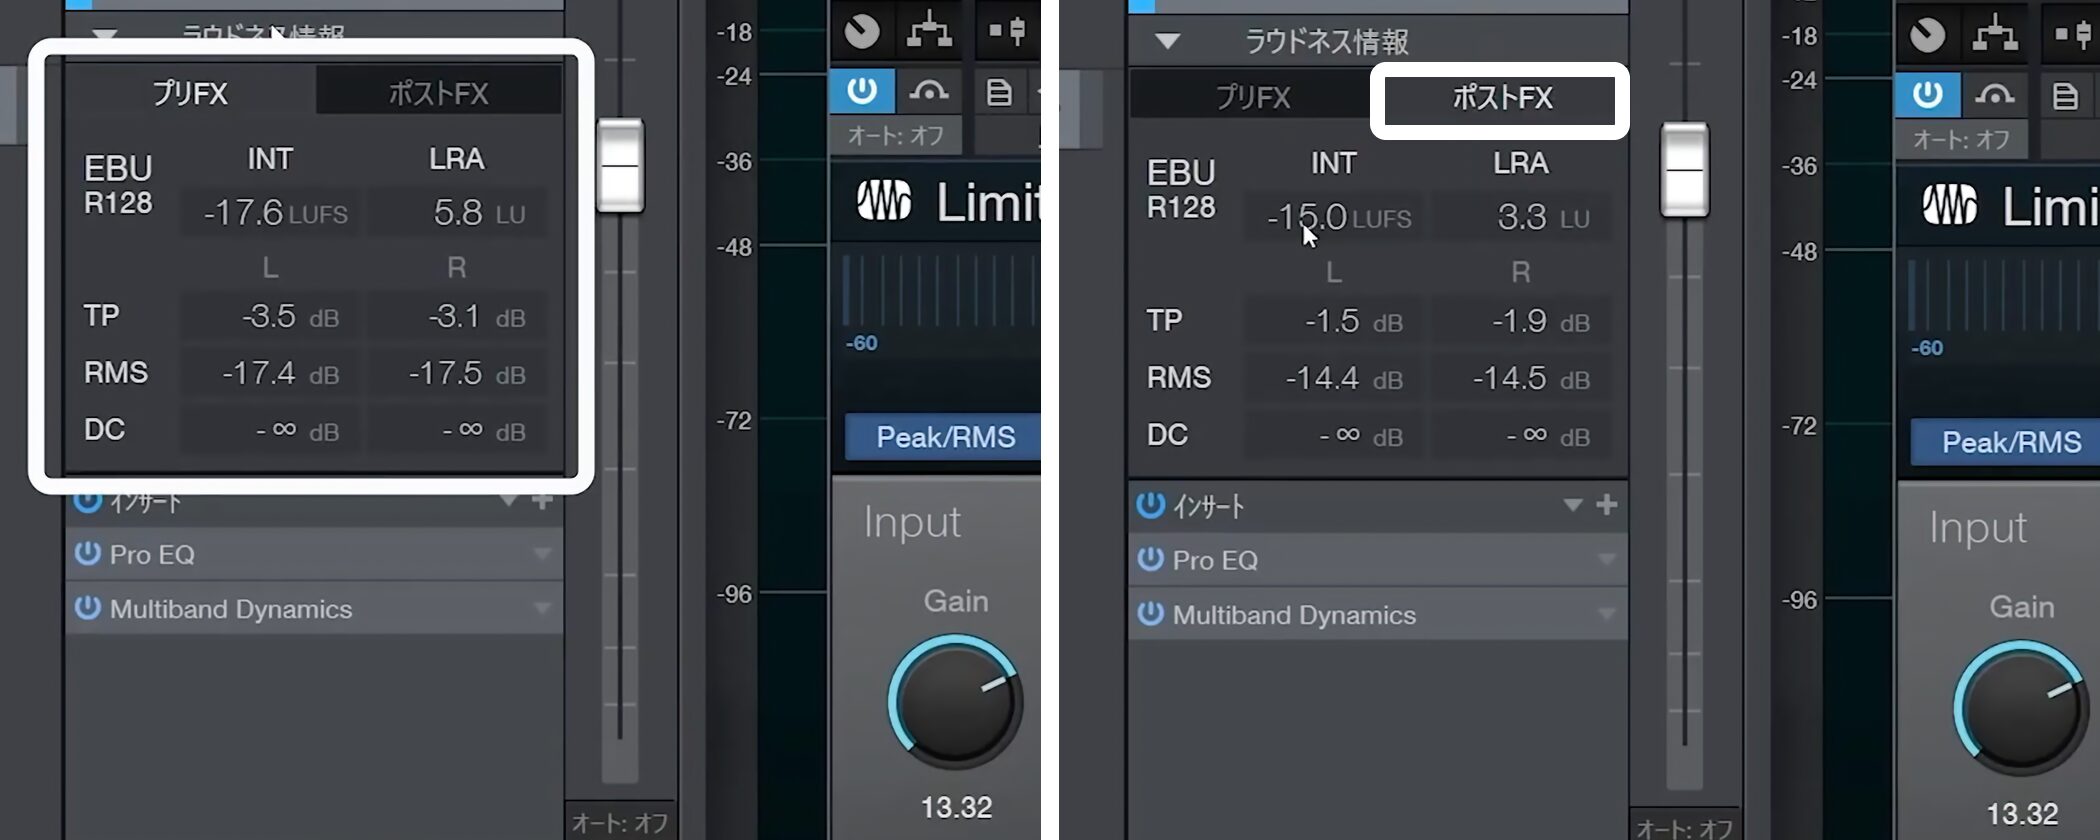
When analysis is complete, the loudness value appears.
To see the level after all effects, switch to Post.
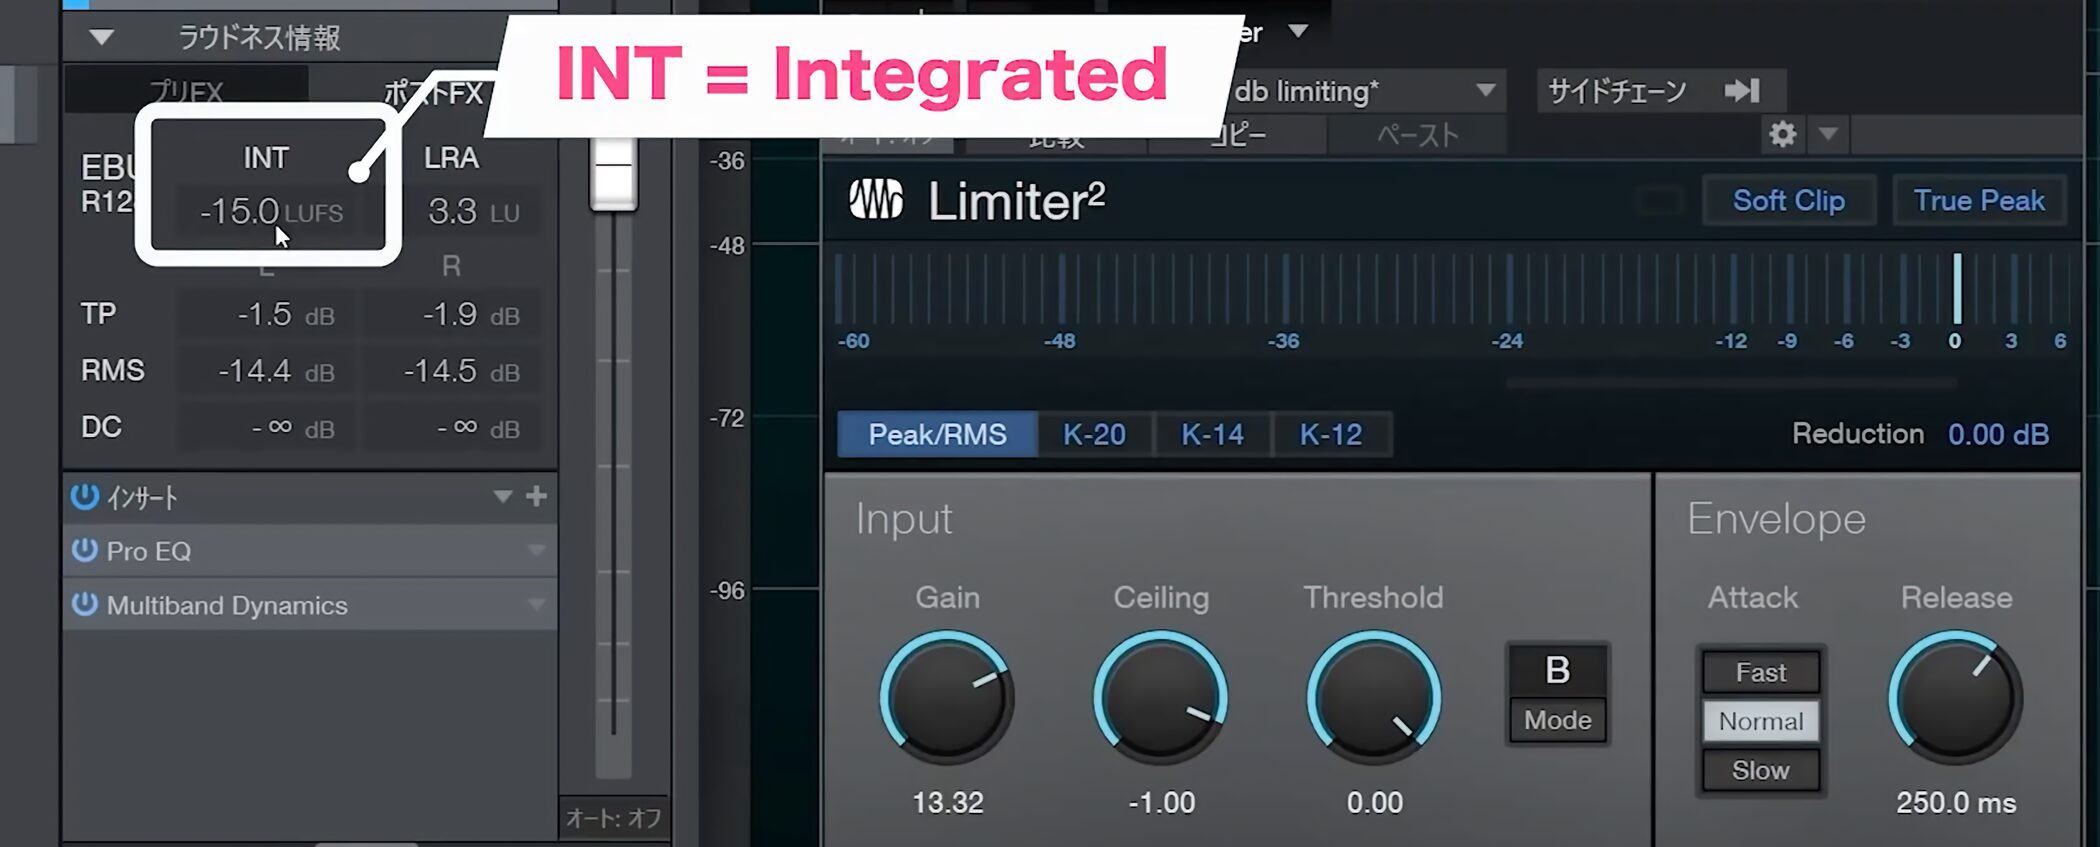
The value to check is INT (integrated loudness).
Here, aim for the Spotify reference of -14 LUFS.
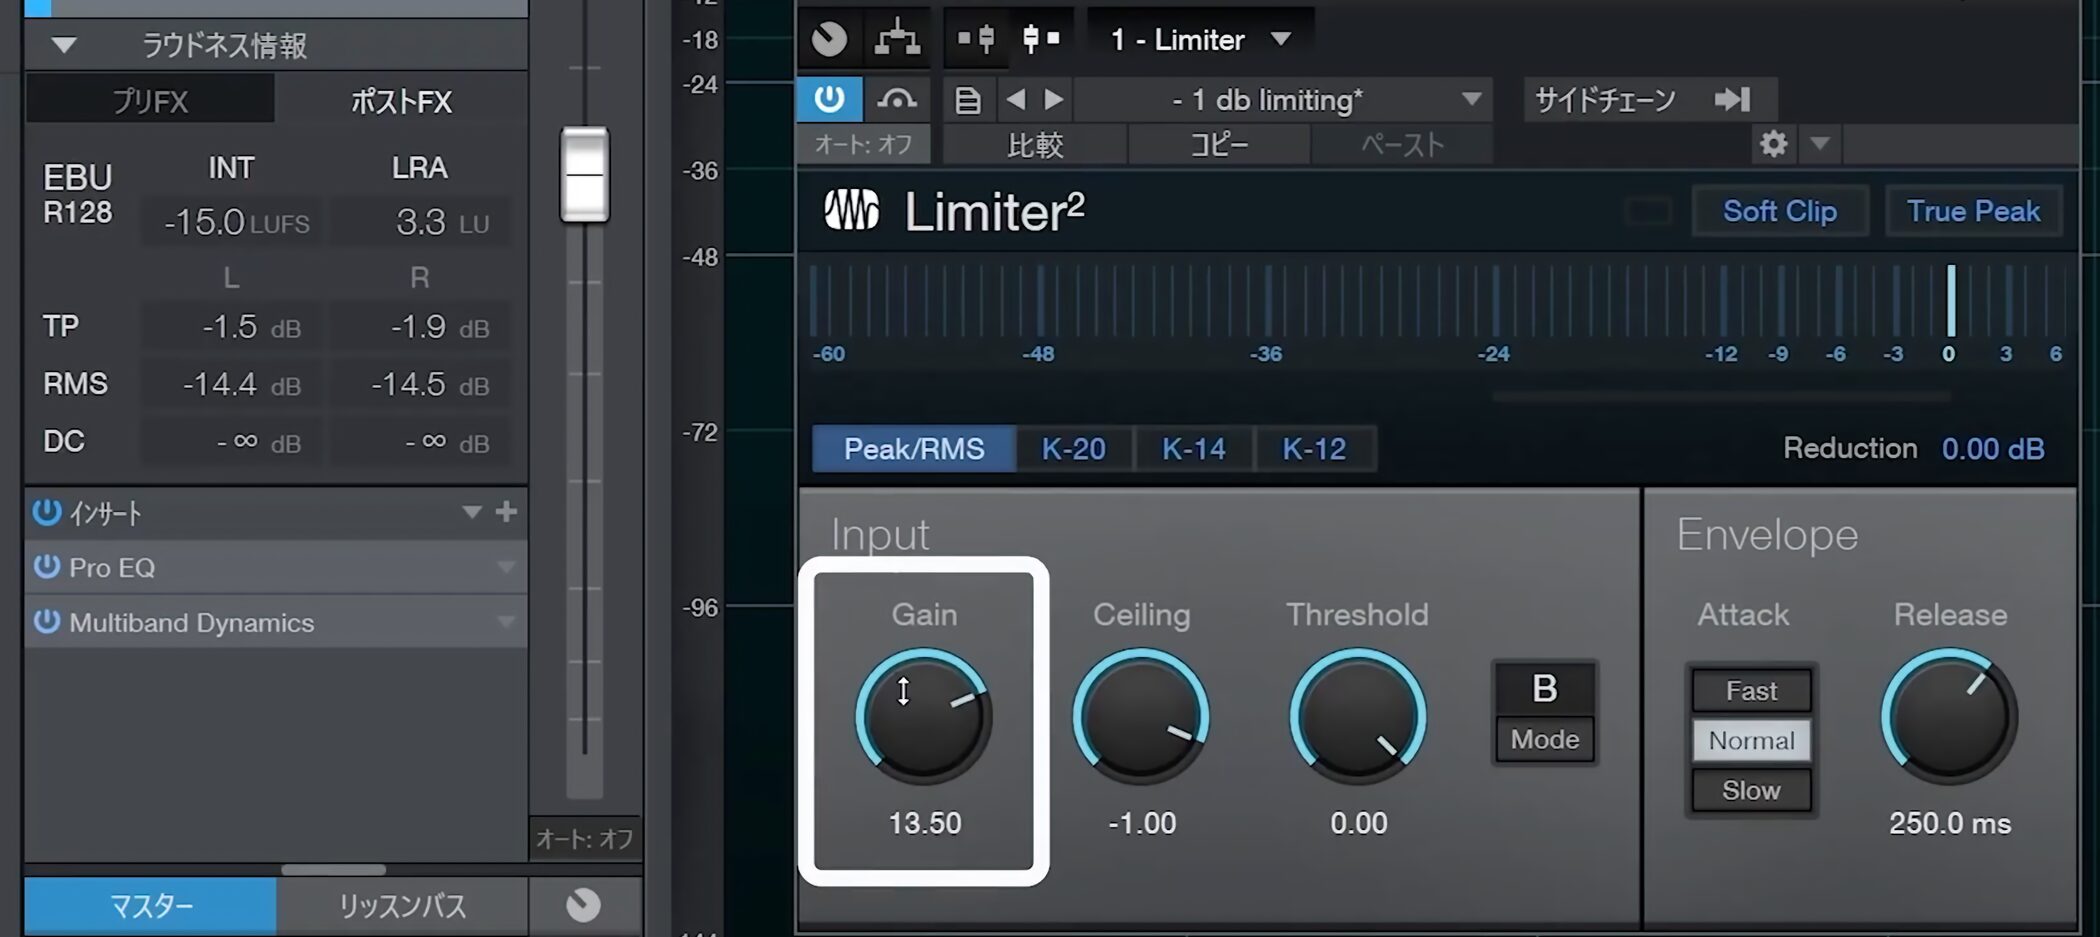
In this example the value is a little low, so raise the limiter gain by the amount needed.
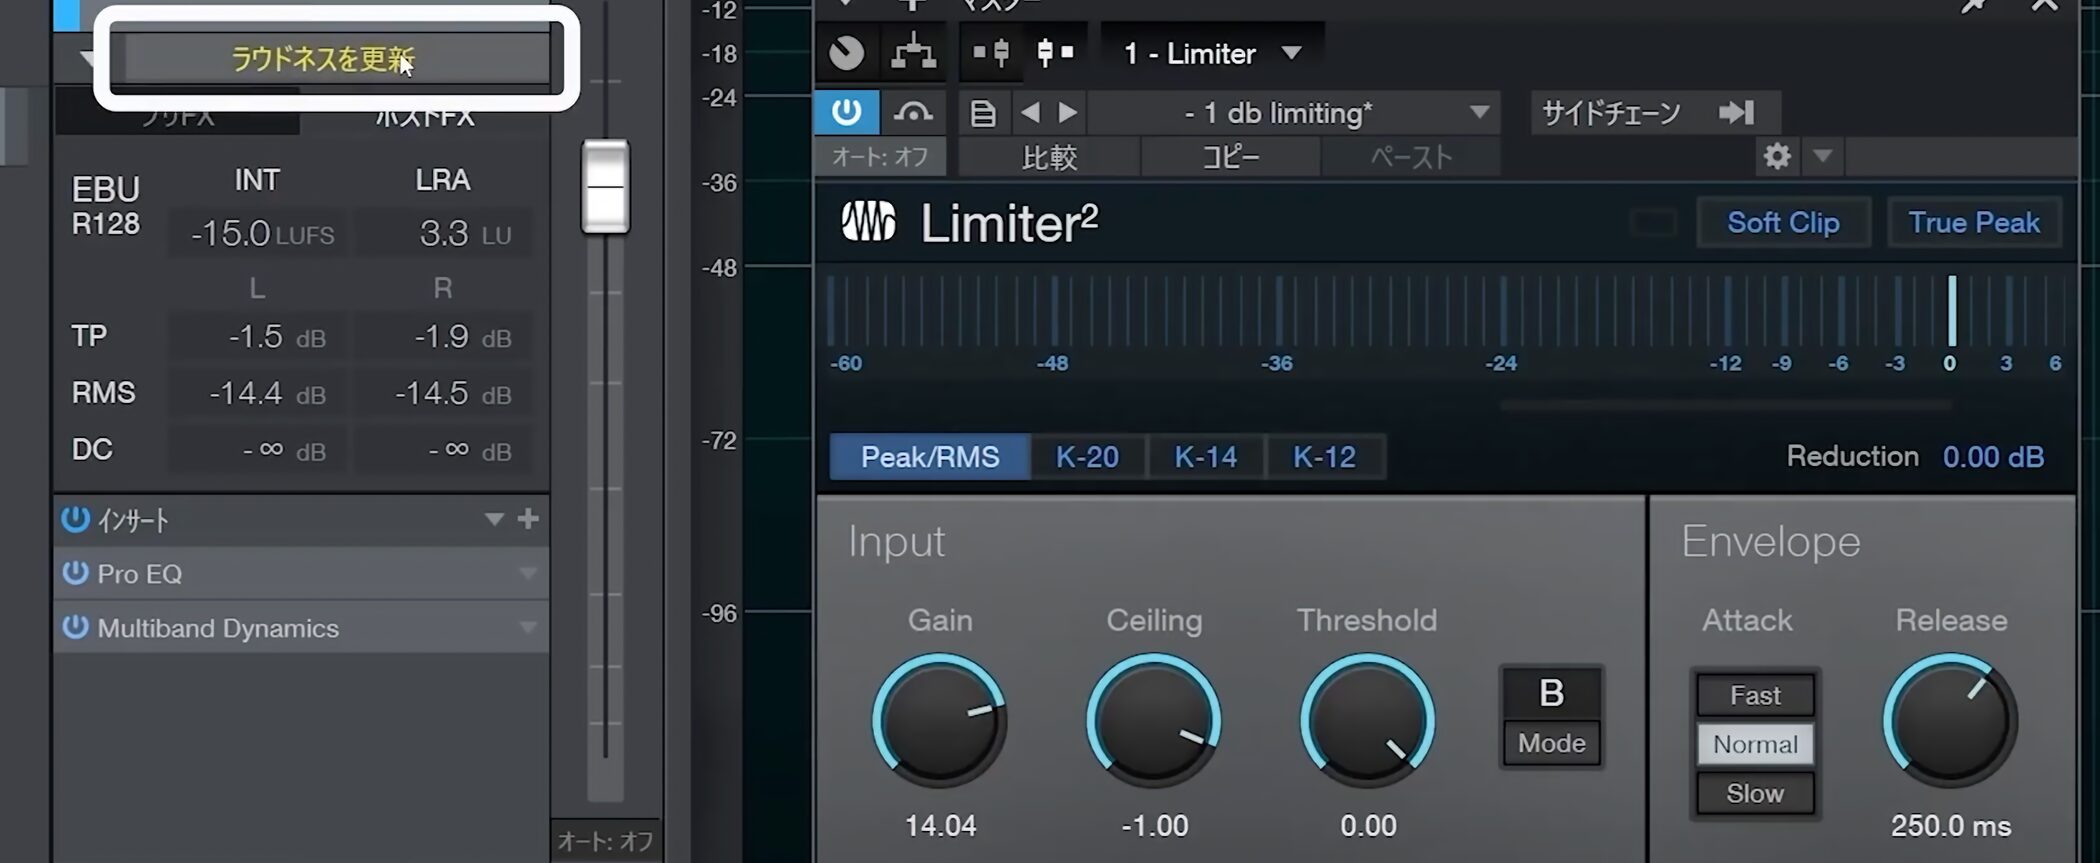
After changing the setting, click Update Loudness.
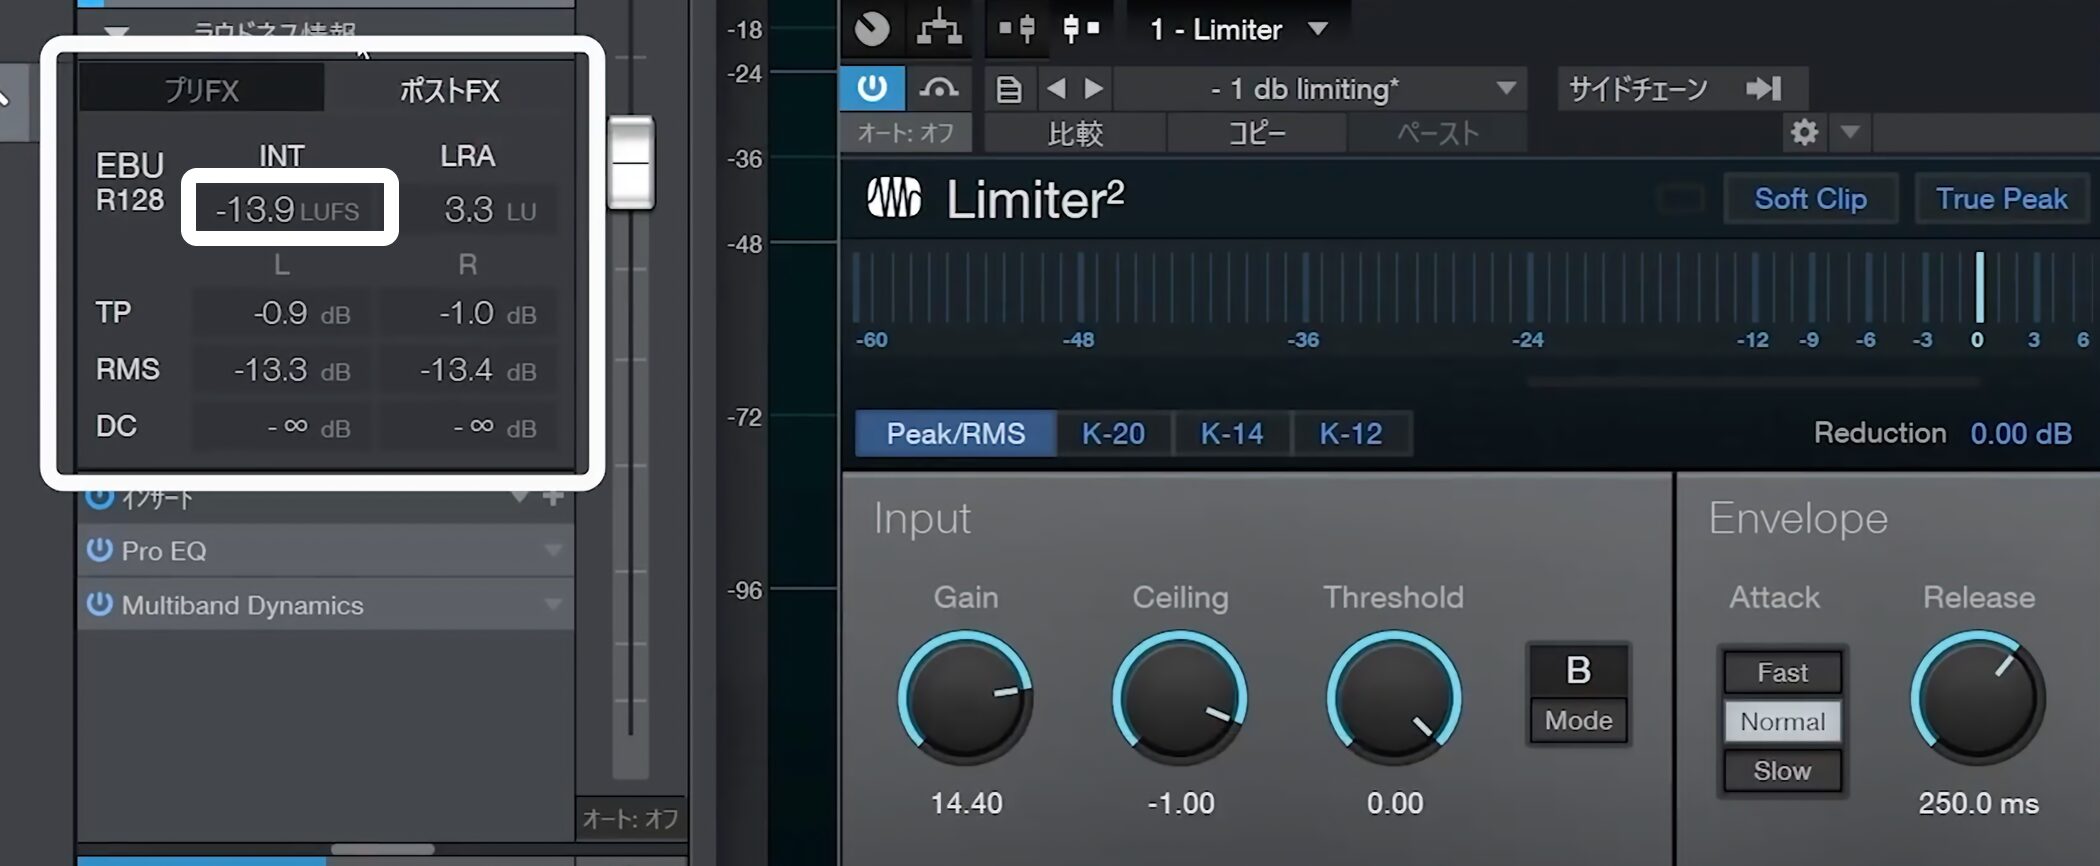
The new measurement appears.
Once you are close to the target, the adjustment is complete.
Prepare to export the song
Once the level is set, prepare the song for export.
First, check how the song ends.
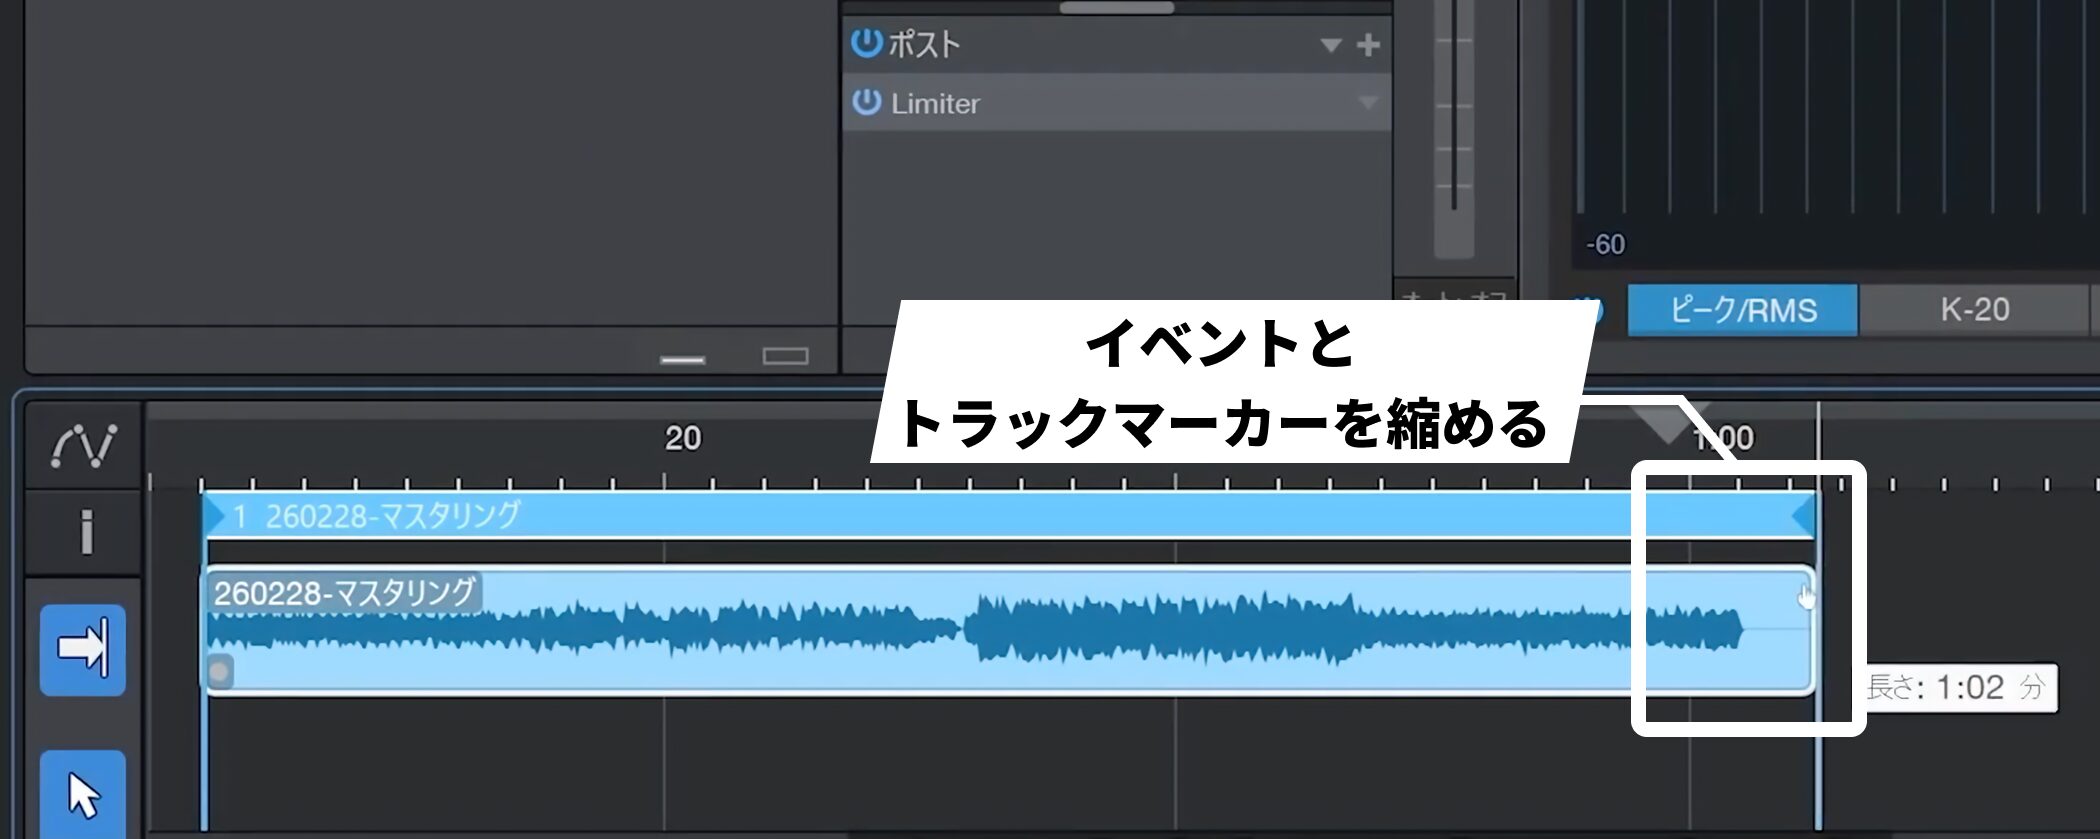
If the tail is too long, choose where the song should end and shorten the event and track marker.
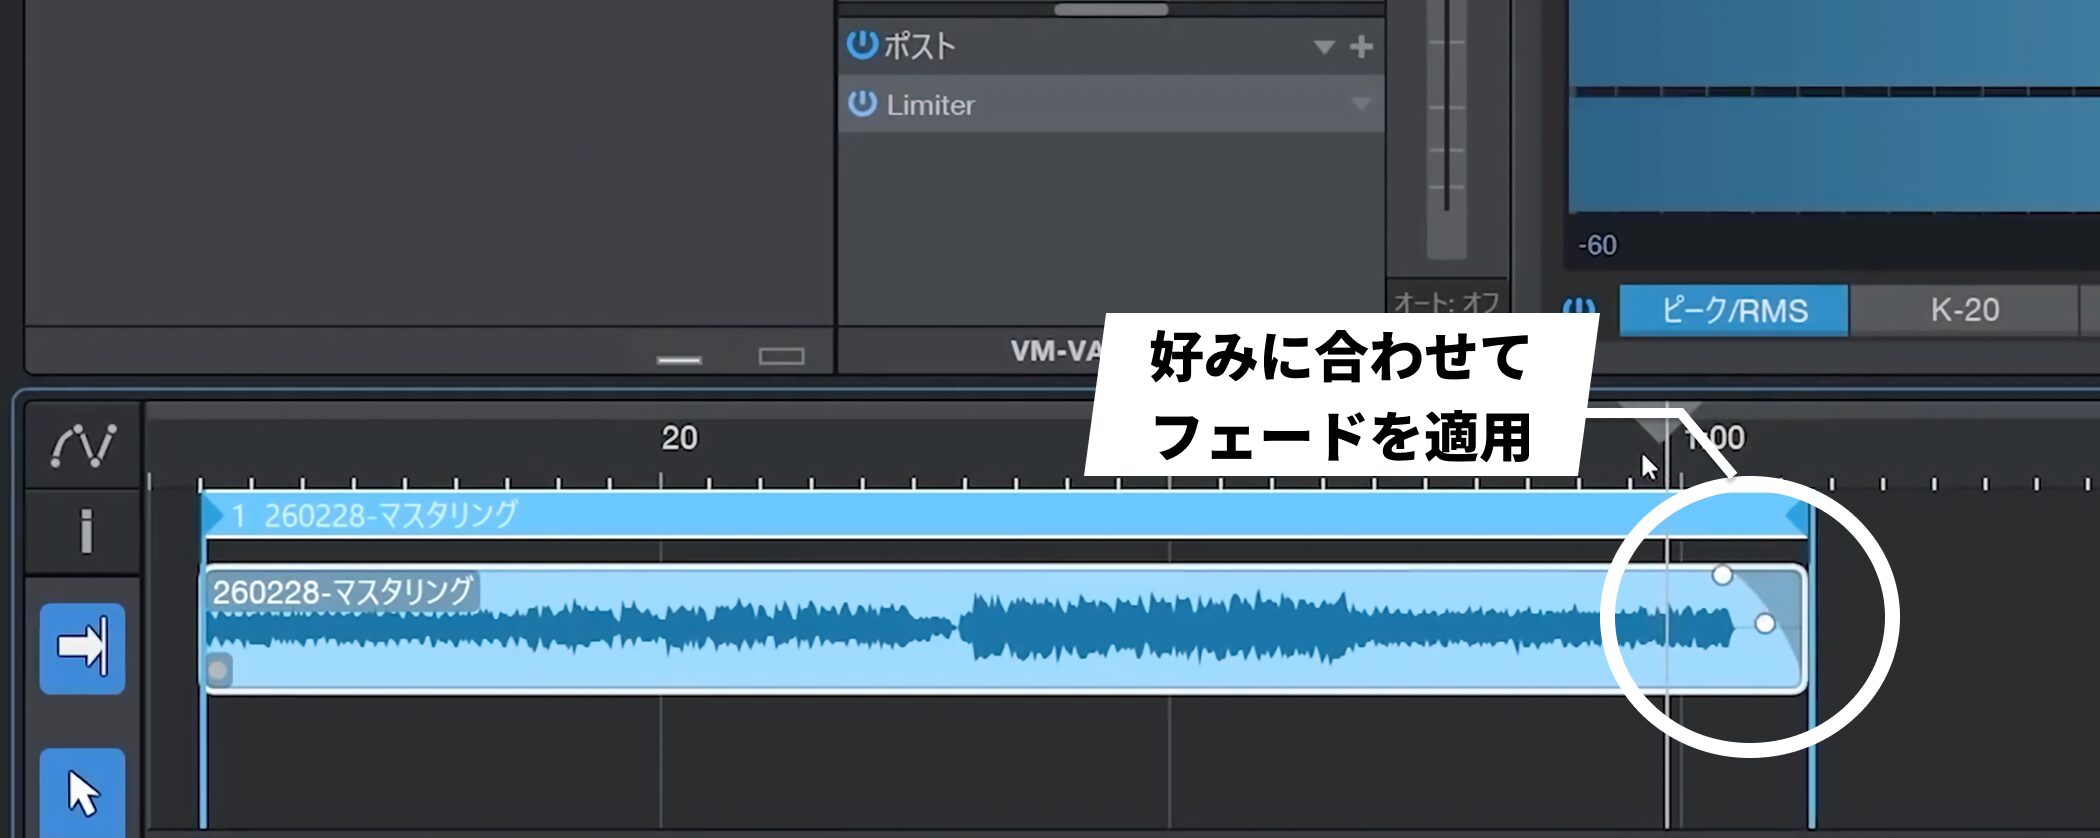
Listen and apply a fade to taste.
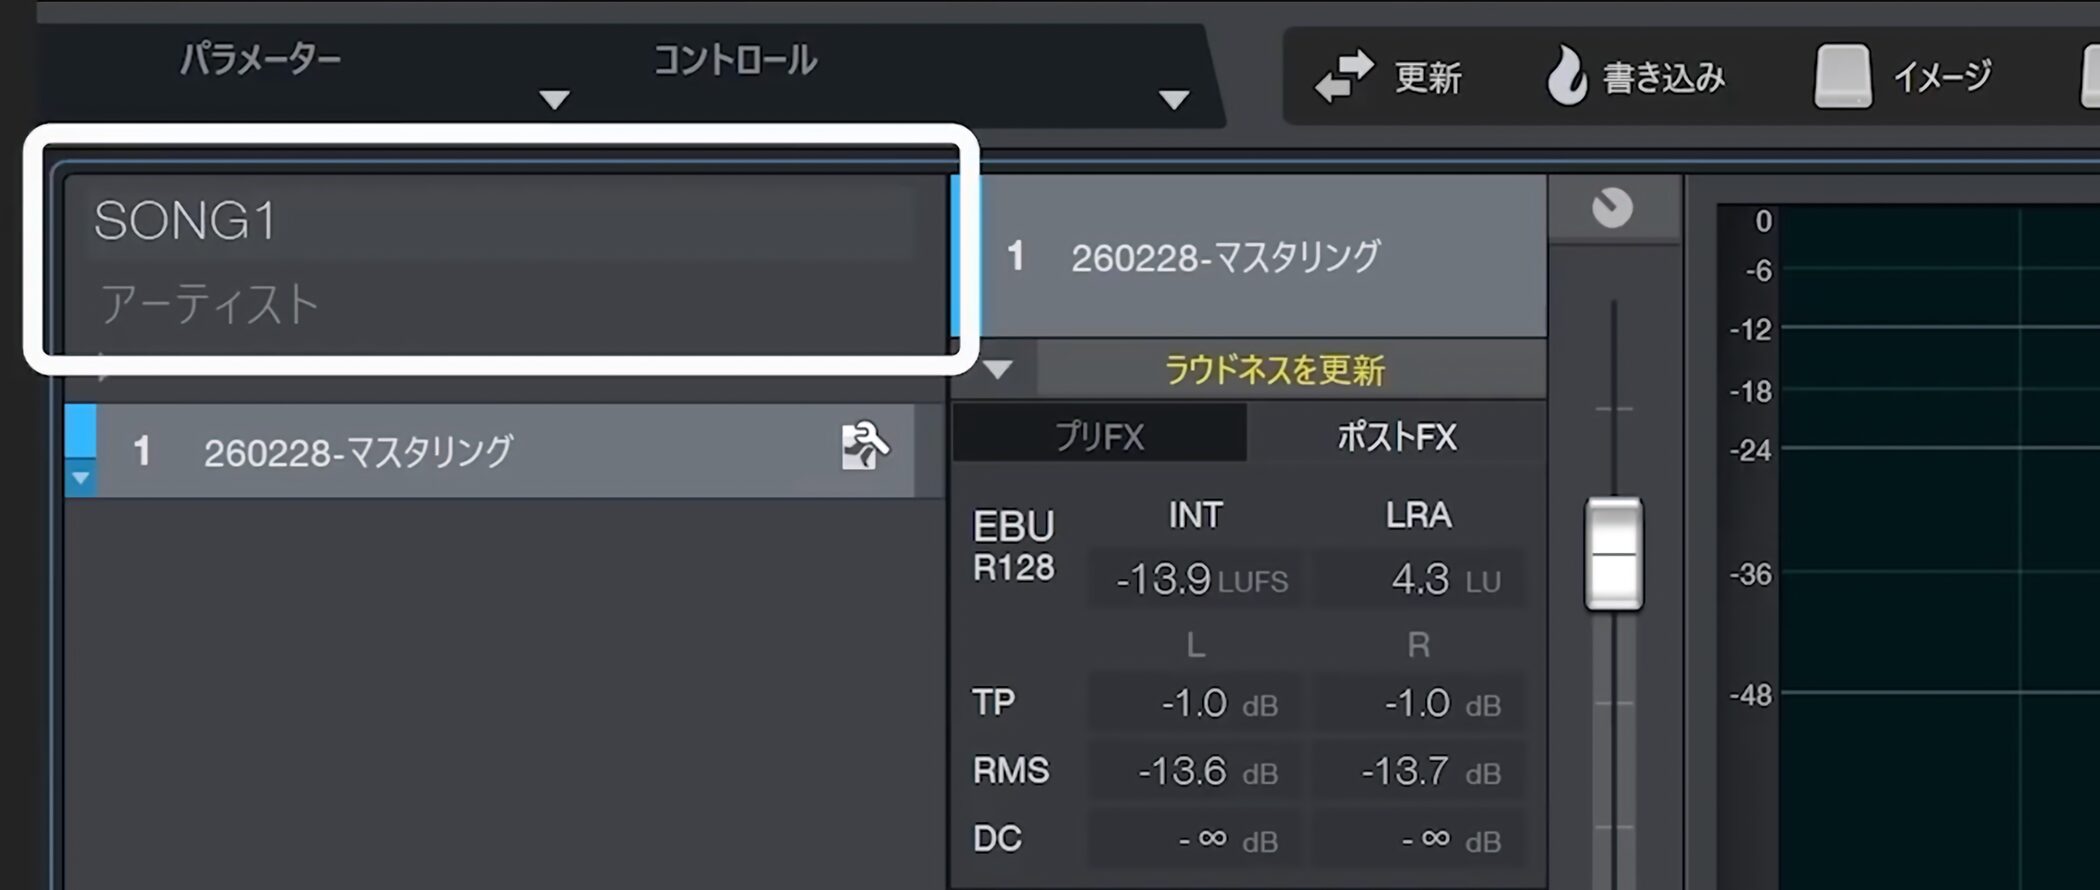
You can also enter metadata such as the artist and song names in the Project.
Export a digital release
When ready, export the song.
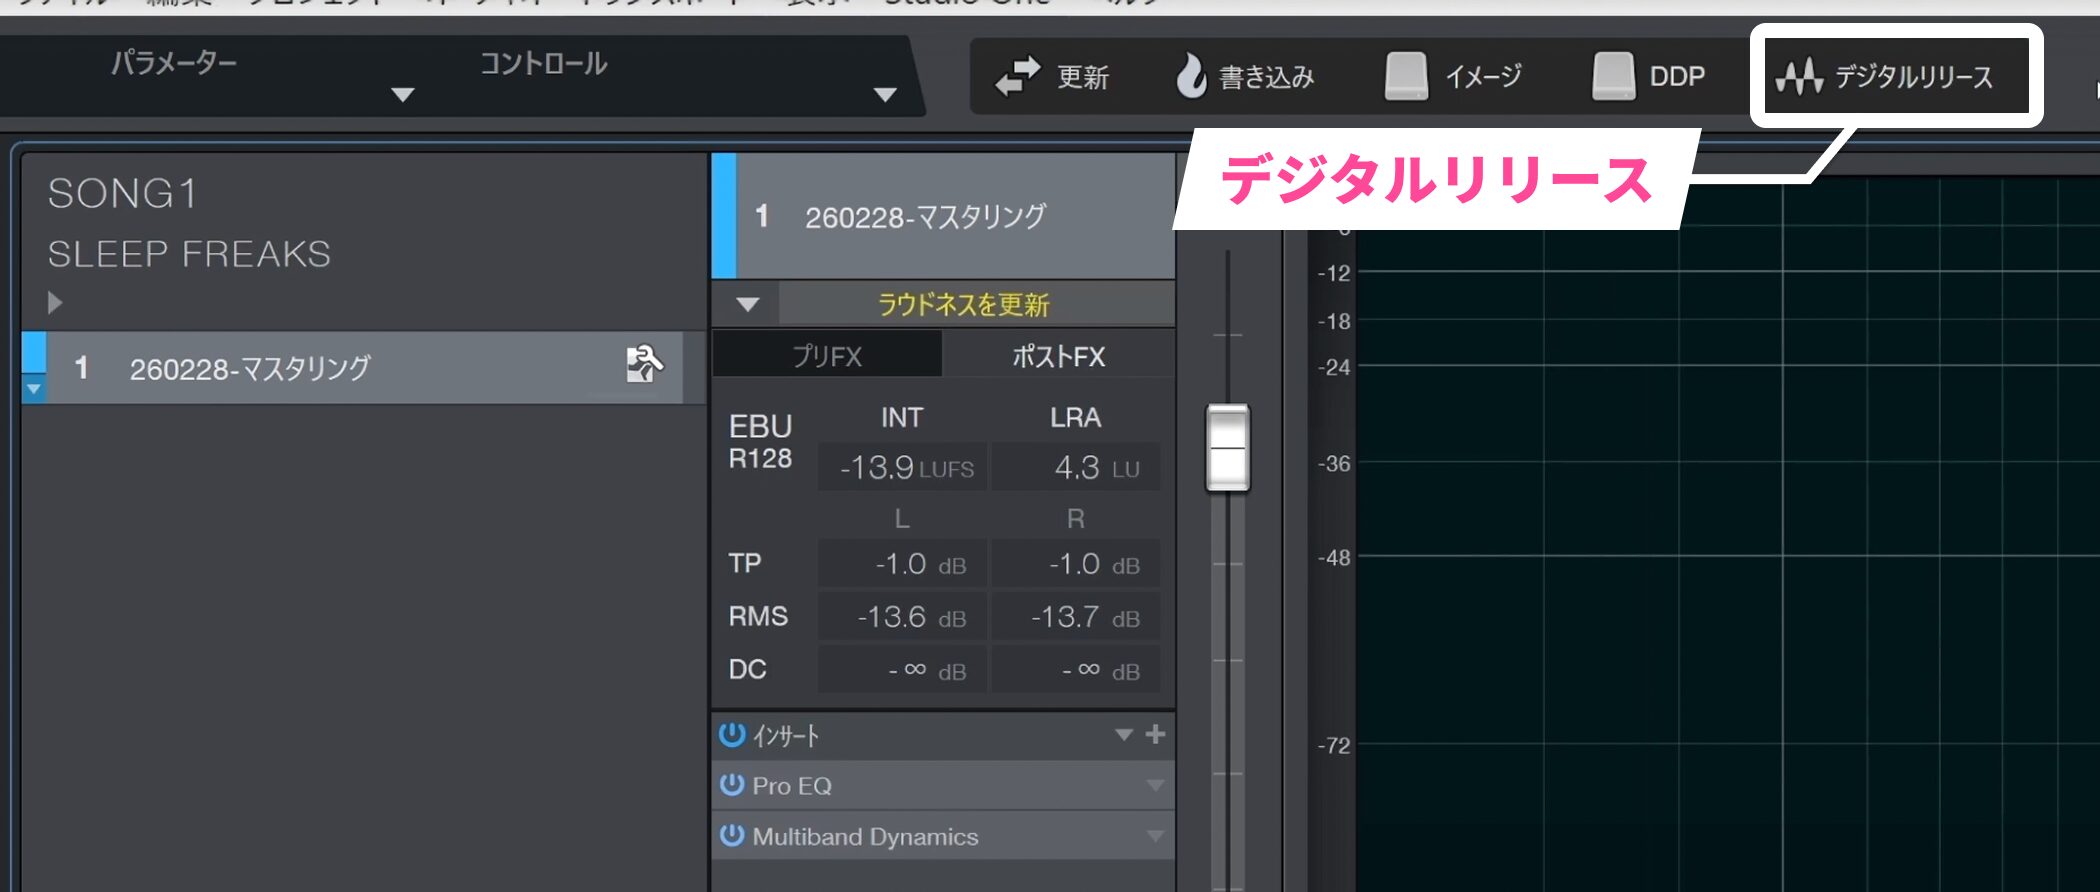
Click Digital Release at the top.
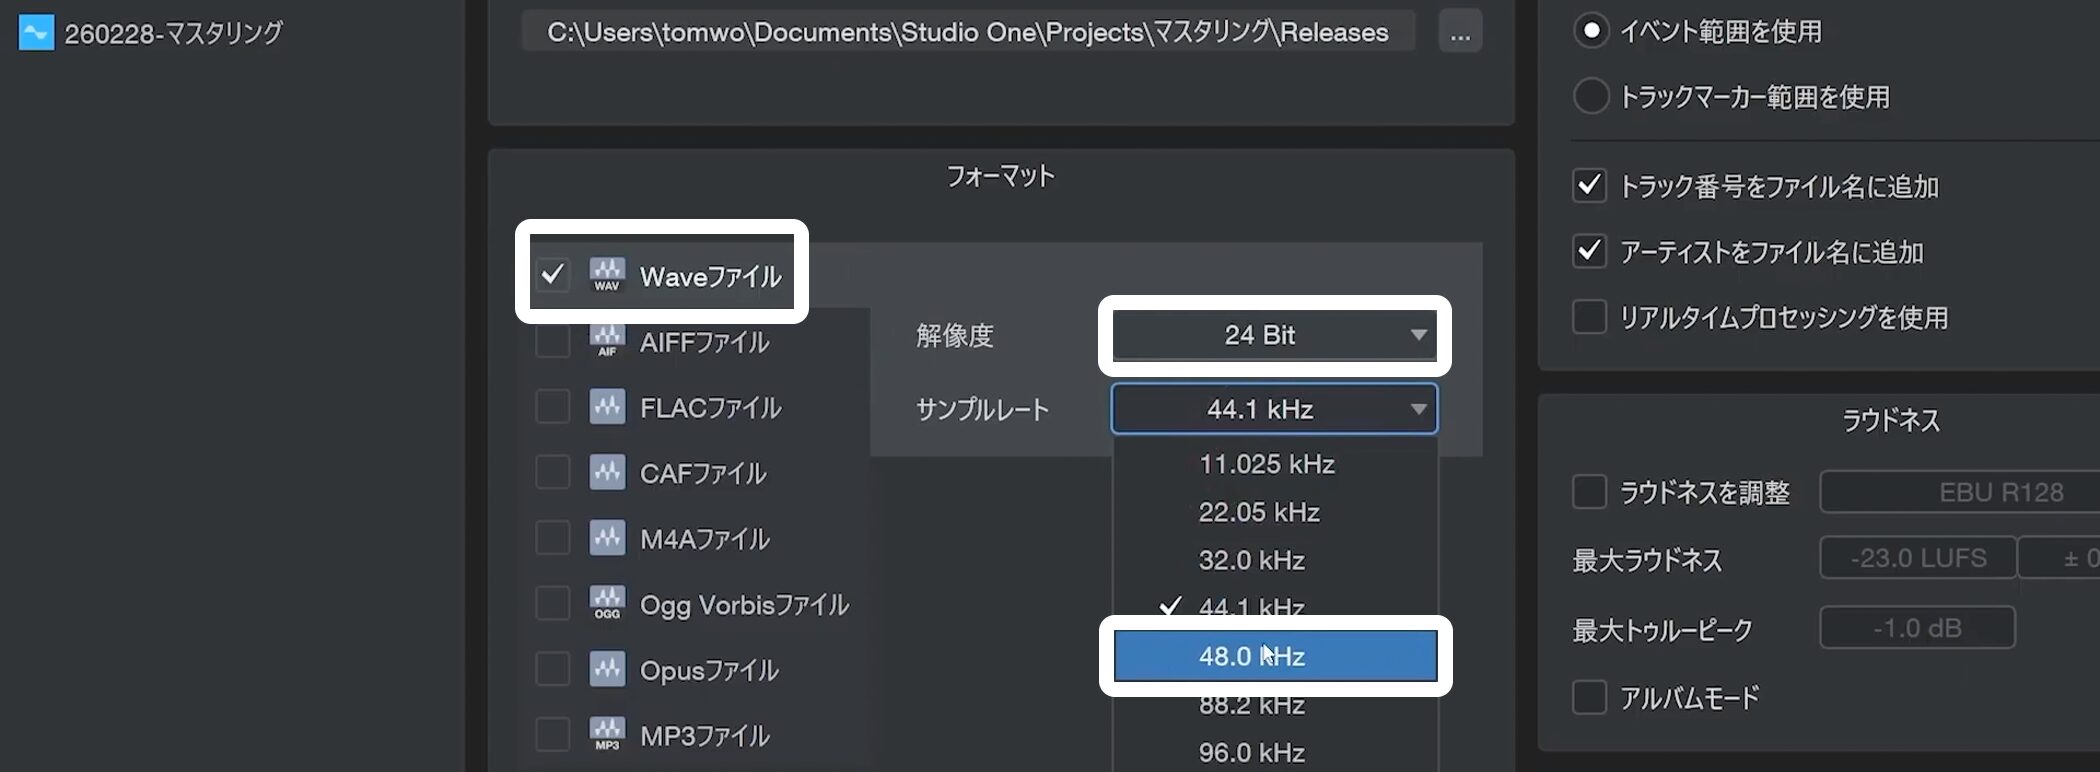
Choose Wave format, 24-bit resolution, and a 48 kHz sample rate to match the song.
Set up dithering
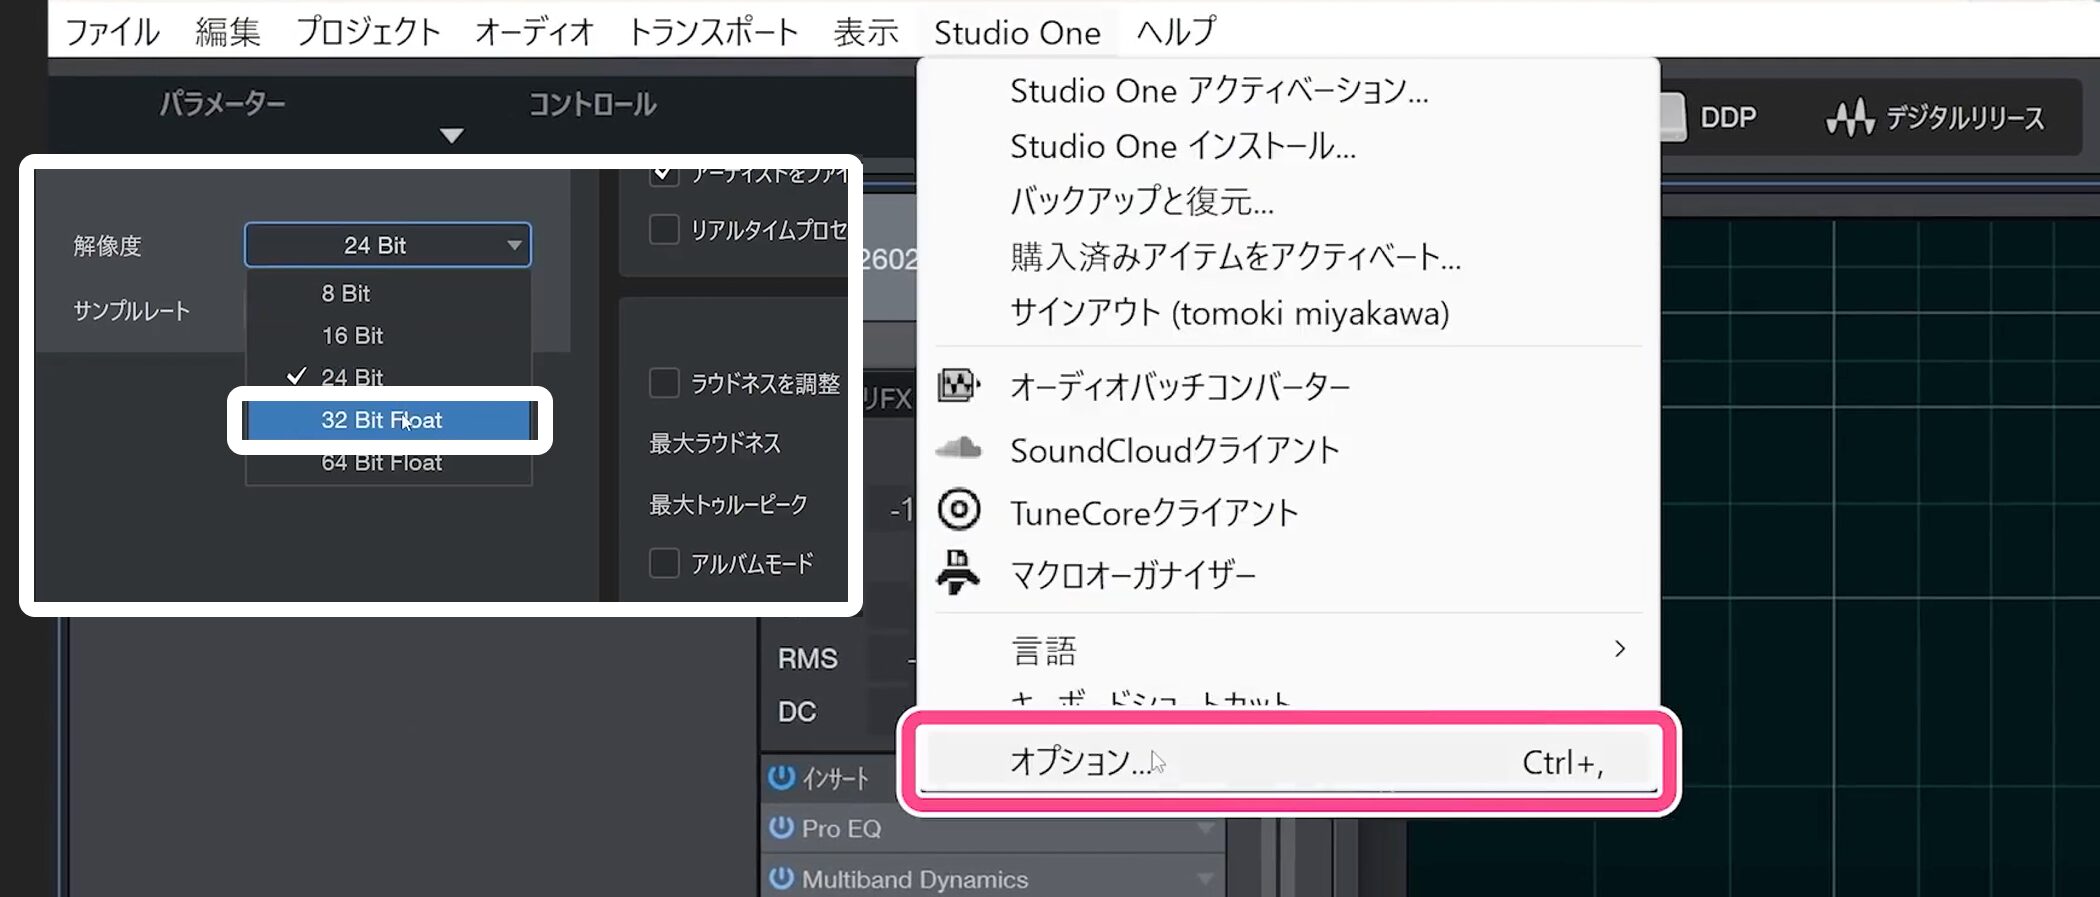
If the project was created at 32-bit float, use dithering when reducing it to 24-bit.
Open Studio One → Options from the top menu.
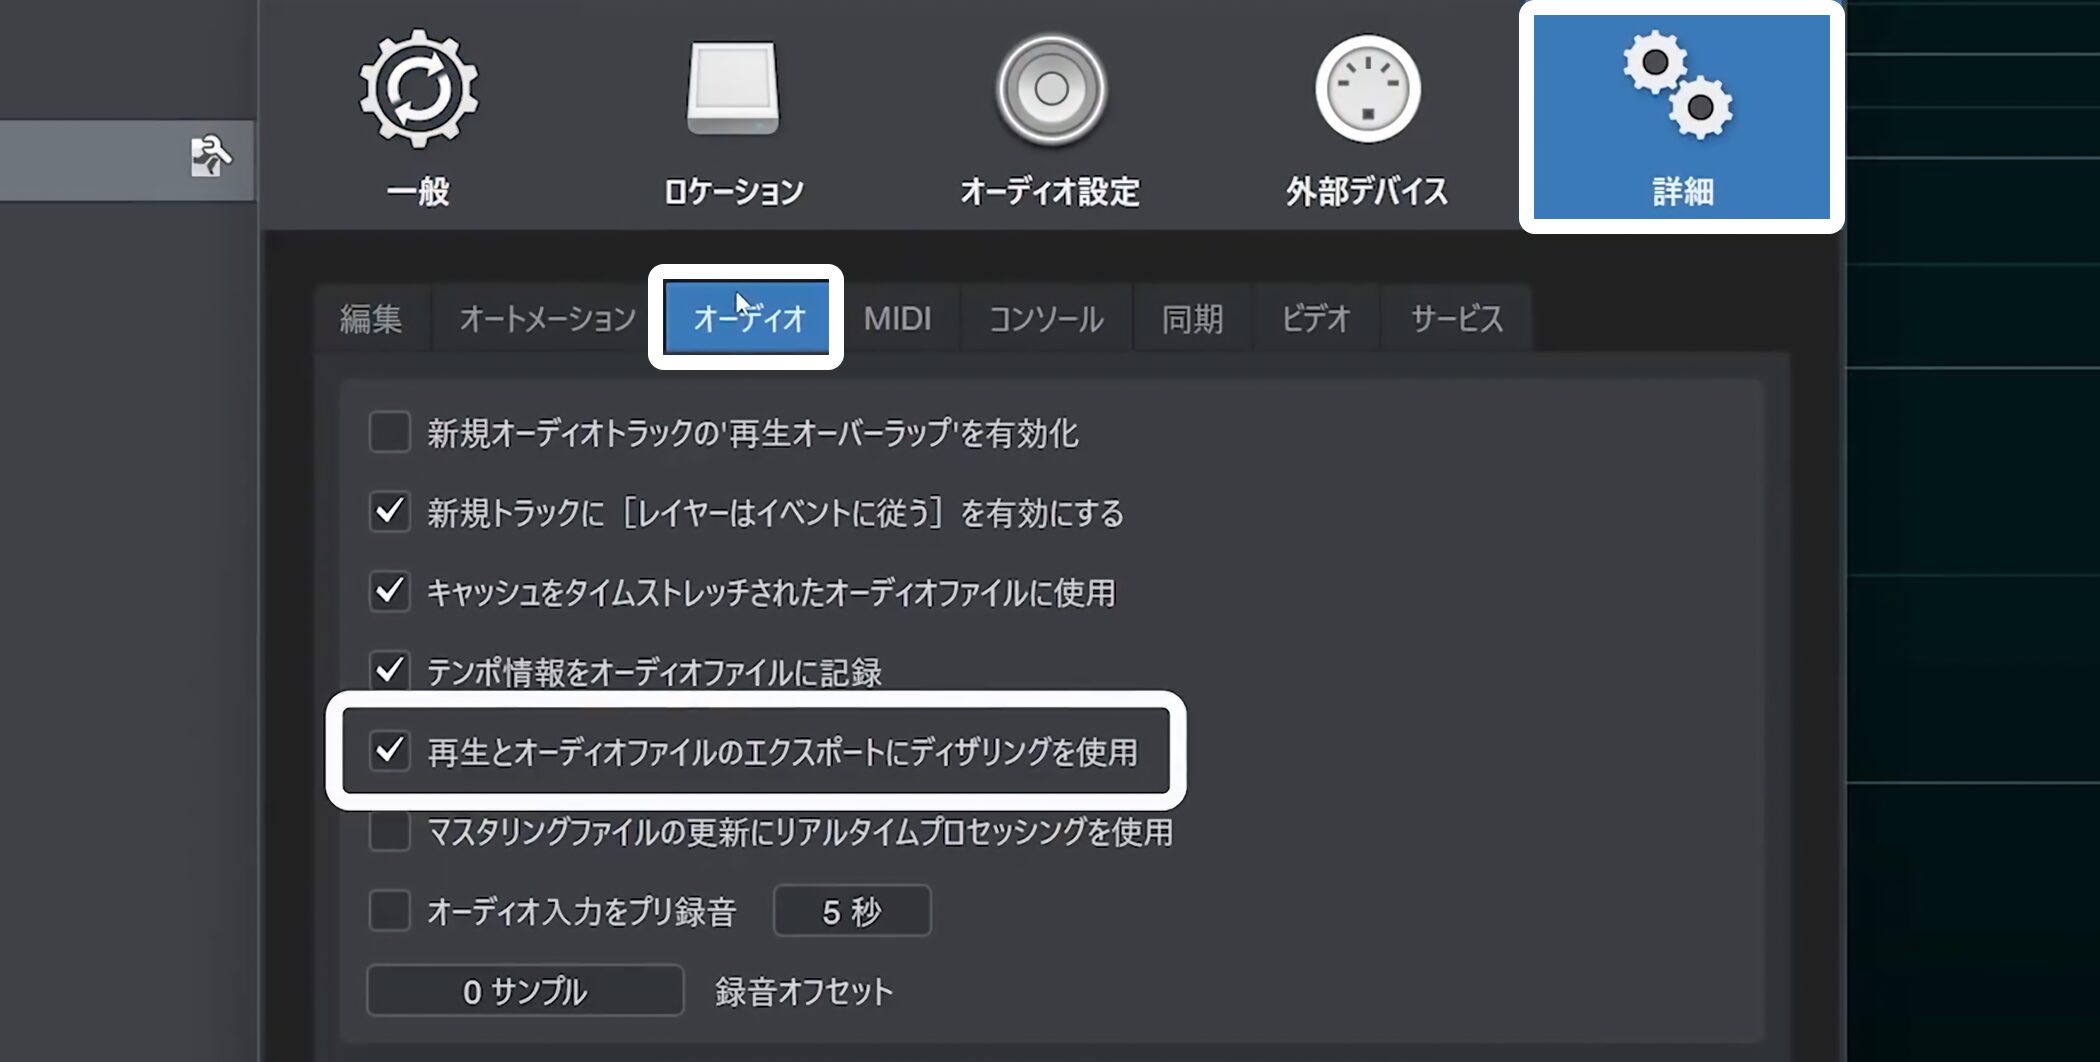
Under Advanced → Audio, check “Use dithering for playback and audio file export.”
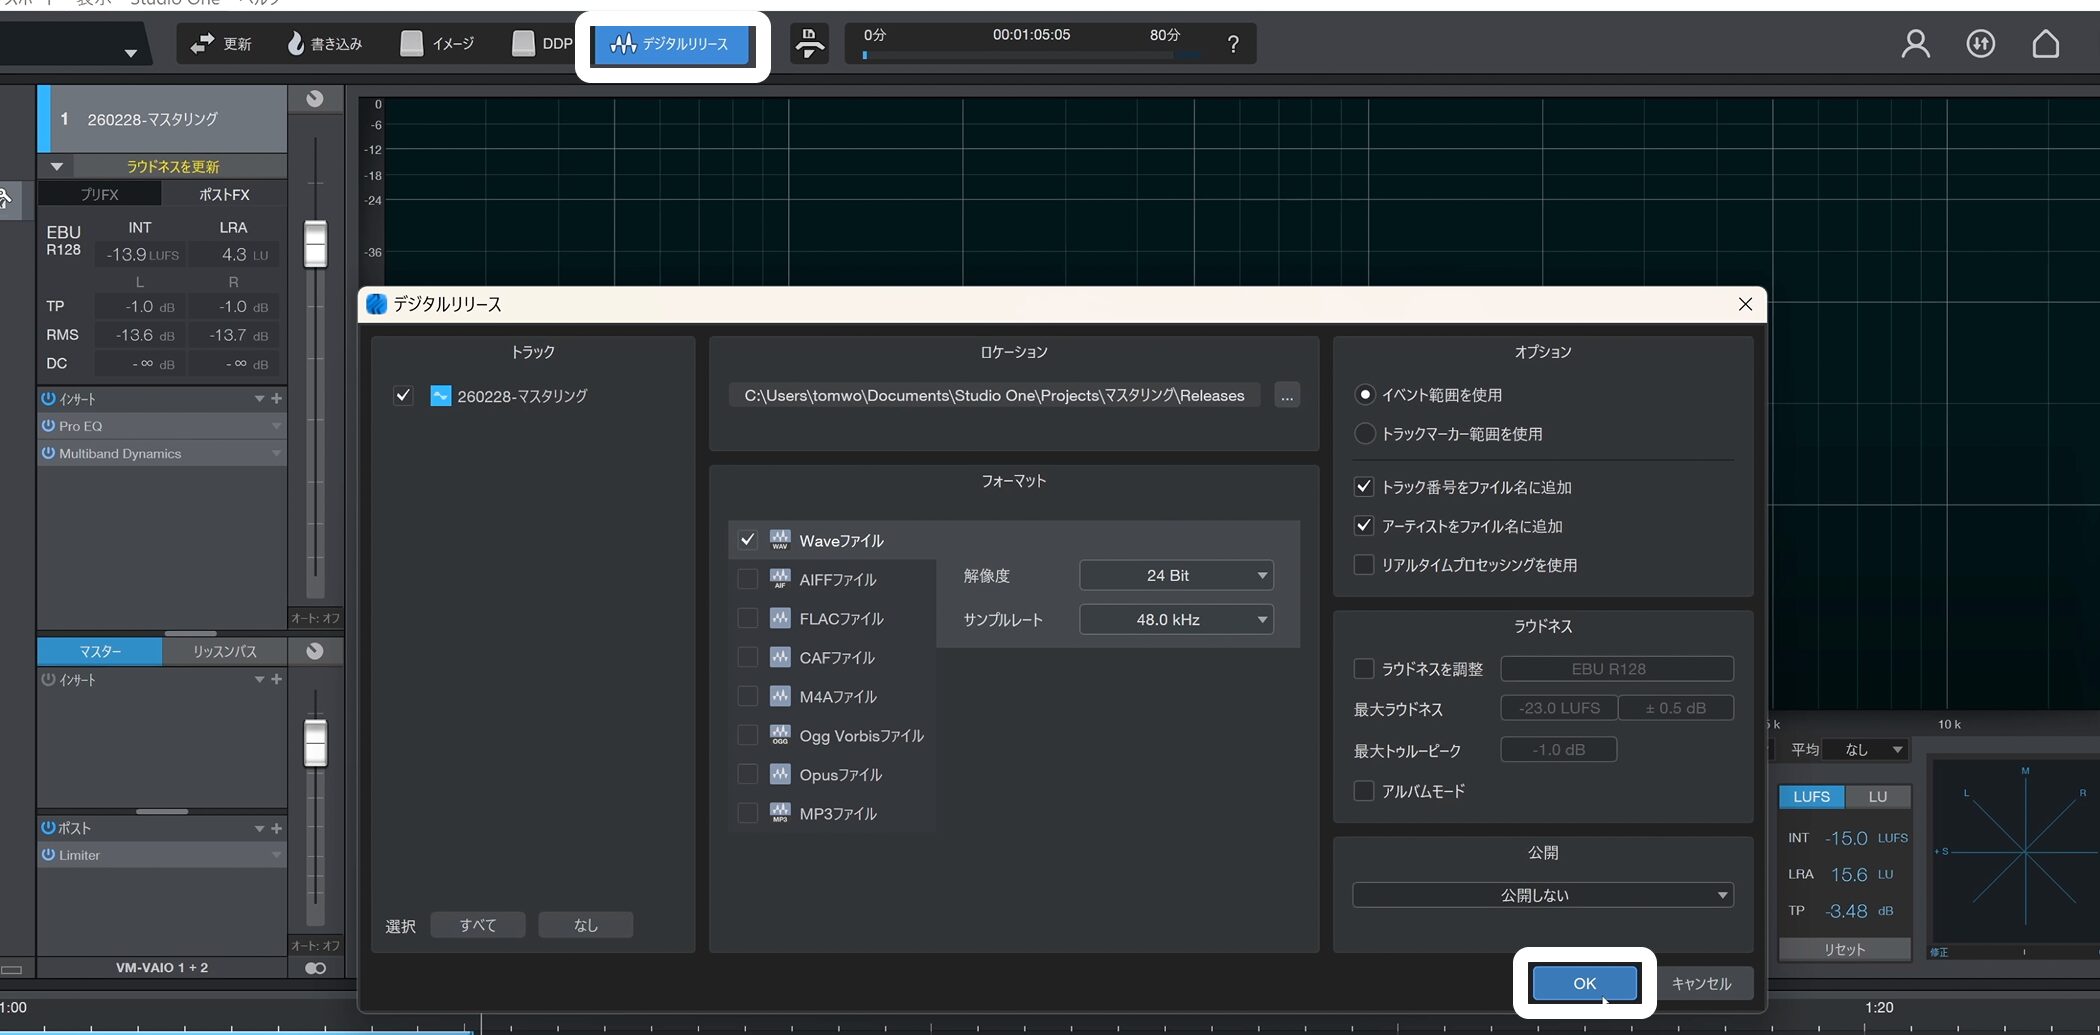
Open Digital Release again and click OK to export.
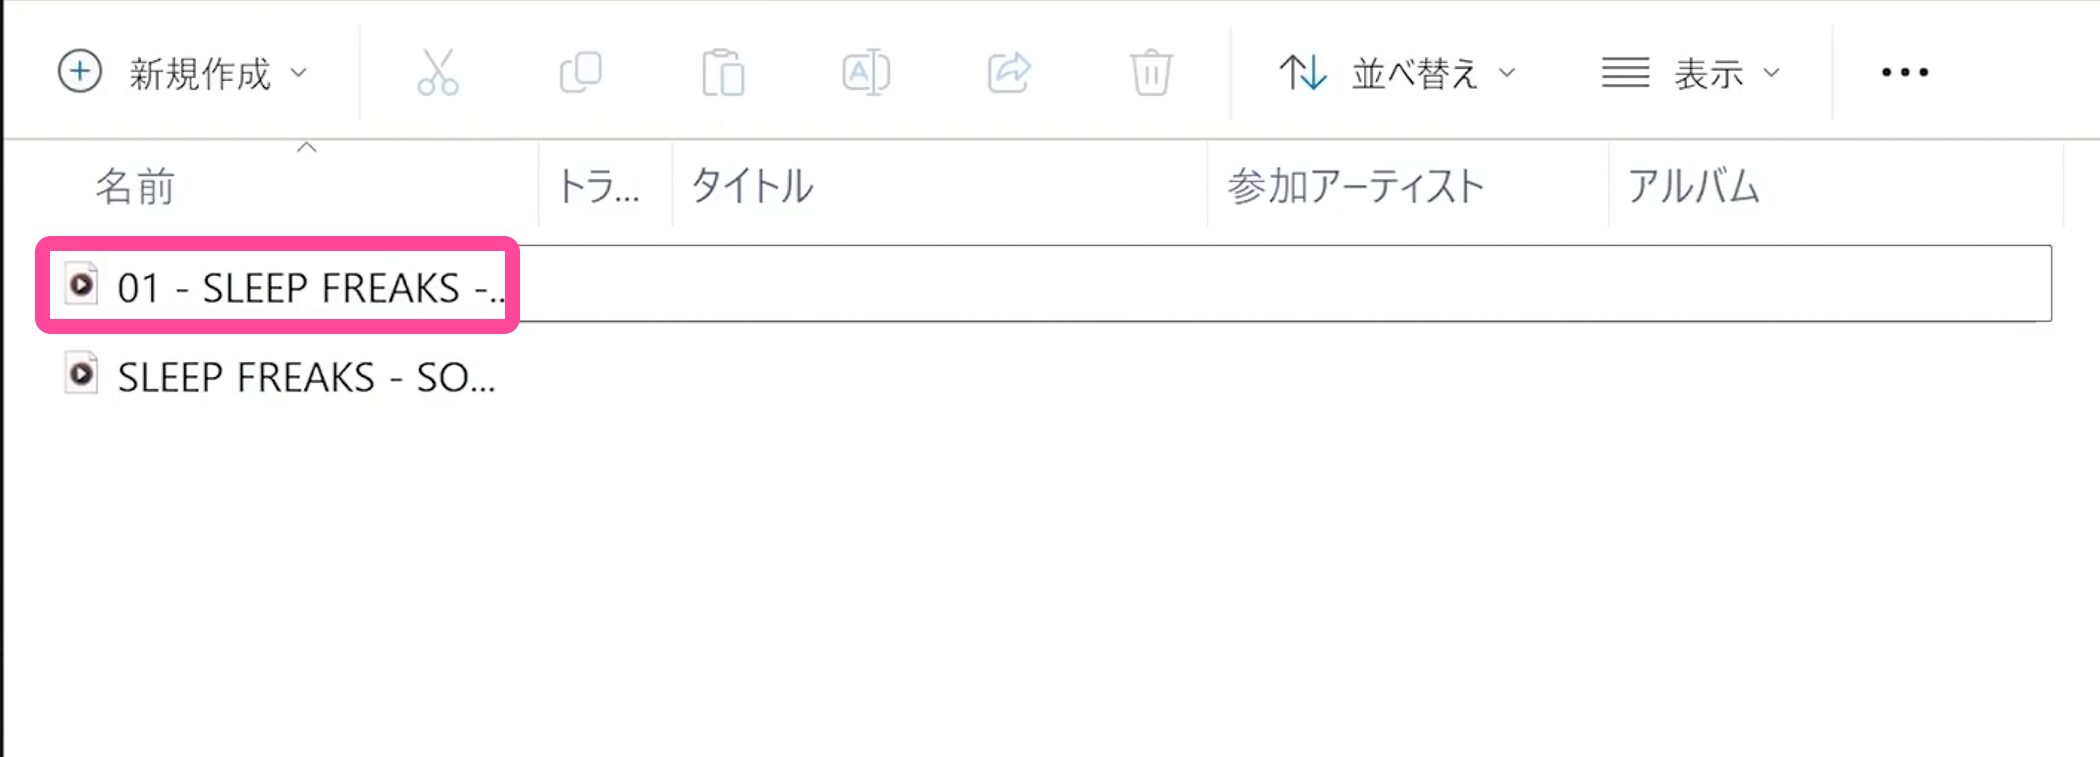
A WAVE file is created at the specified location.

Kanaya
How did you find this Studio One guide?
Following the steps in order may have made it less difficult than you expected.
The Song data created in this tutorial is available to download.
If you found the course helpful, please consider leaving a tip using the Thanks button on the video.
The contribution will help fund content like this tutorial.
Frequently asked questions
Q1. How is mastering different from mixing?
Mixing balances multiple tracks. Mastering is the final stage after the mix, adjusting overall sound and volume for the intended platform or streaming service.
Q2. What does -14 LUFS mean for Spotify?
LUFS measures loudness in a way that approximates human hearing. Streaming platforms use loudness measurements for normalization. The article uses -14 LUFS as Spotify’s reference; actual playback level also depends on the listener’s normalization settings and the track’s peak level.
Q3. What if I edit the Song while mastering?
Choose Update Mastering File from the Song menu to export the changes and update the sound in the Project.
Q4. Why put the limiter in the post section?
Placing a limiter after the master fader controls the final level and helps prevent clipping during volume adjustment.
NEW ARTICLES
Latest English Articles