File management in Studio One is a foundation for an efficient music production workflow. This guide covers choosing a template for a new Song, important initial settings such as sample rate and resolution, creating tracks and assigning instruments. It also explains audio and instrument tracks, regular saving, automatic backups and the basics of adding plug-ins to help beginners build a stable production setup.
Song Setup
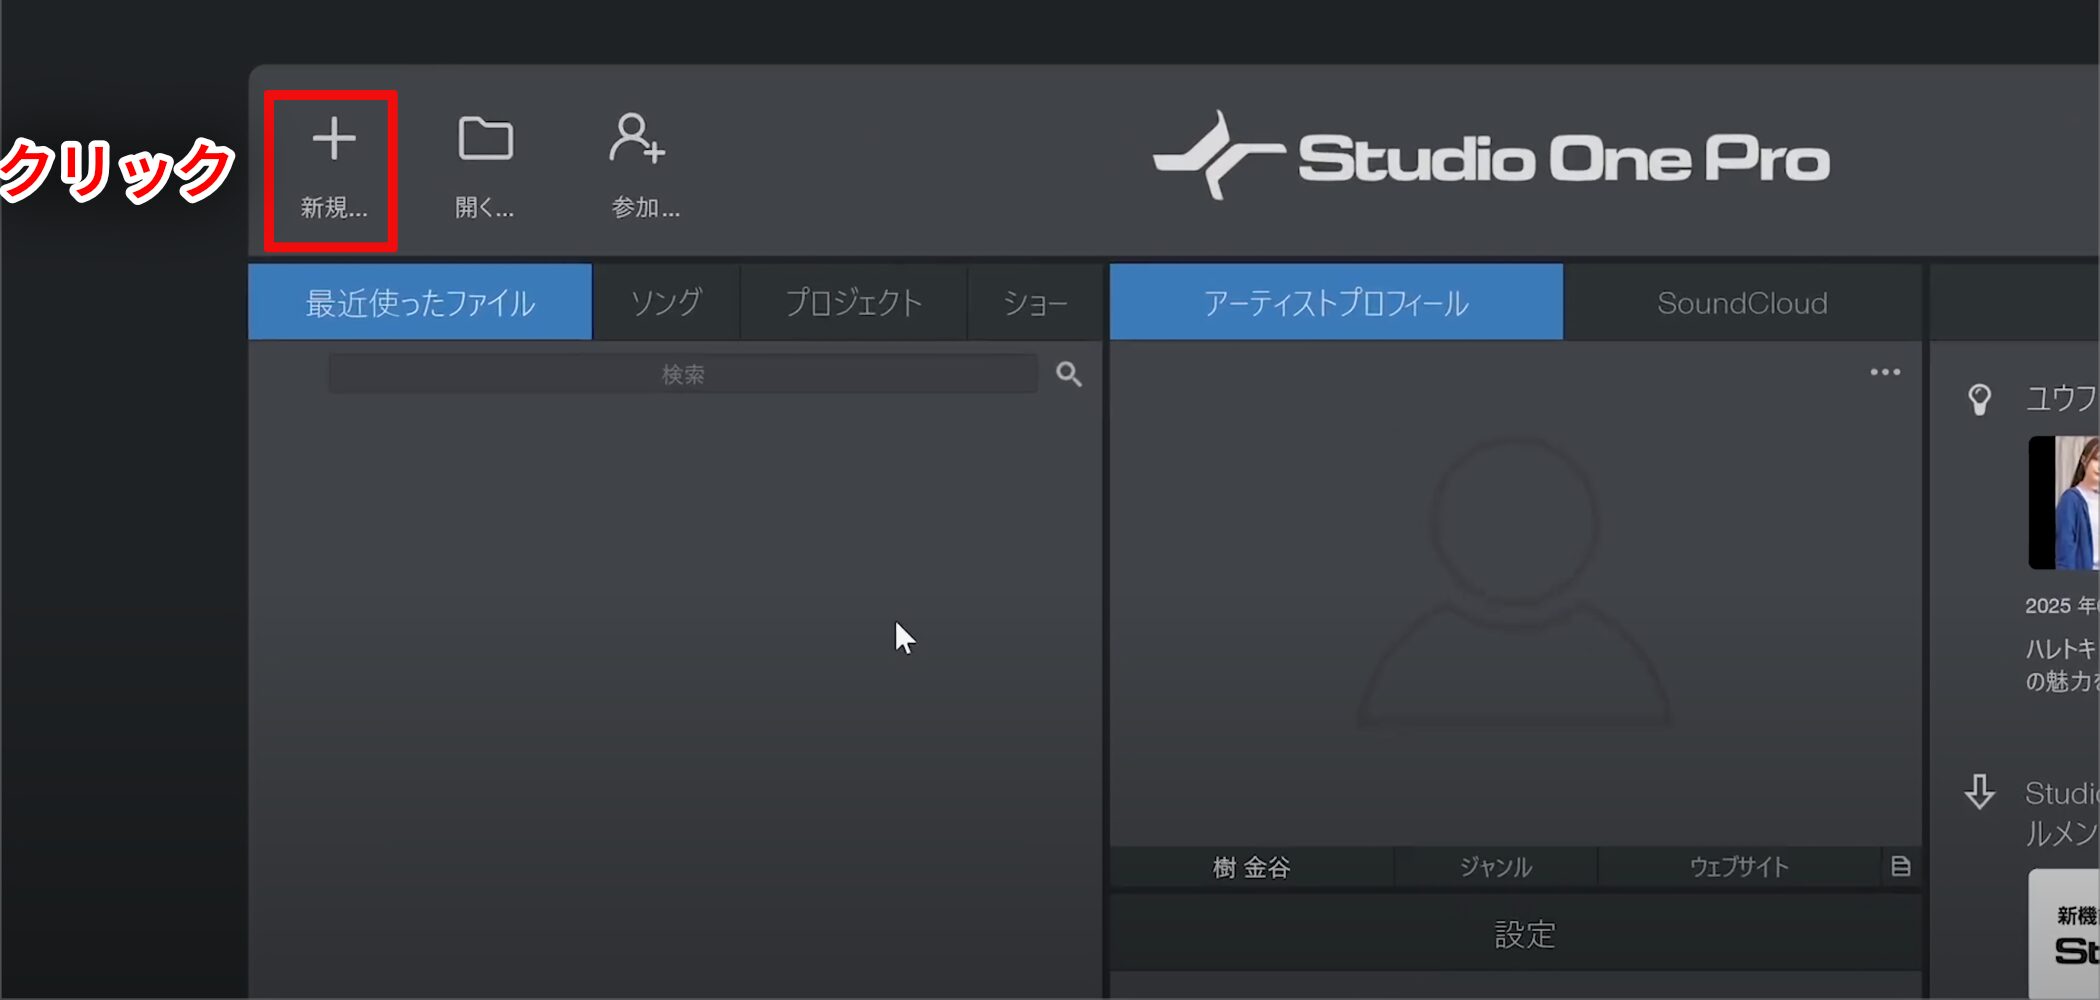
To create a song, click “New…”.
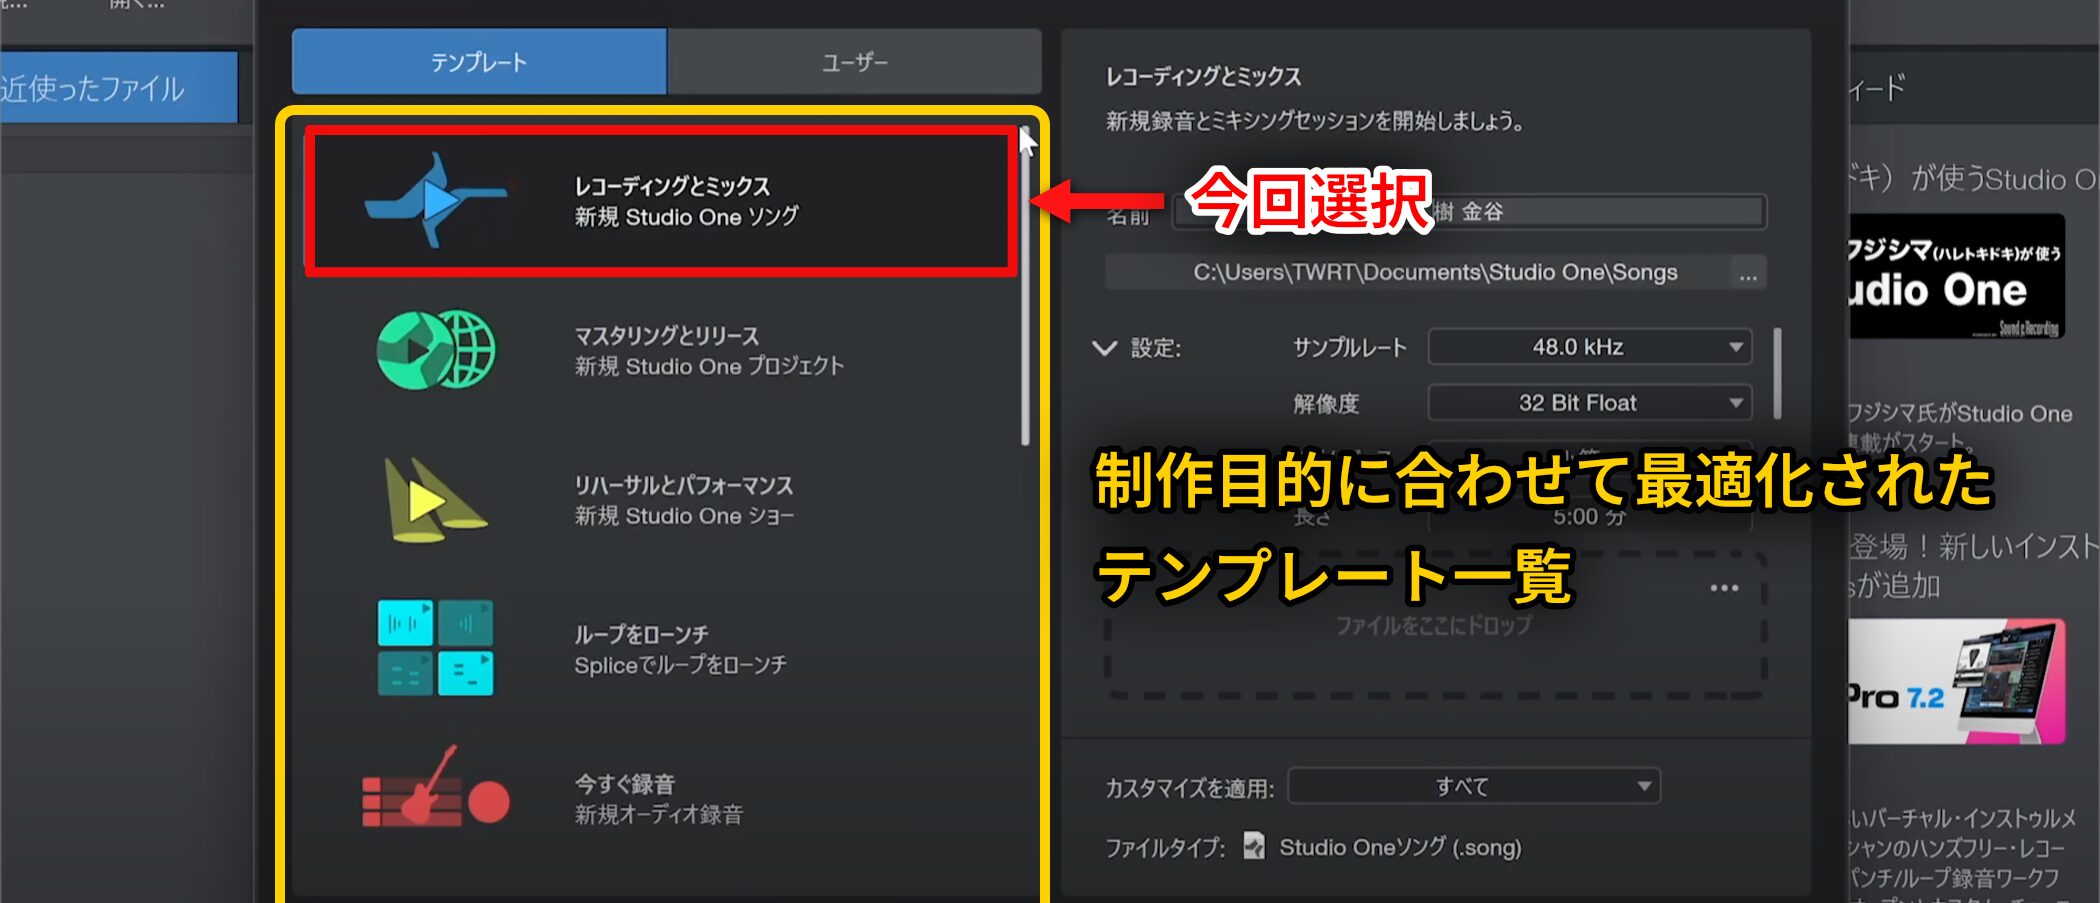
A list of different templates optimized for particular production purposes appears.
Templates help you get started smoothly by preparing the necessary tracks in advance.
To learn the basics, we will choose “Recording and Mixing” at the top.

Before starting, it is useful to know that Studio One has two kinds of file: Songs and Projects.
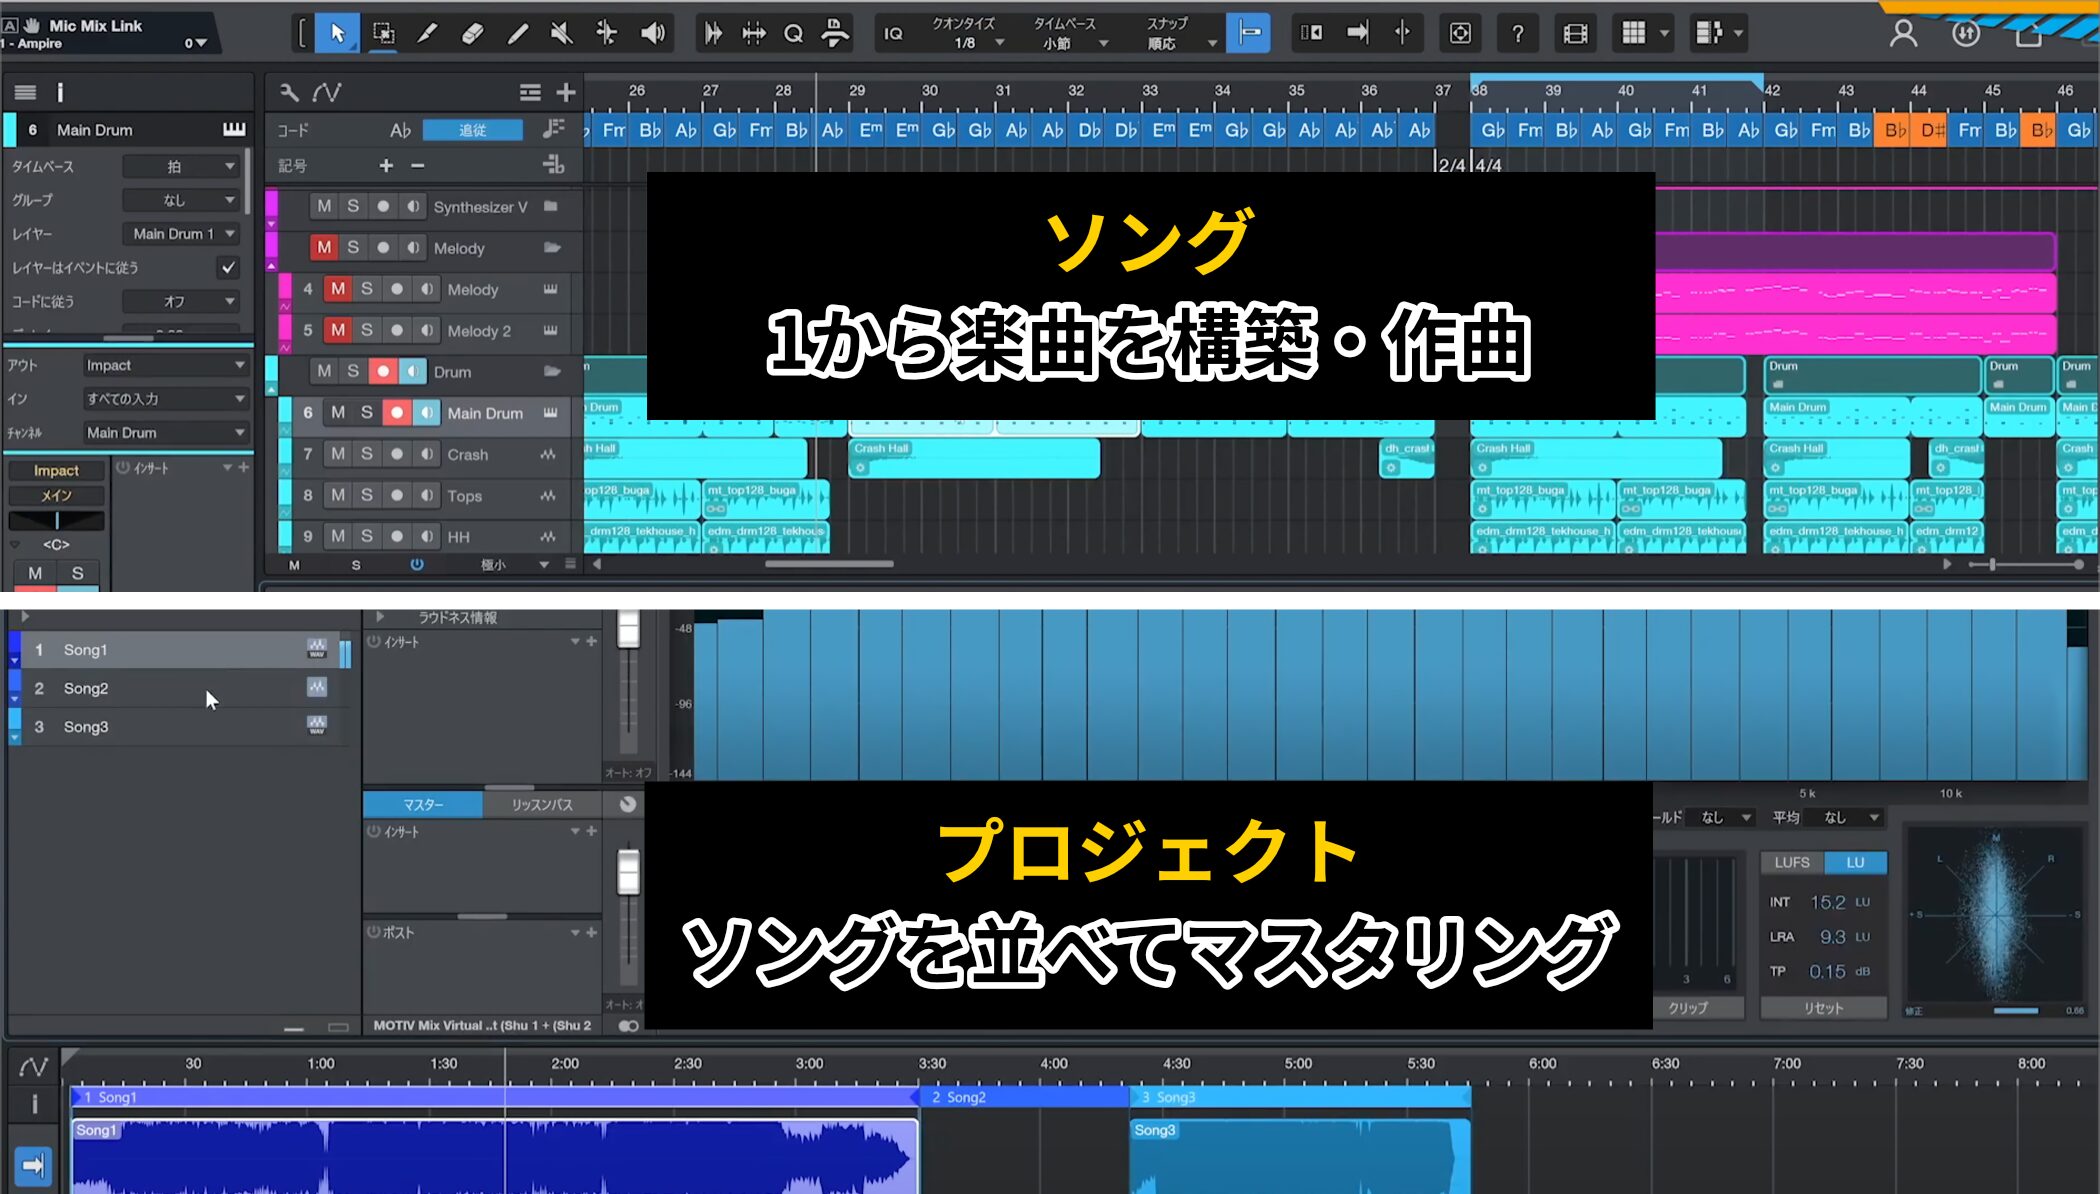
A Song is used to build and compose a track from scratch. A Project is used to arrange songs created in Songs and master them as the final stage.
The workflow is to create music in a Song and finish it in a Project.
Setting Song Information
Many new Song settings can be changed later, but it is convenient to set them up initially if you already know what you need.
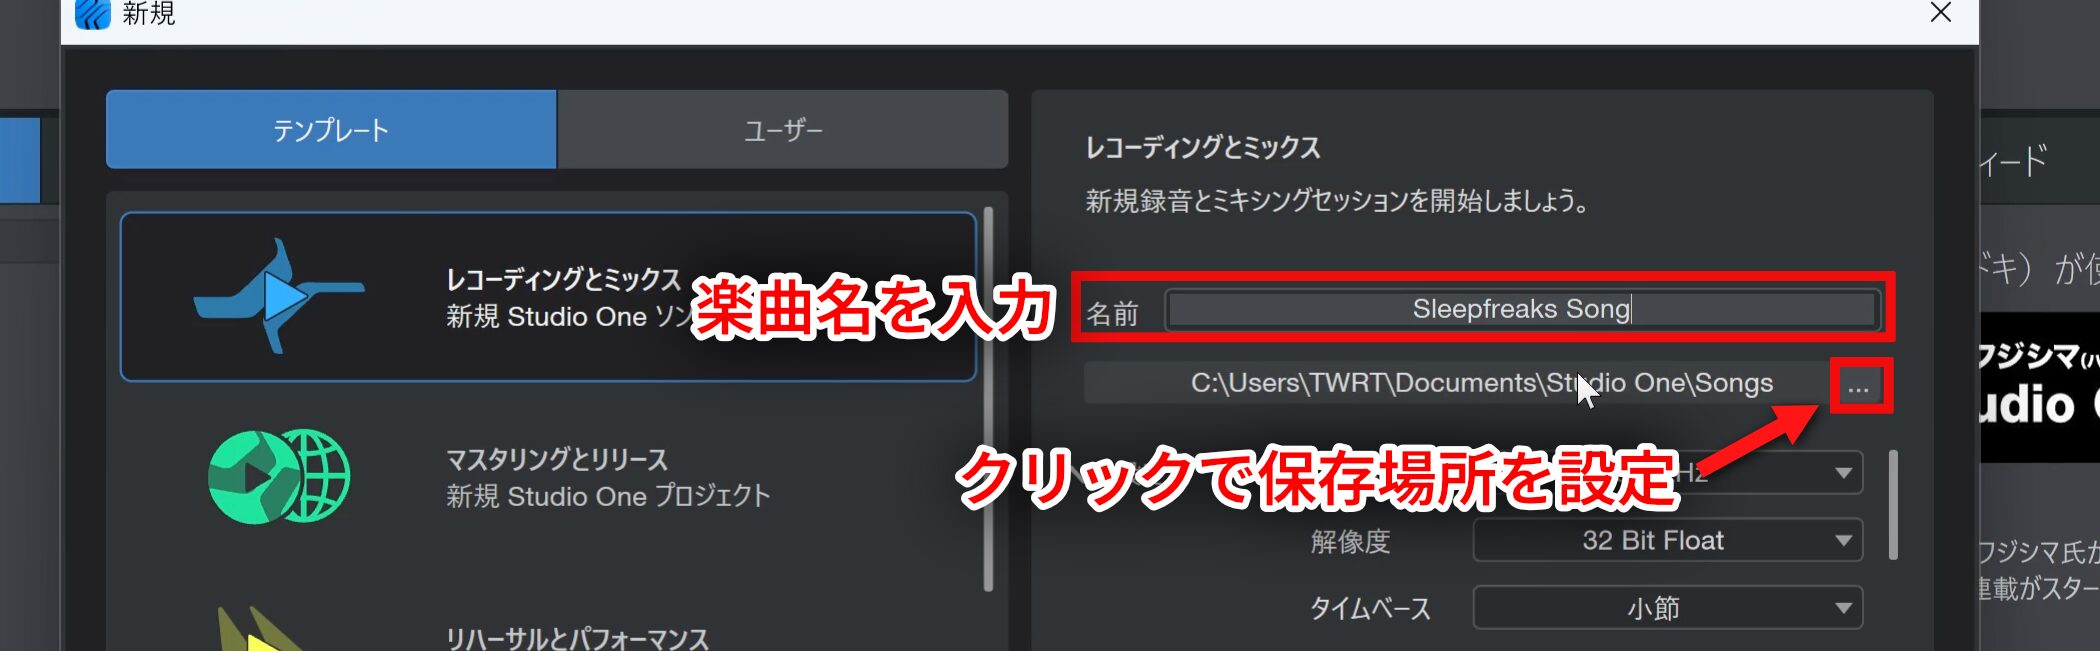
Enter a song name and choose where to save the Song file.
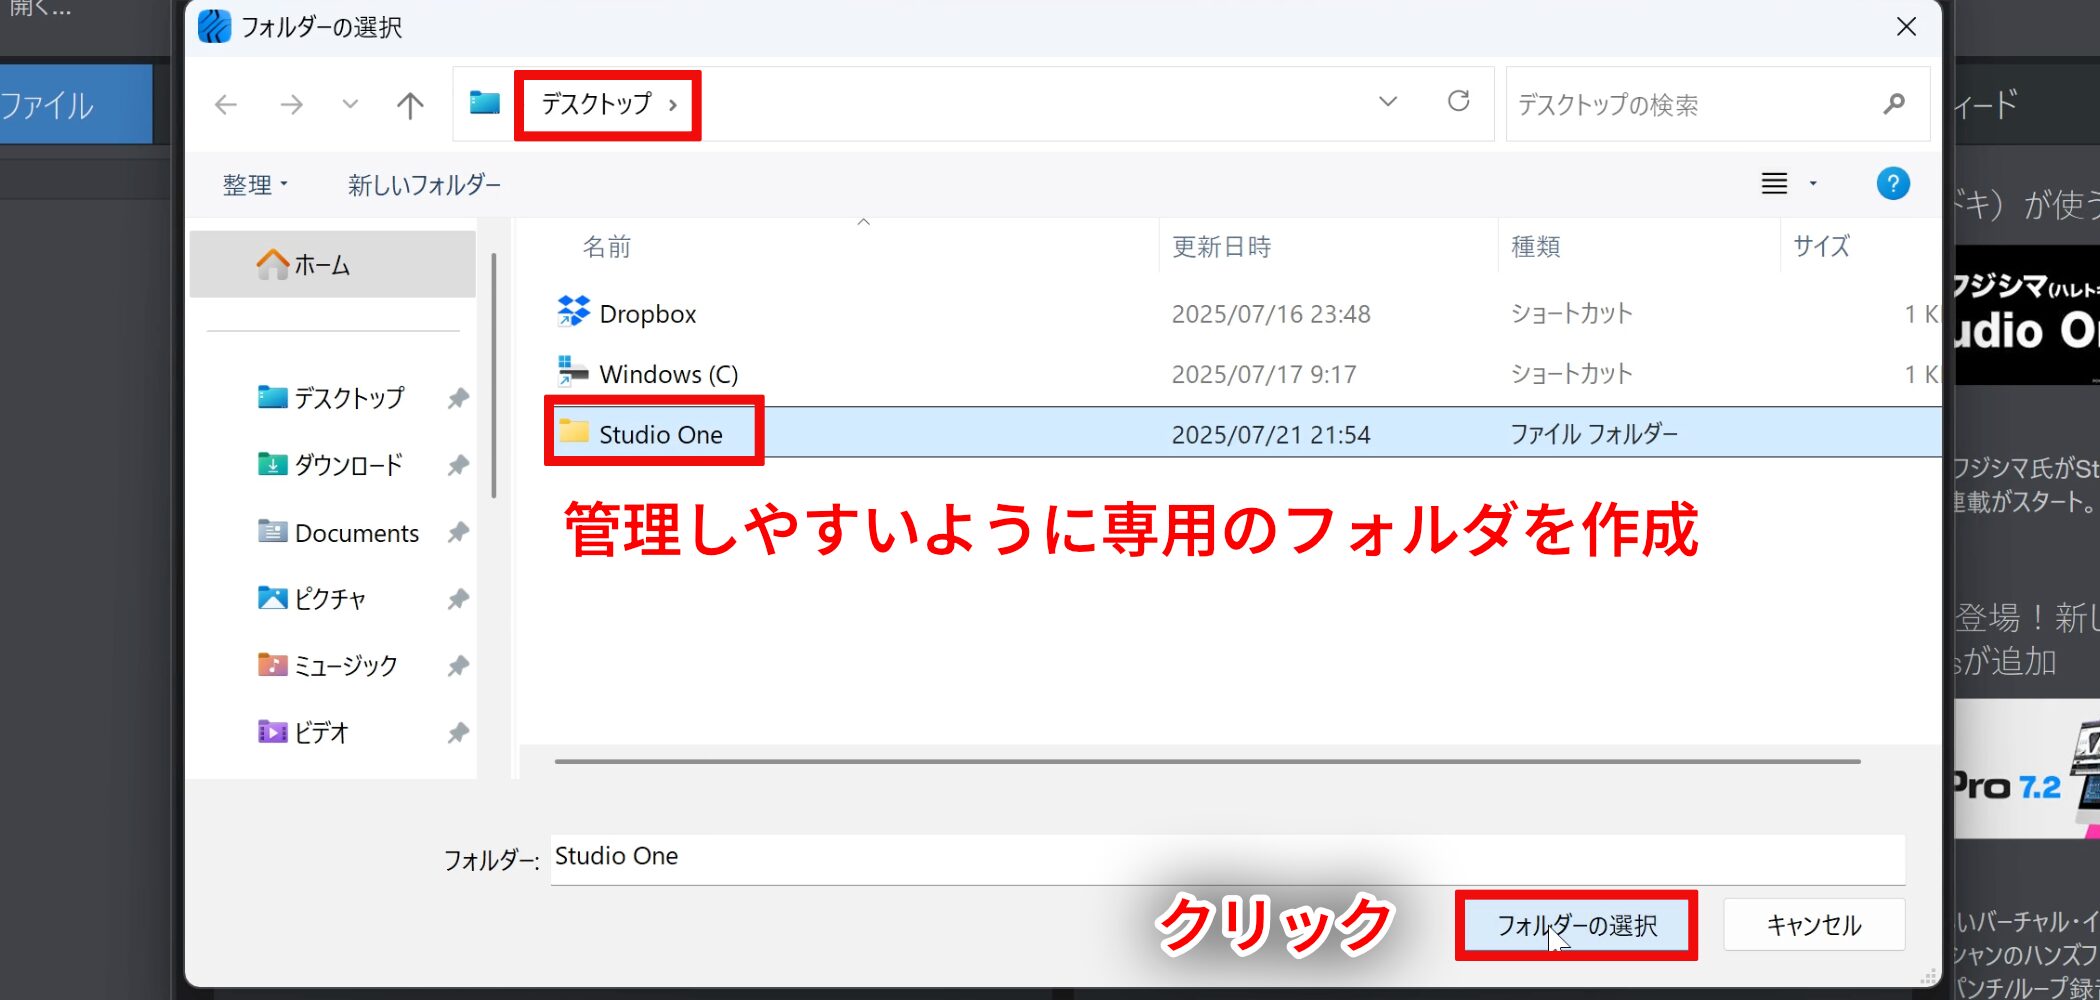
There is no required location, but it is important to choose somewhere you can find easily.
To keep things organized as you create more songs, create a dedicated folder for them.
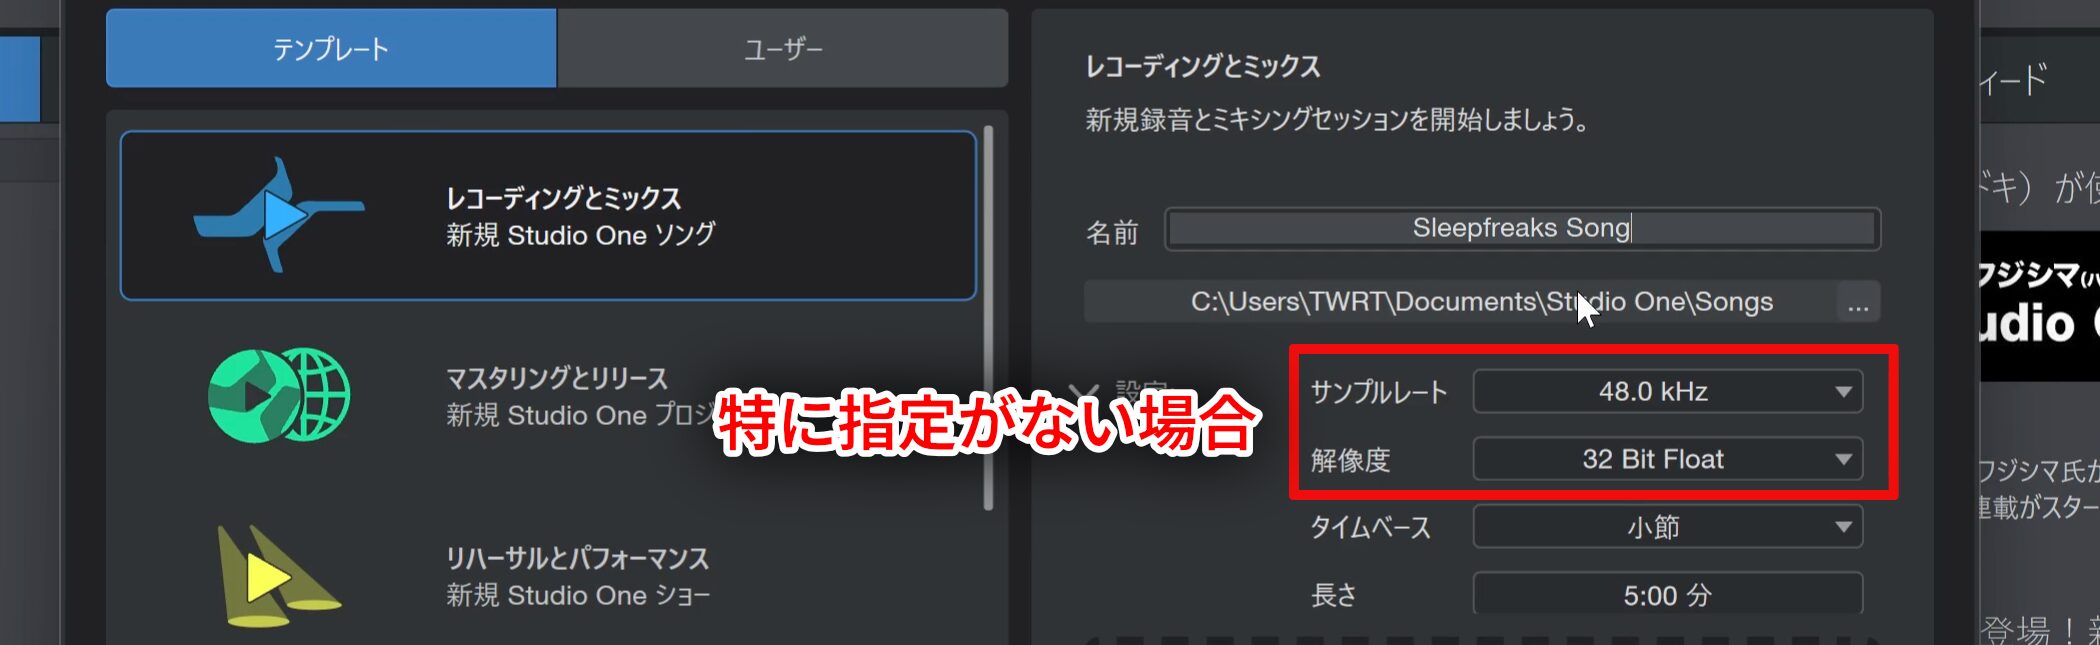
Sample rate and resolution are important settings related to audio quality.
Unless you have a specific requirement, we recommend a sample rate of 48 kHz and a resolution of 32-bit float.
For reference, CD audio is 44.1 kHz and 16-bit, so these settings provide higher resolution than CD audio.
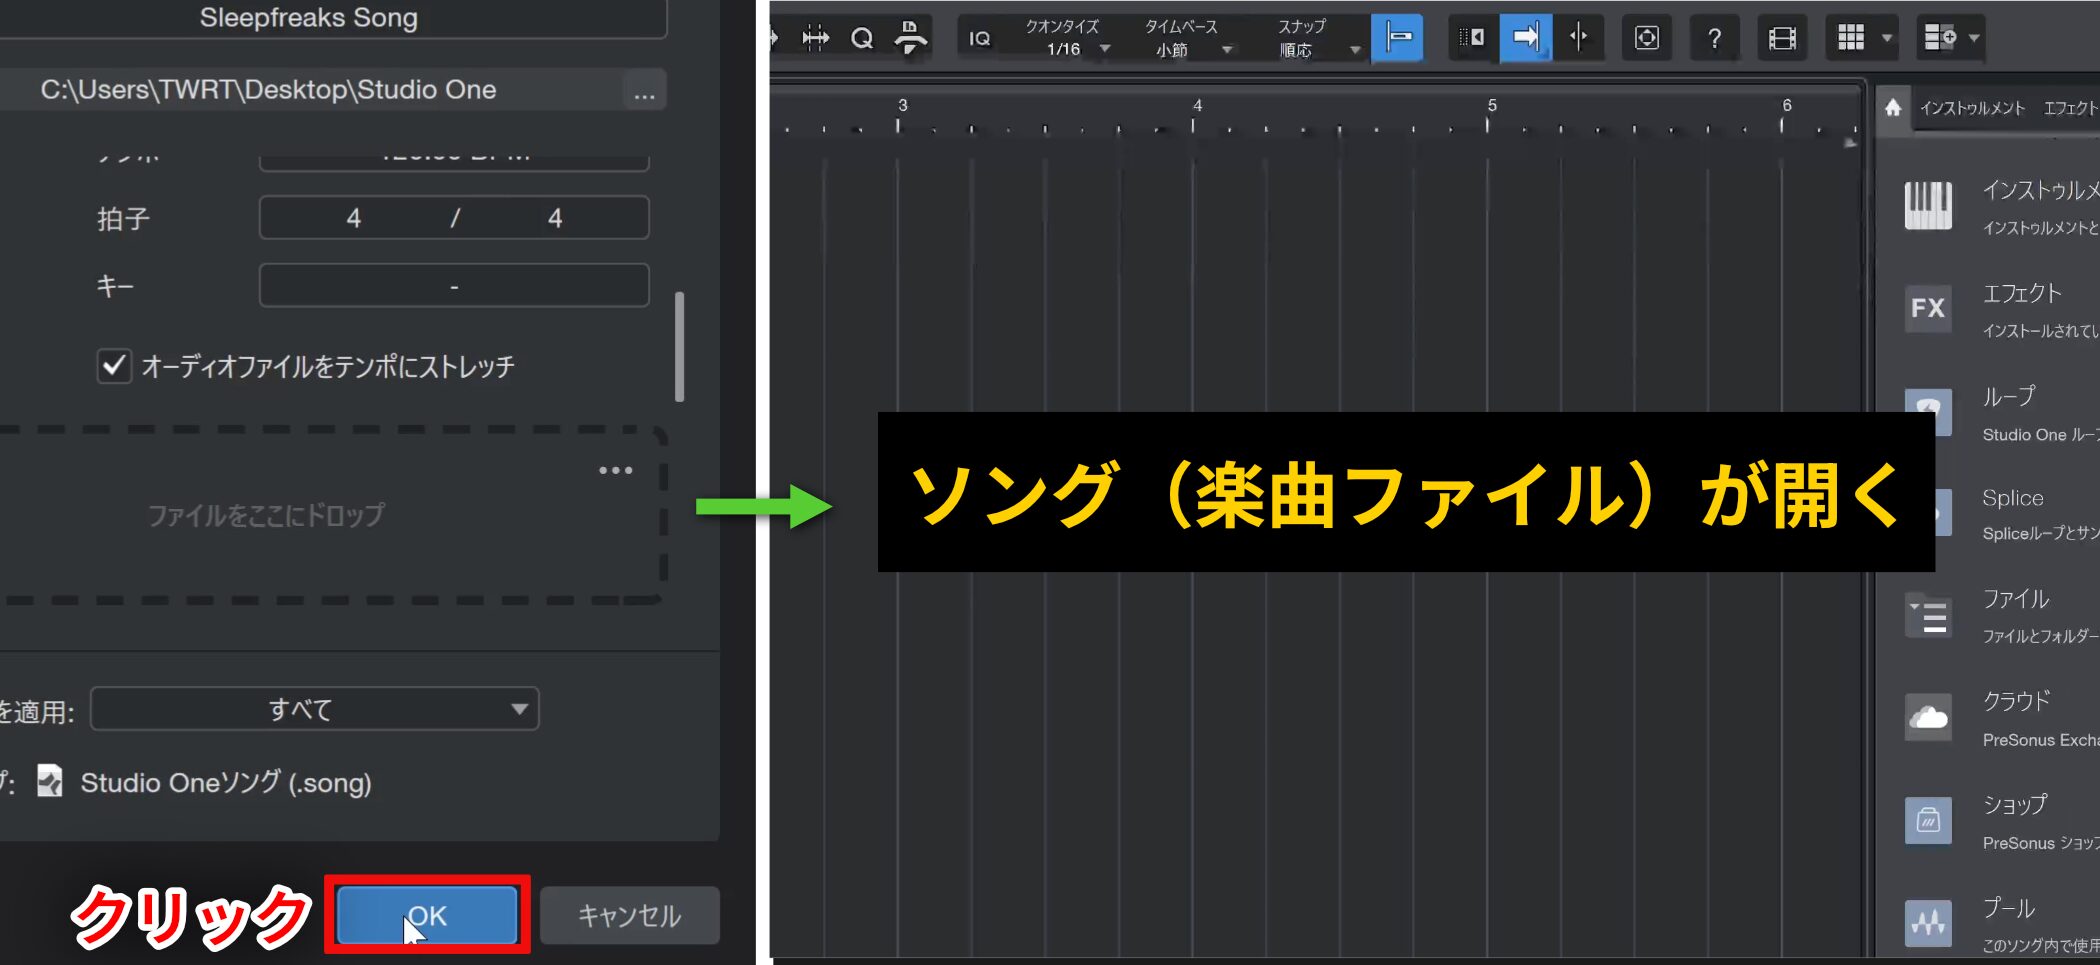
Click “OK” when finished to open the Song file.
Creating Tracks
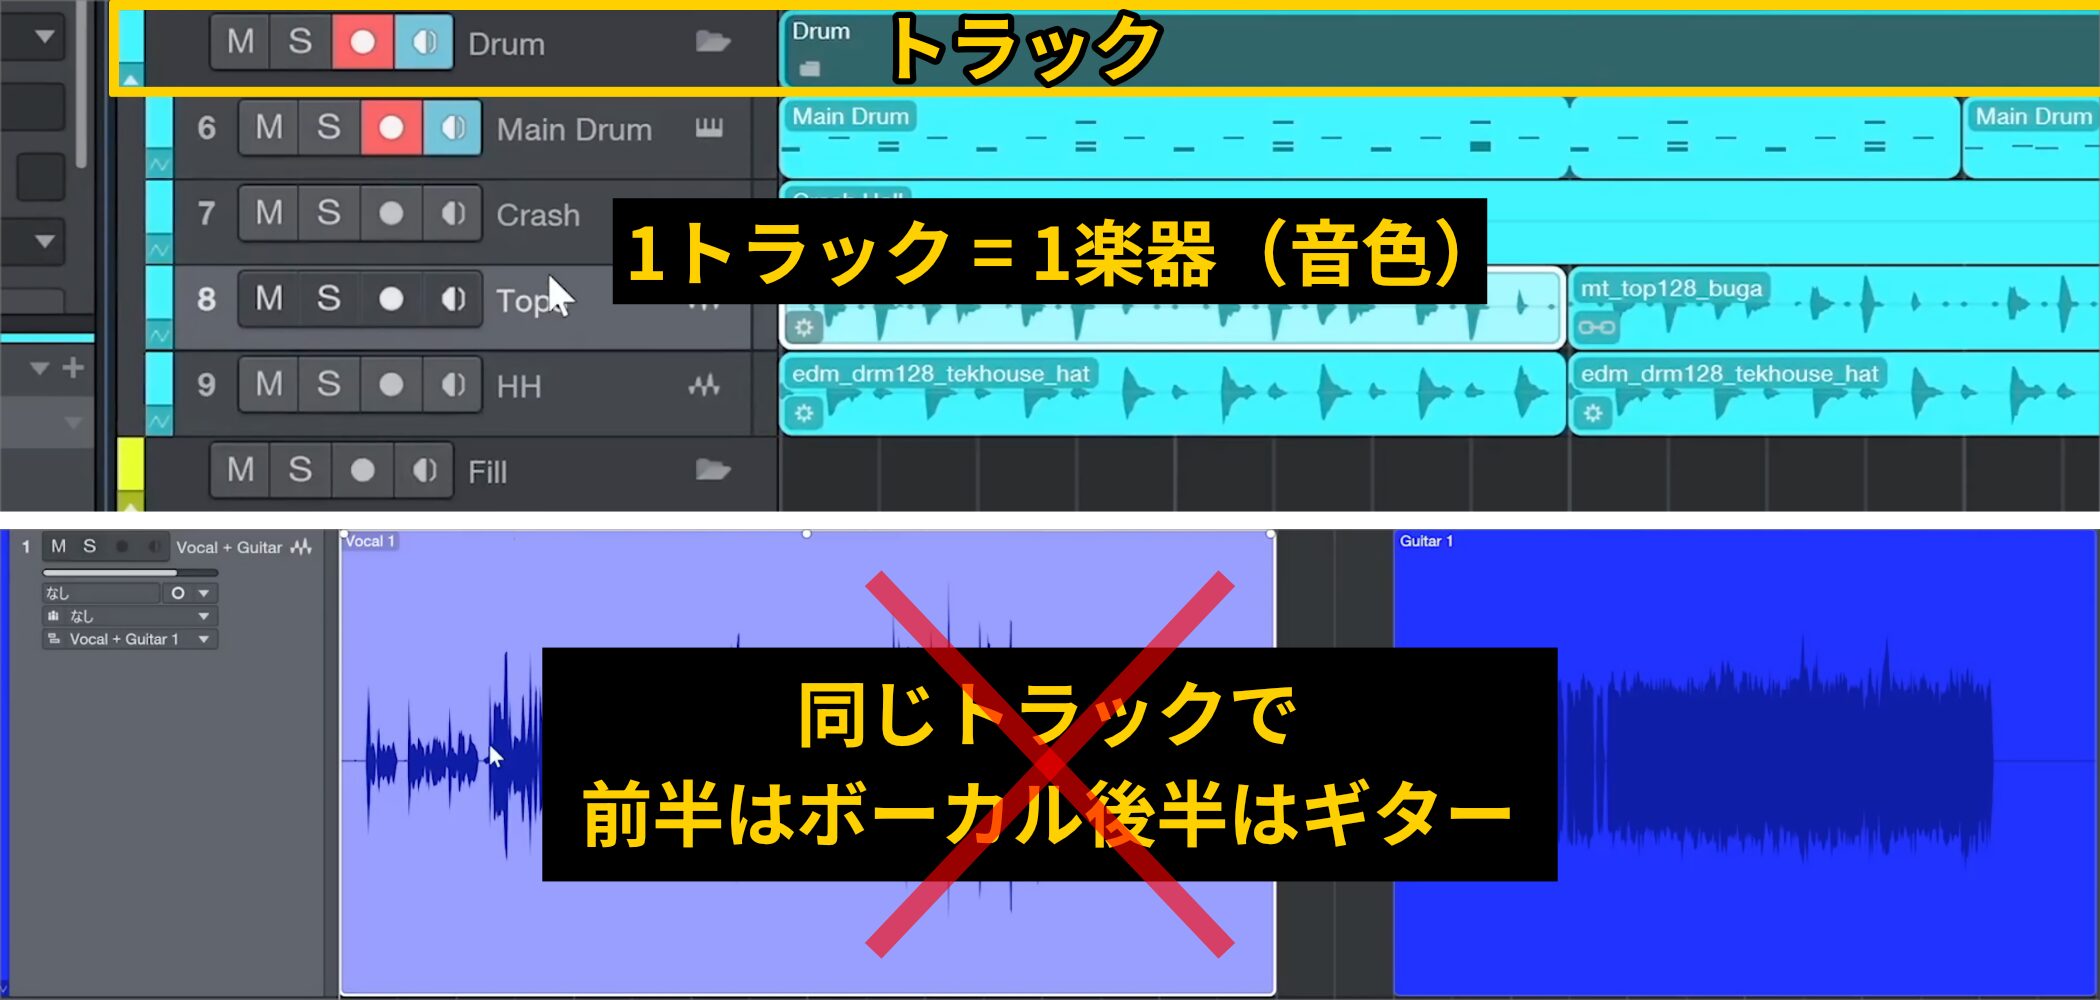
A song is built from multiple vertically arranged tracks, whose sounds combine into one piece of music.
Generally, one track is used for one instrument or sound; using the same track for vocals in the first half and guitar in the second half is not recommended.
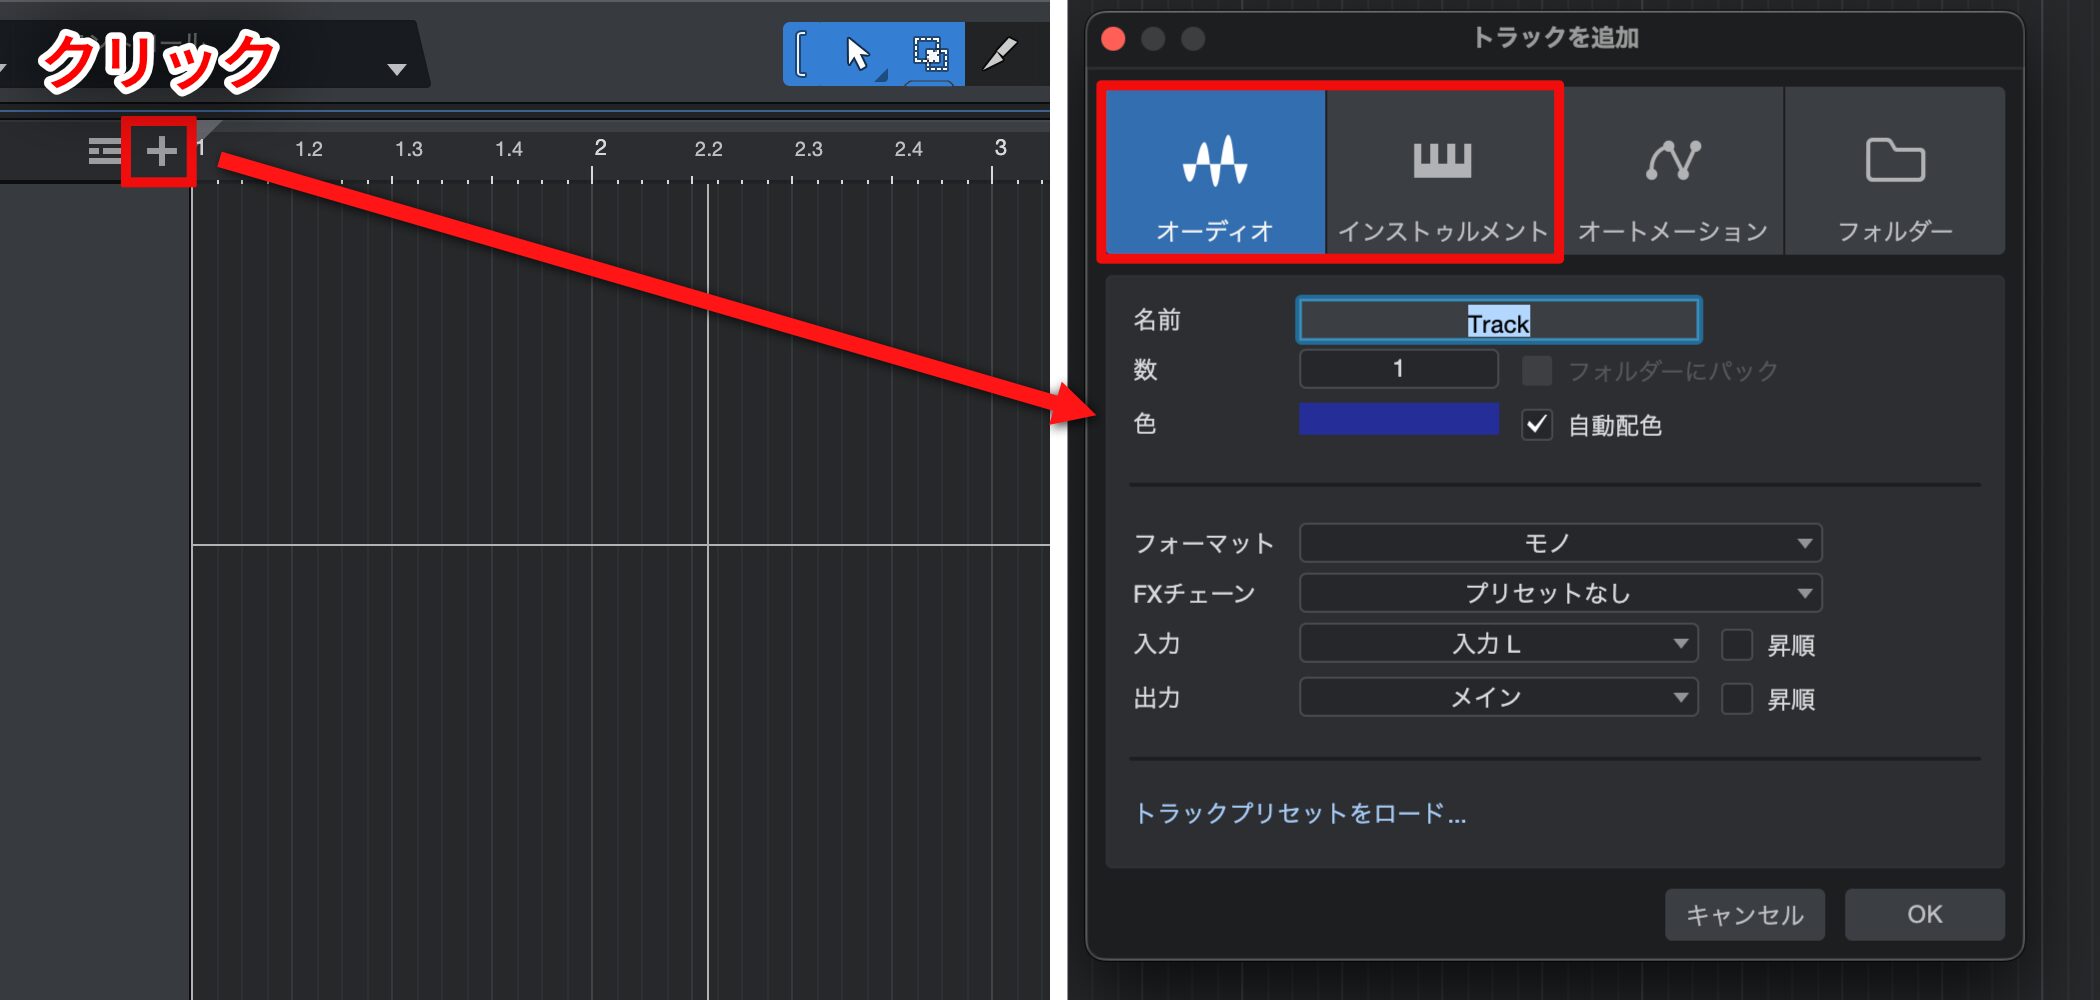
Click the “+” button to add a track.
Four track types are shown, but the two that actually output sound are Audio and Instrument tracks.
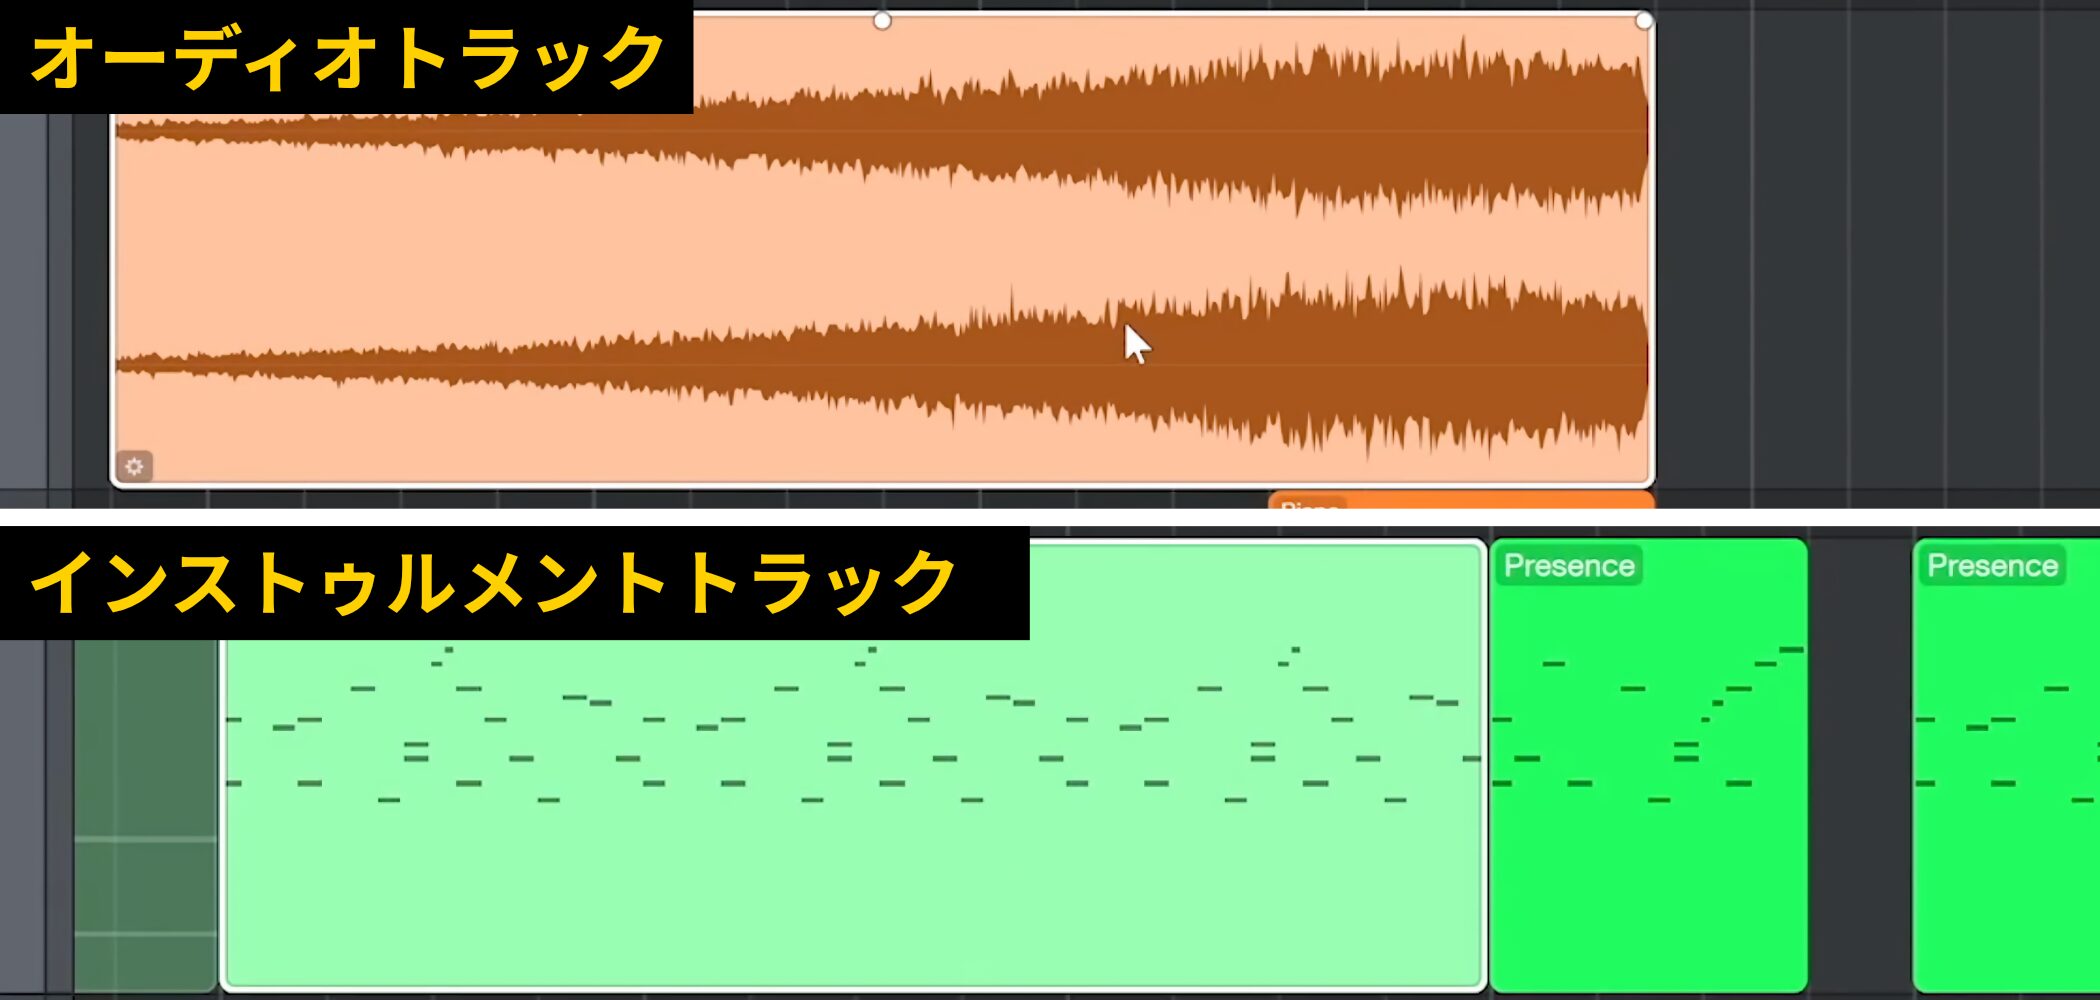
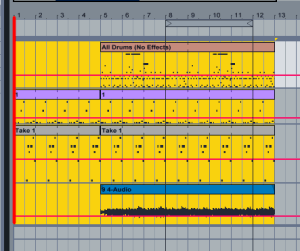
Audio tracks display waveforms and handle recorded performances such as vocals and guitar.
Instrument tracks handle MIDI, displayed as bars, and are used to play virtual instruments such as drums or orchestral sounds.
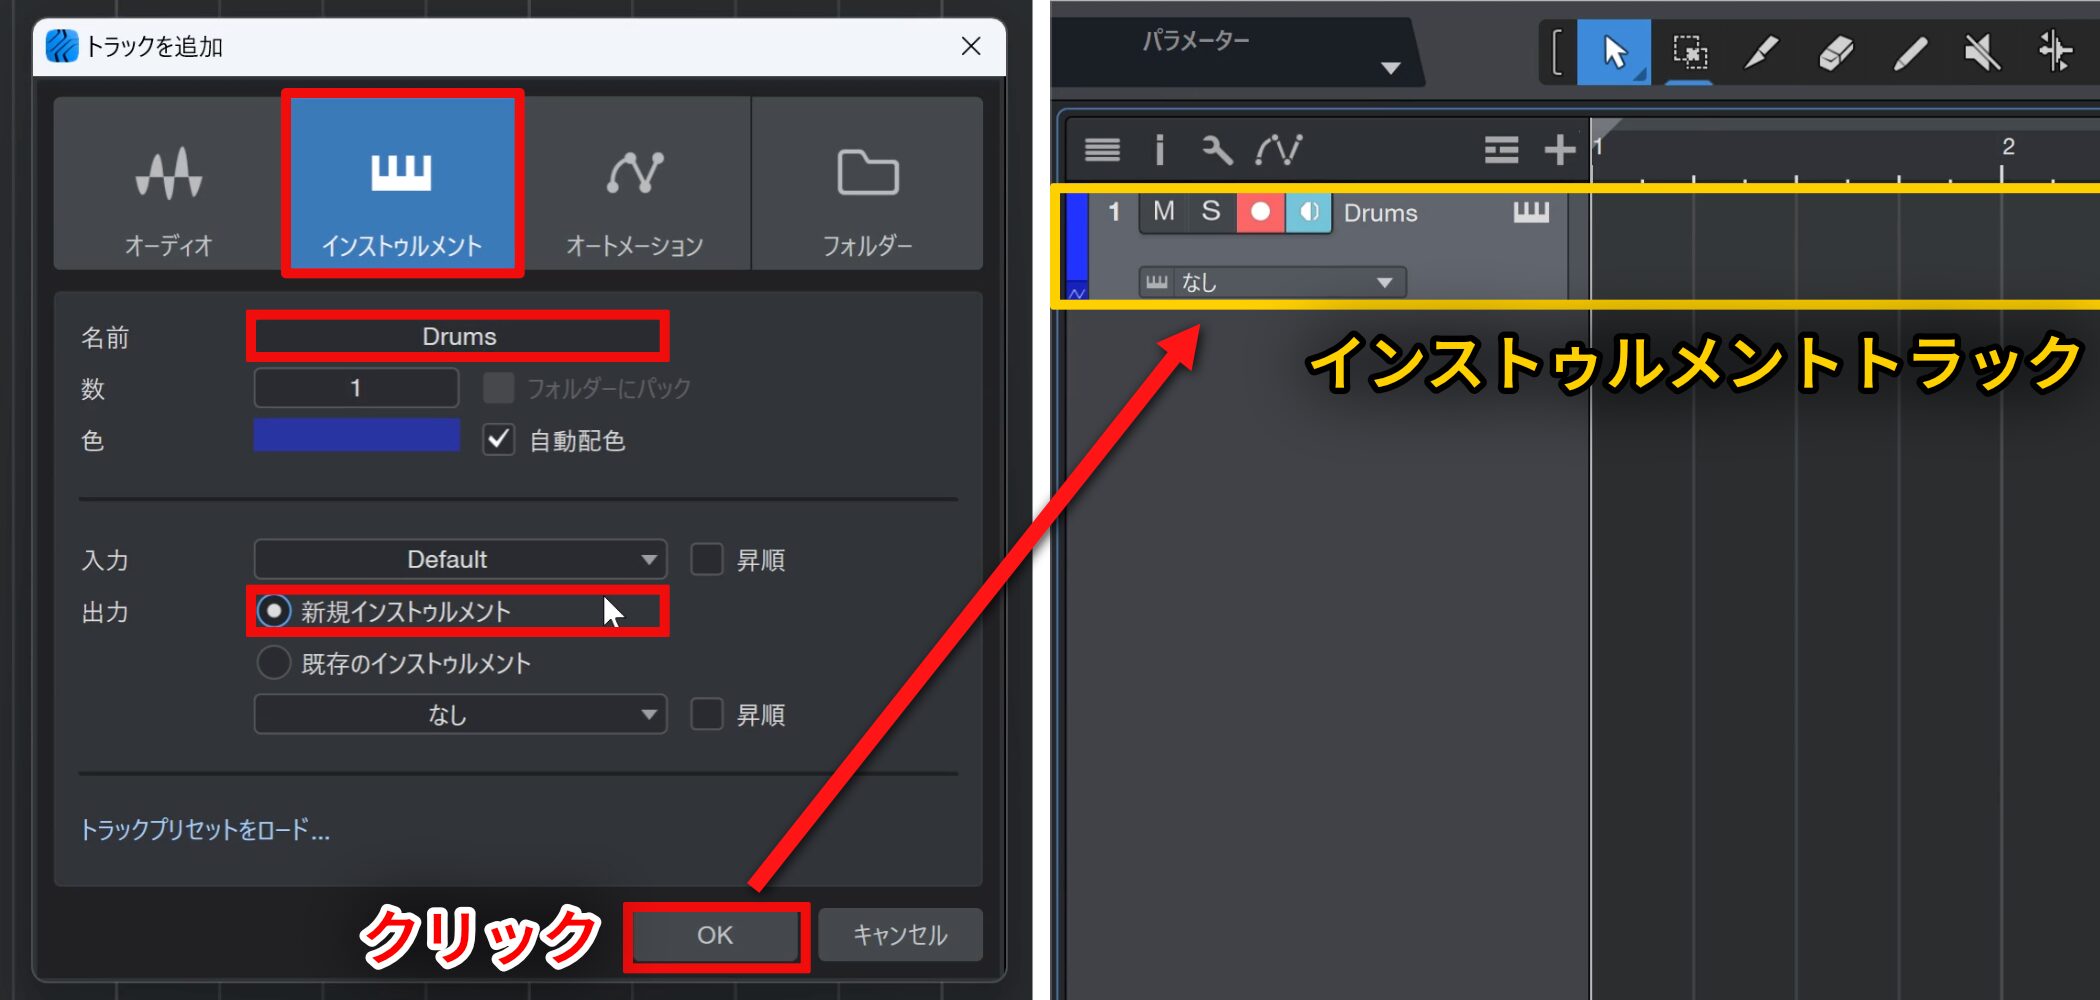
First, create a rhythm track as the foundation of the song.
Because we will use a virtual drum instrument rather than a live performance, select an Instrument track.
Enter “Drums” as the track name, select “New Instrument” and click “OK” to create an Instrument track for the rhythm.
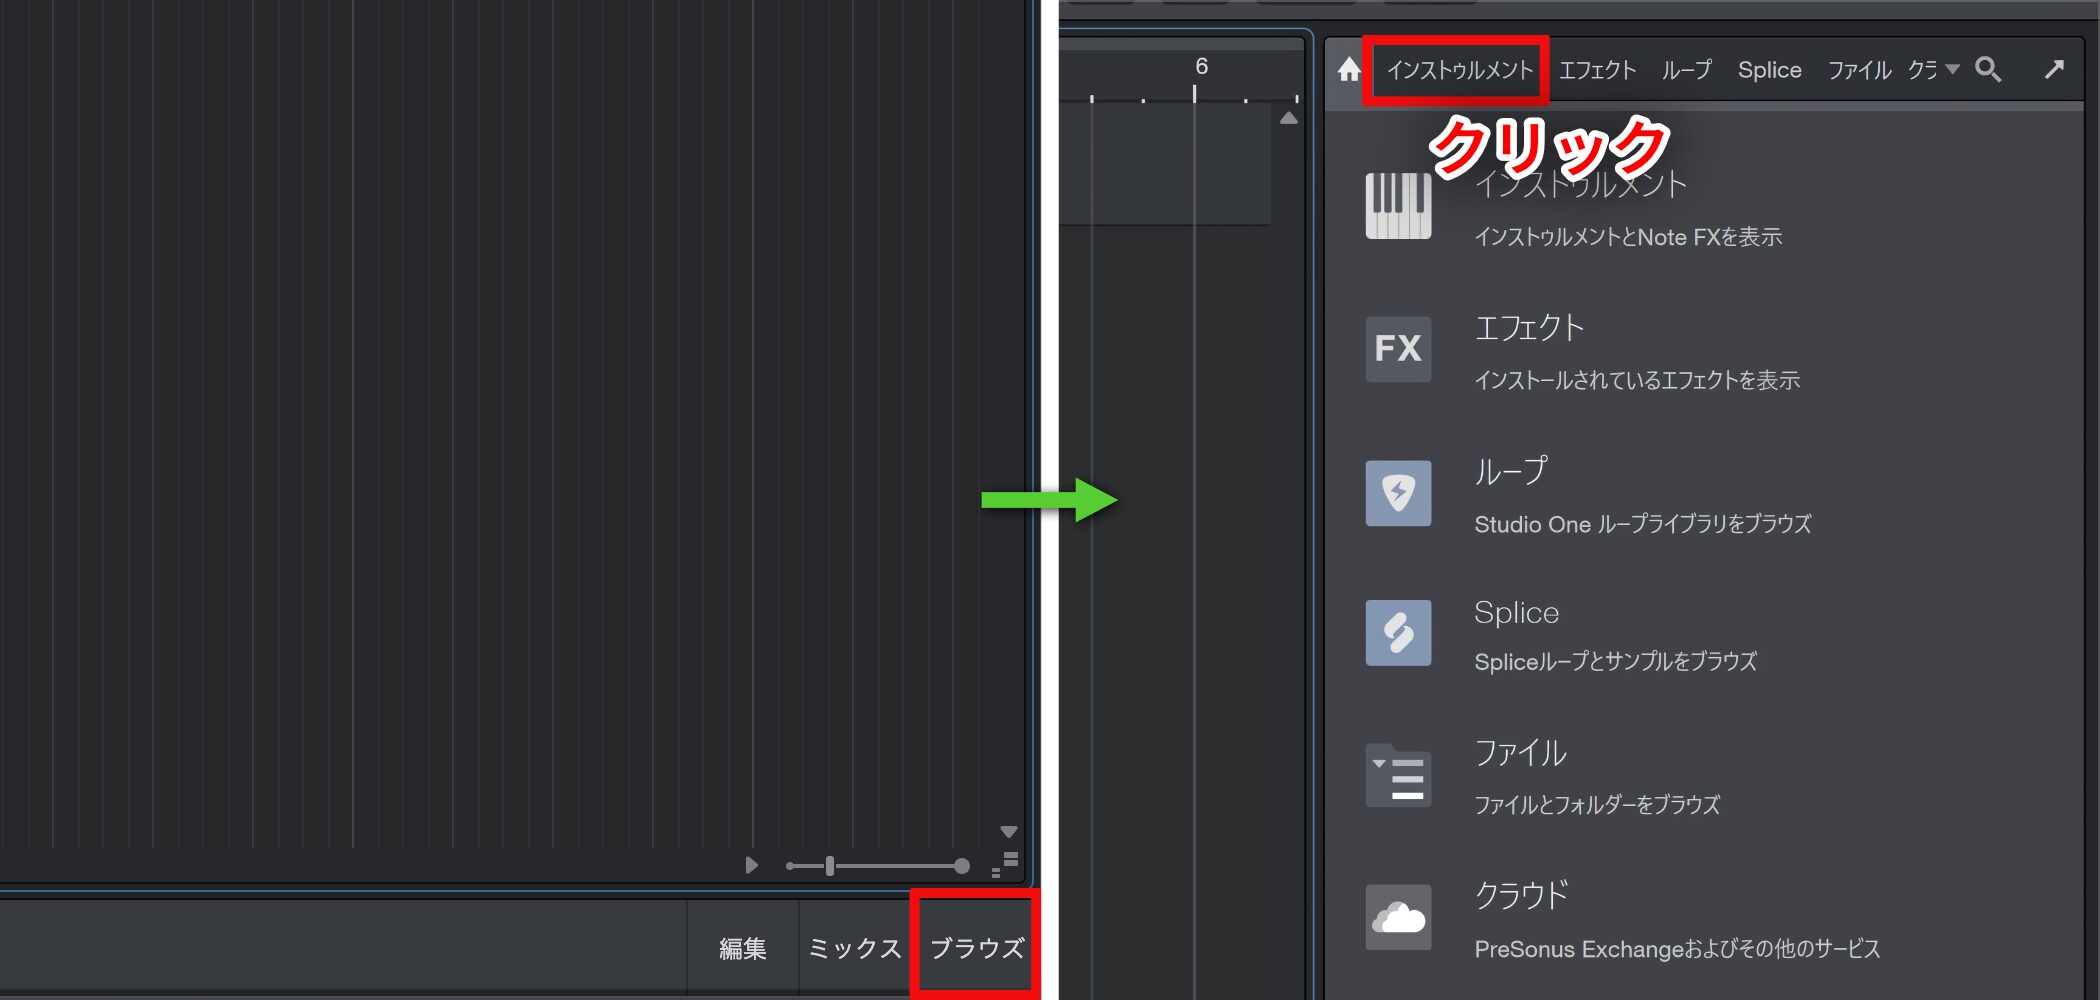
Creating the track alone does not produce sound, so assign an instrument to it.
If the Browser is not visible on the right, enable “Browse” at the lower right and select “Instruments.”
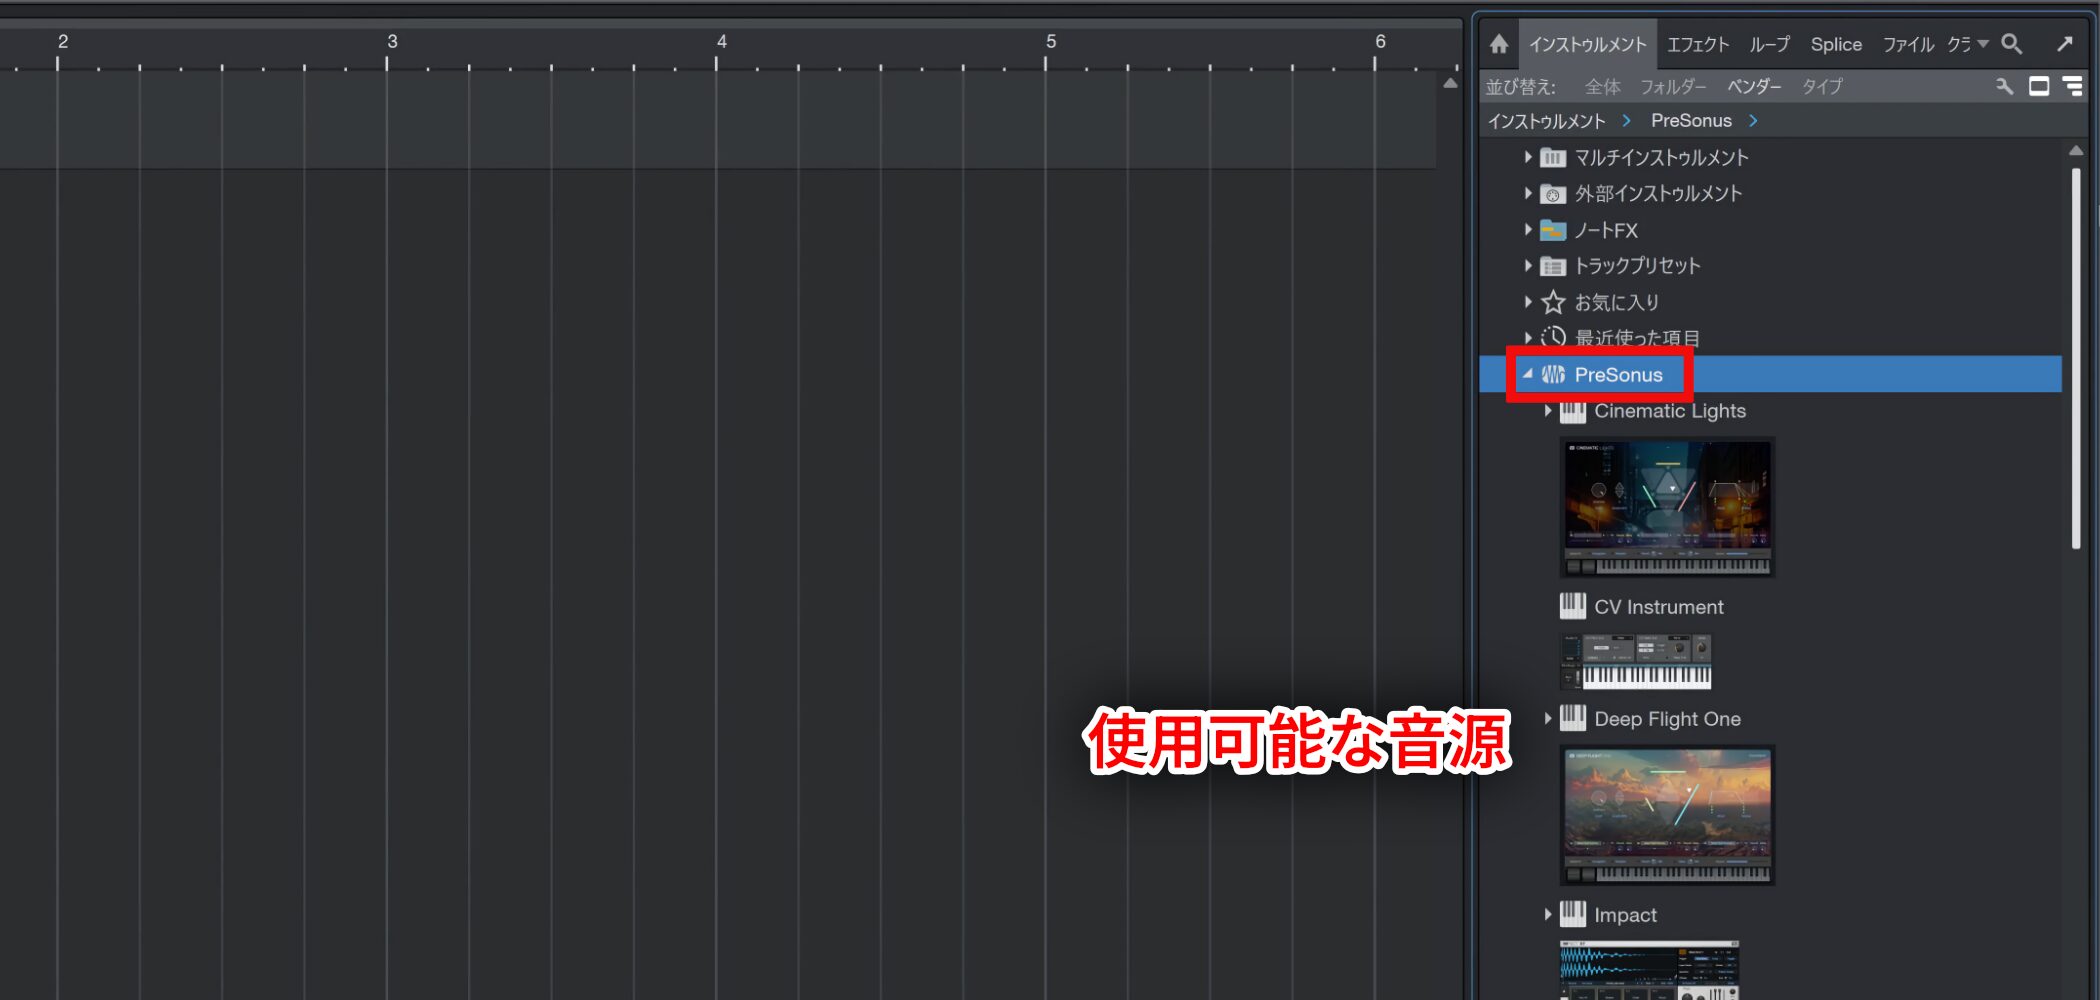
Open the “PreSonus” folder to see the available instruments.
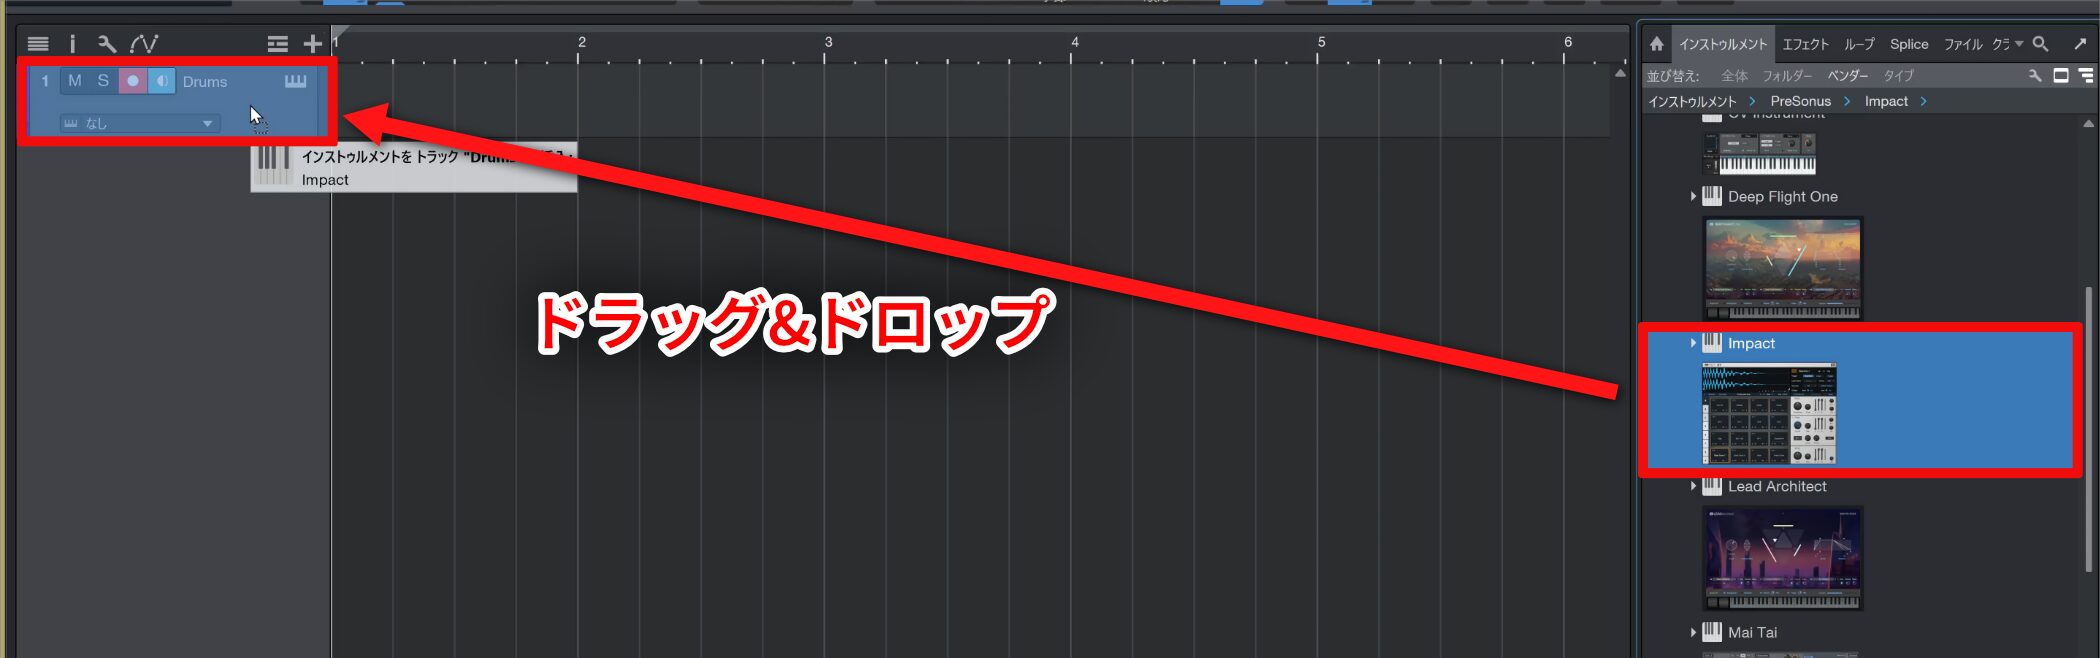
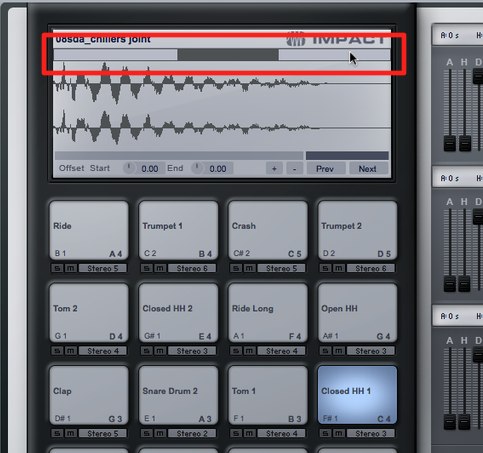
Select the drum instrument “Impact” and drag it onto the timeline or the track name.
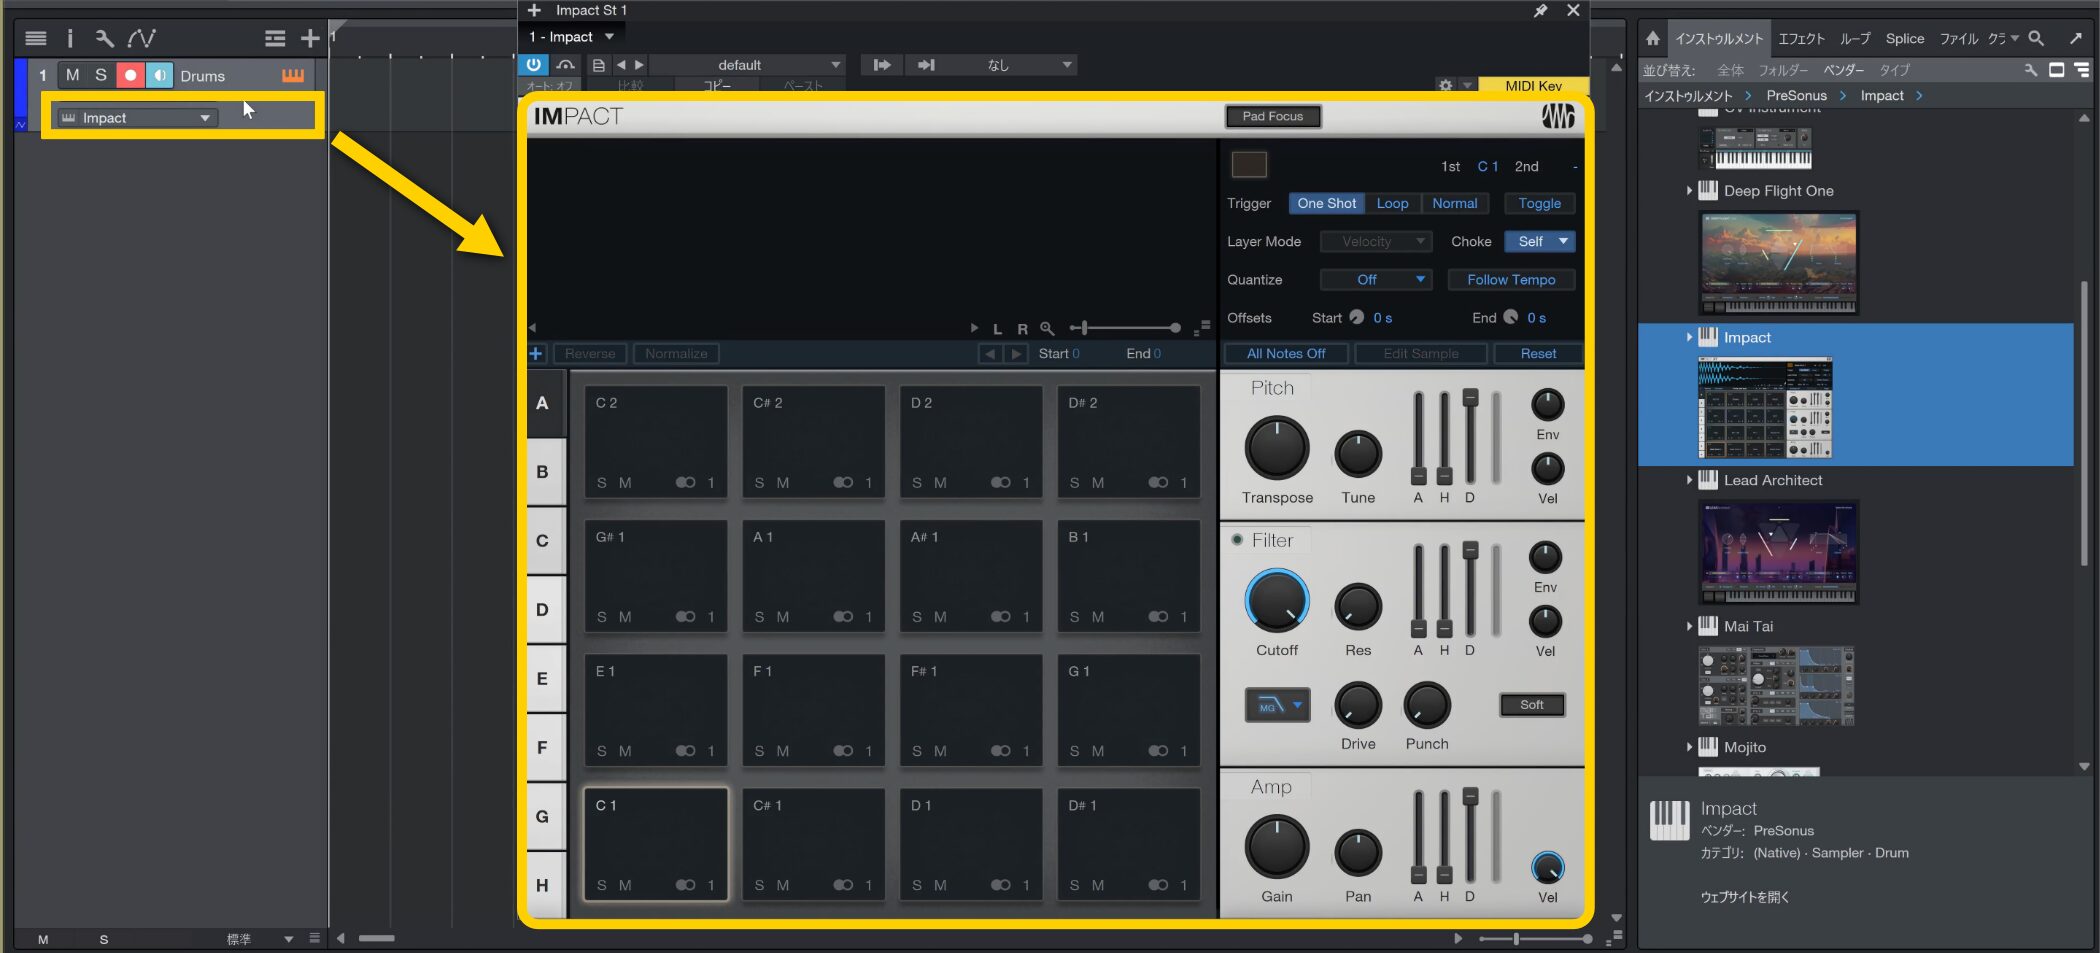
Impact is now assigned to the Drums Instrument track, and its drum sounds are available.
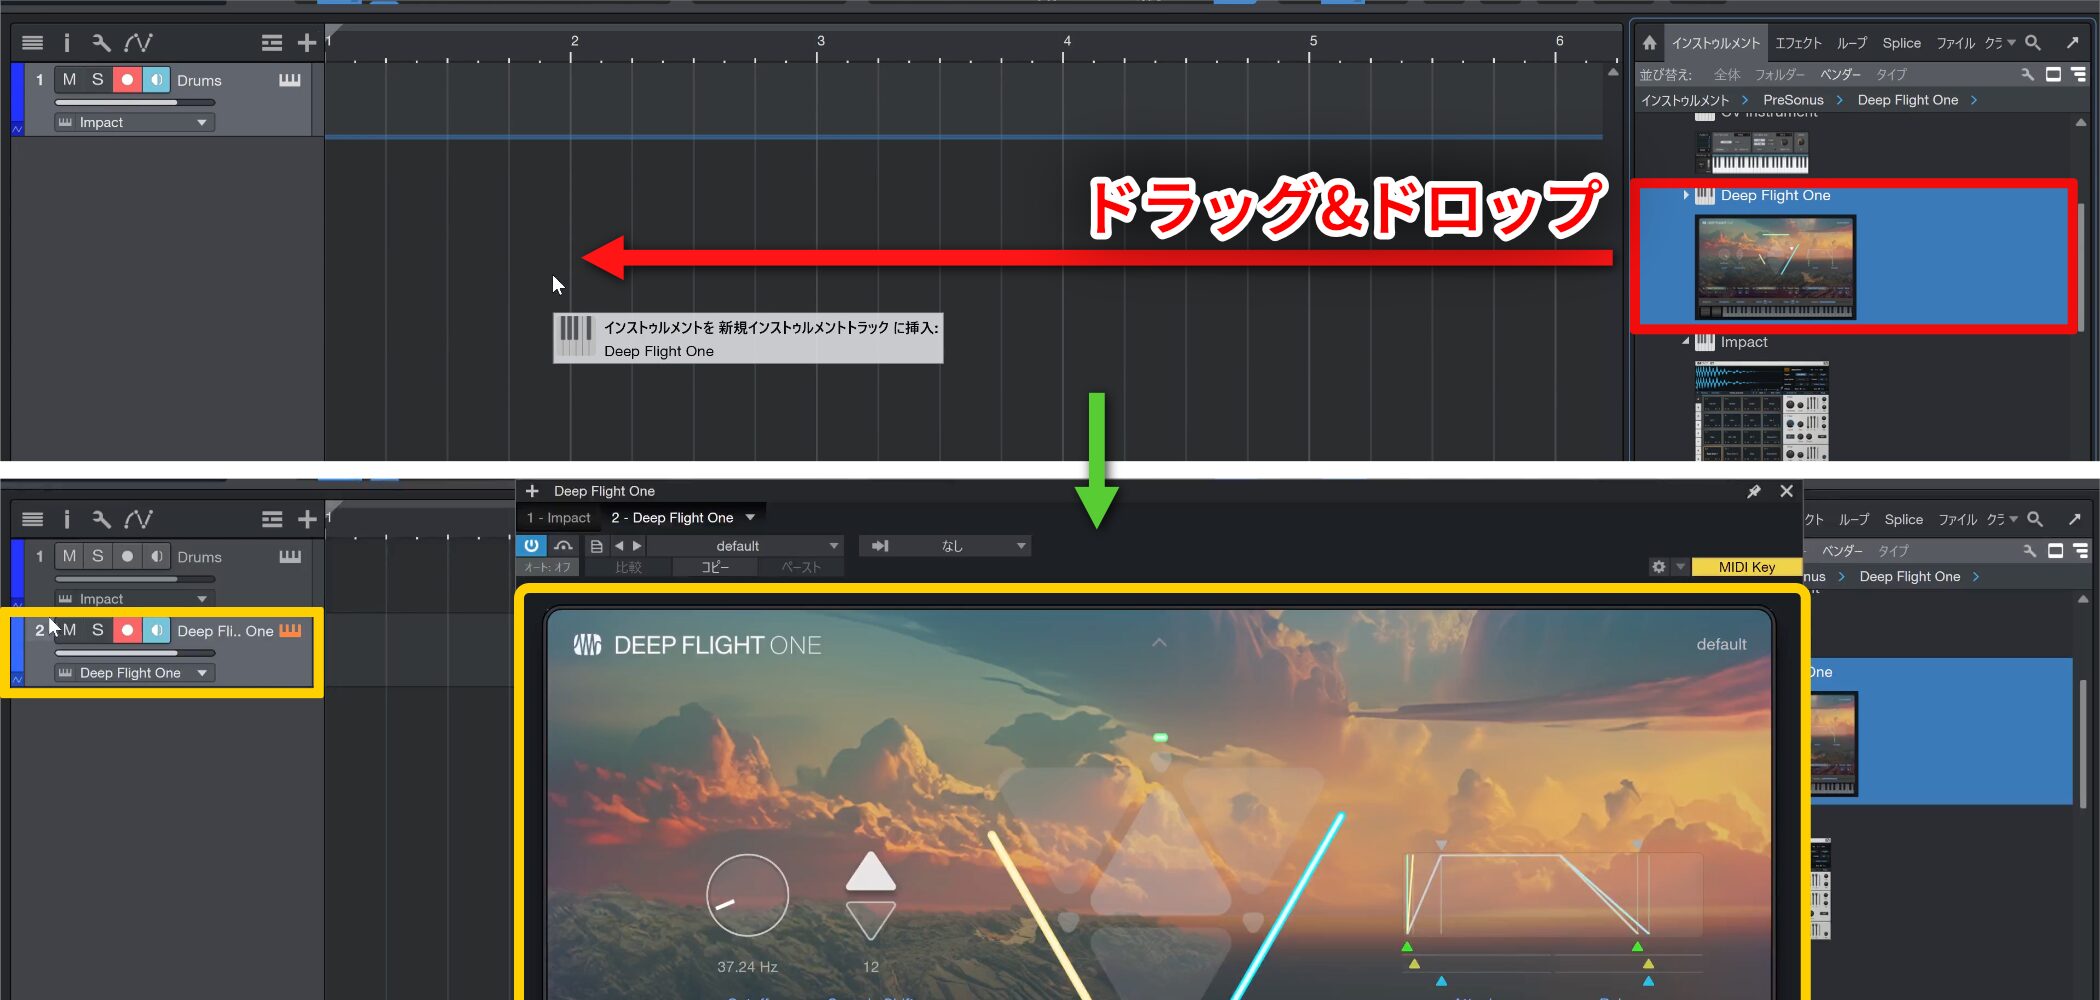
For a more efficient method, instead of creating an Instrument track beforehand, drag the desired instrument directly into an empty area. This creates an Instrument track and opens the instrument in one operation.
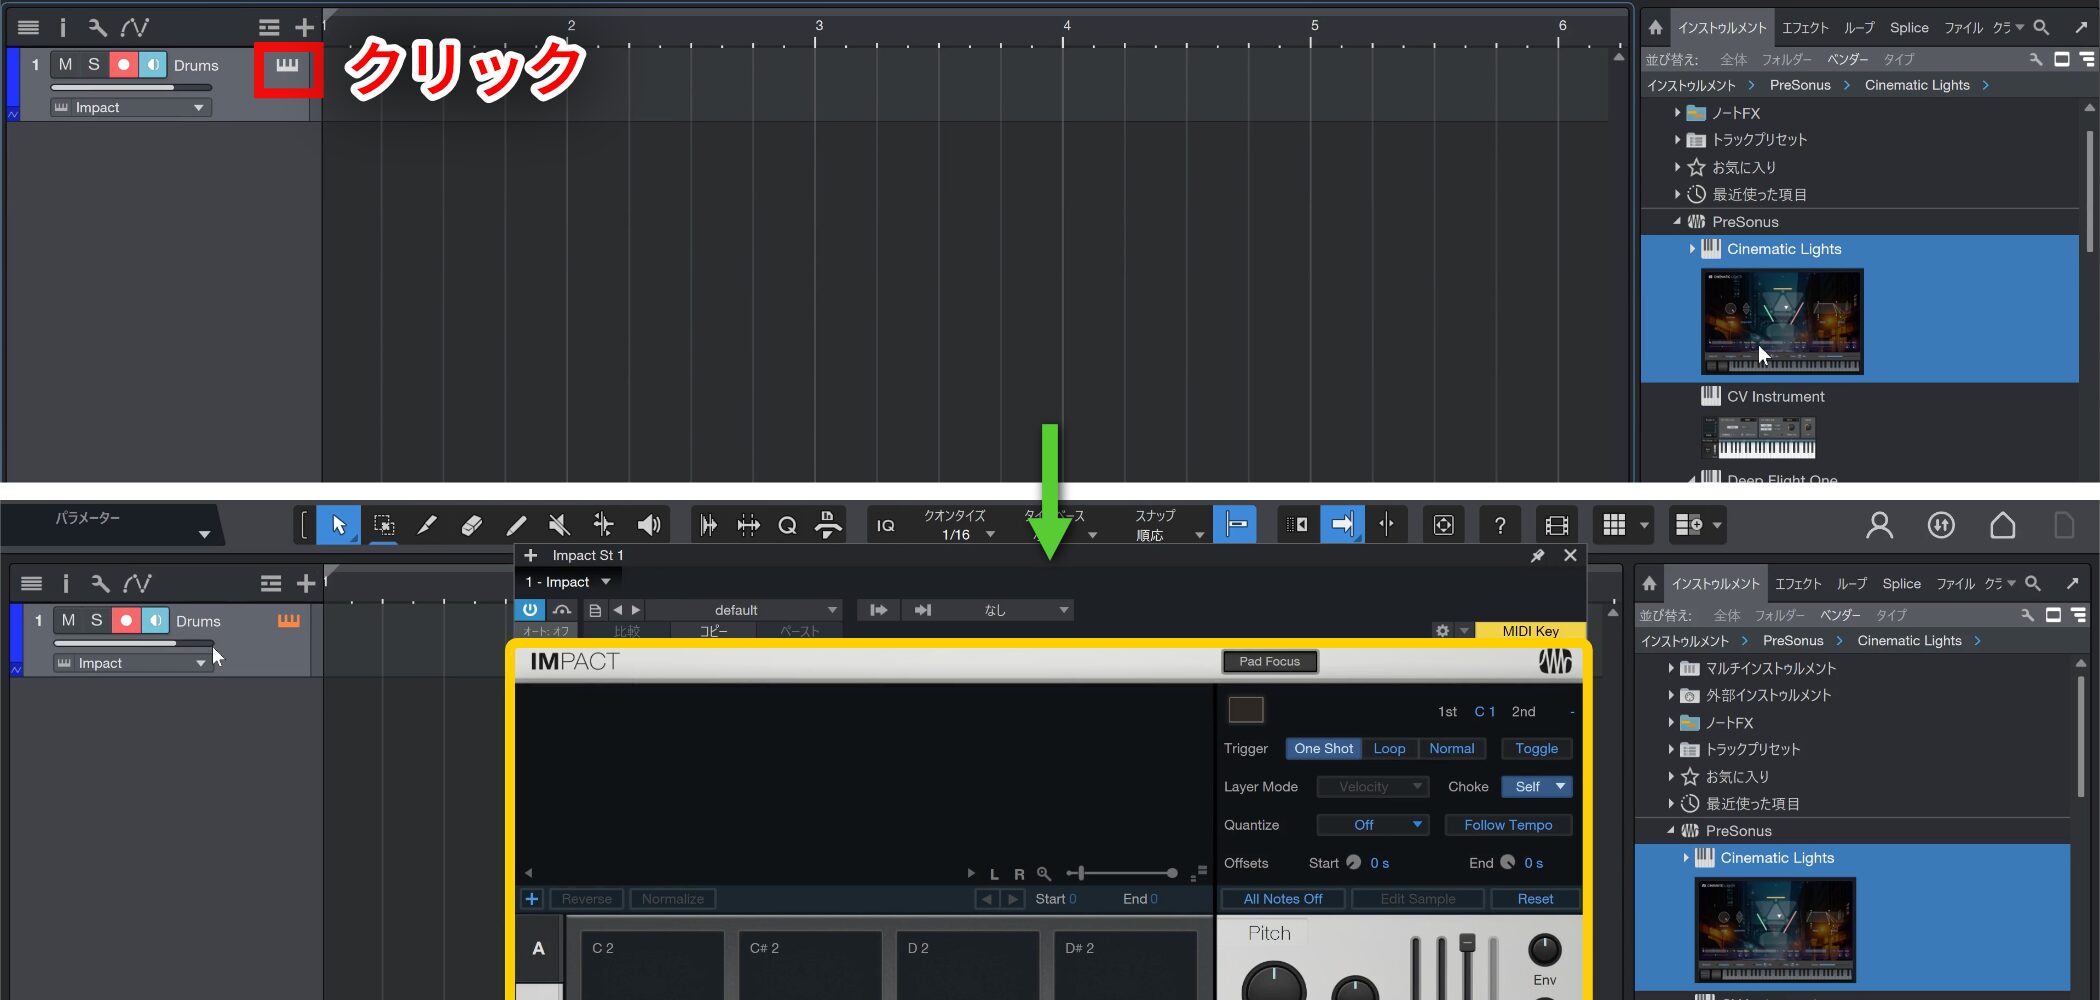
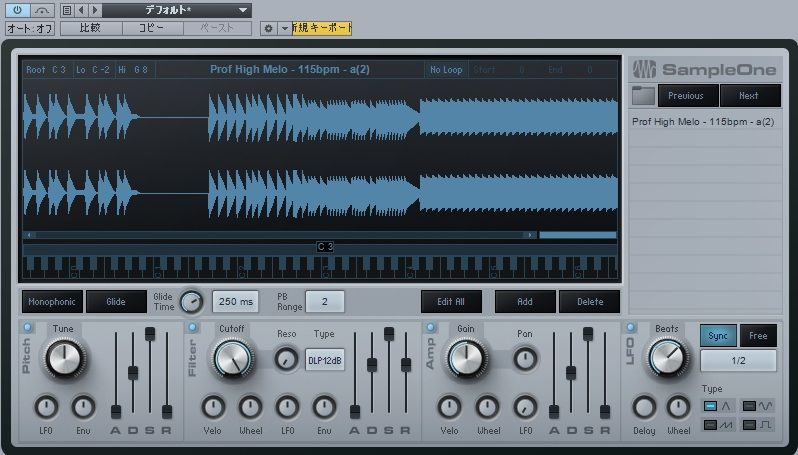
Use the keyboard icon, or Instrument Editor button, to show or hide the instrument.
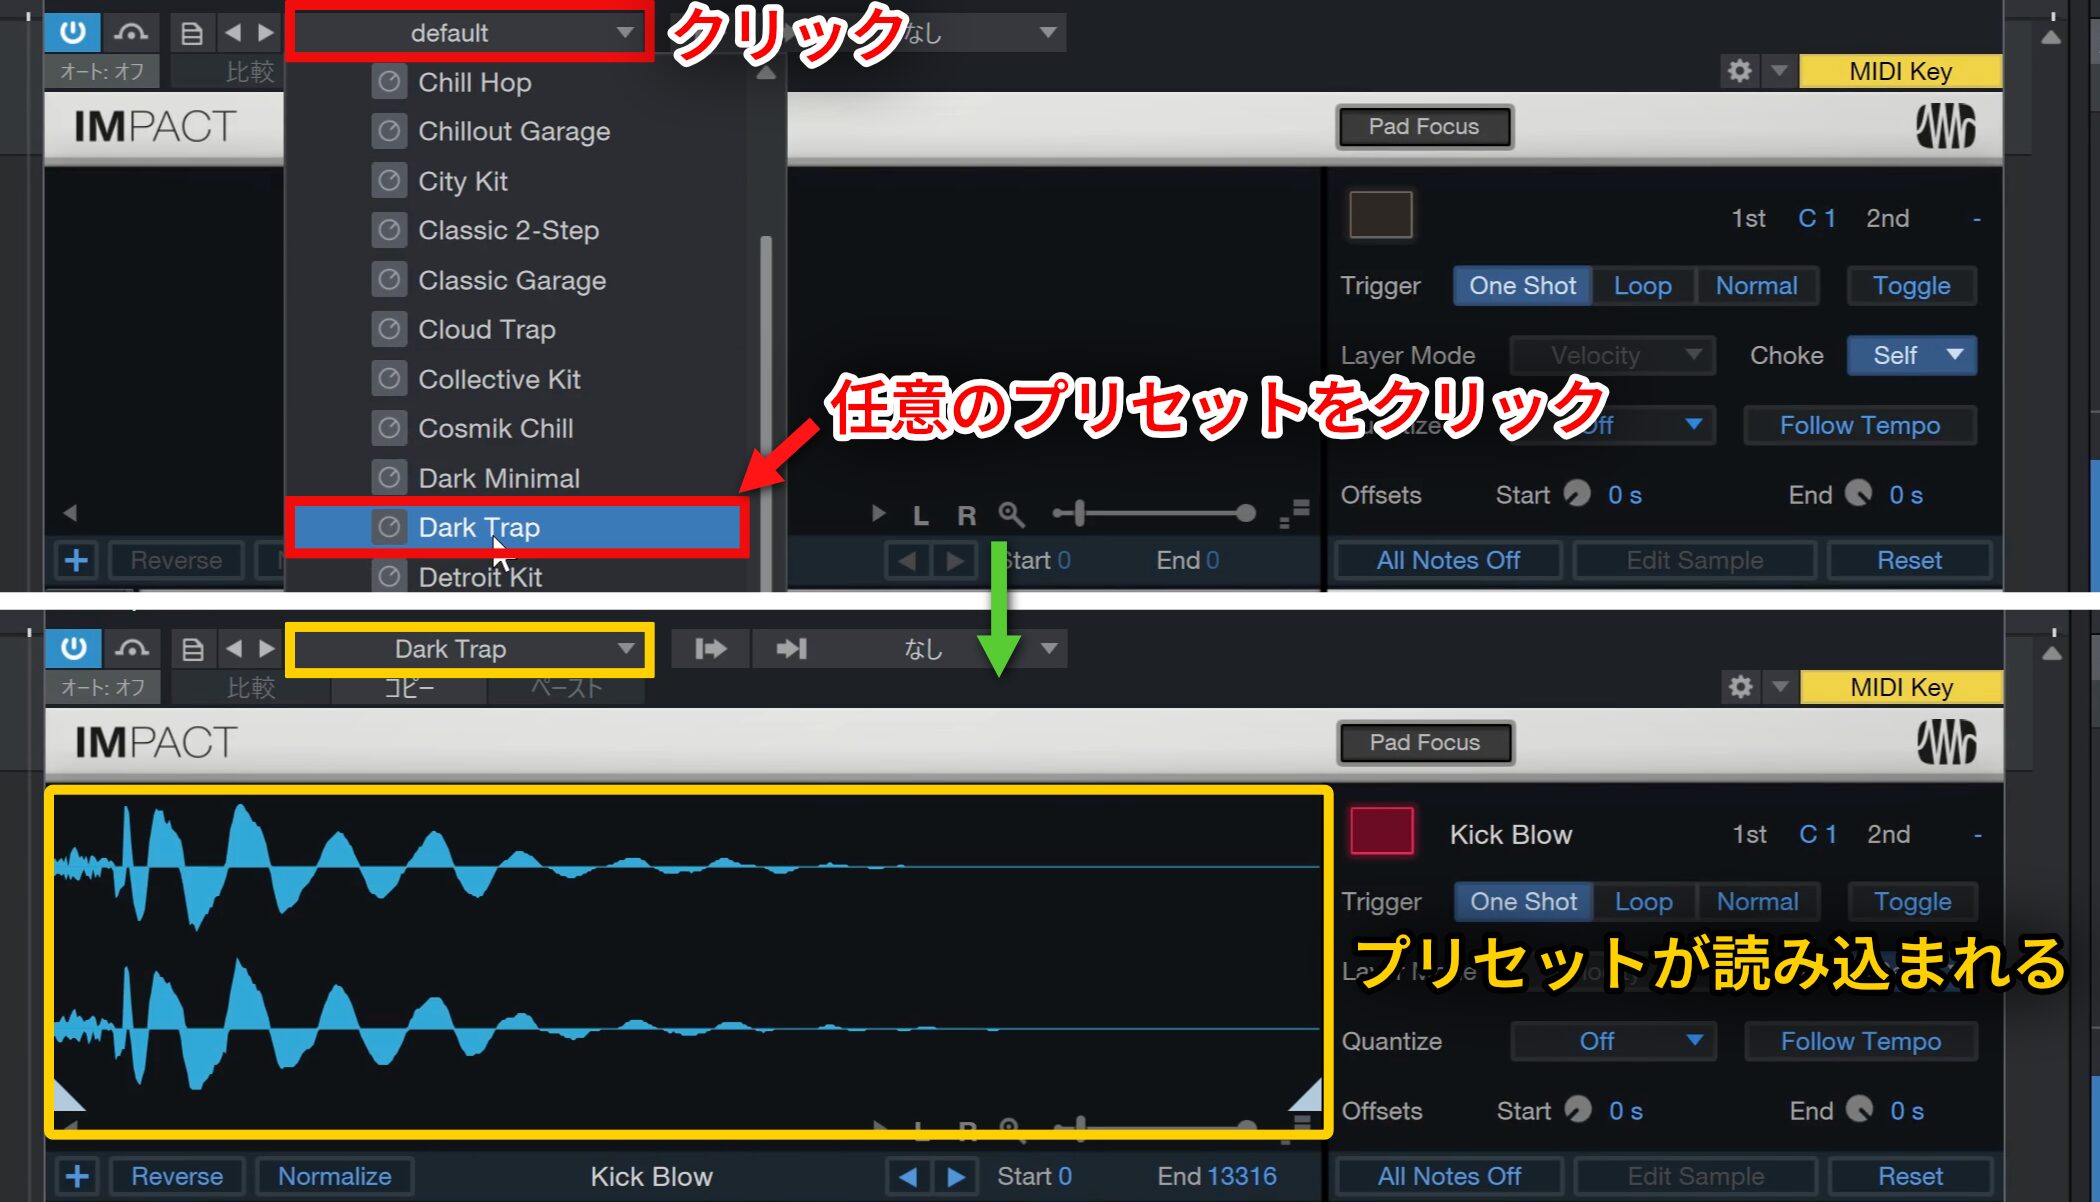
Click “default” at the top of the instrument to display the available presets, then click one to load it.
Saving a Song
Remember to save your Song during production.
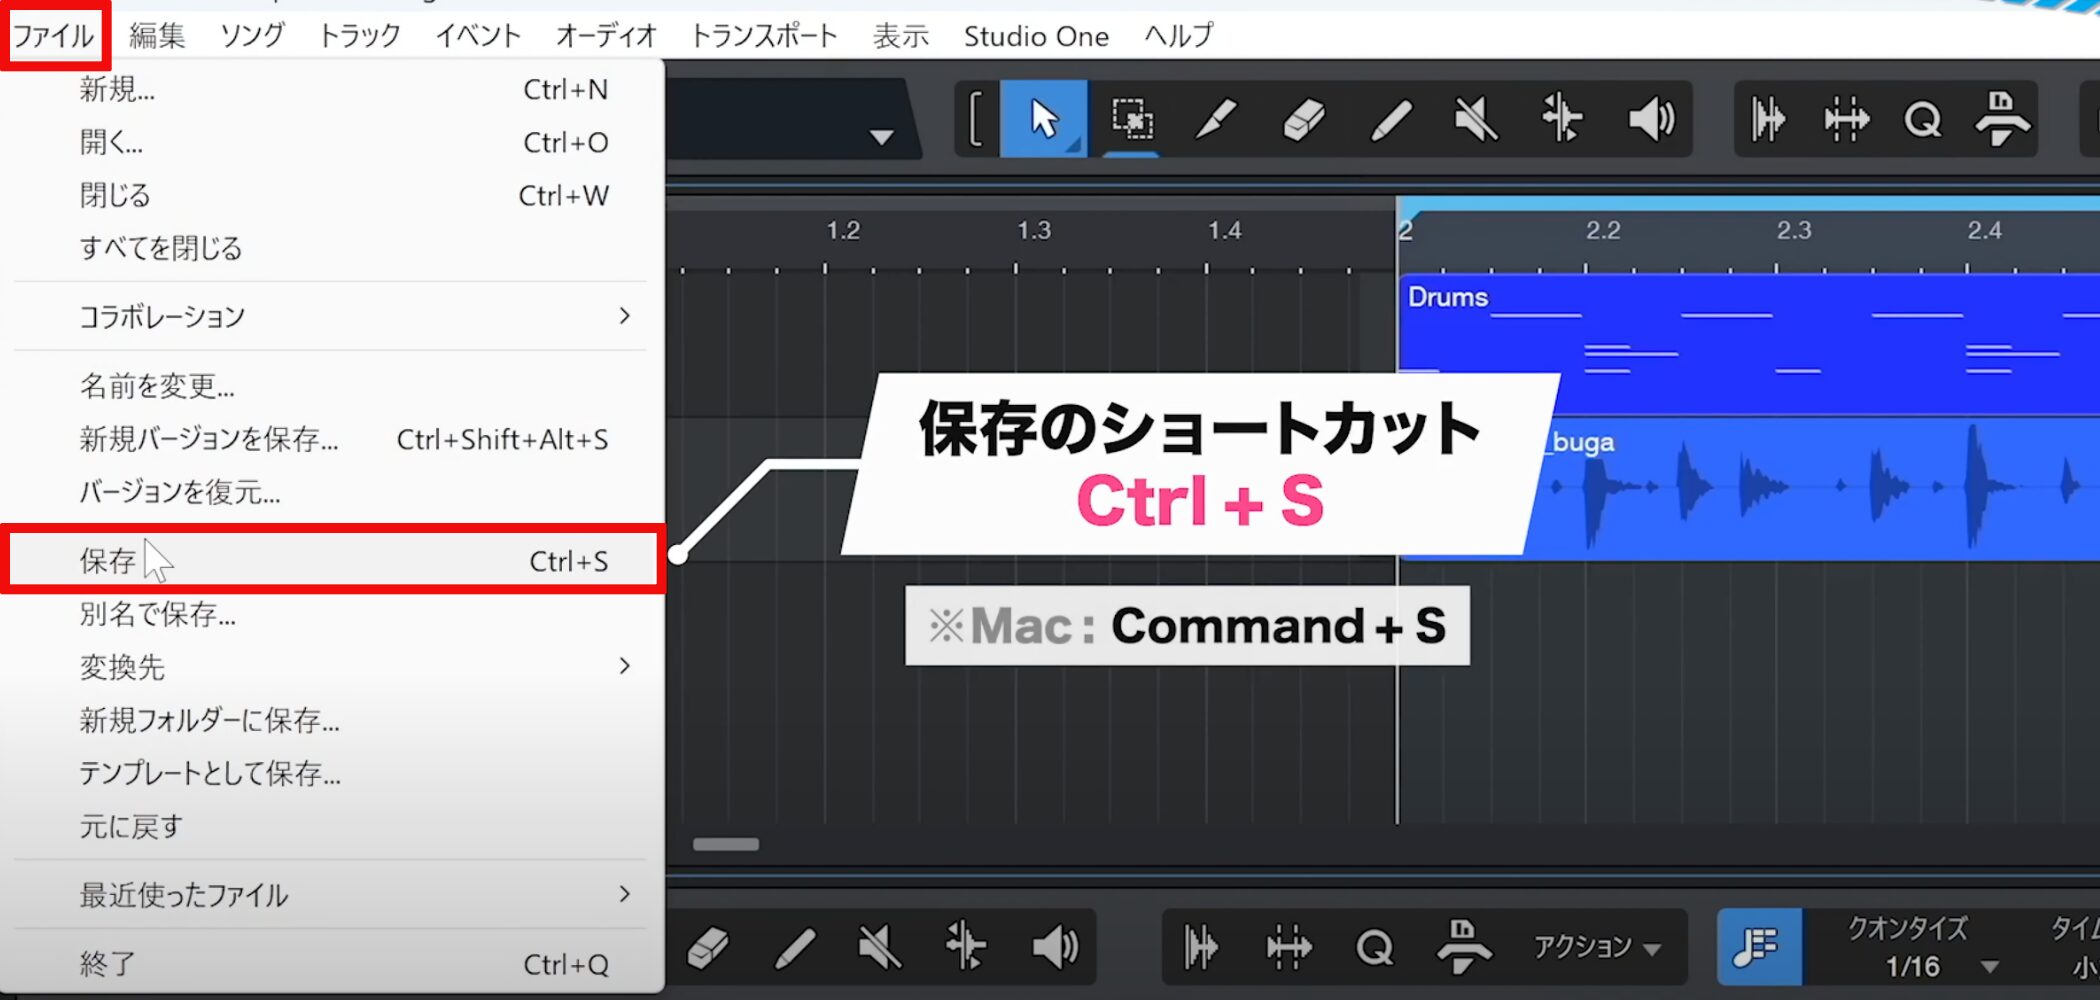
Choose File → Save from the top menu to save it.
You can also use the shortcuts below. We recommend saving regularly as you edit.
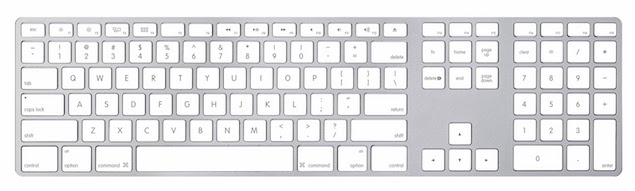
- Windows: Ctrl + S
- Mac: Command + S
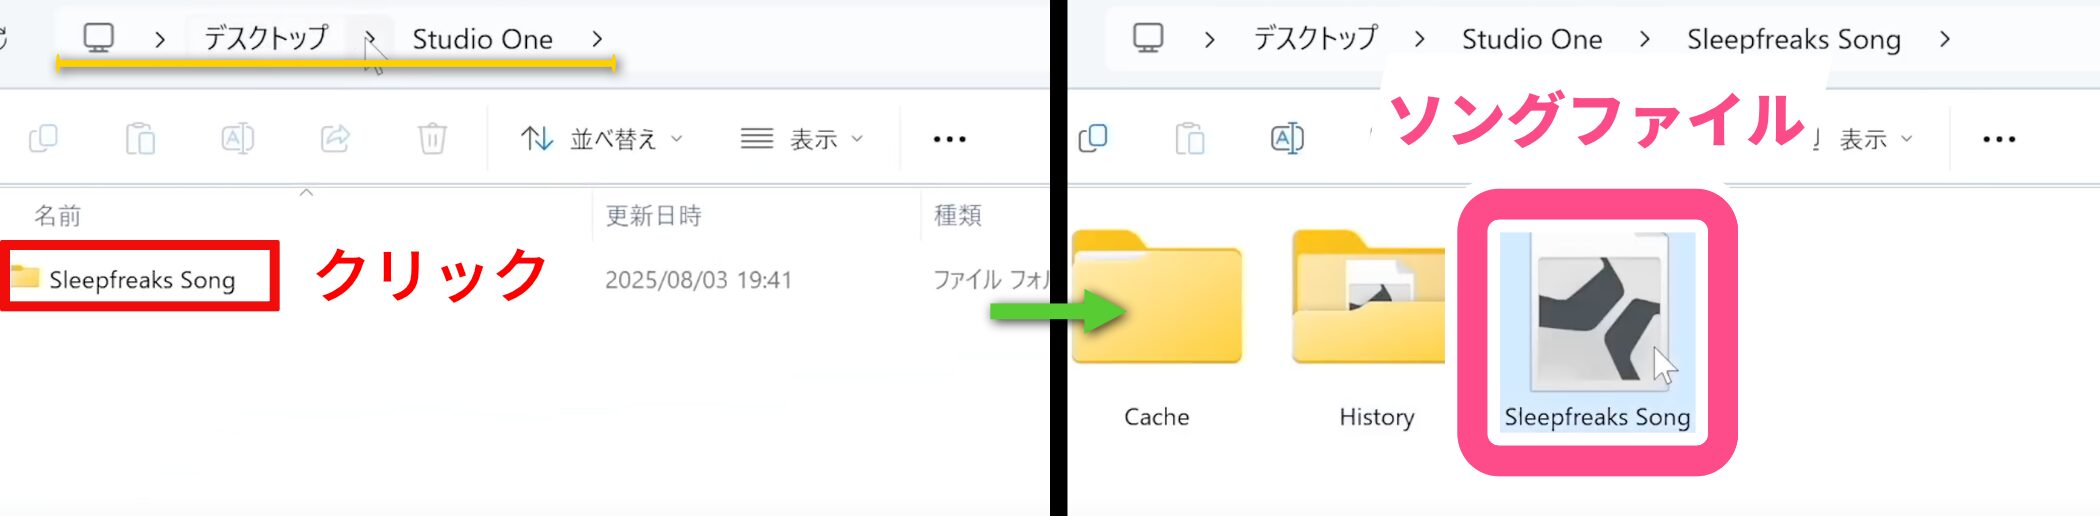
In this example, the saved Song is stored in the Studio One folder created on the desktop.
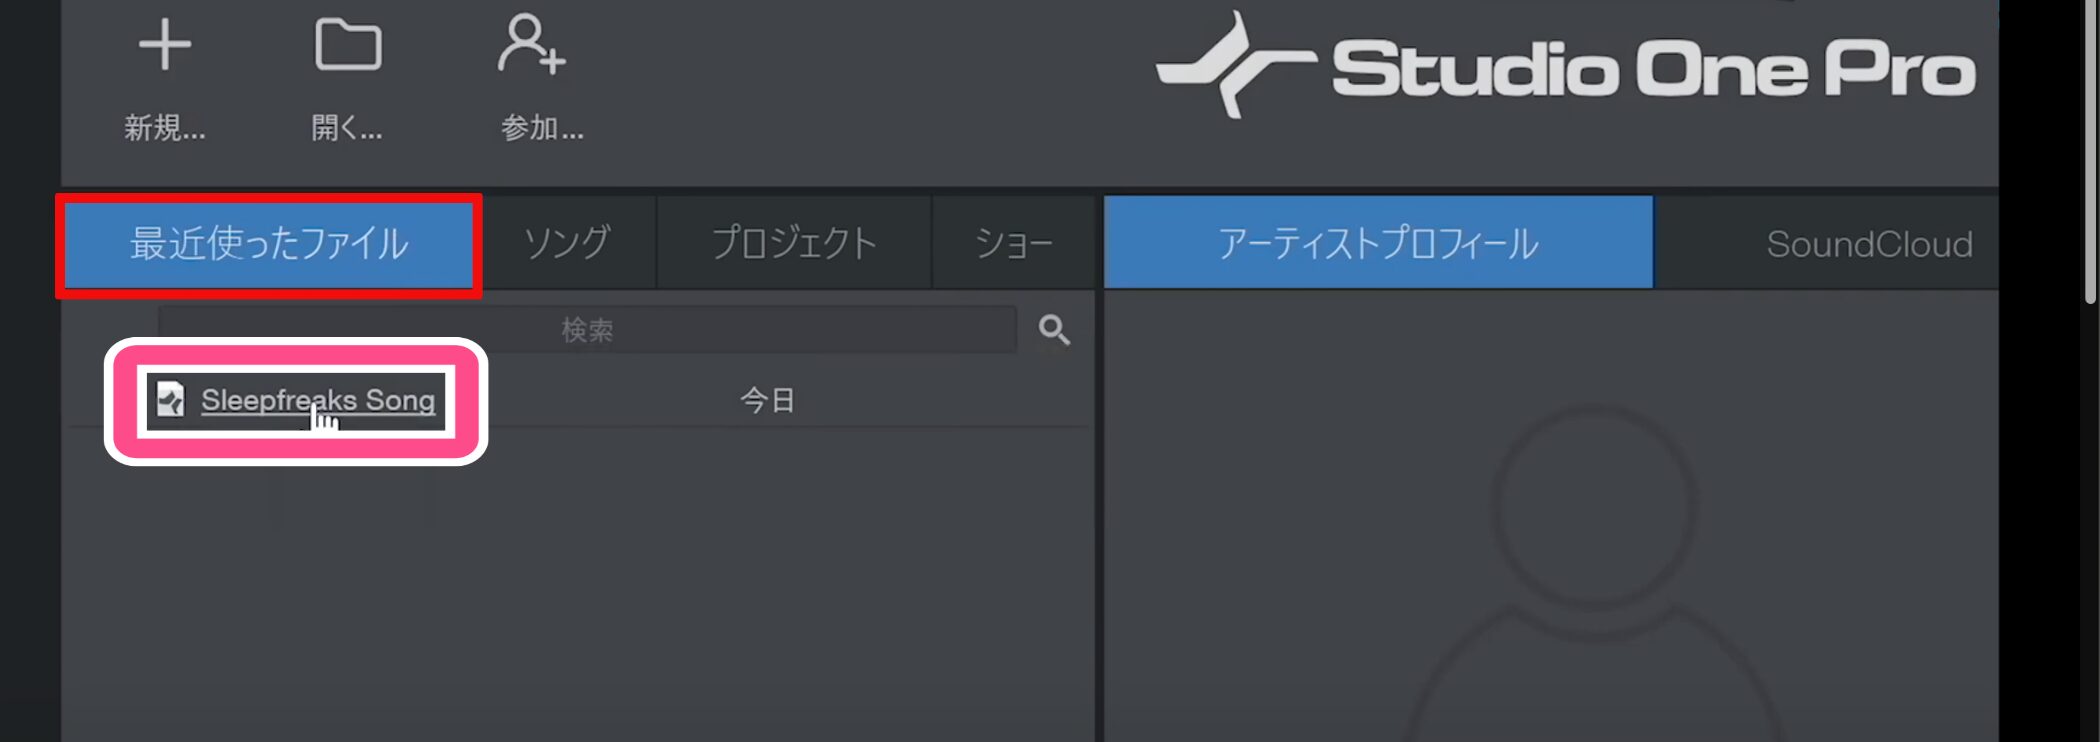
You can also open the song from “Recent Files” when Studio One starts.
Automatic Backup
Studio One provides automatic backups in case you quit without saving or the software crashes.
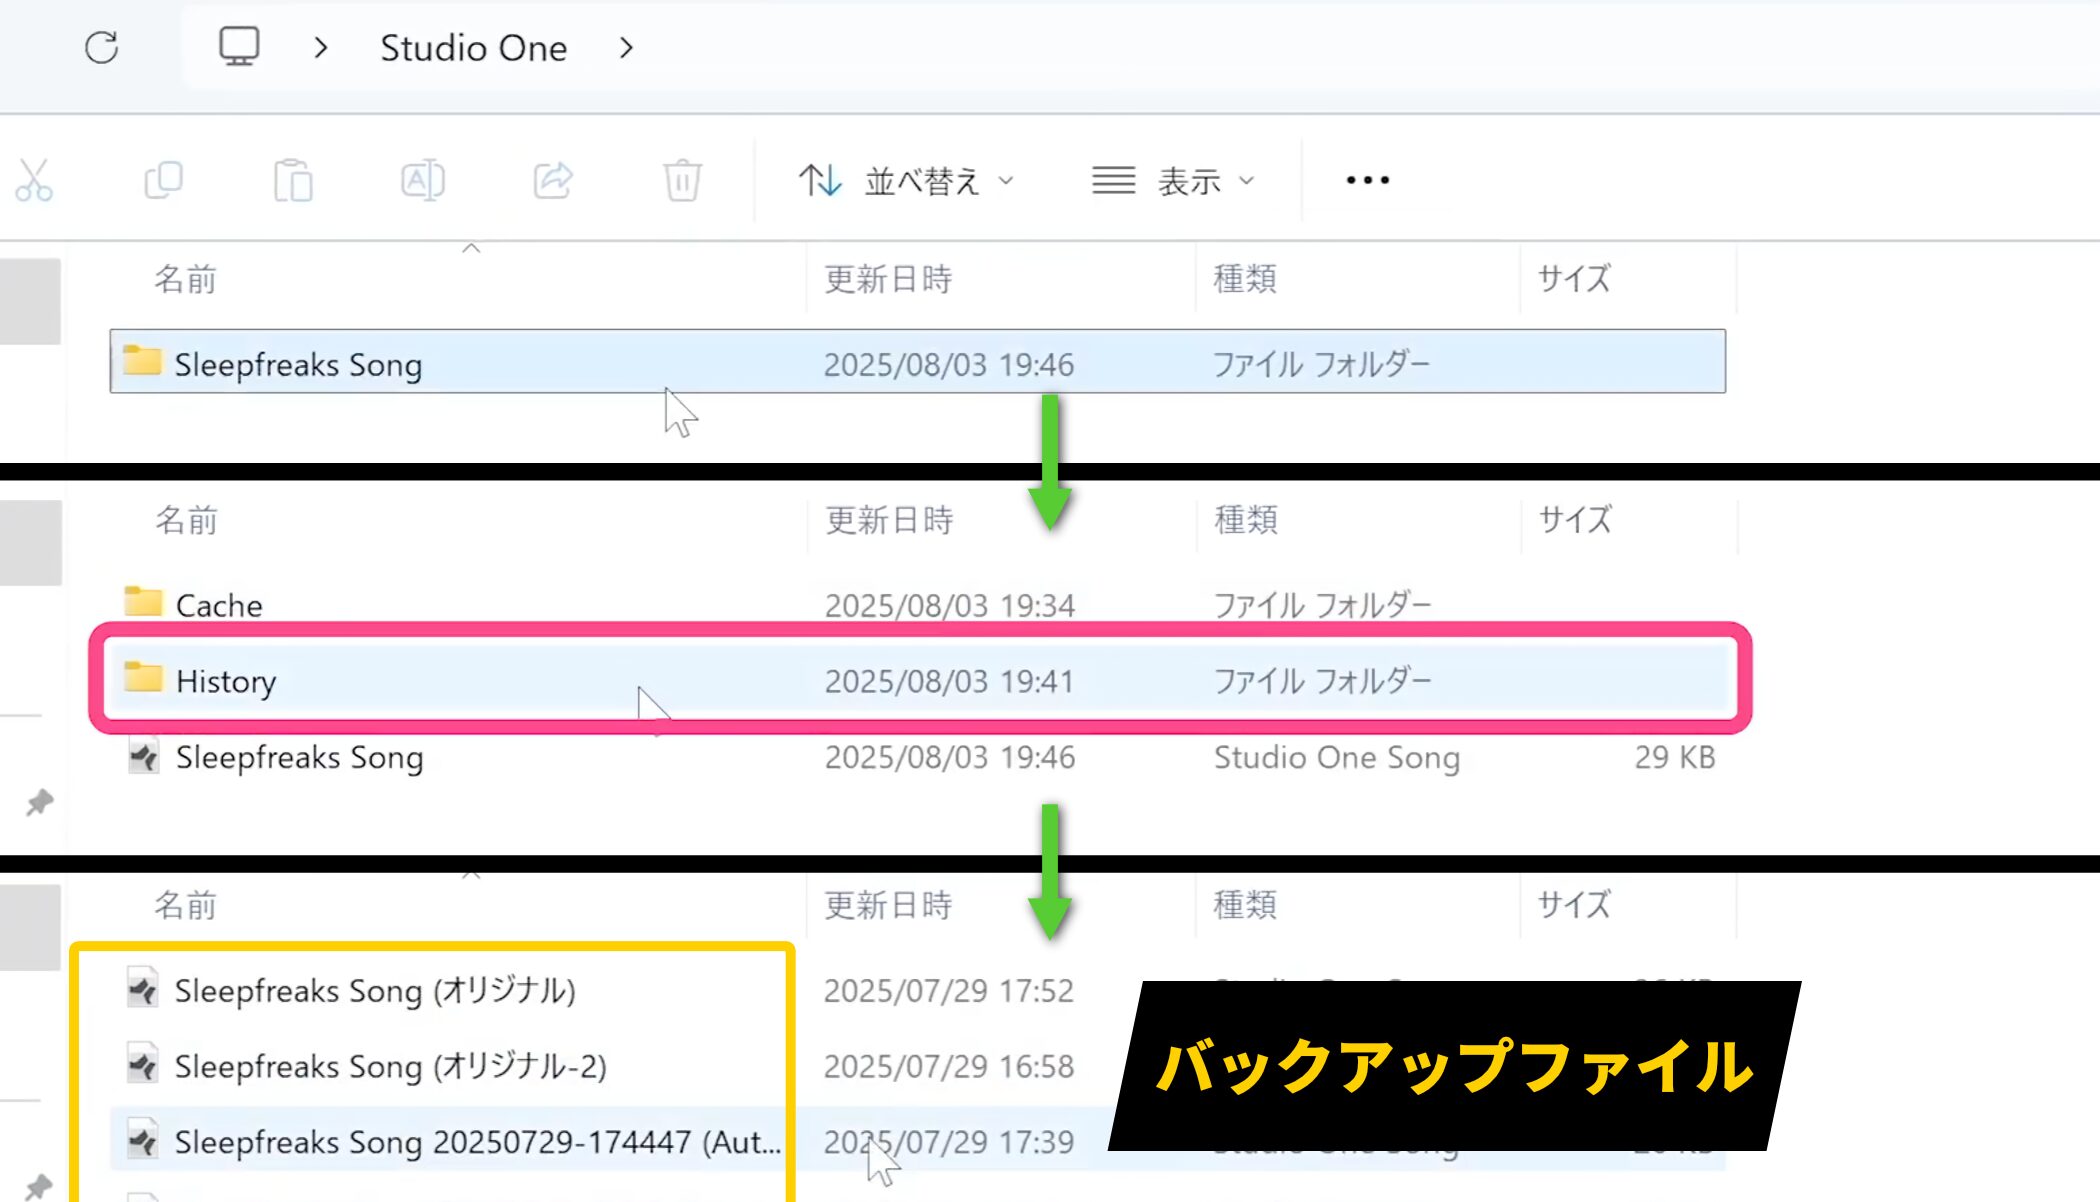
Backups are automatically stored in the “History” folder within the Studio One project folder.
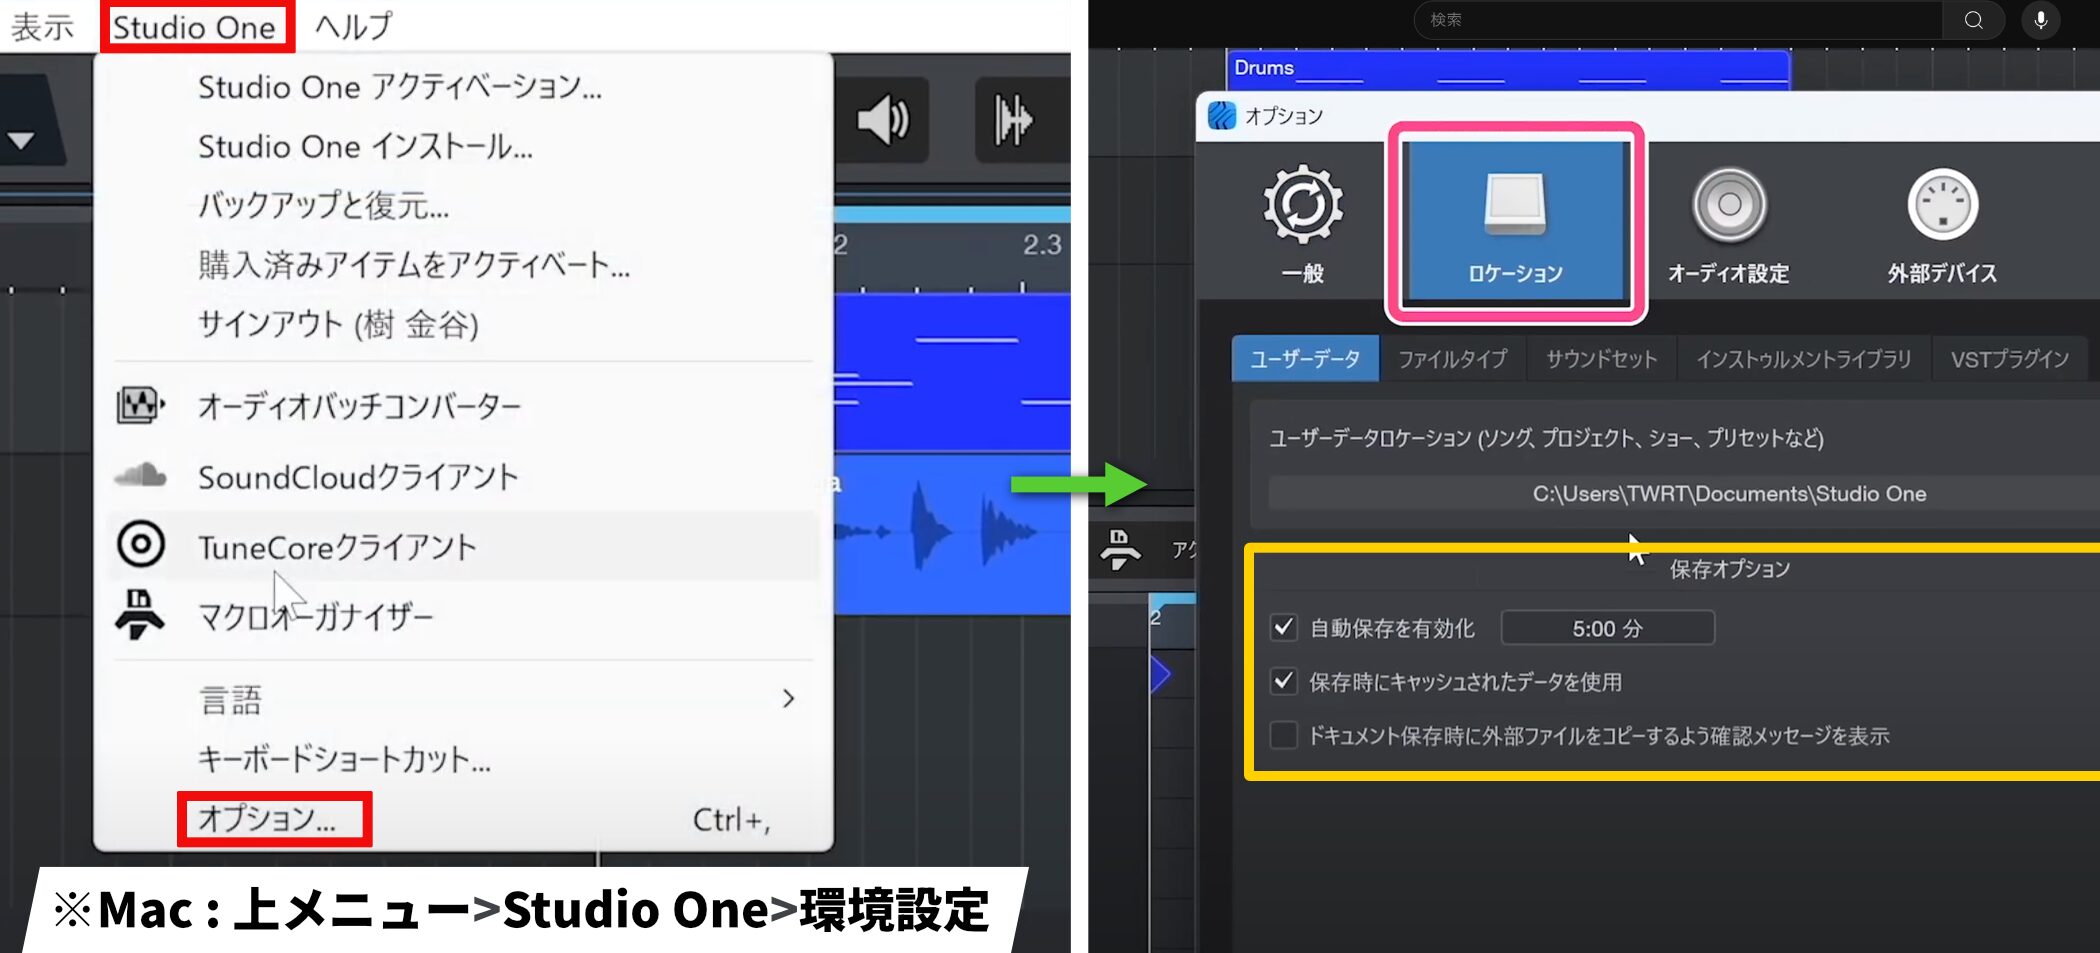
Check backup settings in the save options under Studio One → Options → Locations.
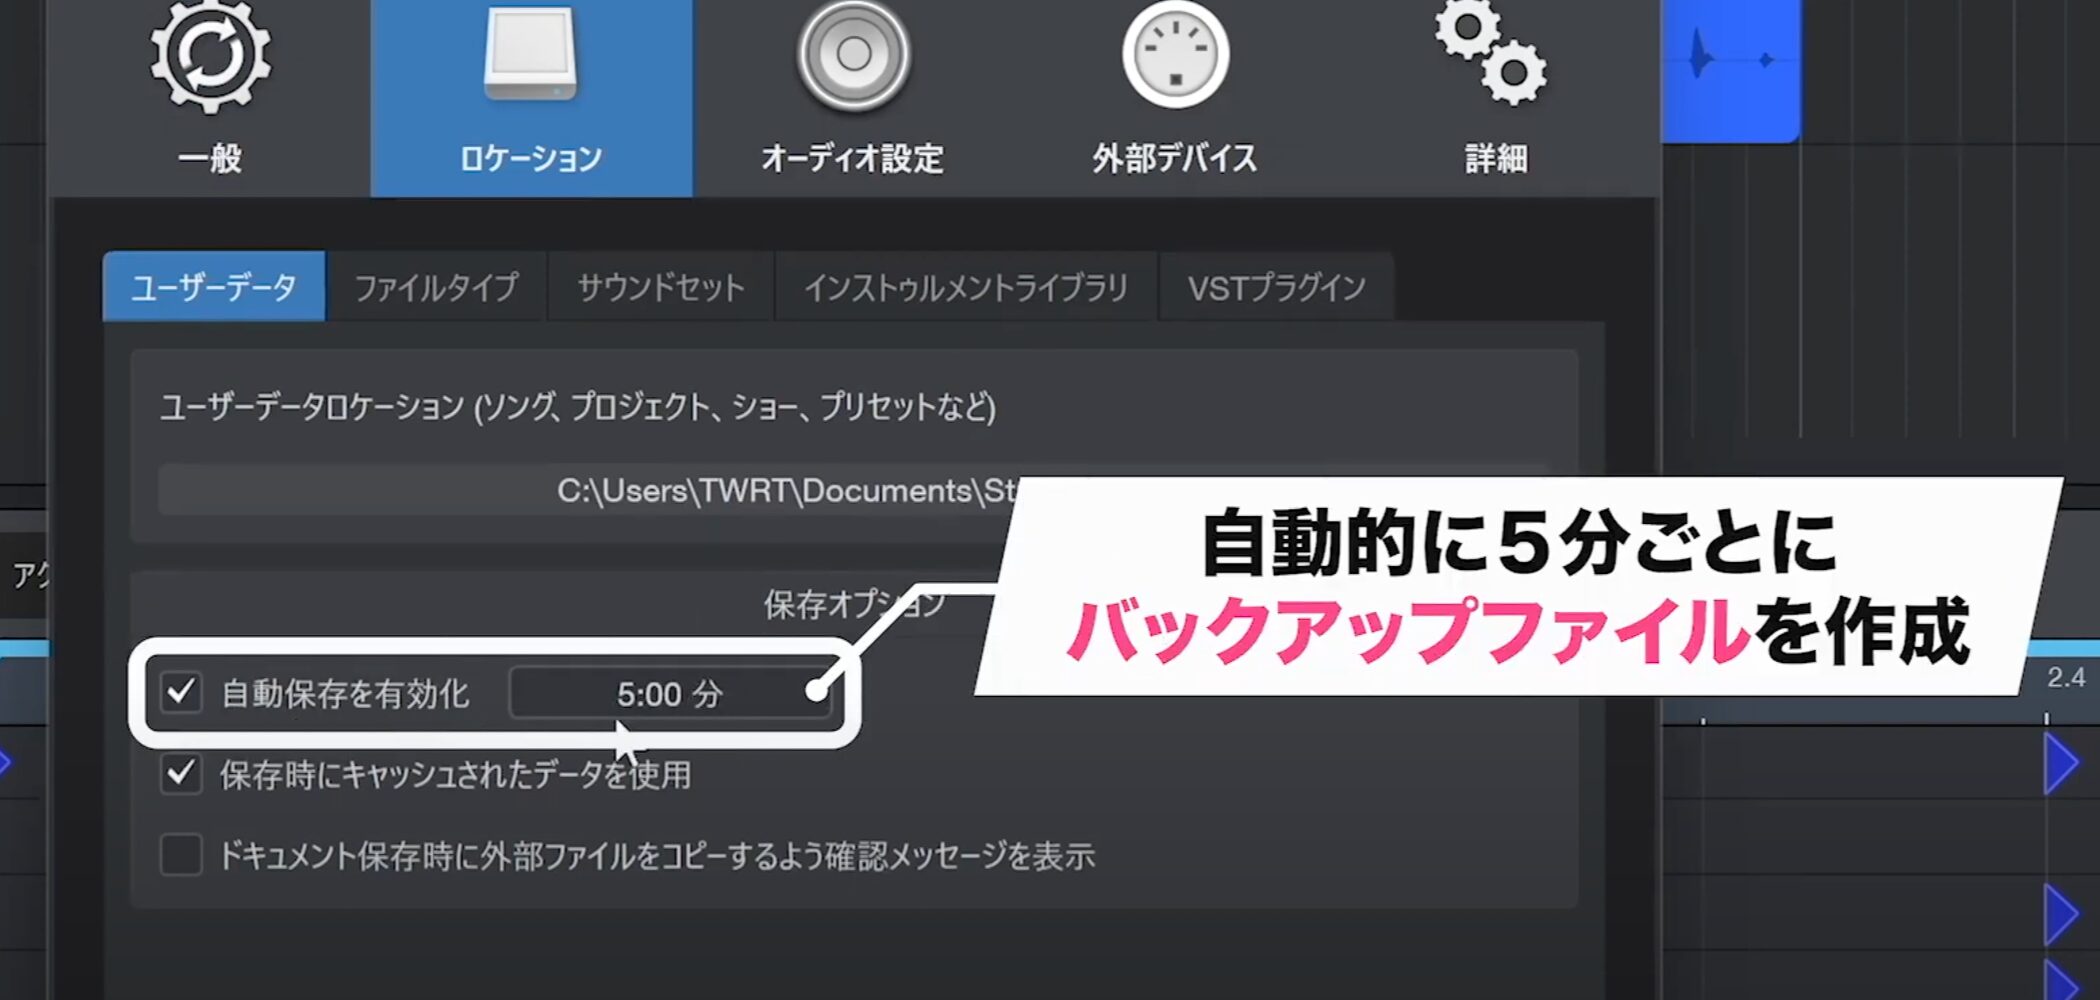
By default, backup files are created every five minutes, but you can adjust this interval.
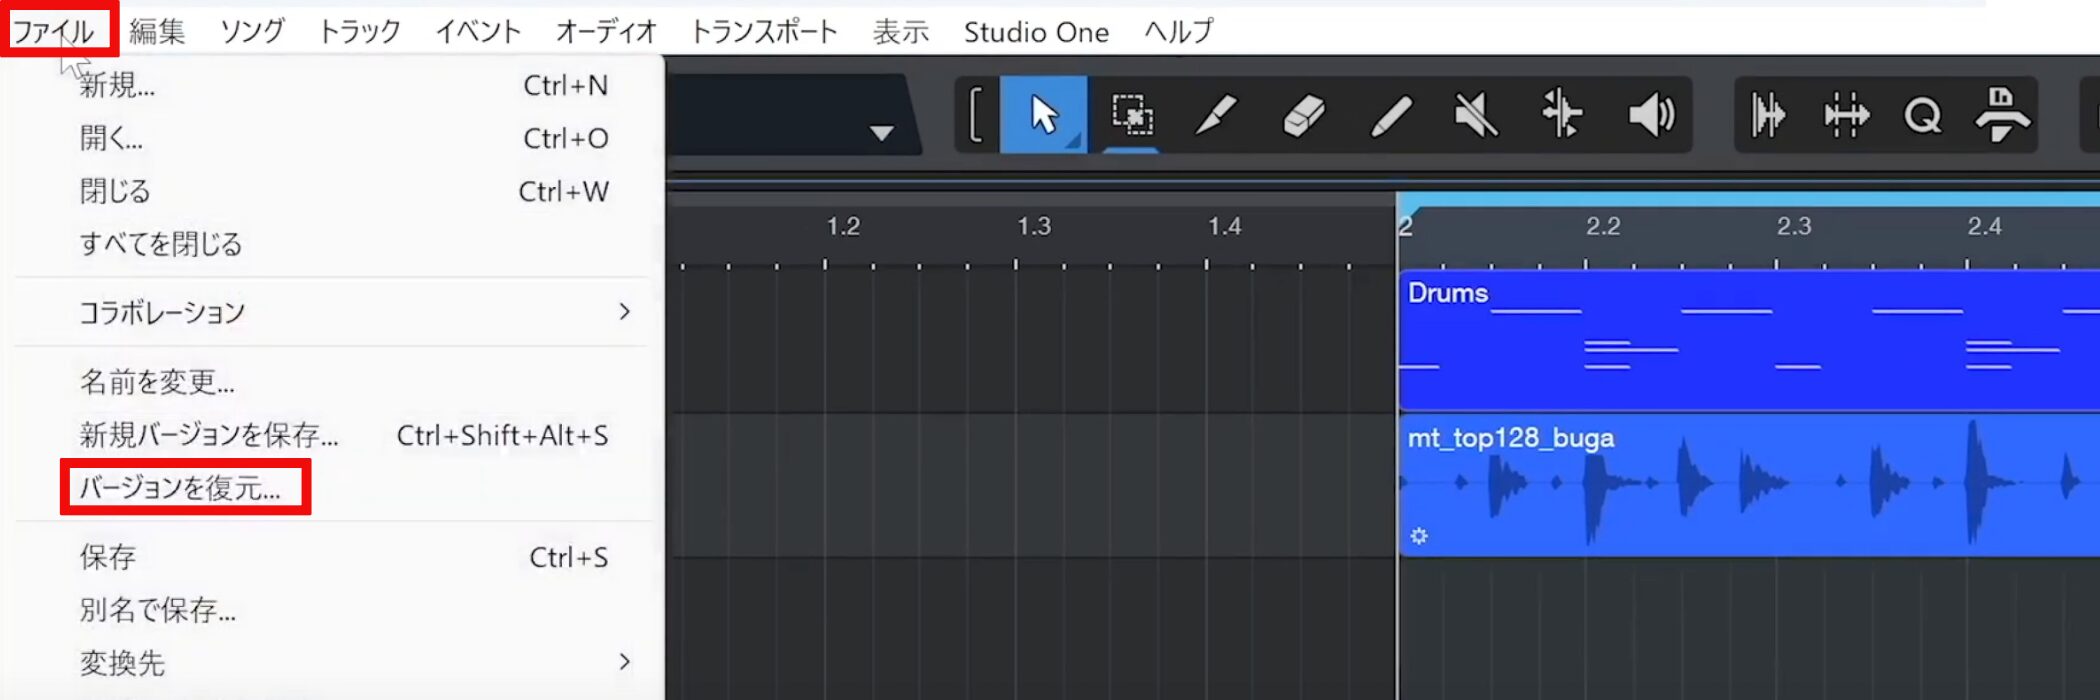
To open a backup, open the song and choose File → Restore Version.
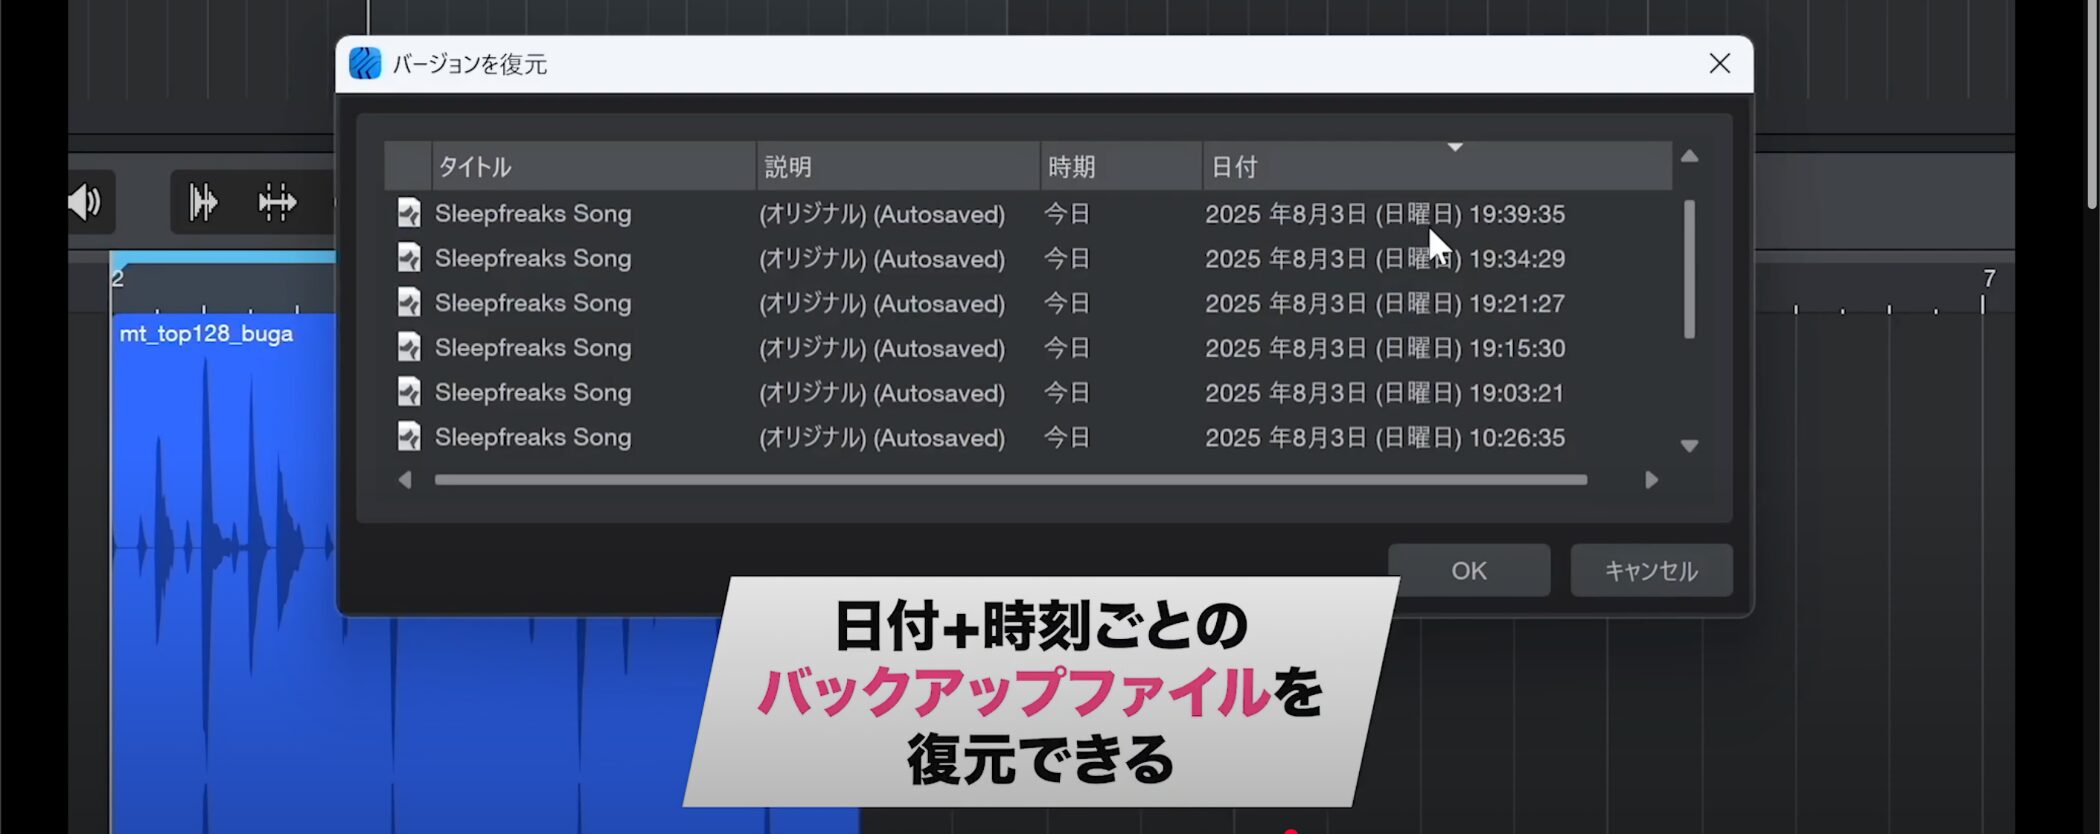
From the automatically saved files listed by date and time, select the desired Song and click “OK” to restore it.
Plug-in Basics and How to Add Them
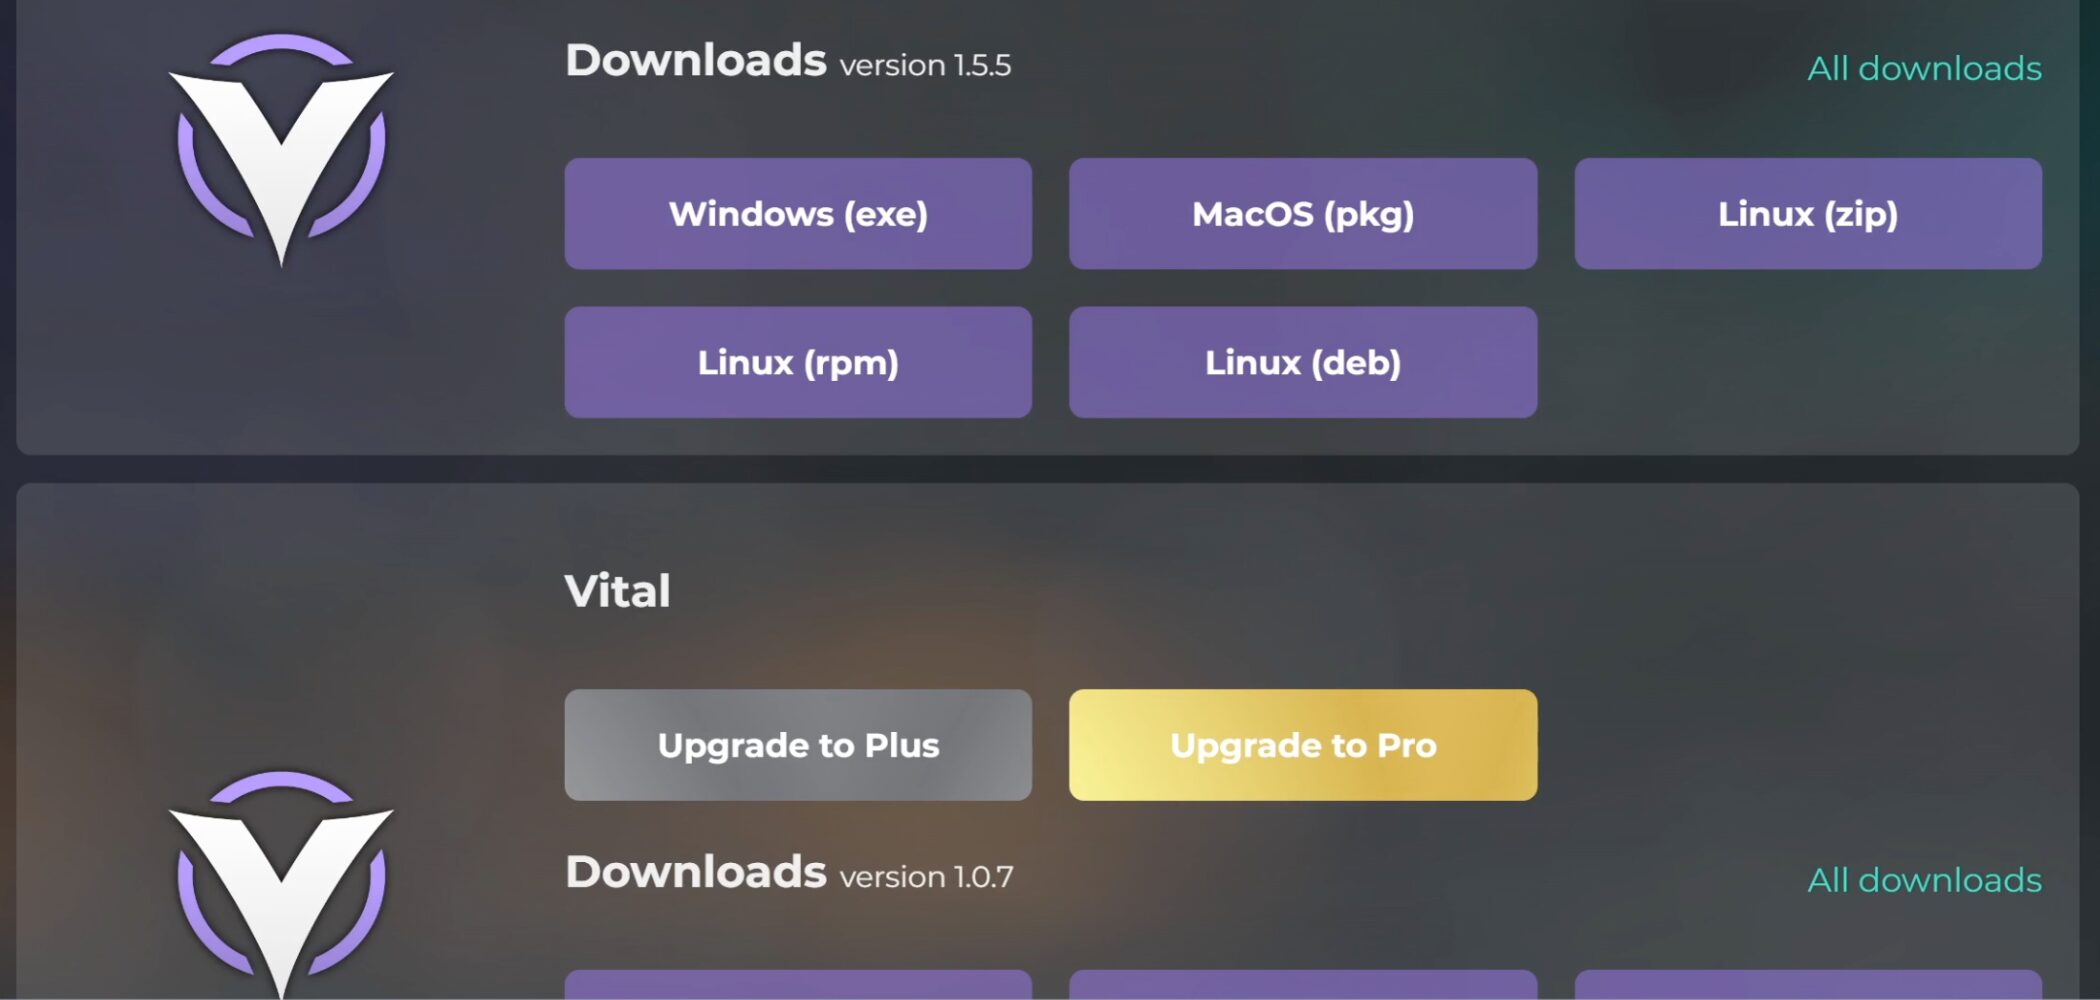
We will use the installation of Vital, an excellent free synthesizer, as an example.

Instruments and effects that extend a DAW’s capabilities are collectively called plug-ins.
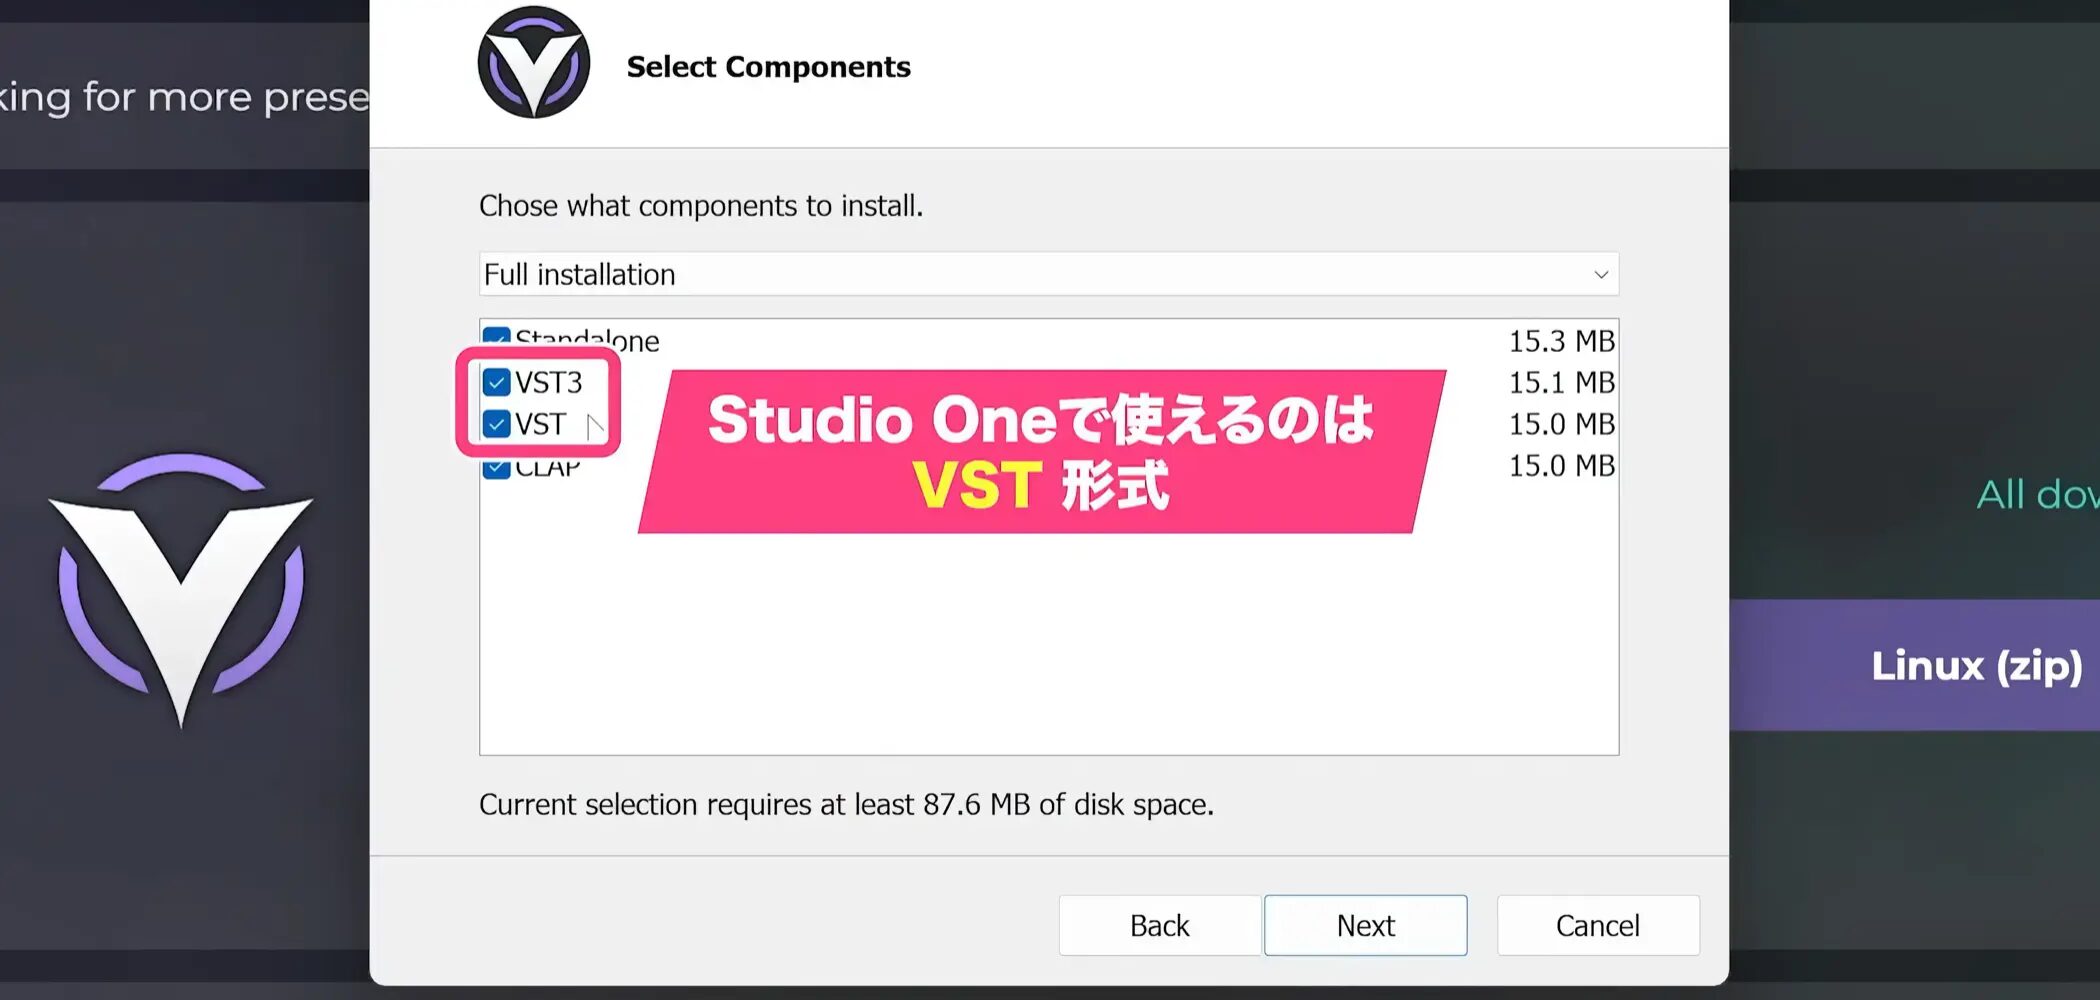
Plug-ins come in different formats, and VST is a format that Studio One can use.
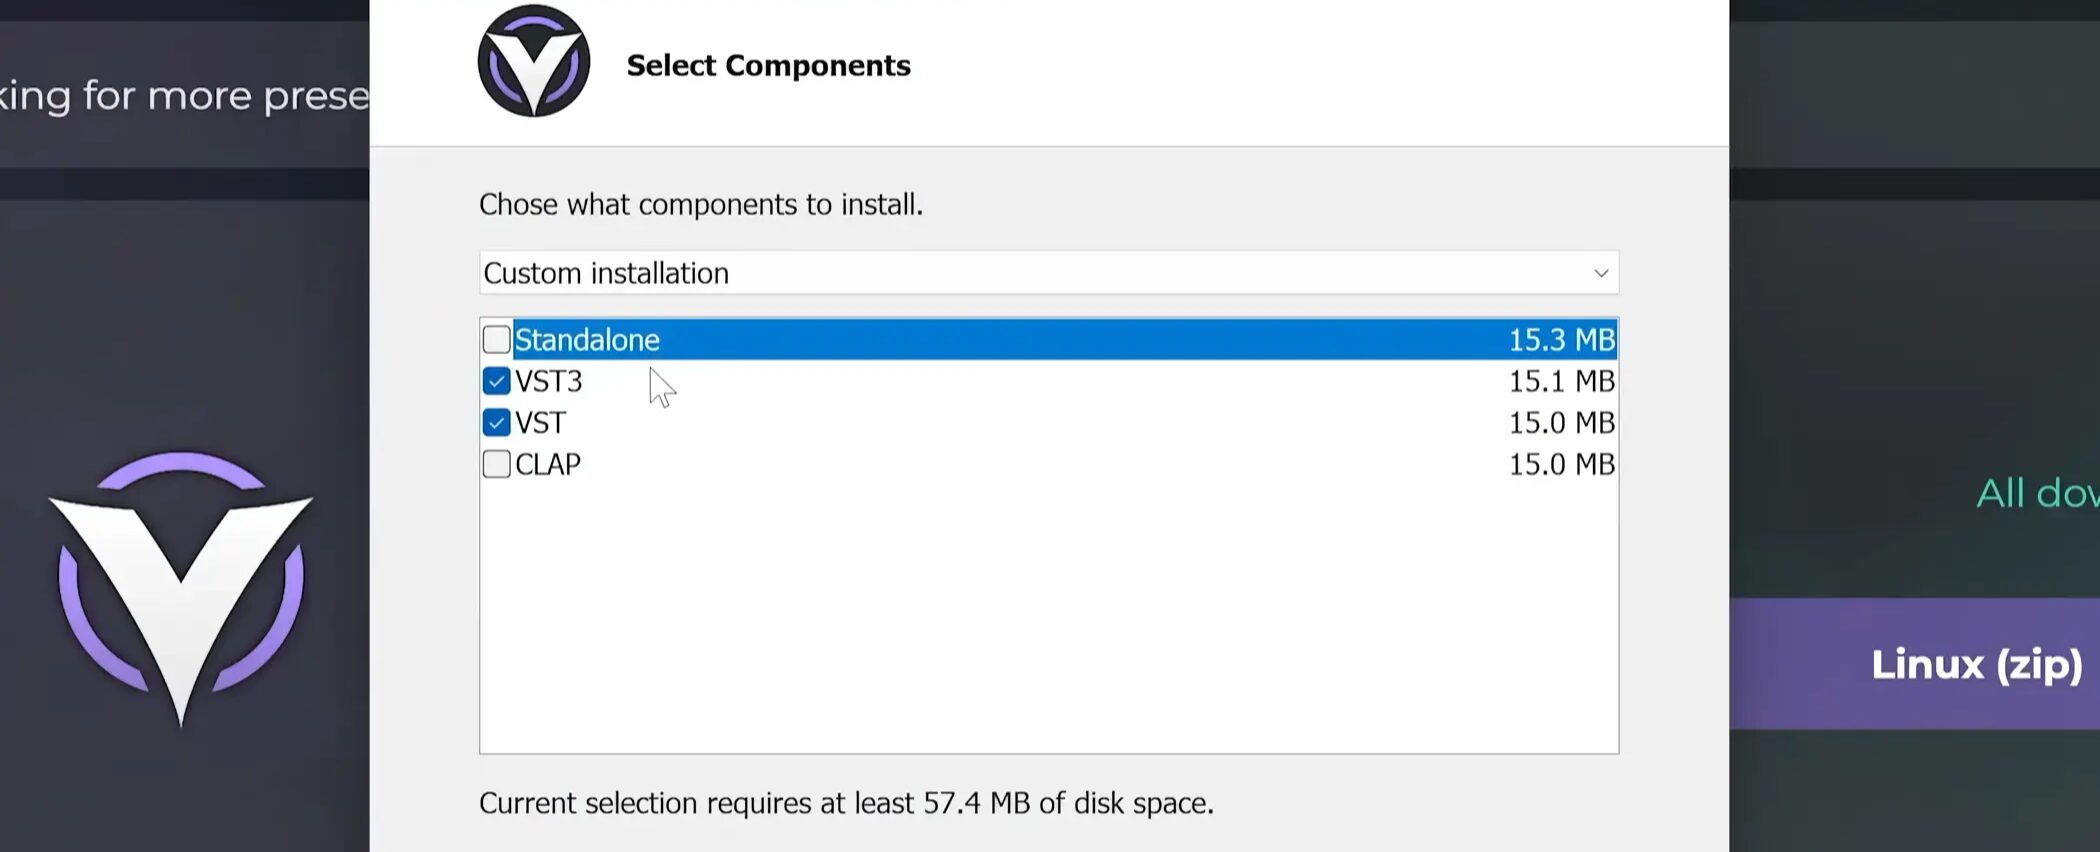
If an installer asks which formats to install, generally select VST.
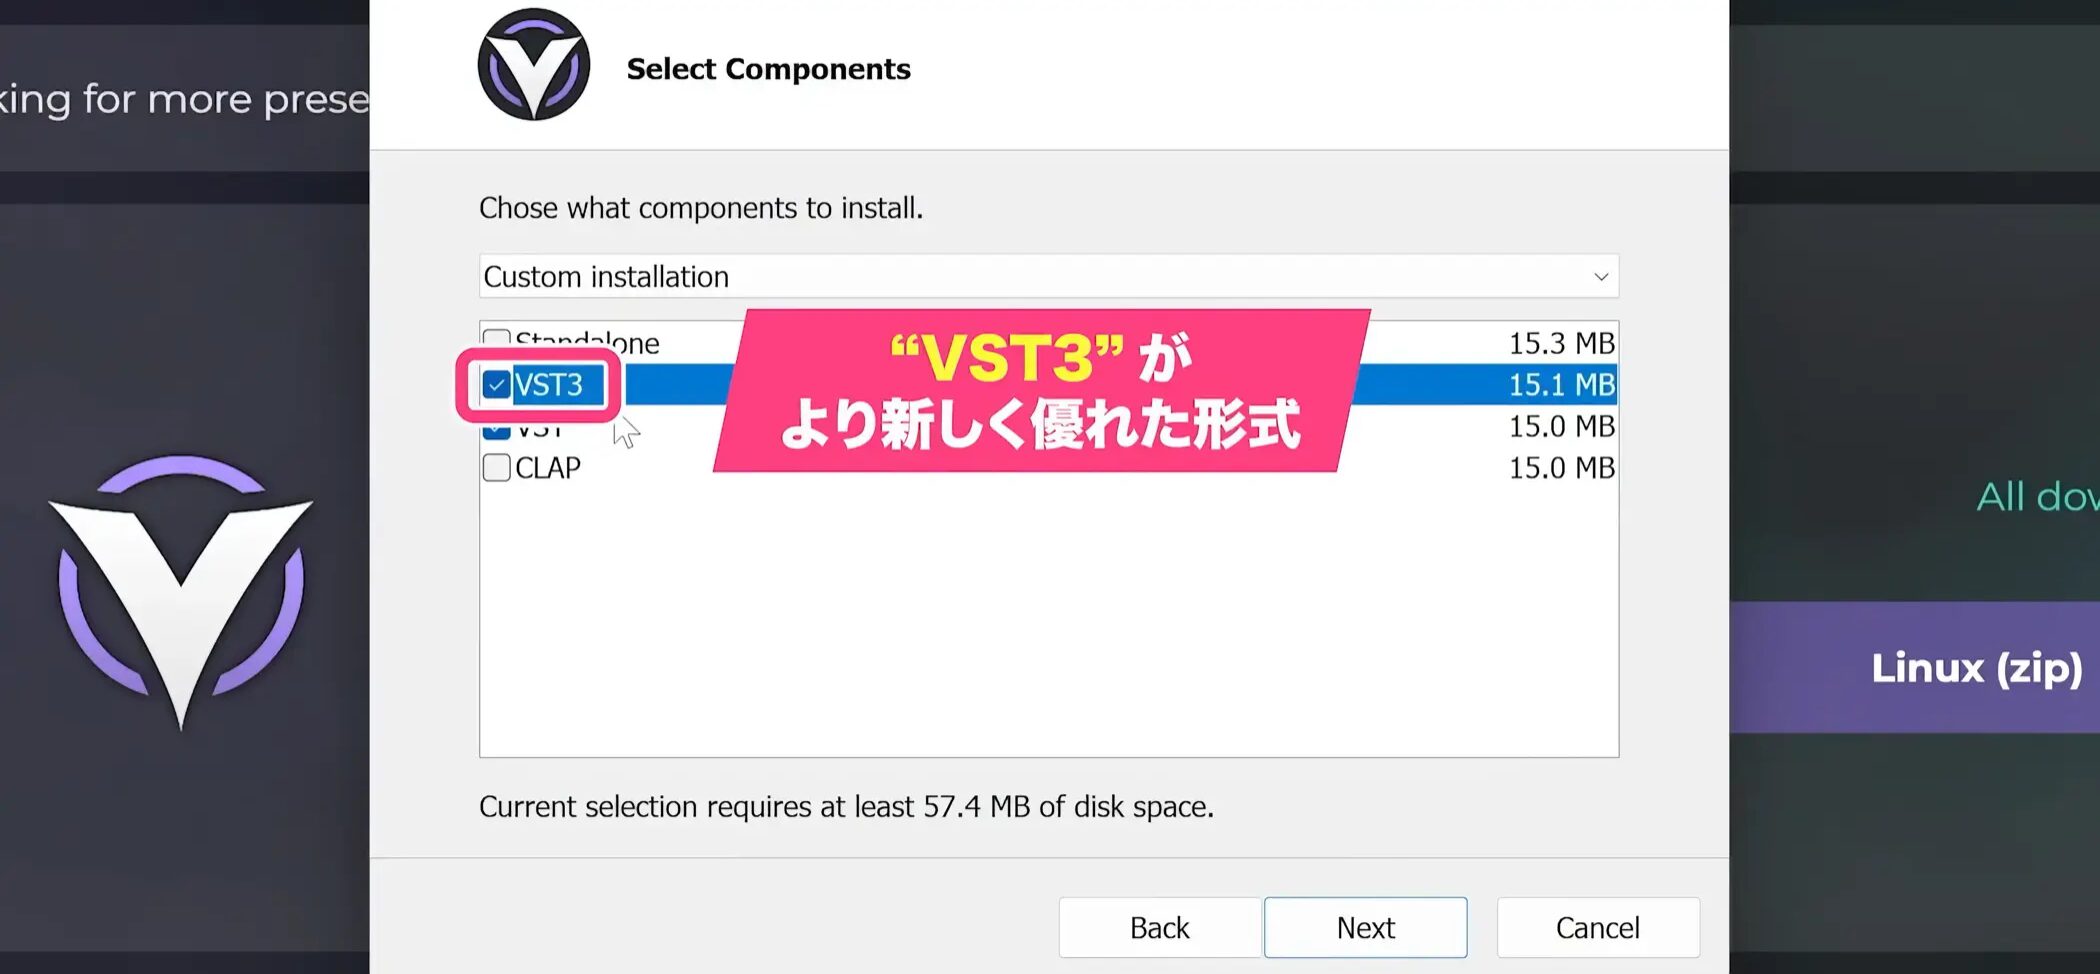
If the choices include “VST3” and “VST” without a number, VST3 is the newer format, and we recommend choosing it.
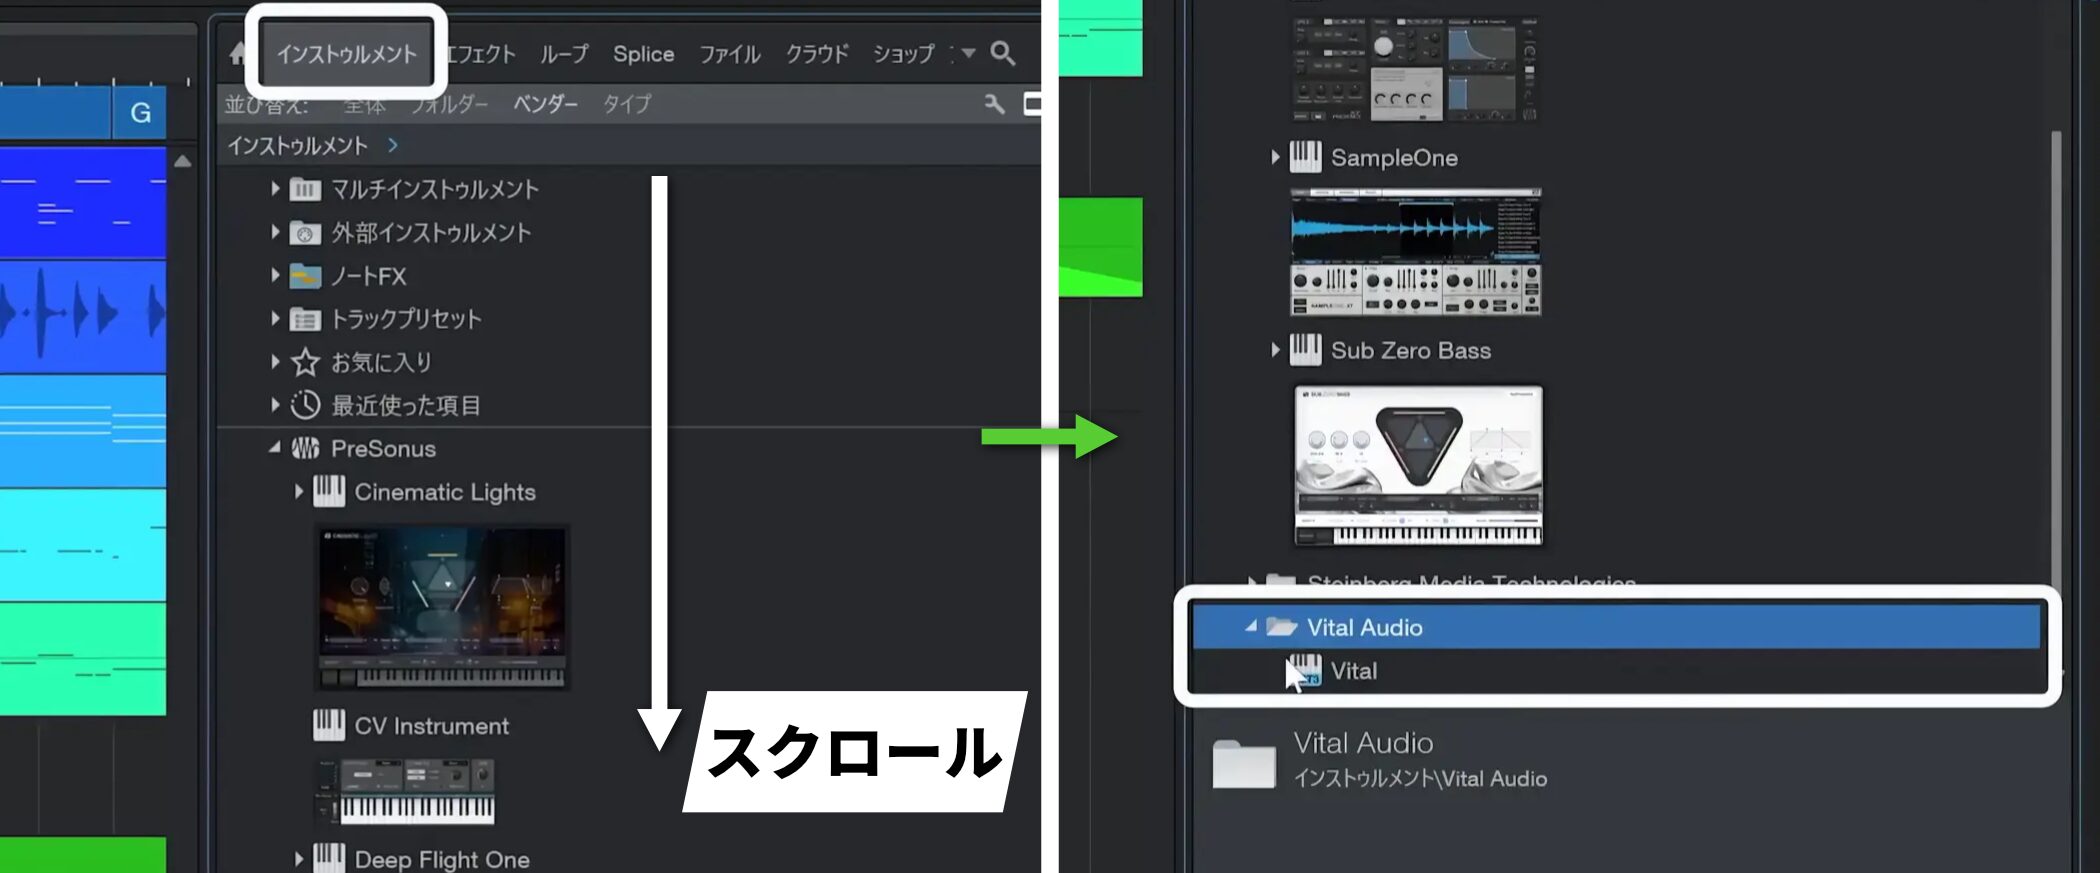
After installation, restart Studio One and check the Instruments browser for the new plug-in.
Plug-in Display Settings on Mac: VST and AU
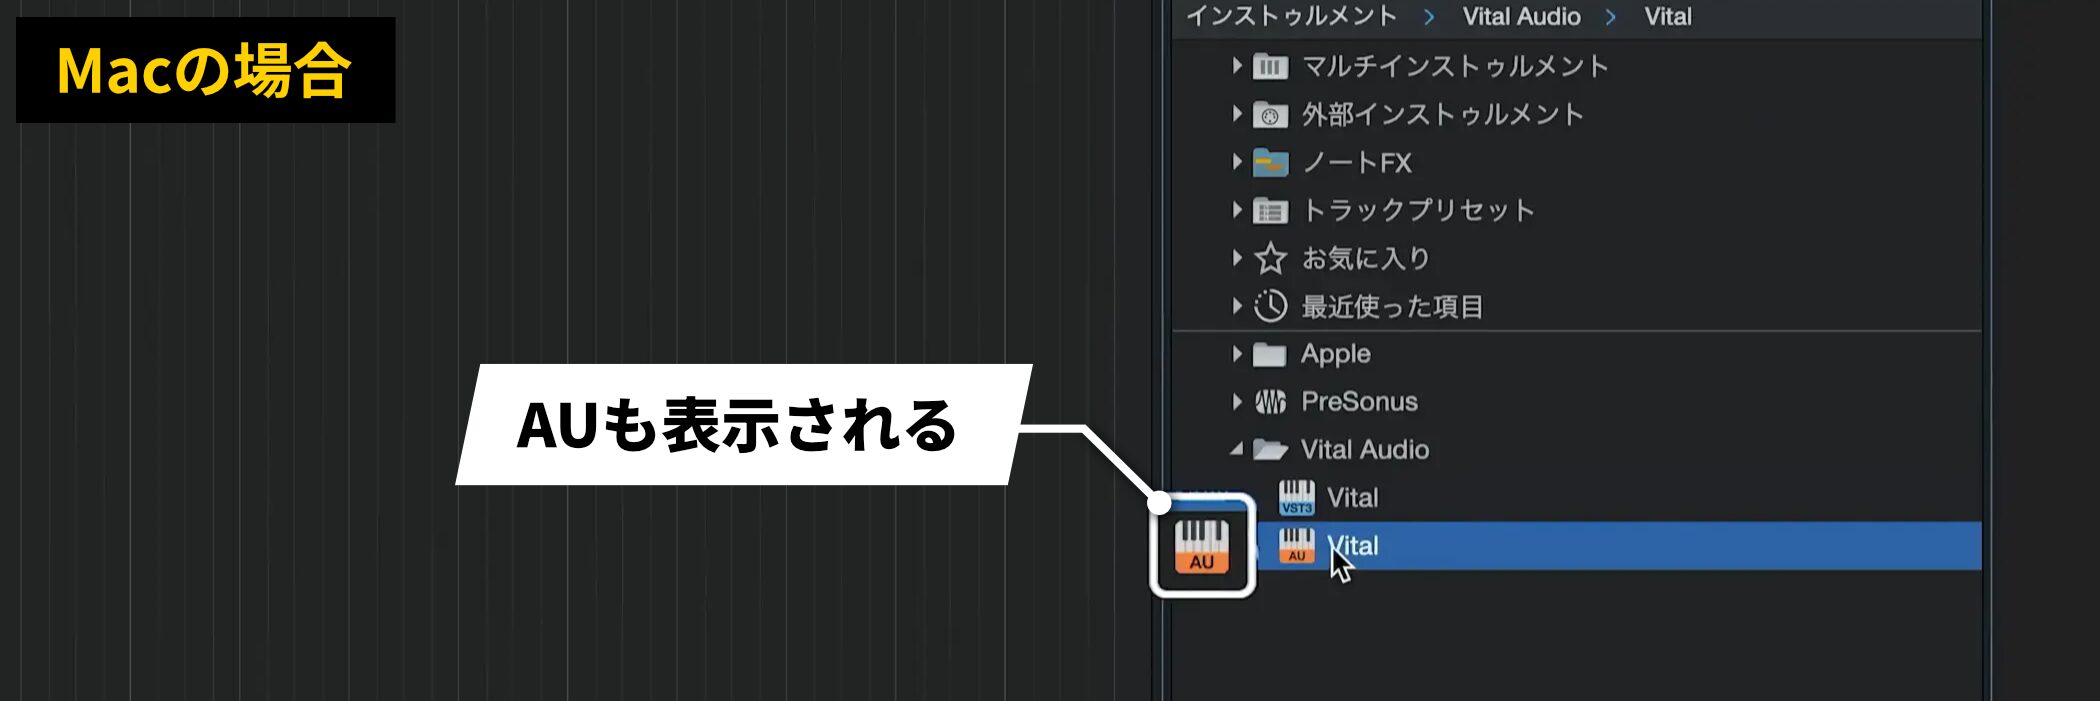
On Mac, Studio One can use the AU (Audio Units) format as well as VST.
The two entries may represent the same plug-in, so you may prefer to display only one format.
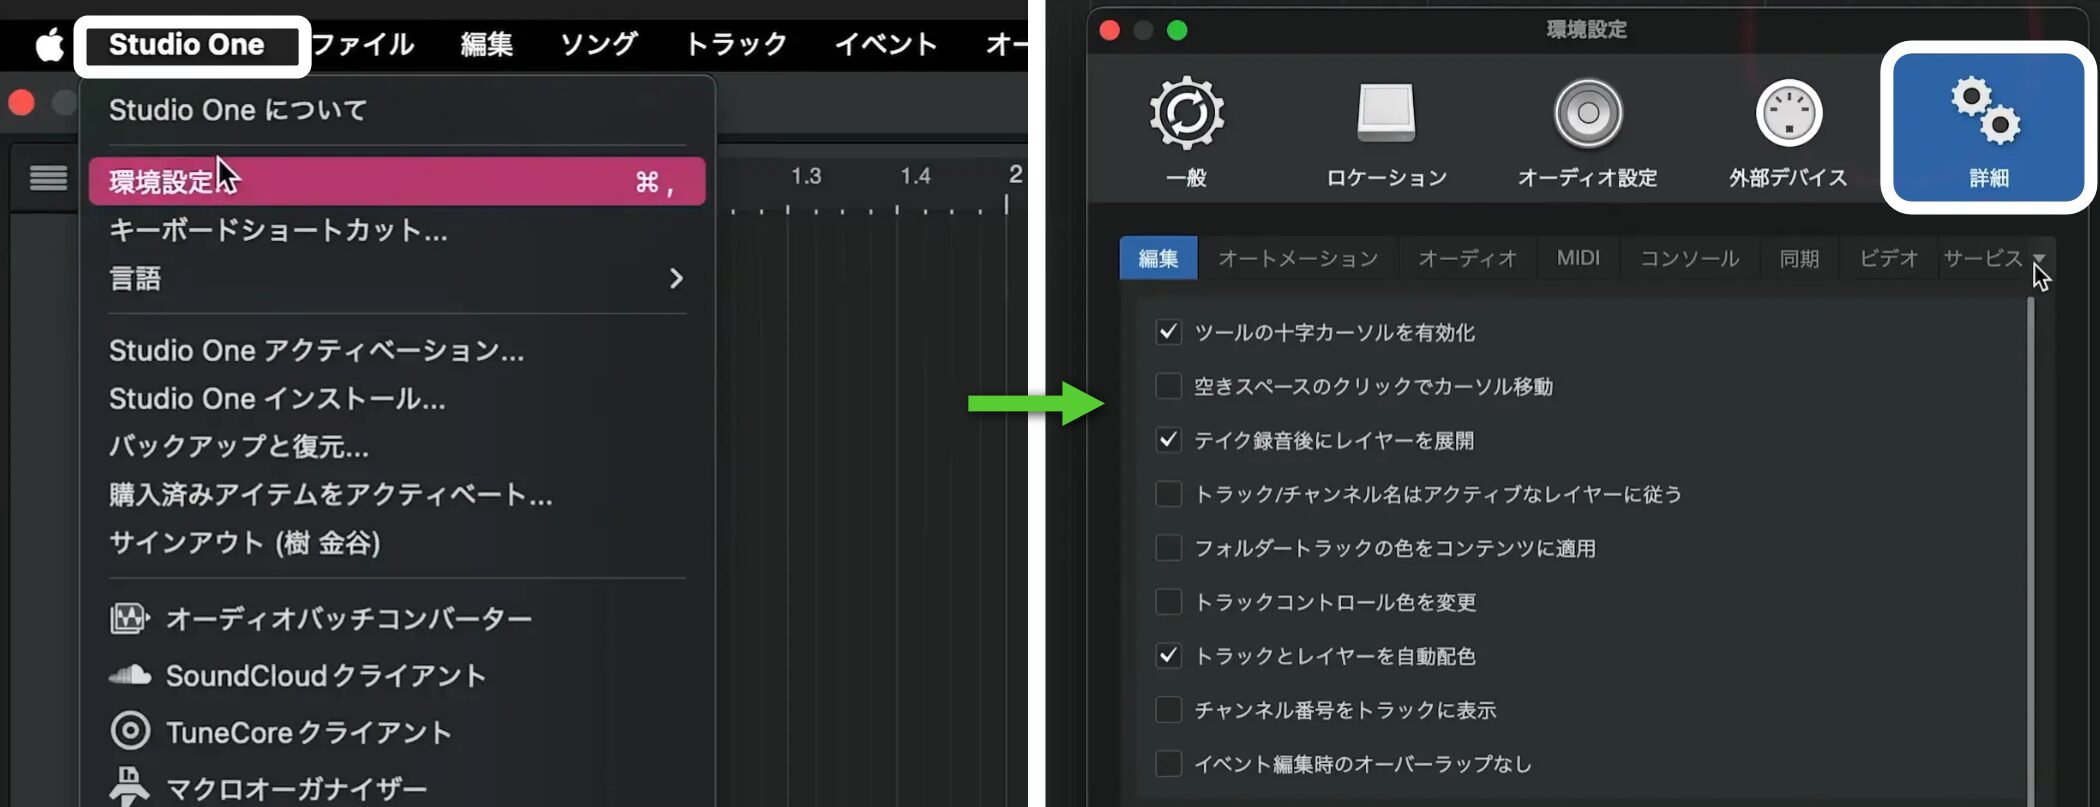
To change which formats are displayed, open Studio One → Preferences from the top menu and select the rightmost “Advanced” tab.
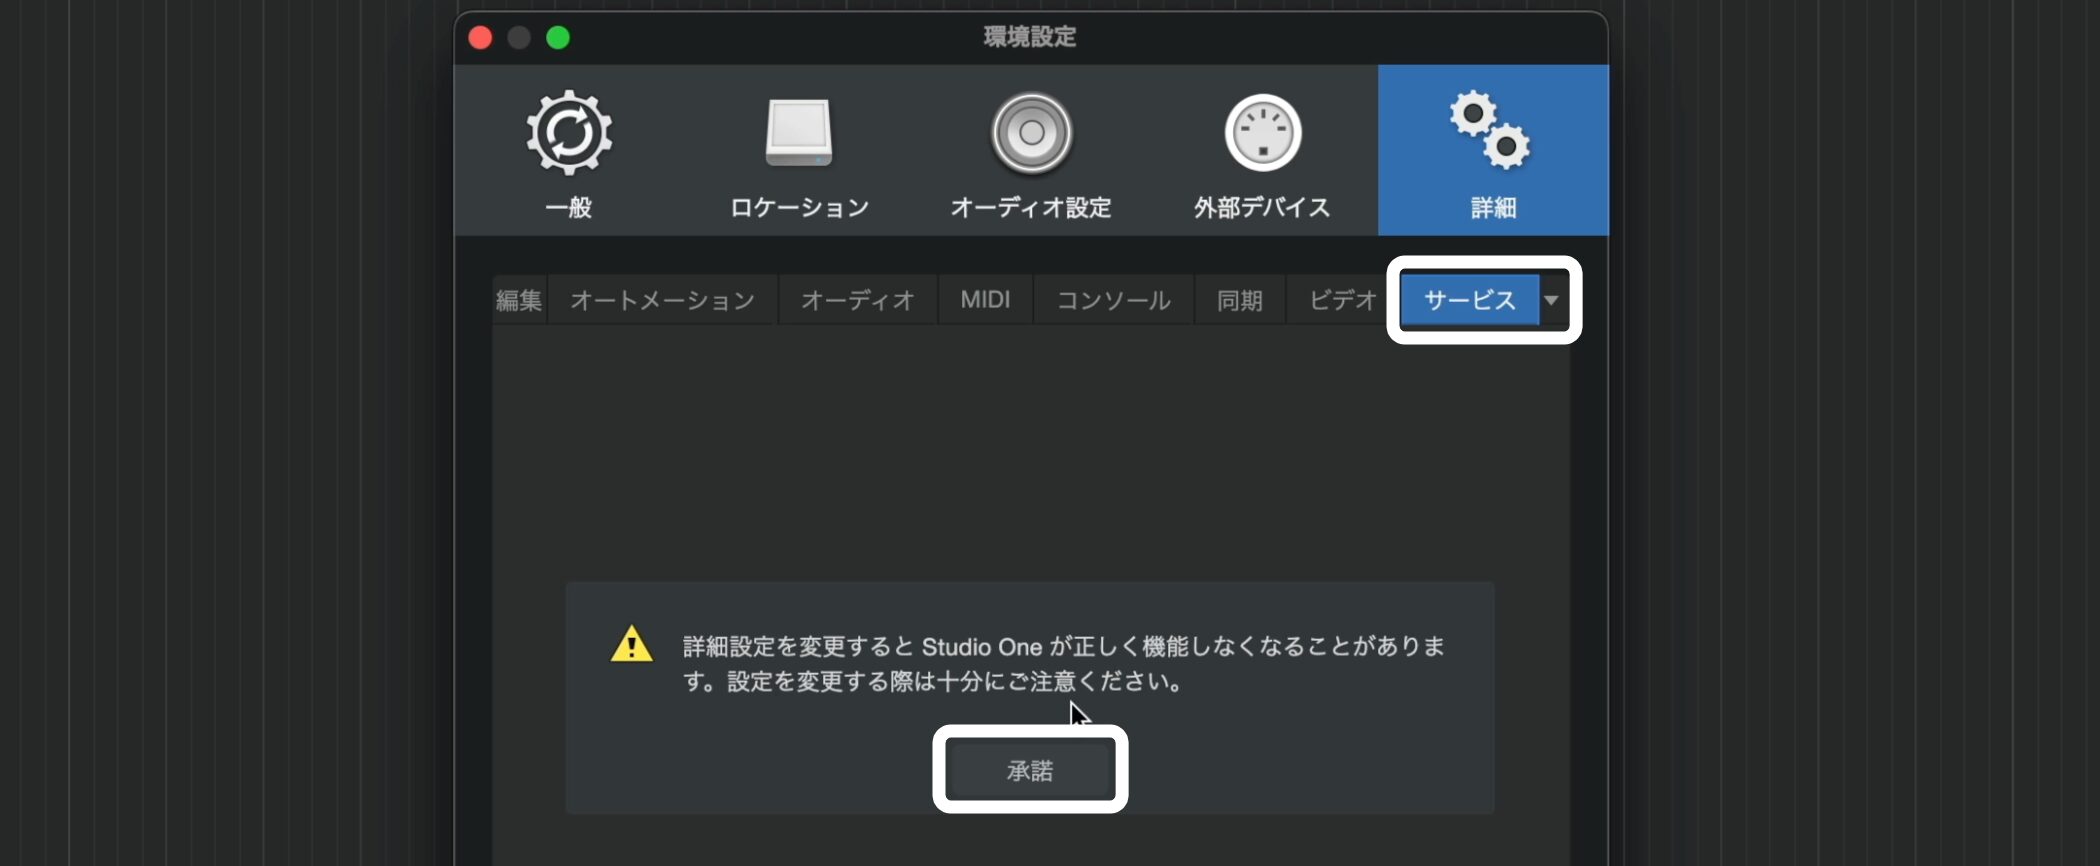
Open the “Services” tab. Review the warning that appears and click “Accept.”
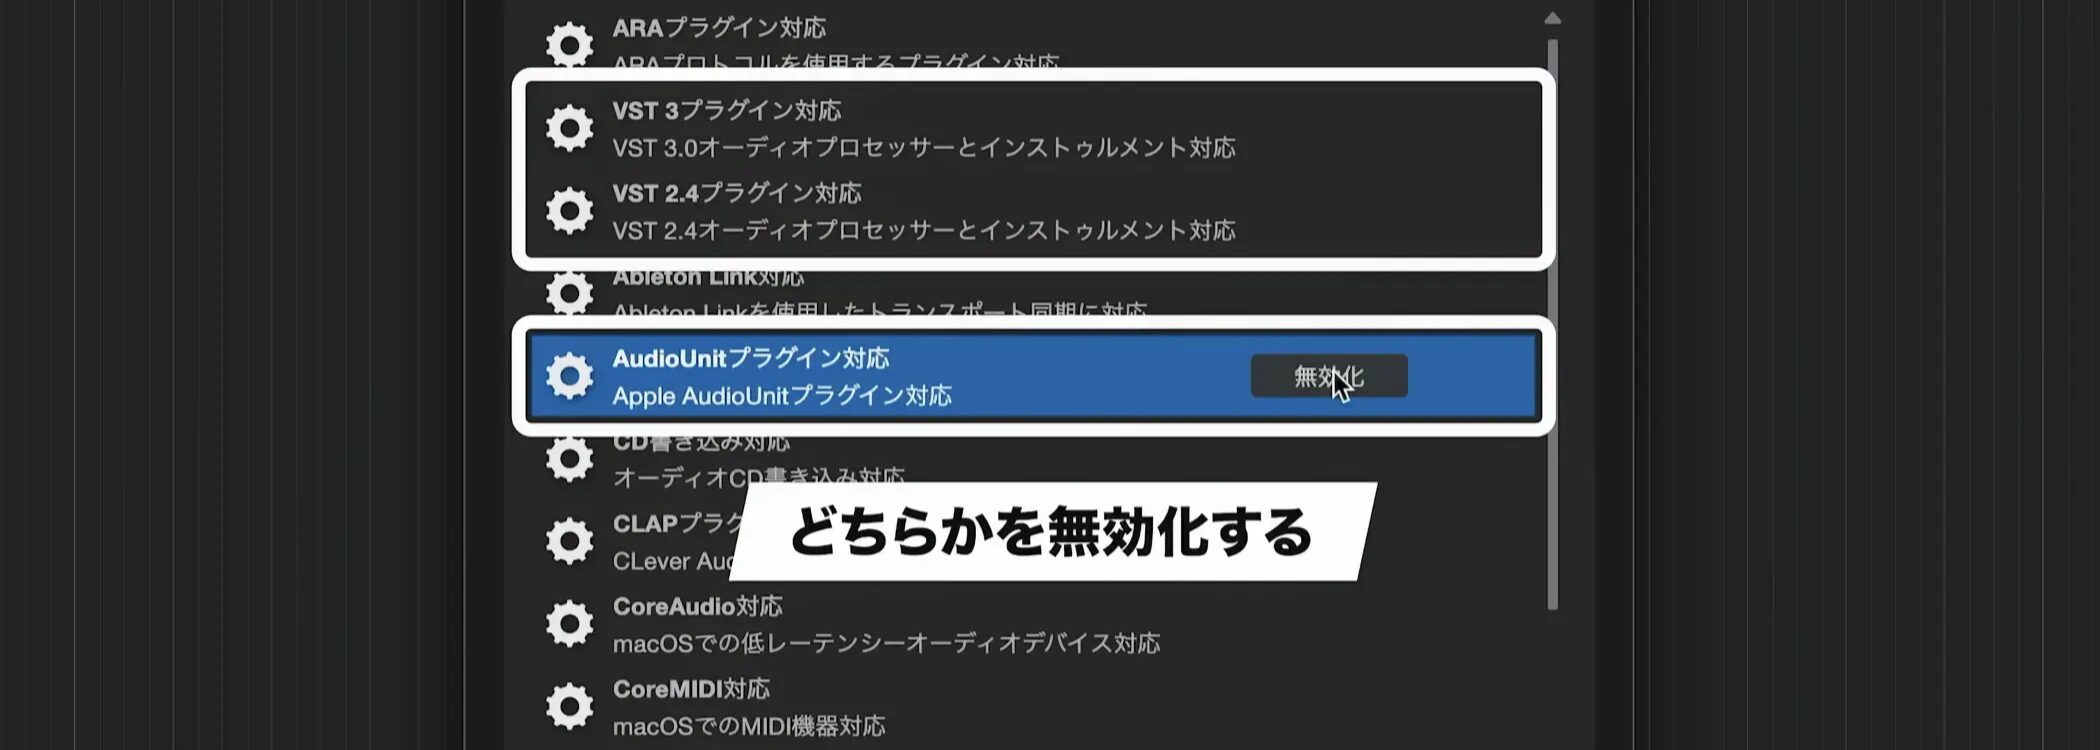
The settings include options for VST support and Audio Units (AU) support.
You can adjust what is displayed by disabling one of them.
VST offers a wide variety of plug-ins, so if you do not specifically need any AU plug-ins, we recommend disabling AU support.
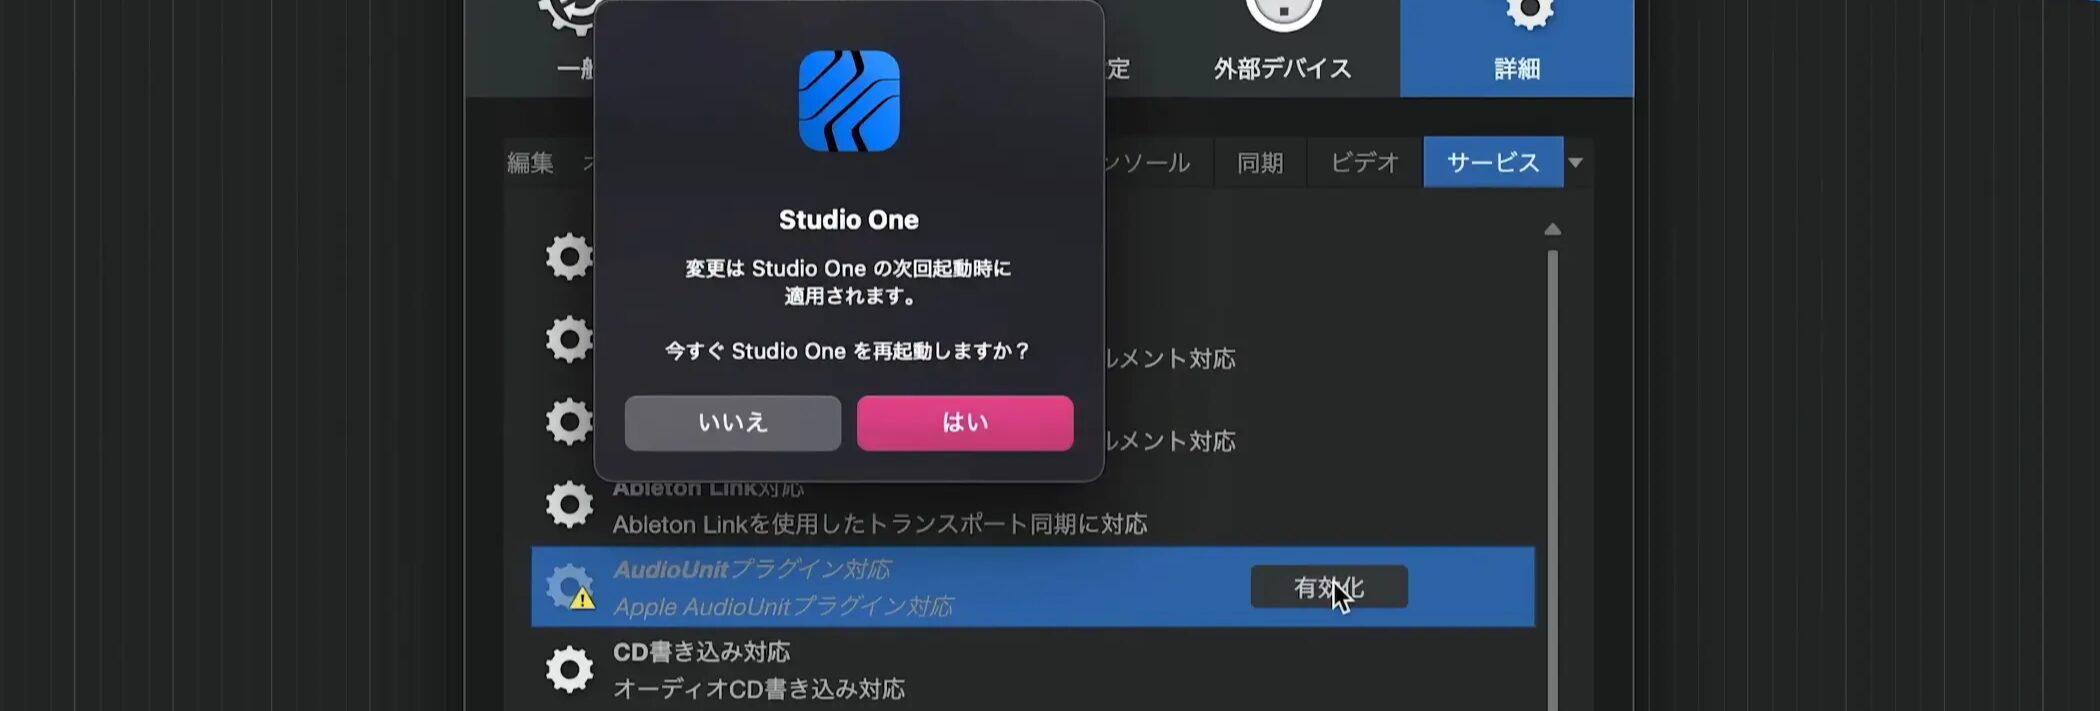
A dialog will prompt you to restart. Follow its instructions to do so.

After restarting, AU entries will be hidden and only VST entries will be displayed.
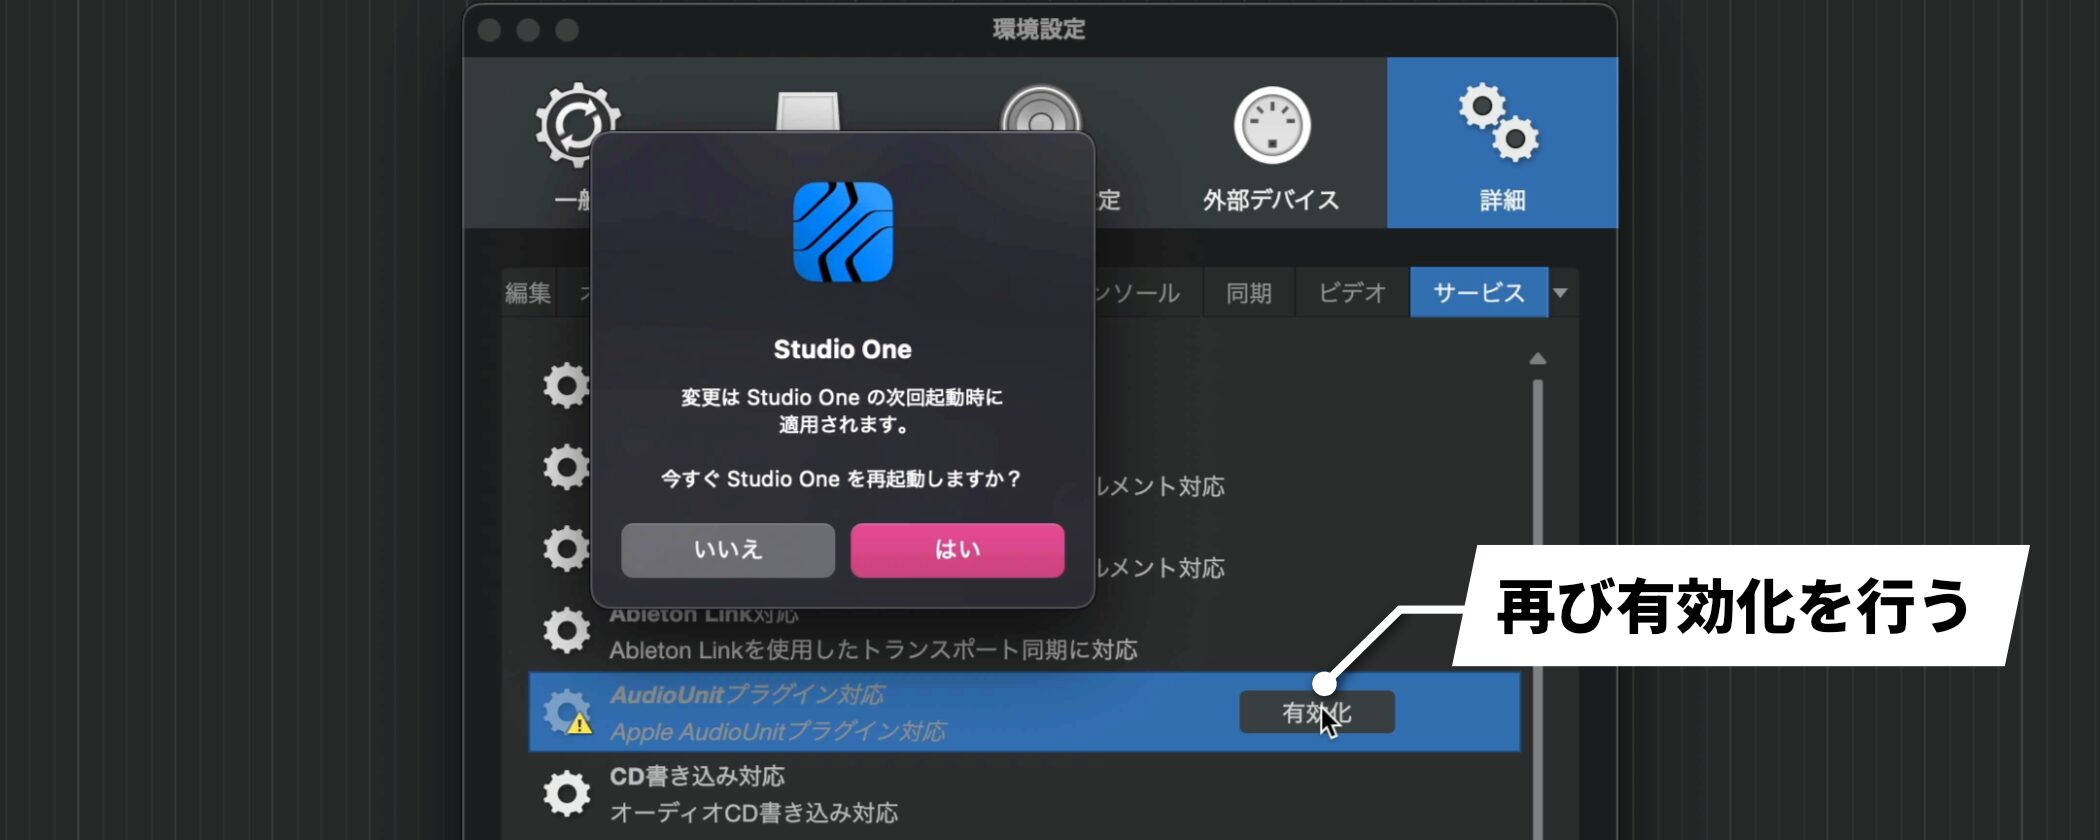
To restore them, enable the setting again from the same menu.
Frequently Asked Questions
Q1. What is the difference between a Song and a Project in Studio One?
A Song is used to build and compose a track from scratch. A Project is used to arrange songs created in Songs and master them. The workflow is to create in a Song and finish in a Project.
Q2. What is the difference between Audio and Instrument tracks?
Audio tracks display waveforms and handle recorded performances such as vocals and guitar. Instrument tracks handle MIDI and are used to play virtual instruments such as drums and orchestral sounds.
Q3. How often does Studio One create automatic backups?
By default, a backup file is created every five minutes. You can adjust the interval in the Locations tab of the options.
Q4. Should I use VST or AU plug-ins on Mac?
For the same plug-in, either format can be used. If you want simpler management, you can configure Studio One to display only one.
Q5. What sample rate and resolution are recommended?
Unless you have a specific requirement, 48 kHz and 32-bit float are recommended. These settings provide higher resolution than CD audio, which is 44.1 kHz and 16-bit.
NEW ARTICLES
Latest English Articles