Automation is an essential tool for producing music in Ableton Live. This article explains how to change knobs, faders, and other parameters automatically over time. You can create dynamic effects that follow the arrangement, such as adjusting vocal volume, moving a sound across the stereo field, or gradually increasing reverb. Learn practical techniques from writing basic values and drawing automation to deleting points for a more refined mix.
Move knobs, faders, and parameters automatically
Normally, effects and tracks play back at their set values.
However,
depending on the arrangement and the state of a track,
you may often want those values to change during playback.
That's where automation comes in.
With automation,
you can change a chosen parameter over the course of a song.
- Lower the vocal volume just for the verse
- Move a sound from right to left
- Gradually increase the reverb
and more—
all of these can be controlled with automation.
Track envelopes video
Product details

Setting up automation
There are several ways to record automation.
Here we'll cover the most basic method: drawing values.
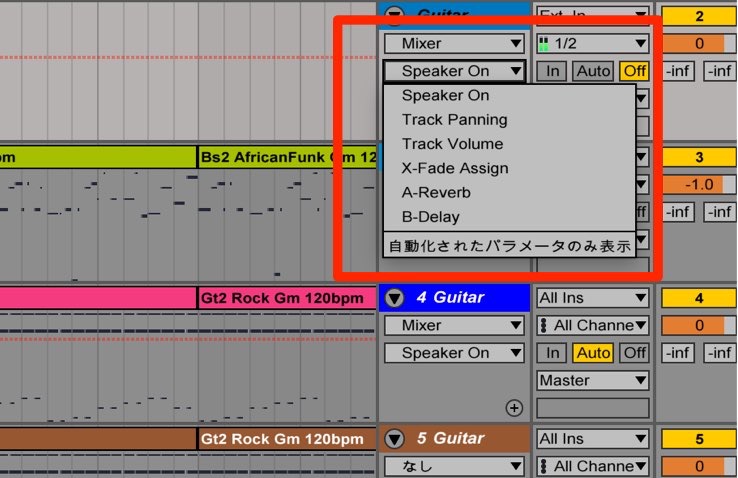
Let's set automation on the Guitar track.
- Find the area outlined in red on the target track.
- Choose Mixer from the upper menu.
- Choose the parameter to control from the lower menu.
Frequently used options include:
- Track Volume — volume
- Track Panning — left/right position
These are common choices.
Let's set the volume here.
As shown above, choose Track Volume.
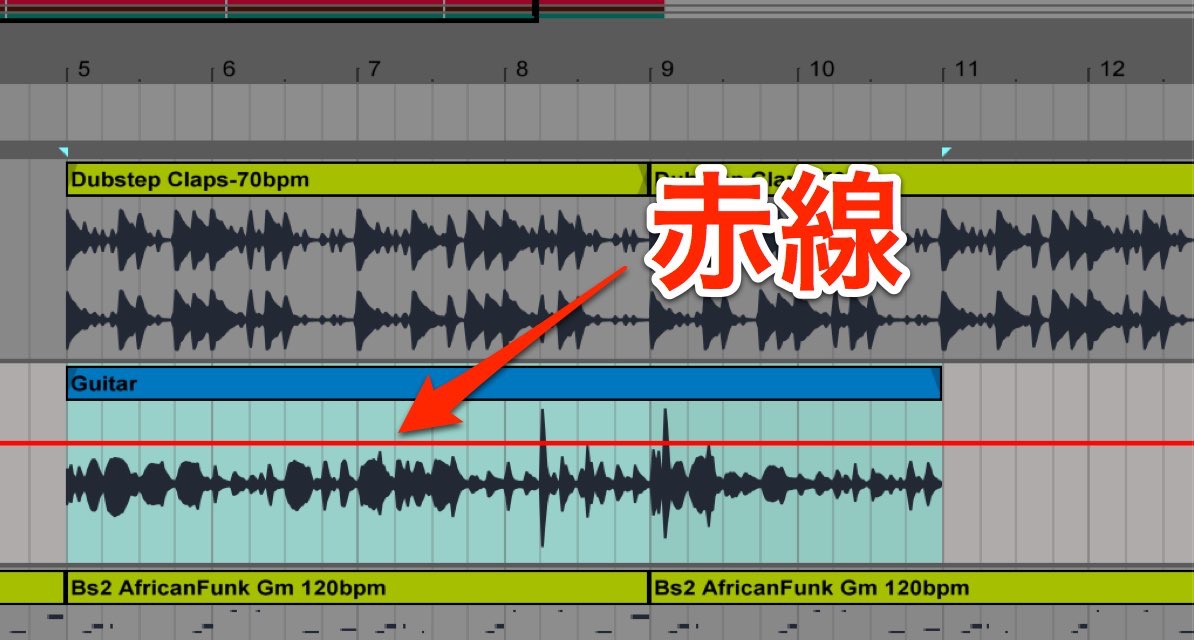
The red line represents the current value.
It stays constant from beginning to end.
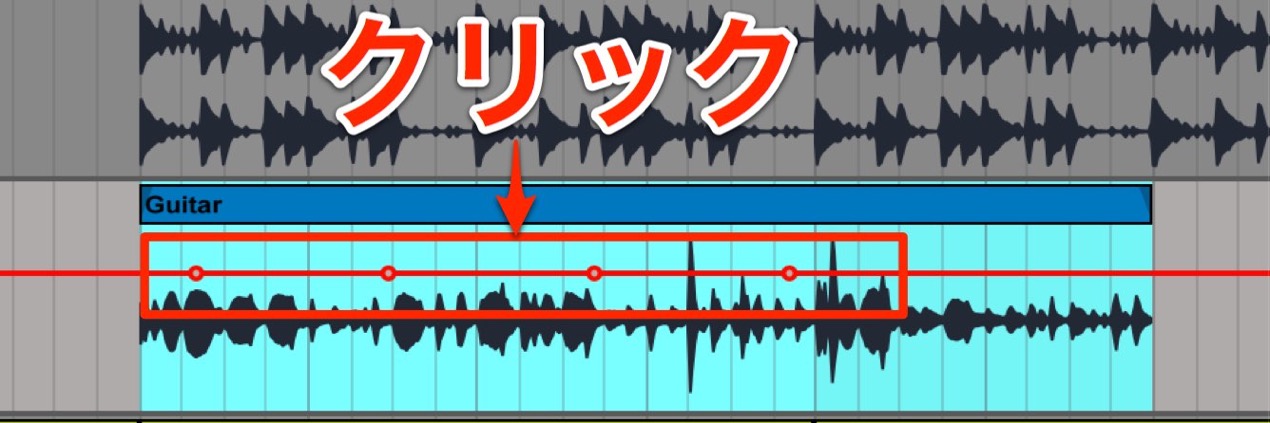
With Draw Mode off, click the line to add an automation breakpoint.
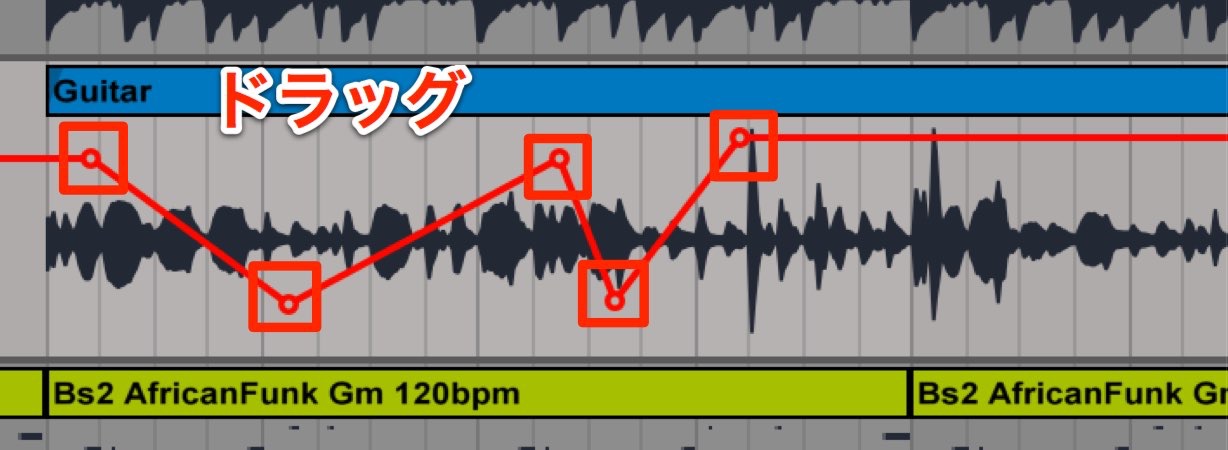
Drag the breakpoint to shape the sound as desired.
For most automation,
moving a point up increases the value, while moving it down decreases the value.
In this example the parameter is volume.
Moving the point up raises the volume; moving it down lowers it.
Drawing automation with Draw Mode
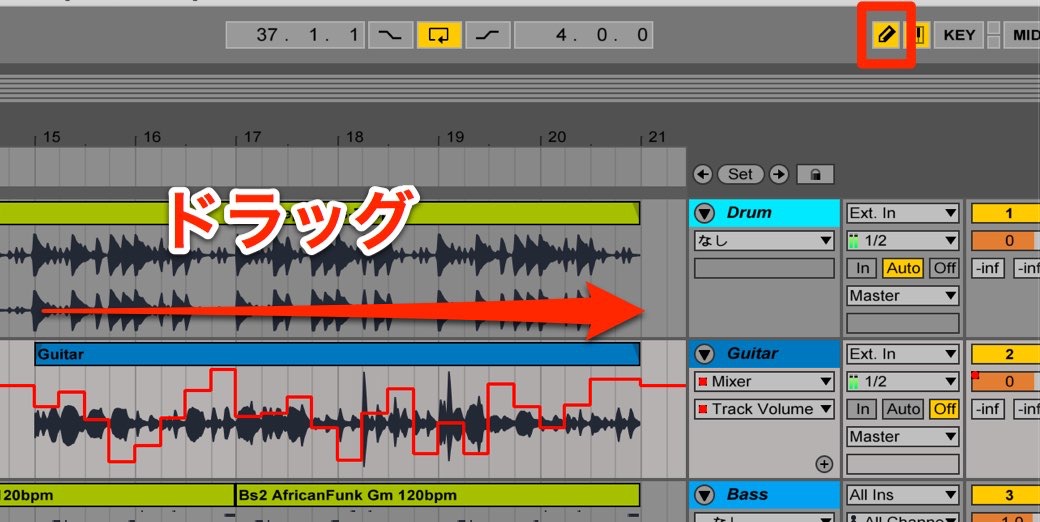
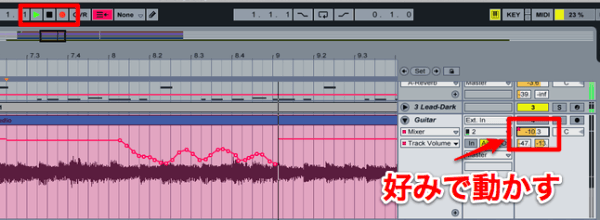
Use the Draw Mode tool outlined in red
to draw automation by dragging as if drawing a picture.
Normally, the grid determines the spacing between drawn values. In the version shown, hold the following key while dragging to draw freely:
- Mac: Option
- Windows: Alt
Hold the appropriate key while dragging
to draw without following the grid.
Deleting automation breakpoints
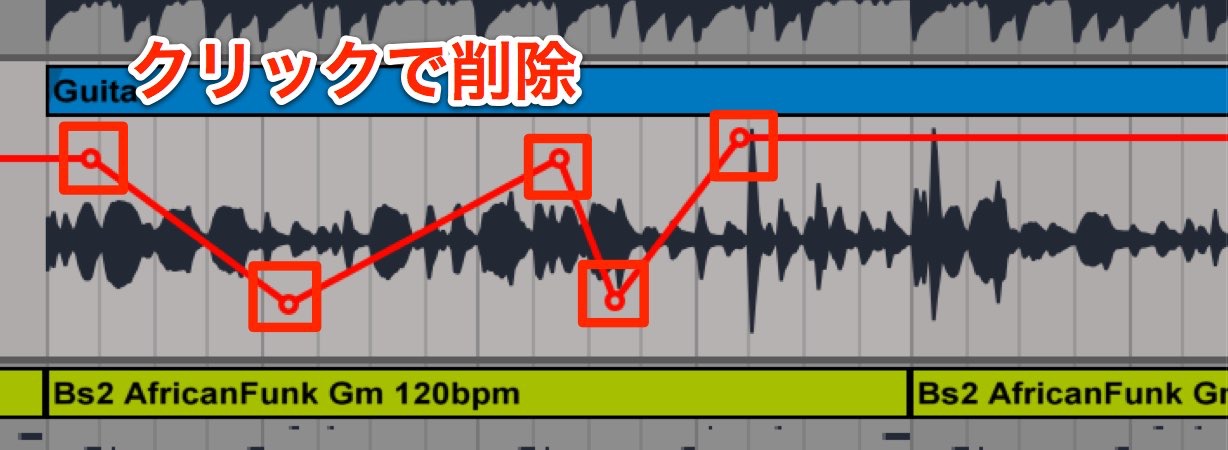
Deleting breakpoints is simple when Draw Mode is off.
Click an existing automation breakpoint to delete it.
Automation order and gain reduction
Frequently asked questions
Q1. What is automation in Ableton Live?
Automation changes effect or track parameters such as volume, panning, and reverb automatically over the course of a song. By changing values along the timeline during playback, you can create dynamic, expressive sounds.
Q2. Which parameters are commonly automated?
Track Volume and Track Panning are frequently used. They are useful controls for managing tracks such as vocals and guitars.
Q3. Can I make detailed adjustments to automation?
Use Draw Mode to draw automation by dragging. In the version shown, holding Option on Mac or Alt on Windows while dragging allows freehand drawing without following the grid.
Q4. How do I delete an unwanted automation breakpoint?
With Draw Mode off, click the breakpoint you want to remove. This is useful when refining a complex automation curve.
Q5. Does automation order matter when using a compressor?
Yes. The position of automation relative to compression can affect gain reduction. Consider the routing and effect order to achieve the response you want, especially when working with vocals.
NEW ARTICLES
Latest English Articles