Installing Studio One 7 and getting ready to make music involves several steps: signing in to a PreSonus account, activating the software, installing the included content and configuring an audio device. This guide covers installation for Mac and Windows, product key management, the full installation option, latency adjustments and MIDI keyboard setup to help beginners start composing and recording.
Downloading the Installer
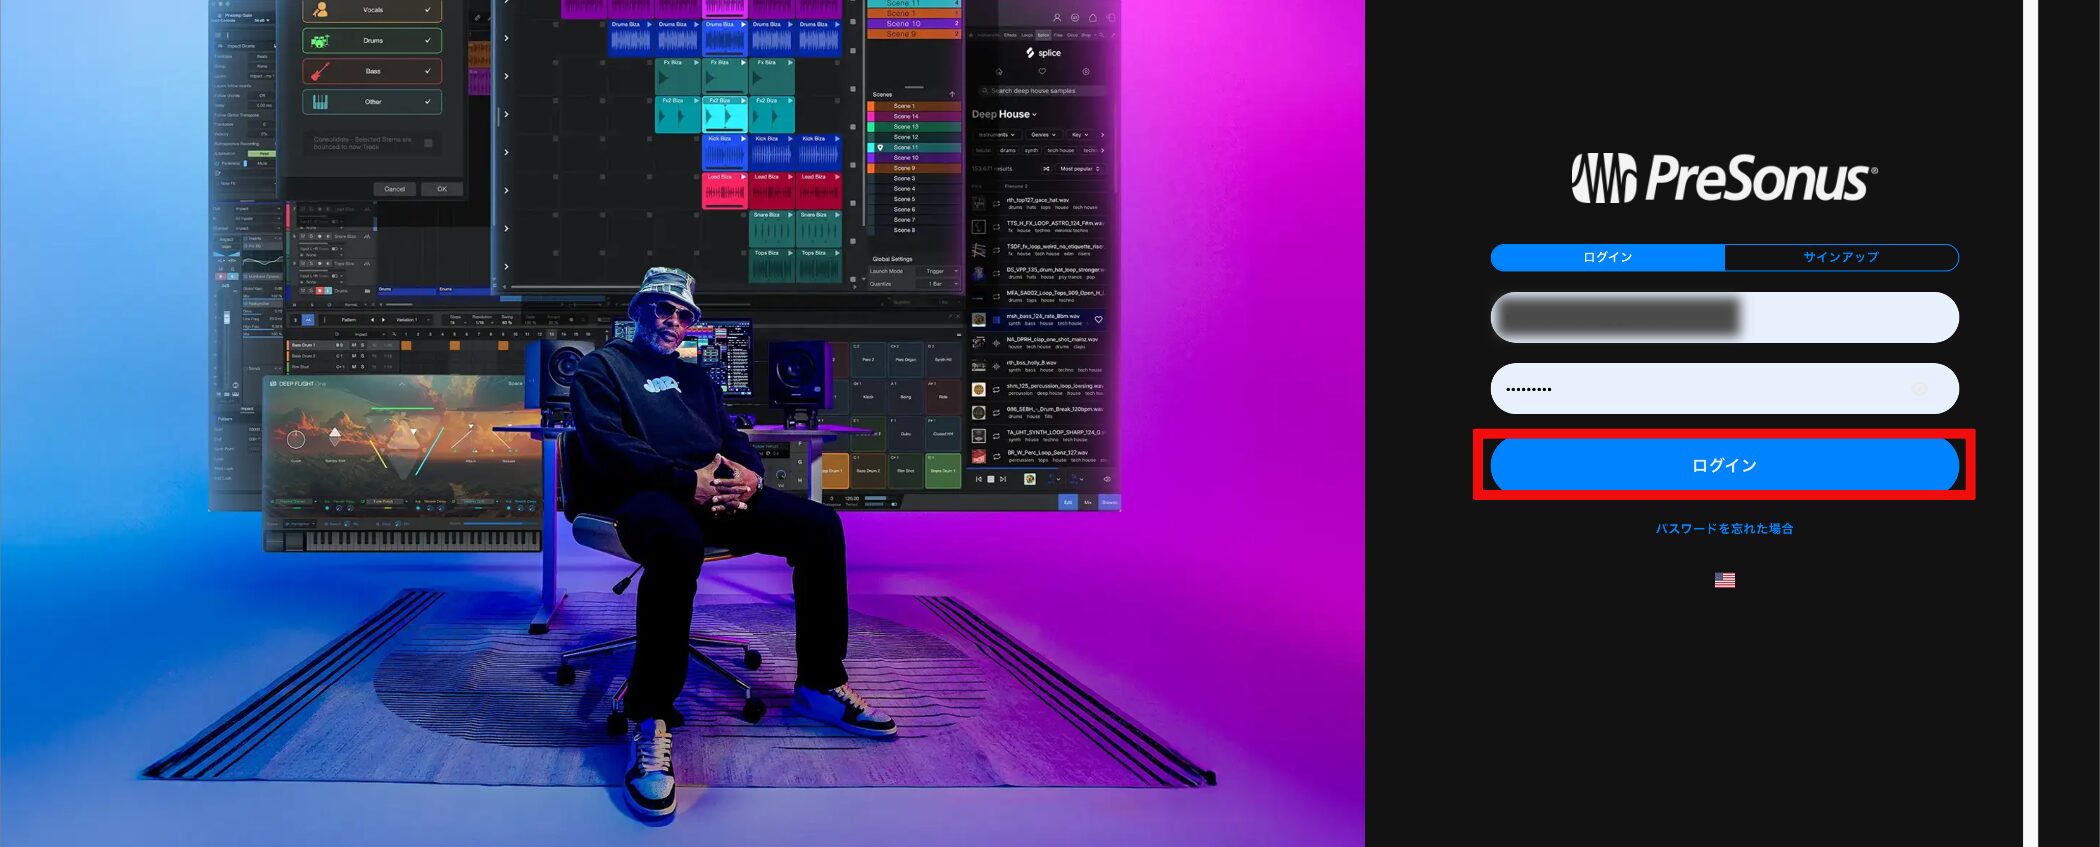
Visit PreSonus and sign in.
For Fender Studio Pro installation, see the following guide:
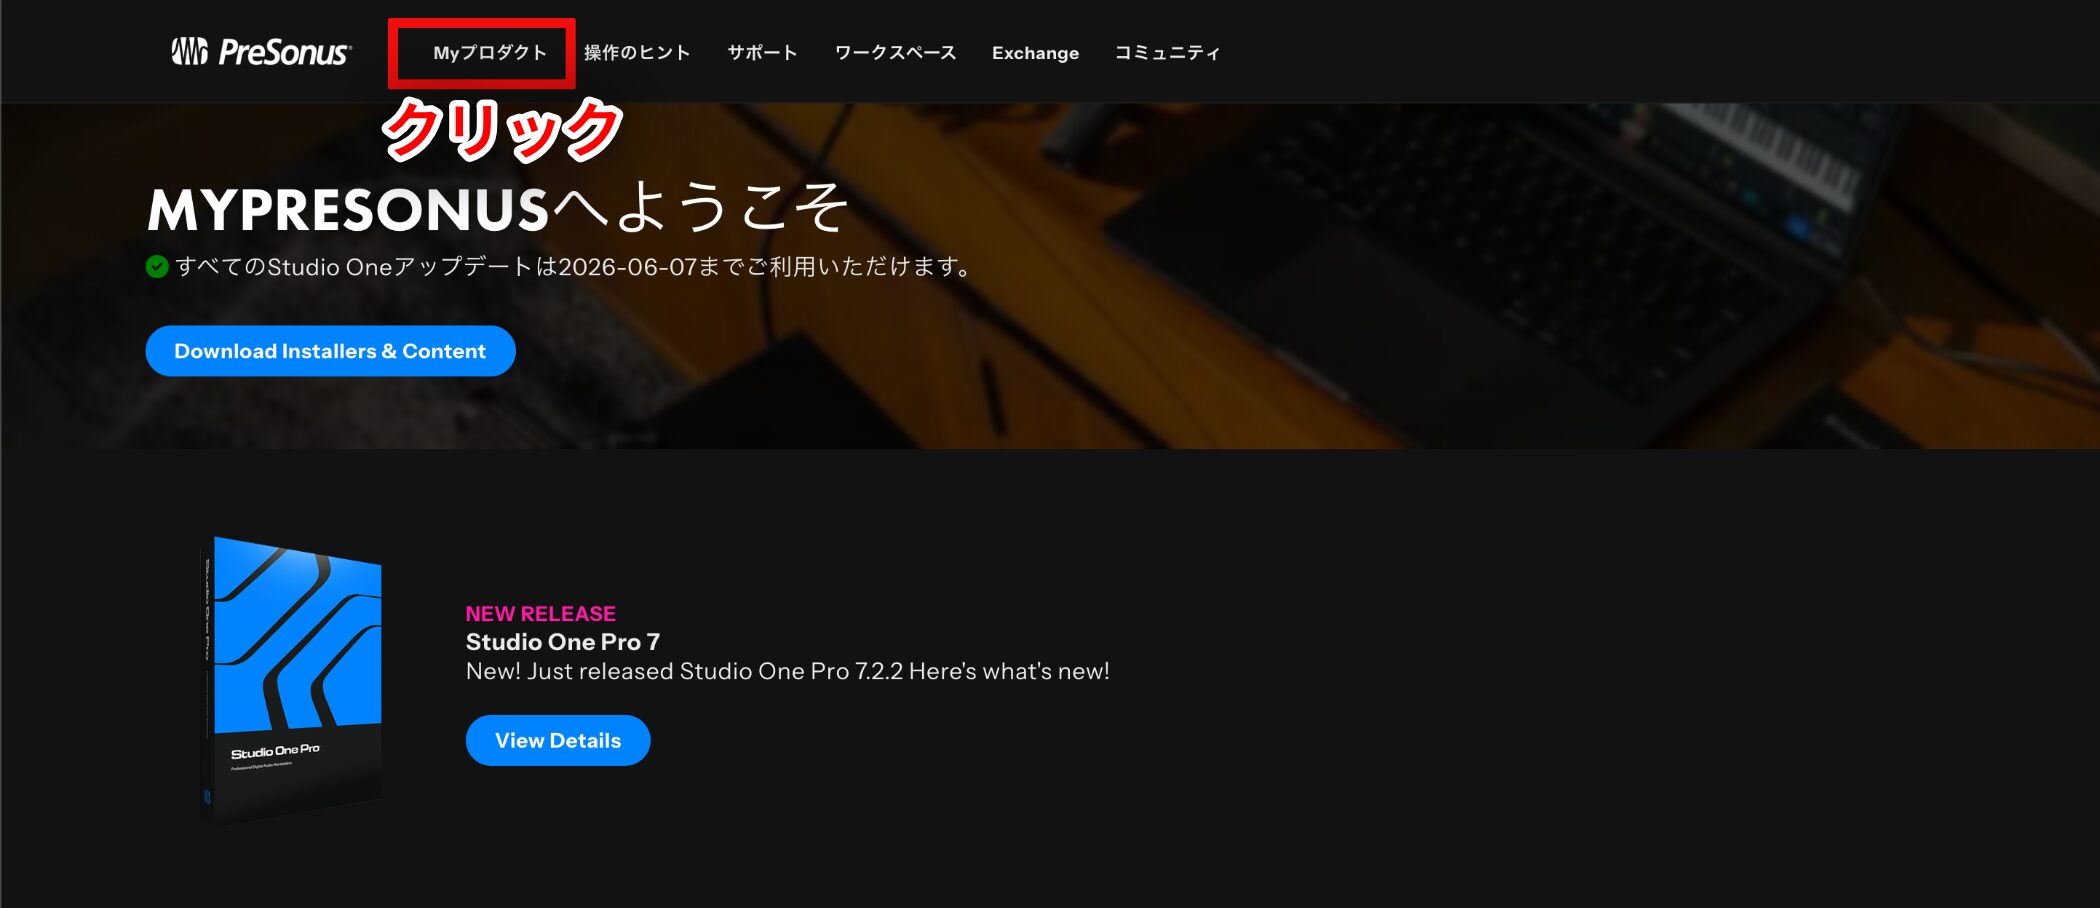
Click “My Products” at the top of the page.
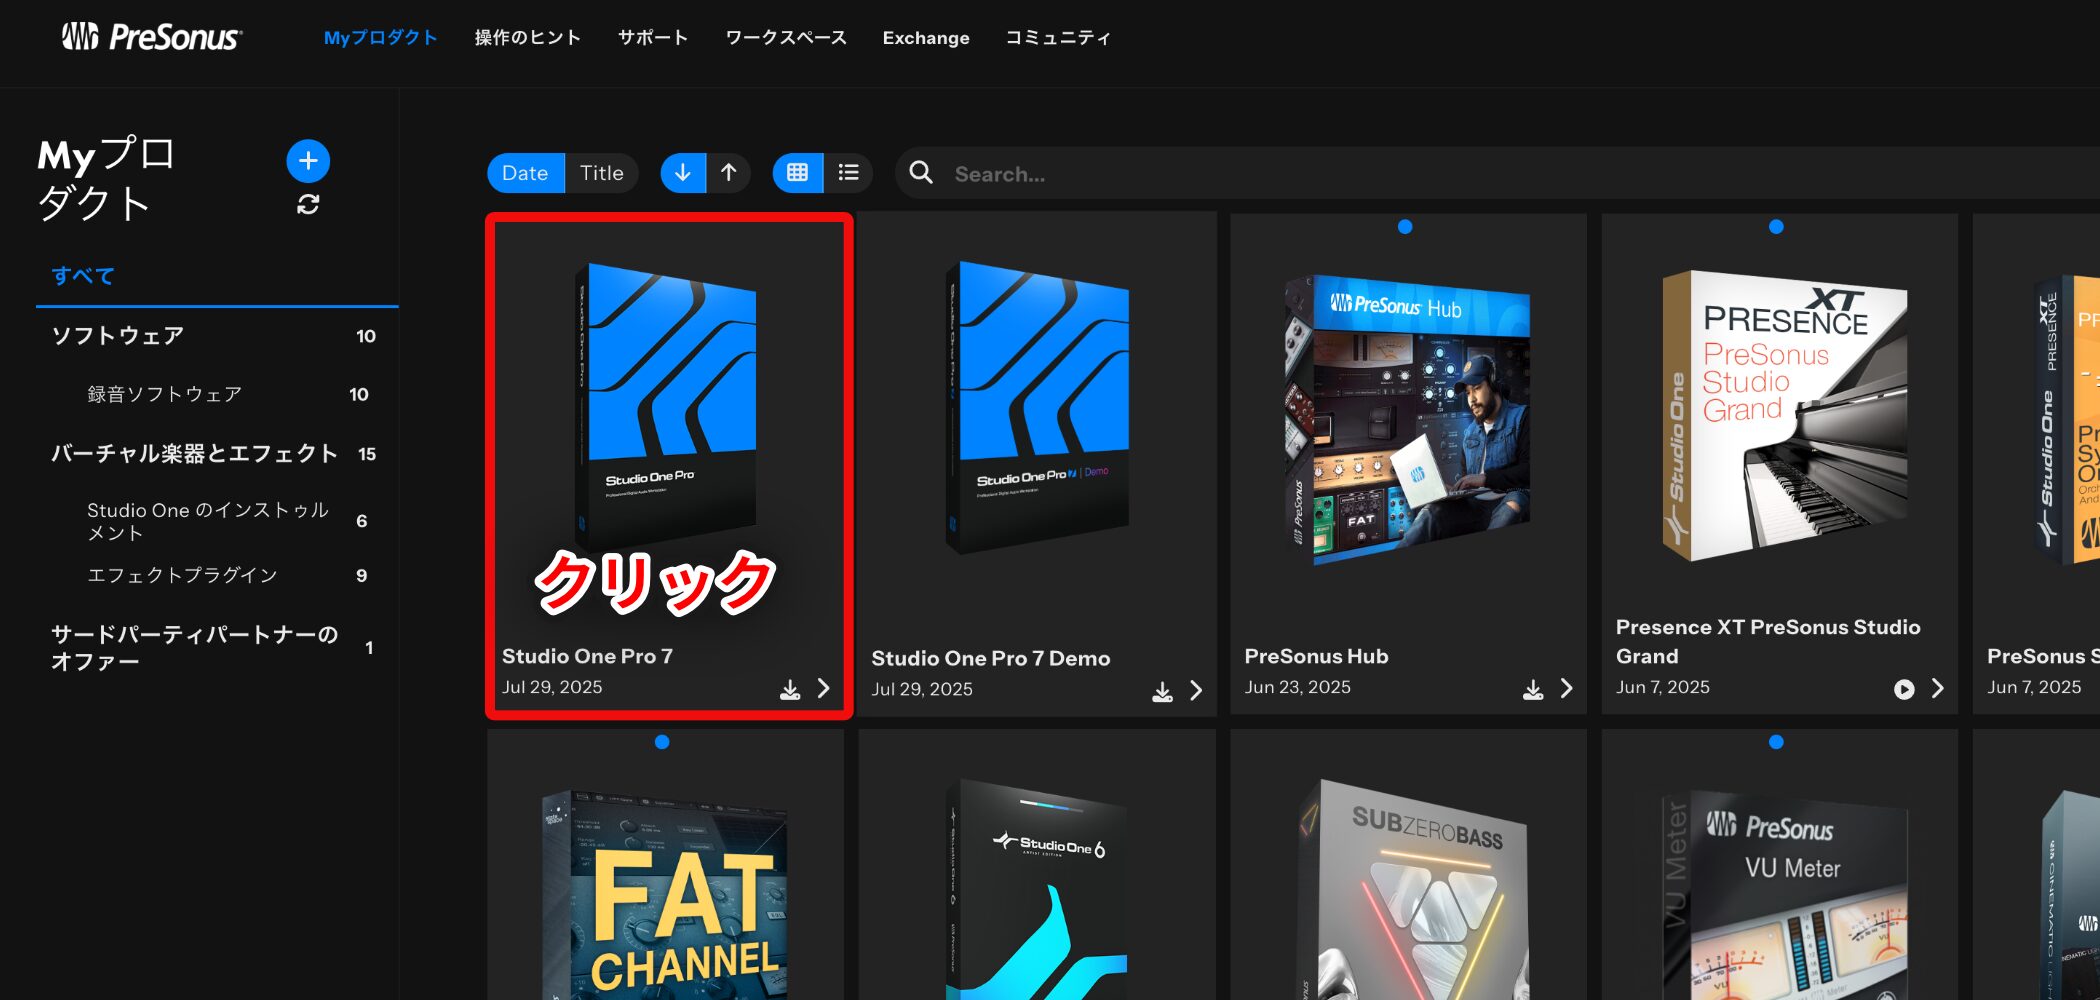
Click “Studio One Pro 7.”
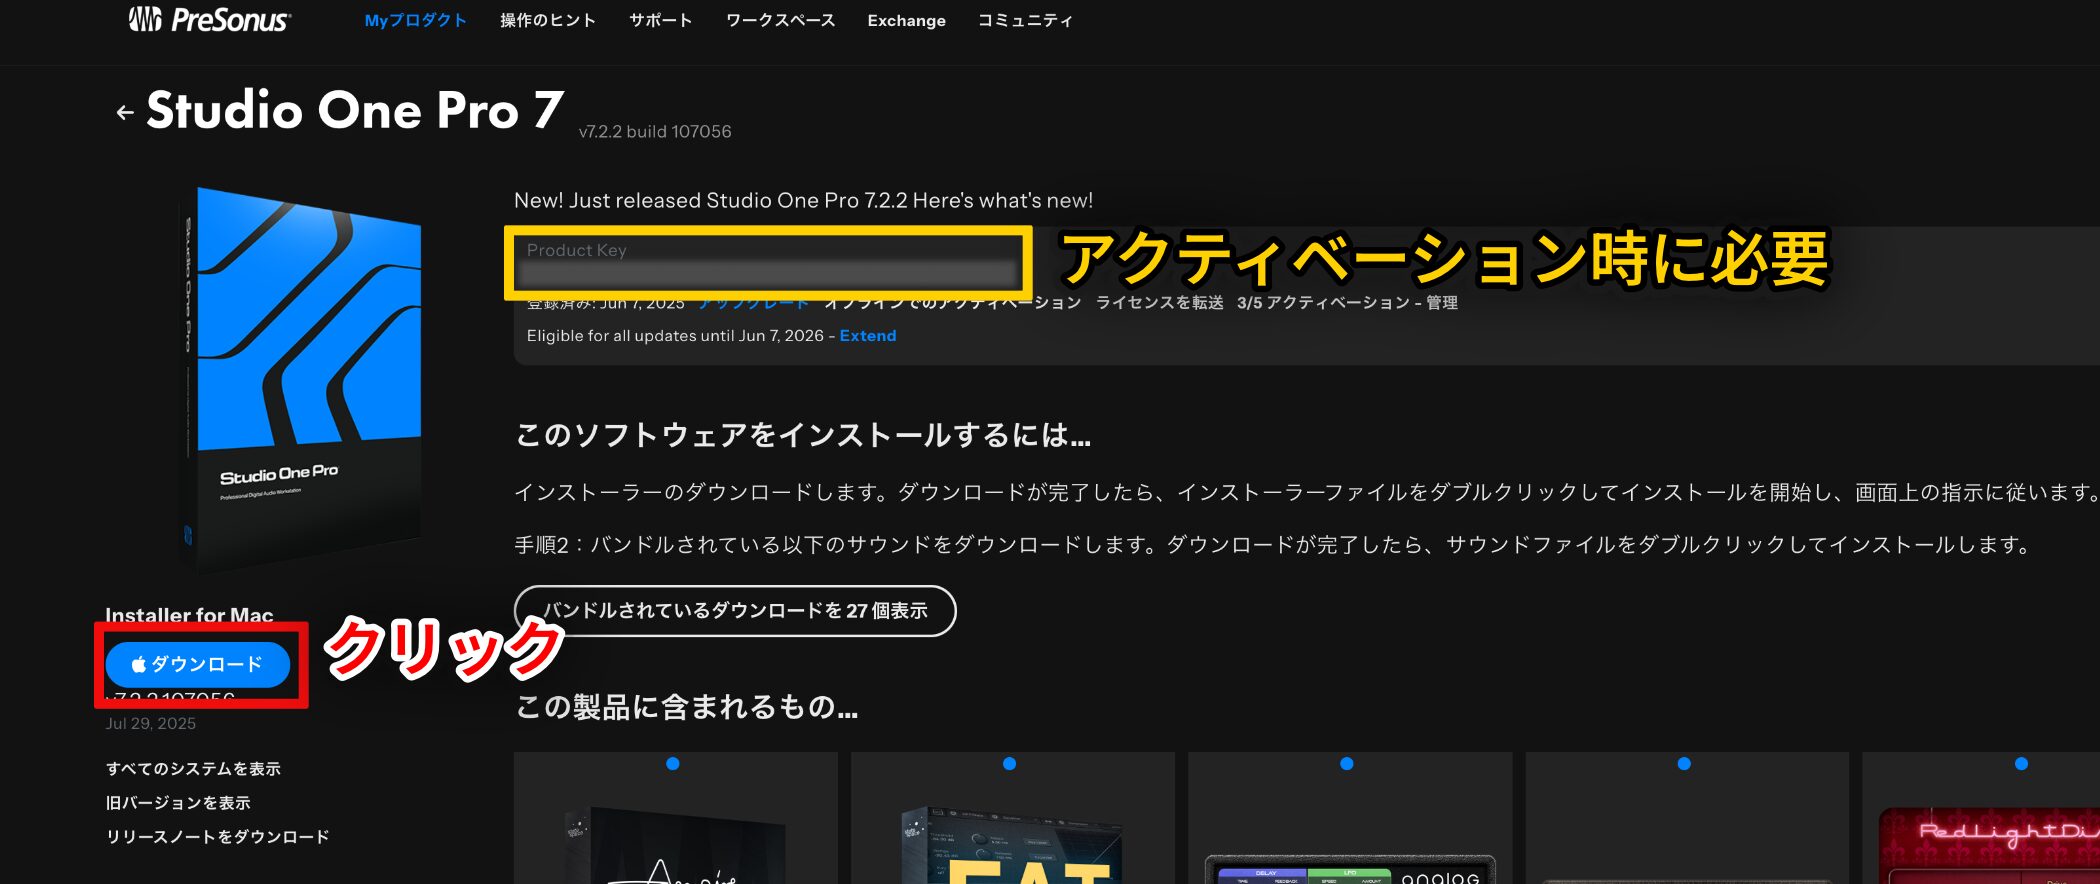
On the left side of the product page, click the download button for your operating system to get the installer.
Your “Product Key” is displayed at the top of the page.
Activation may happen automatically, but keep a note of the key beforehand in case you need to activate manually.
Installation
Once the installer has downloaded, install Studio One 7 on your computer.
The installation steps shown here use the Mac version.
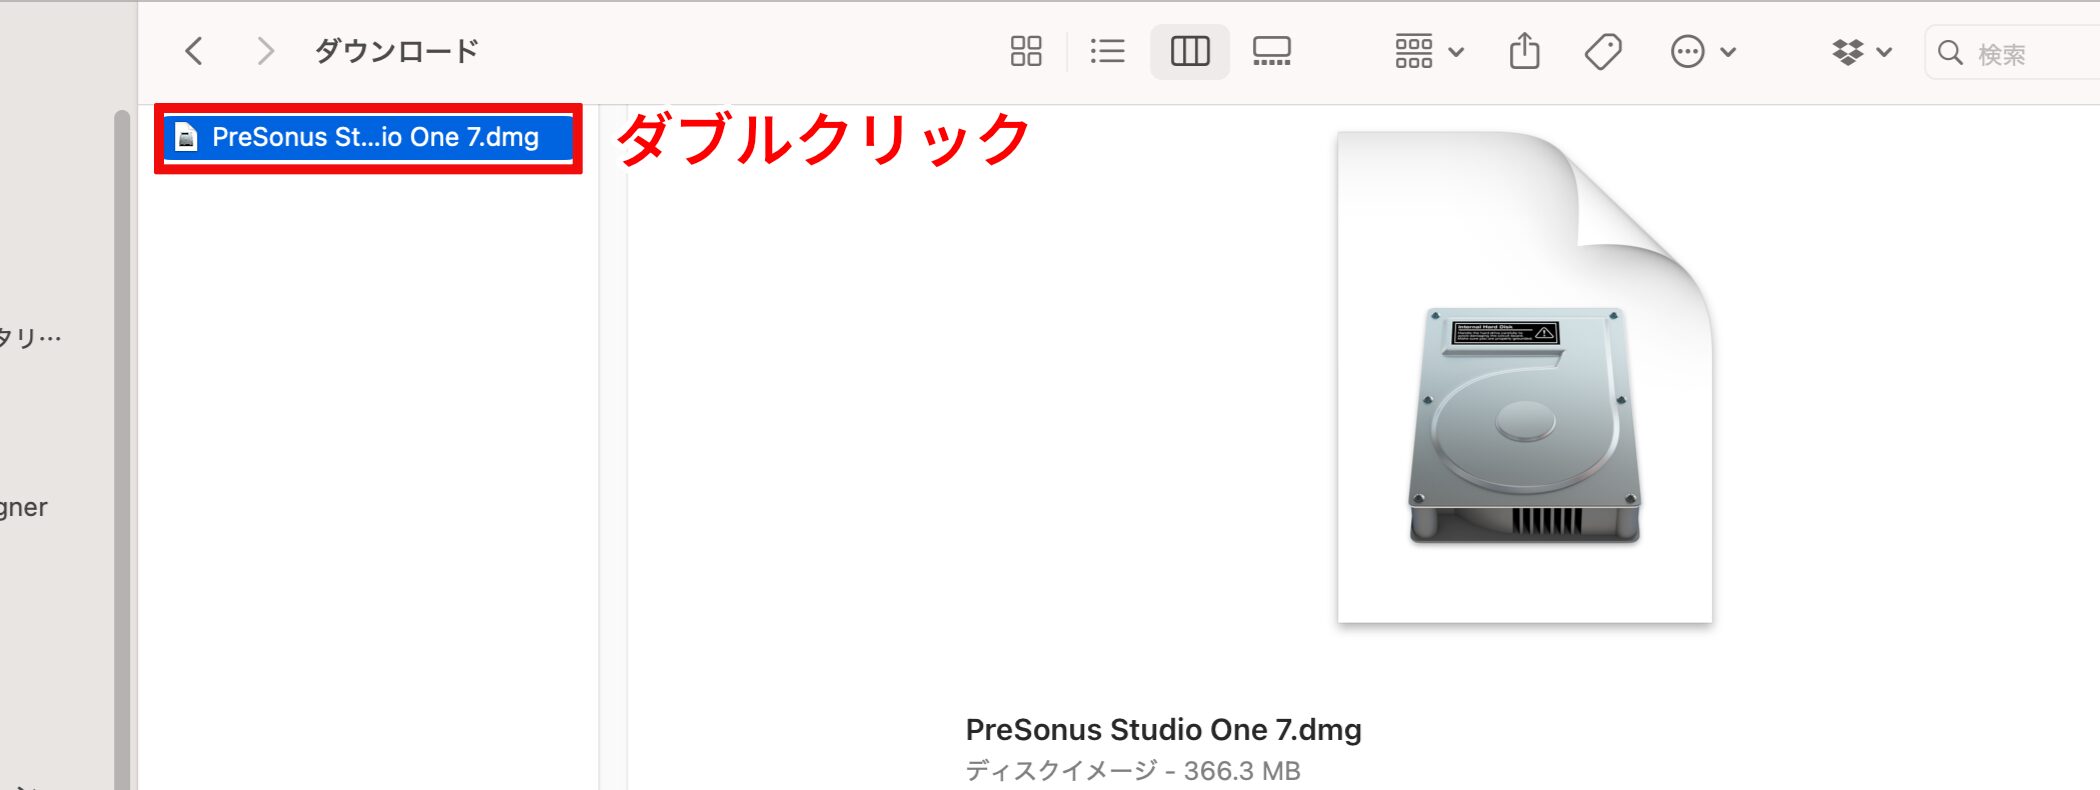
Double-click the downloaded file.
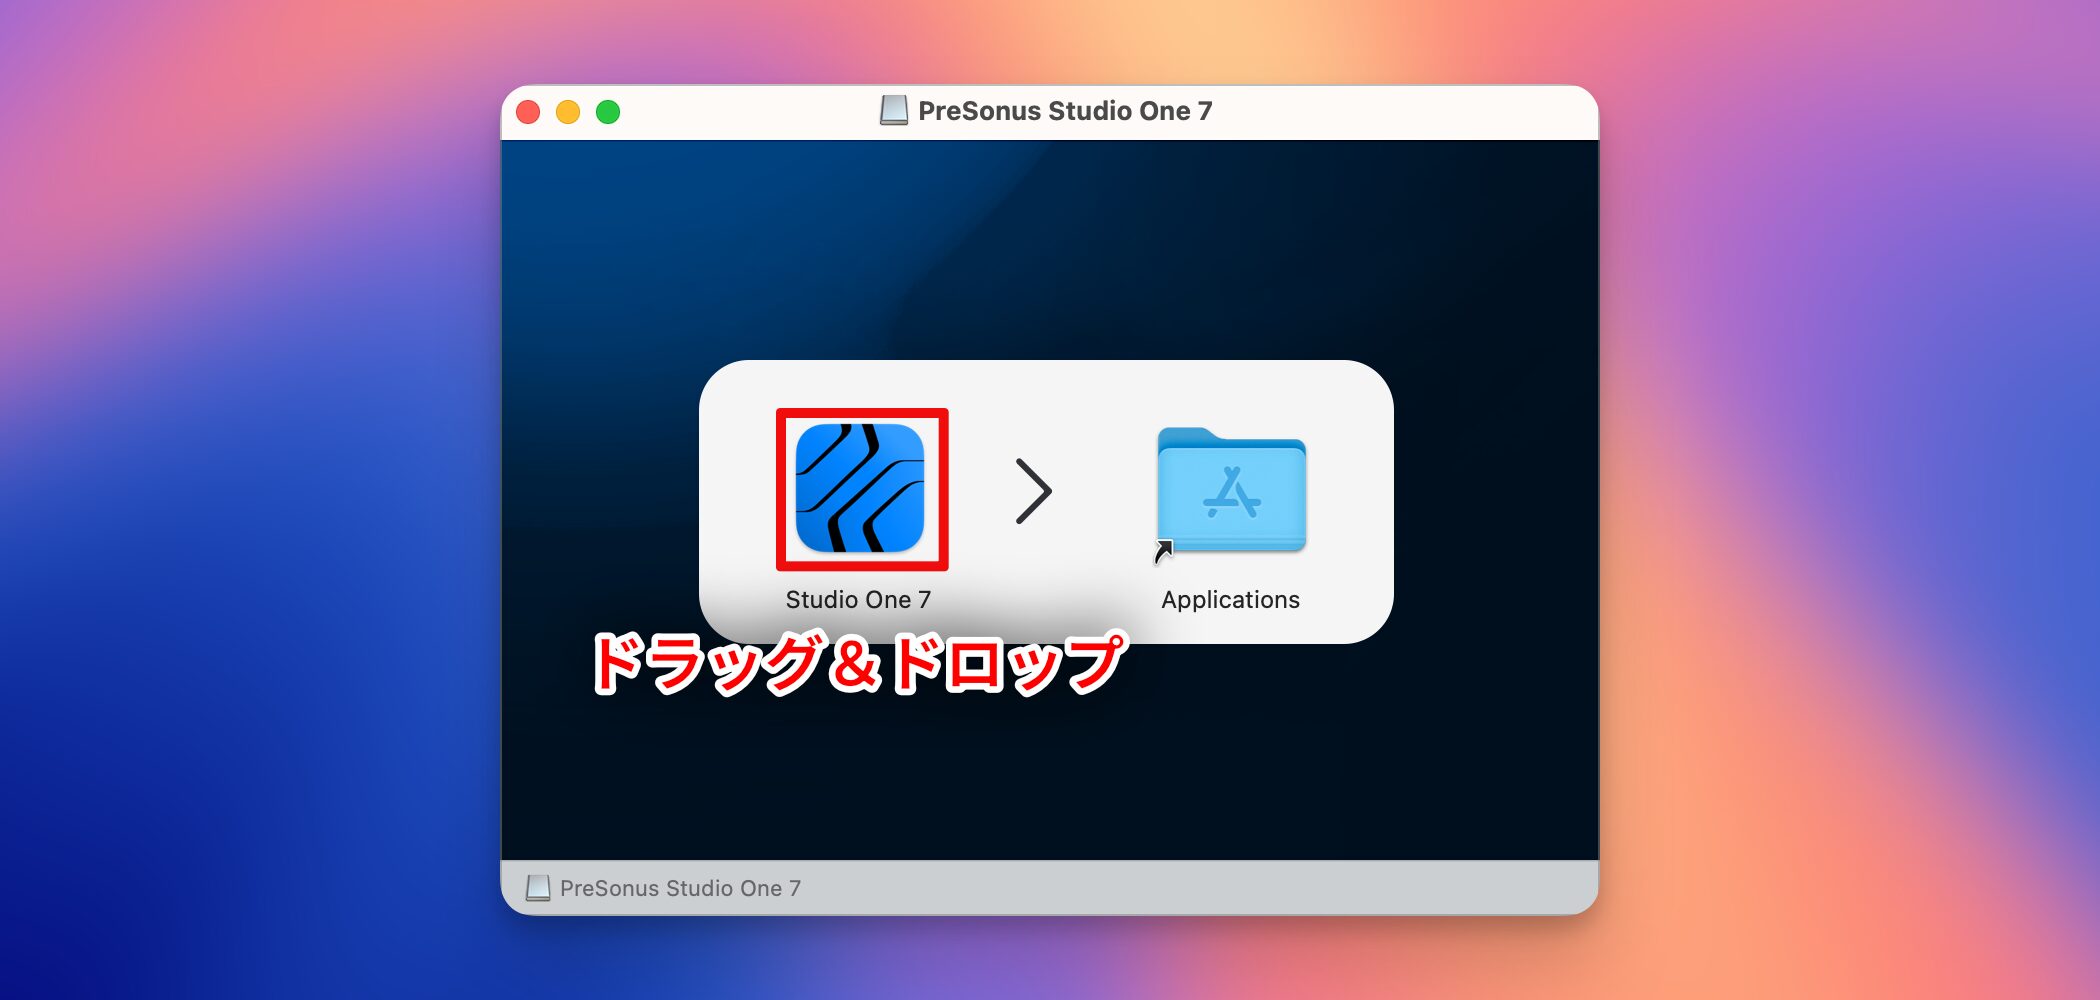
When the window shown above opens, drag the Studio One 7 icon into the Applications folder on the right.
The copying process starts automatically.
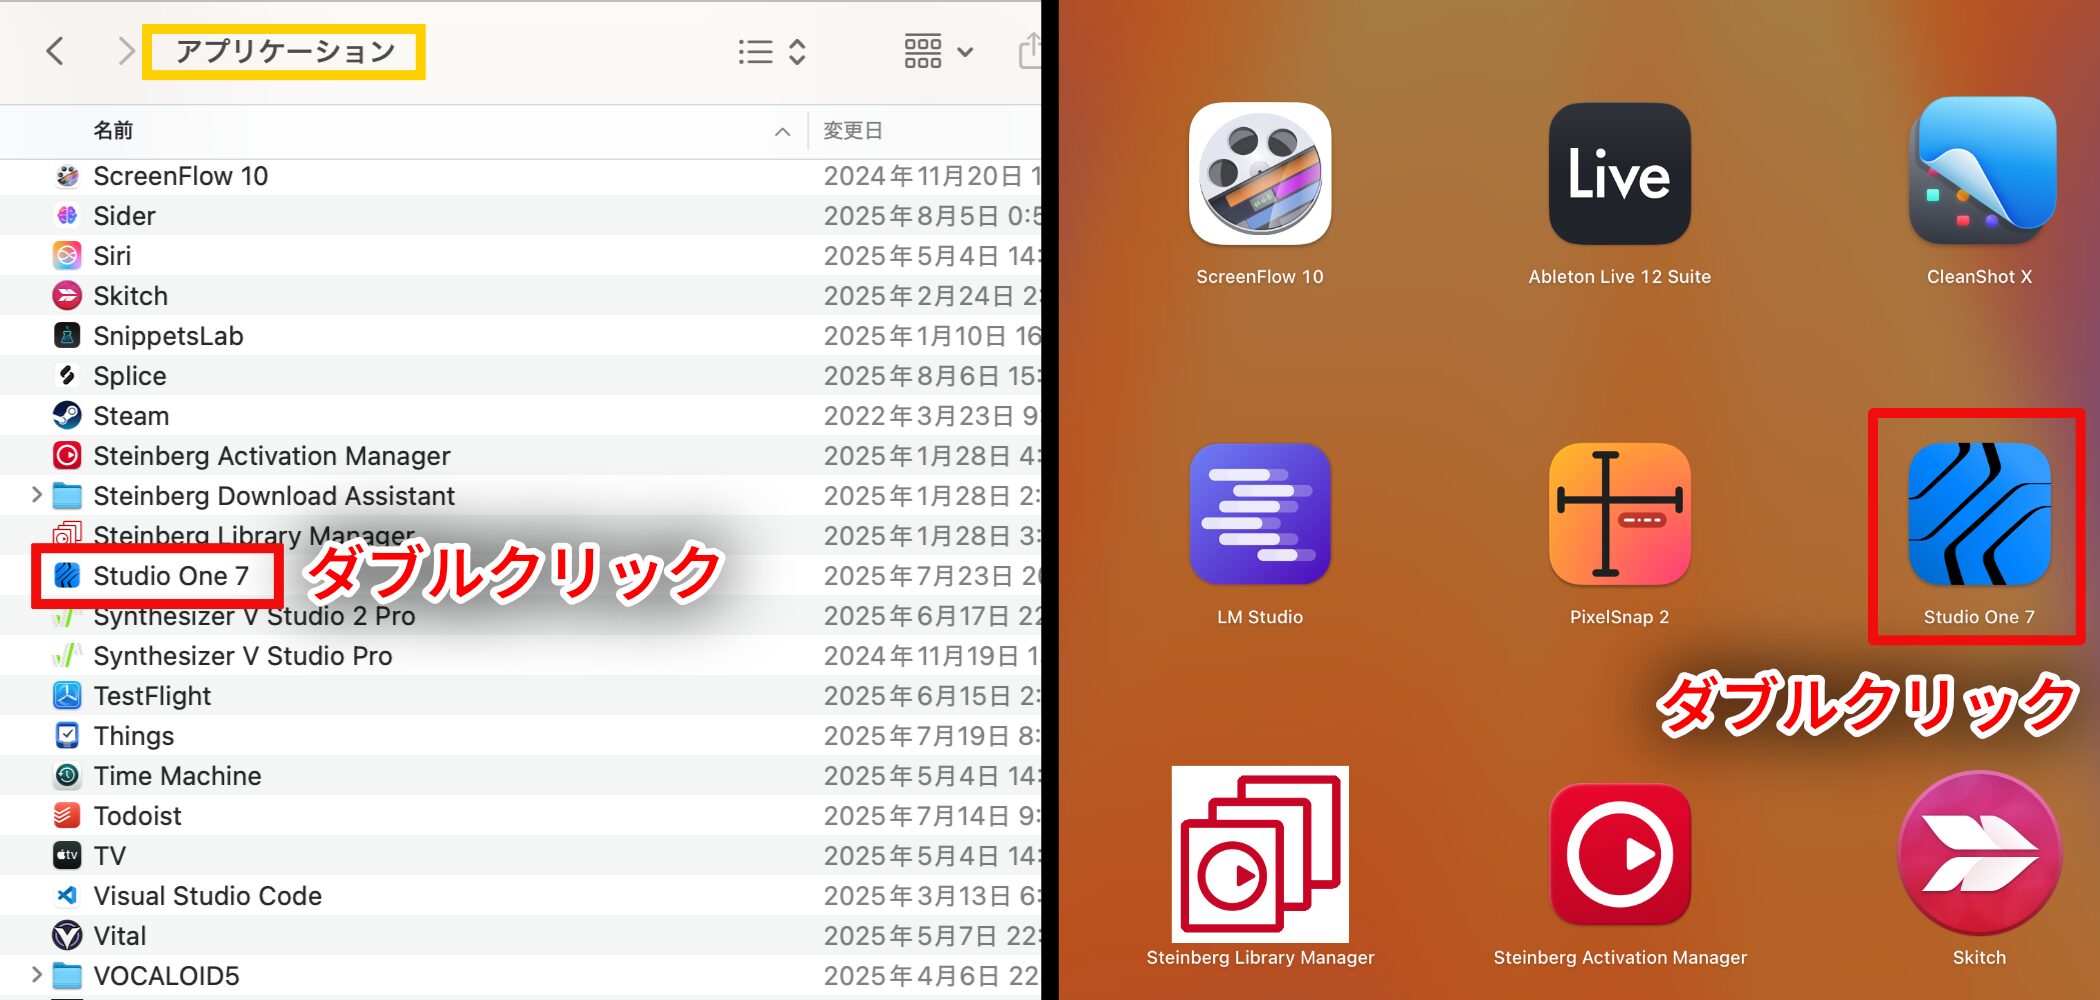
After installation, double-click the Studio One 7 icon in Applications or Launchpad to start it.
First Launch and Activation
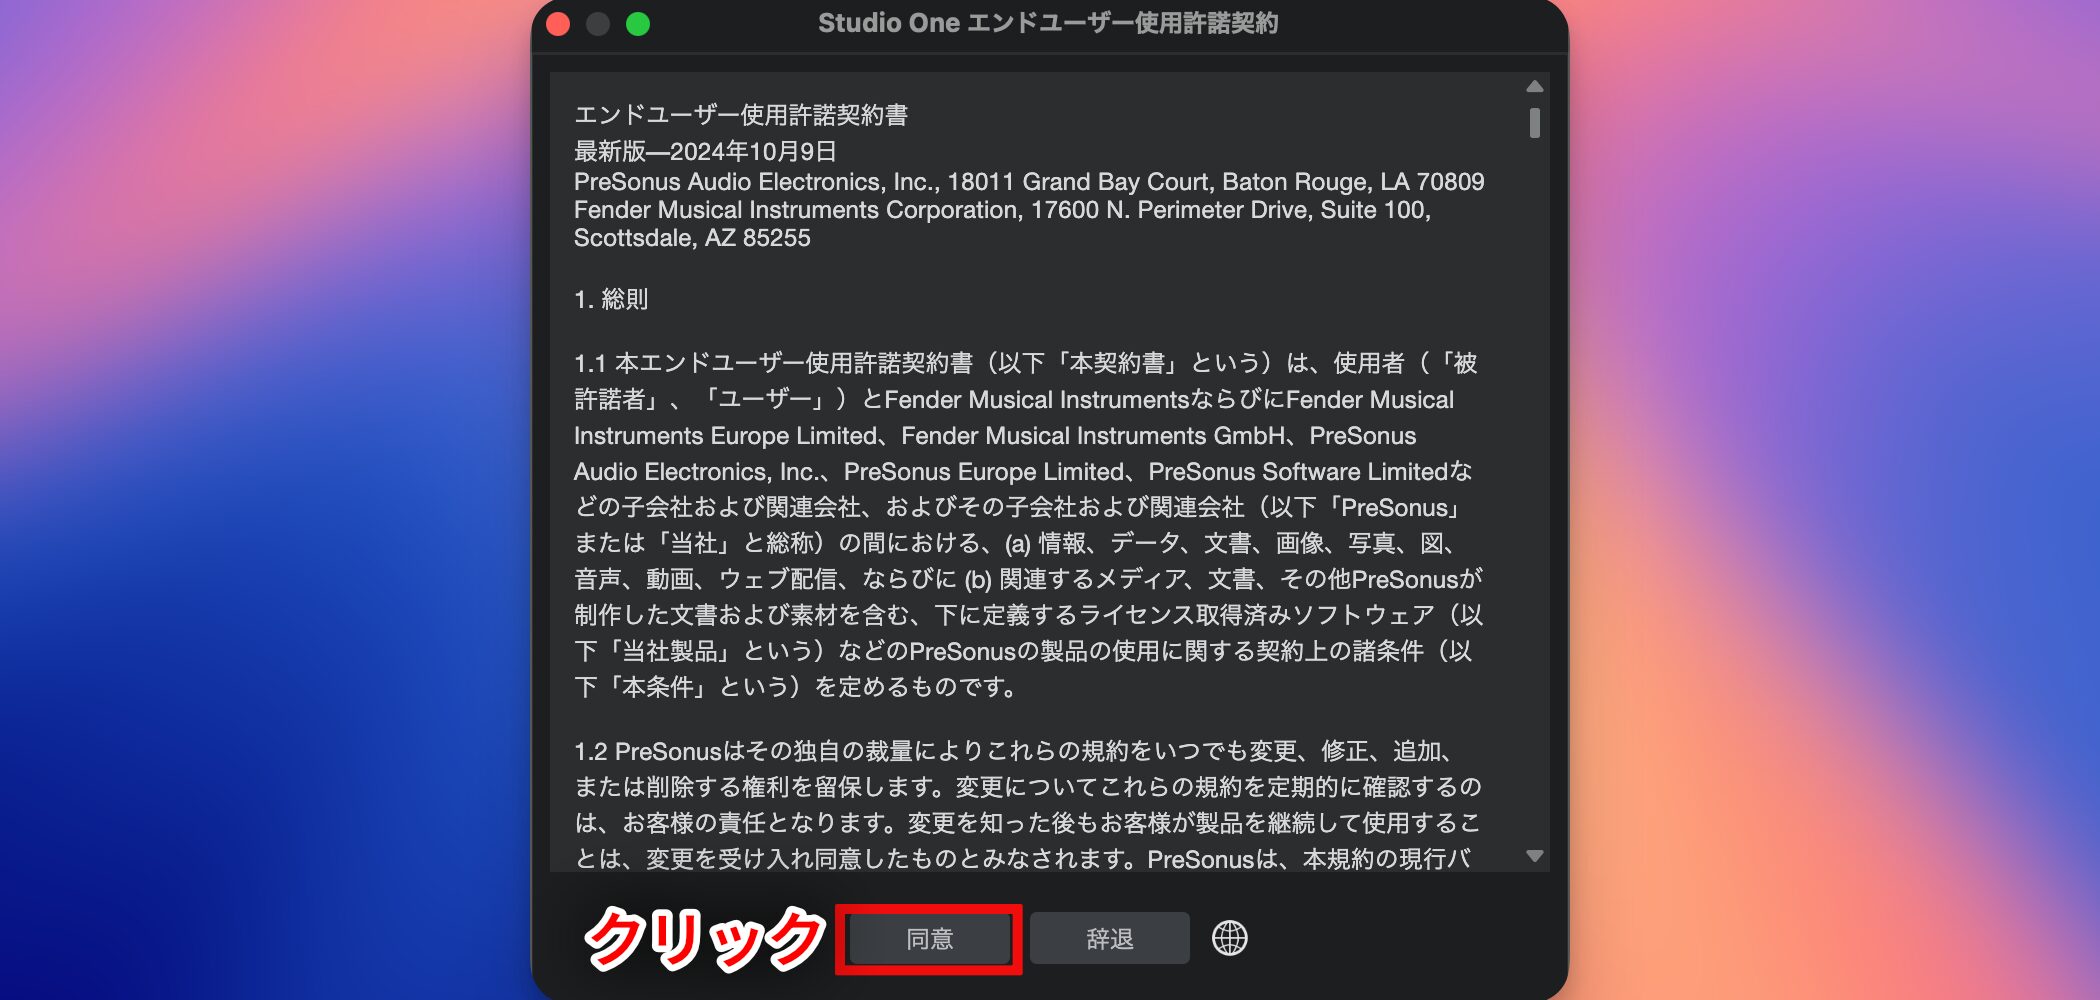
When you launch Studio One 7 for the first time, a license agreement appears.
Review it and click “Agree.”
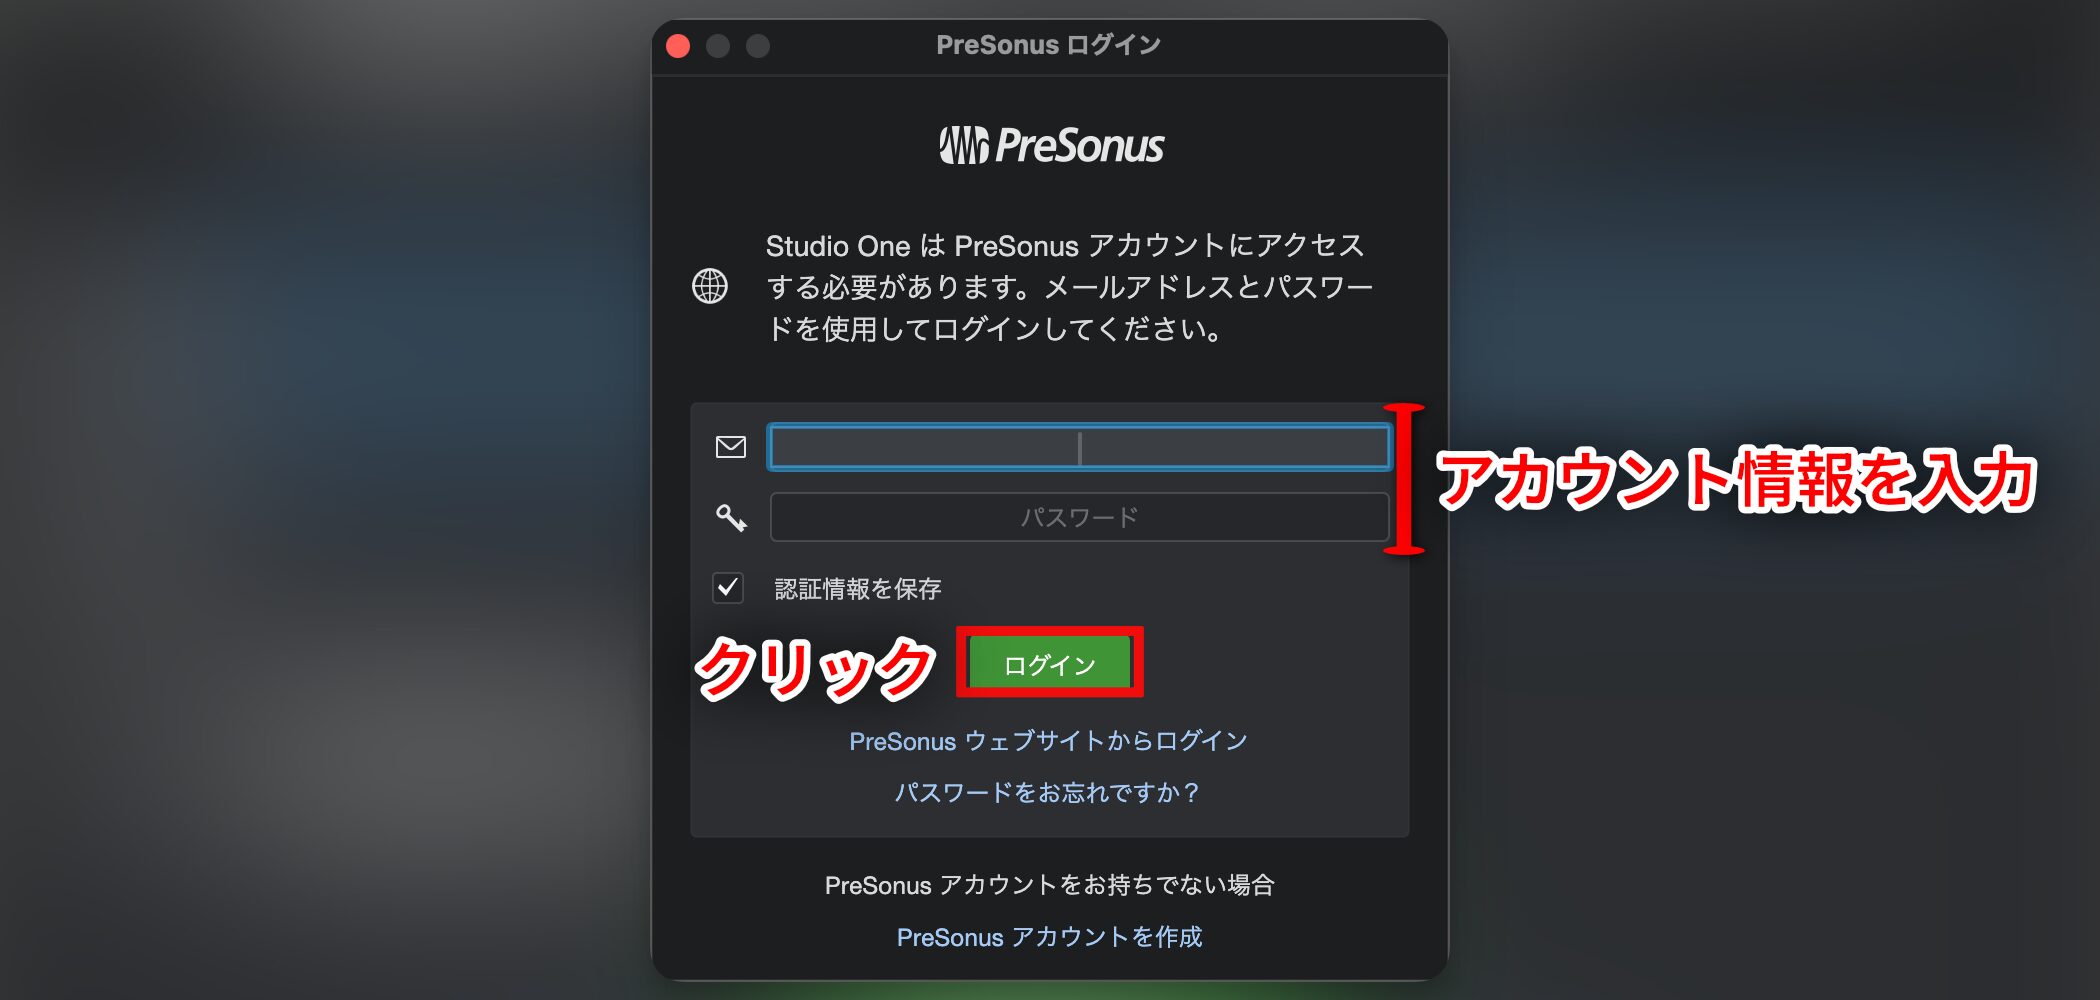
The PreSonus sign-in window then appears.
Enter the email address and password for your PreSonus account and click “Login.”
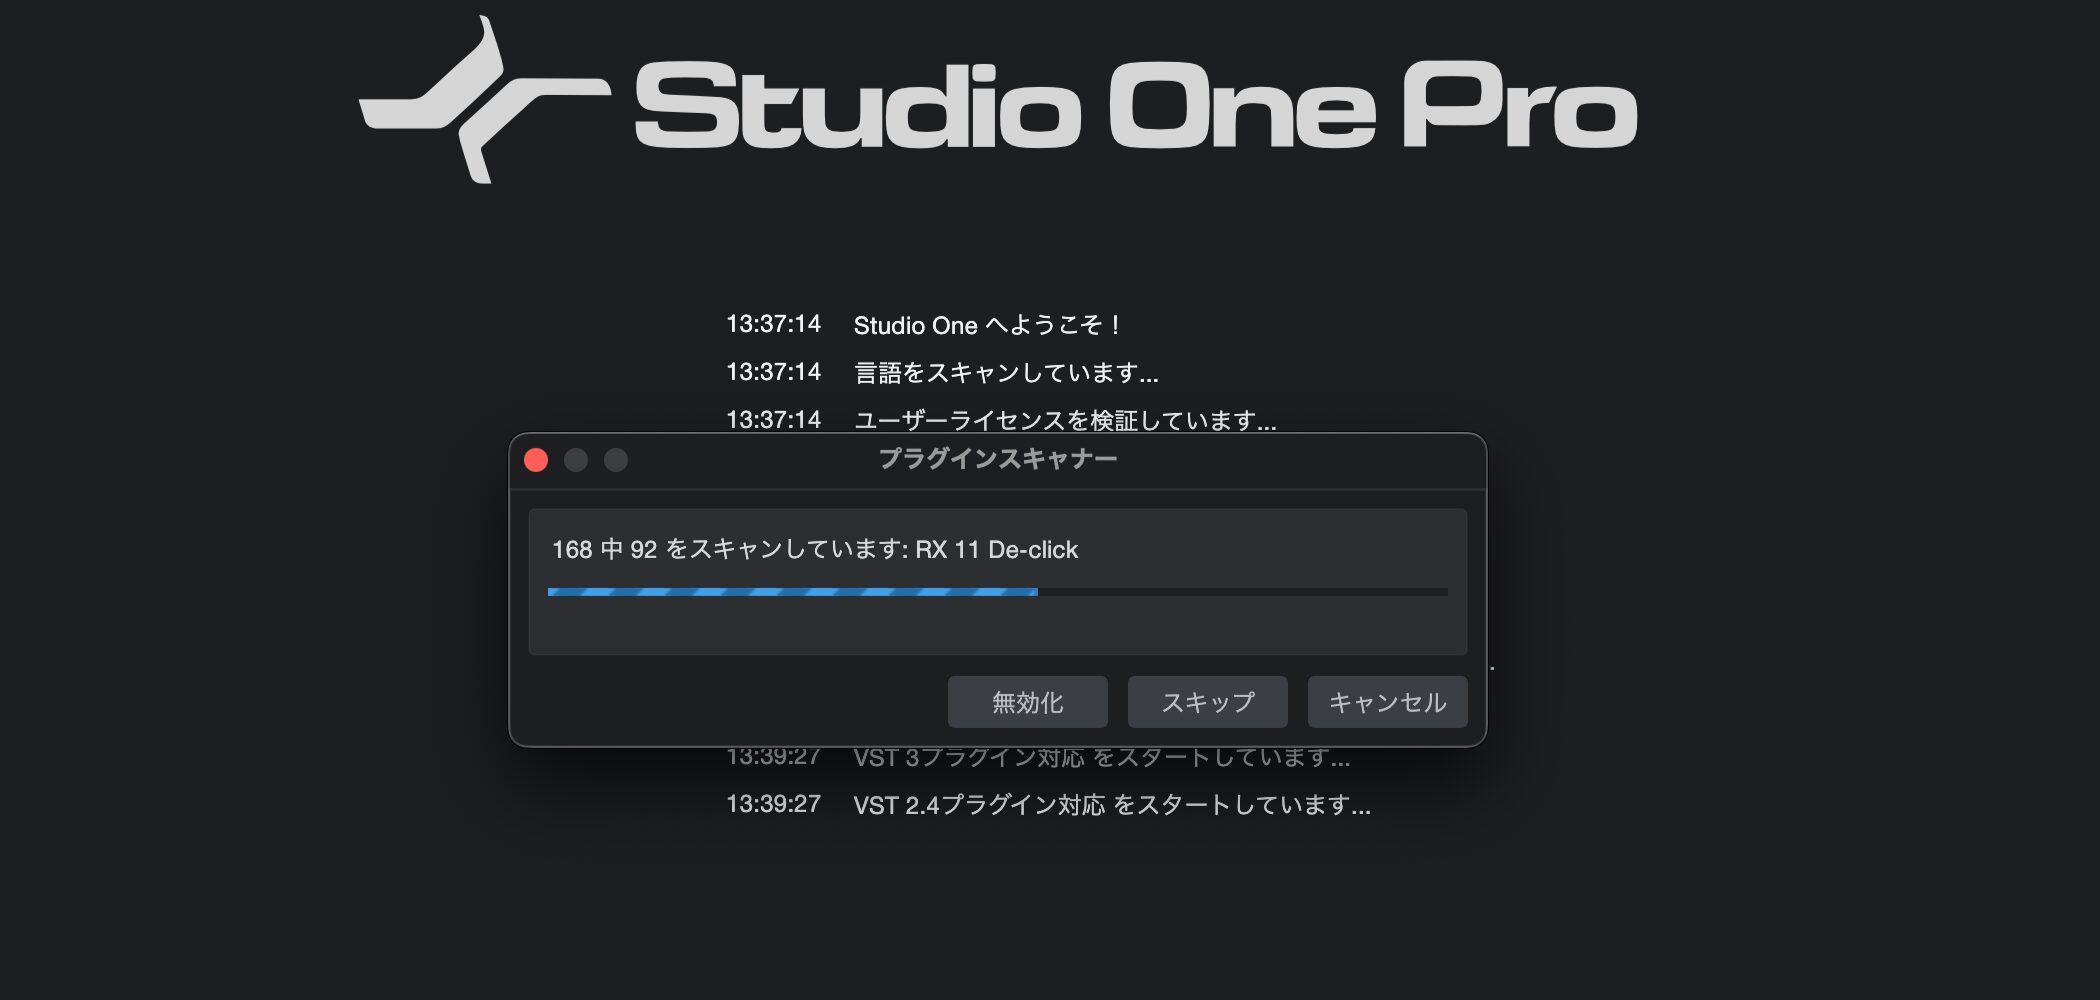
In most cases, Studio One 7 is activated automatically when you sign in to your PreSonus account.
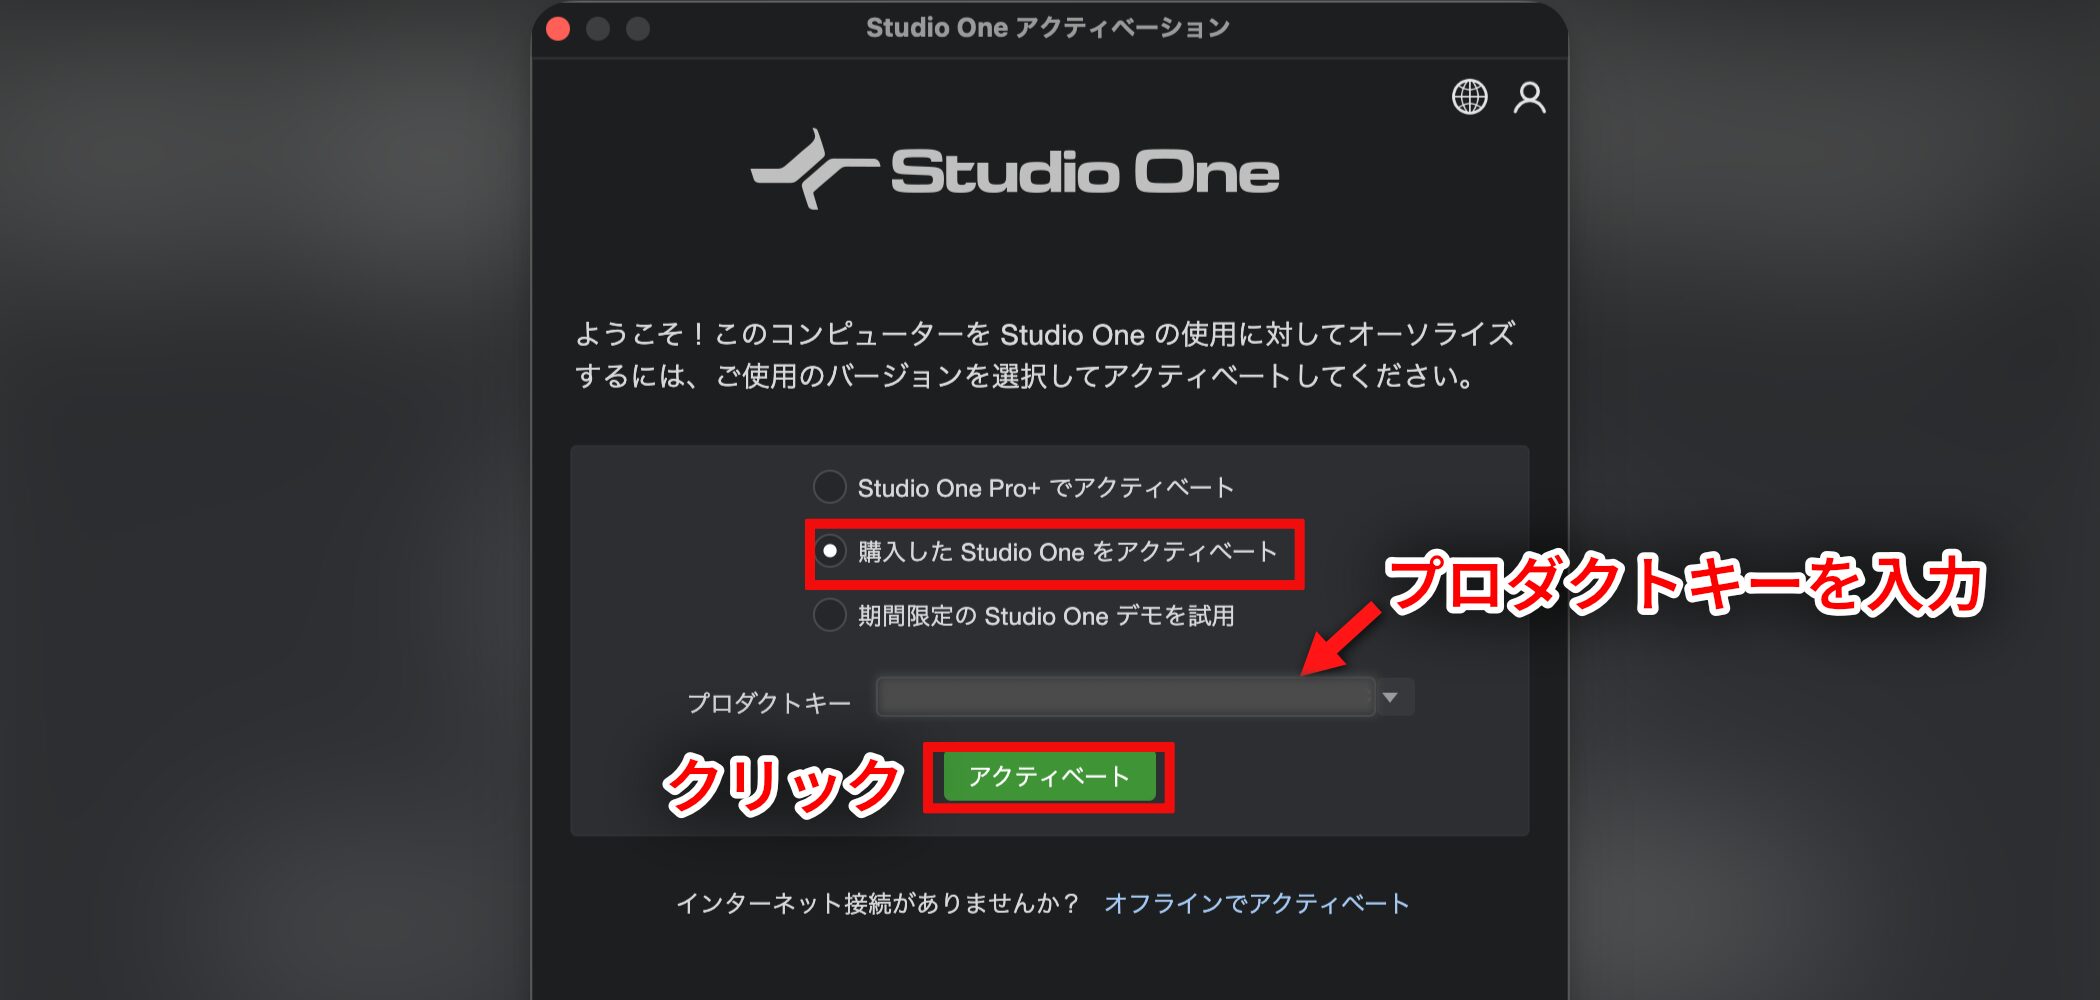
If it is not activated automatically and the screen above appears, select “Activate Purchased Studio One,” enter your product key and click “Activate.”
Installing the Included Content
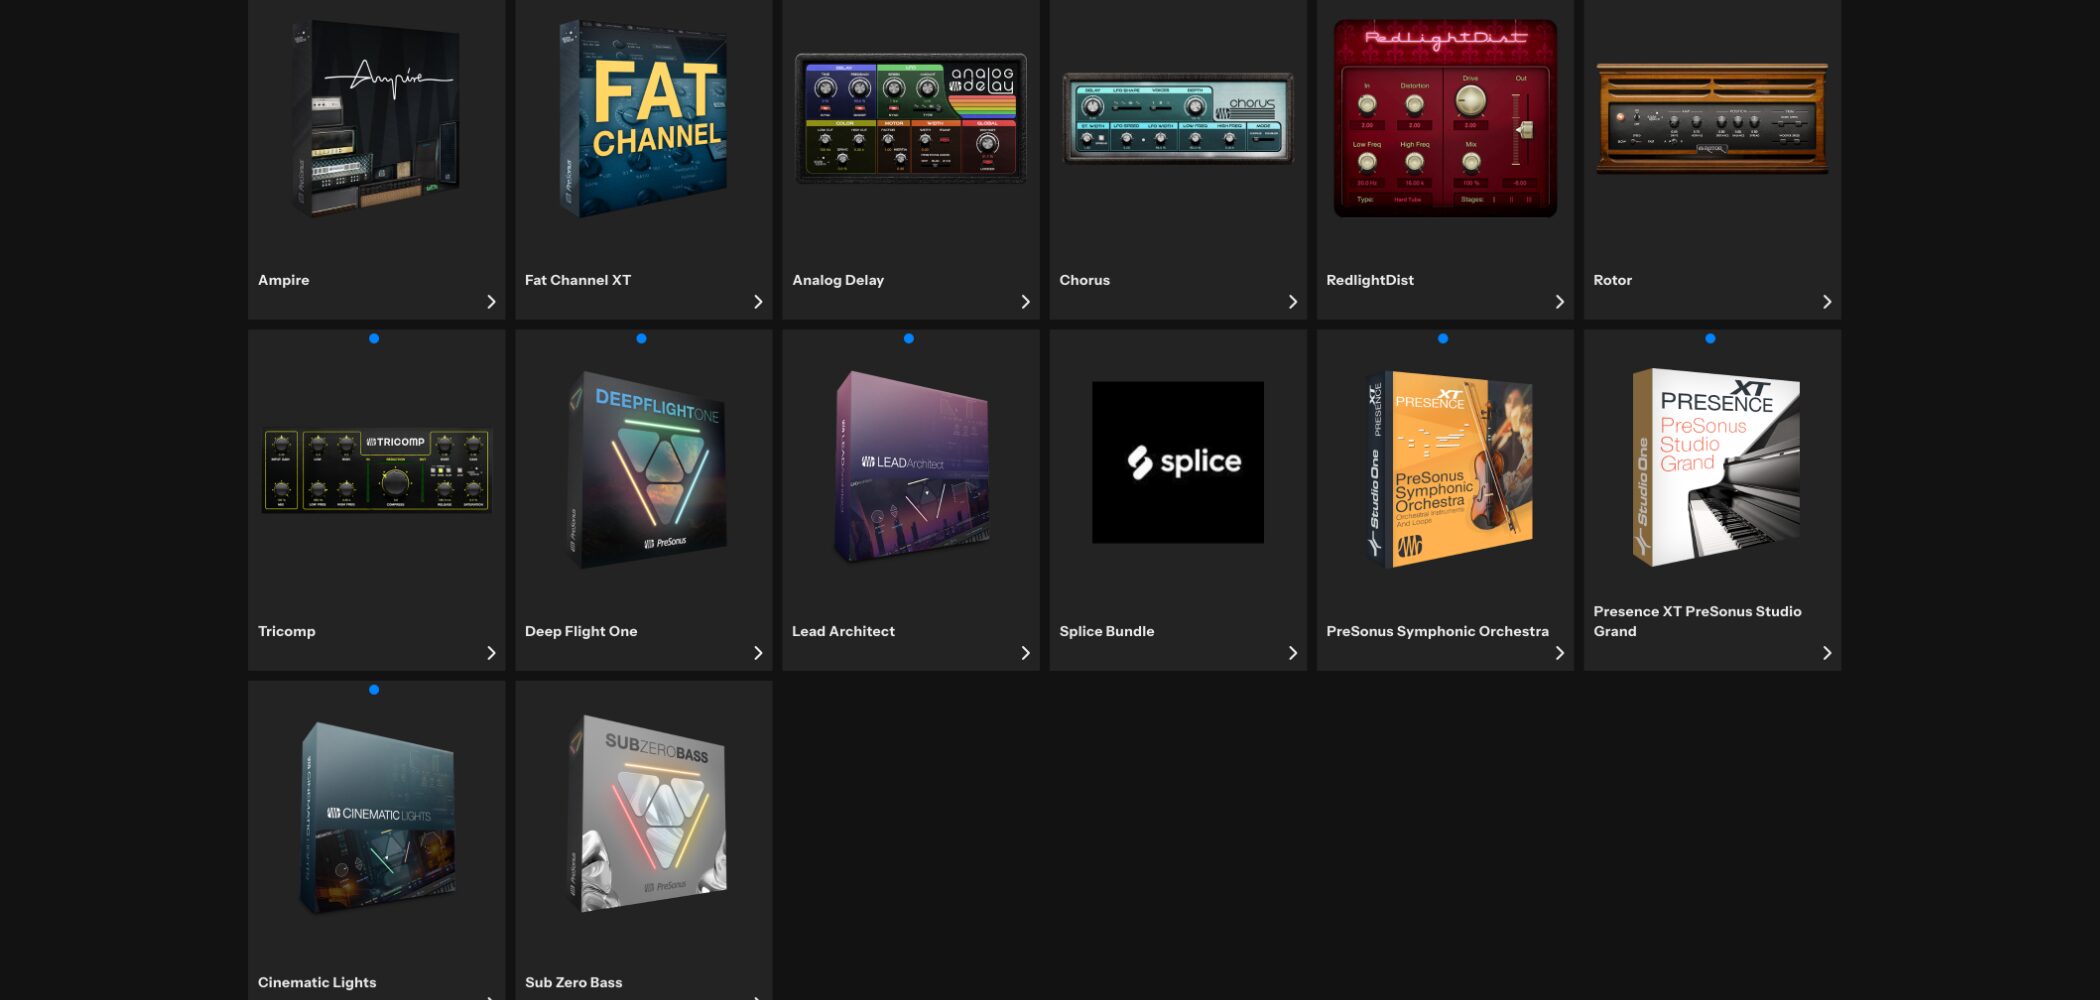
Studio One 7 includes a wealth of audio loops and instruments.
These are packaged as sound sets, demo songs and tutorial videos, and must be installed separately.
Using the Installation Dialog
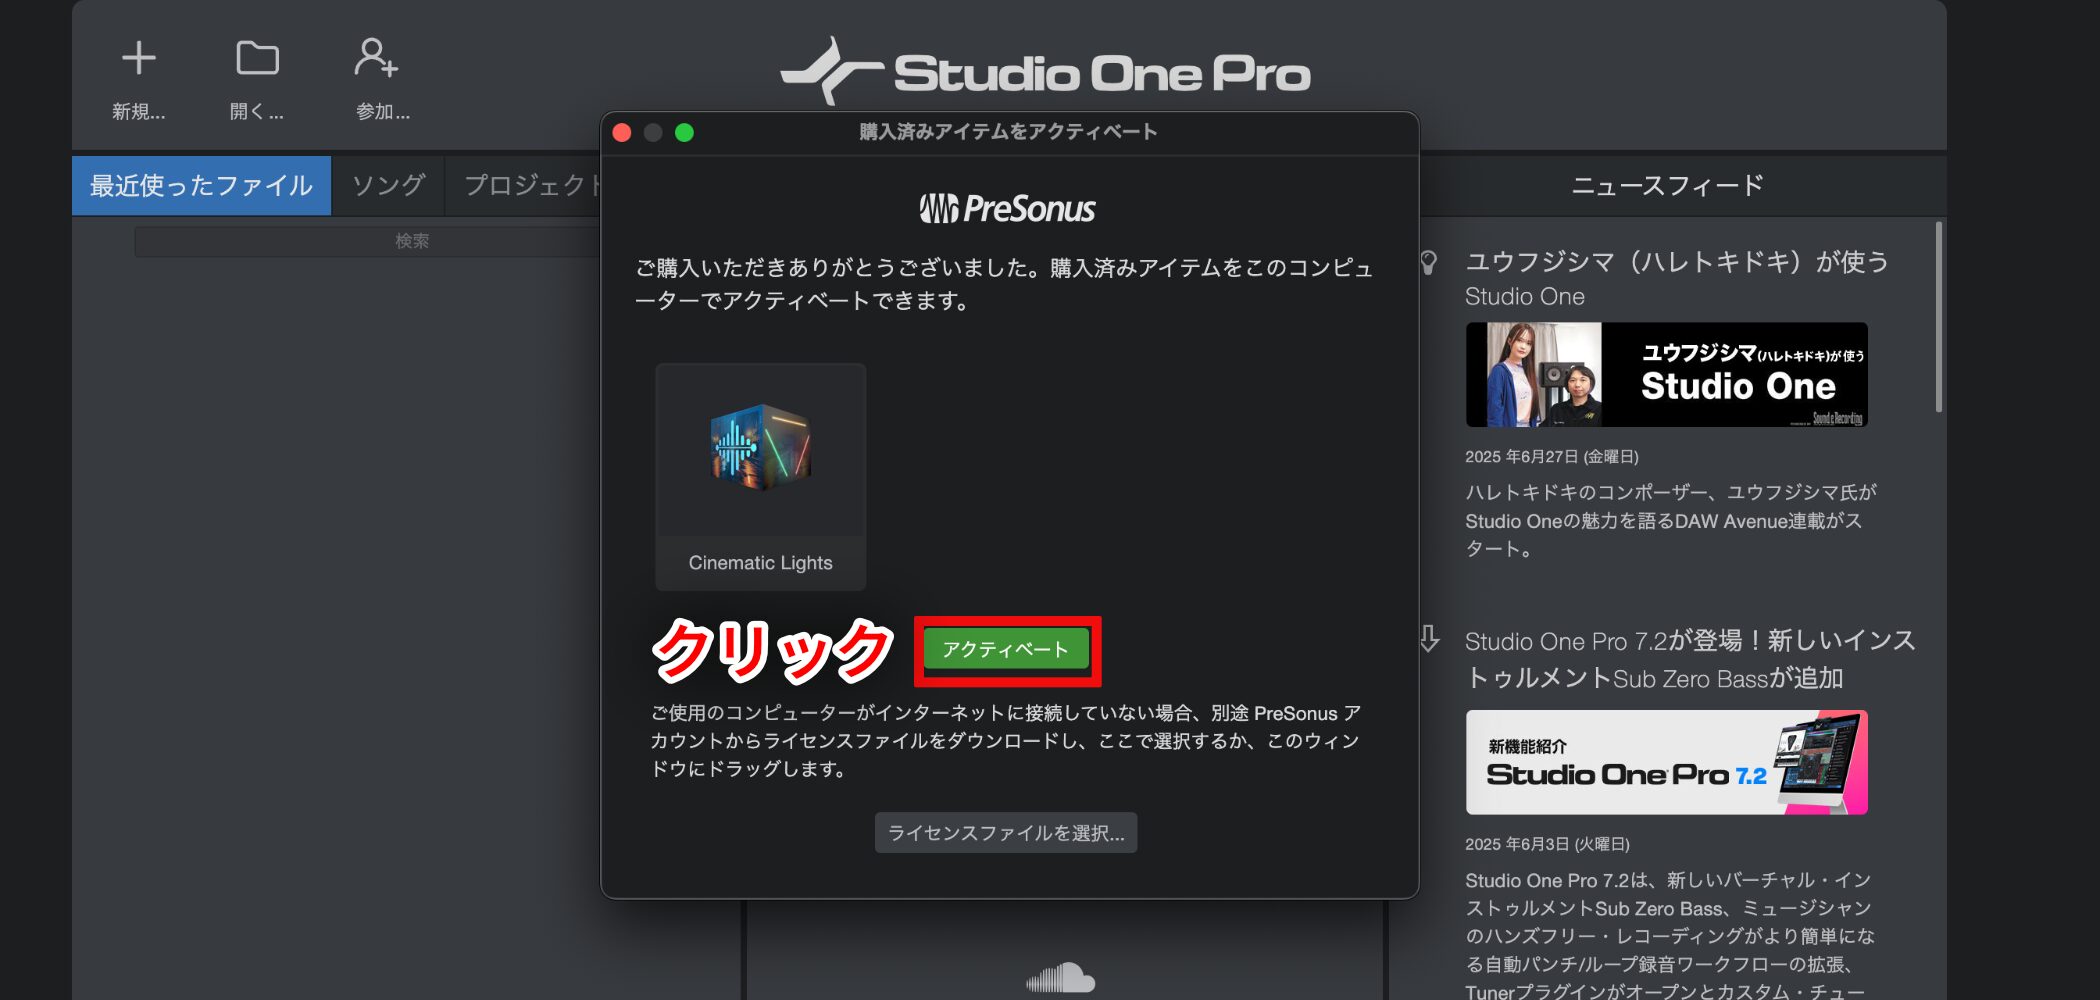
When the activation screen for purchased items appears, click “Activate.”
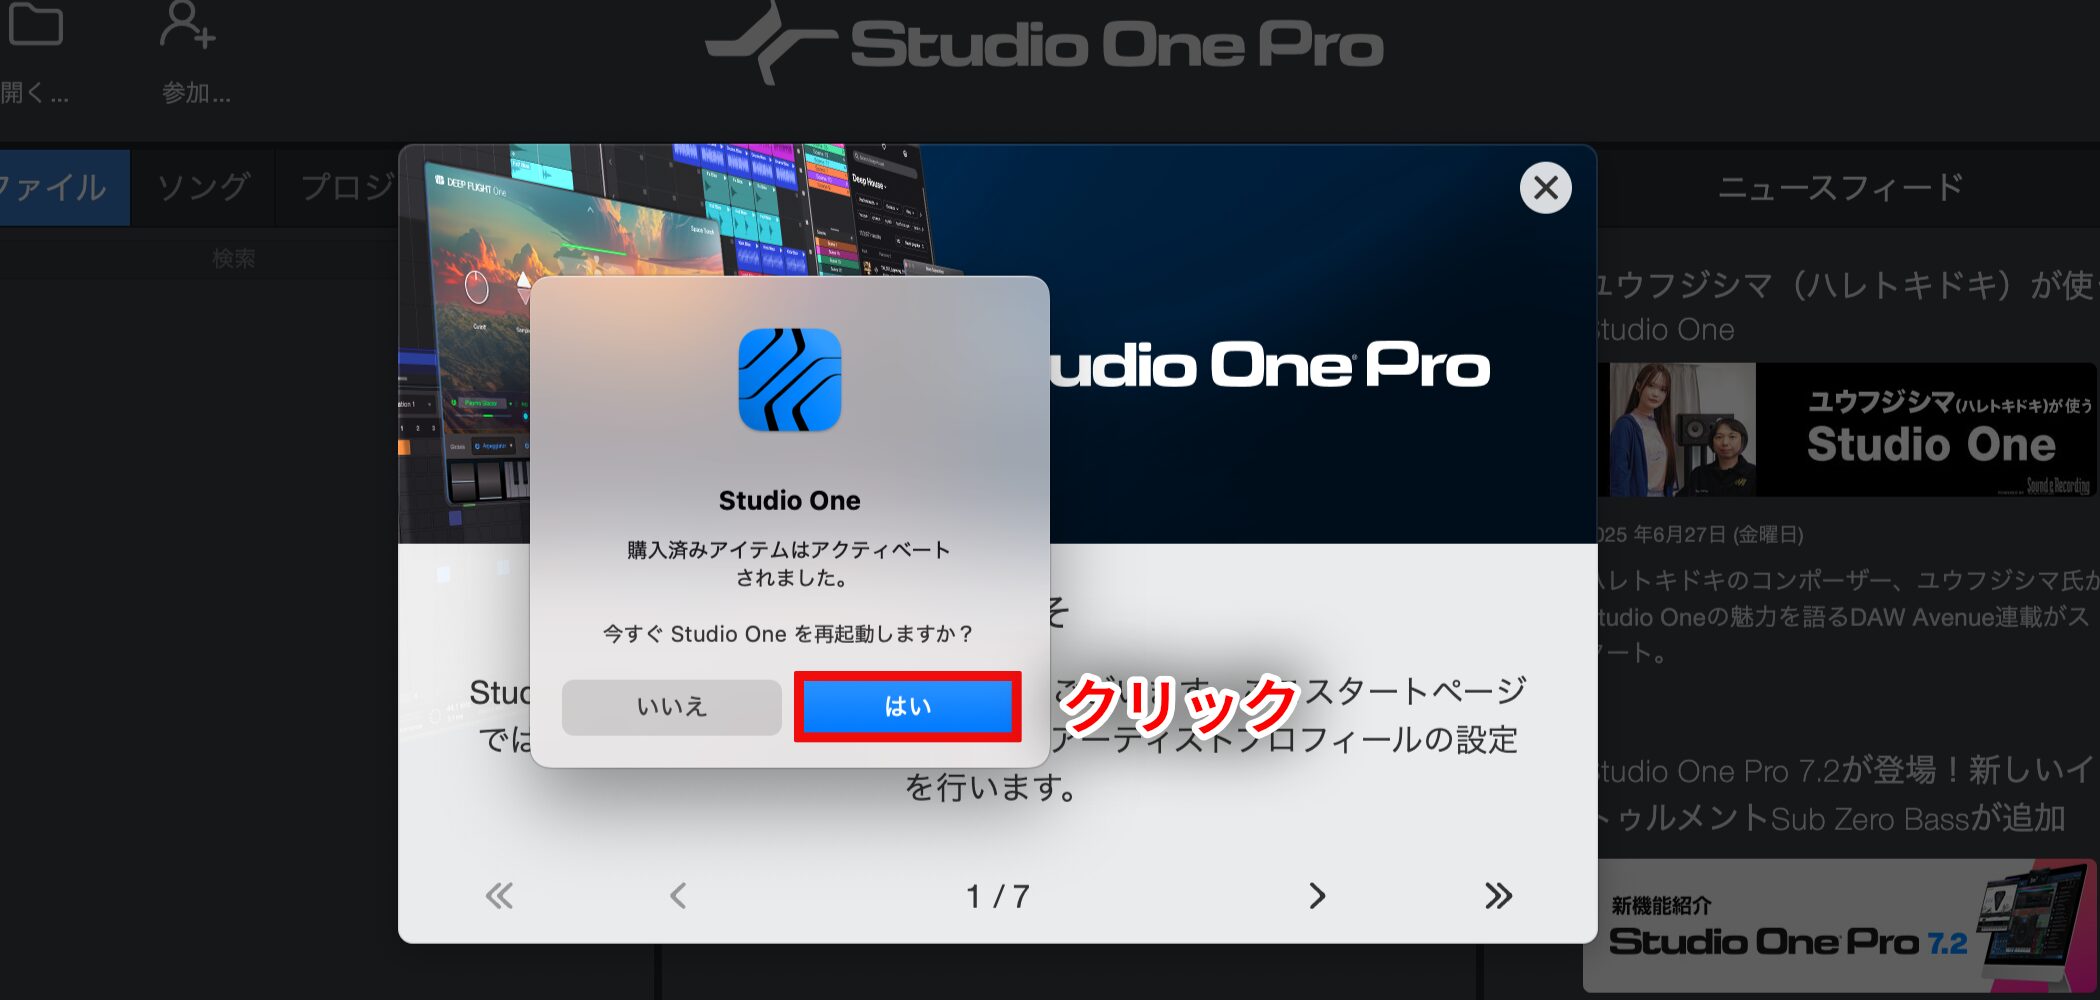
After activation, a message asks you to restart Studio One 7.
Click “Yes” to restart.
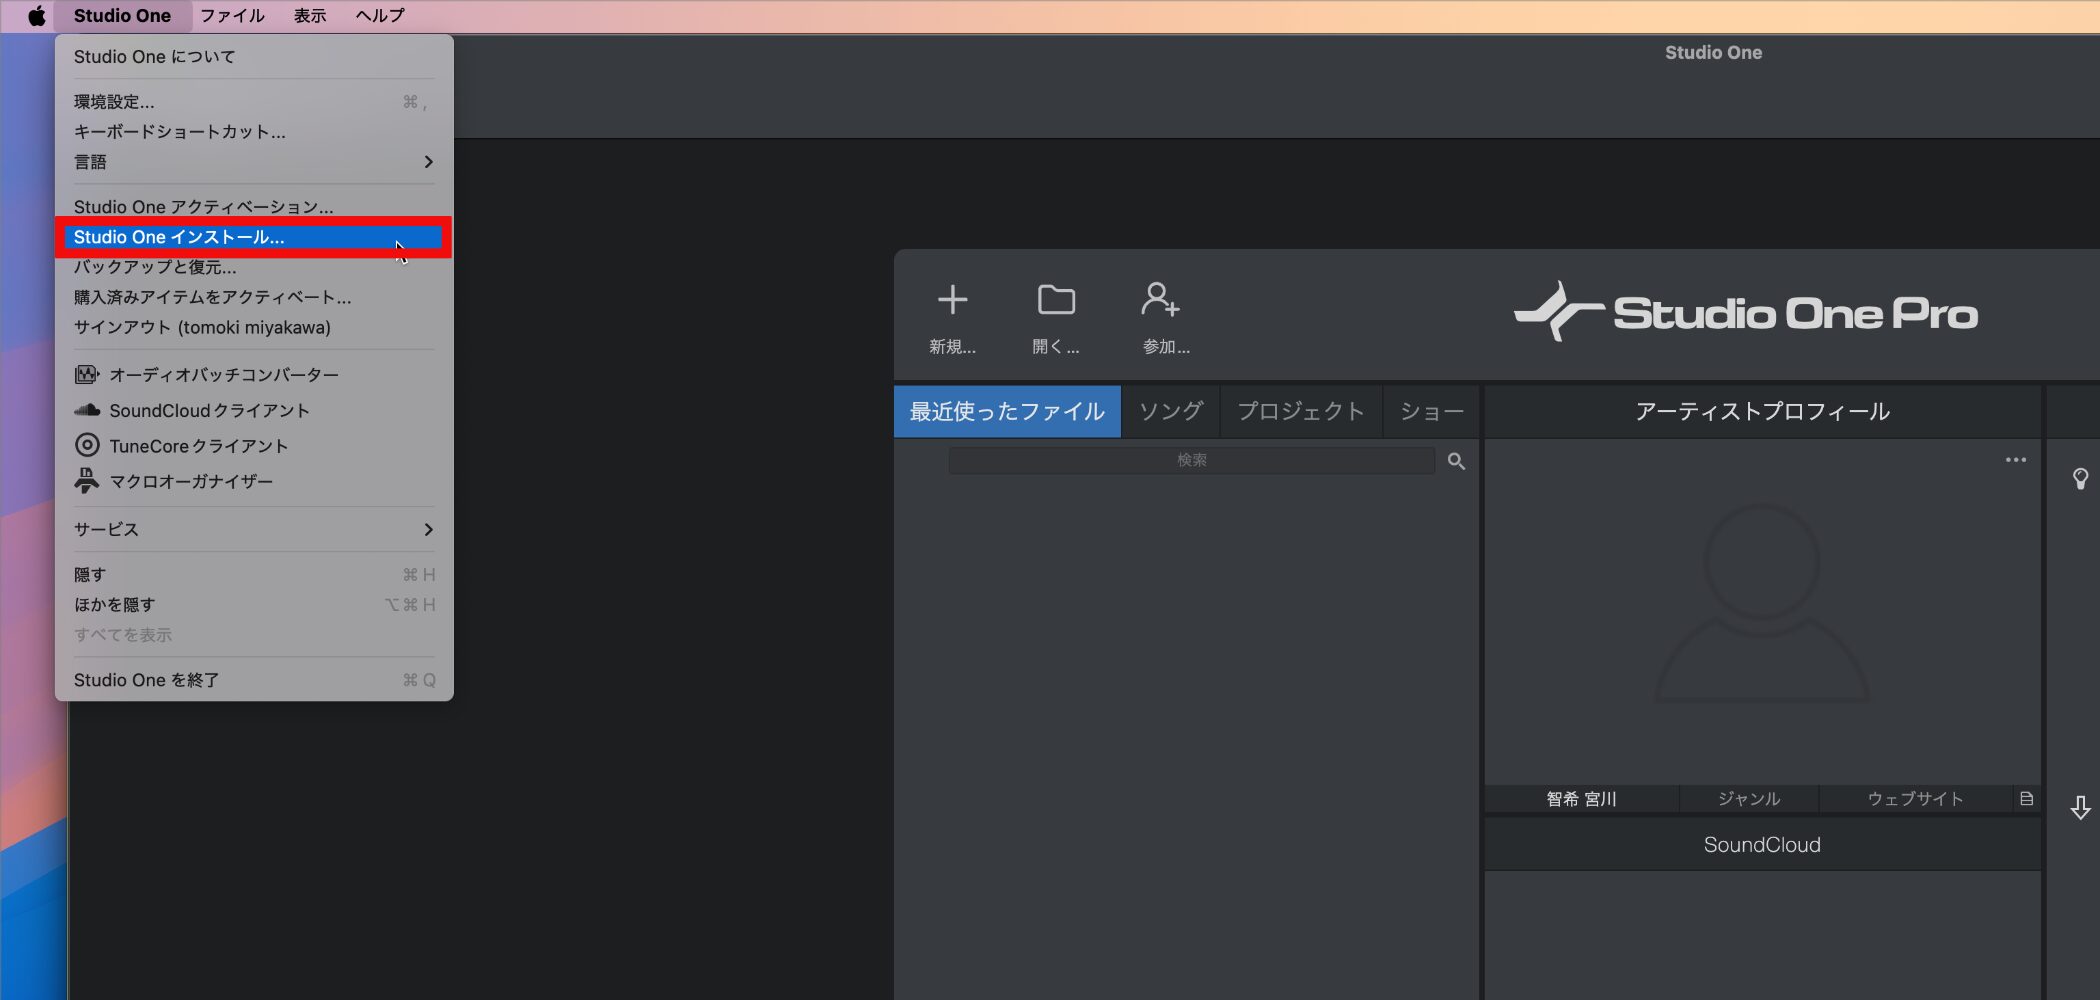
After Studio One 7 restarts, select “Studio One Installation” from the Studio One menu.
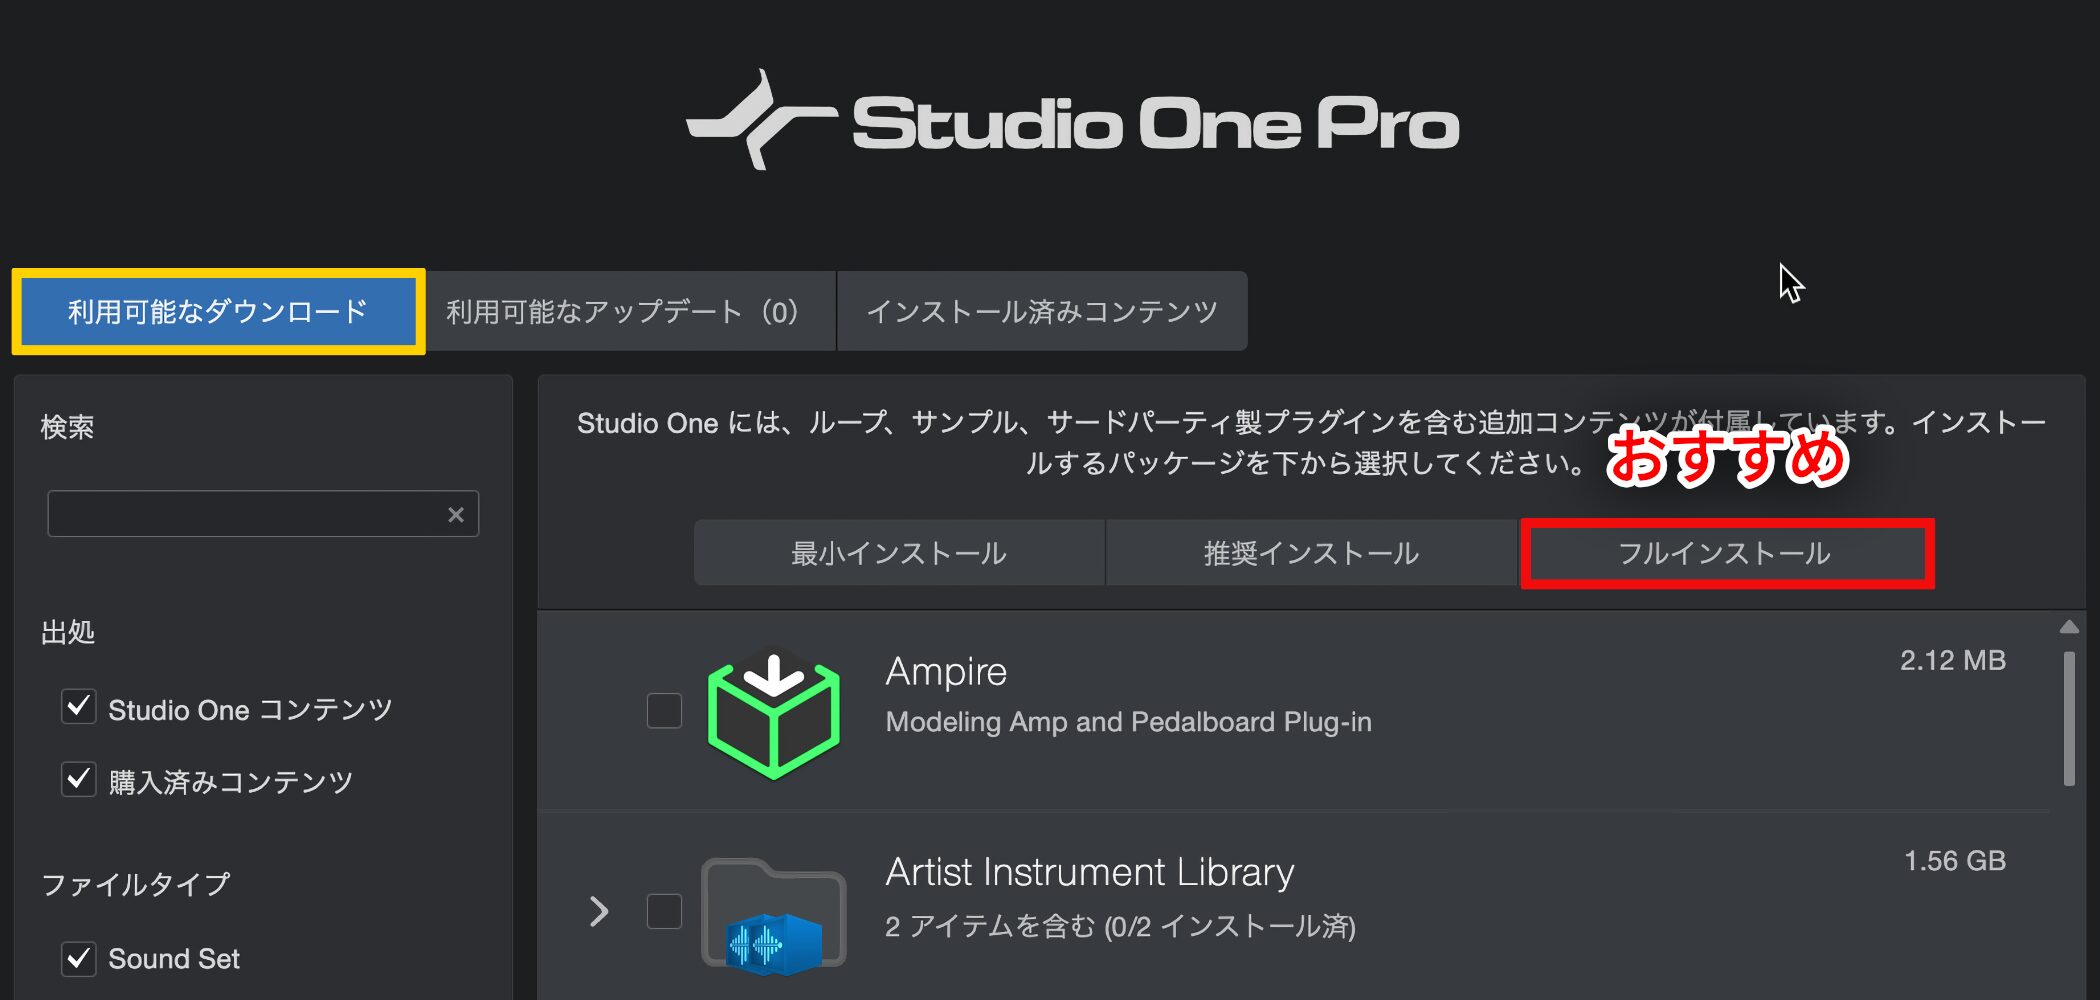
The installation screen offers three choices: Minimal, Recommended and Full Installation.
Generally, Full Installation is recommended because it provides the widest range of production options.
Checking Installation Settings
The included content is large. If your computer has limited free storage, you can change the destination to external storage.
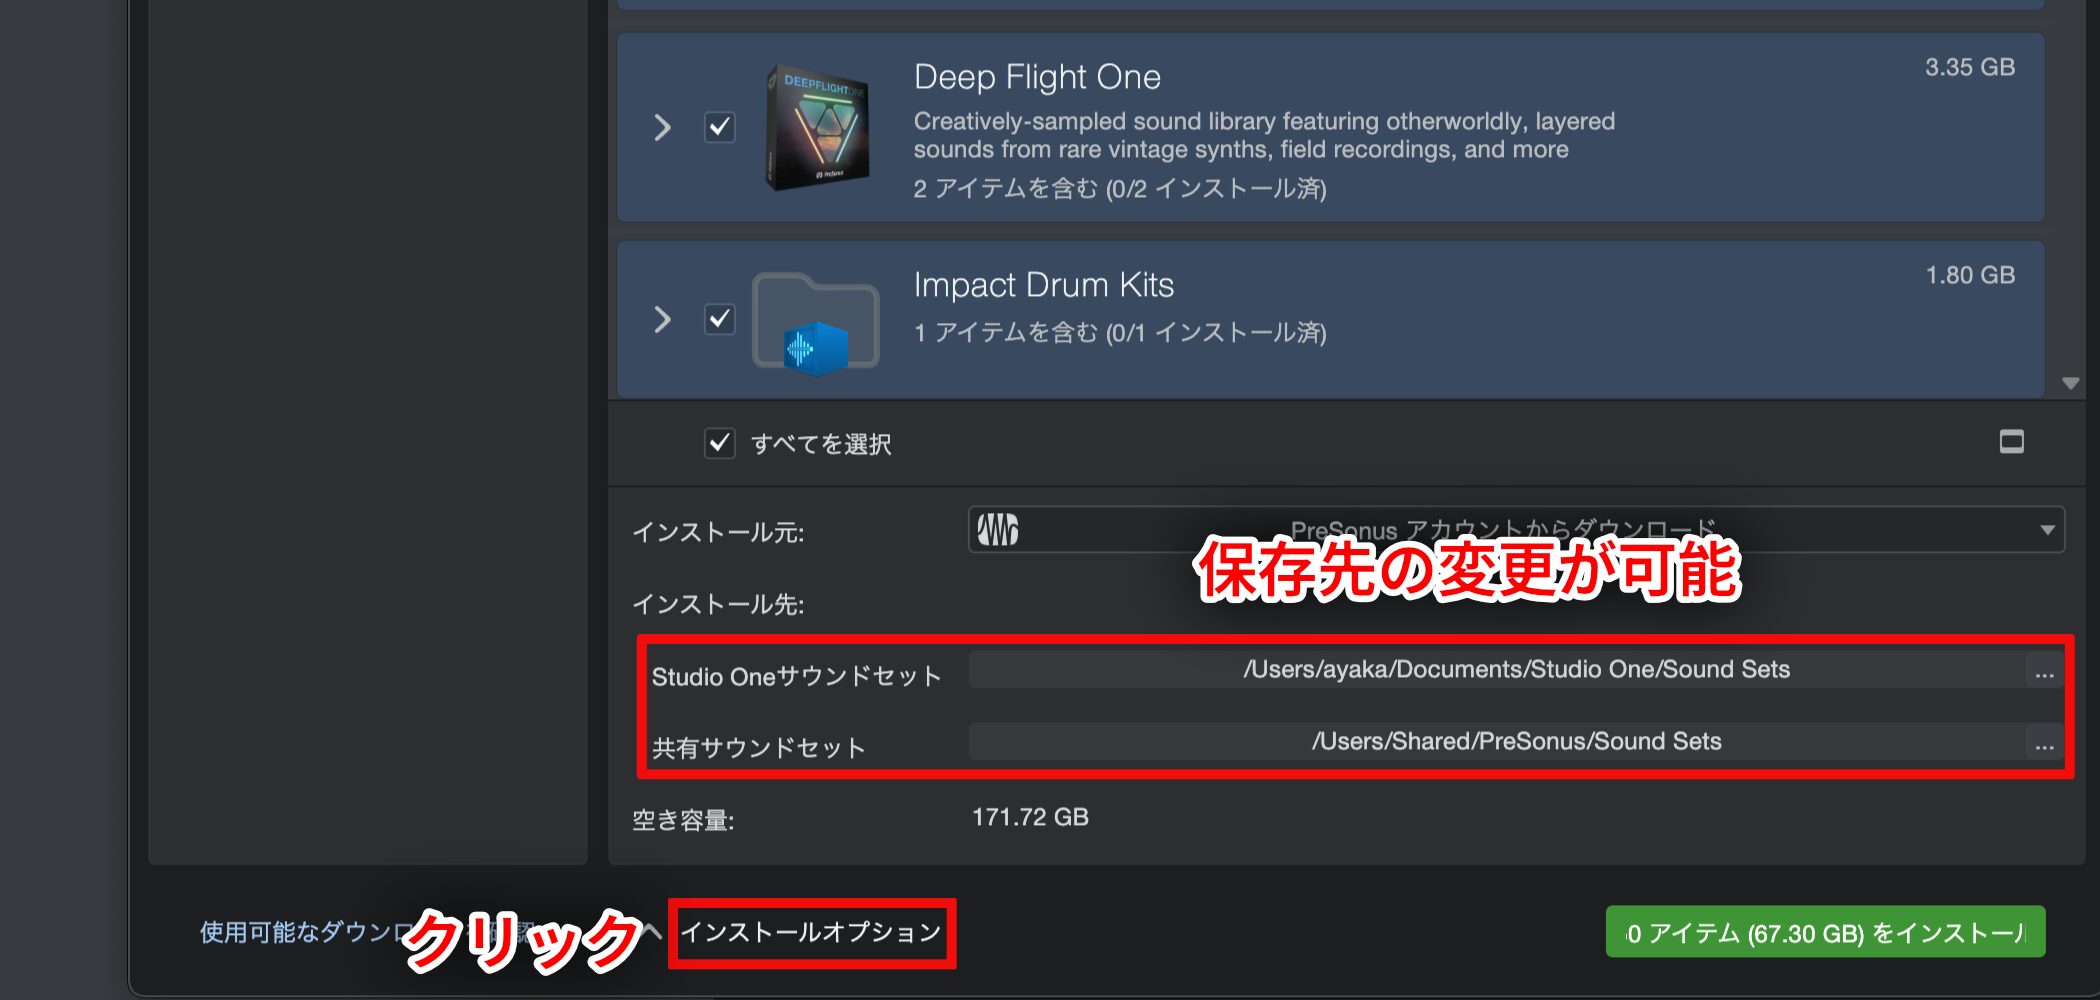
Click “Installation Options” to change the locations for “Studio One Sound Sets” and “Shared Sound Sets” to external storage.
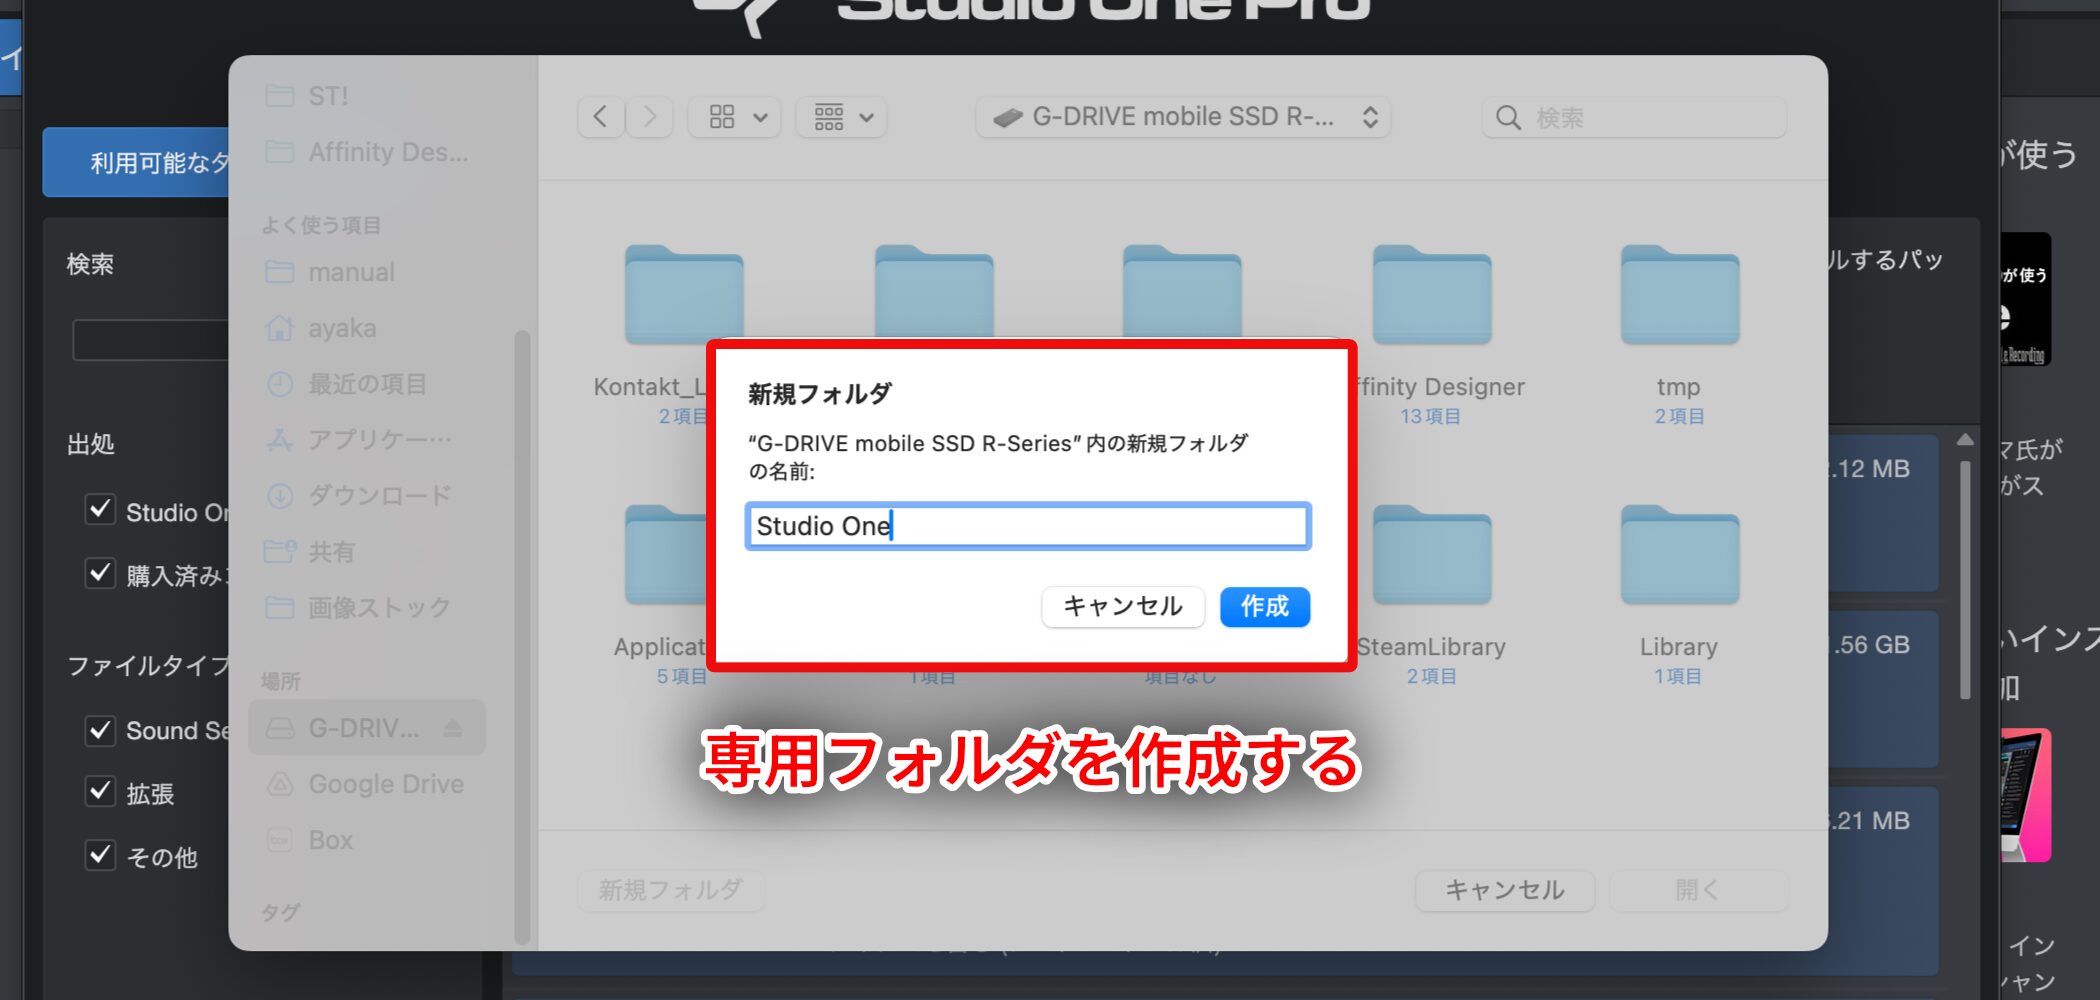
You can save directly at the top level of the external drive, but creating a “Studio One” folder and saving inside it makes files easier to manage.
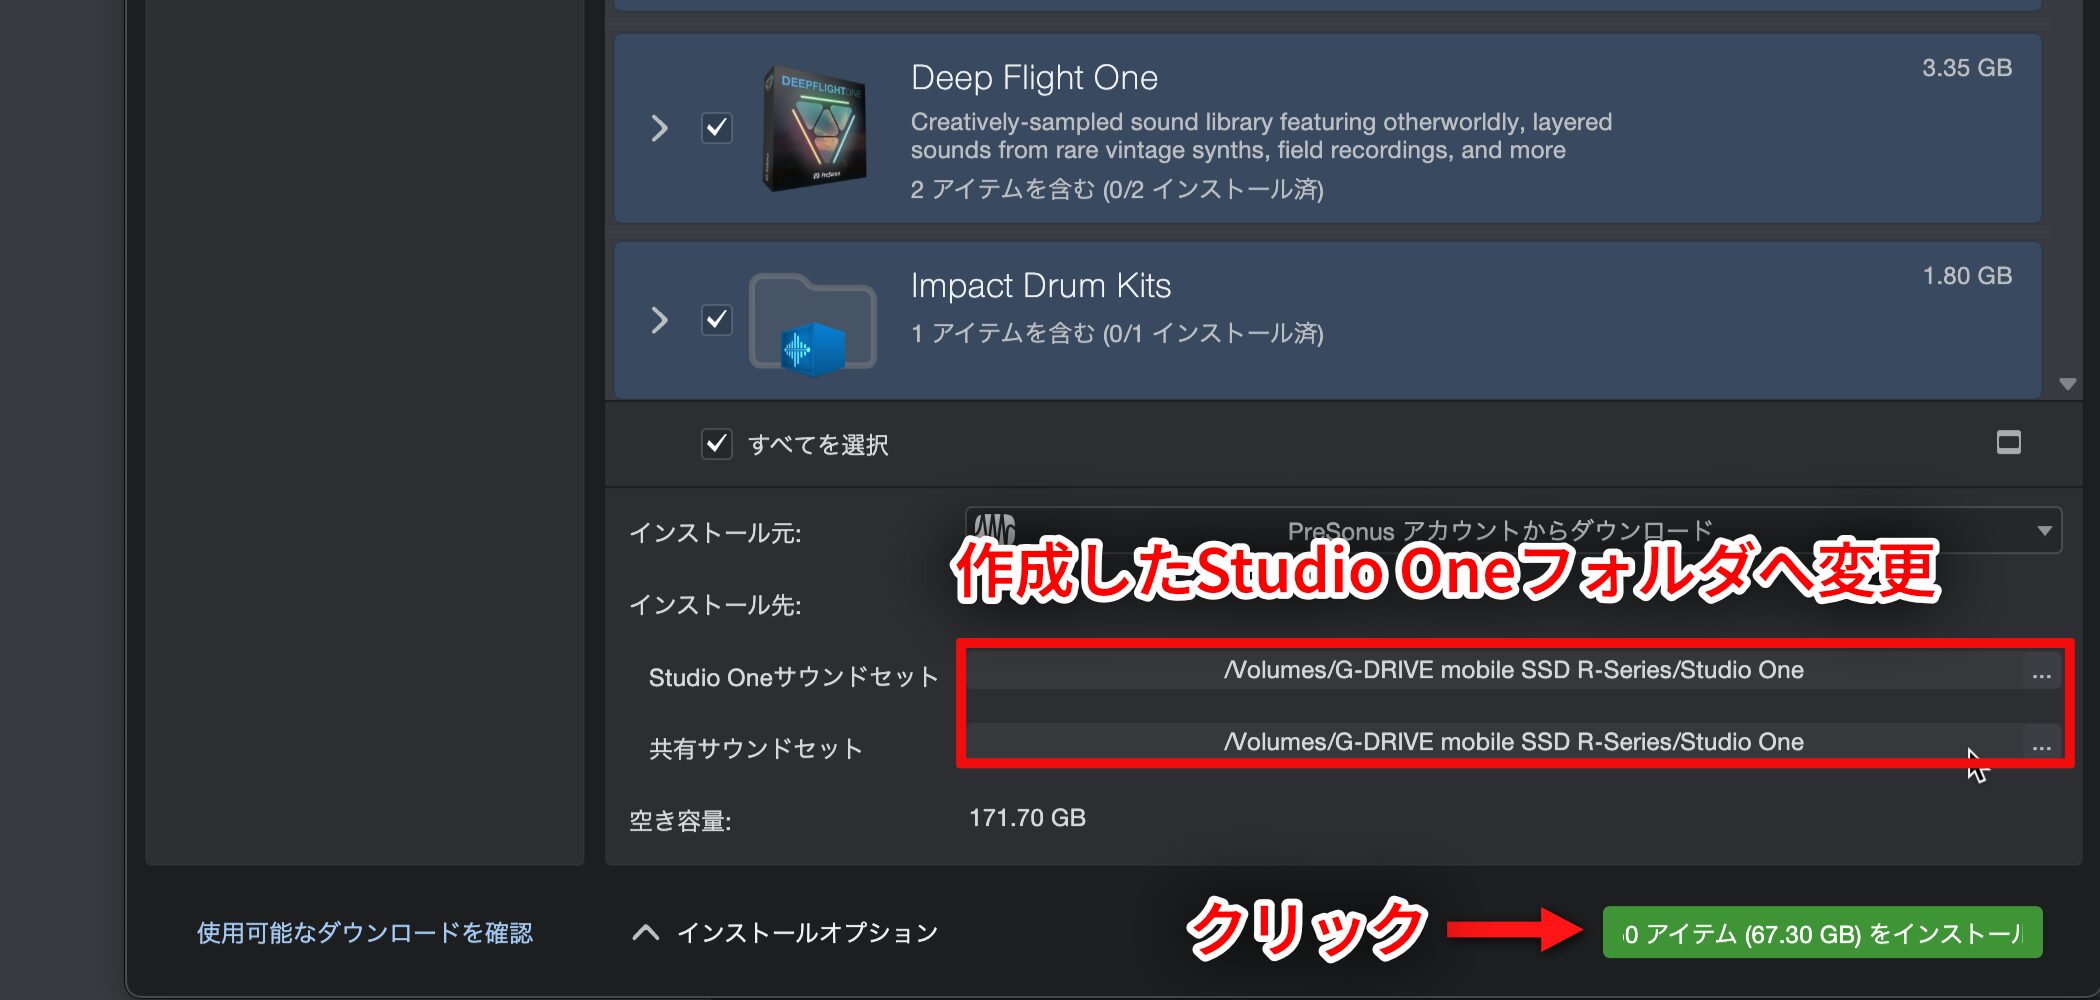
Likewise, change the shared sound set location to the Studio One folder on the external drive. Once configured, click “Install” to begin.
This completes the content setup.
Installation may take considerable time depending on your internet connection speed.
Basic Audio Device Setup
To listen to music or record vocals and instruments in Studio One, first configure your audio device.
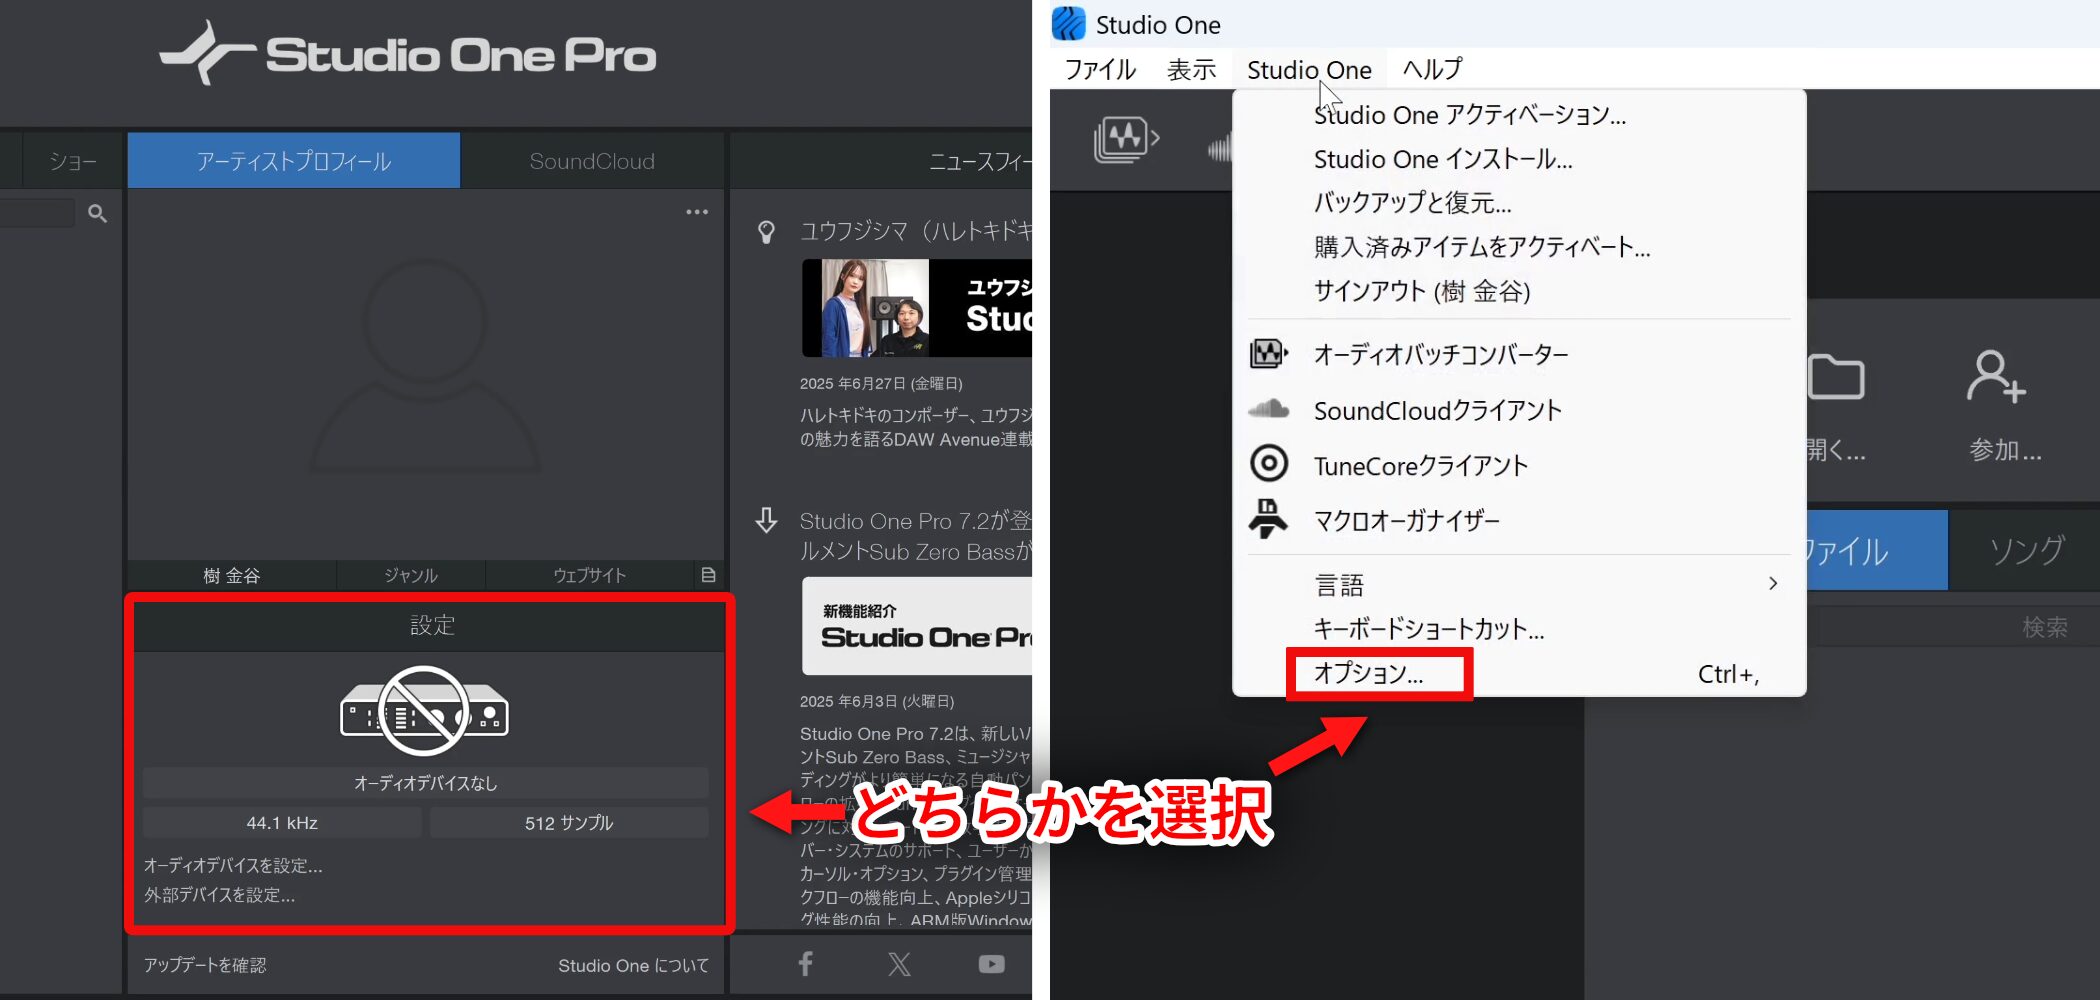
Do this in the options window.
Click the settings area on the Start page, or choose Studio One → Options from the top menu (Preferences on Mac).
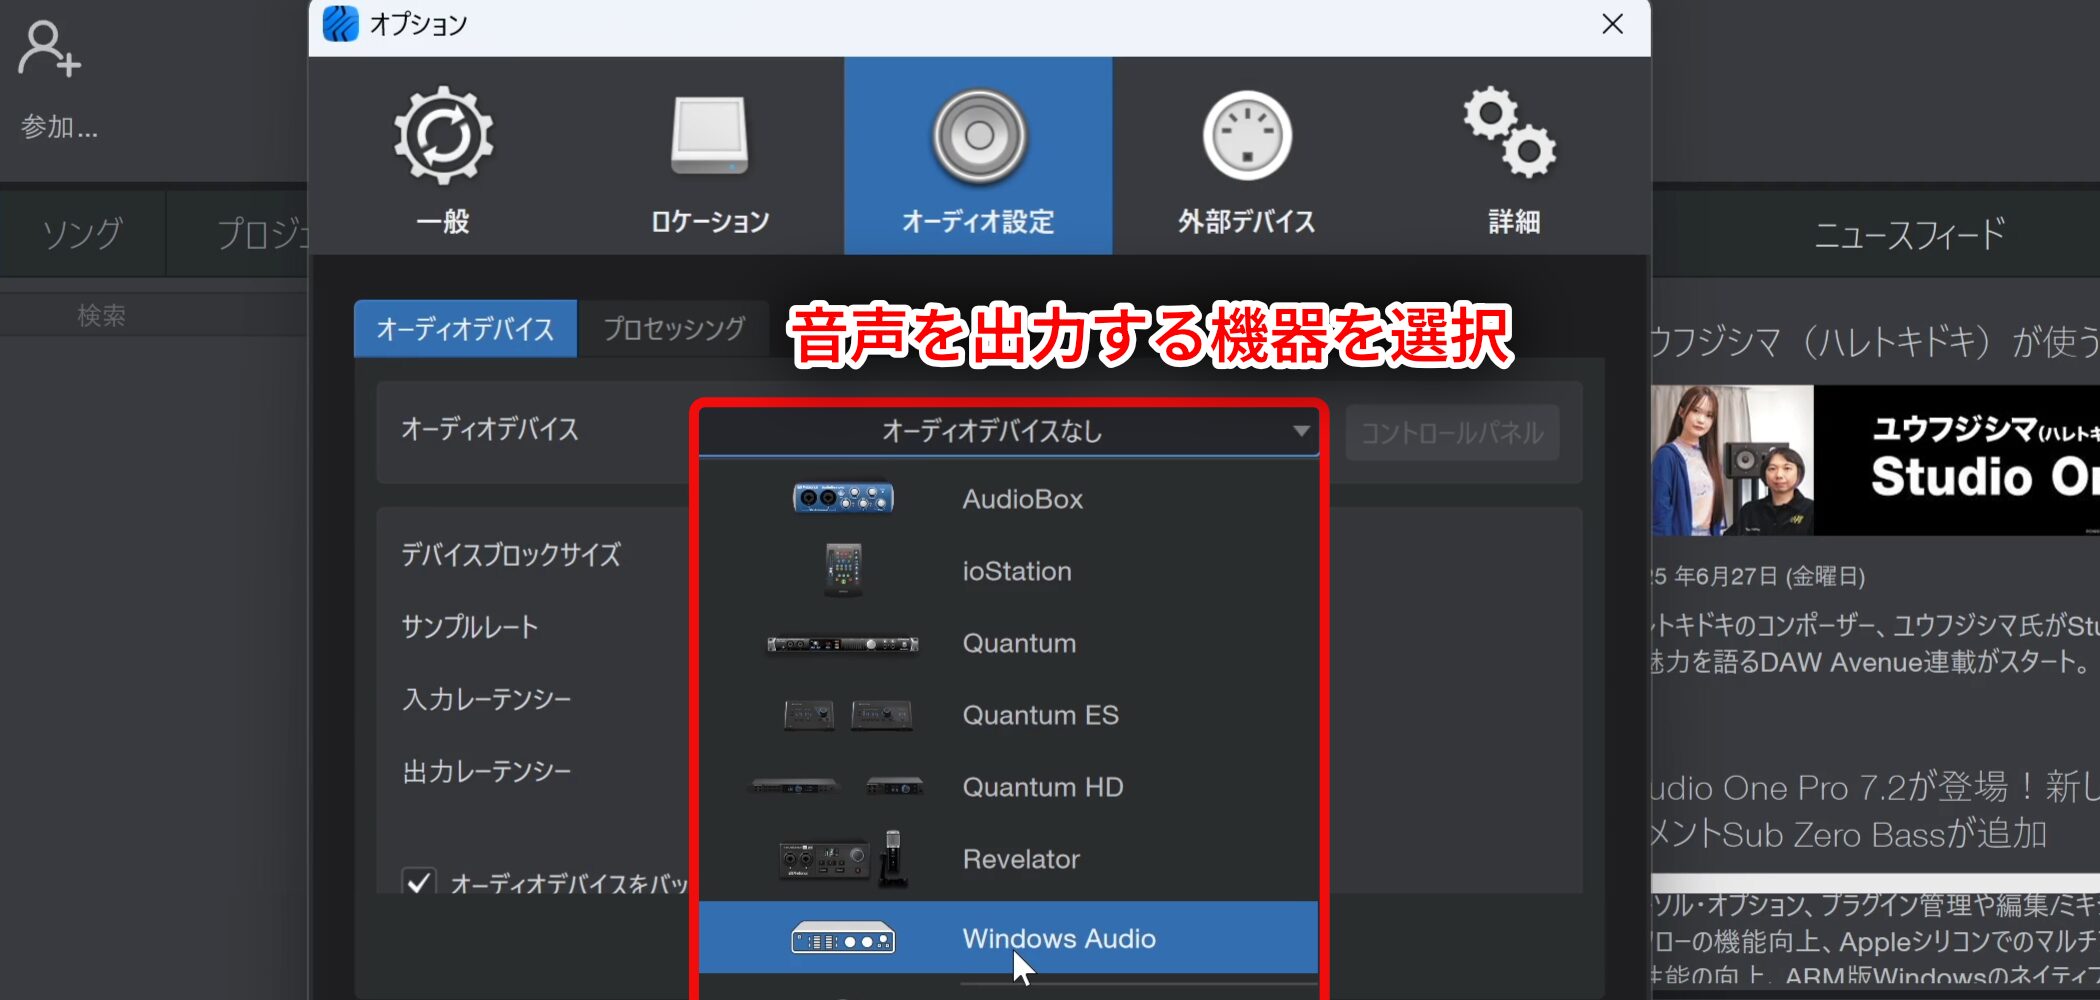
Under Audio Setup → Audio Device, select the device you want to use.
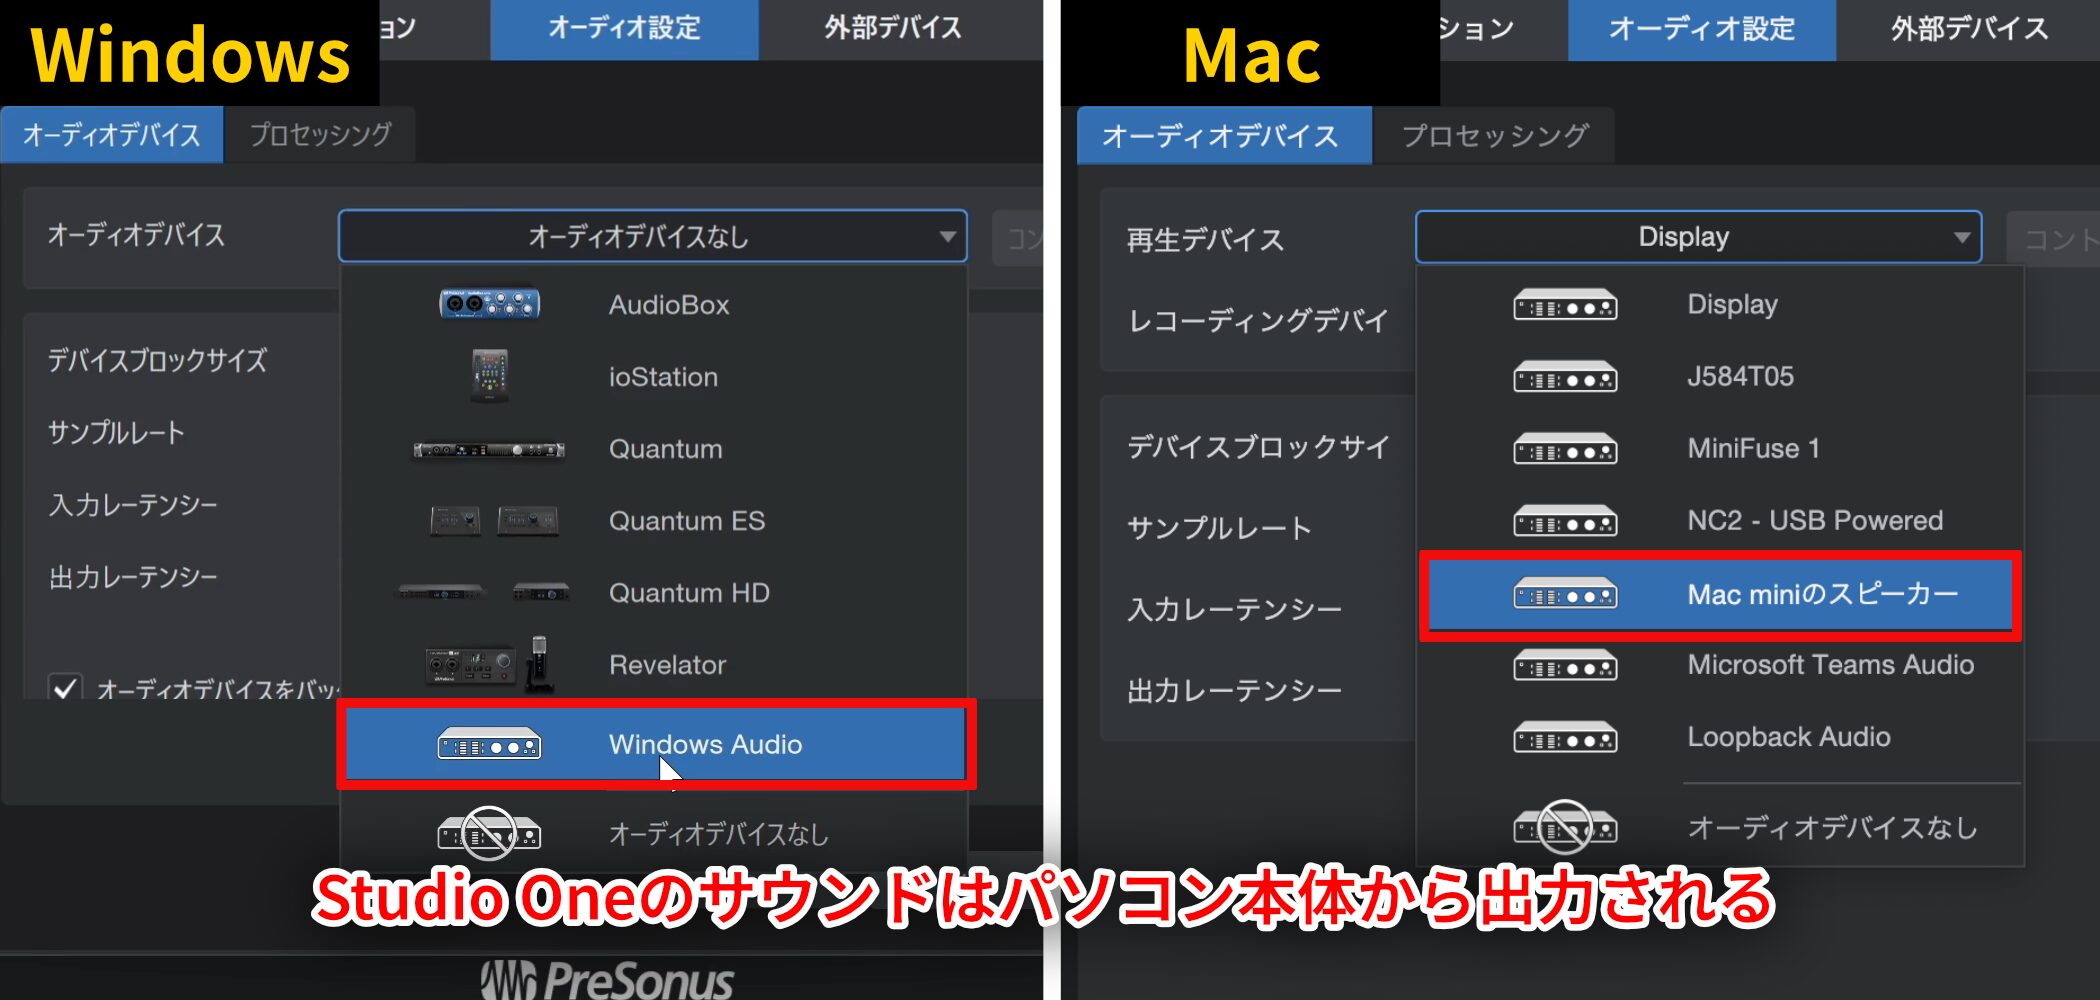
For example, if you select Windows Audio or the Mac speakers, Studio One’s sound will be output through the computer.
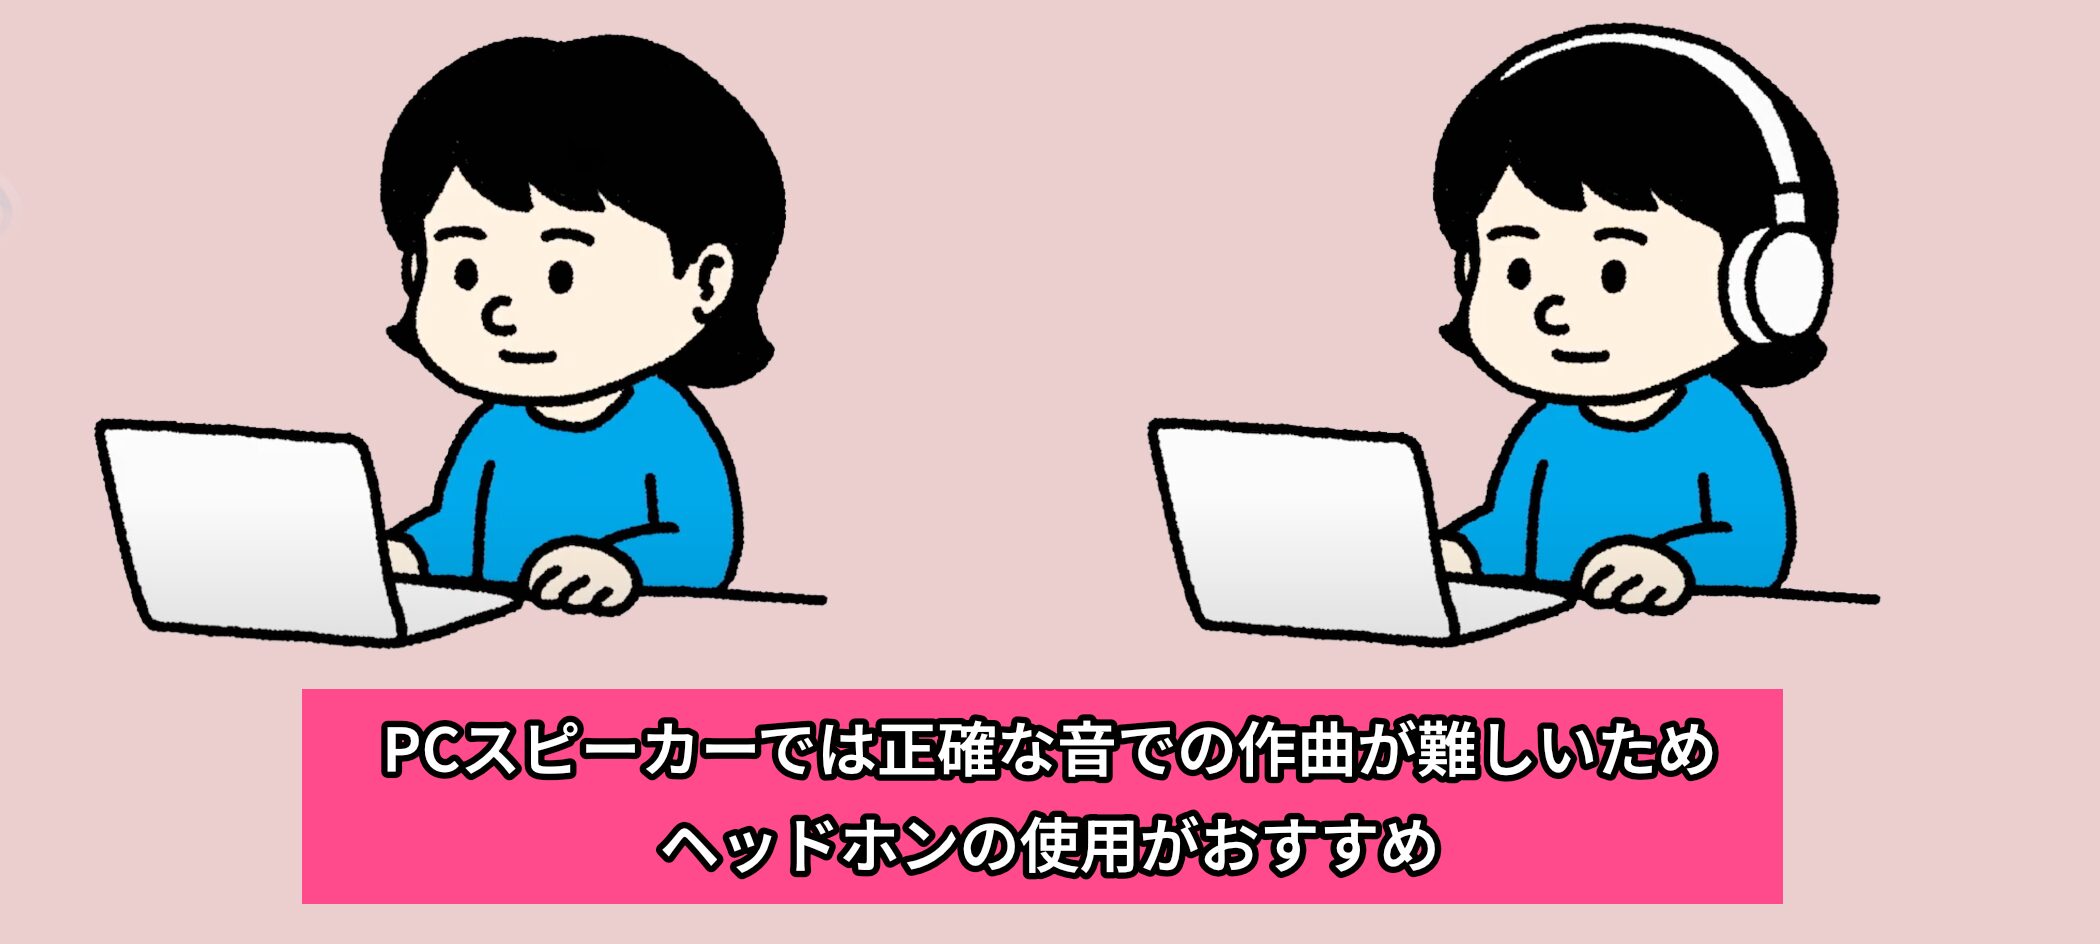
If you are not recording live instruments, you can compose using the computer’s sound output, but computer speakers are not optimized for music production.
We therefore recommend connecting at least a pair of headphones.
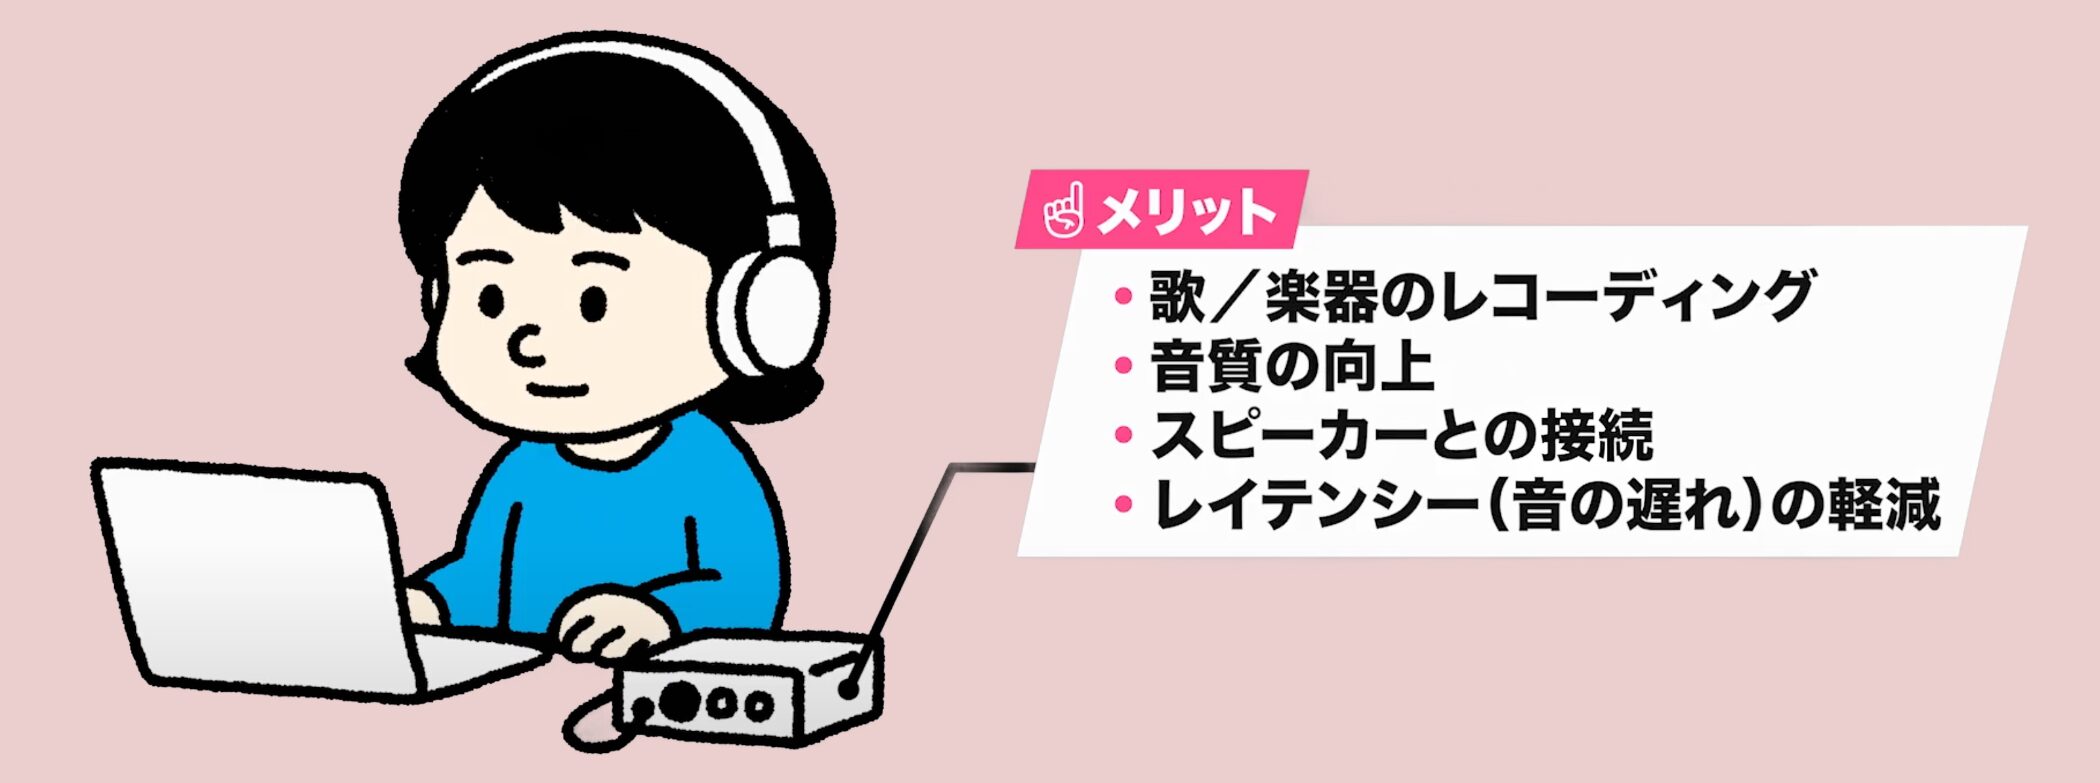
An audio interface lets you record vocals and instruments, can improve sound quality and connect to speakers, and also offers lower latency—the delay in the sound.
Consider getting one if your budget allows.
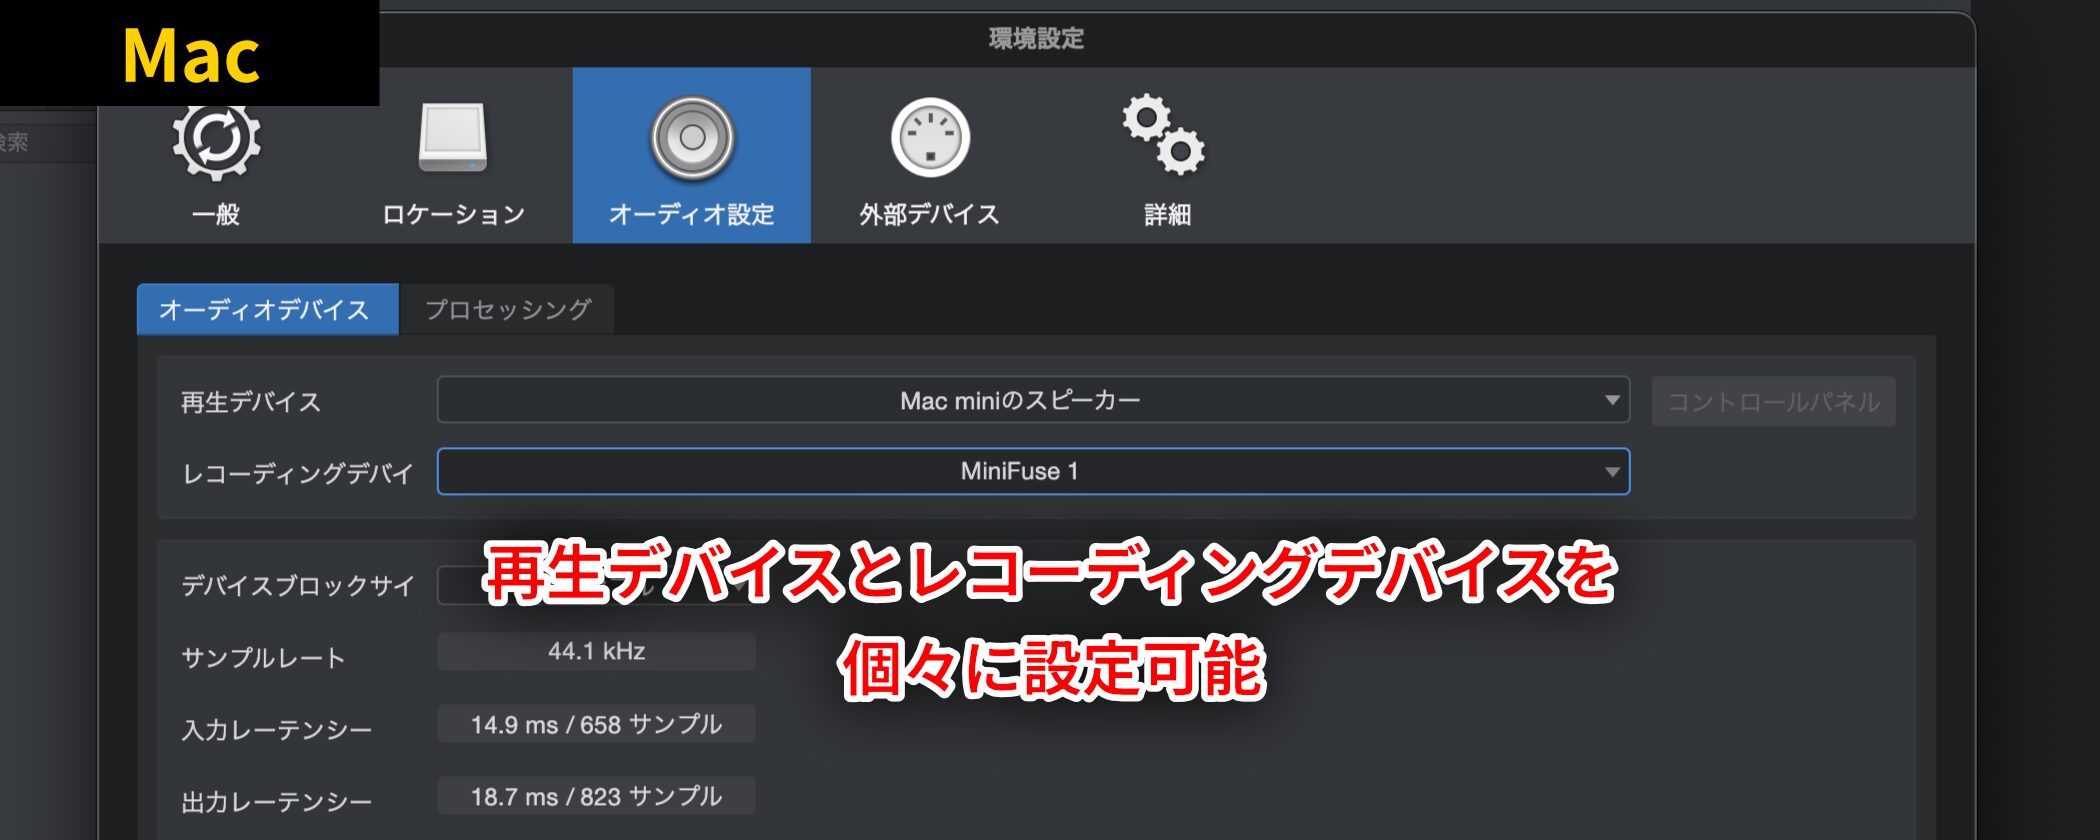
On Mac, you can configure playback and recording devices separately.
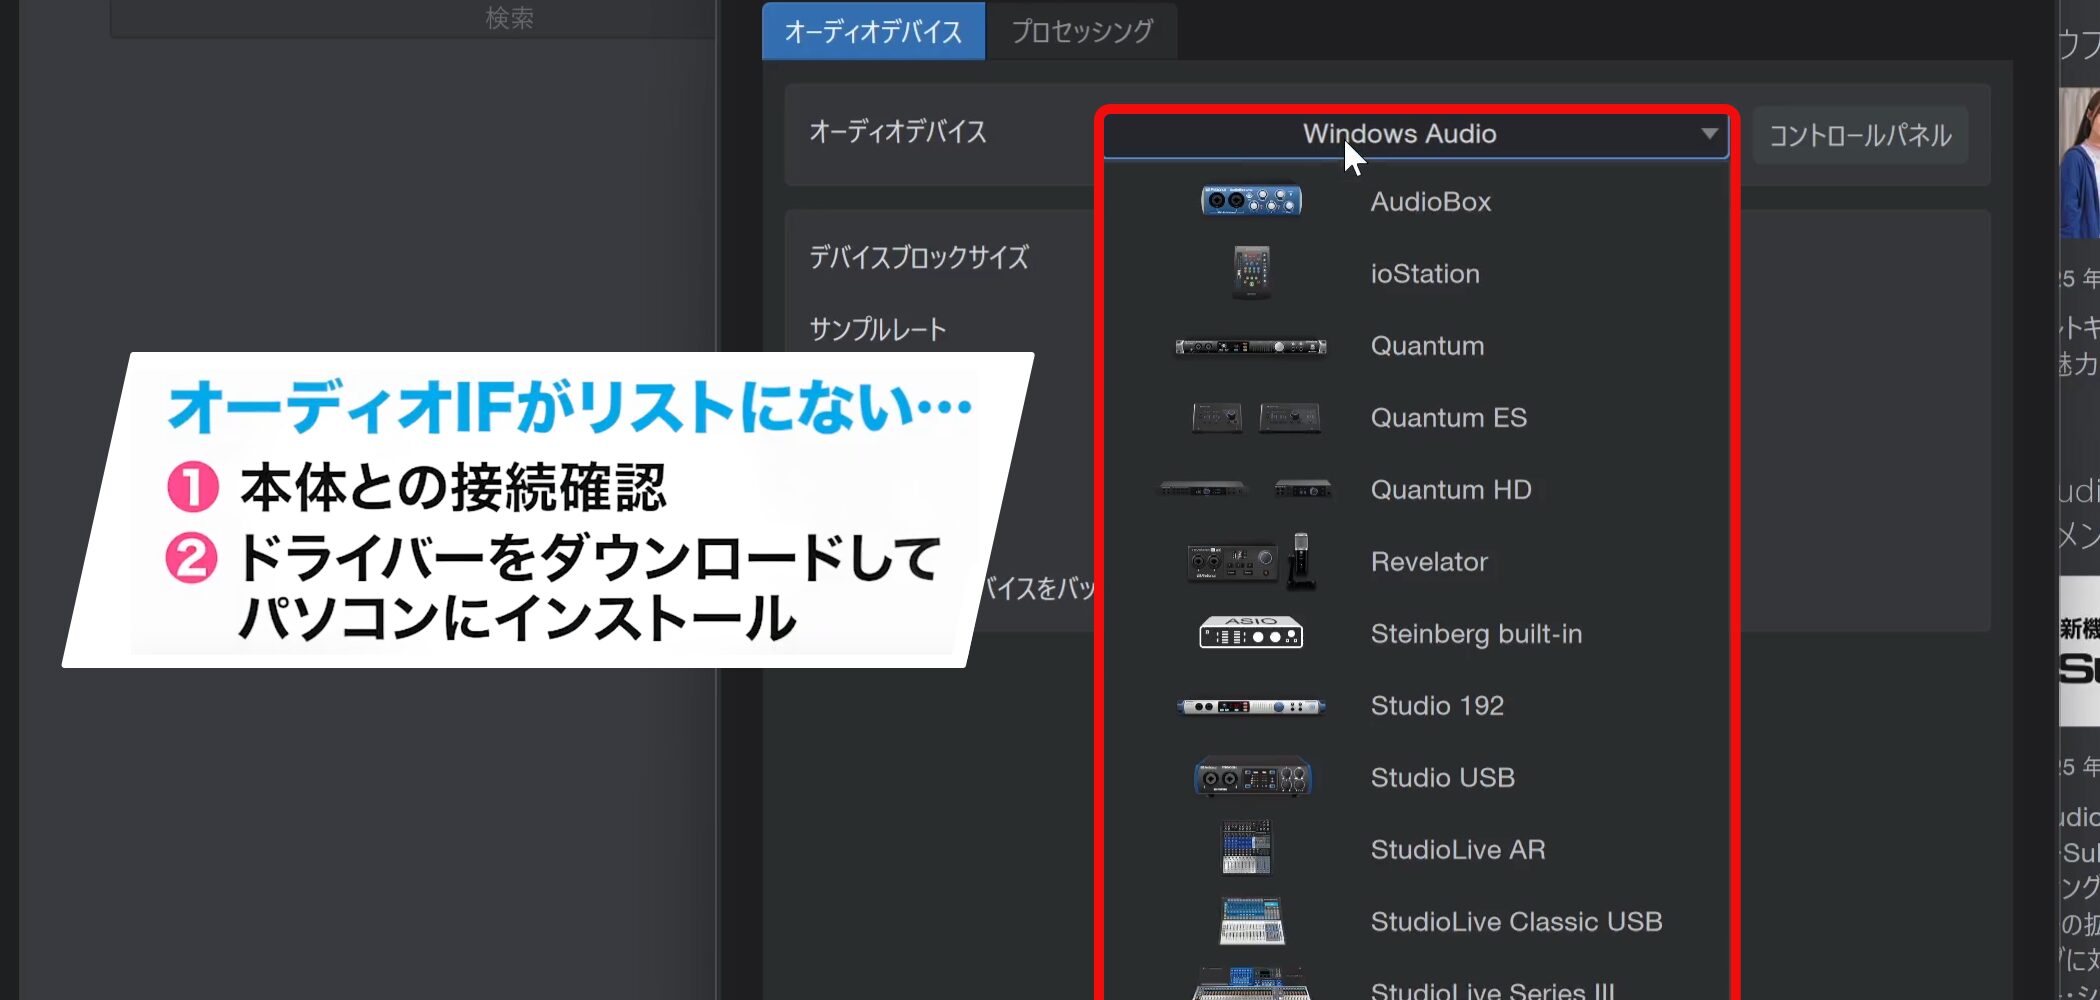
If your audio interface does not appear in the device list:
- Check its connection to the computer.
- Download and install the driver from the manufacturer’s website.
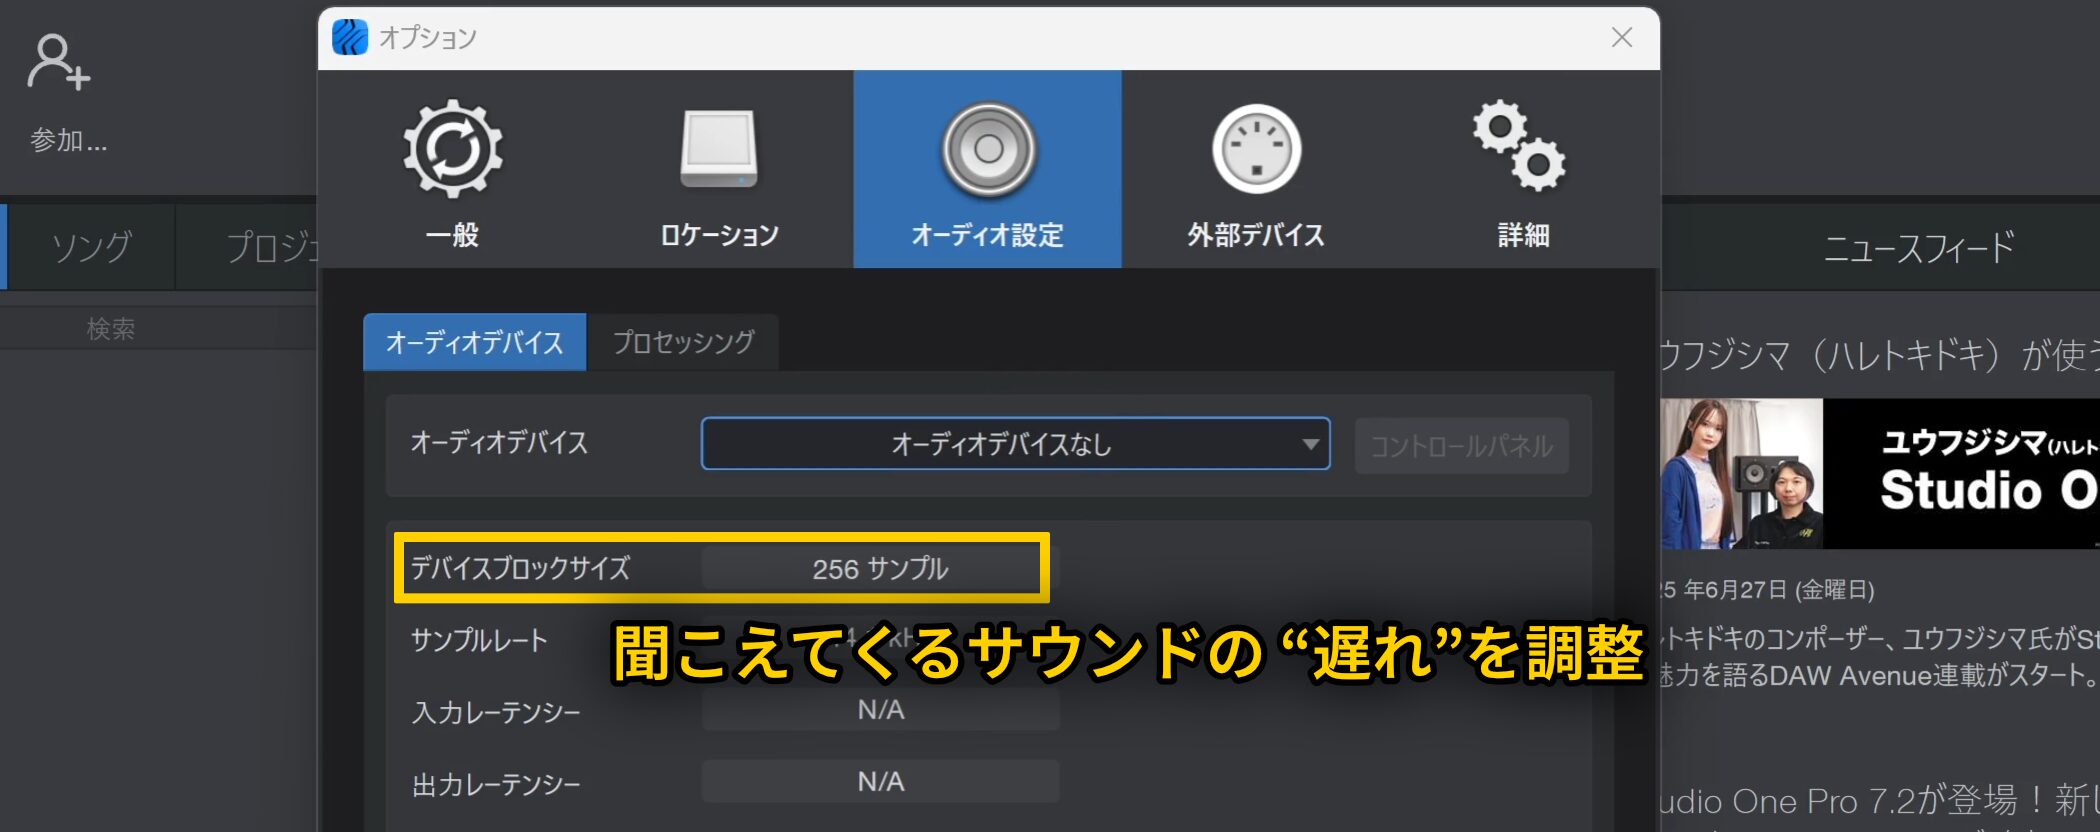
After selecting the device, an important setting is “Device Block Size”.
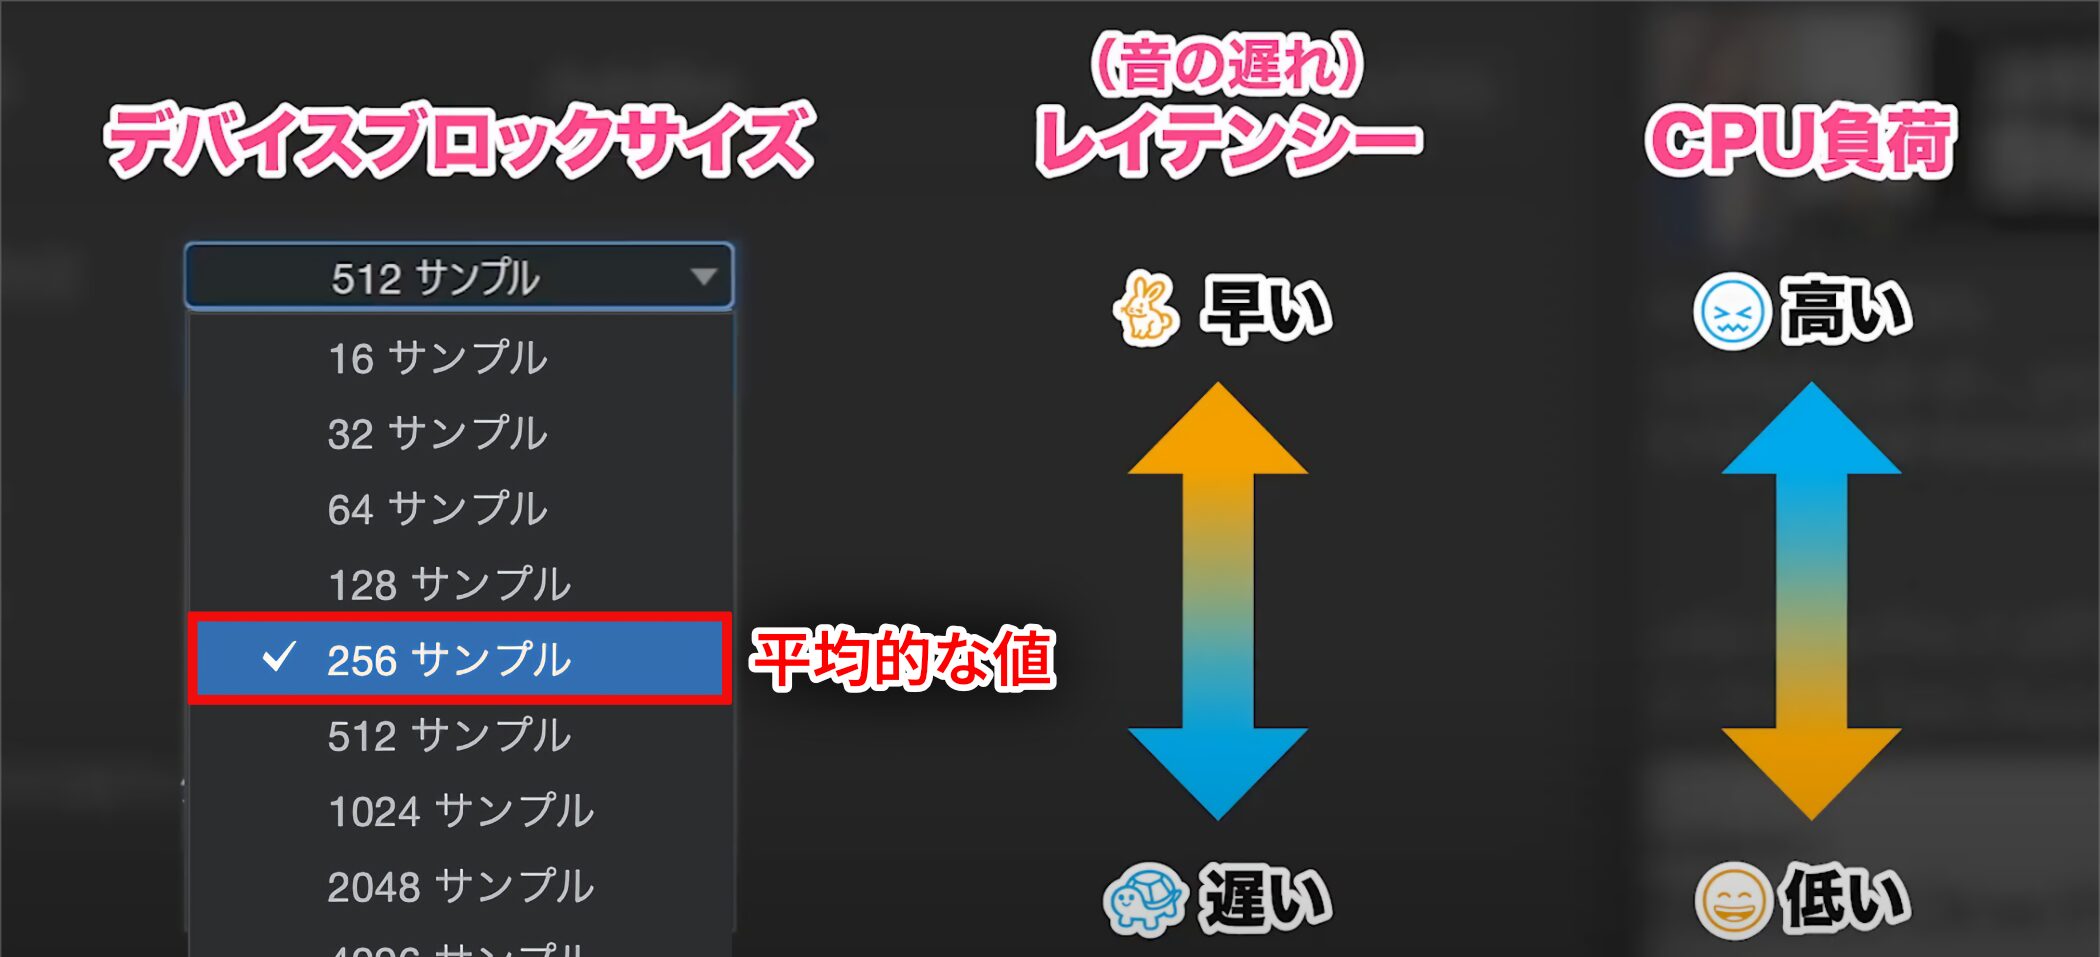
This setting controls audio delay, or latency.
A smaller value reduces delay but increases CPU load, which can cause noise or playback to stop.
For example, use a lower value for recording and a higher one during production. It is important to adjust it to the situation.
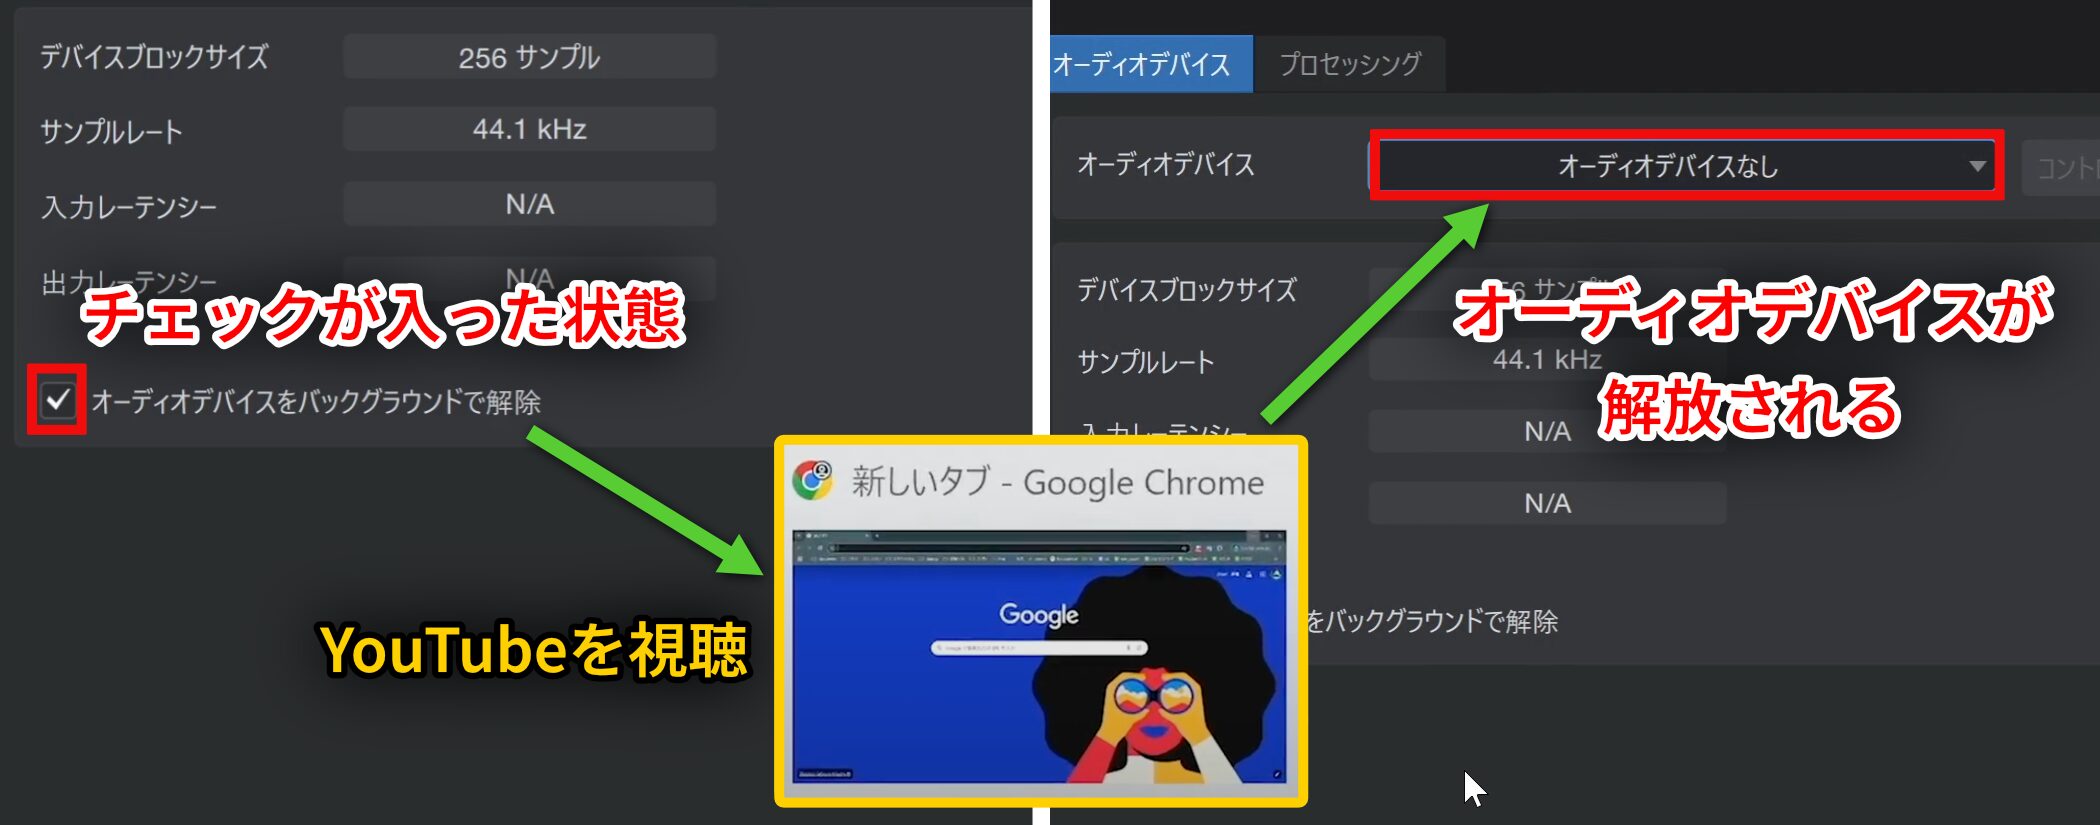
If “Release Audio Device in Background” is checked, the device is released when you do something such as watching YouTube in a browser, and Studio One playback also stops.
Uncheck it if you want to avoid this behavior.
This option appears only on Windows.
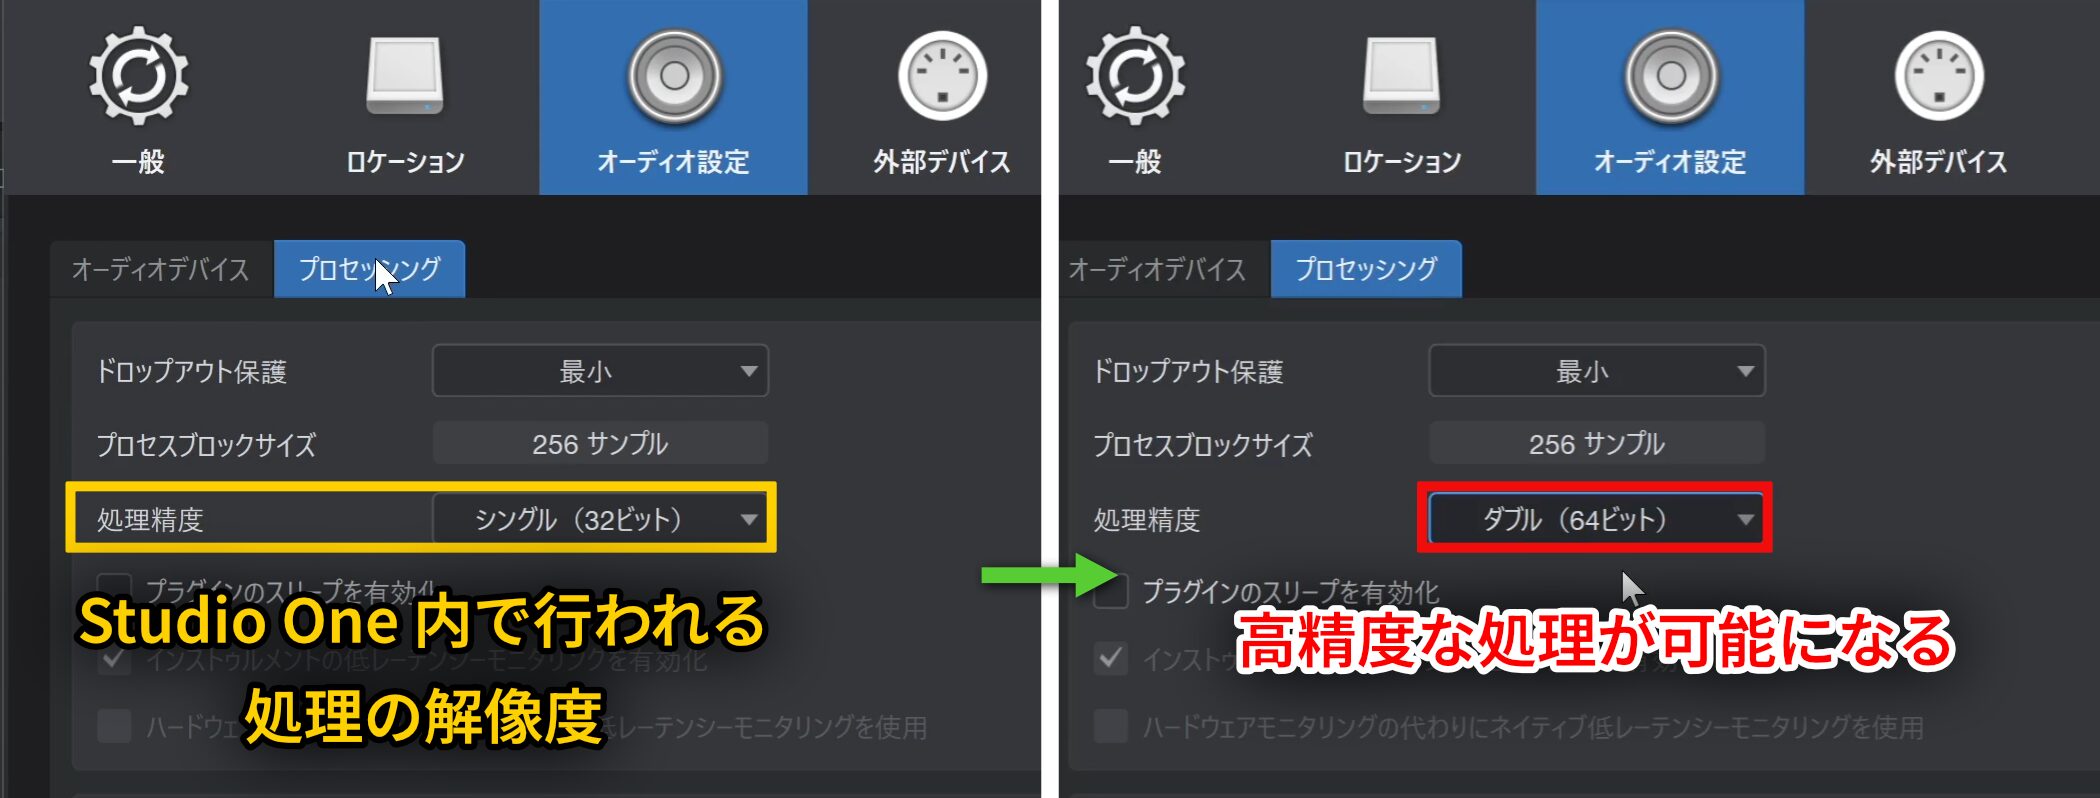
The processing precision setting under “Processing” determines the resolution of processing within Studio One.
The initial setting is “Single,” but changing it to “Double” (64-bit) enables higher-precision processing.
Setting Up a MIDI Keyboard
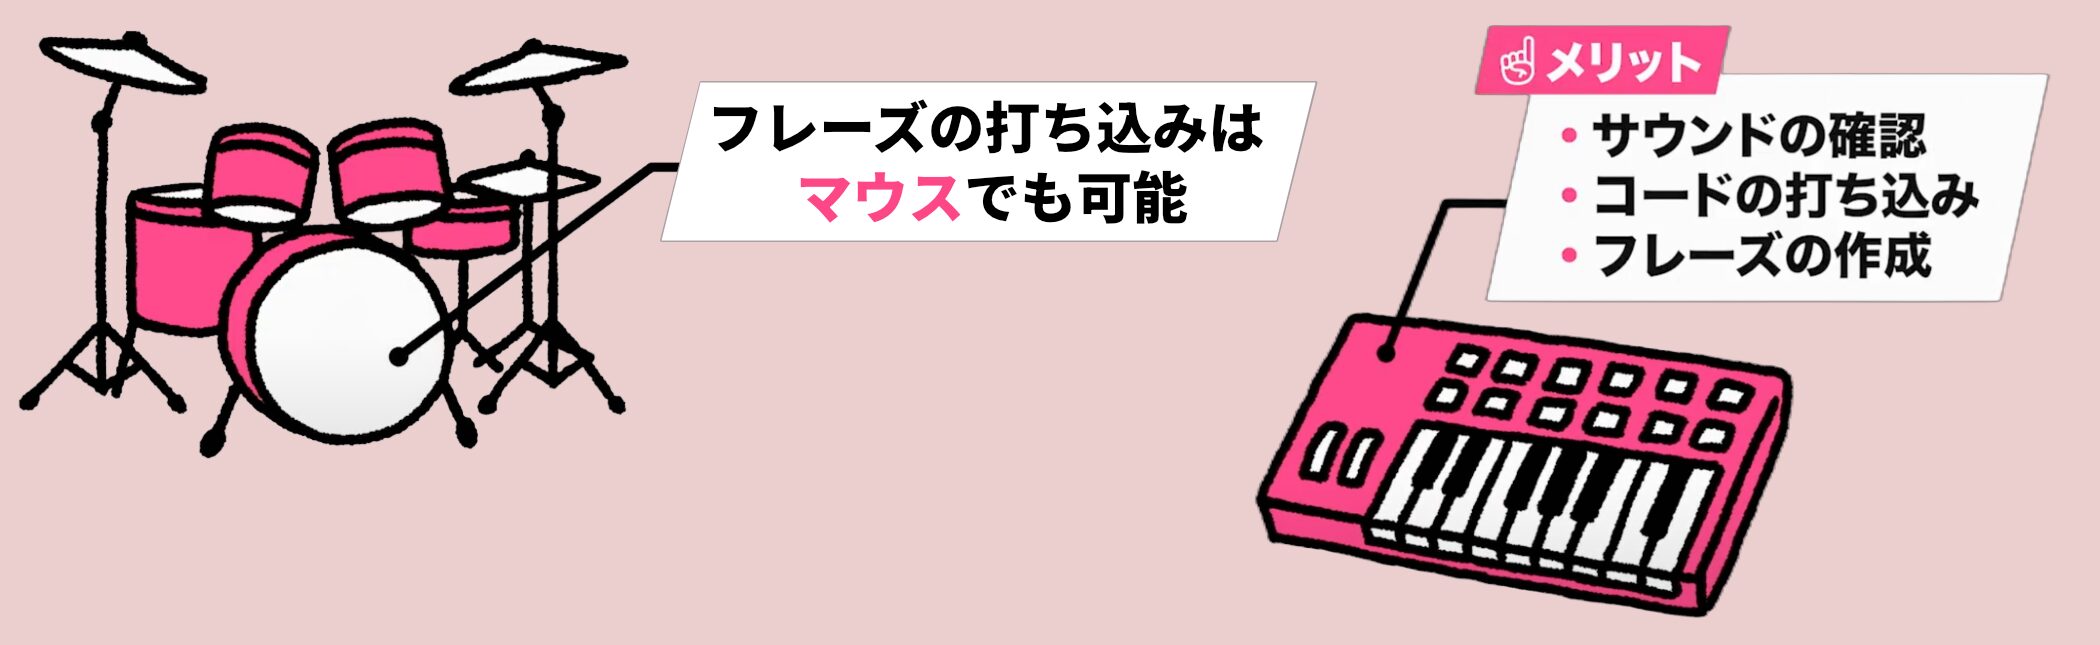
A MIDI keyboard is not essential because you can program drums and instruments with a mouse. However, it can speed up many tasks, including auditioning sounds, entering chords and creating phrases.
If your budget allows, it is another piece of equipment we strongly recommend considering.
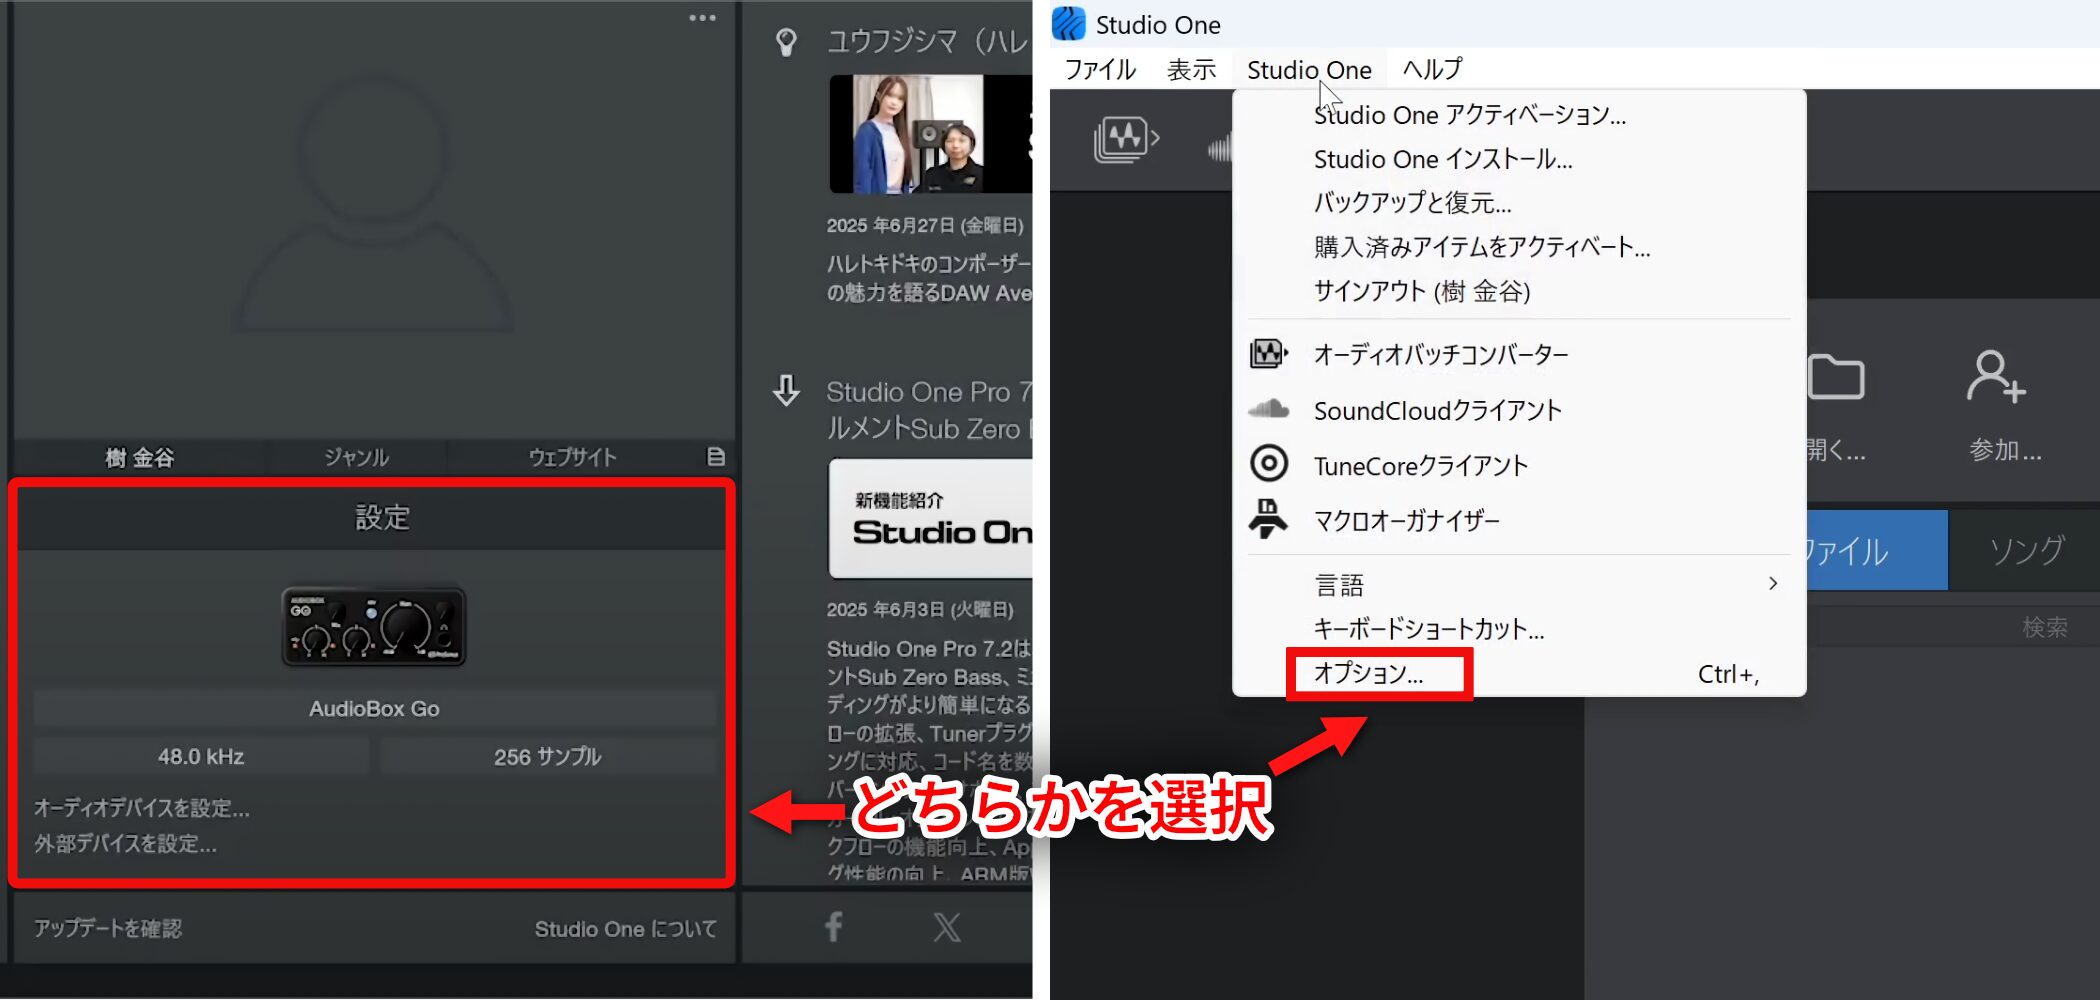
Like audio setup, MIDI keyboard configuration is done in the options window.
Click the settings area on the Start page, or choose Studio One → Options from the top menu (Preferences on Mac).
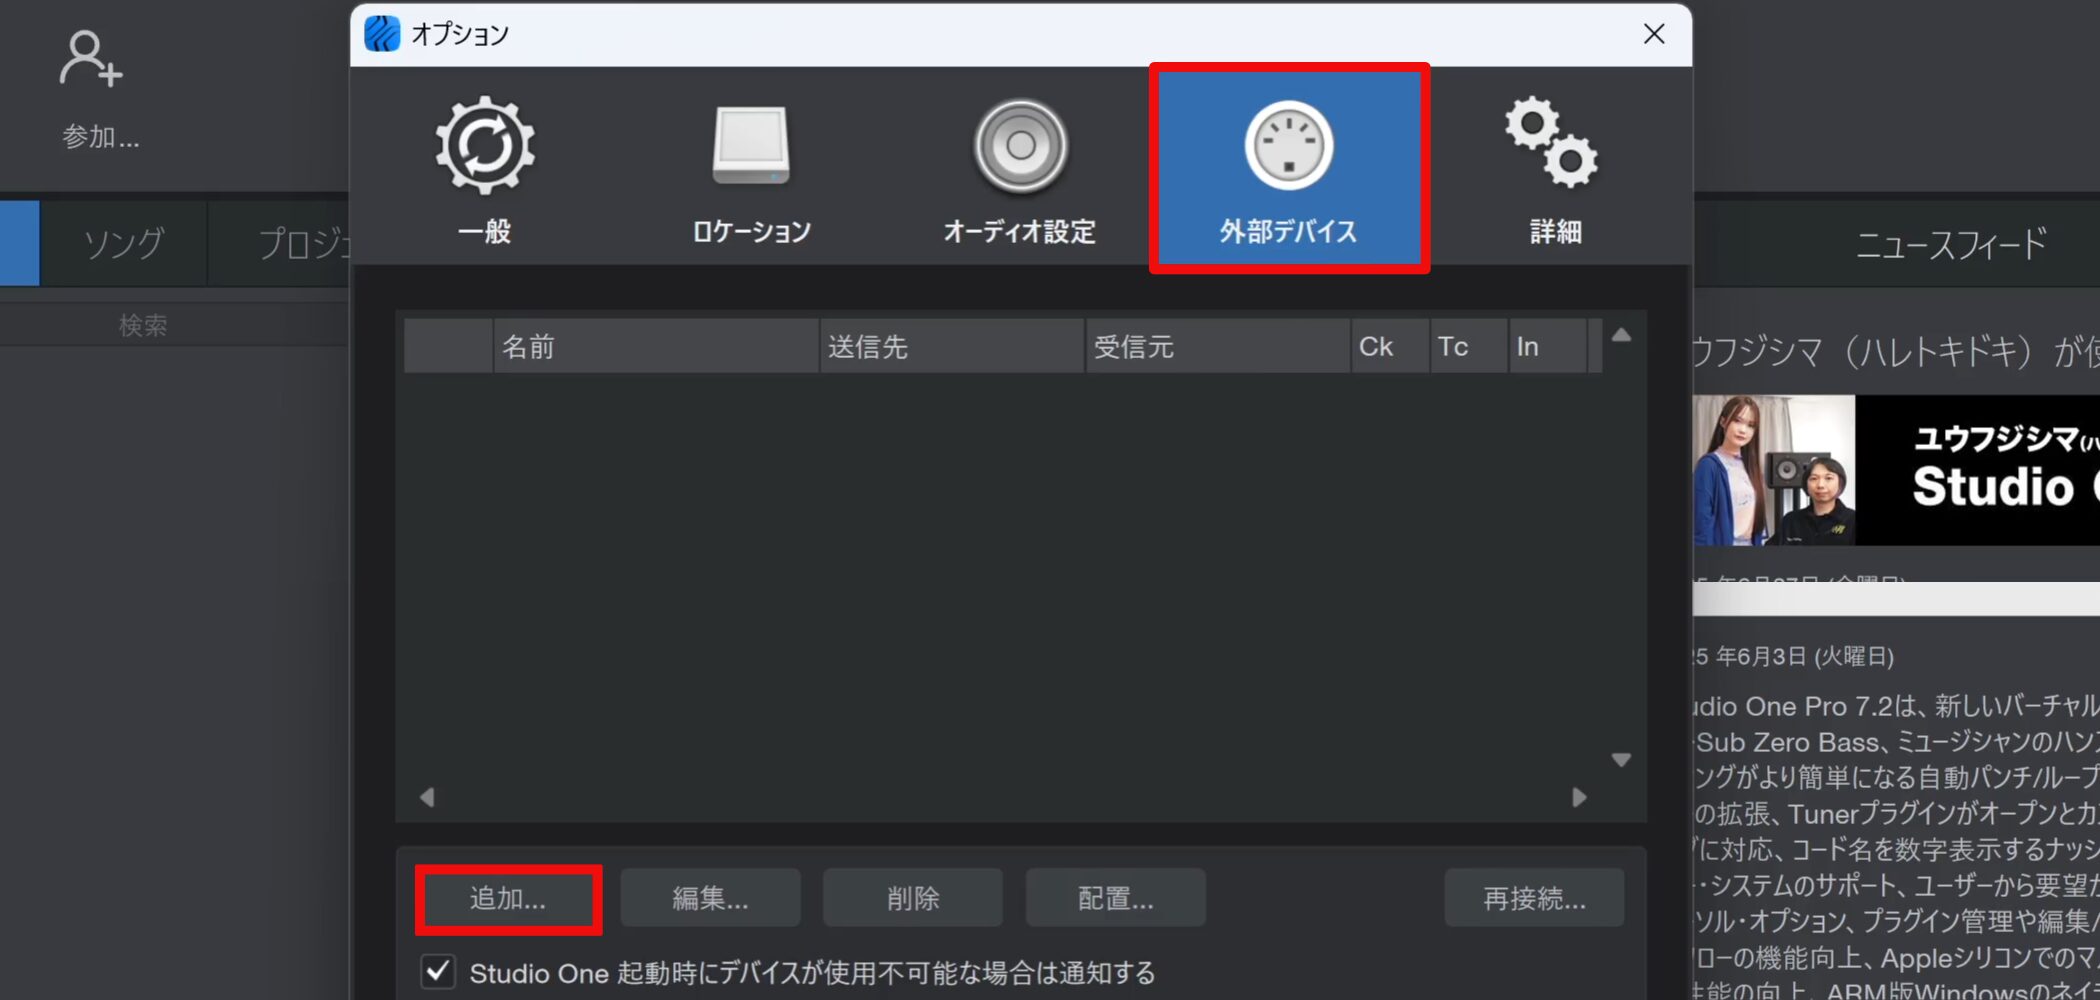
Select “External Devices” and click “Add…”.
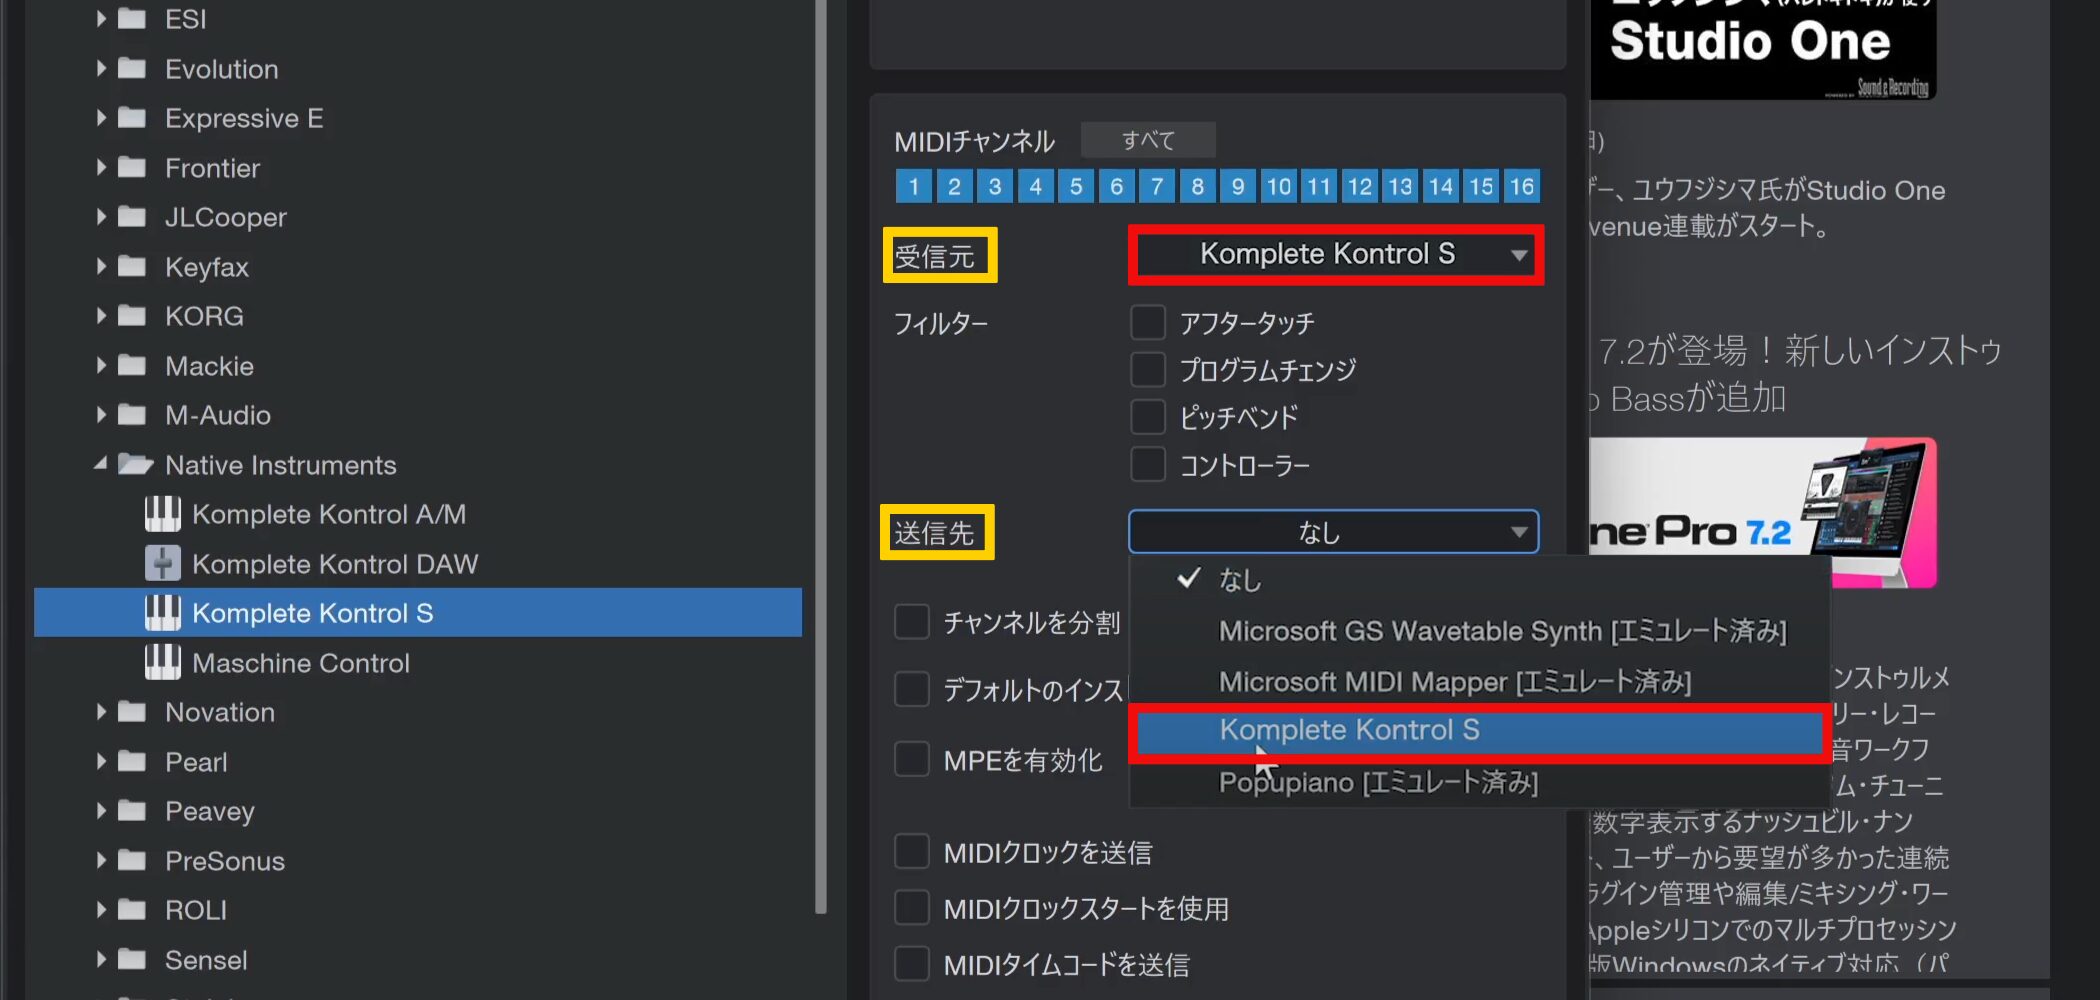
Presets are available for keyboards from various manufacturers. If your product is listed, set both “Receive From” and “Send To” to that product to complete setup.
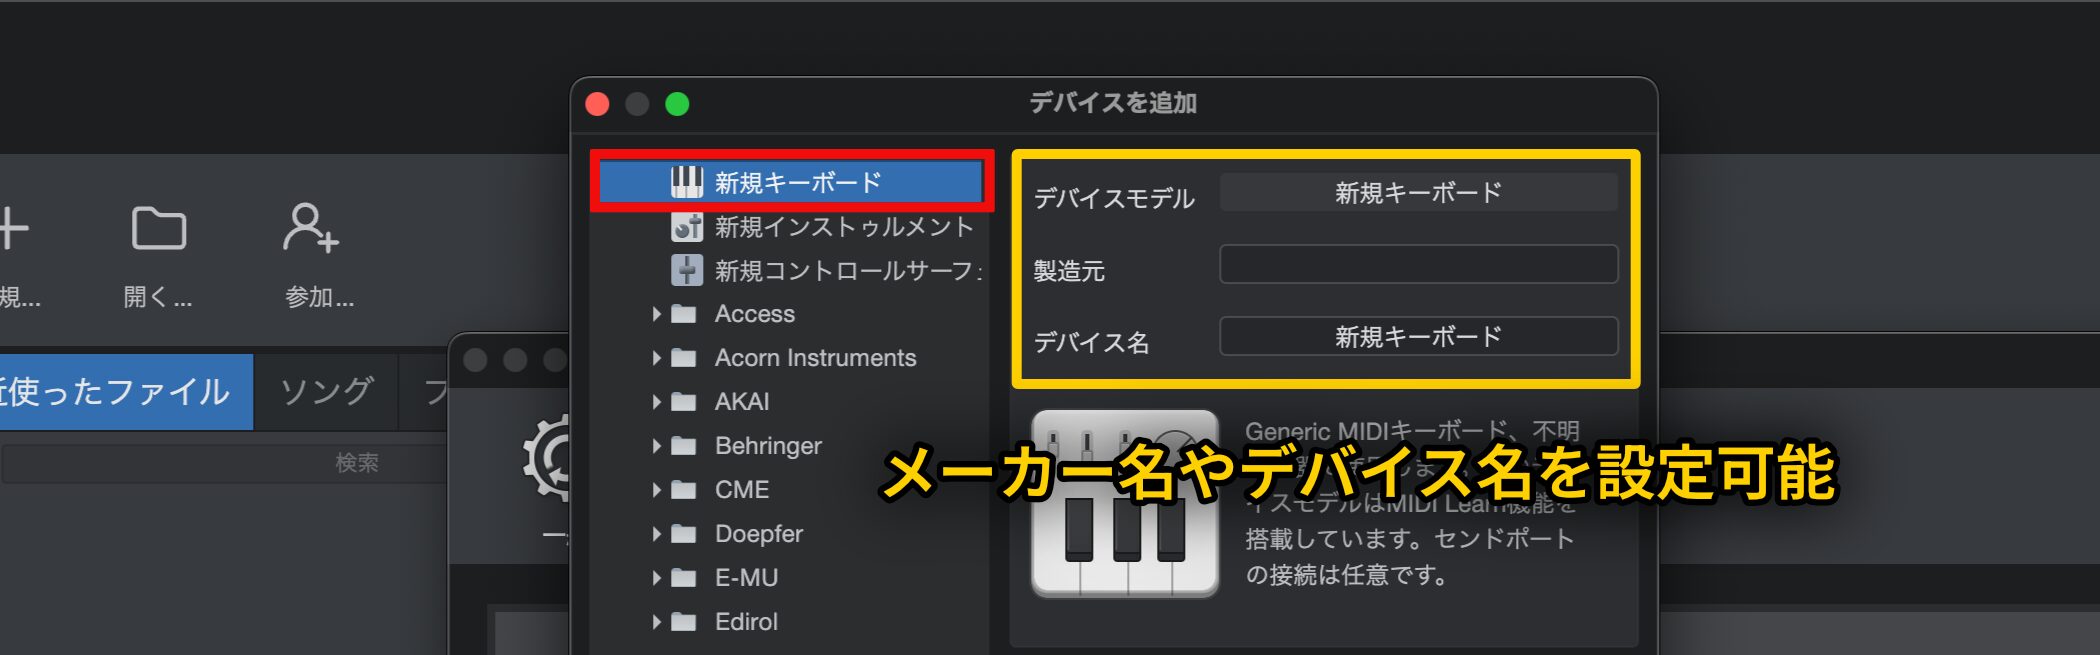
If your keyboard is not listed, select “New Keyboard.”
You can also enter a manufacturer and device name.
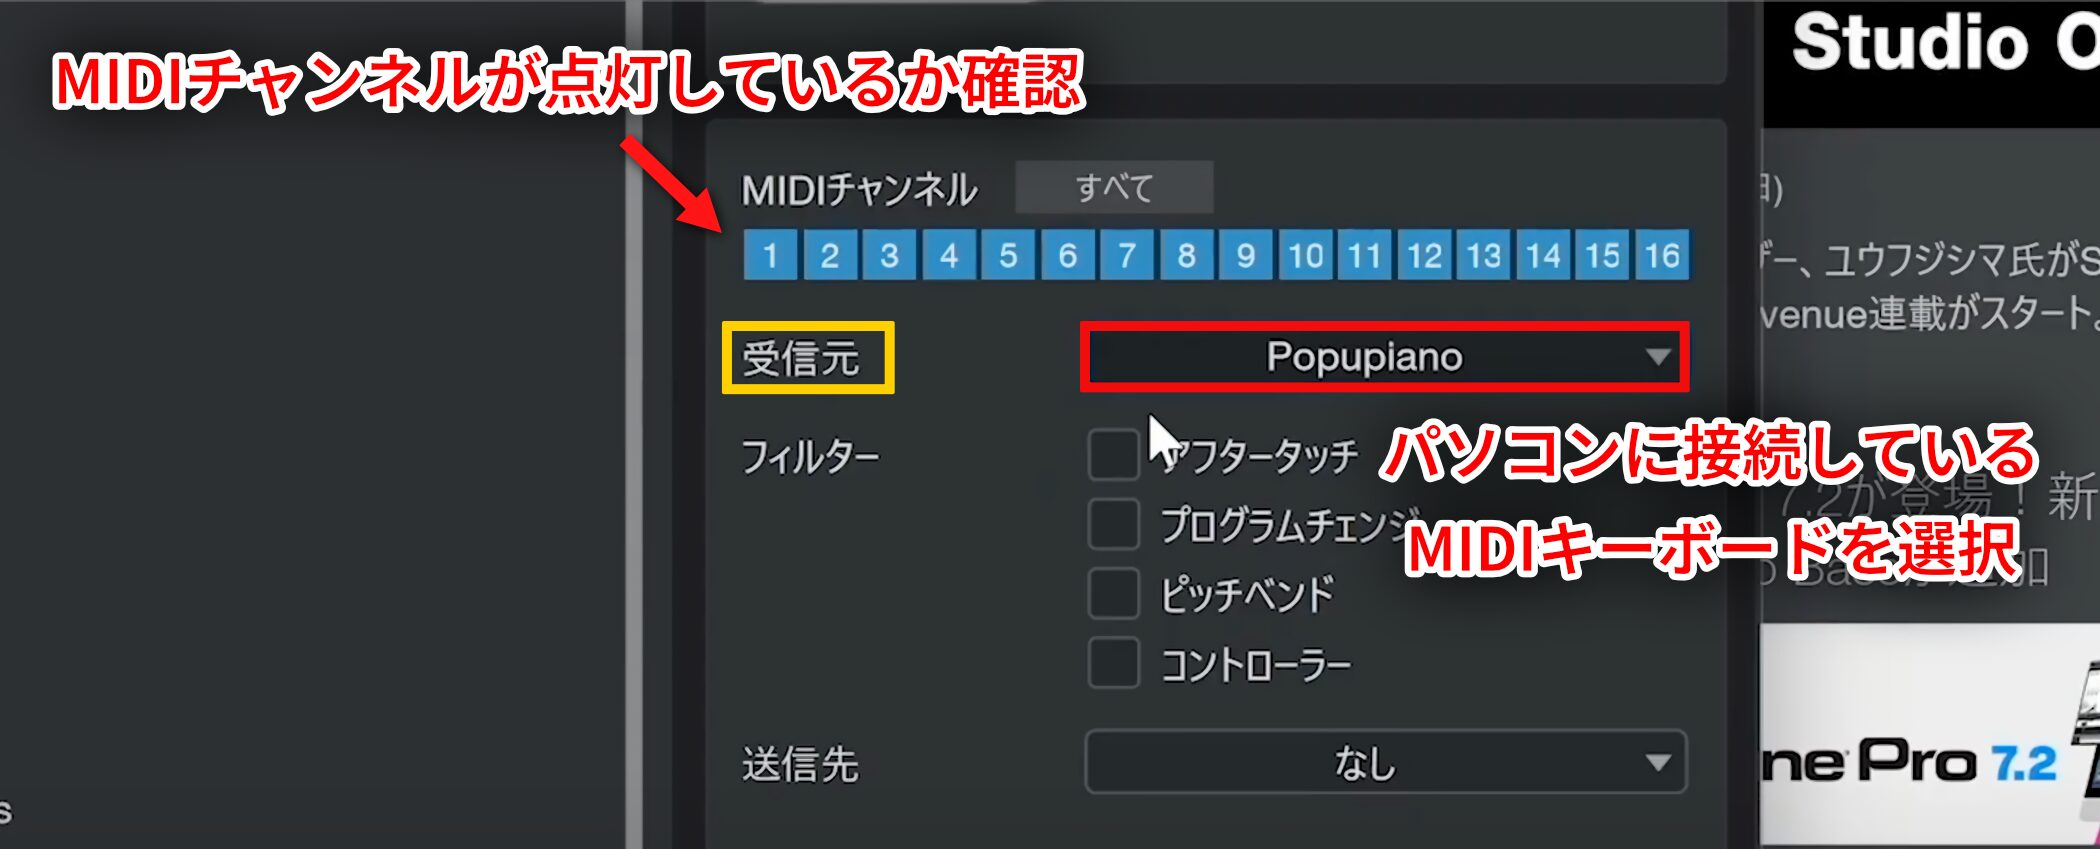
If you only want to send your keyboard performance into Studio One, select the connected MIDI keyboard under “Receive From.” Setup is complete when the MIDI channels are enabled.
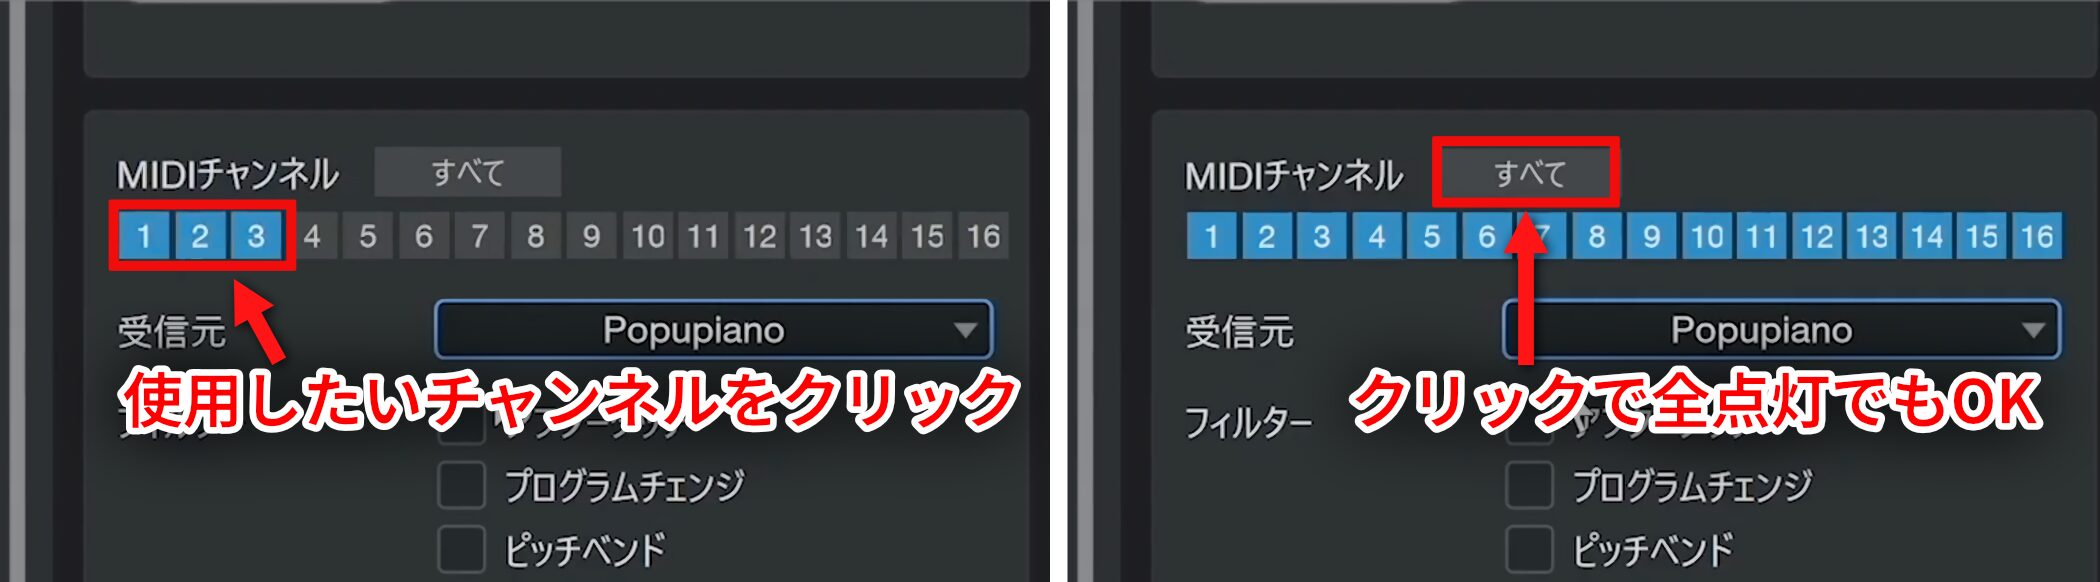
If the channels are off, click the ones you want individually or use “All” to enable them together.
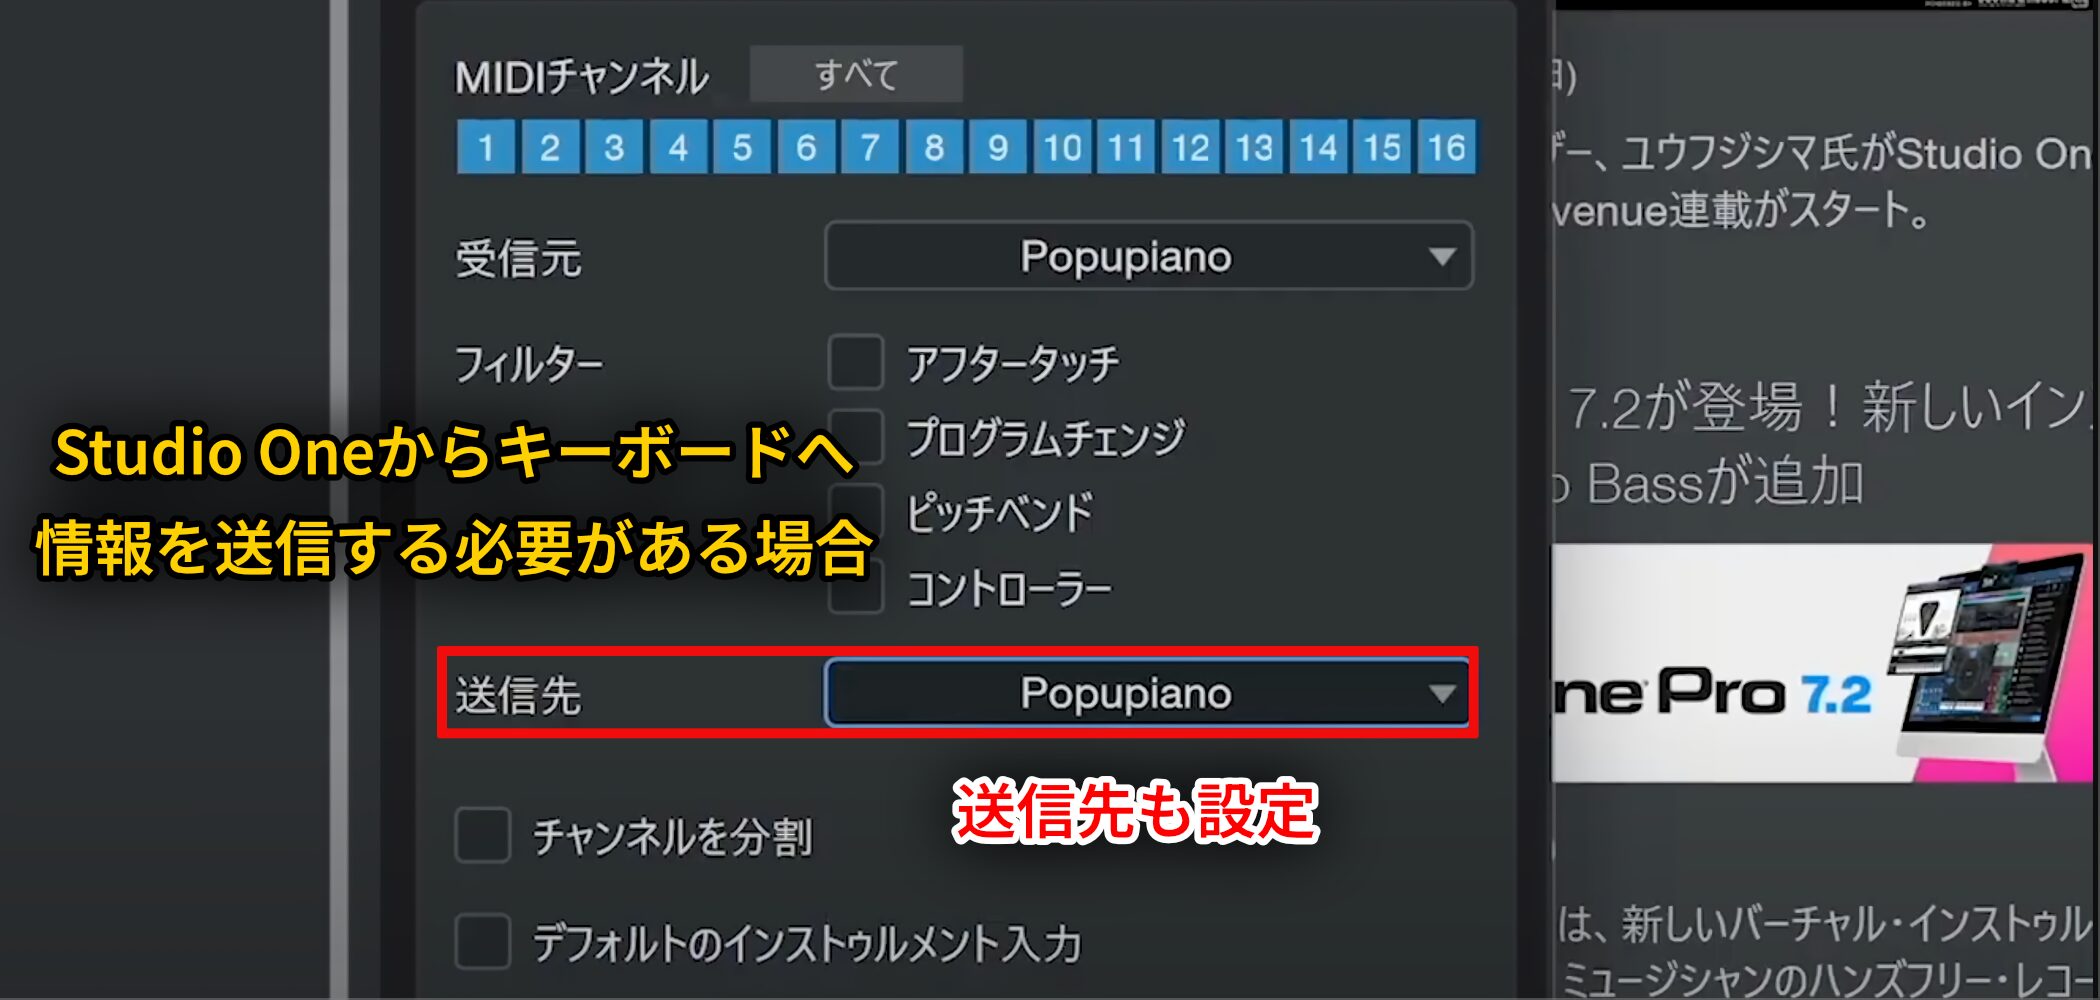
If Studio One also needs to send data to the keyboard—for example, to play the keyboard’s built-in sounds—configure “Send To” as well.
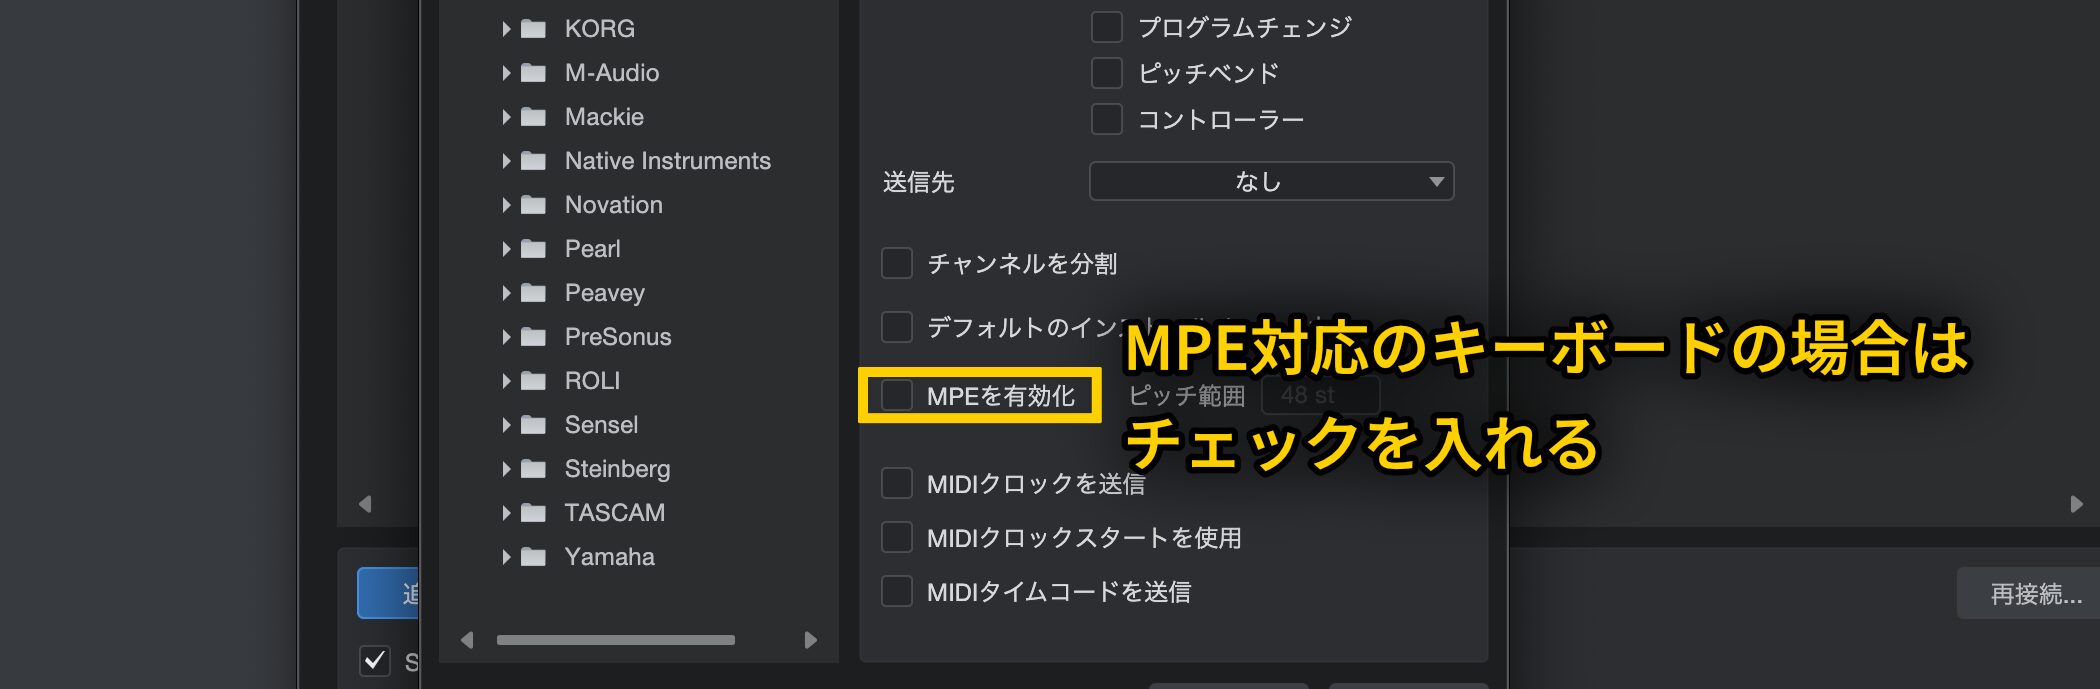
If your keyboard supports MPE, a standard allowing expressive control per note, check “Enable MPE.”
ROLI Seaboard is one example; most conventional keyboards do not support MPE.
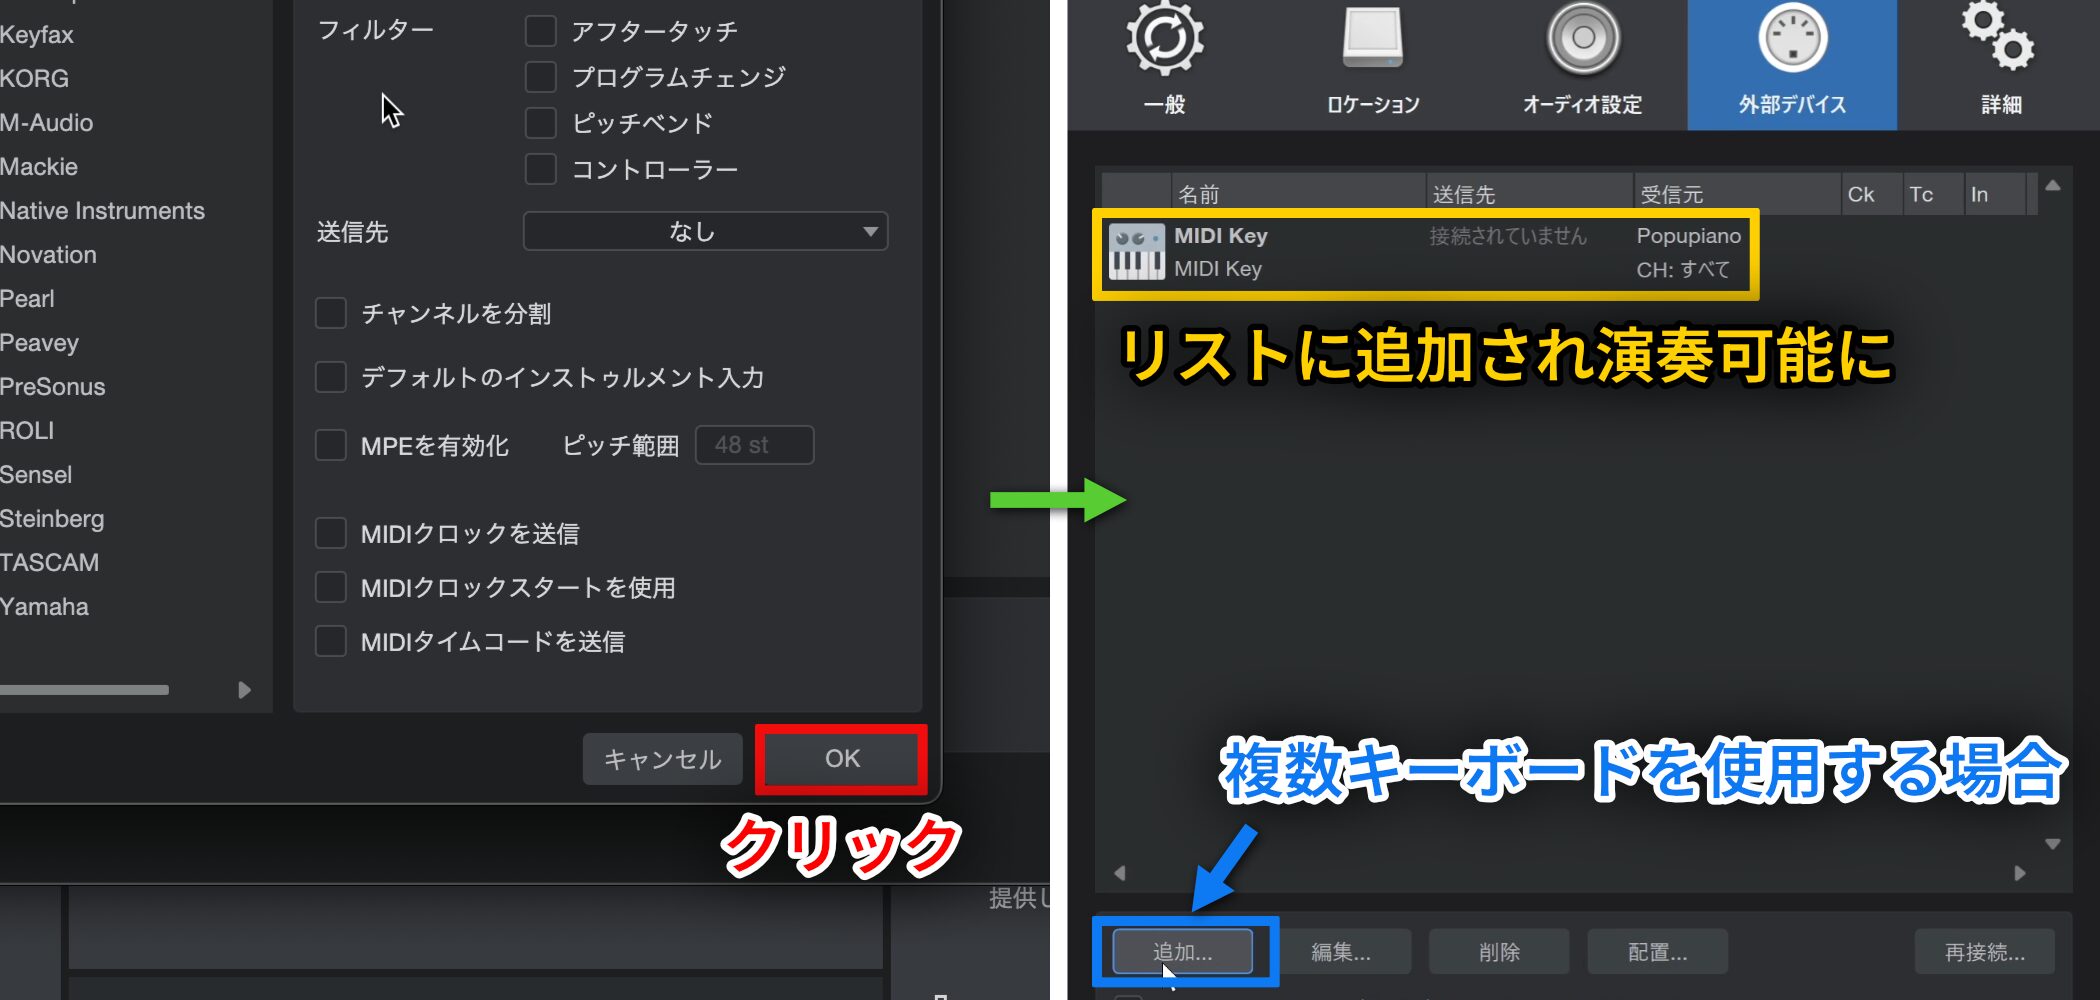
Click “OK” when setup is complete.
The keyboard is added to the list and is ready to play.
To use more than one keyboard, repeat the setup using “Add” at the lower left.
Frequently Asked Questions
Q1. What if I lose my Studio One 7 product key during installation?
Sign in to PreSonus and open the Studio One Pro 7 product page under “My Products.” The “Product Key” is displayed at the top and can be checked if manual activation is needed.
Q2. Why does installing the included content take so long?
The audio loops, instruments, sound sets, demo songs and tutorial videos are large files. Installation can take hours depending on your internet speed, so a stable connection is recommended.
Q3. What should I set the audio device block size to?
Use a lower value when recording to reduce latency and a higher one during production to reduce CPU load. A value that is too low can cause noise or stop playback, so adjust it to your needs.
Q4. What if Studio One does not recognize my audio interface?
Check the connection, then download and install the latest driver from the manufacturer’s official website. Updating the driver resolves recognition in many cases.
NEW ARTICLES
Latest English Articles