Studio One integrates Splice, a global music sample service, giving you access to a large library that includes more than 2,500 free samples. The workflow covers account creation, searching, previewing, and placing sounds, while automatic tempo and key adjustments help them fit your song. Tag searches, filters, and sound-based search can help you find suitable material efficiently and expand your creative options.
Expand your productions with Splice integration
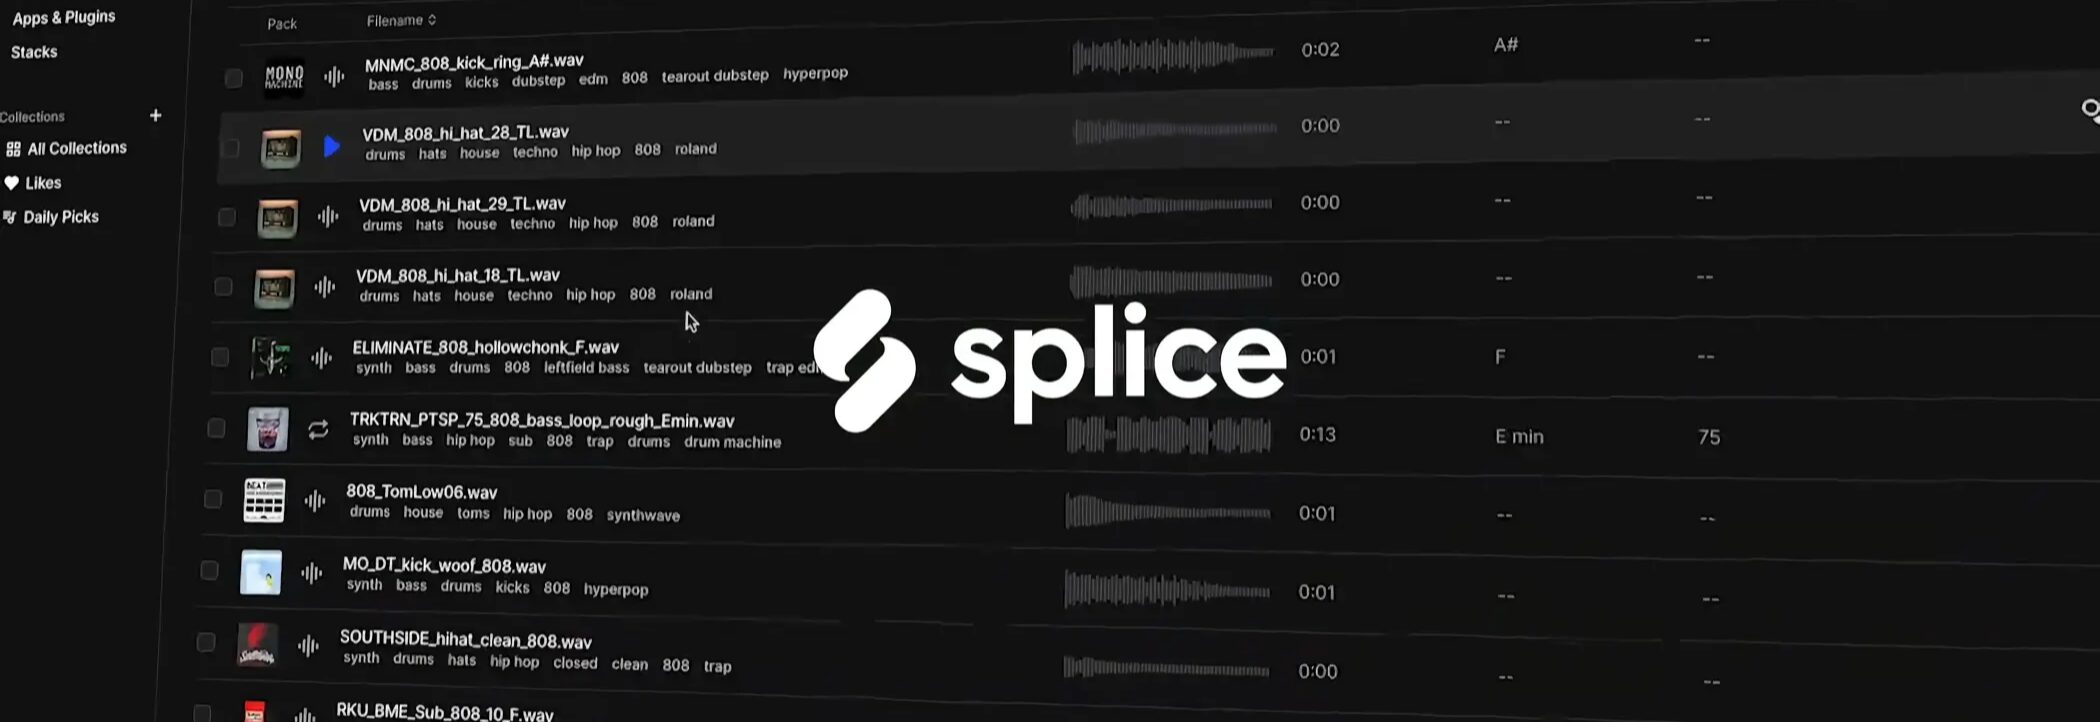
Studio One integrates the well-known music sample service Splice, so you can use its extensive sample library directly inside the DAW.
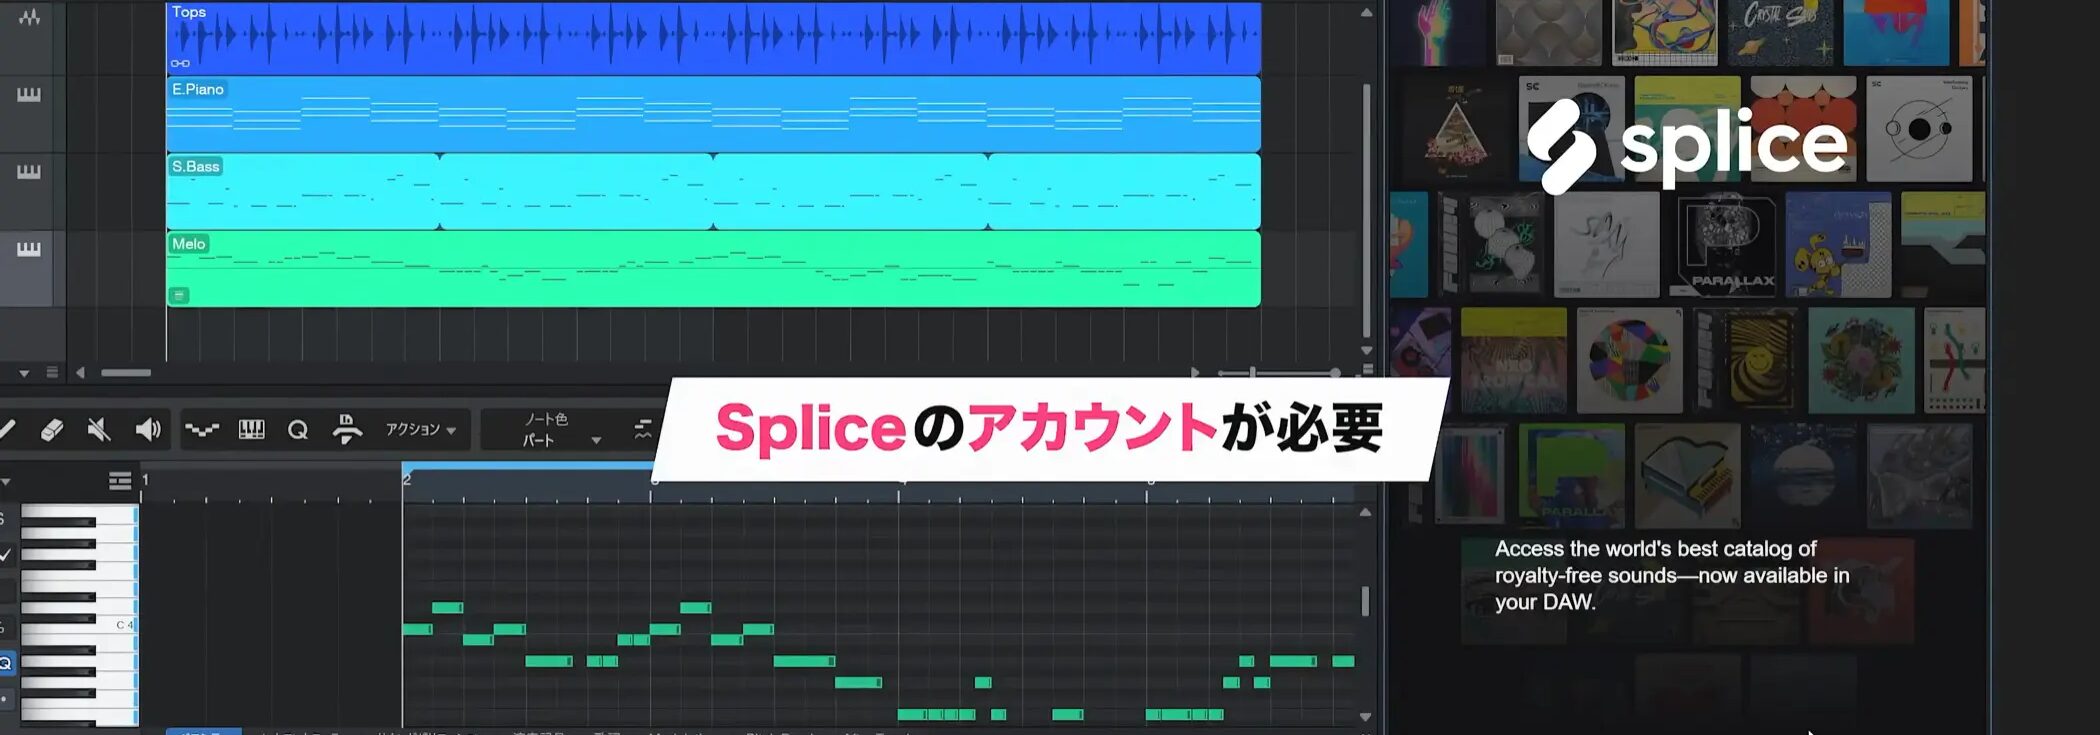
A dedicated account is required to use the Splice service.
If you already have an account, simply sign in.
If you do not have an account yet, you can still access more than 2,500 curated music samples for free by creating one.
Creating and setting up a Splice account
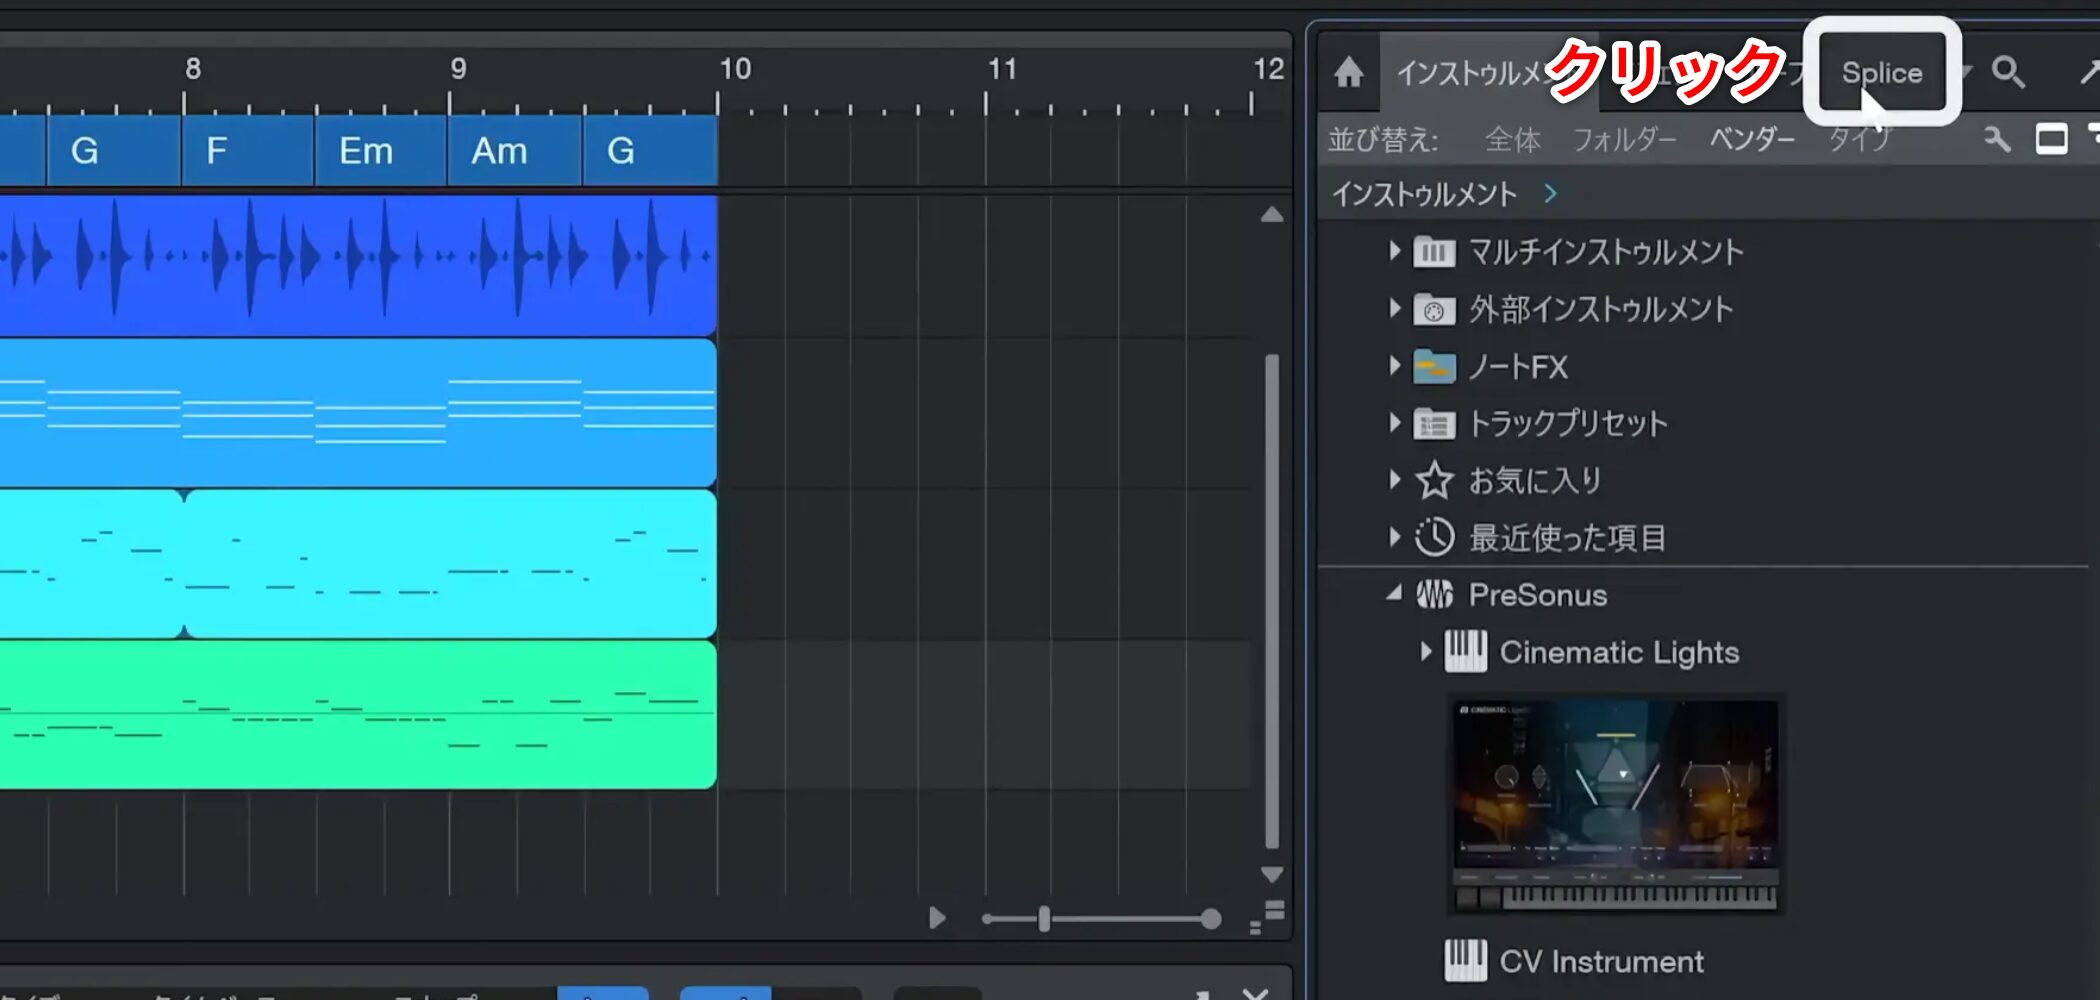
Select Splice in the Browse menu to access it.
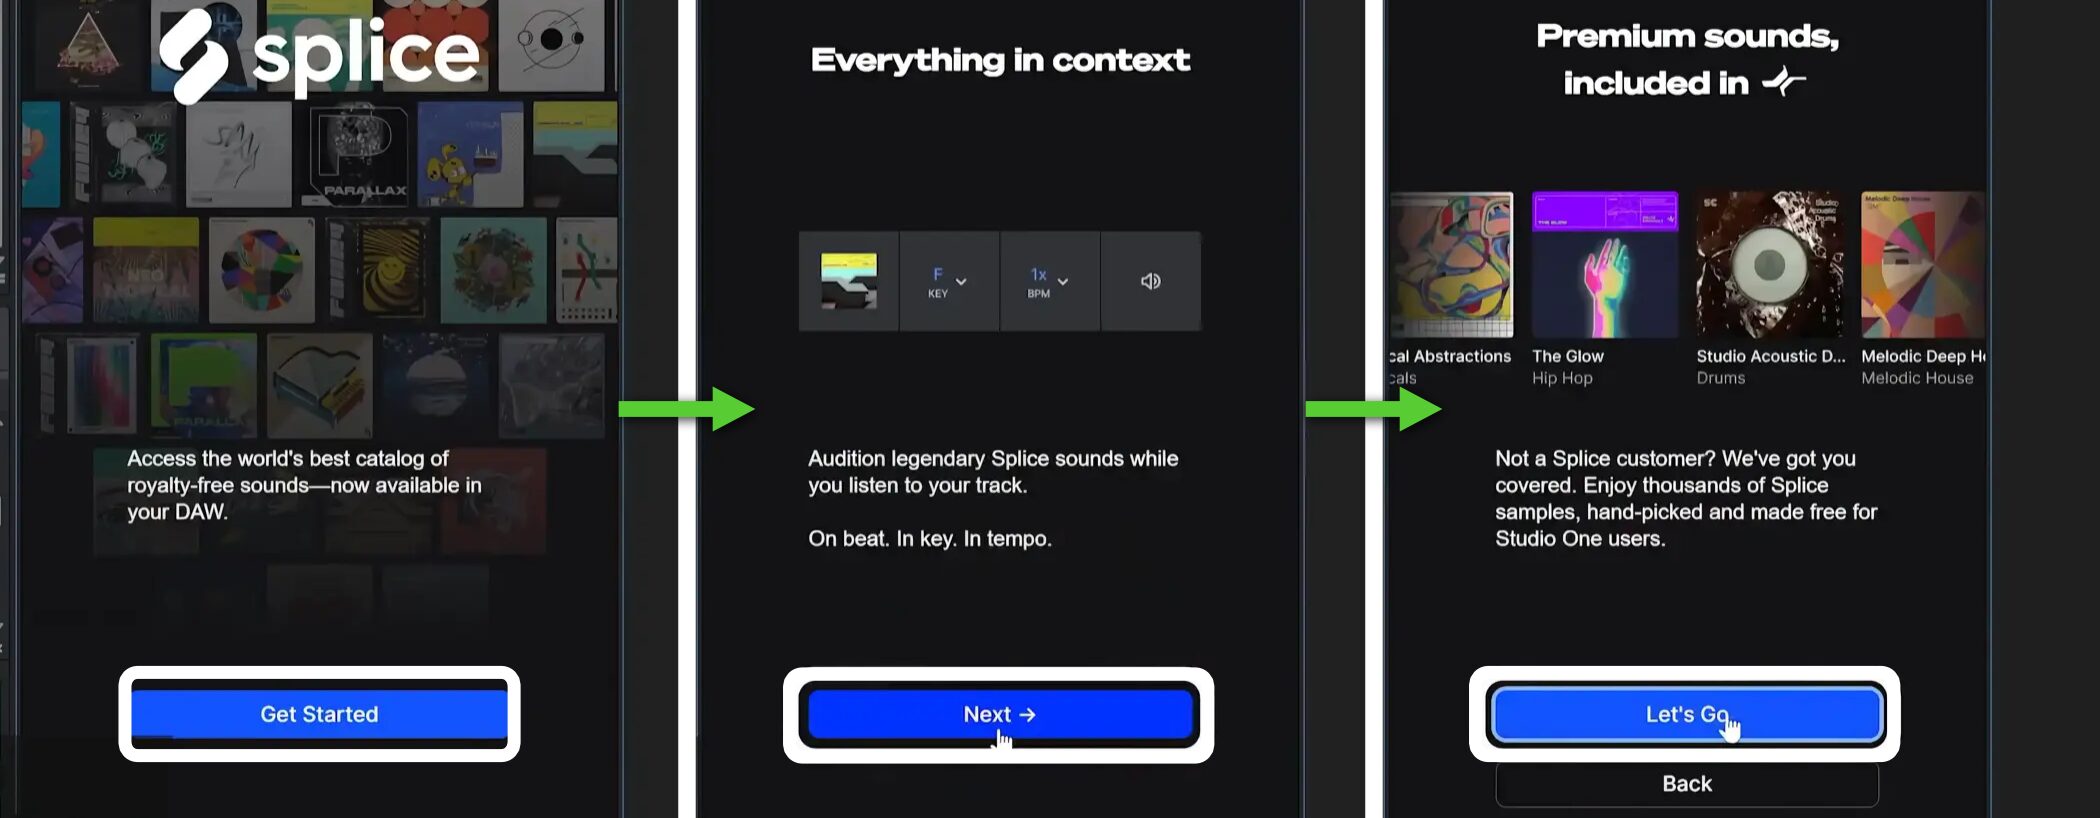
First click Get Started, then select Next.
Then click Let’s Go to continue.
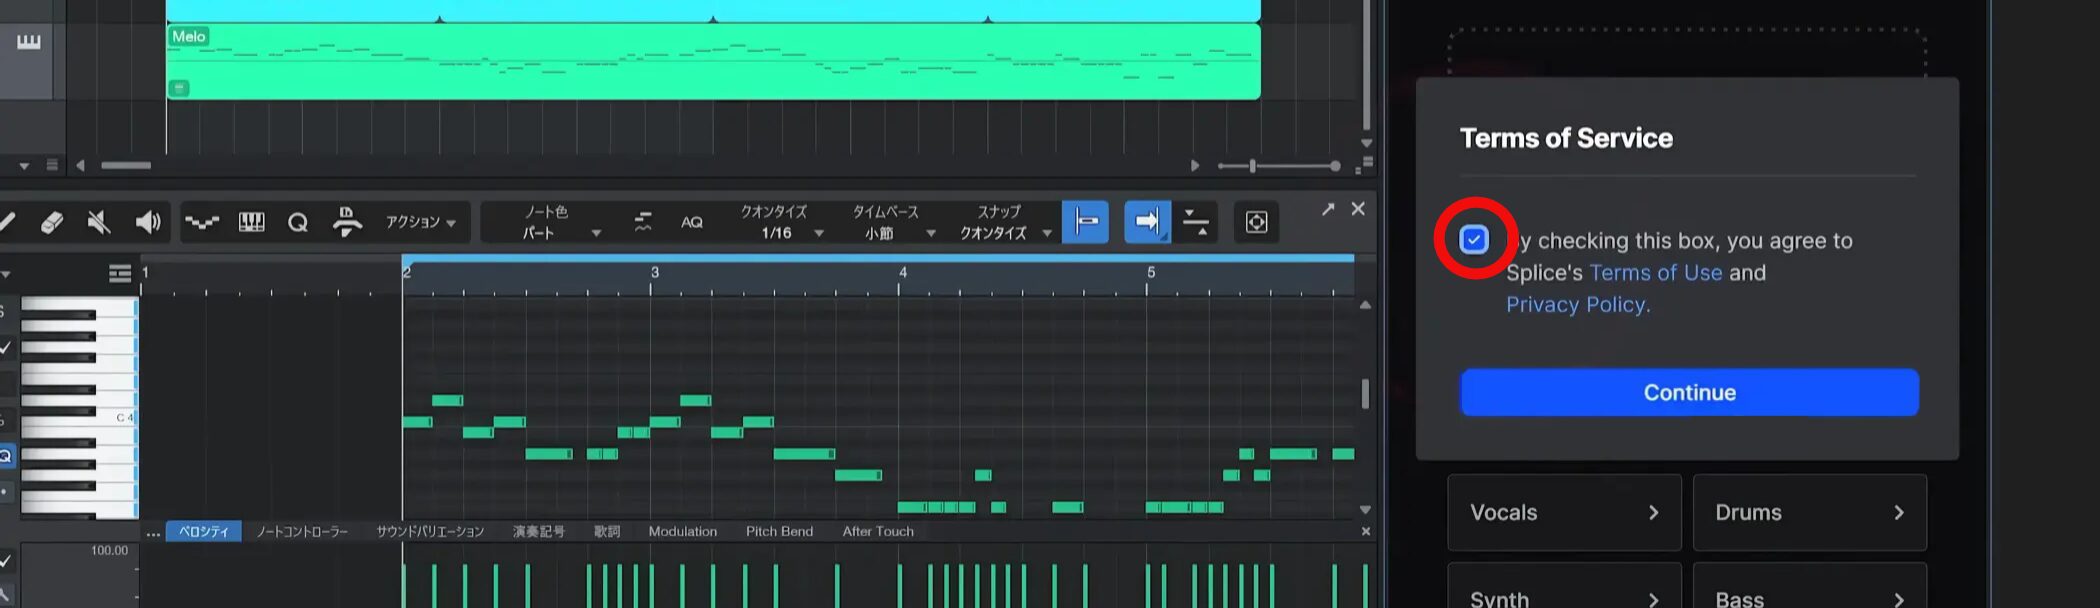
A terms of service page opens. Review the terms, check the box, and click Continue.
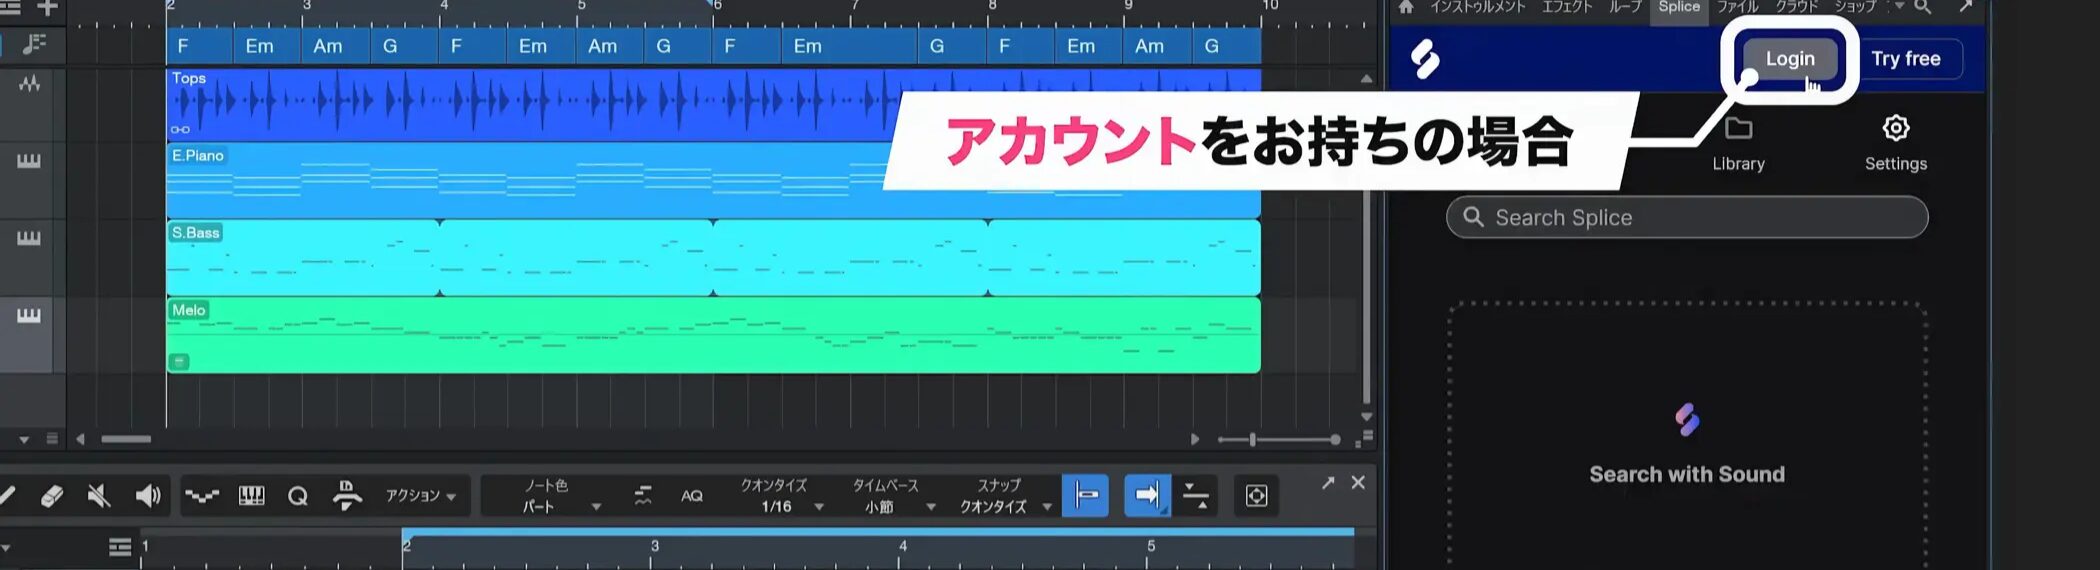
If you already have an account, select Log In.
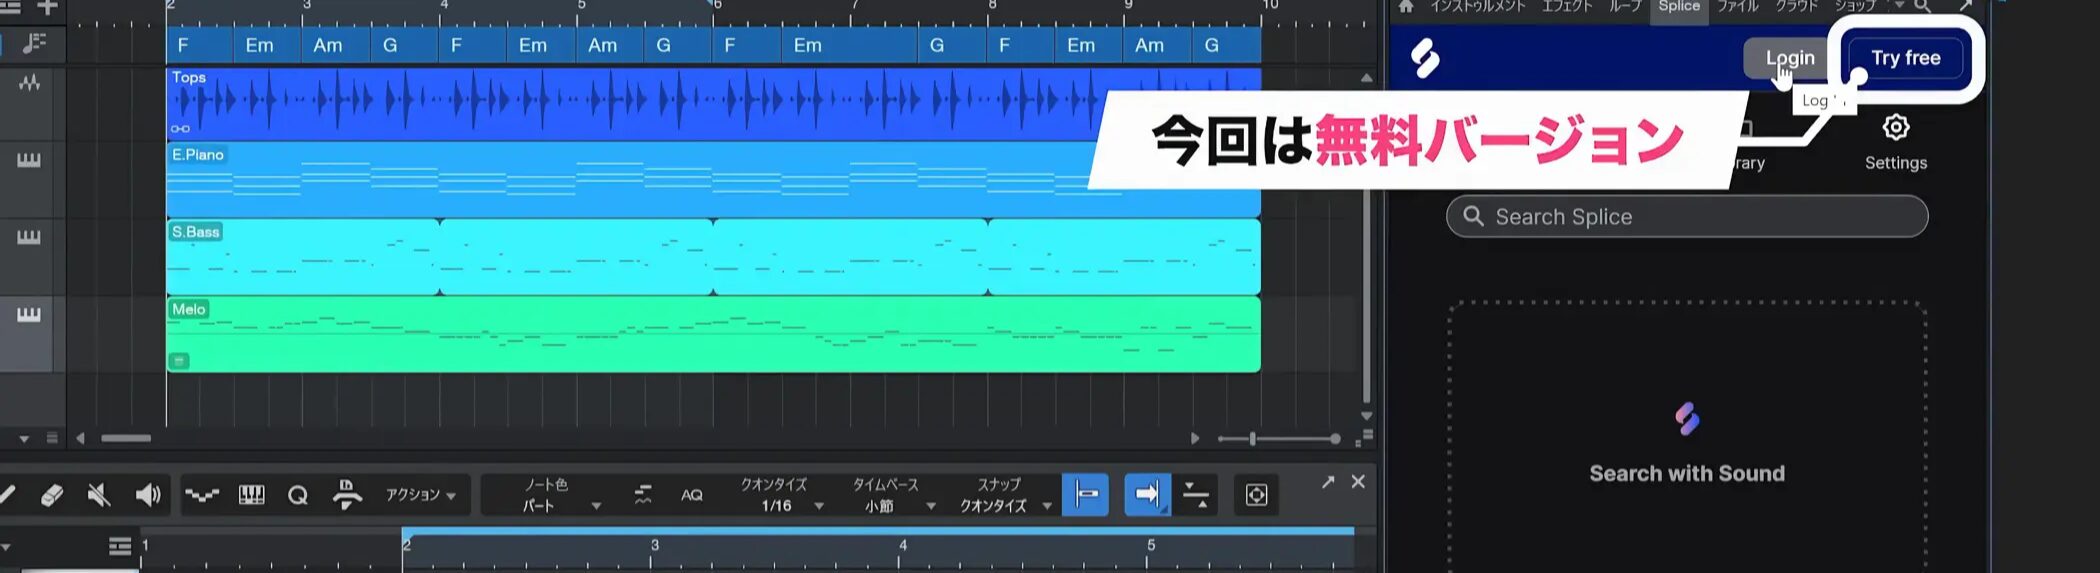
To use a free account, click Try free.
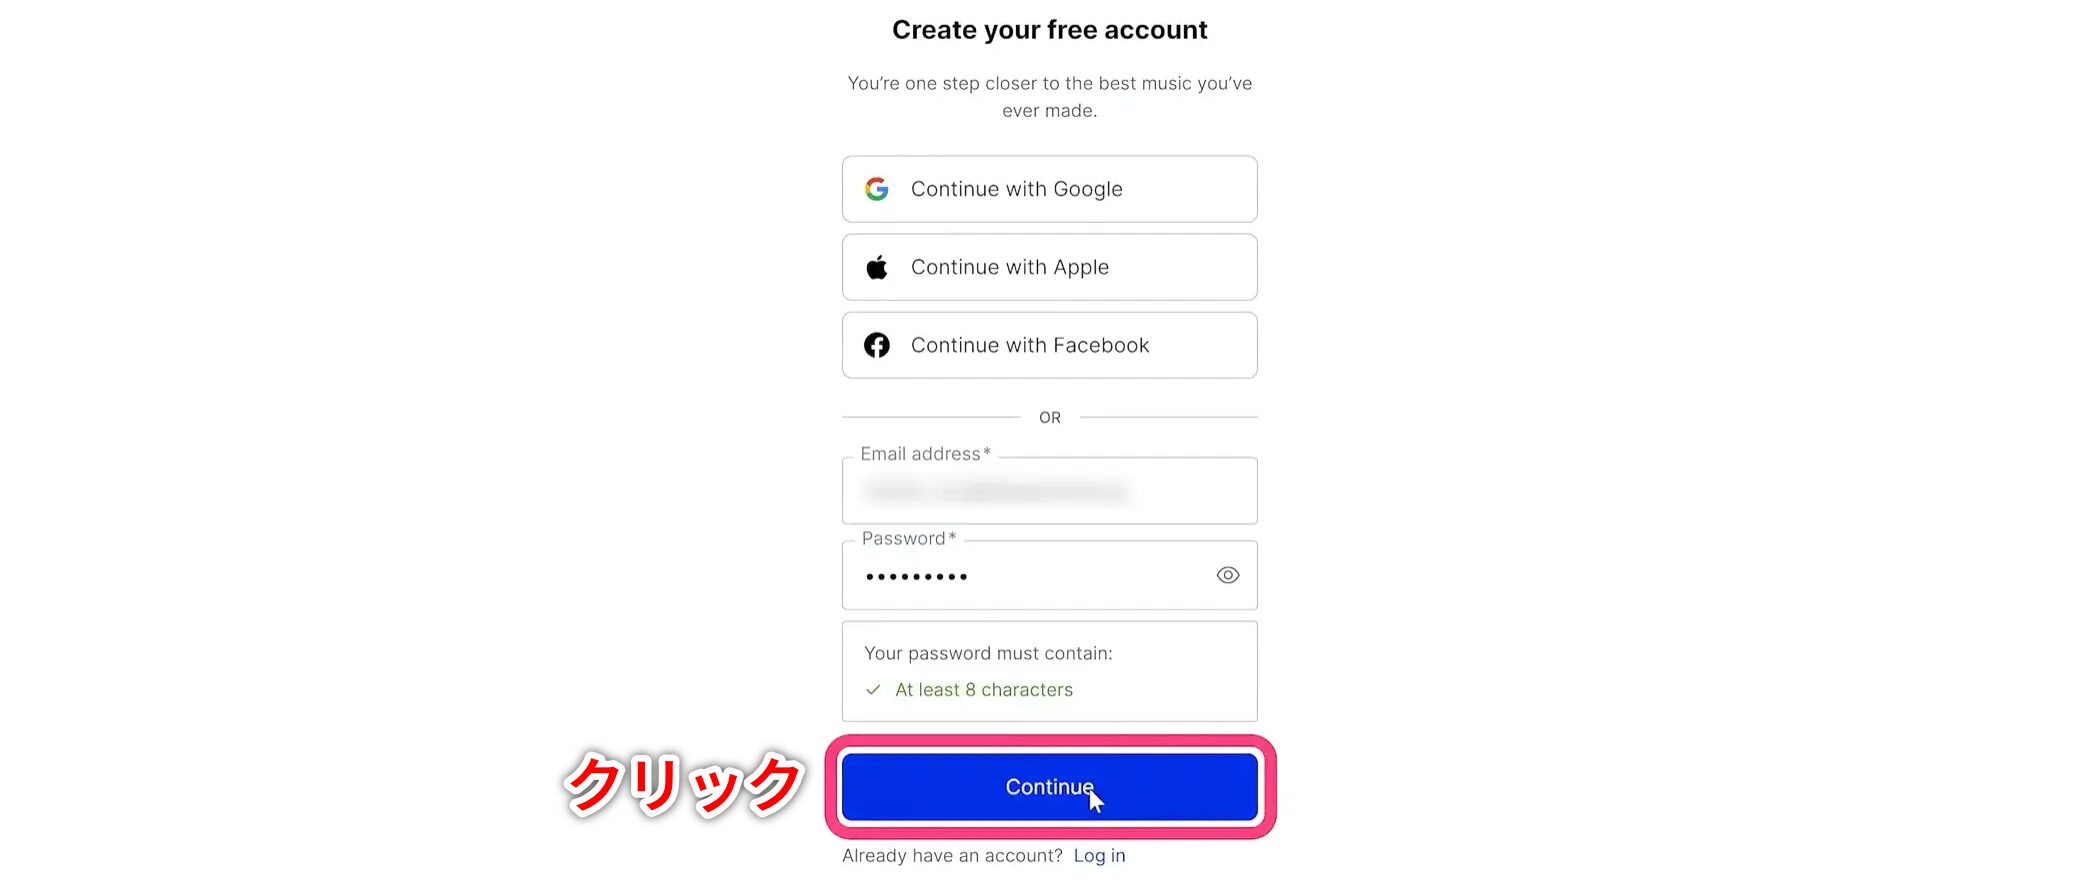
On the account creation page, you can sign up using a Google account, Apple account, or your email address.
Enter the required information and click Continue.
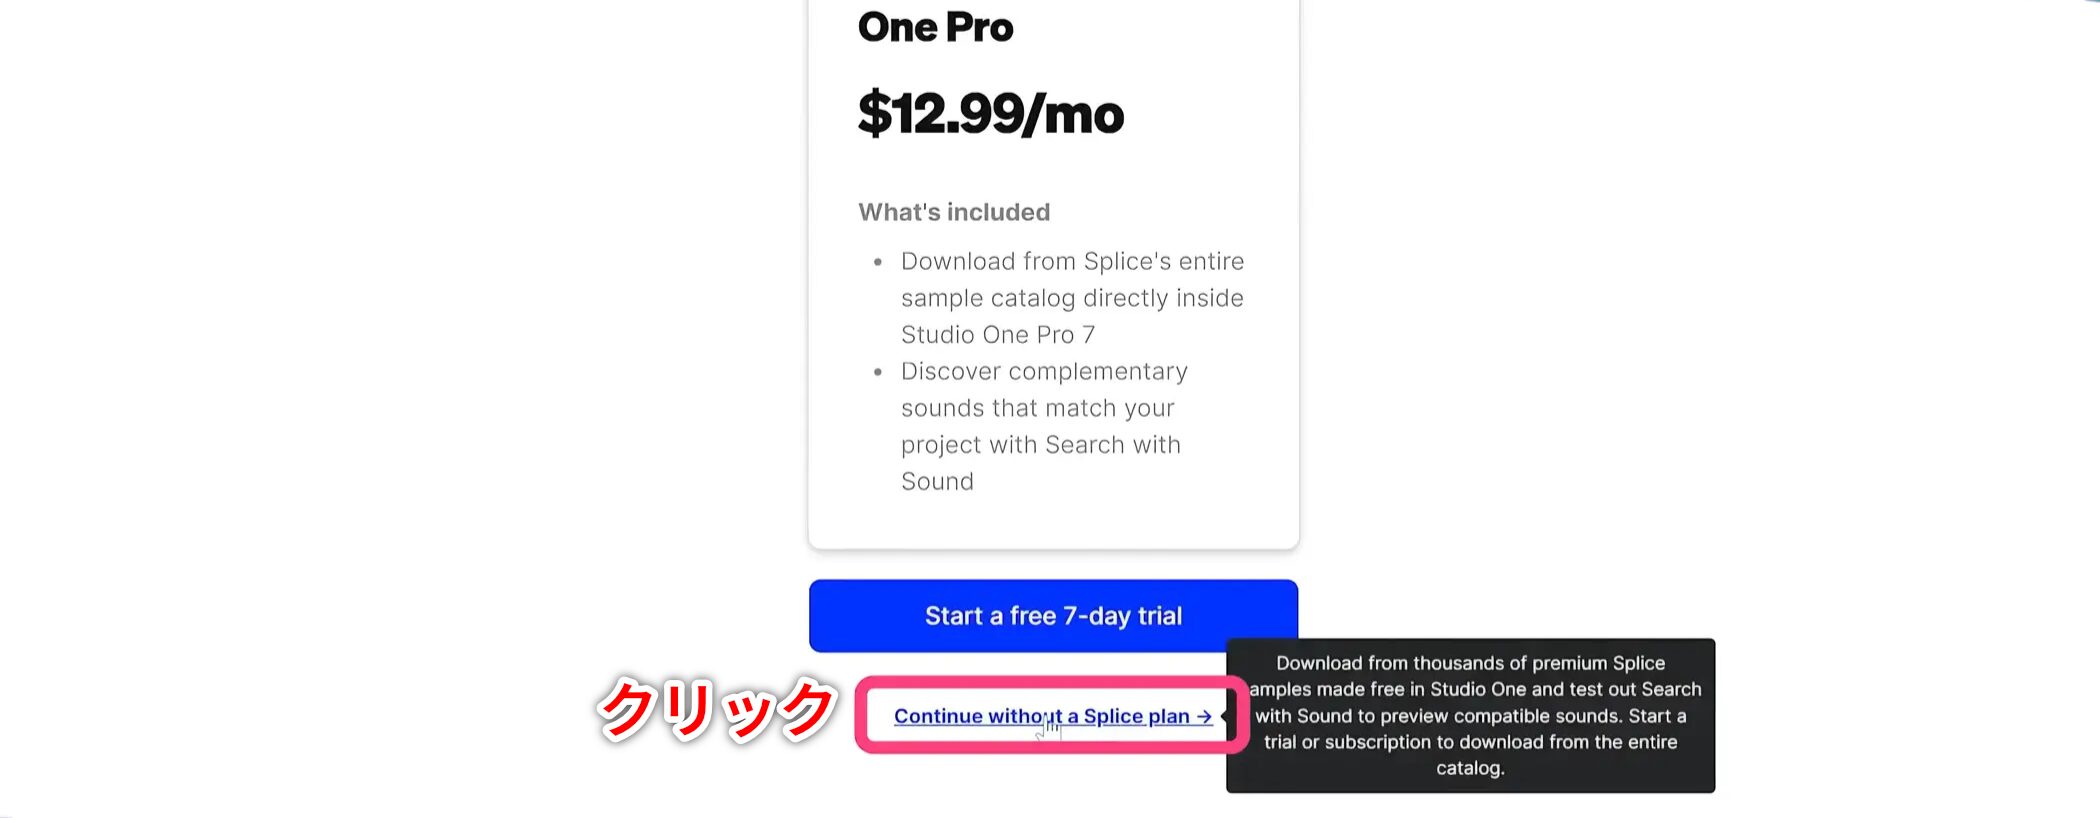
A paid account offer appears. To use a free account for this example, click the link at the bottom of the screen.
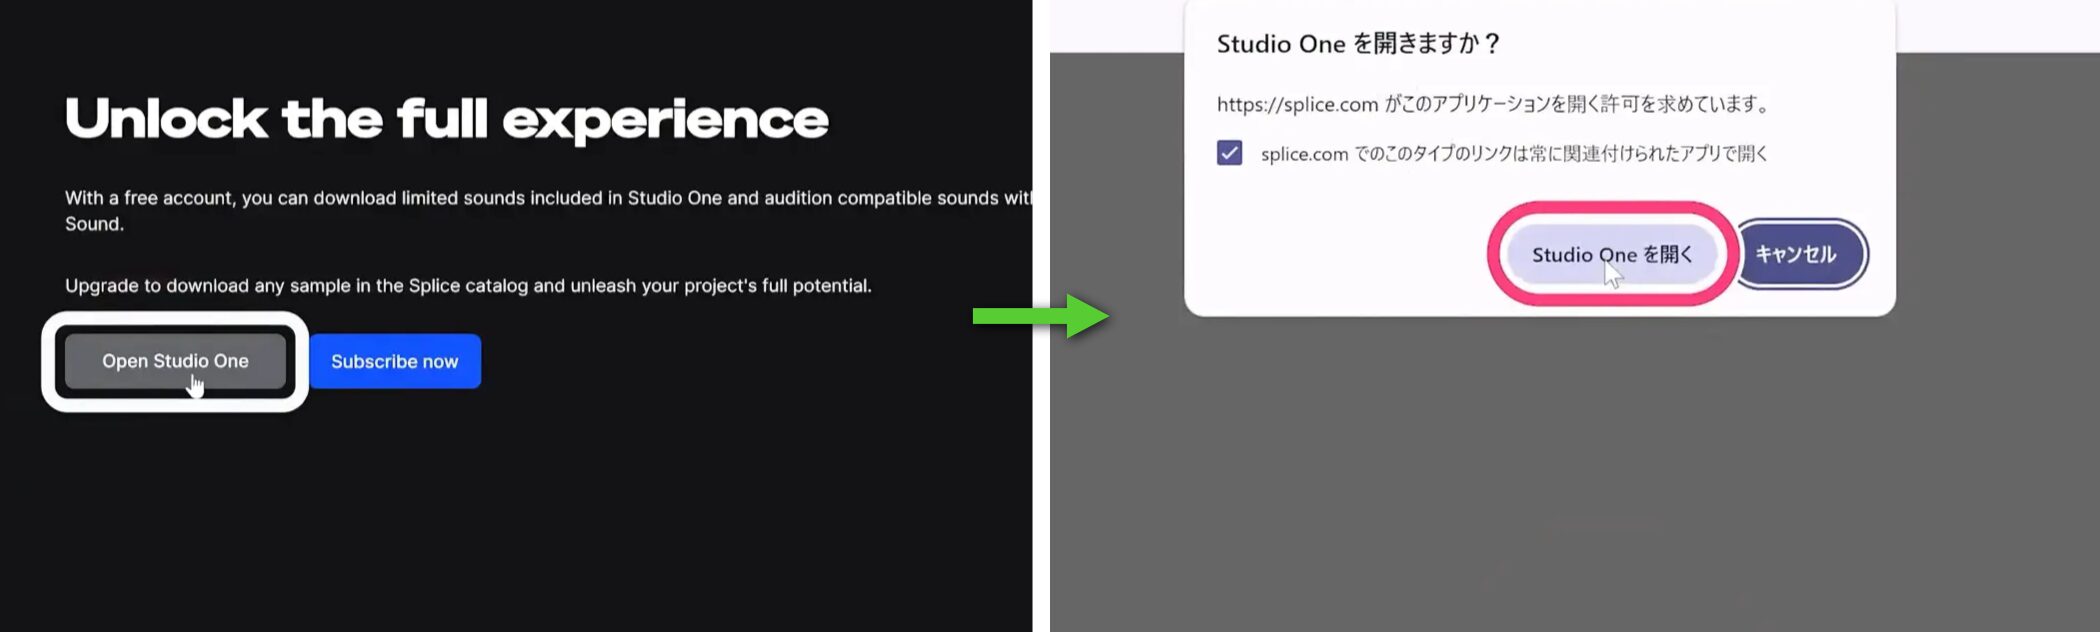
Next, click Open Studio One.
When the confirmation screen appears, check the box and select Open Studio One.
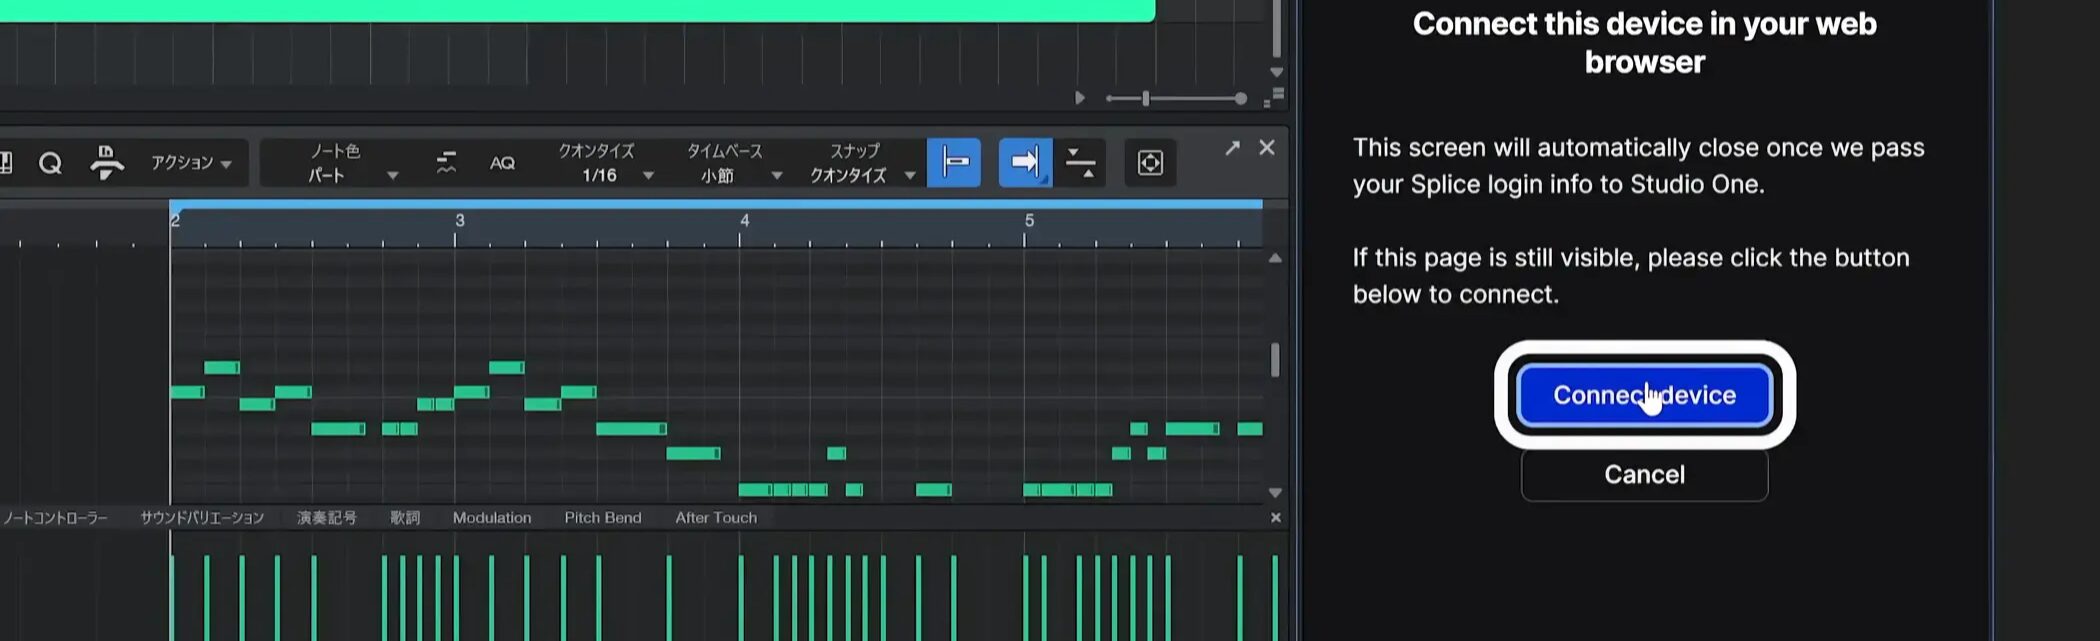
Back in Studio One, click Connect Device.

A code appears on the screen. Click Confirm to continue.

Setup is complete when the connection confirmation screen appears.
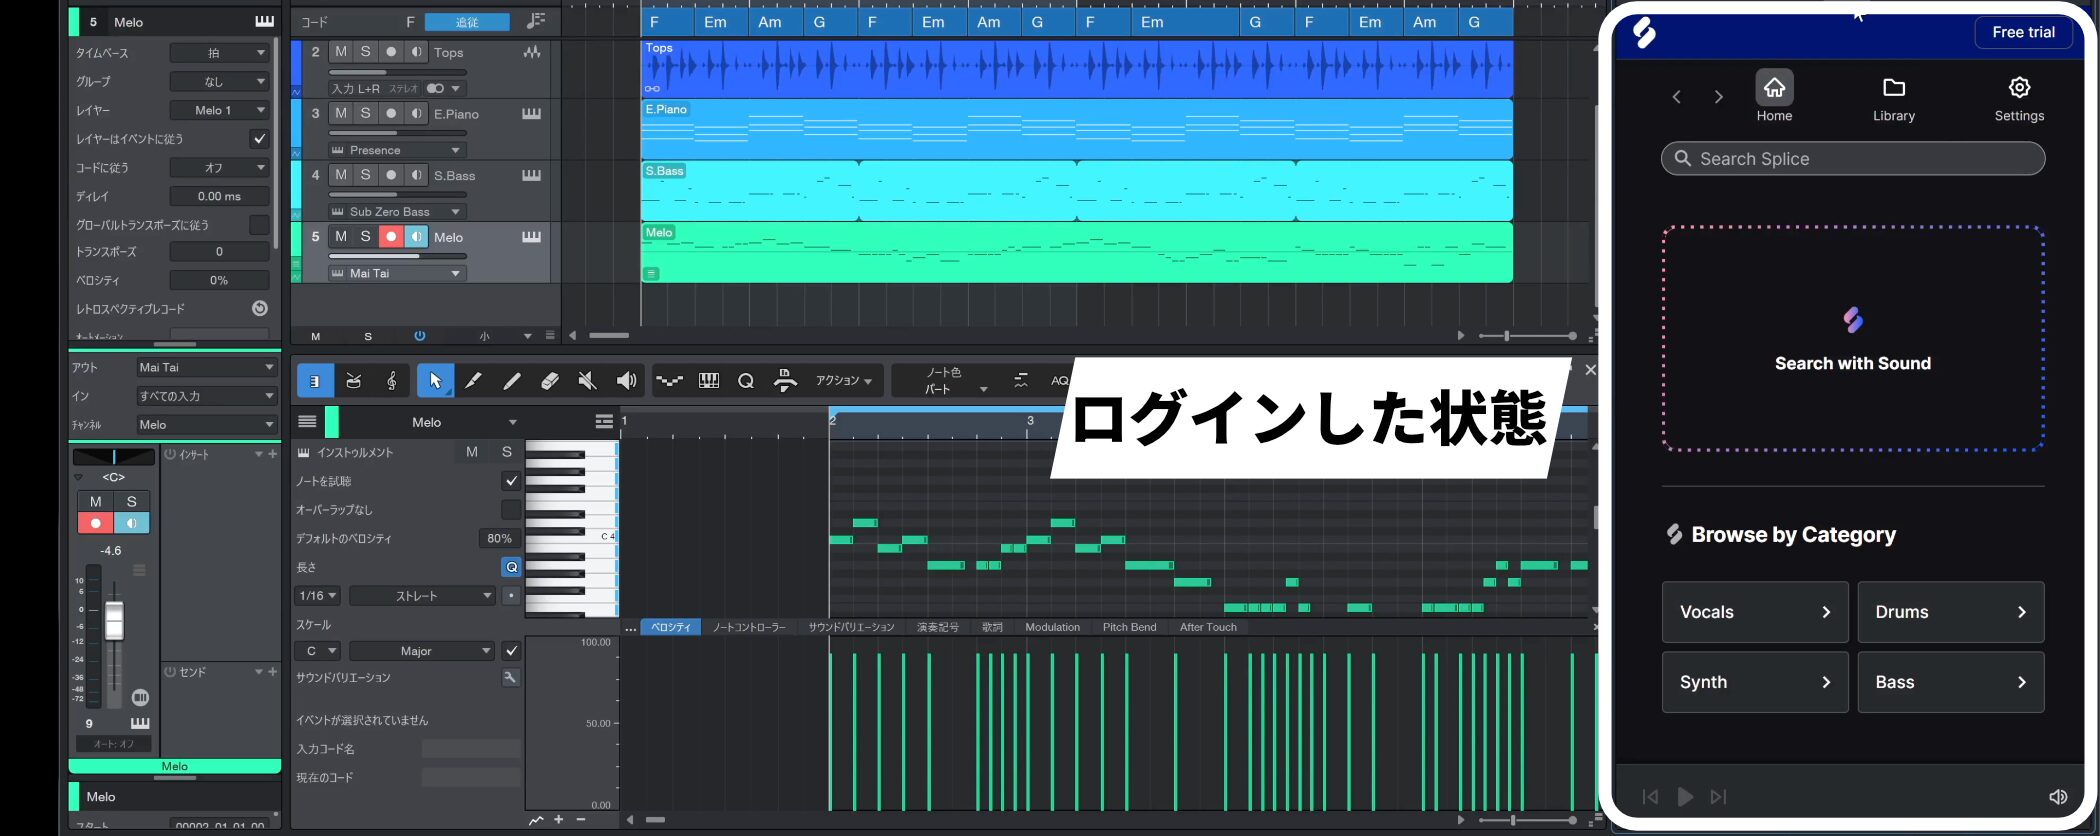
When you return to Studio One, you can use Splice while signed in.
Searching and previewing samples by category
Splice samples are organized by use and genre, making them easier to search.
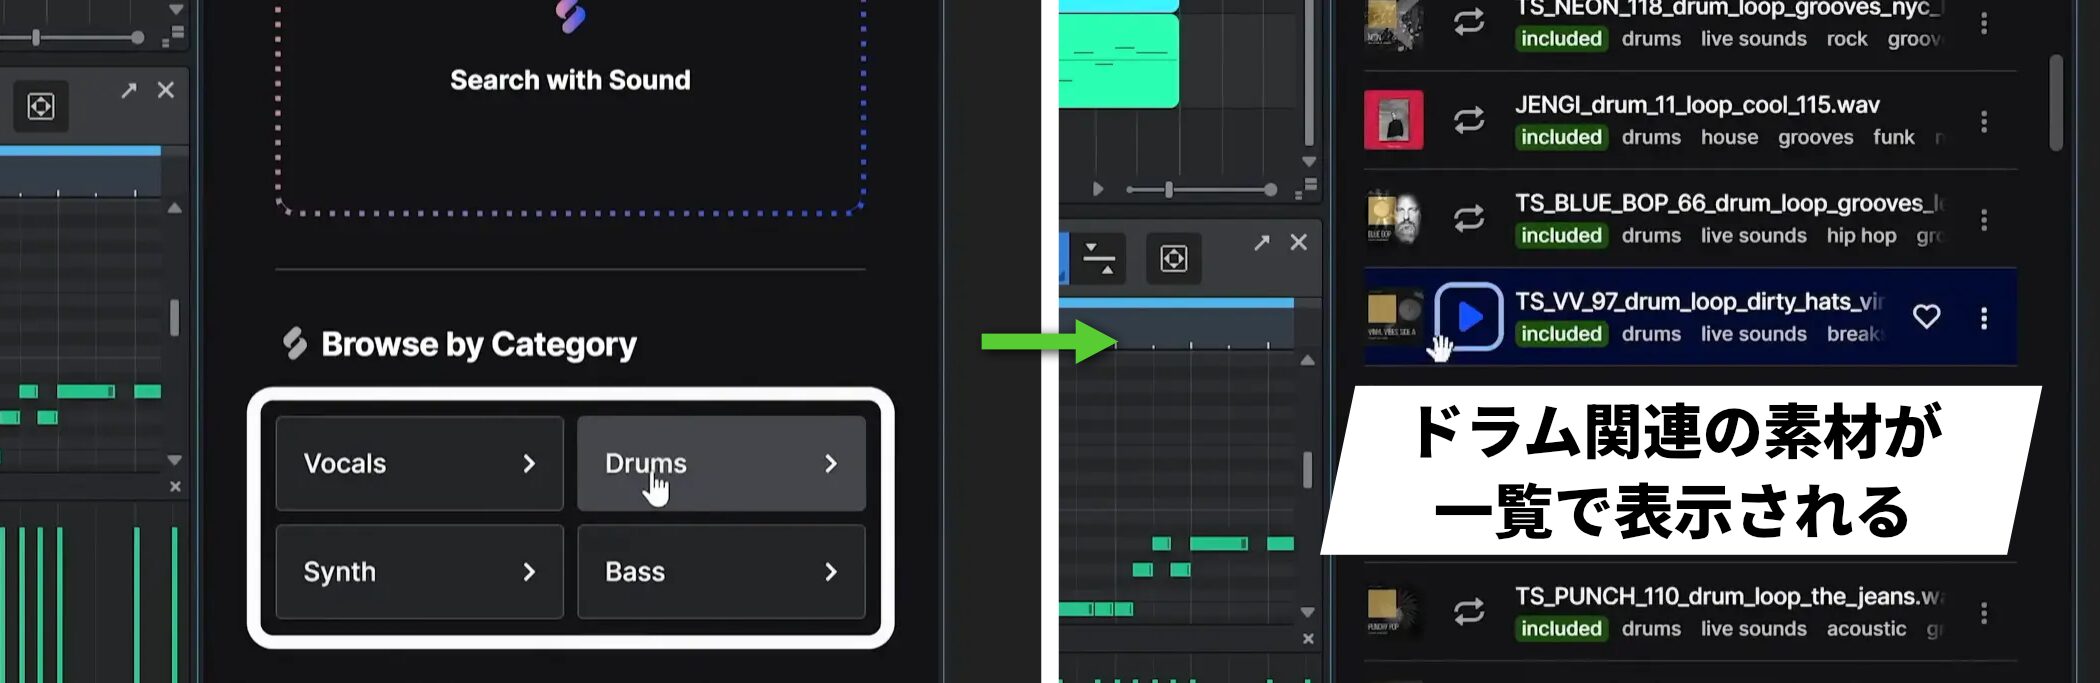
For example, select the Drums category to see a list of drum-related samples.
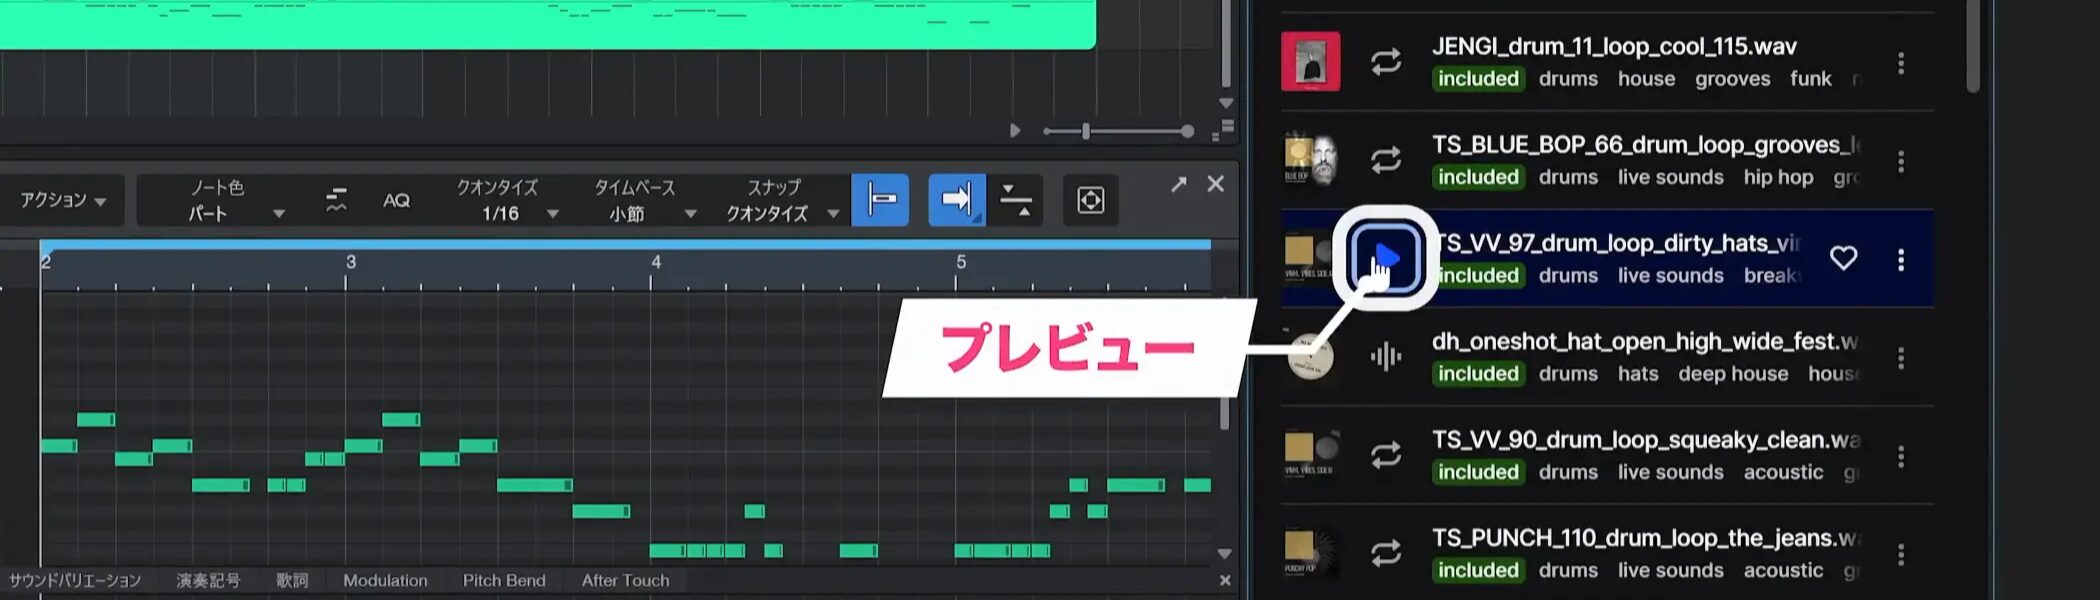
Click a sample’s play button to preview its sound and content before downloading.
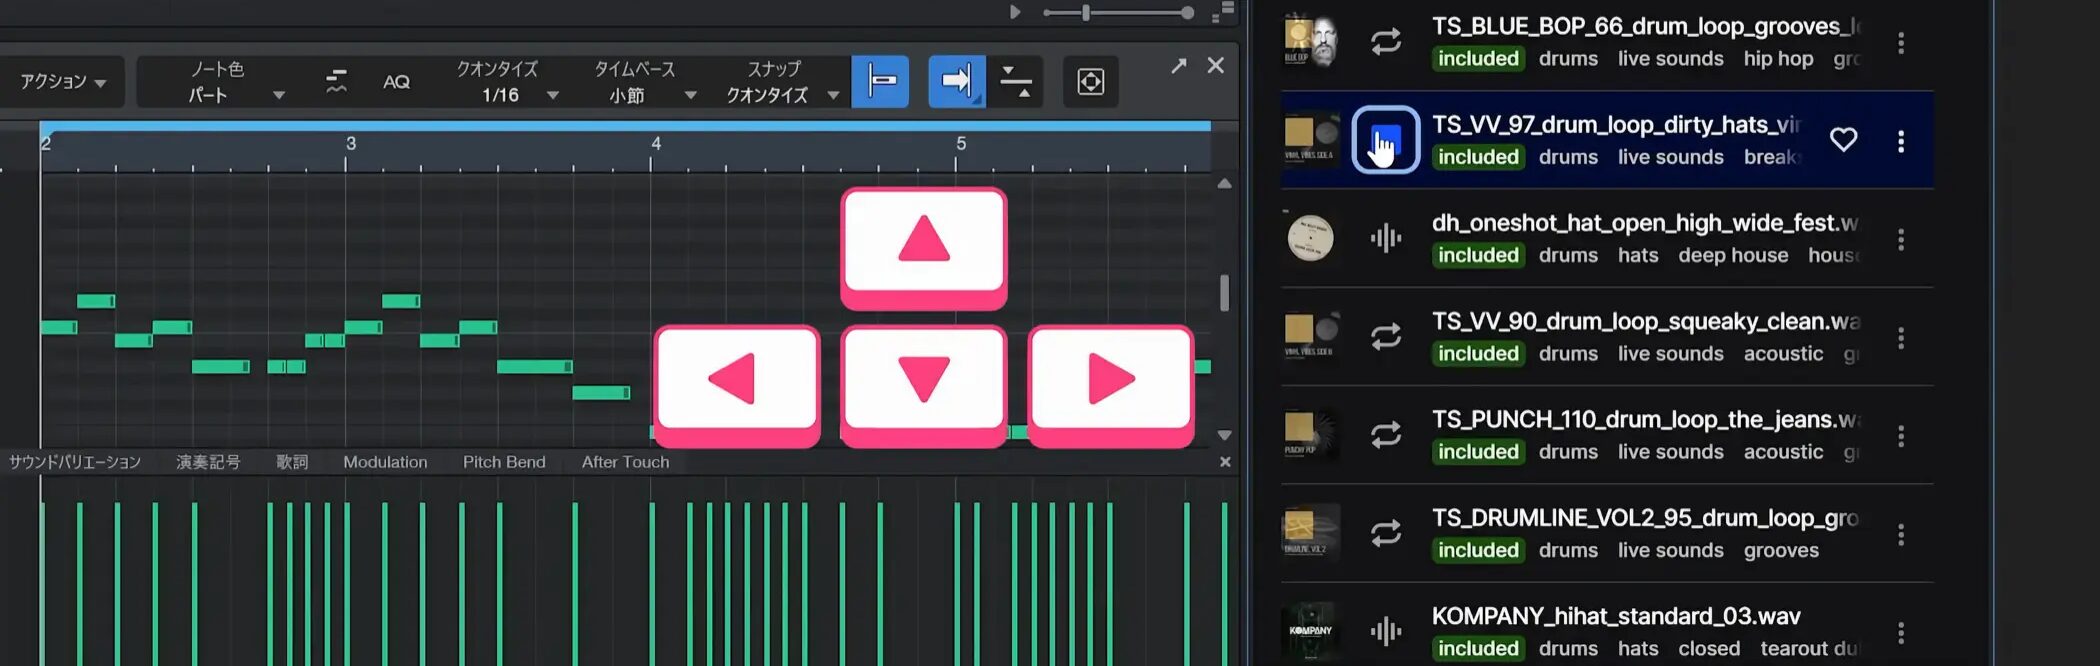
Use the keyboard’s up and down arrow keys to move between samples and choose efficiently.
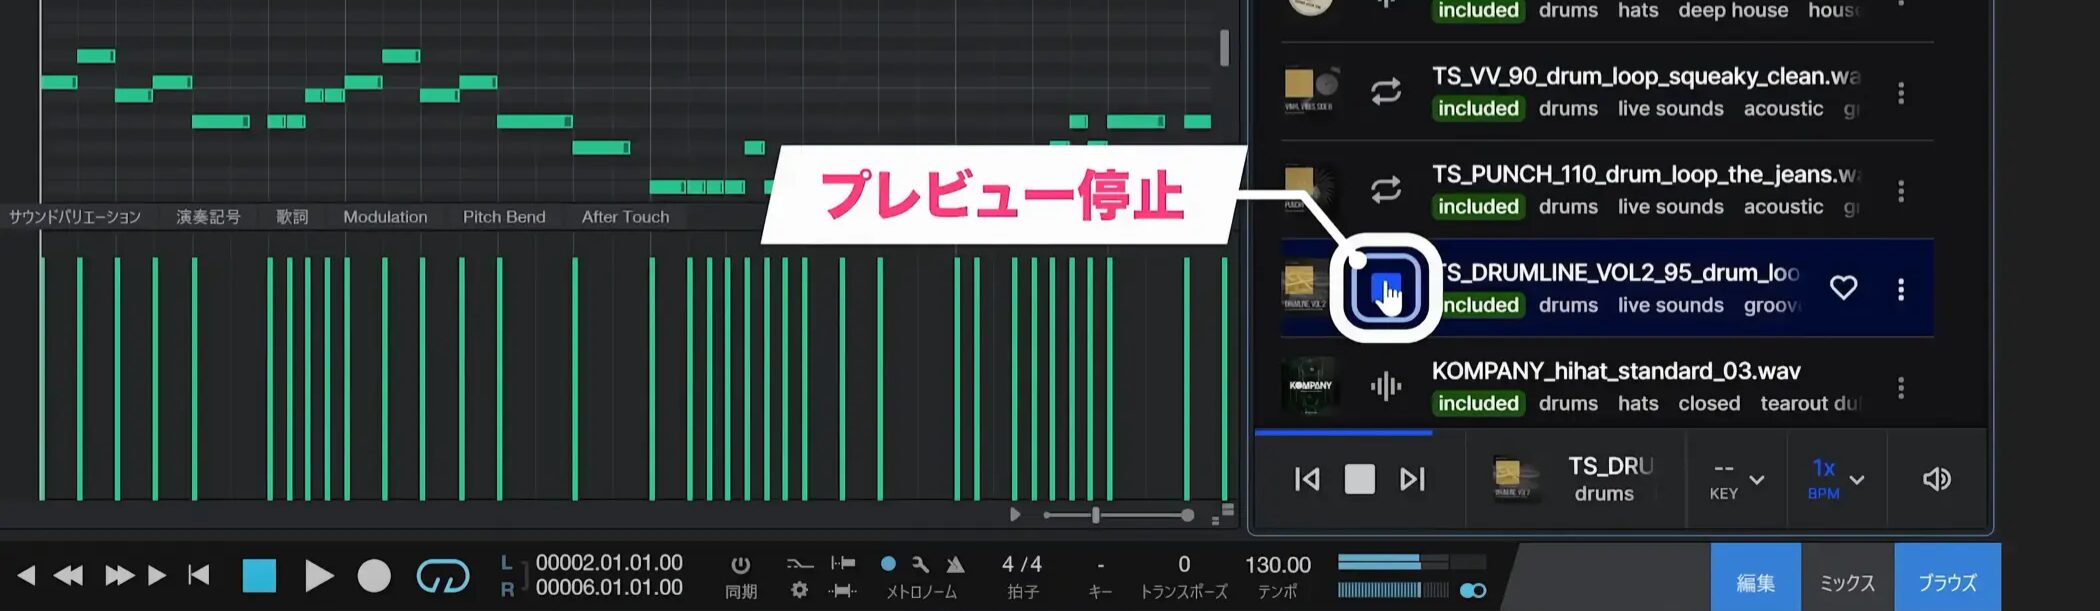
To stop a preview, click the stop icon.
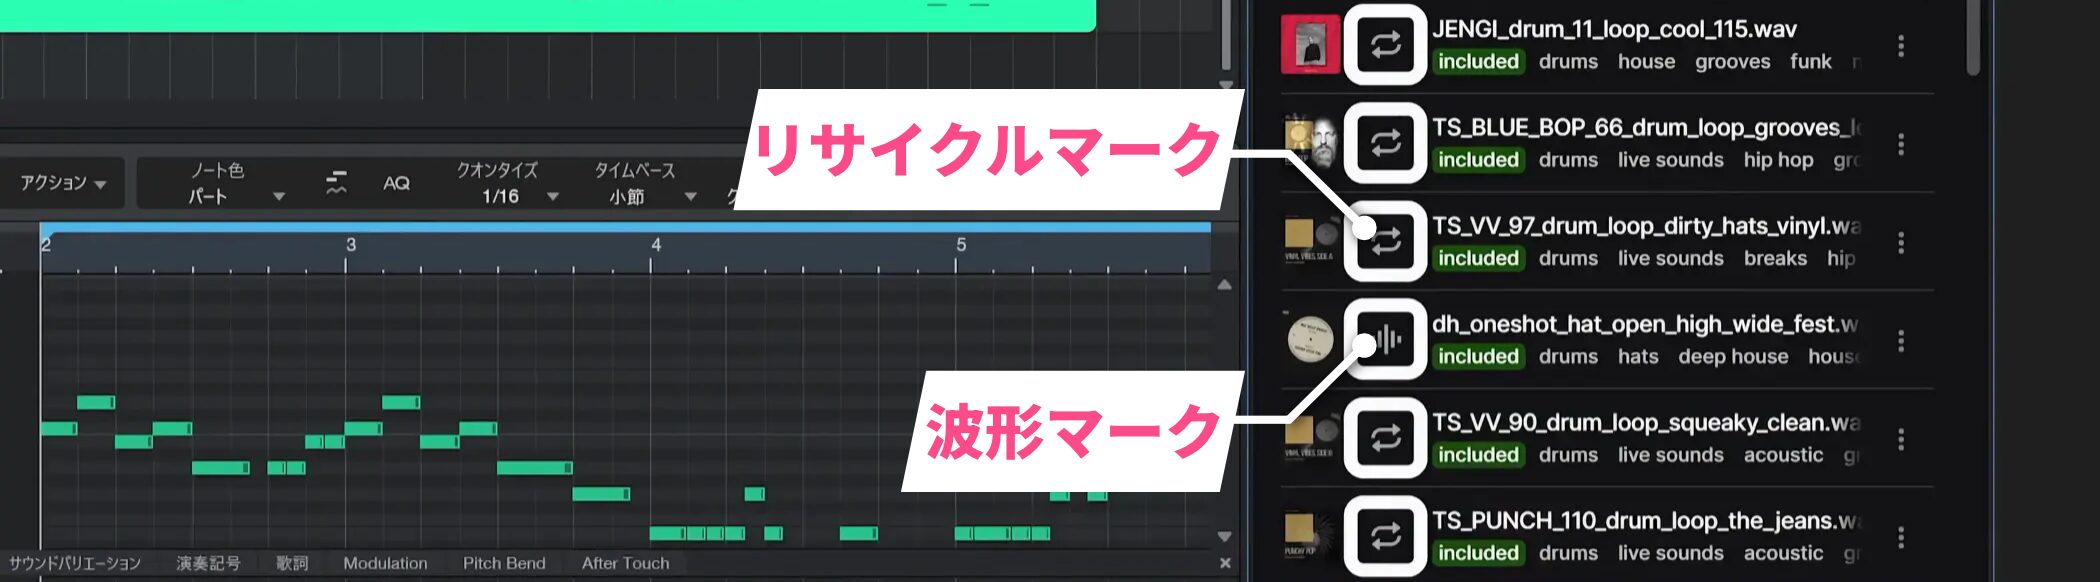
To the right of each sample’s artwork are a recycle symbol and a waveform symbol: the recycle symbol indicates a loop, while the waveform symbol indicates a one-shot.
Placing and managing samples
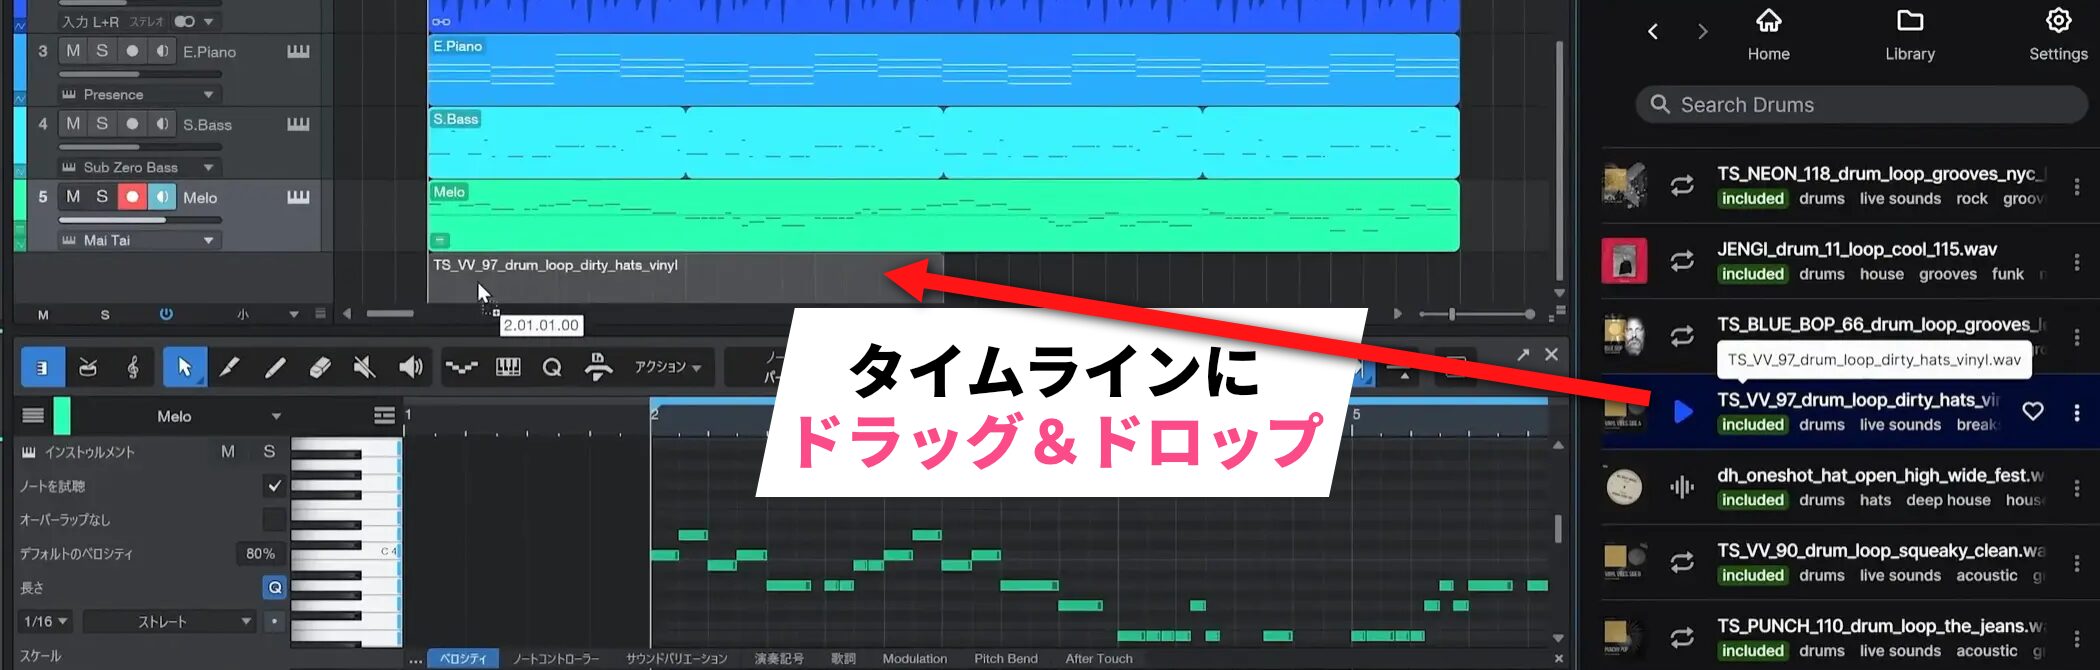
When you find a sample you want, drag and drop it directly onto an empty area of the timeline.
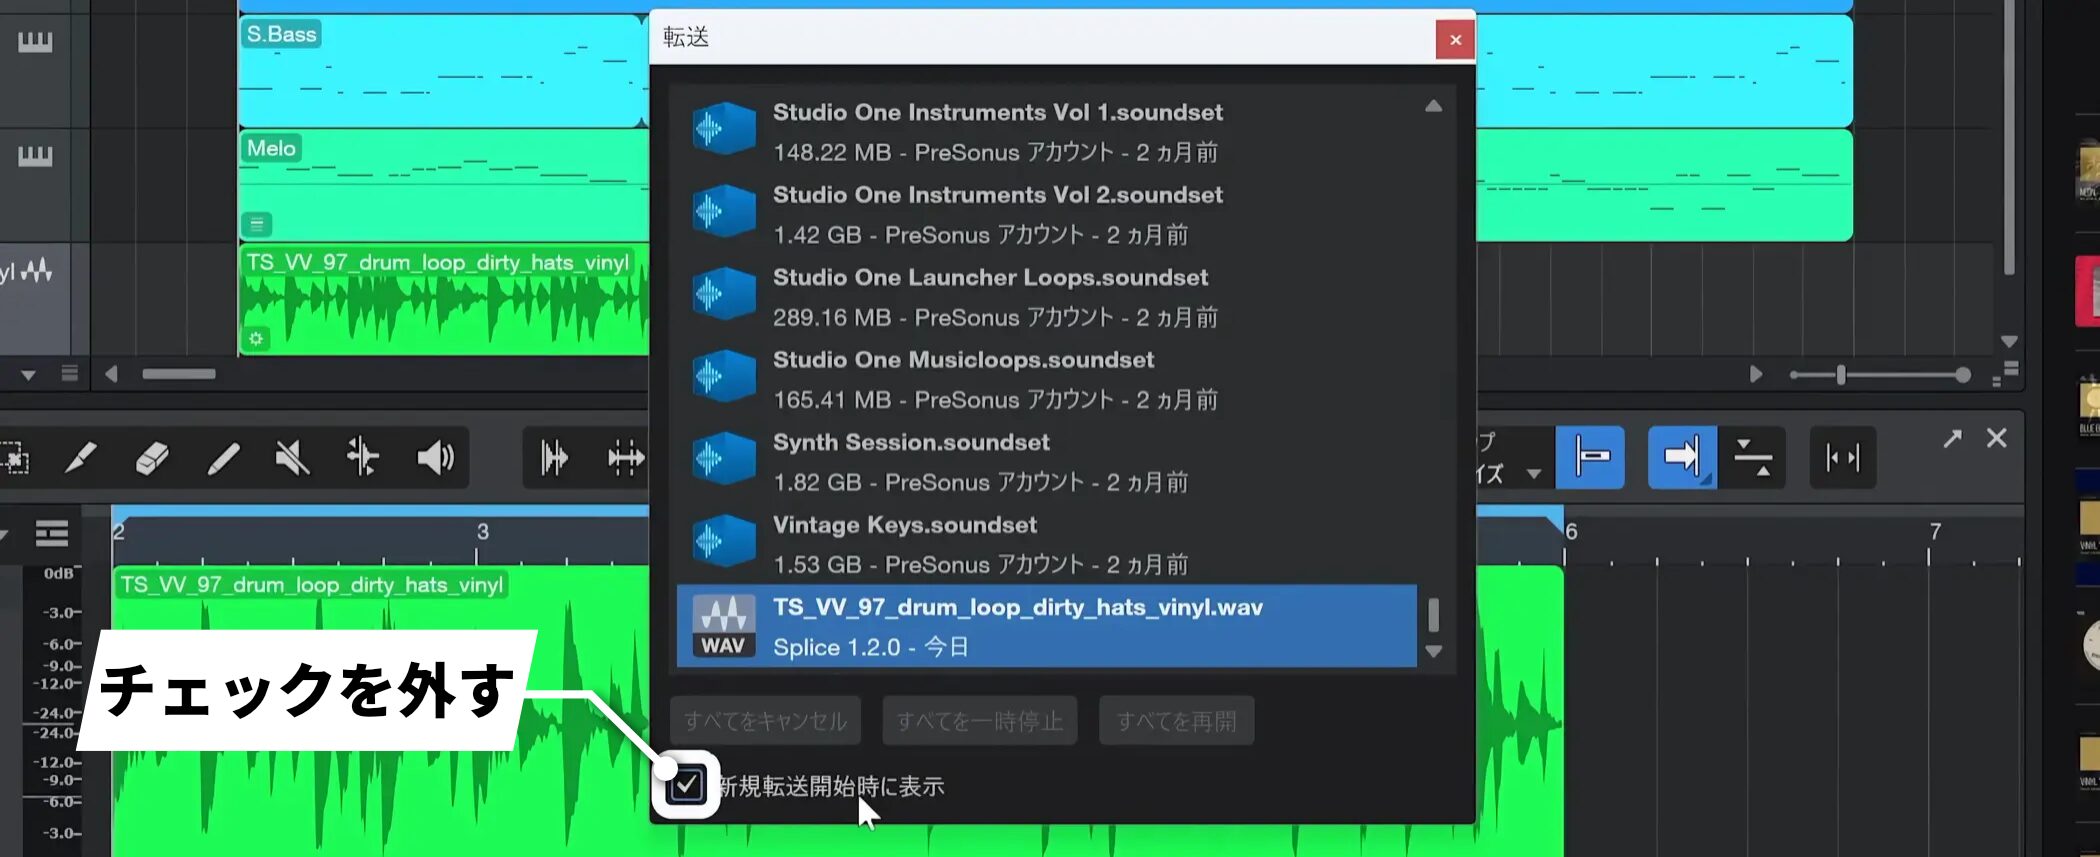
A transfer window may appear when the sample loads. Clear its checkbox to prevent it from appearing next time.
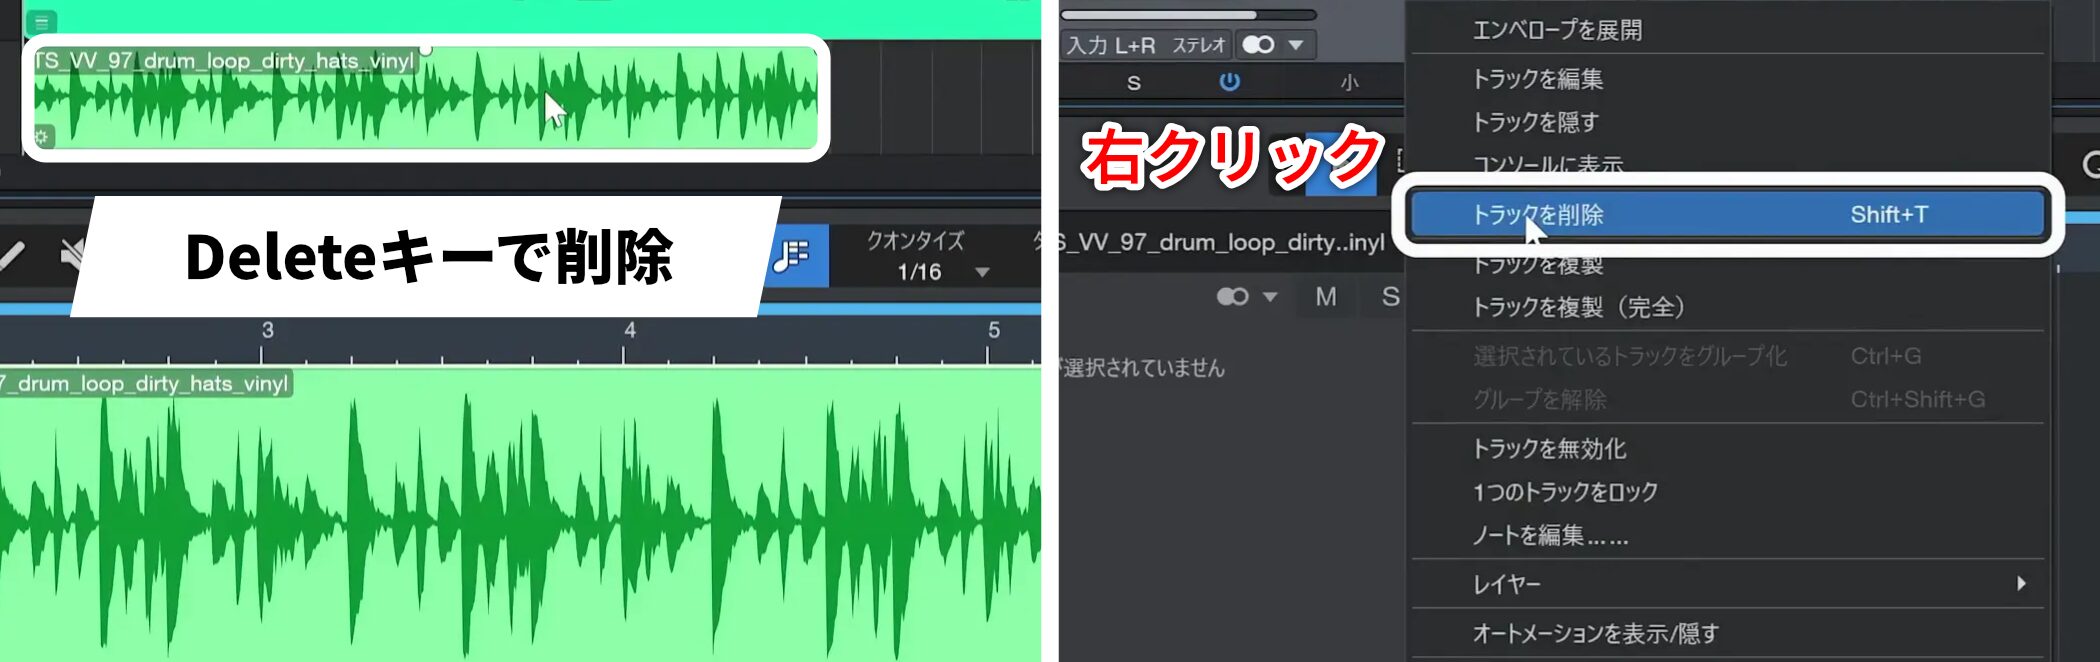
If you no longer need a placed sample, select it and press Delete.
To remove the entire track, right-click the track and choose Remove Track.
Advanced search and filters
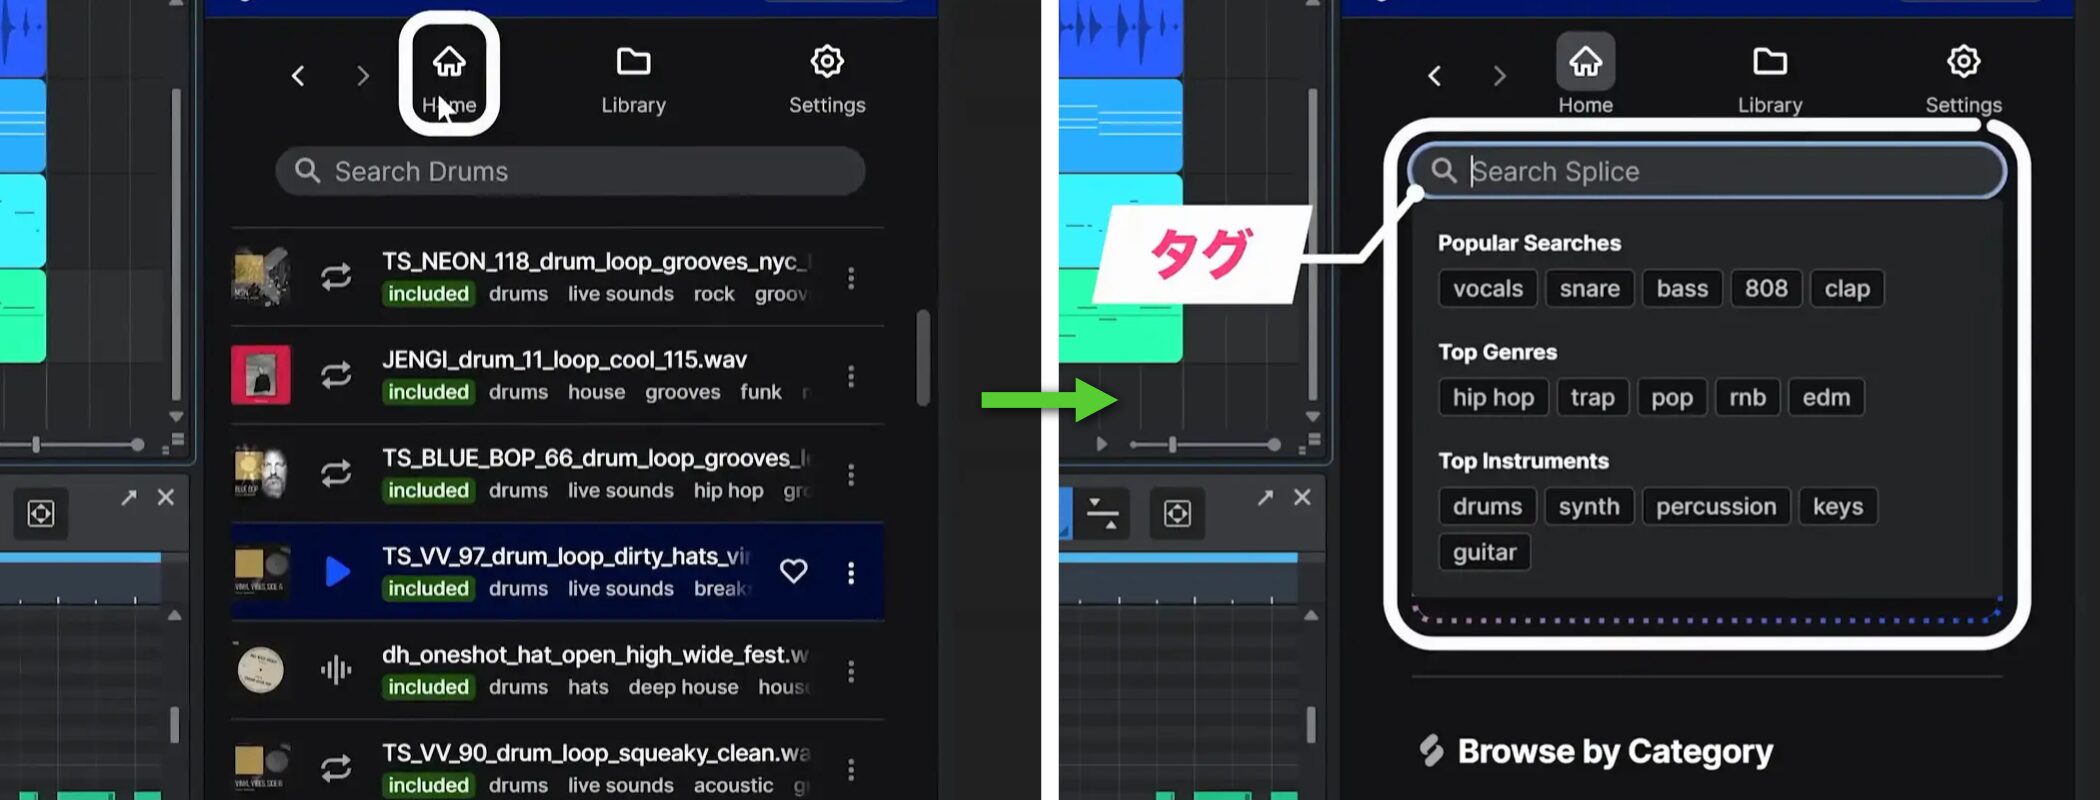
To find something more specific, return to the home screen and use the tag search.
Enter a keyword in the search box to see the number of matching samples.
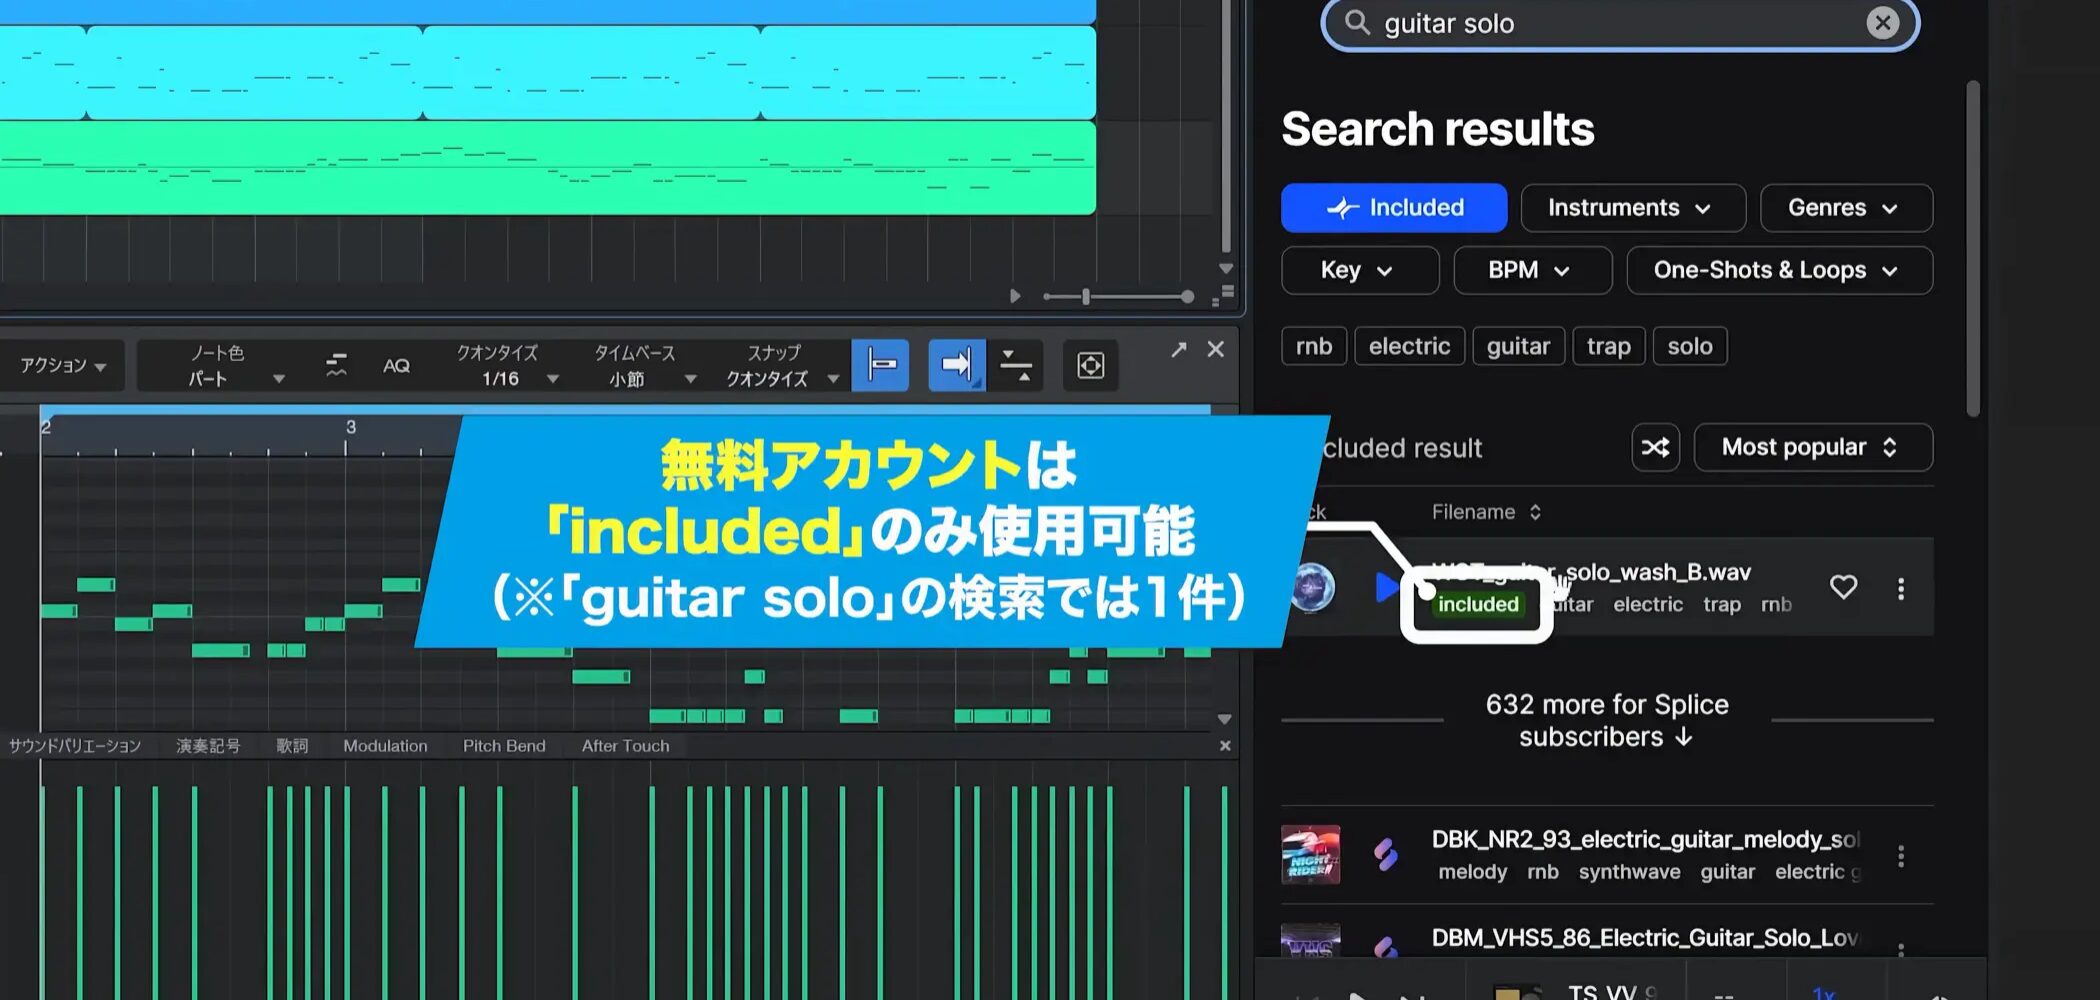
With a free account, only samples marked “included” can be used.
Samples requiring a paid account also appear, but cannot be used with a free account.
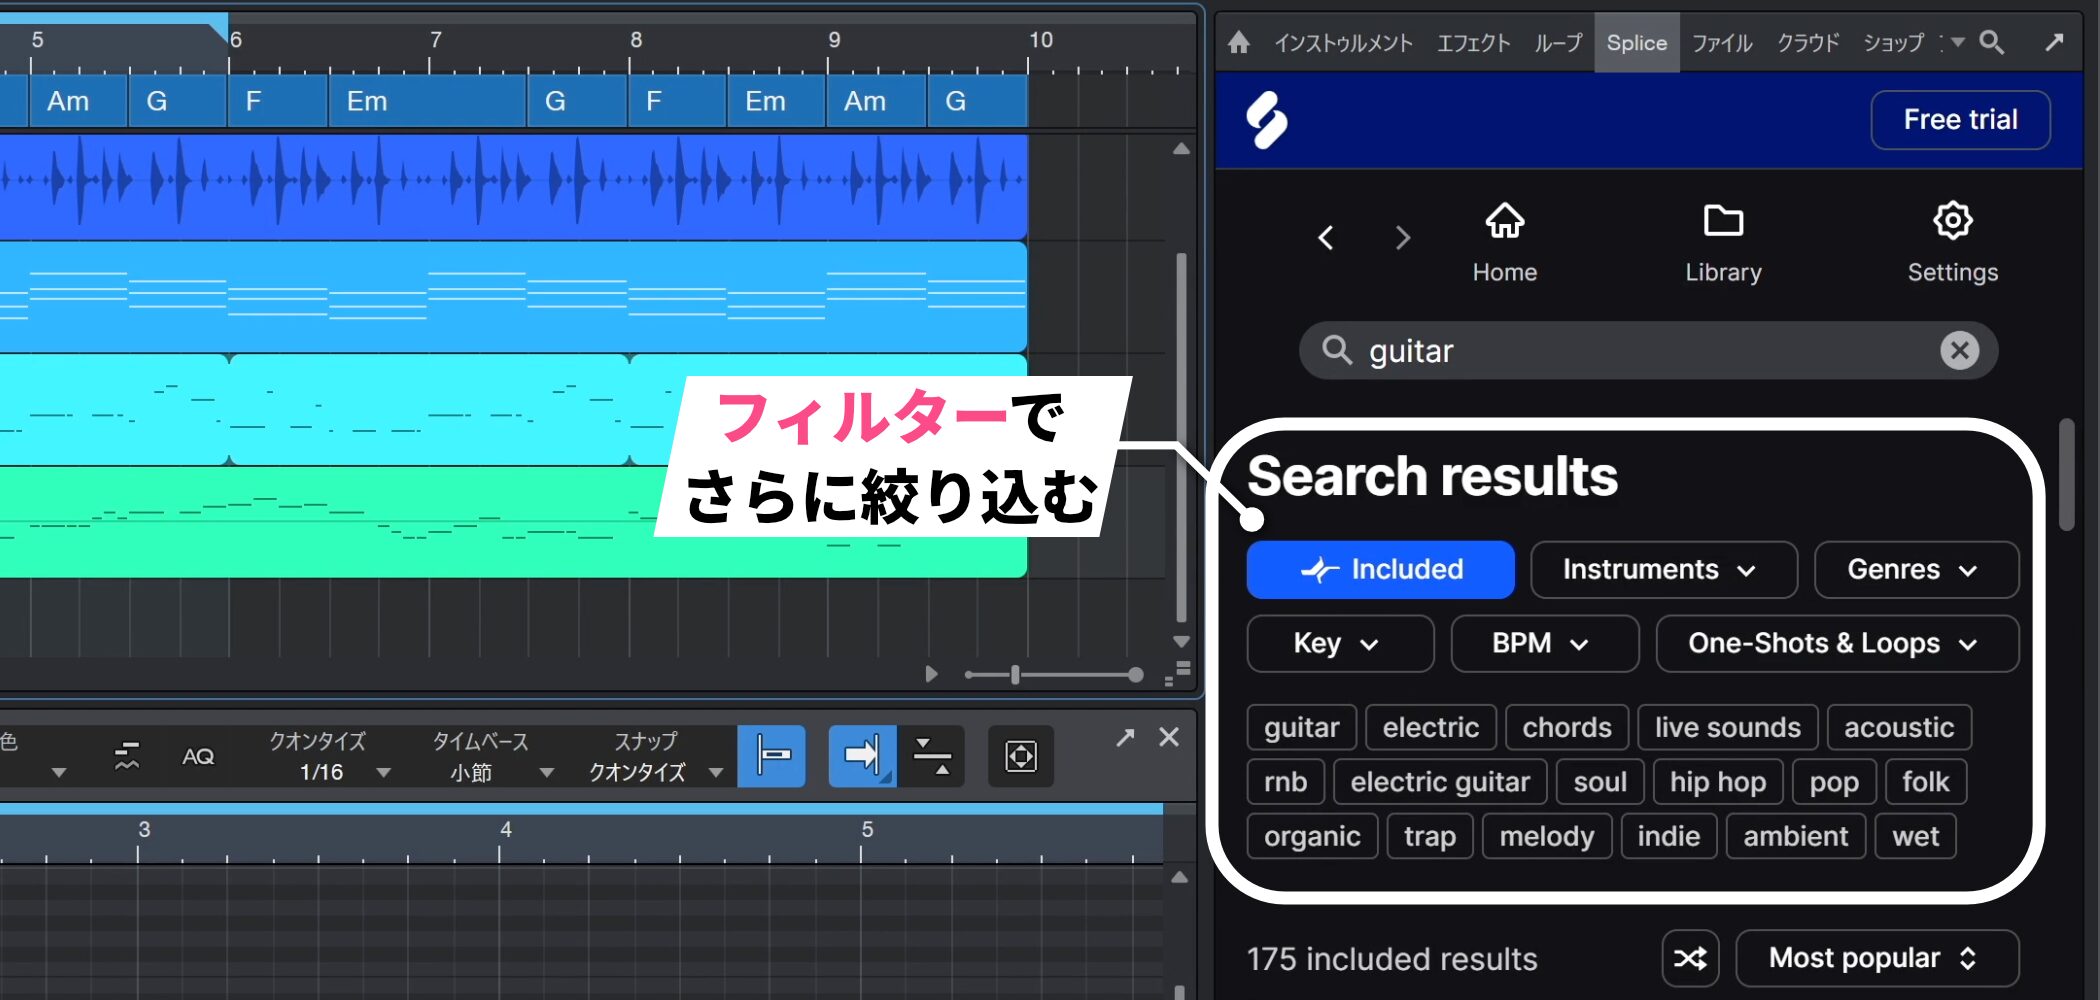
To narrow the results further, use filters such as instrument type and style.
Previewing samples alongside your song
Previewing samples while the song plays makes it easier to hear how they fit.
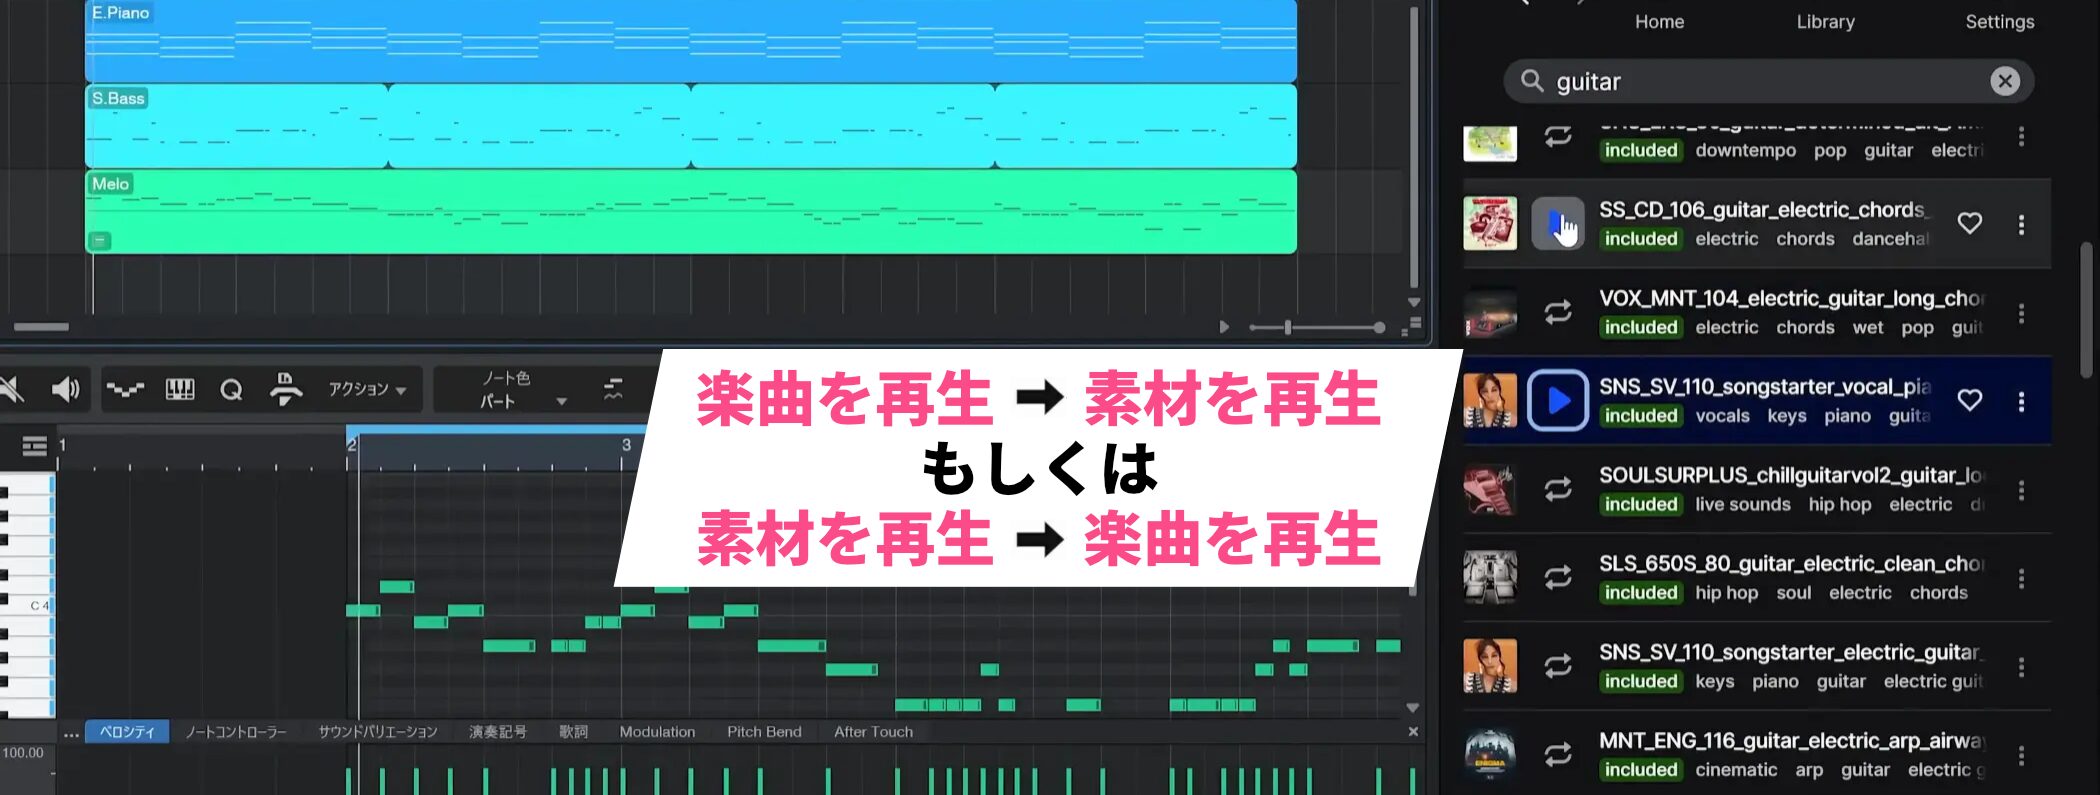
Start playback of the song, then preview a sample that interests you.
Alternatively, start the sample preview first and then play the song alongside it.
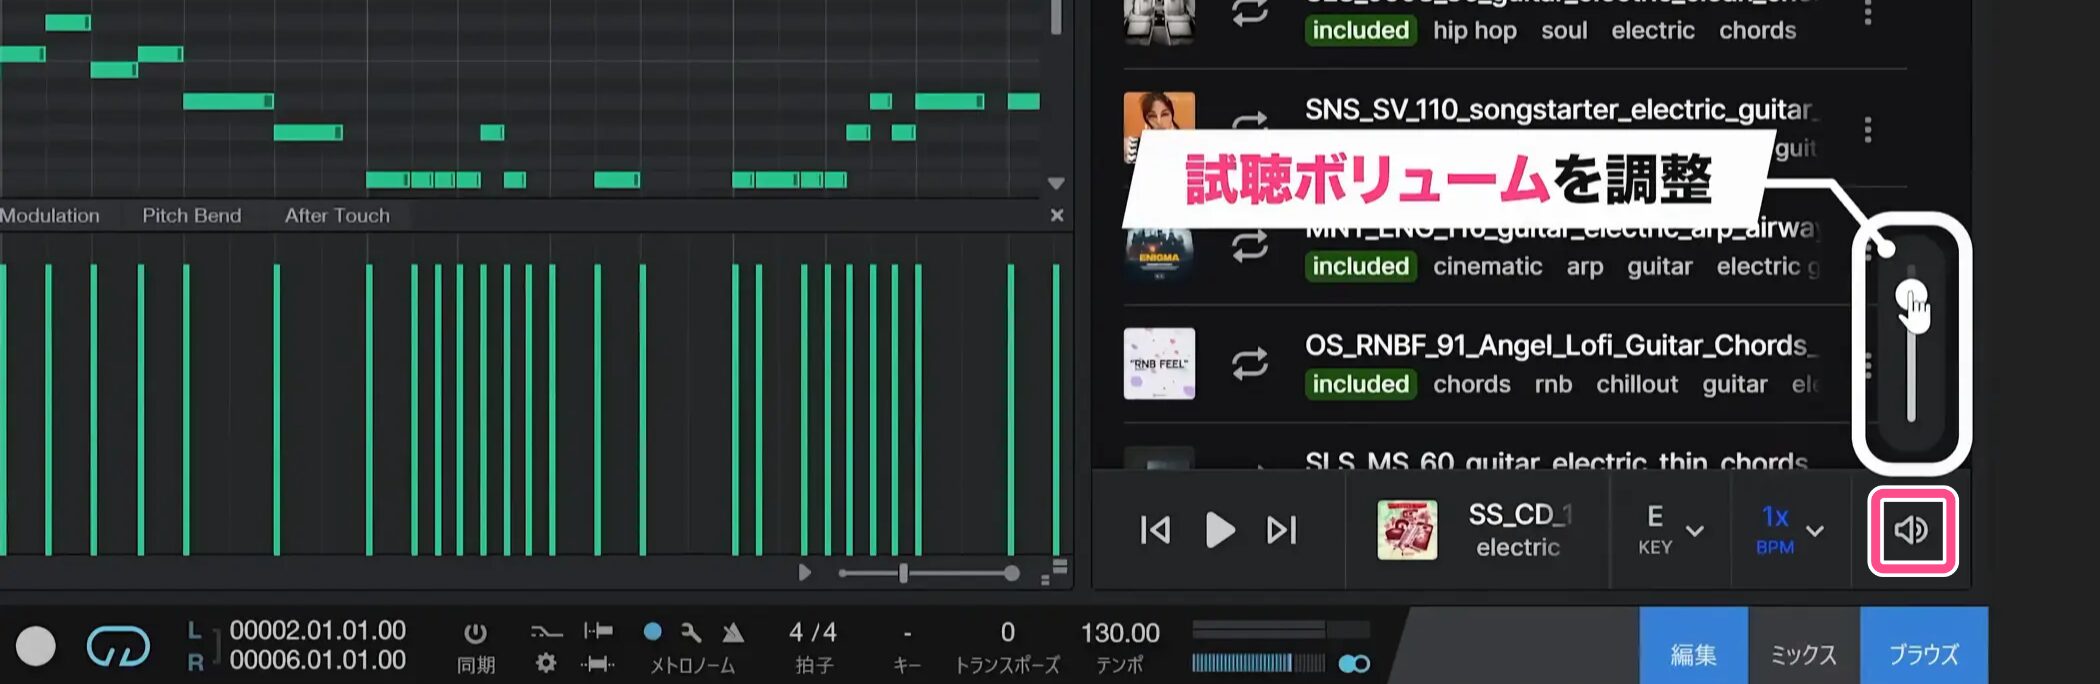
Adjust the preview volume using the speaker icon.
Automatic tempo and key adjustment
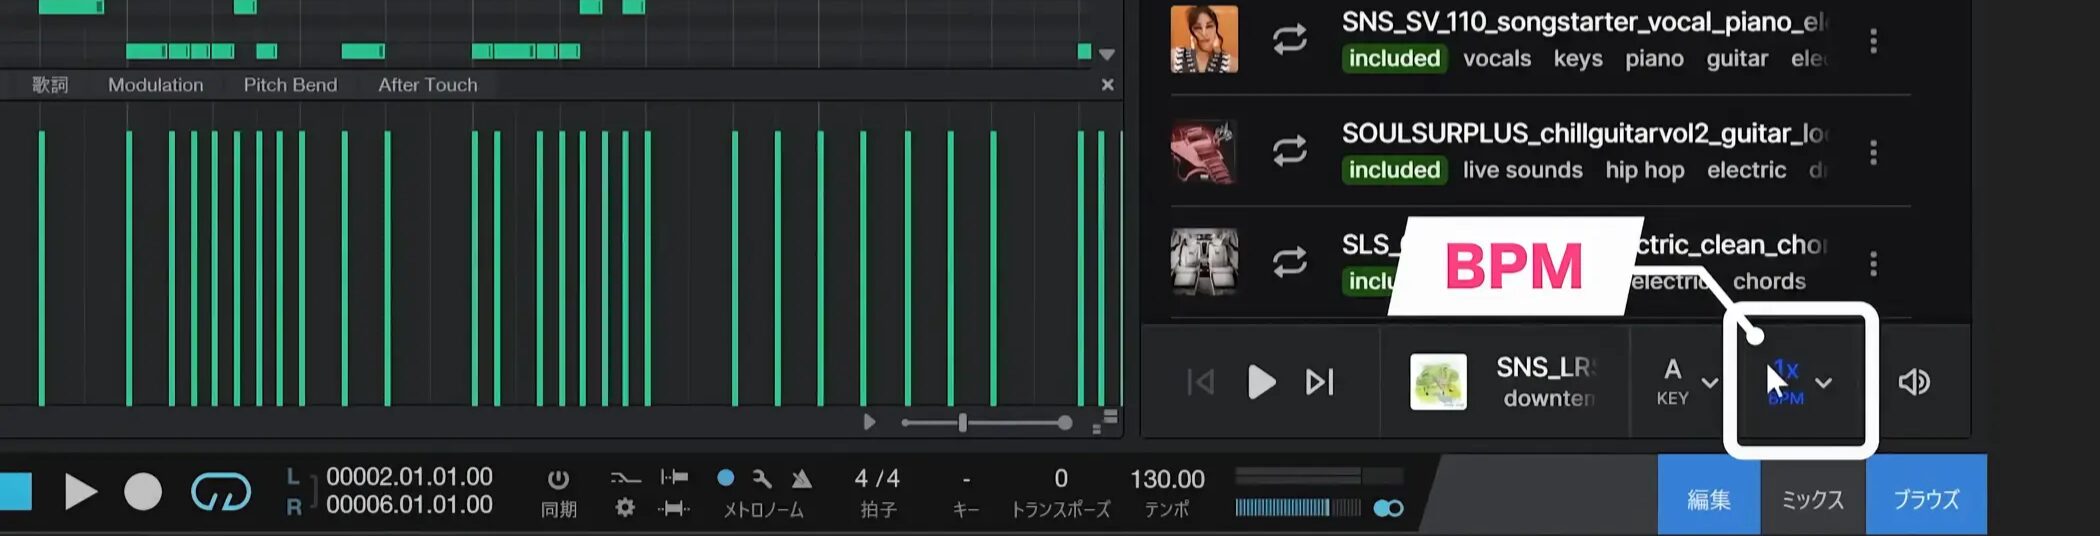
Splice samples automatically play in time with the project BPM.
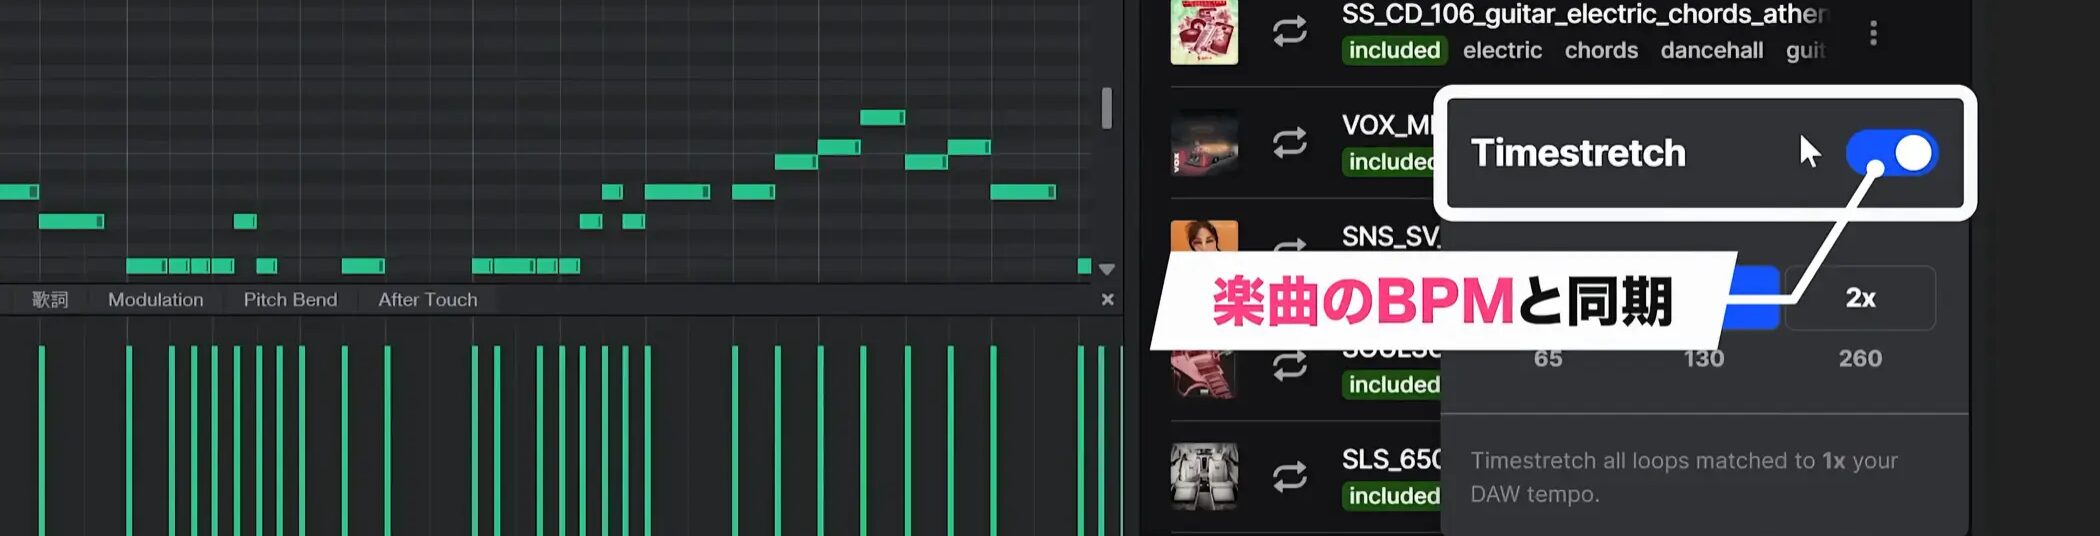
This is because time-stretch is enabled by default.
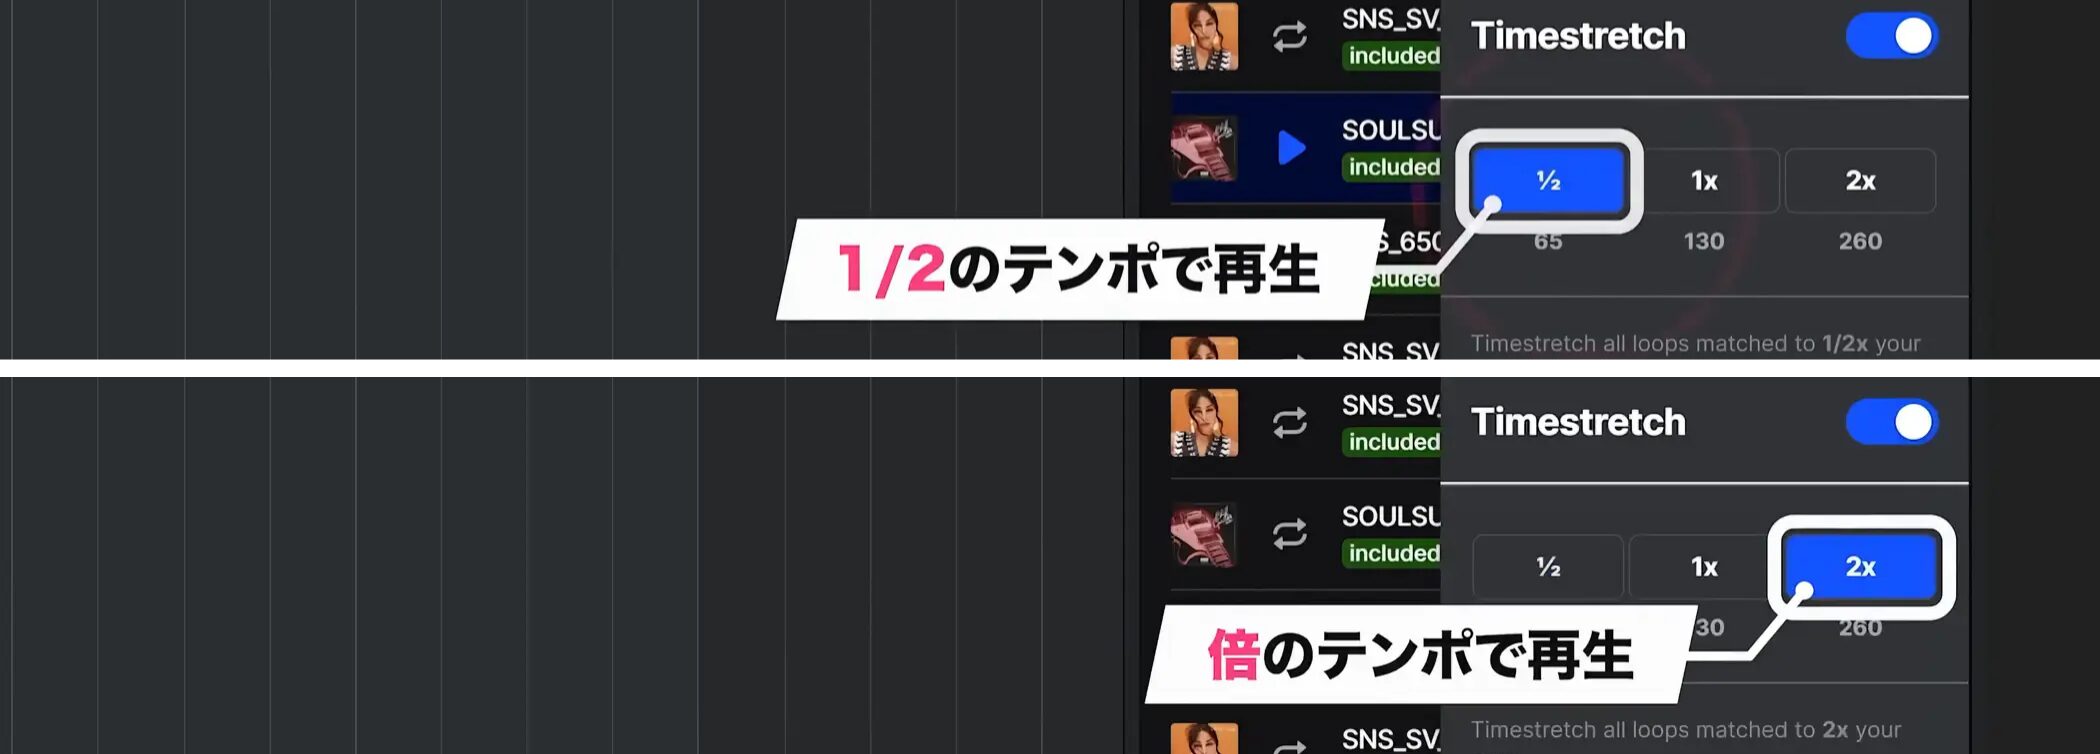
You can also use time-stretch to play a sample at half or double speed for a different rhythmic feel.
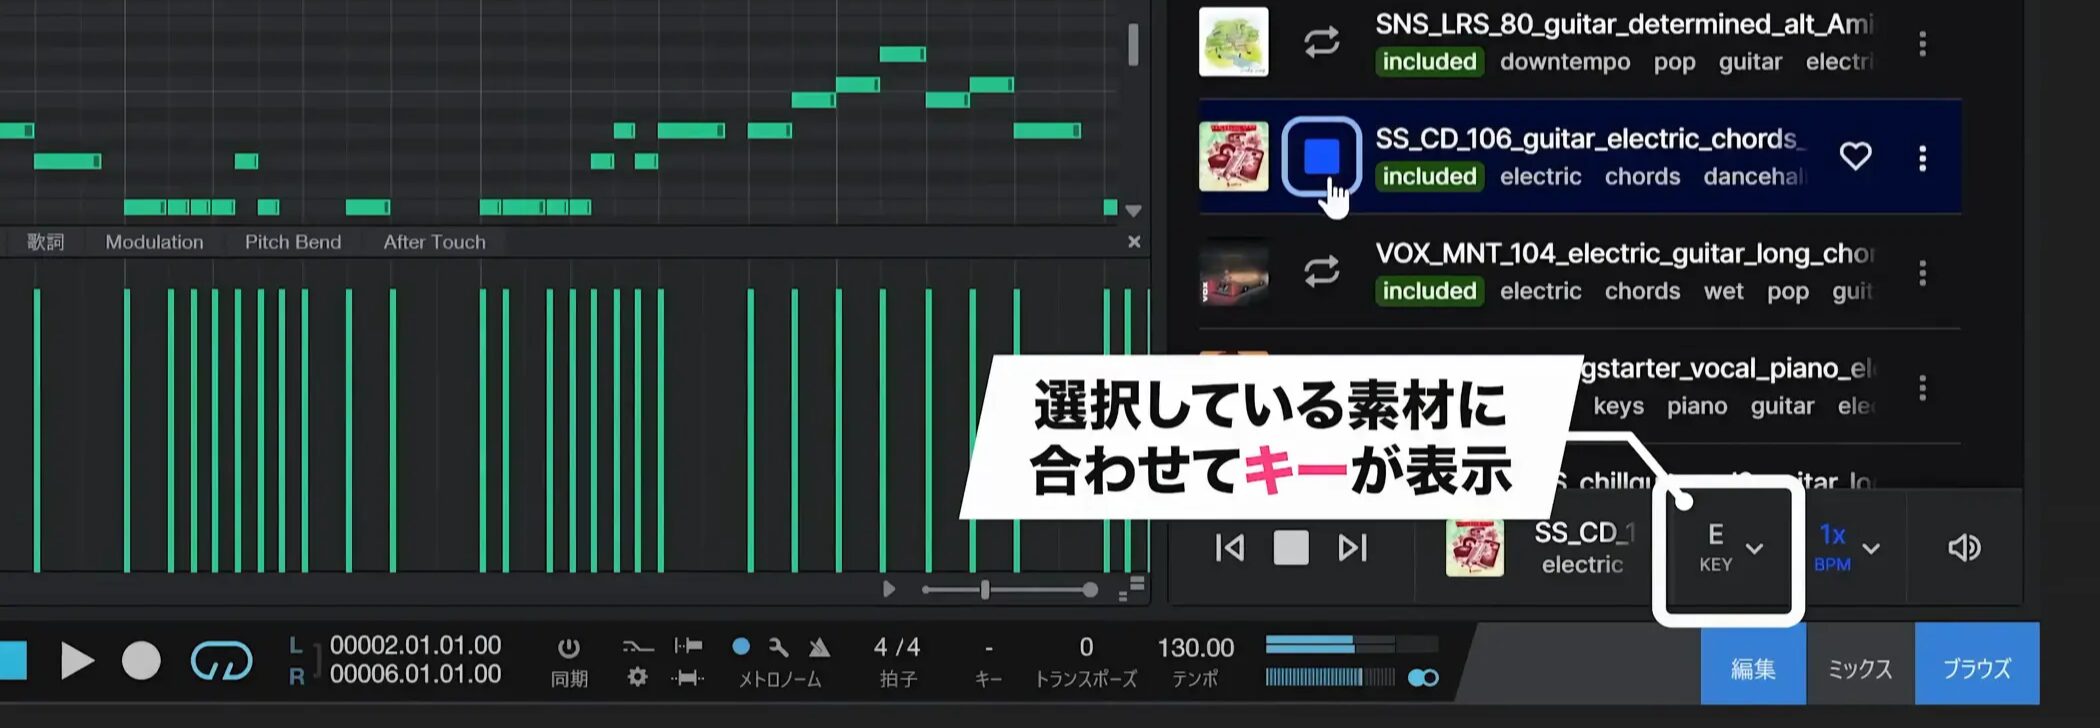
When using a sample, it is important to match its key to the song.
The selected sample’s key appears next to its BPM; it is also a good idea to set the song key in the project settings.
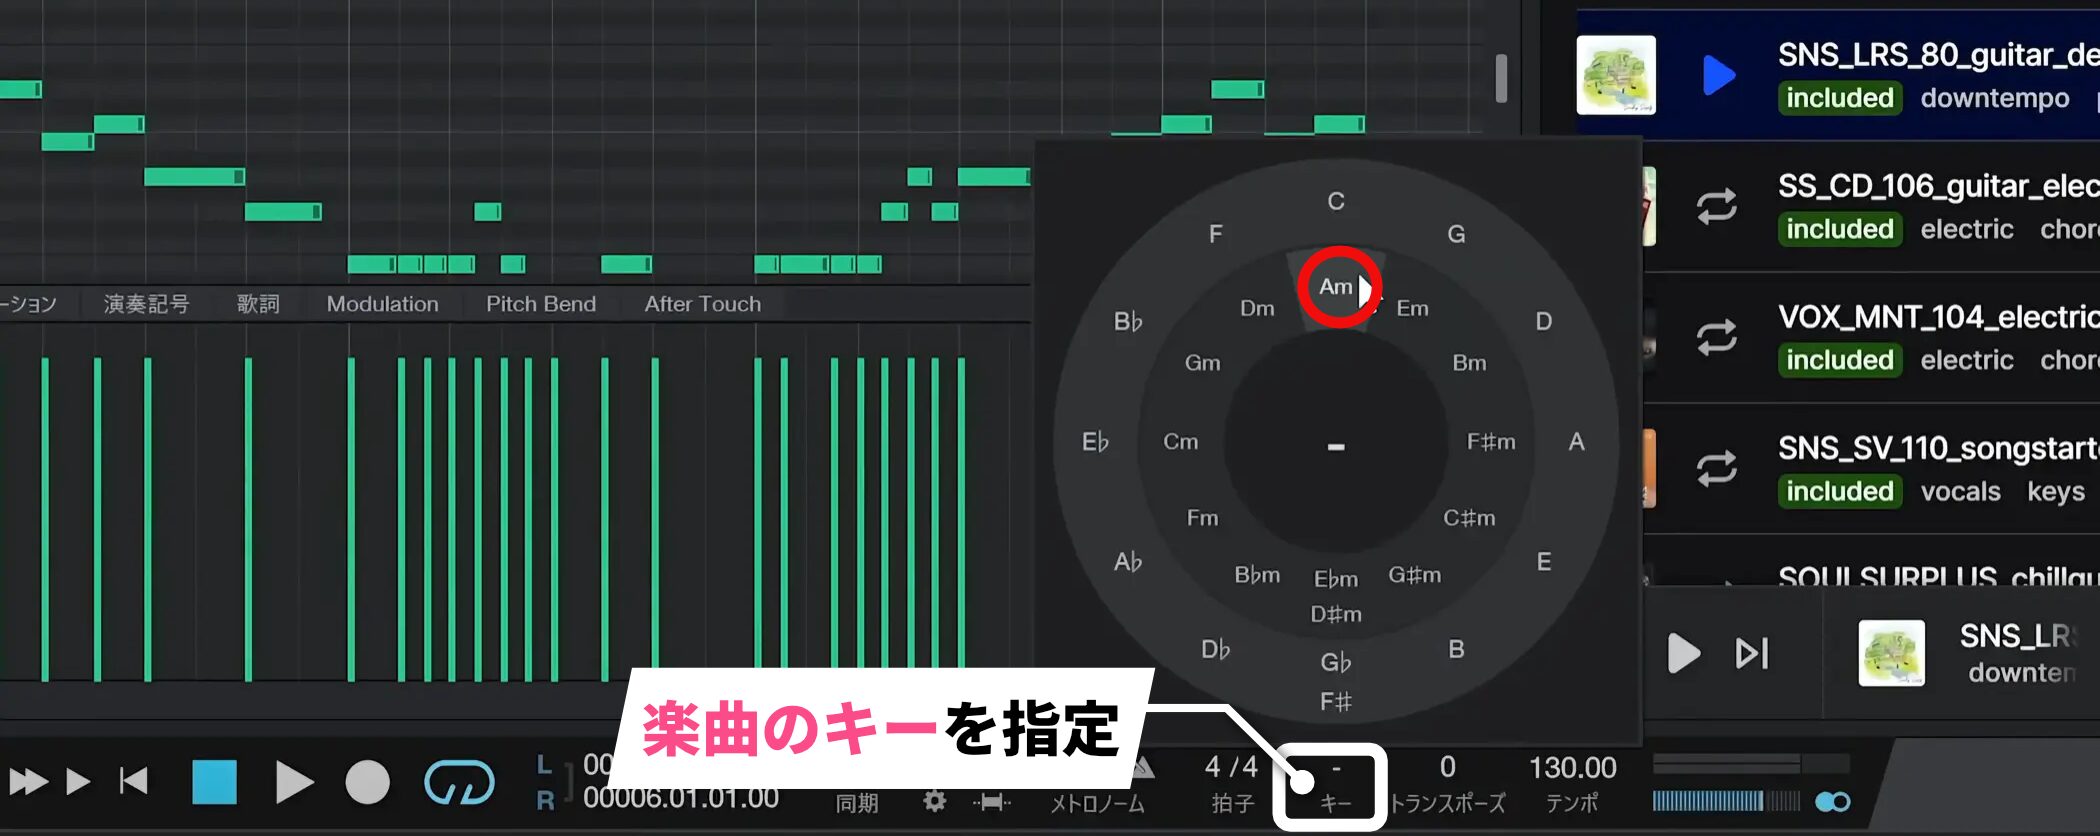
Click the key setting and choose the song’s key. In this example it is A minor.
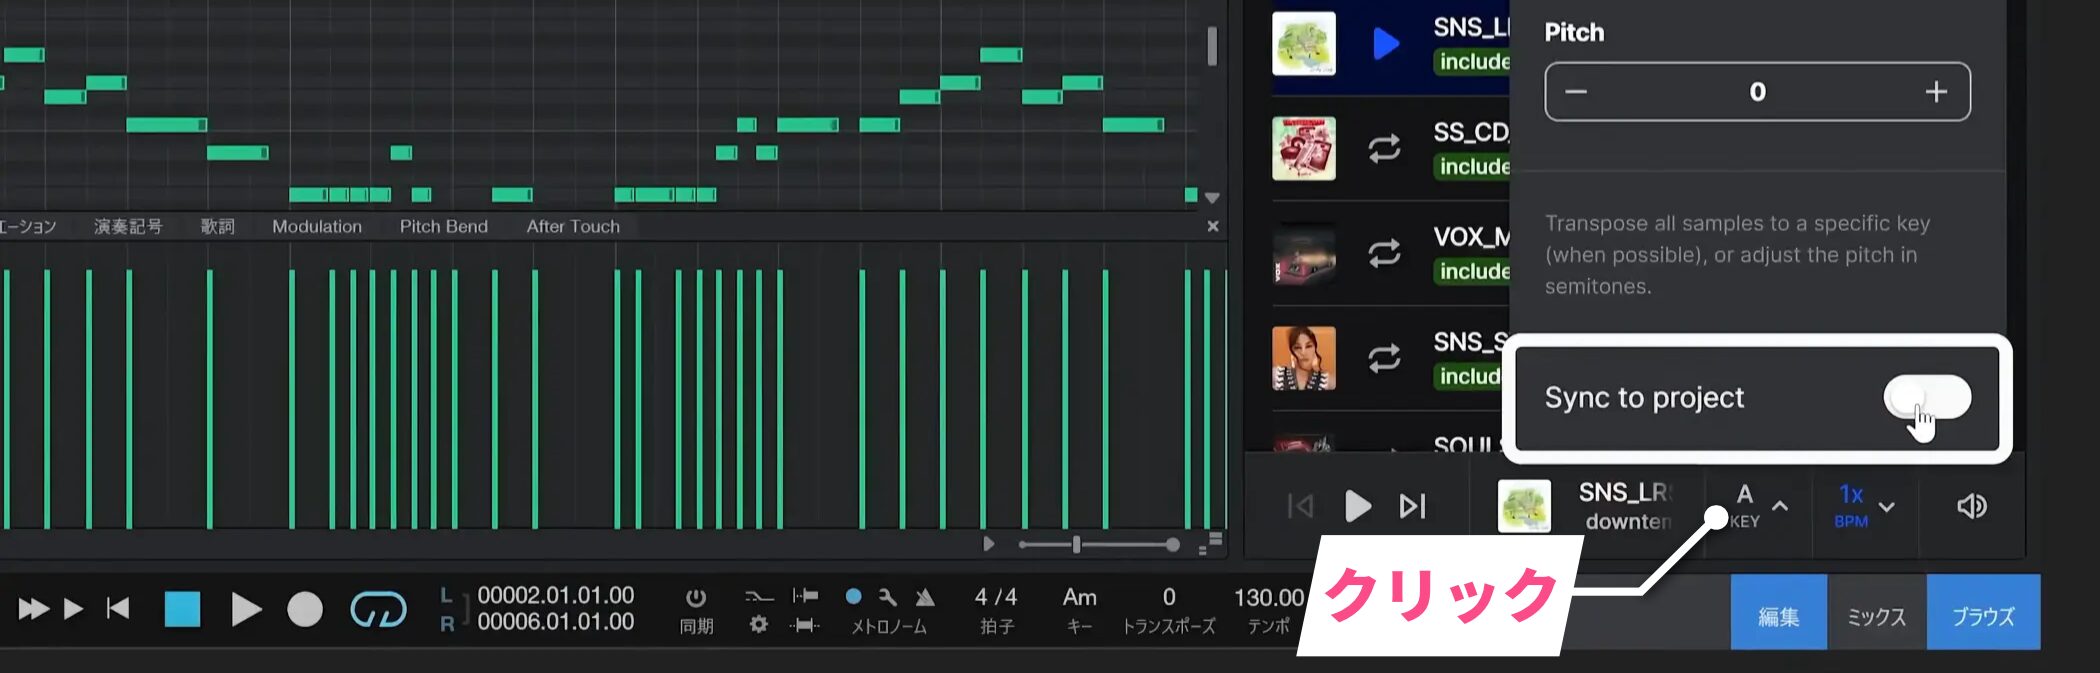
After setting the key, click the sample’s key and enable Sync to project.
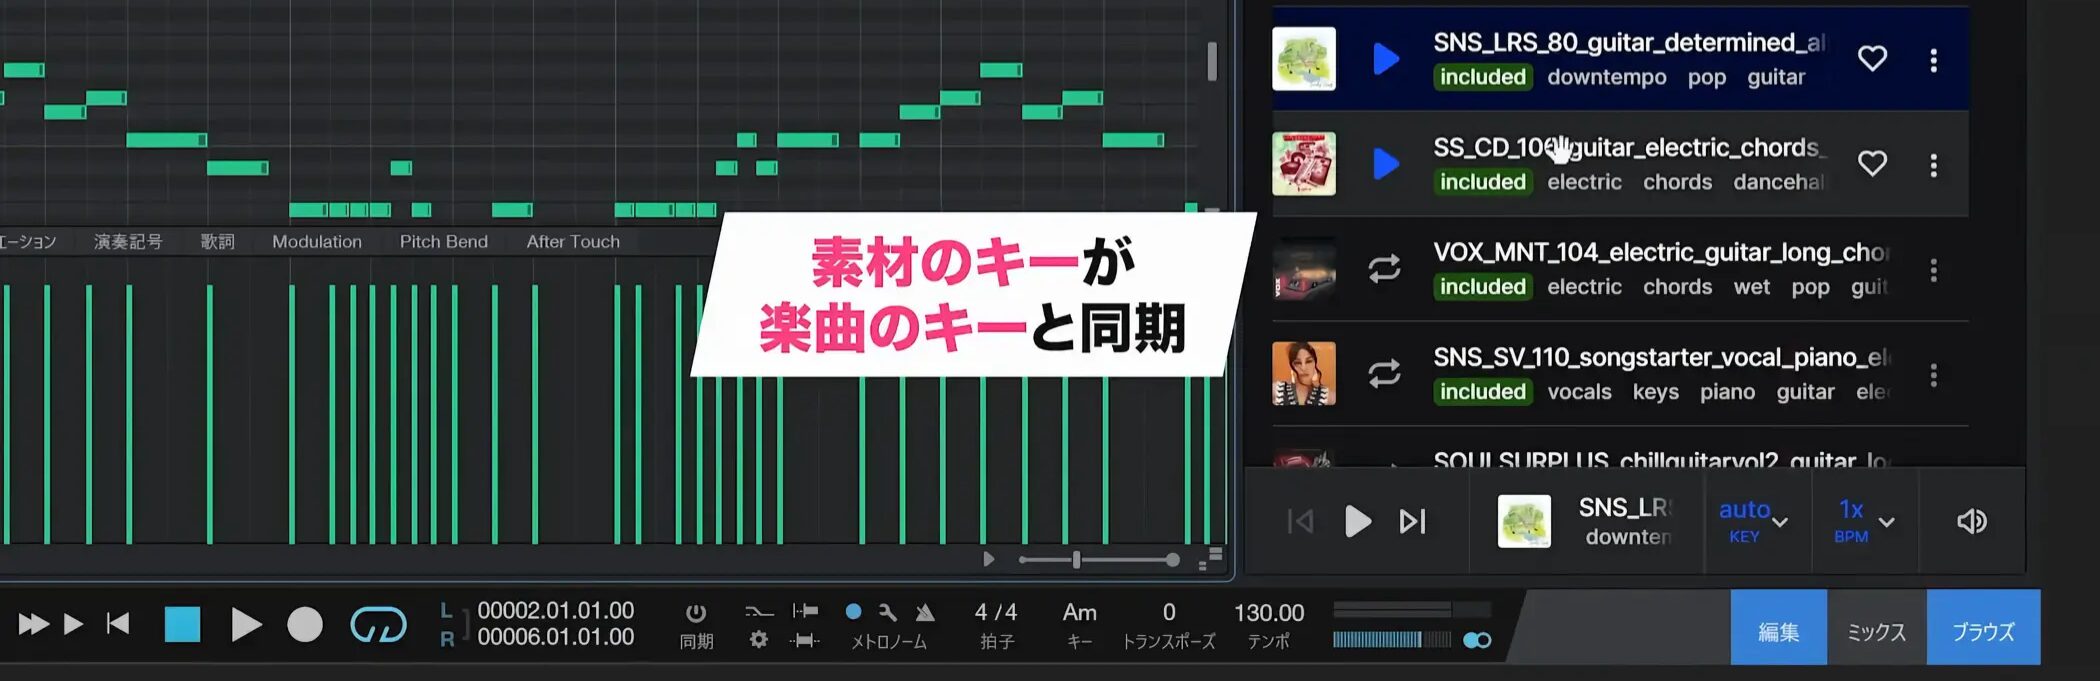
This synchronizes the Splice sample’s key with the song, helping prevent a key mismatch.
Finding similar sounds
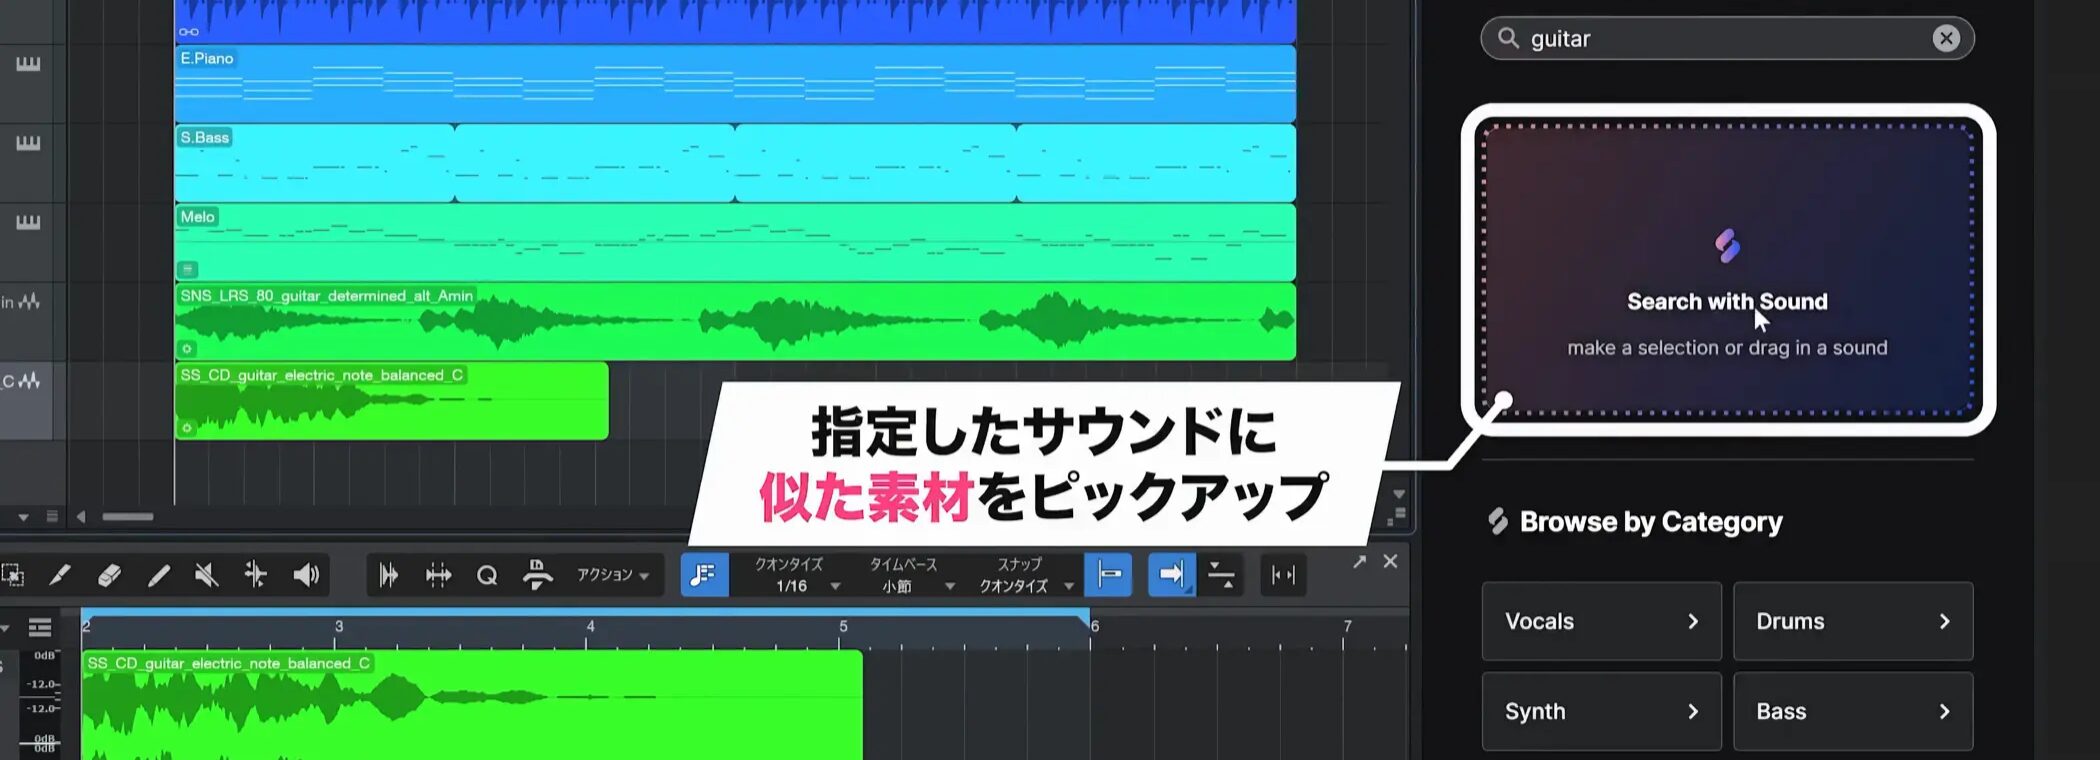
Splice has an advanced feature called Search with Sound that finds similar samples based on an existing sound file.
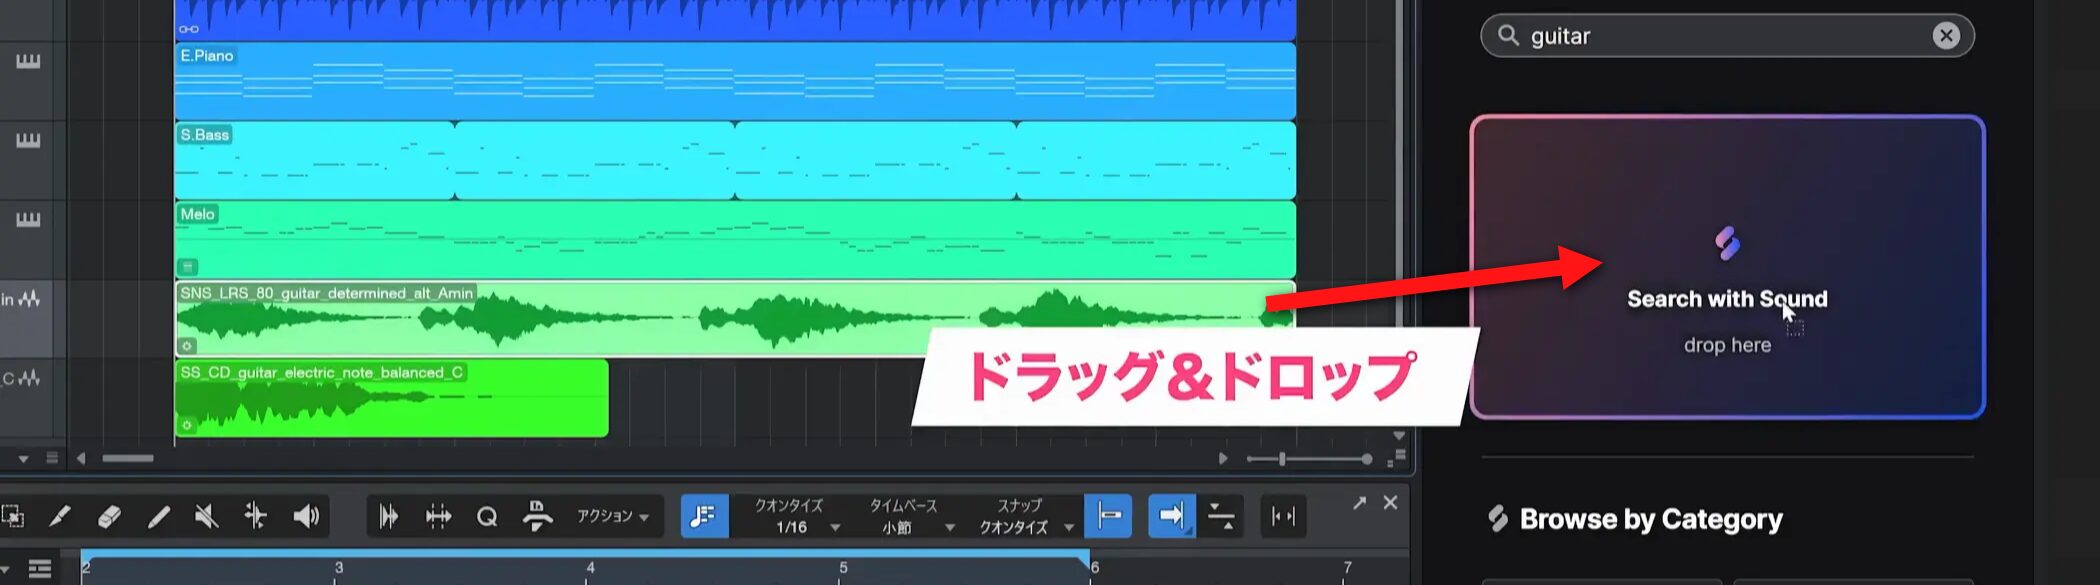
Drag and drop a sound file into the search area.
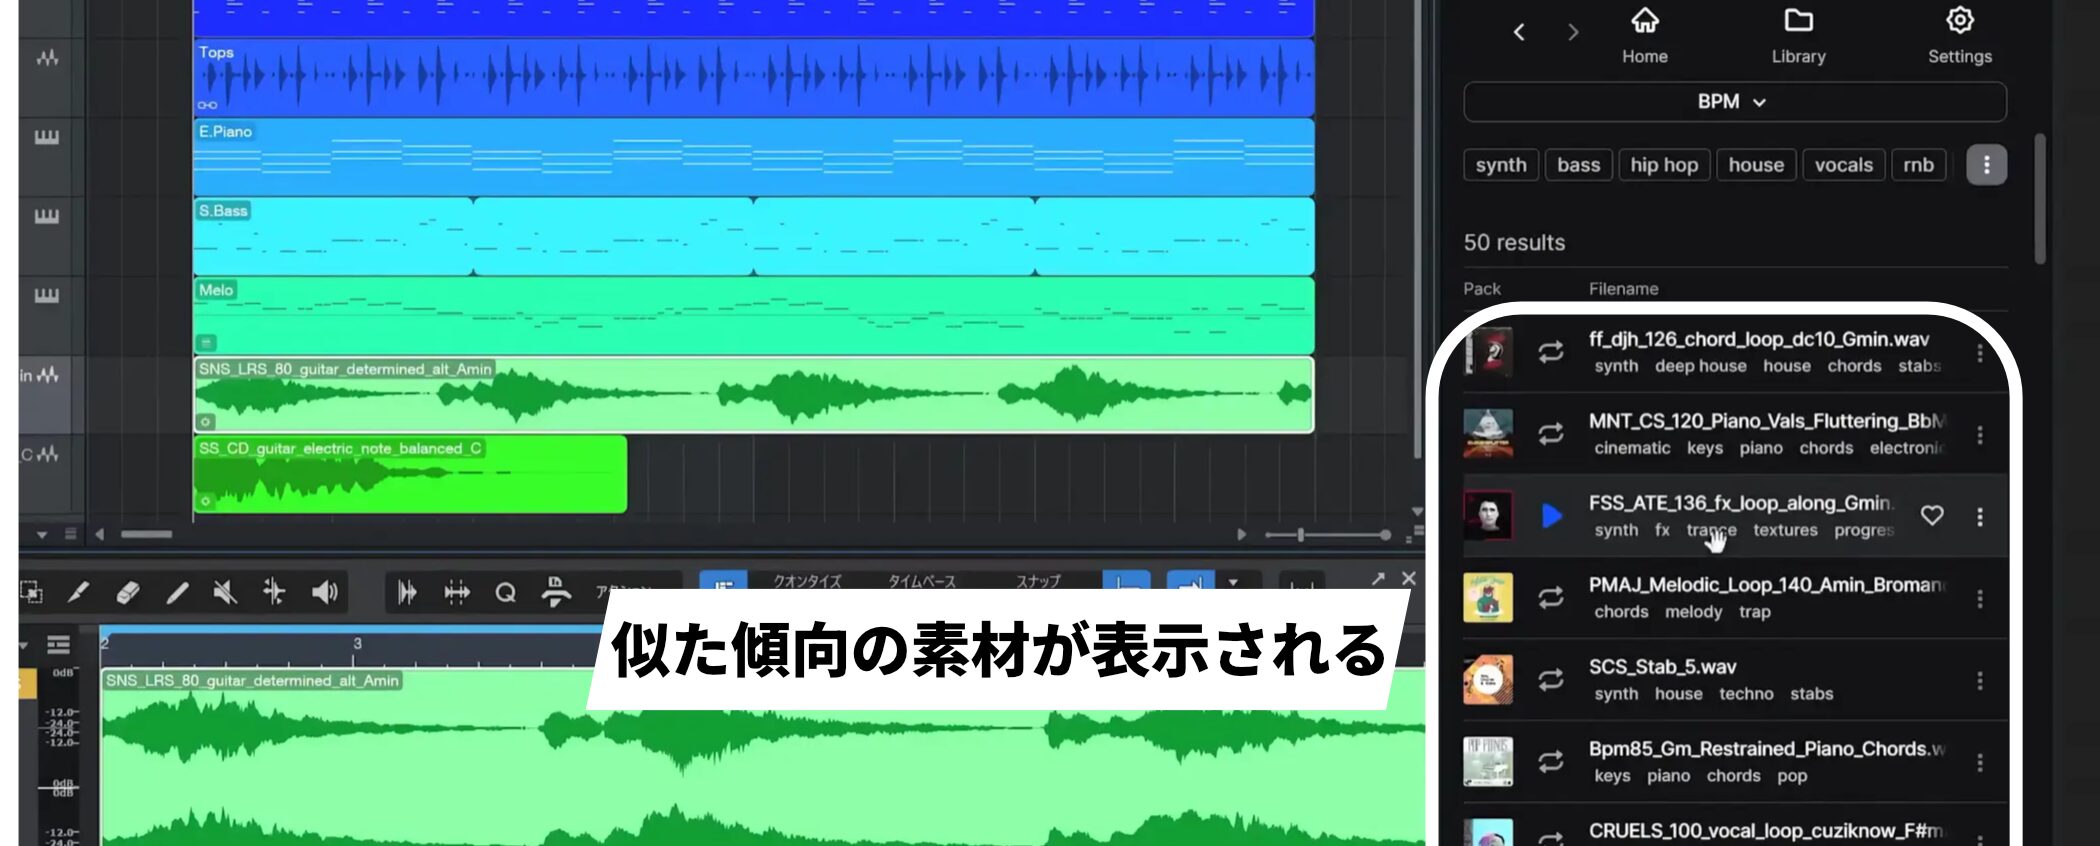
Once the search finishes, a list of similar samples appears.
The feature offers accurate results and is useful for choosing multiple samples while keeping a consistent sound across a song.
However, many results may be limited to paid accounts.
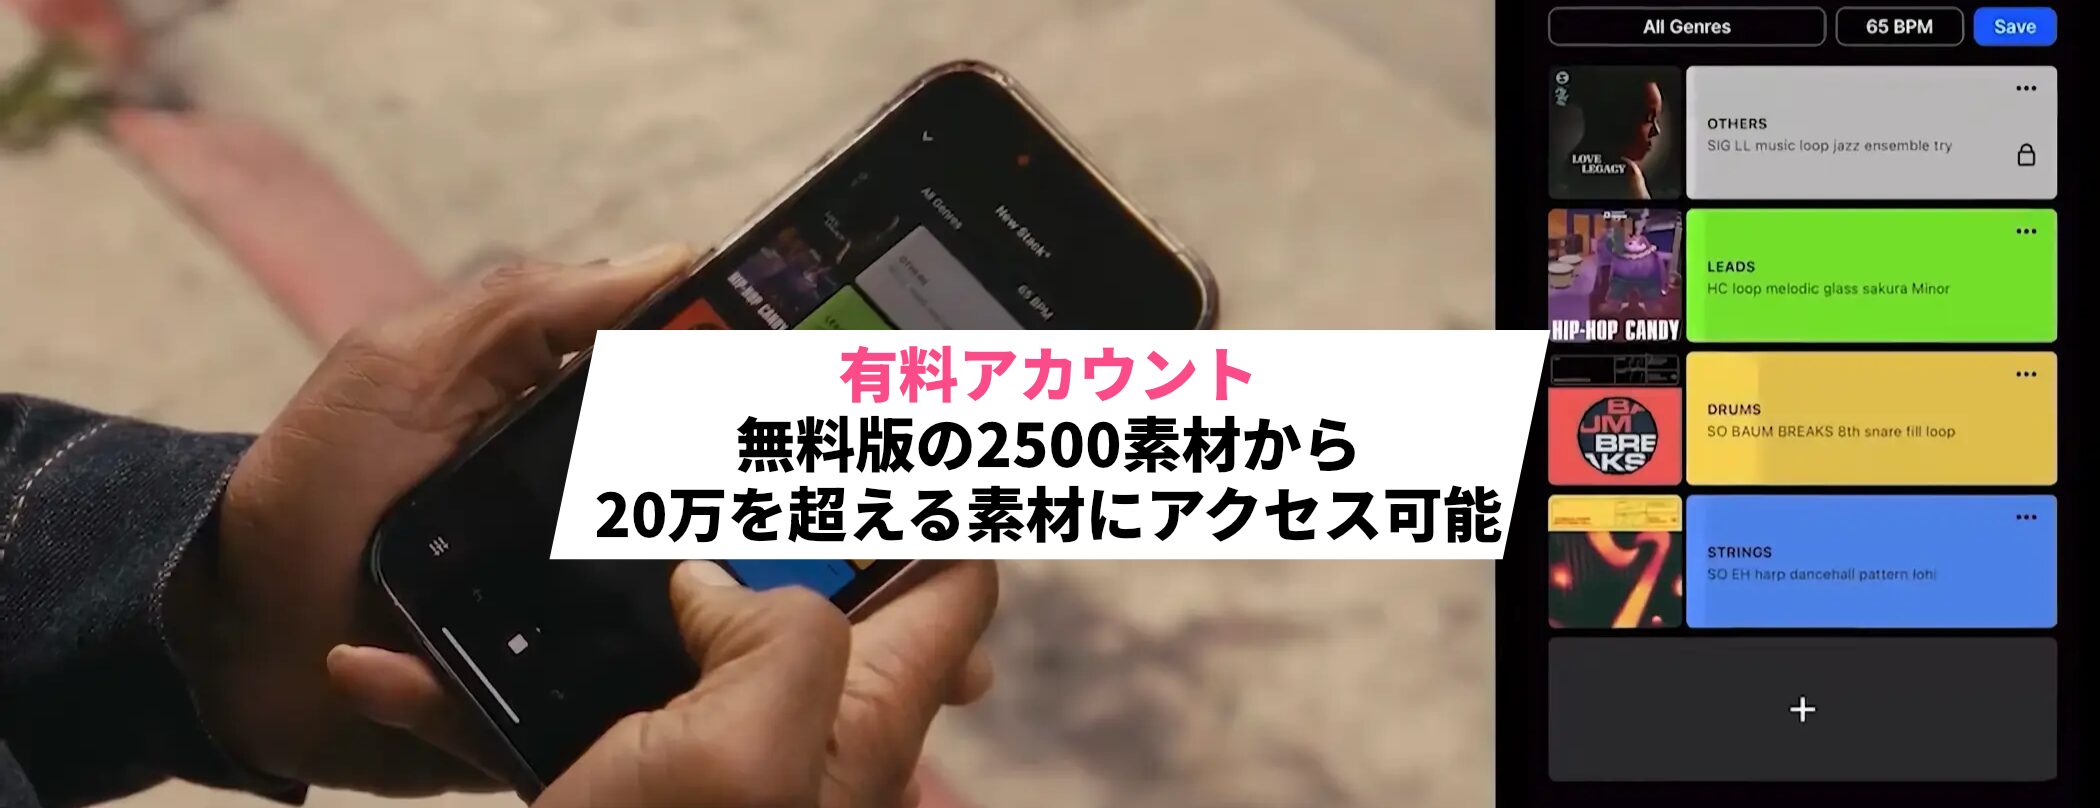
Compared with the 2,500 samples in the free account, a paid account provides access to more than 200,000 samples.
For more extensive production work, you may want to consider a paid plan.
Frequently asked questions
Q1. Can I use Splice without an account?
You can access more than 2,500 curated samples by creating a free account. Sign up with Google, Apple, or an email address, then access the samples directly from Studio One.
Q2. Can I check a sample before downloading it?
Yes. Click its play button to preview it. You can preview alongside your song and adjust the preview volume to help choose suitable sounds.
Q3. Can I use Splice samples in a song with a different tempo?
Yes. Time-stretch is enabled by default and adjusts the sample to the project BPM. You can also play it at half or double speed for a different rhythmic feel.
Q4. Can I adjust a sample if its key is different?
Yes. Set the song key in the project and enable Sync to project on the sample to synchronize its key with the song.
Q5. How do I find samples similar to an existing sound?
Use Search with Sound. Drag a sound file into the search area to find similar samples and choose material that fits the song’s overall sound.
NEW ARTICLES
Latest English Articles