Arrangement and transposition tools can make music production more efficient and flexible. This guide covers selecting and moving multiple events, duplication, chord extraction from MIDI, time stretching, Follow Chords, muting, arrangement markers, scratch pads, and key changes in Studio One.
Arrangement and transposition techniques for an efficient workflow
Select and move all events
When changing a song’s structure, you may want to move multiple events together.
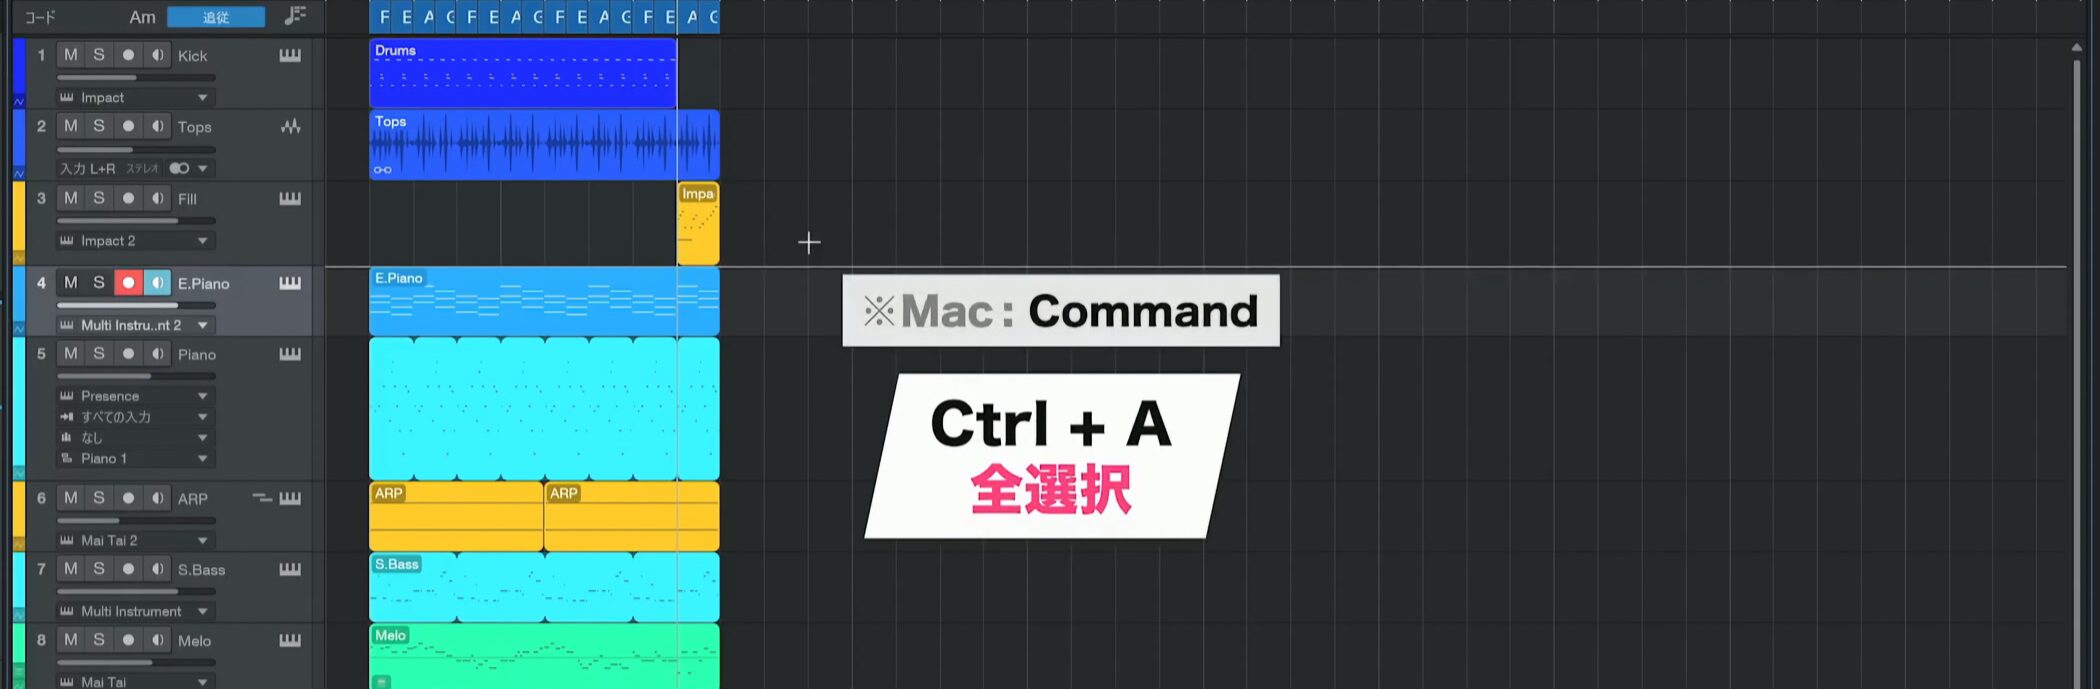
Use Ctrl+A to select all events.
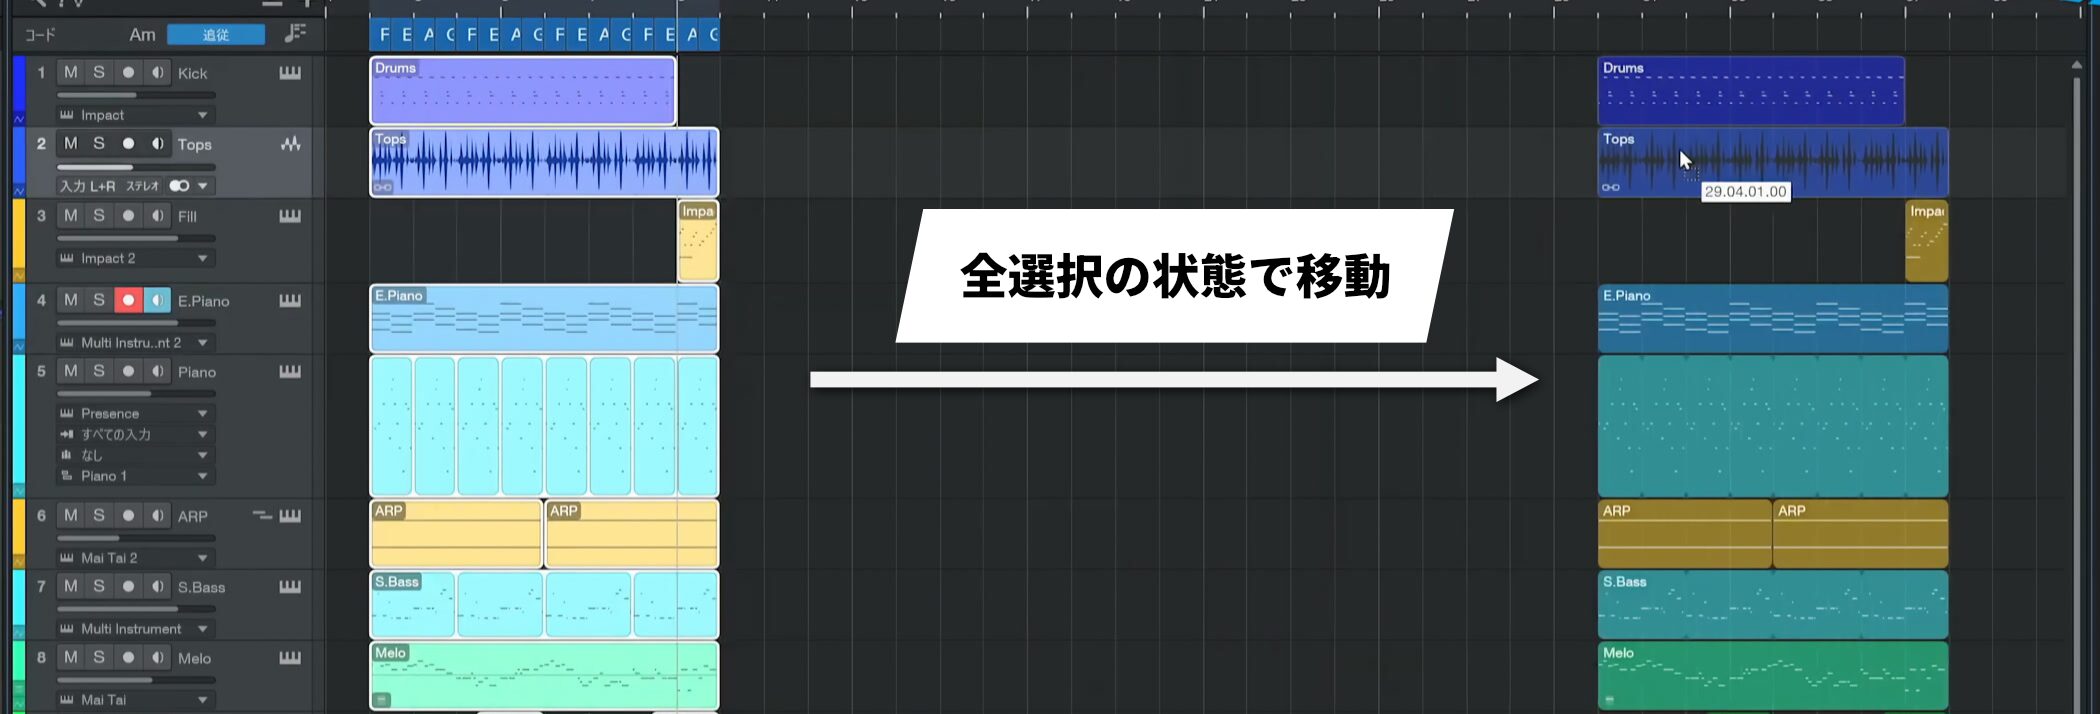
With everything selected, move the events together to a new position.
Duplicate events
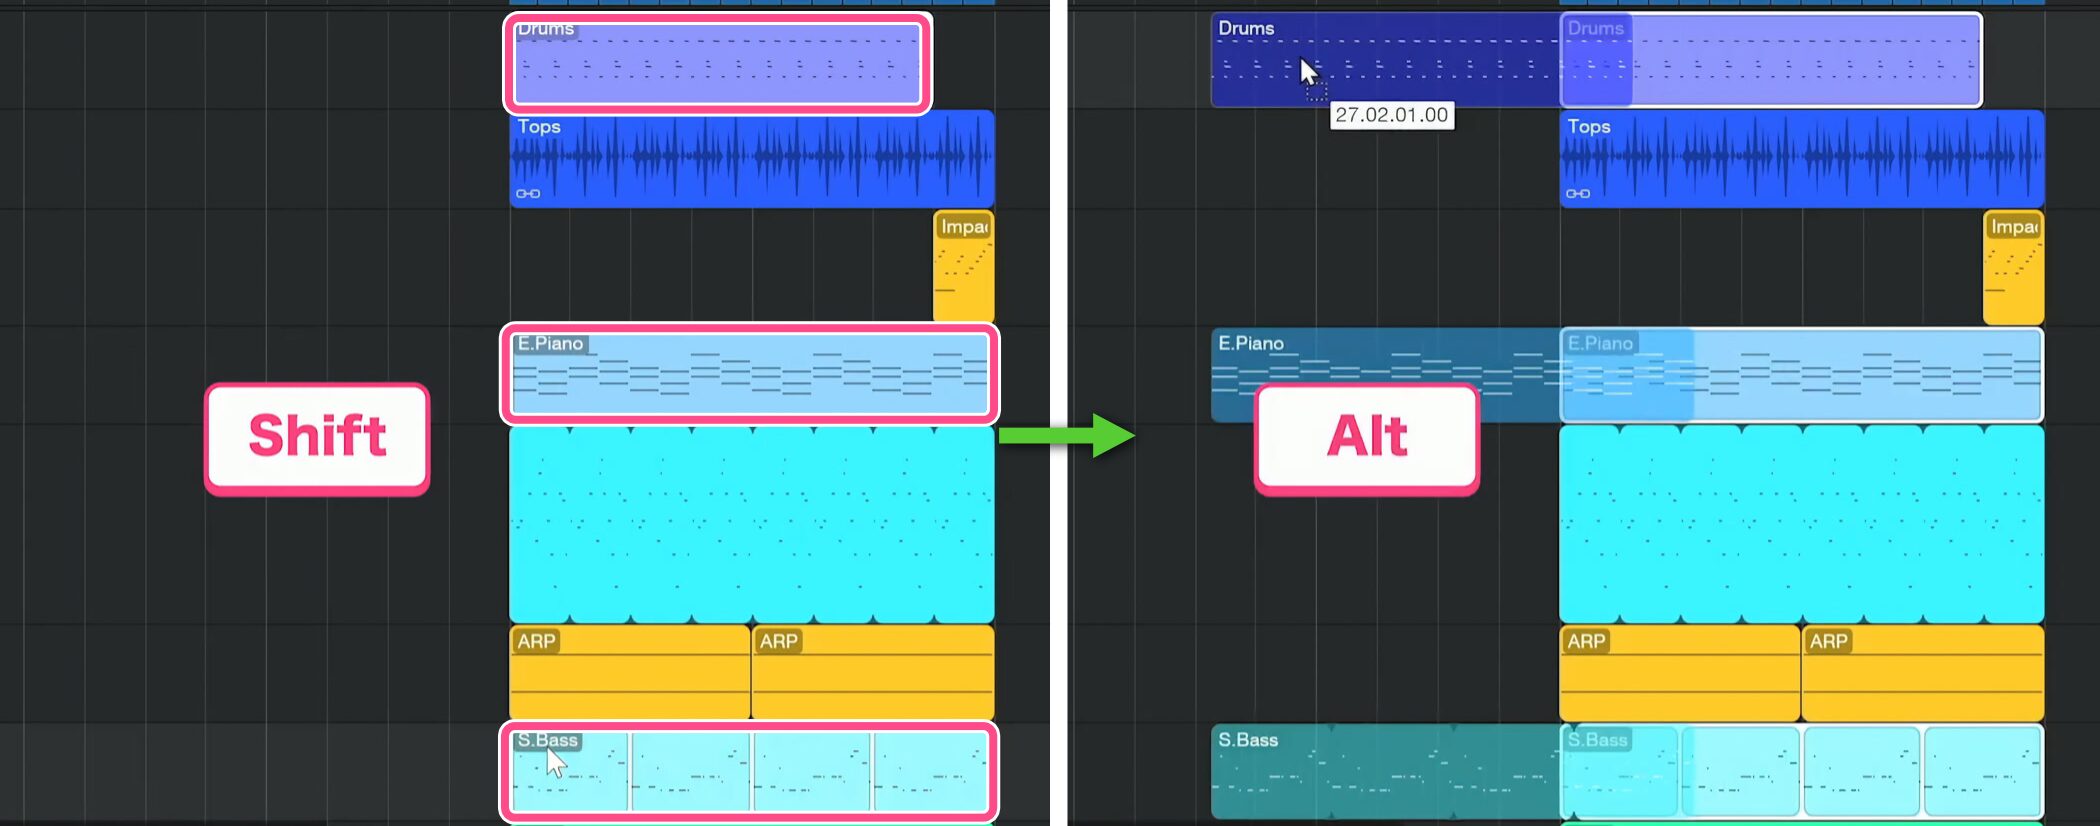
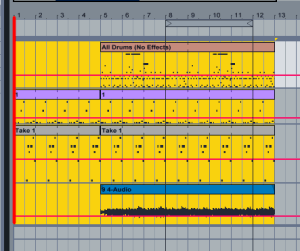
To copy several existing events elsewhere, select them while holding Shift, then drag while holding Alt to create copies.
This lets you duplicate several tracks, such as drums, electric piano, and bass, at the same time.
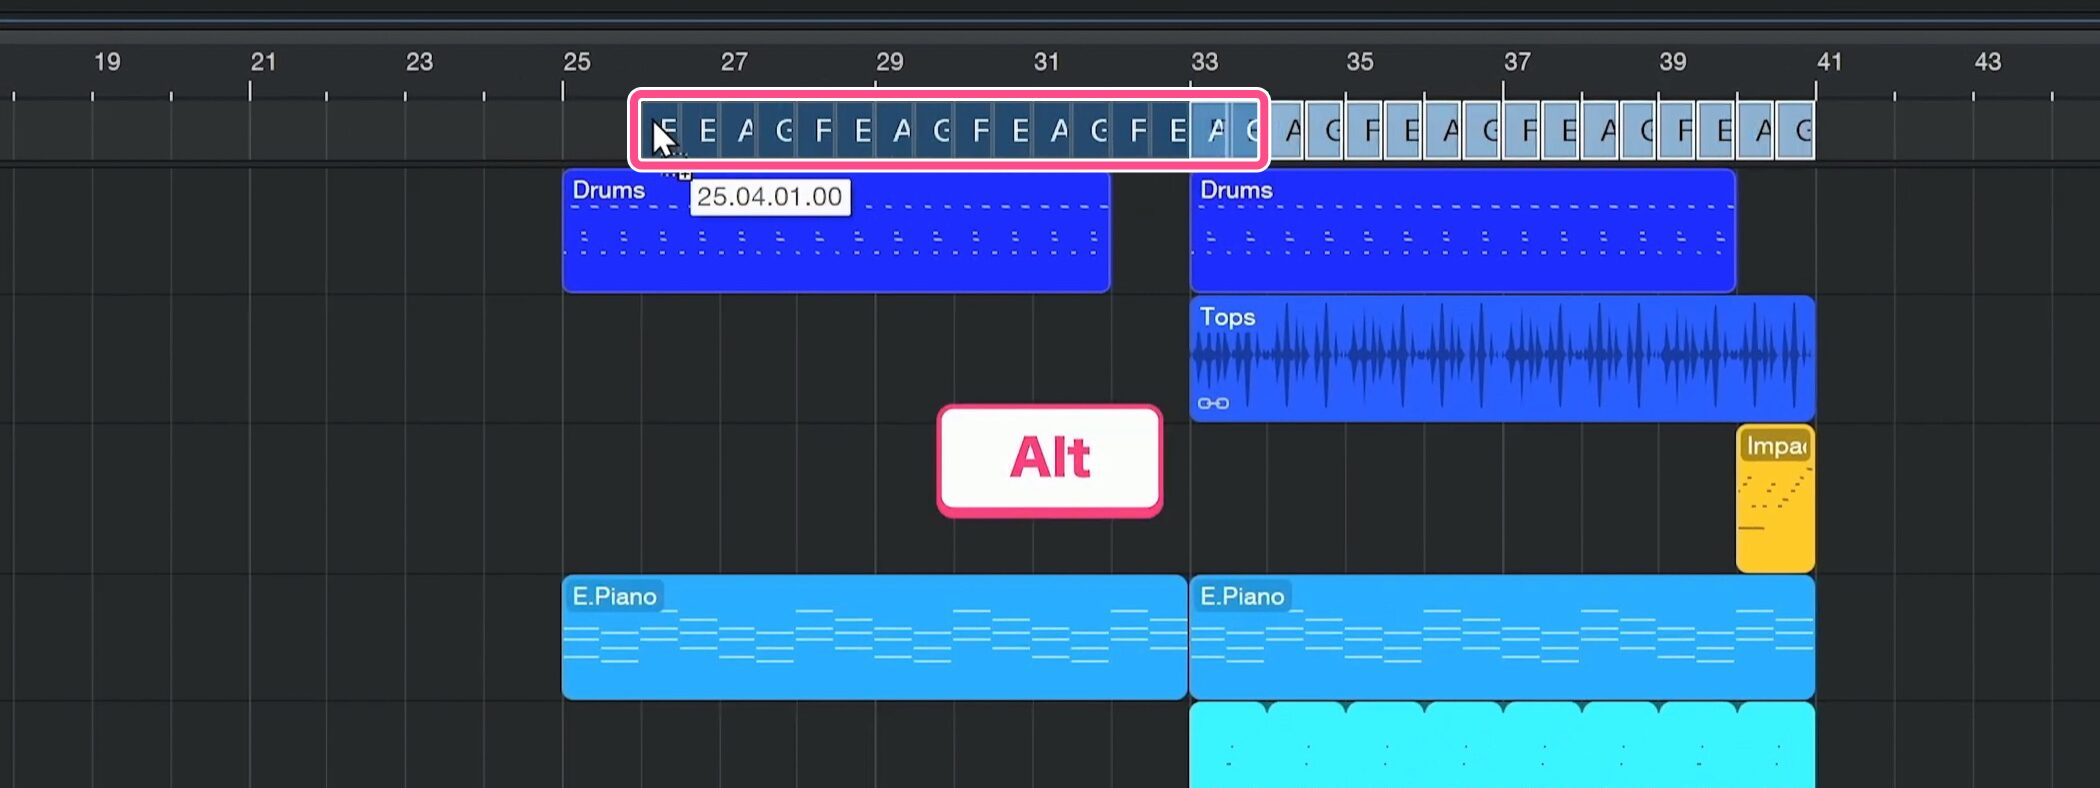
You can duplicate chords in the same way.
Extract chords from MIDI events
Studio One can analyze a MIDI melody or phrase and extract chords.
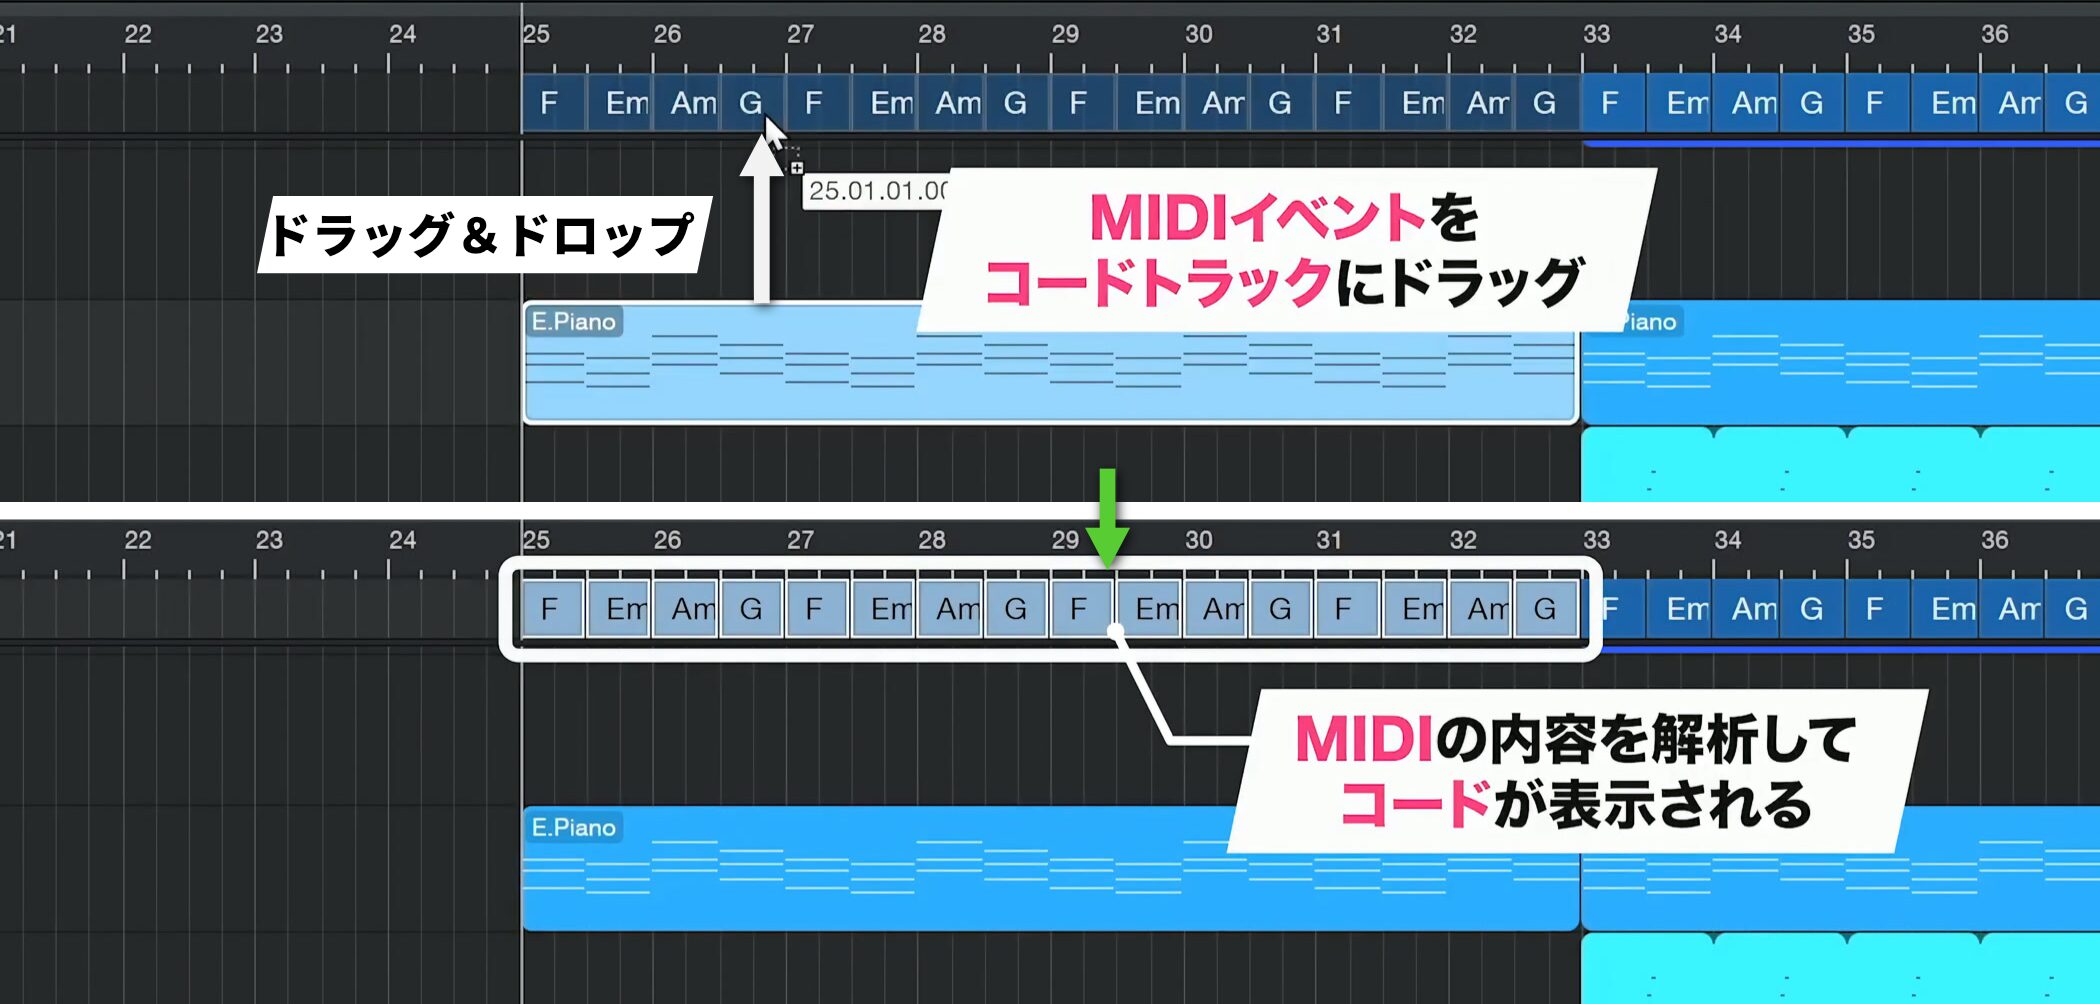
Drag the MIDI event onto the chord track to analyze its contents and display chords.
This saves manual entry and helps build a chord progression from the MIDI data.
Time stretching
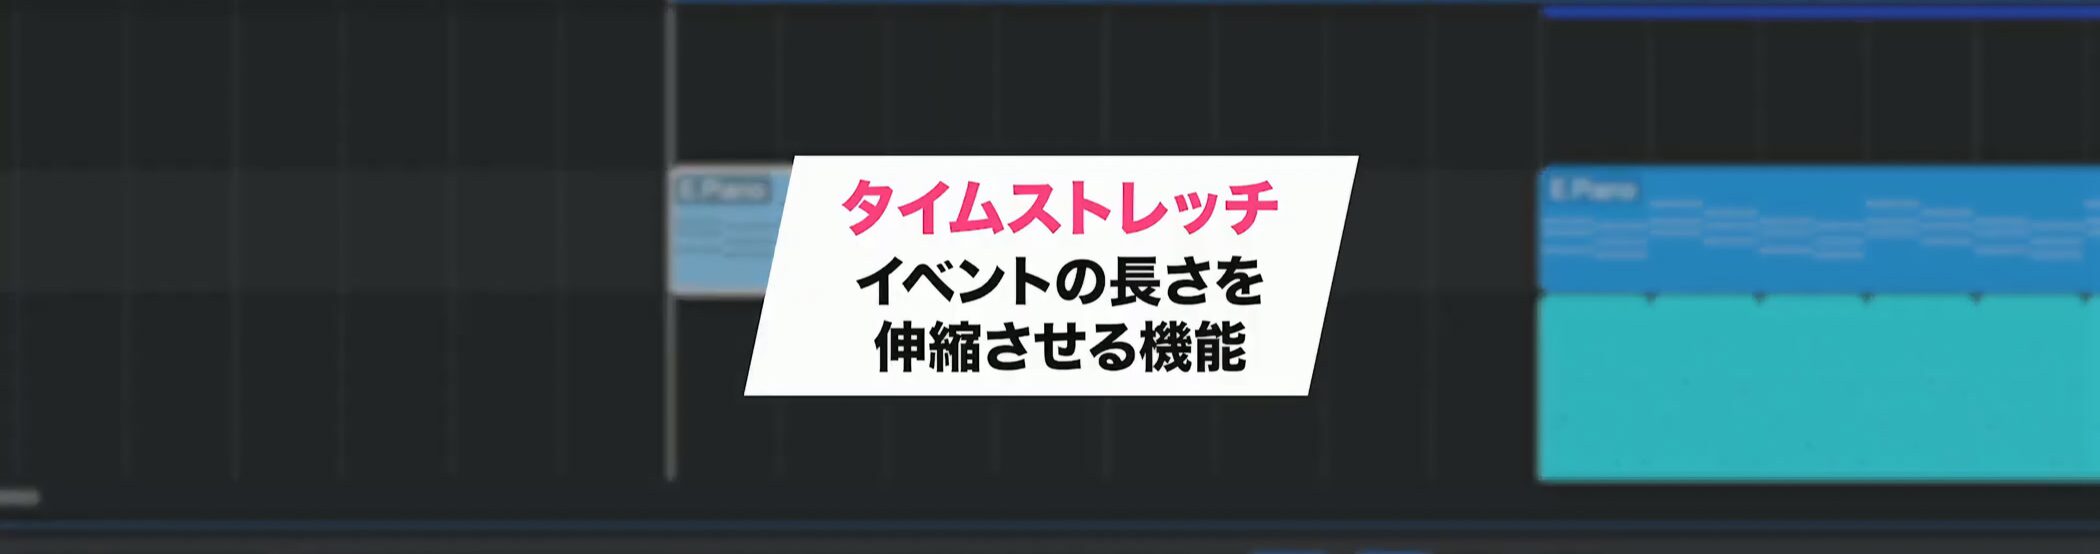
Changing an event’s length normally changes only its boundaries. Time stretching lets you expand or compress its contents.
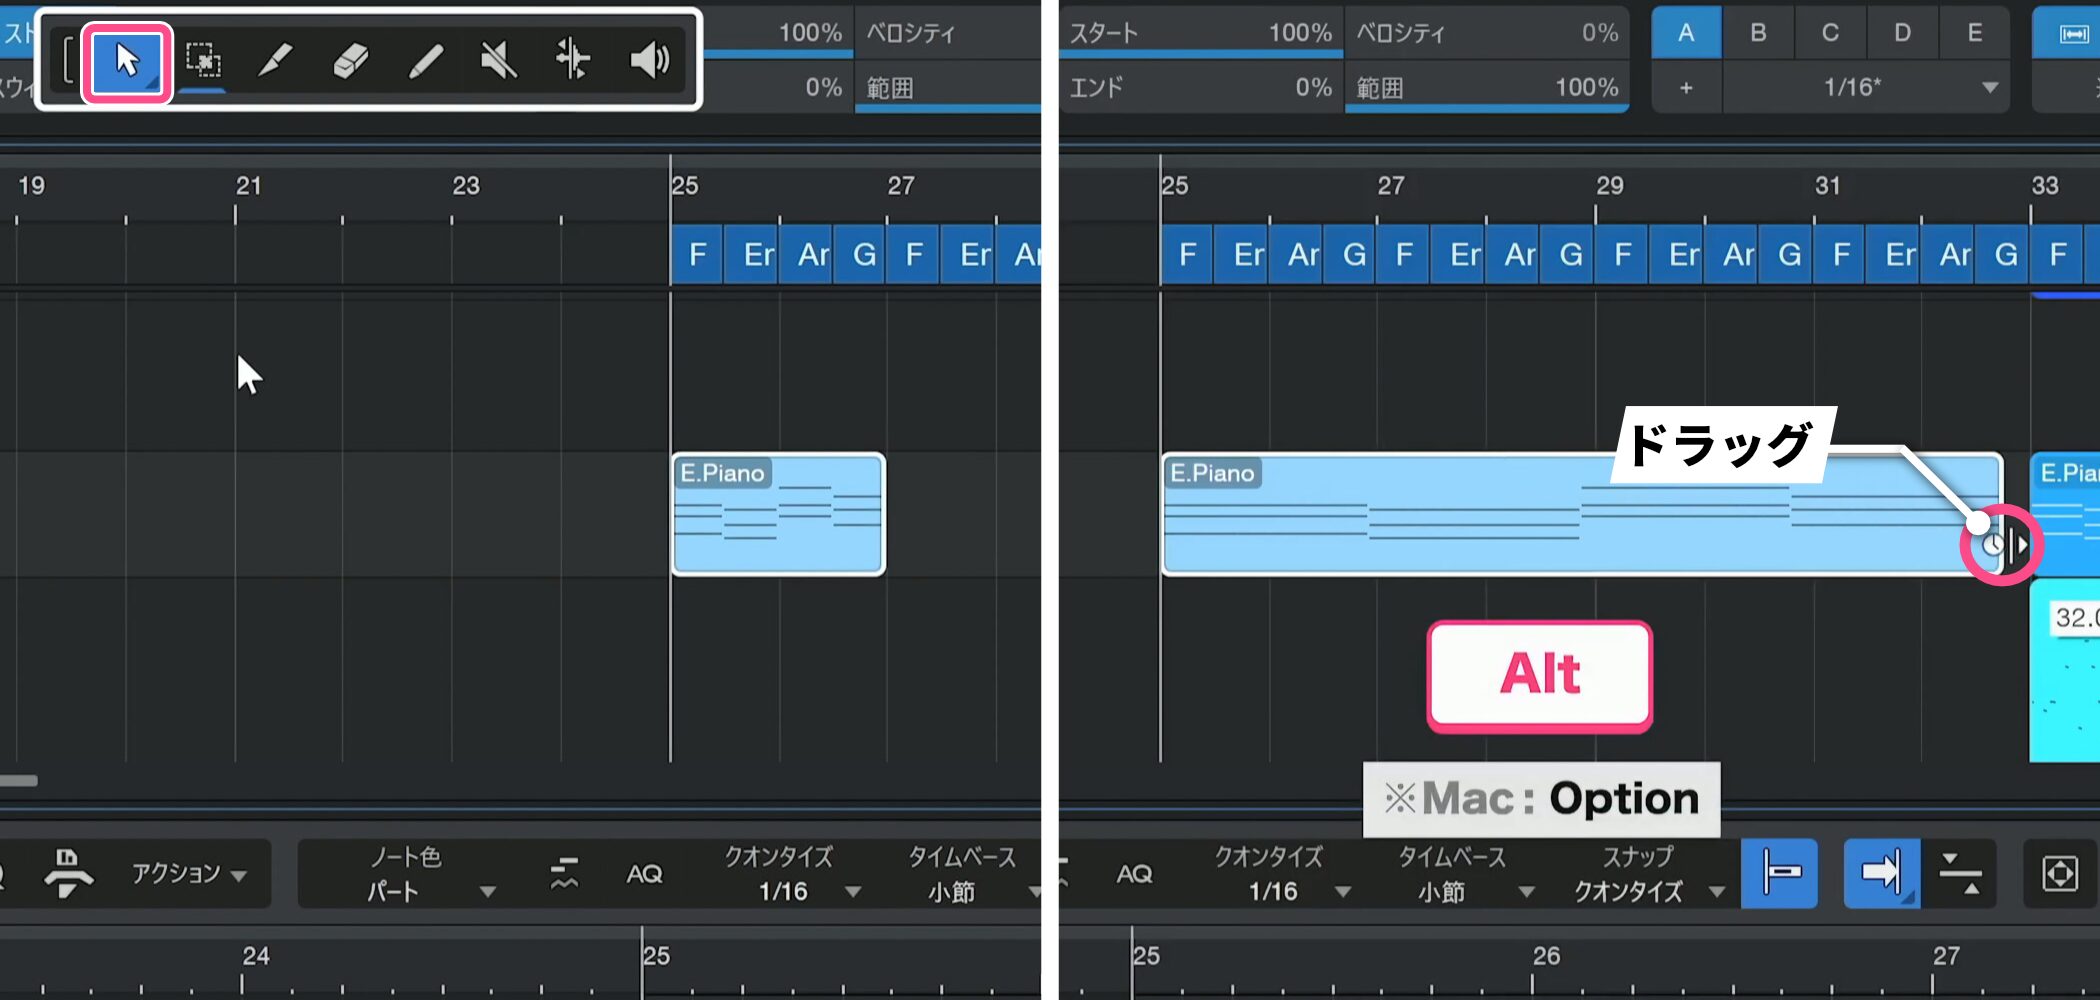
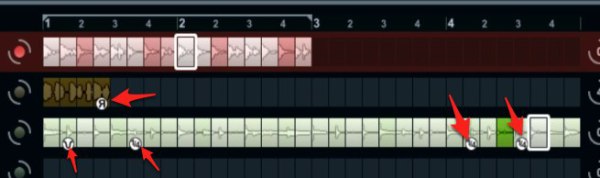
Select the Arrow tool and hold Alt while dragging the event’s edge to stretch or compress it.
Time stretching also works with audio events.
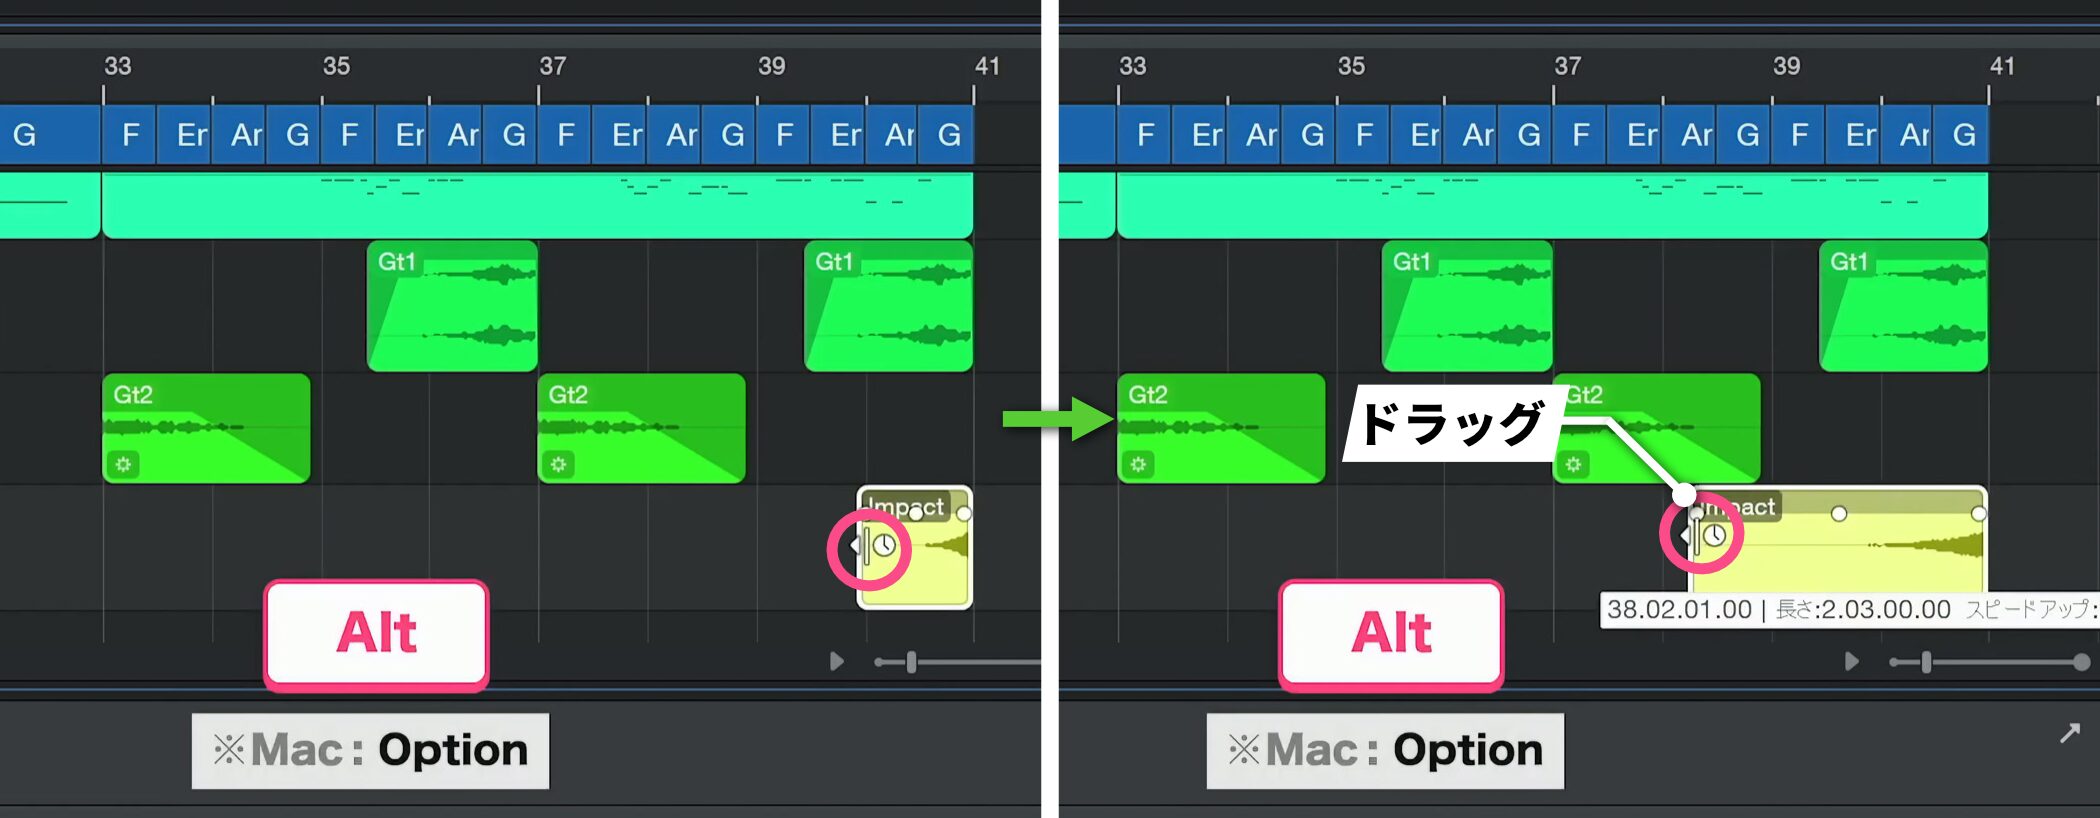
For example, hold Alt and extend a reverse cymbal to make it a little longer and adjust its timing.
Try using this flexible feature in your arrangements.
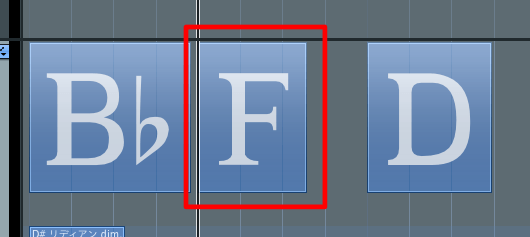
Follow Chords
You can make parts such as bass and pads automatically follow the chord progression on the chord track.
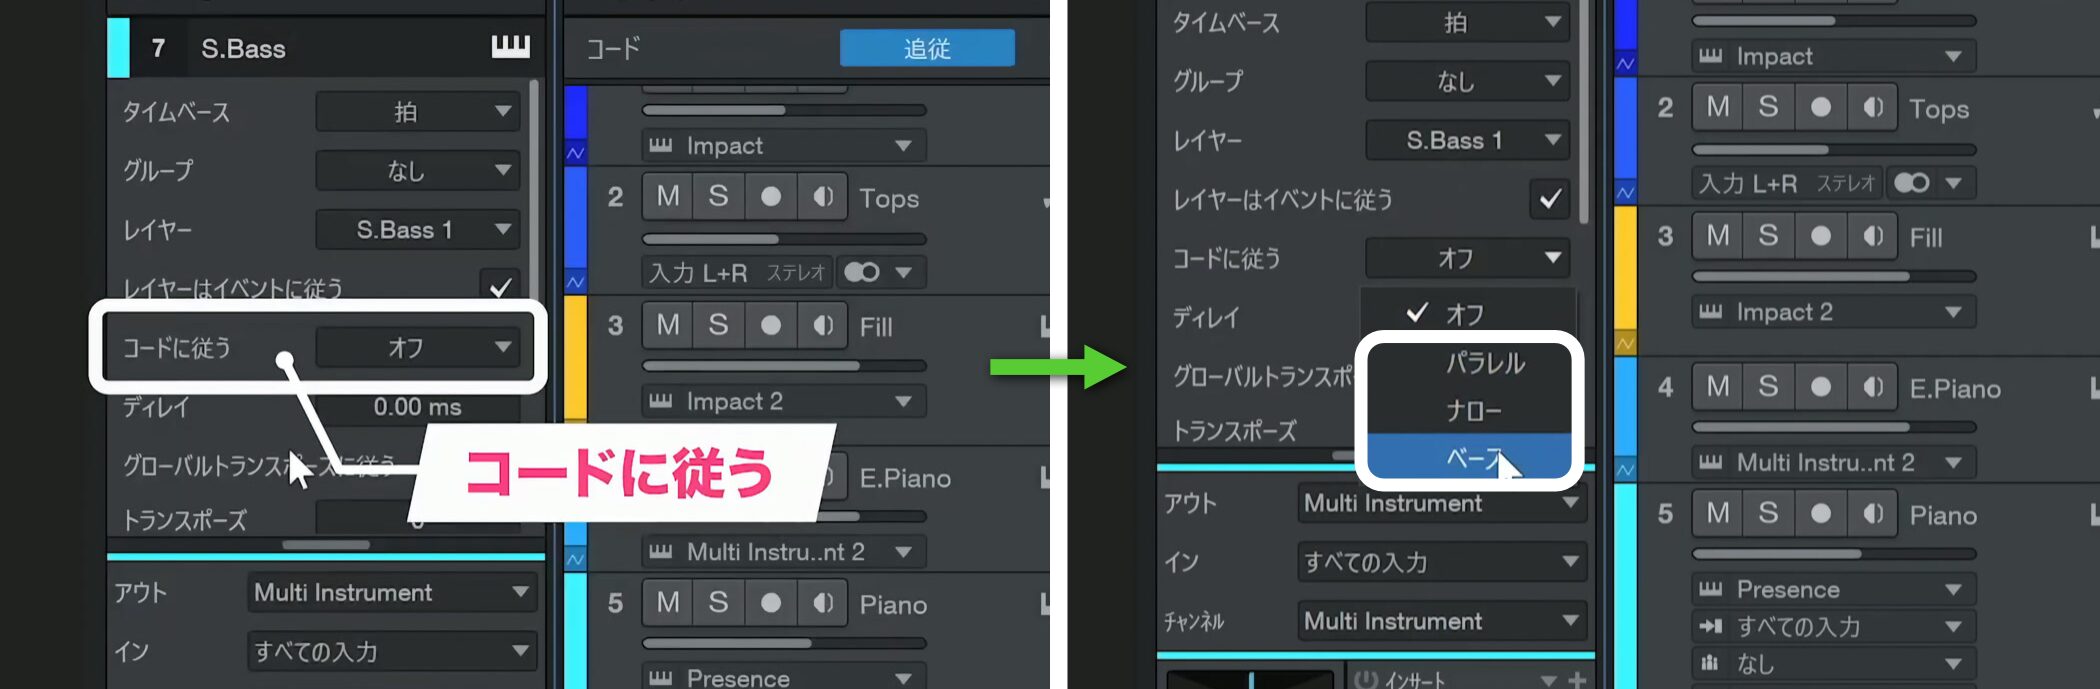
In the inspector, use Follow Chords and choose Parallel, Narrow, or Bass according to your needs.
- Bass: follows the chord root.
- Parallel: moves the current chord voicing in parallel.
- Narrow: creates inversions and voicings while minimizing note movement.
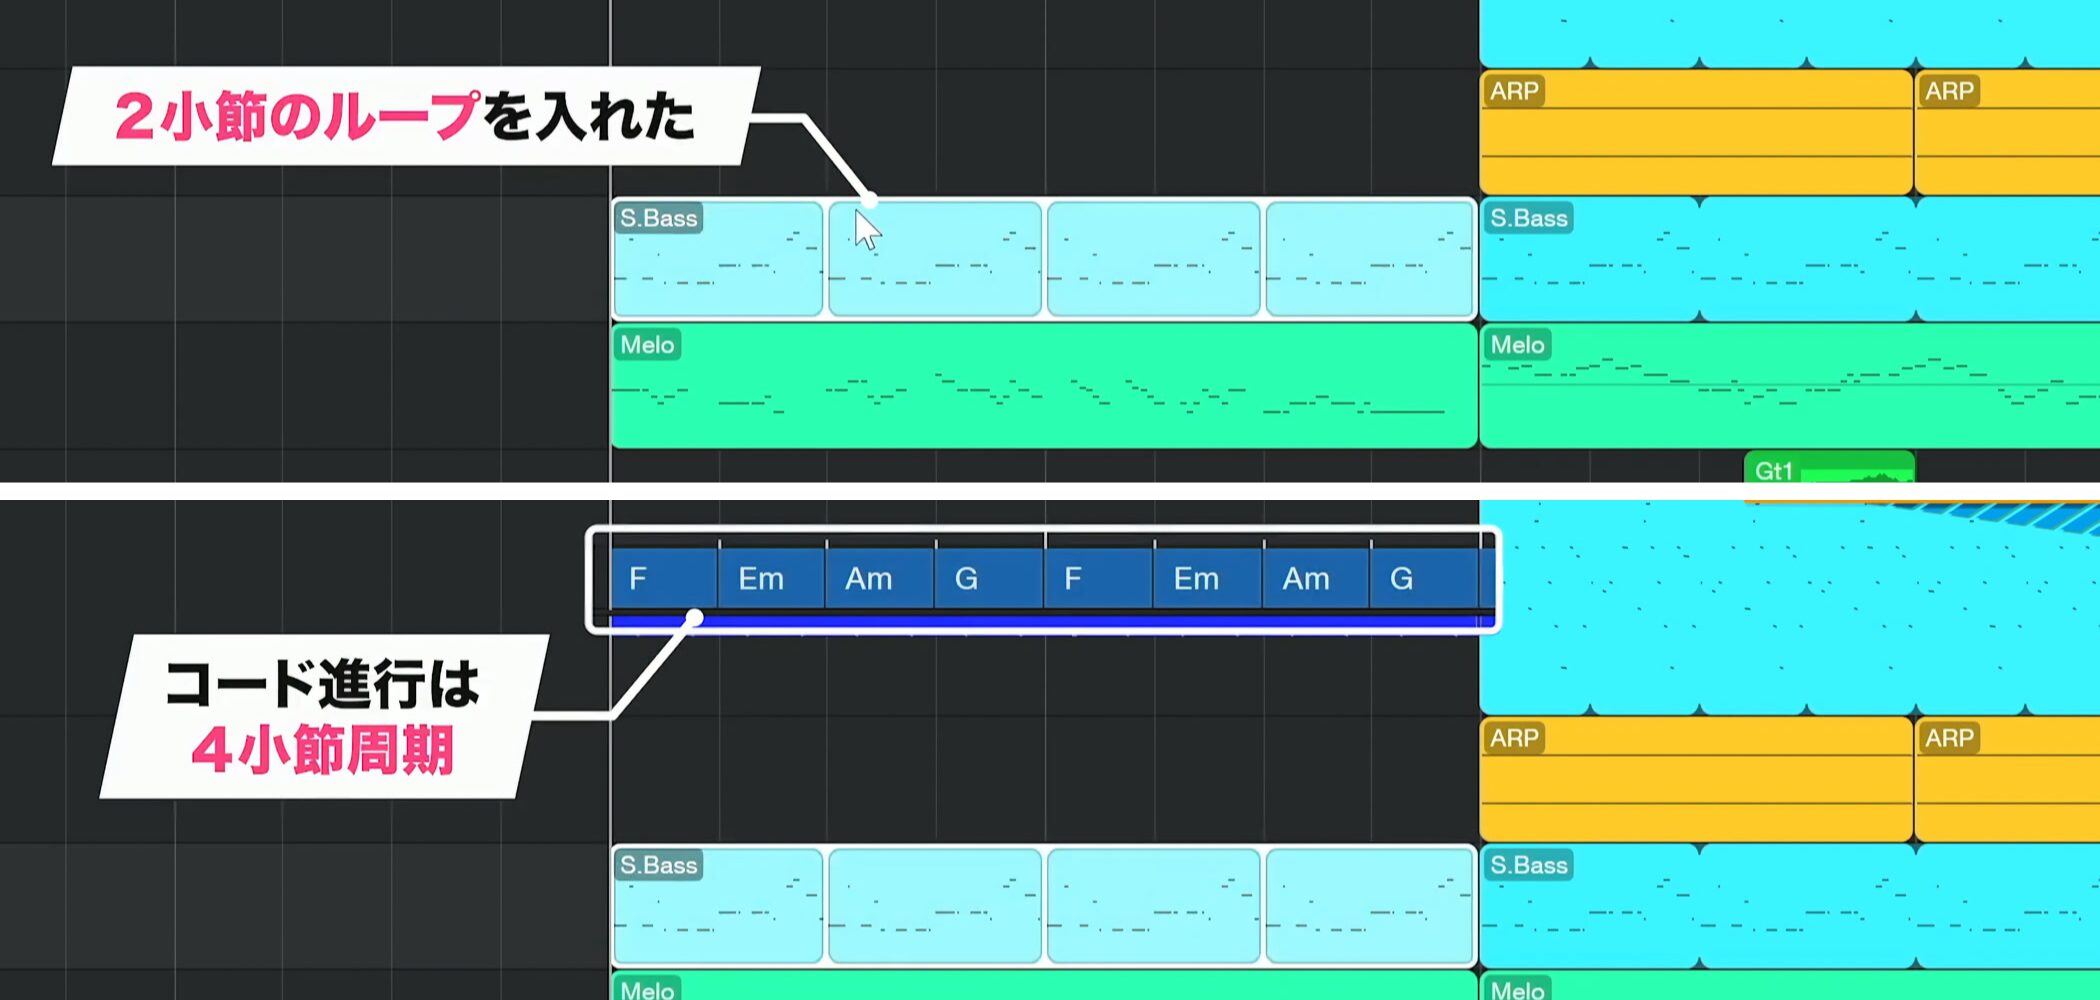
With a looped event, its repeat cycle may not match the chord progression.
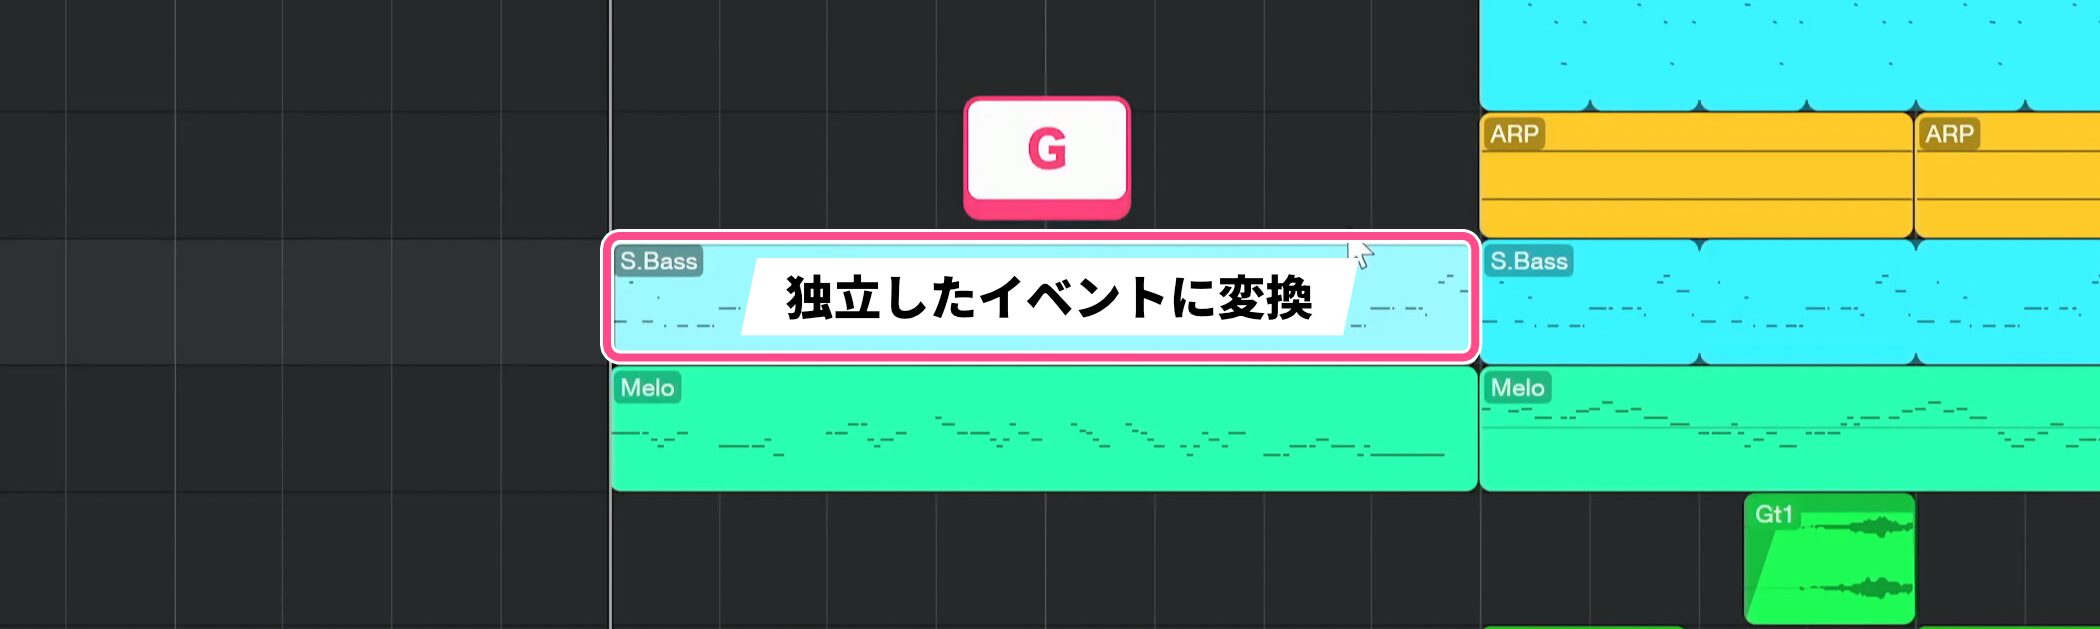
If so, press G to convert it to an independent event before applying Follow Chords.
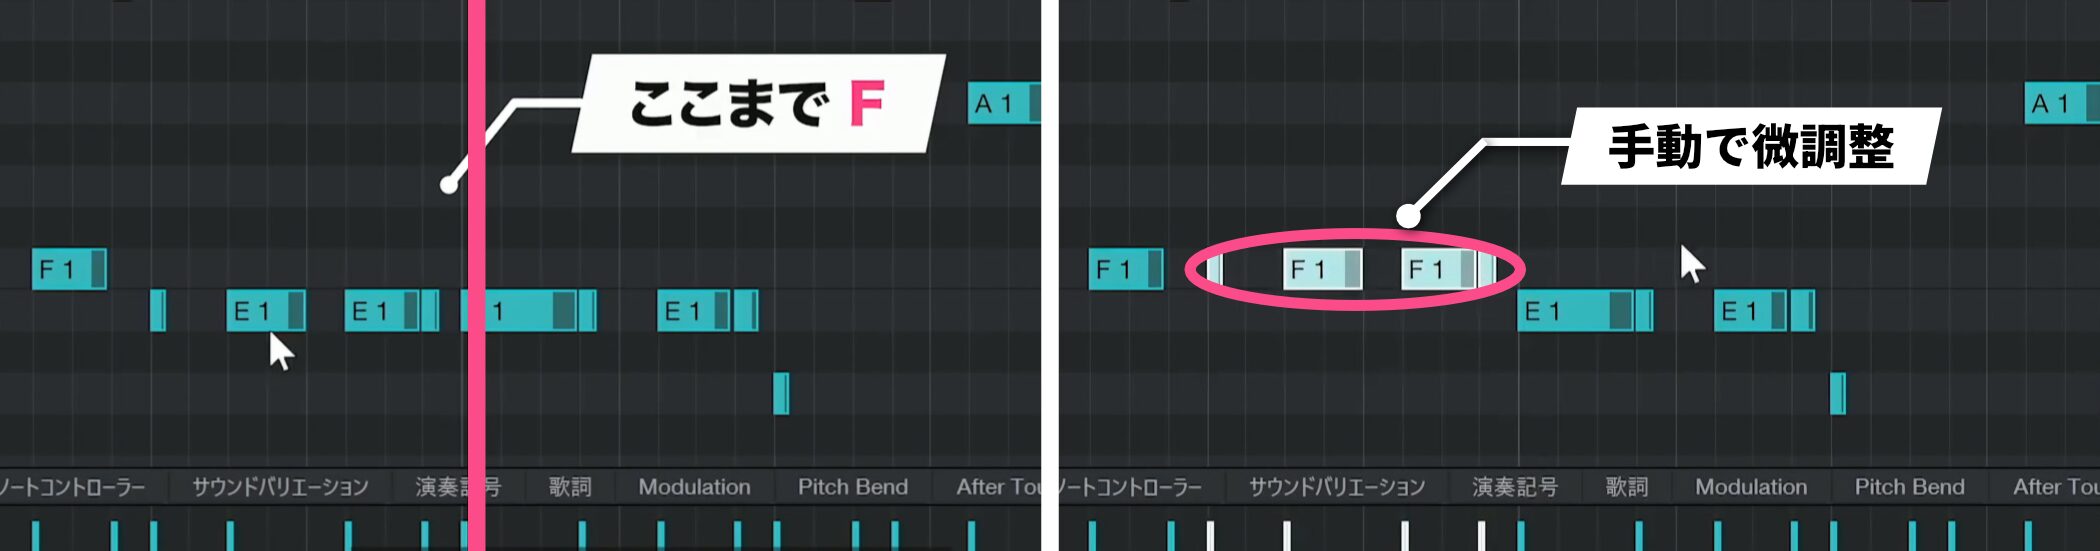
Listen to the result and fine-tune any passages that need adjustment.
Mute events
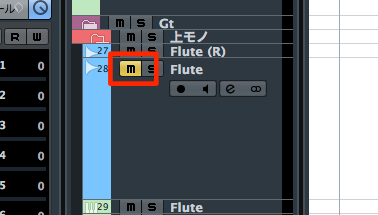
You can temporarily disable an event by muting it instead of deleting it.
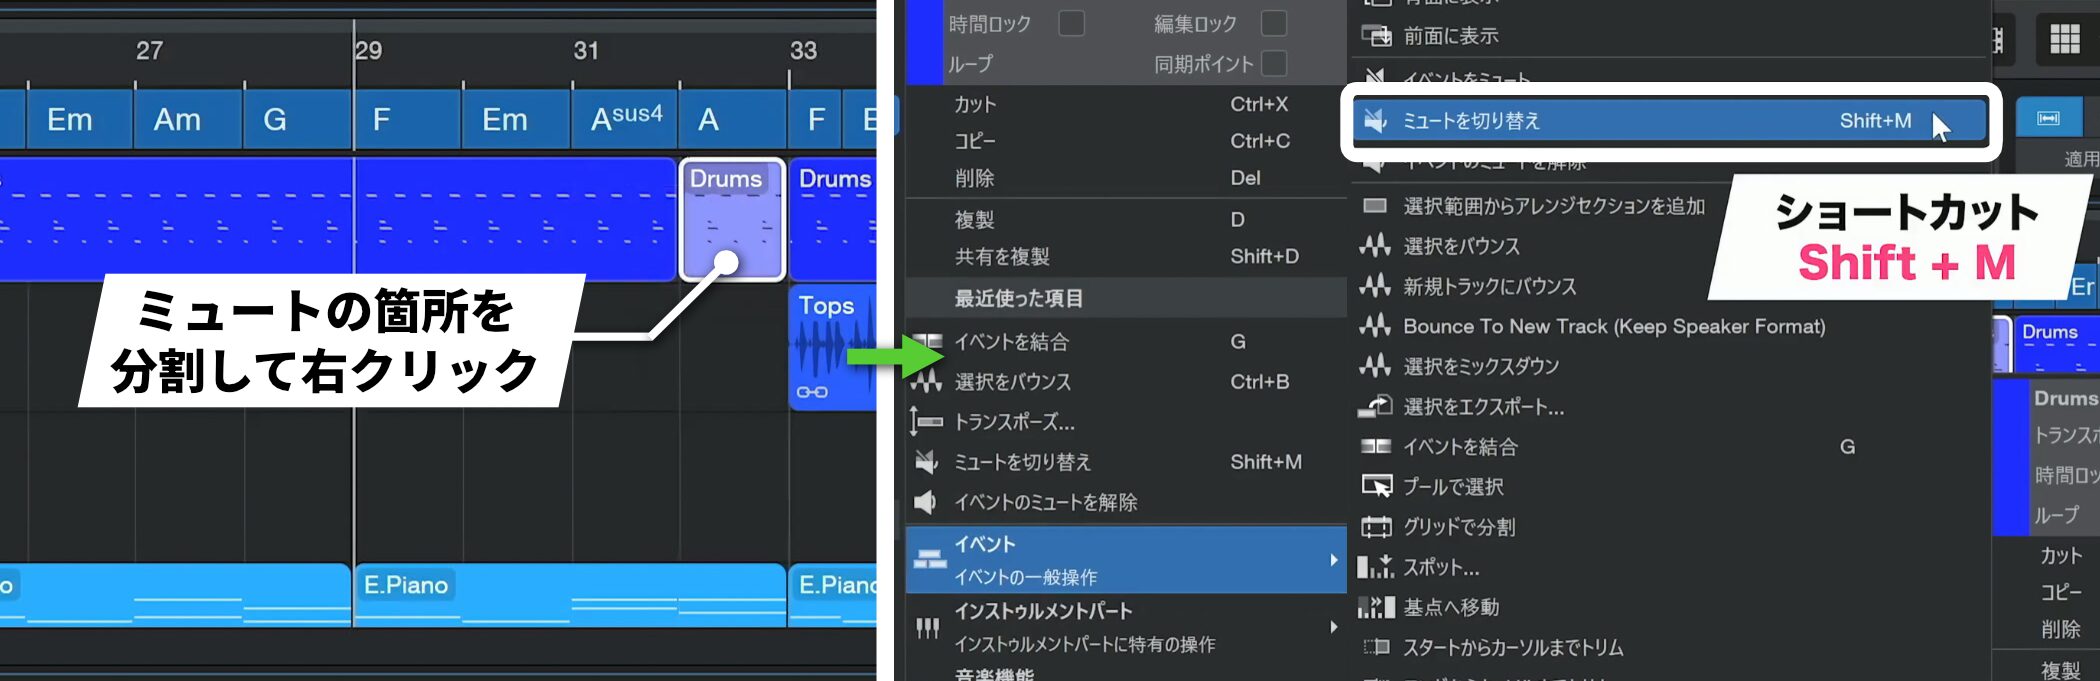
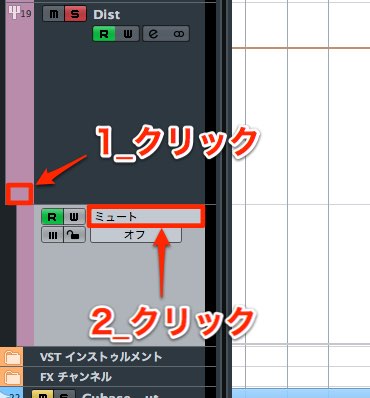
Split the portion you want to mute, then right-click and choose Event → Toggle Mute, or press Shift+M.
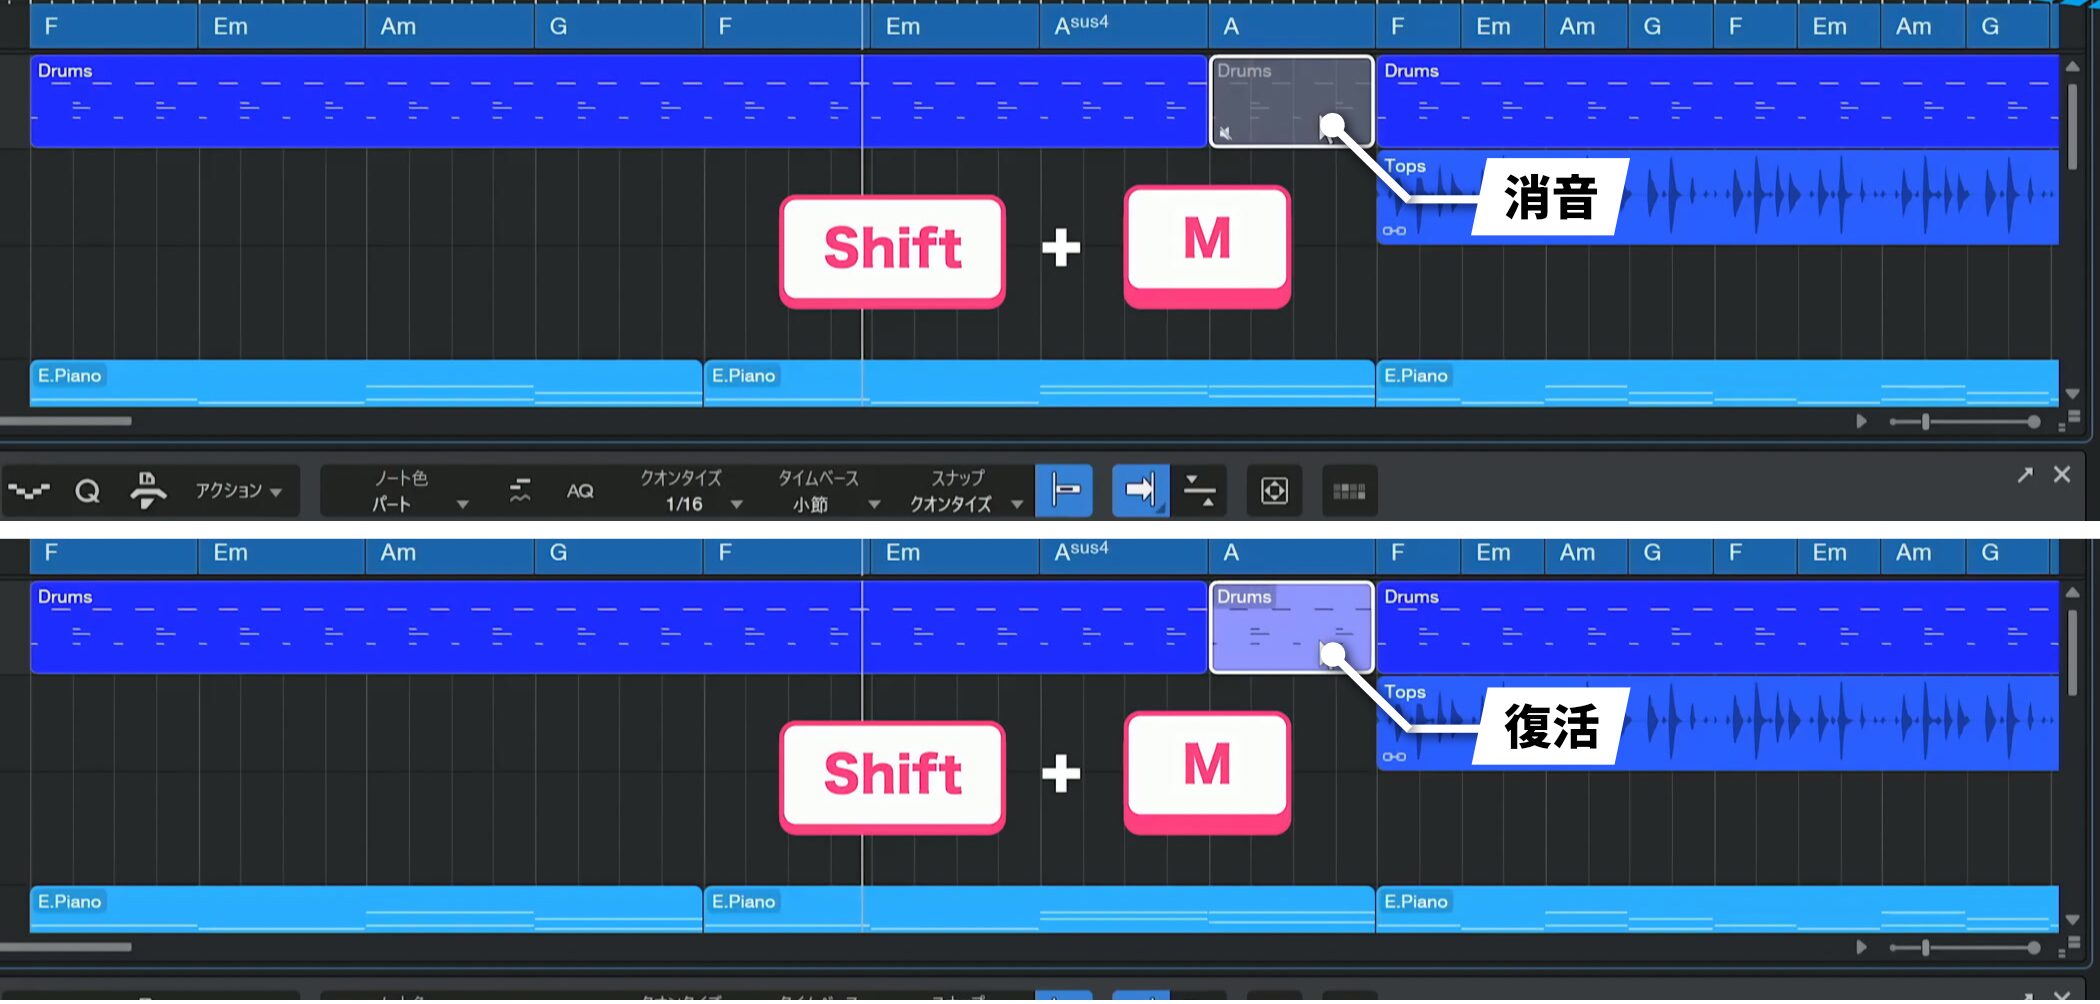
This silences the event while preserving it, and Shift+M restores it later.
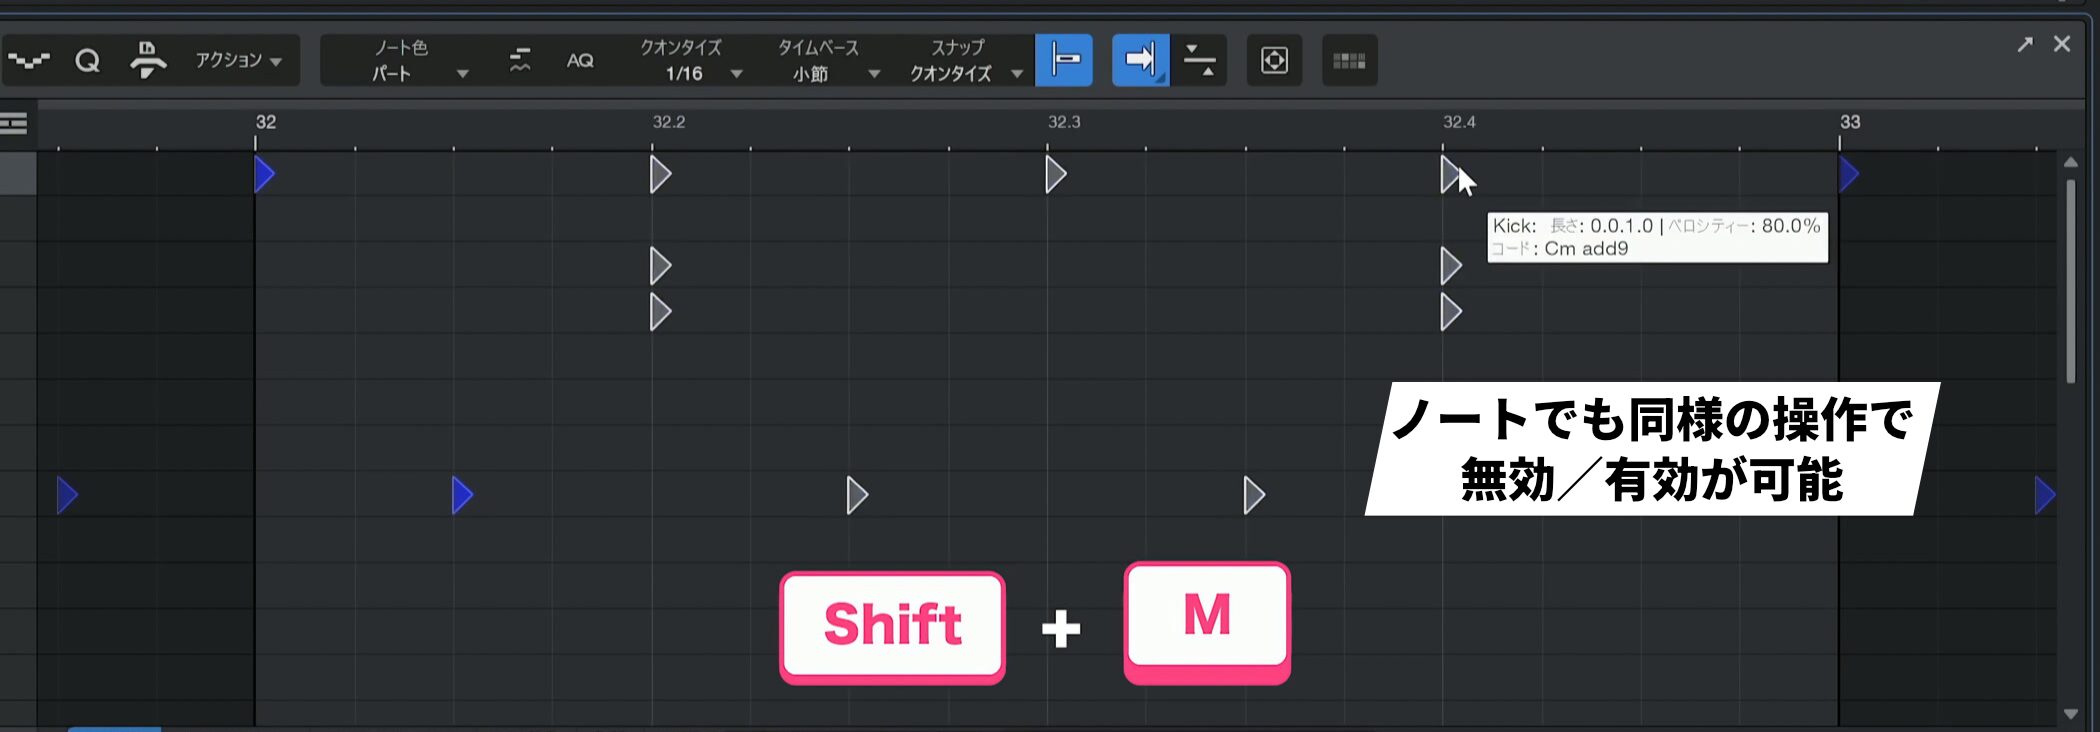
The same toggle also works on individual notes.
Arrangement markers
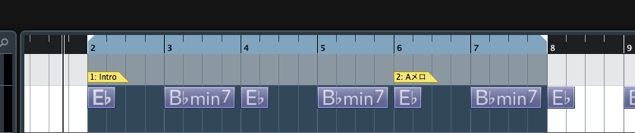
Arrangement markers provide a visual overview of the song structure.
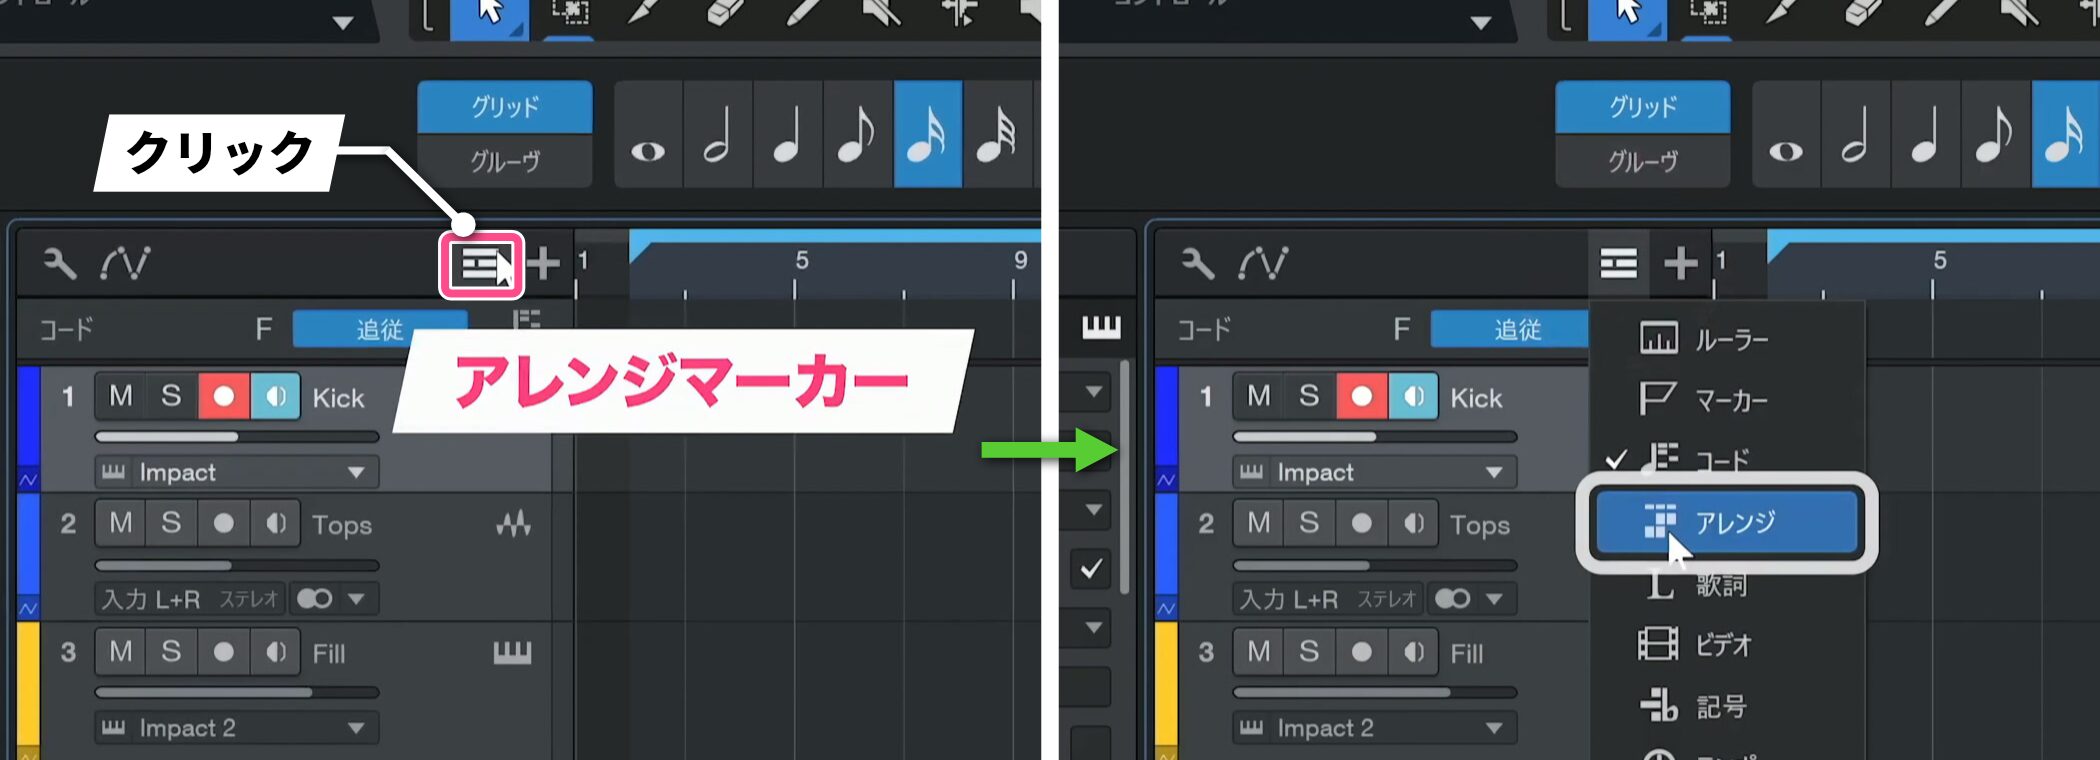
Click the global tracks display and select Arranger.
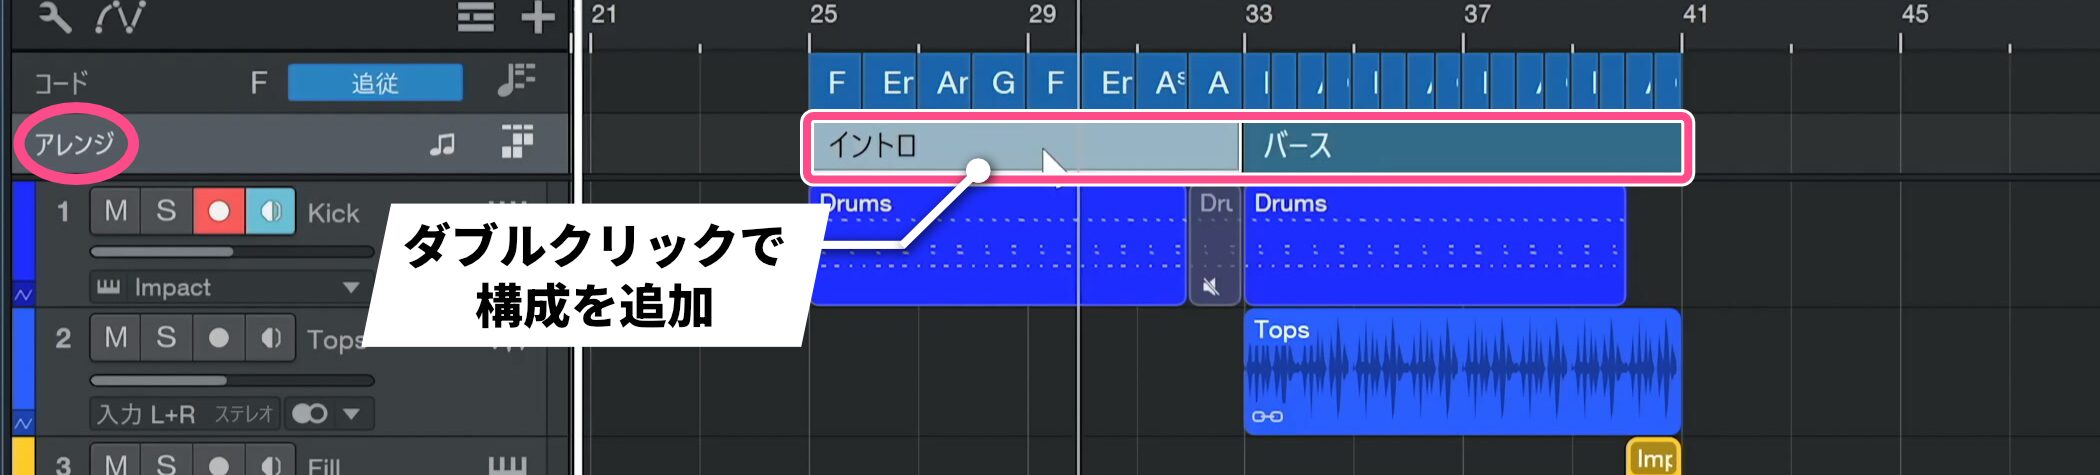
The Arranger track appears; double-click the timeline to add sections.
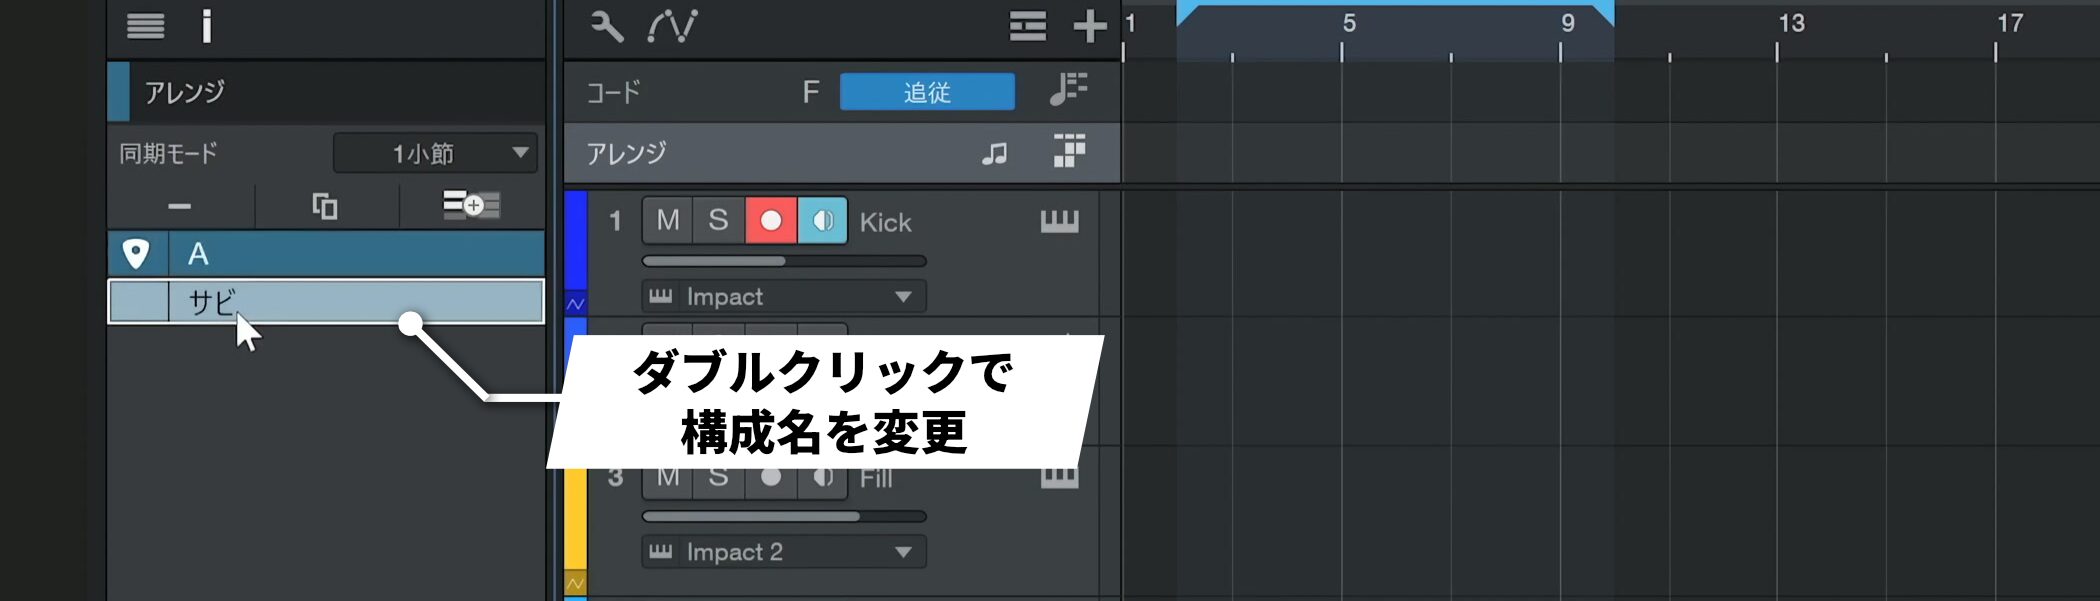
Open the inspector and double-click a section name to label it Intro, Verse, Chorus, Outro, or another name.
Named sections remain easy to identify when zooming.
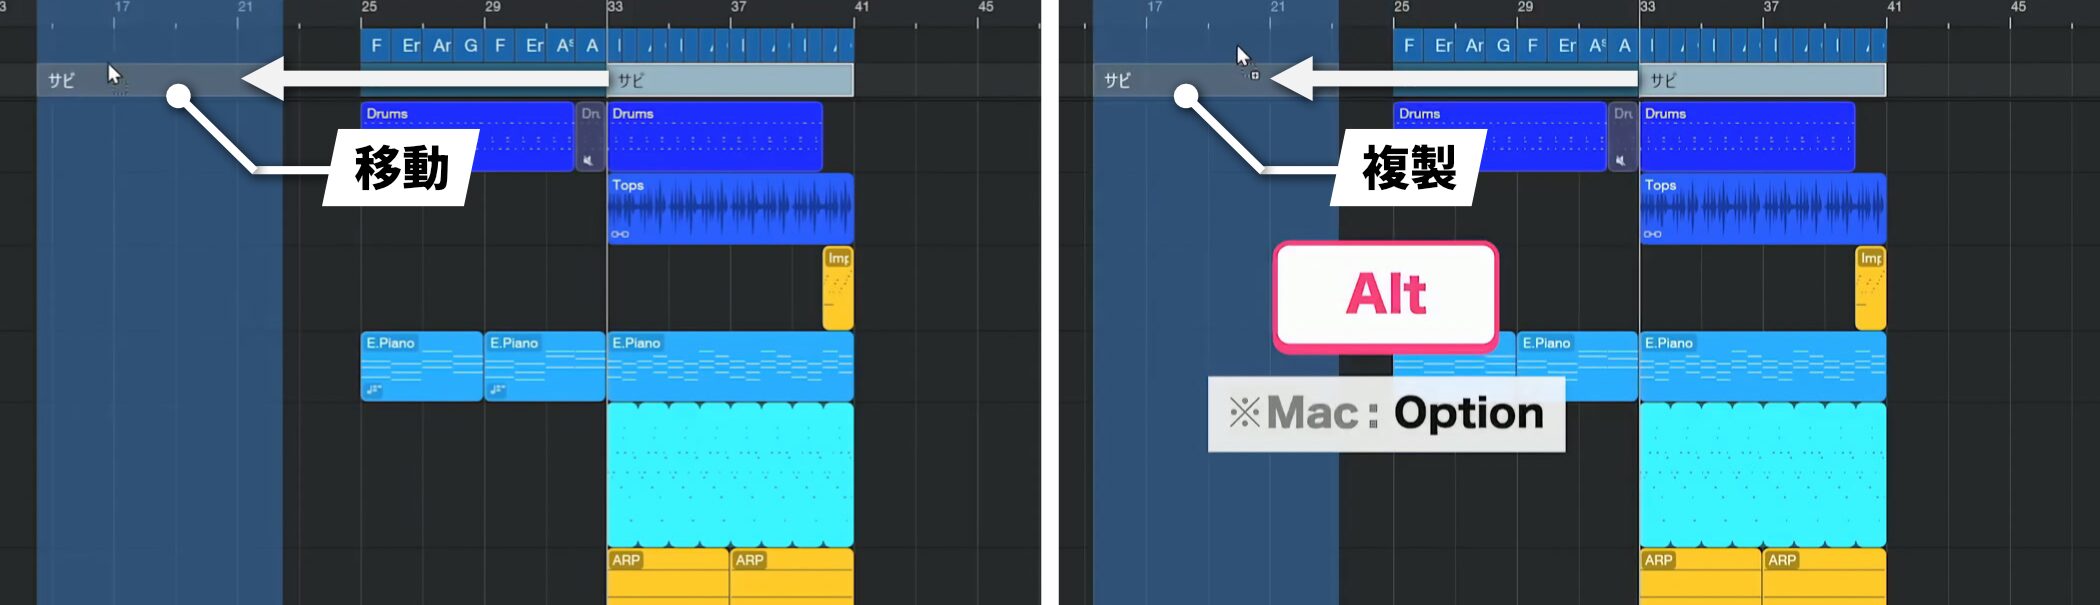
Drag a marker to move the section, or hold Alt while dragging to duplicate it.
Added April 18, 2026
Create an arrangement section from an event
You can add an arrangement section that matches an event’s length.
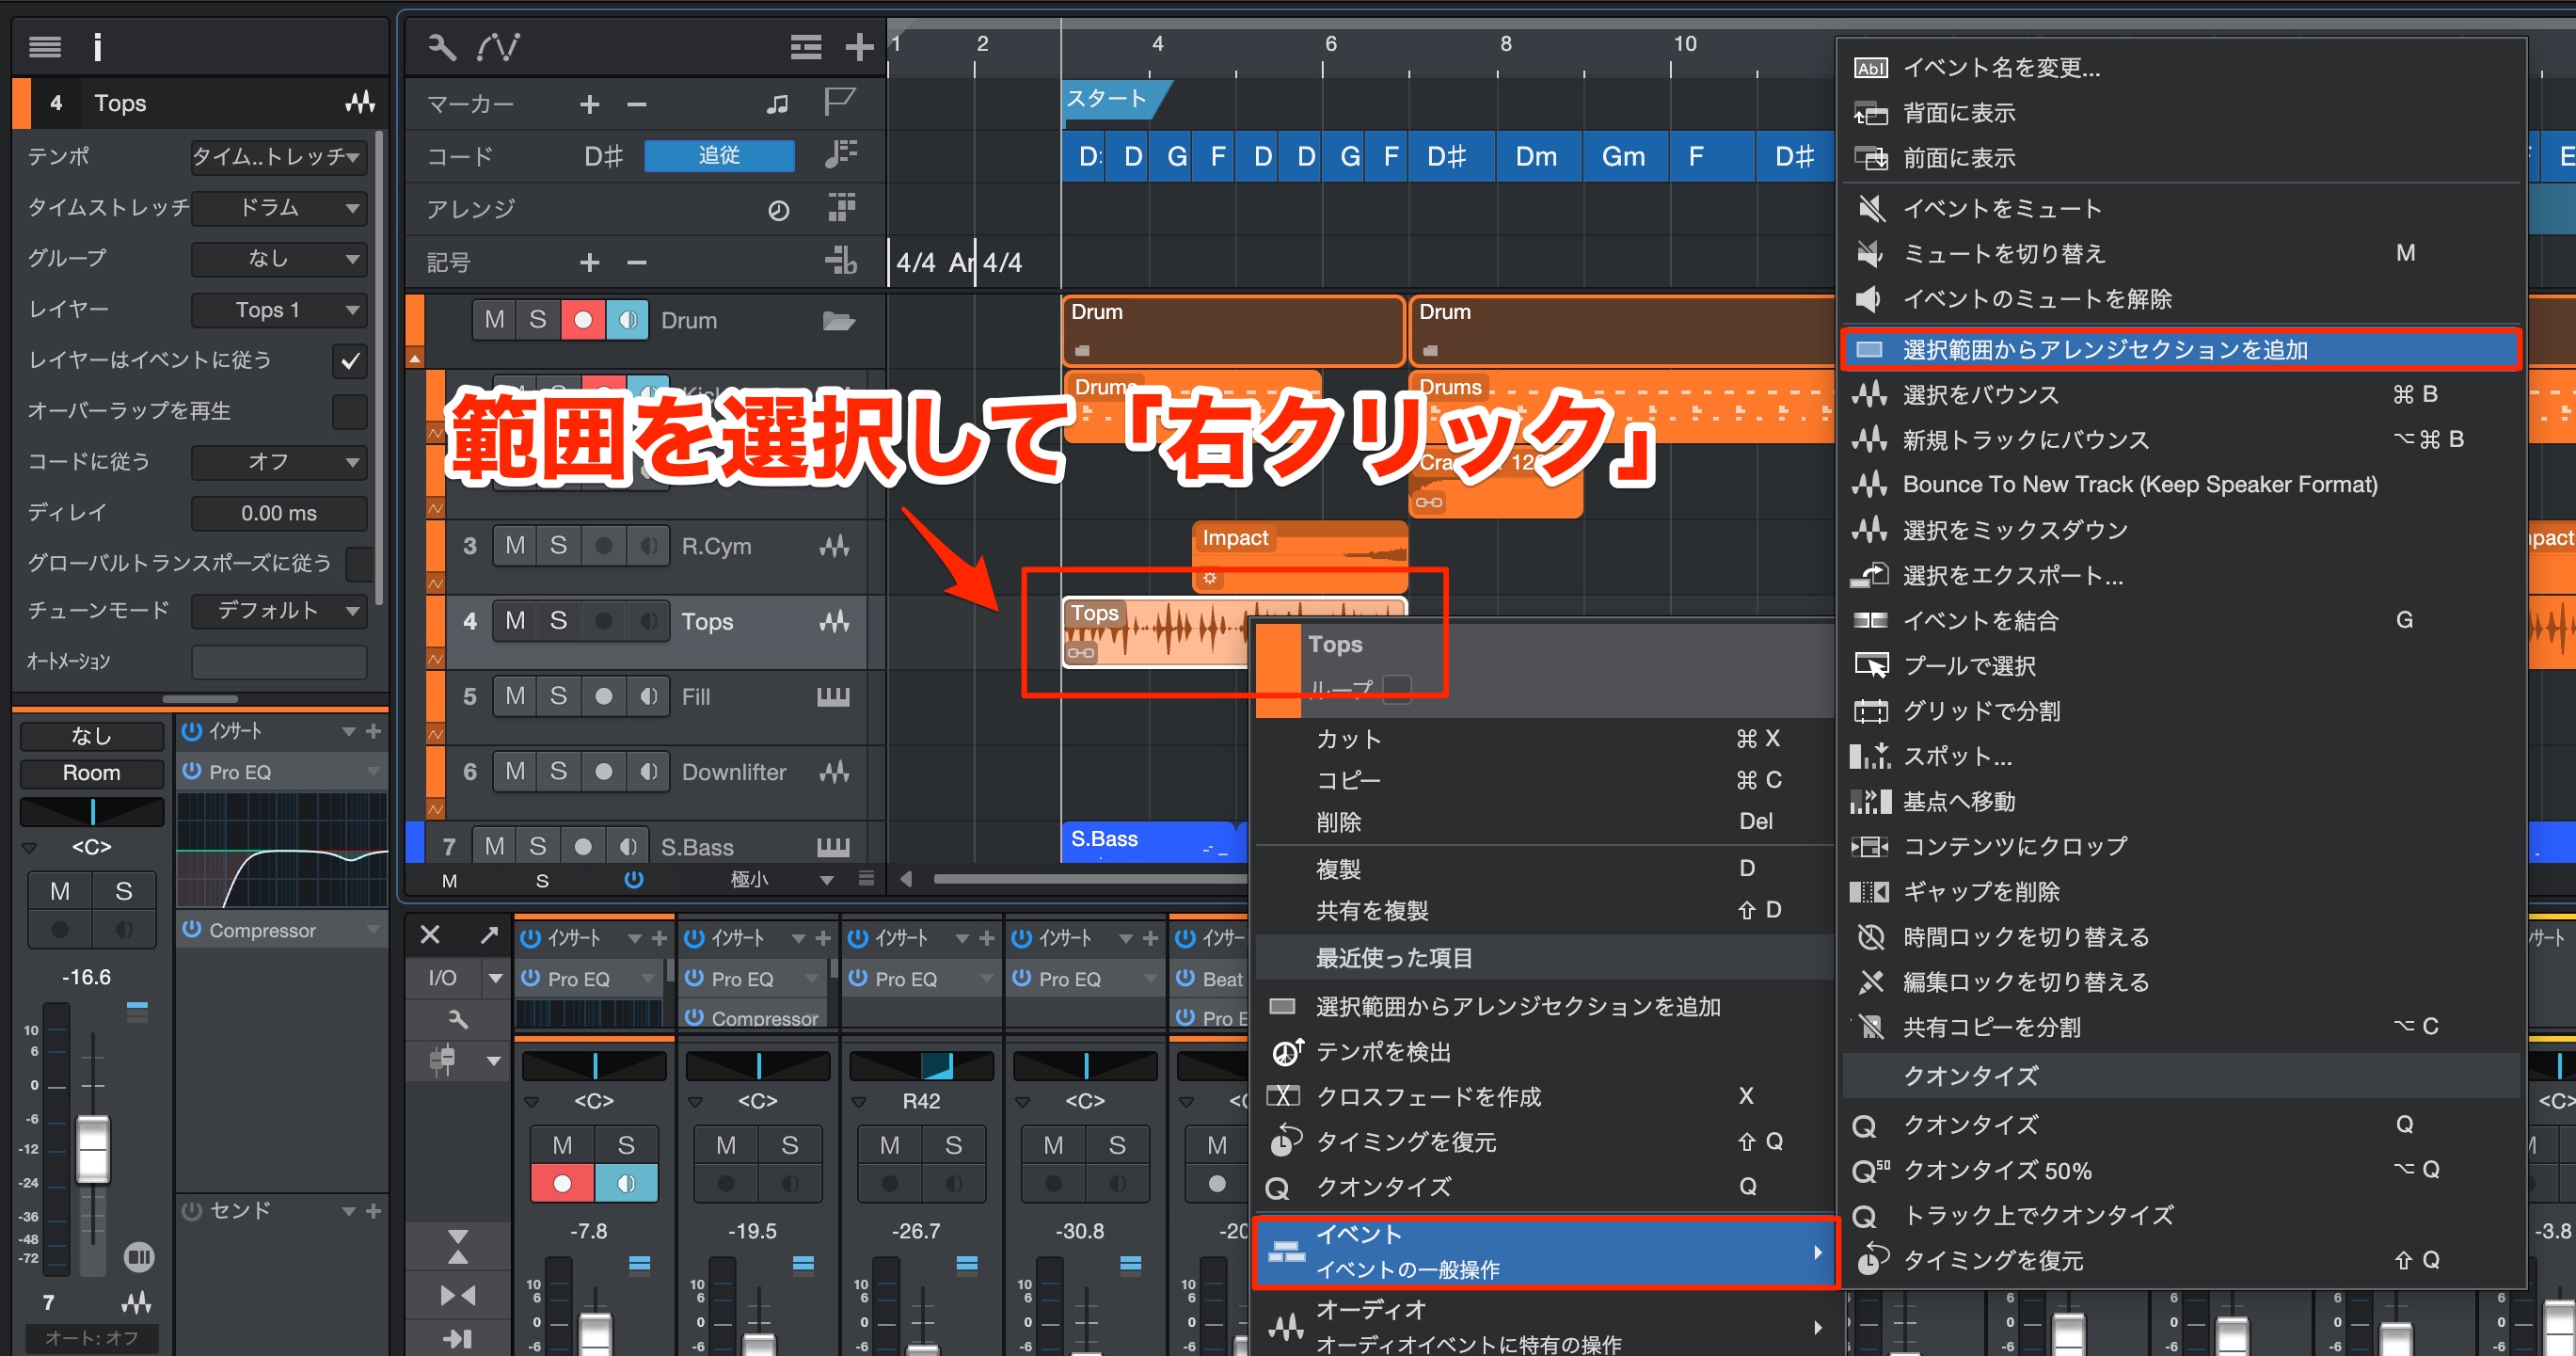
Select the event and right-click.
Choose Event → Add Arranger Section from Selection.
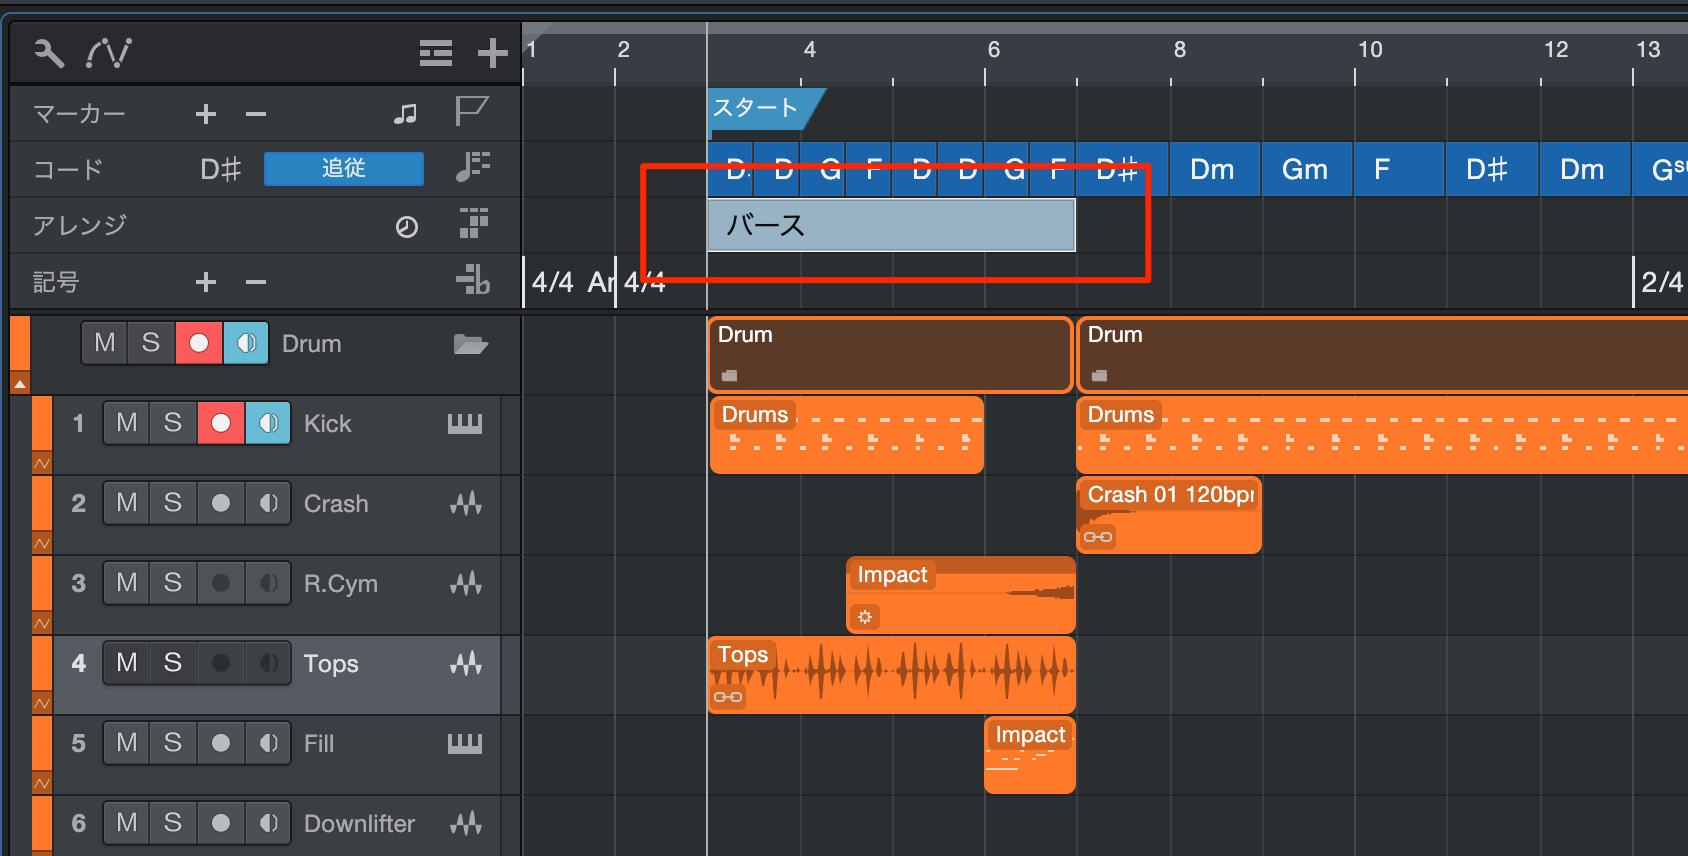
An arrangement section matching the event’s range is created.
Scratch Pad
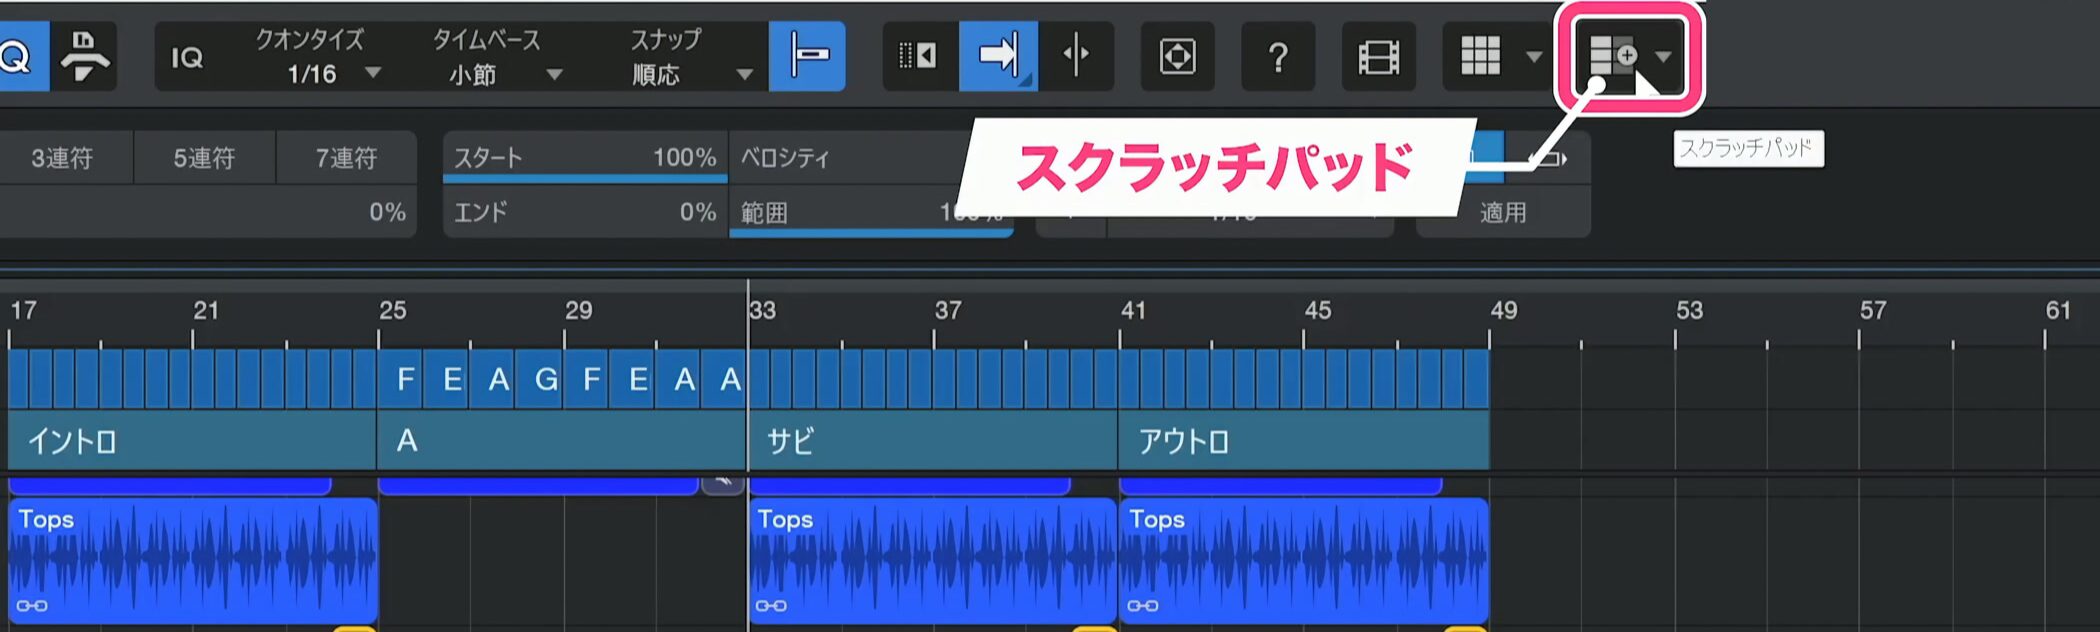
Scratch Pad is useful for trying out arrangement ideas.
Click the Scratch Pad icon at the top.
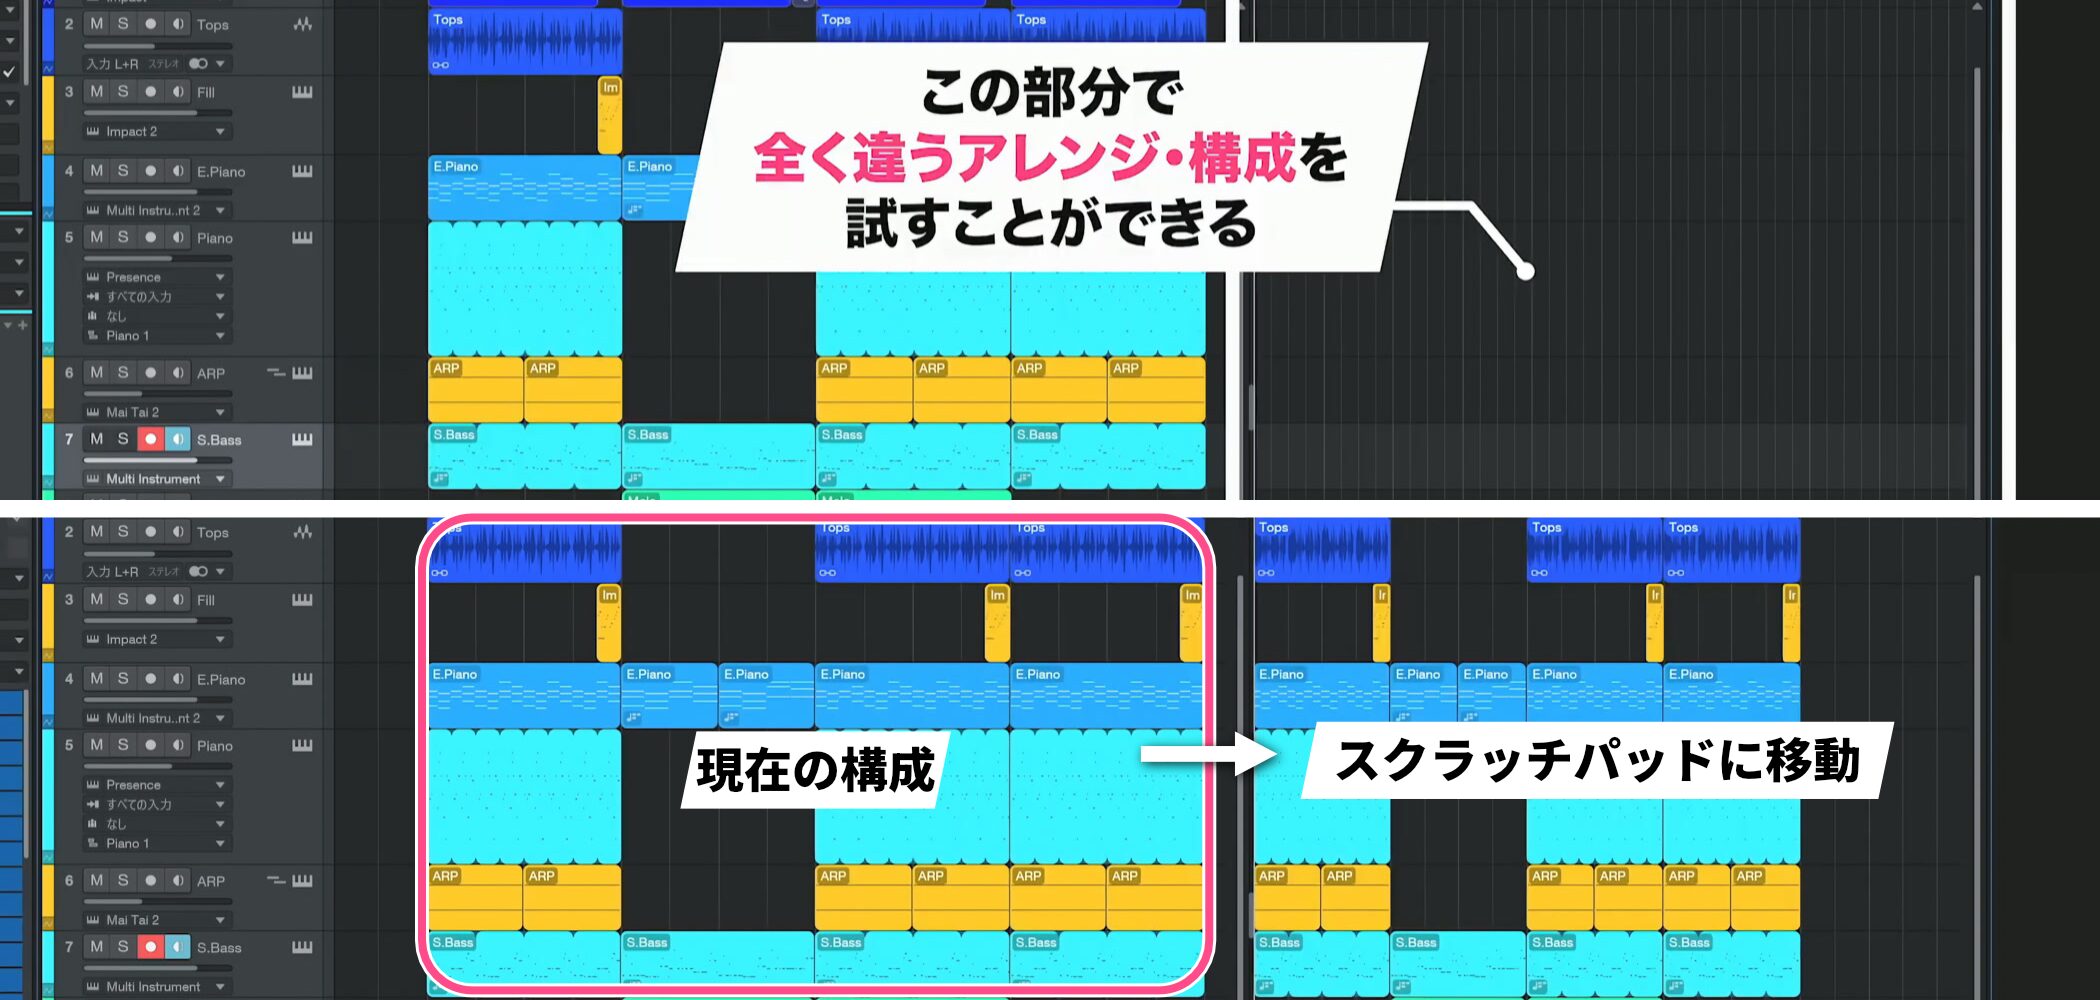
A separate timeline appears. Move the current arrangement into it to experiment without affecting the main arrangement.
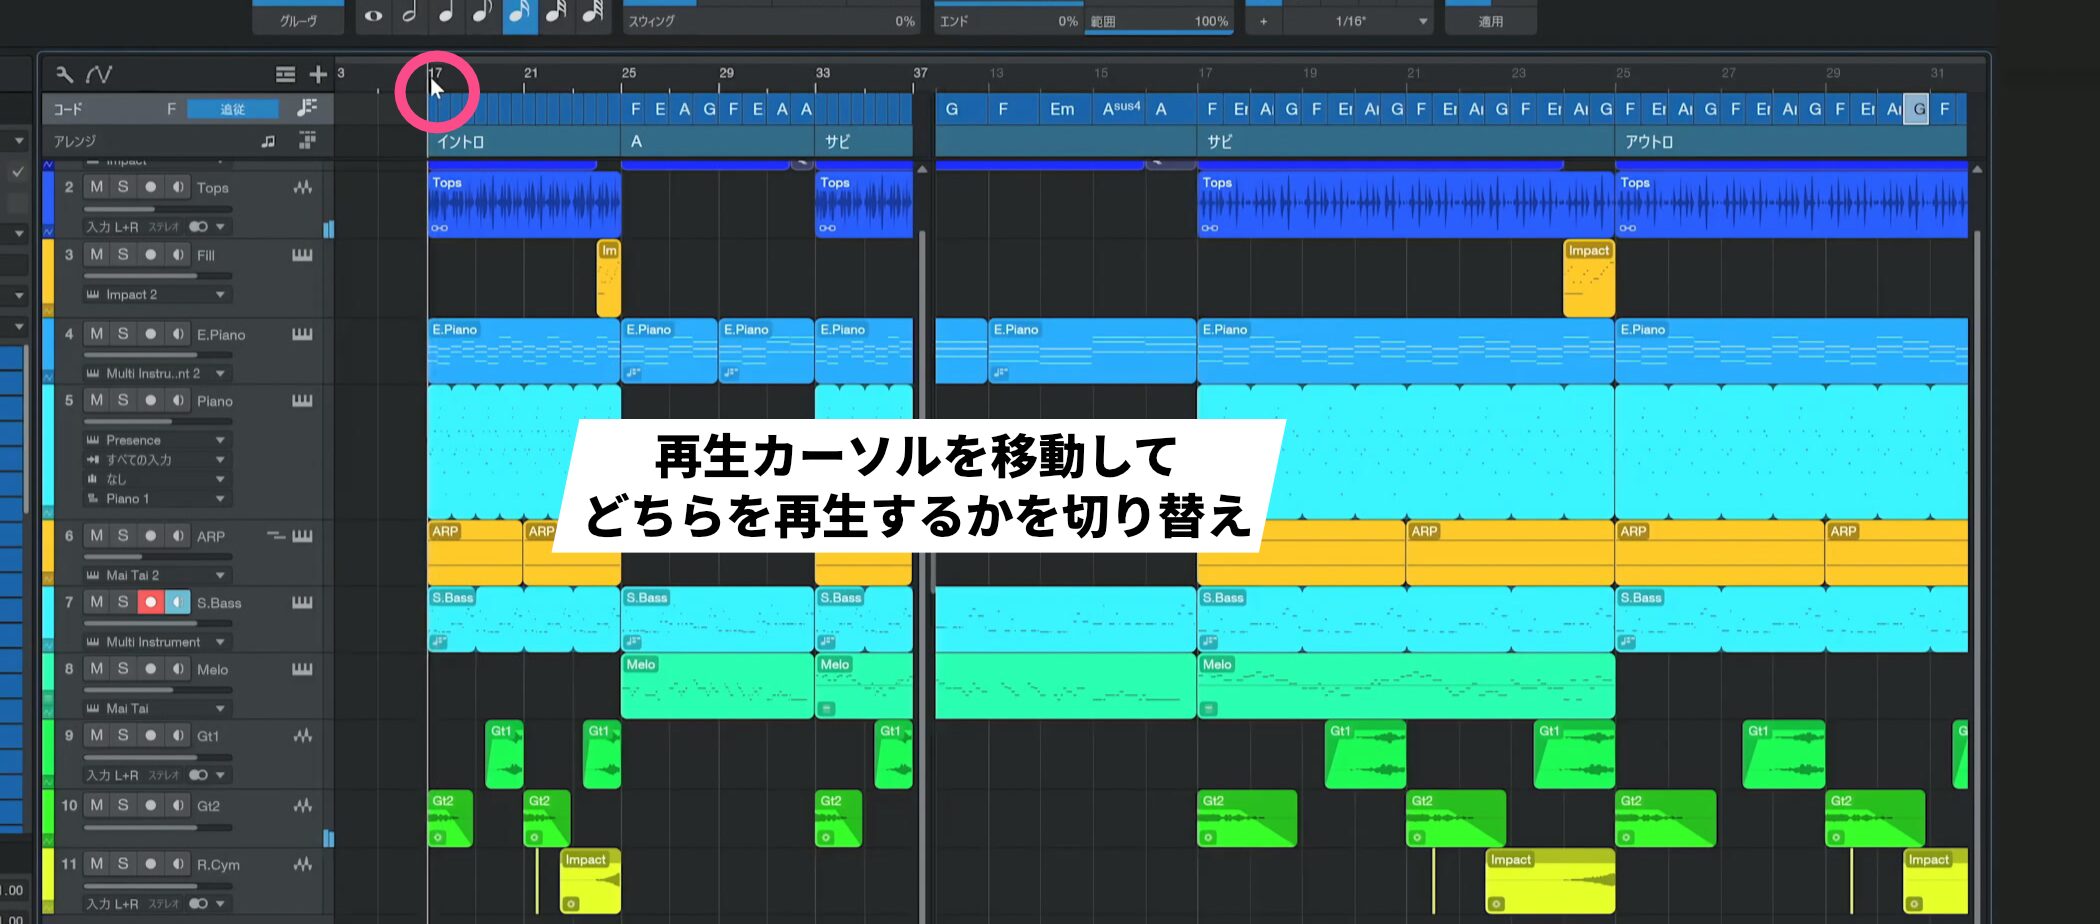
Playback uses either the main timeline or the Scratch Pad; move the play cursor to switch between them.
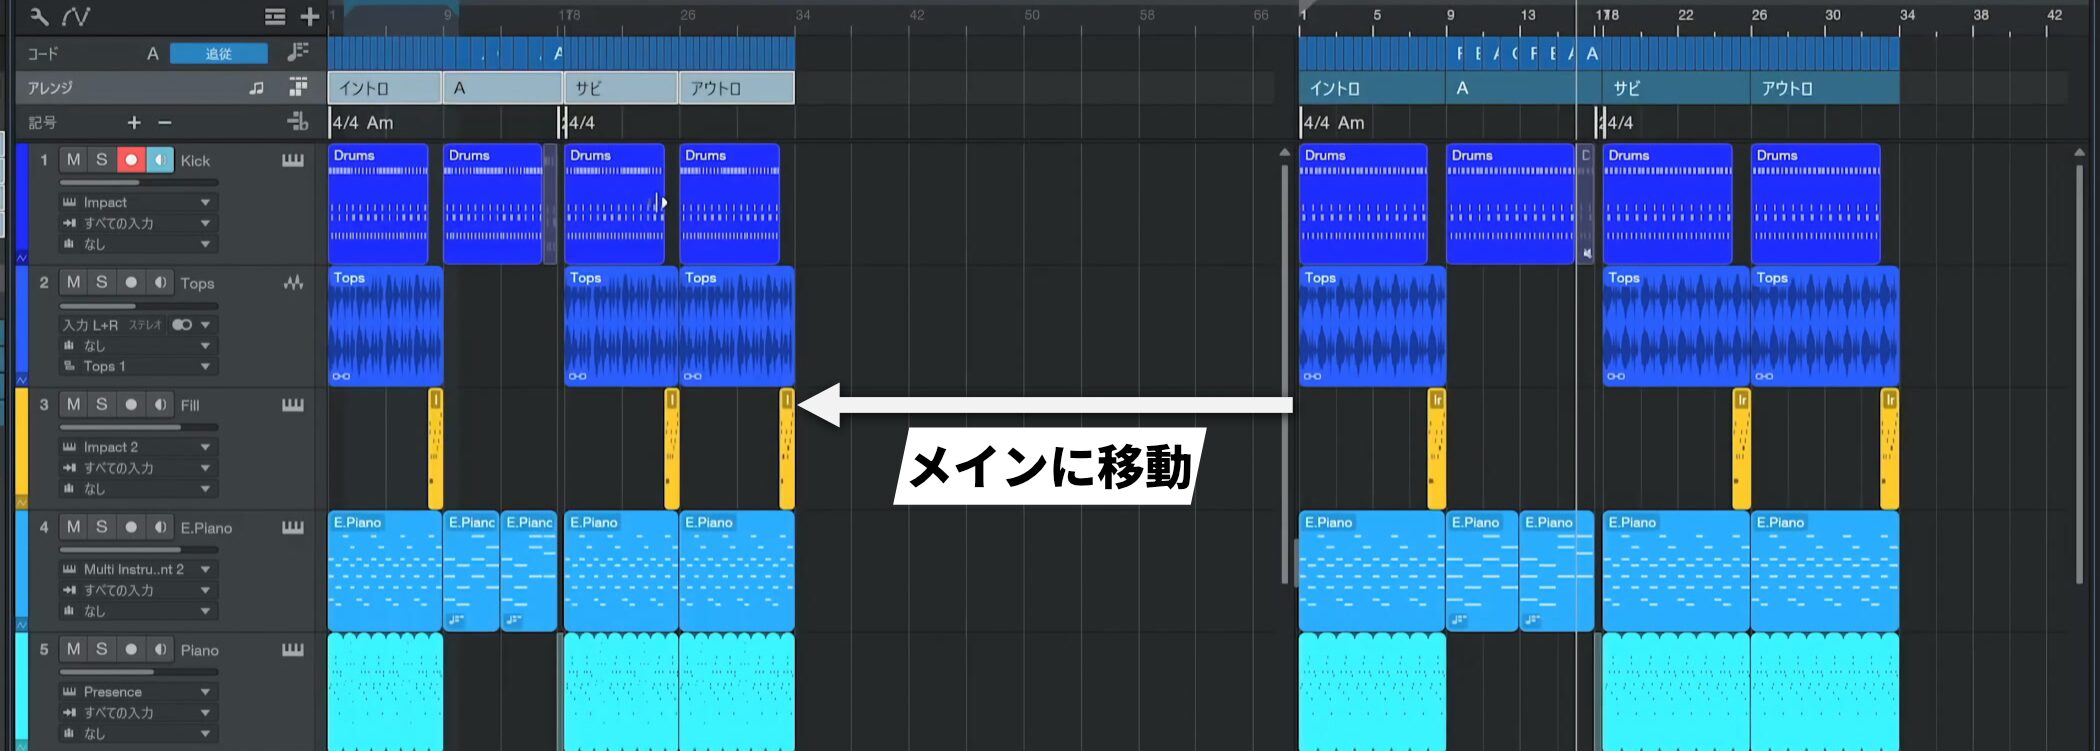
When you like an arrangement, remove the main version and move the selected Scratch Pad events back to the main timeline.
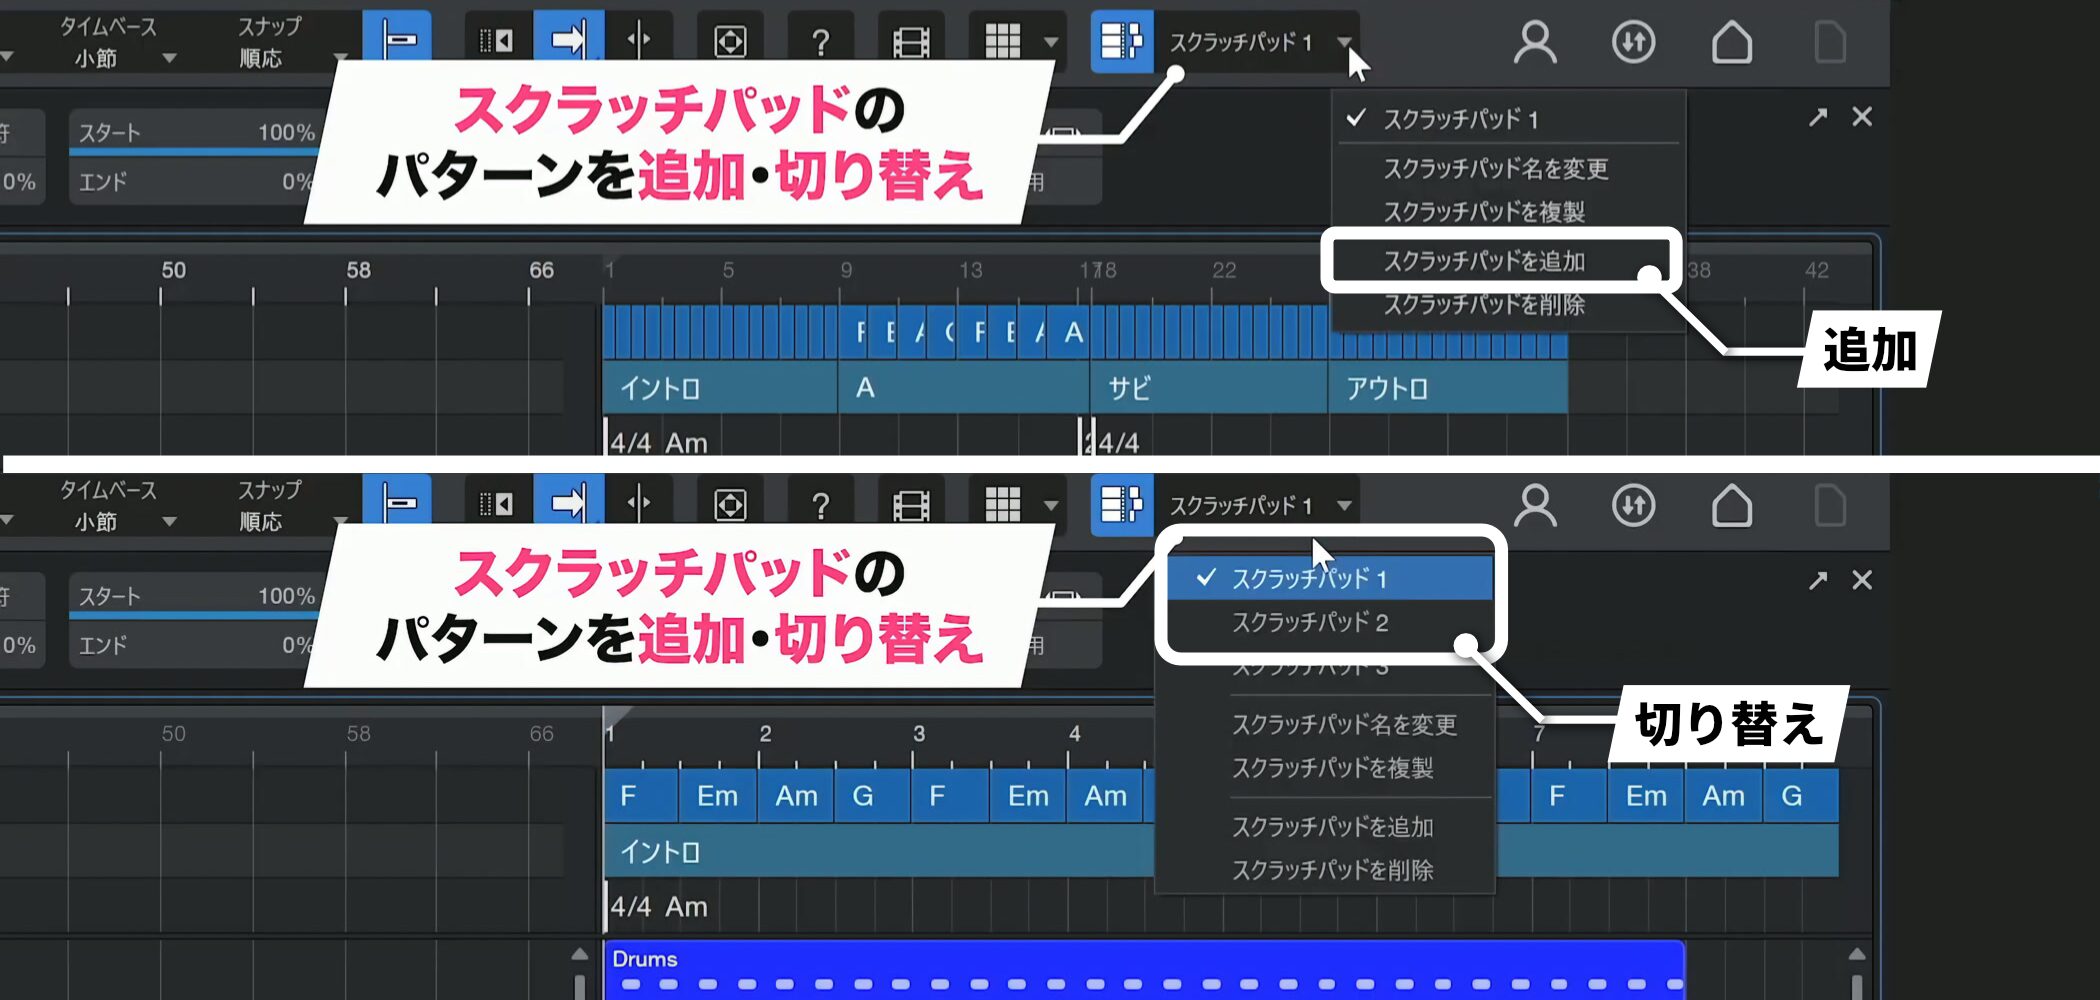
You can add multiple Scratch Pads and switch between them to compare ideas.
Insert silence
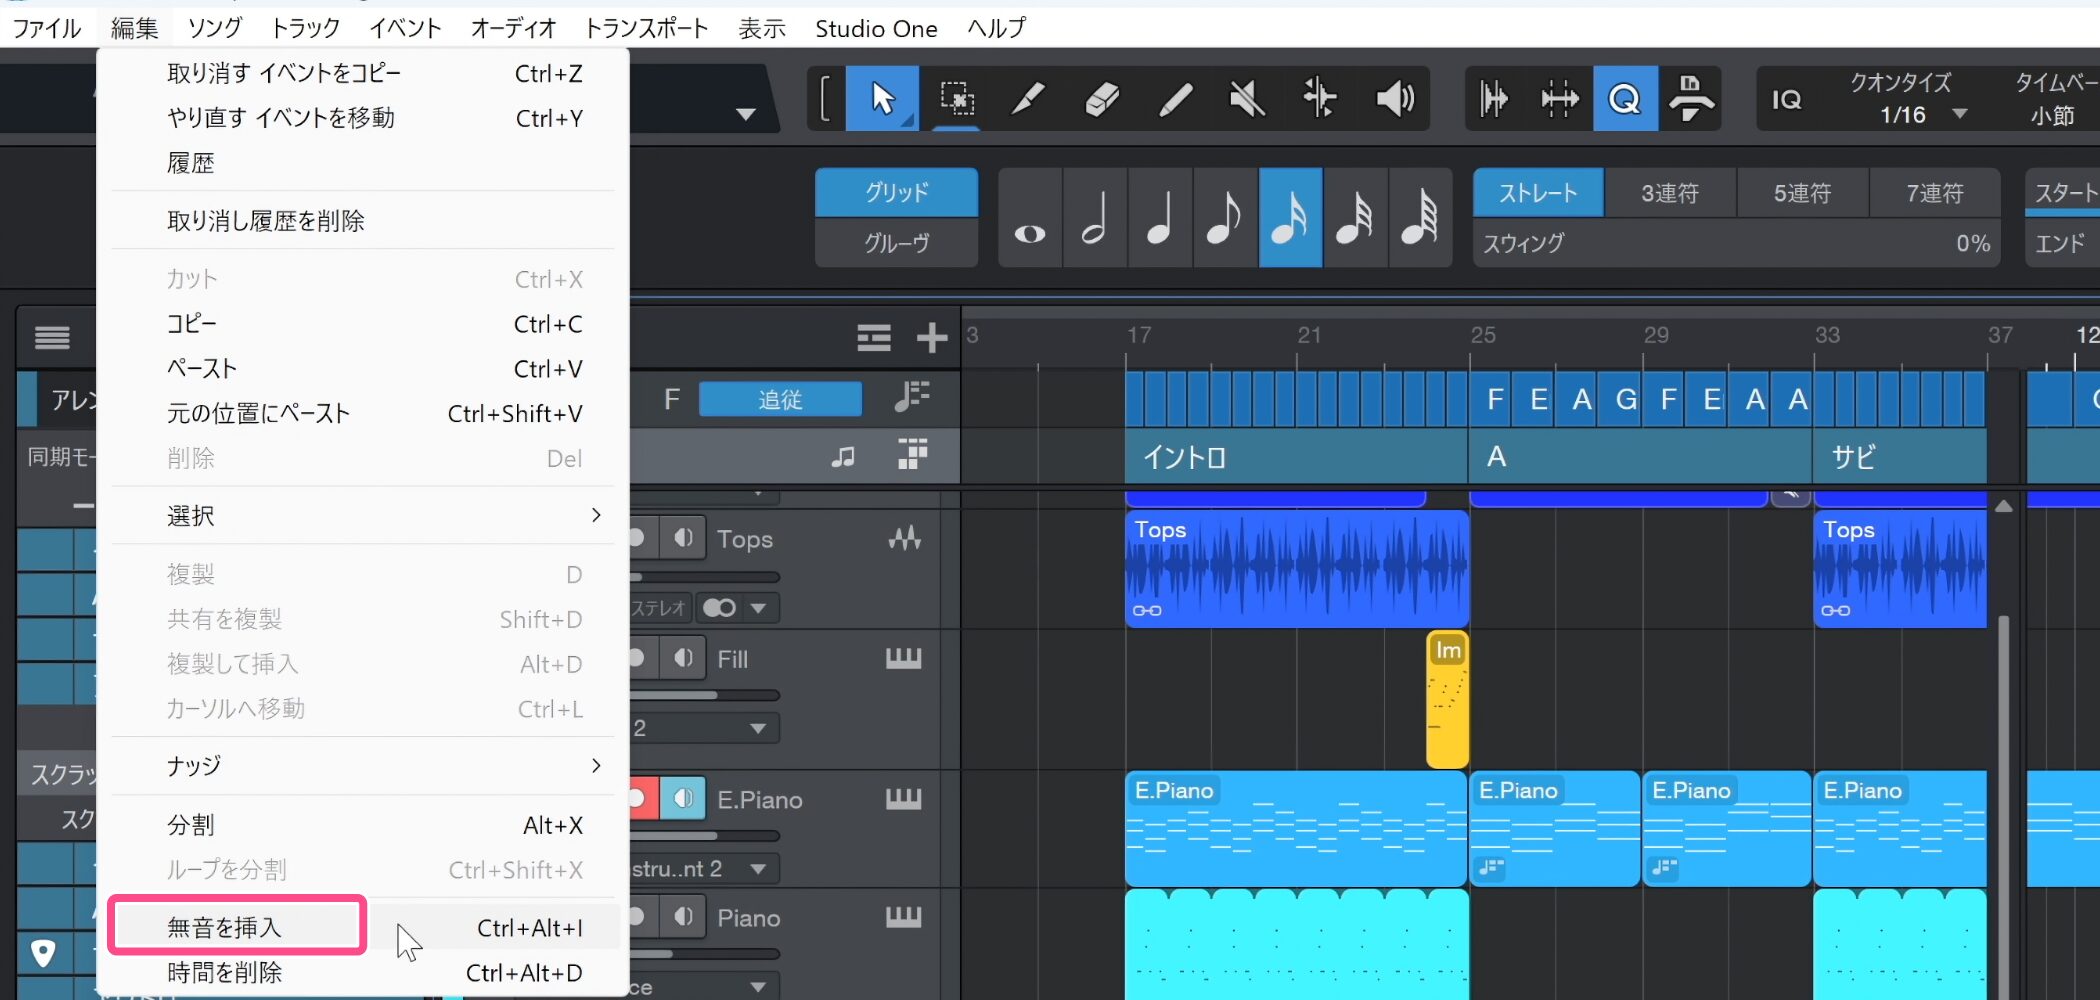
To add a gap, such as one bar, in the middle of a song, choose Edit → Insert Silence.
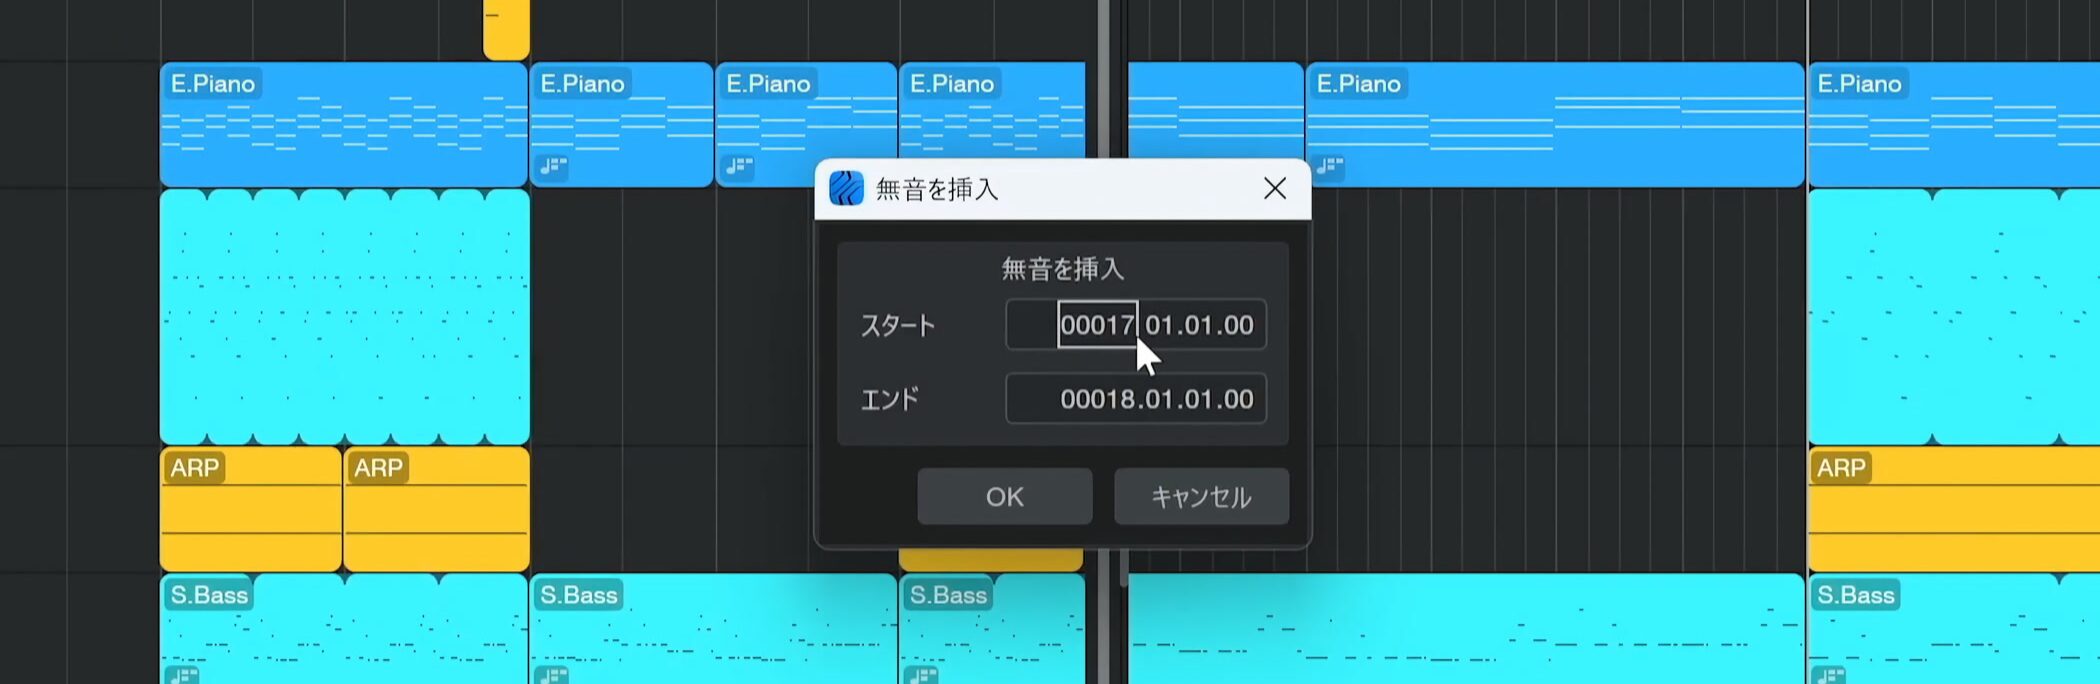
Specify the start and end of the silence and click OK.
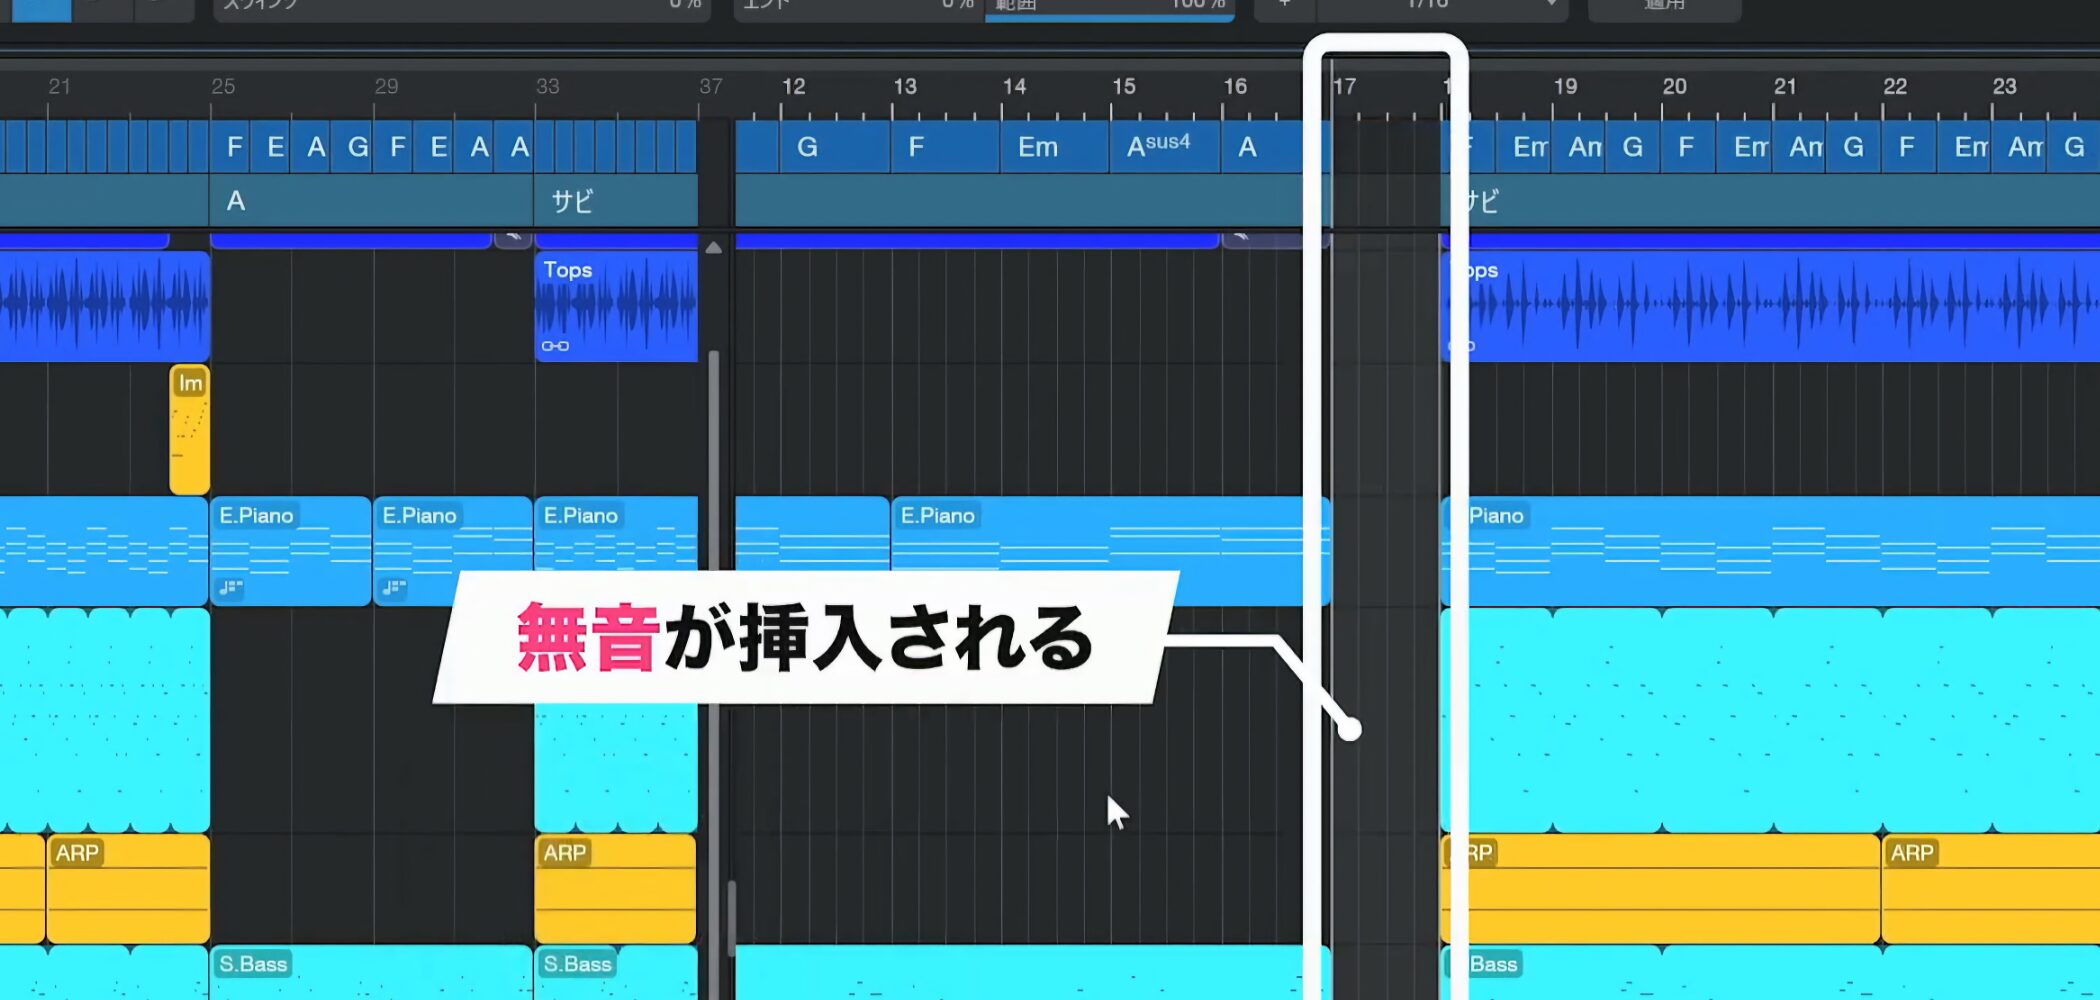
The specified span of silence is inserted.
Change time signature
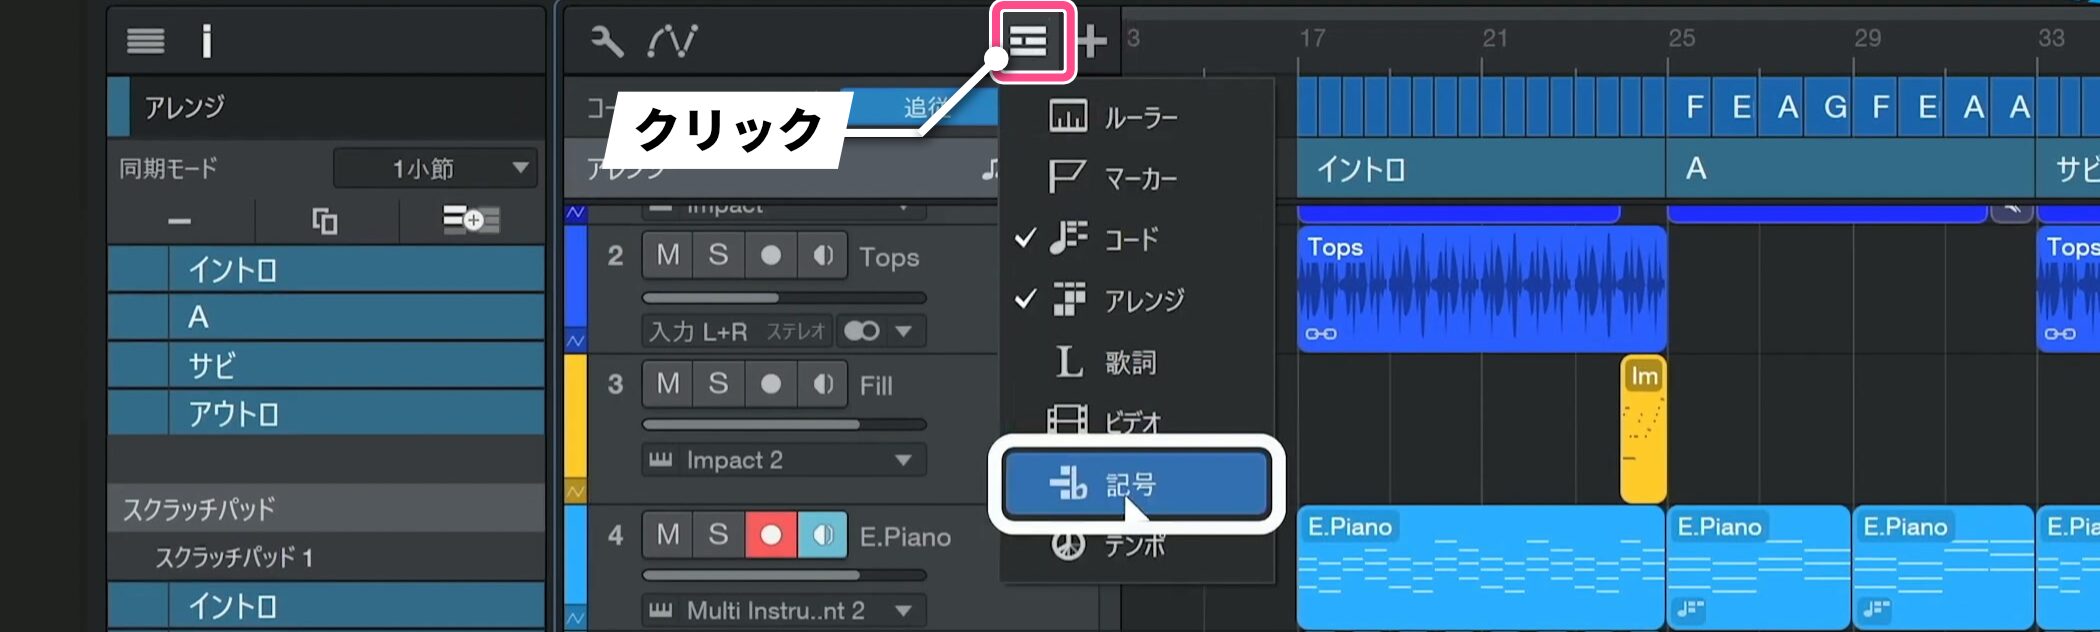
To change meter during a song, open the global tracks display and choose Signature.
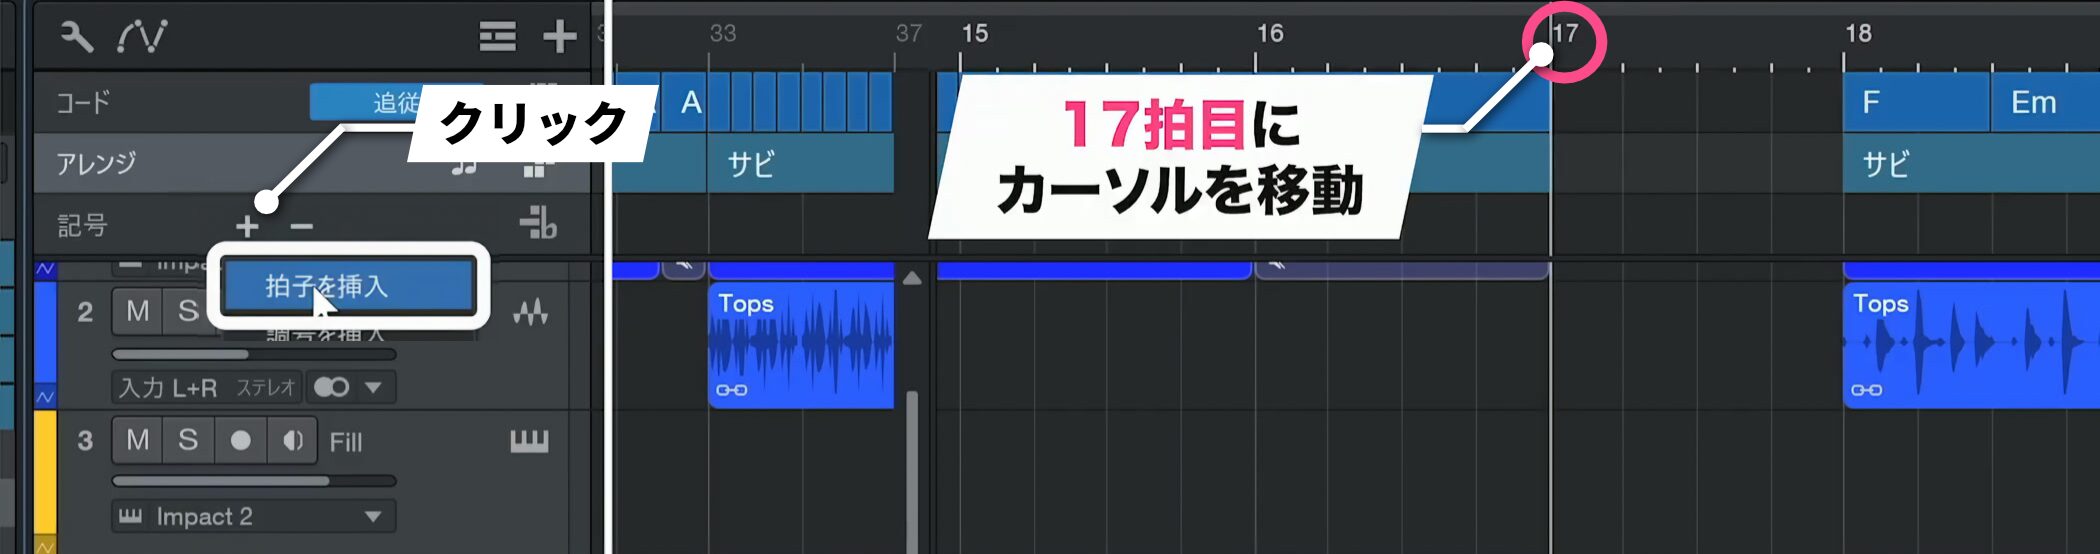
Specify where the change should start, then use the plus button to choose Insert Time Signature.
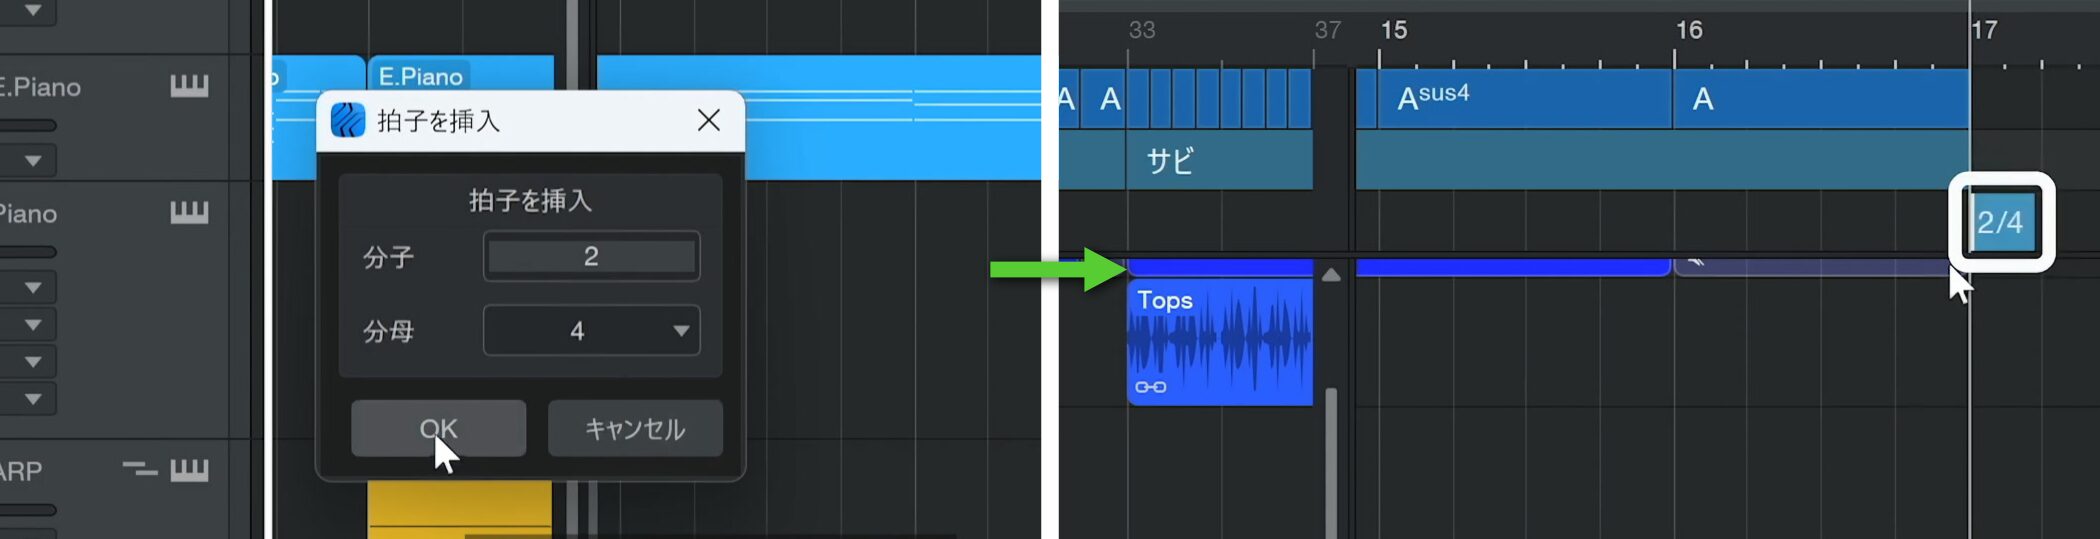
Choose a meter, such as 2/4, and click OK. It changes at the selected position.
Delete time
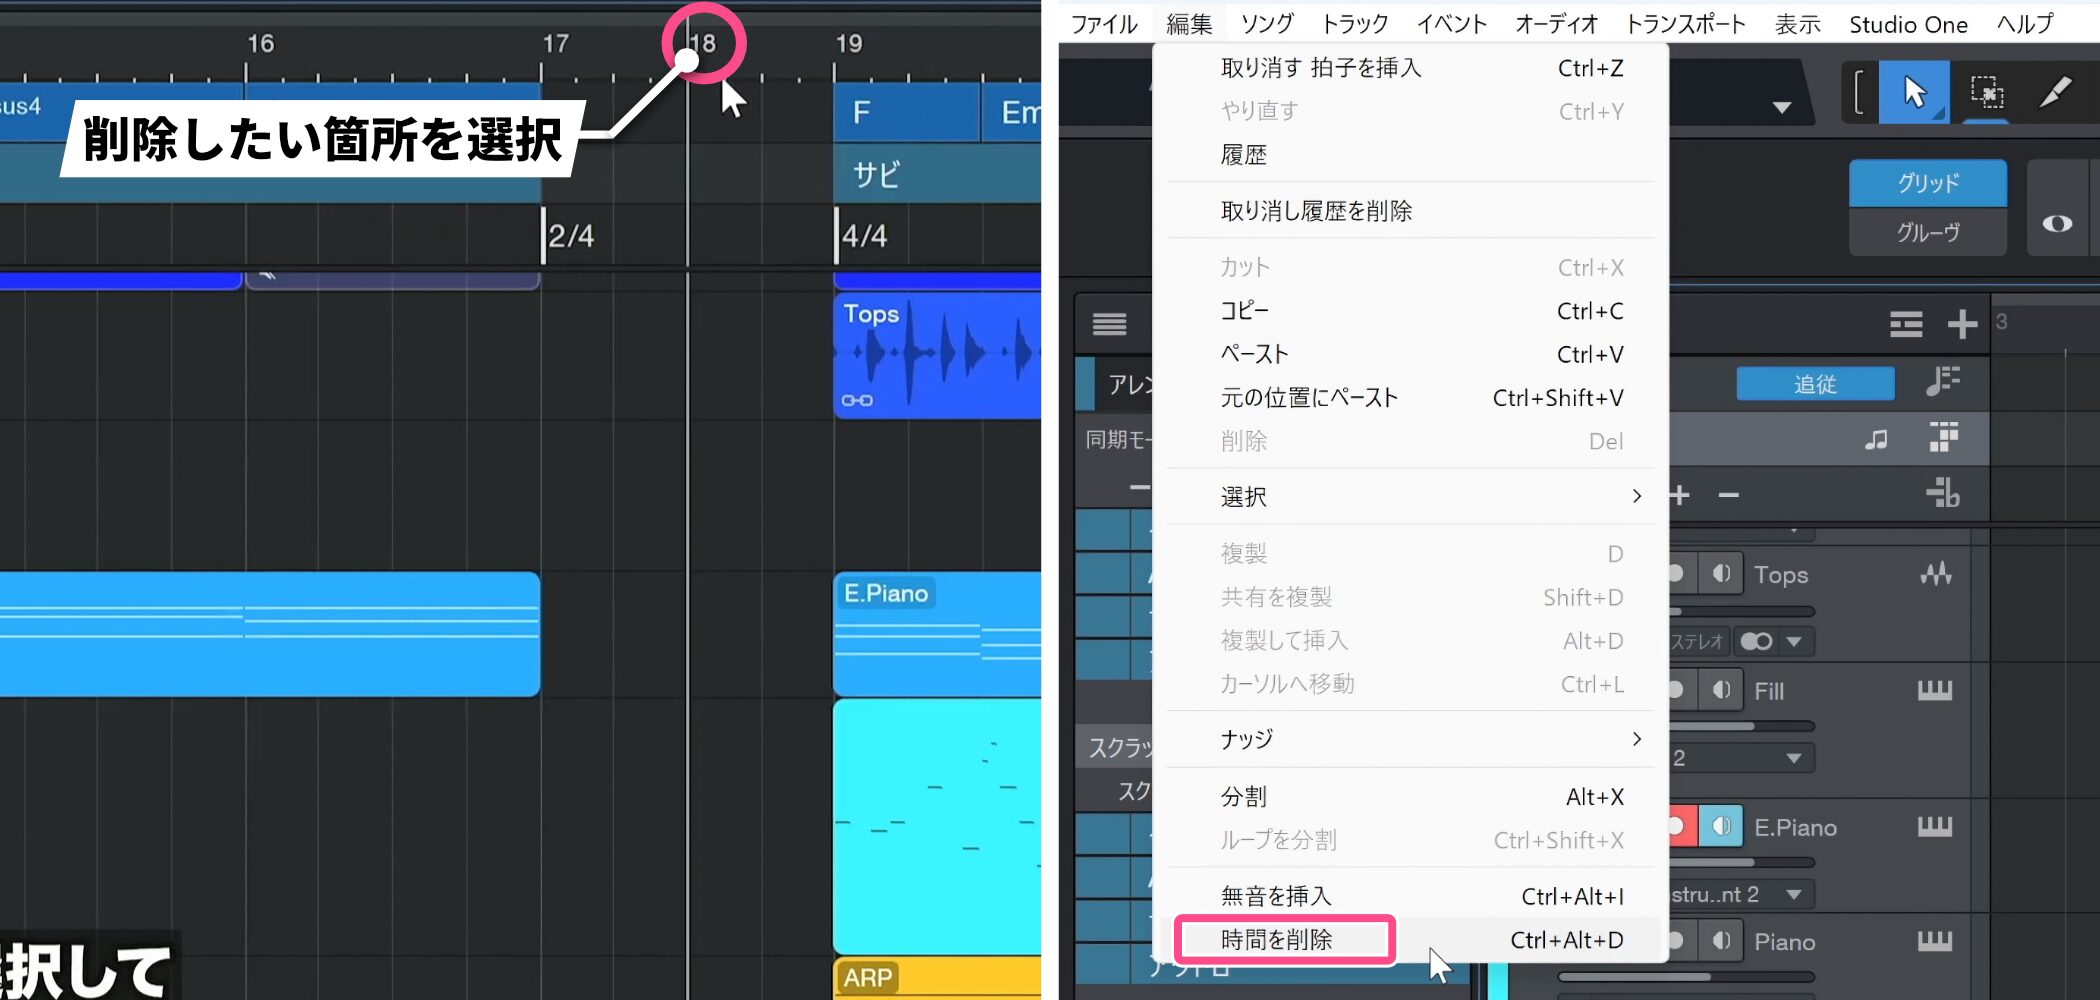
To remove unwanted bars, select the region and choose Edit → Delete Time.
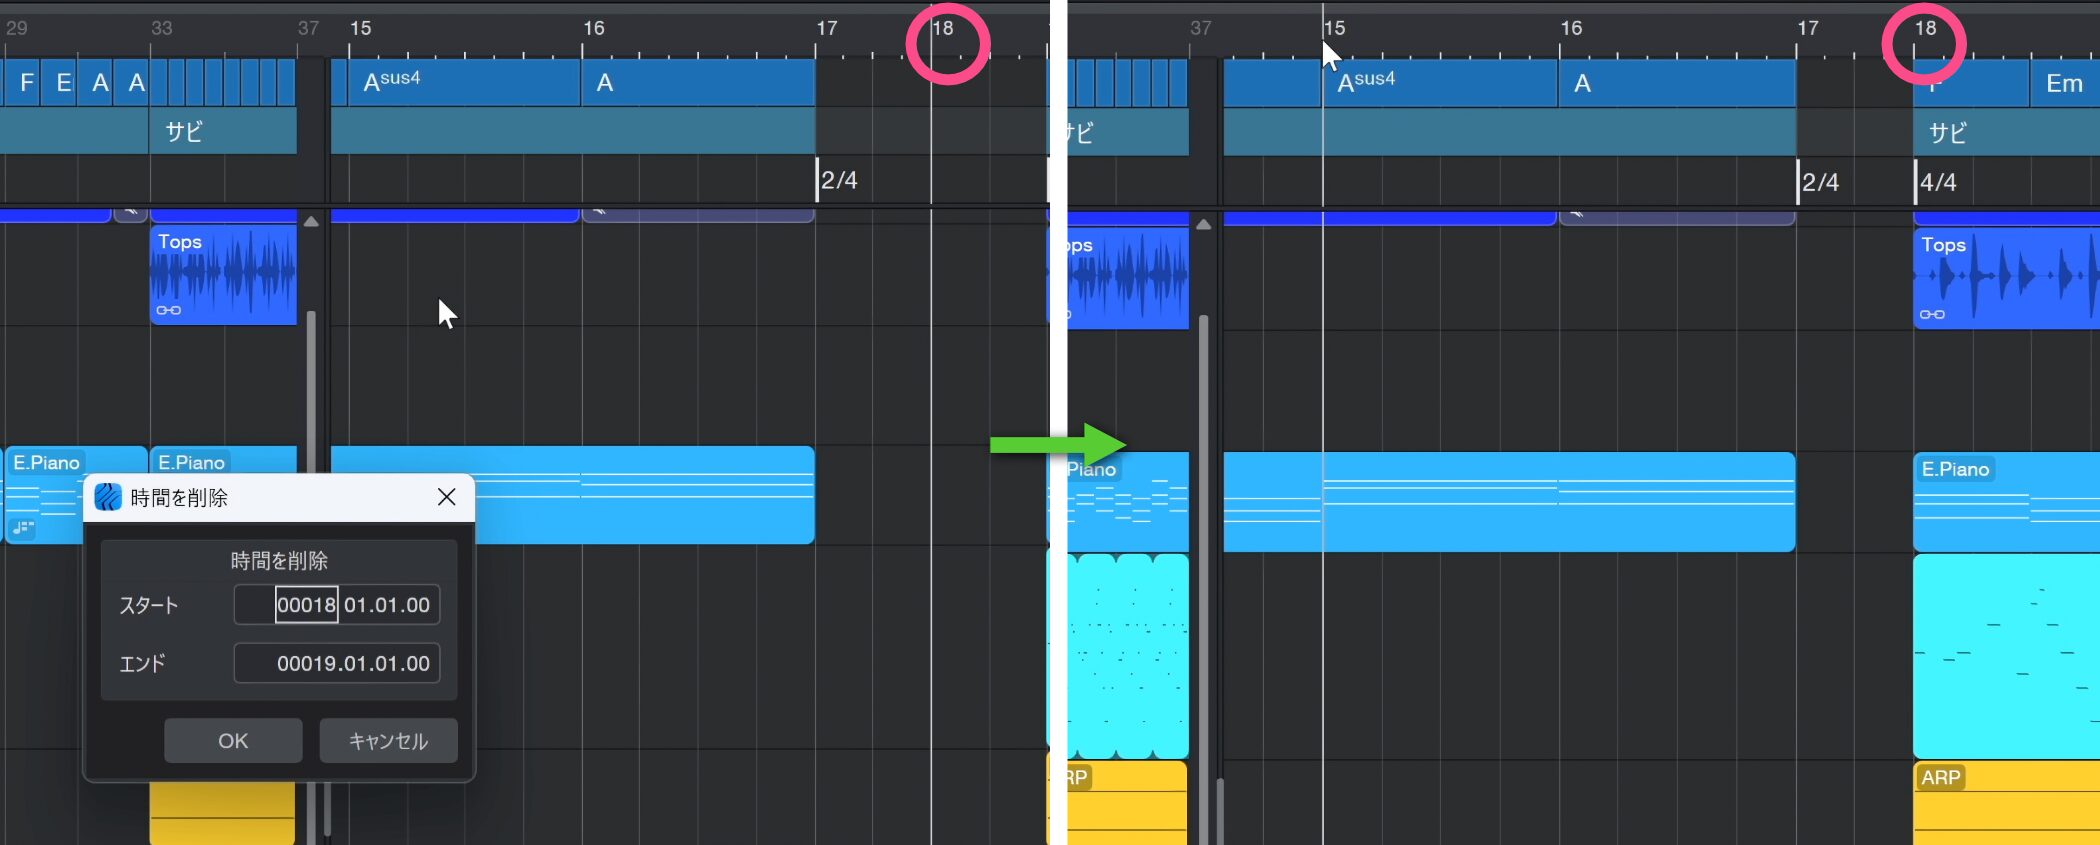
Confirm the range and click OK. The selected time is removed and later events move forward to close the gap.
Transpose
Transposition raises or lowers the pitch or key of a song or part.
For example, you can change key to suit a vocalist’s range.
In Studio One, MIDI, audio, and chord tracks each use a different procedure.
Transpose MIDI events
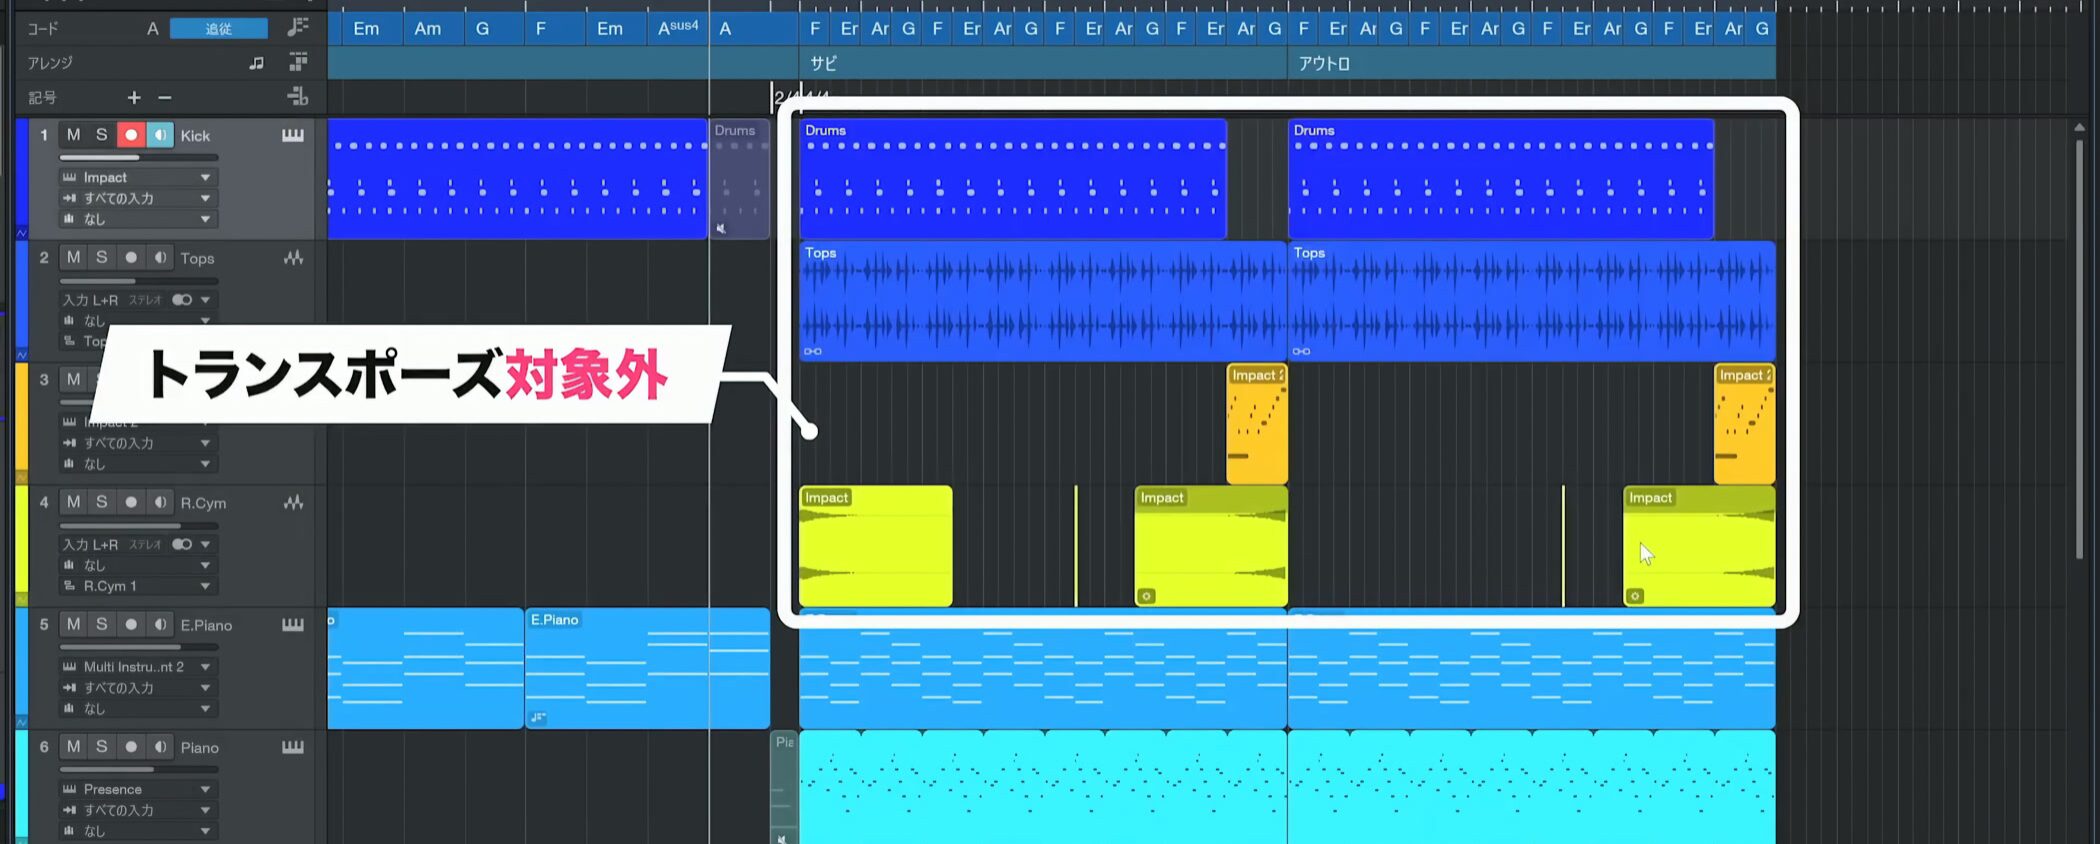
When changing MIDI pitch, exclude unpitched tracks such as drums and percussion.
Grouping tracks to exclude beforehand can make selection easier.
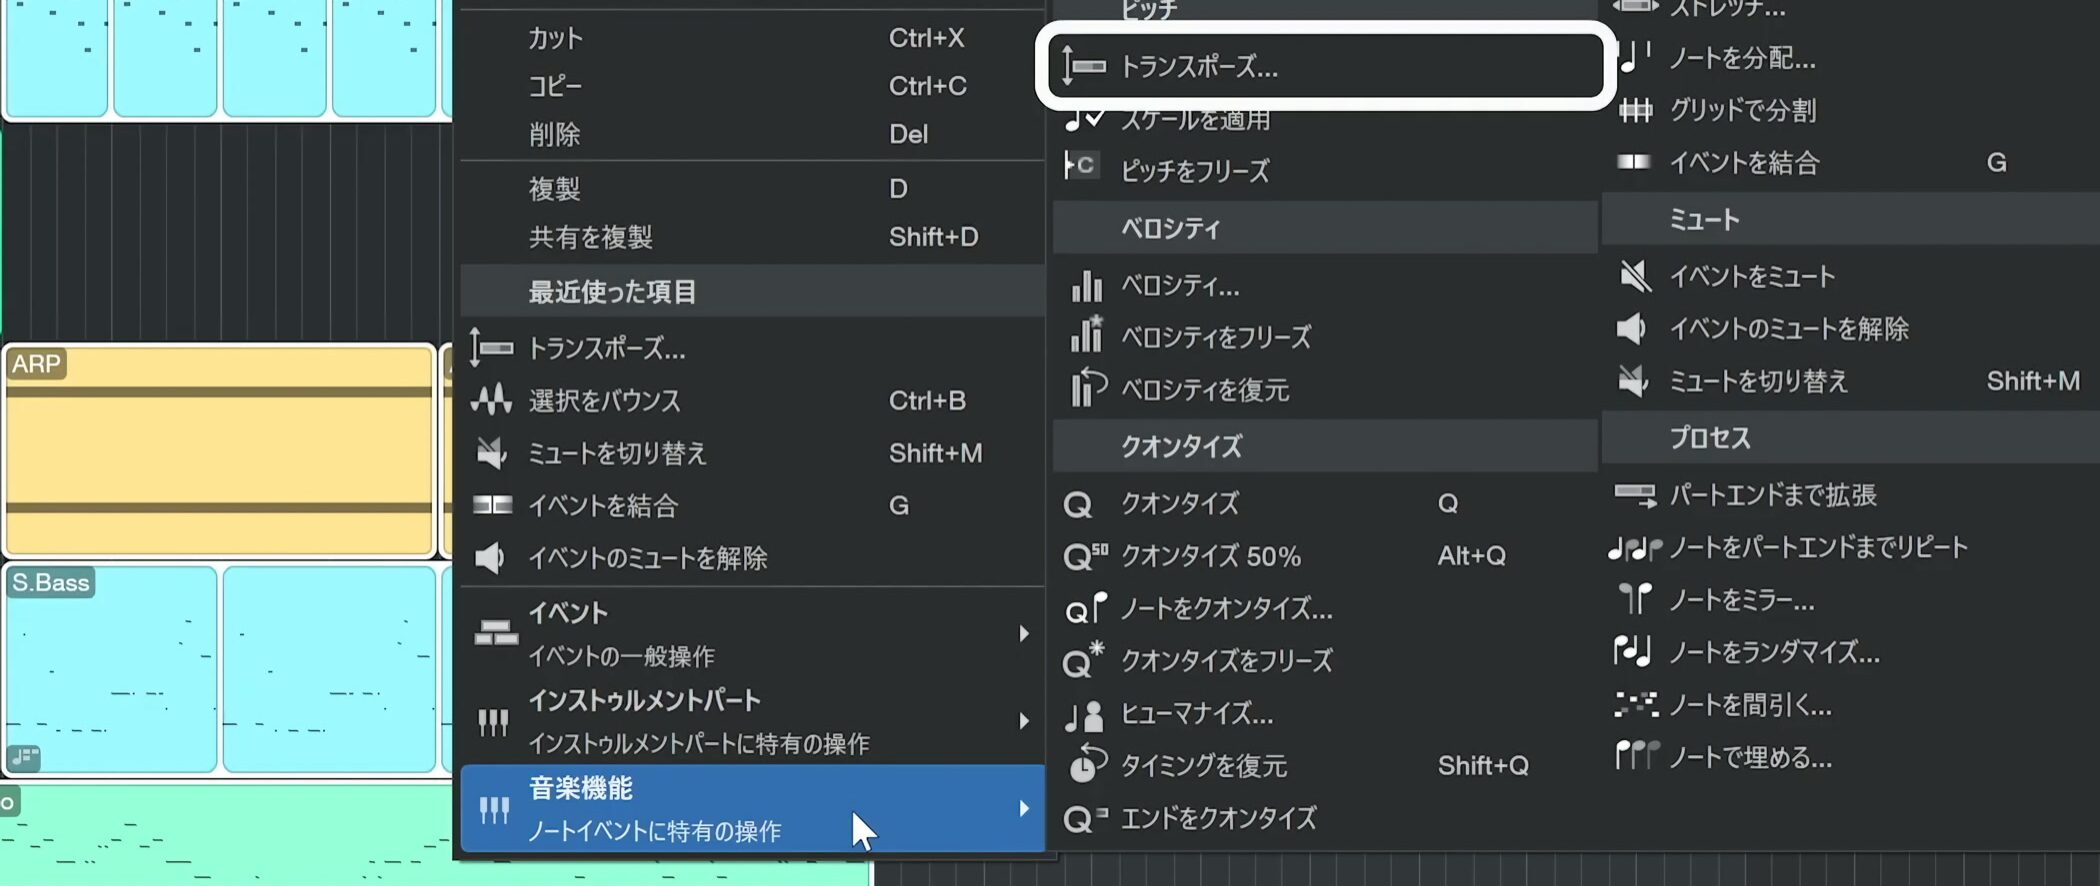
Select the events, right-click, and choose Musical Functions → Transpose.
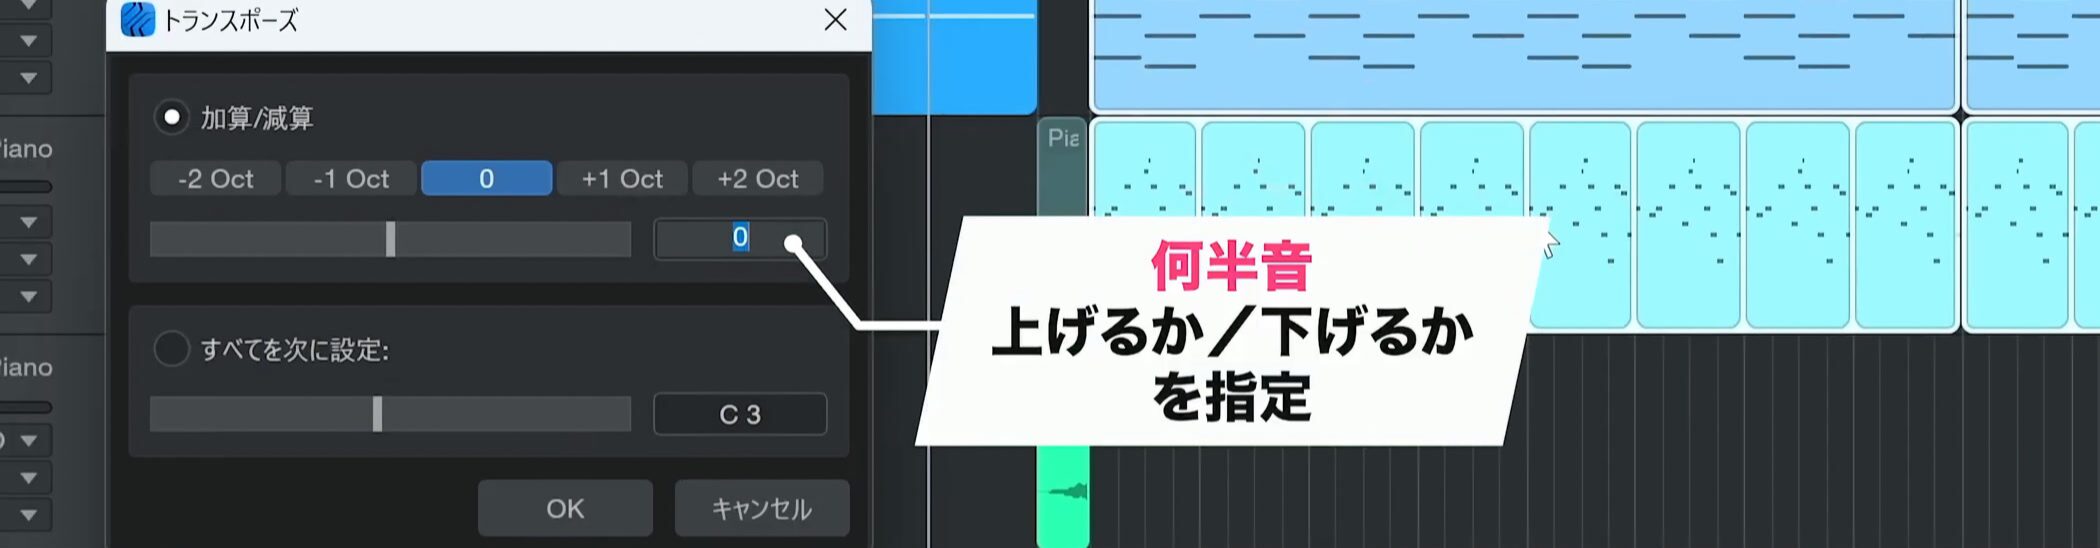
In the Transpose window, enter the number of semitones to raise or lower the pitch.
For example, 2 raises it by two semitones; a negative value lowers it.
Transpose the chord track
If tracks use Follow Chords, transpose the chord track as well.
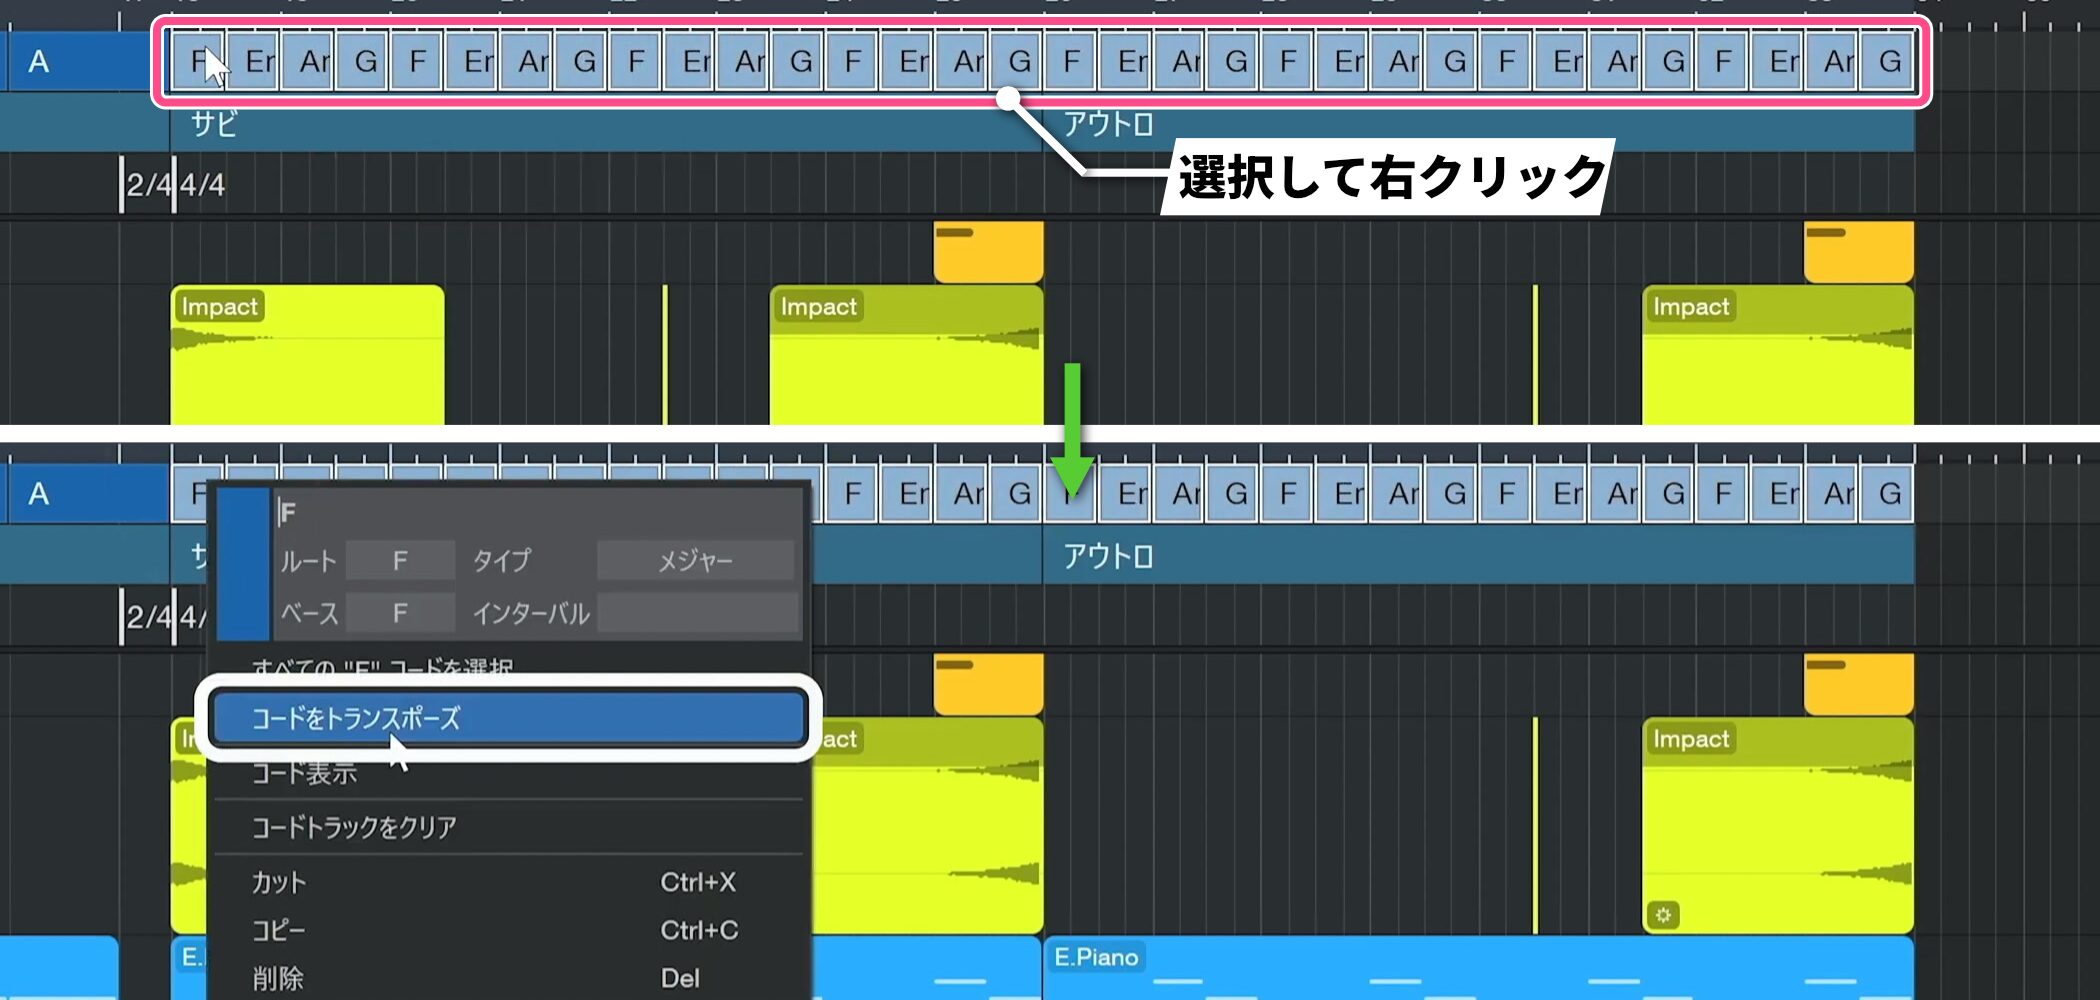
Select the chords, right-click, and choose Transpose Chords.
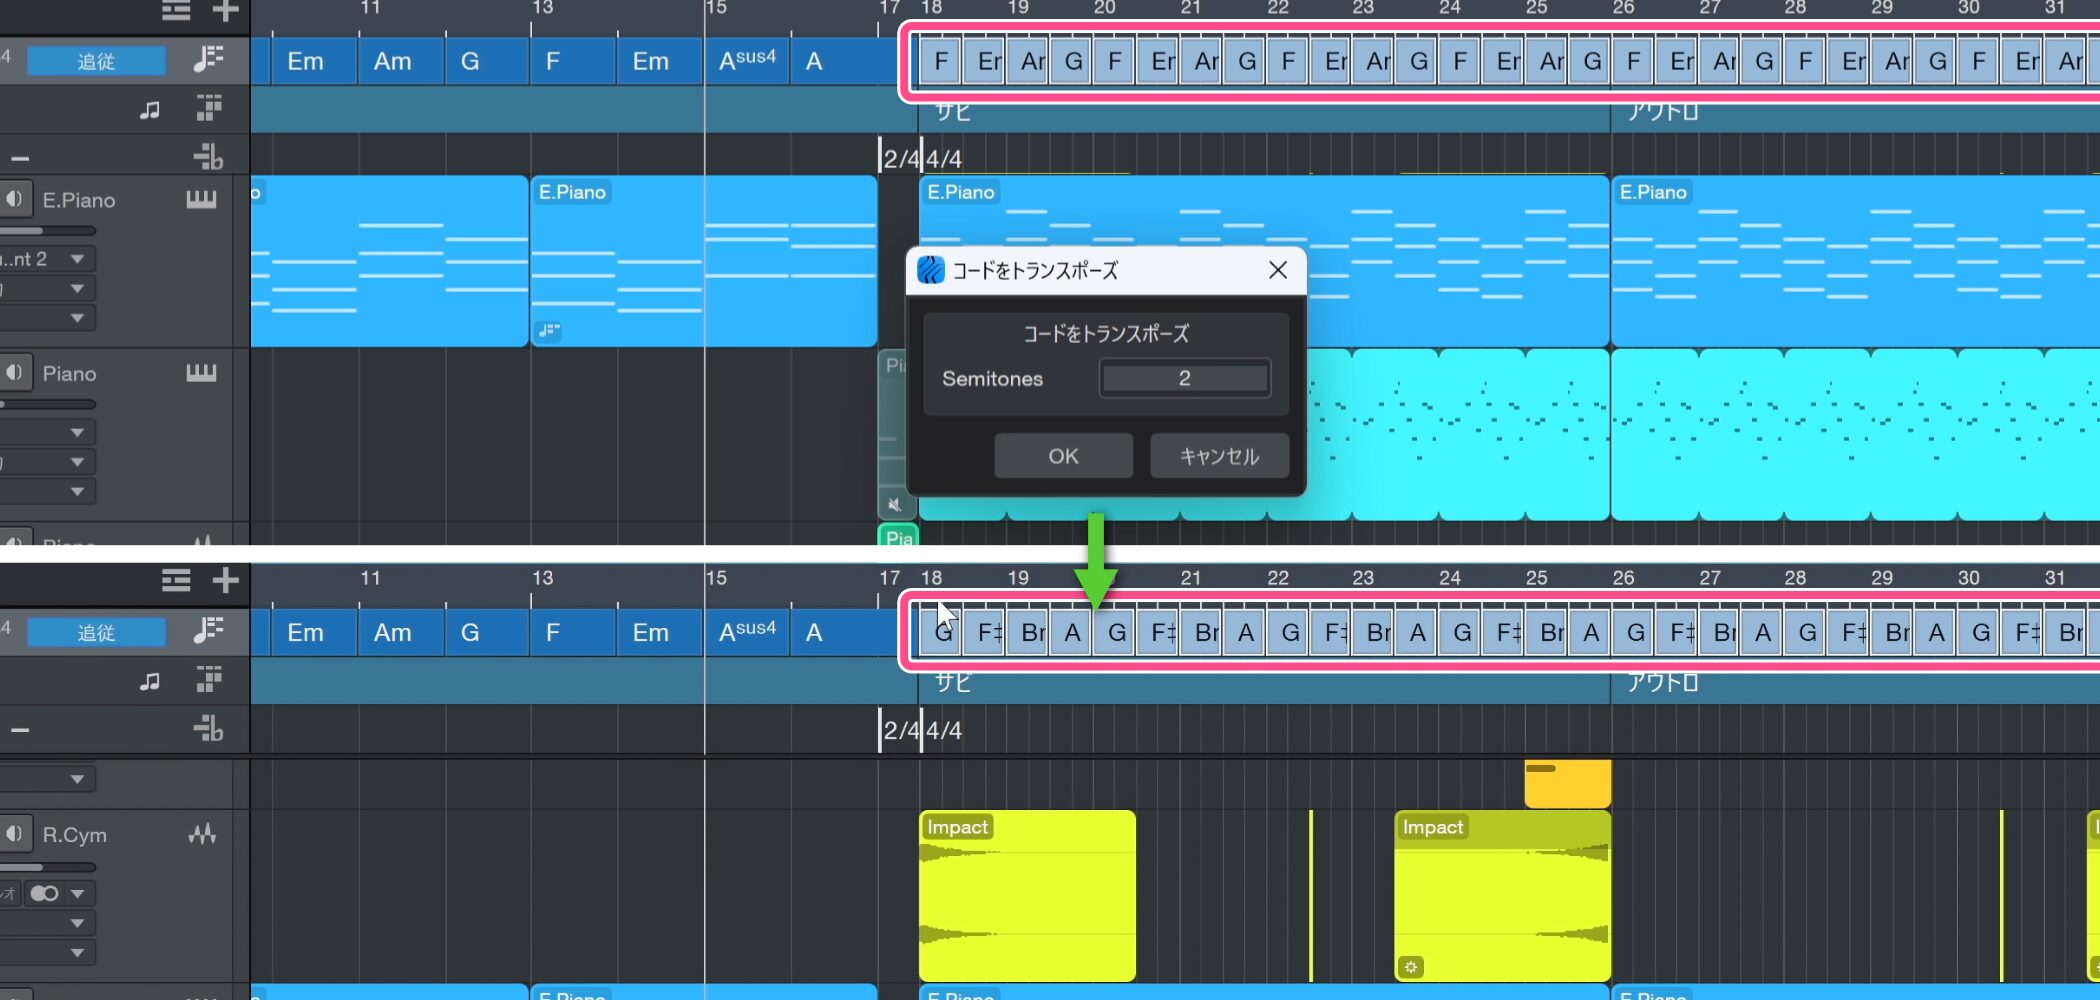
Enter a value and click OK. The chord symbols change, and tracks set to Follow Chords follow the new progression.
Transpose audio events
Audio events do not have Musical Functions in their right-click menu.
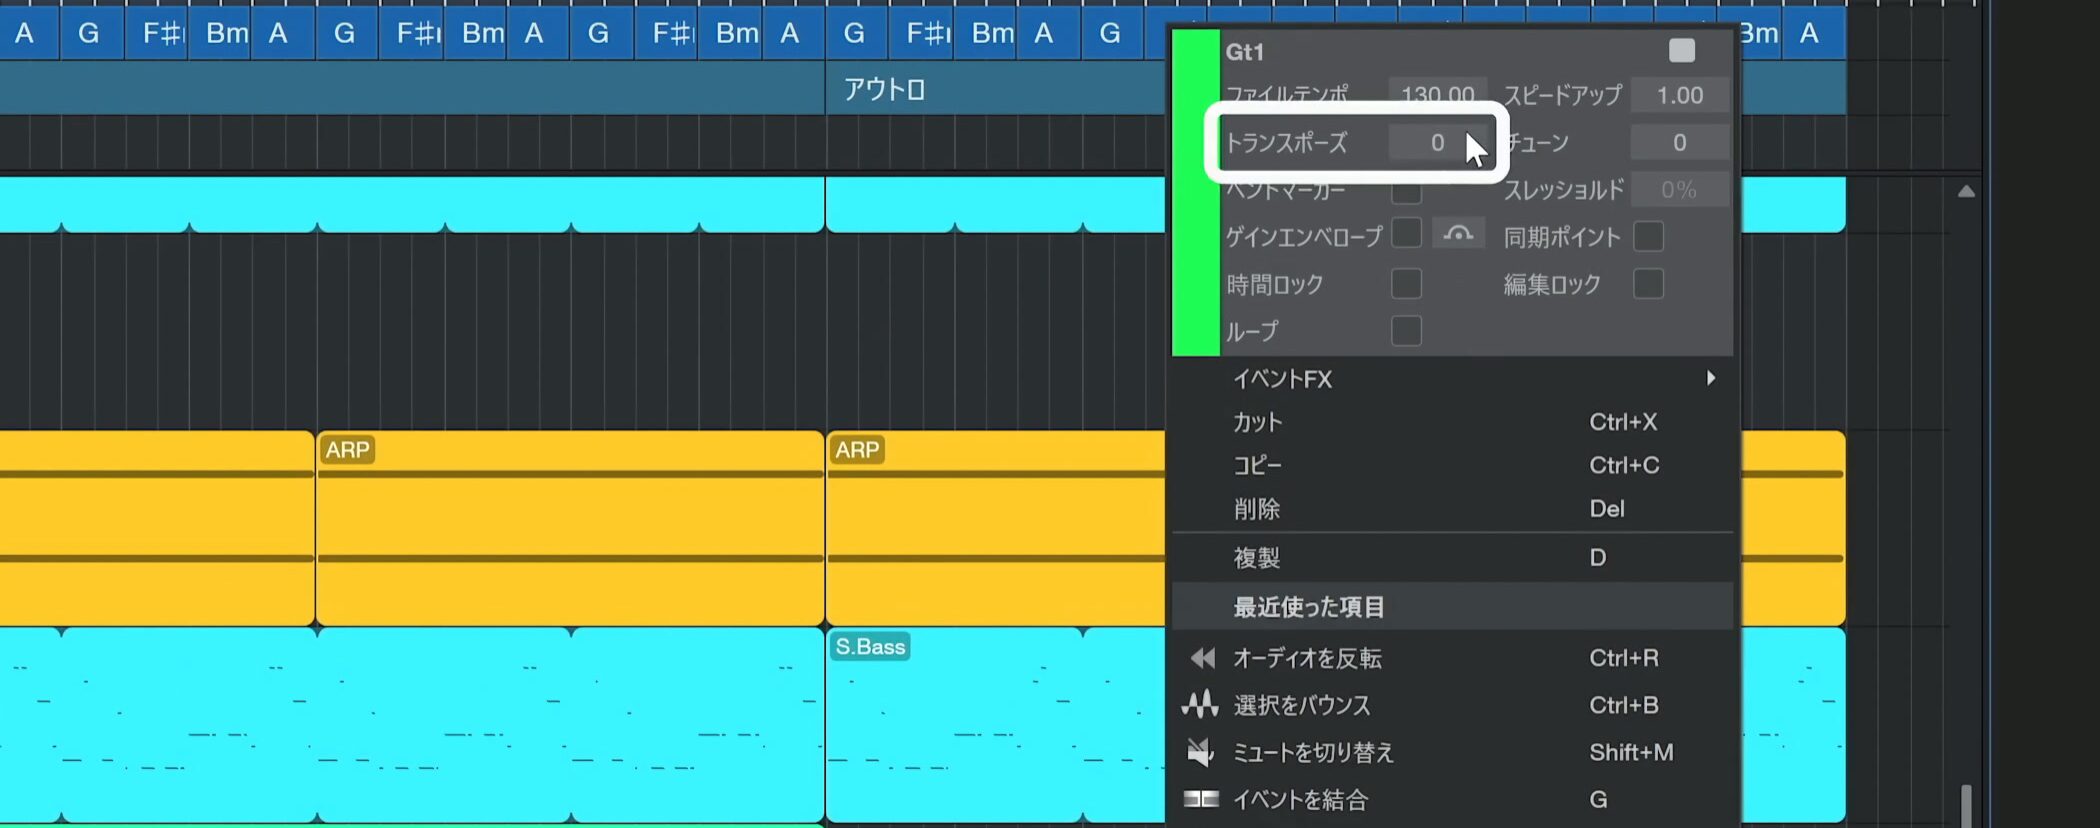
Right-click an event and edit it directly using Transpose.
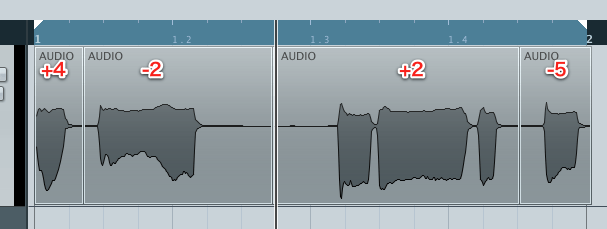
Take care if an audio event already has a transposition value.
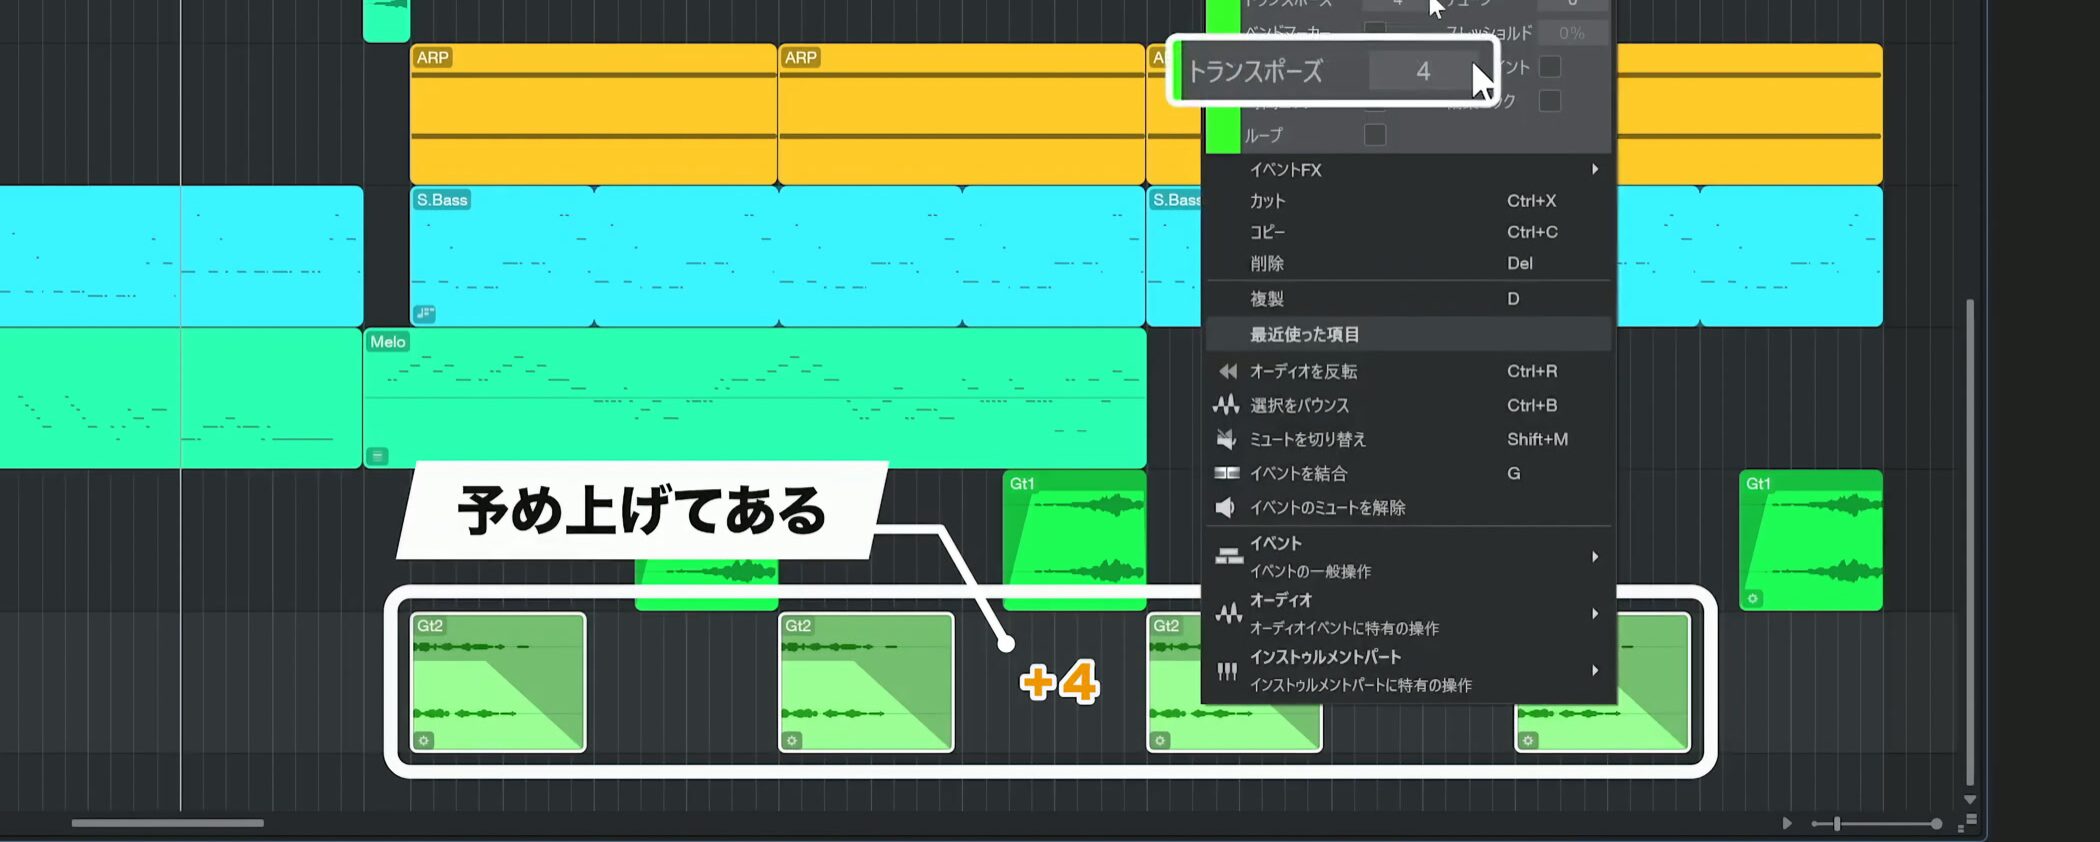
For example, suppose one audio event is already transposed up four semitones.
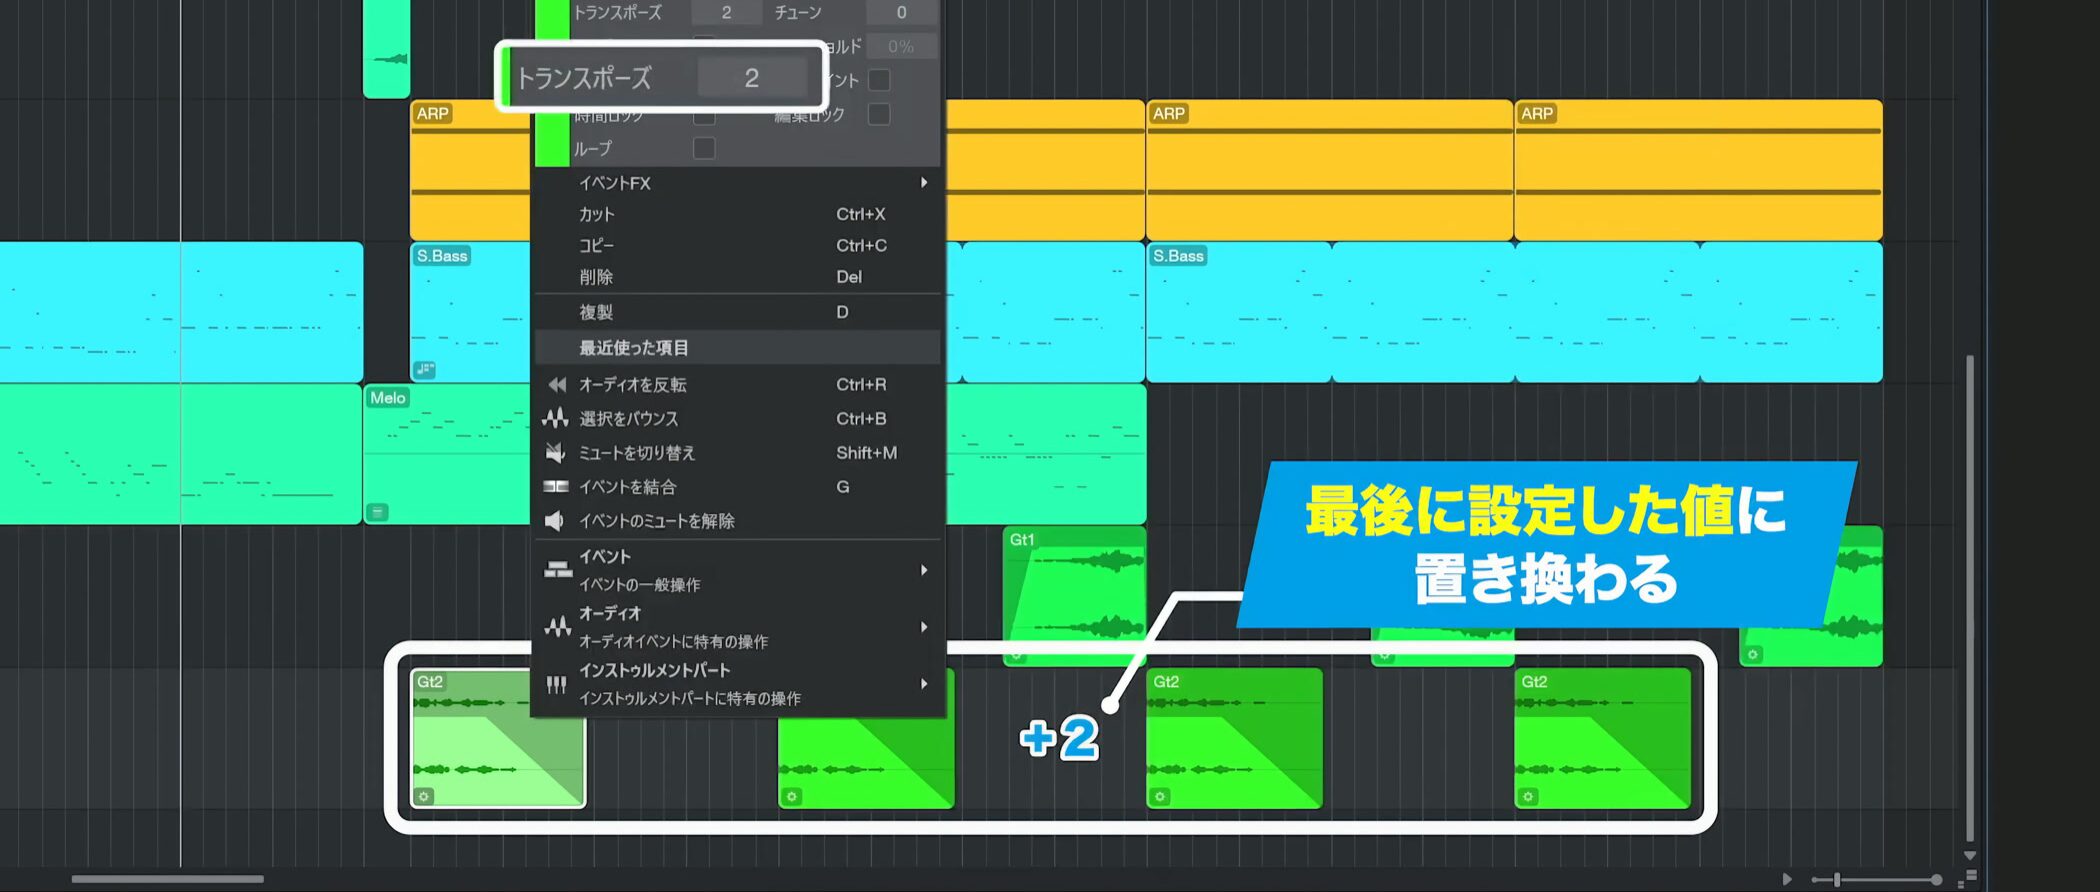
If you select several events and change their transpose value, all values are replaced by the newly entered value.
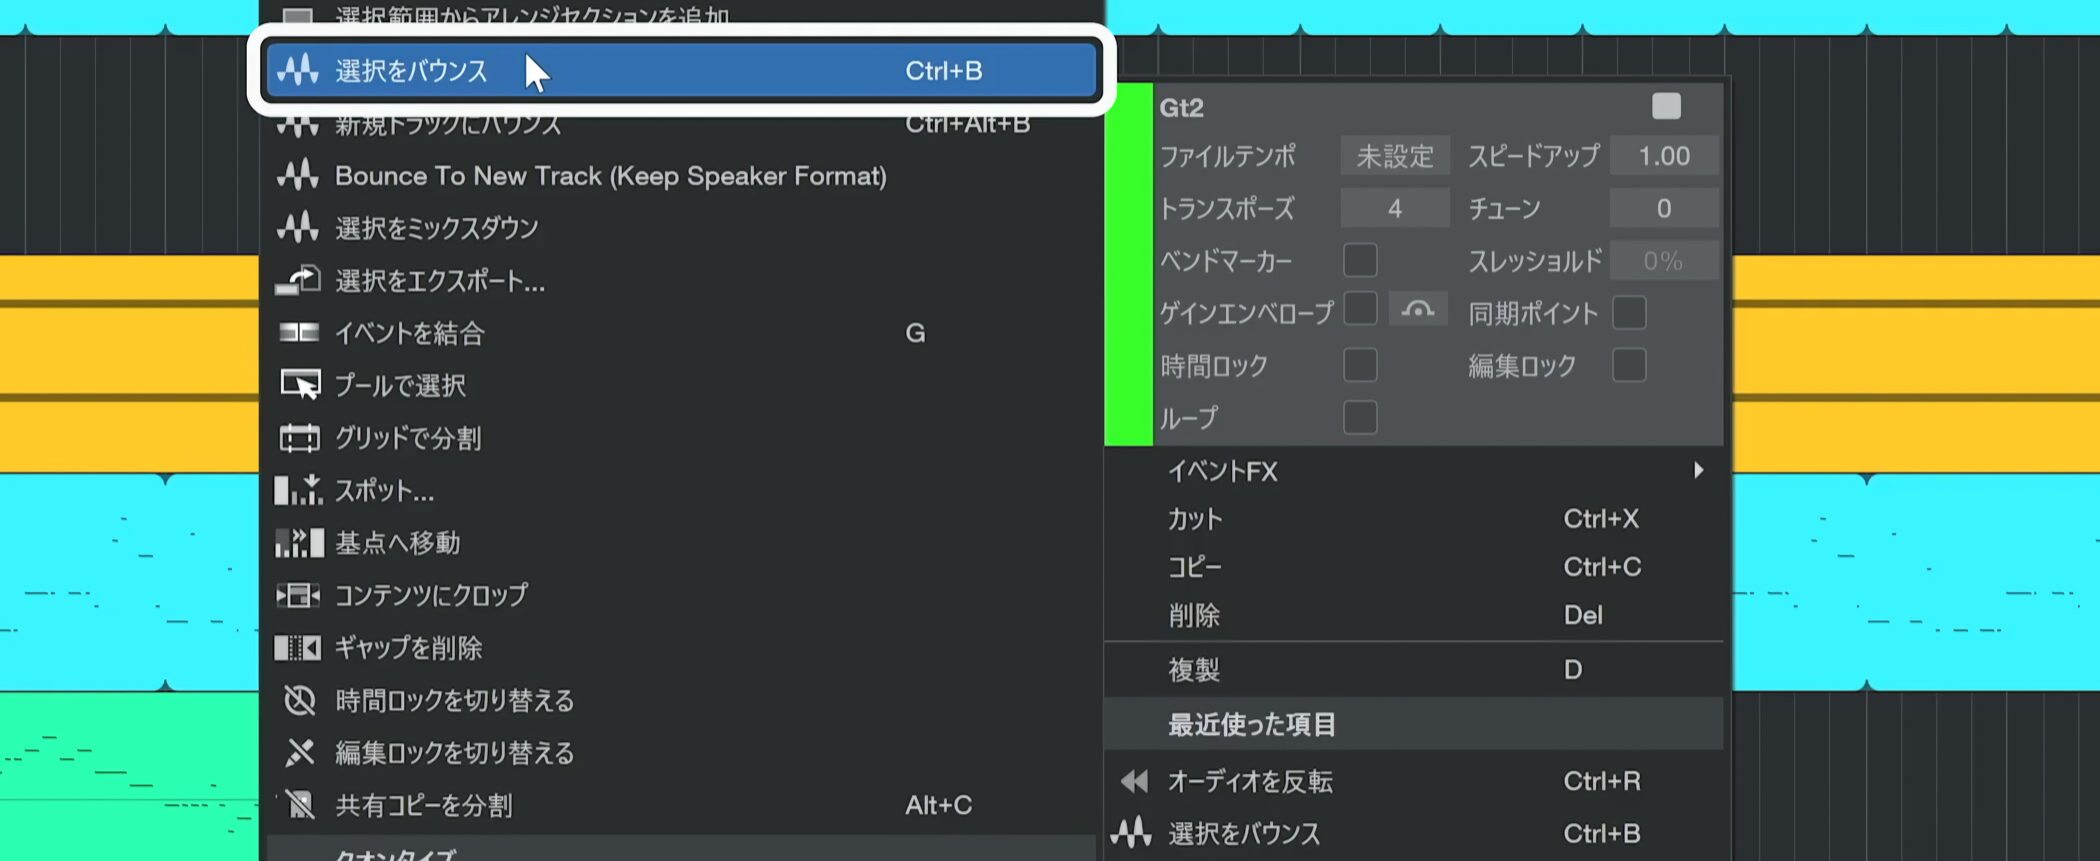
To avoid this, right-click the event with the different value and choose Bounce Selection first.
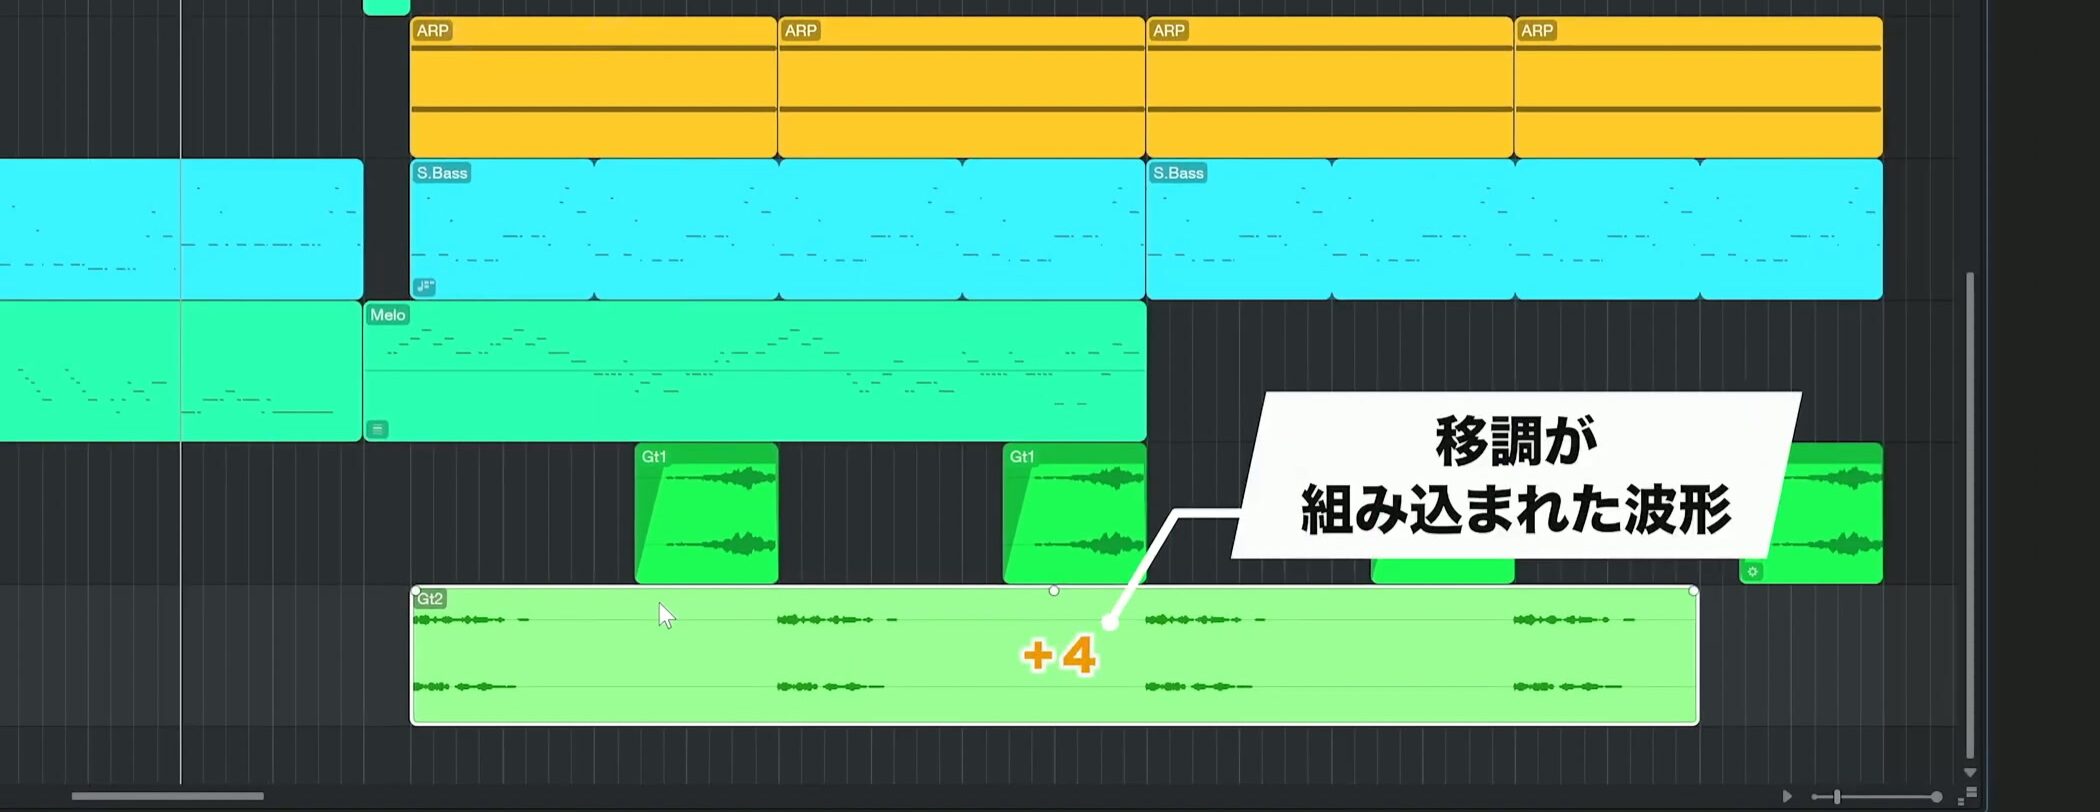
This creates a waveform with its current transposition—in this case +4 semitones—rendered into it.
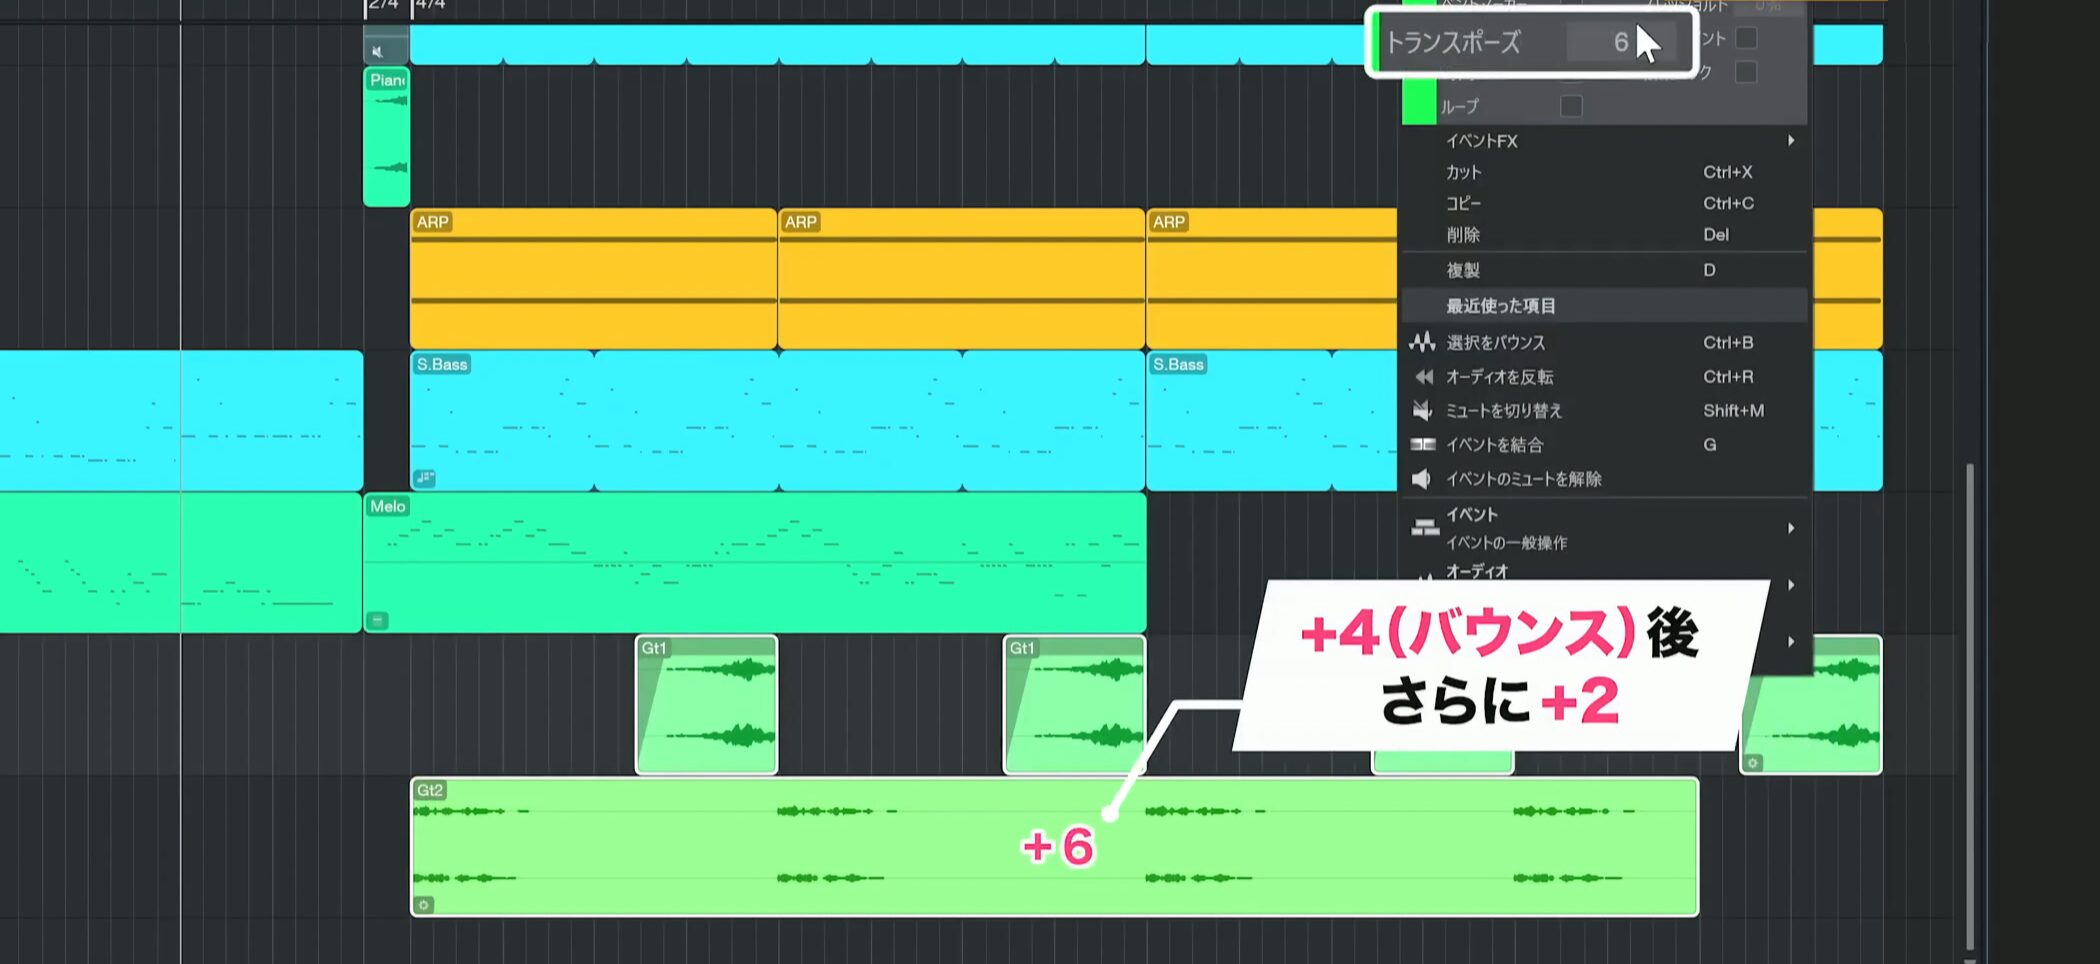
After bouncing, the event’s transpose value resets to zero, putting it on the same footing as the other events.
You can then select all the audio events and set the desired transpose value.
Frequently asked questions
Q1. How can I duplicate events efficiently?
Select events with Shift and drag while holding Alt. You can duplicate multiple tracks, such as drums, bass, and pads, together.
Q2. Can I extract chords automatically from a MIDI melody?
Yes. Drag a MIDI event onto the chord track to analyze its contents and display chords, reducing the need for manual entry.
Q3. How can I change an audio event’s duration while stretching its contents?
Use time stretching: select the Arrow tool and hold Alt while dragging the event edge. This can help fine-tune a reverse cymbal, for example.
Q4. How do I change key to suit a vocalist’s range?
Use transposition. MIDI events, audio events, and the chord track use different procedures, so choose the method that matches the material.
Q5. How can I try several arrangements without changing the main timeline?
Use Scratch Pad to experiment on a separate timeline. You can compare multiple variations and move the result to the main arrangement when ready.
NEW ARTICLES
Latest English Articles