This guide covers creating rhythm tracks in Studio One, from choosing a drum kit preset and creating an event to opening the editor and entering a four-on-the-floor pattern with the Paint tool. Learn to place kicks, claps and hi-hats, adjust velocity and use looping to build house and EDM rhythms step by step.
Creating a Rhythm Track
Drum kit presets are useful when creating rhythm patterns in Studio One.
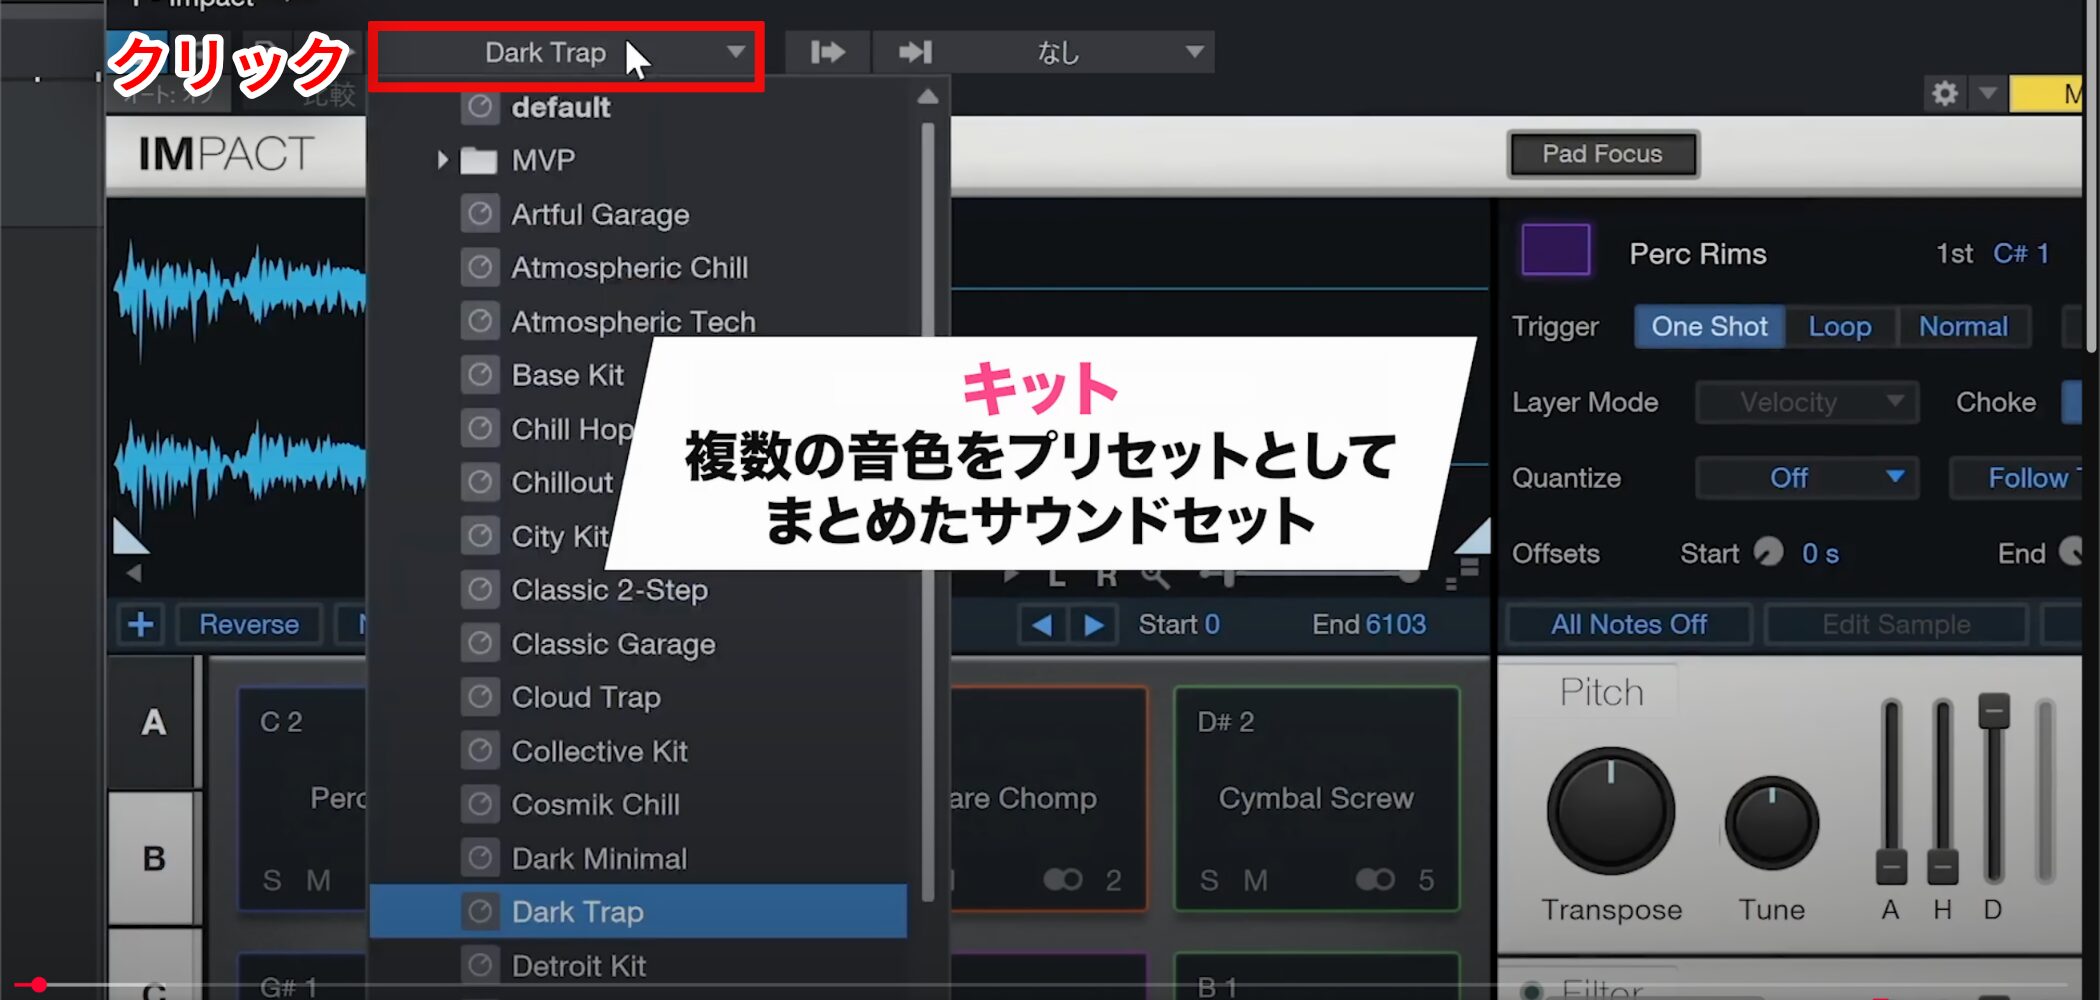
A kit is a collection of different drum sounds.
Changing the preset can significantly change the character of the sound.
Choosing a Preset and Auditioning Sounds
Choose a preset that matches the mood of your song.
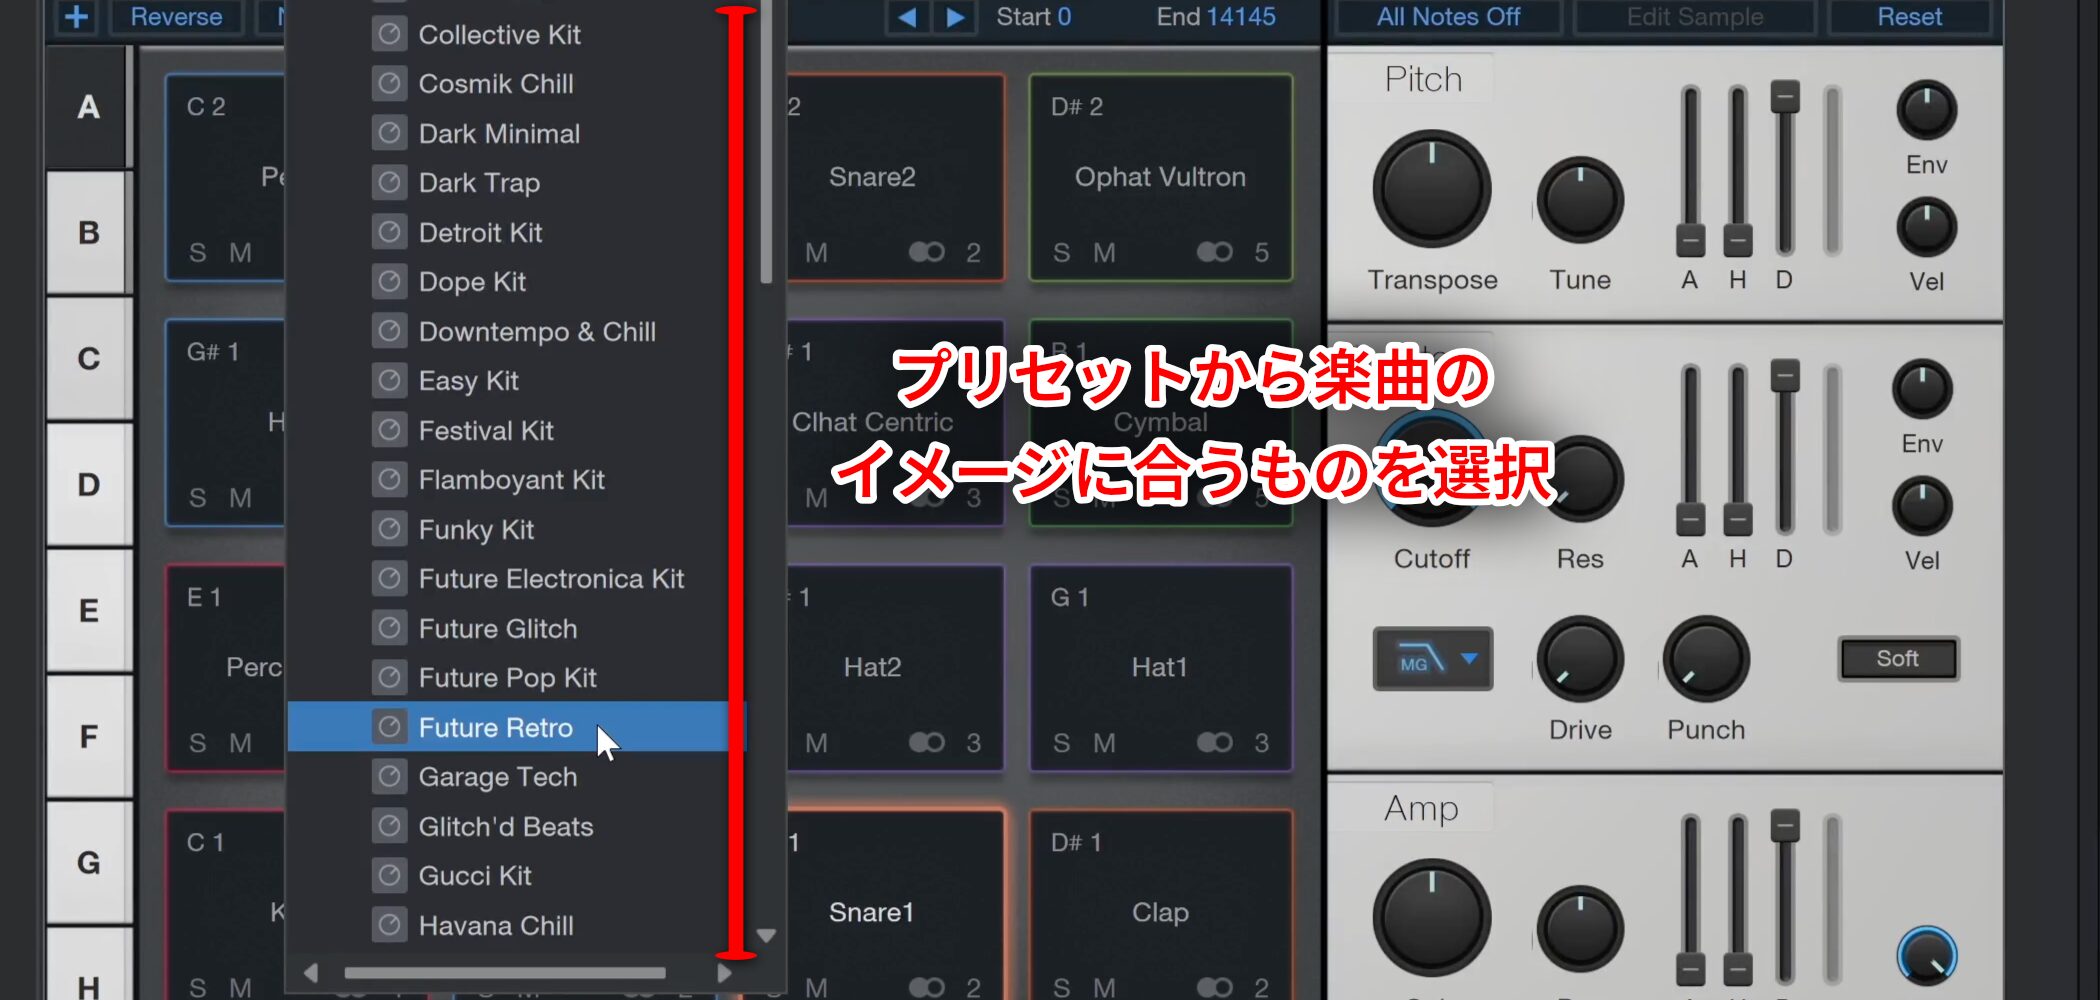
For this example, we chose “Future Retro.”
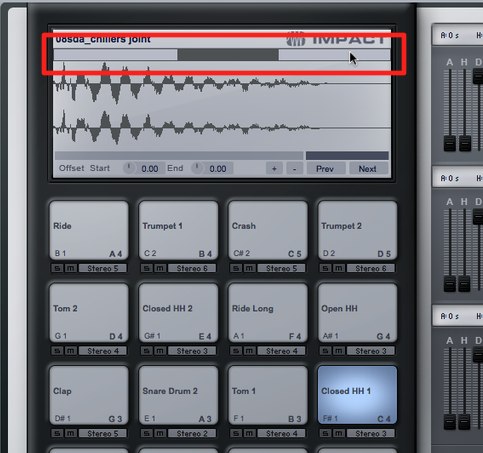
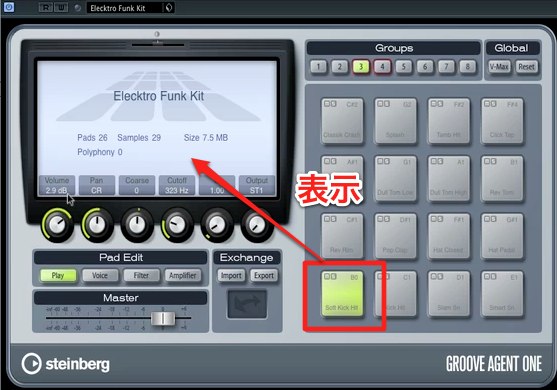
The preset assigns sounds to the pads. Click a pad or play a MIDI keyboard to audition them.
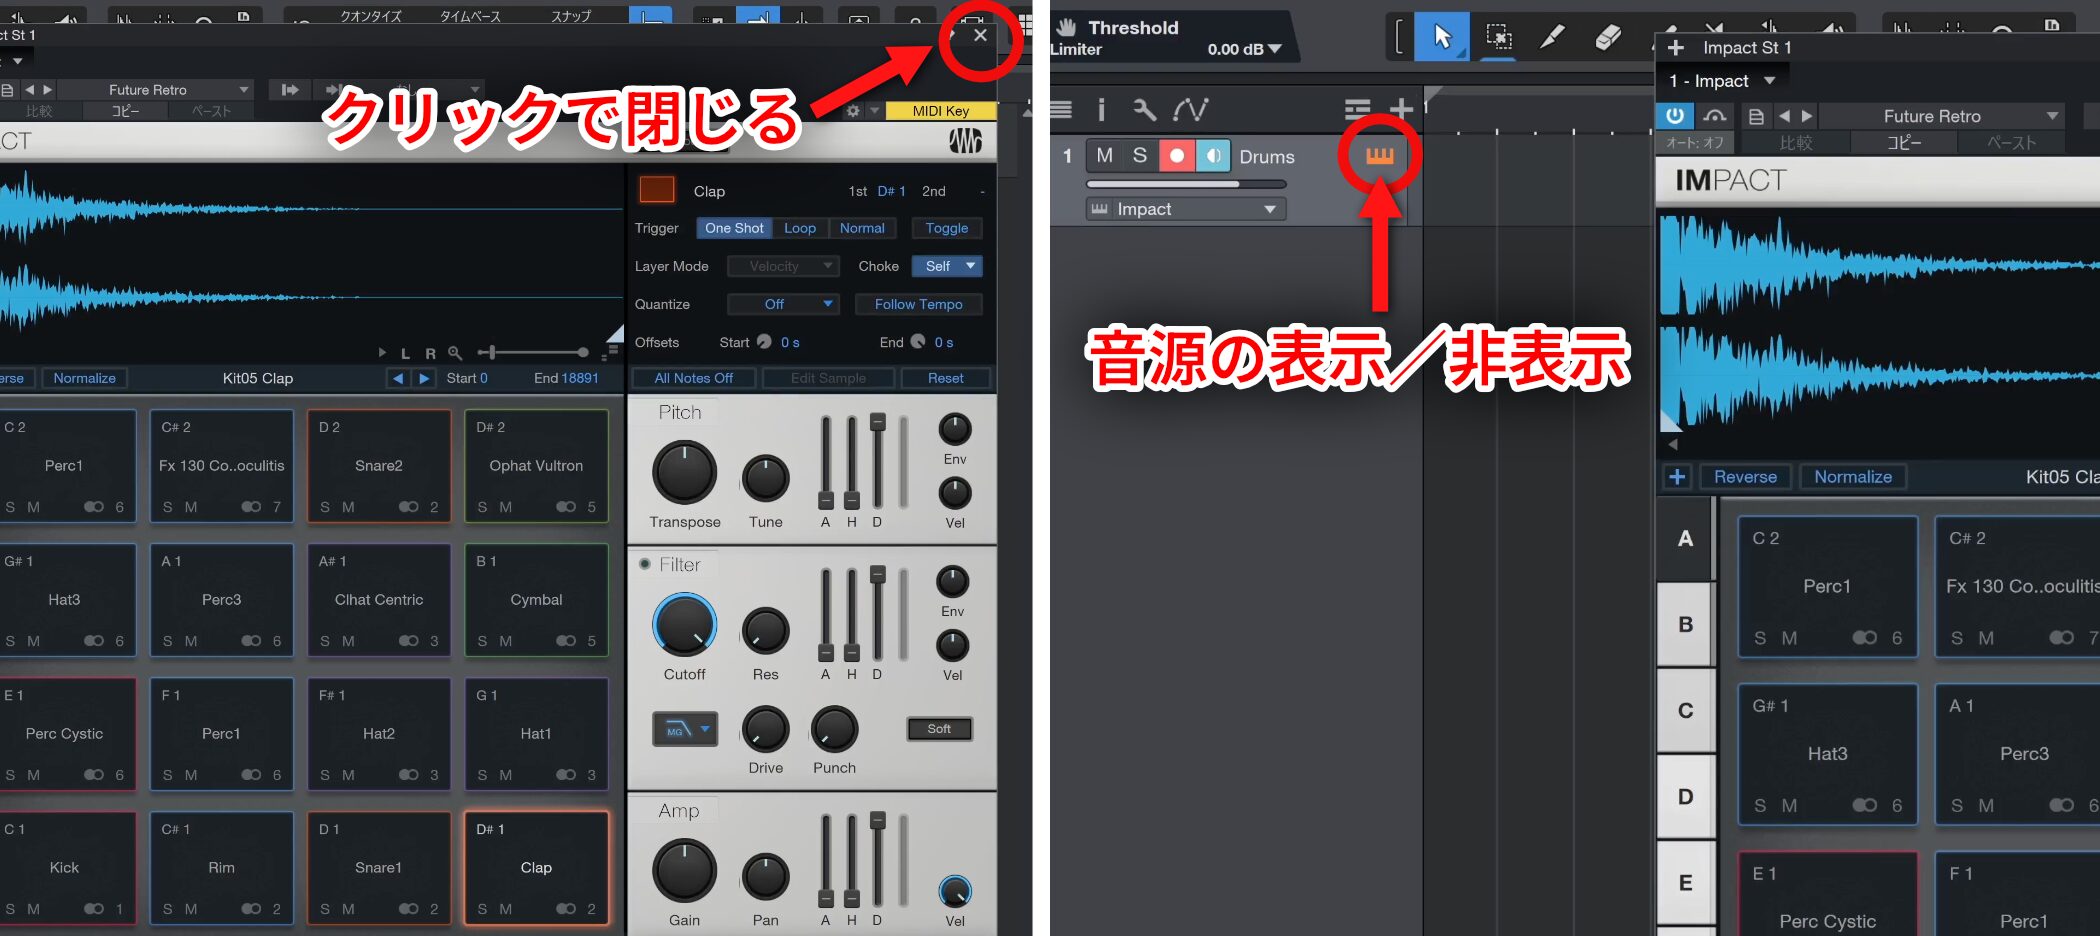
You can close the instrument window after choosing a preset.
To reopen it and change settings later, use the keyboard icon.
Creating an Event and Preparing to Enter a Rhythm
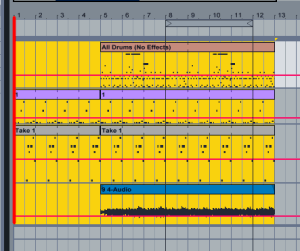
To enter a rhythm, you need an area called an “event” on the track.
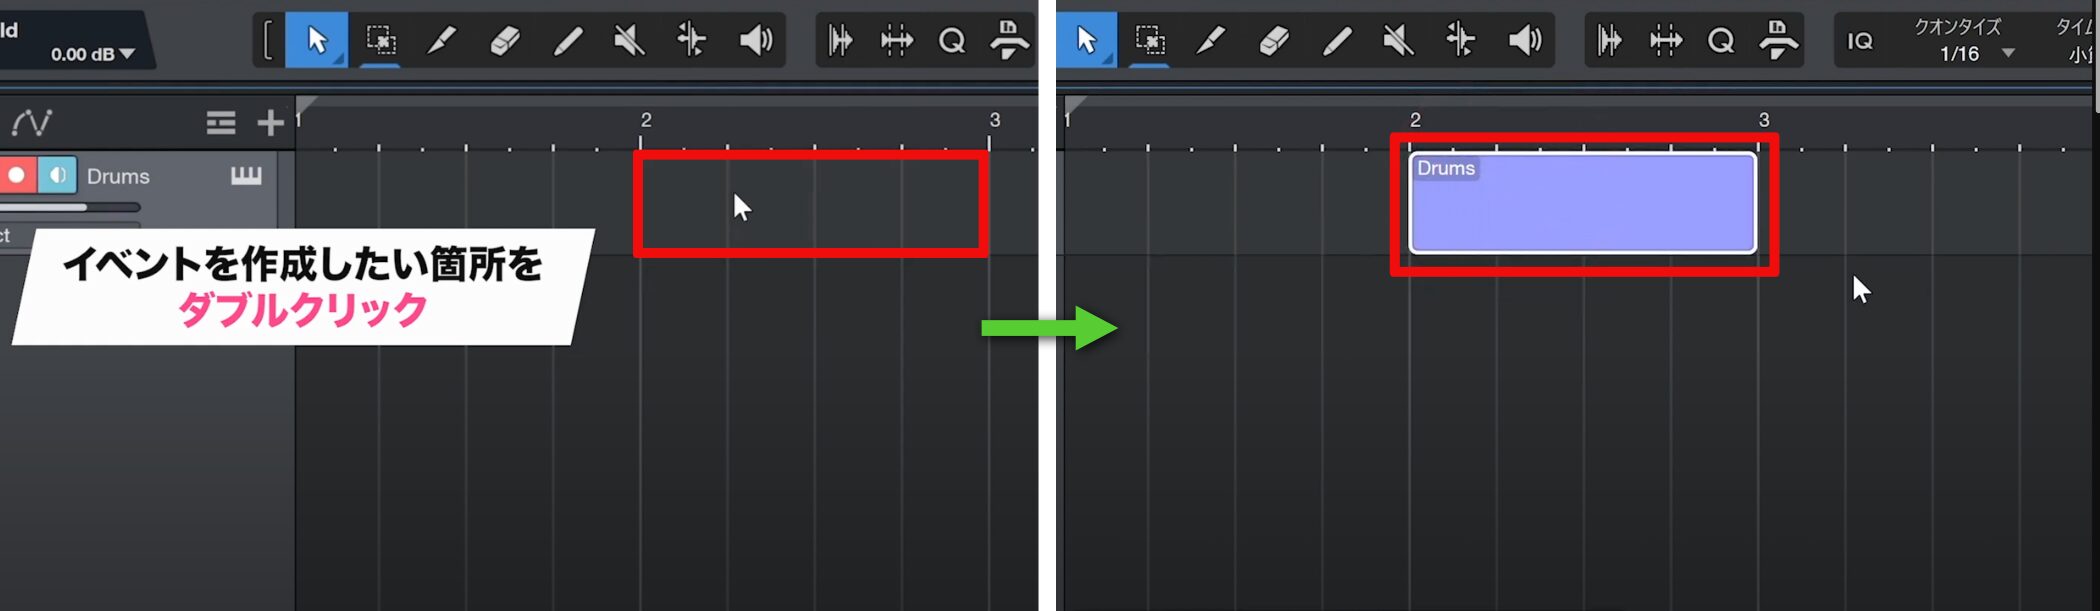
Double-click the range where you want to create the rhythm—for example, between bar 2 and bar 3—to create an event.
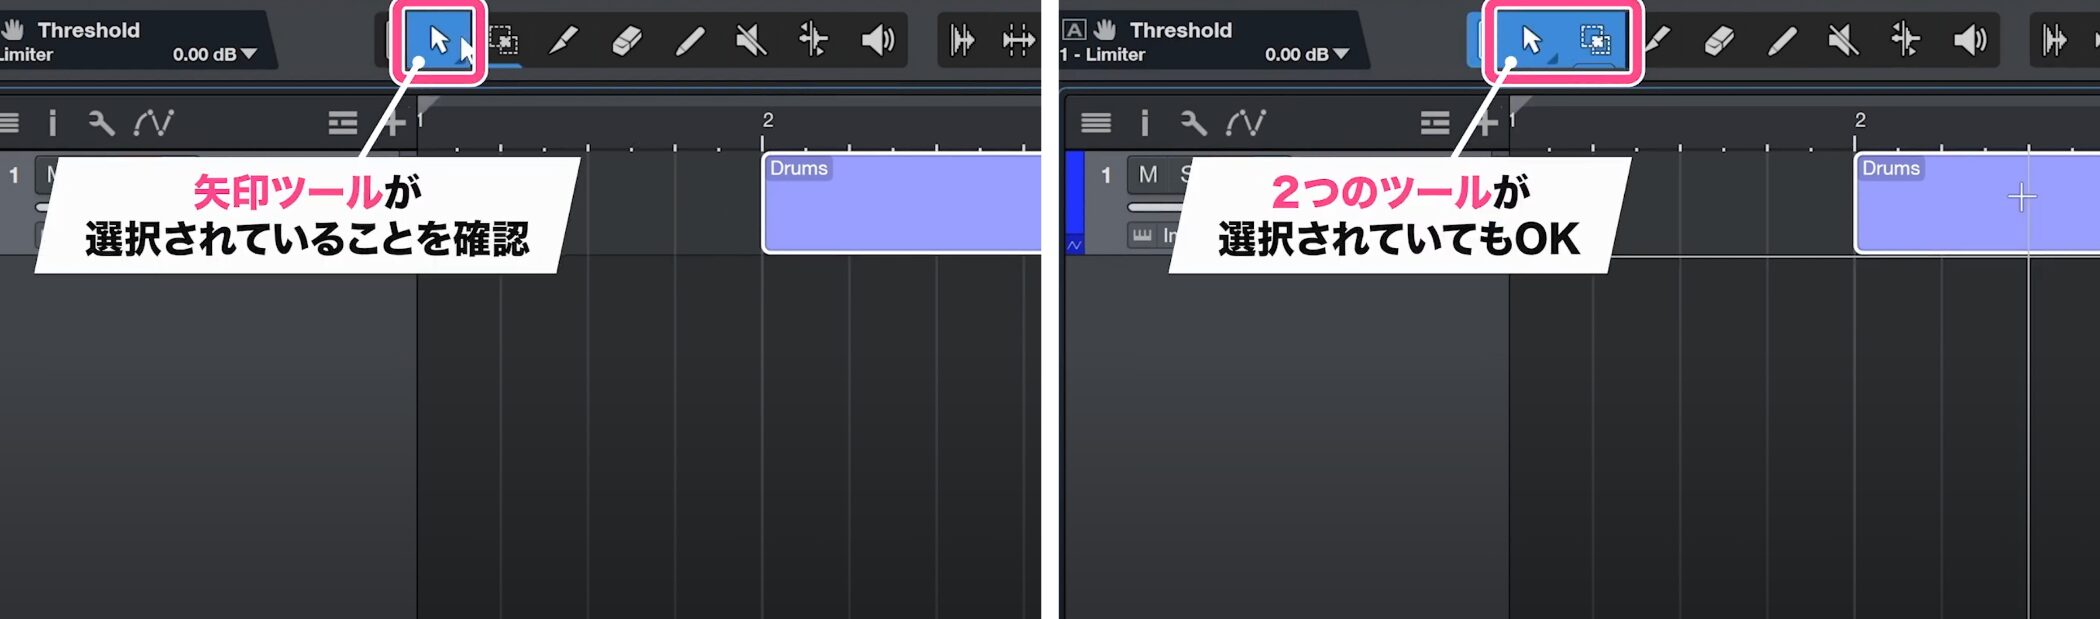
If an event is not created, check that the Arrow tool is selected.
The same operation is available when both the Arrow and Range tools are selected.
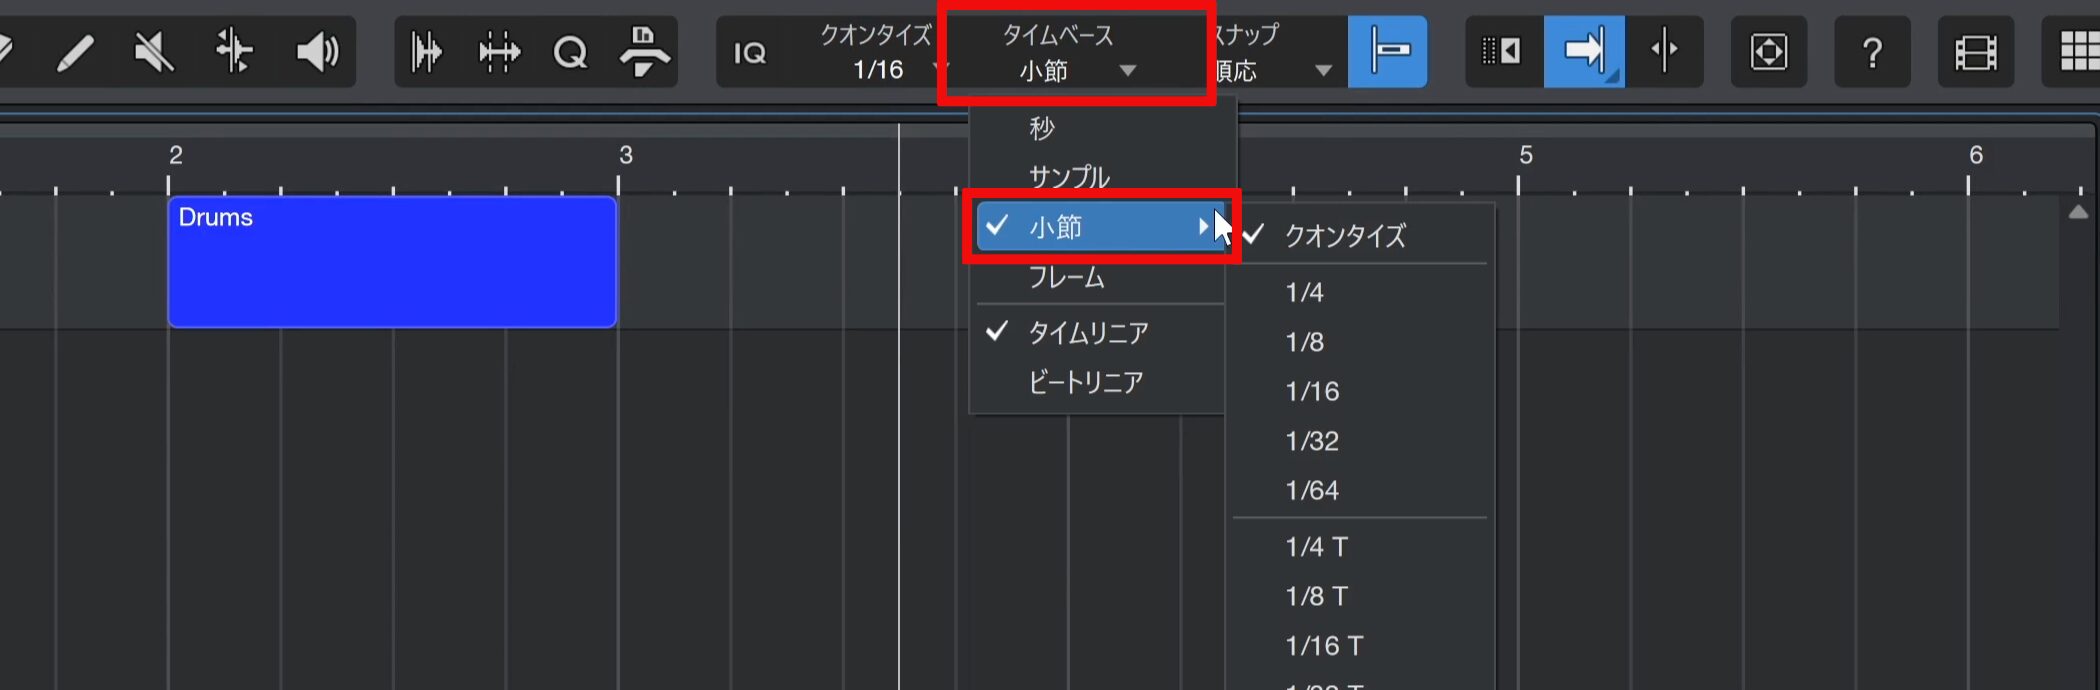
If the timebase at the bottom of the screen is not set to bars, select Bars in the timebase menu.
Opening the Editor
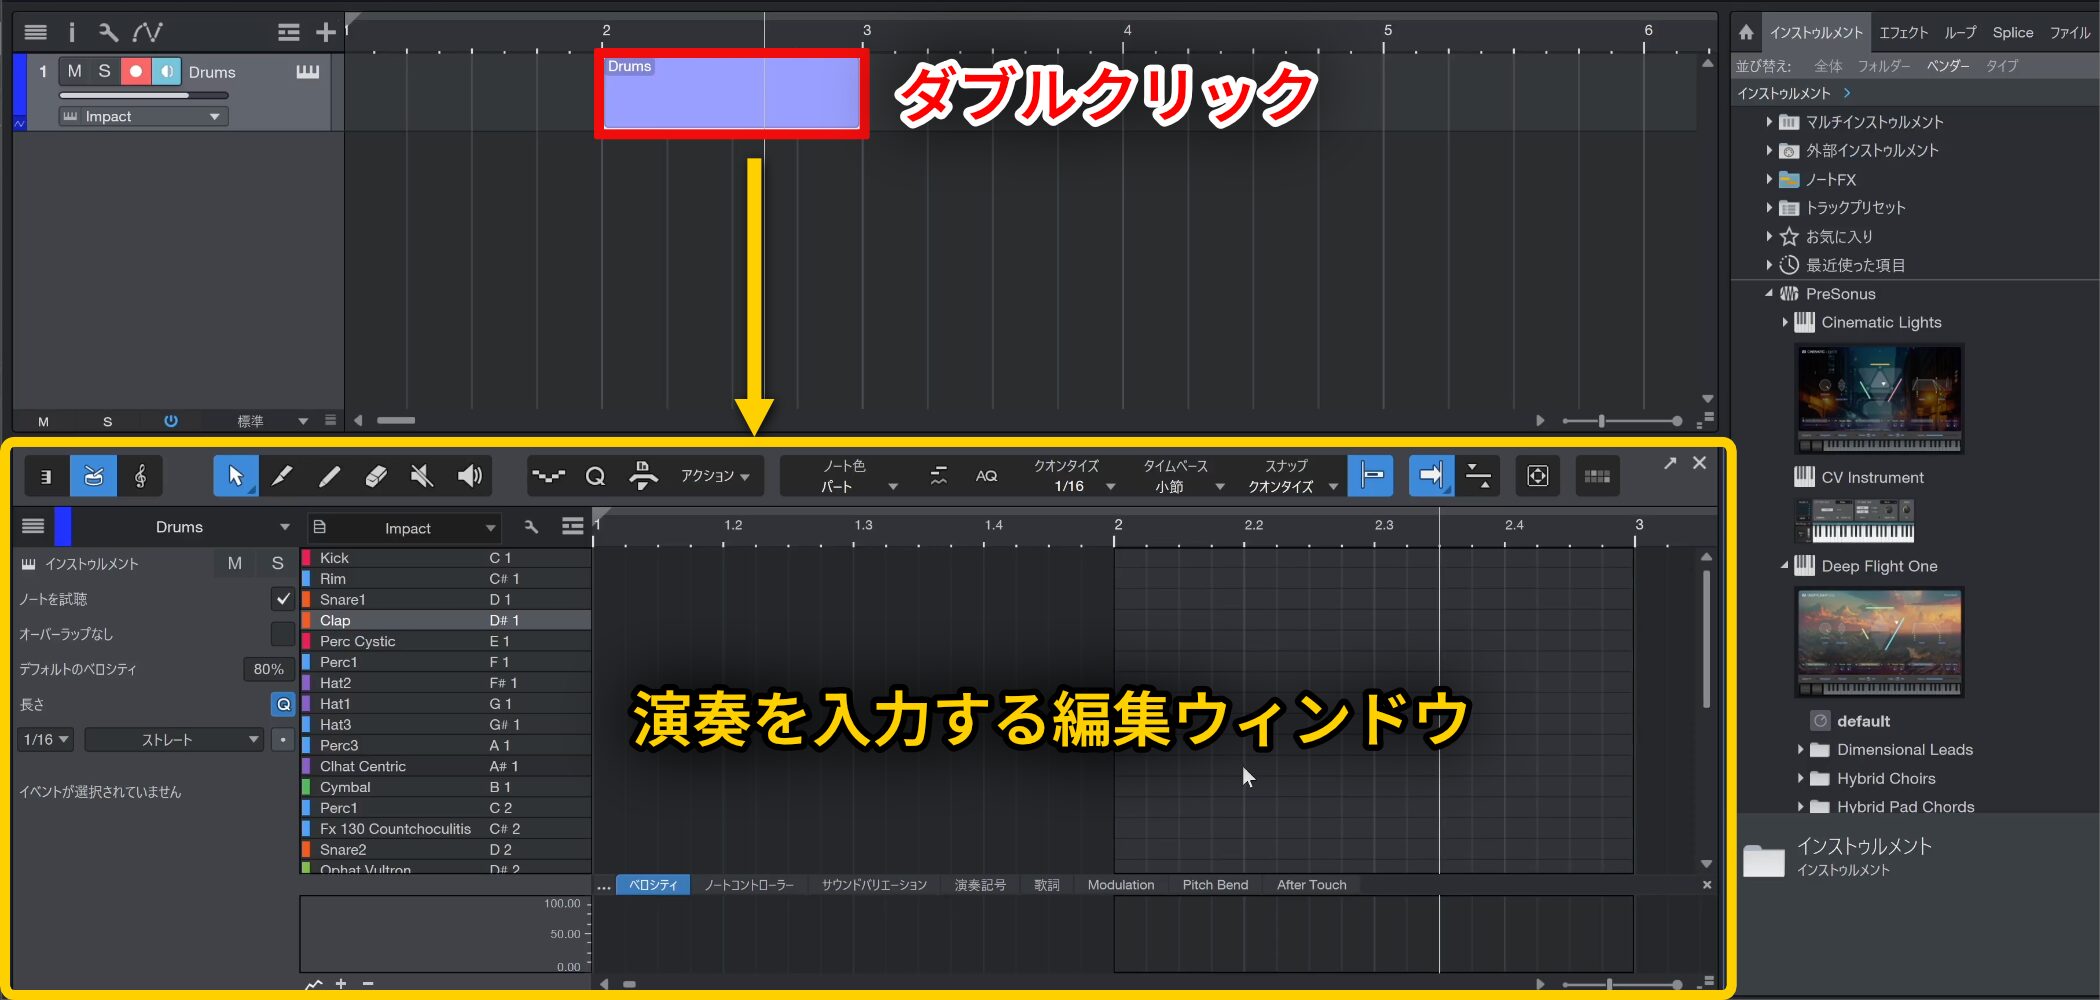
Double-click the event you created to open the editor for entering the performance.
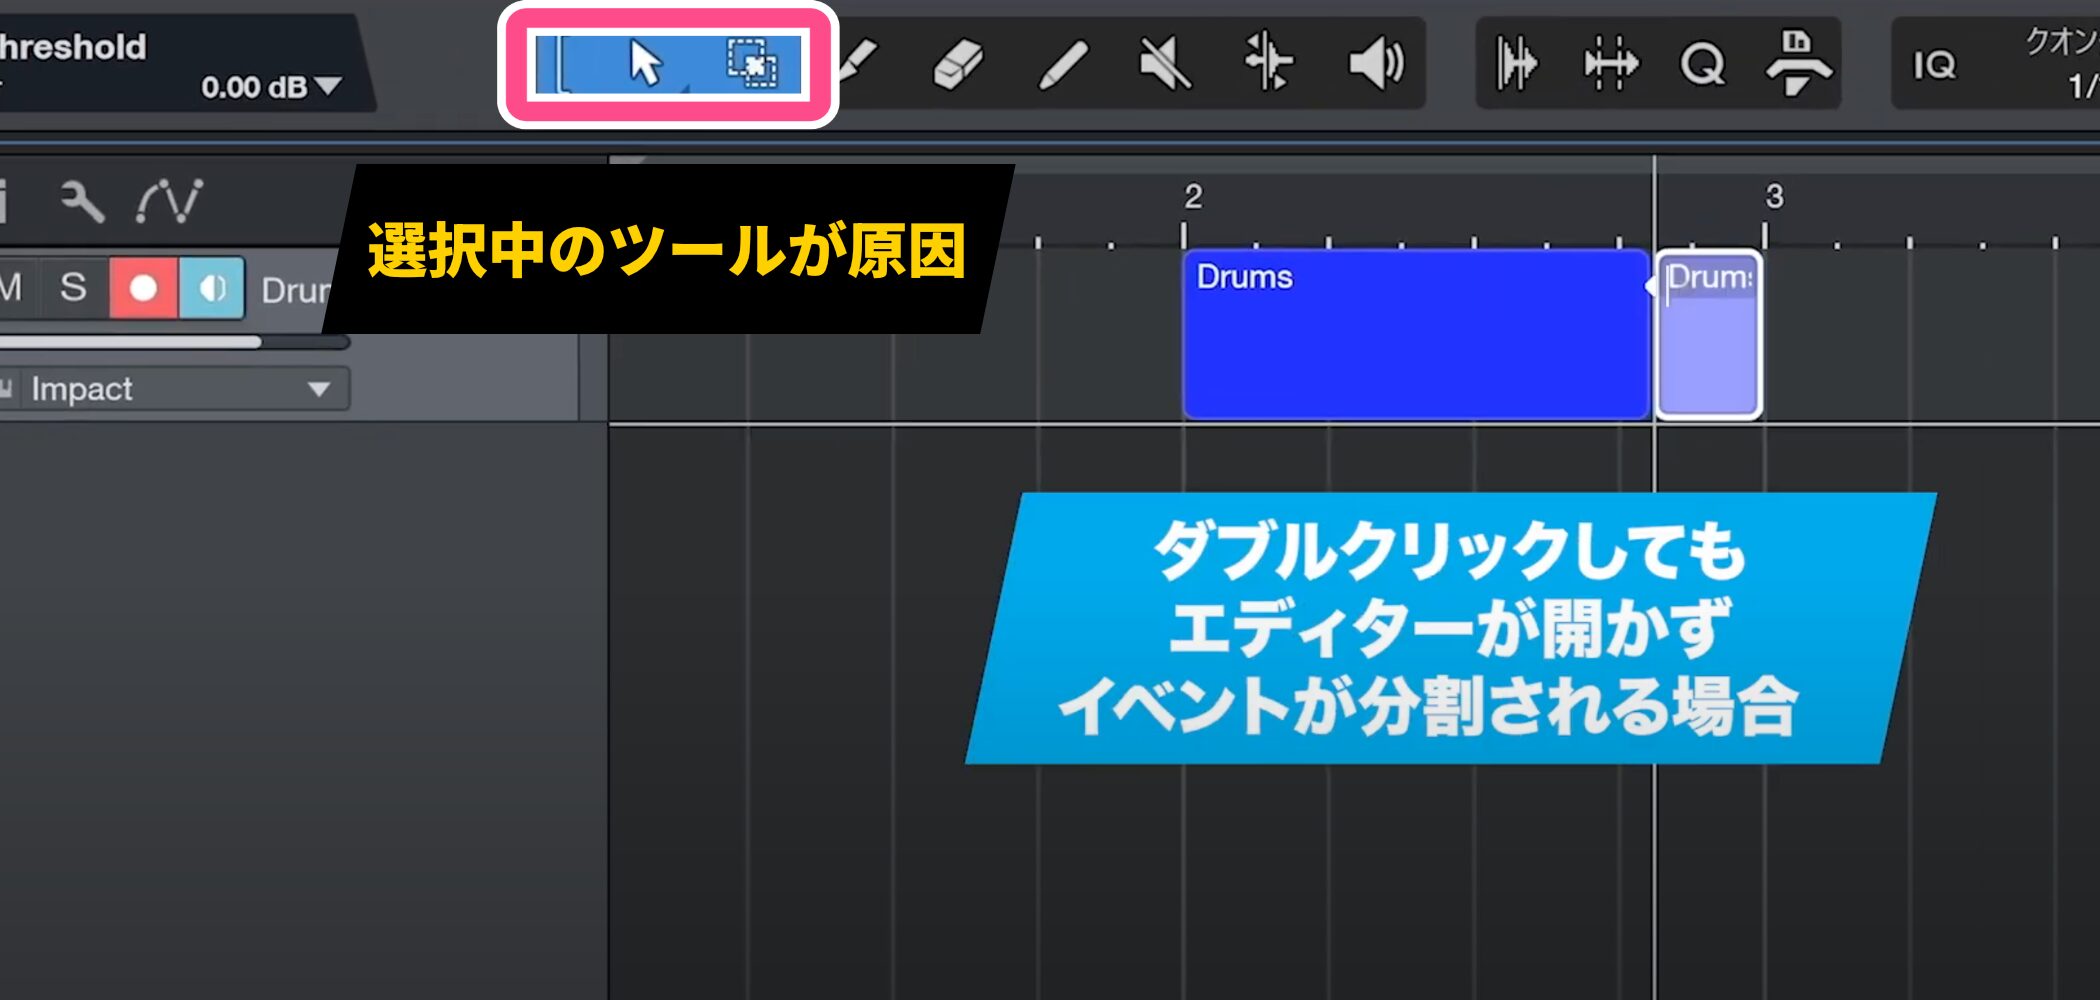
Depending on the selected tool, however, double-clicking may split the event instead of opening the editor.
This depends on the behavior of the currently selected tool.
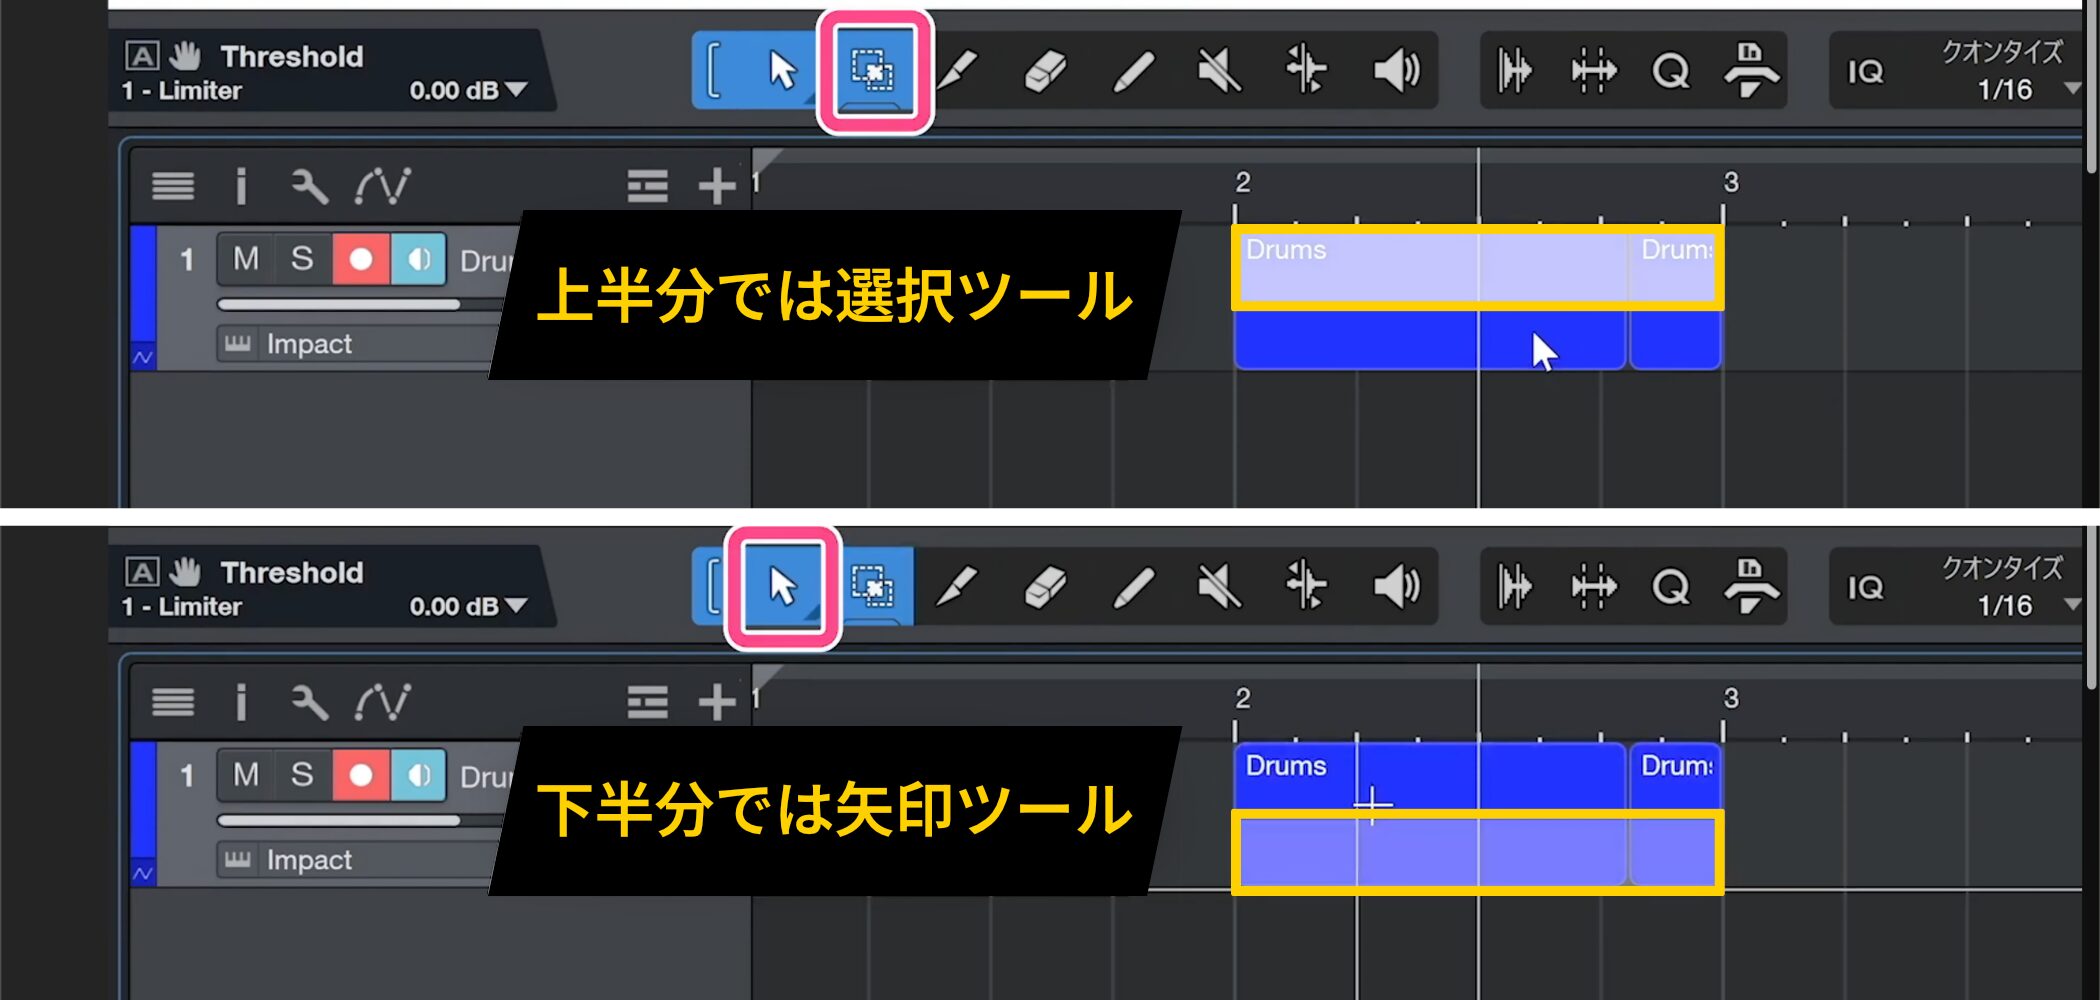
The upper half of the event uses the Range tool and the lower half uses the Arrow tool, so double-click in the appropriate area.
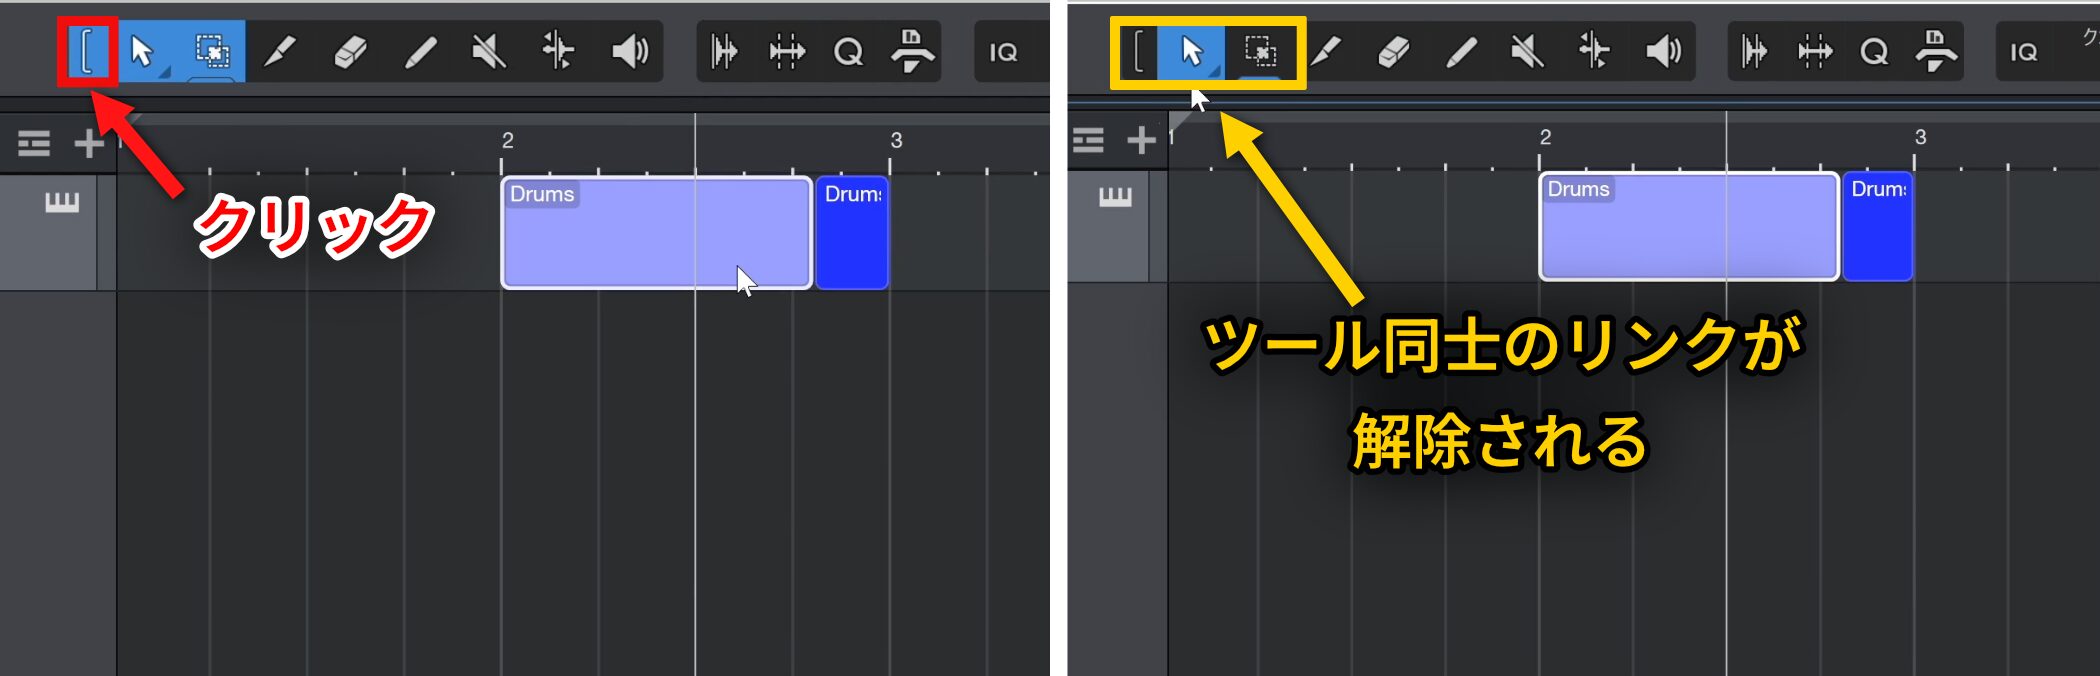
If this is awkward, unlink the tools to resolve the issue.
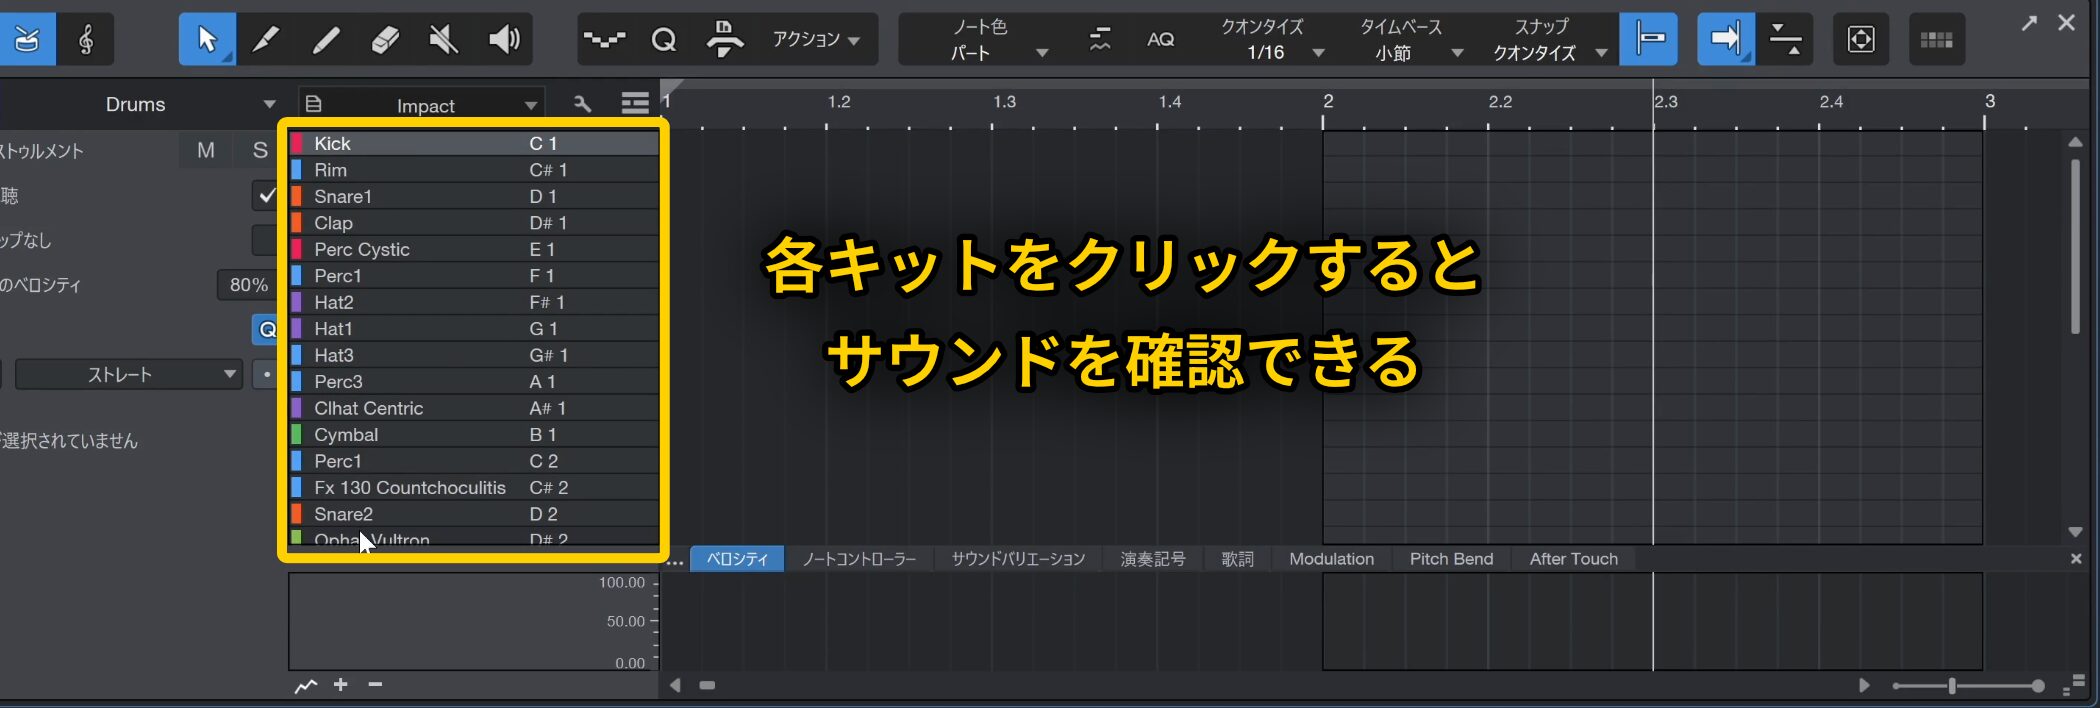
Once the editor is open, the kit names appear on the left. Click them to audition the sounds.
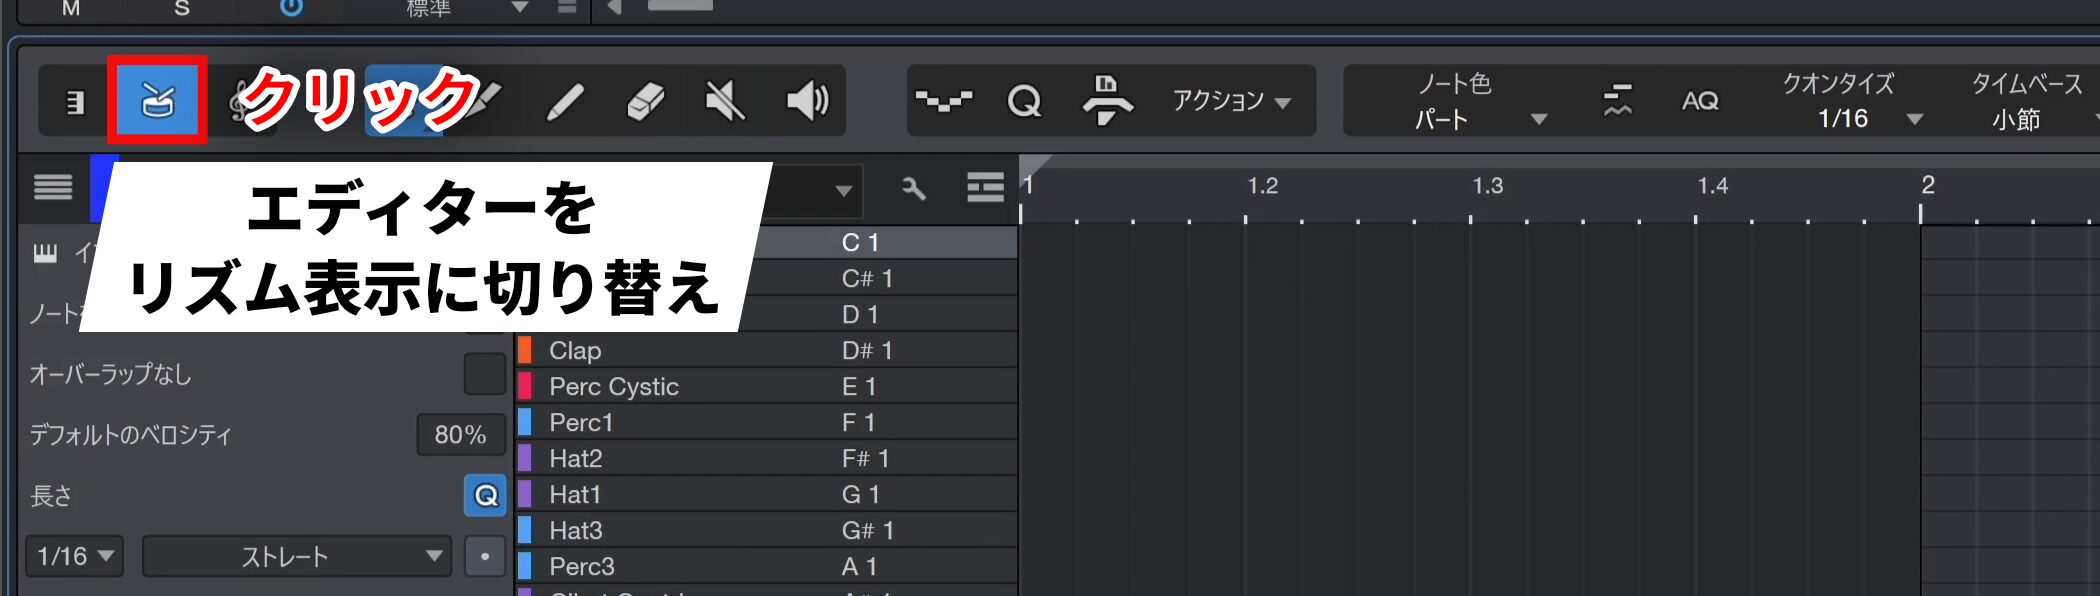
If the editor is not in rhythm view, switch views using the button at its upper left.
Entering a Basic Rhythm Pattern
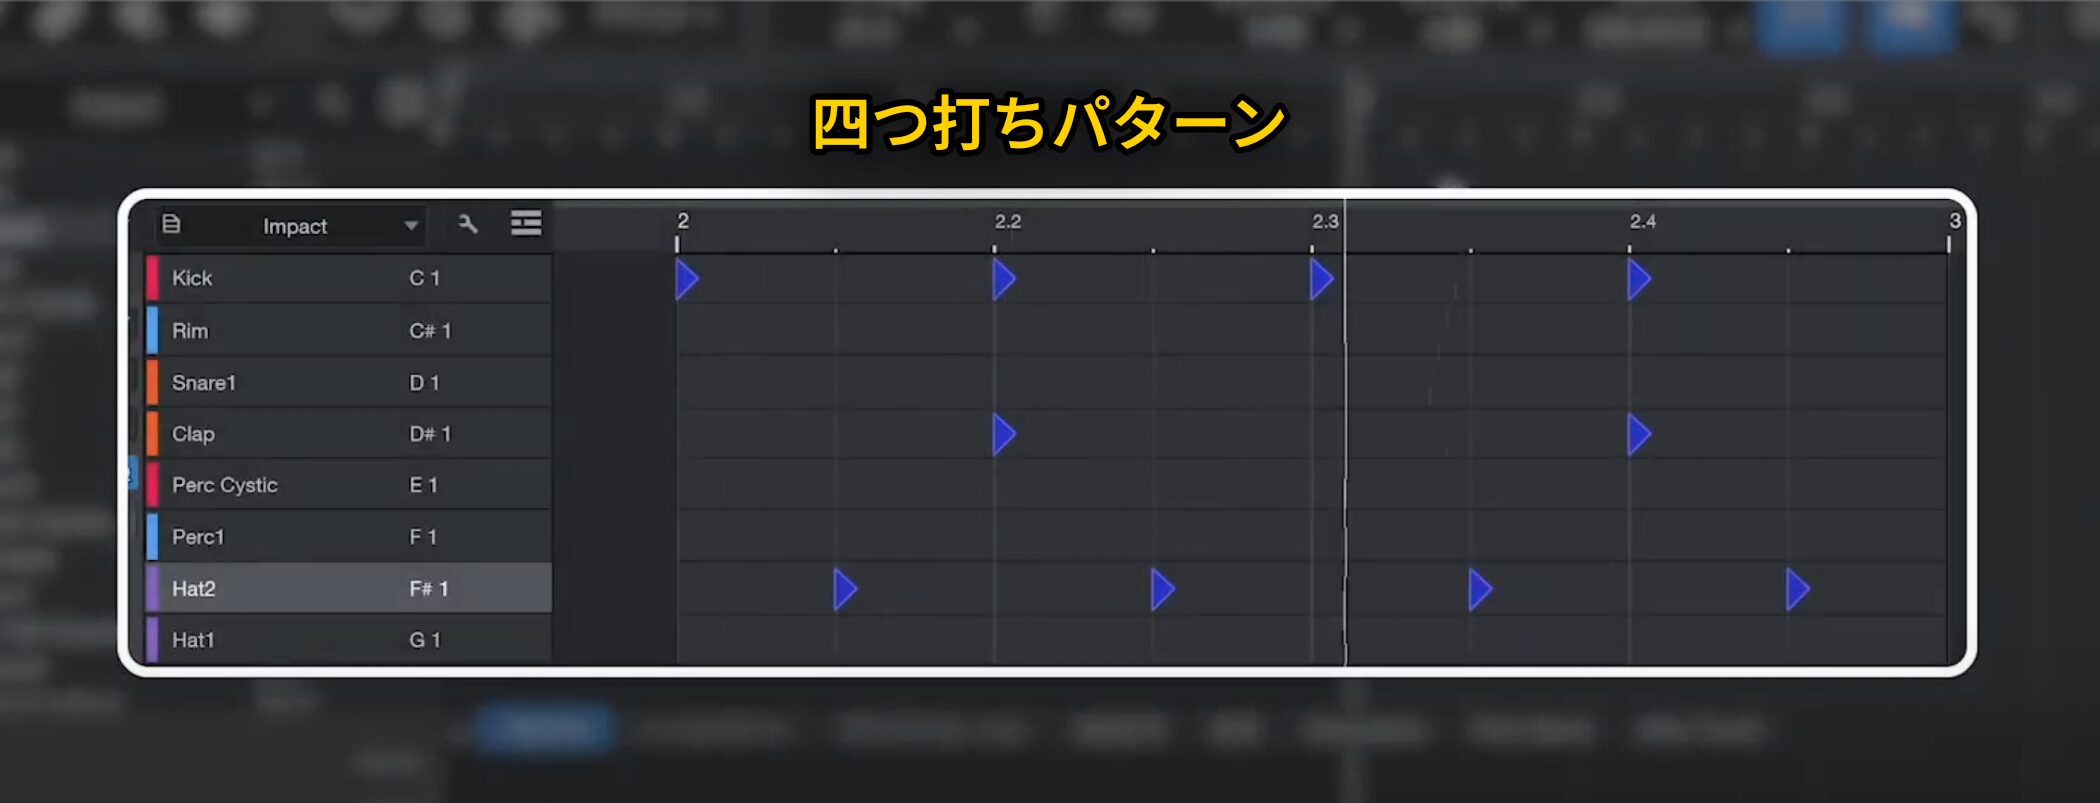
We will start with a four-on-the-floor pattern, commonly used in house and EDM.
First, enter a kick drum on each beat: 1, 2, 3 and 4.
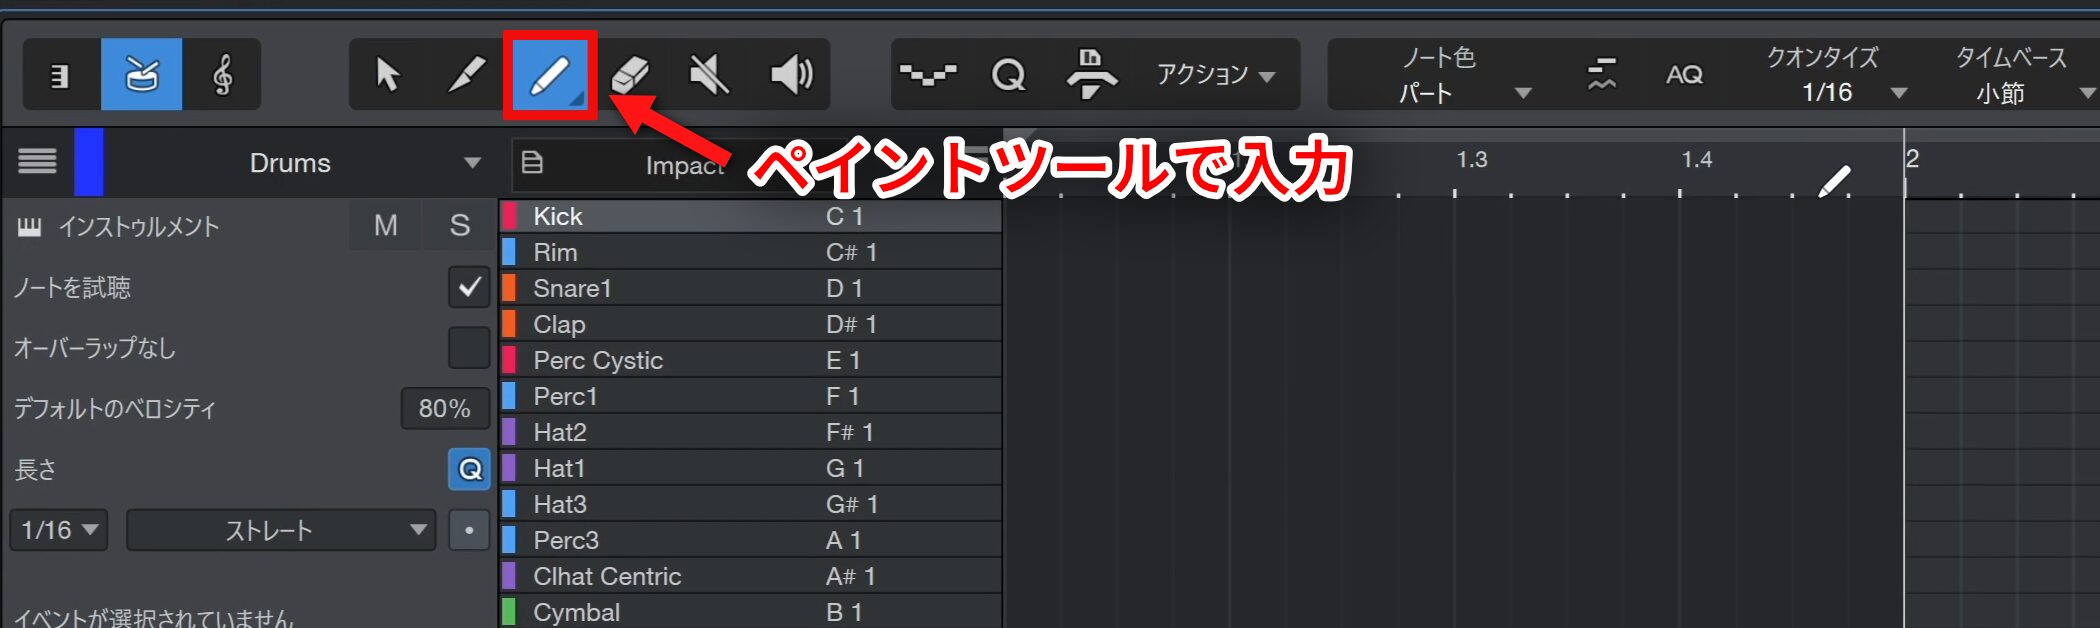
Use the Paint tool as the basic tool for entering rhythms.
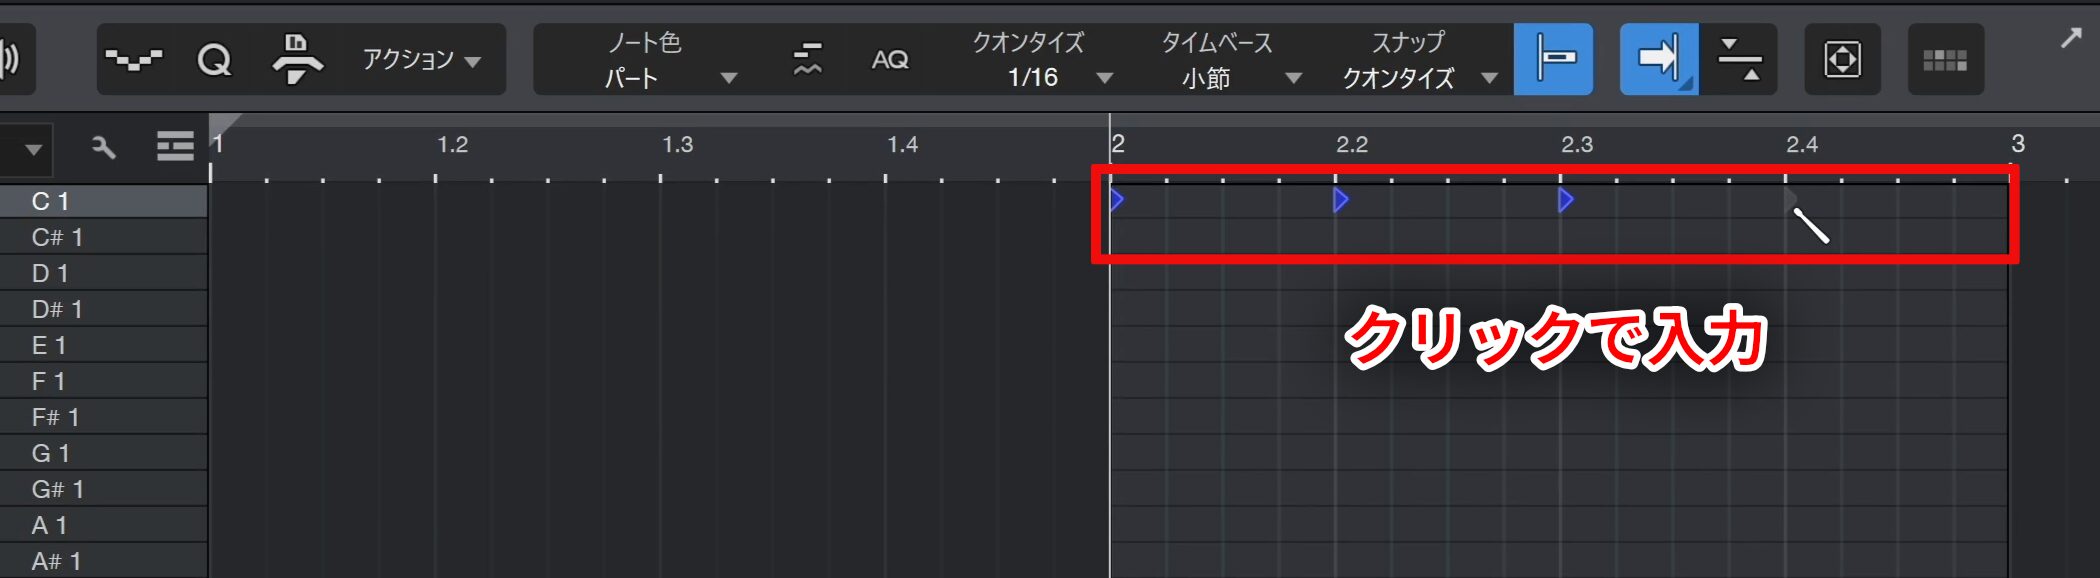
Click the desired position to enter performance data as a note.
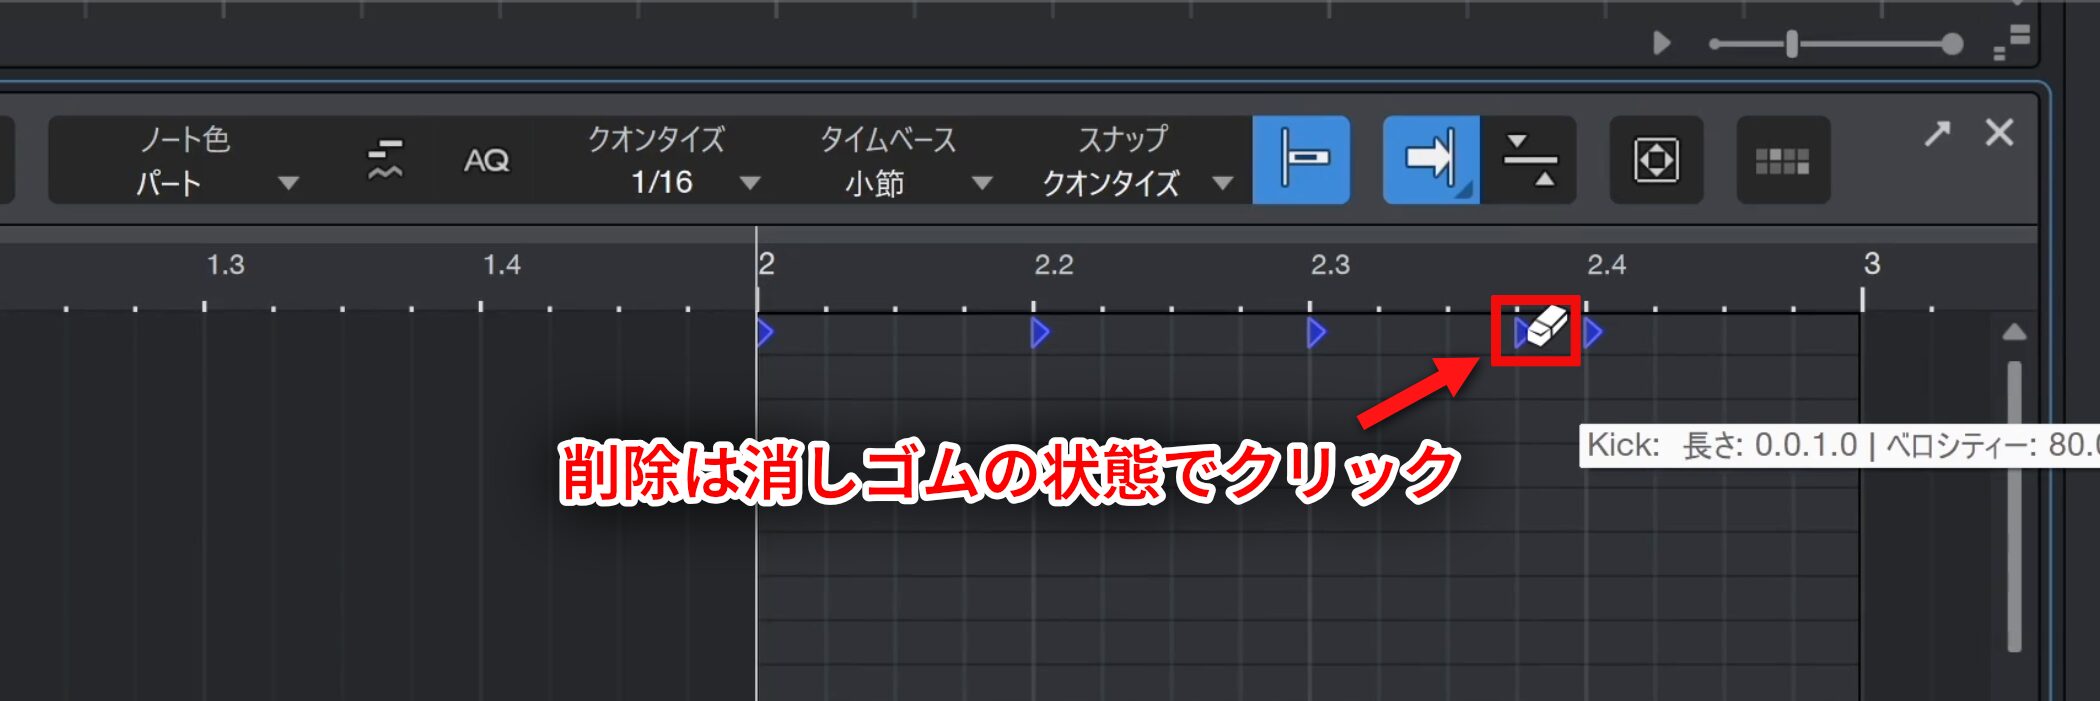
If you enter a note by mistake, move the cursor over it. When the cursor becomes an eraser, click to delete it.
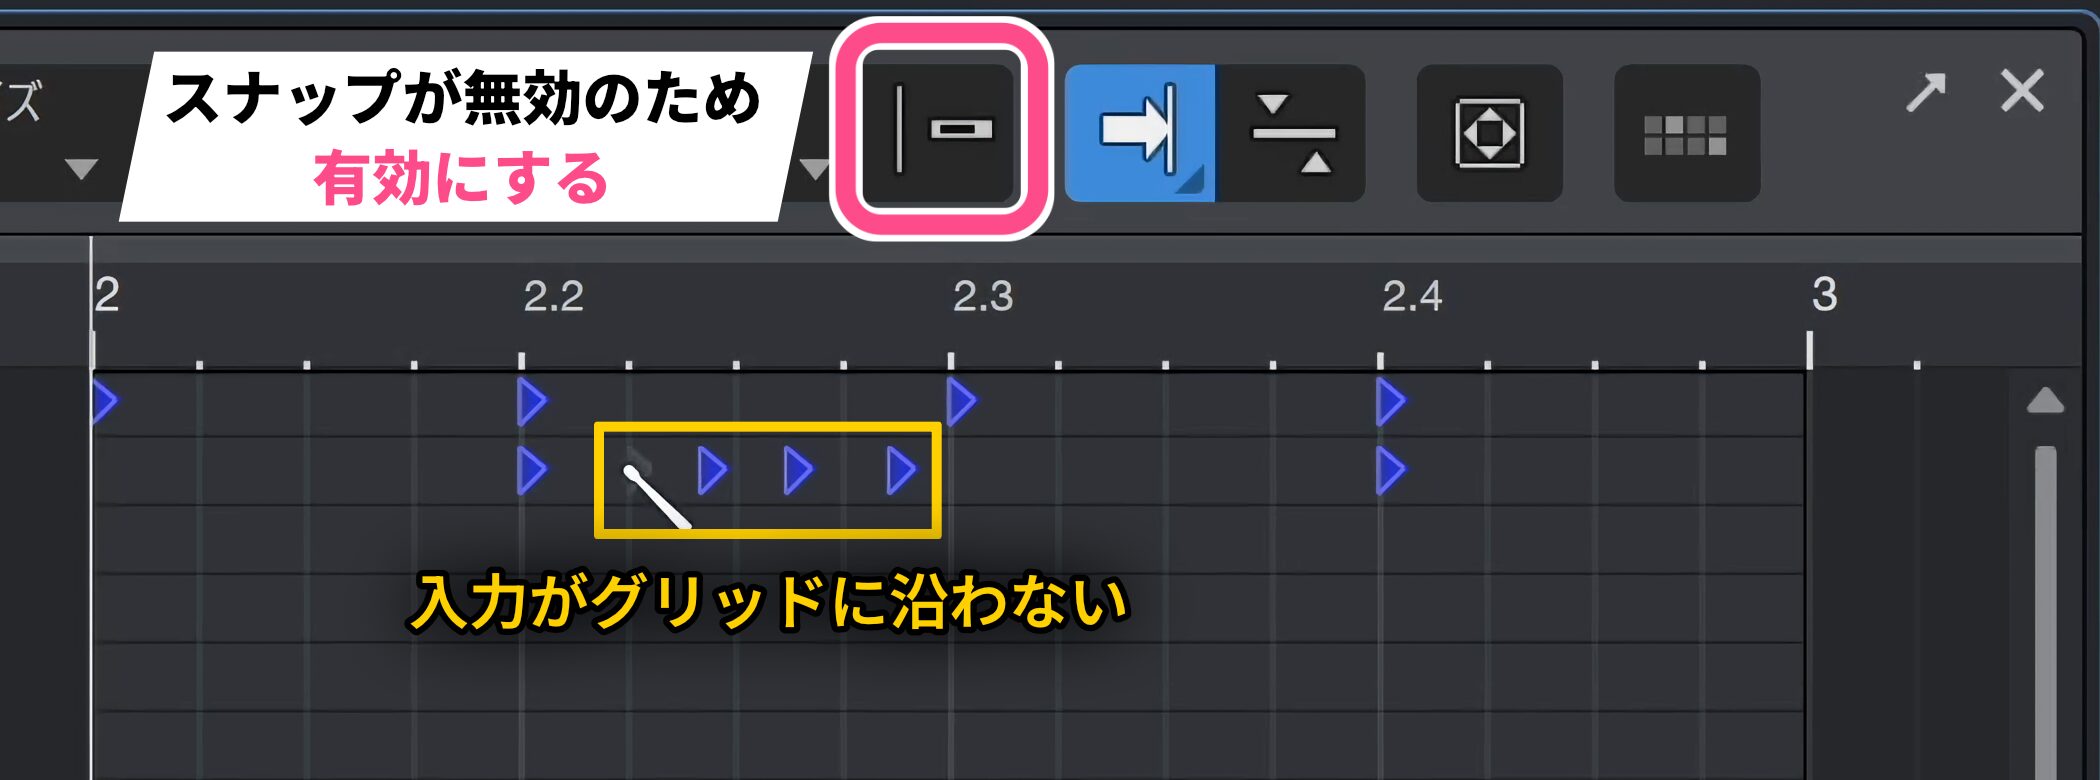
If notes do not align precisely with the grid, check that Snap is enabled.
With Snap off, notes can be entered without regard to grid positions, so it is generally best to leave Snap enabled.
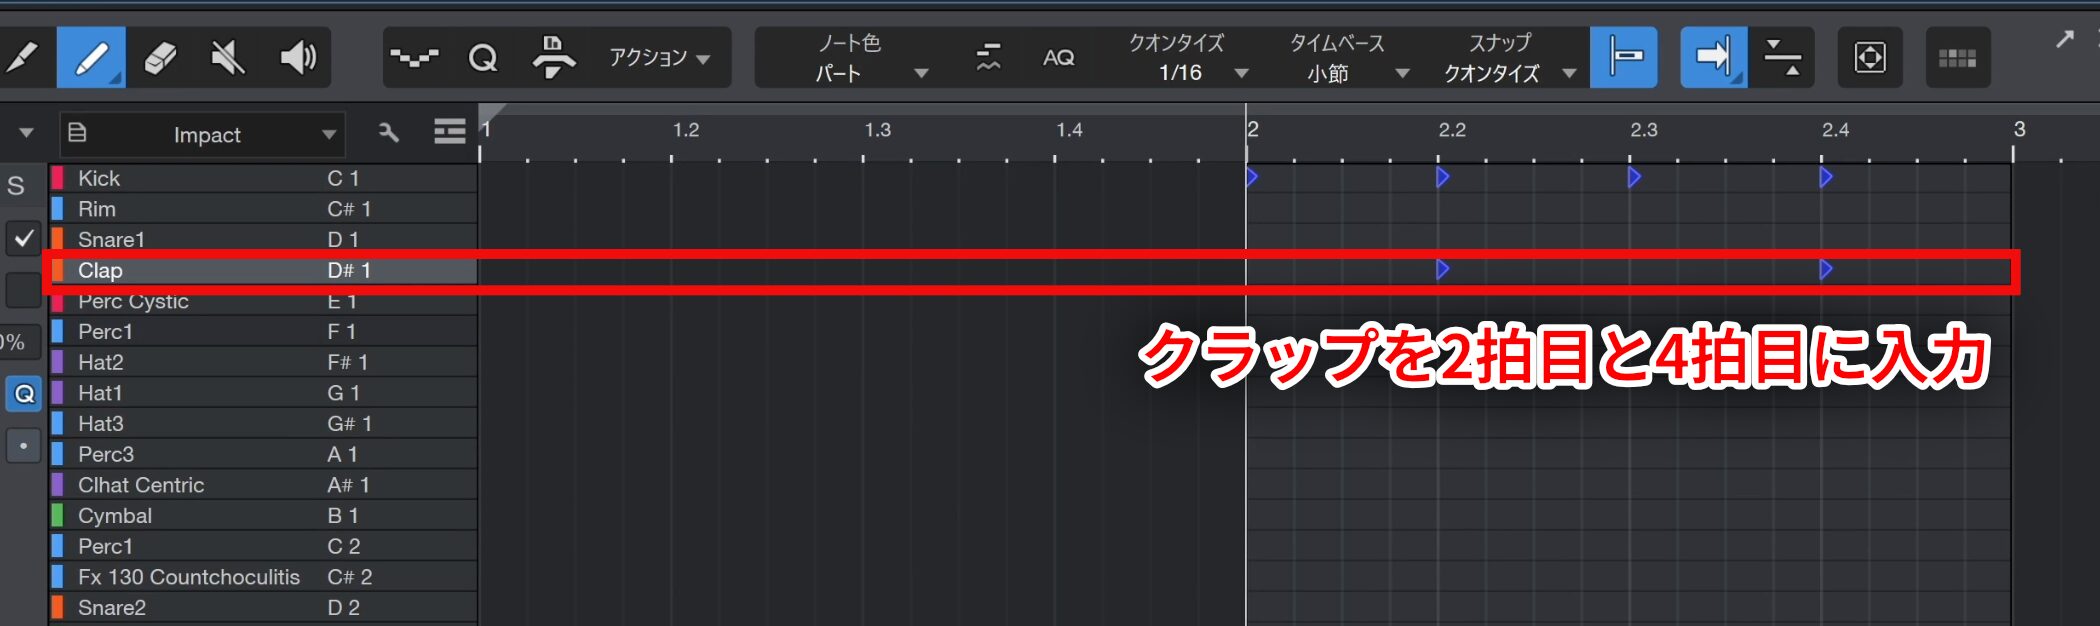
After the kick, enter claps on beats 2 and 4.
Playback and Looping
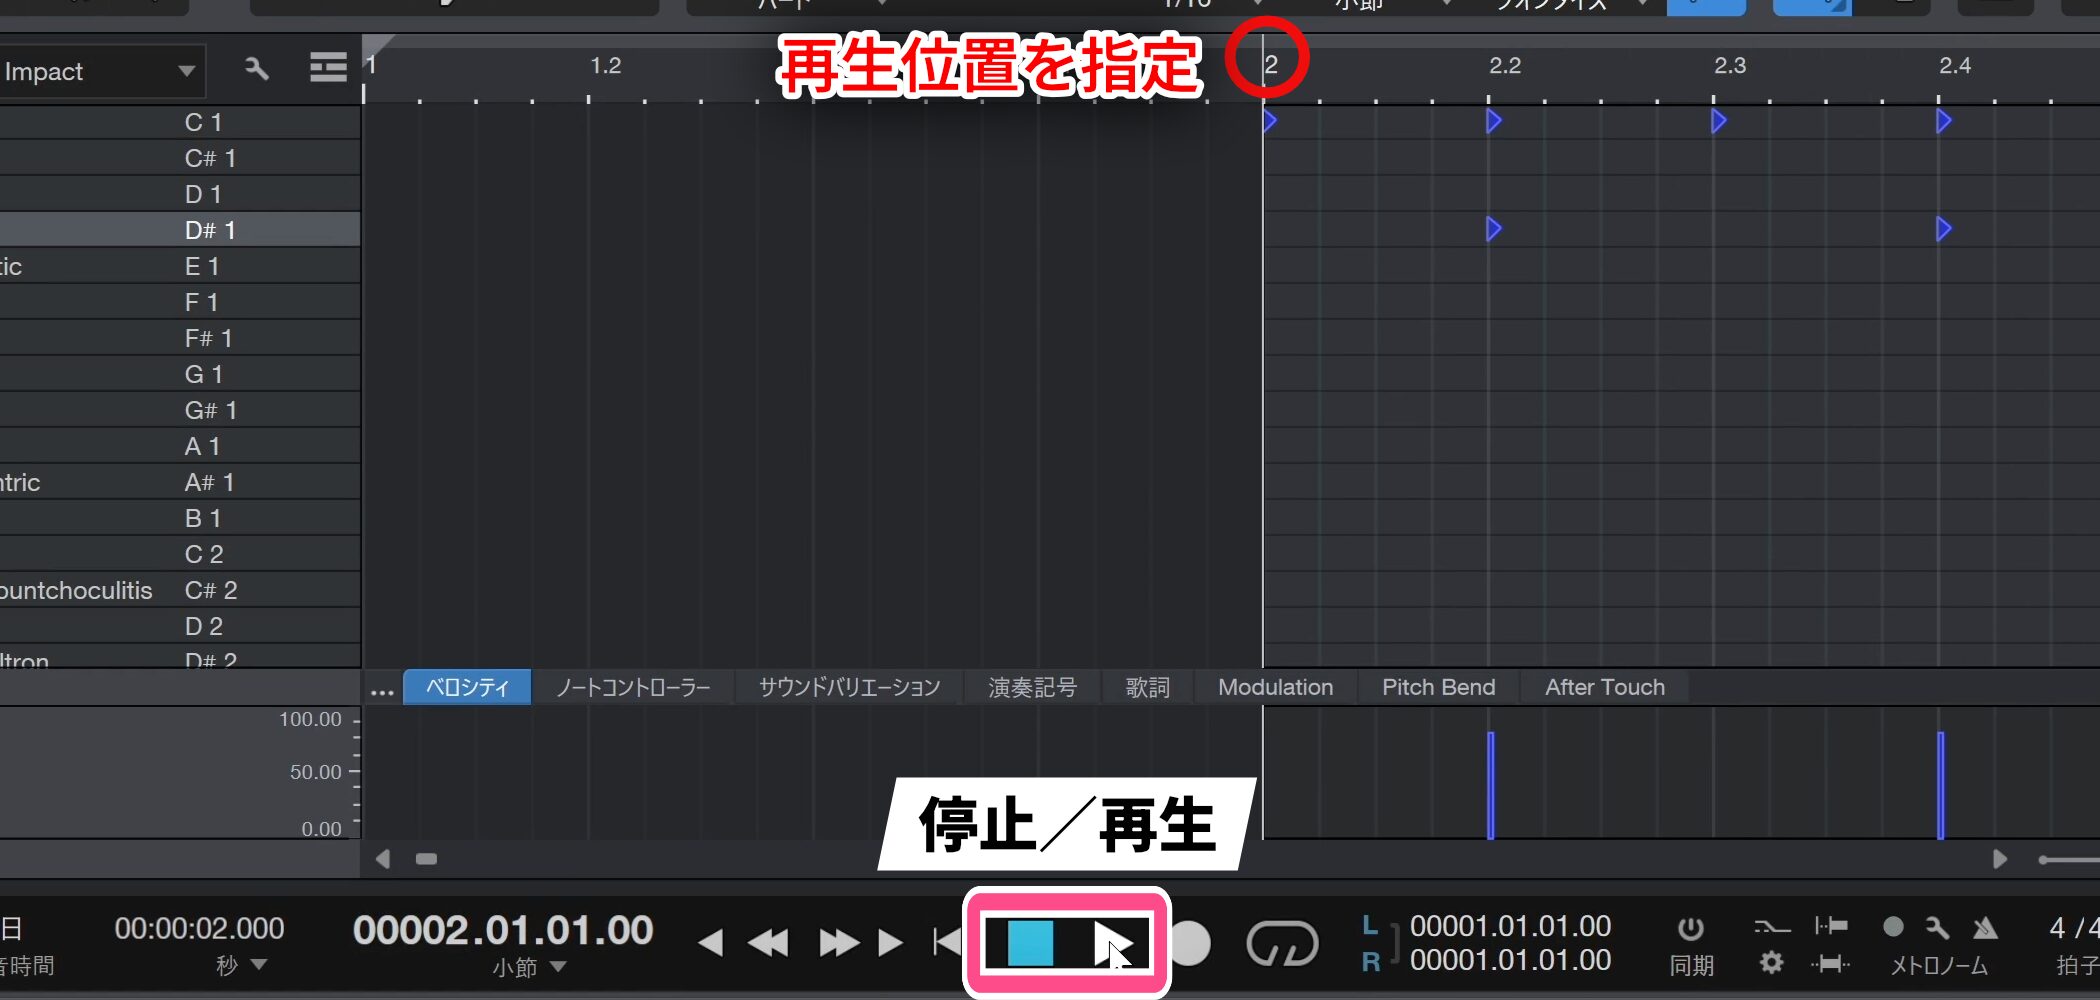
To hear the sound, specify a playback position on the timeline and press Play.
Use the button immediately to its left to stop.
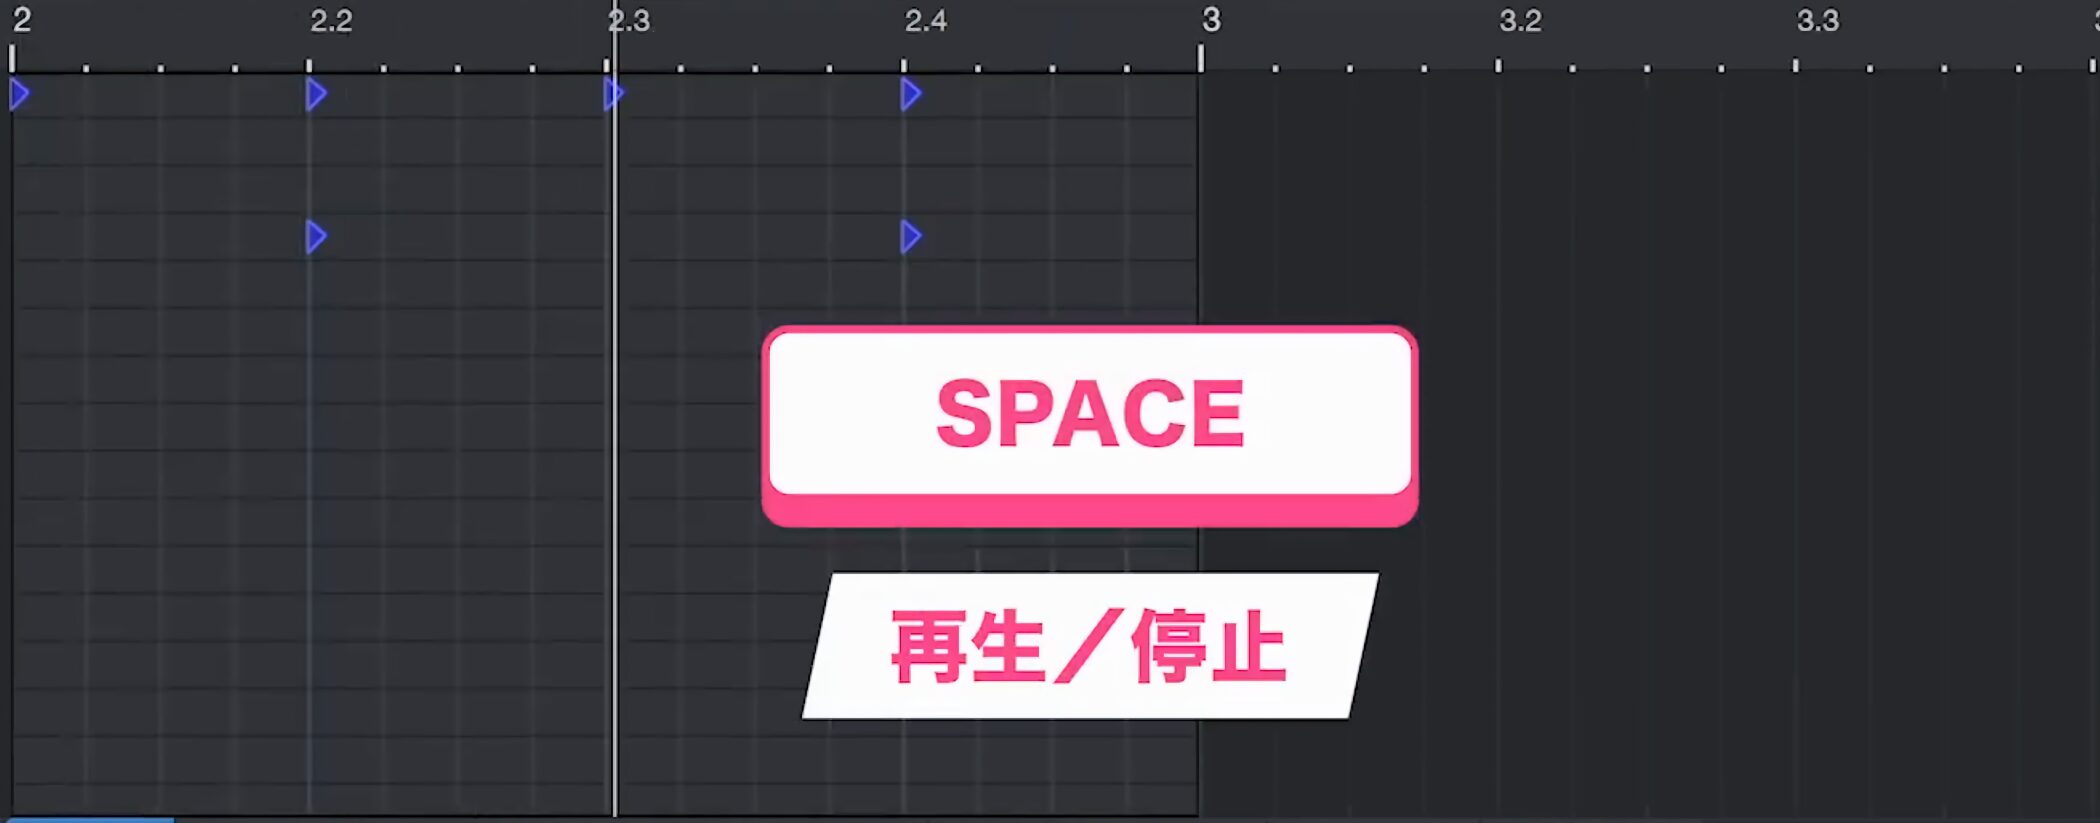
The spacebar is a more efficient way to start and stop playback.
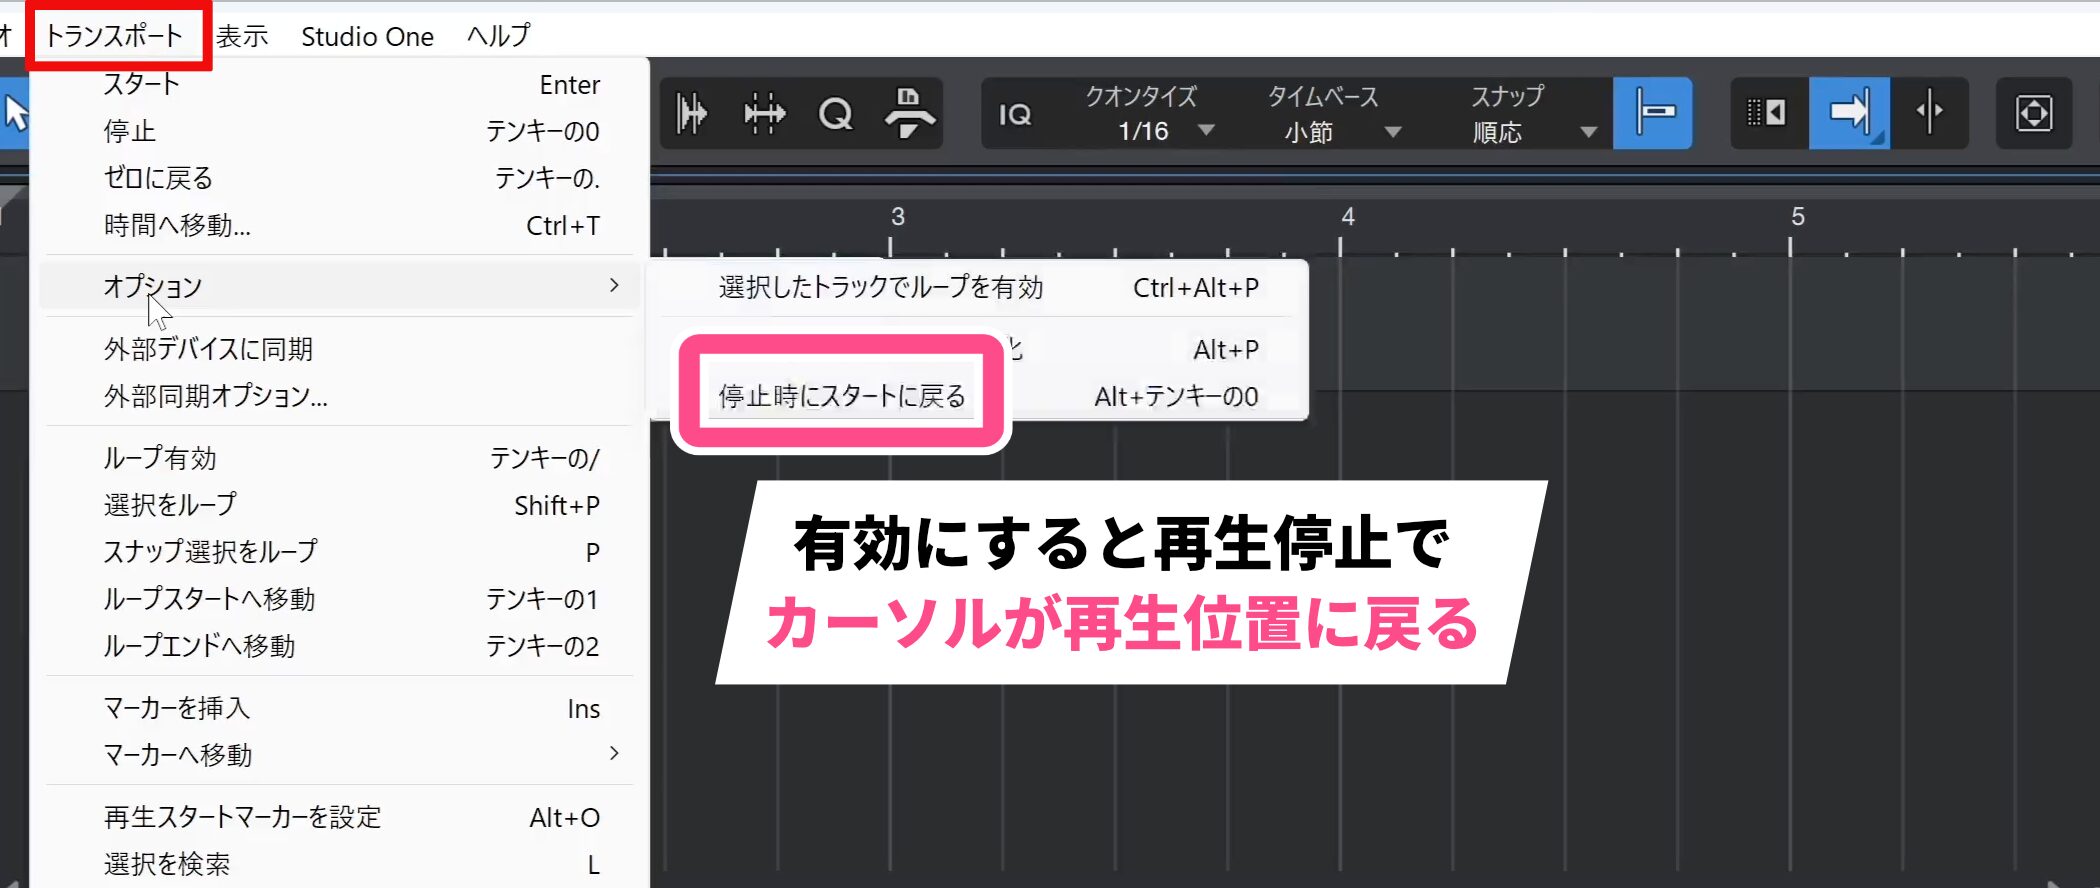
A useful production setting is Transport → Return to Start on Stop in the top menu.
With this enabled, stopping playback automatically returns the cursor to the playback start position, making repeated checks much smoother.
Adjusting the View and Grid
Next, enter hi-hats on the eighth-note offbeats.
Because we will be working with smaller note divisions, first adjust the view.
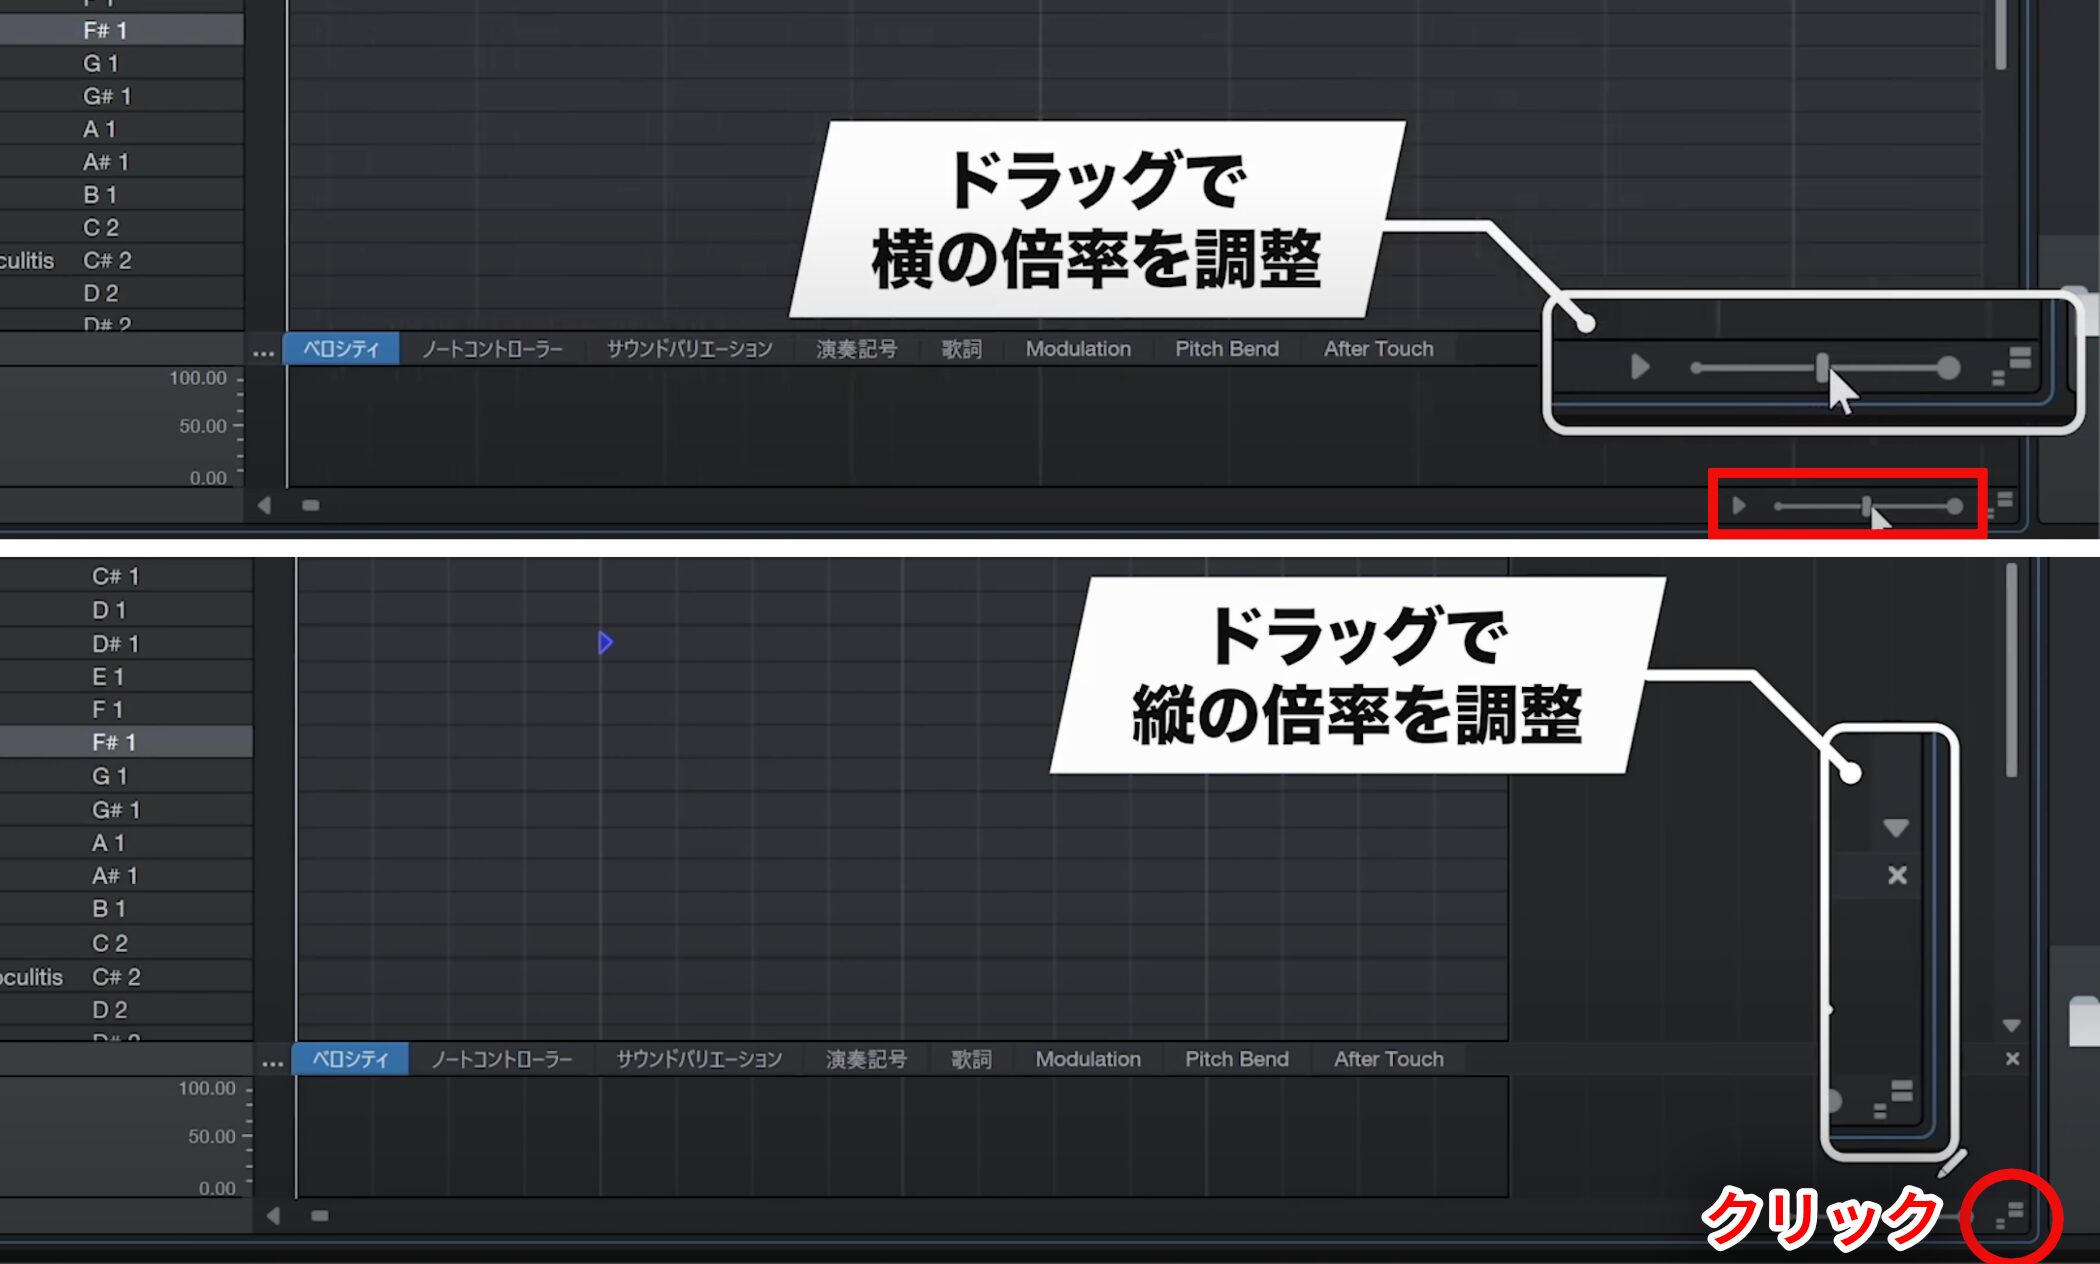
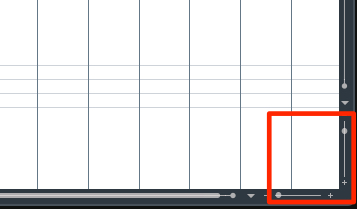
Use the zoom controls at the lower right to adjust horizontal magnification.
You can also click and drag an edge to change vertical magnification.
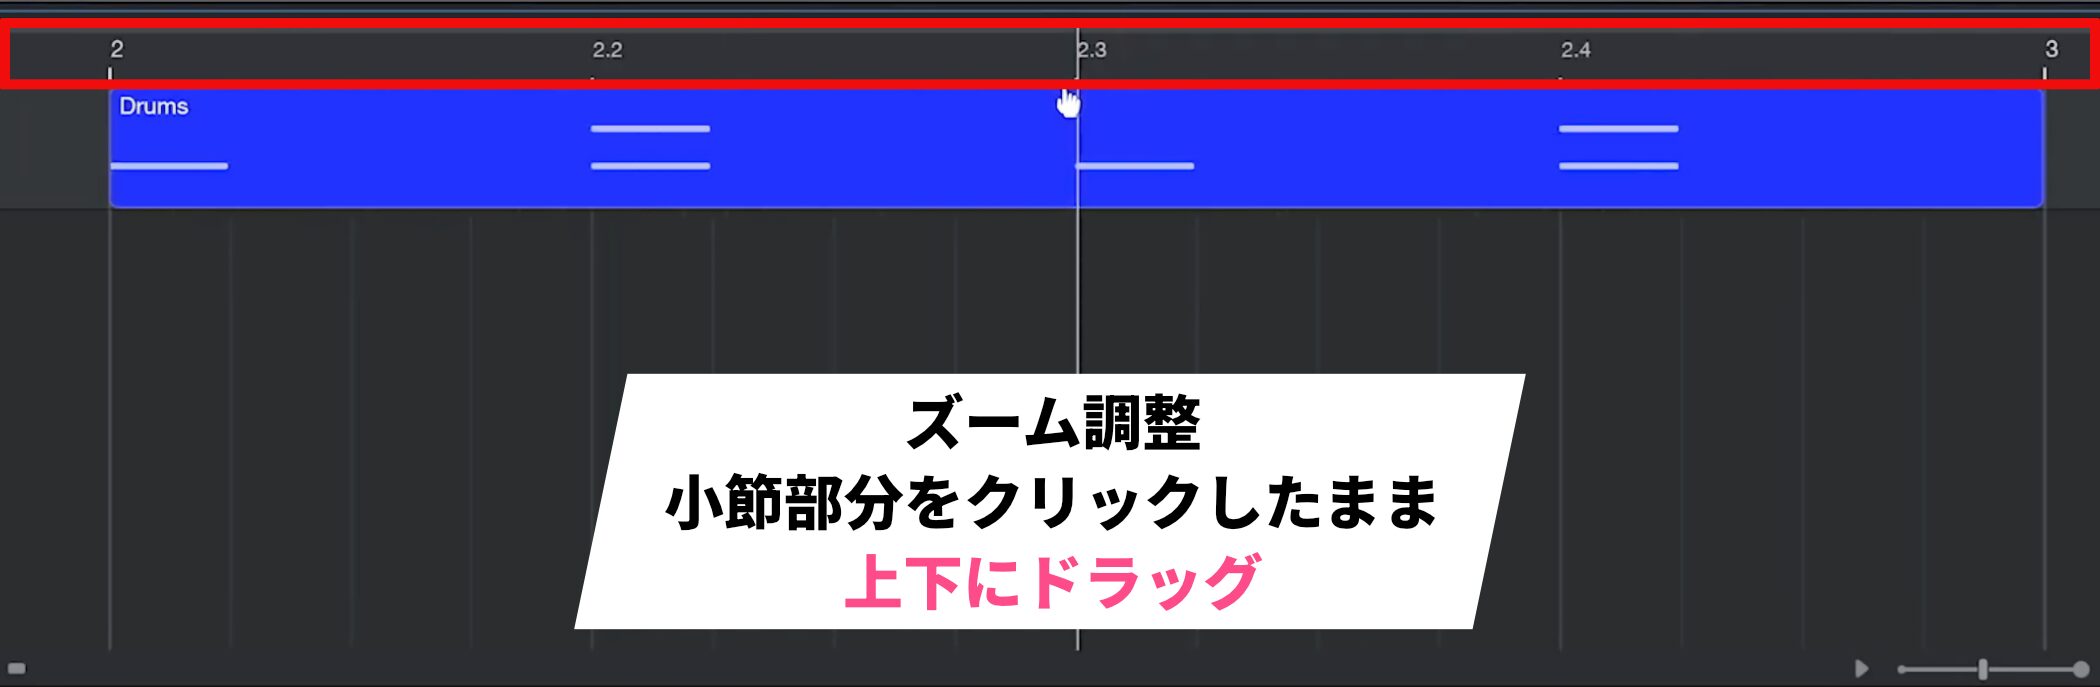
For faster zooming, click and drag up or down in the bar ruler to zoom around the cursor.
The same operation works in the editor.
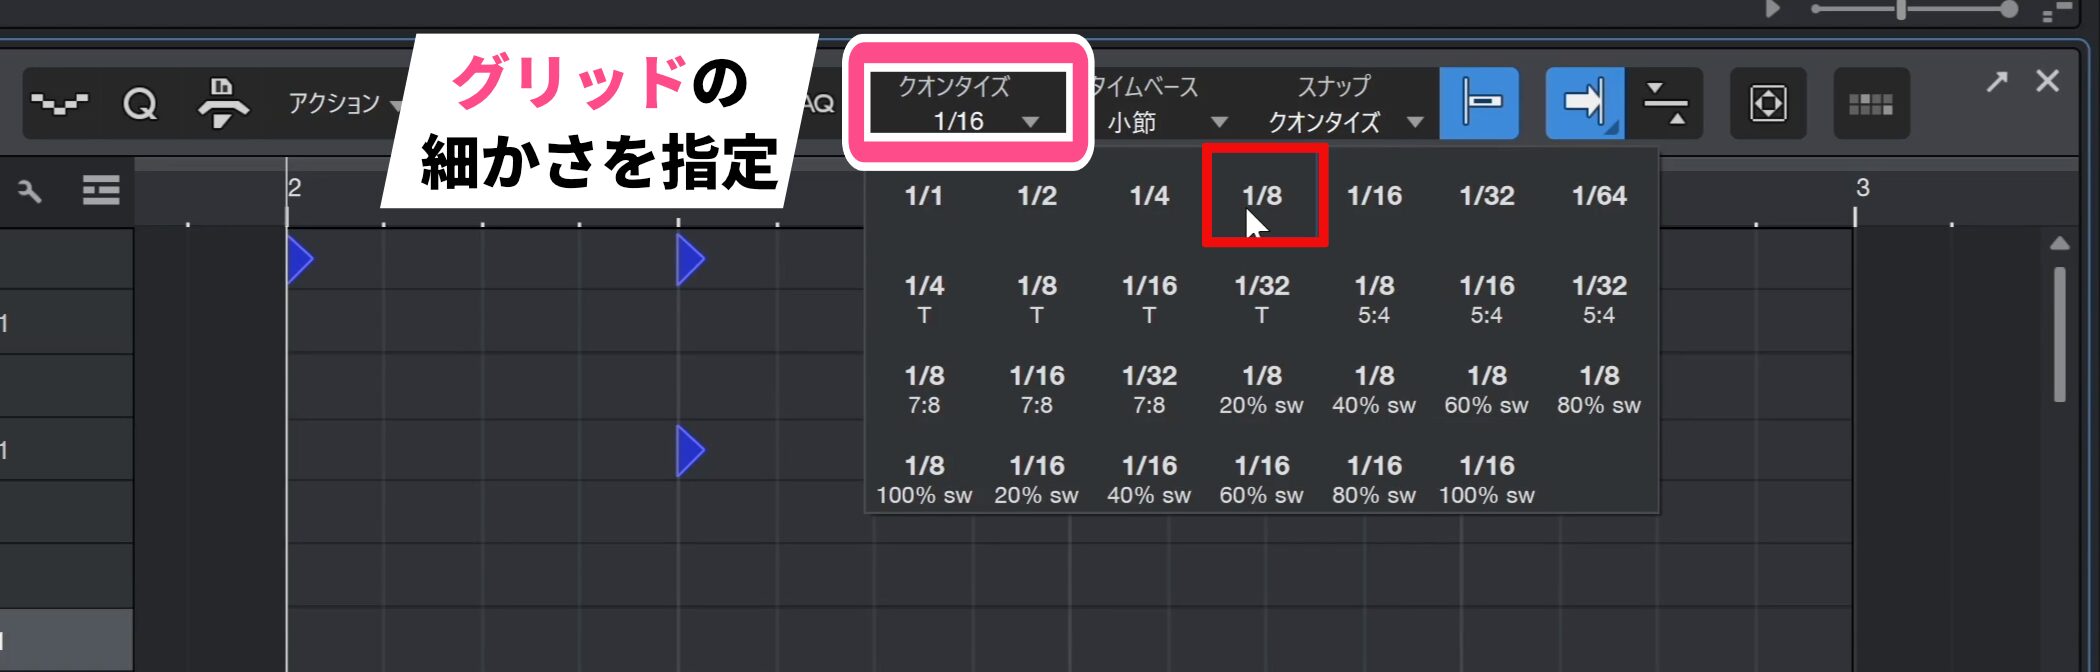
Adjust the grid resolution for entering the hi-hats.
Each grid cell currently represents a sixteenth note. Change Quantize to eighth notes to display the grid in eighth-note divisions and make it easier to read.
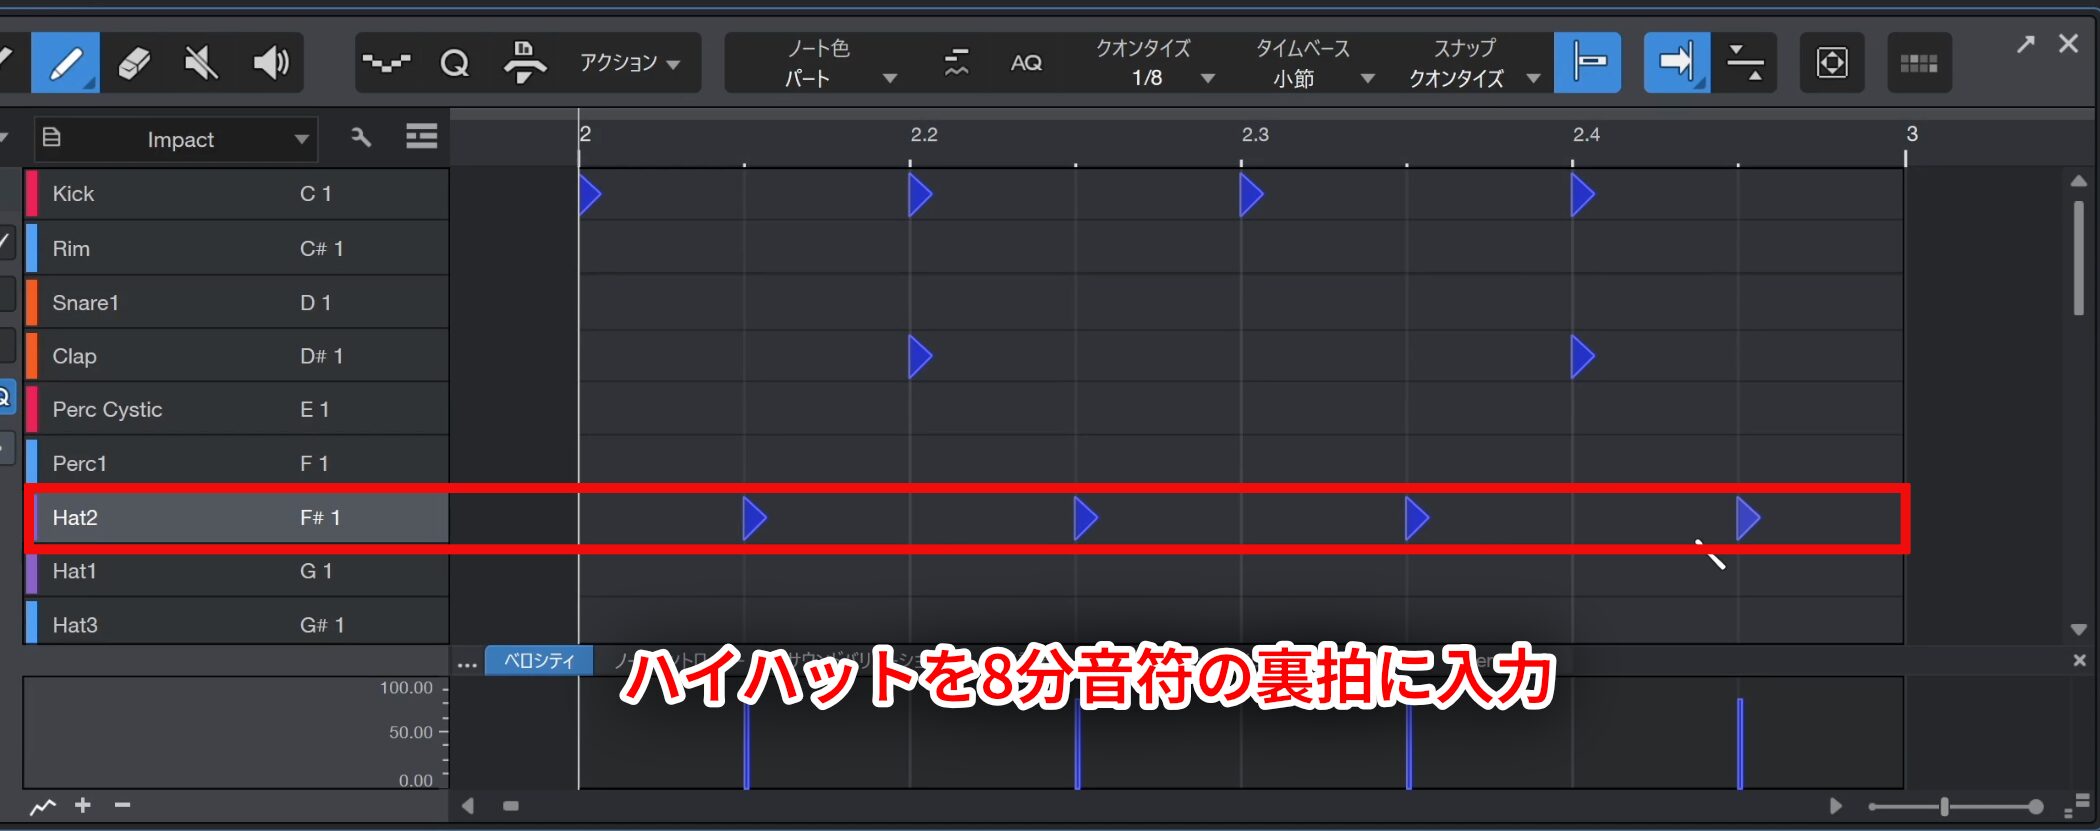
Enter hi-hats on the eighth-note offbeats to give the pattern its characteristic feel.
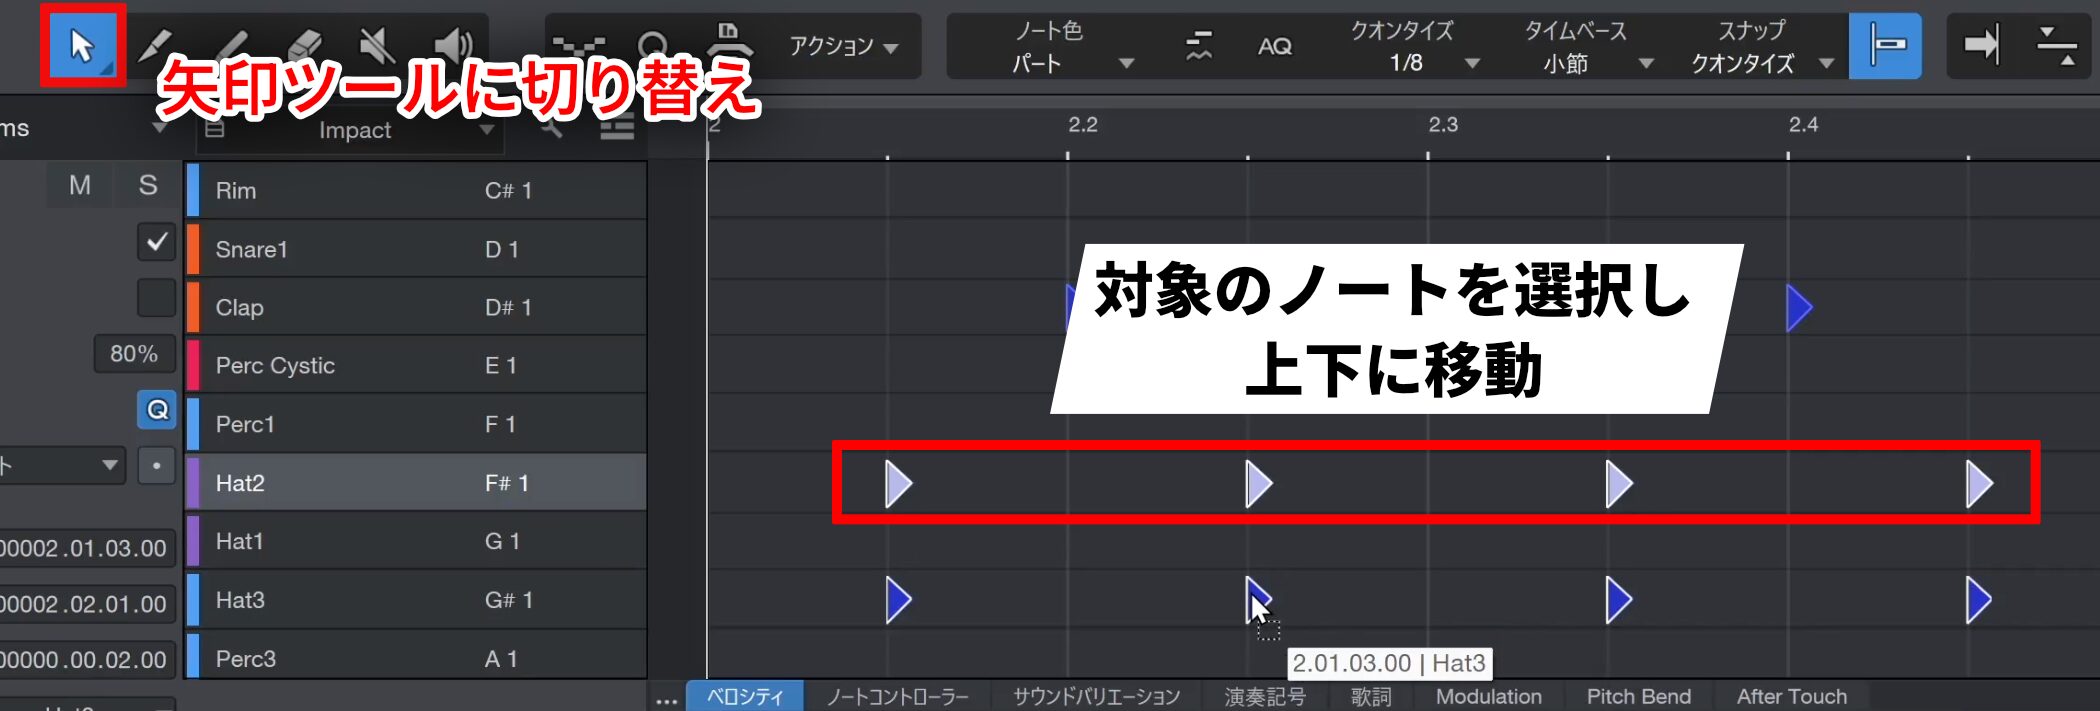
To try a different hi-hat sound, switch to the Arrow tool, select the notes and move them up or down to another sound.
This is more efficient than entering the notes again.
Efficient Note Entry
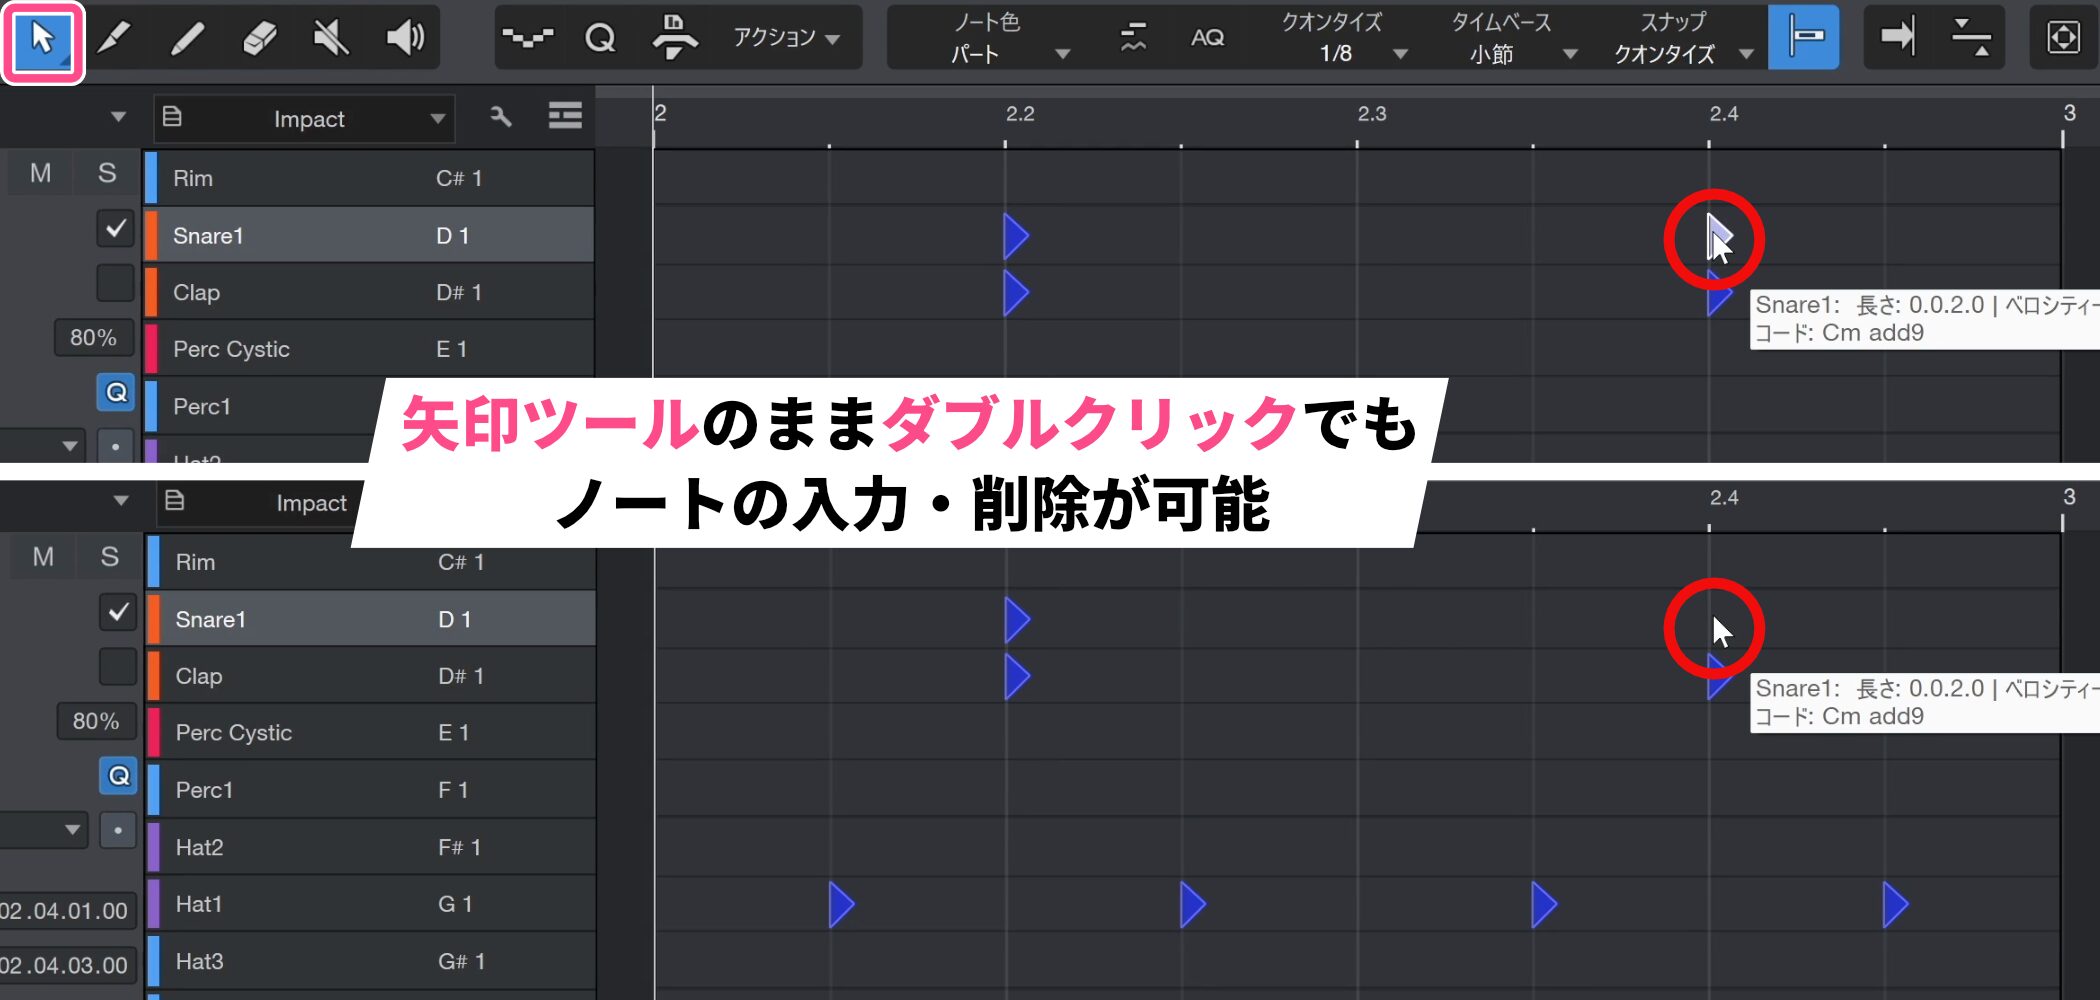
In actual production, you can also enter and delete notes by double-clicking with the Arrow tool.
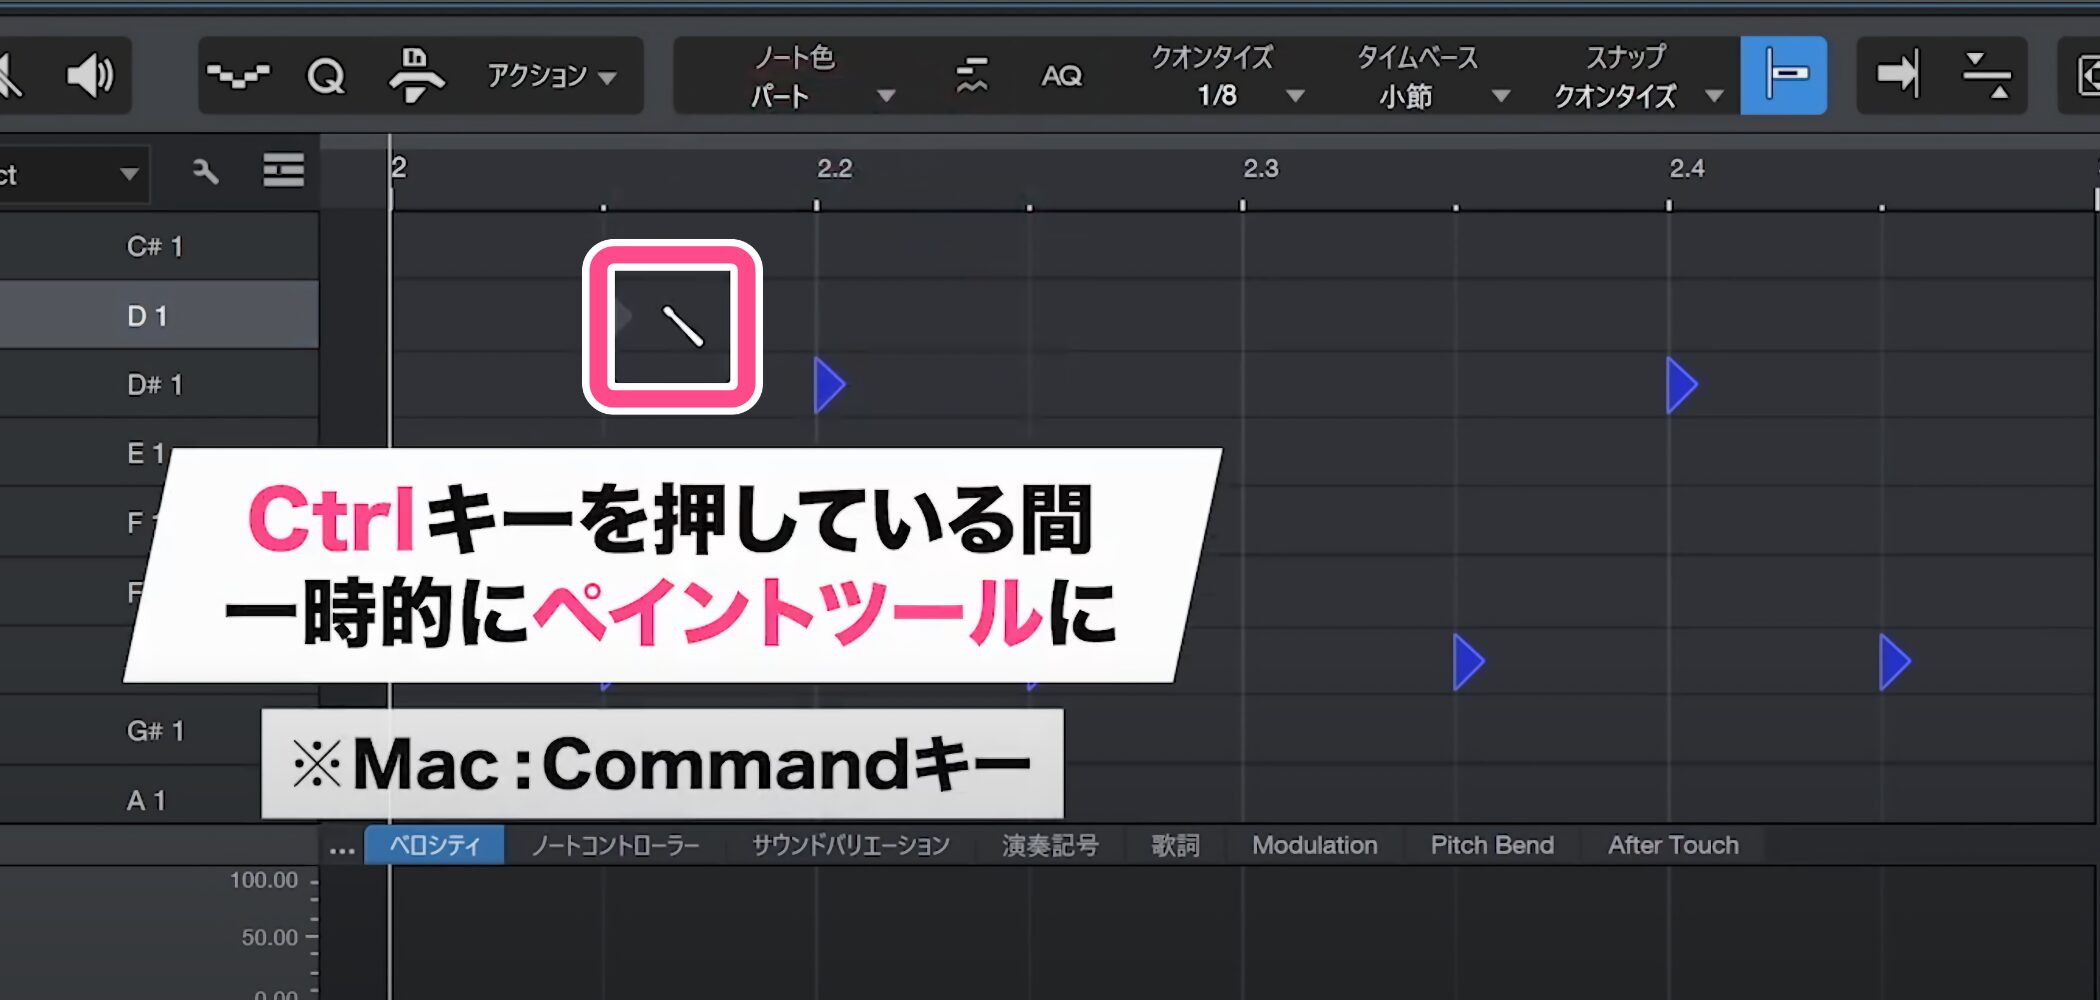
Holding Control temporarily gives it the Paint tool function, so an efficient workflow is to edit primarily with the Arrow tool and hold Control only when entering notes.
On Mac, use Command instead.
Layering Sounds and Velocity
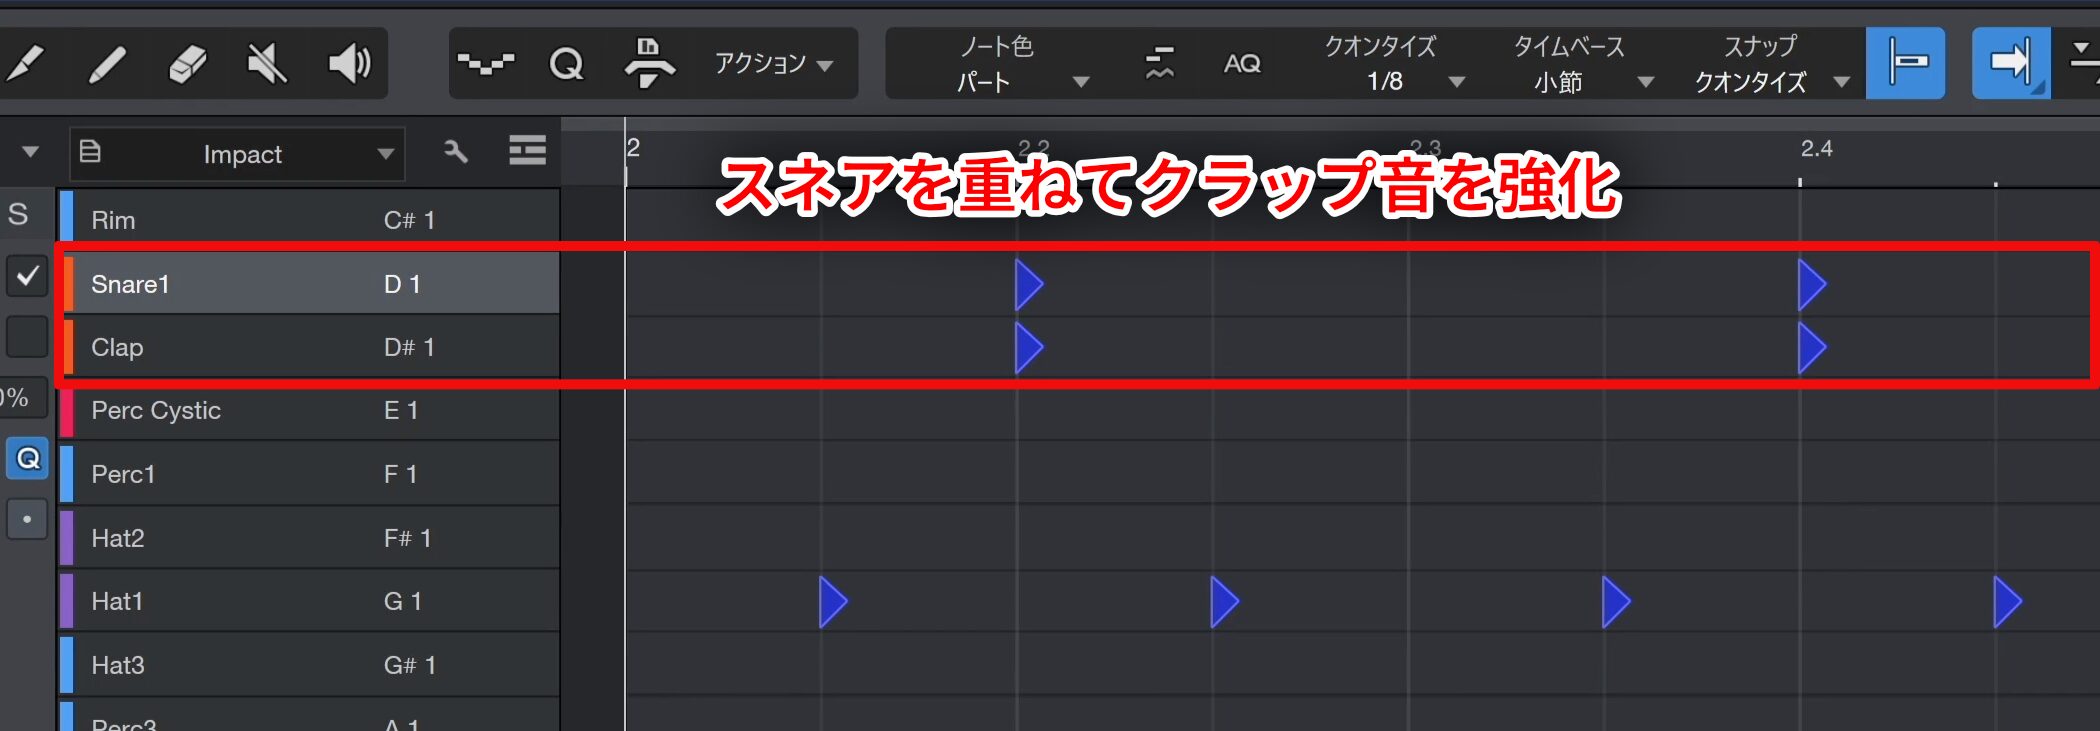
To reinforce the clap, try layering a snare at the same time.
Adjust the volume balance as needed when layering sounds.
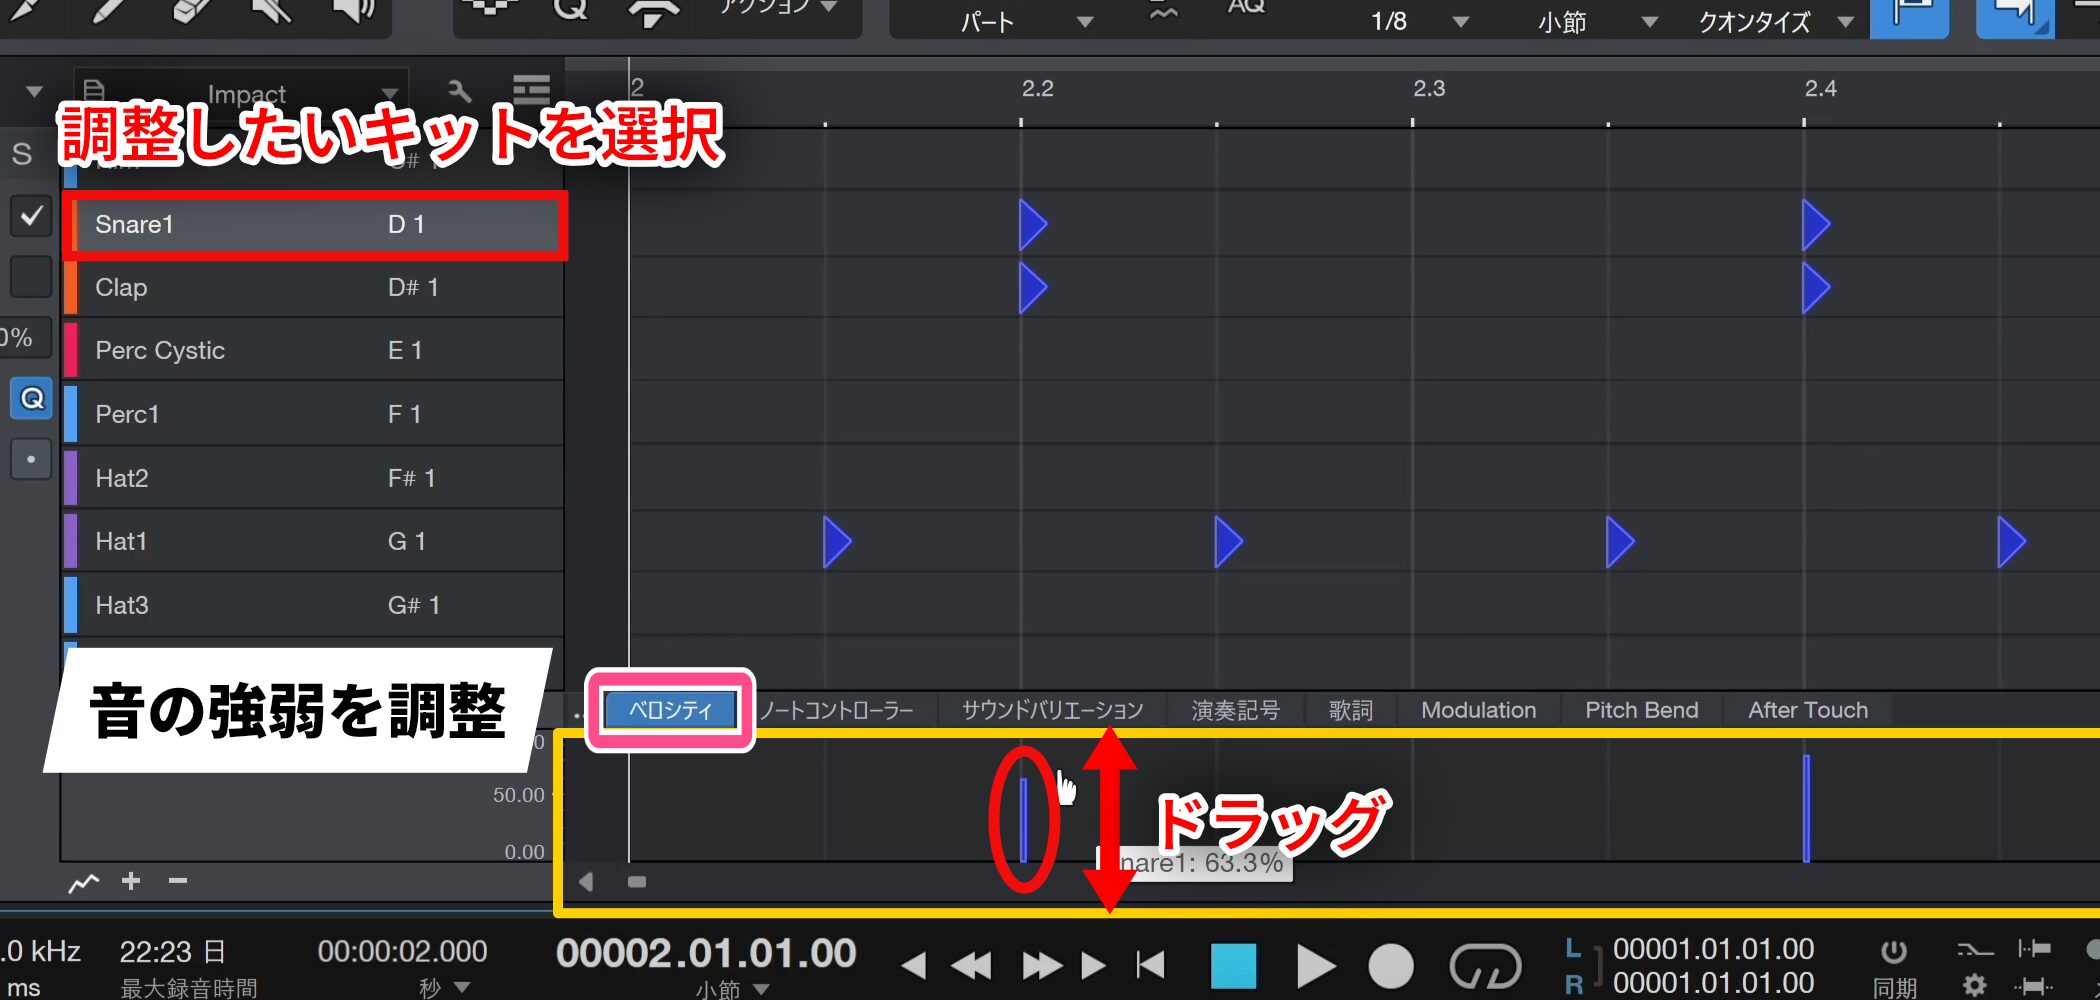
Use velocity to control how strongly a sound is played.
Select the kit sound you want to adjust and drag the displayed bars to change the strength.
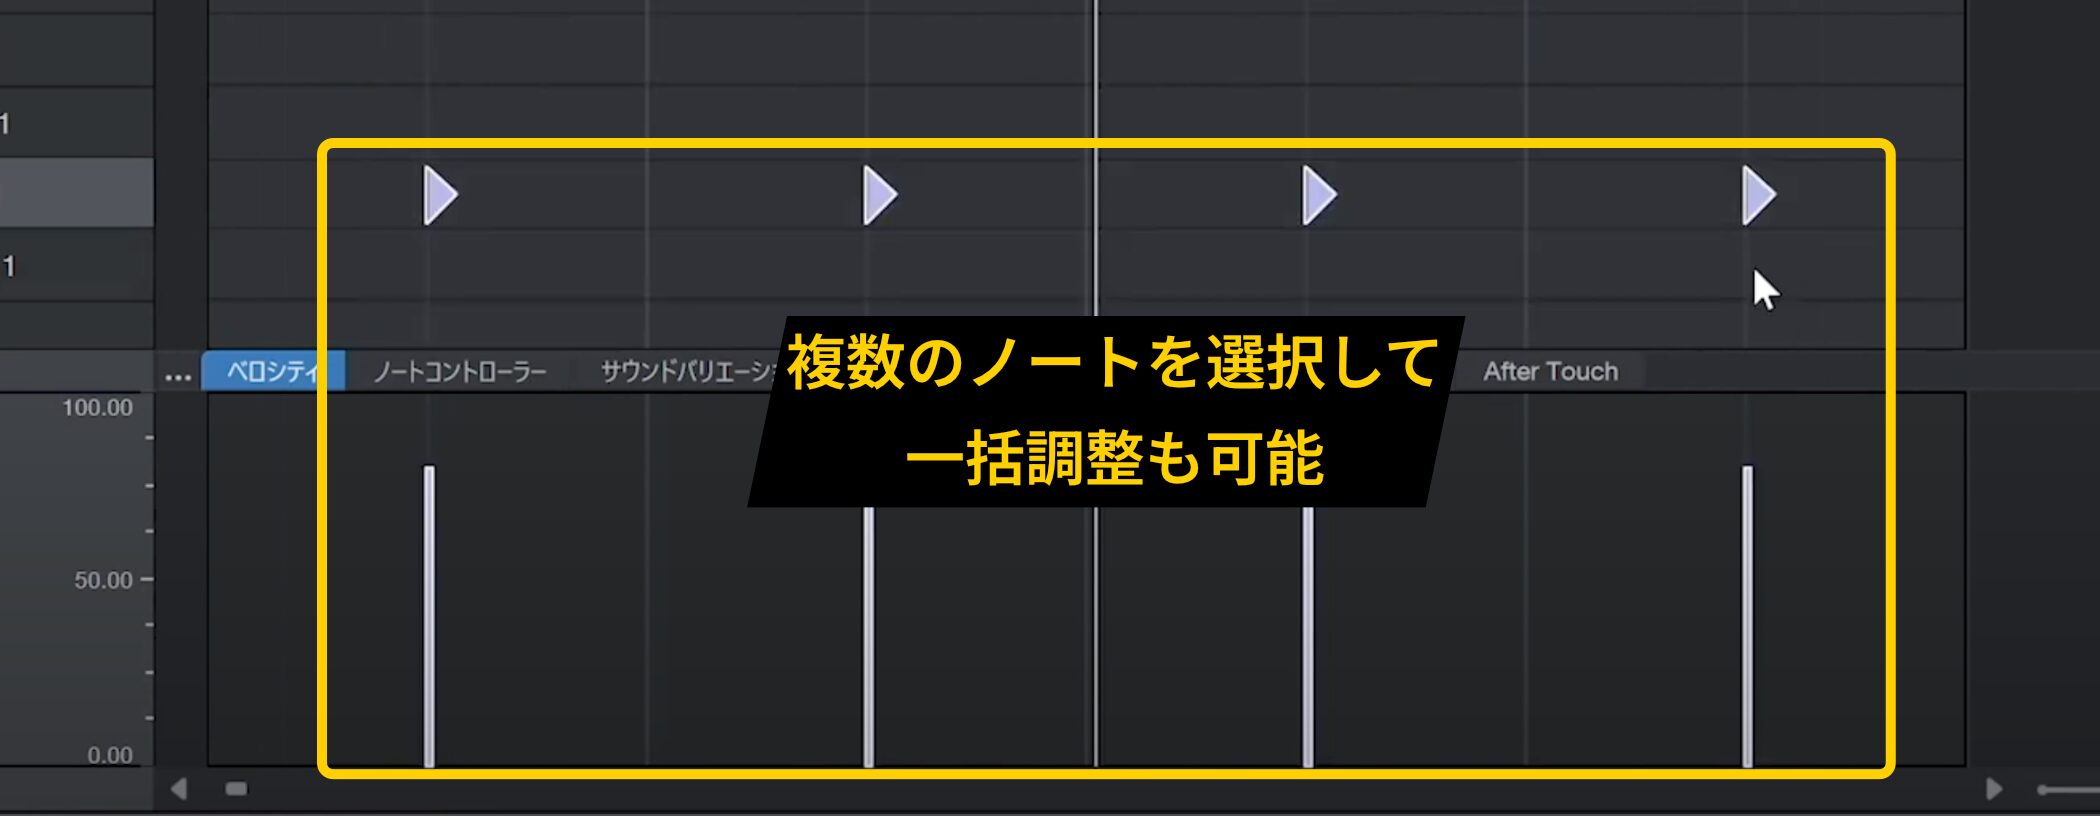
You can also select multiple notes and adjust their velocities together.
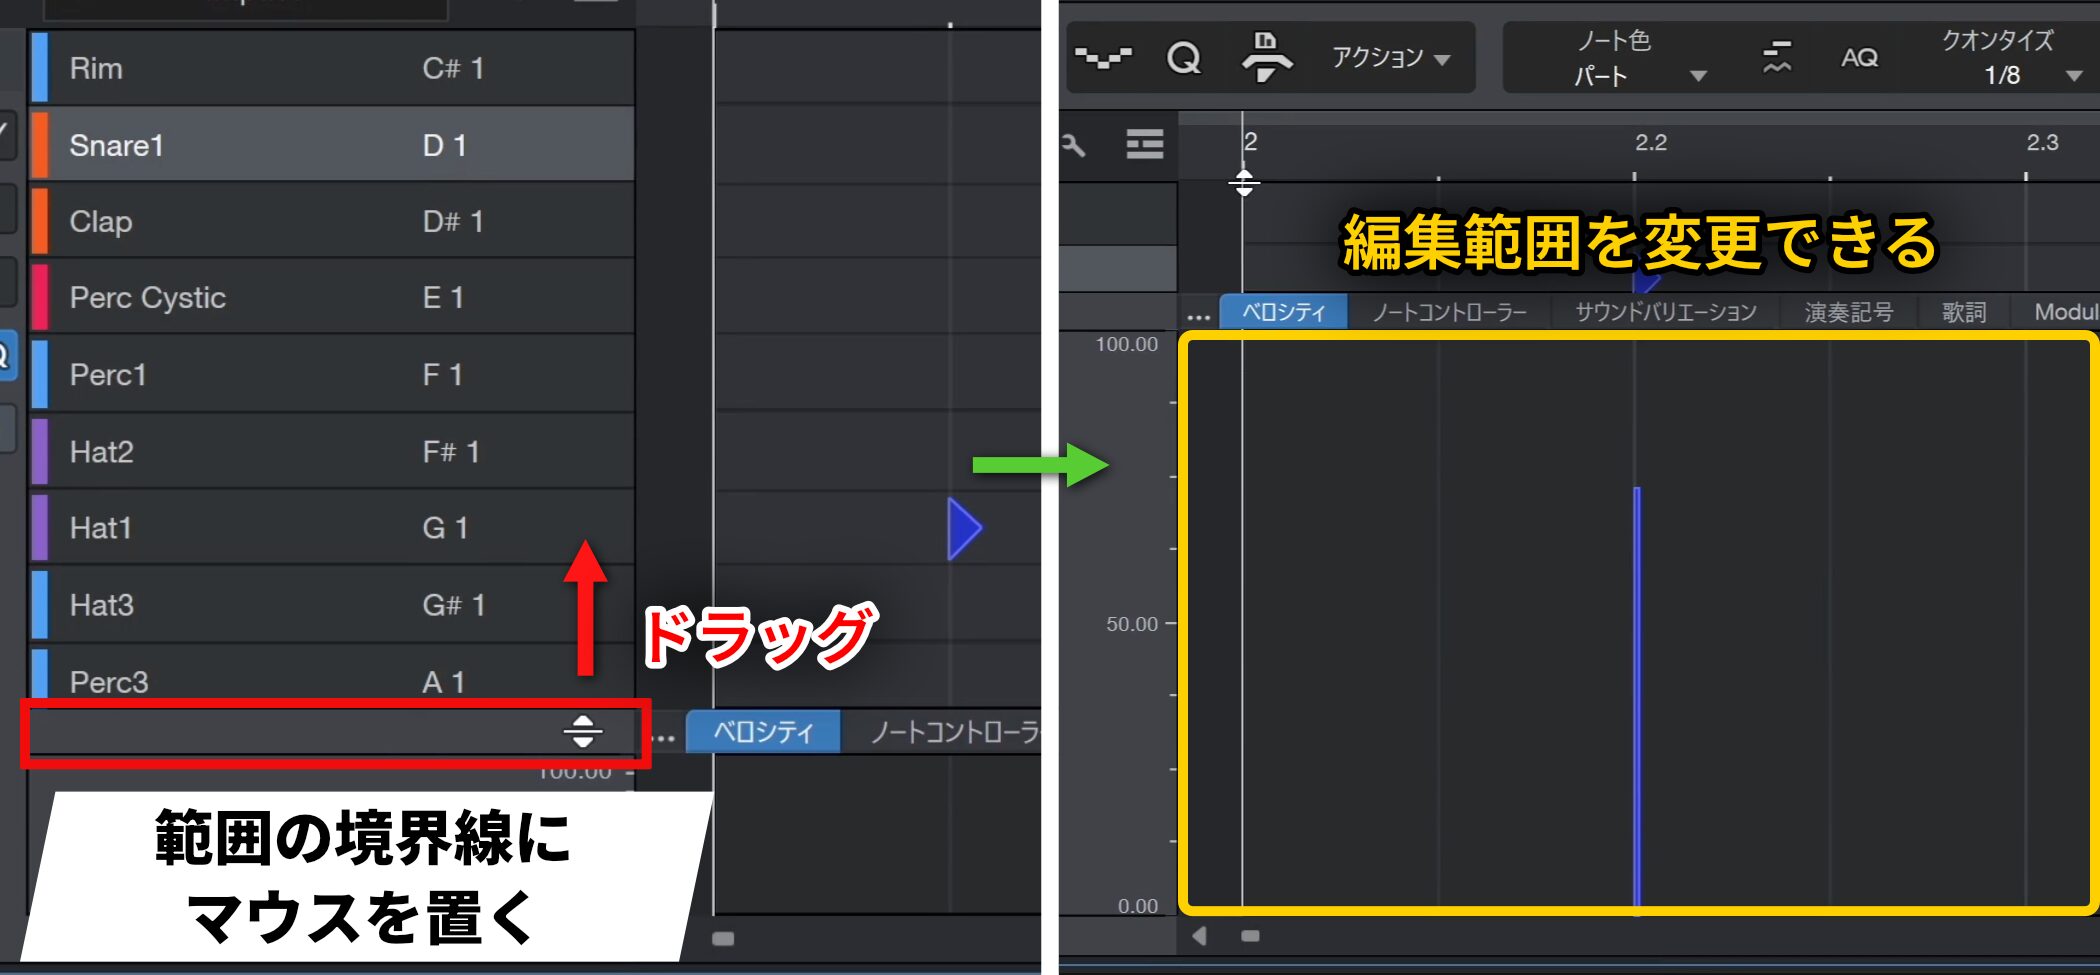
If the editing area is too small, place the cursor on its boundary and drag vertically to enlarge it.
You can adjust the size of the editor window in the same way.
Efficient Editing with Looping
Looping is useful for detailed work such as velocity adjustments.
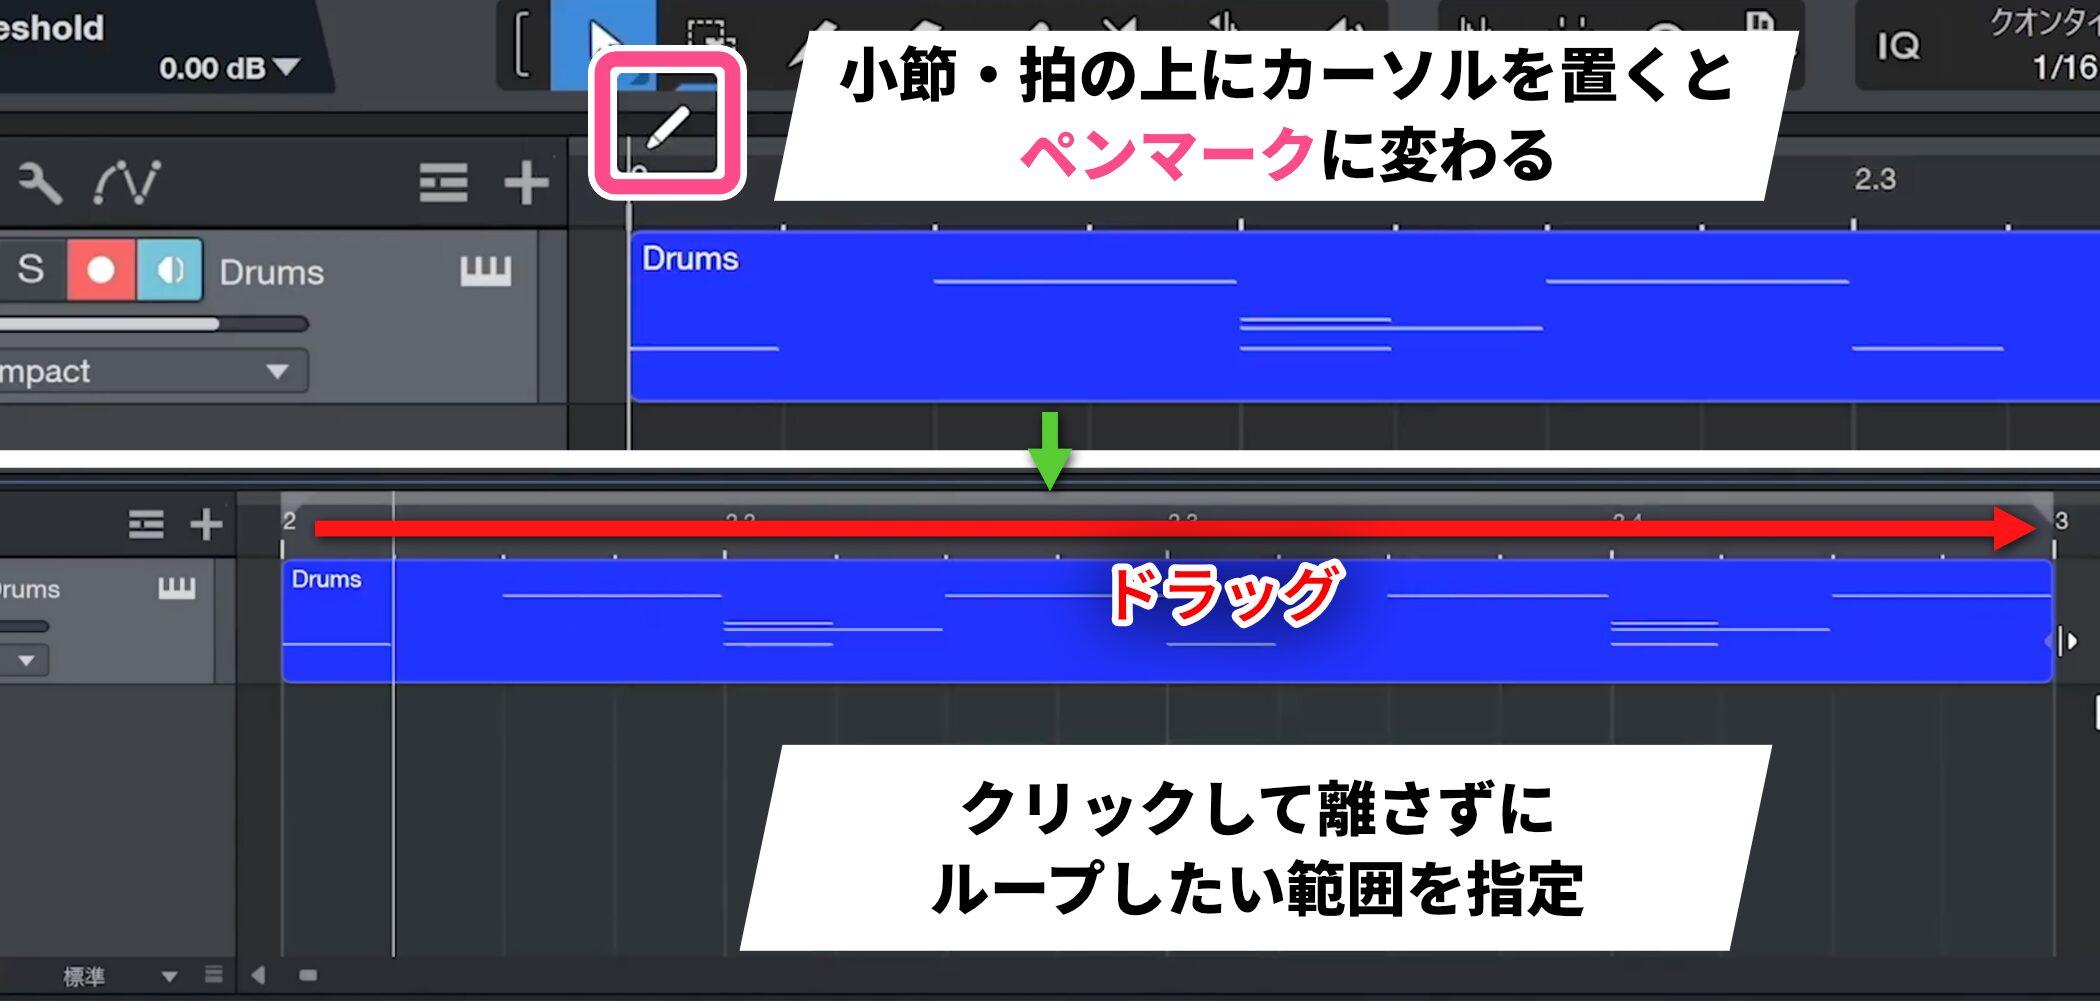
First, move the cursor over the bars and beats you want to loop. When it becomes a pencil, click and drag to specify the range.
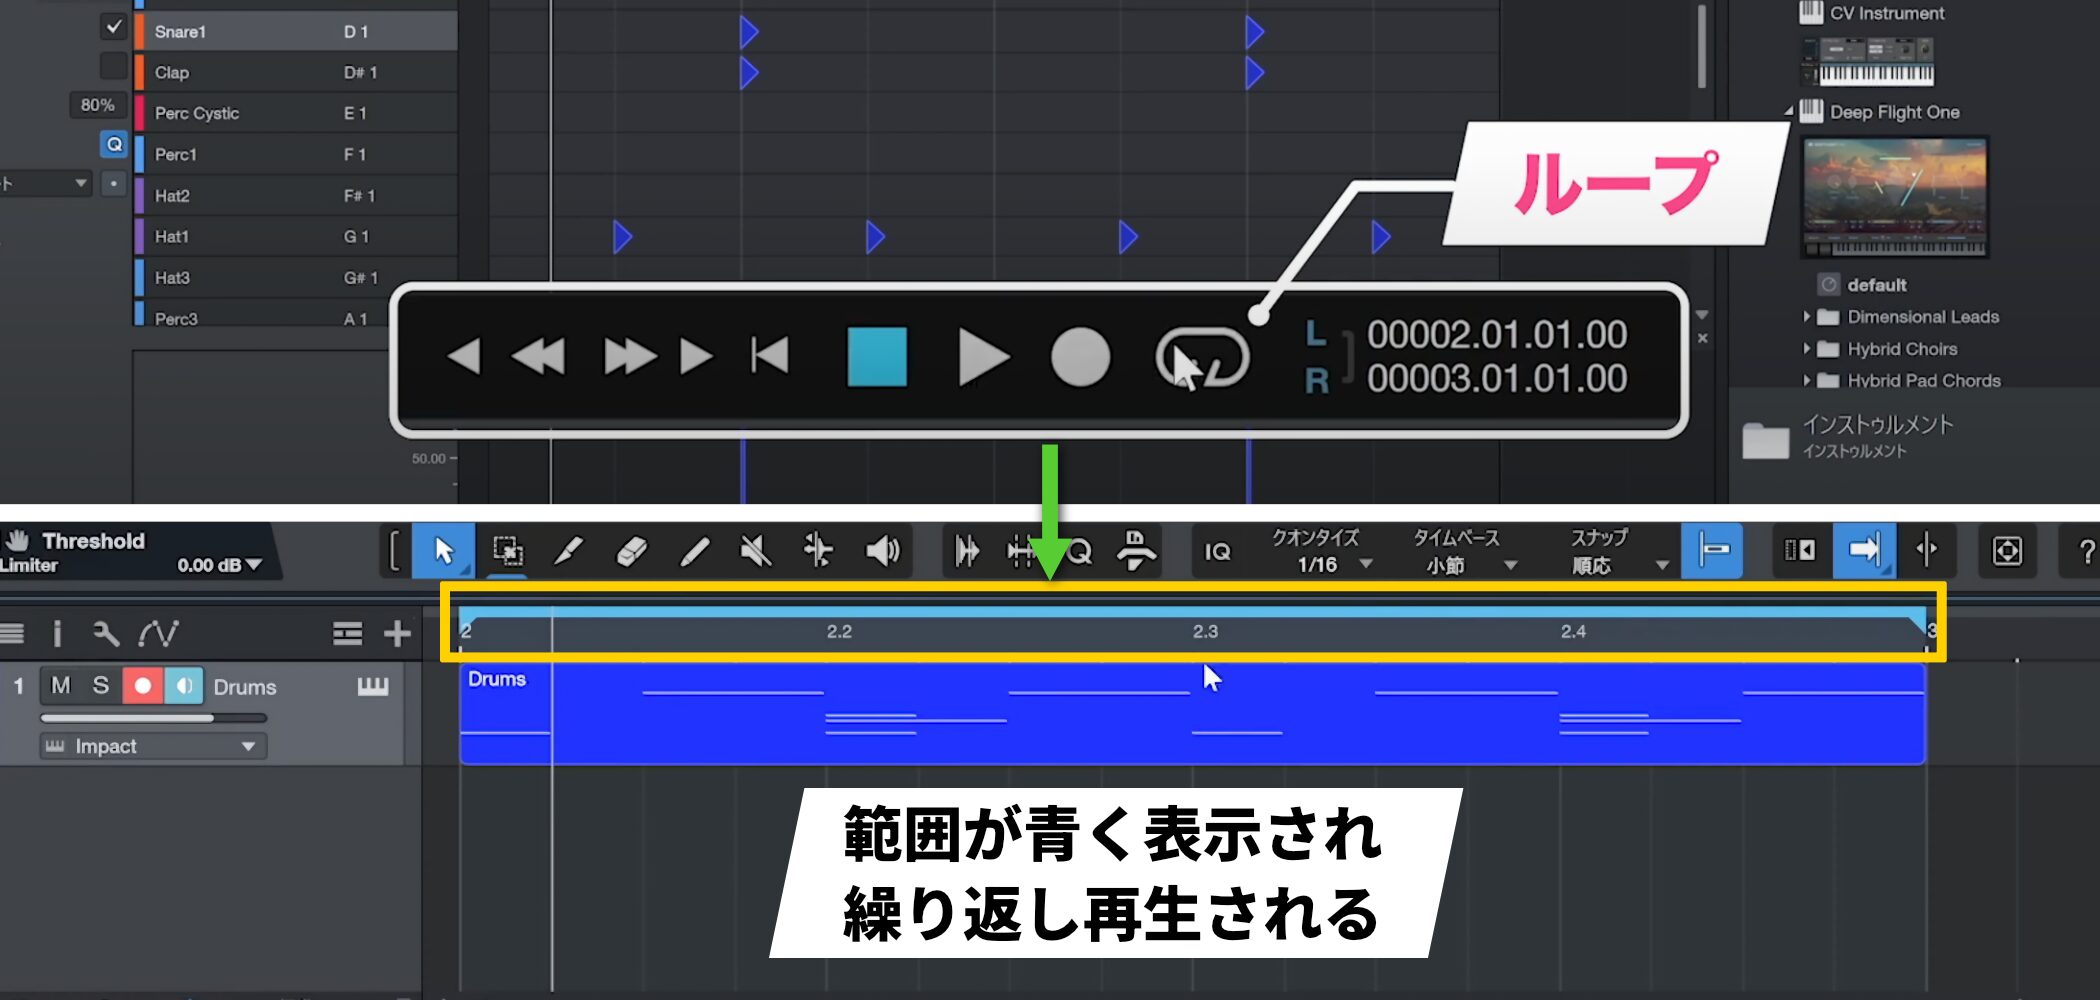
Enable the Loop button immediately to the right of Play.
The range turns blue, and the selected section plays repeatedly.
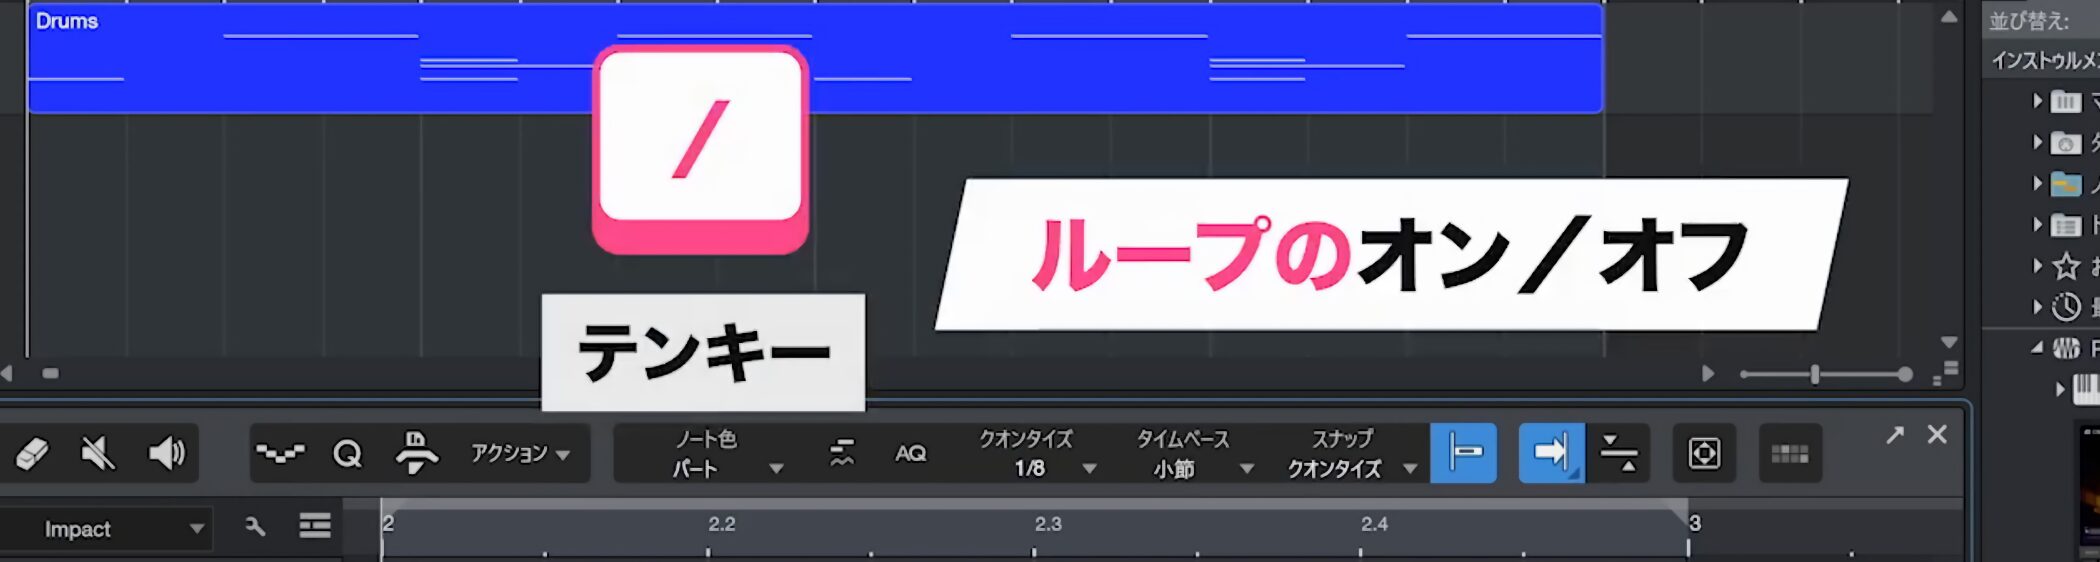
You can also toggle Loop quickly with the slash key on the numeric keypad.
Adjusting Tempo
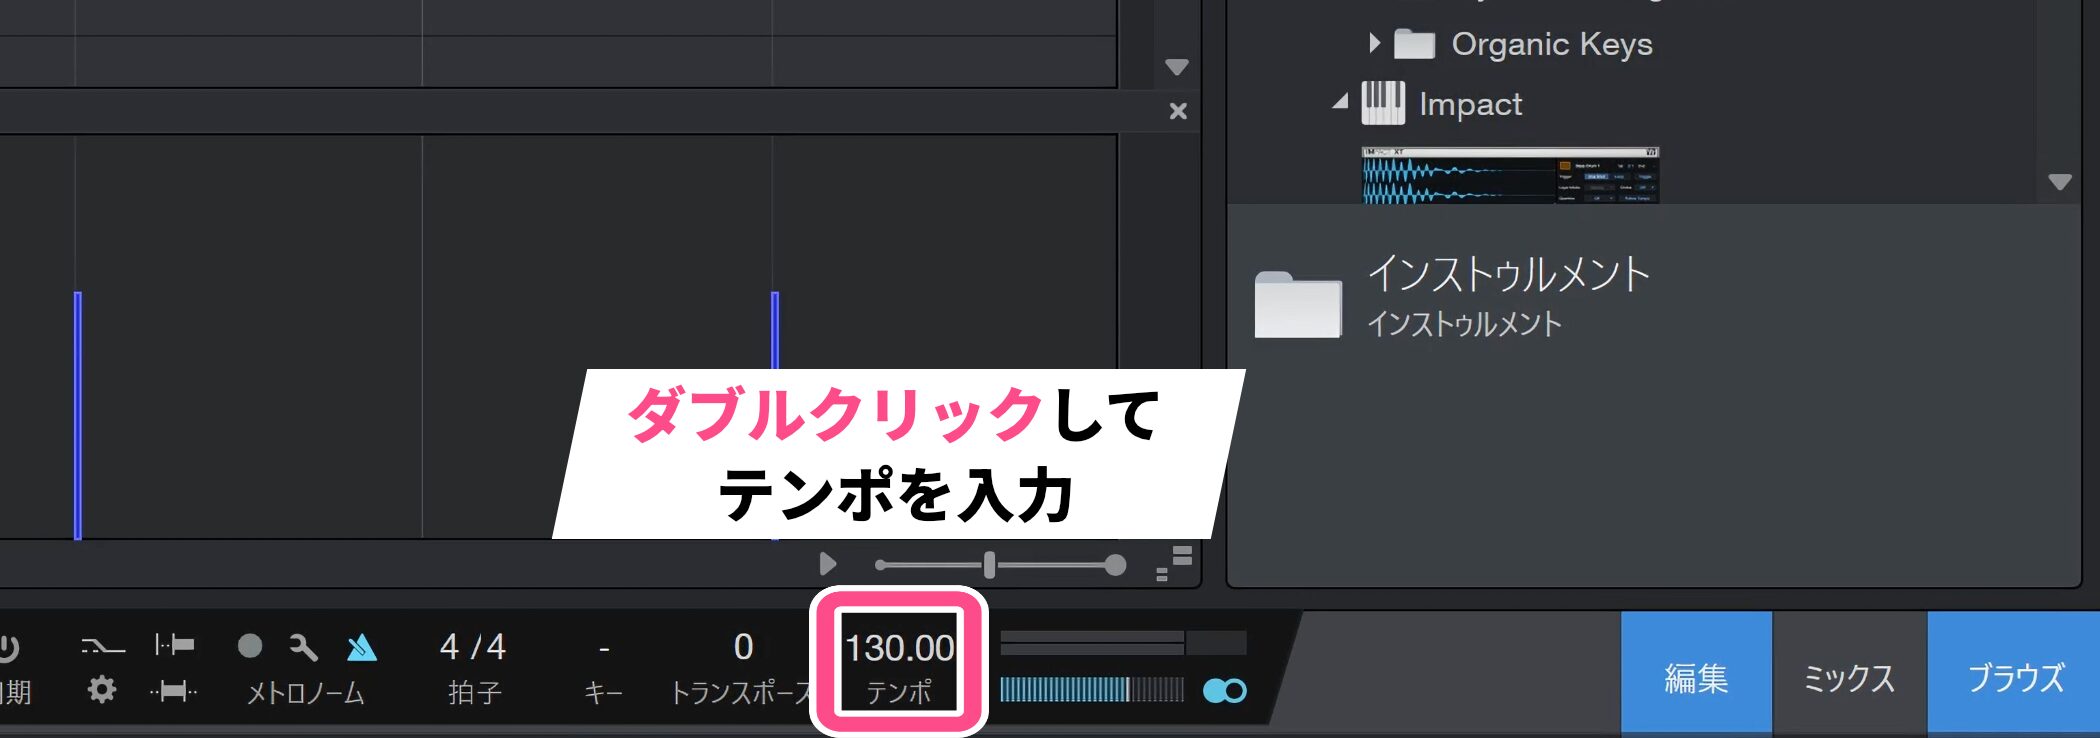
To change tempo, double-click the tempo display at the bottom of the screen and enter the desired value.
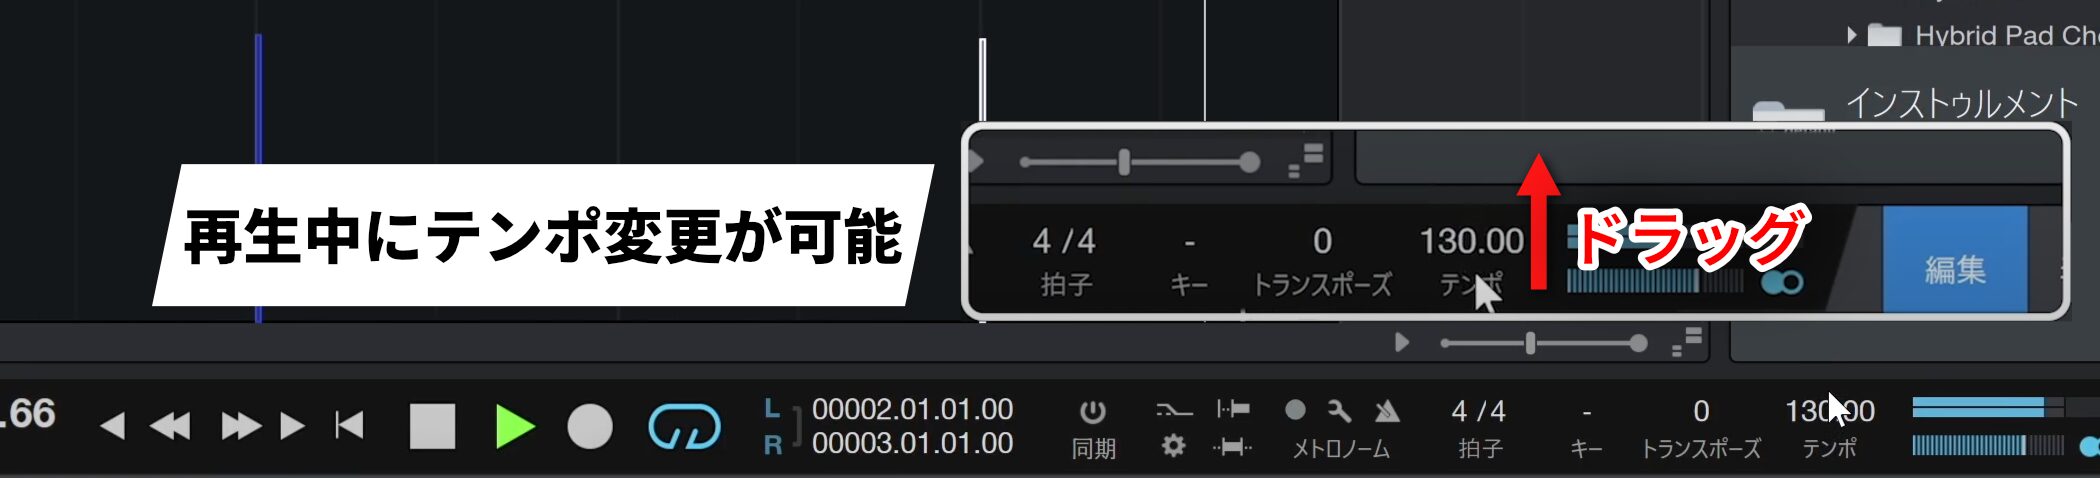
For a more intuitive adjustment, drag the tempo value during playback to change the tempo in real time while listening.
Changing Sounds
A major advantage of MIDI input is that you can freely replace sounds later.
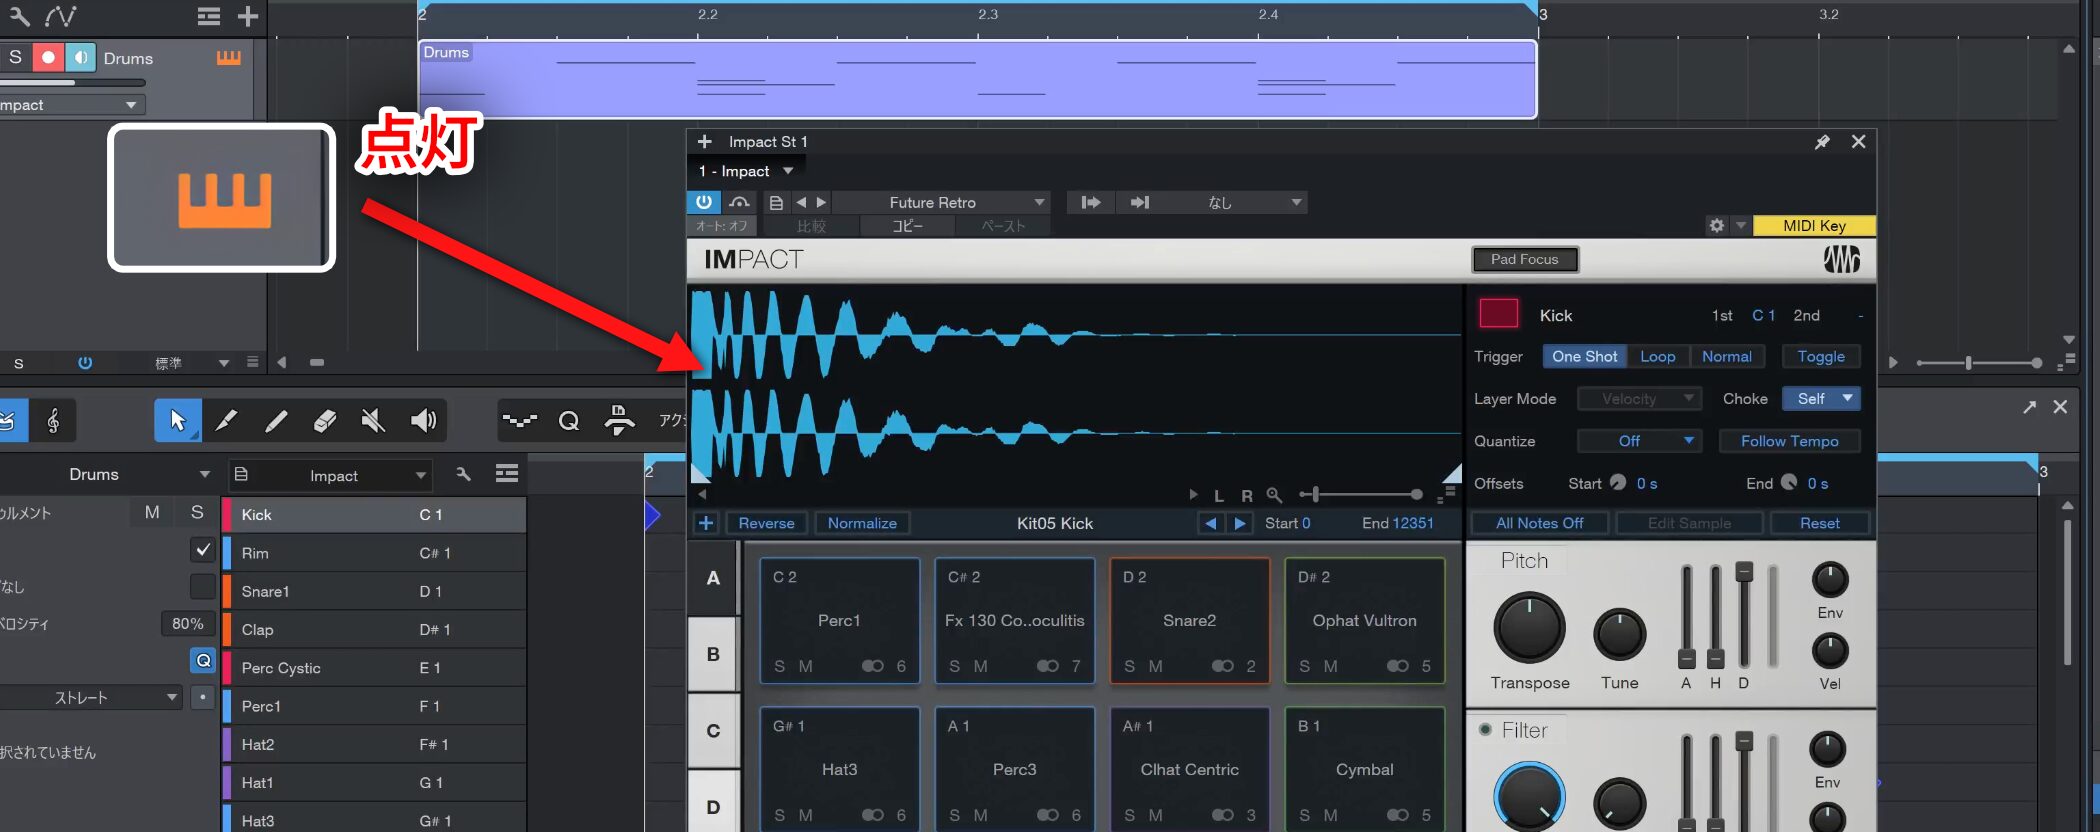
To change a sound, open the instrument using the keyboard icon.
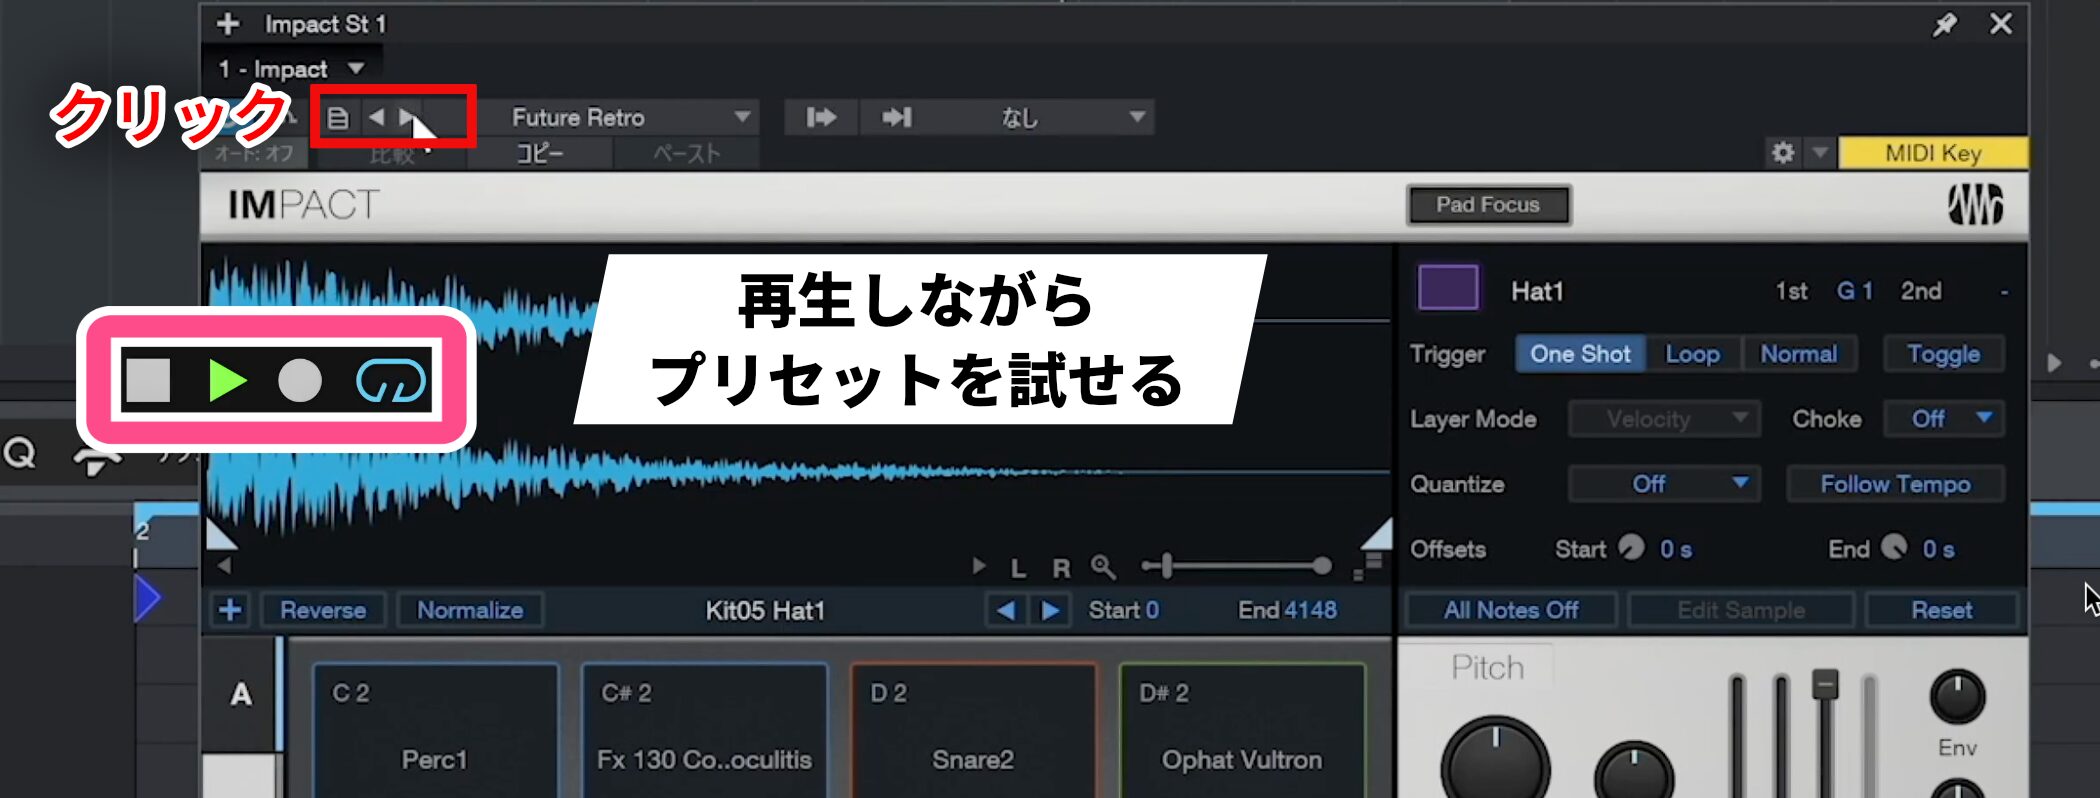
During playback, click the ◀︎ or ▶︎ buttons next to the preset name to switch presets and audition sounds against the performance.
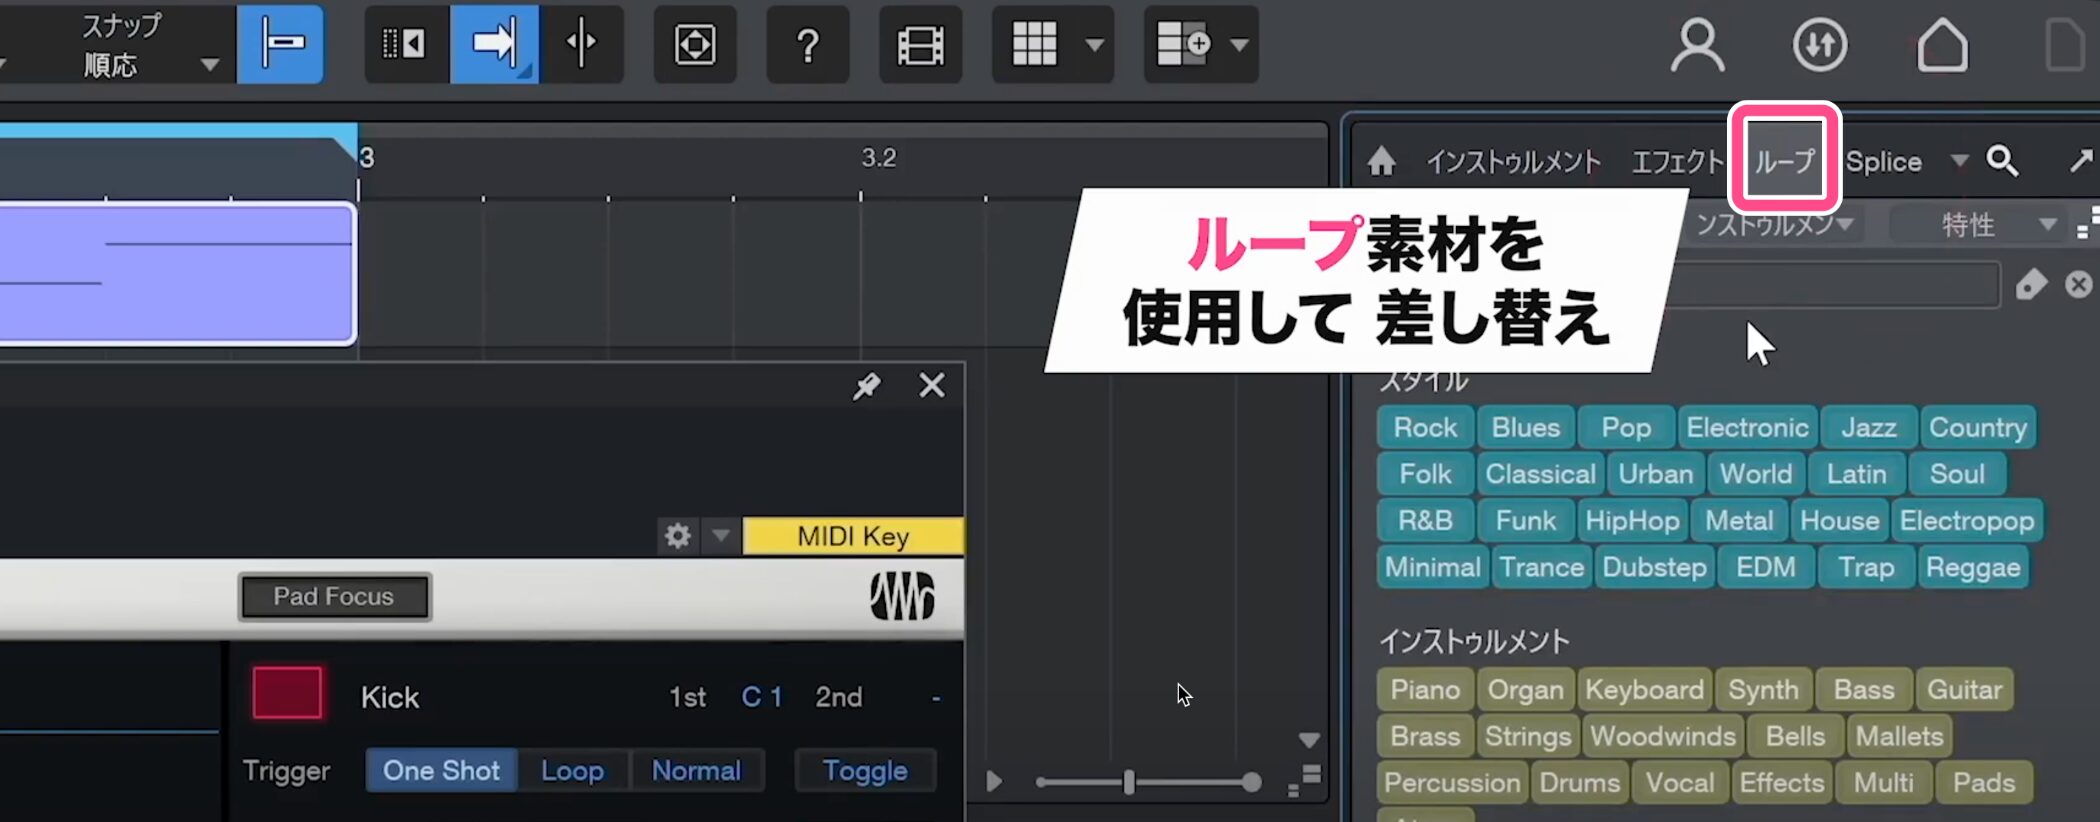
Replacing sounds using loop content is a convenient way to choose from a wide variety of sounds. Use tags to find what you need efficiently among the large collection.
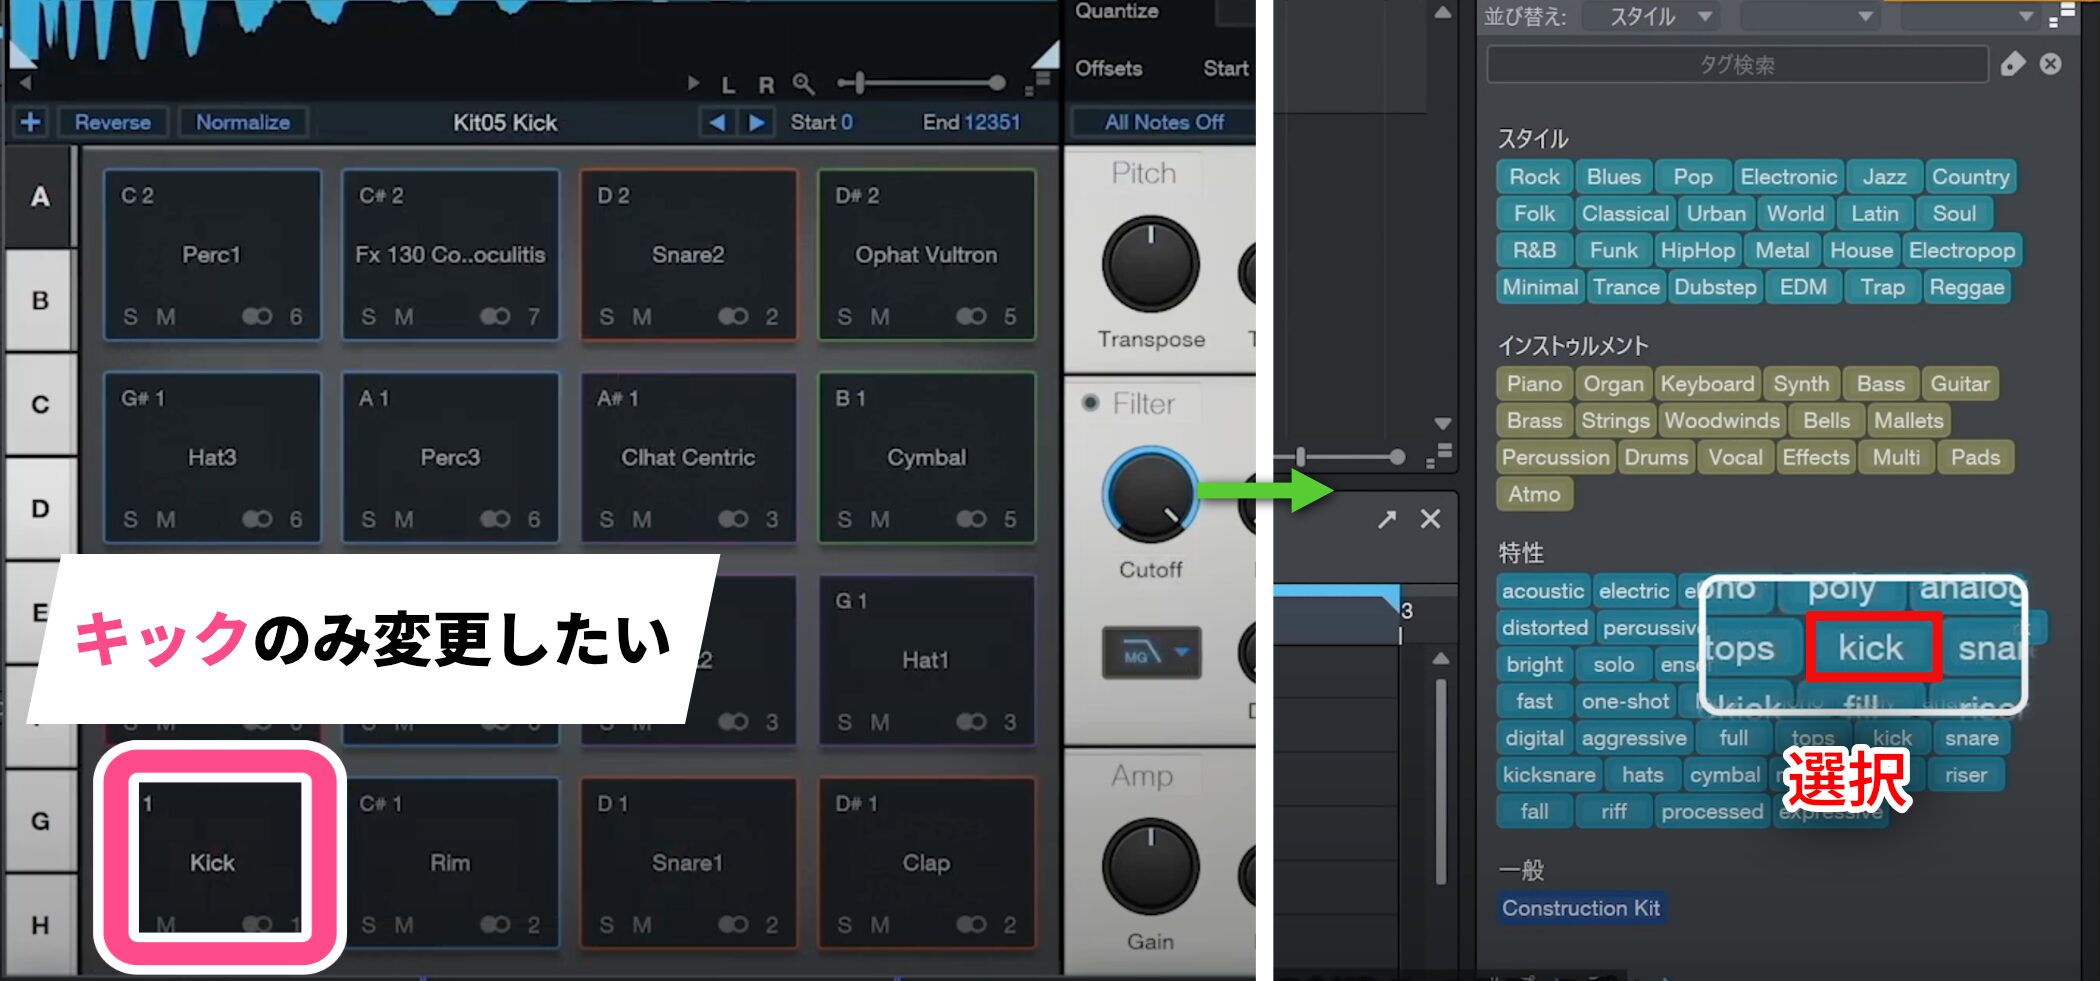
For example, select the “kick” tag when looking for a kick sound.
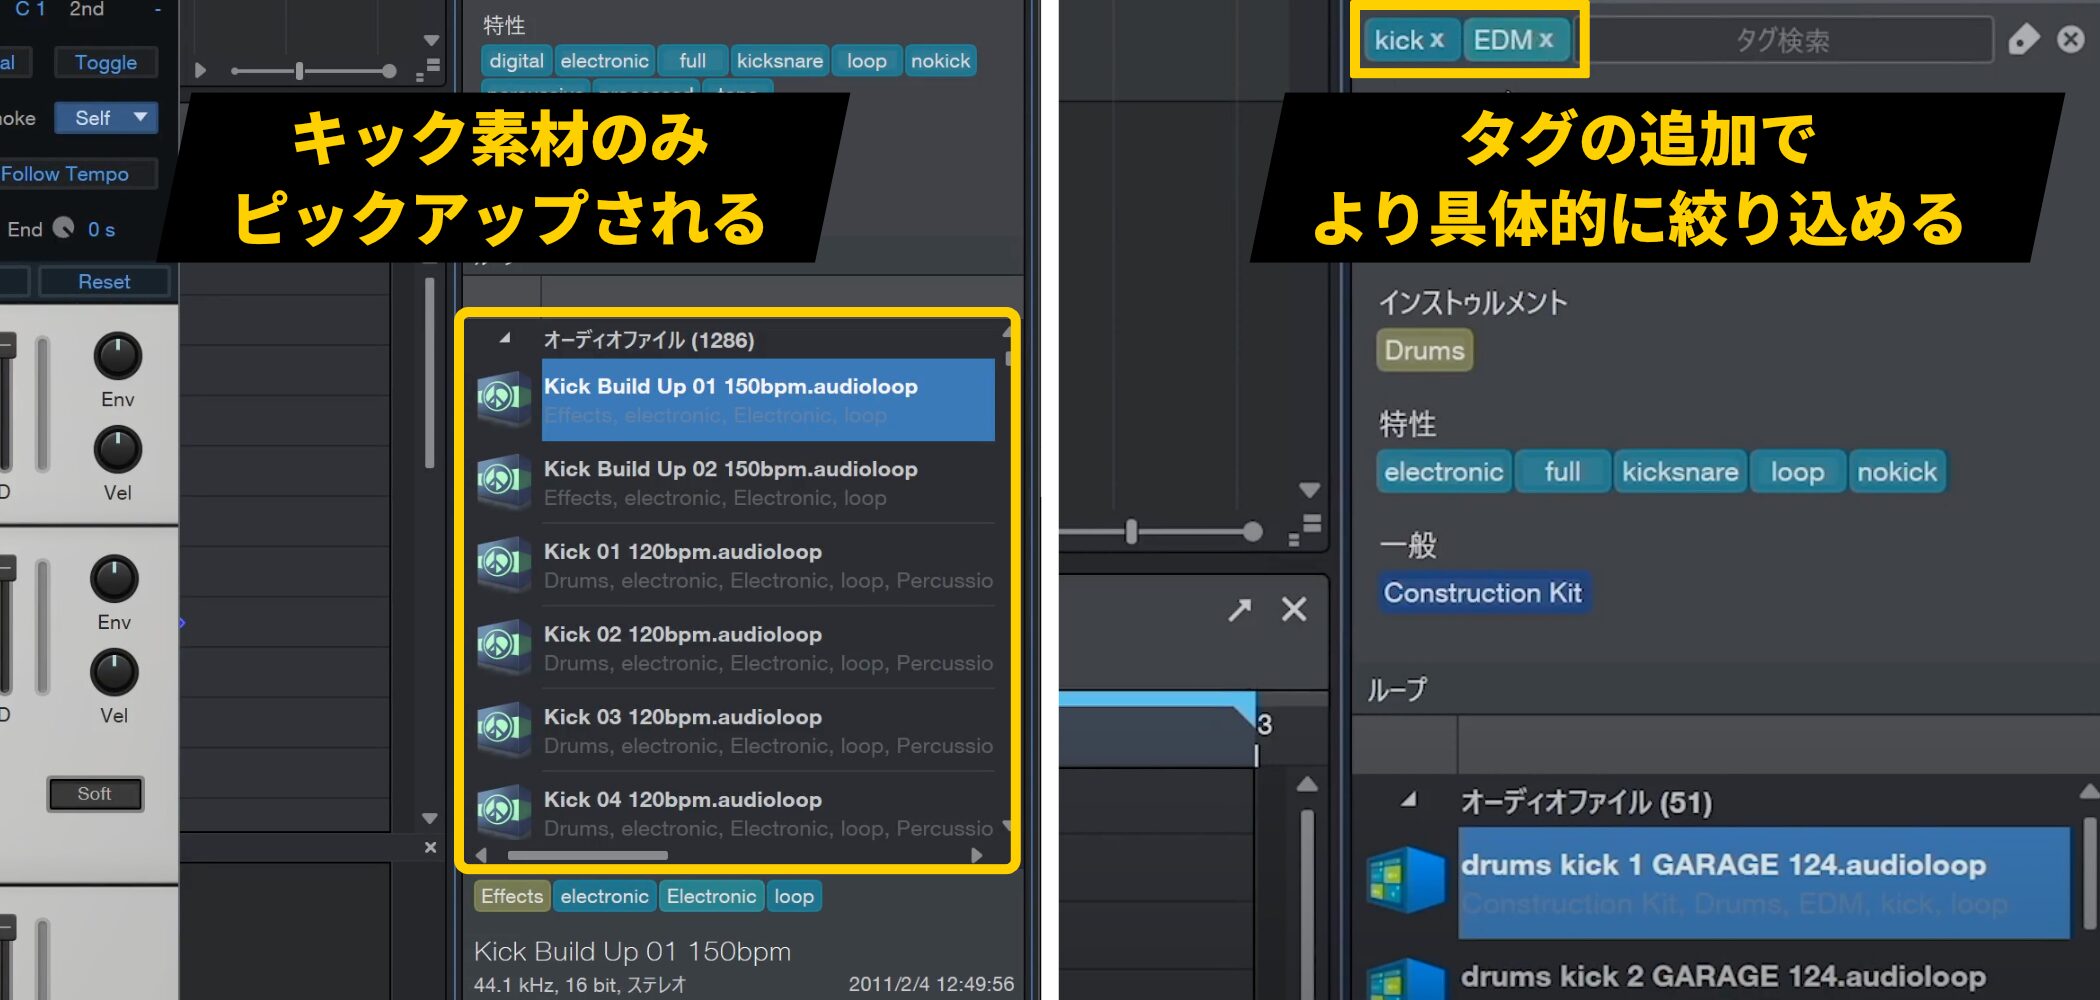
Only kick content will be shown.
Add another tag such as “EDM” to narrow the results with multiple tags and find a more specific sound.
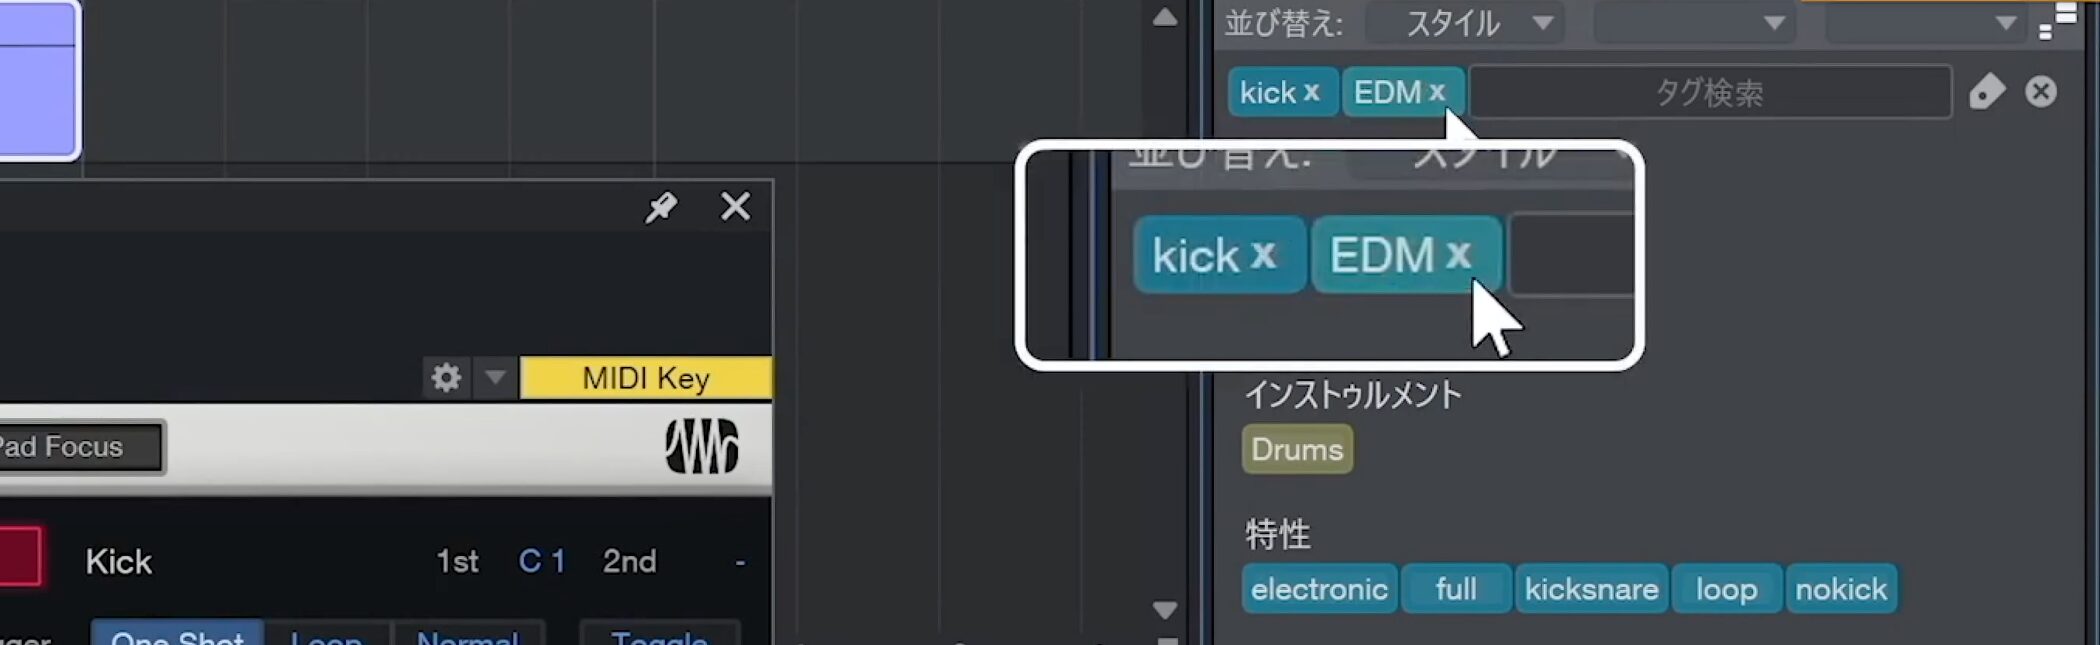
To remove a tag, click its ×.
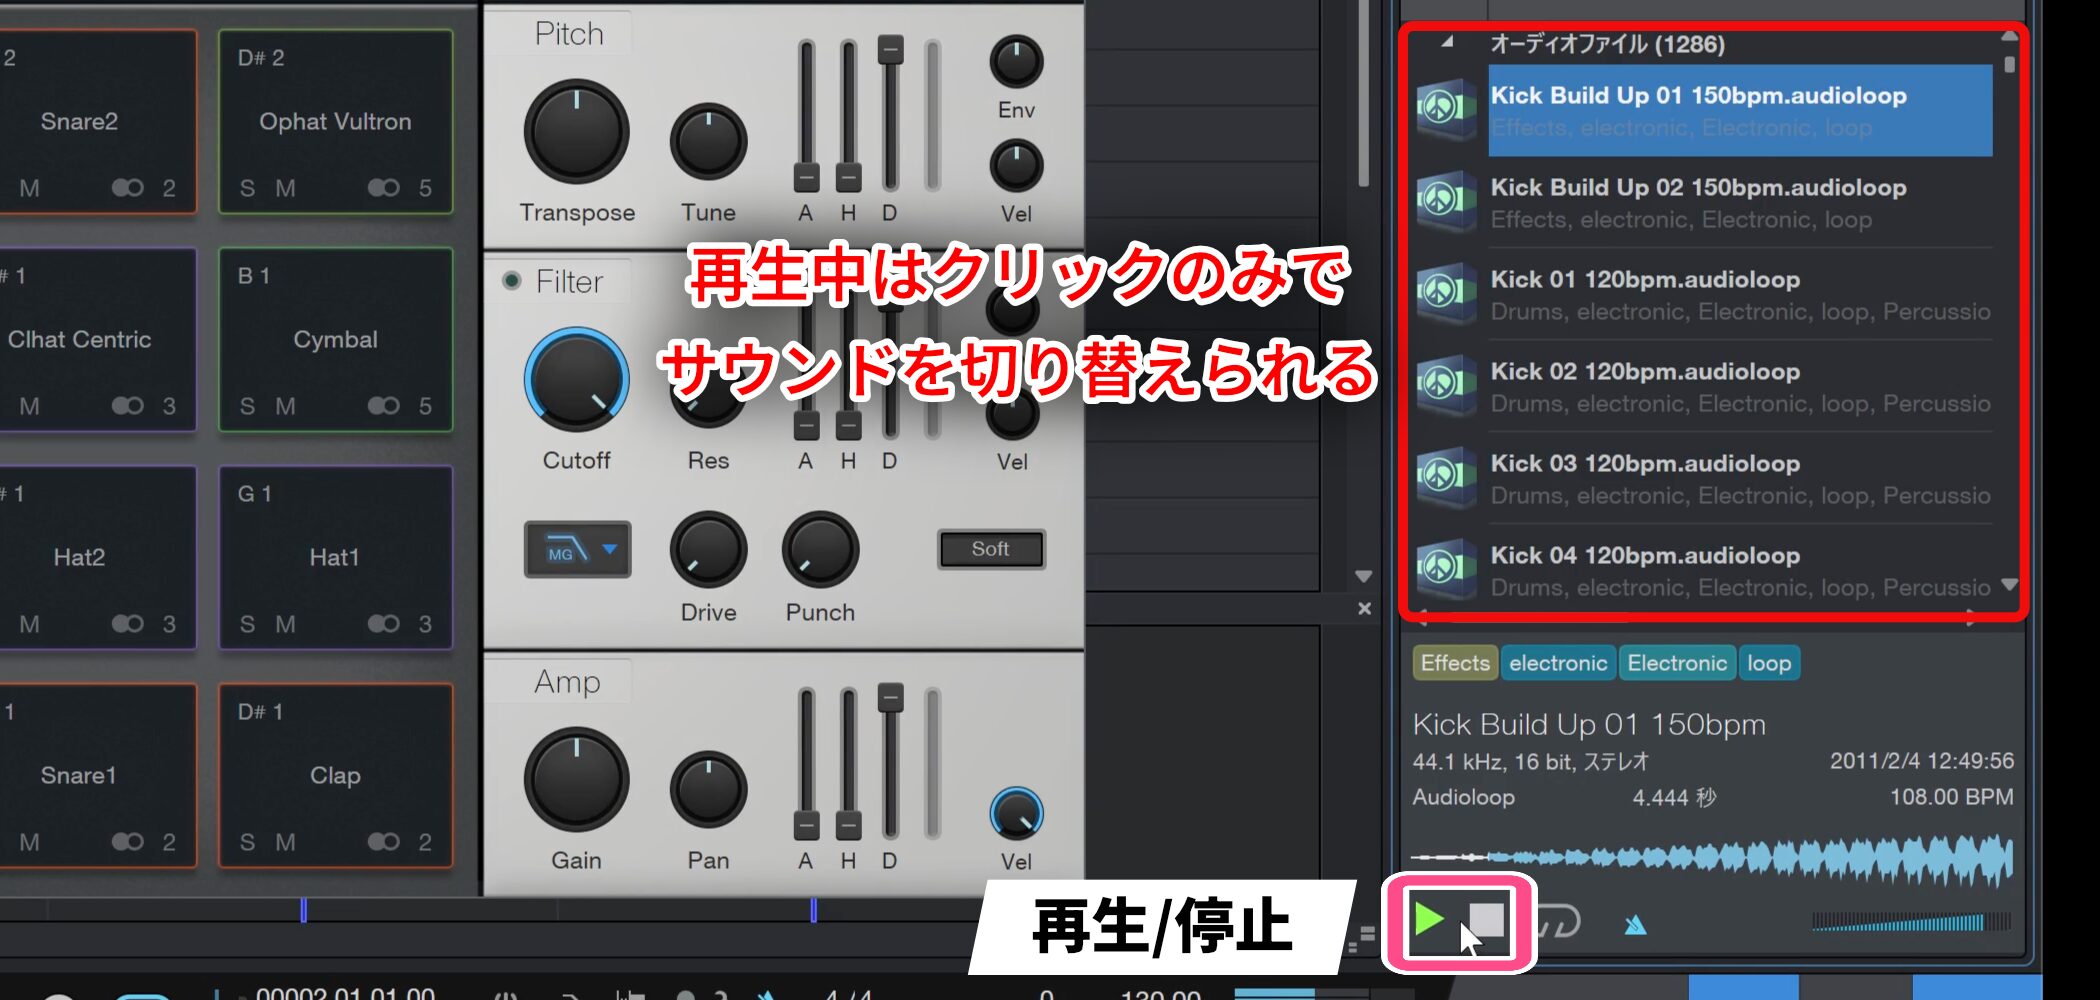
Click a result and use the Play button below to preview it.
While the Play button is active, you can audition successive sounds simply by clicking them.
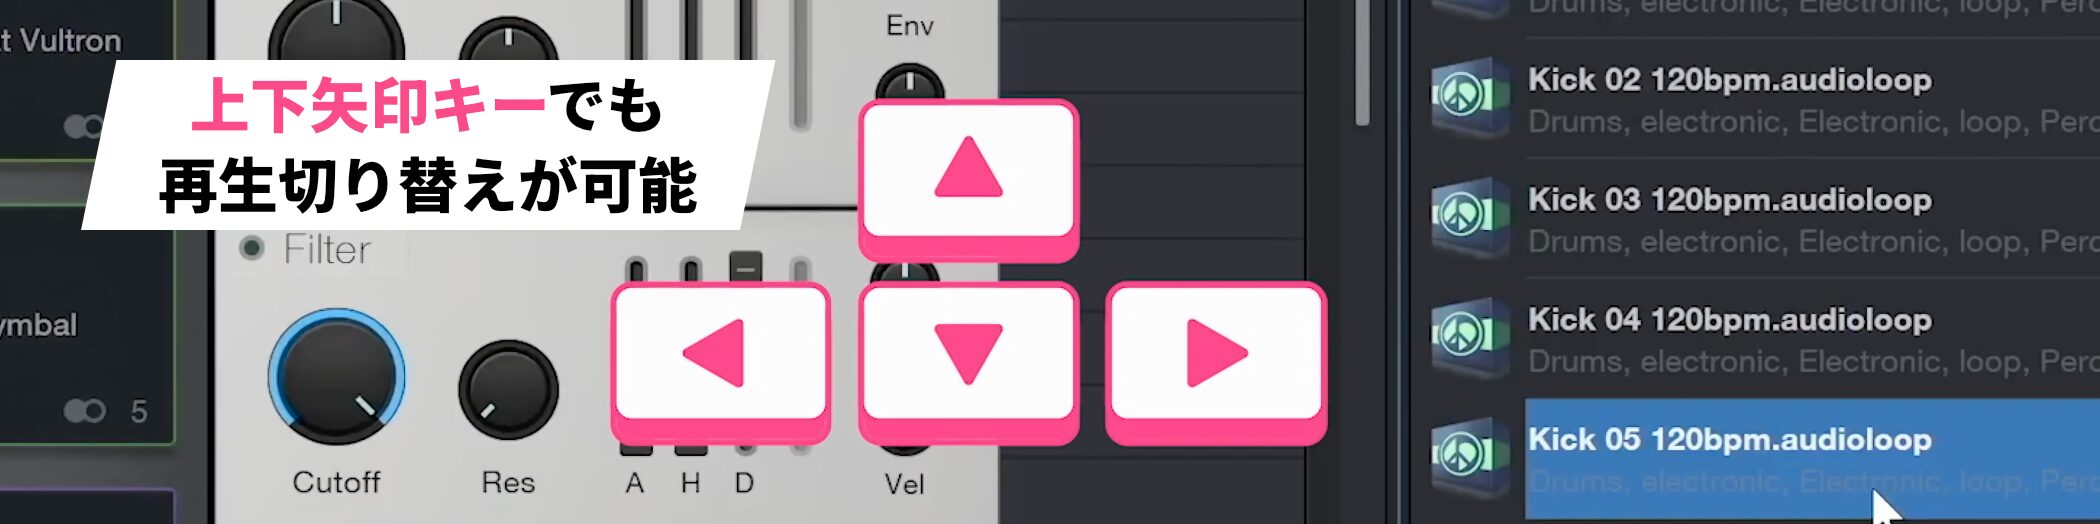
For an even faster workflow, use the up and down arrow keys to switch between sounds.
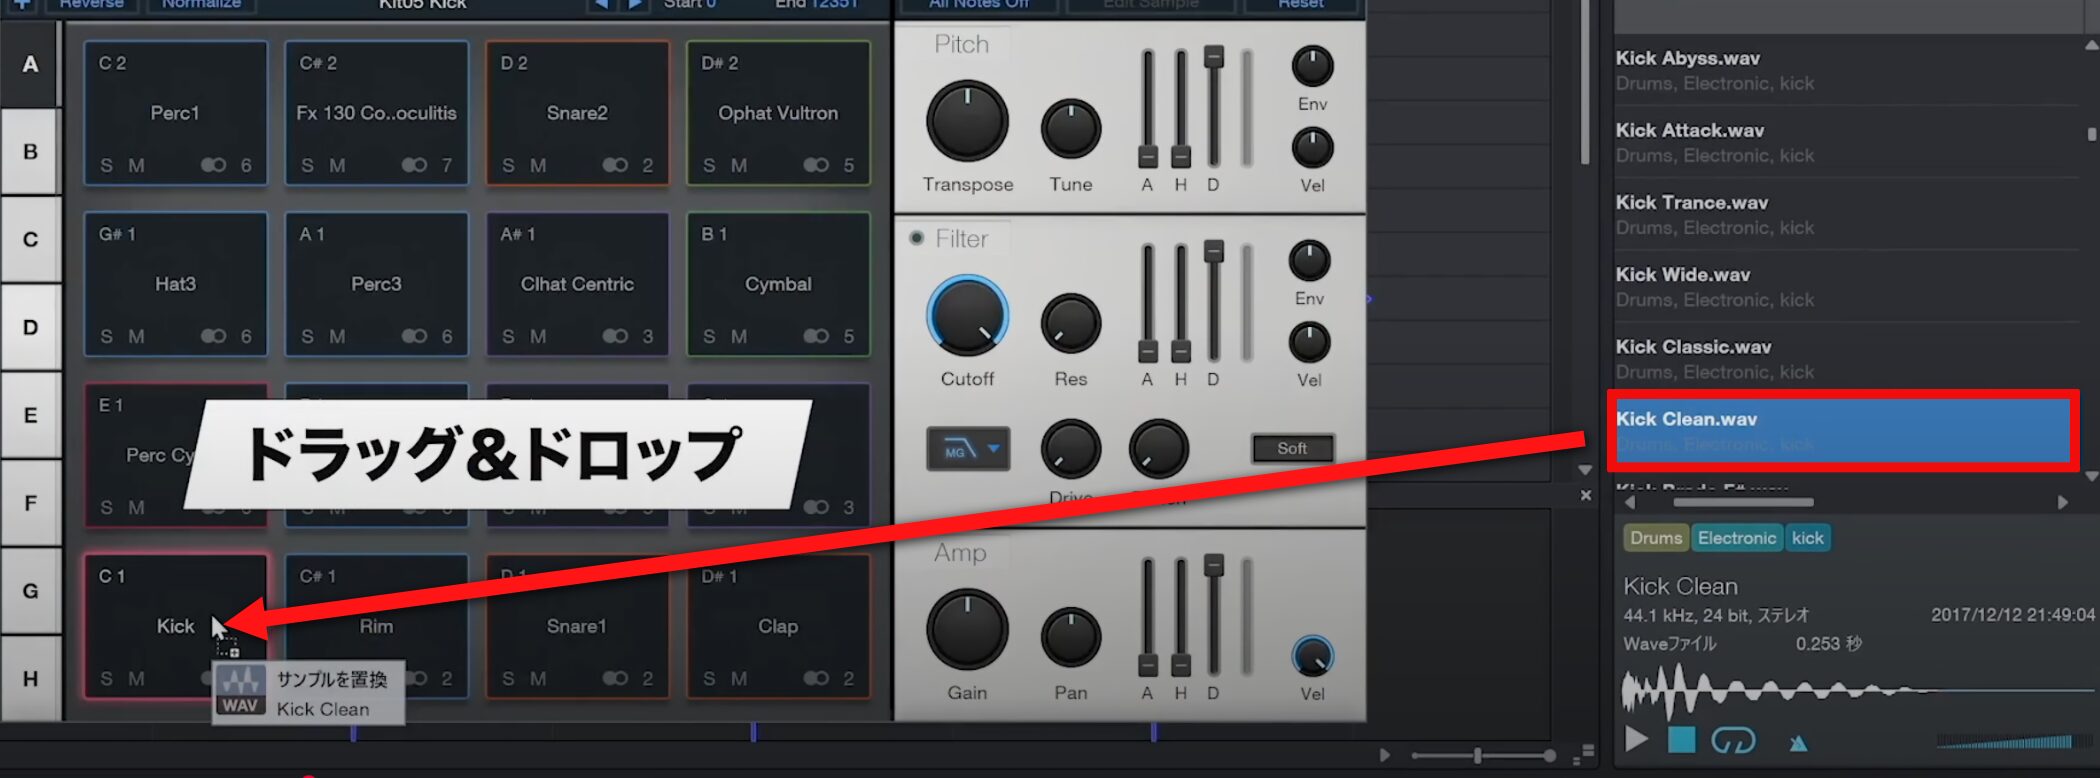
If you want an individual kick rather than a loop, scroll down the list to find individual sounds.
Once you have auditioned and found a sound you like, drag it onto the existing kick to replace only the kick.
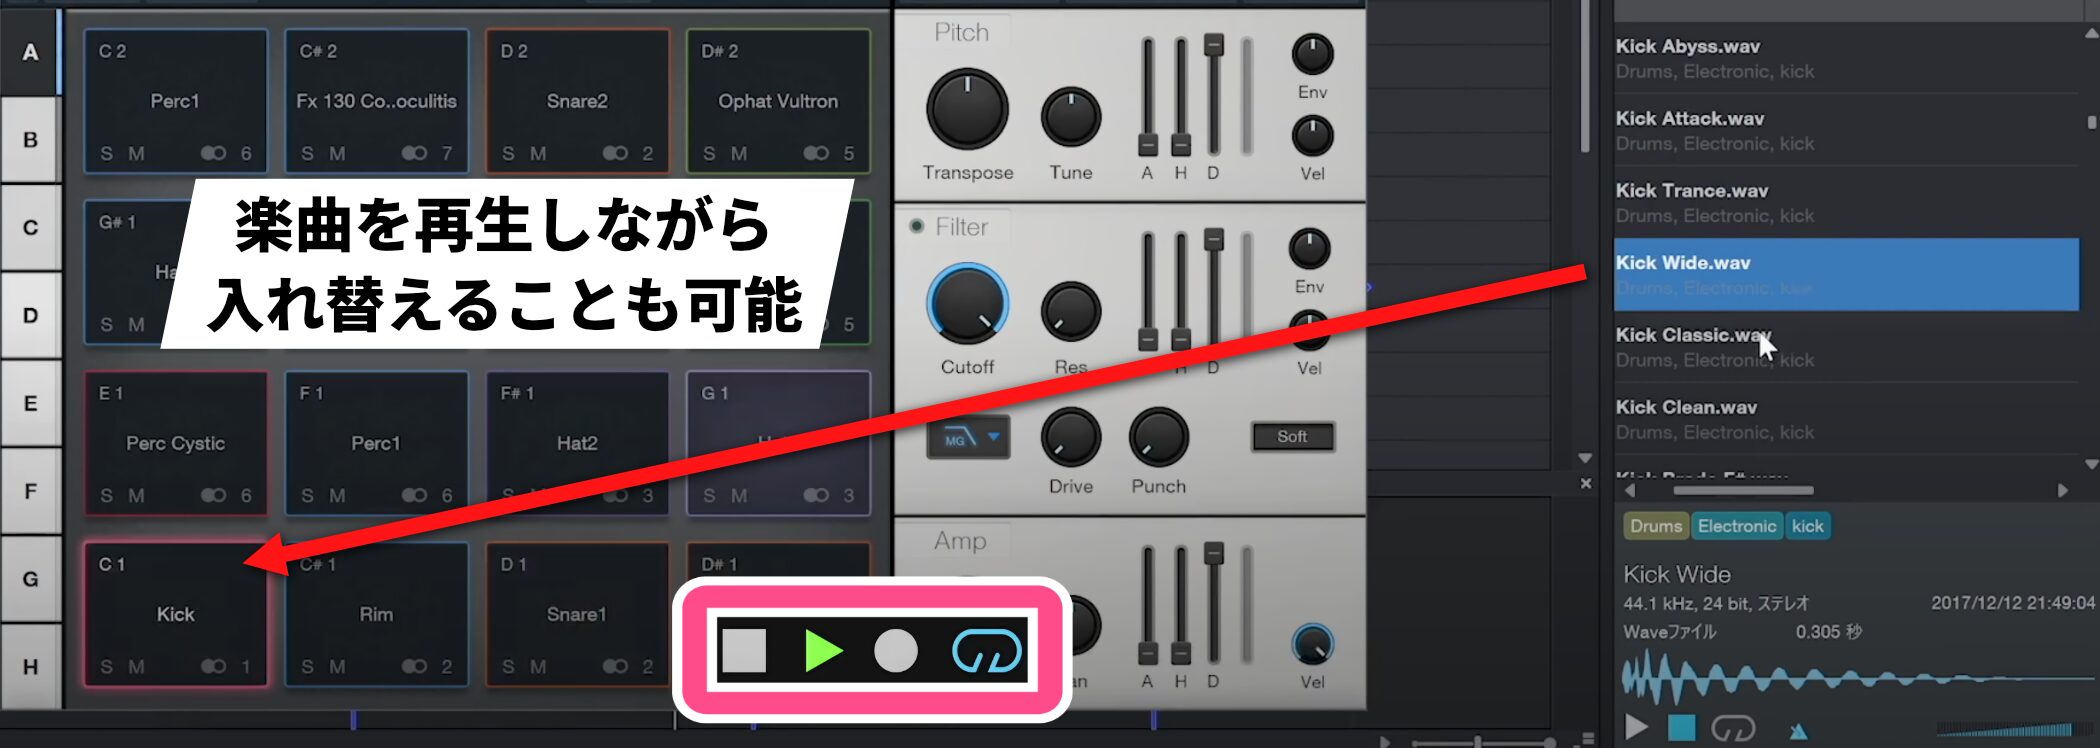
It is also useful to swap sounds and audition them while the song plays.
Listening in context with the rest of the kit helps you choose a more suitable sound.
Adding a Tops Loop
Once the basic pattern is complete, add a loop on another track to bring more energy to the groove.
One particularly useful type of loop is called “tops”.
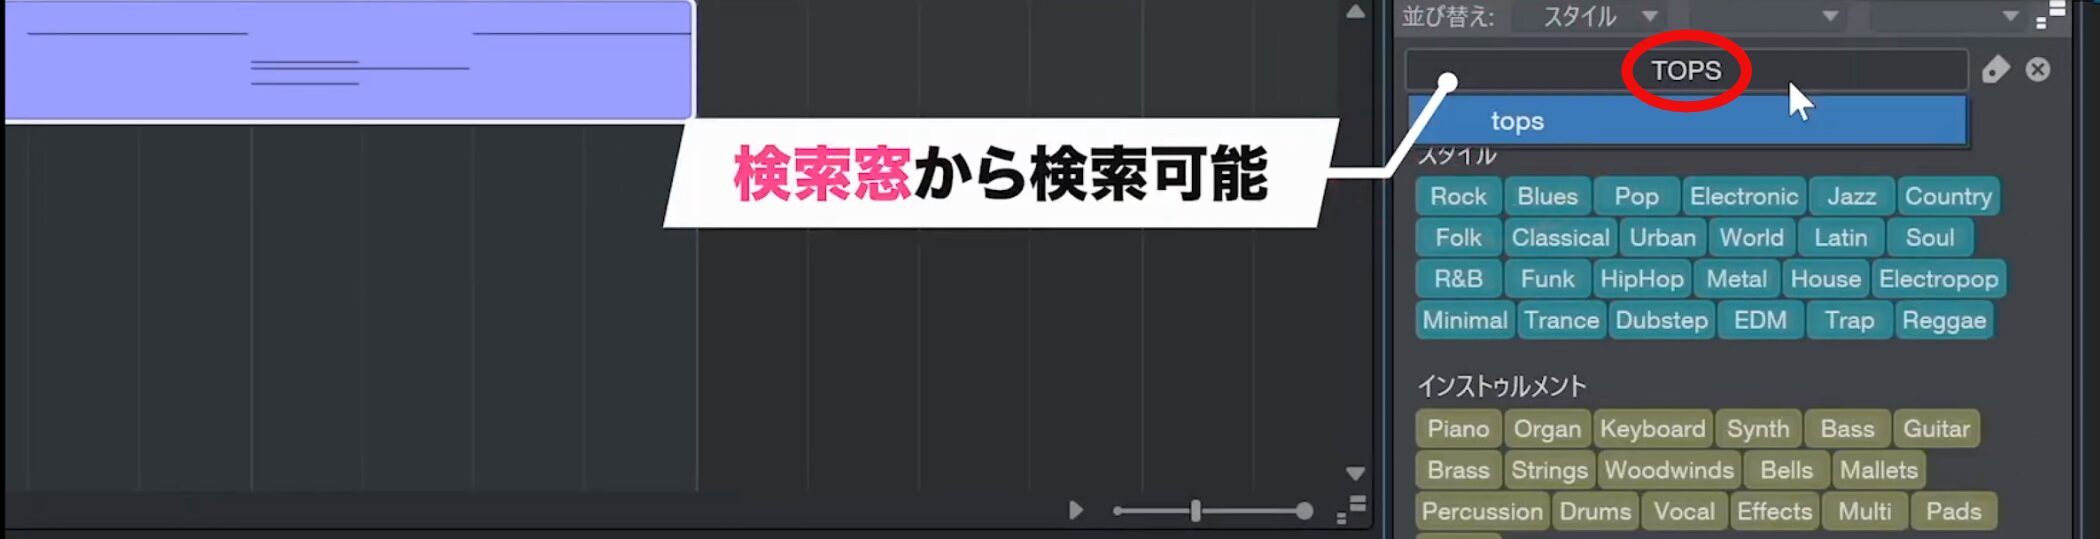
Clear all tags and search for “Tops” to narrow the results to related sounds.
These rhythmic sounds focus on the mid and high frequencies and help create the song’s groove.
It is easier to choose one when you hear it alongside the main pattern.
The “Play at Song Tempo” feature is useful here.
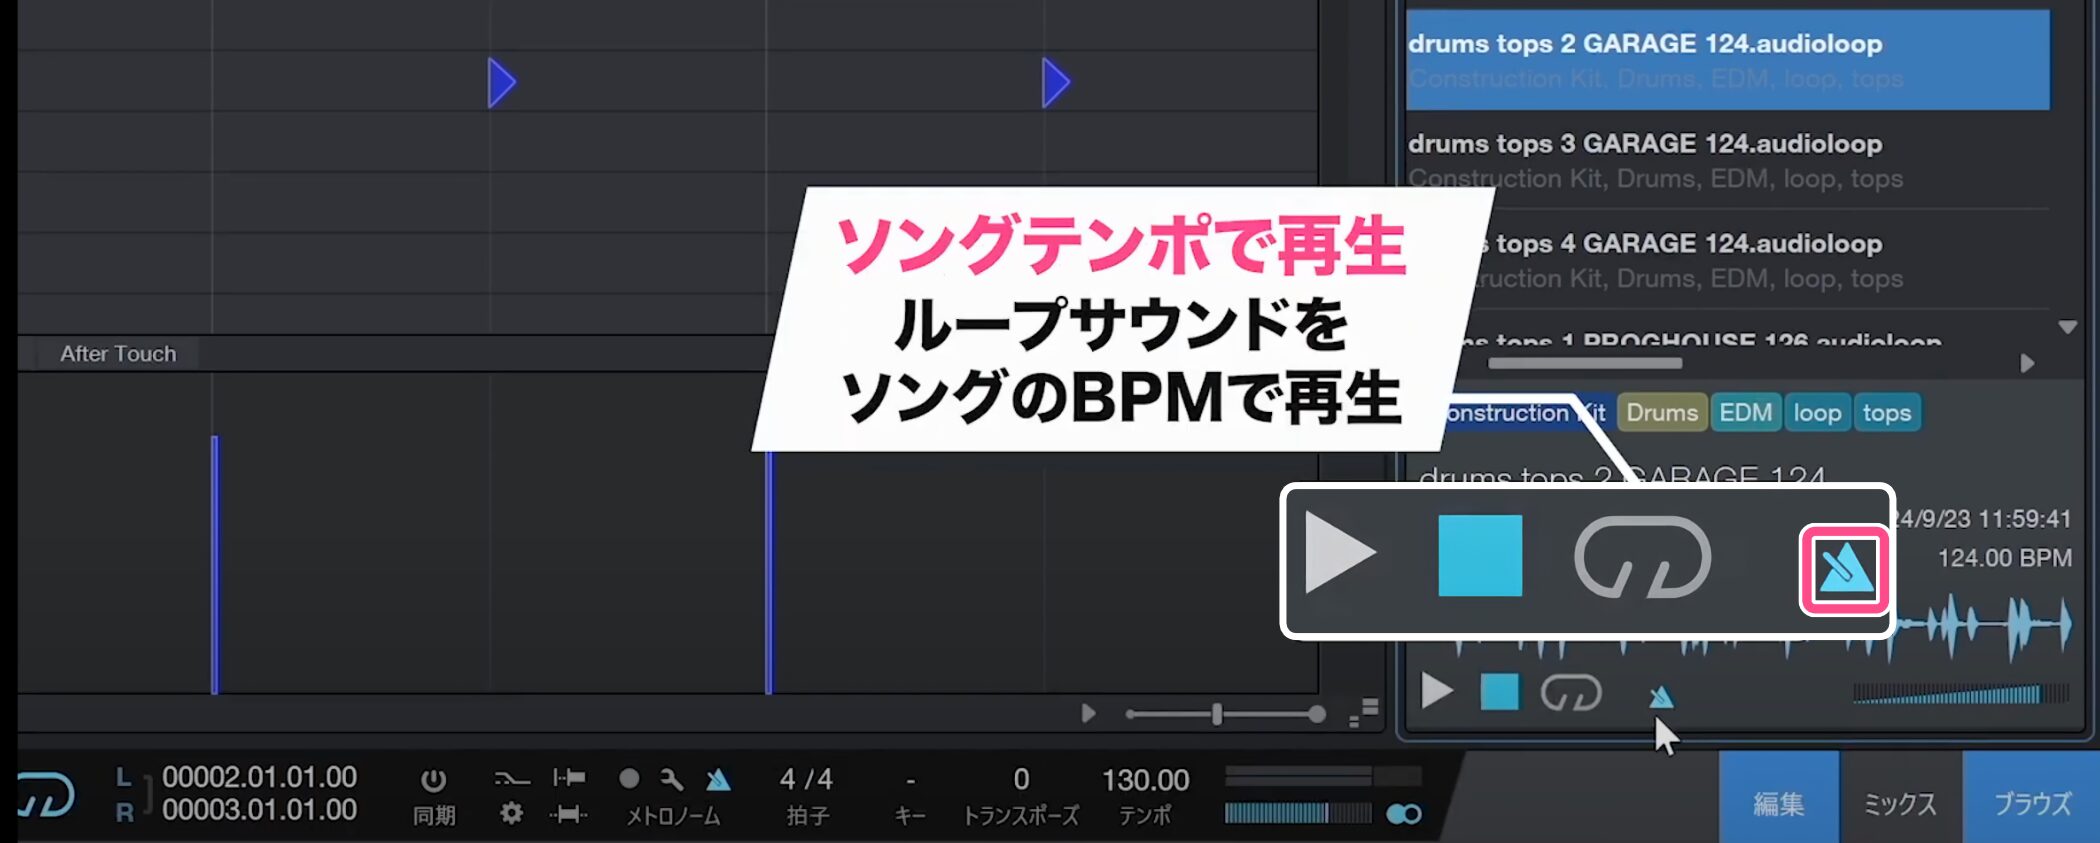
Enable the metronome icon so the loop plays at the current song tempo (for example, 130 BPM).
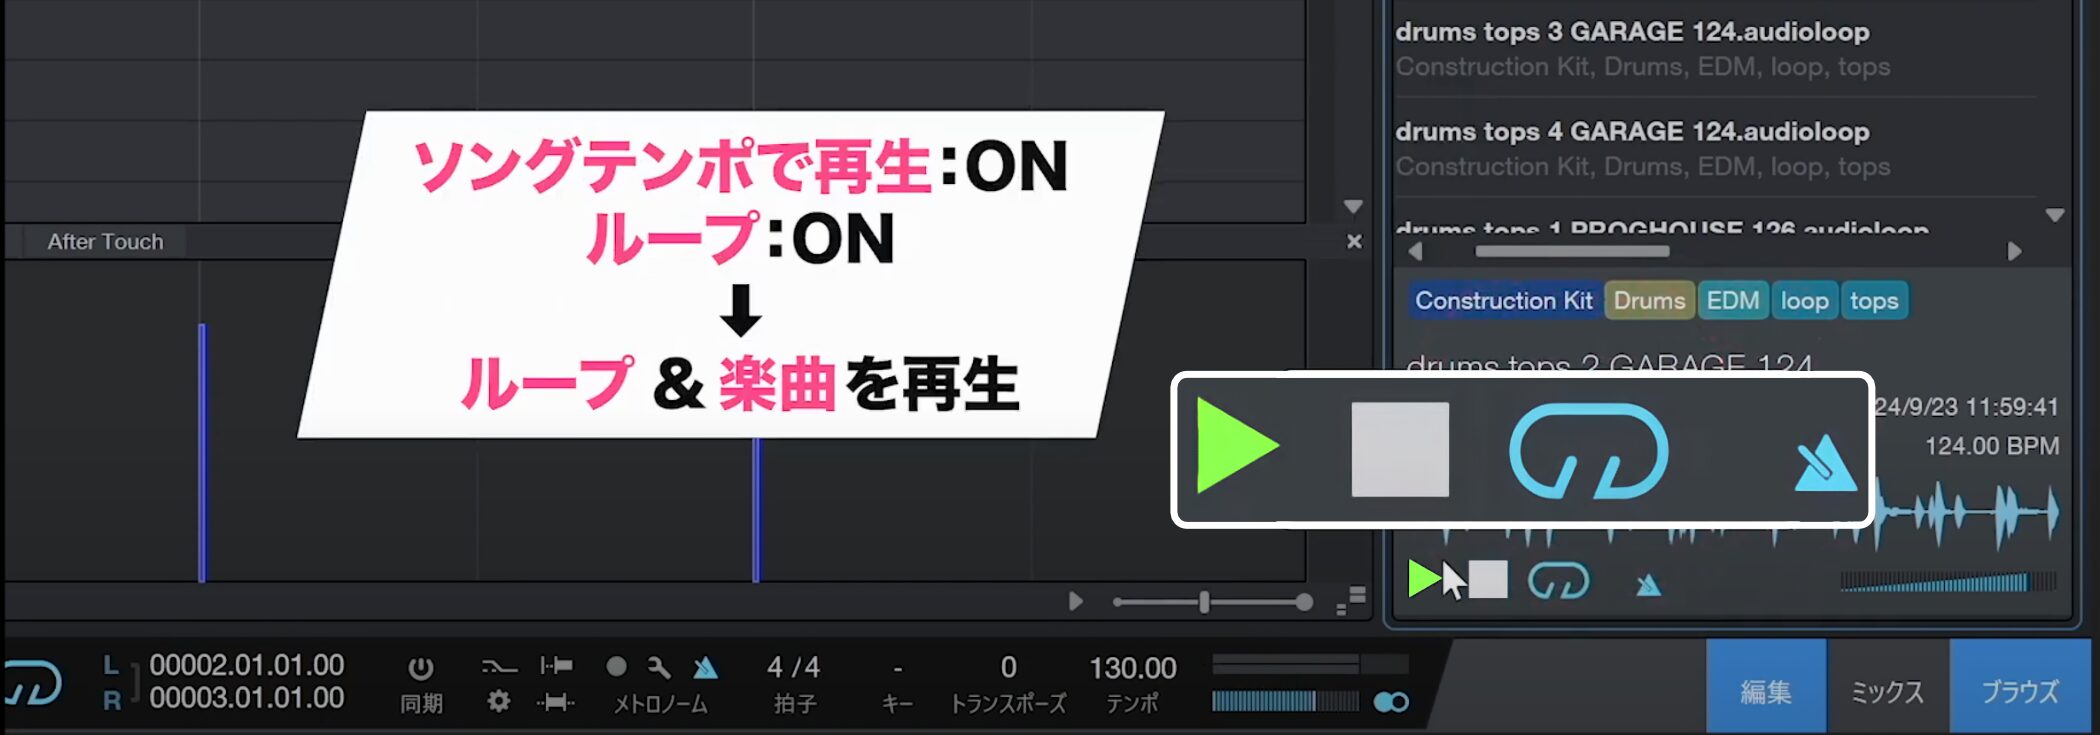
Enable song-tempo playback and looping, then play the song to hear the loop in time with its tempo.
You can then switch between tops loops while searching, which makes the feature especially convenient.
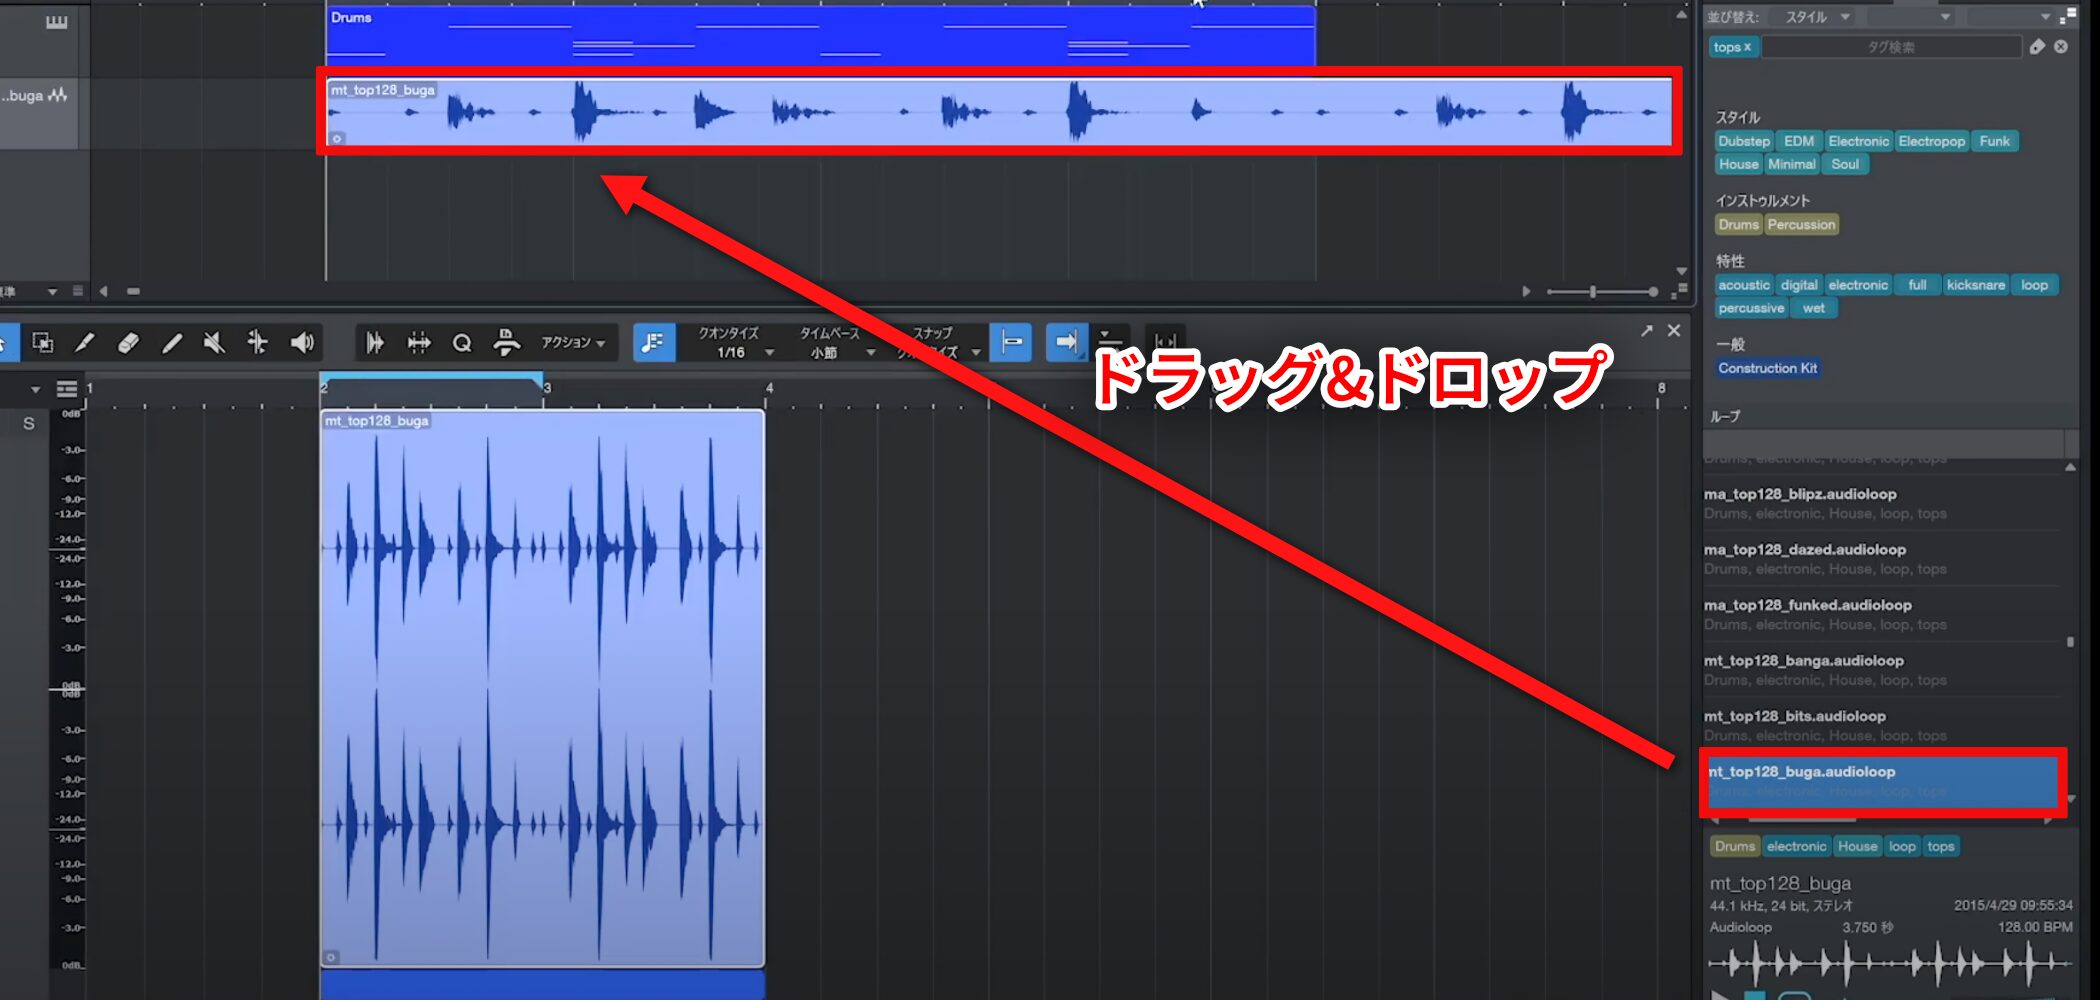
Once you find a loop you like, drag it into an empty area to add it.
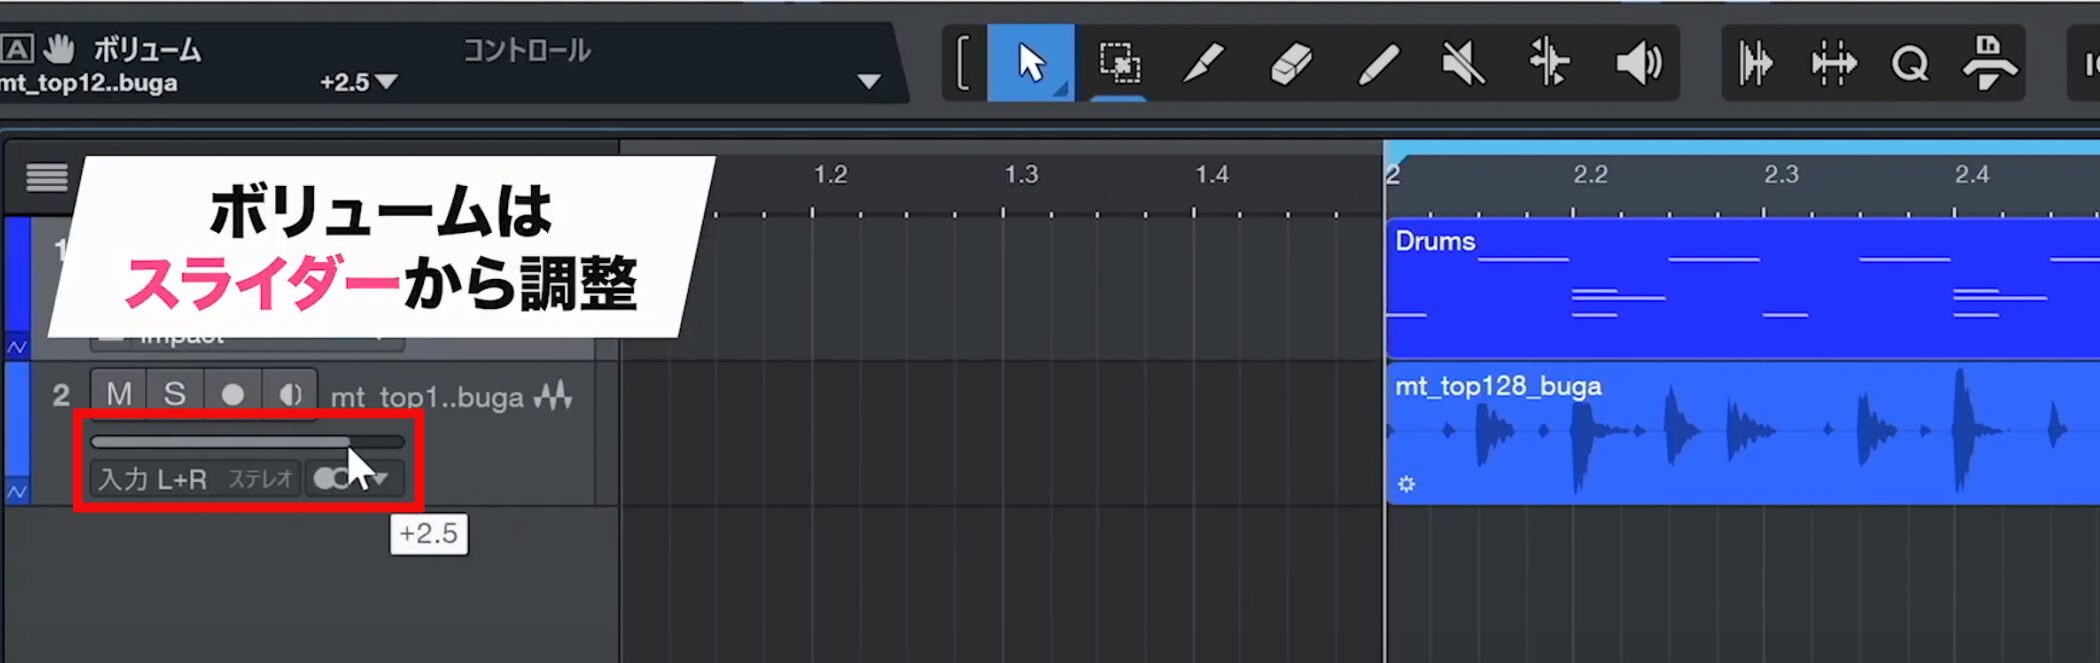
If the loop sounds too loud after importing, adjust it with the volume slider.
It is often effective to keep it subtle, just enough to reinforce the groove.
Adding and Using Drum Fills
Drum fills are effective for adding accents to a song.
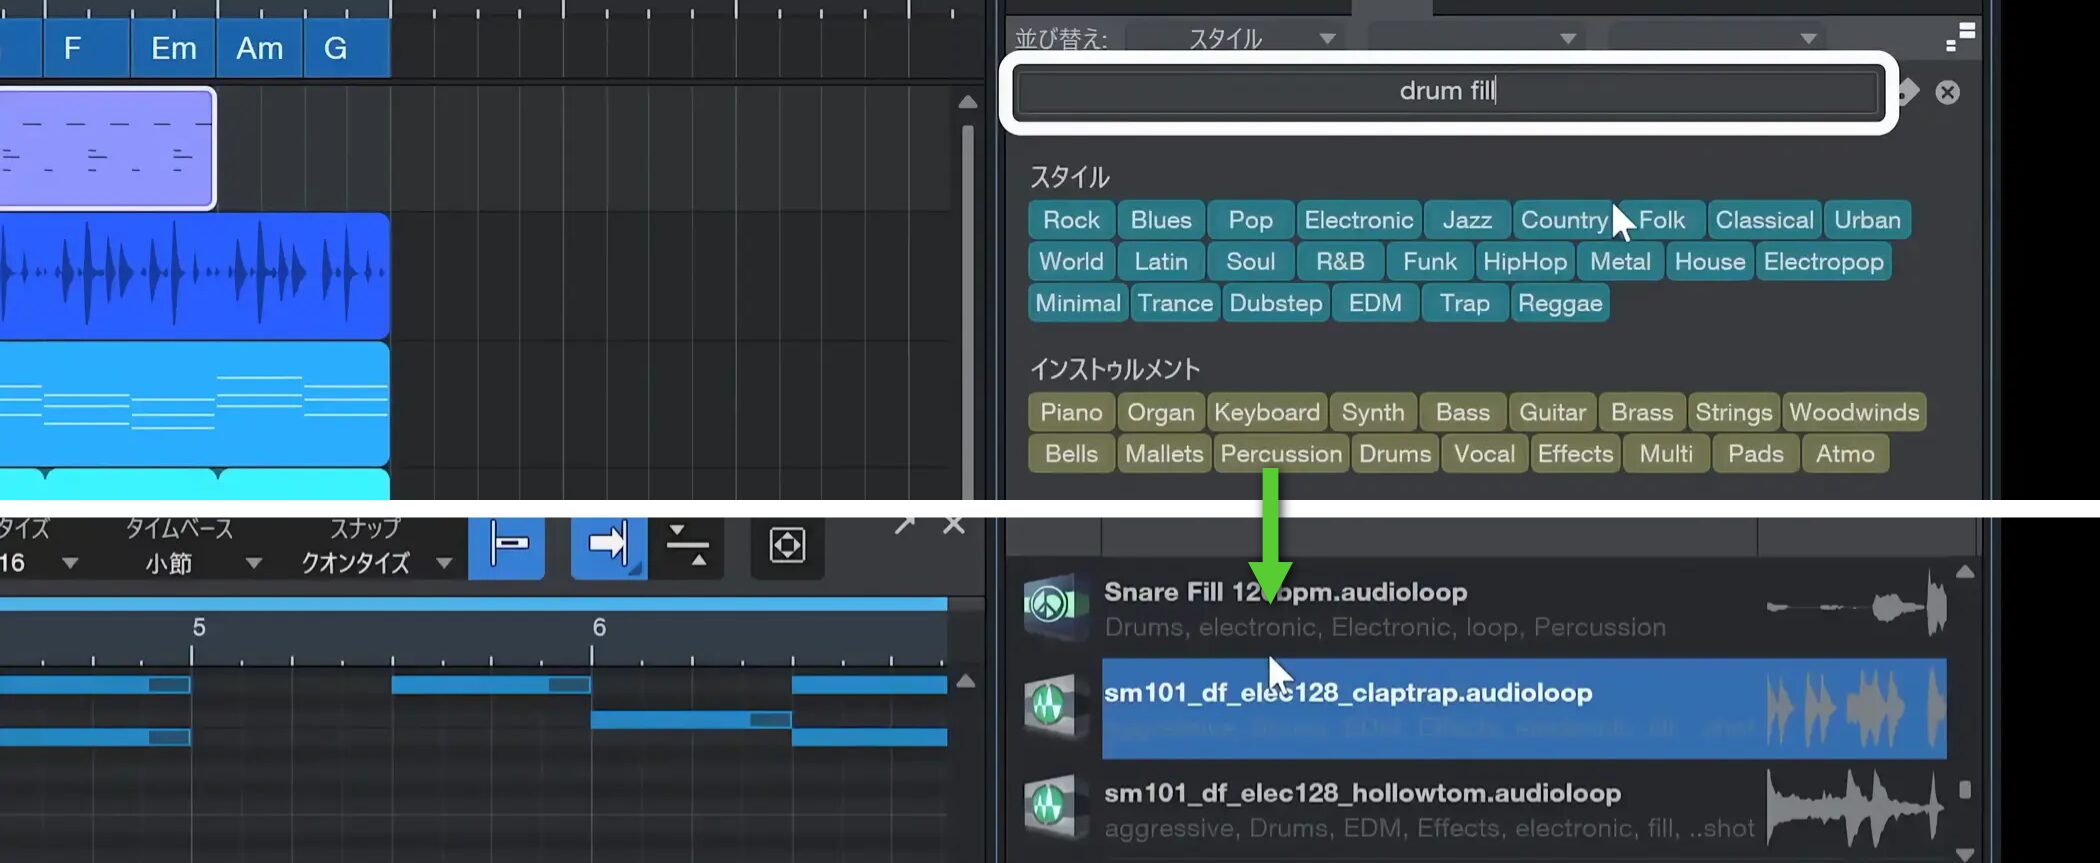
Type “drum fill” into the Browser’s loop search to find a variety of fills.
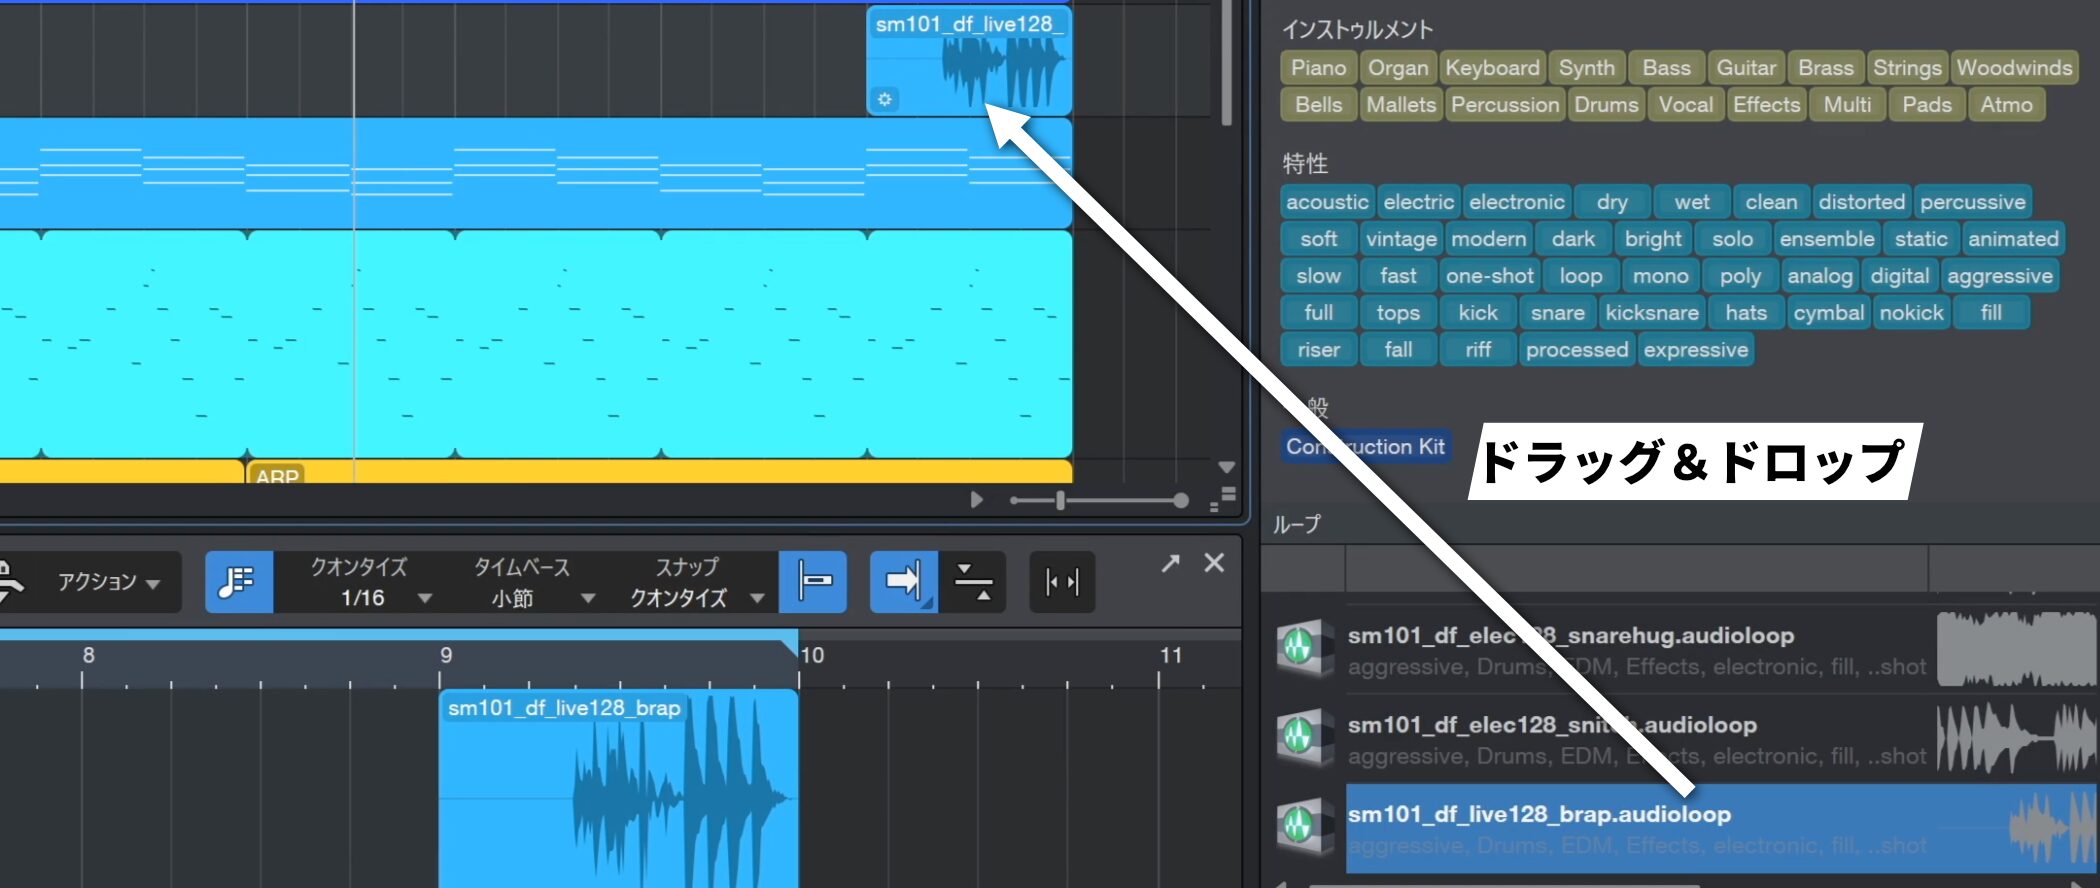
When you find one you like, drag it to a place where you want a change, such as a transition between song sections.
This creates an effective accent.
Duplicating and Deleting Events
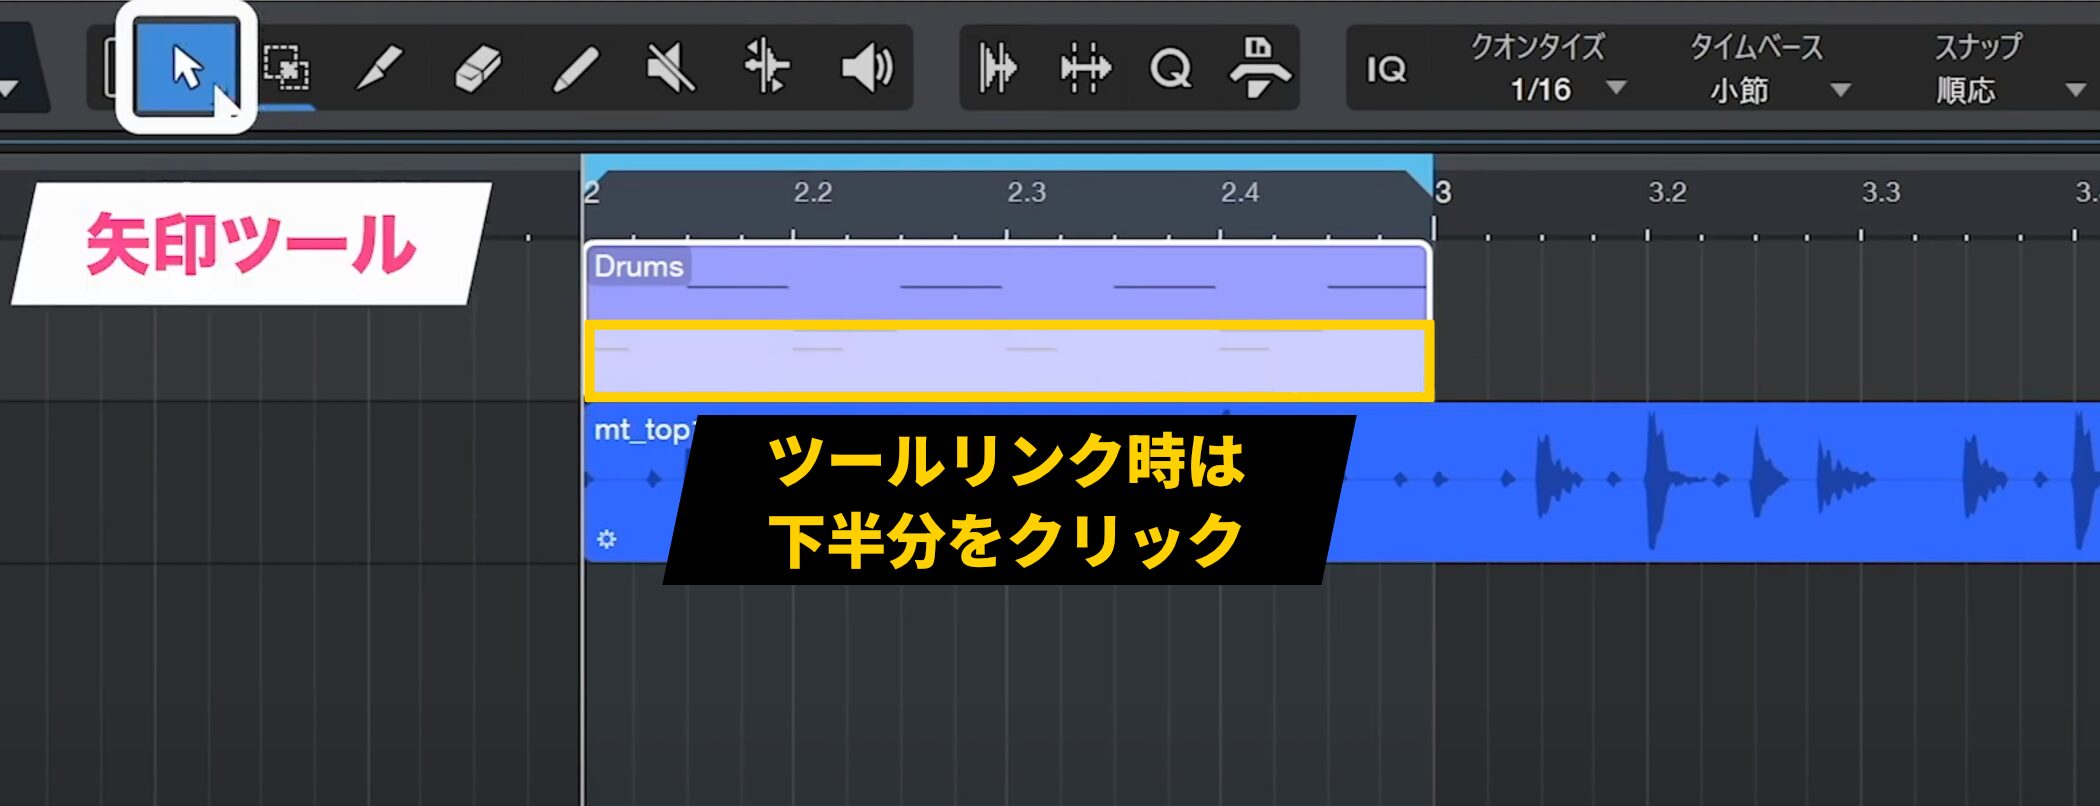
Use the Arrow tool to edit events. When the tools are linked, click the lower half of the event, where the Arrow tool is active, to select it.
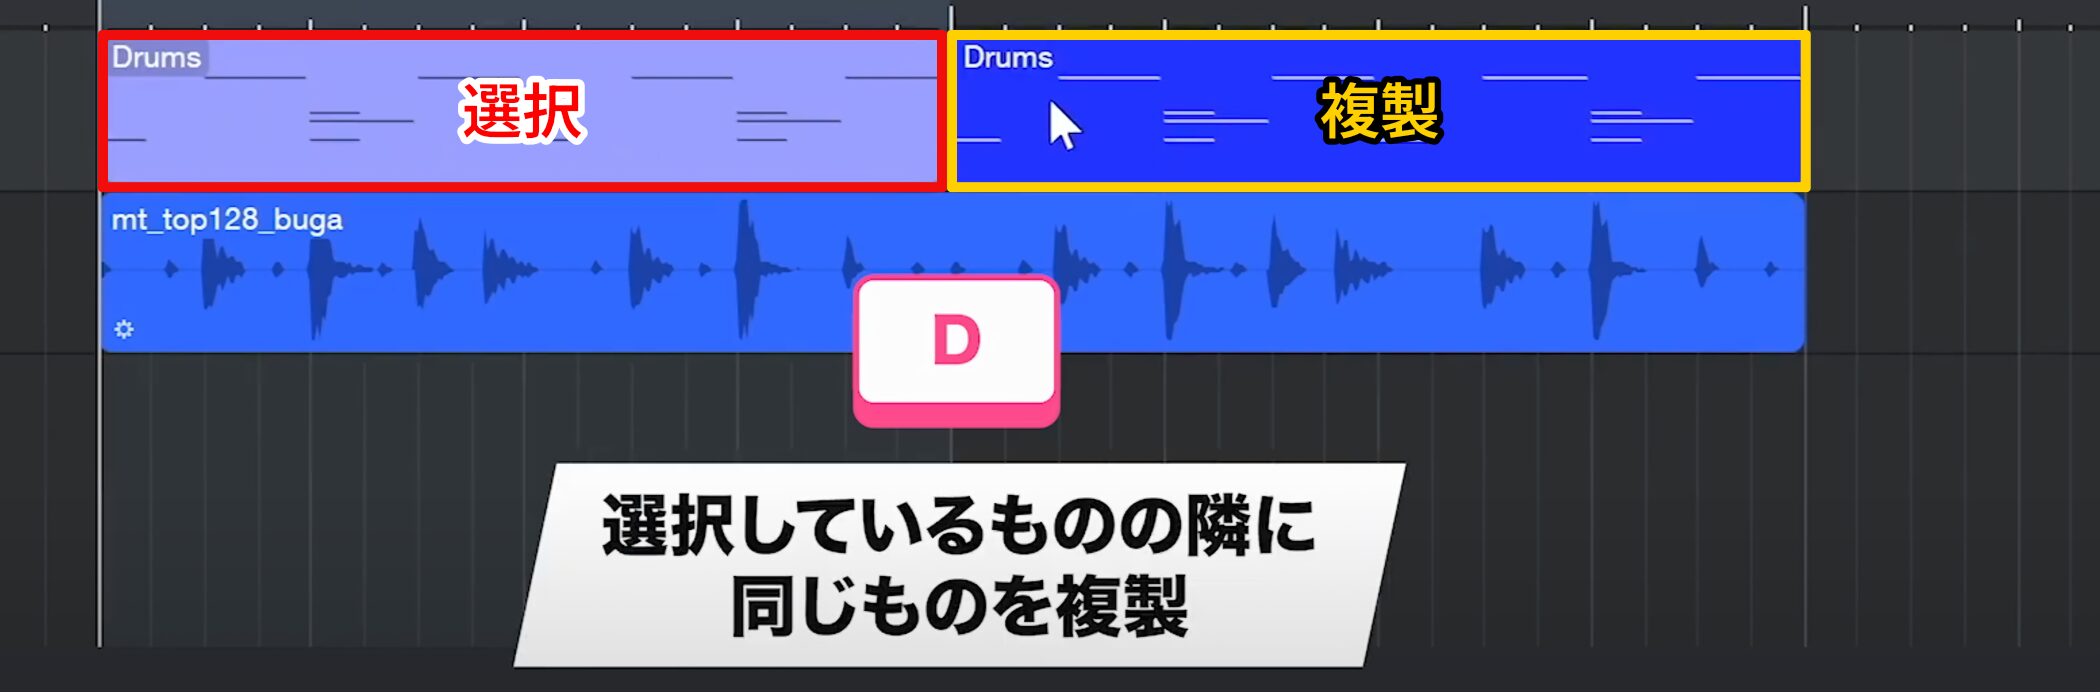
The easiest way to duplicate an event is to select it and press D.
The duplicate appears beside the selected event.
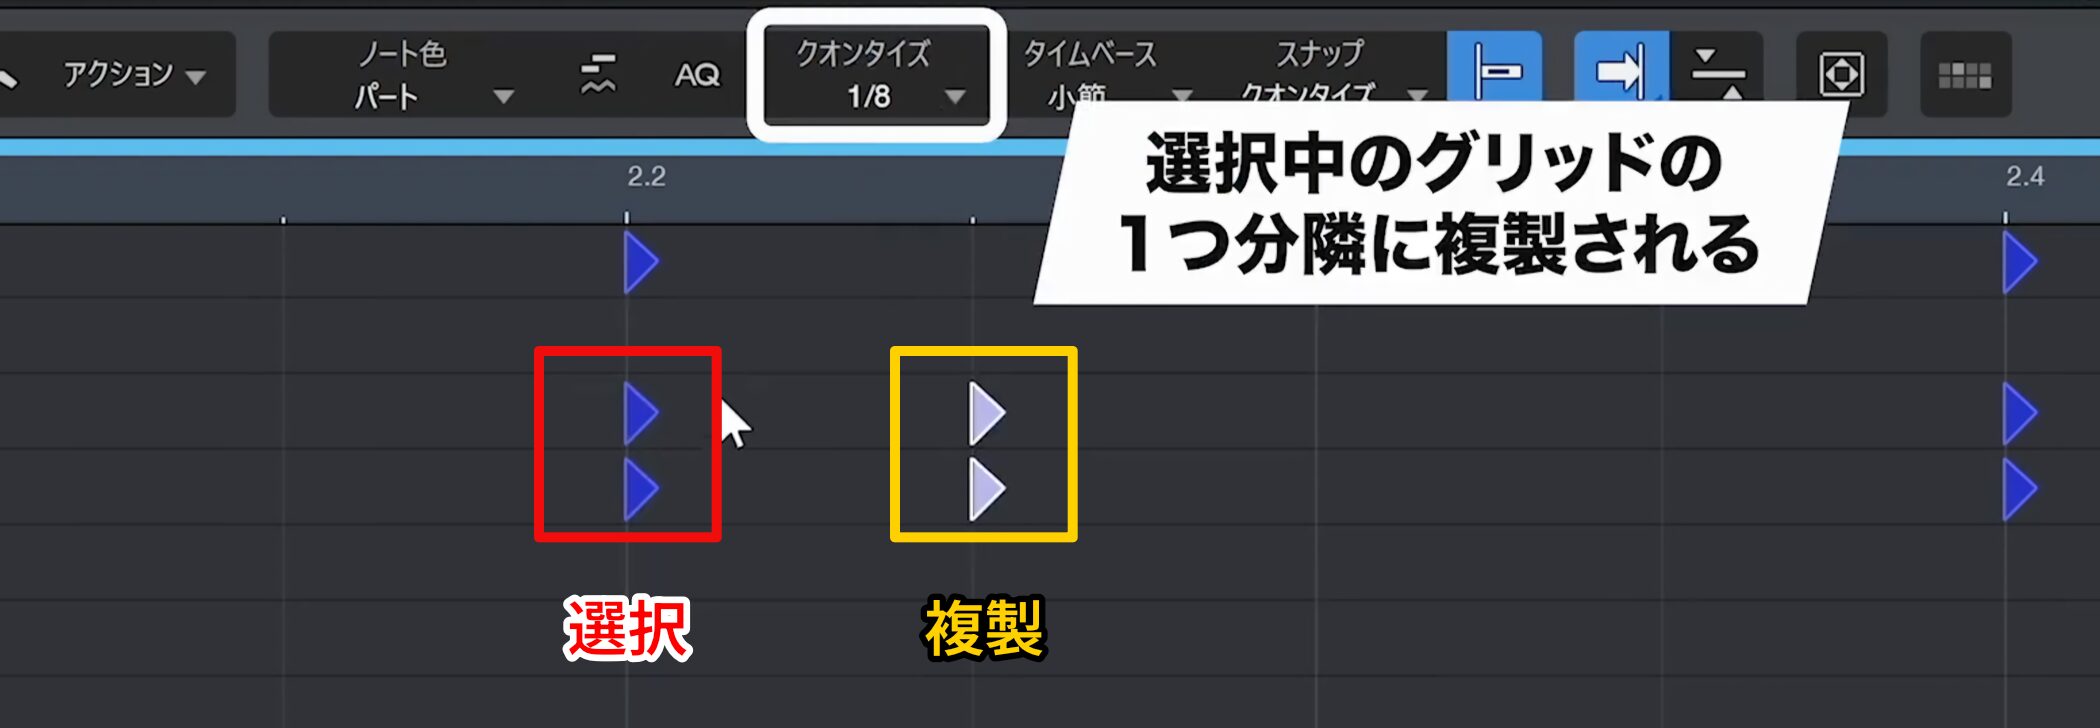
The same method works for programmed notes.
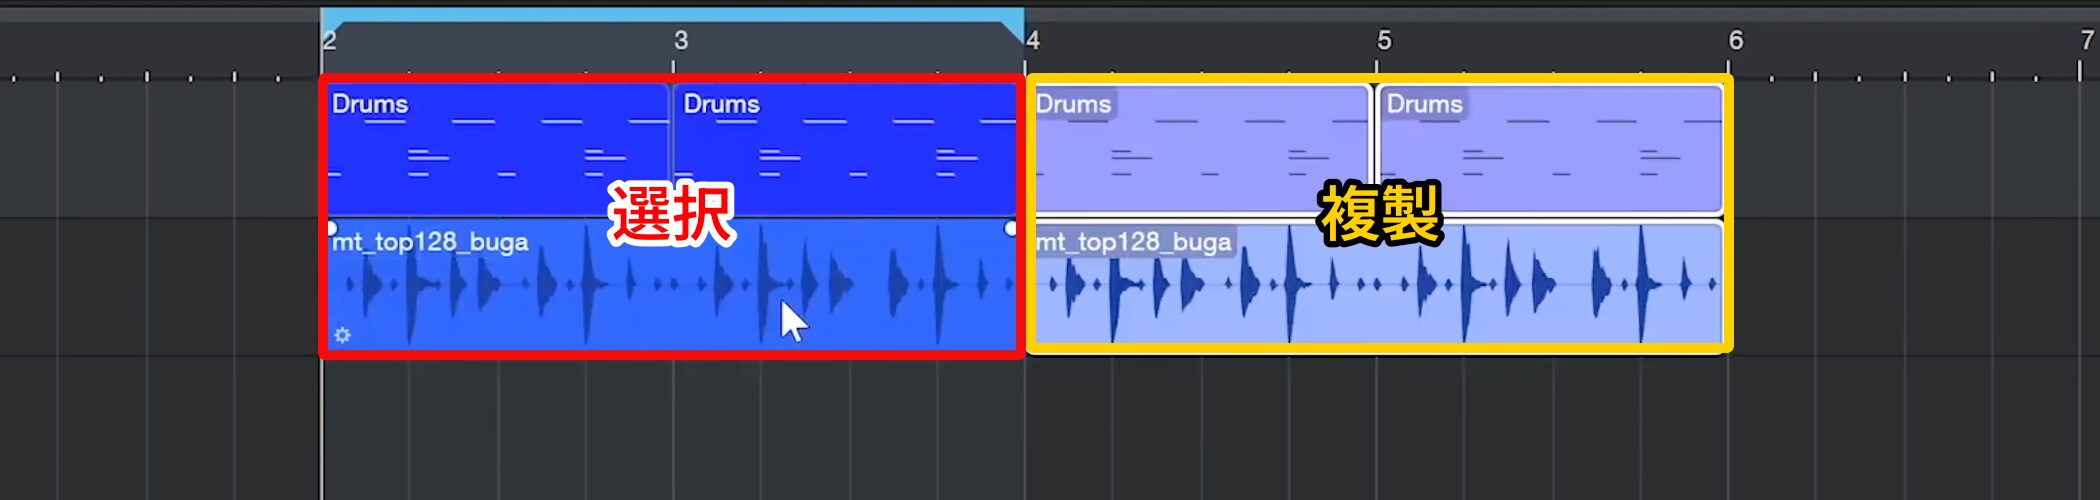
You can also use it with multiple items selected.
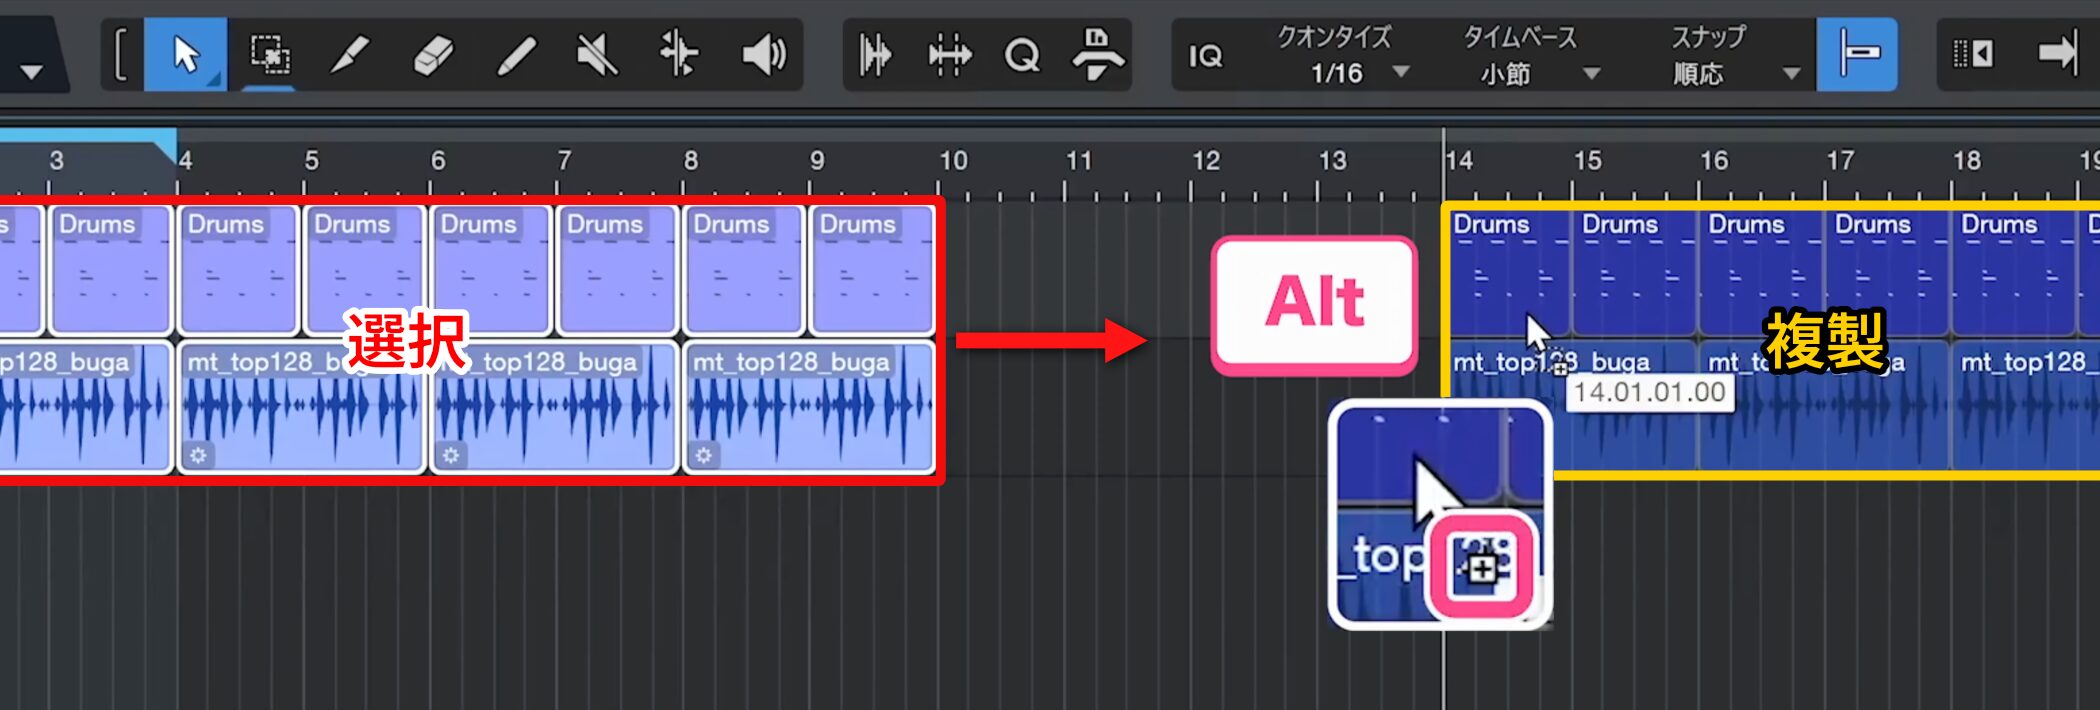
To create a duplicate at a specific position, select the event and drag it to the destination.
While holding the mouse button, hold Alt. A plus icon appears beneath the cursor; release the mouse to place the duplicate at the desired position.
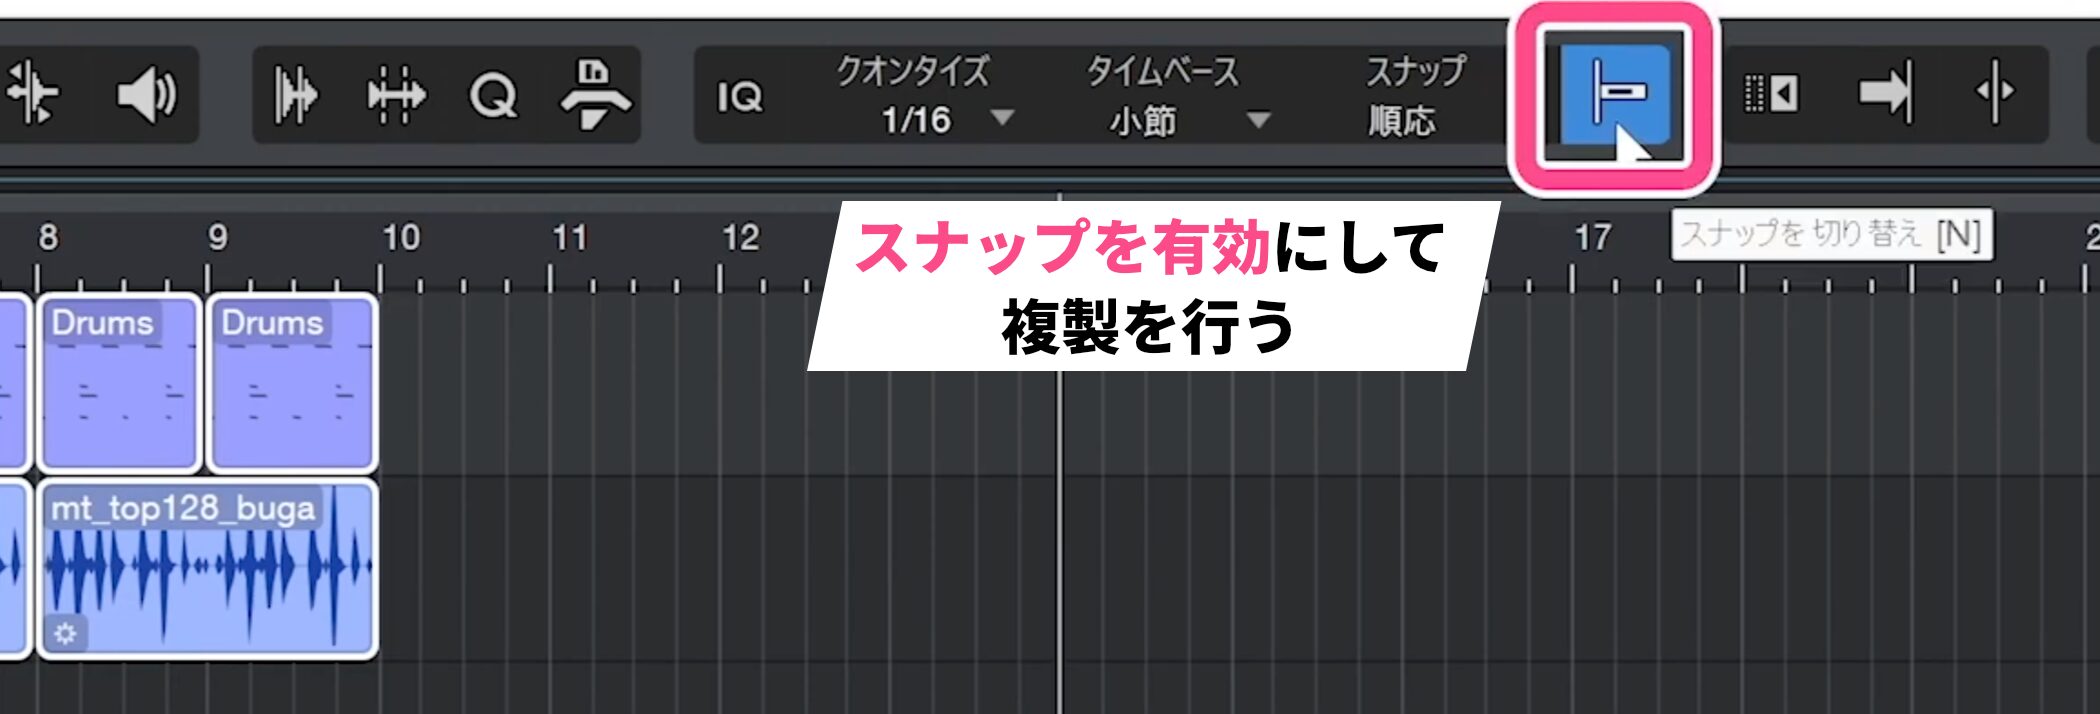
If Snap is off, the position may be misaligned, so we generally recommend duplicating with Snap enabled.
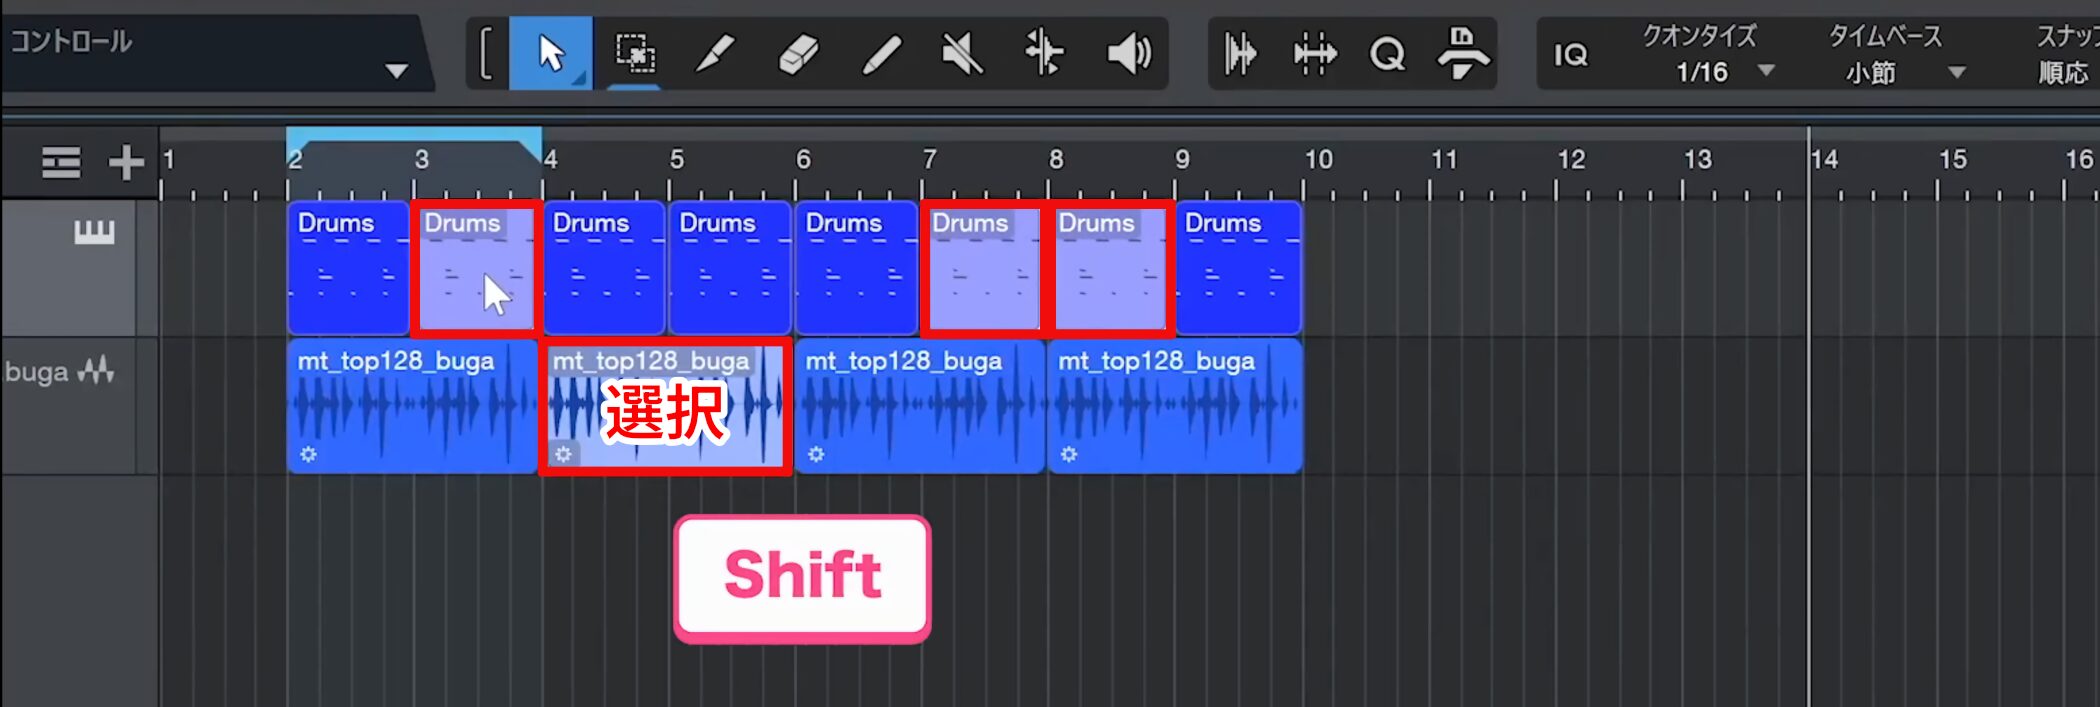
To duplicate several nonadjacent events at once, hold Shift and select the events you want.
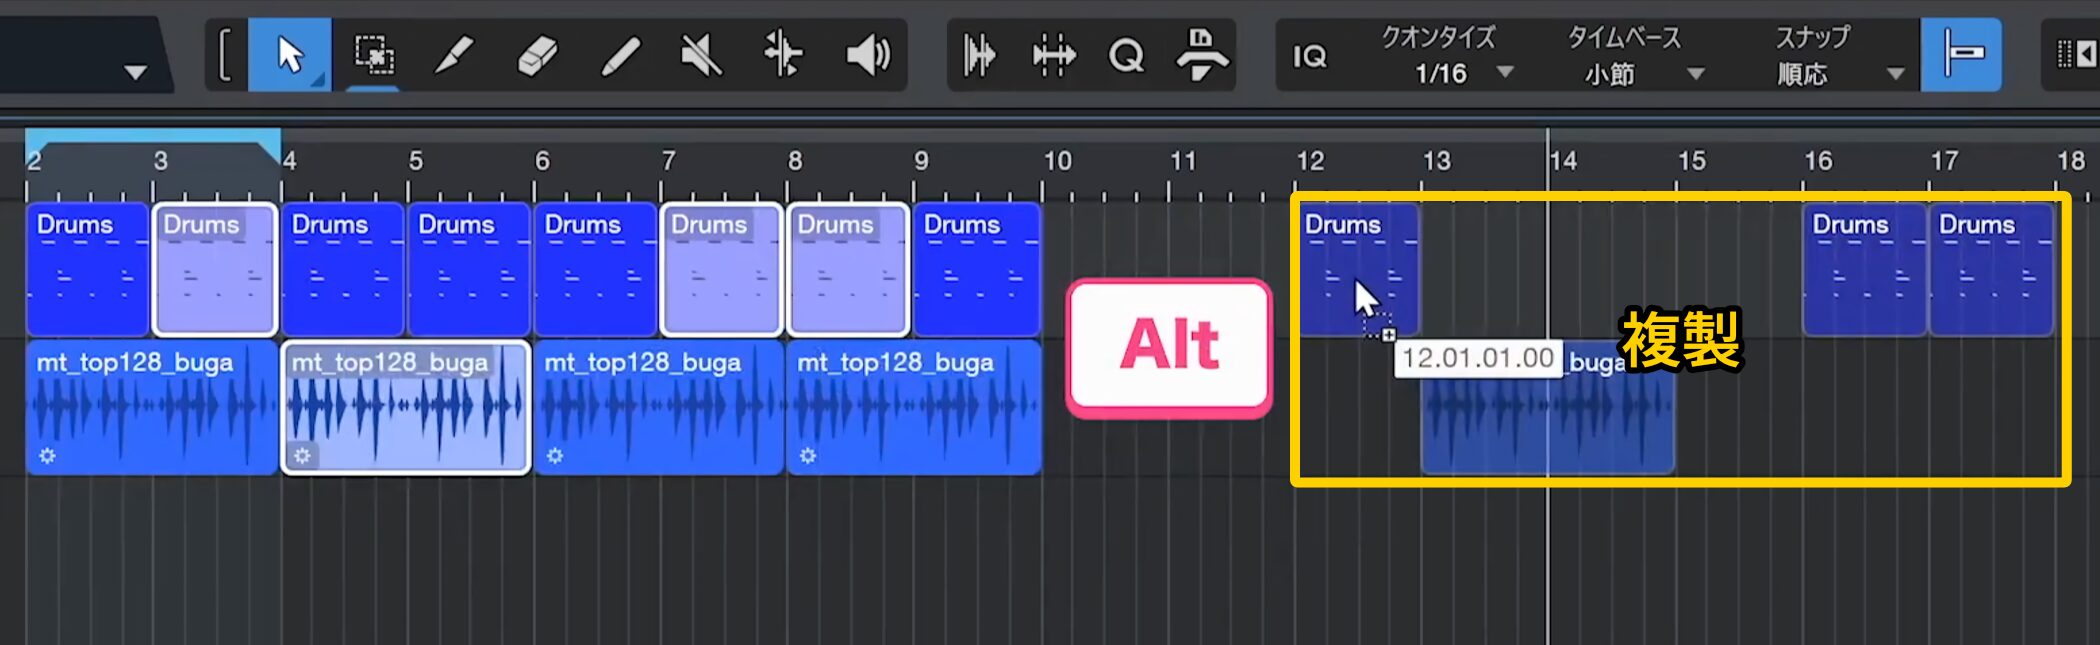
Then release the mouse at the destination while holding Alt to duplicate them efficiently.
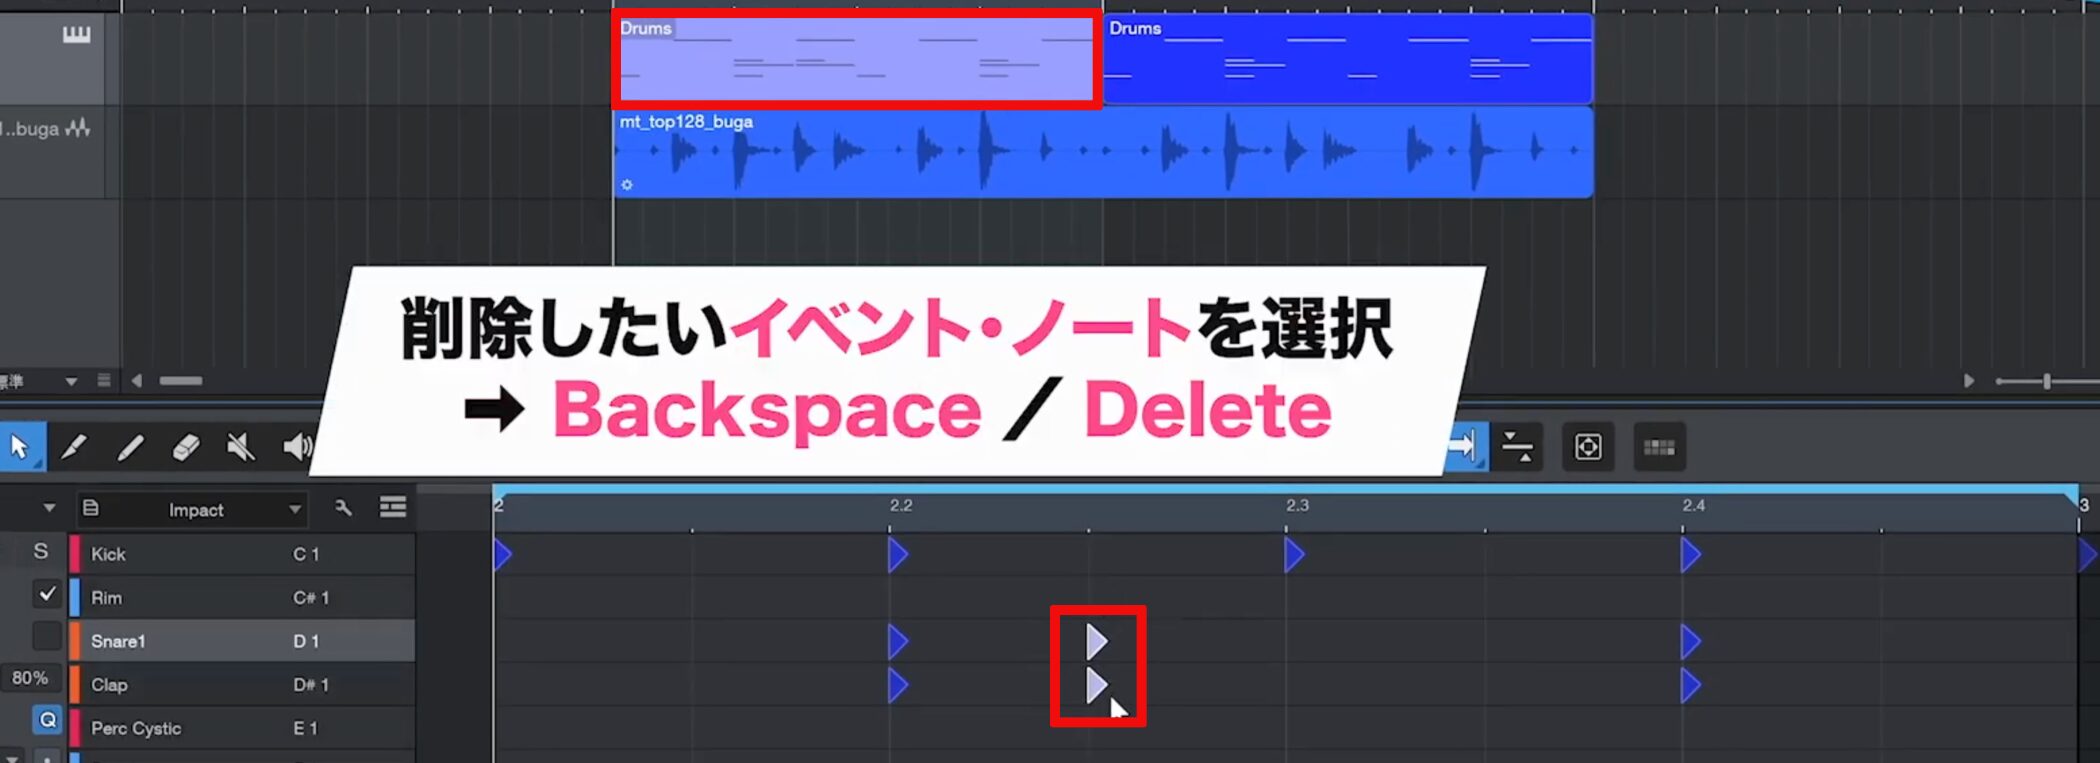
To delete unwanted events or notes, select them and press Backspace or Delete.
Undoing Actions
Undo is an essential function you will use frequently while editing.
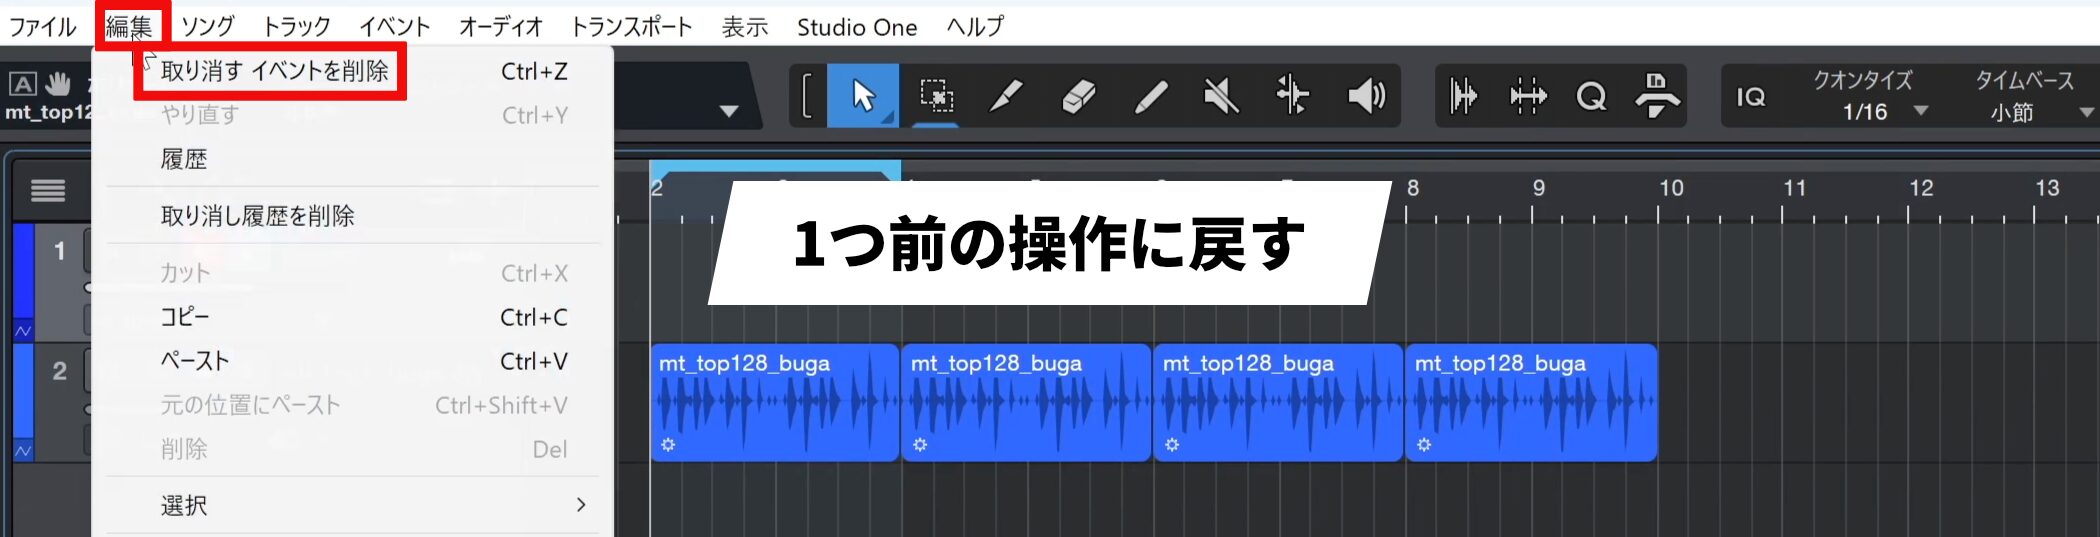
If you accidentally delete an event, for example, choose Edit → Undo from the top menu to reverse the last action.
You can use it repeatedly to return to earlier states, not just the immediately preceding one.
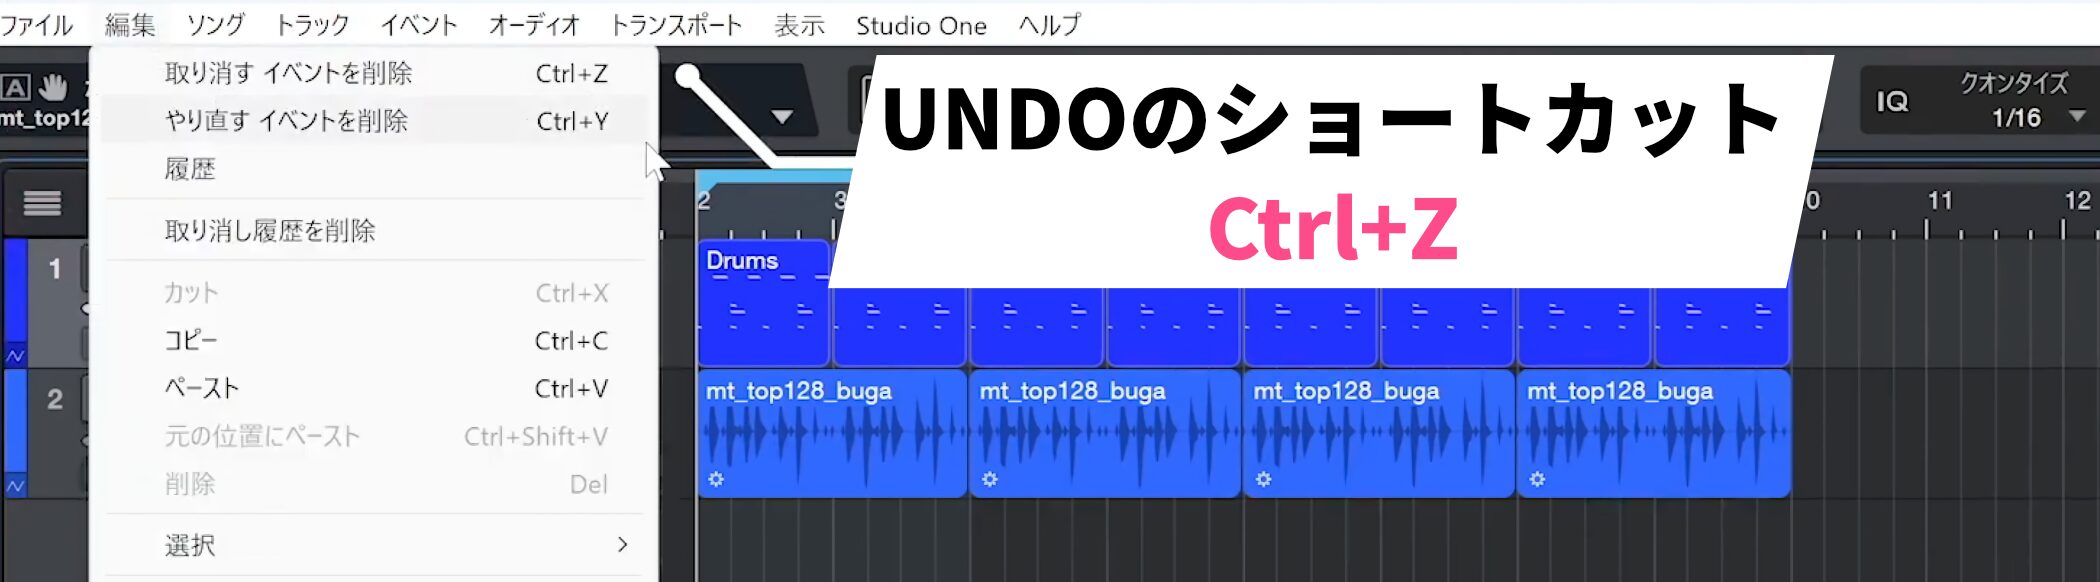
You can use it for all kinds of actions in Studio One, and also invoke it with Ctrl+Z.
Undo is used often during production, so it is an essential basic operation to remember.
Frequently Asked Questions
Q1. How do I change a drum kit preset in Studio One?
Choose a drum kit preset in the instrument window to assign different sounds to the pads. You can close the window afterward and reopen it with the keyboard icon if you want to make further changes.
Q2. My rhythm notes are not being entered accurately. What should I do?
Check that Snap is enabled. With Snap off, notes can be entered without regard to the grid. We generally recommend leaving it on.
Q3. Are there any tips for editing drum patterns efficiently?
Use the Arrow tool as your main tool and hold Control (Command on Mac) only when entering notes to temporarily use the Paint tool. Looping is also useful while making detailed adjustments such as velocity changes.
NEW ARTICLES
Latest English Articles