This guide walks through audio recording in Studio One, from setting up an audio interface to recording vocals or guitar. Learn how to adjust latency and inputs, set gain, shape a guitar sound with an amp simulator, balance monitoring levels, and work with takes.
Audio recording basics for vocals and guitar
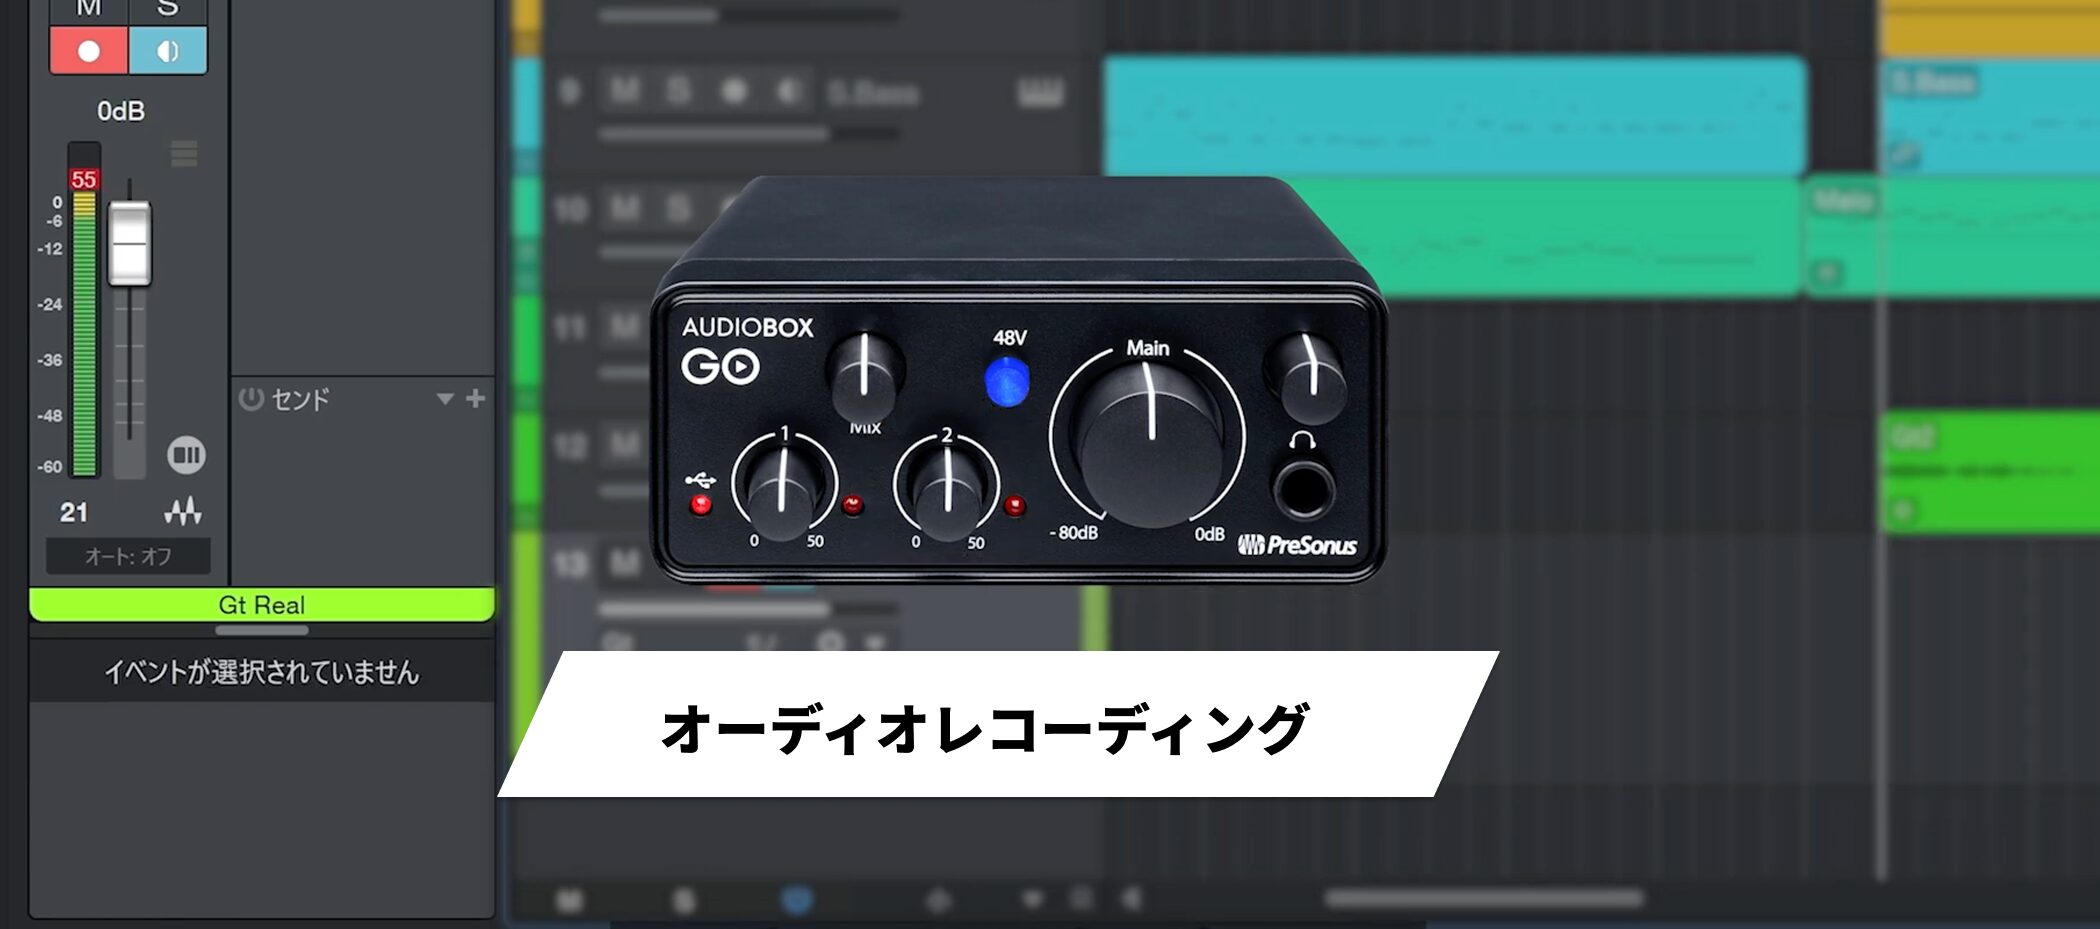
Audio recording is similar to MIDI recording, but some settings need attention first.
We will go step by step from audio interface setup through recording and the take features.
Set up your audio interface and latency
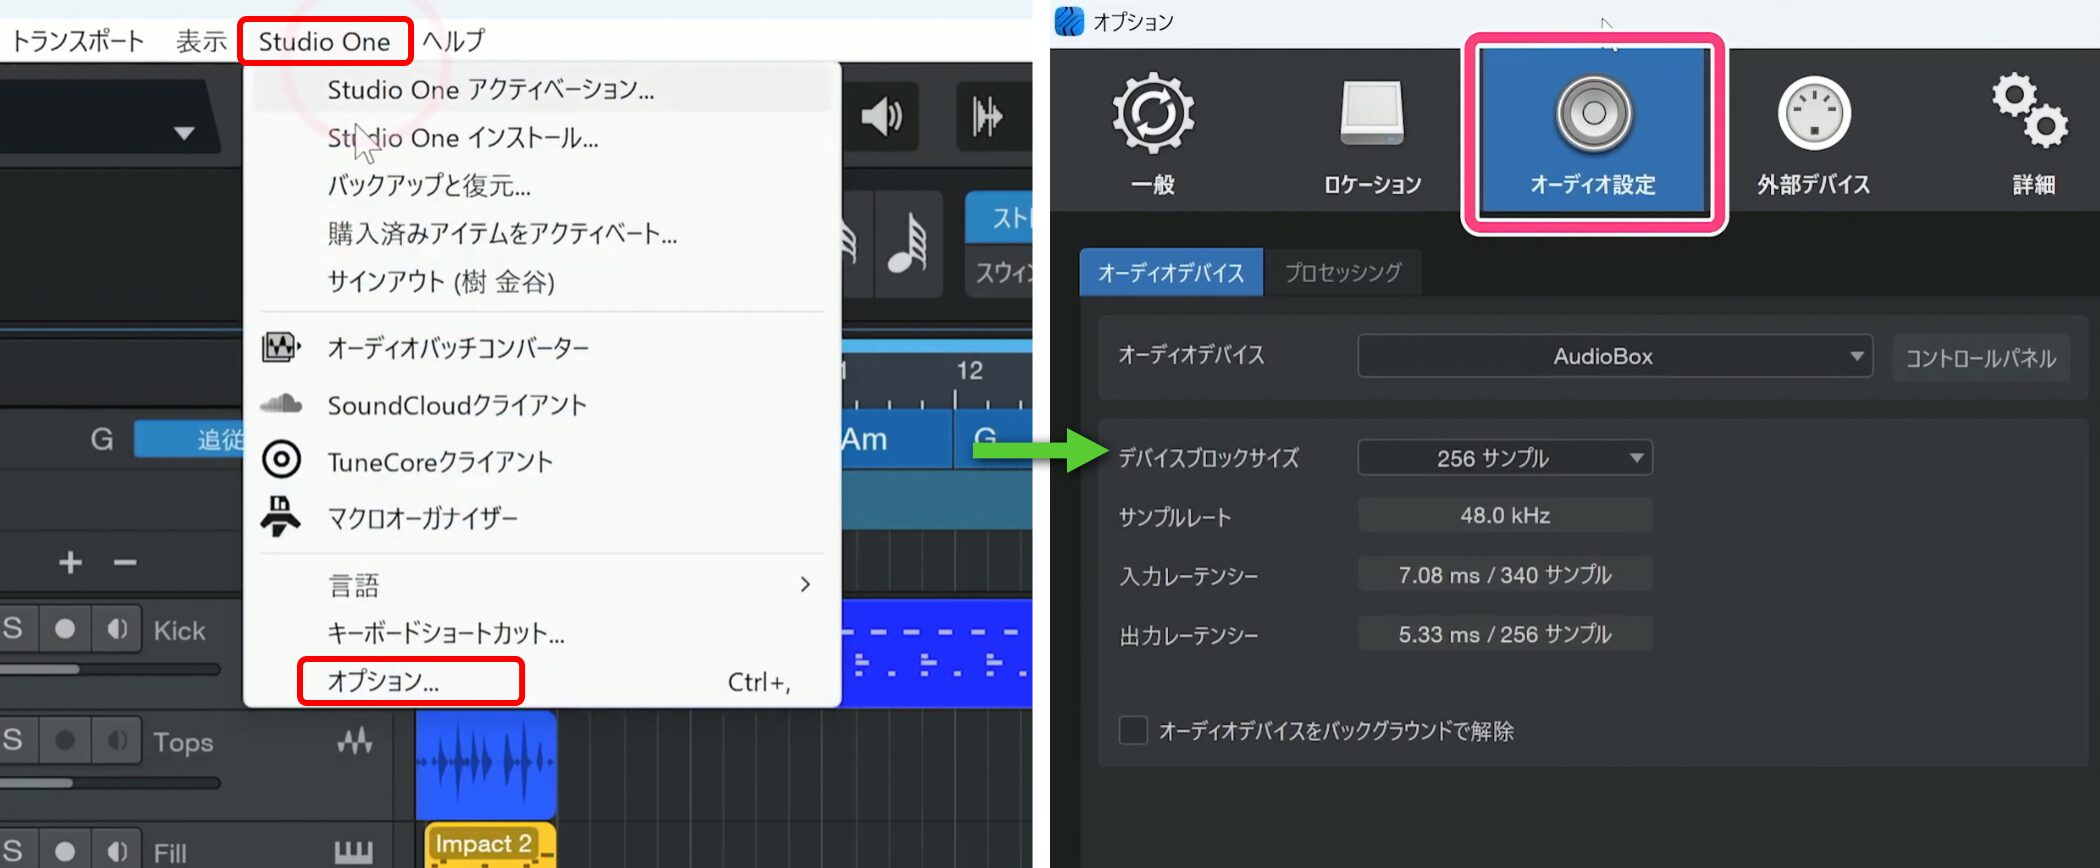
Choose Options from the Studio One menu and open the Audio Setup tab.
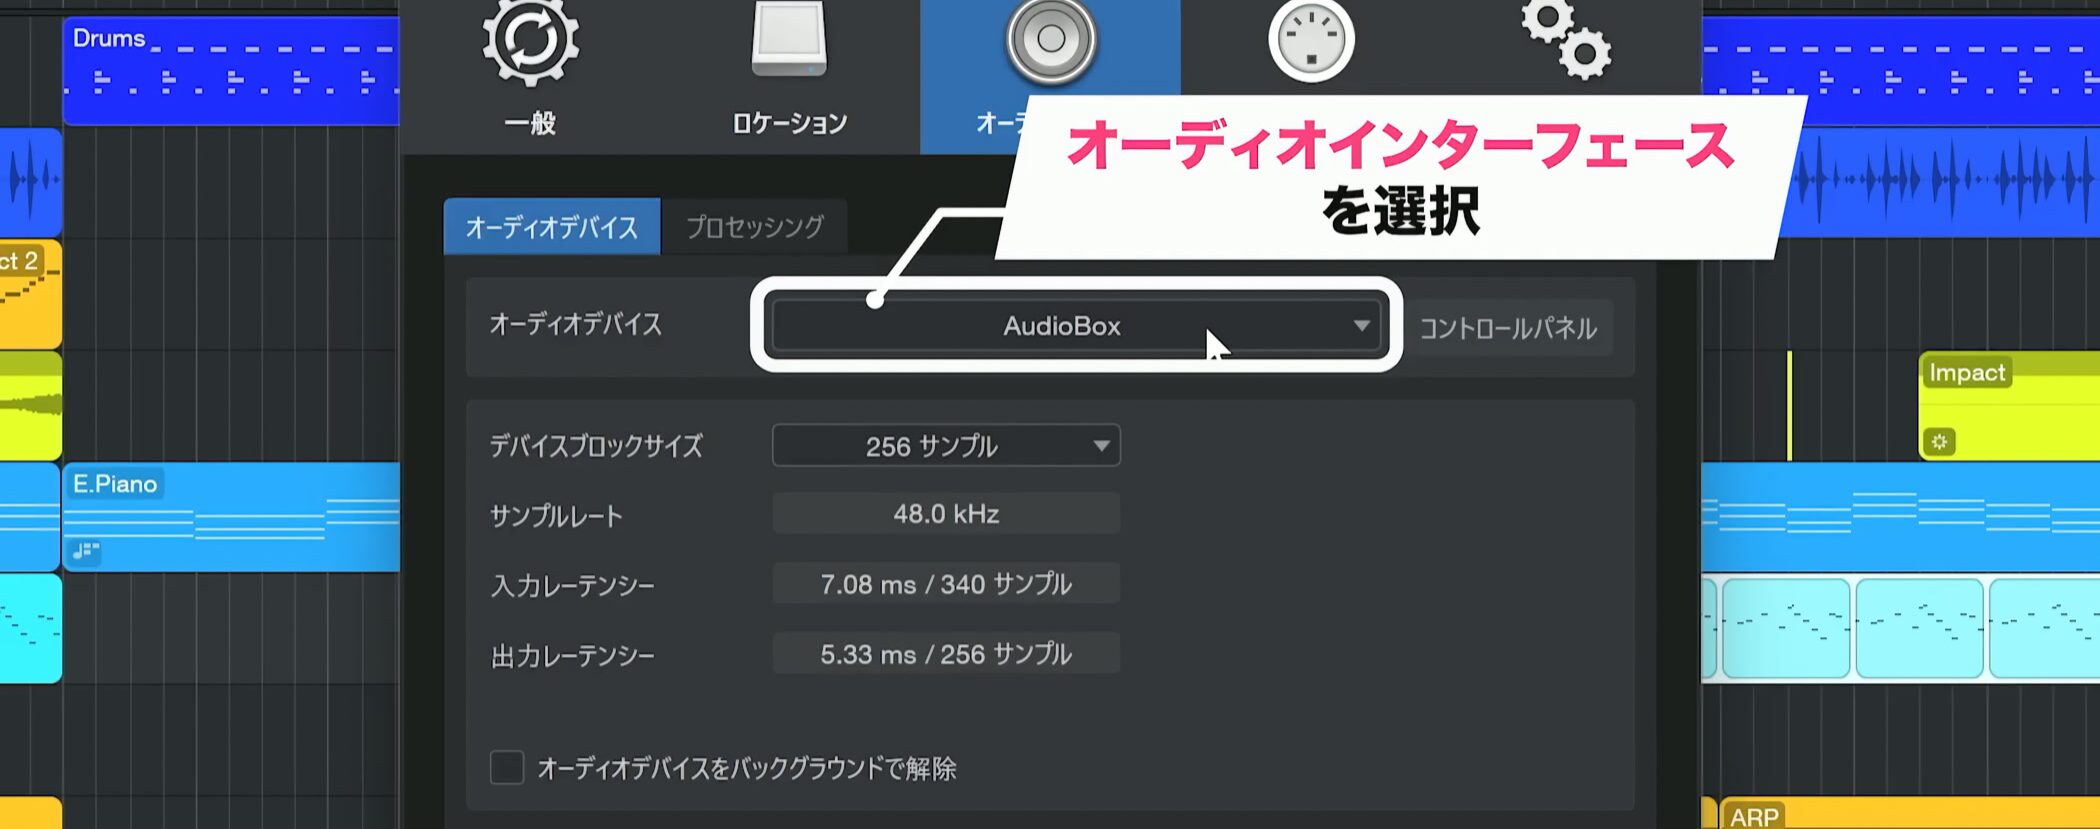
Select your audio interface.
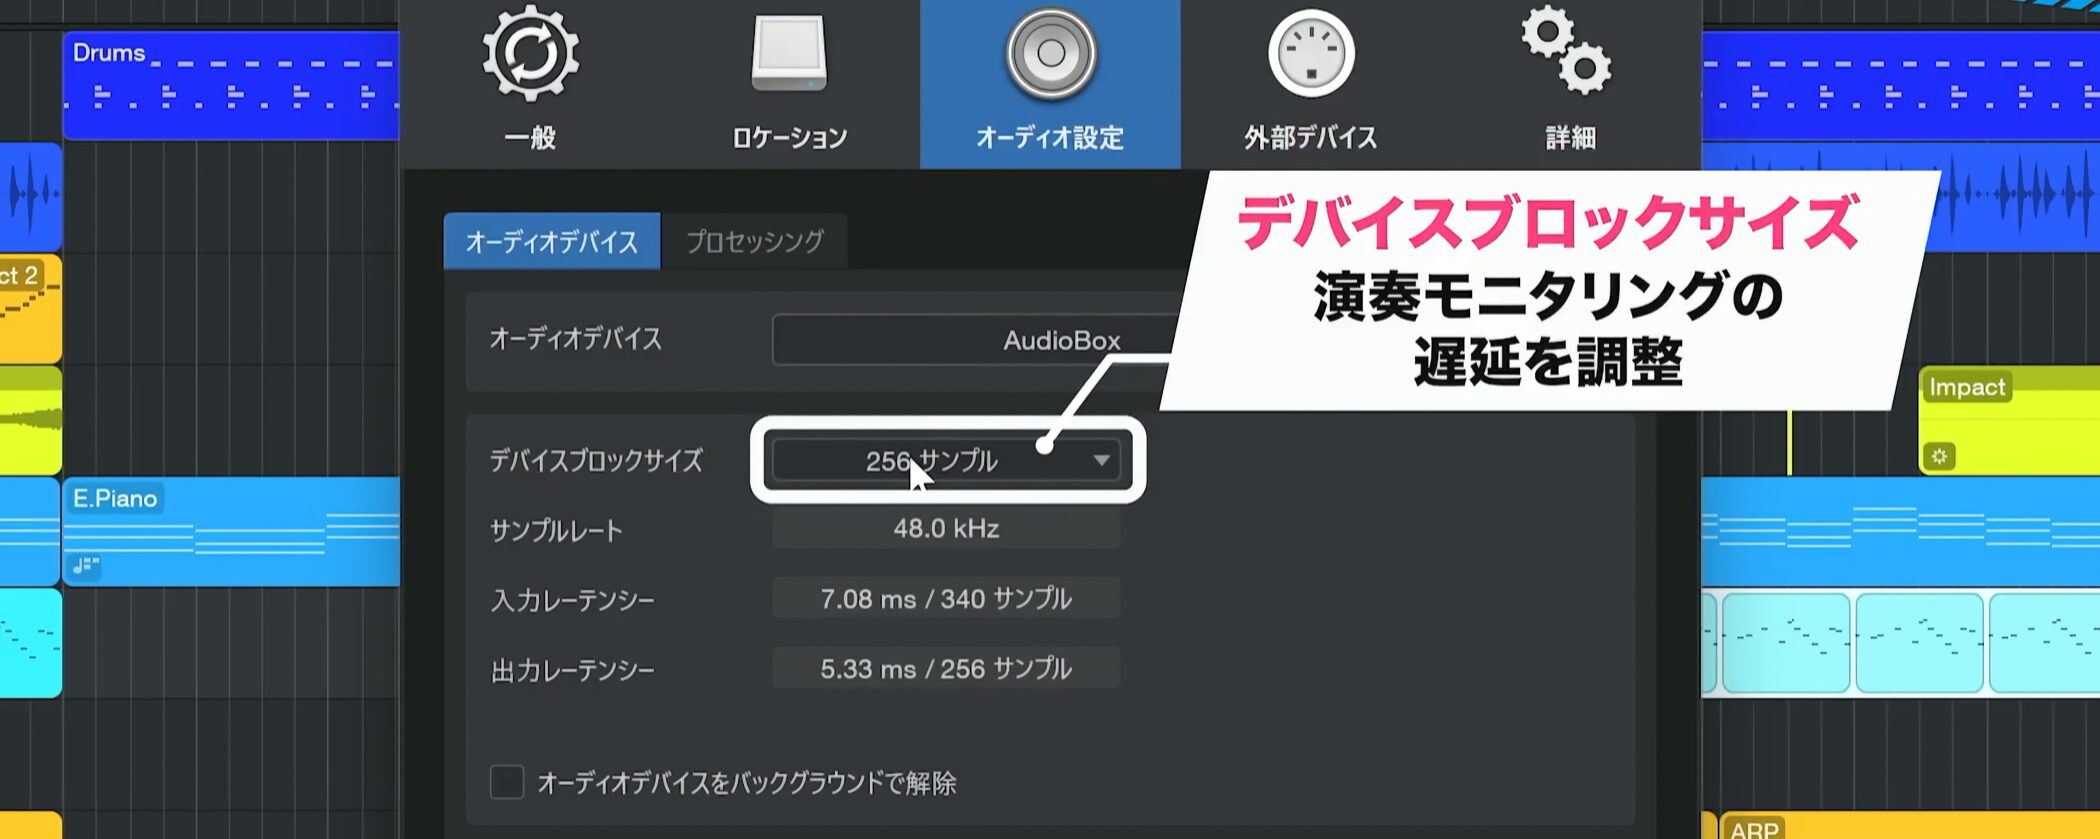
Use Device Block Size to adjust monitoring delay, or latency.
A smaller value reduces latency.
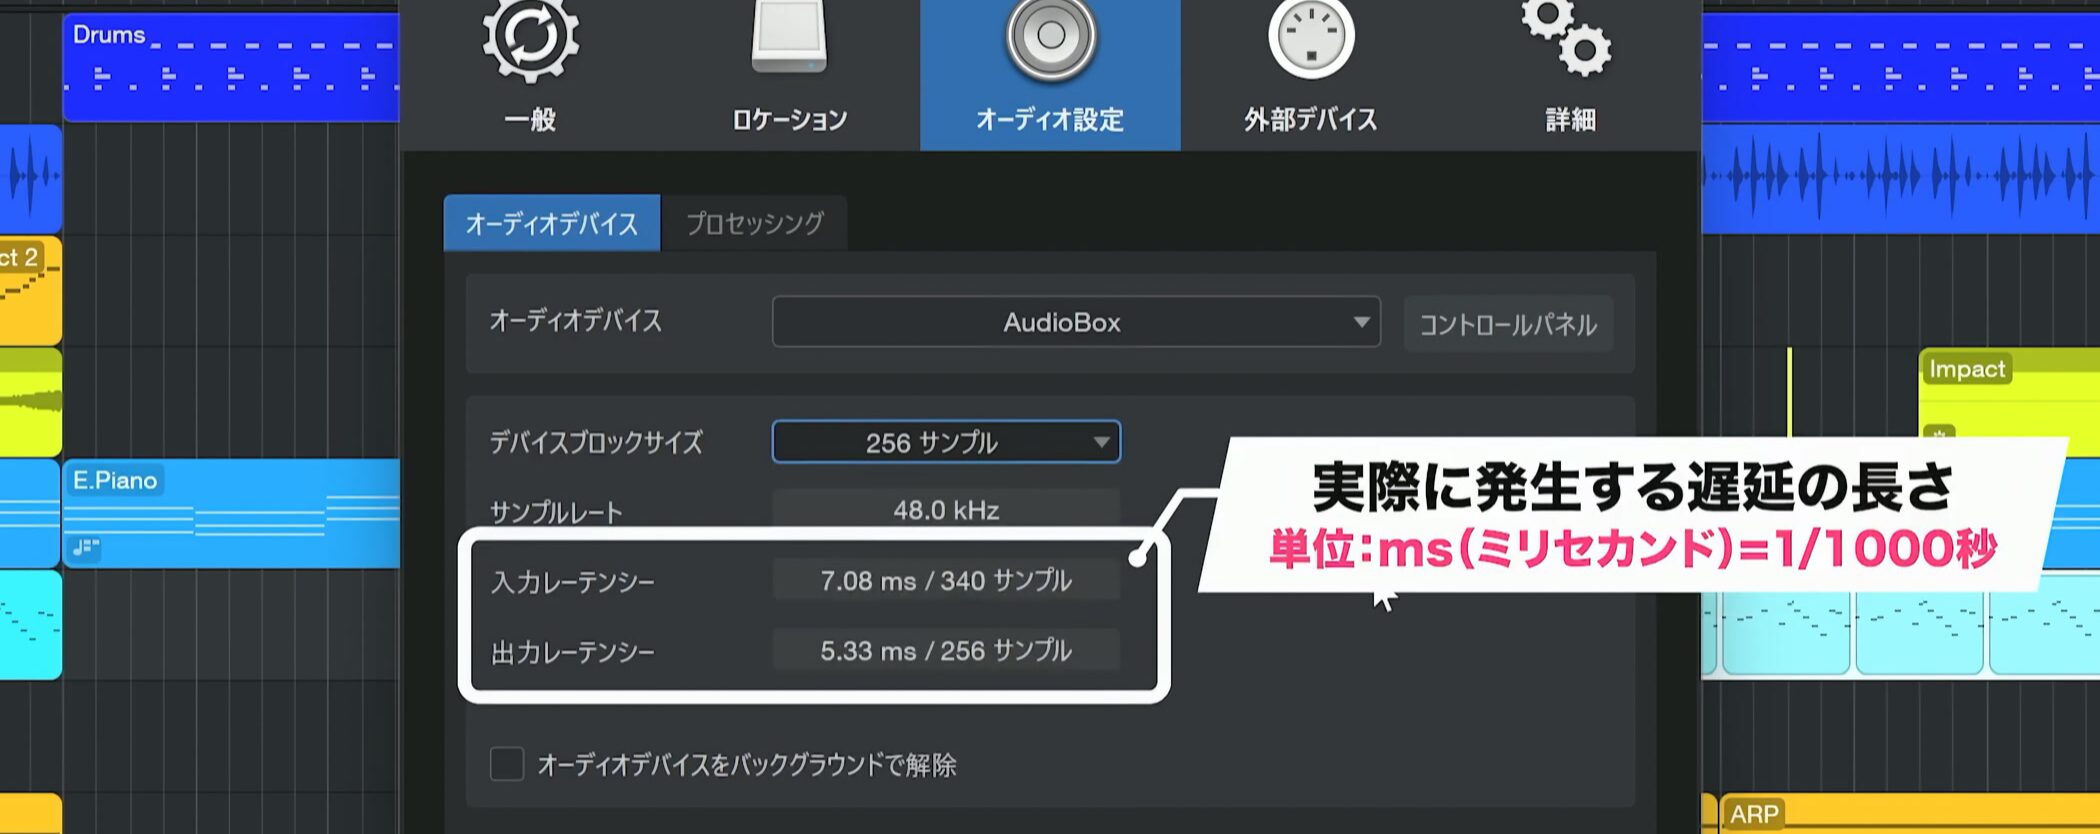
The displayed values show the resulting delay.
They are measured in milliseconds, or thousandths of a second.
For example, approximately 7 ms of input delay plus 5 ms of output delay gives a total of 12 ms.
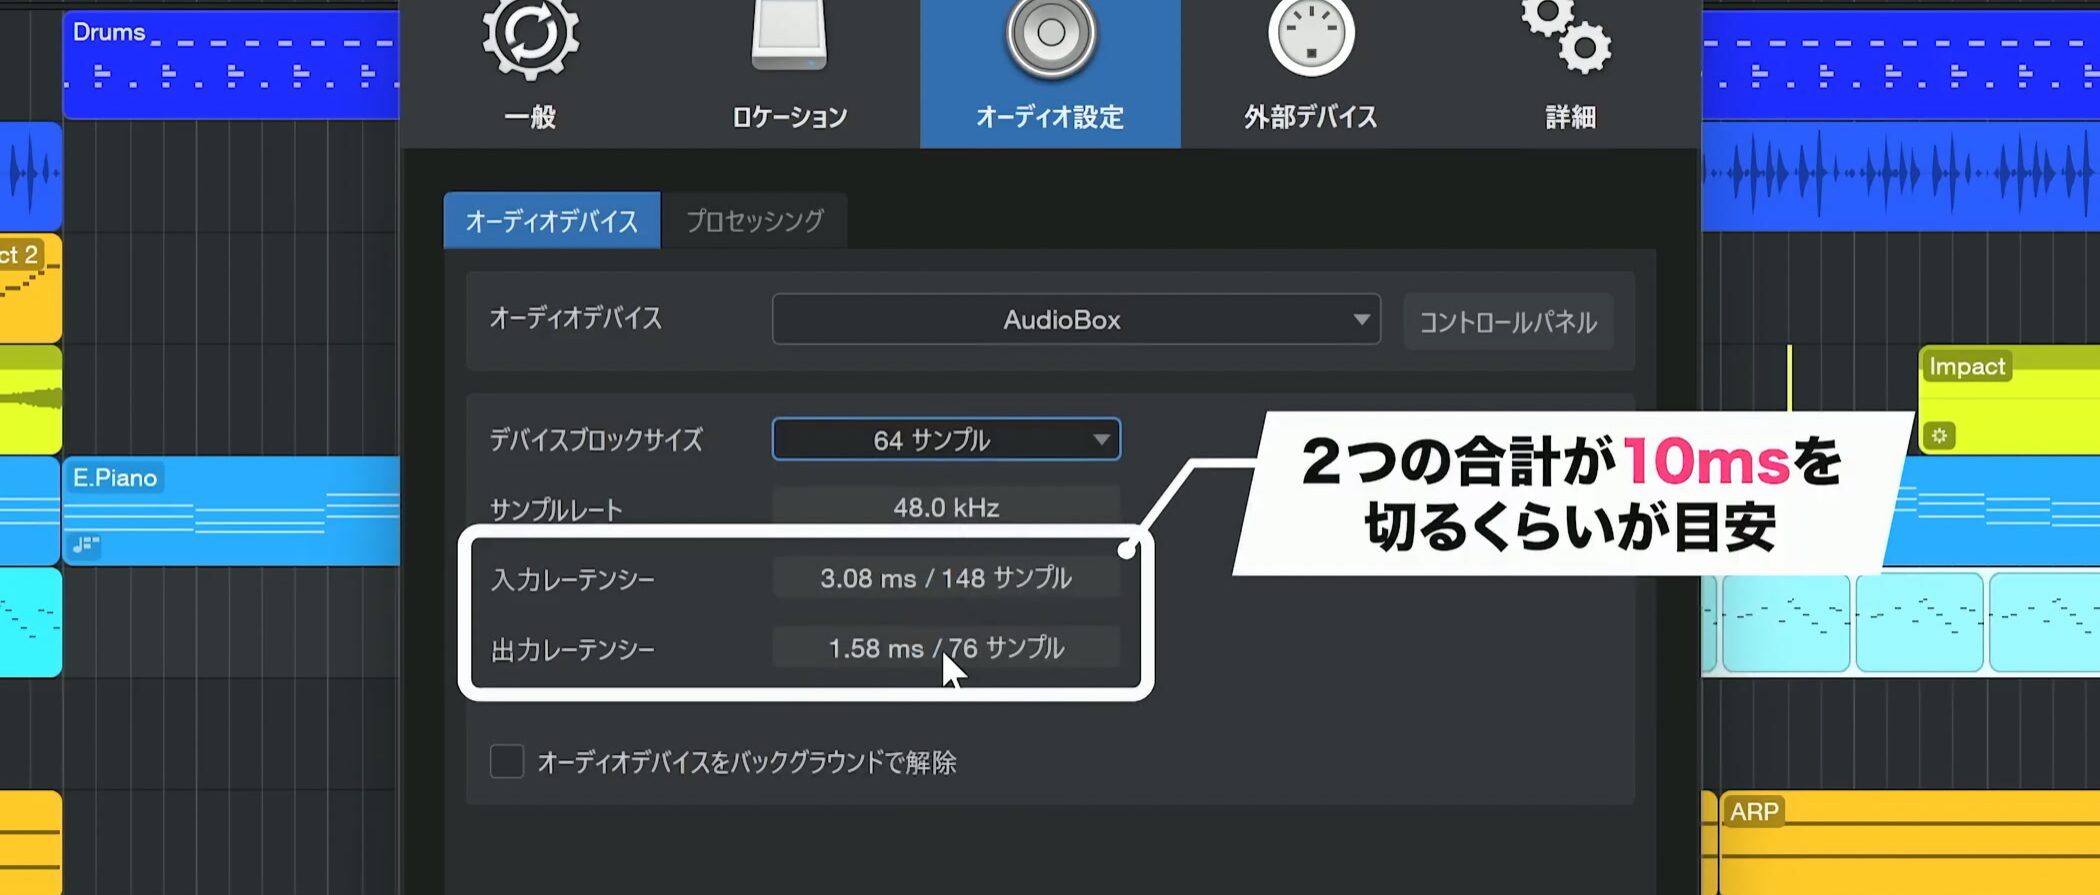
As a guideline, aim for less than 10 ms combined input and output latency.
In this example, we proceed with a block size of 64 samples.
Configure inputs in Song Setup
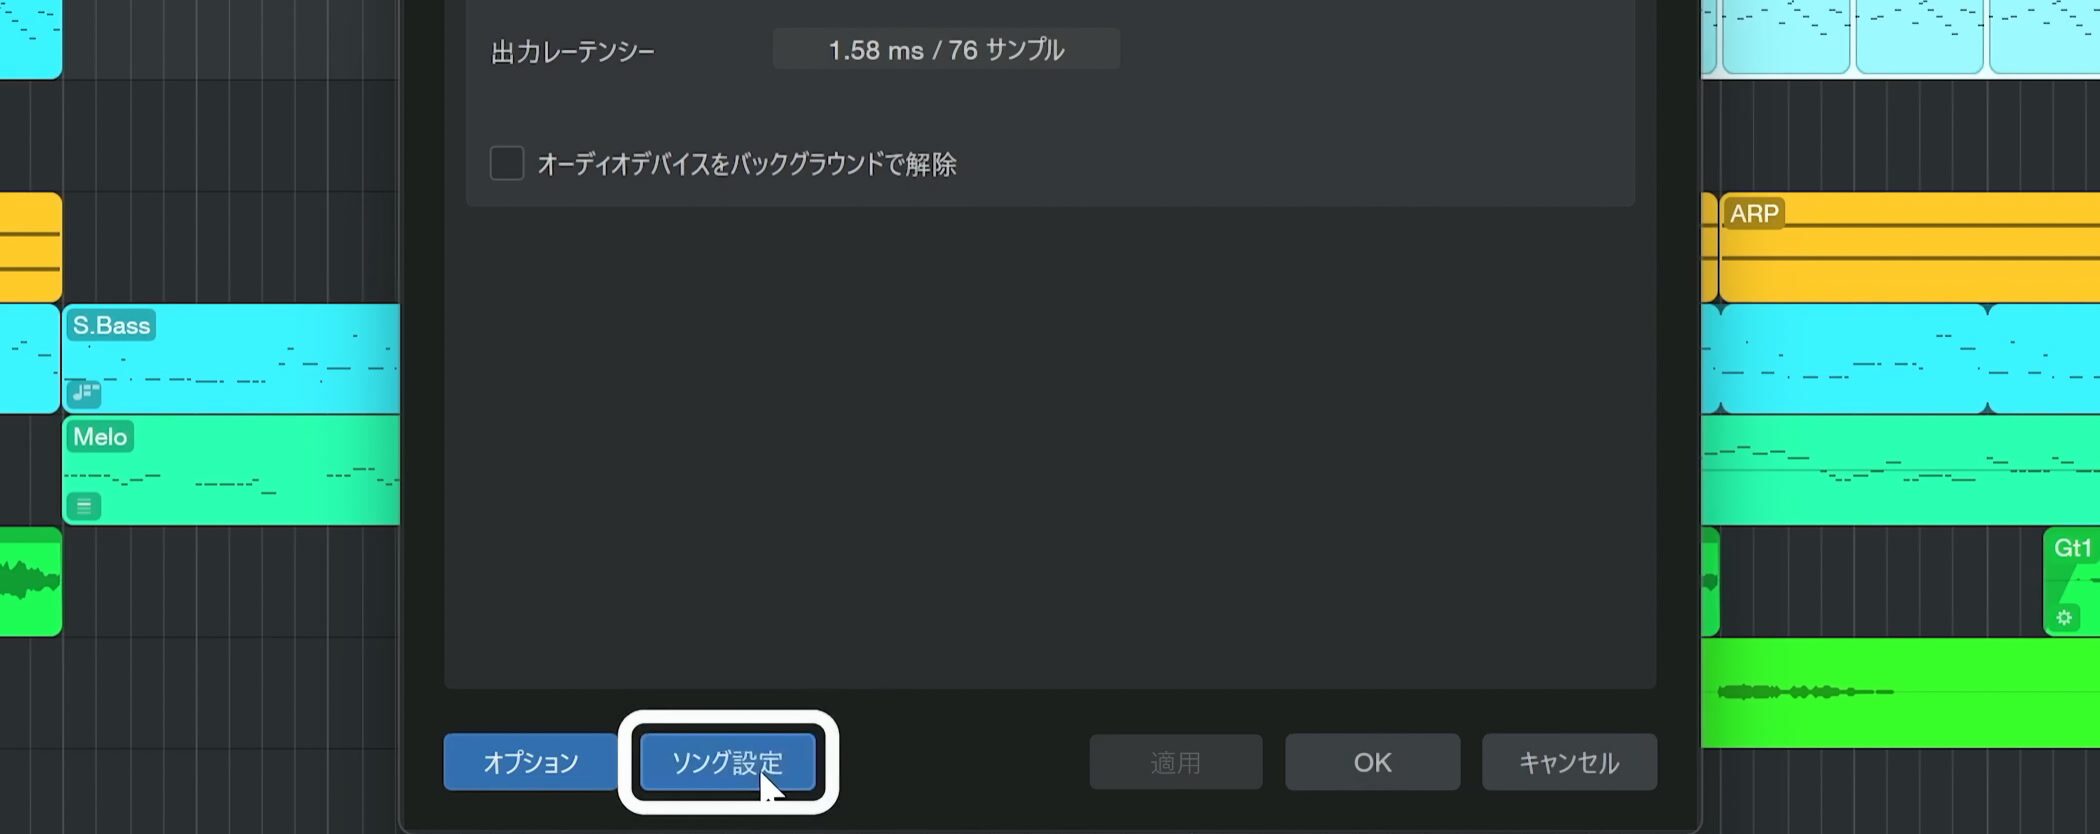
Also check Song Setup.
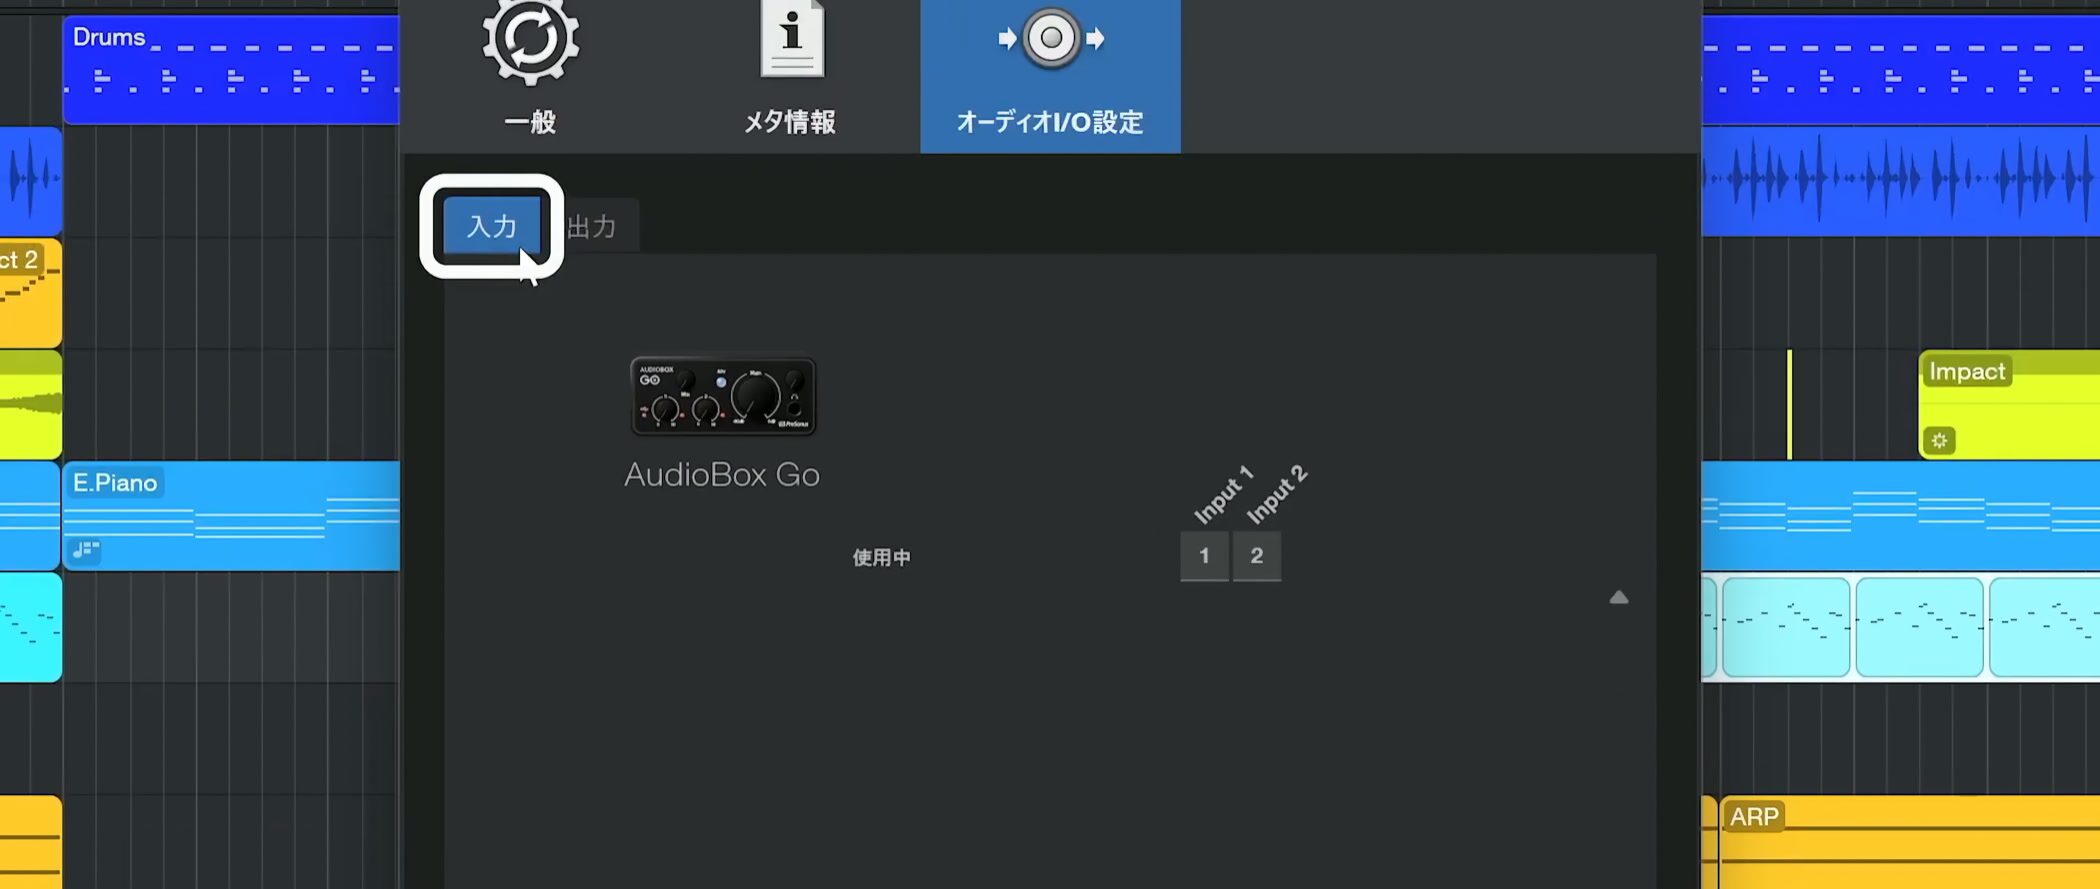
The Inputs section may initially be empty.
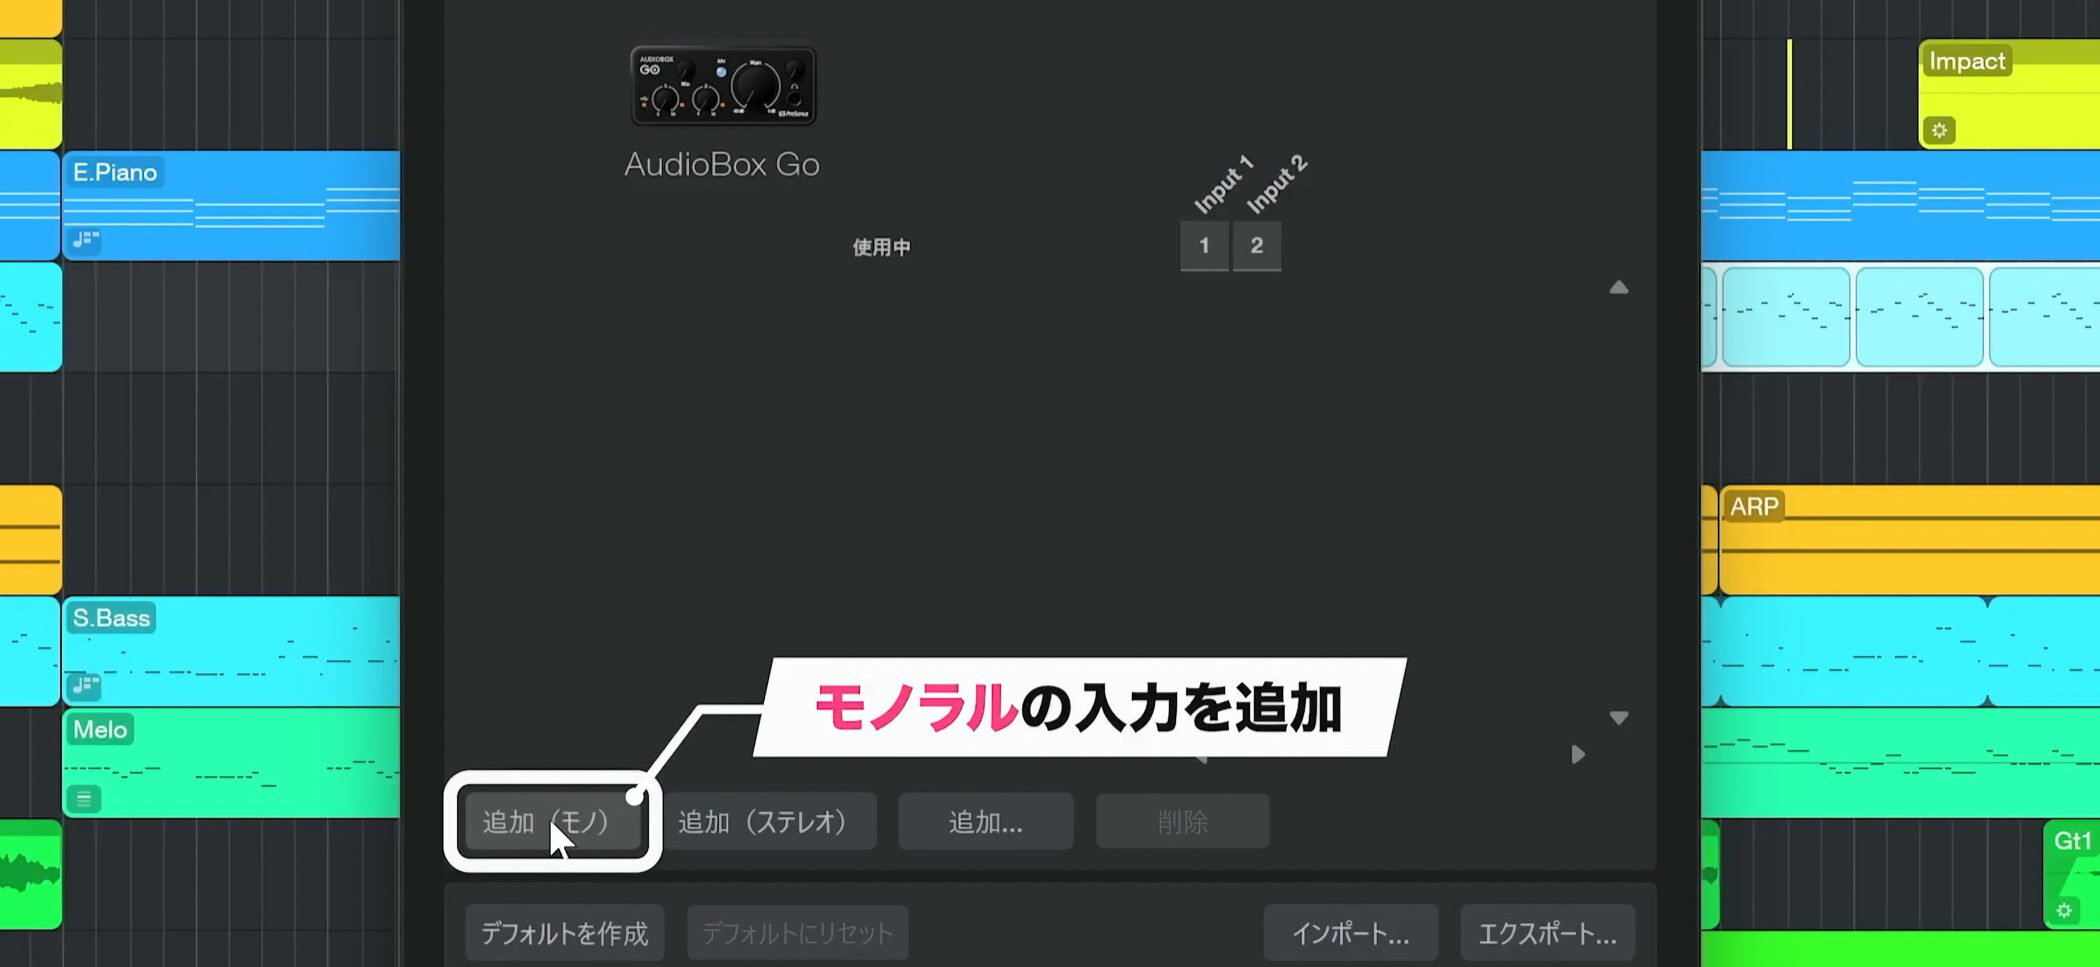
For an instrument connected with one cable, such as a guitar or microphone, add a mono input.
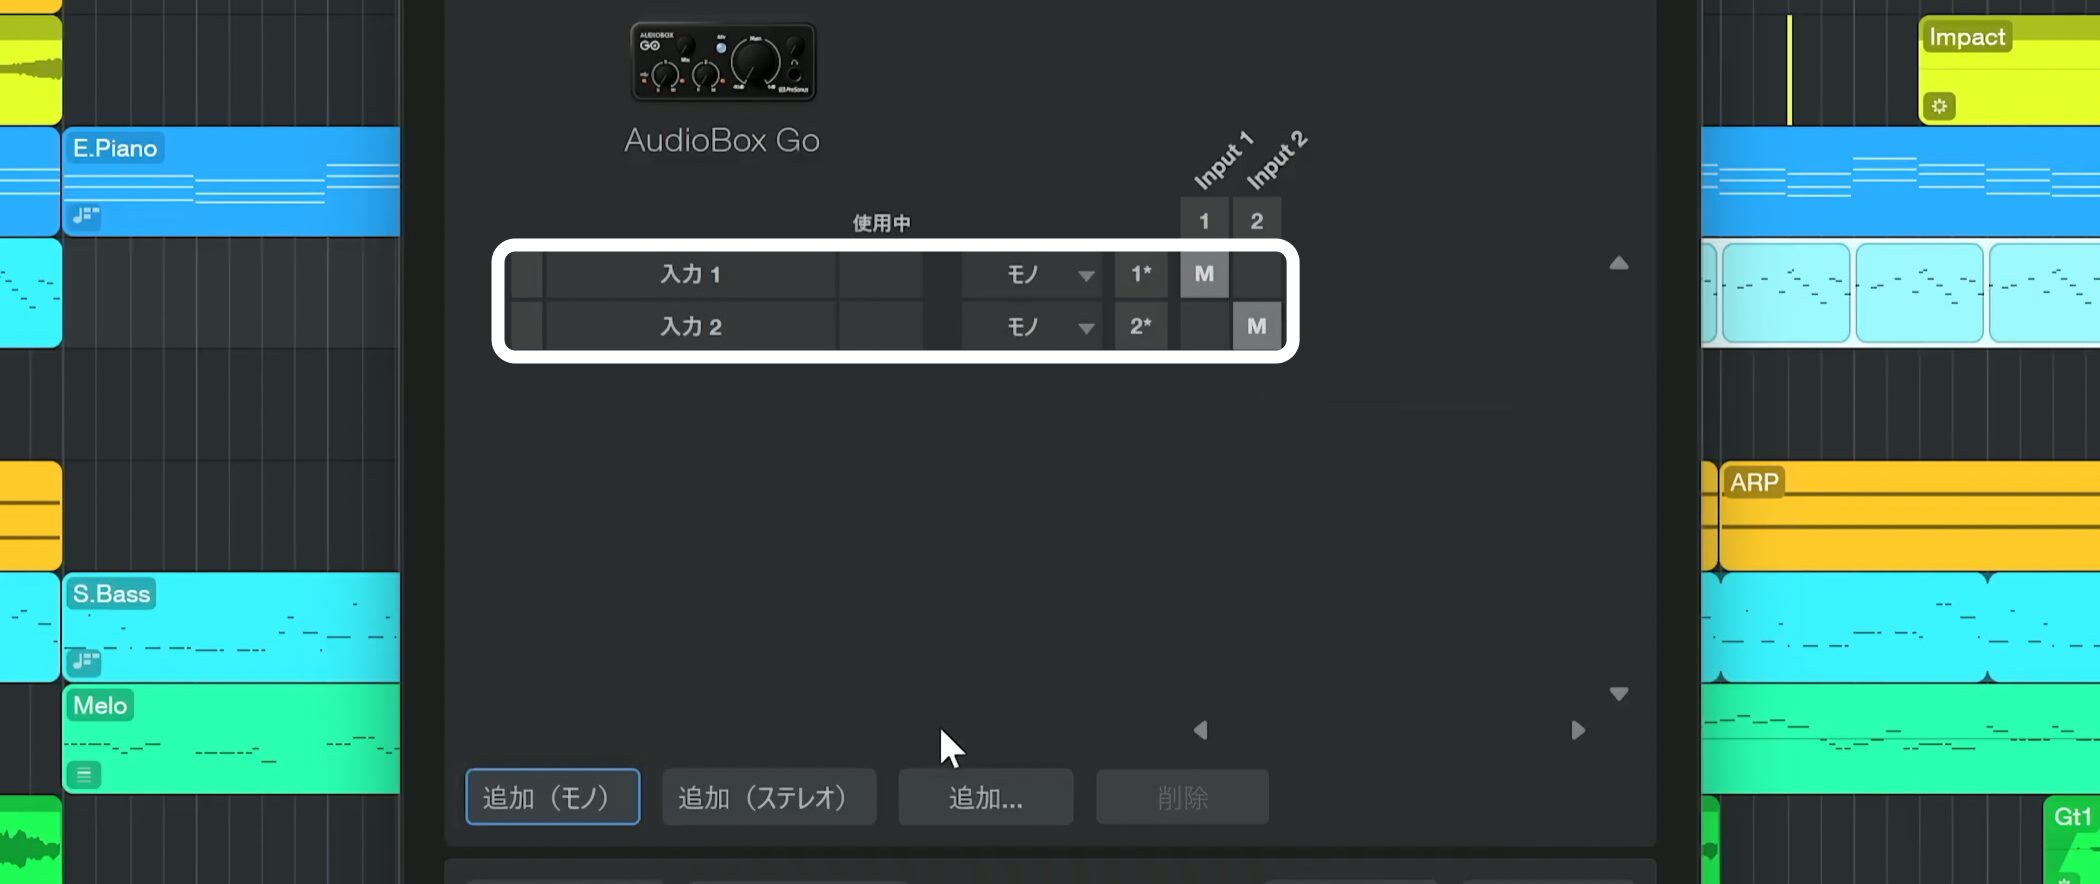
If the interface has two inputs, you can add another mono input.
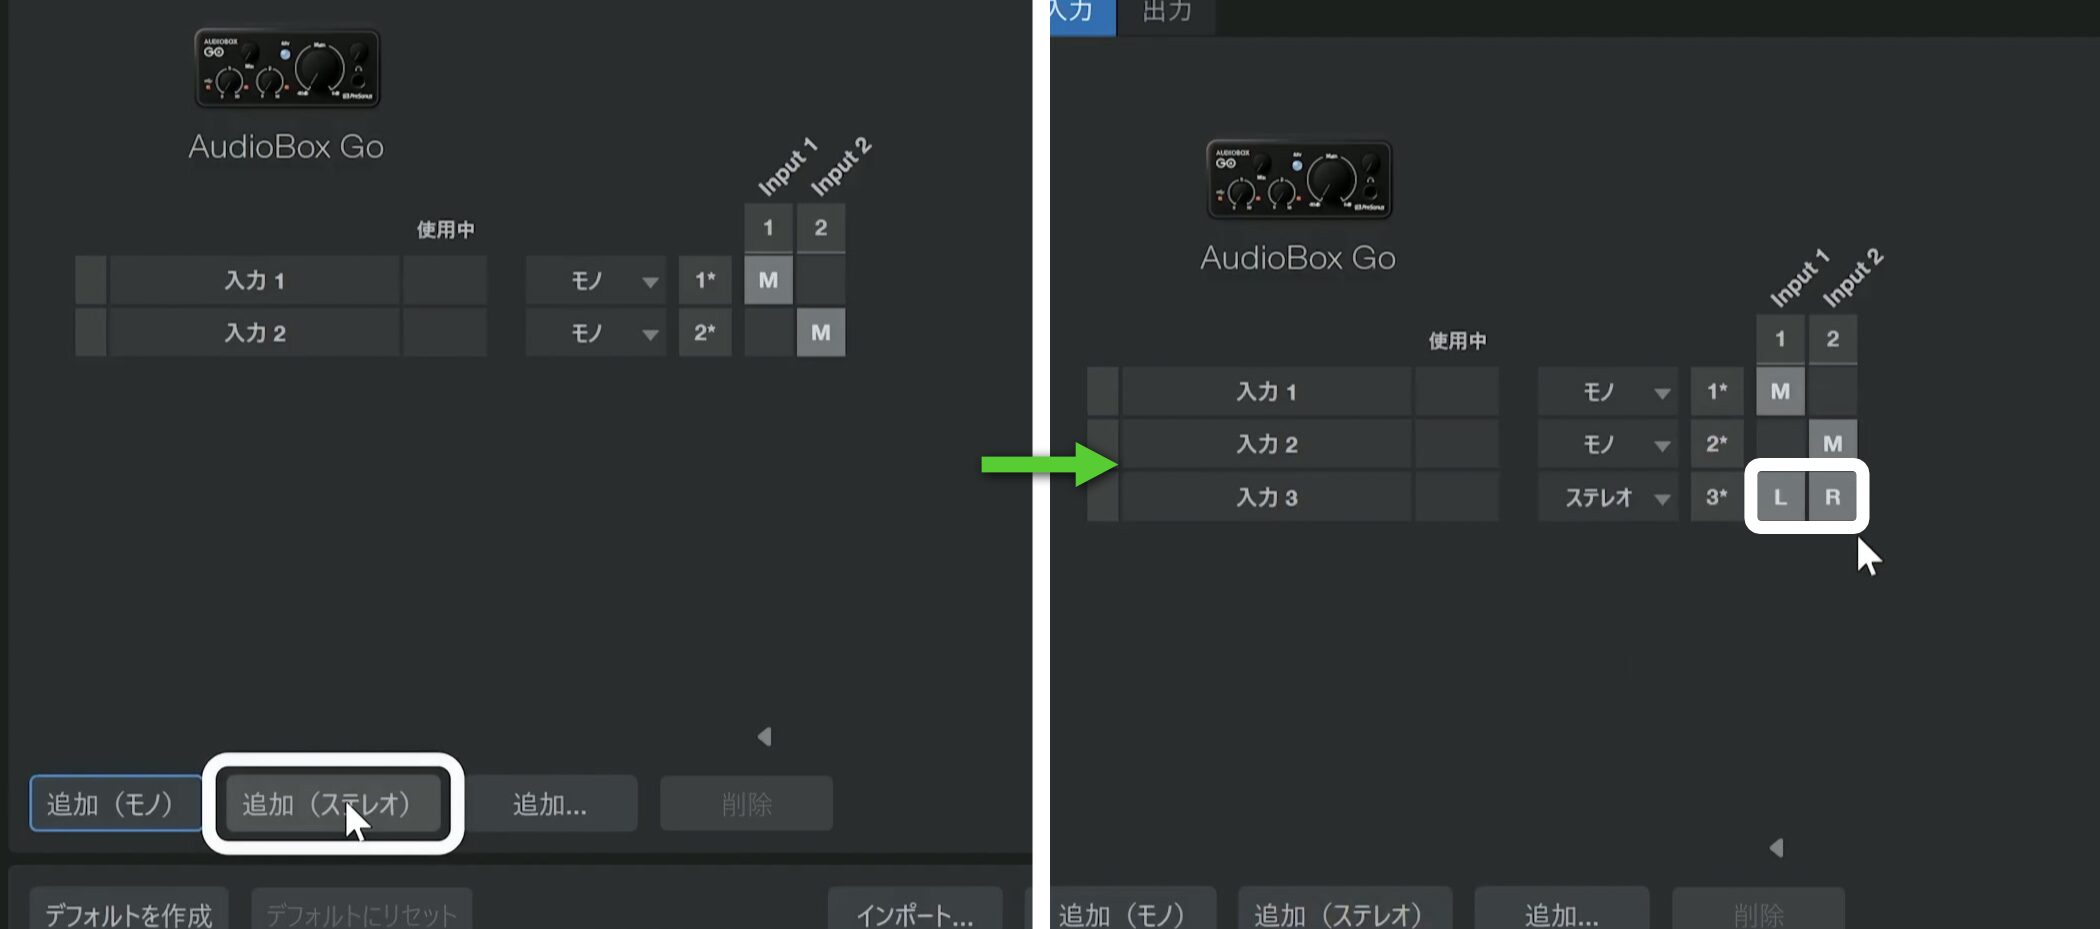
To connect a stereo instrument such as a synthesizer or keyboard, create a stereo input.
Click to assign its left and right channels.
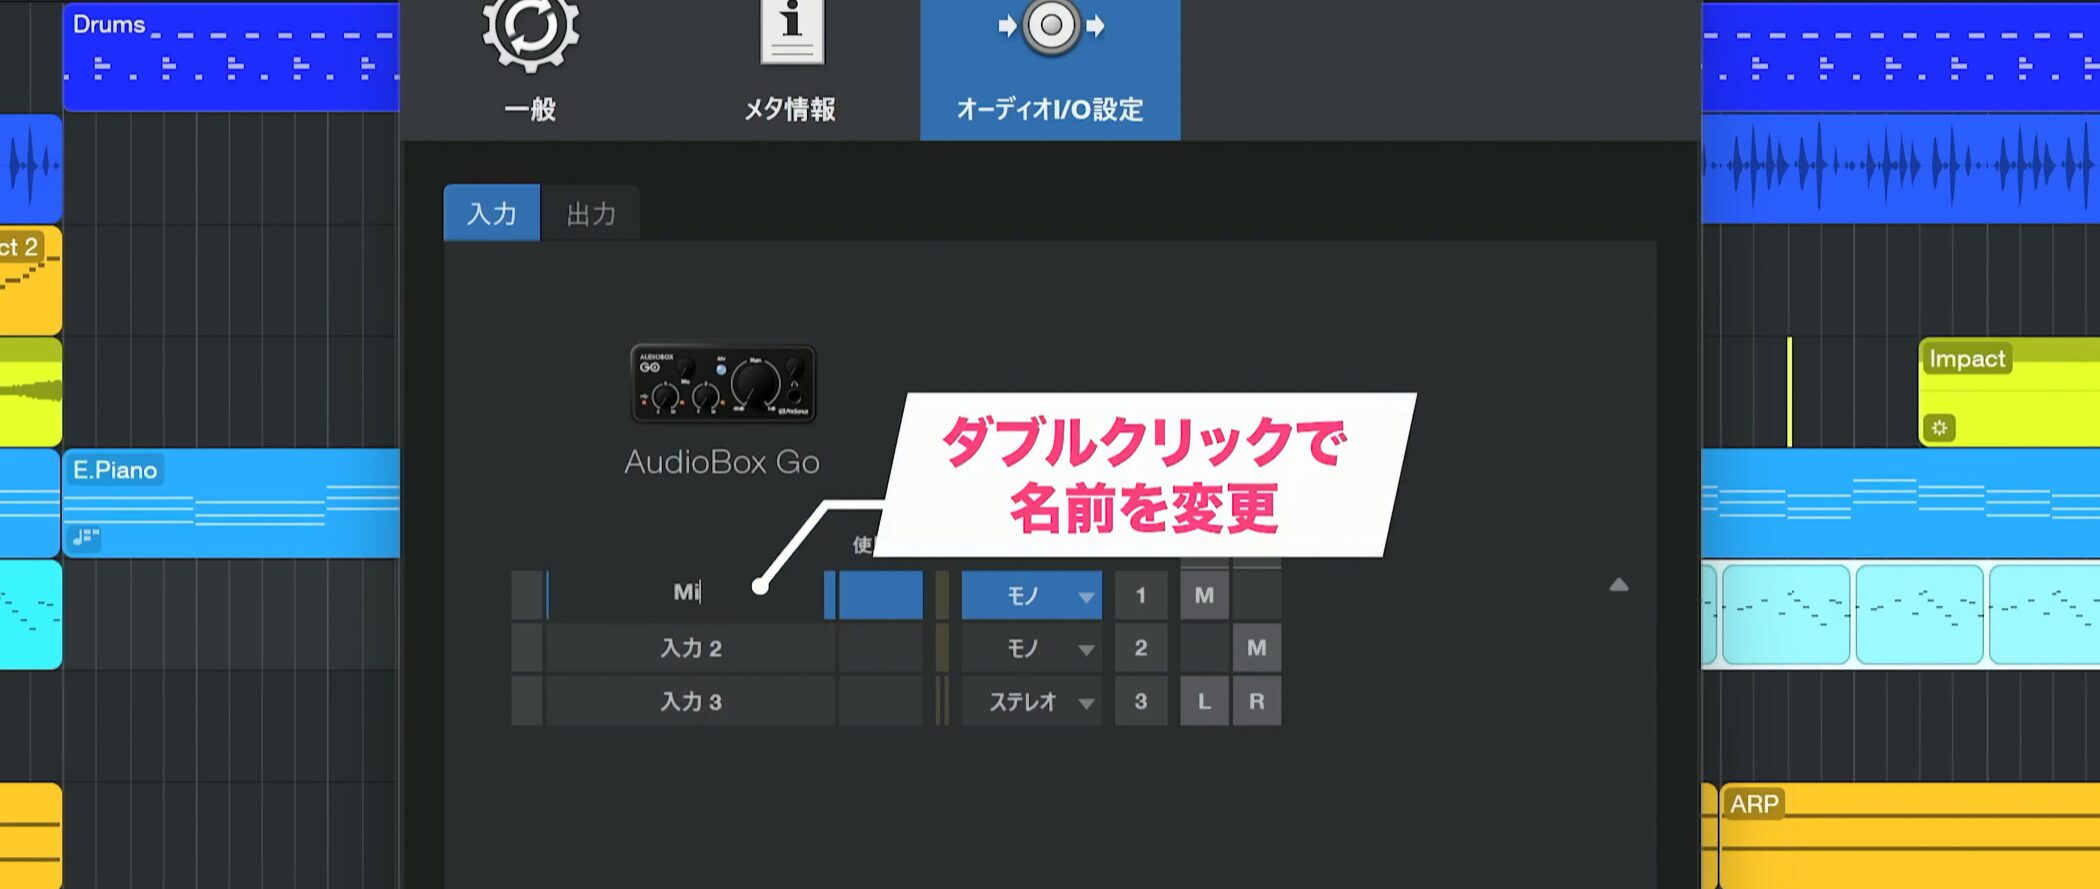
If every input is named “Input,” it may be hard to tell what is connected.
Double-click to rename each one clearly in advance.
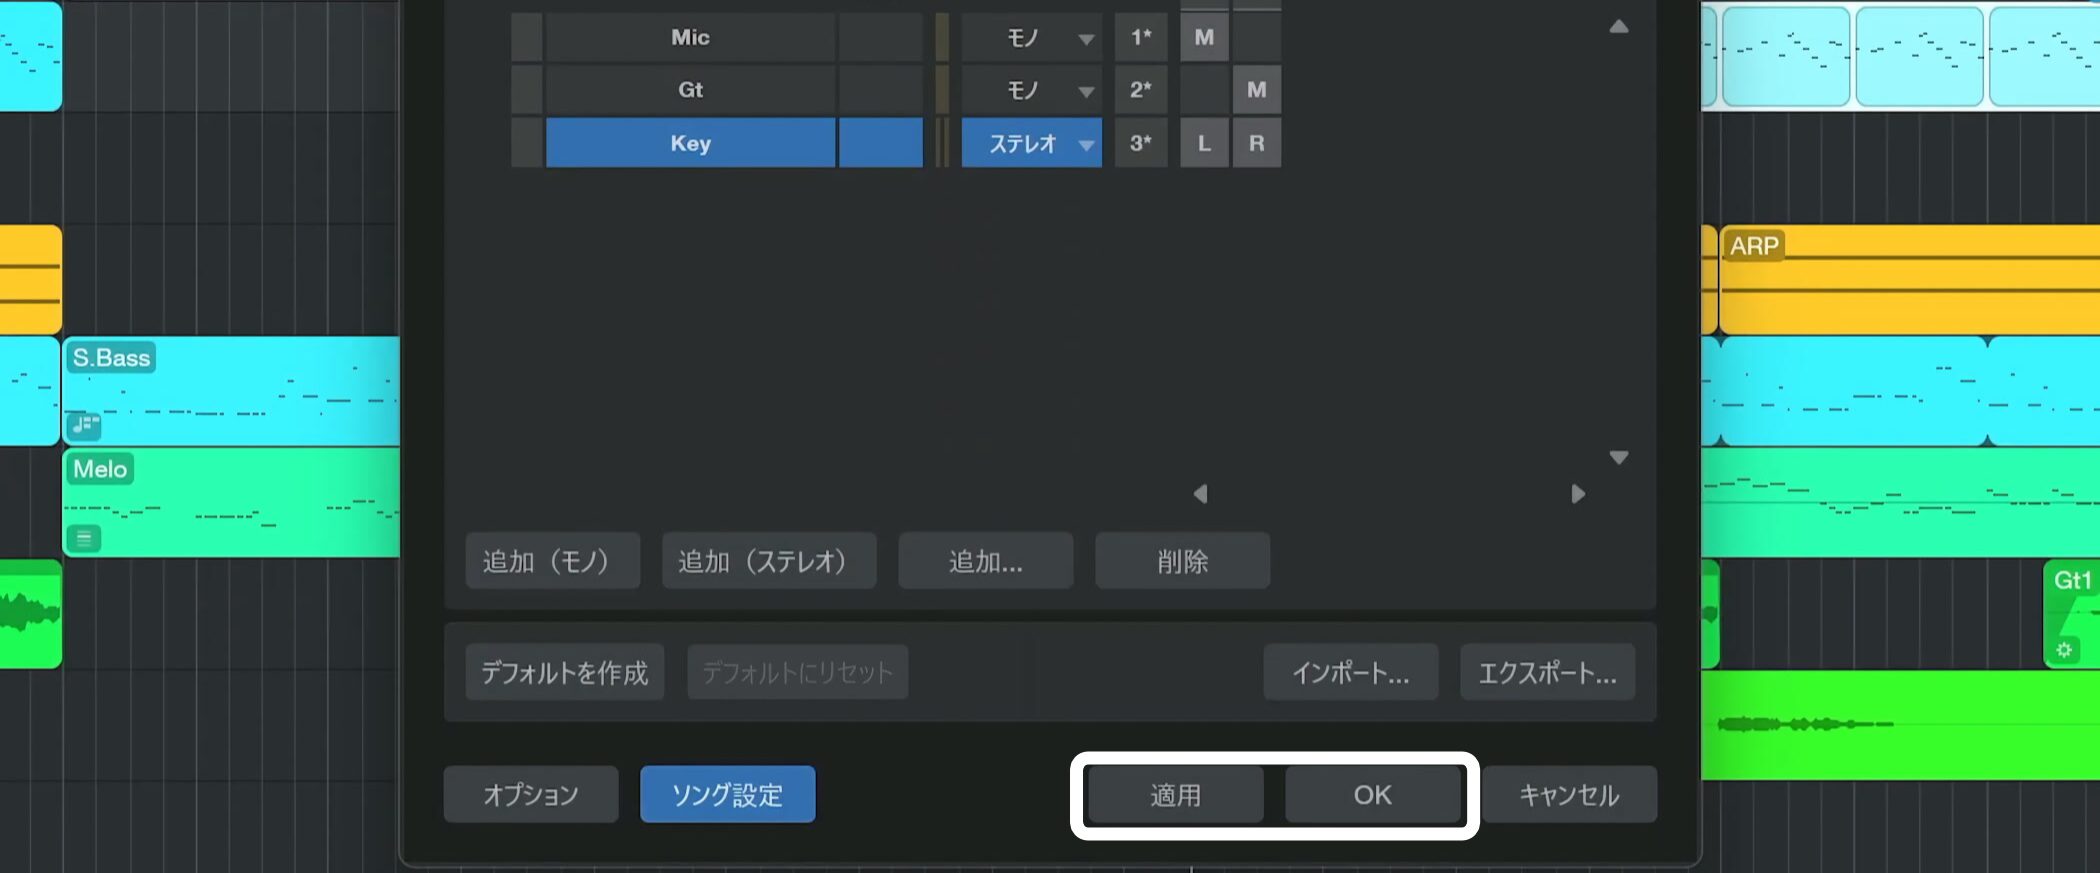
For example, name input 1 “Microphone,” input 2 “Guitar,” and the stereo input “Keyboard.”
Click Apply, then OK to close the window.
Create an audio track and choose its input
Create an audio track to record the guitar.
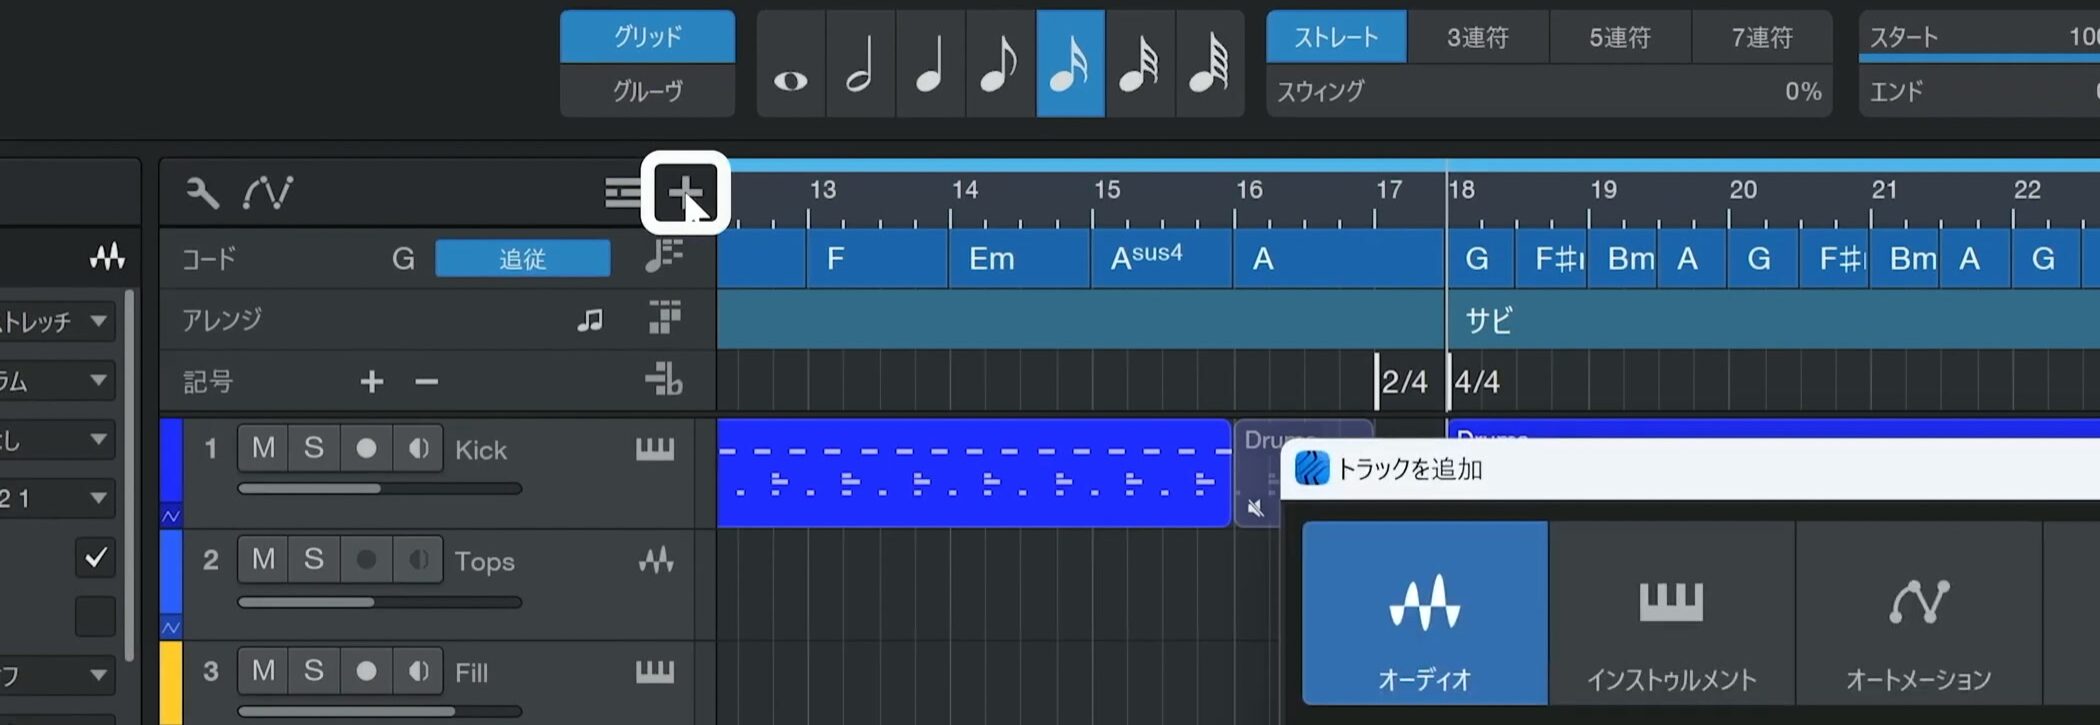
Use the plus button at the top or right-click the track list.
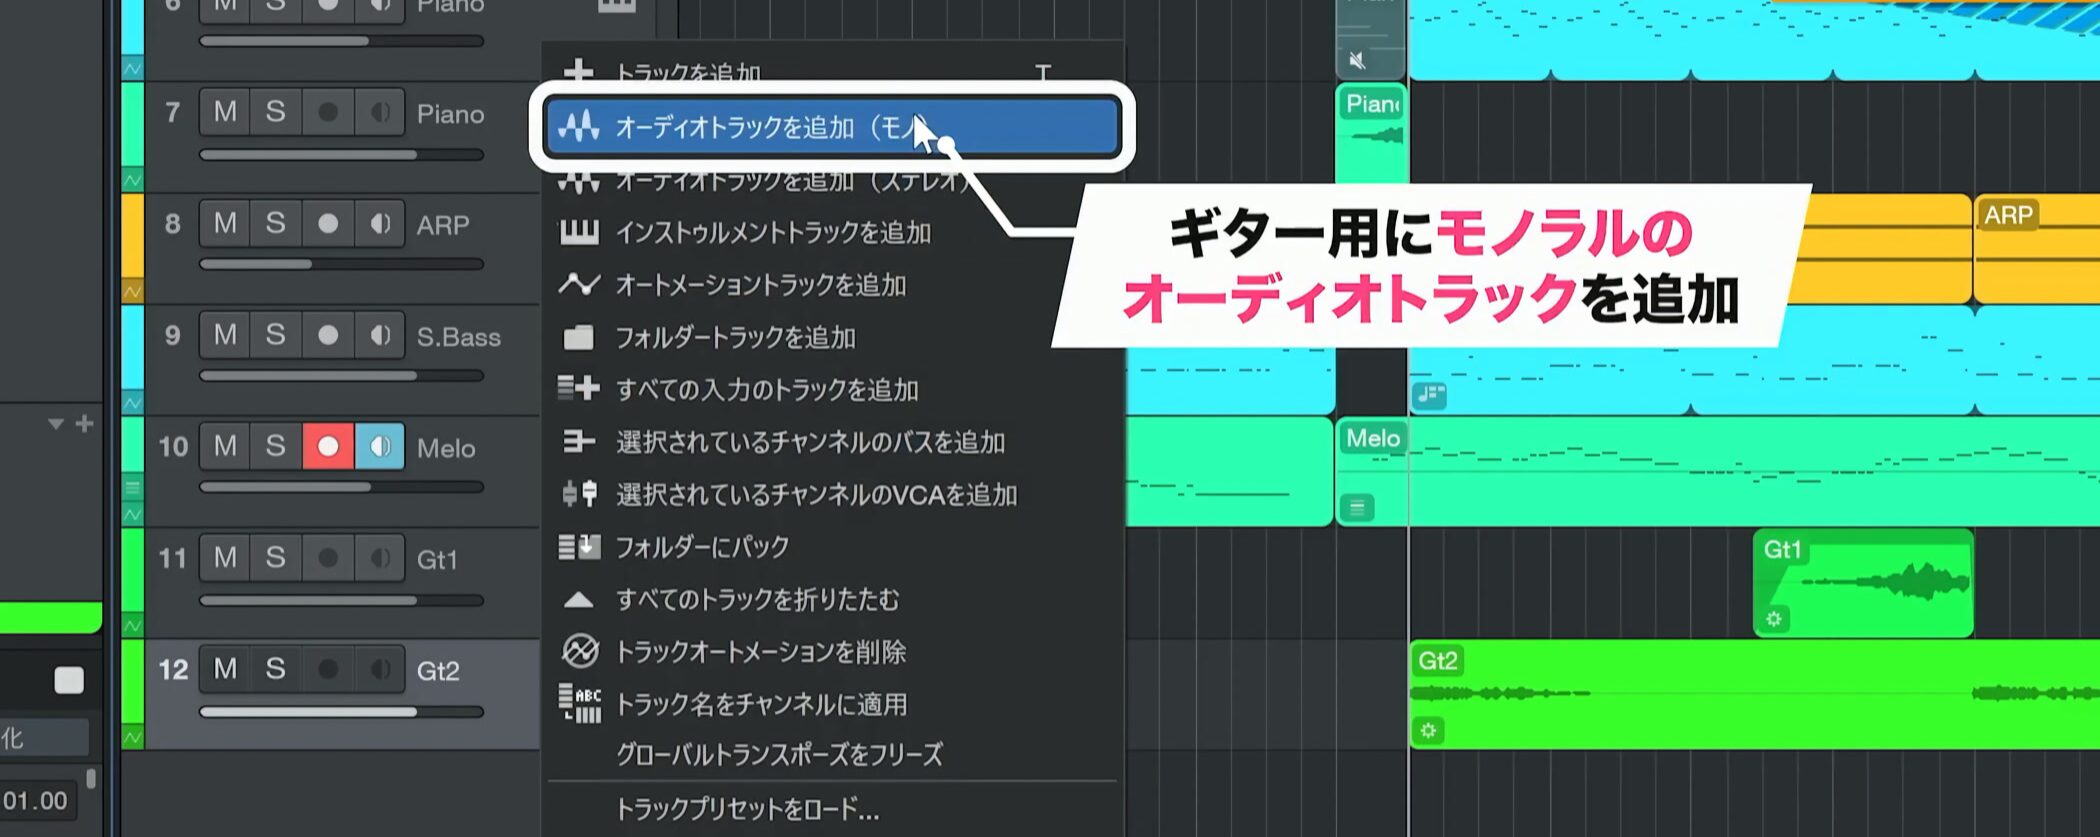
Select an audio track and choose Mono because the guitar uses one cable.
Give the track a clear name.
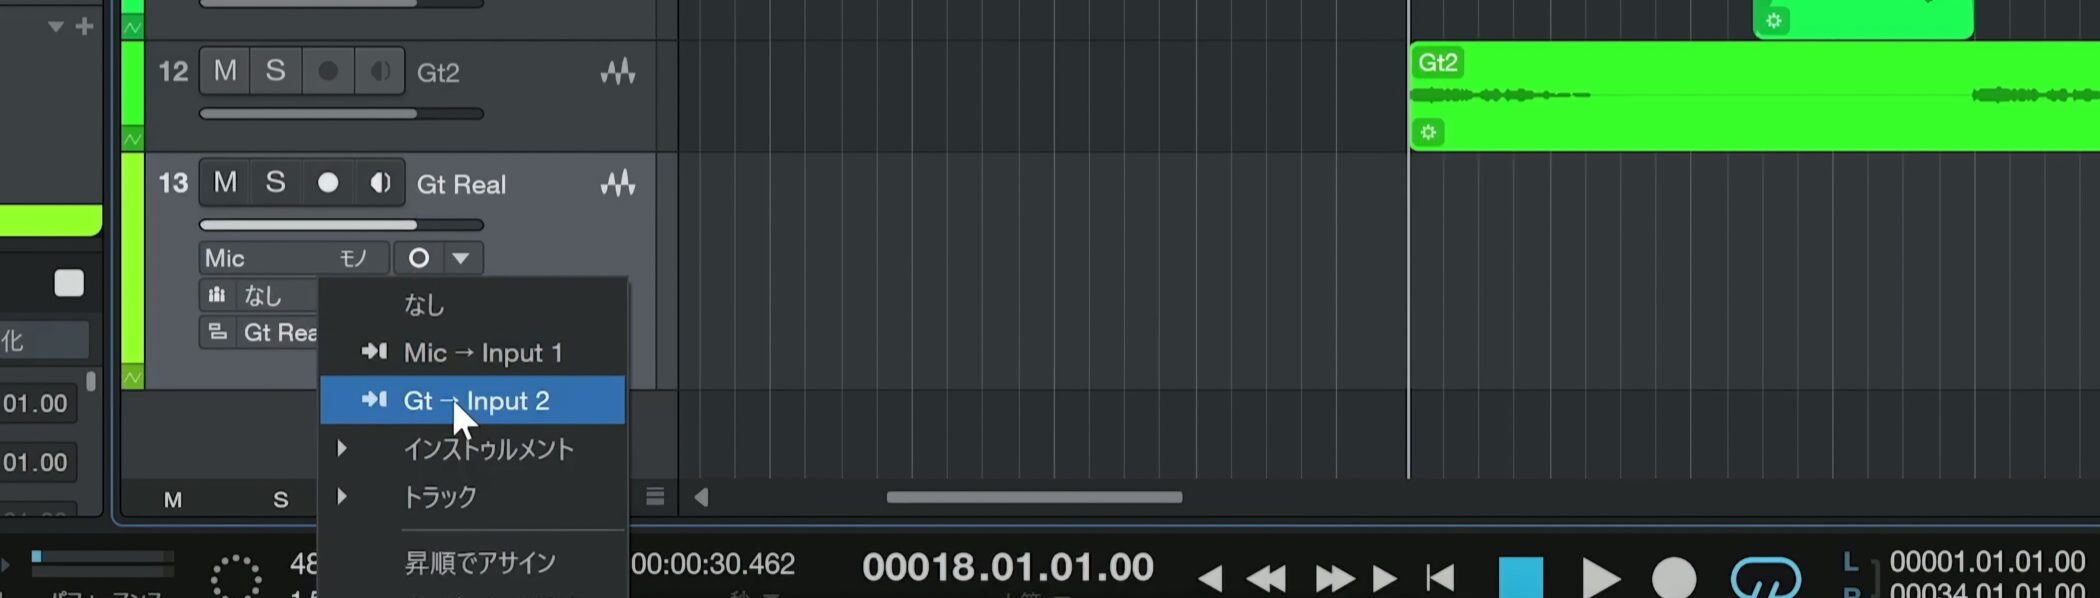
Always check the Input setting when creating the track.
In this example it defaults to the microphone on channel 1, so click it and switch to the guitar input.
The audio track is now connected to the guitar.
Monitor and record
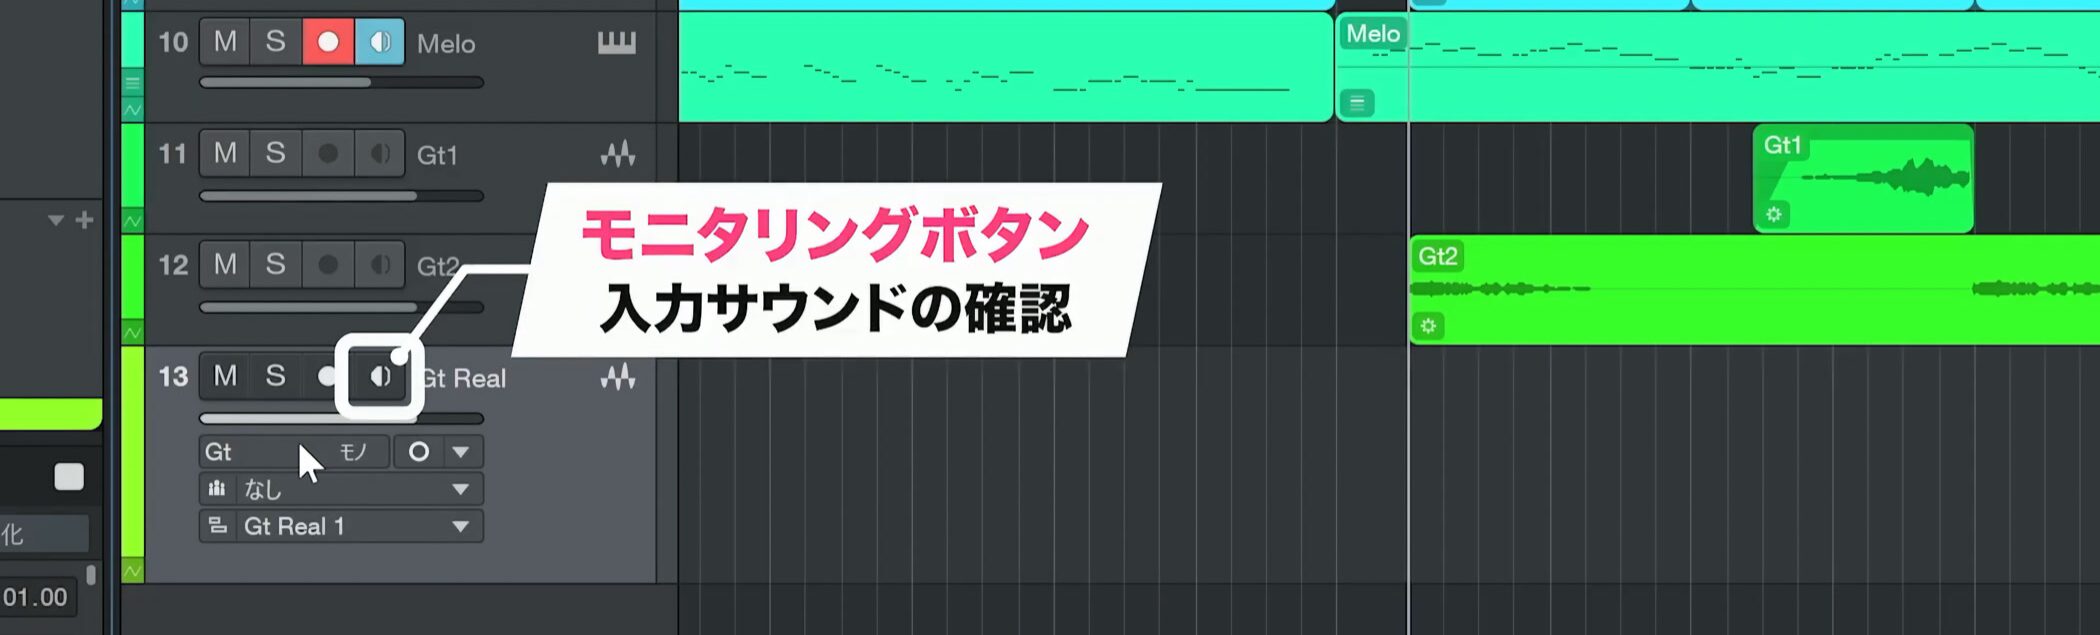
Enable the Monitor button to hear the sound.
Play the instrument to check that you can hear it.
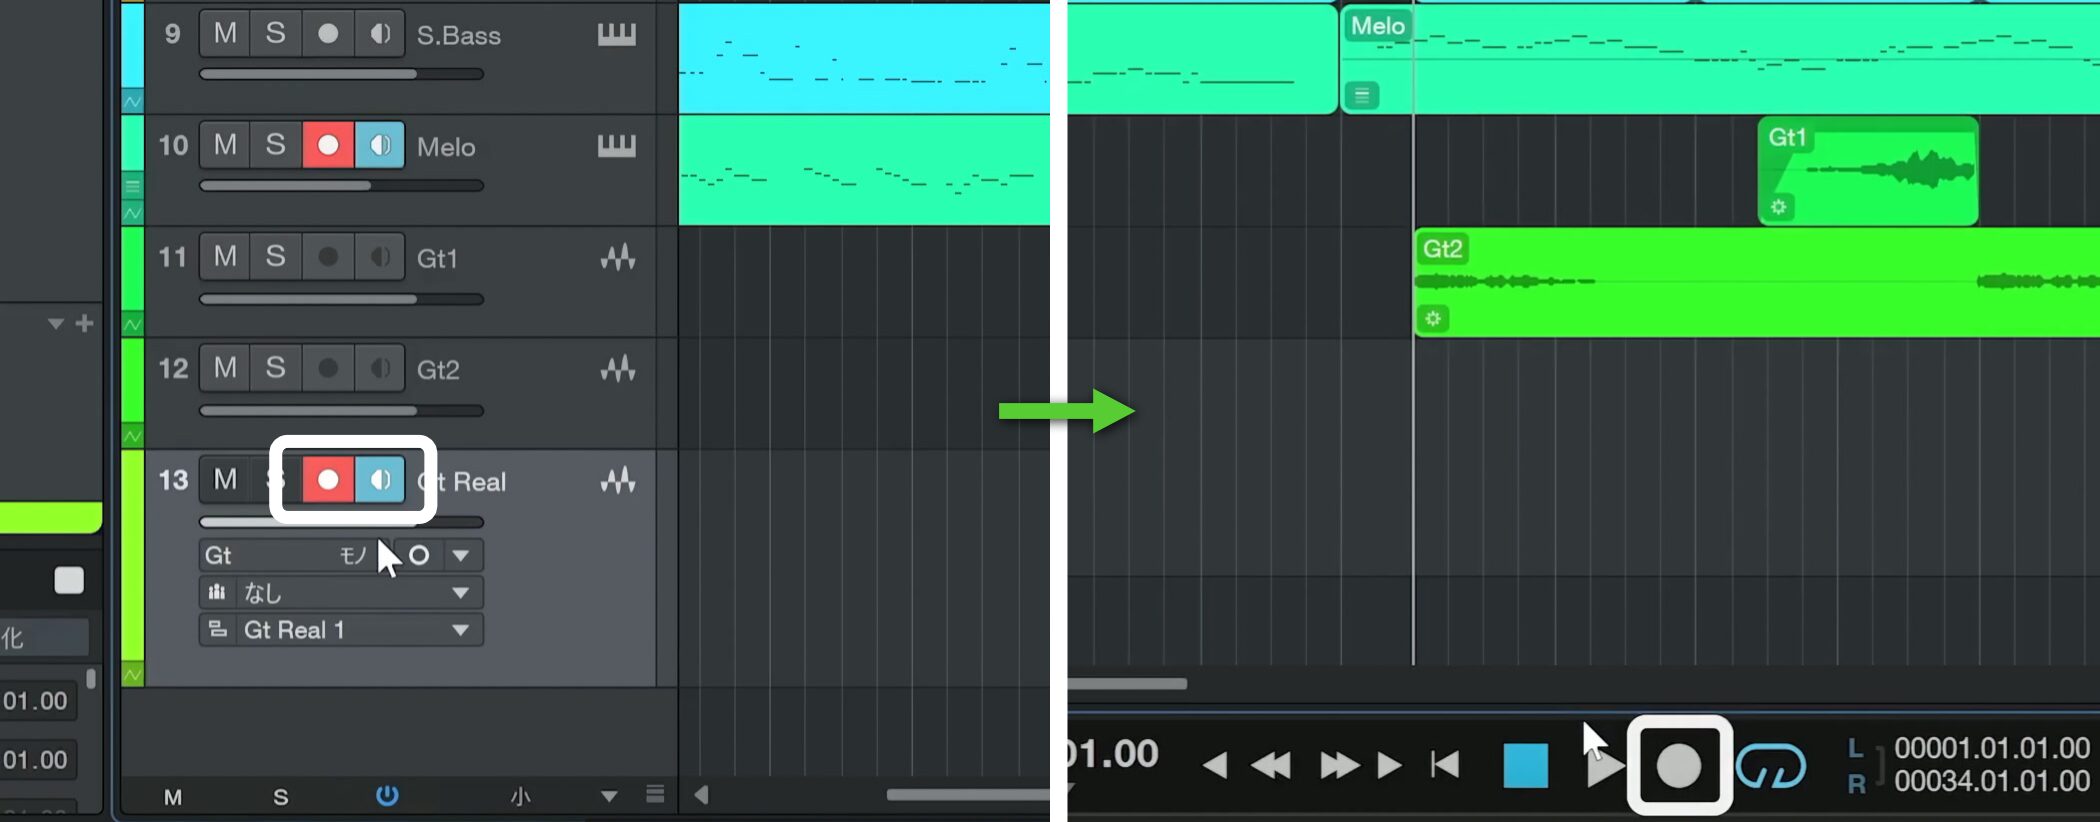
Enable the track’s record button, then press Record on the transport to begin recording.
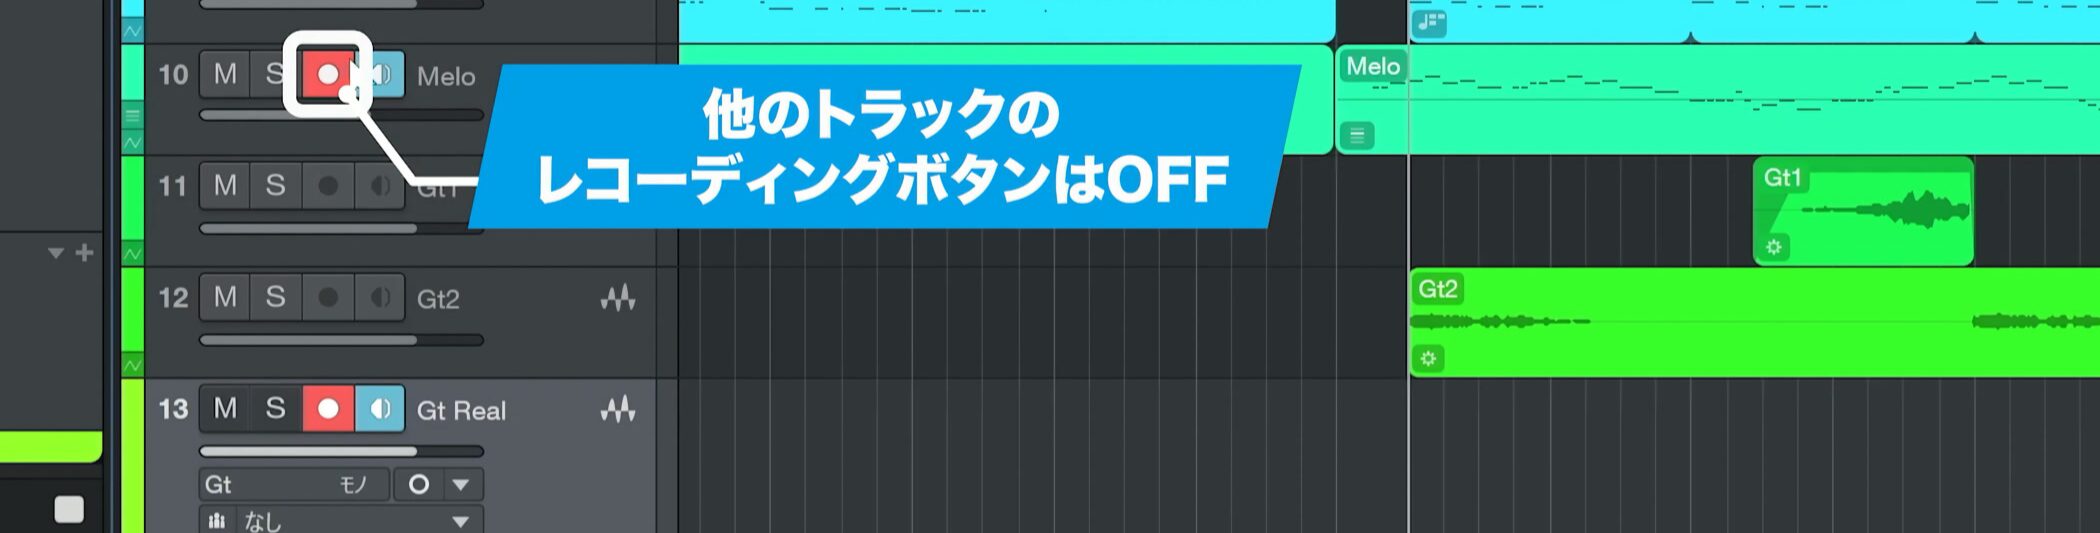
Make sure to disarm any other tracks that are record-enabled.
Adjust recording level and gain
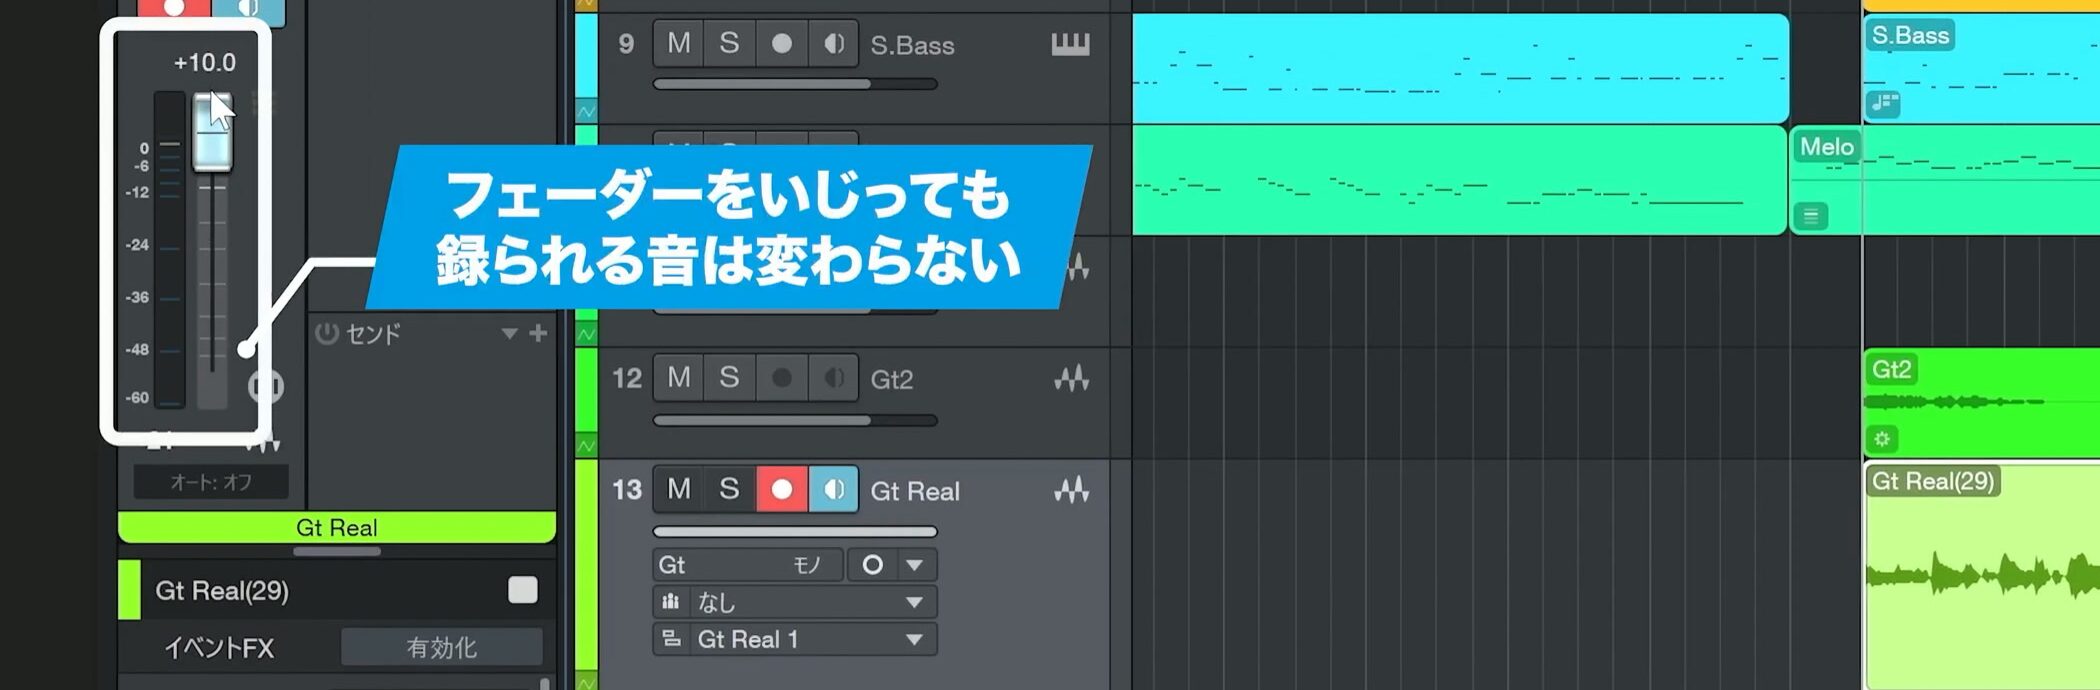
If the recorded signal is too loud or quiet, moving the track fader does not change the level being recorded.
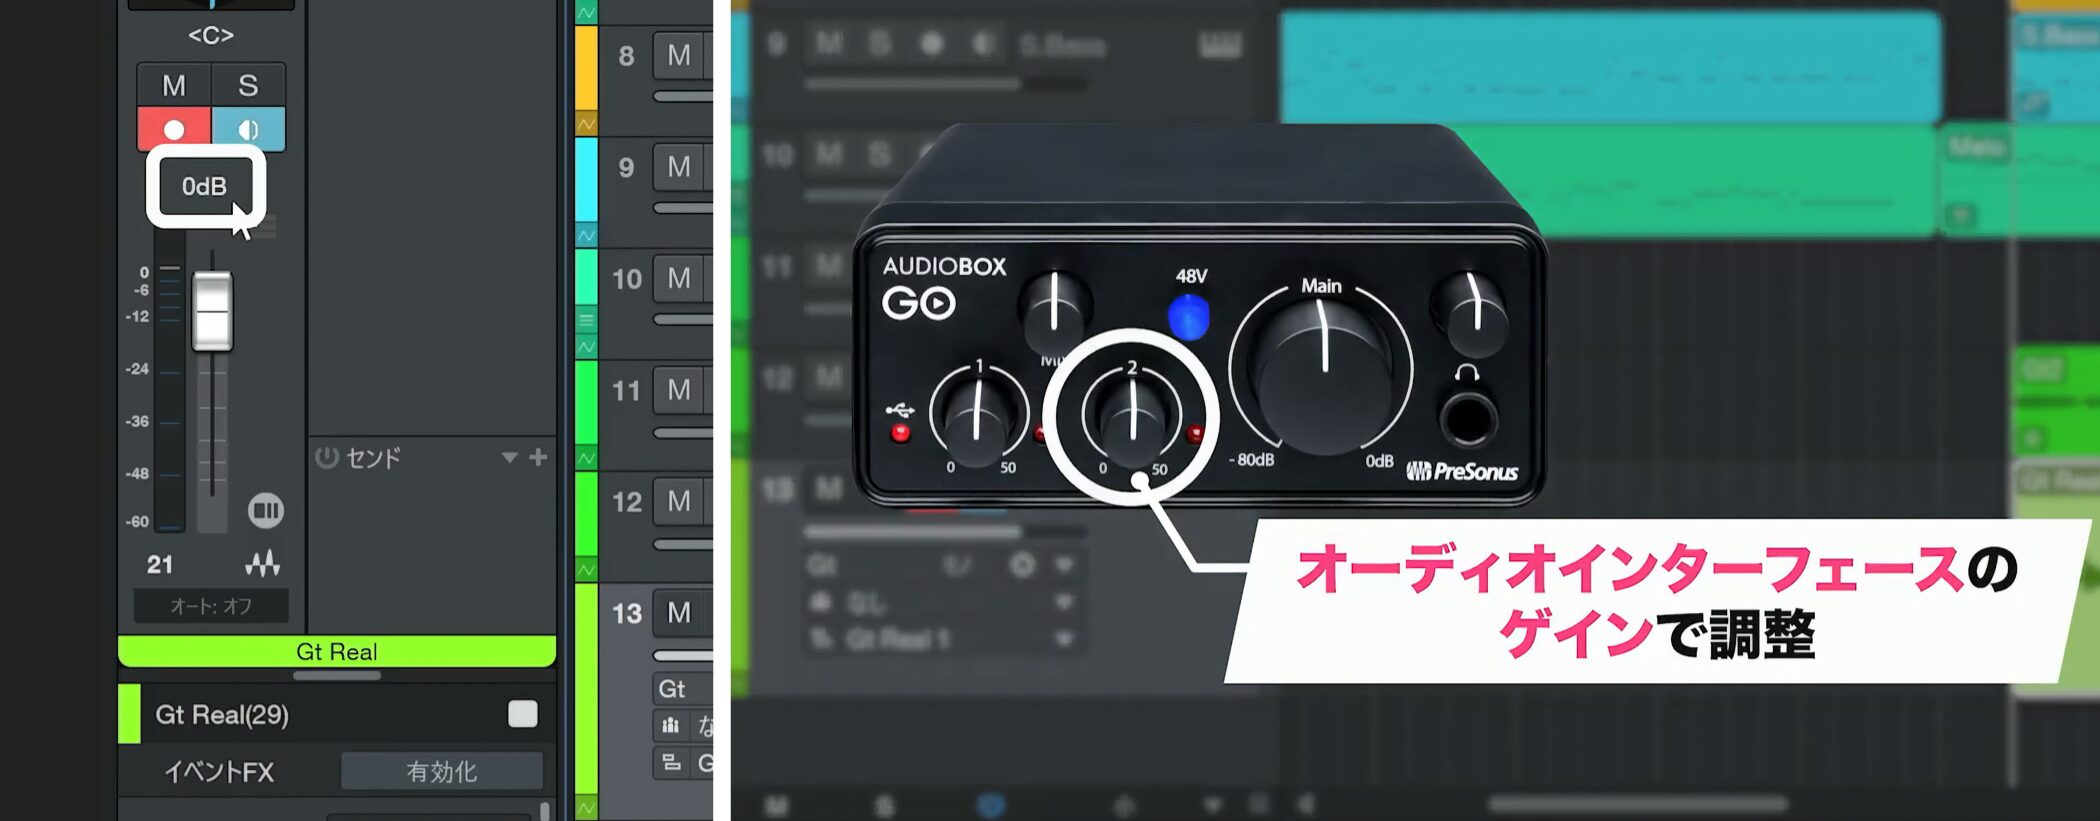
Leave the fader at zero and adjust the gain on the audio interface.
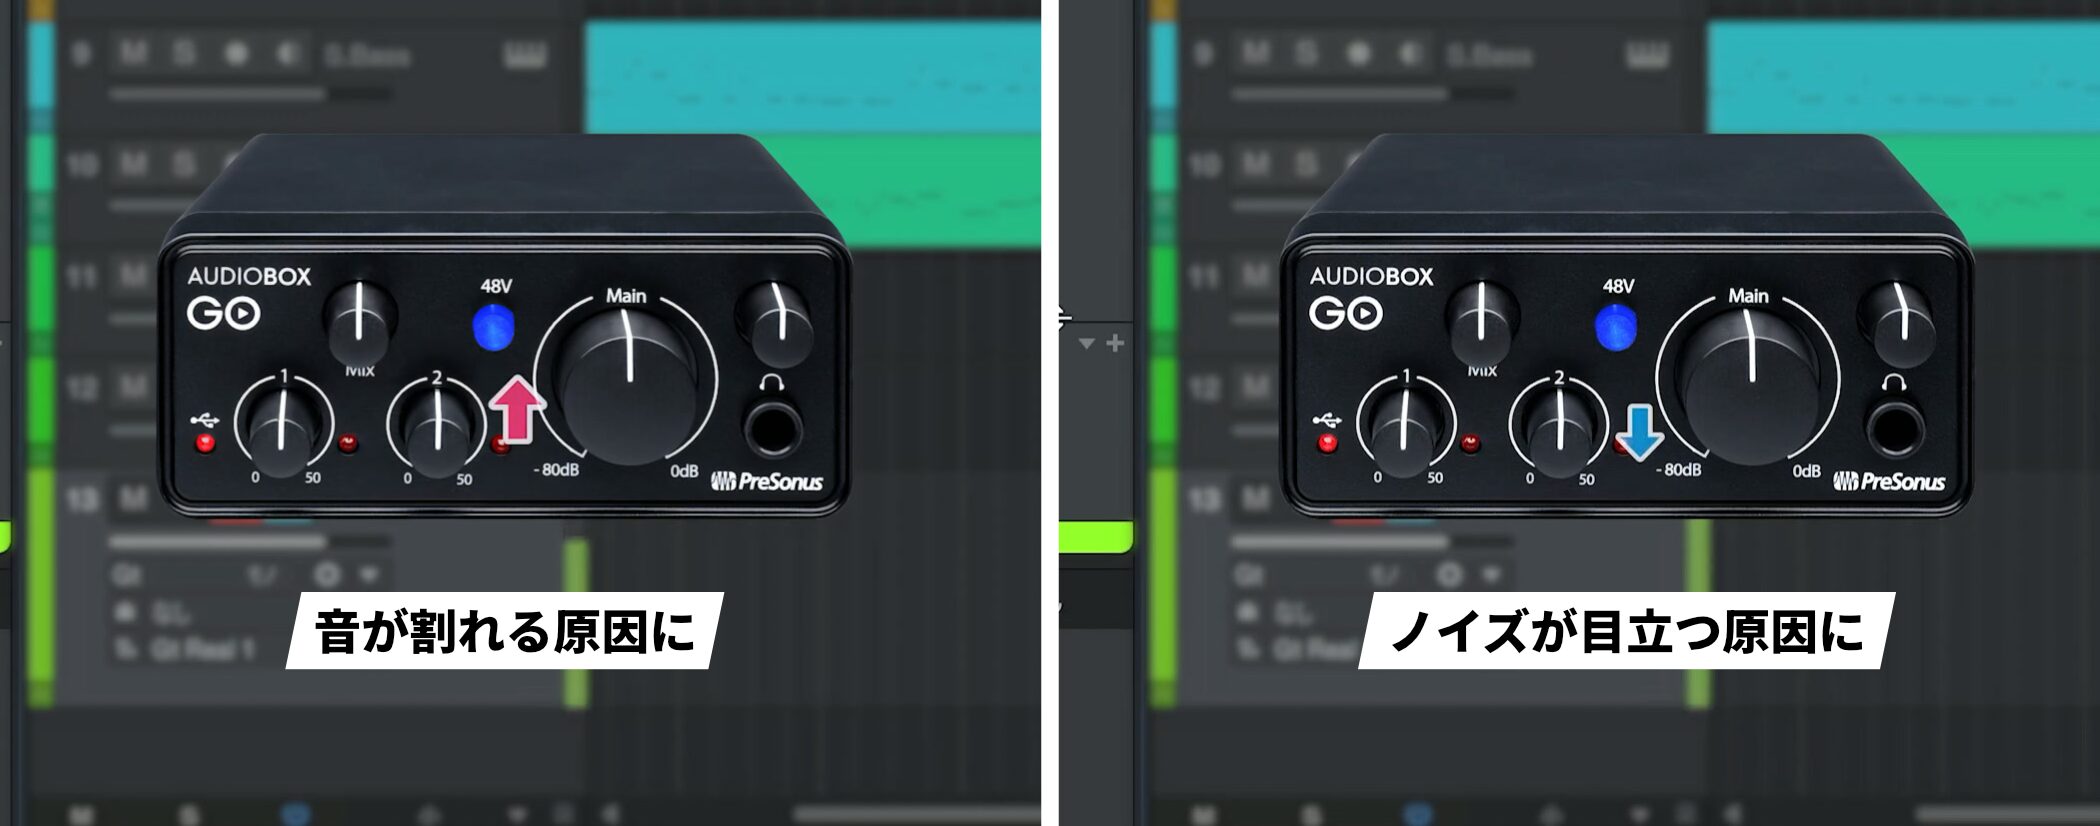
Too much gain causes distortion.
Too little may require boosting the recording later and can make noise more noticeable.
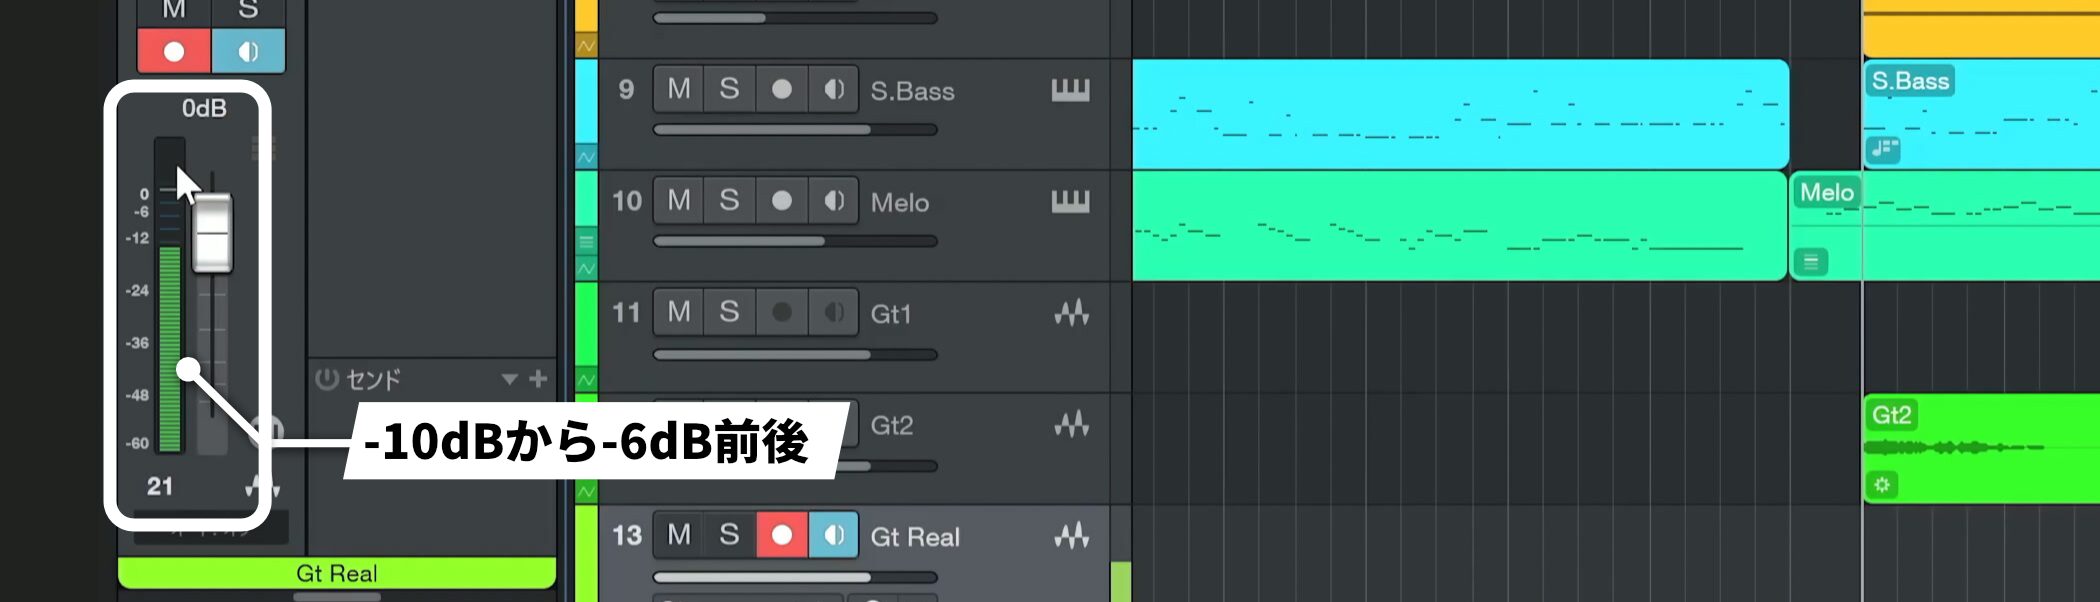
As a starting point, play the loudest part and aim for a level of about -10 to -6 dB.
Shape the sound with an amp simulator
The guitar signal is currently dry, so let’s add an amp effect.
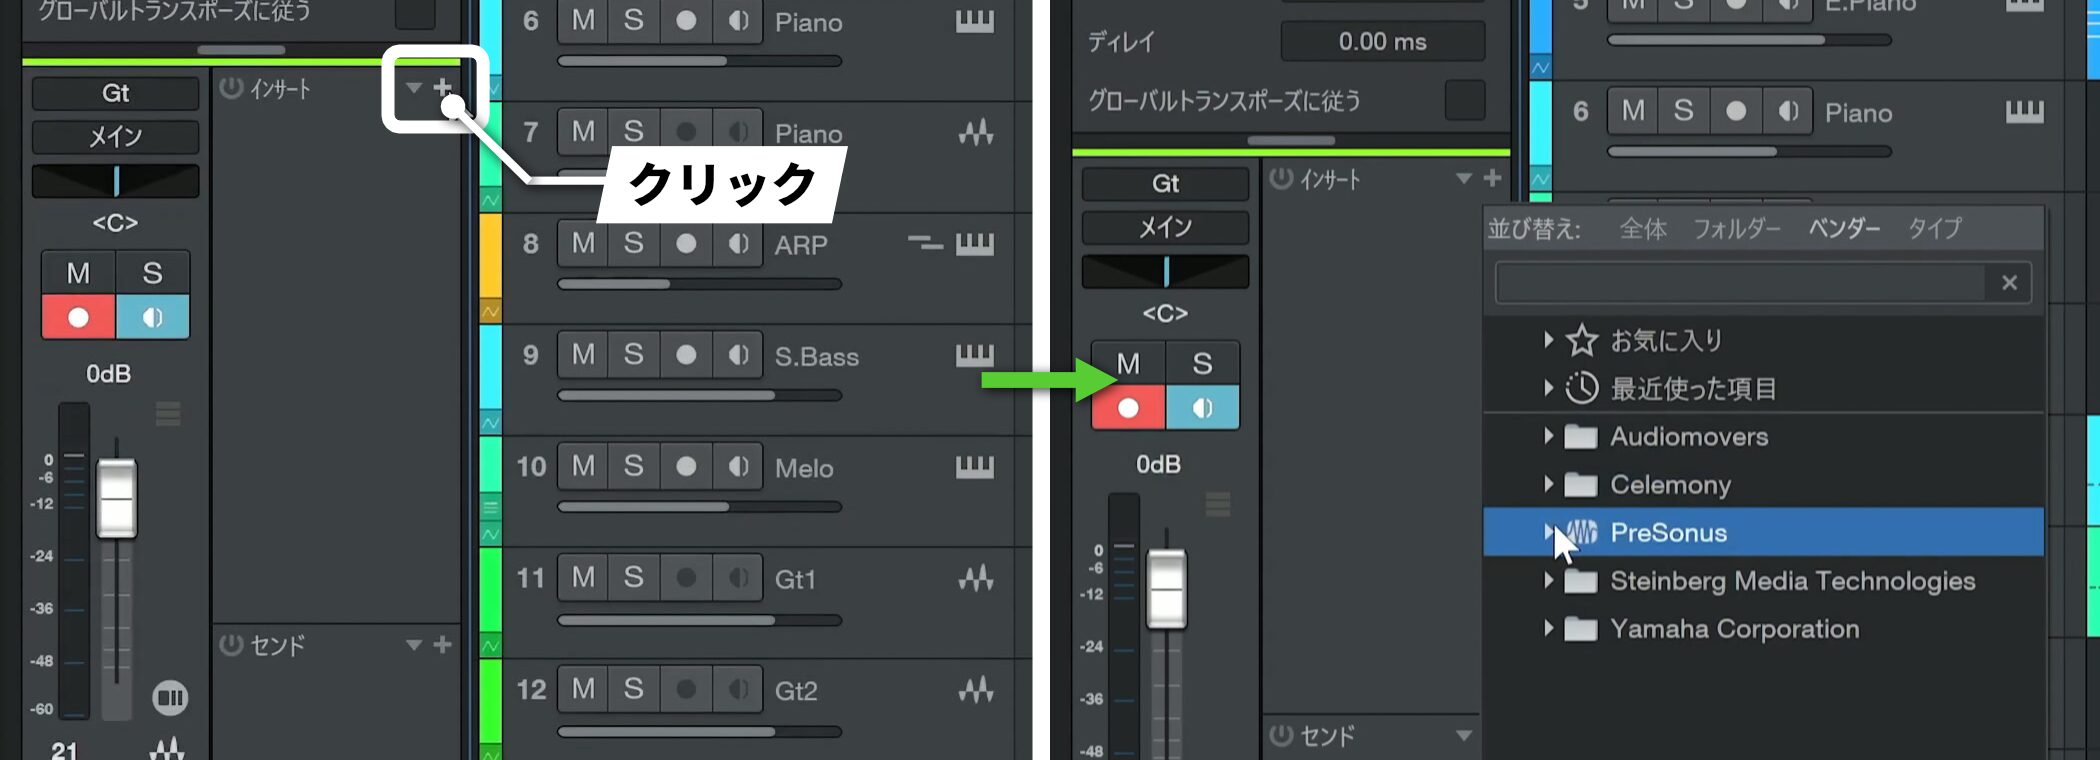
Select the track and open the inspector to access Studio One effects under Inserts.
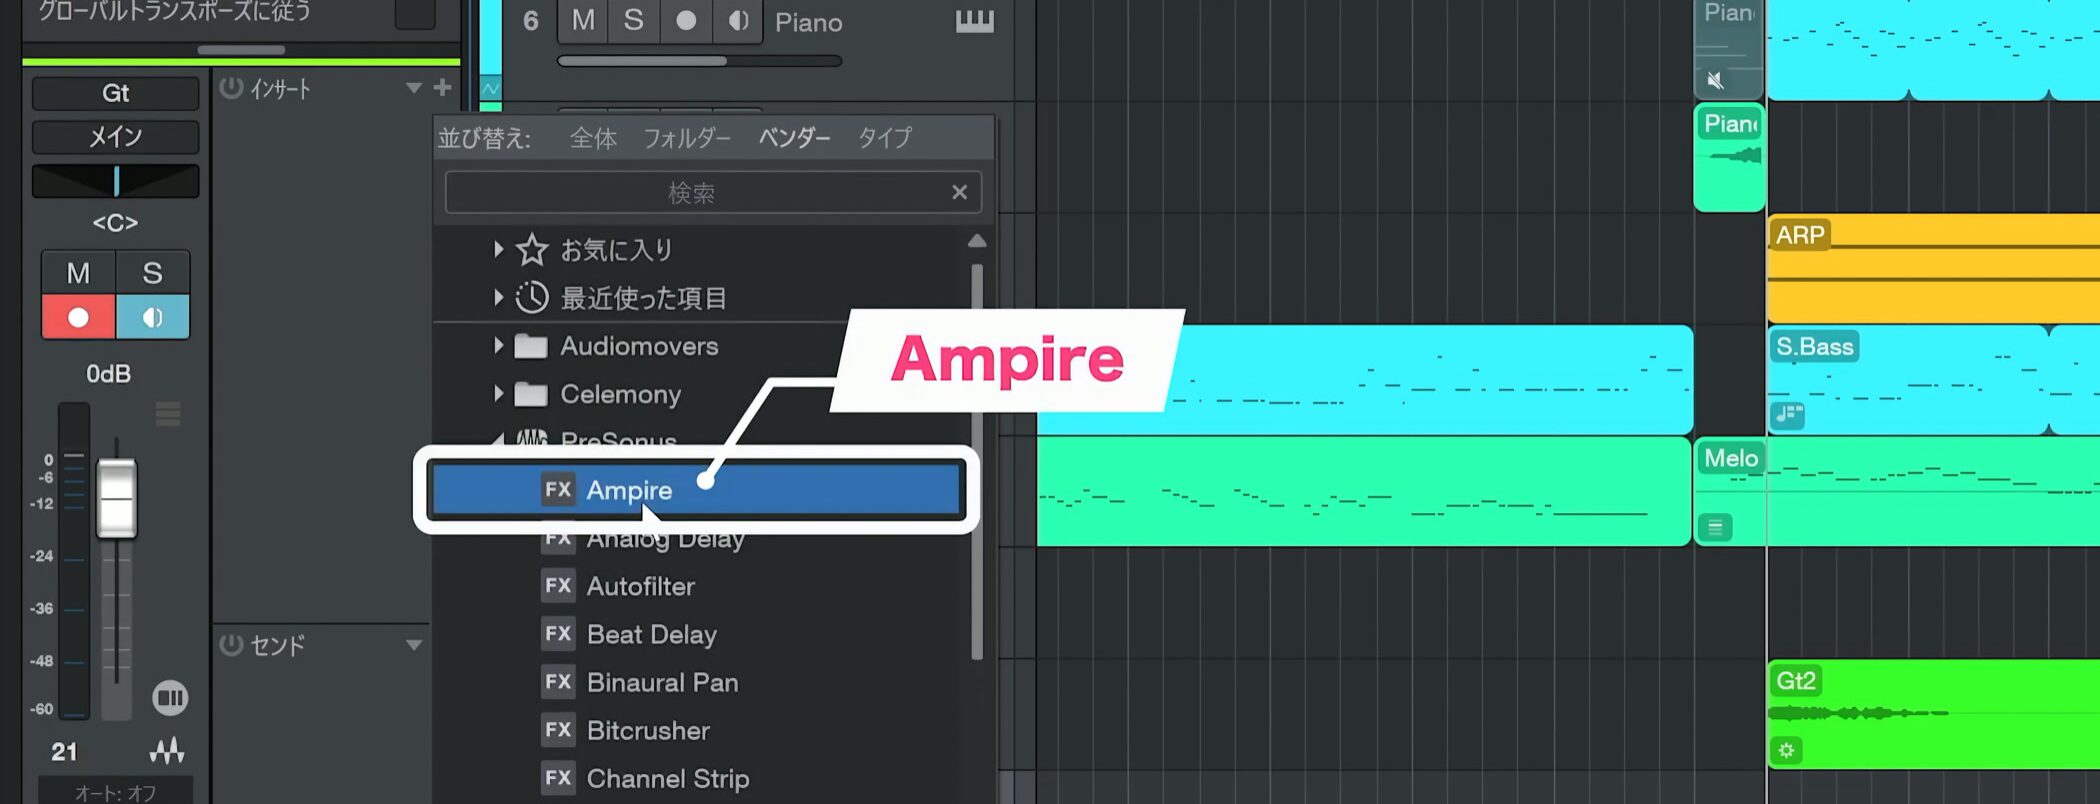
Choose Ampire.
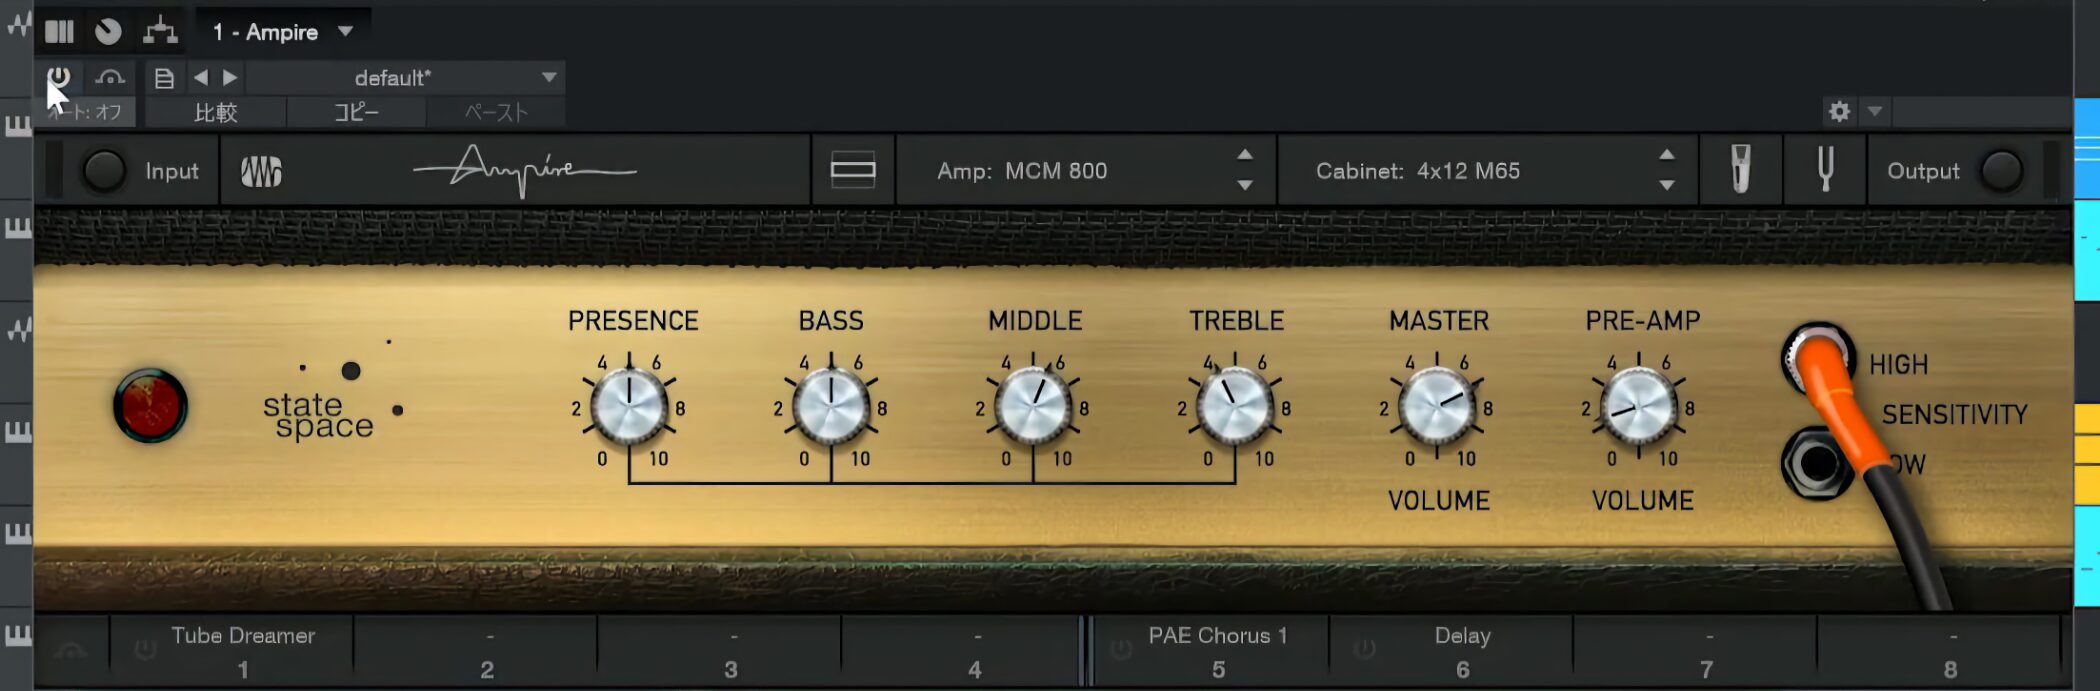
Applying it gives you an amp sound.
You can change presets or fine-tune the parameters.
An important distinction is that an insert effect is being heard during monitoring.
Even when recording with the amp effect active, the recorded signal is the dry, unprocessed sound in this setup.
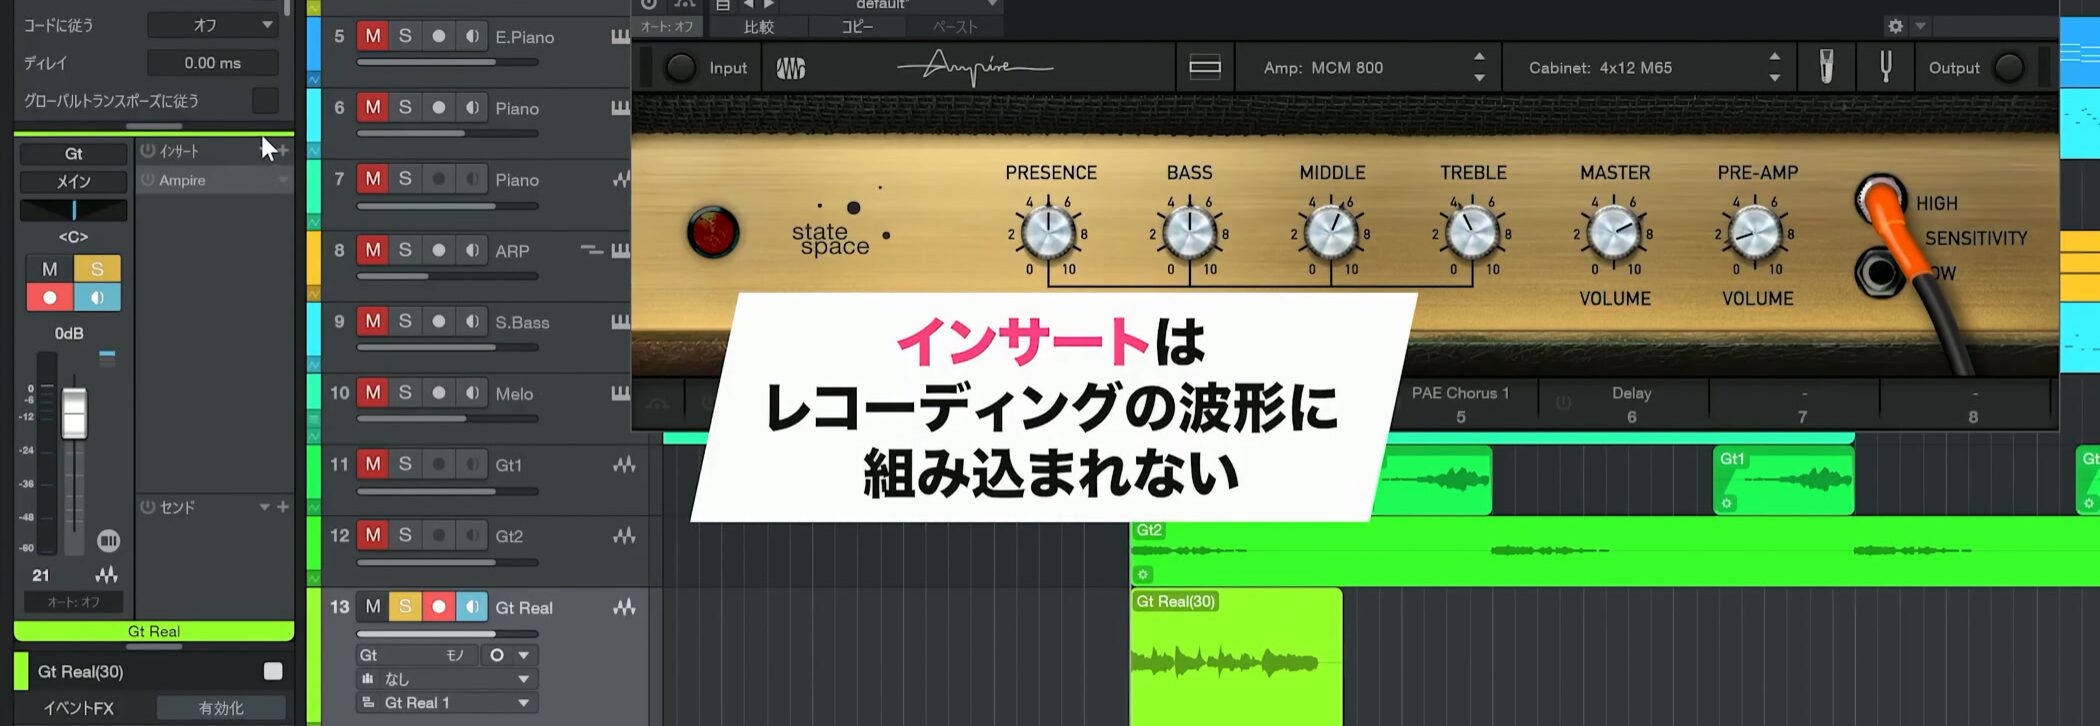
The insert is not baked into the recorded waveform.
This lets you take your time shaping the sound afterward.
Balance monitoring levels
If the backing is too loud, it may be difficult to hear the guitar you are playing.
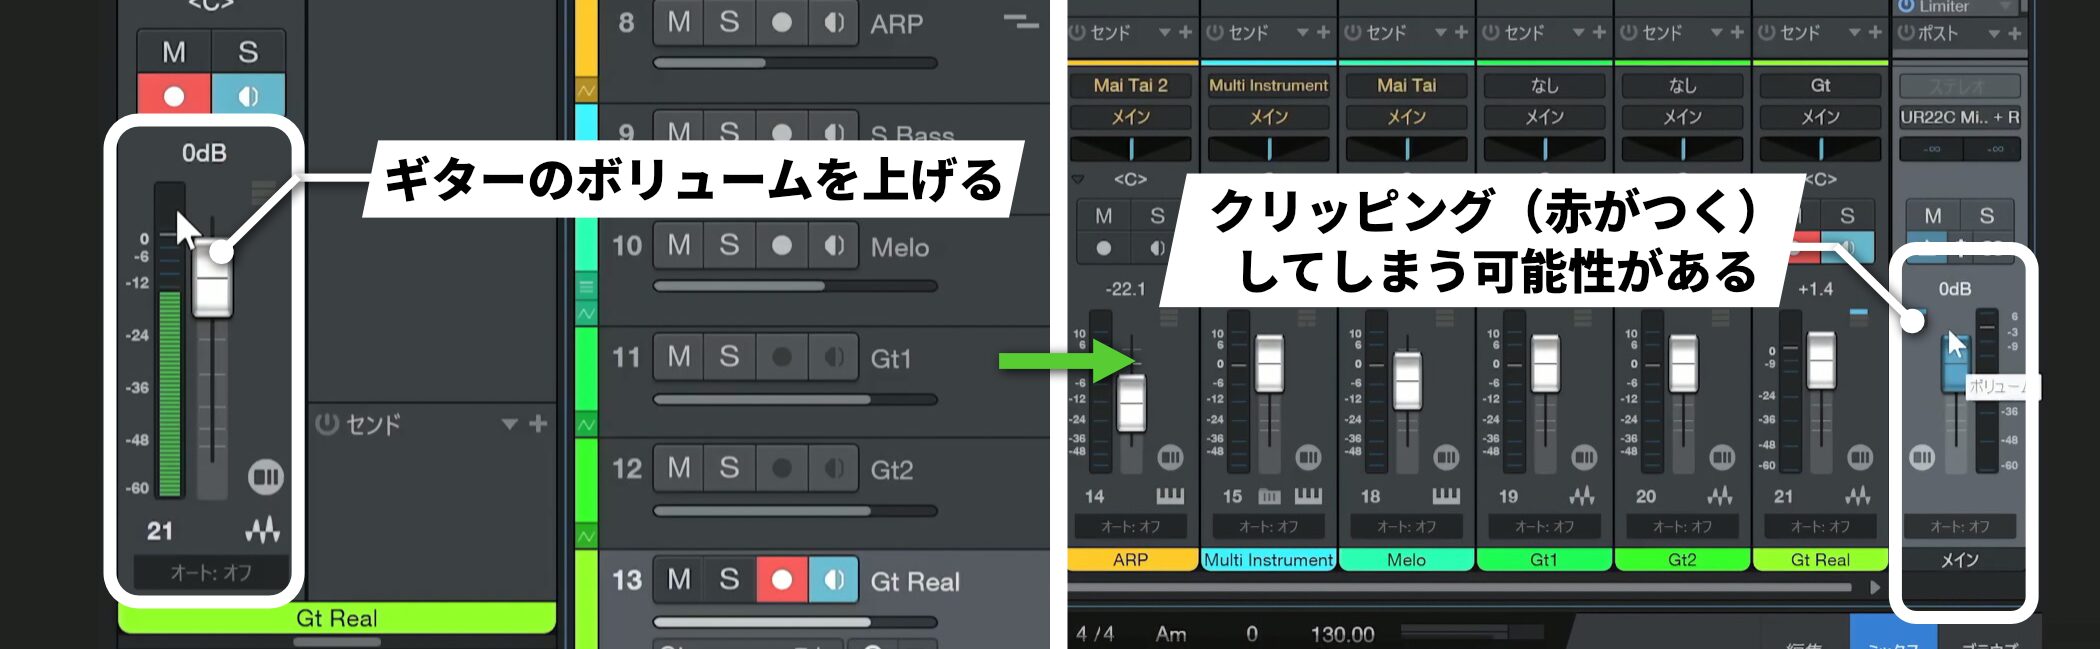
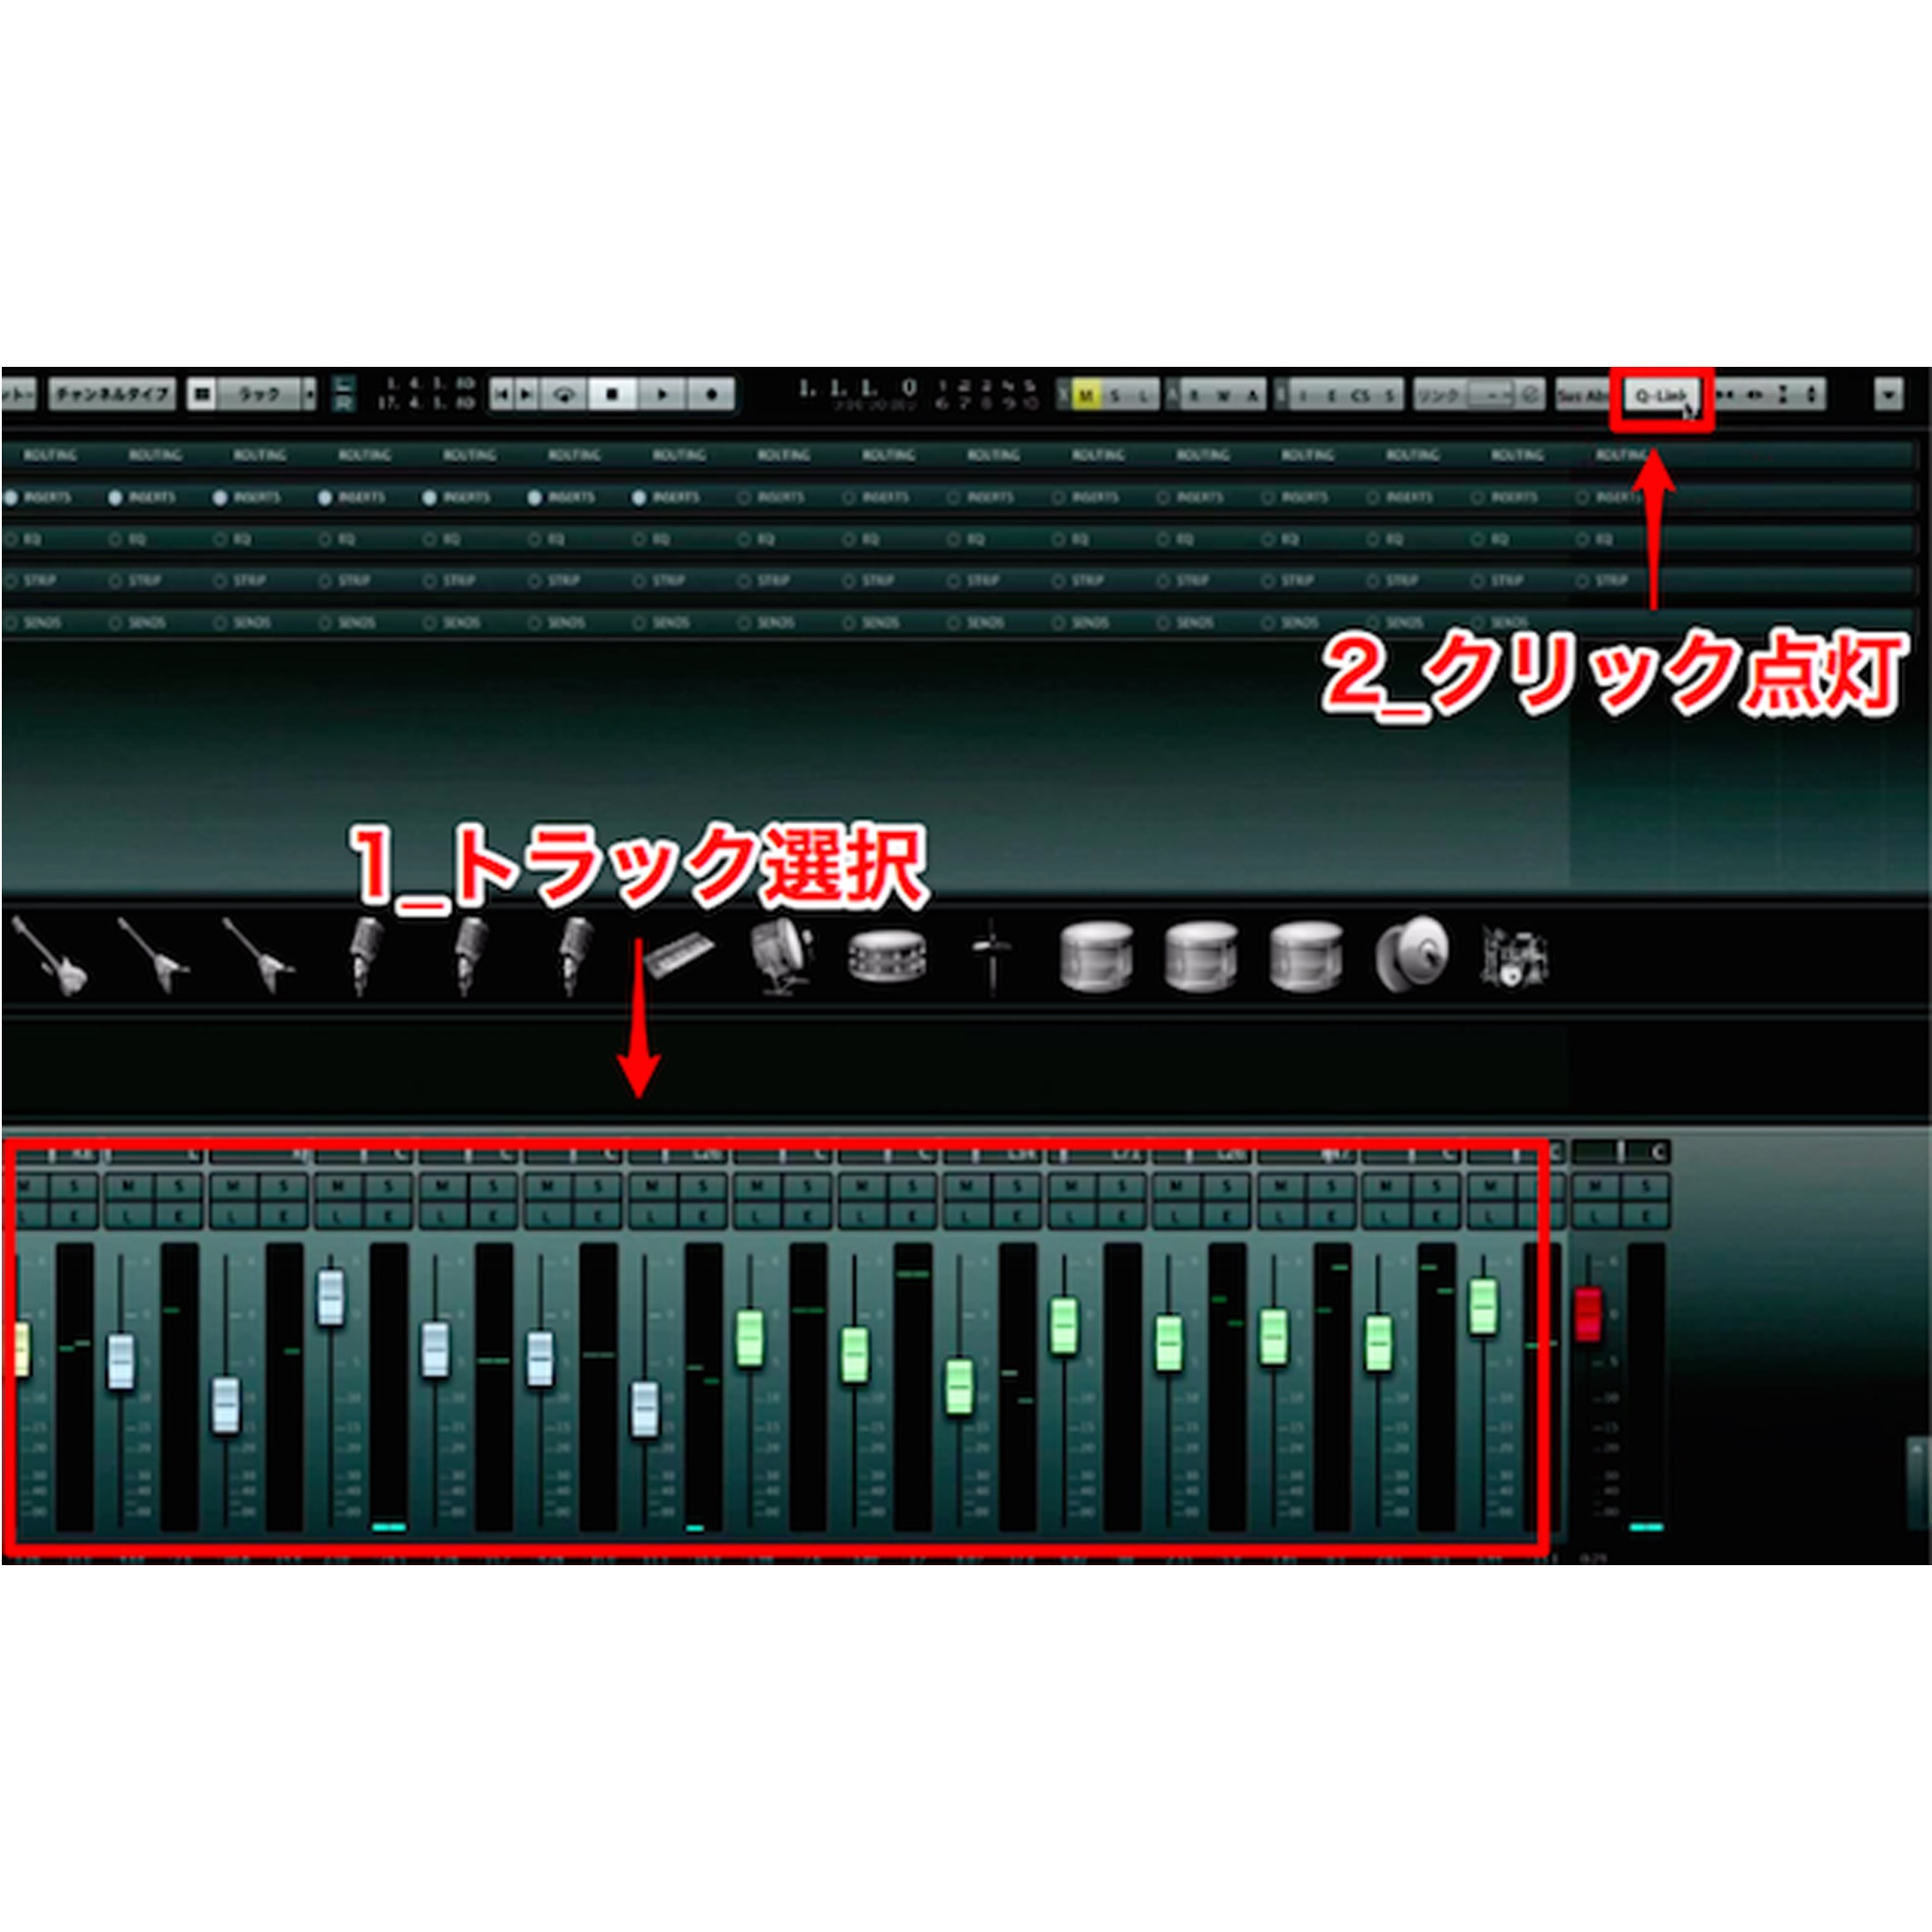
Raising the guitar track fader makes it louder in the monitor without changing the recording level.
However, raising it too far may cause the master meter to turn red and interfere with the performance.
Instead of turning up the guitar, consider lowering the other tracks so the guitar is easier to hear.
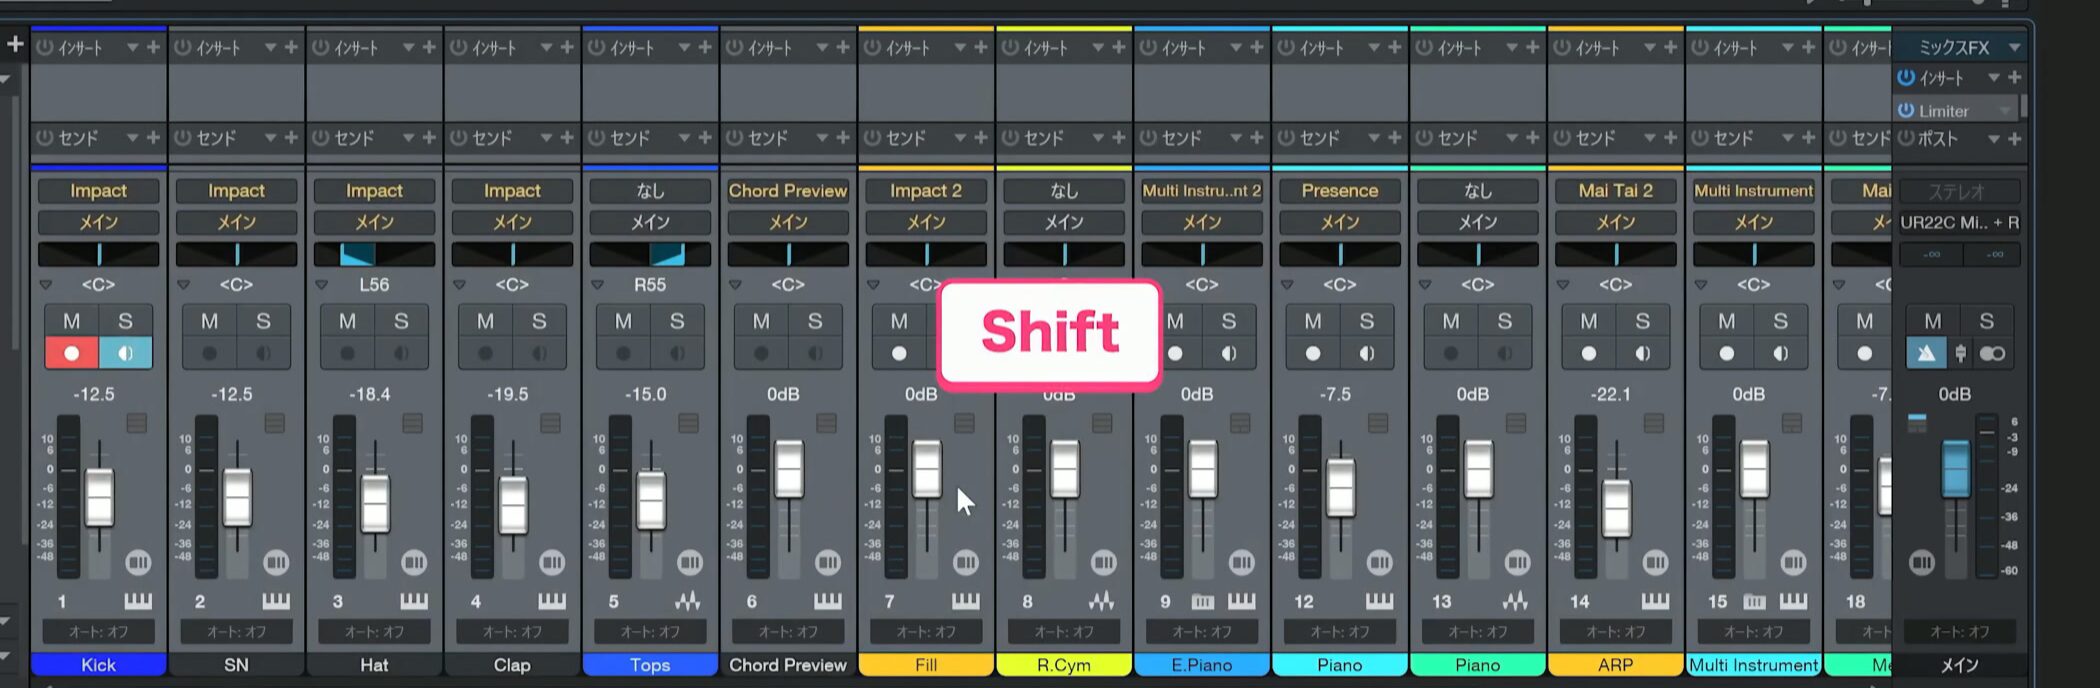
Hold Shift to select all tracks except the guitar, then lower one of them to reduce their levels together.
The guitar should now be easier to hear.
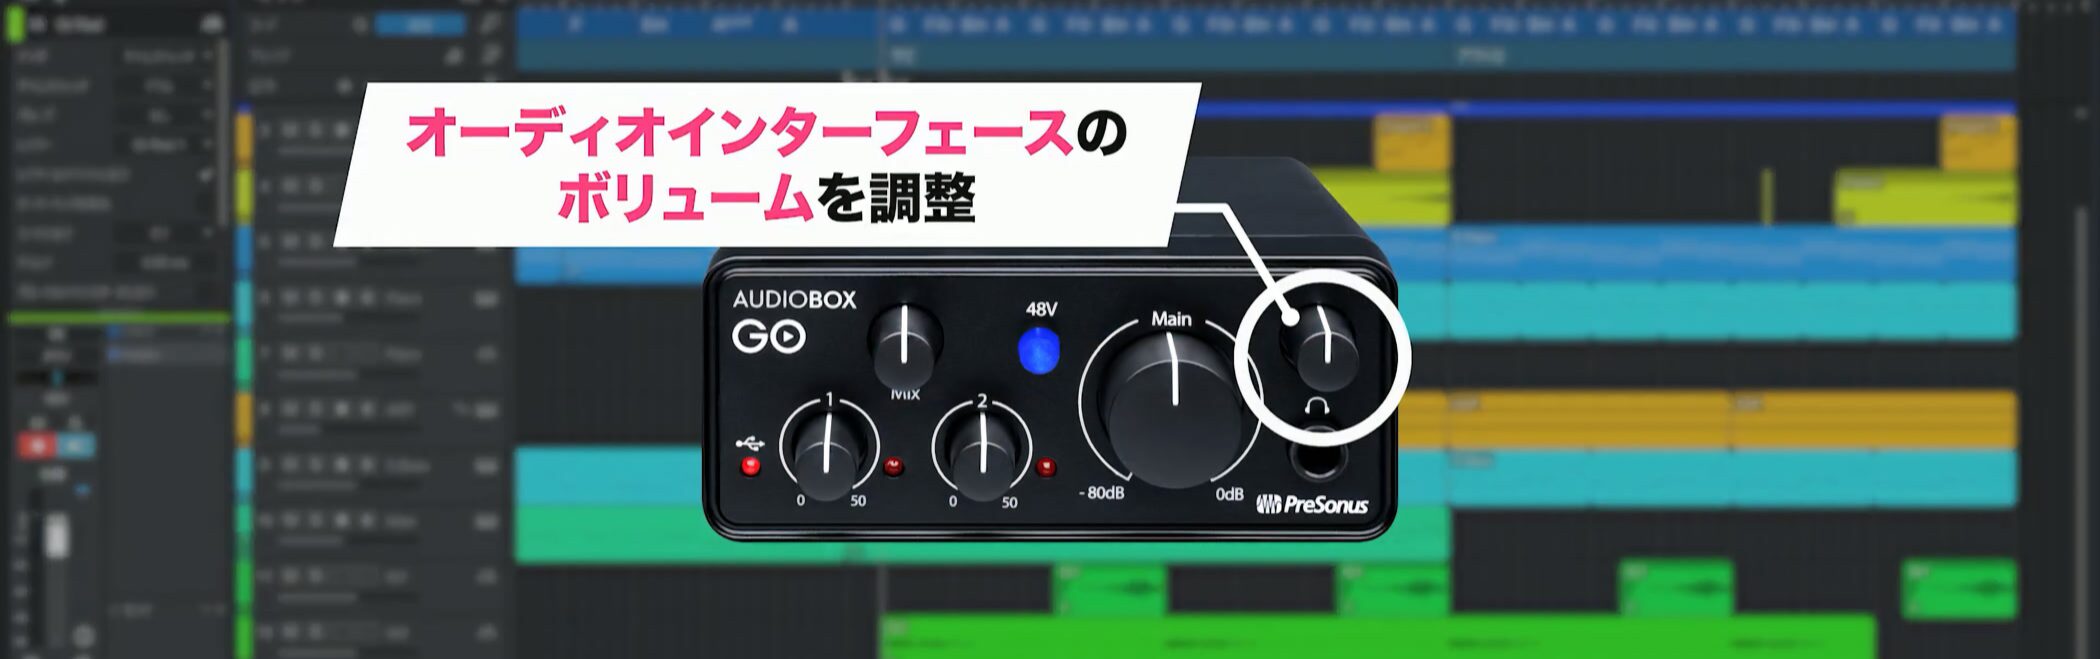
If the overall monitoring level is too low, raise the audio interface’s output volume.
Set a count-in using pre-roll
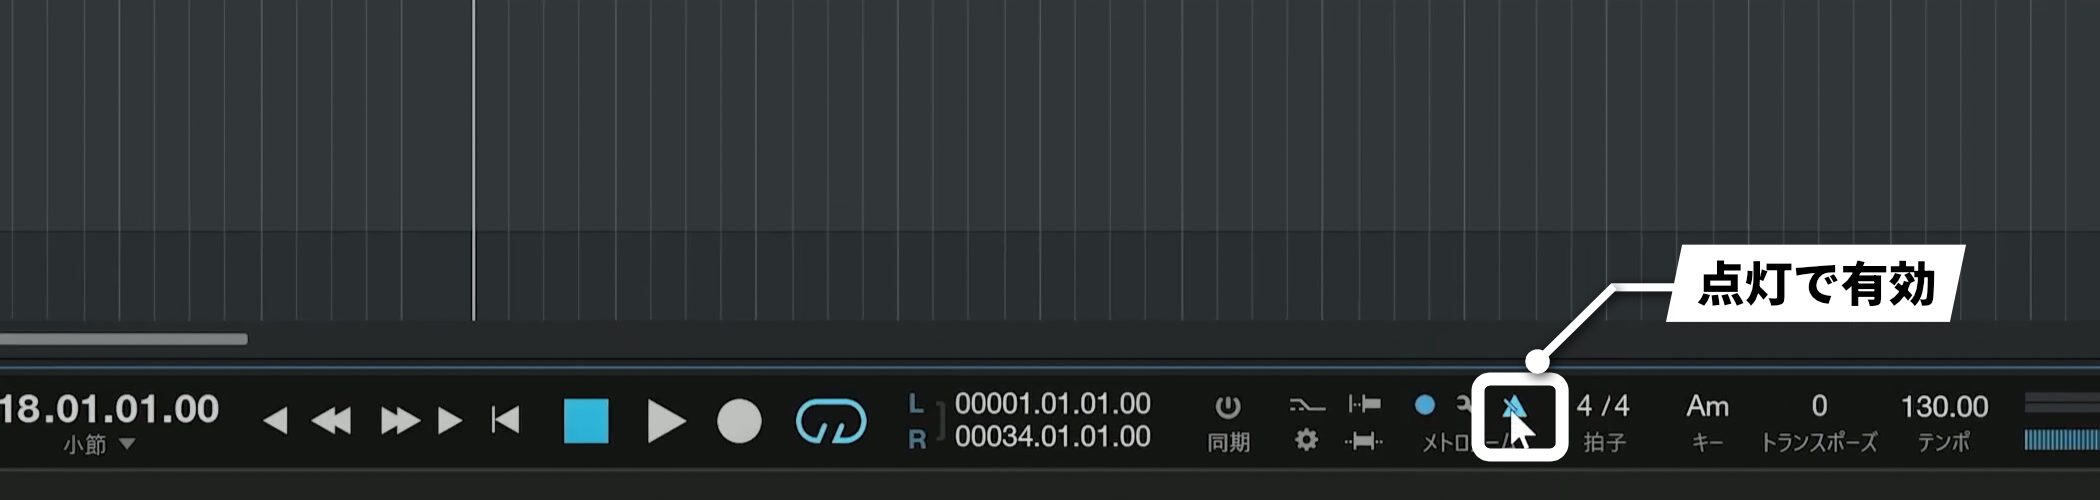
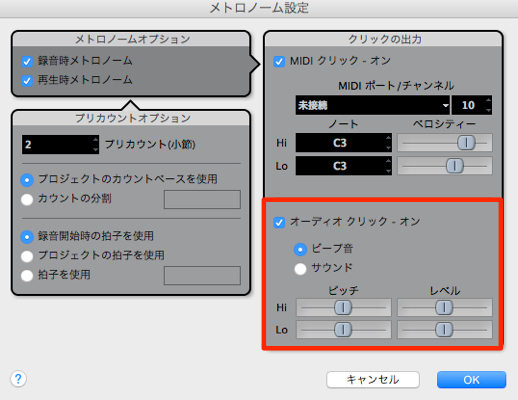
First enable the metronome.
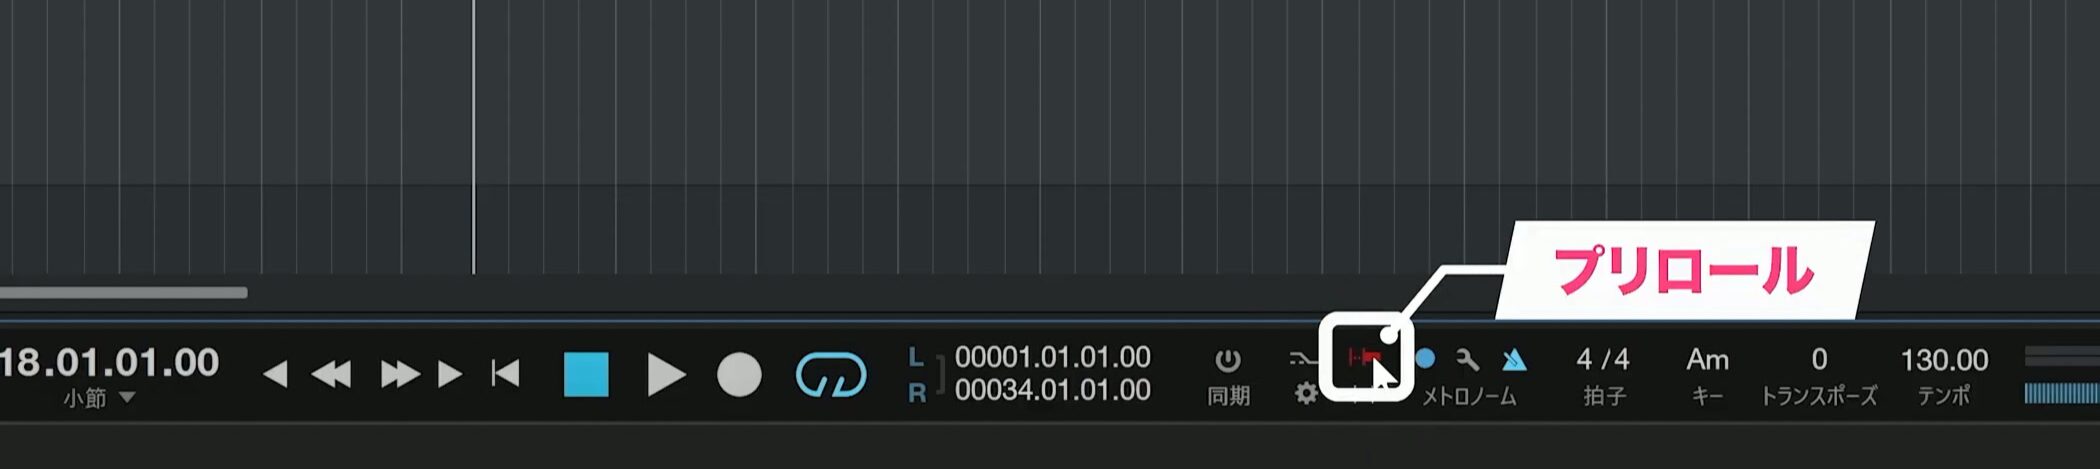
For MIDI recording we used pre-count; this time we will use Pre-roll.
Pre-roll plays the preceding bars of the song as well as the count before recording starts.
This lets you hear the lead-in and get into the performance.
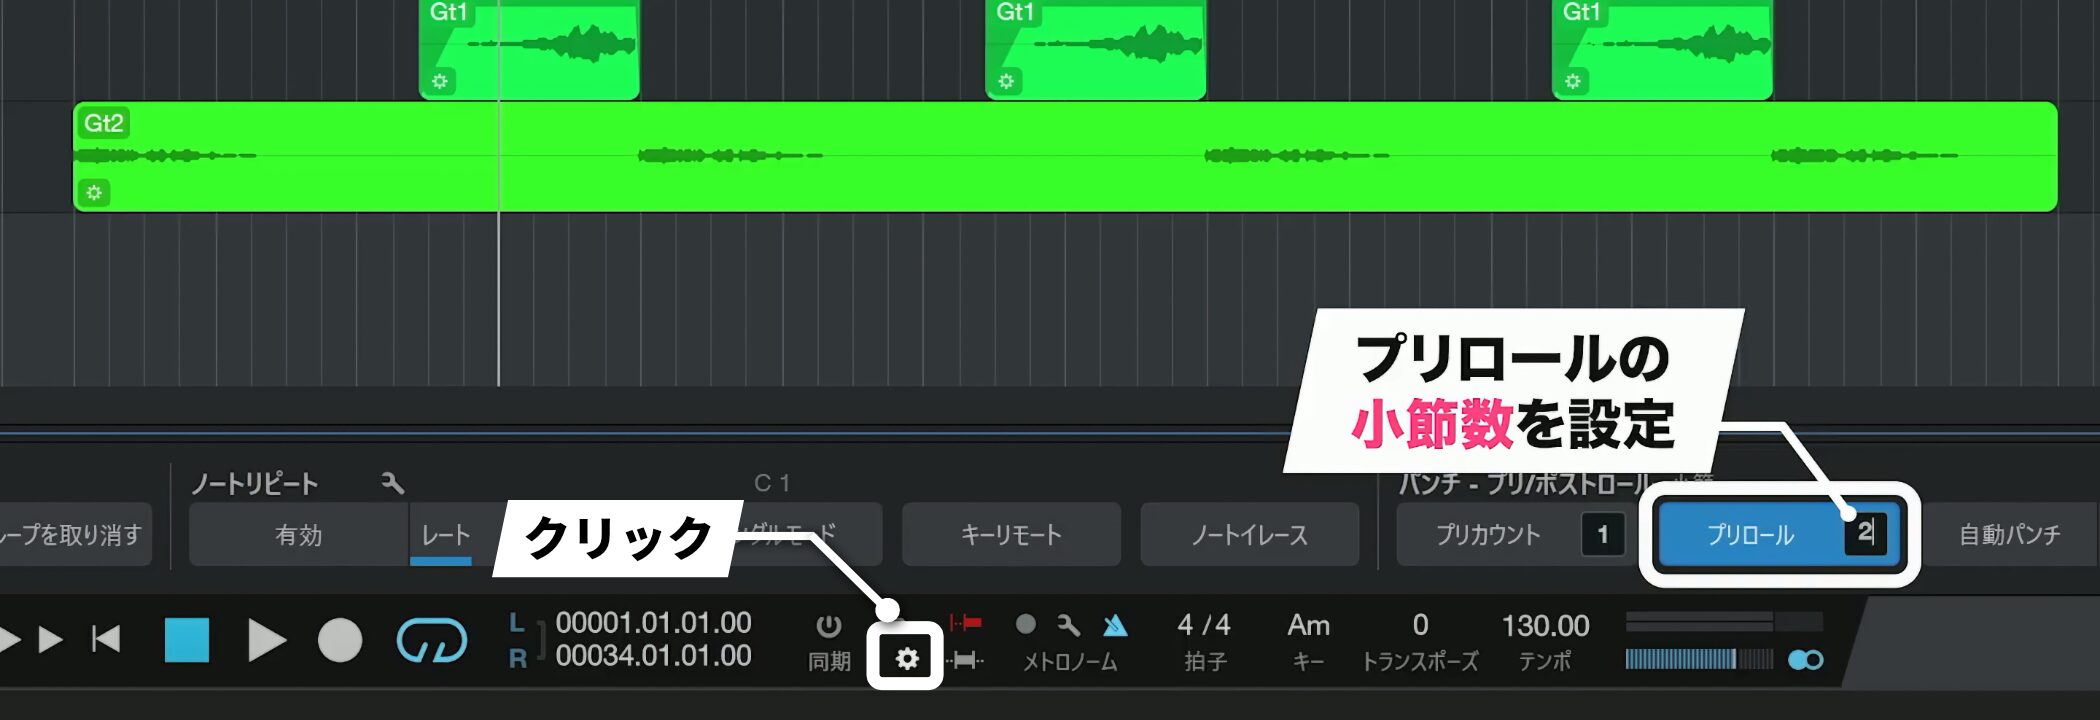
To change the pre-roll length, click the gear icon and adjust the Pre-roll value.
For example, a value of 2 plays two bars before recording starts at the specified point.
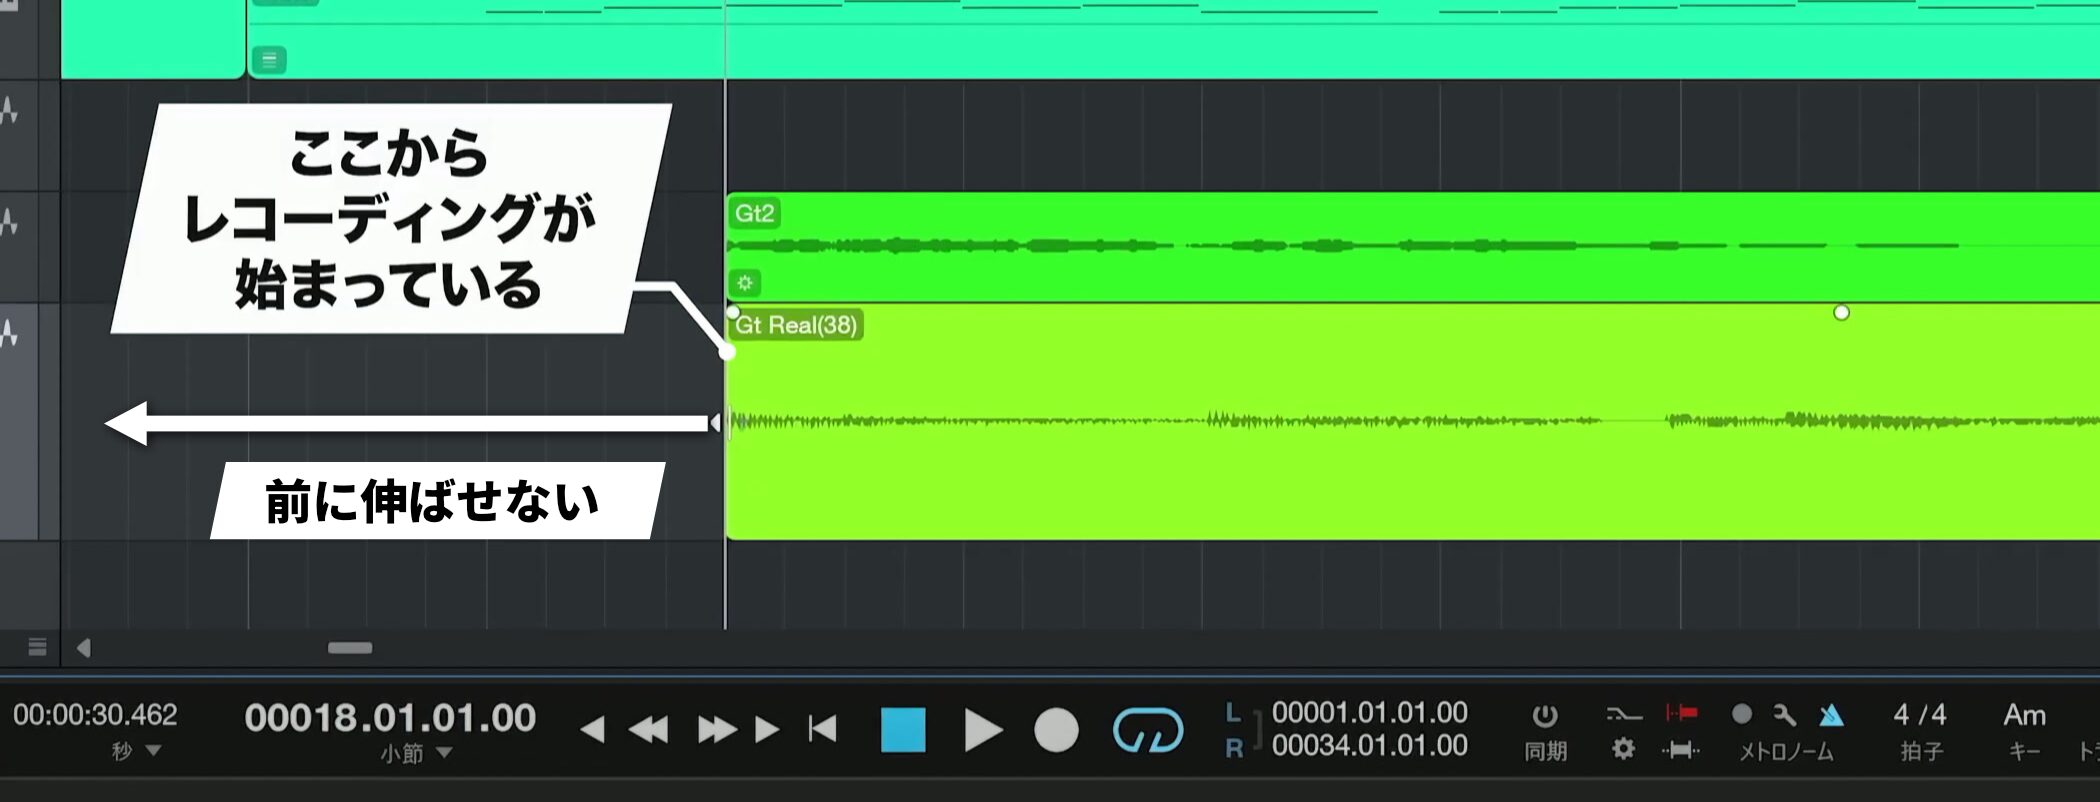
If you need to preserve an attack or another sound played slightly earlier, you cannot extend an event before the portion that was actually recorded.
For that reason, start recording a little before the part you want to keep.
Use recording modes
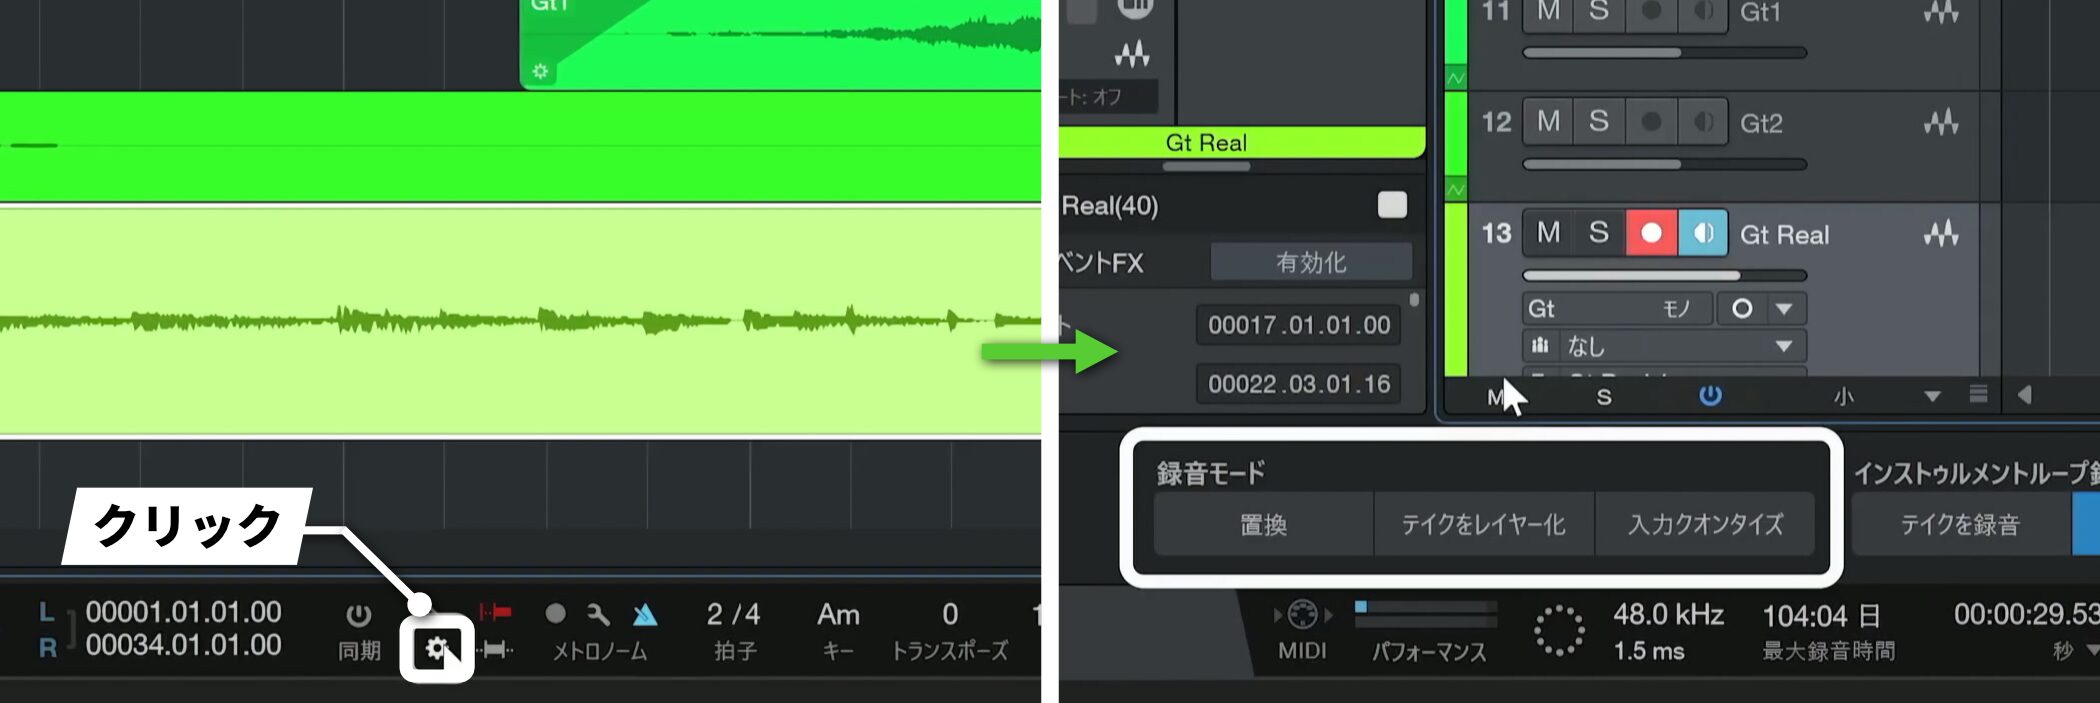
Click the gear icon to choose a recording mode.
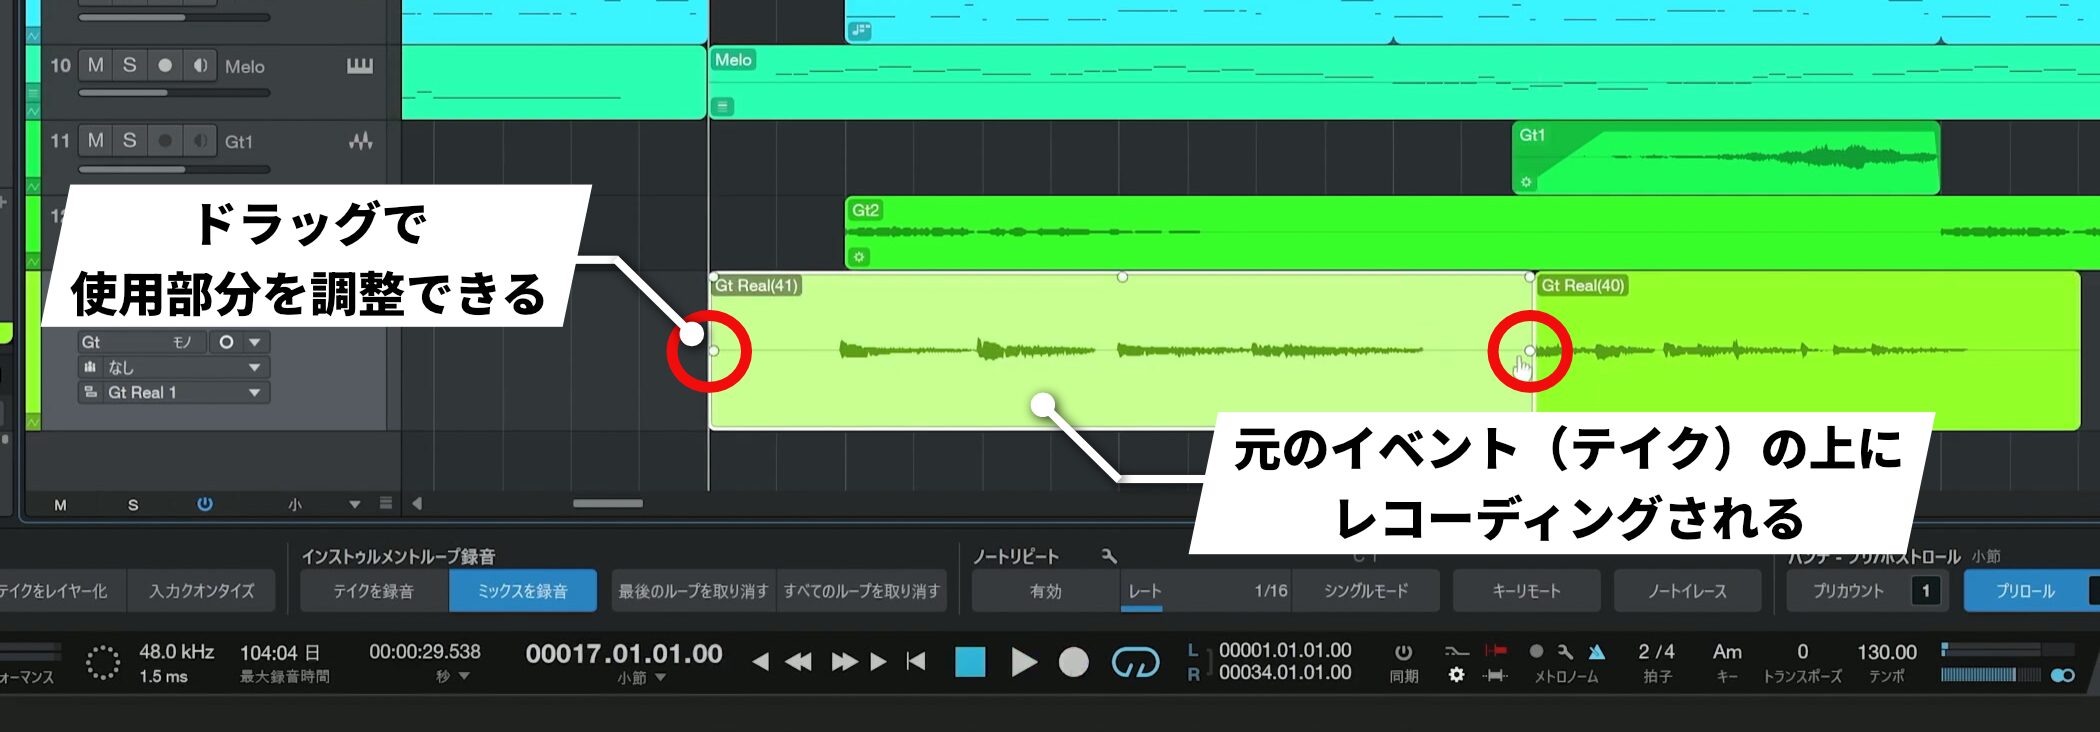
Without a specific mode selected, recording is placed over the existing event or take.
Drag the event boundaries to adjust which portion is used.
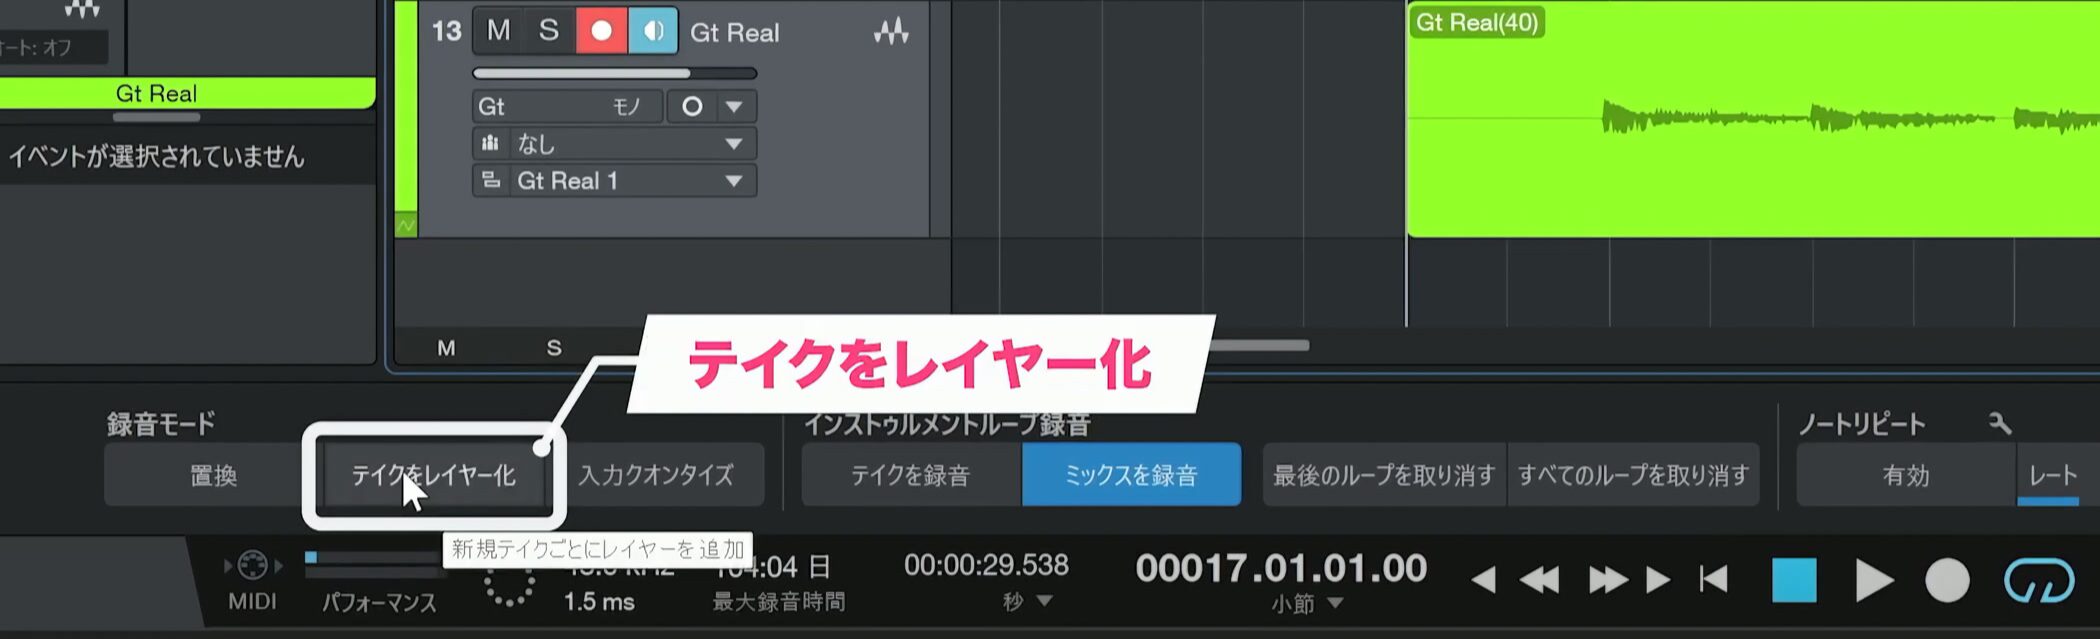
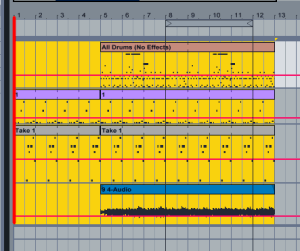
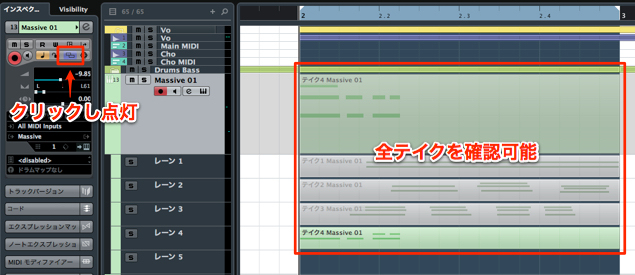
A useful option is Takes to Layers.
This records while keeping the original event.
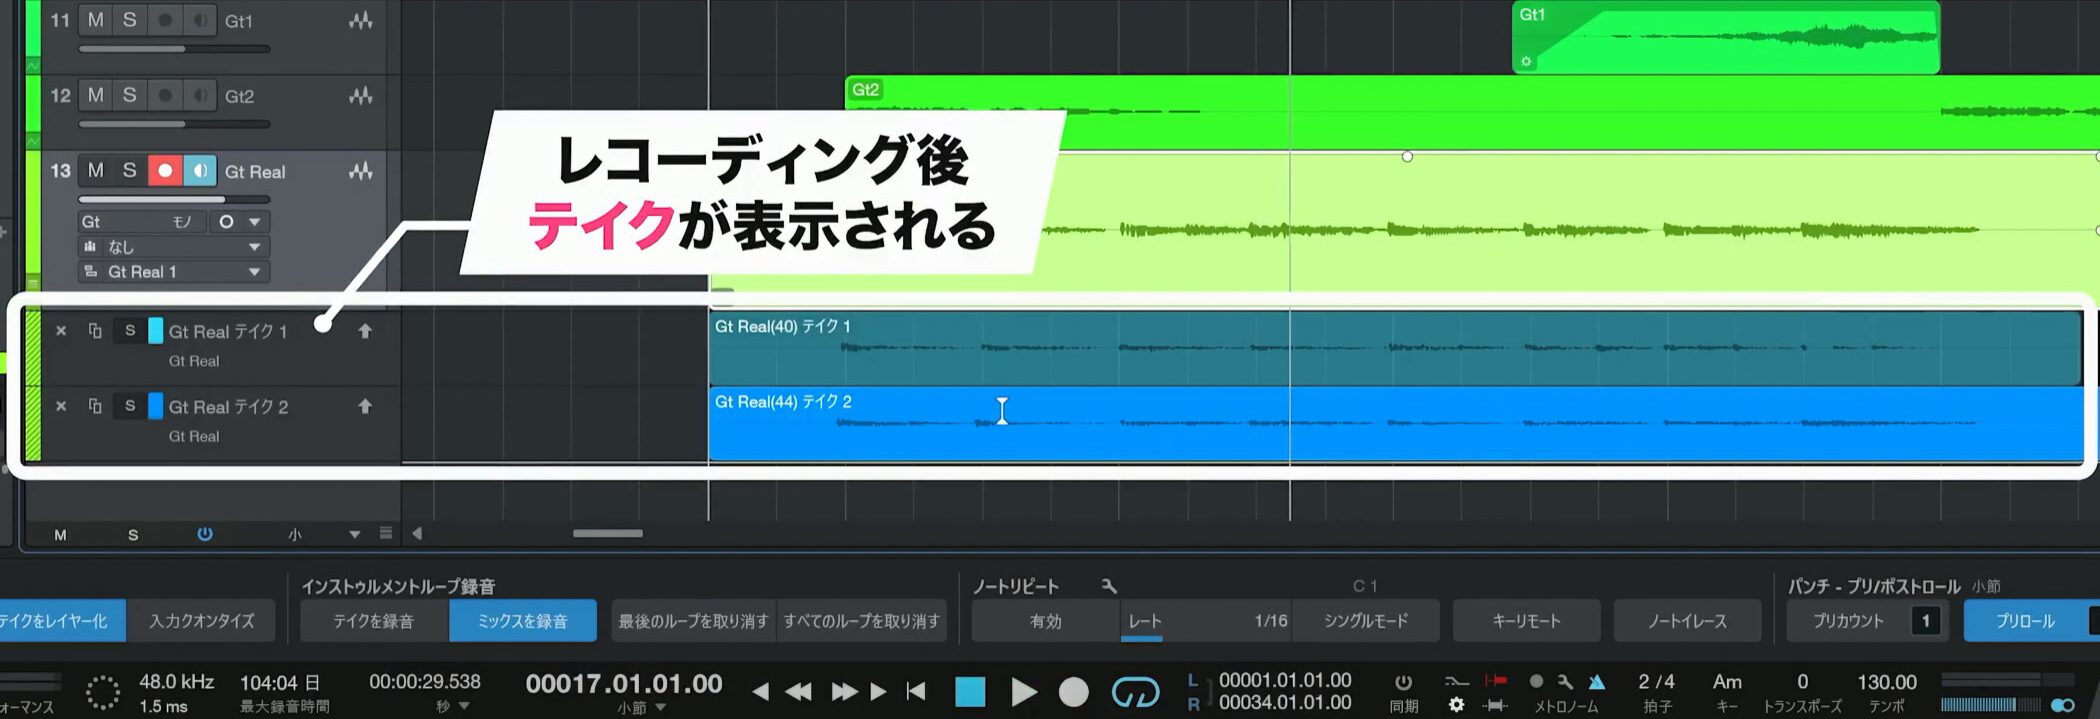
After recording, the takes appear.
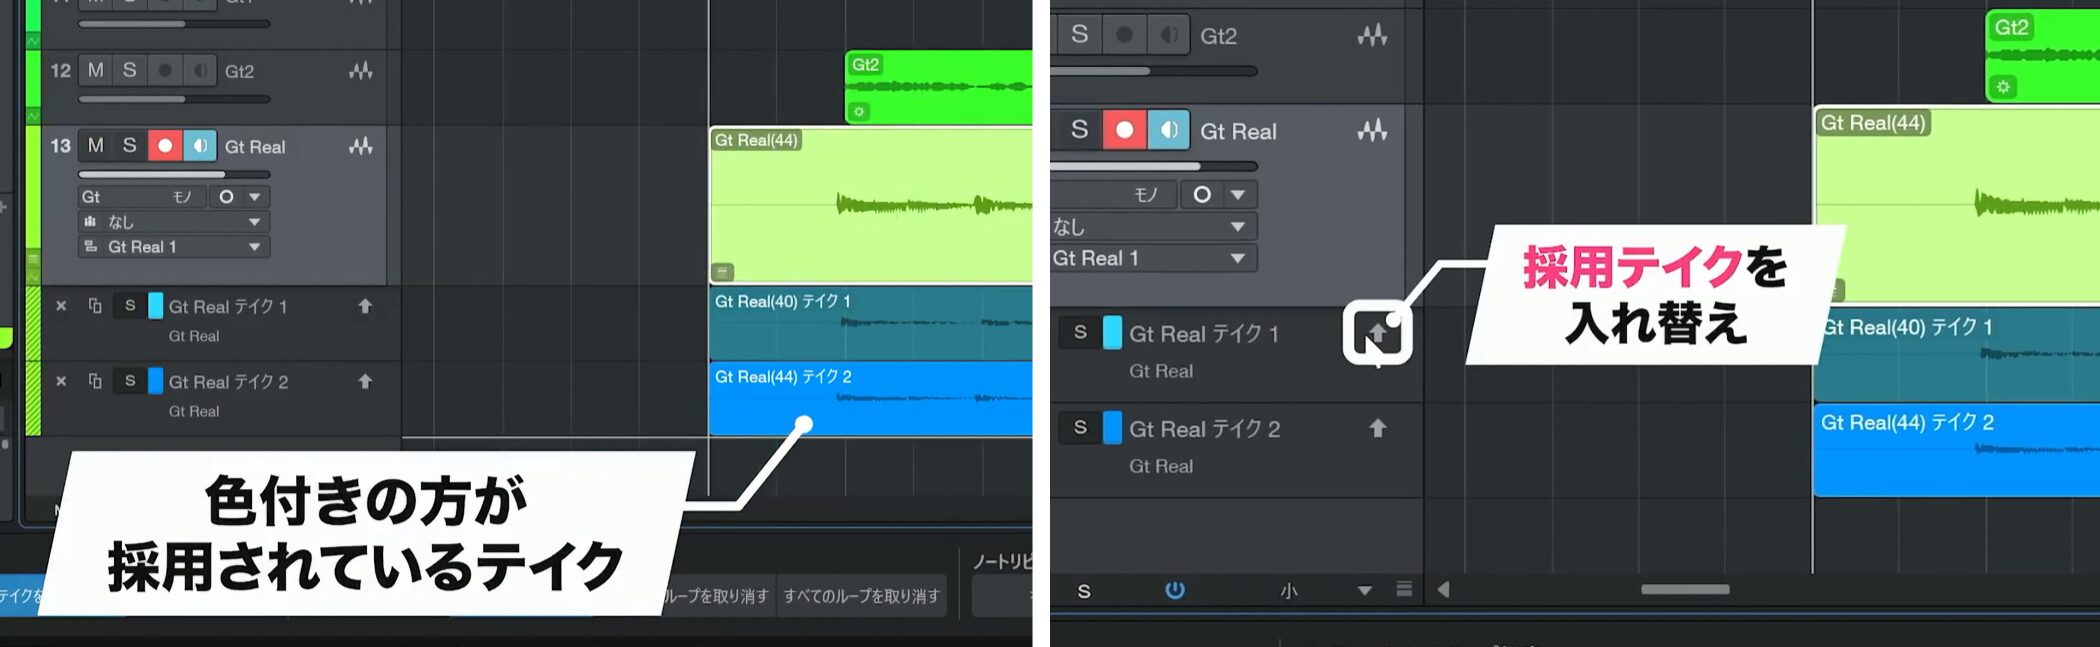
The colored take is currently active; click the indicated arrow to switch takes.
You can also choose sections from different takes, such as one passage from the first take and another from the second.
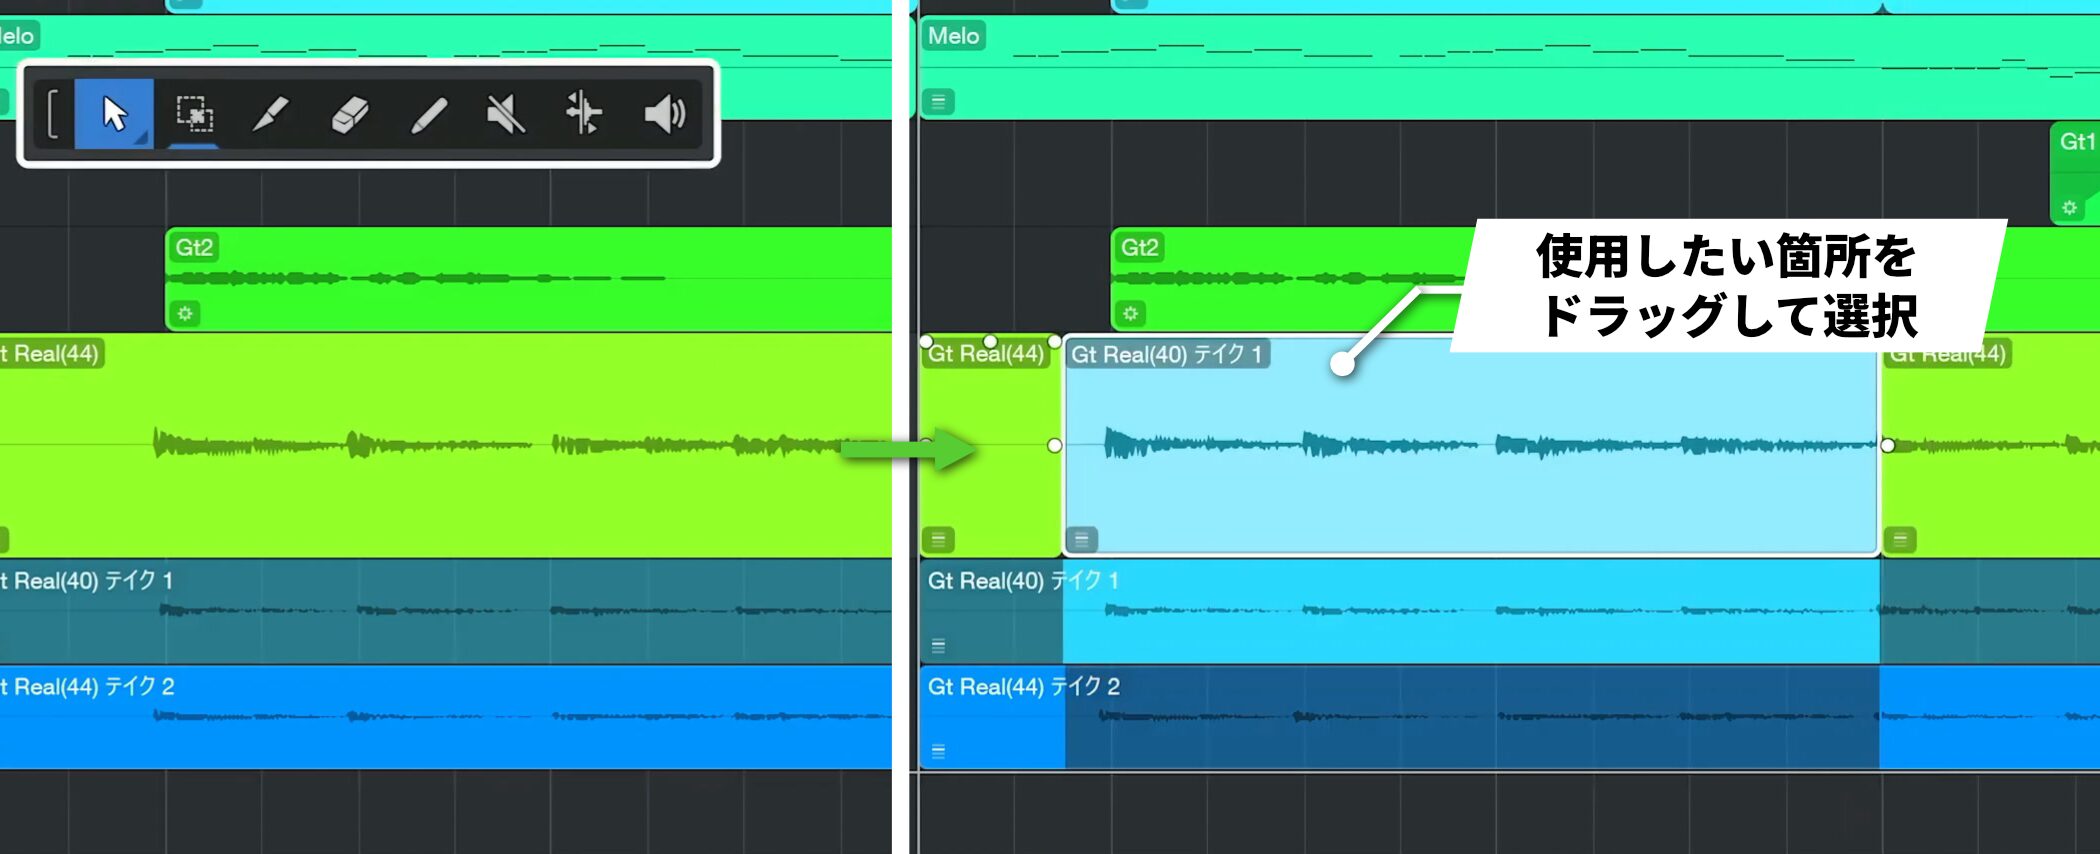
Select the Arrow tool and drag over the sections you want to use.
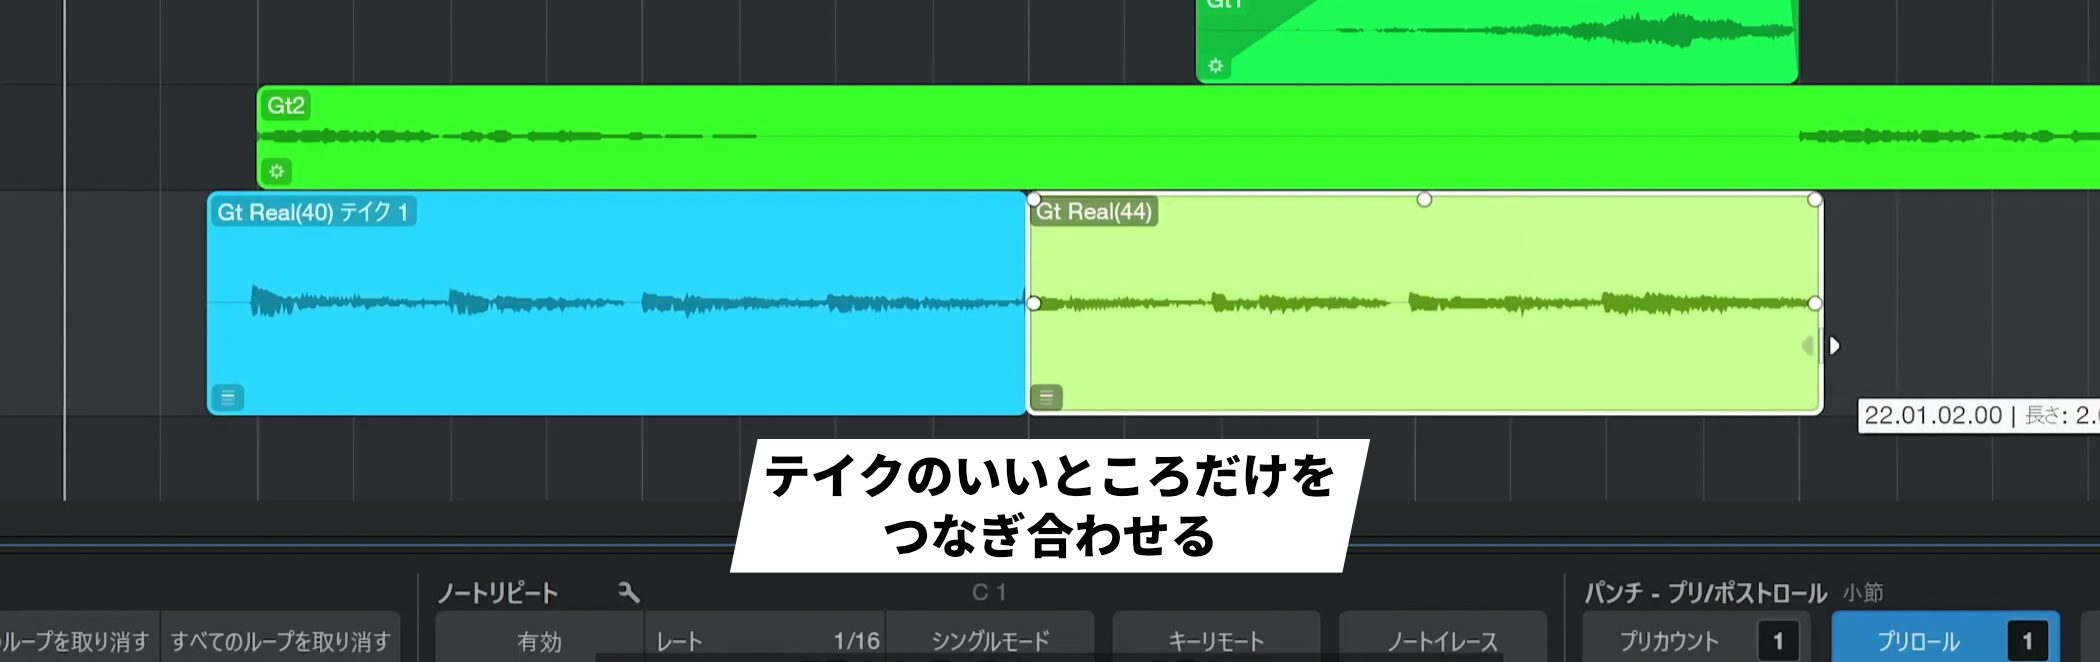
This lets you combine the best parts of the takes.
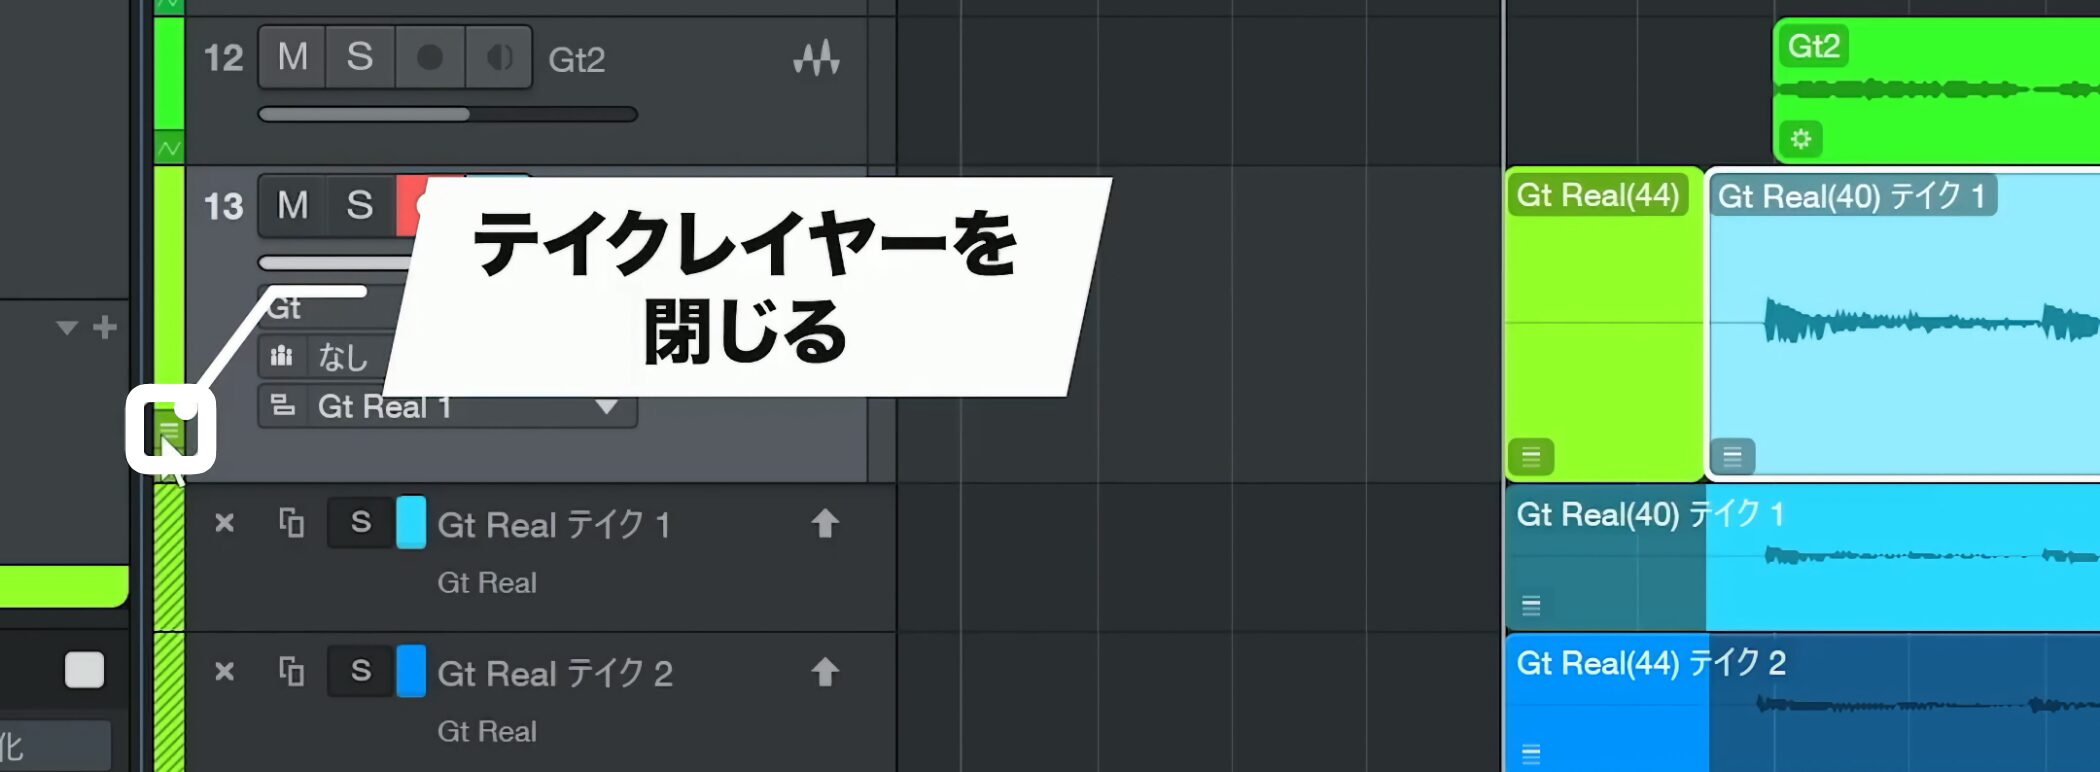
Once you have selected the sections, click the indicated control to close the layers.
Frequently asked questions
Q1. What latency should I aim for when recording guitar?
Use less than about 10 ms combined input and output latency as a guideline. Around 12 ms may also be usable, depending on the performer. Reducing Device Block Size can lower latency.
Q2. Why does changing the track fader not change the recorded level?
The track fader adjusts monitoring level, while the interface gain controls the input level being recorded. As a starting point, aim for peaks around -10 to -6 dB.
Q3. Is the Ampire insert effect included in the recording?
In the setup described here, the insert is heard during monitoring but is not baked into the recorded waveform, so you can adjust the sound later.
Q4. What if the guitar is too quiet in the monitor?
Try lowering the other tracks, such as the backing, so the guitar is easier to hear without raising the master level.
NEW ARTICLES
Latest English Articles