Vienna Ensemble Pro 6 の使い方② DAWとの連携
Viennaに立ち上げた音源をDAWと互換させる
前回はVienna Ensemble Pro 6 の基本概要と立ち上げを解説しました。
ここからは実際にDAWと音源を連携させる機能面について進めていきたいと思います。
DAWと的確に連携できるように、MIDIチャンネルの割り当てやパラアウトなどルーティング面をしっかりと把握していきましょう。
製品サイト : http://sonicwire.com/product/39790
Vienna Ensemble Pro 6 動画解説


製品のご購入
インスタンスと音源の立ち上げ
まずは Vienna Ensemble Pro Sever に音源を用意する必要があります。
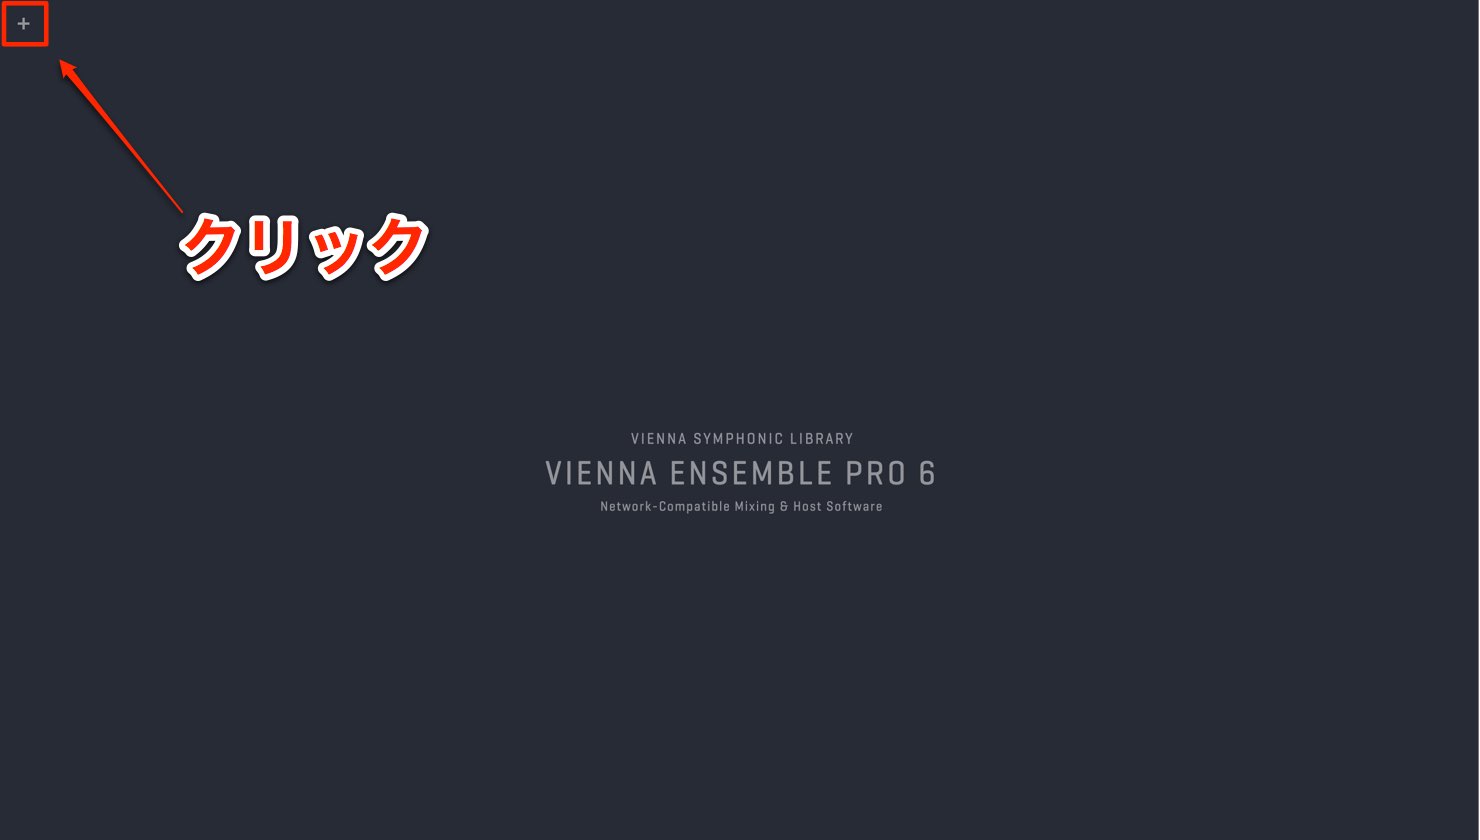
左のプラスボンタンをクリックします。
1つのインスタンスが作成されます。
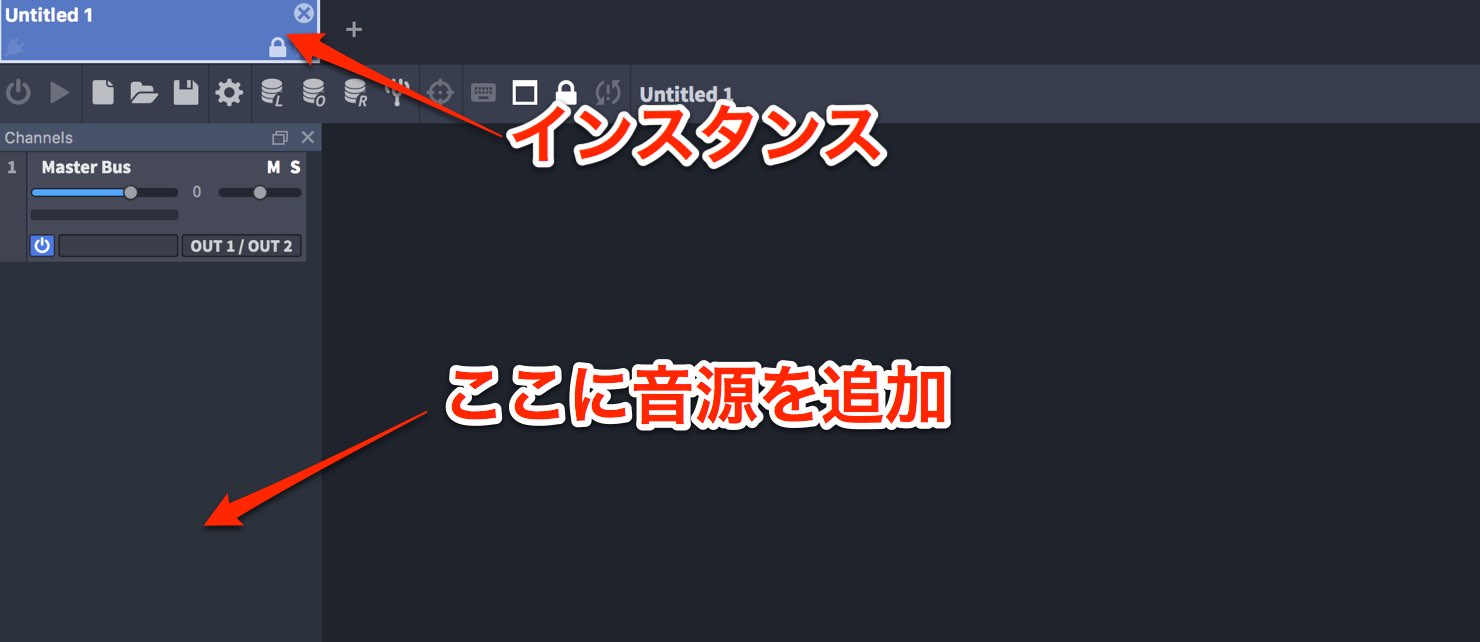
このインスタンスの中に必要な音源を複数作成していきます。
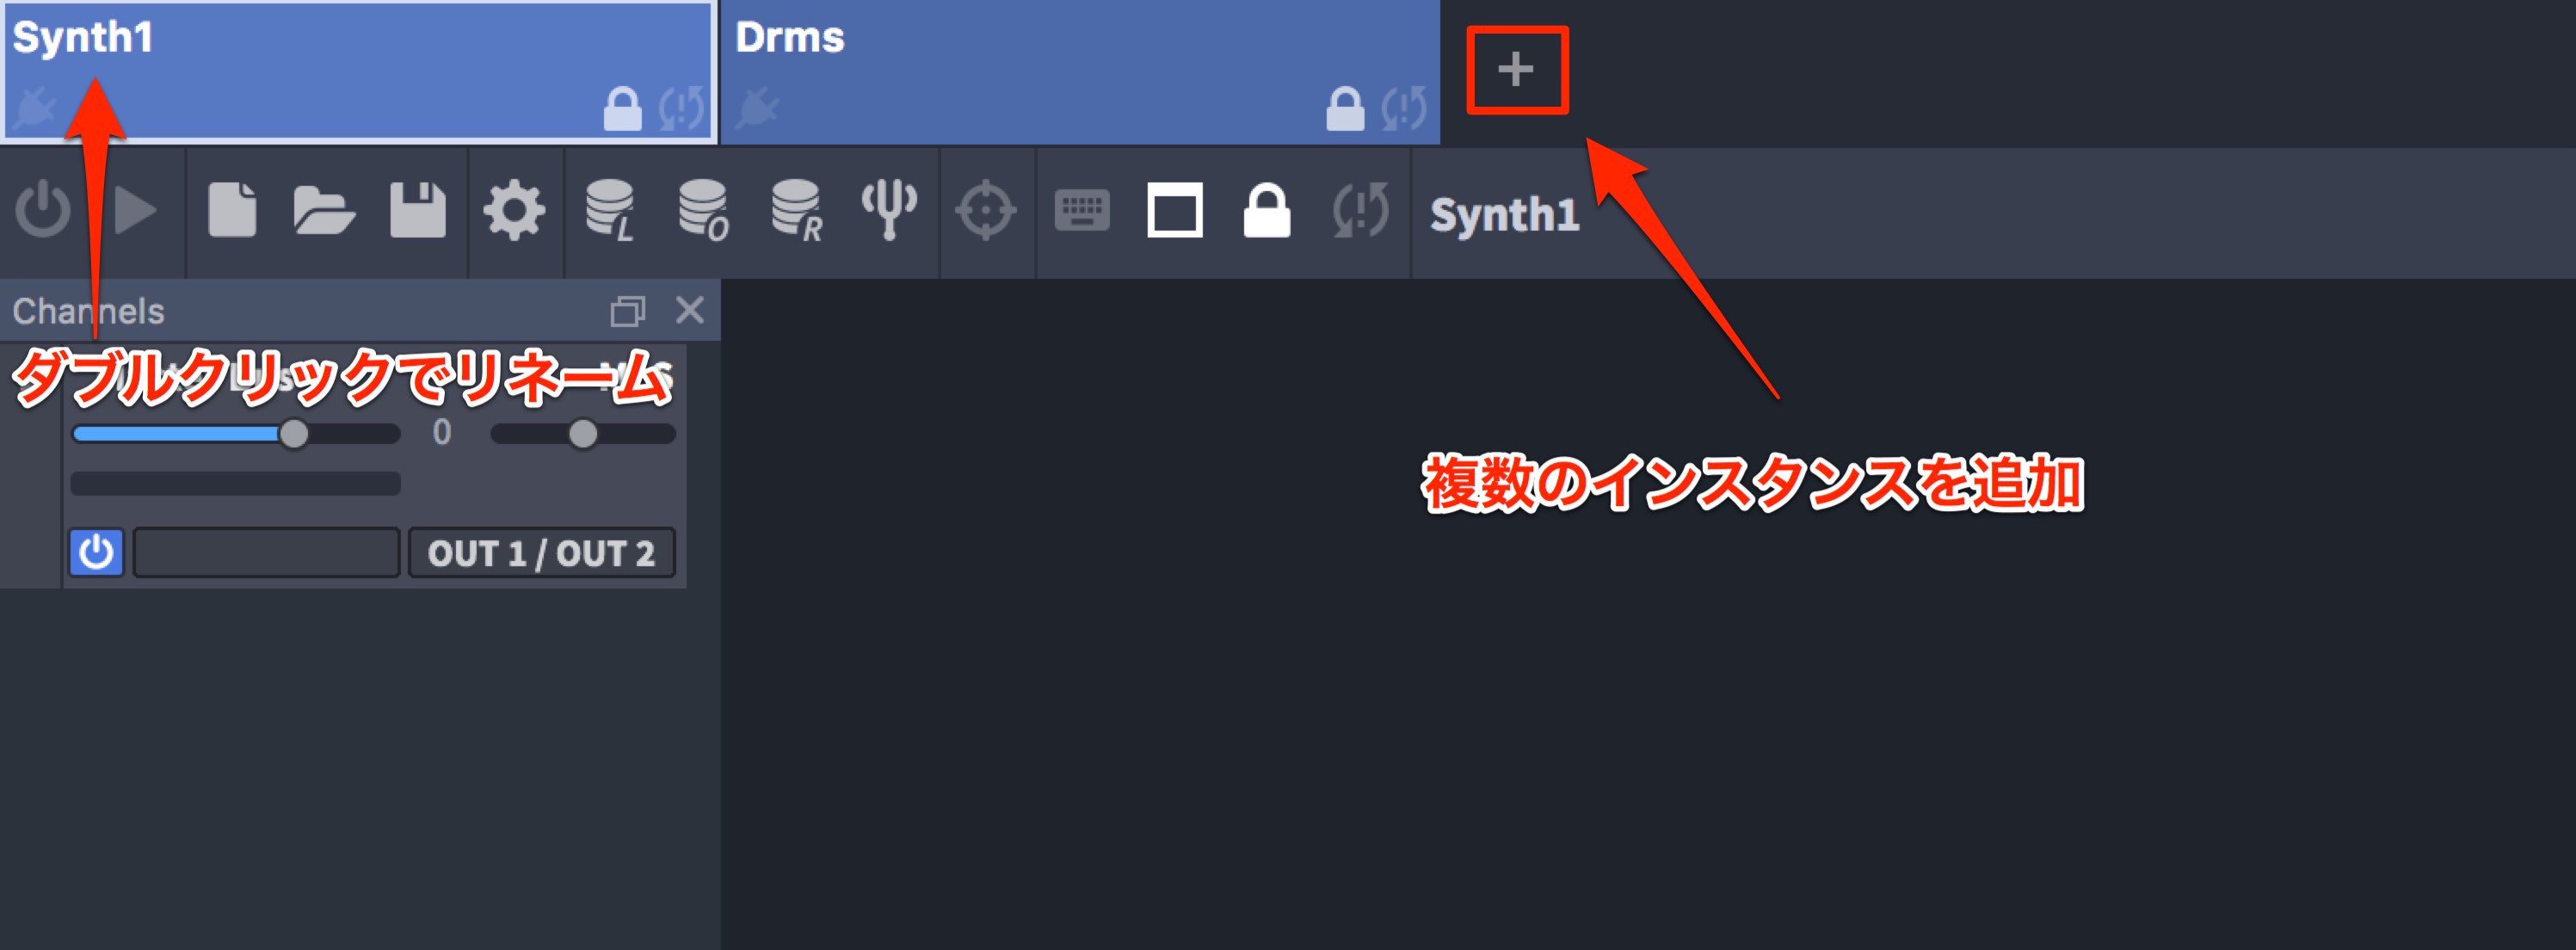
「+」からは複数のインスタンスを追加することができ、インスタンス名をダブルクリックすることで名前をつけることができます。
このように音源の系統ごとに分けていくと把握しやすくなるでしょう。
次に音源を立ち上げます。
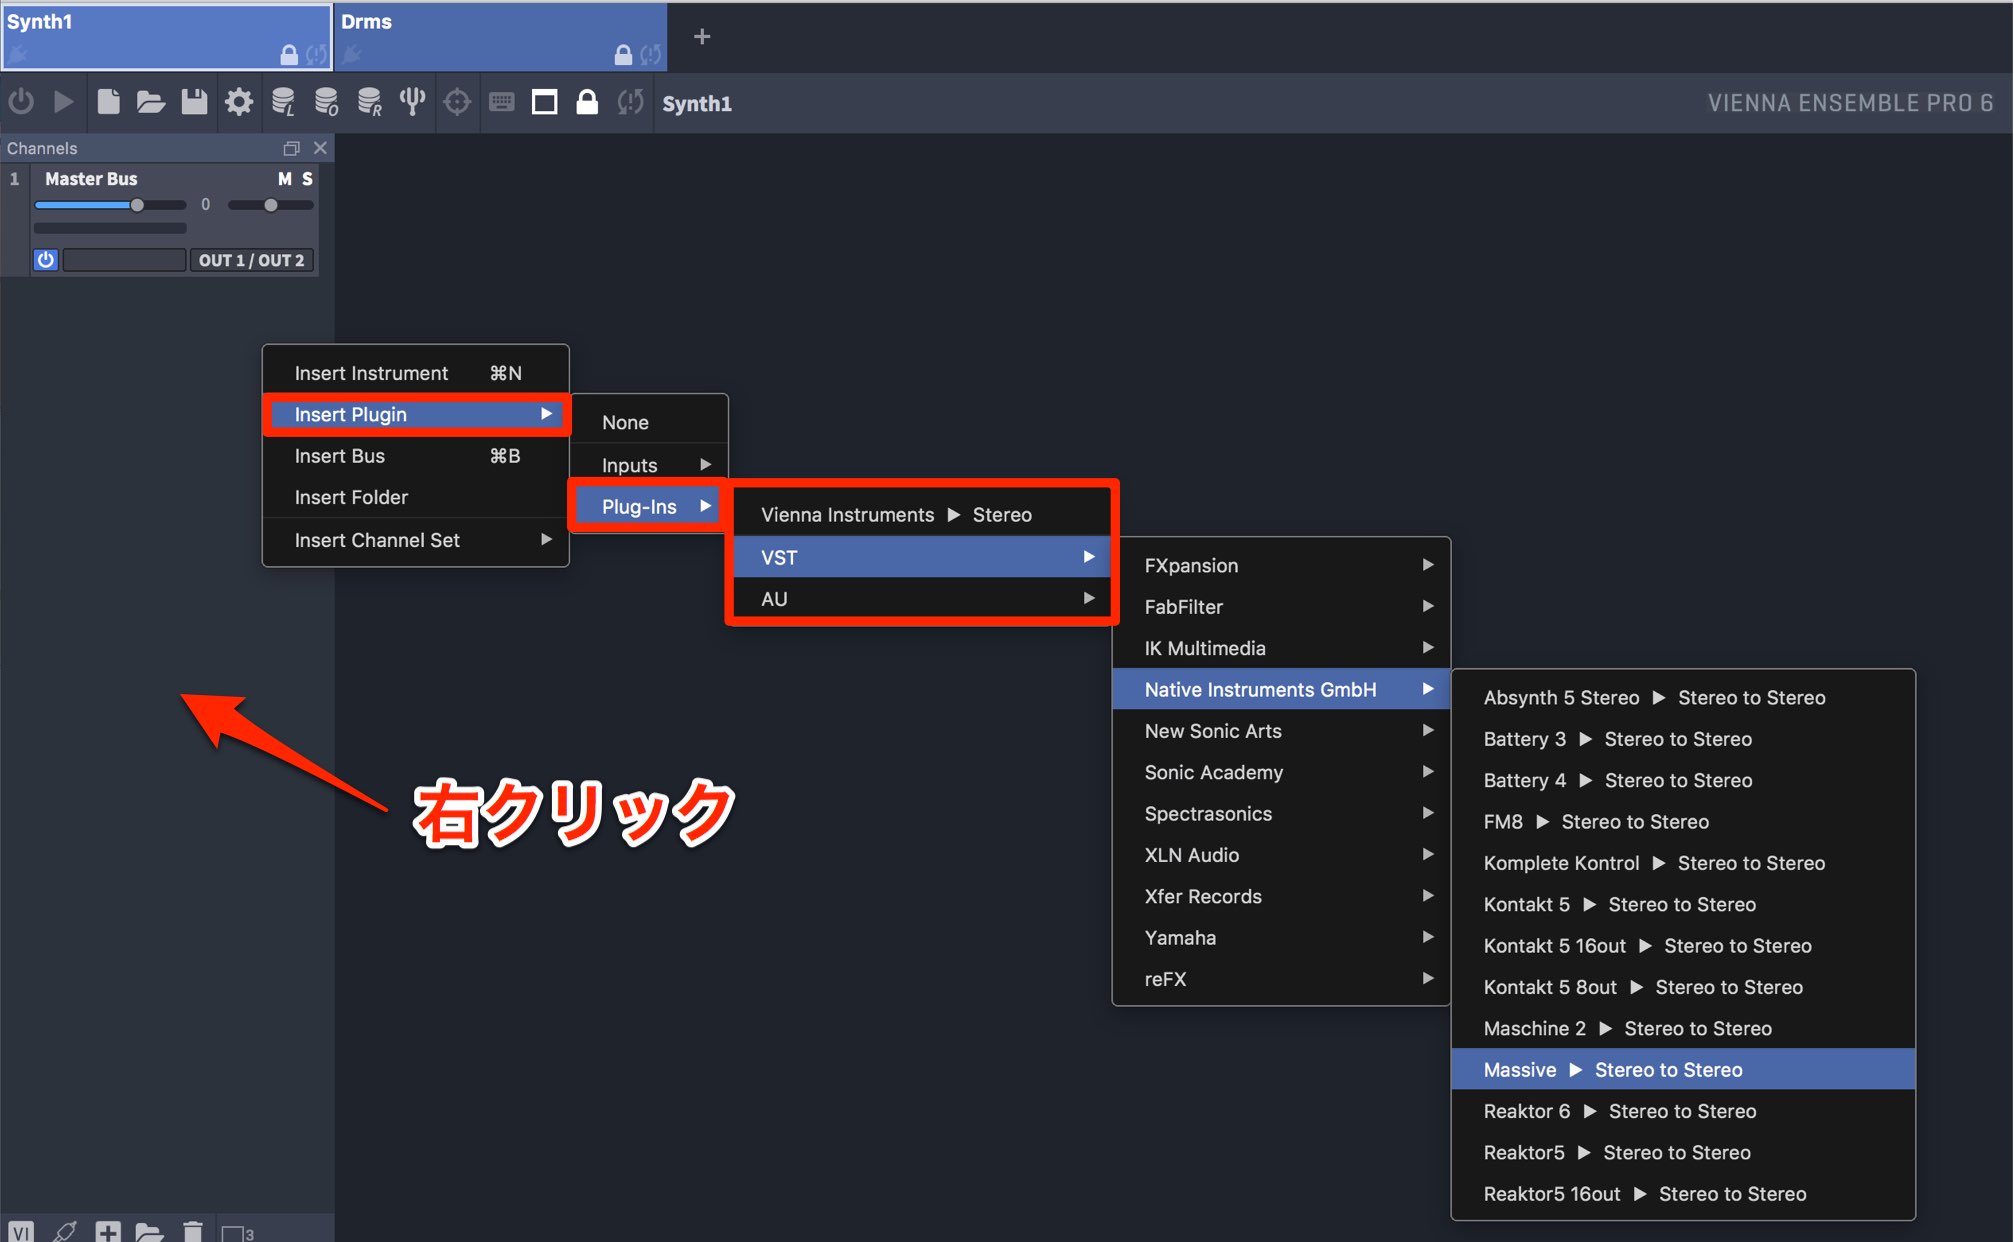
音源を追加するインスタンスを選択し、トラックリスト部分を右クリックします。
メニューから「Insert plugin」→「Plug-Ins」へ進み「VST/AU」から目的のプラグインを立ち上げます。
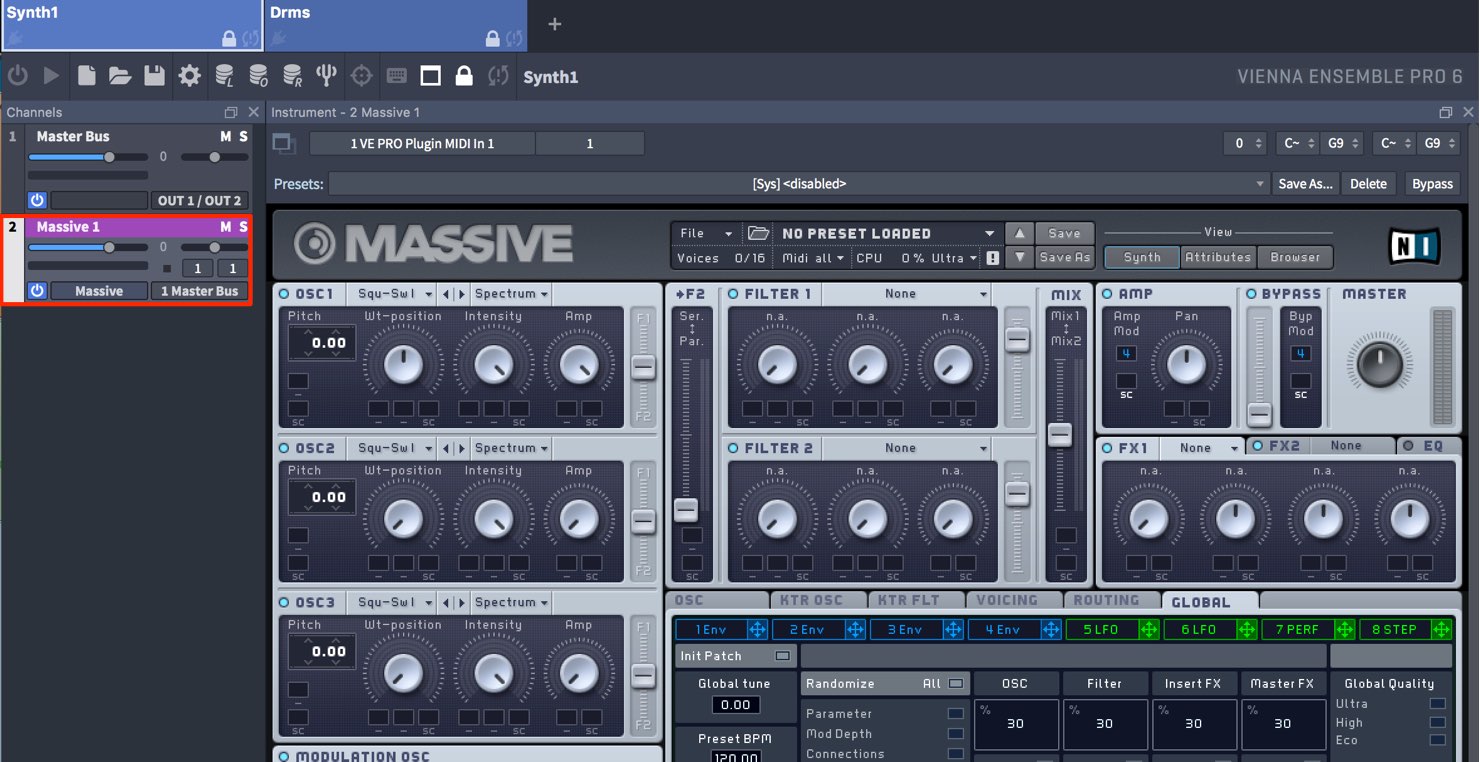
ここではMassiveを立ち上げました。
同じ要領で必要な音源を1つのインスタンスに起動していく形です。
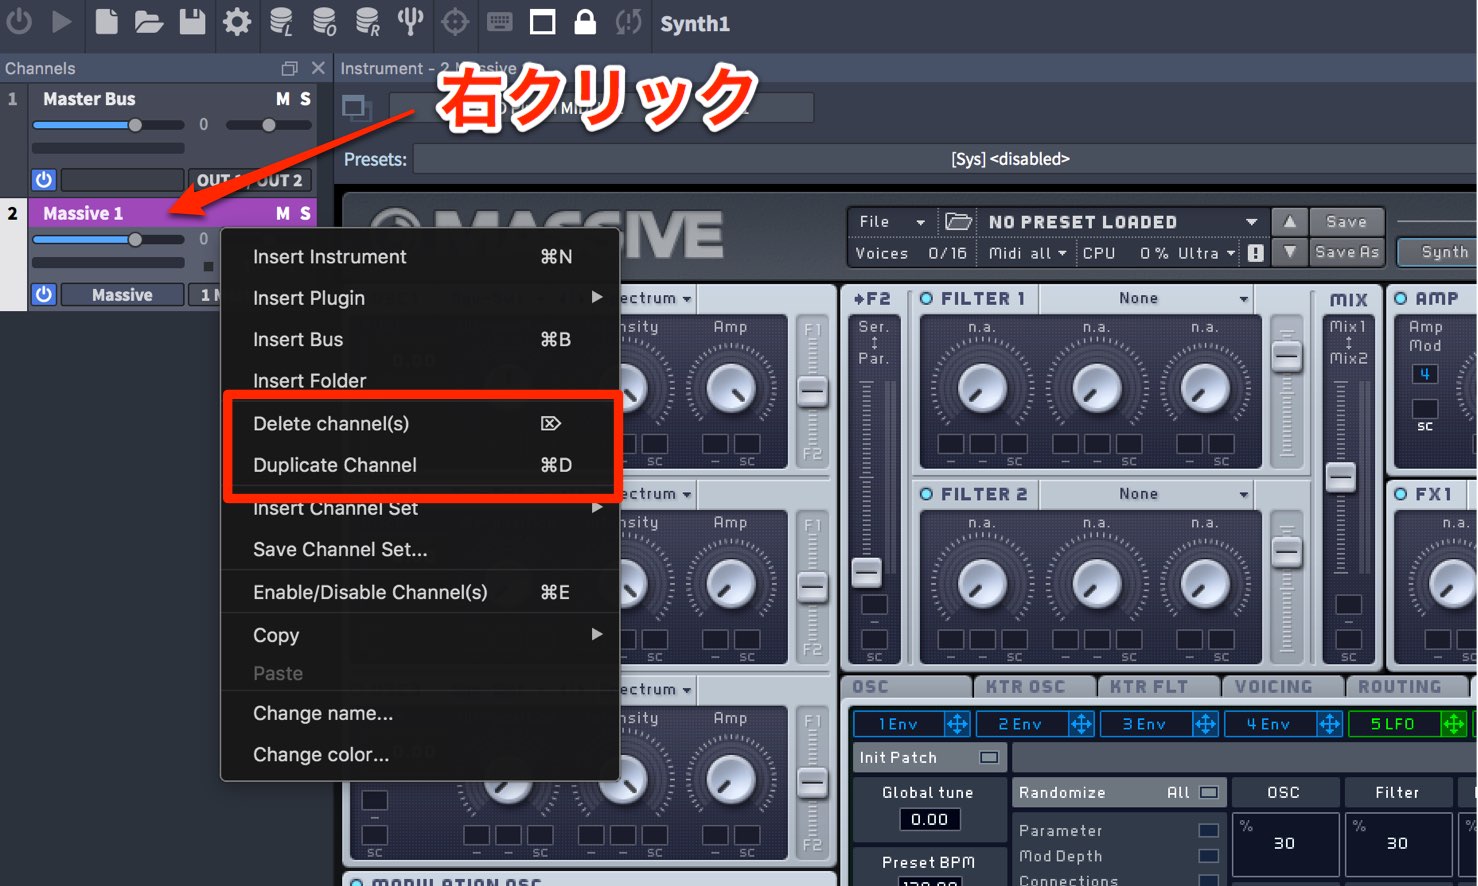
立ち上げた音源トラックを右クリックすることで、削除や複製を行うことができます。
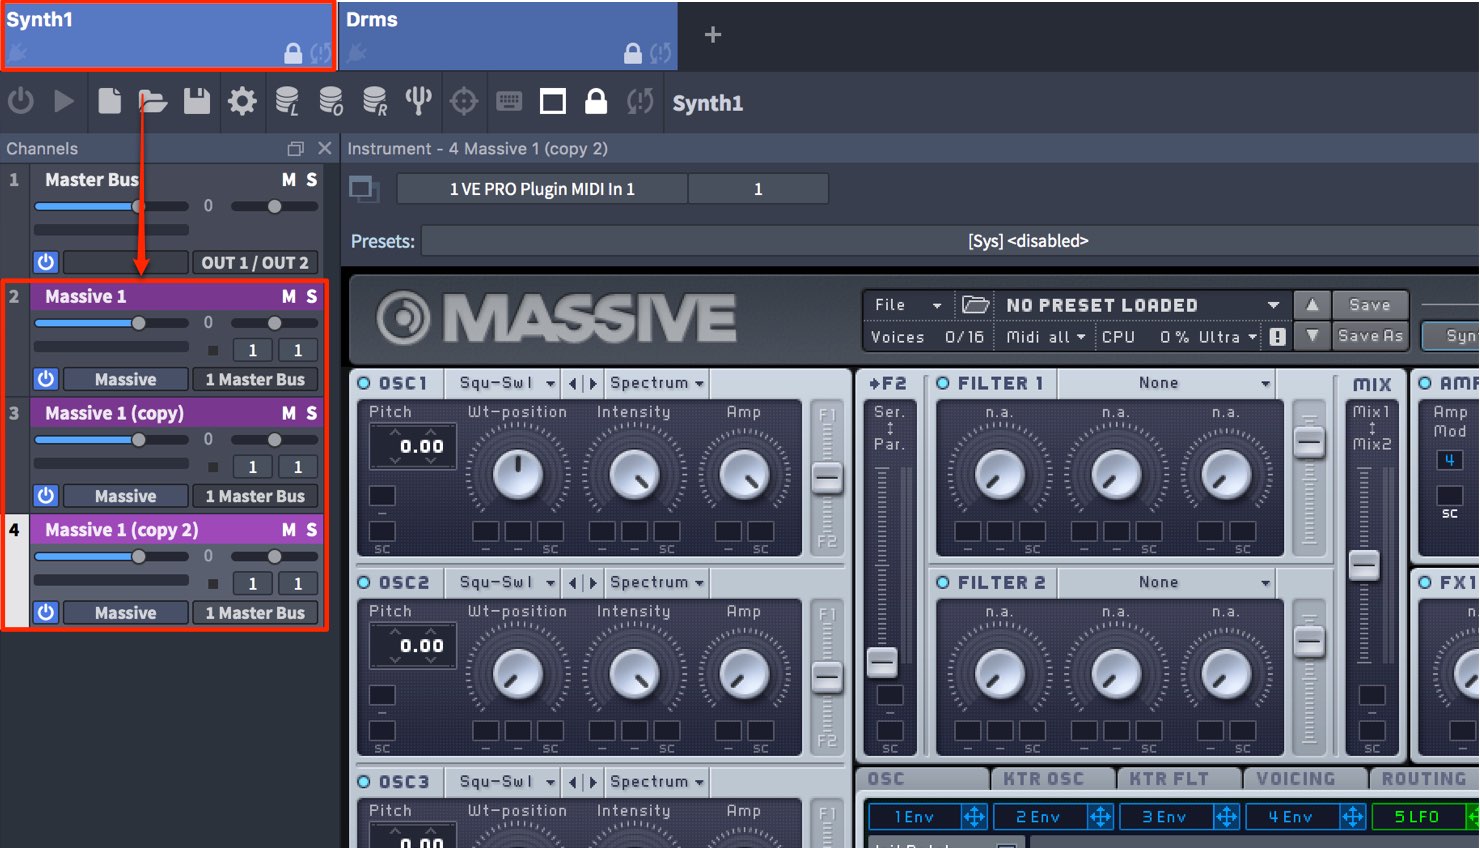
今回はSynthというインスタンスに3つのMassiveを複製しました。

インスタンスをDAWに読み込む
作成したインスタンスをDAWへ読み込みます。
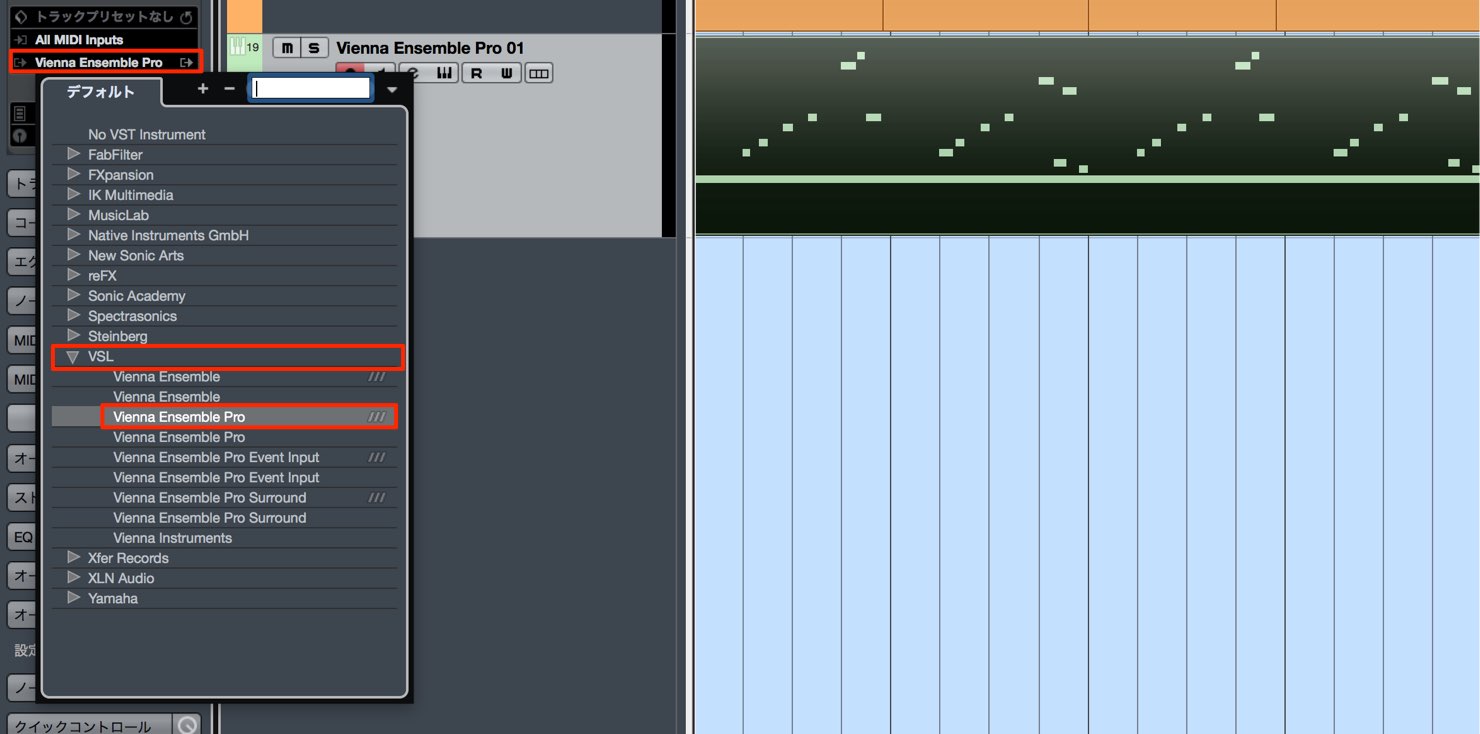
通常のソフトシンセを立ち上げる要領で、「VSL」→「Vienna Ensemble Pro」を選択します。
右に出ている3本線はVST3という新しい規格を表しています。特に理由がない場合は、VST3をご選択ください。
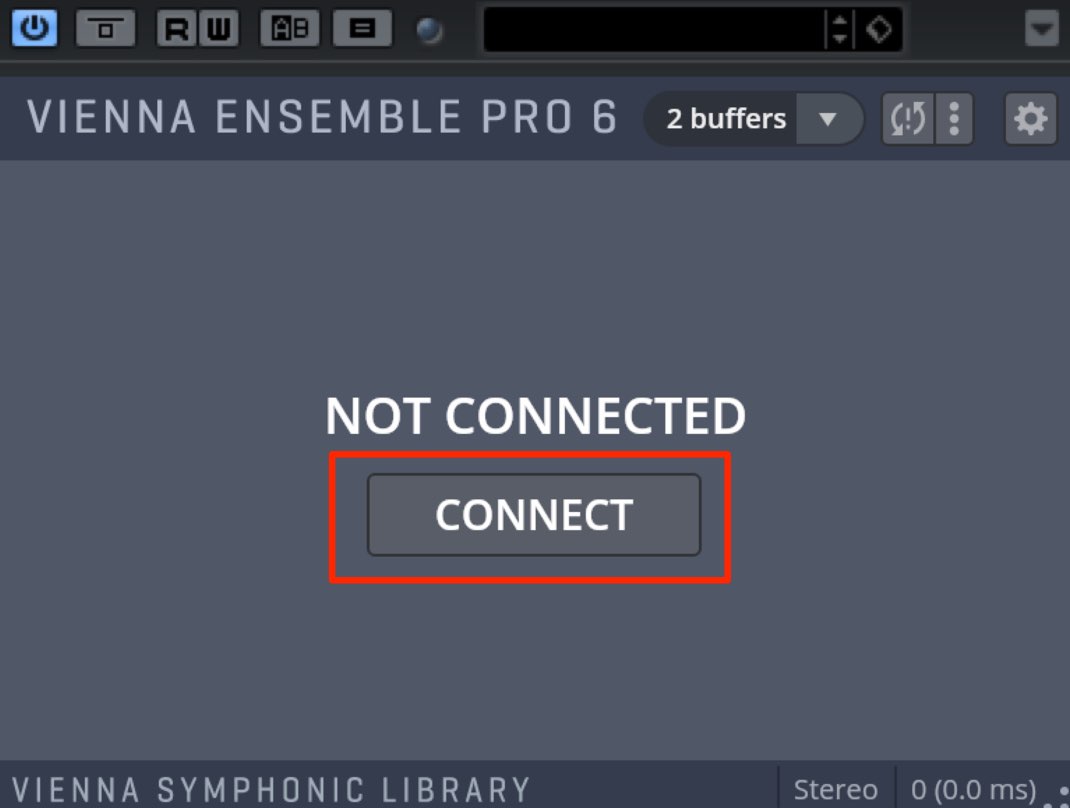
このようなウィンドウが立ち上がりますので「CONNECT」を選択します。
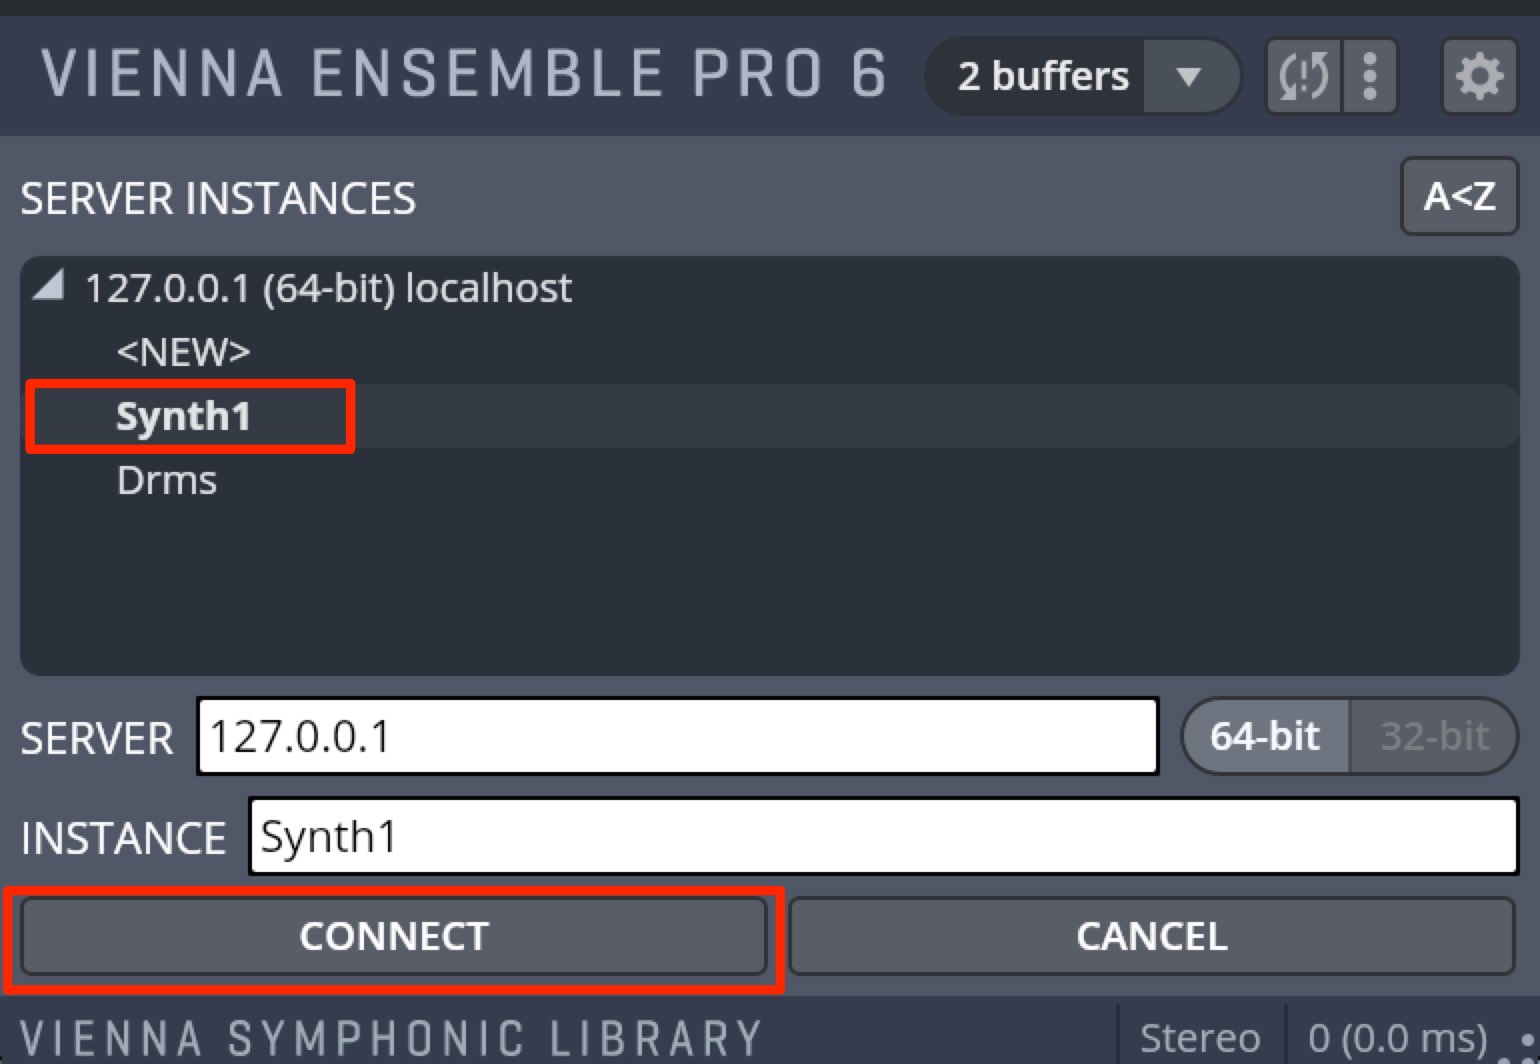
作成したインスタンスが表示されていますので、目的のインスタンスを選択し「CONNECT」を押します。
ここではMassiveを立ち上げてあるSynth1を選択しました。
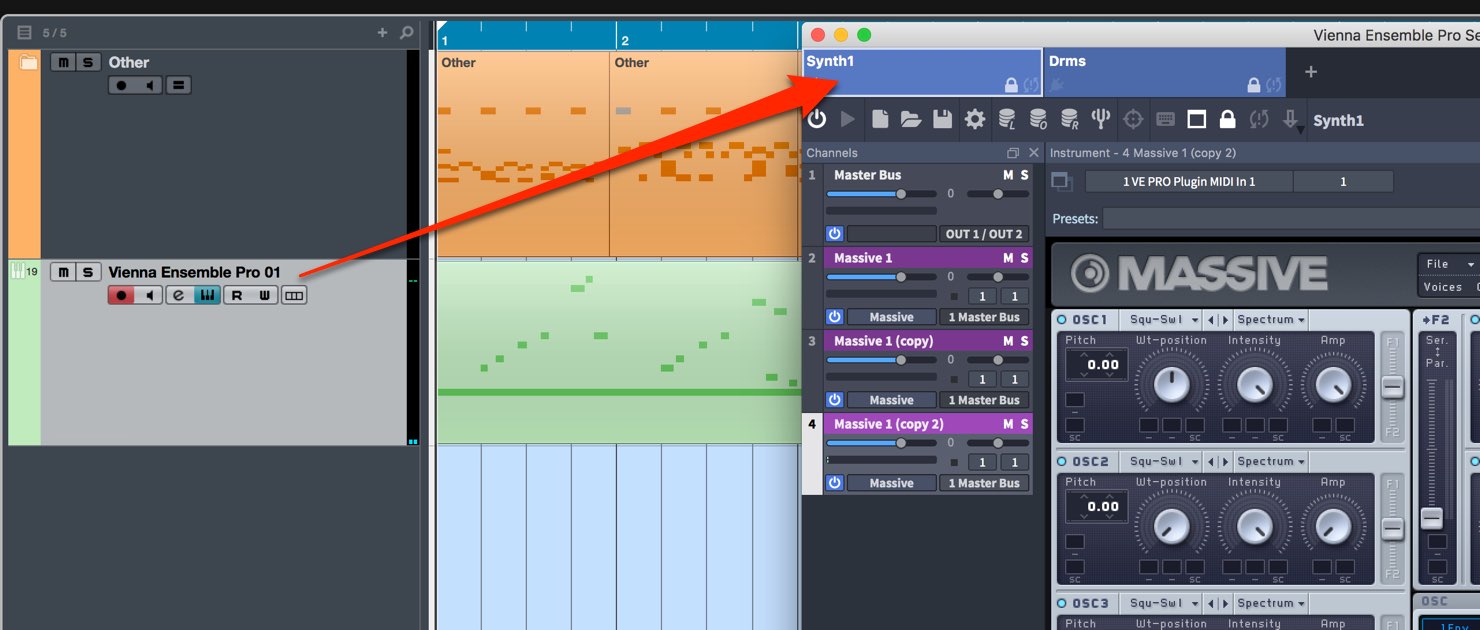
これでDAWの音源トラックとViennaのインスタンスが結びつき、サウンドが出力されるようになります。
インスタンスの環境設定
インスタンスに対して環境設定を行うことができます。
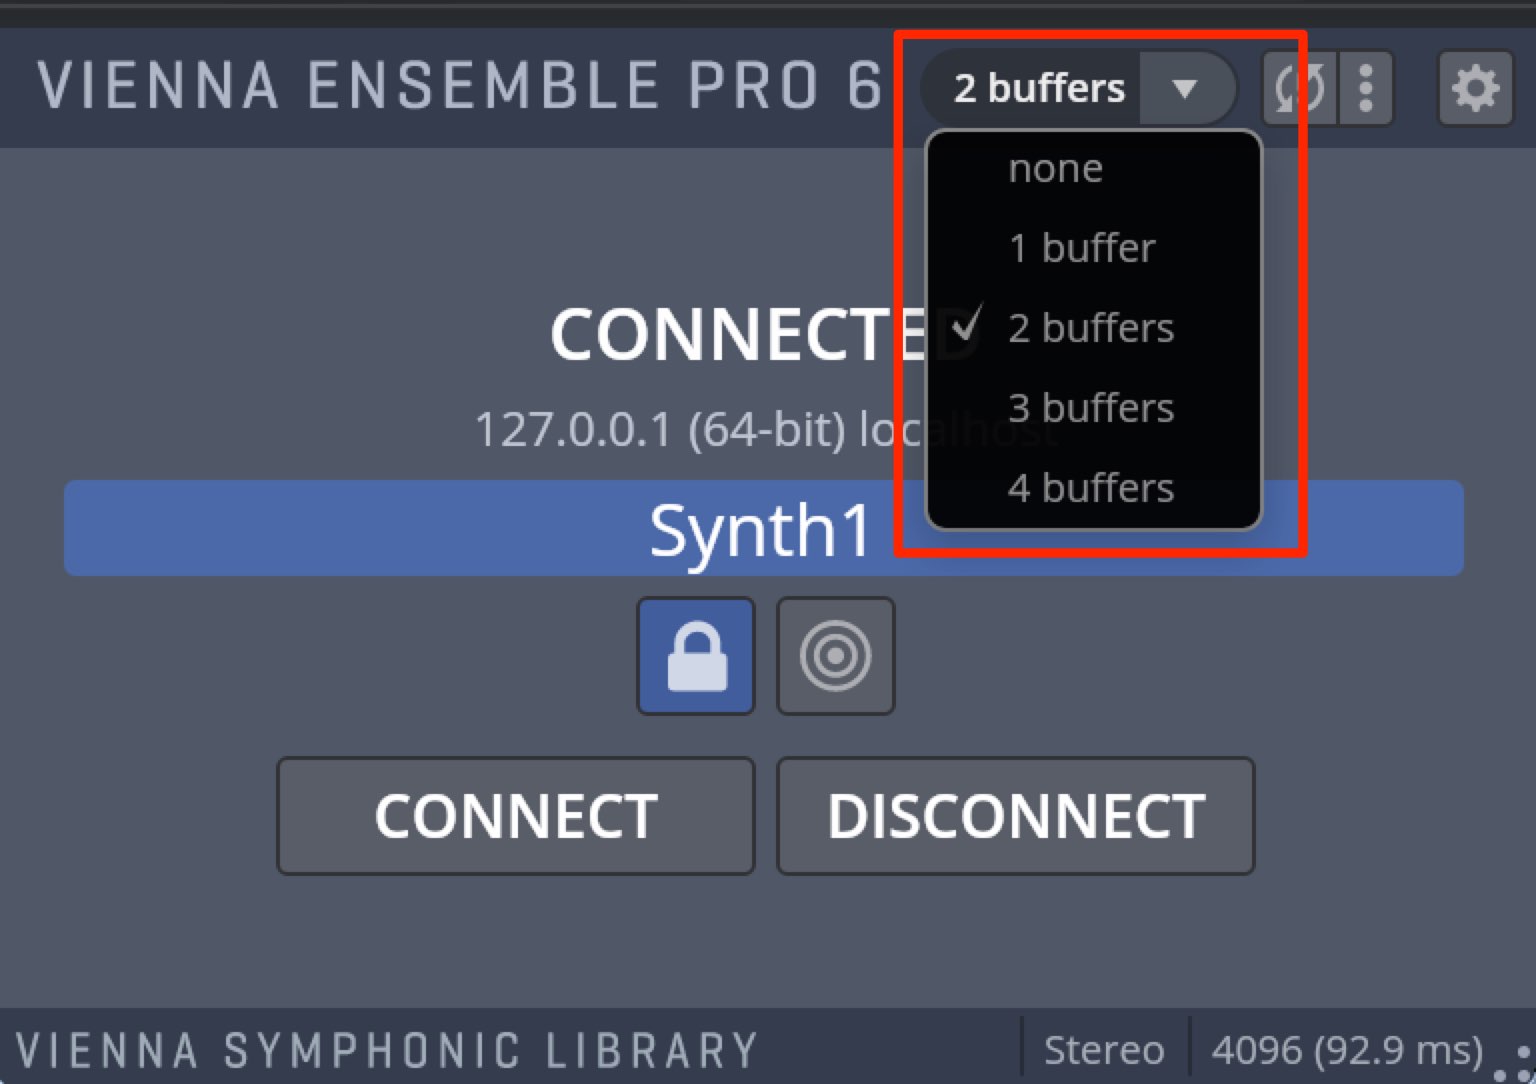
鍵盤を演奏した際の音の遅れ(レイテンシー)を設定します。
数字が小さくなるにつれて、反応が良くなりますが、CPUパワーを消費します。
使用用途に合わせて切り替えることをお勧めいたします。

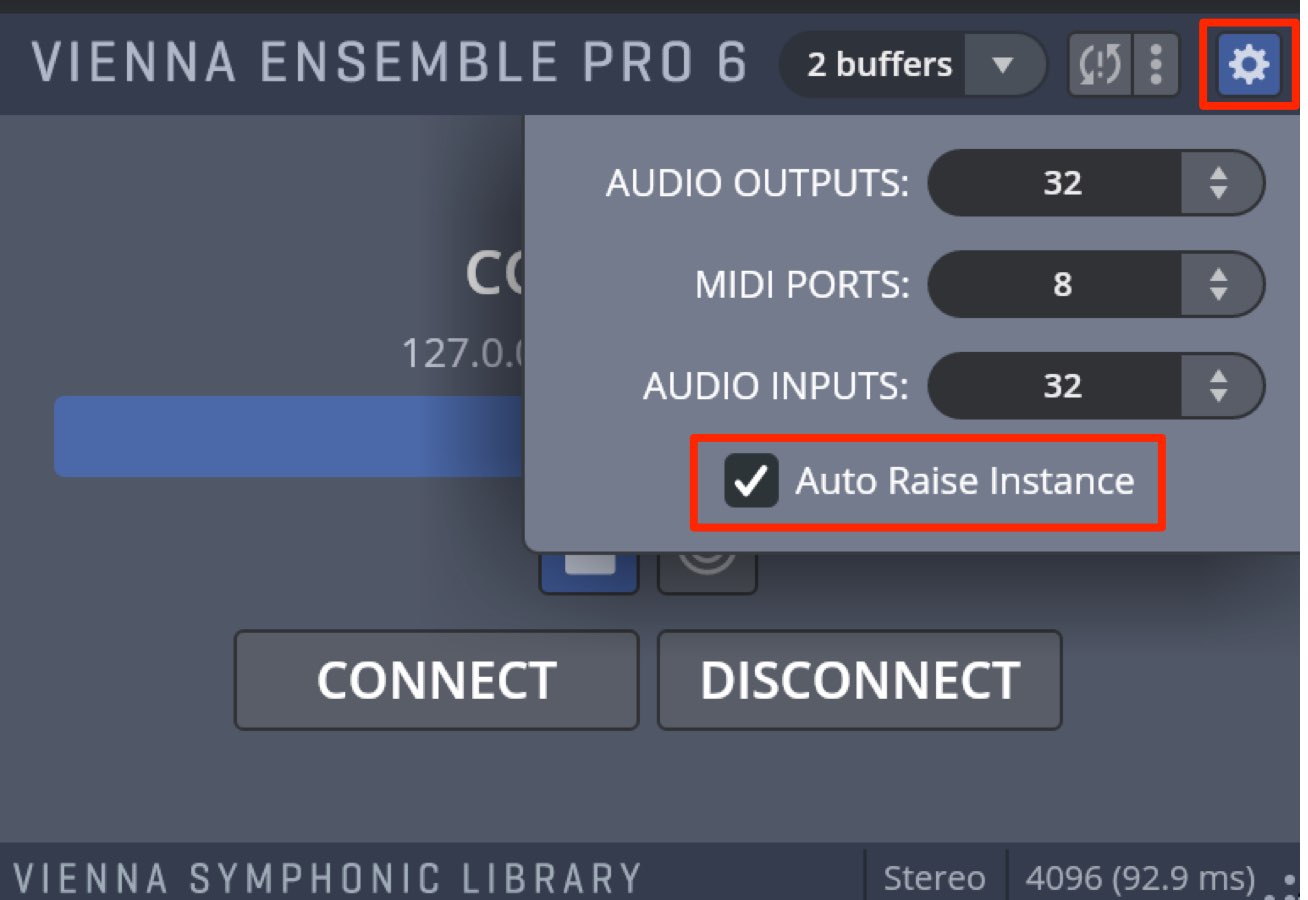
環境設定アイコンの「Auto Raise Instance」へチェックを入れると、DAW側でVienna音源を呼び出した際、すぐに音源の設定画面が開きます。
各音源の設定
インスタンスの中の音源を個別に調整することができます。
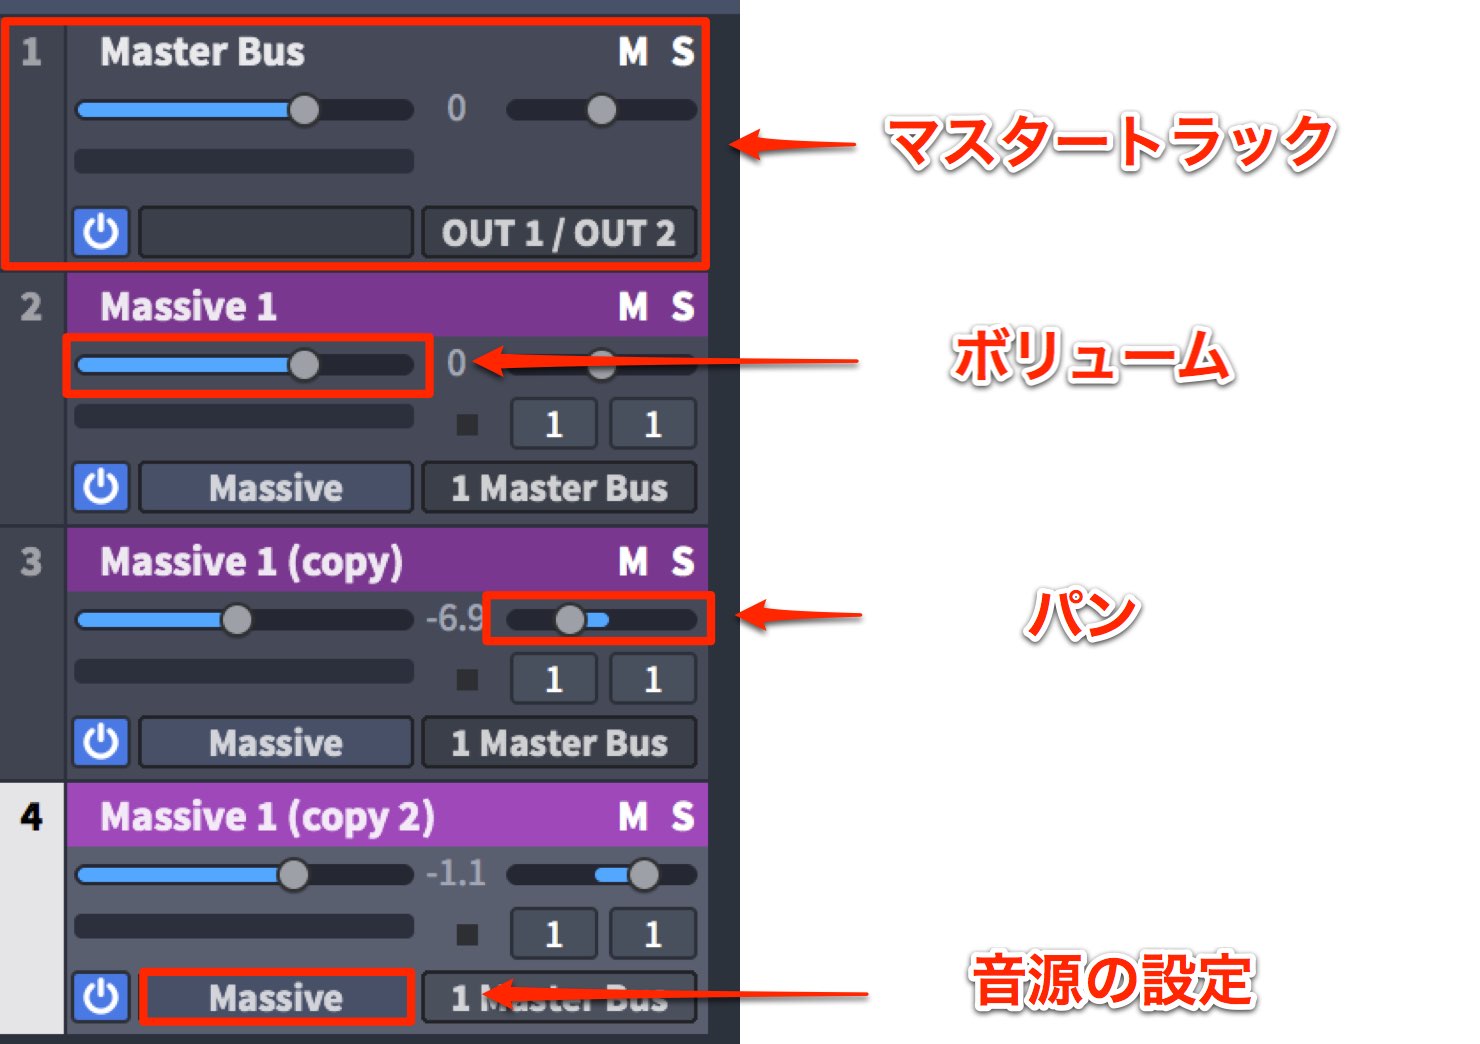
- デフォルトで立ち上がっているトラックで、全音源のボリューム/パンを一斉にコントロールできます
- ボリューム : 各音源のボリュームを個別に調整します
- パン : 各音源の定位を個別に調整します
- 音源 : トラックの音源へアクセスします
各音源が同じフレーズを演奏するなど、音色のレイヤーにも便利ですね。
MIDIチャンネルの割り当て
上記の場合、DAWに打ち込んだMIDI演奏を全音源が出力します。
しかし、音源ごとに個別の演奏を行いたいという場合もあると思います。
これはMIDIトラックと、MIDIチャンネルを使用することで実現可能です。
操作はDAWごとに異なりますので、各記事をご参照ください。

 Logic
Logic Cubase
 Ableton Live
 StudioOne
 FL_Studio

インスタンスの中に立ち上げた音源数に合わせてMIDIトラックを作成します。
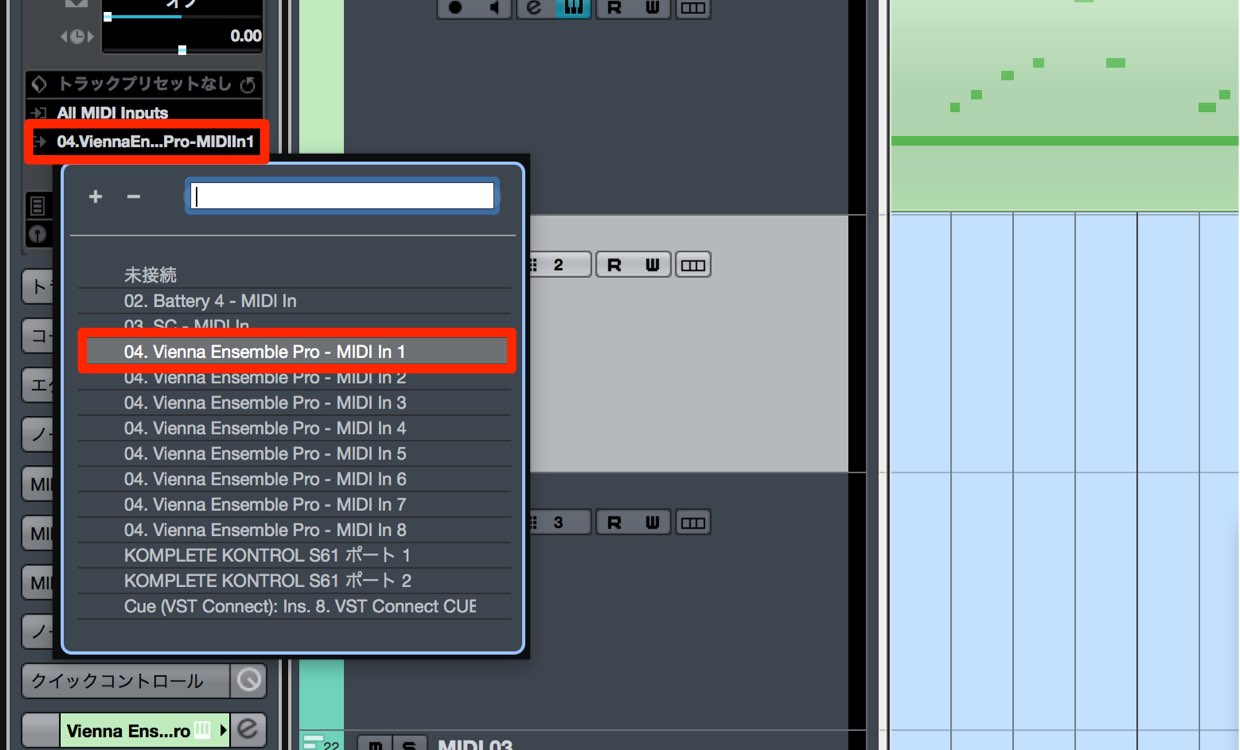
扱う音源がマルチ音源ではない場合は、すべて同じポート(1)で問題ありません。
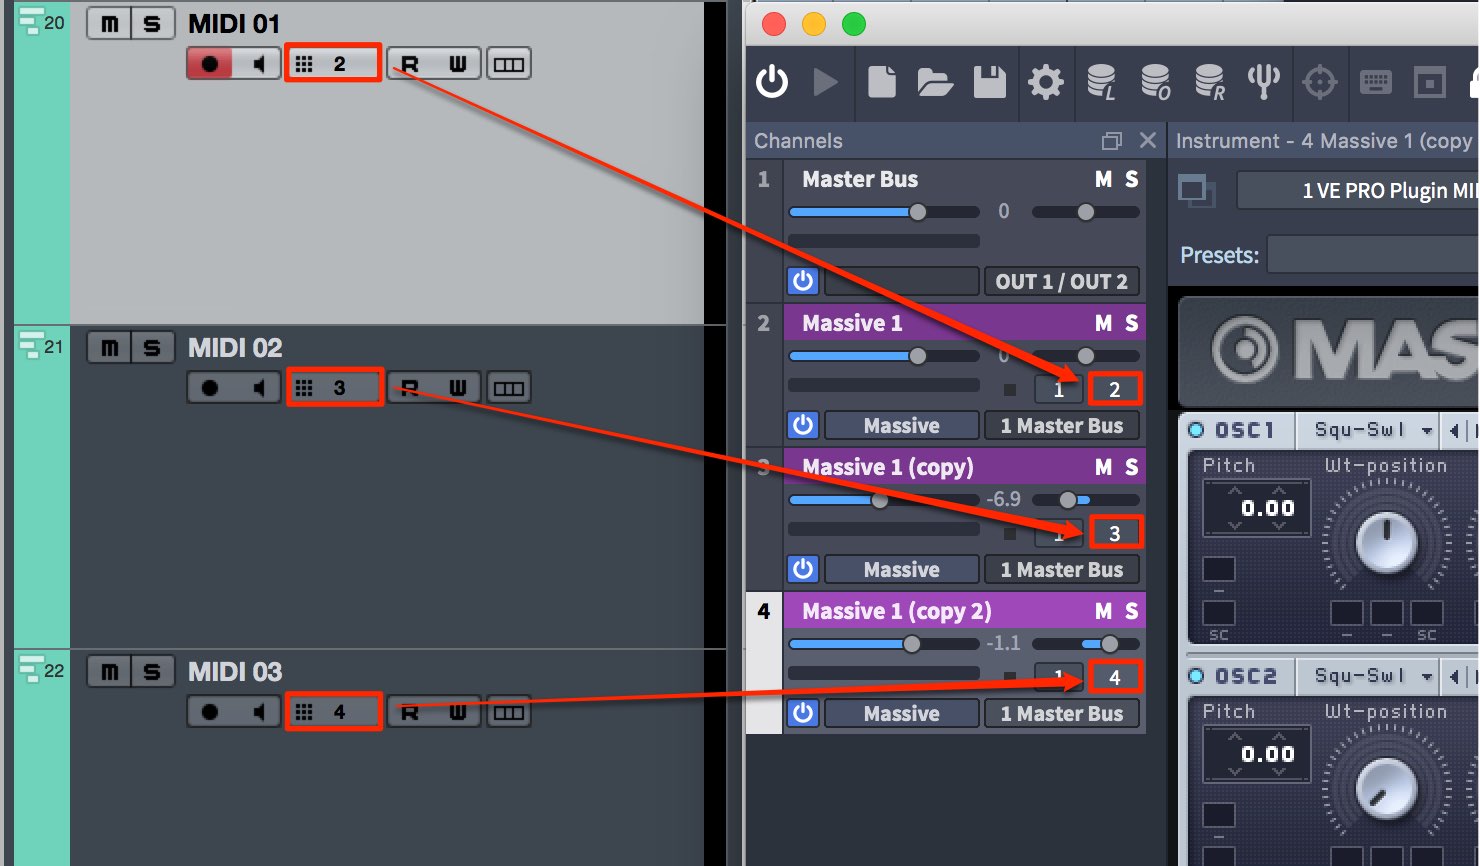
MIDIトラックのチャンネルと、インスタンスのMIDIチャンネルを合わせます。
これにより、各音源で演奏されたMIDI情報はそれぞれの音源に届き、サウンドが出力されます。
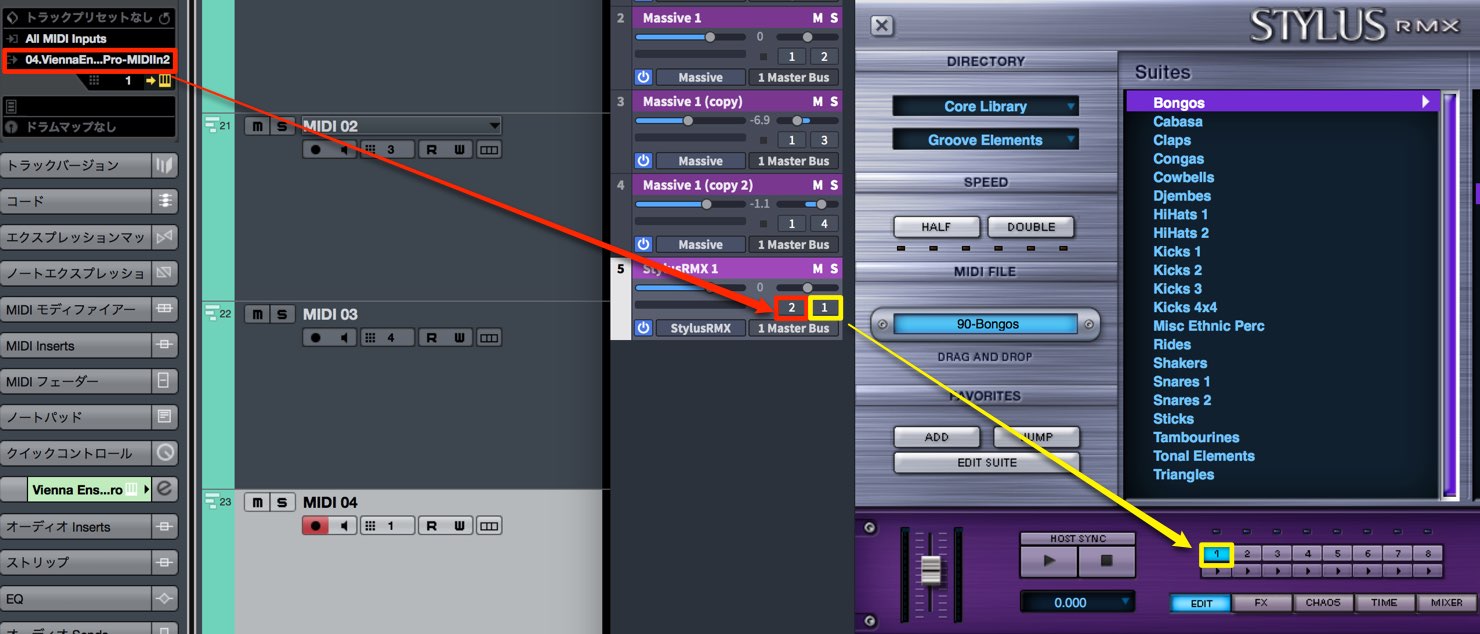
マルチ音源を使用する場合は他音源とMIDIチャンネルが被ってしまうなど、整合性をとることが難しくなります。
このような場合にポートを使用します。
上記のようにマルチ音源1つに対し、新たなポートを用意します。(ここでは2にしています)
ポートを変更することで、新たに1〜16までのMIDIチャンネルを使用できます。
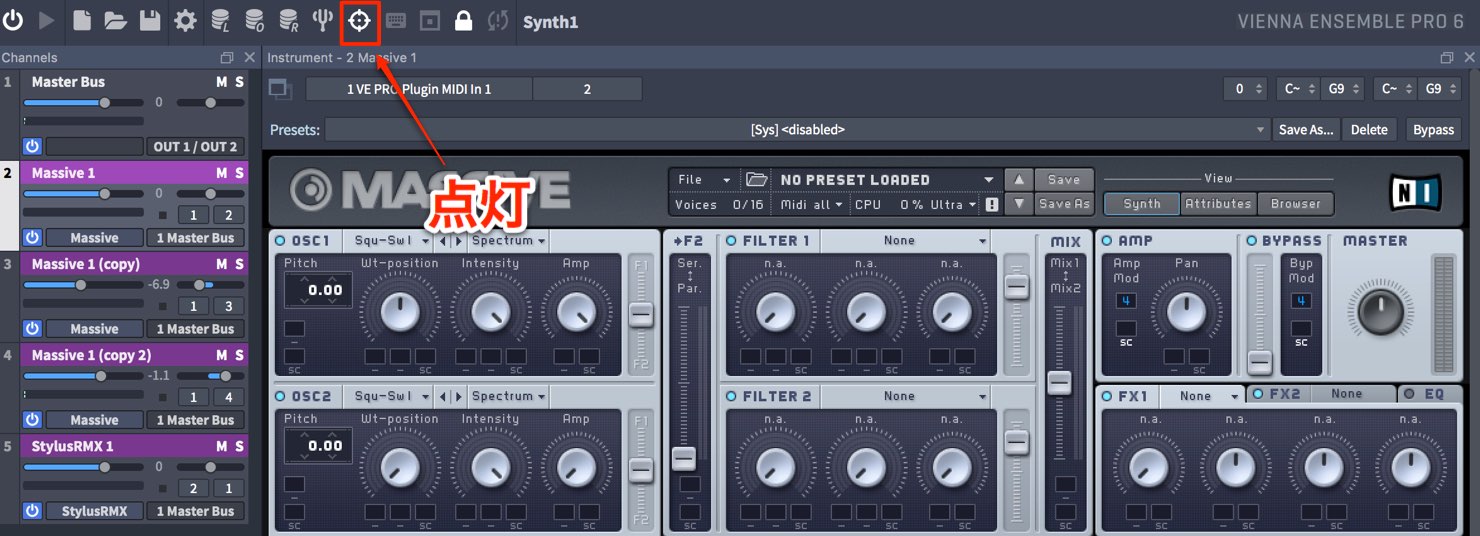
「MIDI FOCUS」を点灯させることで、MIDI演奏を受信した音源が自動的に表示されます。
パラメーターなどの調整に非常に便利です。
パラアウト
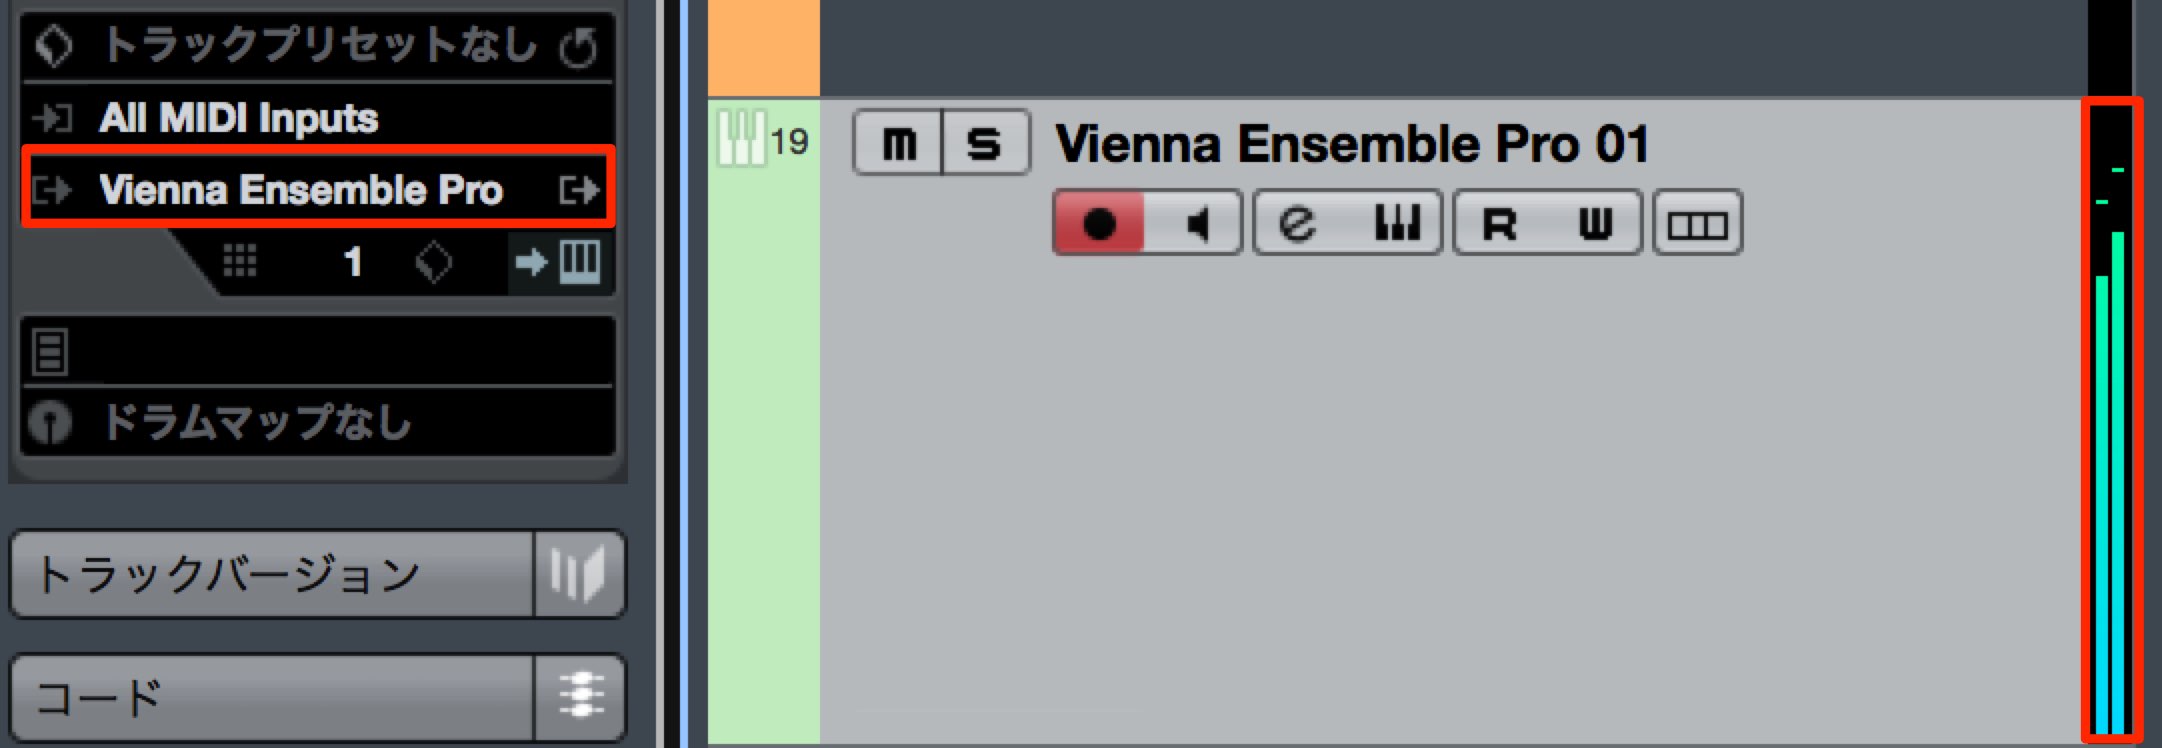
現在の設定は、全音源のサウンドがDAW上の1トラックから出力されます。
これをインスタンス内の音源ごとに出力したいという場合もあると思います。
これはパラアウトを使用することで可能となります。
DAWごとに設定が異なりますので、各記事をご参照ください。
Cubaseの場合、
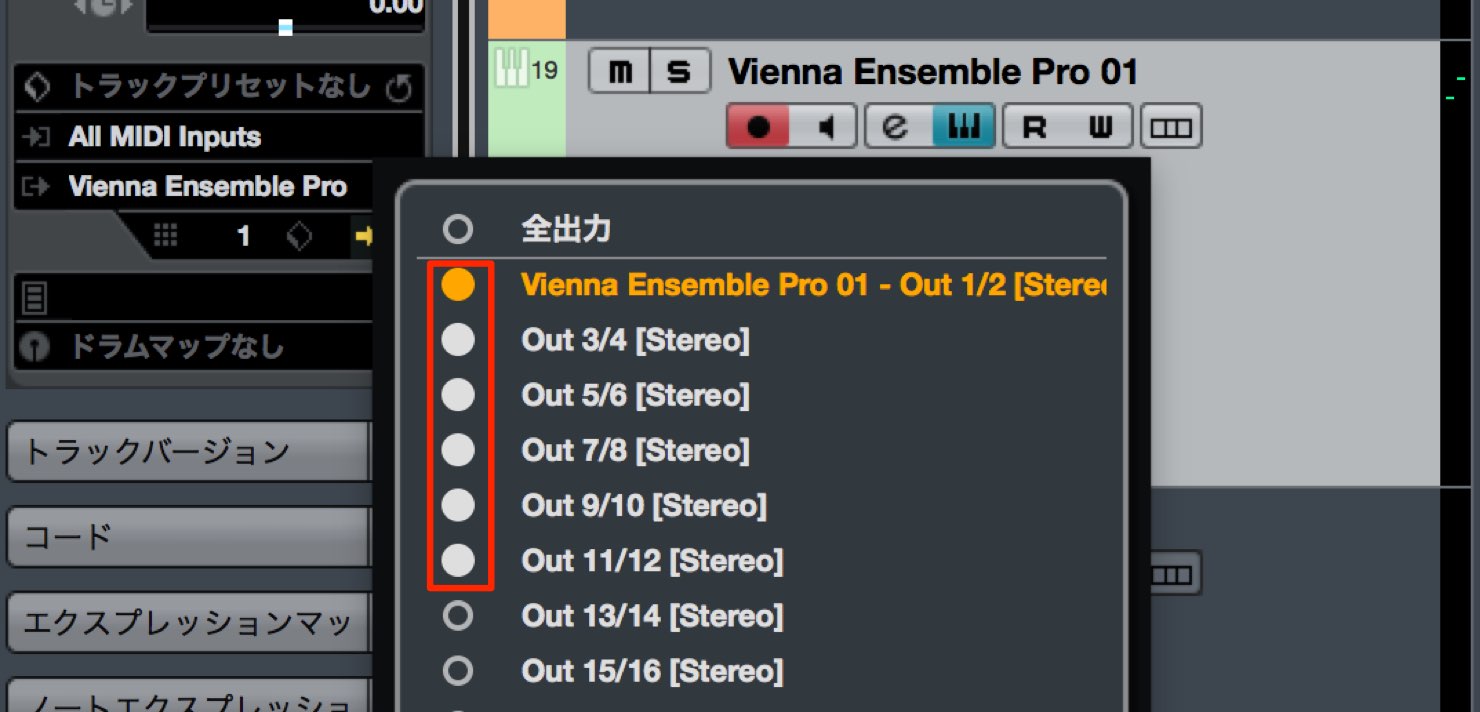
トラック数に合わせて出力を有効にします。
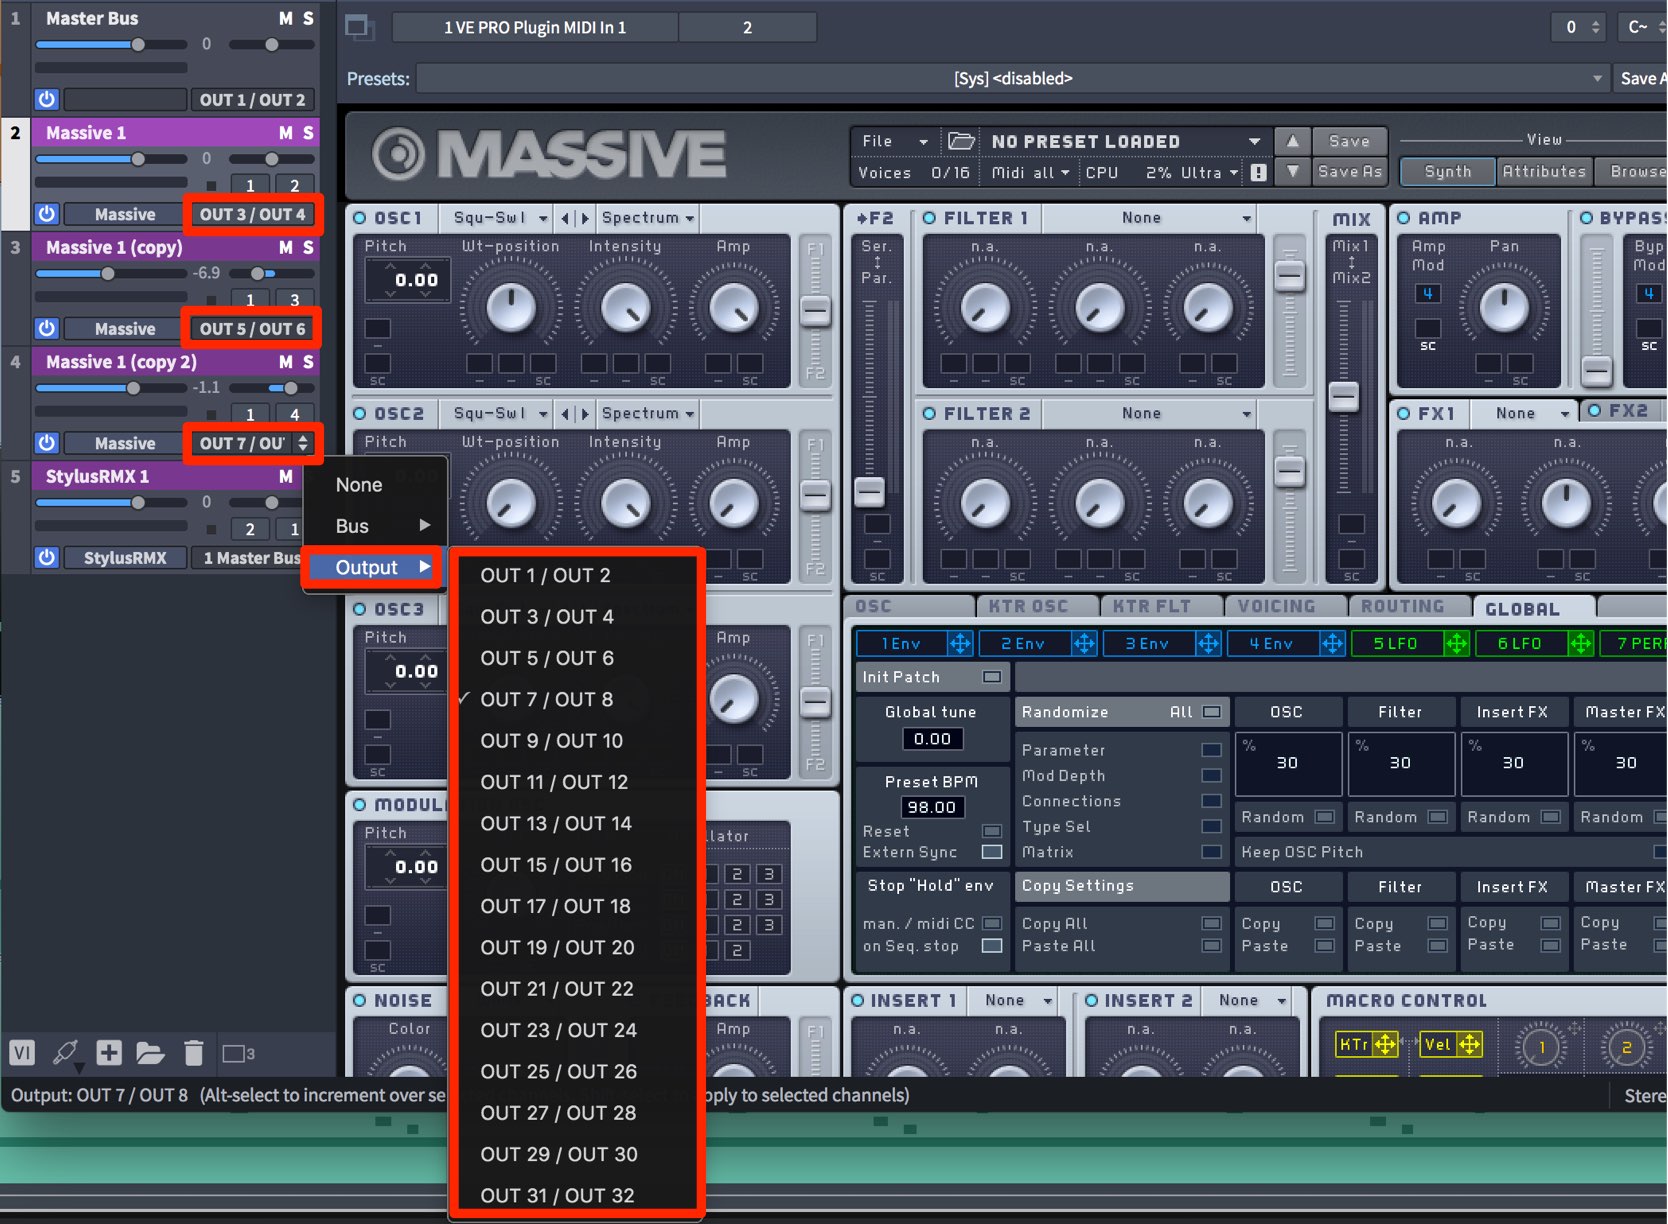
Cubaseで有効にしたアウトプットに合わせて、それぞれの出力を変更します。
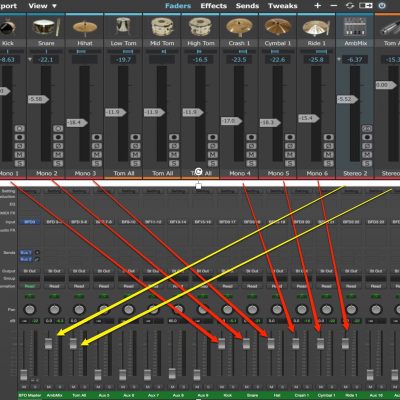
マルチ音源のようにソフト内で複数出力先を変更する必要があるソフトの場合、
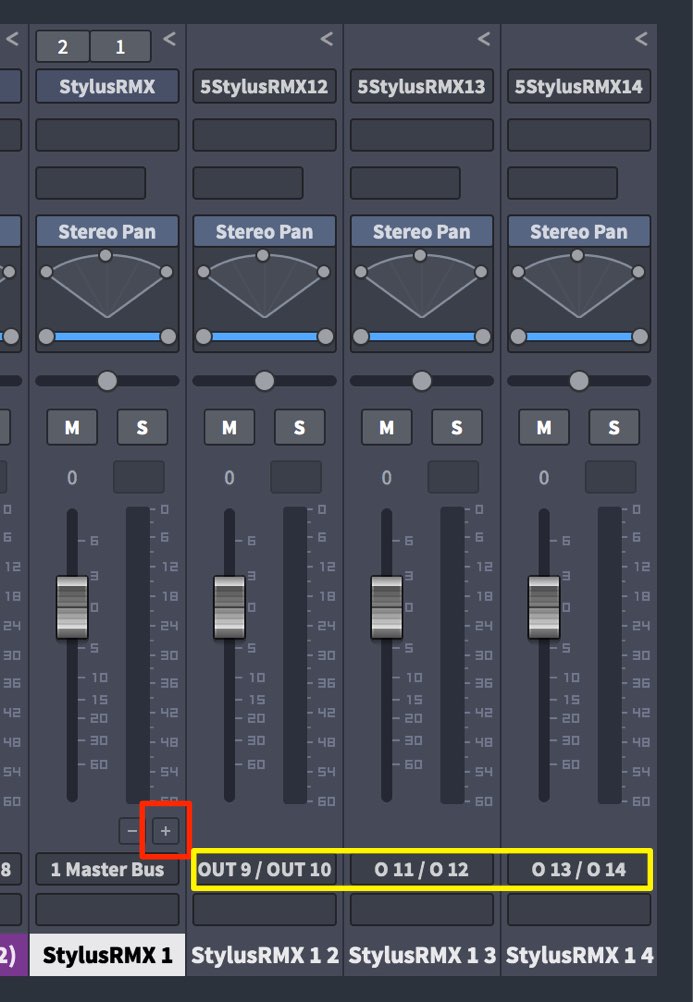
ミキサー画面からトラックネームの下に配置されている「+」ボタンを押します。
トラックが拡張されるため、Cubaseで有効にしたアウトプットに合わせて、それぞれの出力を変更します。
製品のご購入
このような記事も読まれています

BFD3 パラアウトの注意点
「DAWでパラアウトを行う際、各トラックへの出力が思うようにいかない。。。」というご相談をいただくことがあります。 そこで今回は、困惑しがちなBFD3独自のパラアウト出力について解説したいと思います。
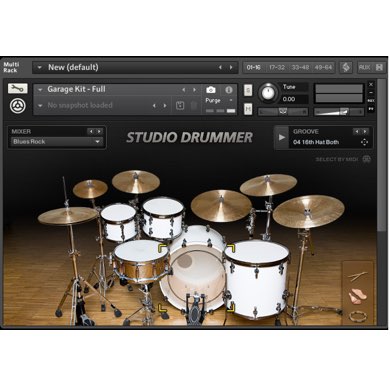
Kontakt内のドラム音源パラアウト方法
ドラムのような音源では、「キック、スネア、ハット」など1つの音源から個別の出力を設定したい場合があります。 この設定方法を解説していきます。
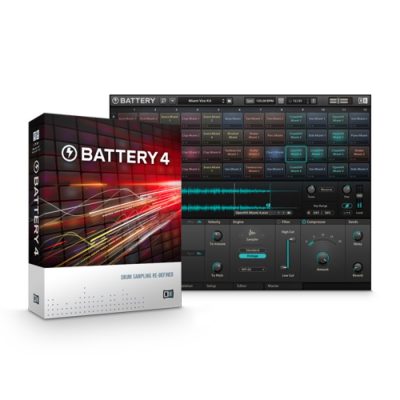
カスタマイズに特化したBattery 4
自ら作成、用意したサンプルを取り込み、様々な編集が可能なリズム音源。プリセットも充実しており、エレクロサウンドにとても向いています。
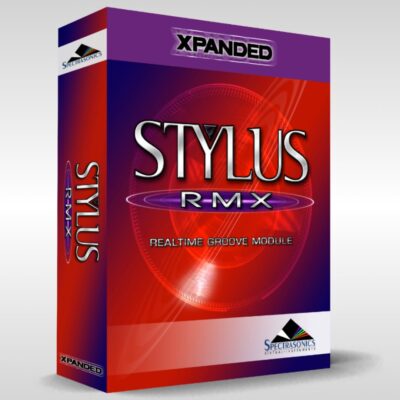
ブレイクビーツやクラブリズム系リズムに特化したStylus
今っぽいサウンドが満載。豊富なリズムパターンを使用でリズム組み替えも可能です。パーカッションループも素晴らしい完成度です。