Addictive Drums 2 is a drum instrument known for its light system load and high-quality sound, suitable for beginners and experienced producers alike. Choosing presets, customizing kit pieces and using its extensive drum-pattern library can make drum production more efficient. This article covers the process from auditioning and saving presets through creating your own drum sounds for use in a DAW.
Exploring an Ever-Evolving Drum Instrument
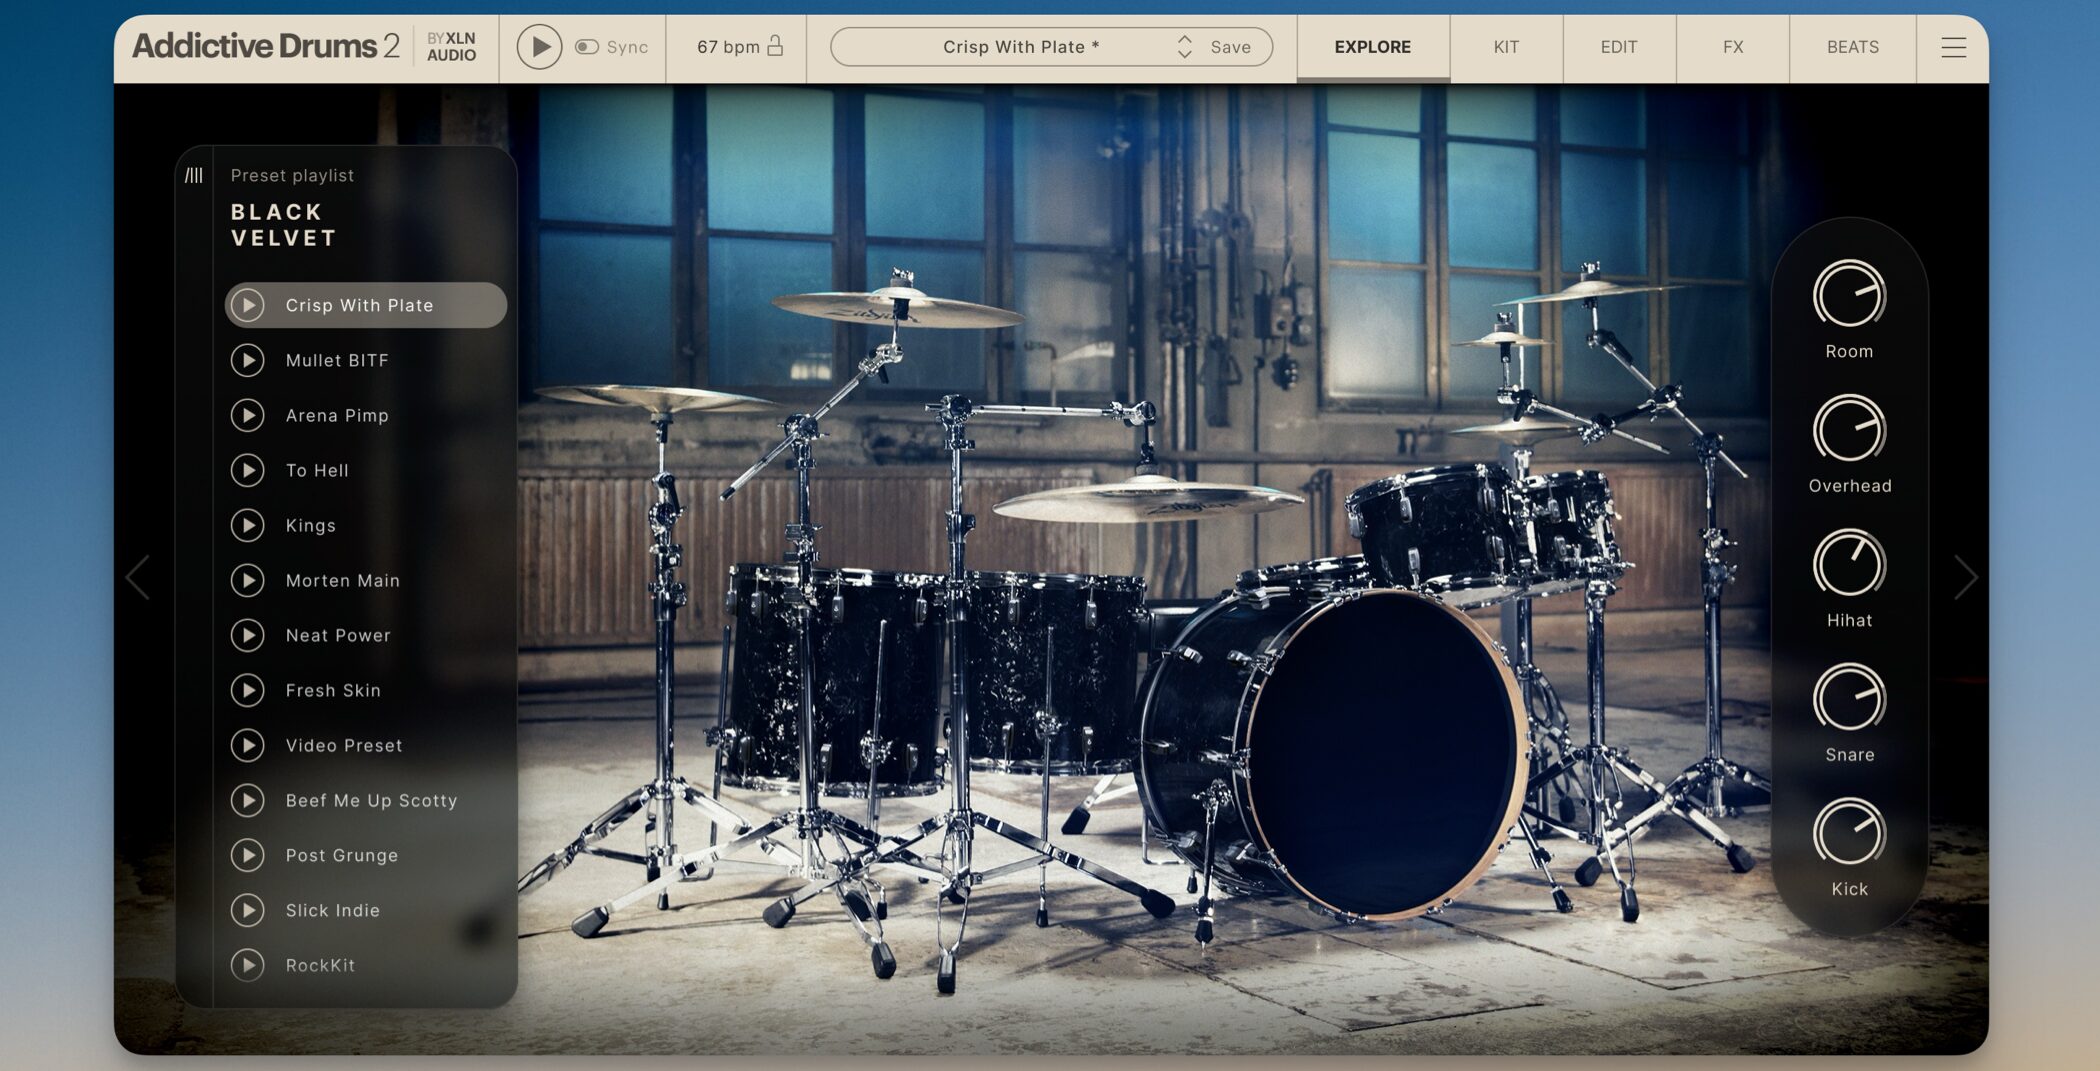
Addictive Drums has long been popular for its light system load and polished sound.
Its successor, Addictive Drums 2, has continued to receive updates since release, expanding its sound libraries, mixing functions and effects while retaining an intuitive workflow. It continues to support more advanced music production.
Here we explain the main features of Addictive Drums 2 and how to use them.
Addictive Drums 2 Video: Selecting Presets and Kits
Selected Questions and Answers from the YouTube Video

How can I use the second Studio Pop preset as a starting point but apply the sound of the fourth Metal preset to just the snare? I can swap the snare for one from another kit, but can I also apply that preset’s sound to it?
There is no direct way to load an individual preset sound, but you can select the kit piece in EDIT and copy Kit Piece Settings from the upper right-click menu and Insert Effect settings from the middle right-click menu, then paste each onto the target kit piece.
That was quick! Has the sound stayed the same?
The source sounds have not changed, but even with the same preset, the effects and their settings may differ, so versions 1 and 2 sound slightly different.
Auditioning and Selecting Presets
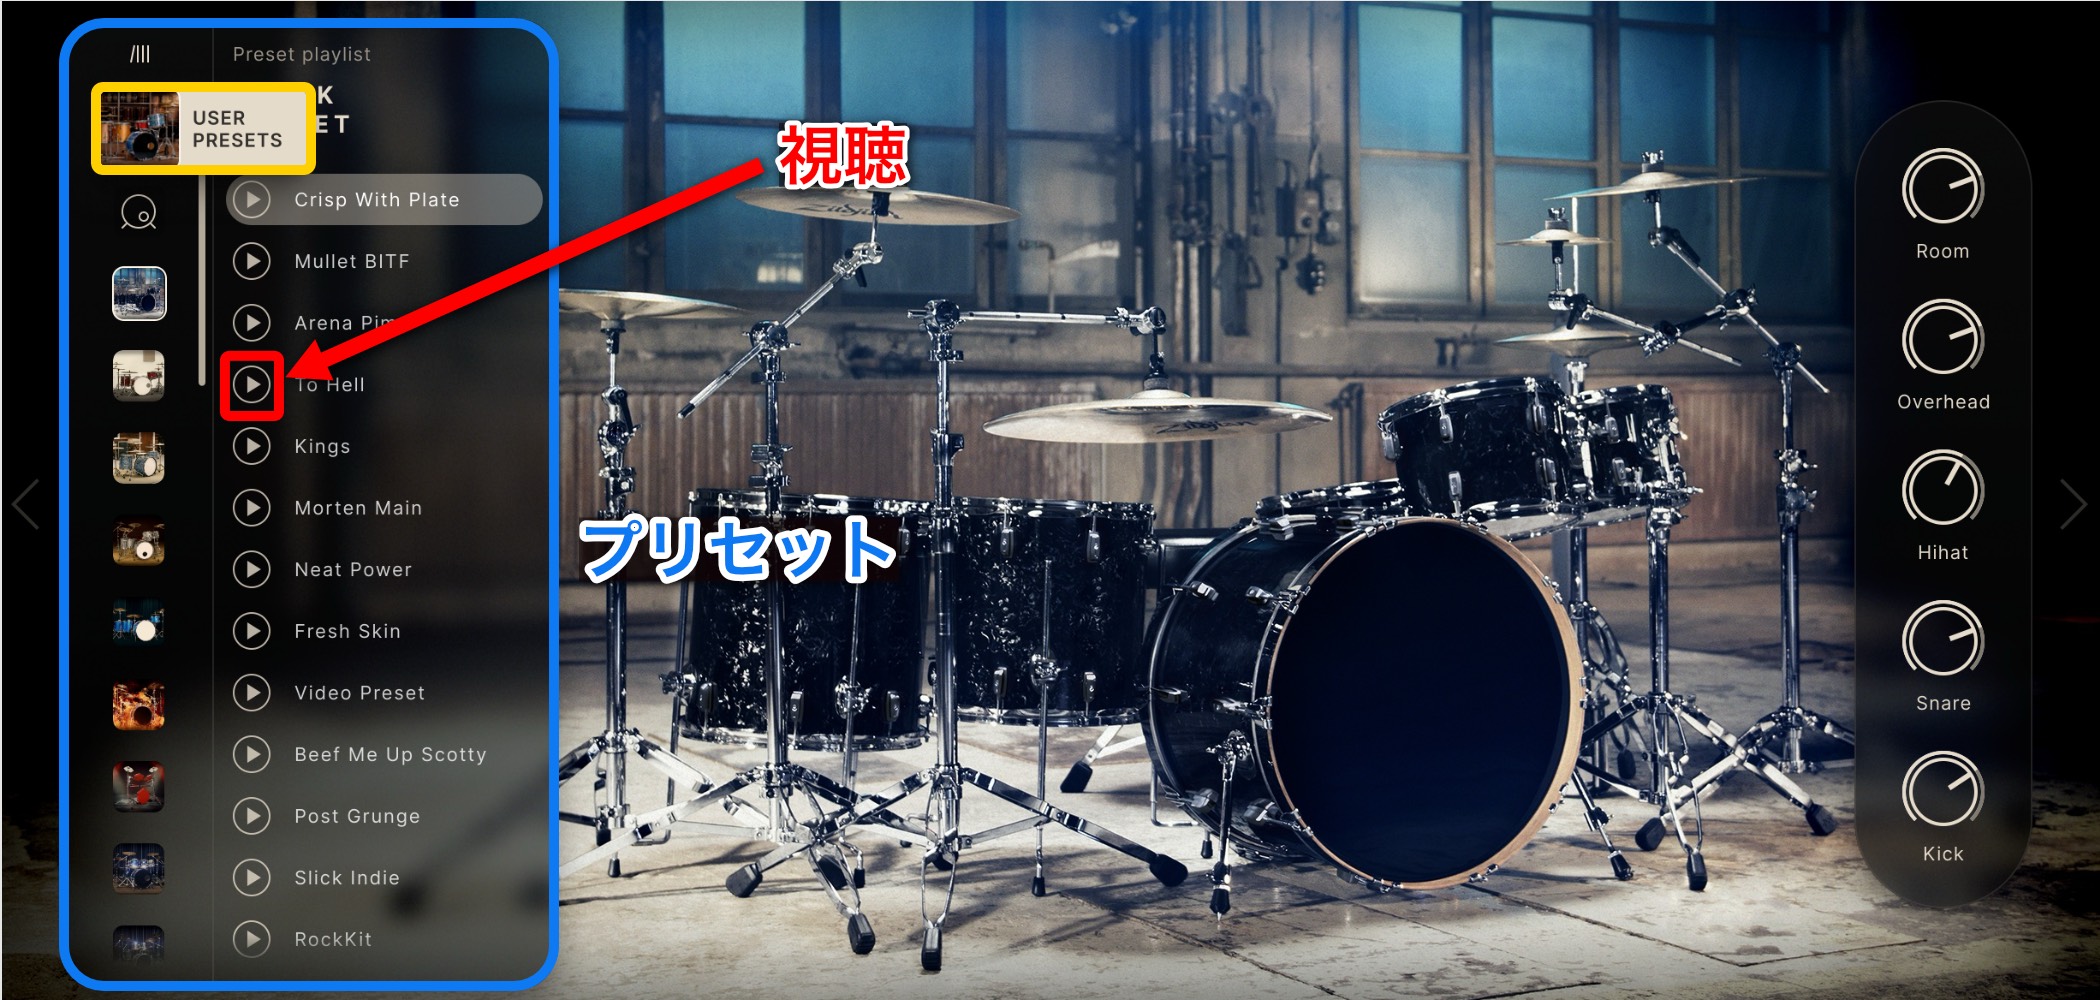
When Addictive Drums 2 opens, presets appear on the left.
Drag to browse the list and click a play button to audition a sound.
The selected preset is loaded at the same time.
USER PRESETS appears above the thumbnail column, followed by three categories.
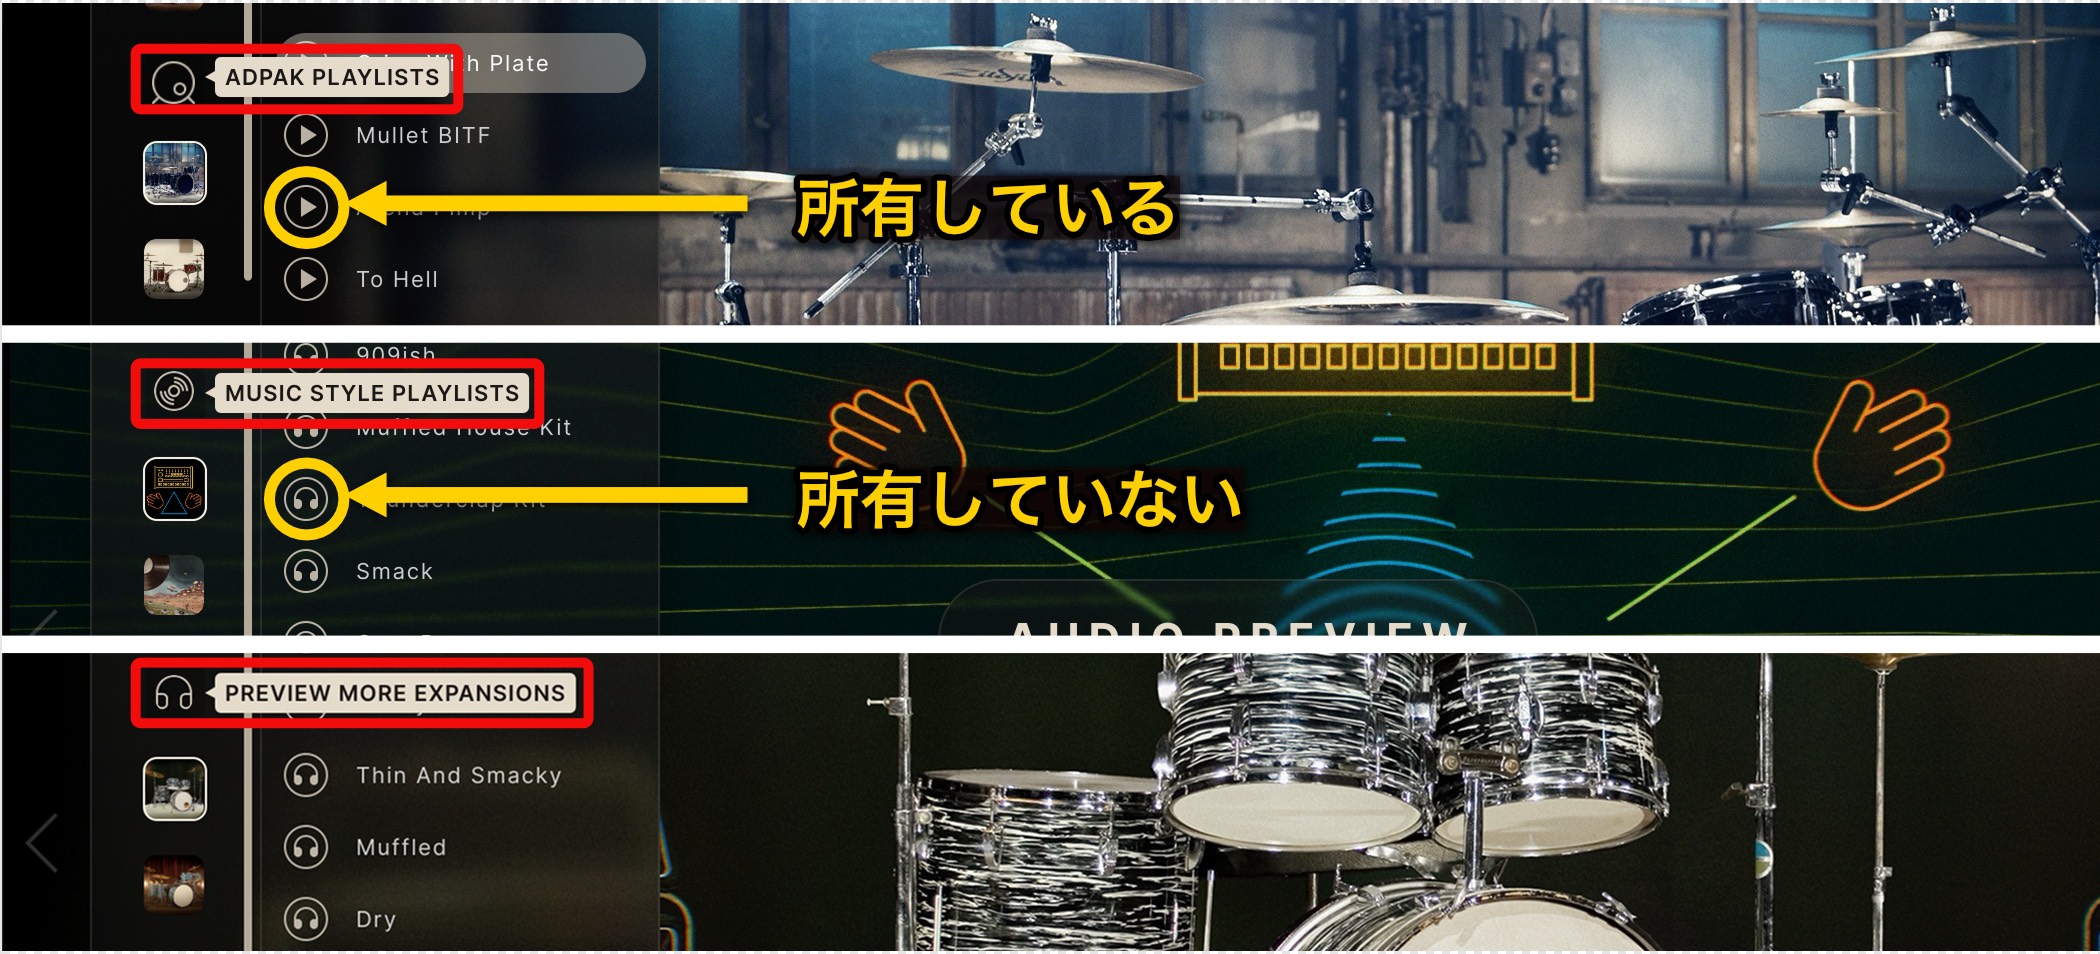
- ADPAK PLAYLISTS: Playlists for ADpaks you own.
- MUSIC STYLE PLAYLISTS: Playlists focused on particular musical styles or genres.
- PREVIEW MORE EXPANSIONS: Playlists for ADpaks you do not own.
All sounds can be auditioned, but ones you do not own are marked with a headphone icon and must be purchased before use.
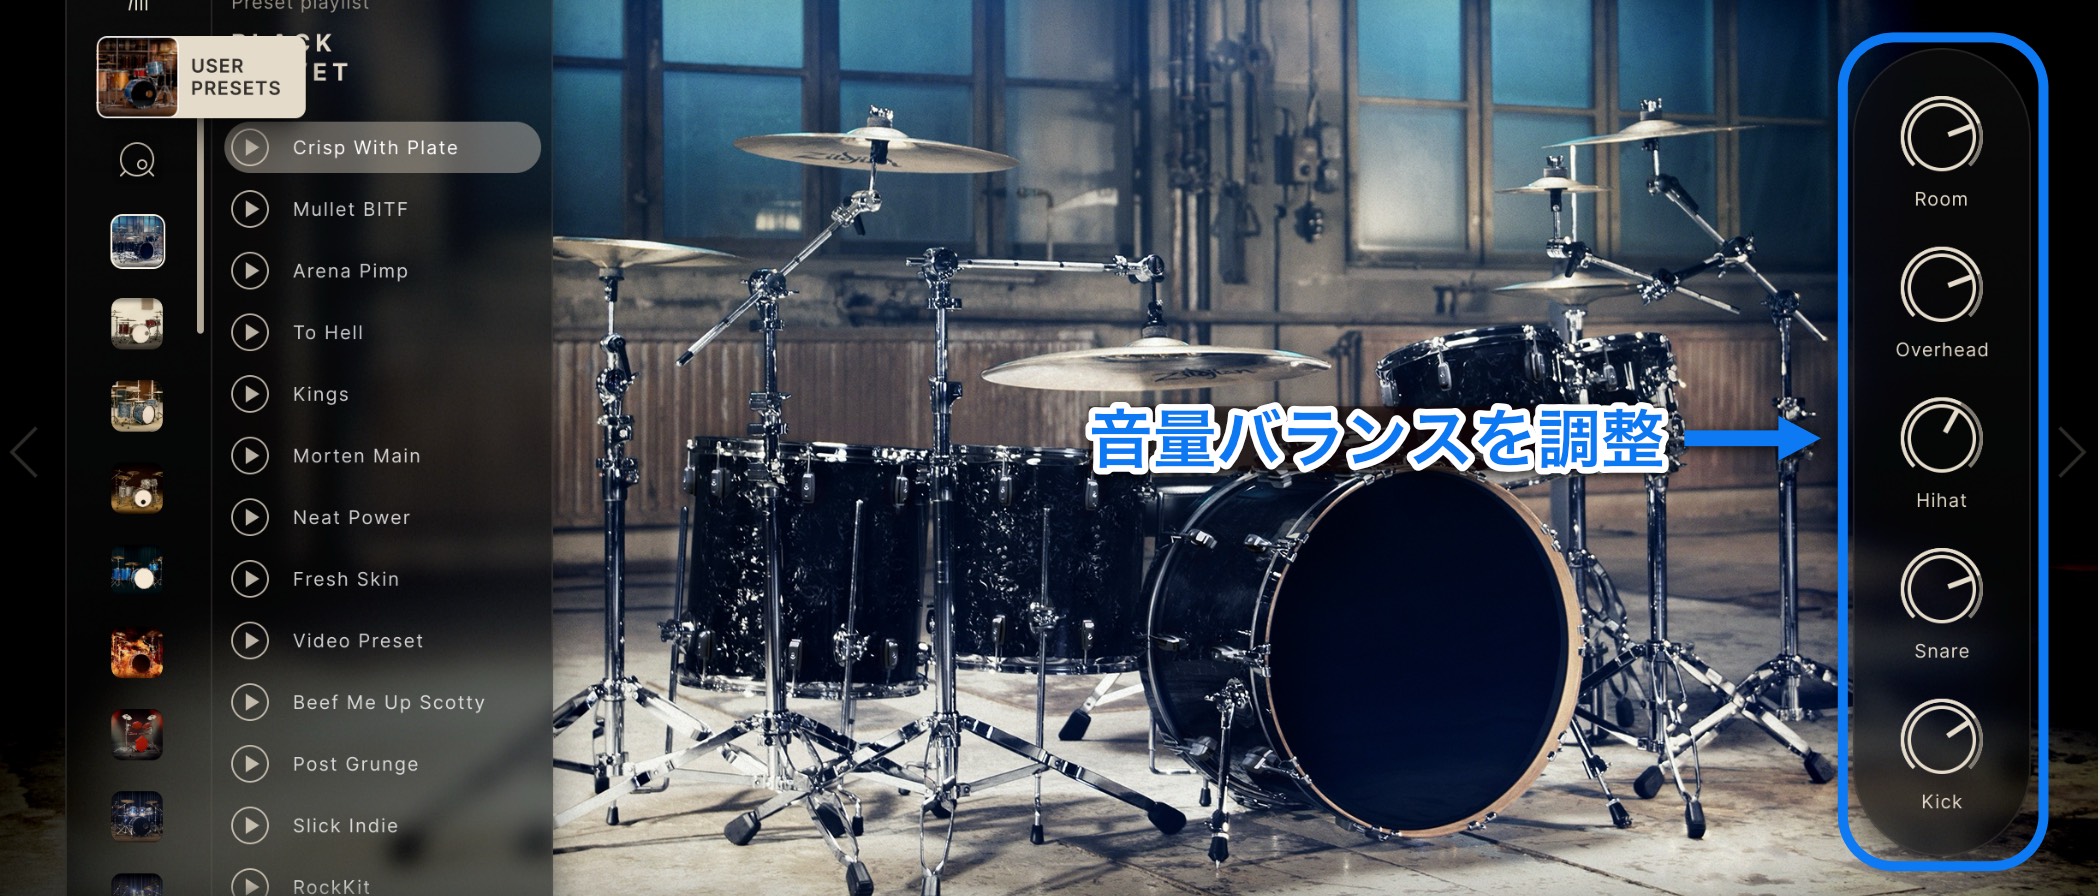
On the right, you can adjust the volume of each microphone.
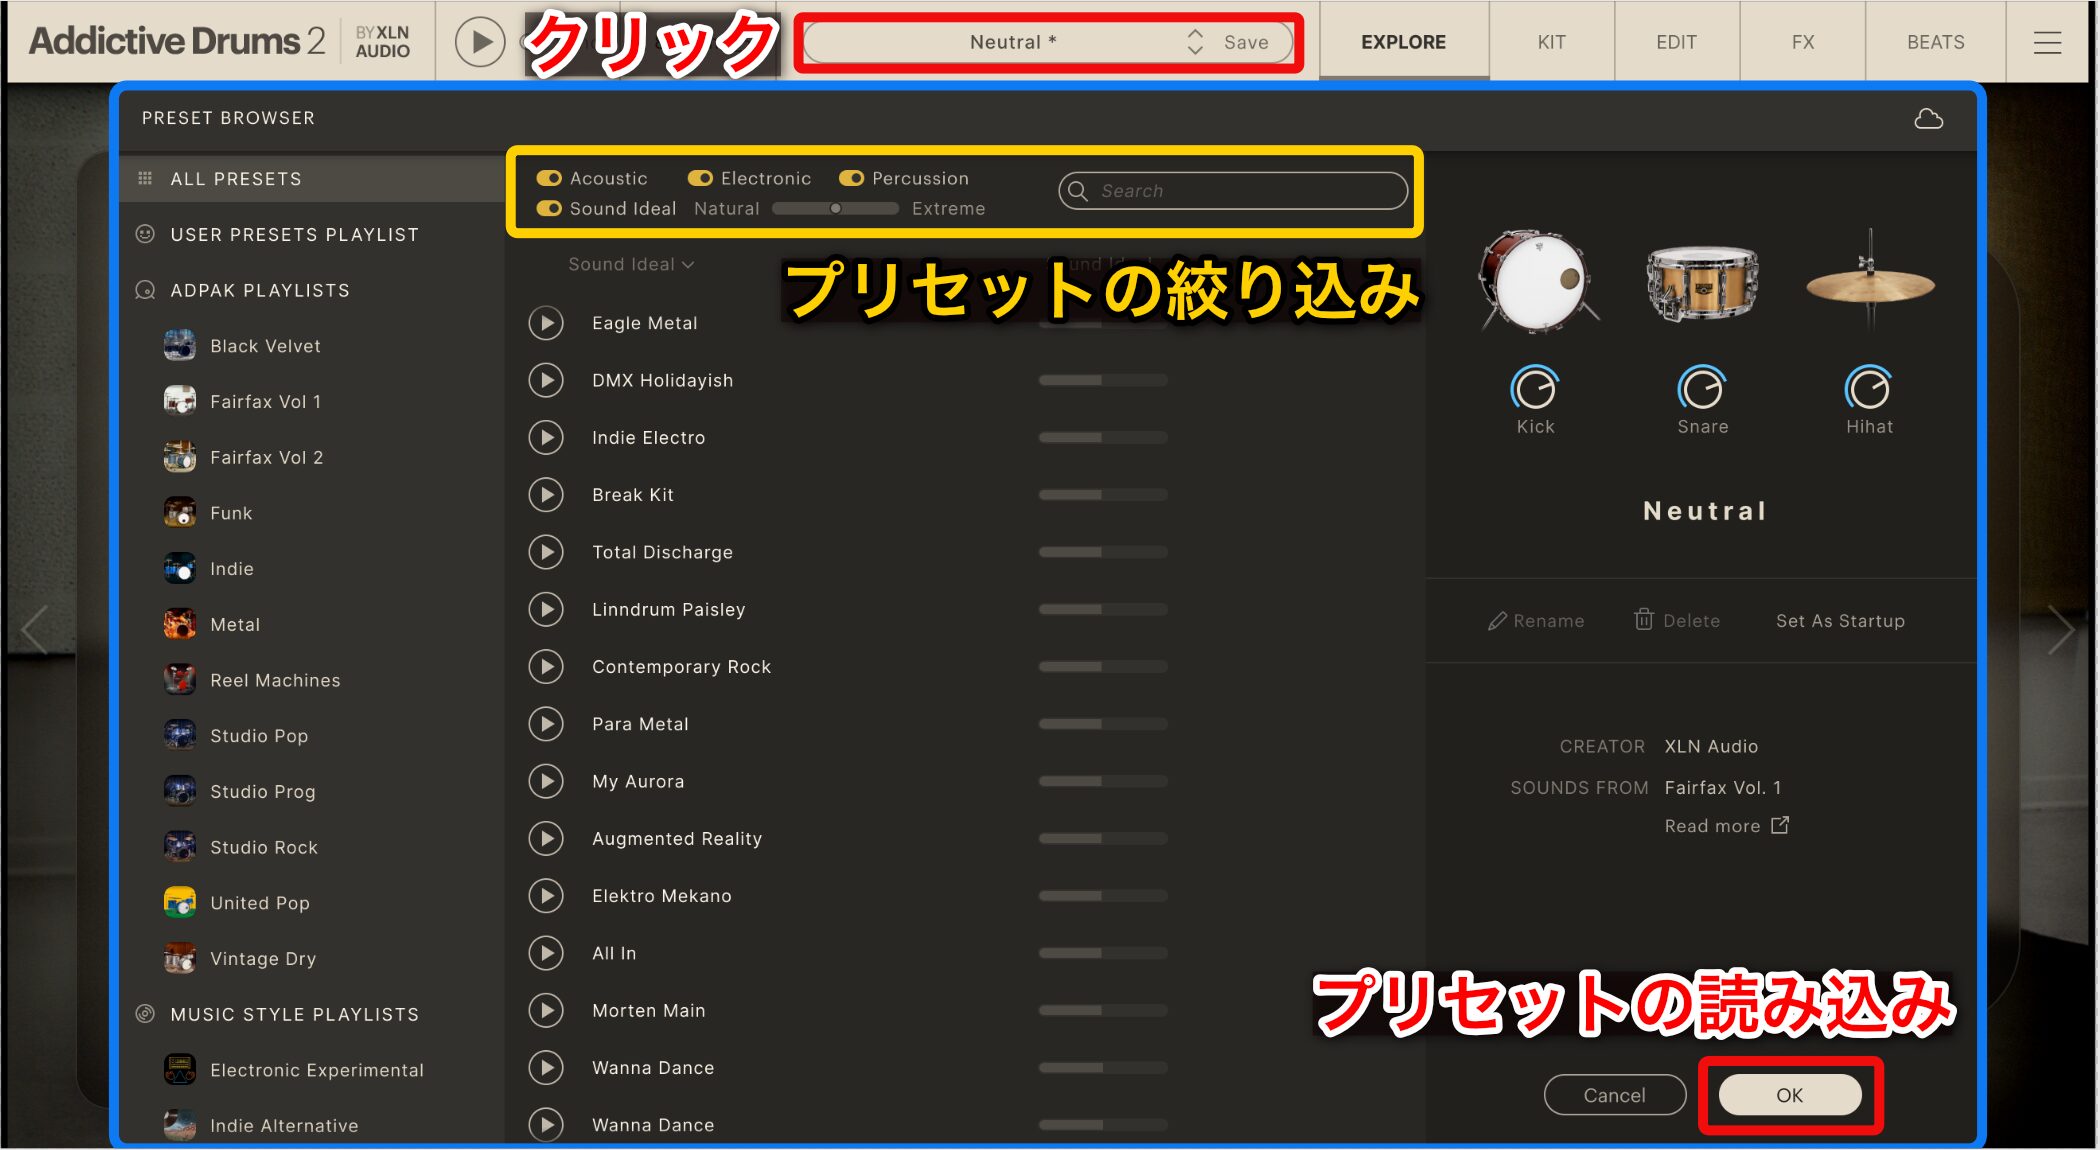
To filter the presets, click the preset name at the top to open PRESET BROWSER.
As on the initial EXPLORE screen, playlists appear on the left, the preset audition area in the center, and microphone volume controls on the right.
Enter a preset name in Search at the top of the center section or enable filters to narrow the results.
- Acoustic: Filter for acoustic drum presets.
- Electronic: Filter for electronic or synth drum presets.
- Percussion: Filter for percussion presets.
- Sound Ideal: Filter by processing level; presets closer to Natural sound more like unprocessed drums.
In PRESET BROWSER, select a preset and click OK at the bottom to load it.
Selecting Kit Pieces
You can swap individual kit pieces within a preset.
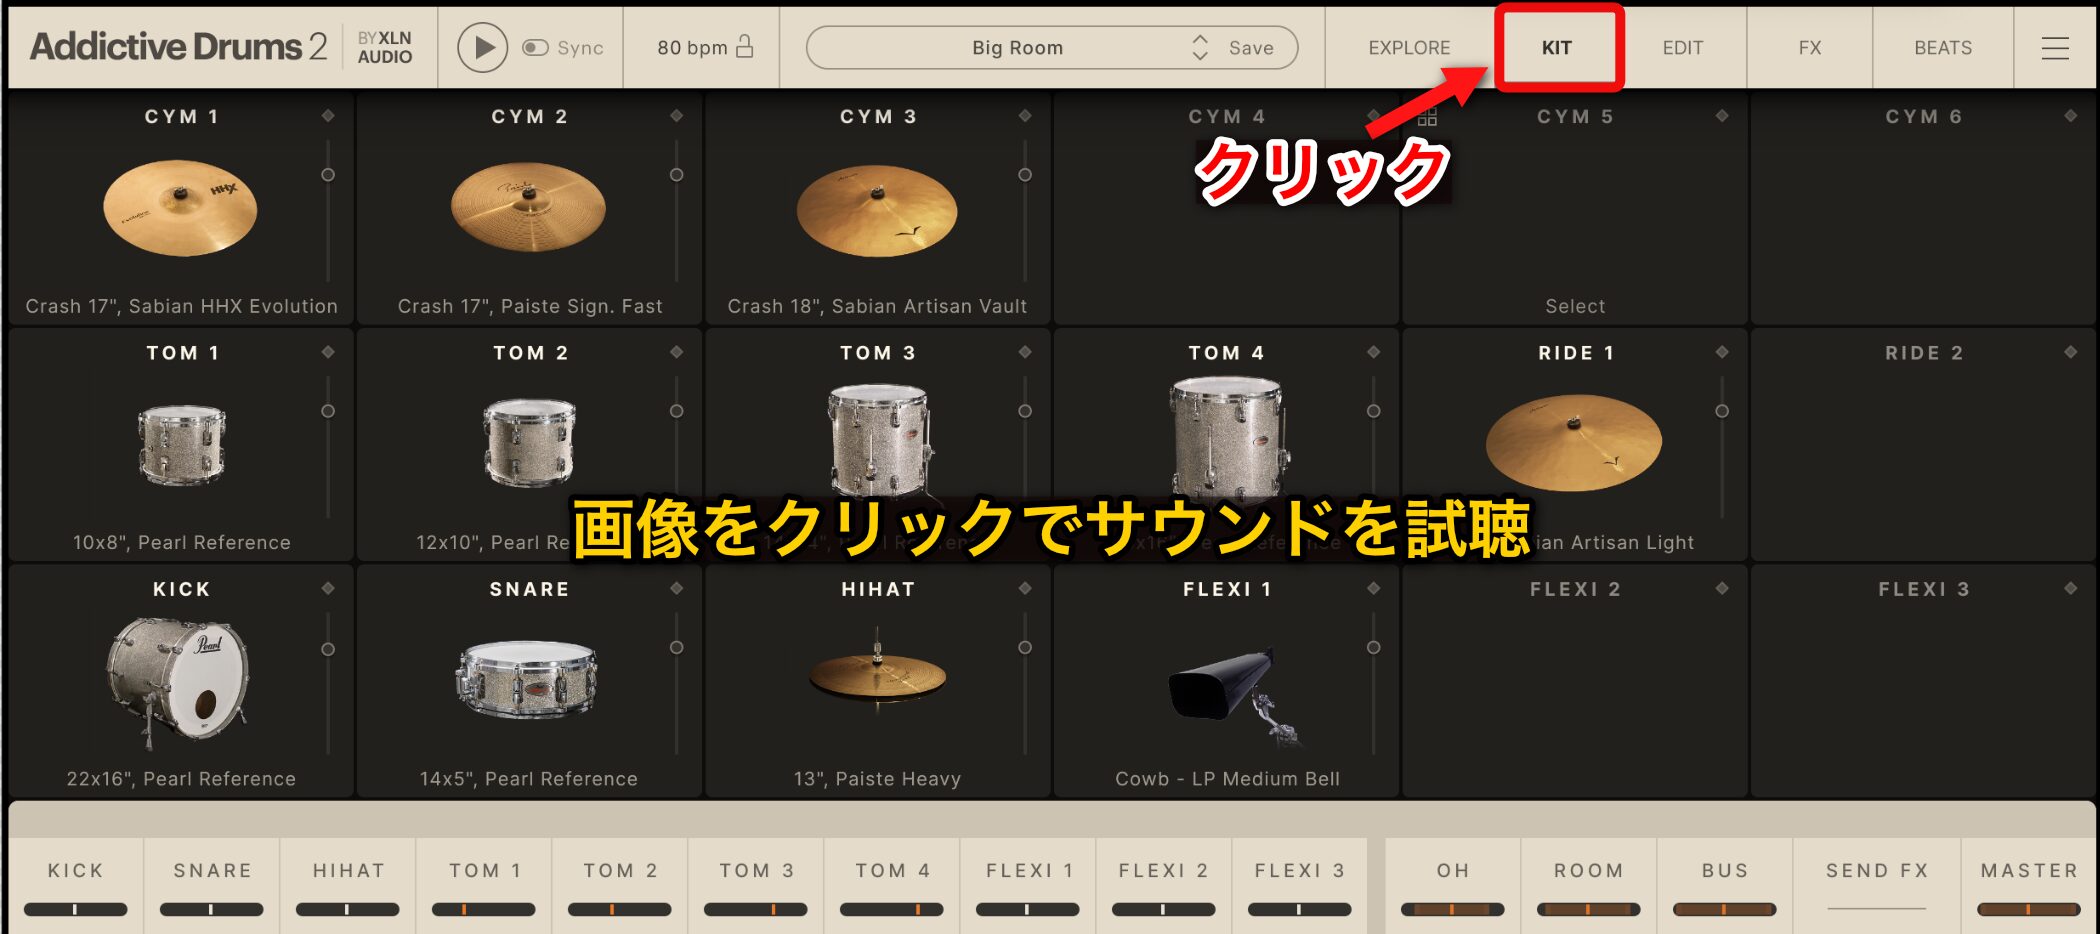
Click KIT to display images of the currently selected pieces.
Click an image to audition it; clicking higher on the pad plays it at a higher velocity.
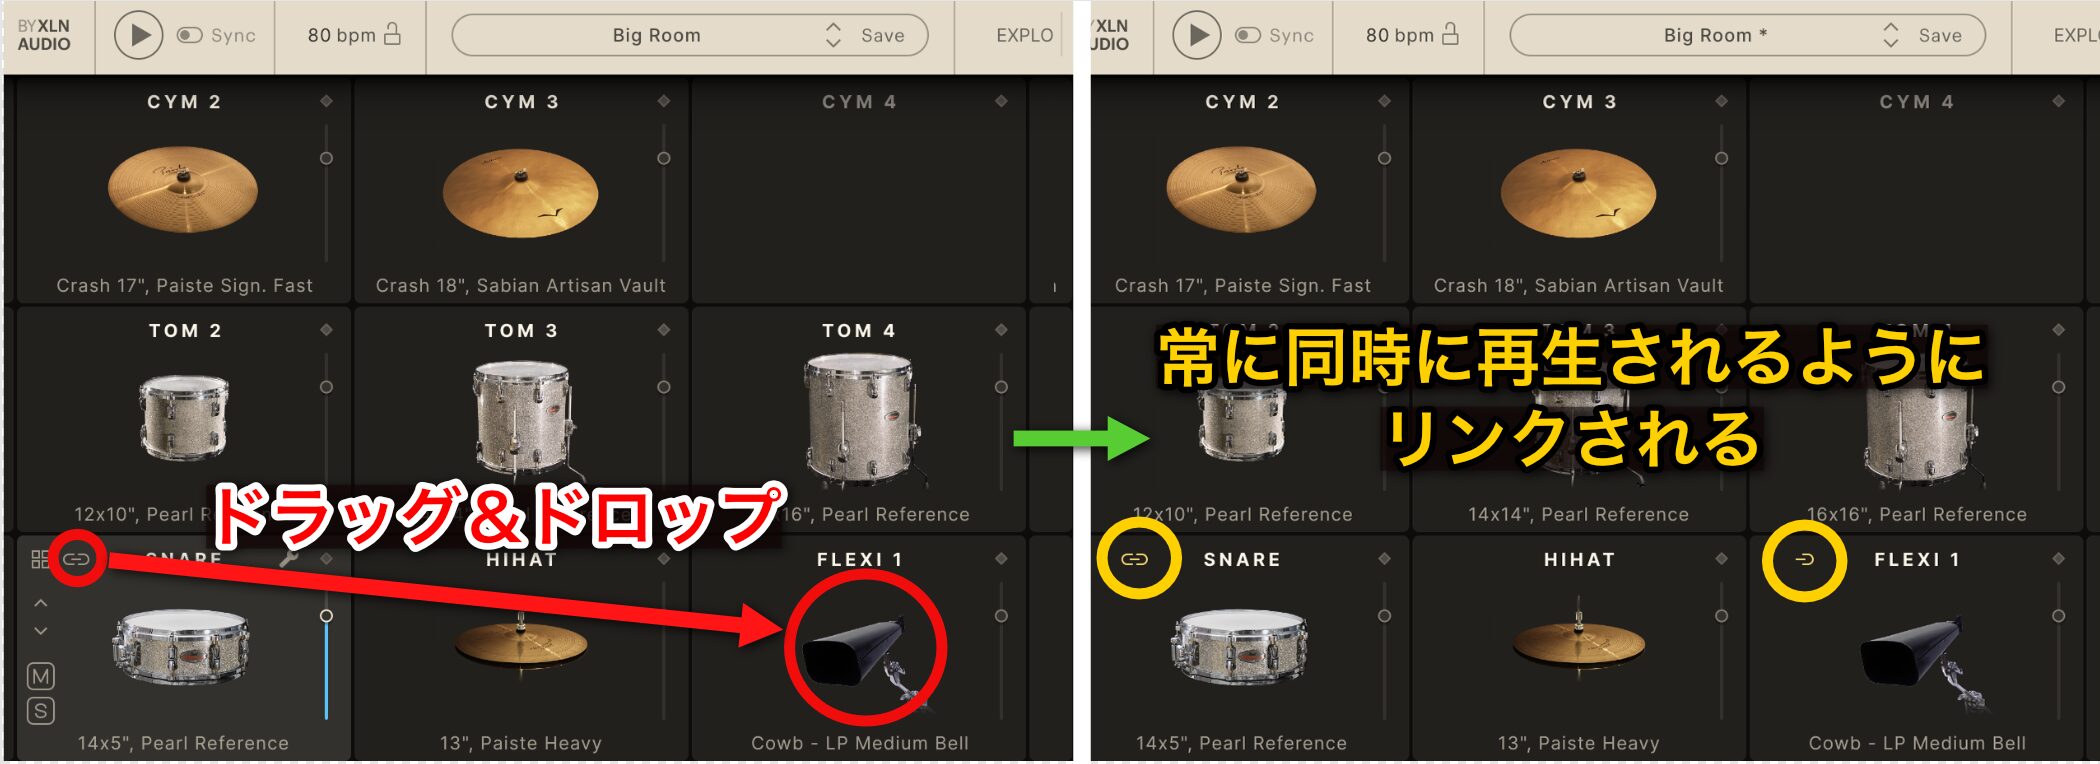
Drag a link icon from a kick or snare slot onto another kit-piece pad to link them so they always play together.
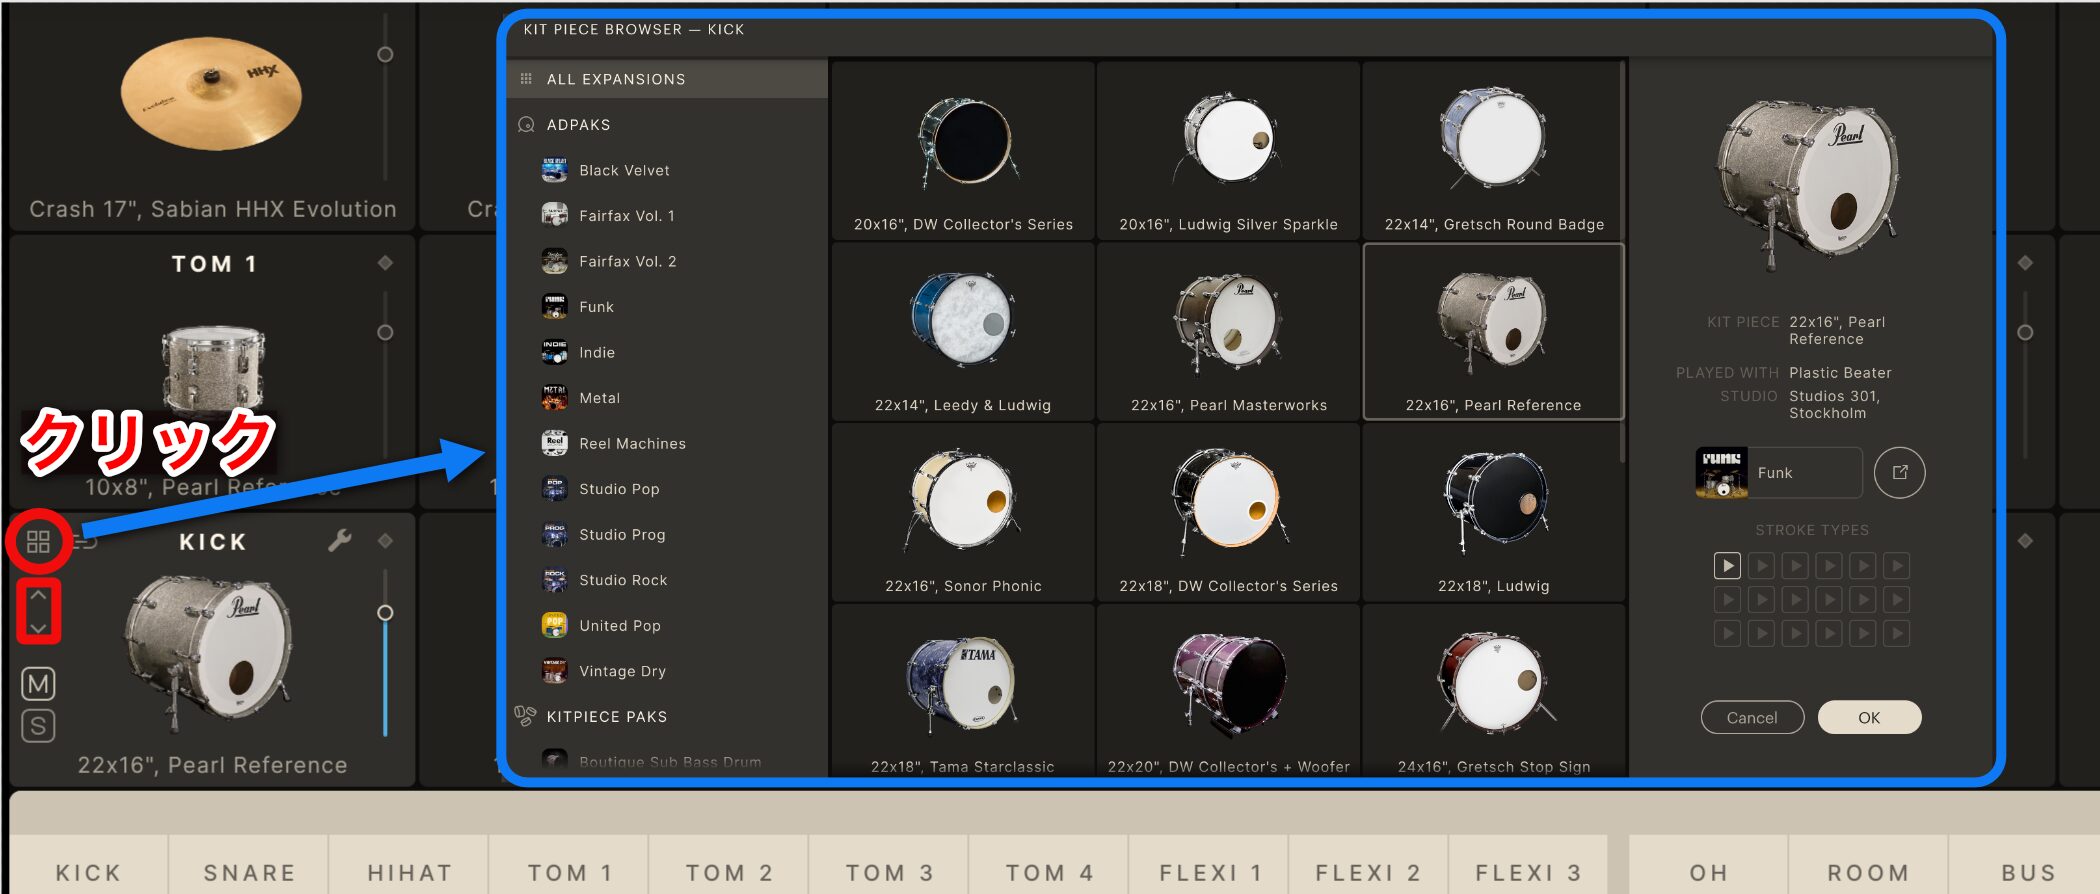
Click the up and down arrows on a kit piece to change it.
You can also open KIT PIECE BROWSER using the circled icon and select a piece there.
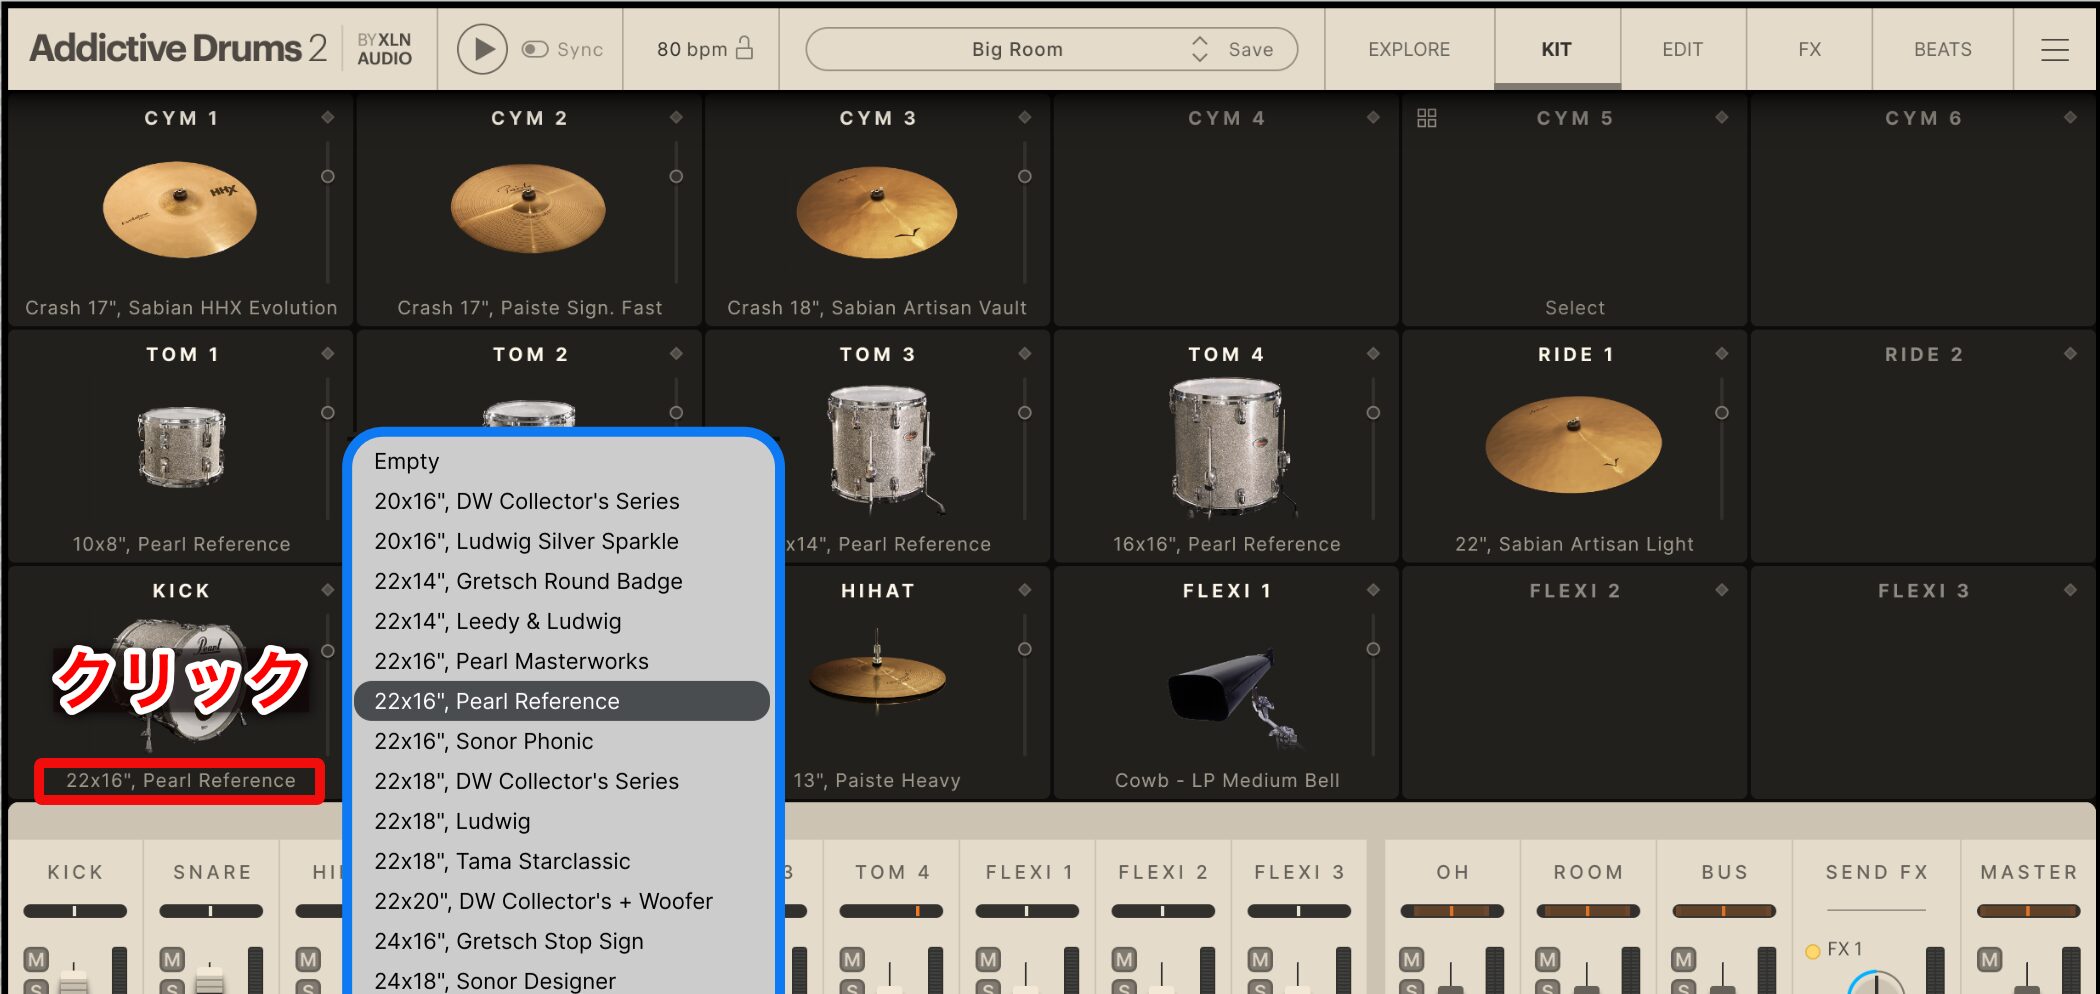
Clicking the name displays a list of all available kit pieces; select one to make the same change.
When changing kit pieces, play a pattern while choosing to hear how the sounds work together.
Saving a Preset
Once you have created your own combination, save it so you can use it in another DAW or song.
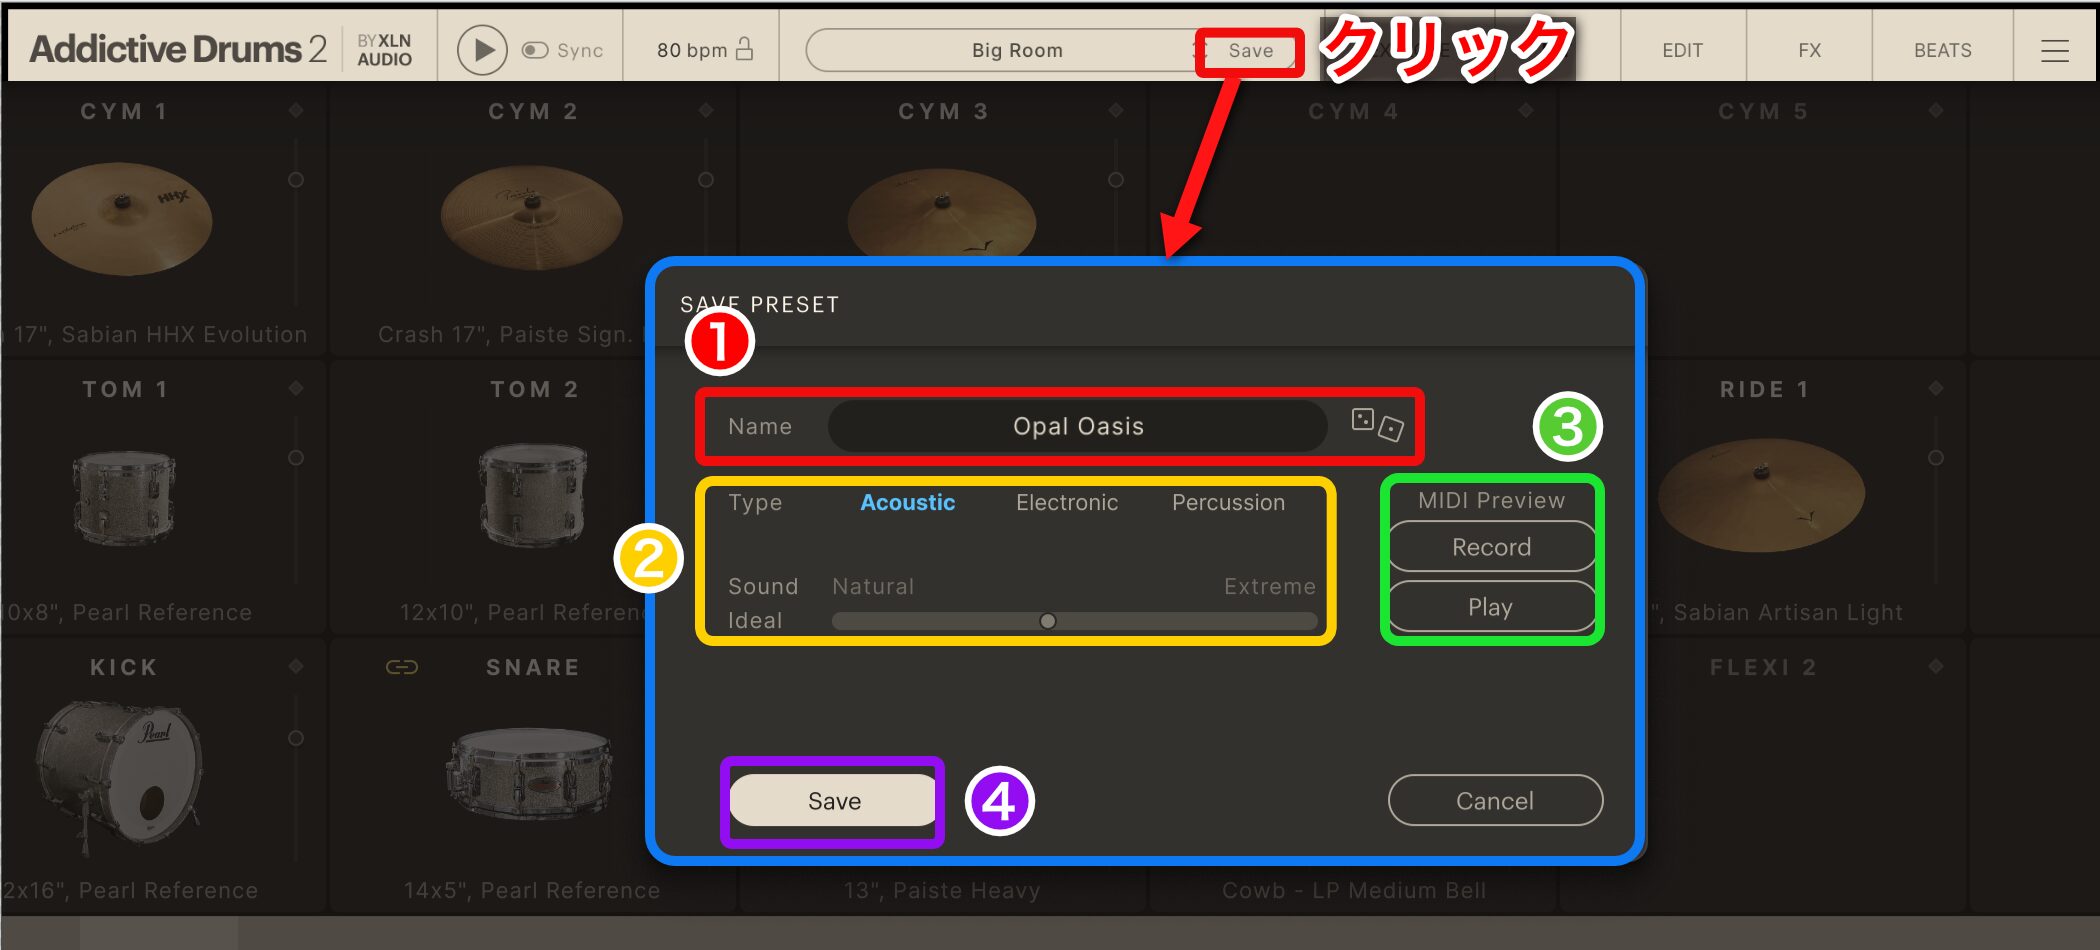
Click Save to open the SAVE PRESET screen.
1 (red): Name the preset. Click the dice icon to generate a name automatically.
2 (yellow): Define the preset type to make it easier to find in searches.
3 (green): Click Record and play a loop section in the DAW or perform to record a sound that plays with the preset.
4 (purple): Click to finish saving.
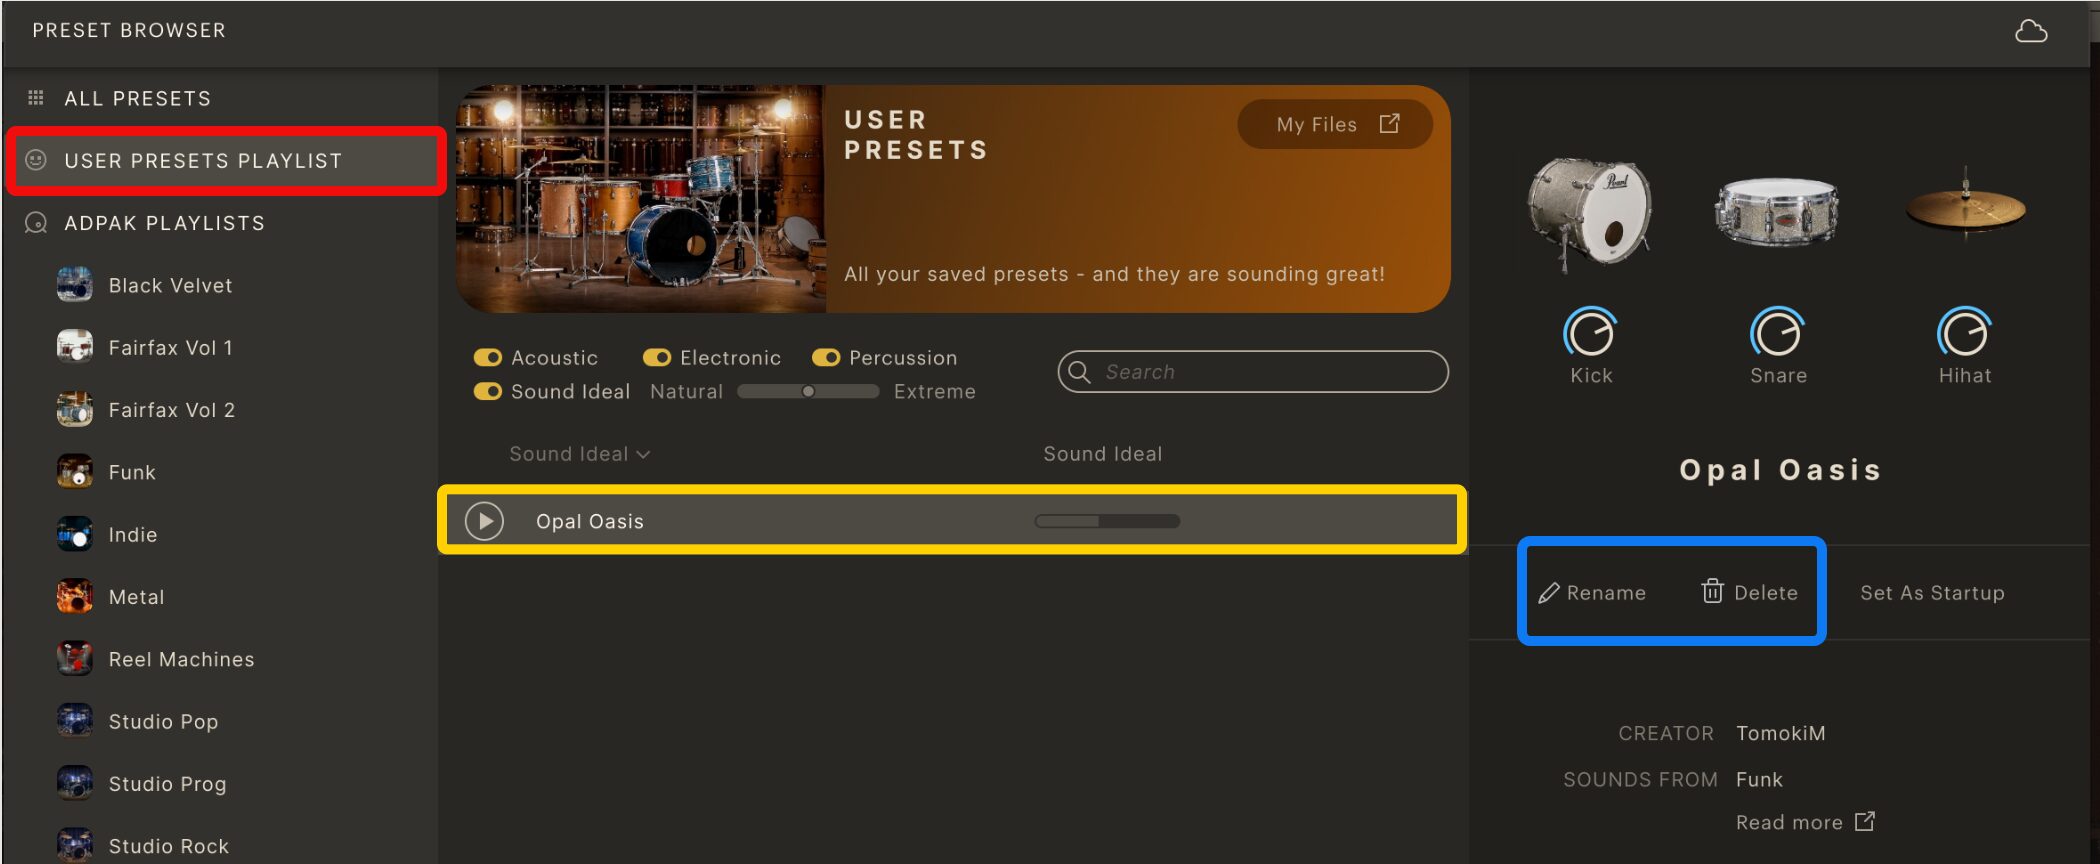
The preset is saved in USER PRESETS PLAYLIST.
Open it in PRESET BROWSER to rename or delete it.
BEATS: Selecting and Applying Drum Patterns
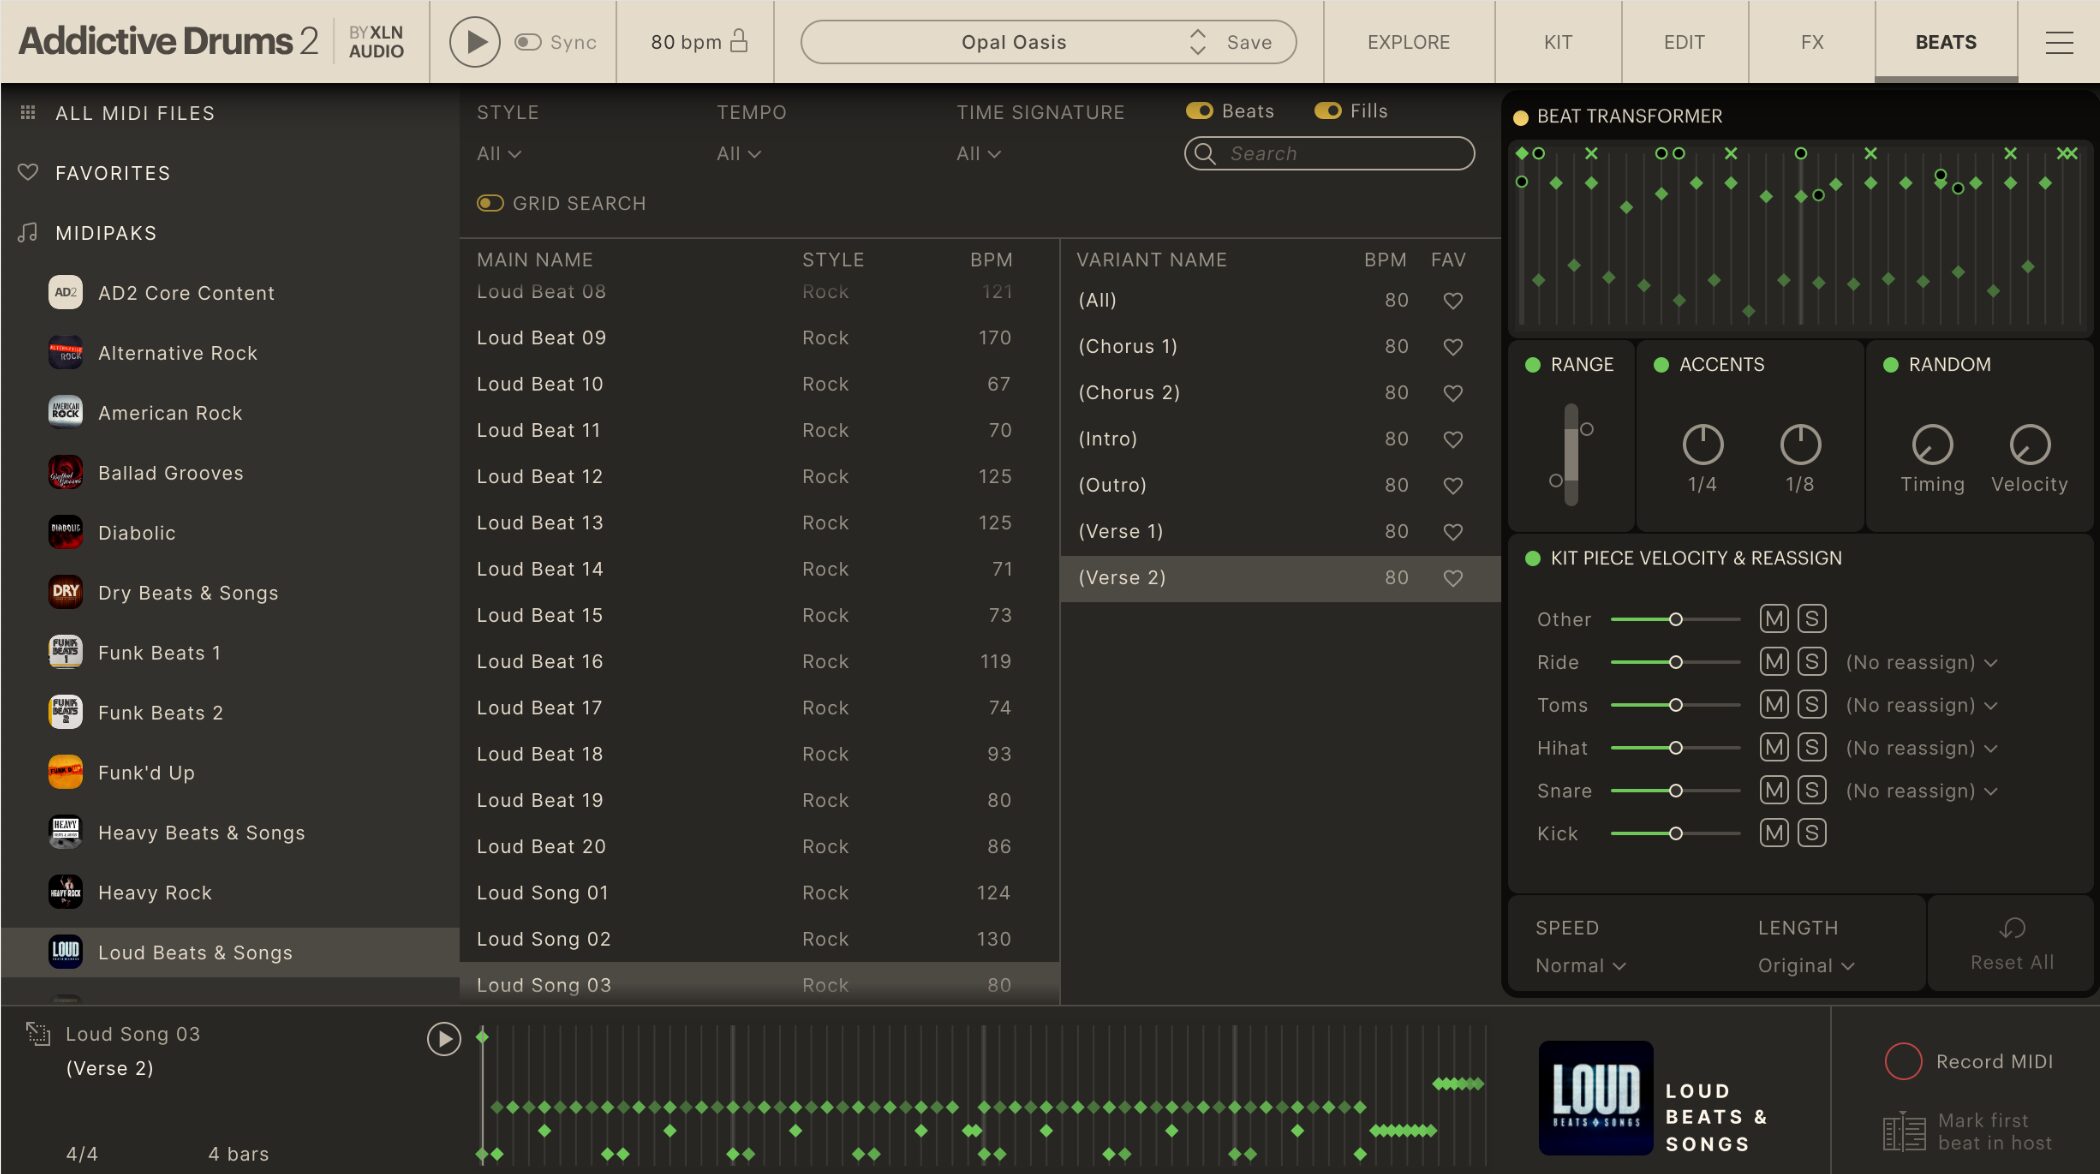
Addictive Drums includes many drum patterns.
They make drum programming relatively easy even for beginners.
Addictive Drums 2 Video: Selecting and Applying BEATS
Opening Drum Patterns
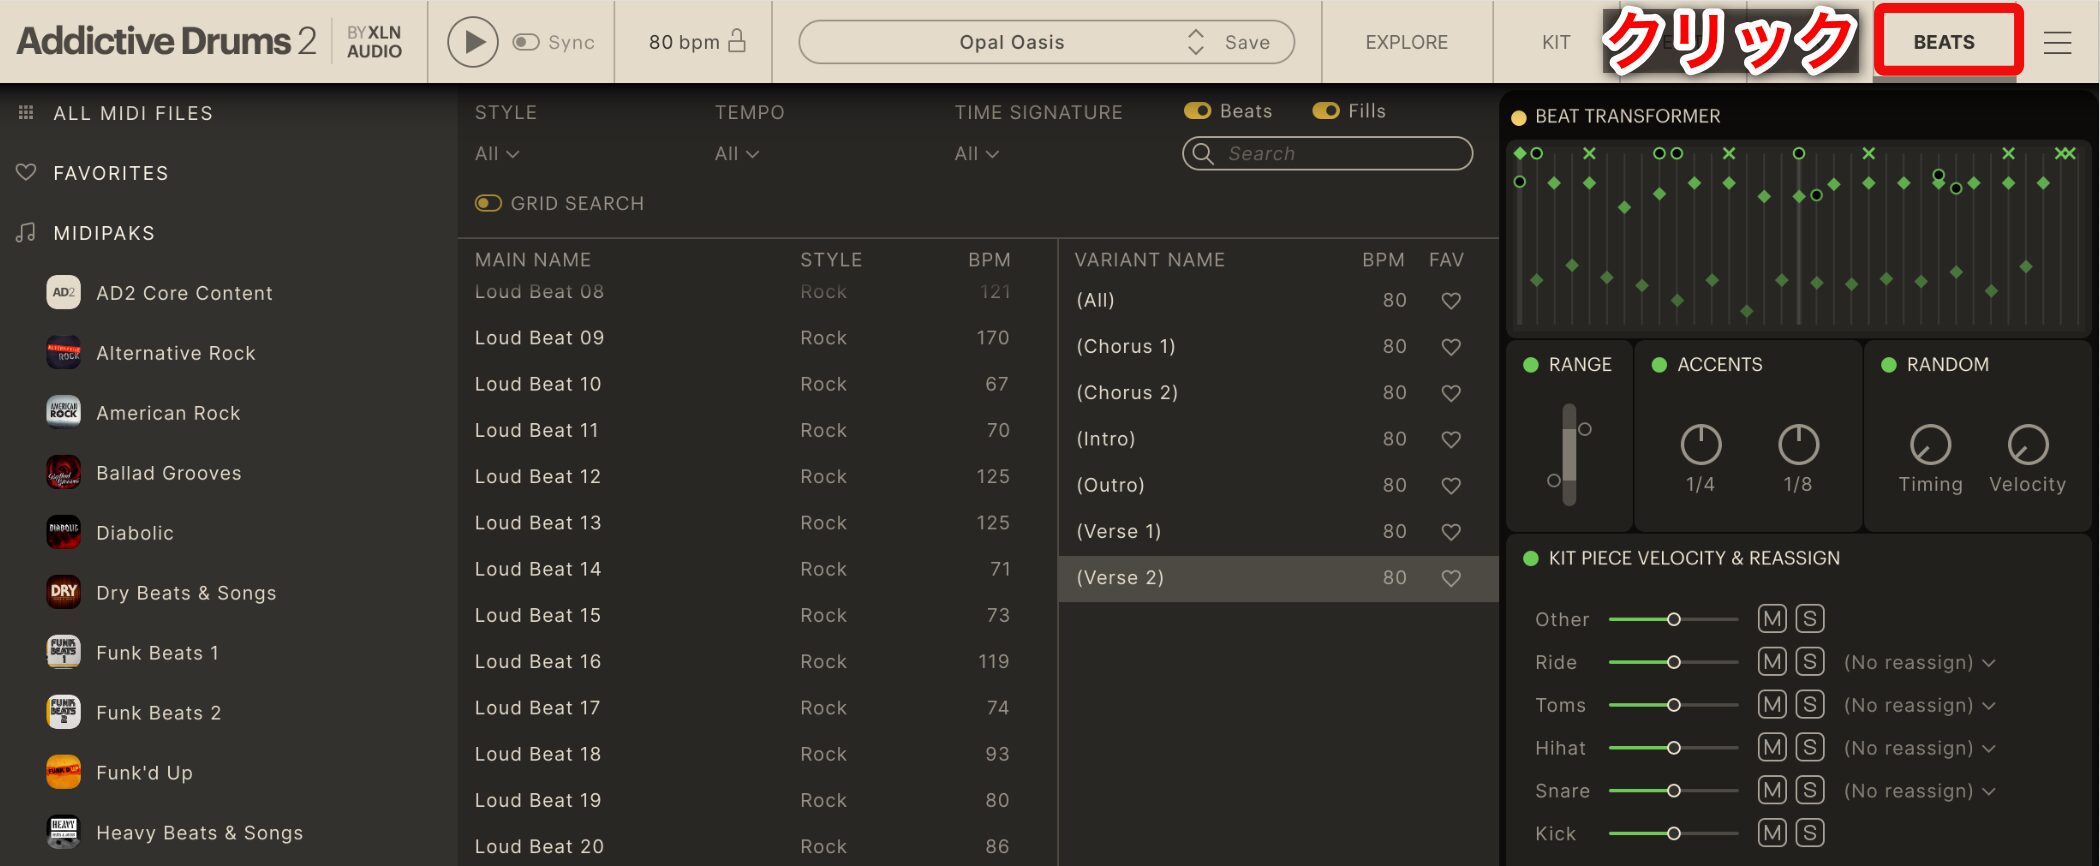
Click the BEATS tab to access drum patterns.
Filtering Drum Patterns
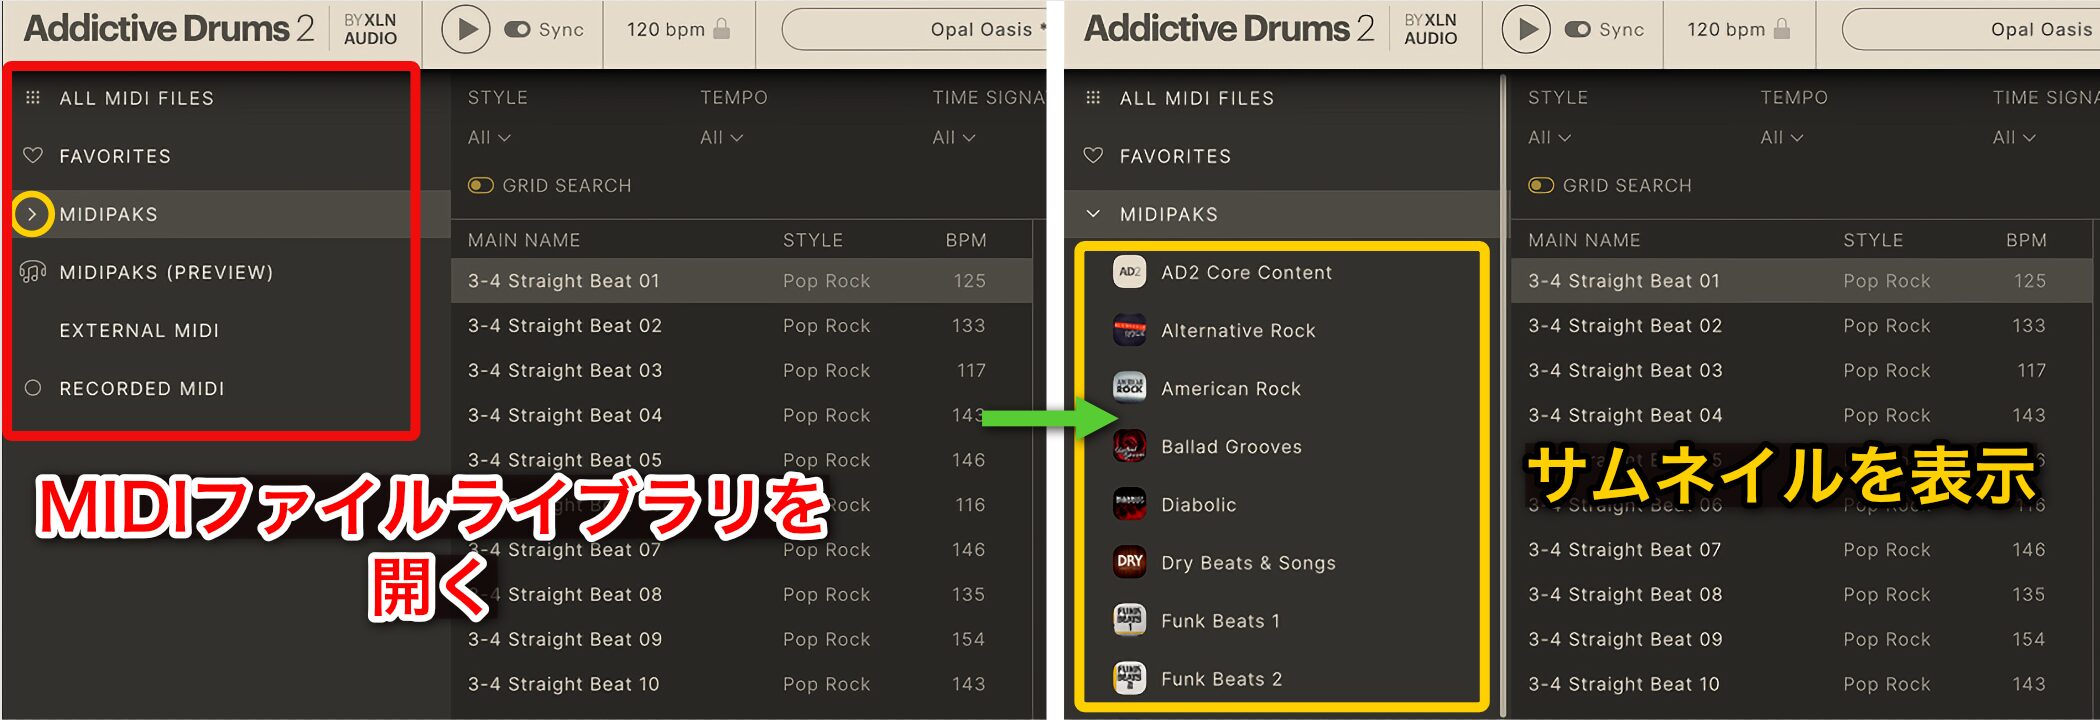
Select the desired MIDI library on the left to display its MIDI files in the center.
Click > to expand the pack thumbnails.
- All MIDI Files: All MIDI files.
- FAVORITES: Beats and fills added to favorites.
- MIDIPAKS: MIDI files you own.
- MIDIPAKS (PREVIEW): MIDI files you do not own.
- EXTERNAL MIDI: Third-party MIDI files.
- RECORDED MIDI: Recorded MIDI files.
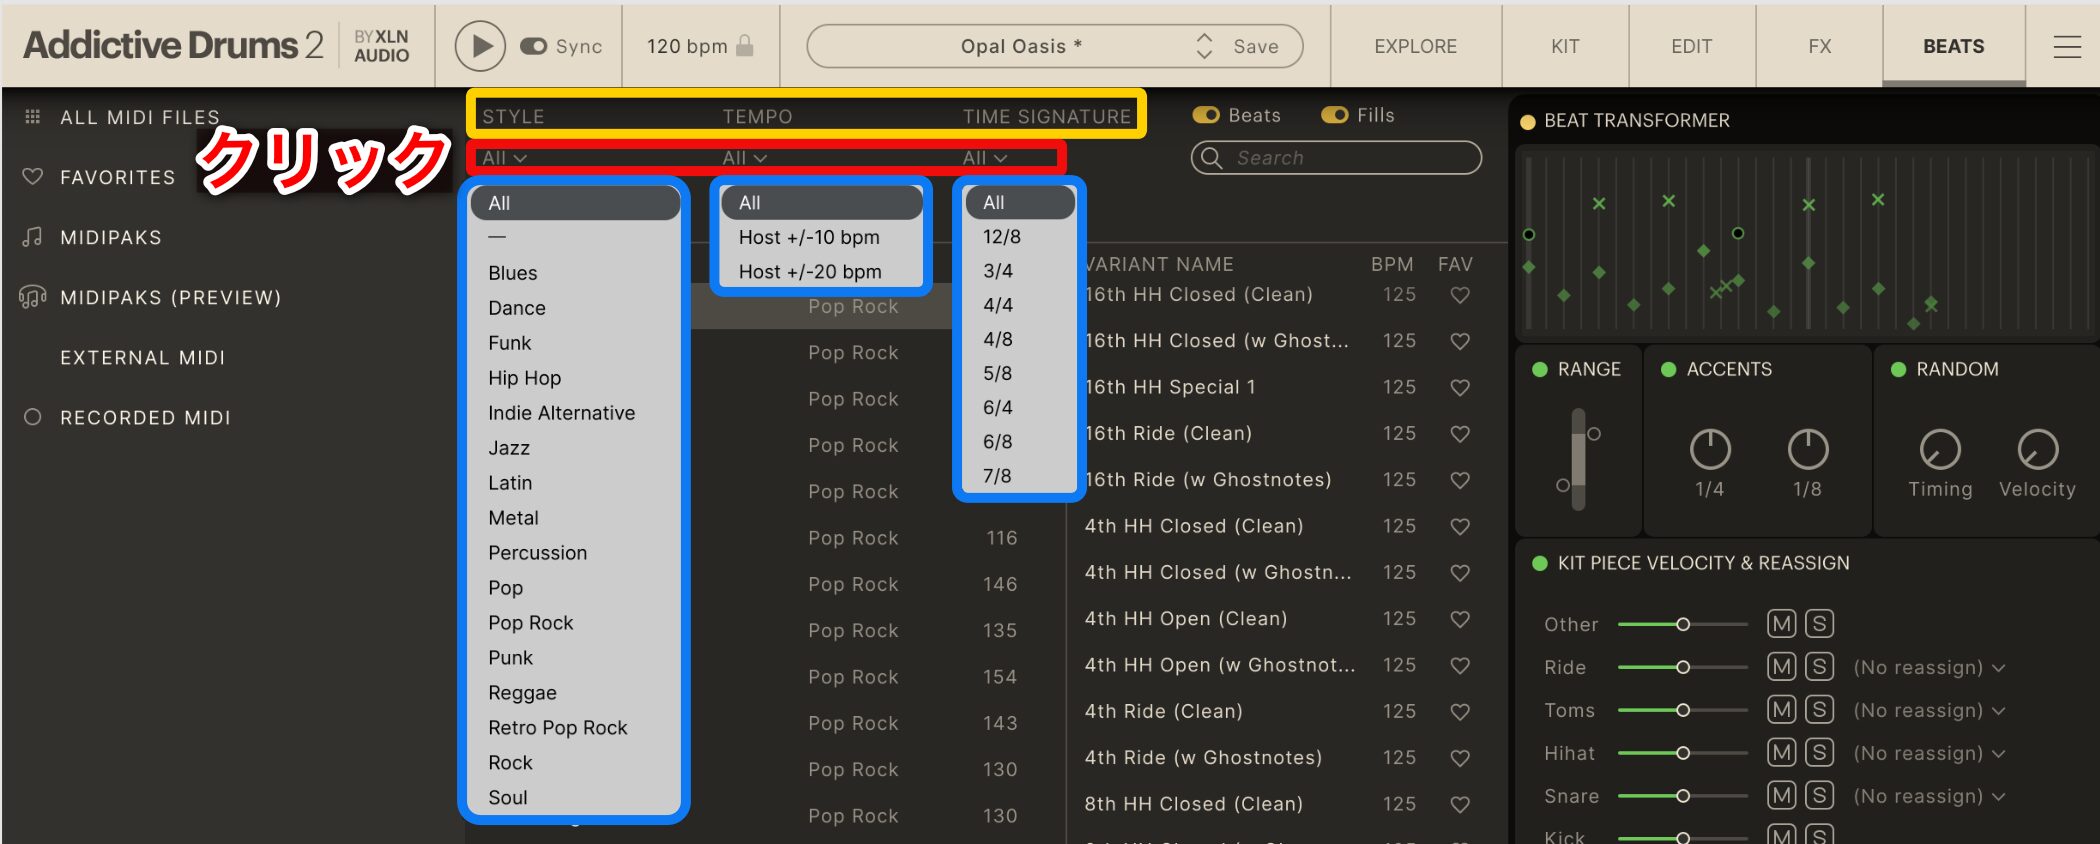
Click ALL for a category at the top center and use its dropdown menu to filter the results.
- STYLE: Filter by musical style or genre.
- TEMPO: Filter within ±10 or ±20 of the DAW tempo.
- TIME SIGNATURE: Filter by meter, such as 3/4 or 4/4.
Selecting a Drum Pattern
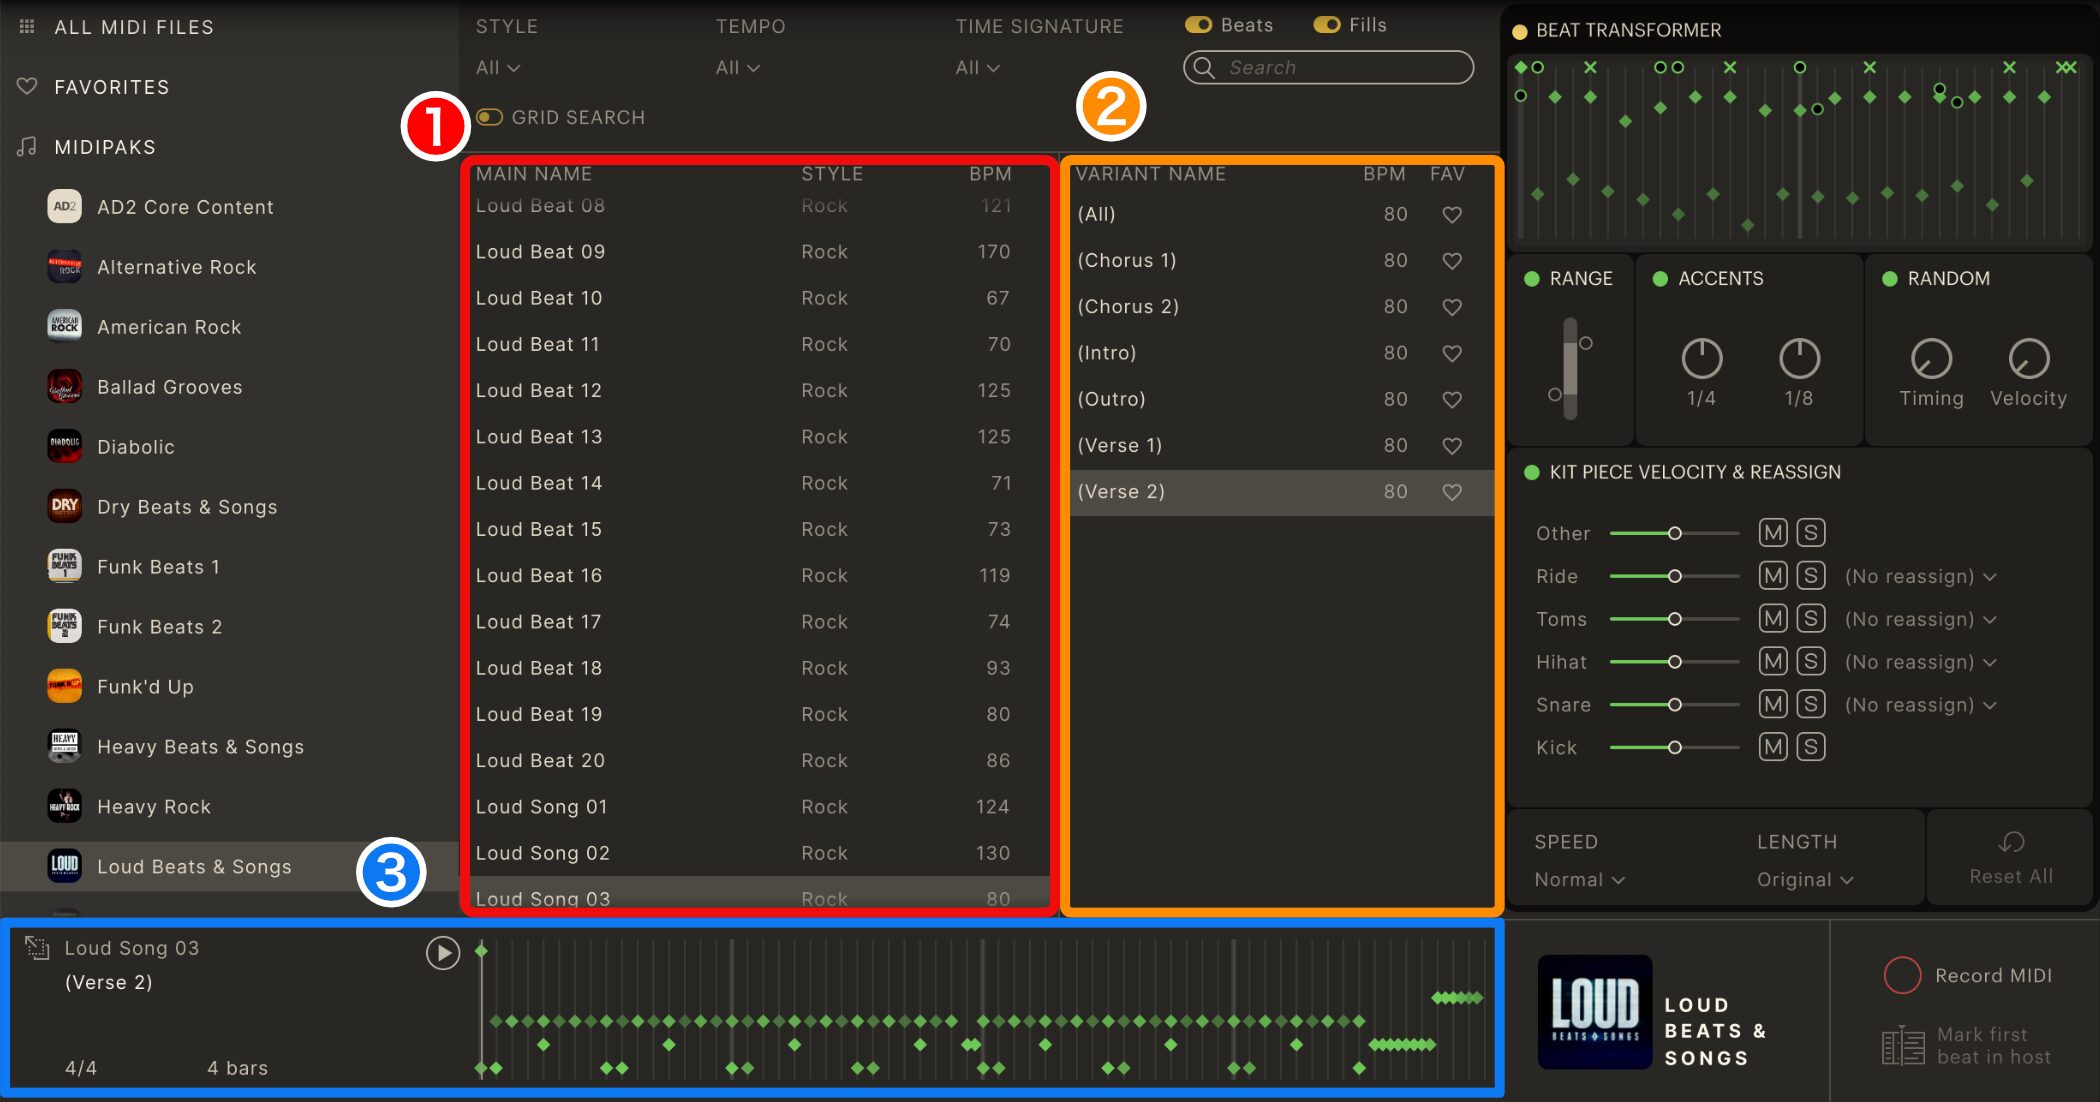
1 (red): Select a pattern you like.
2 (orange): More detailed variations of the pattern selected in 1 appear here.
3 (blue): The pattern selected in 2 appears here.

If the DAW tempo and drum-pattern tempo differ, enable Sync to synchronize the pattern to the DAW tempo.
When Sync is enabled, the pattern in Addictive Drums and the pattern entered in the DAW play simultaneously. If you only want the DAW pattern to loop, turn off Sync and the play button.
Using Drum Patterns
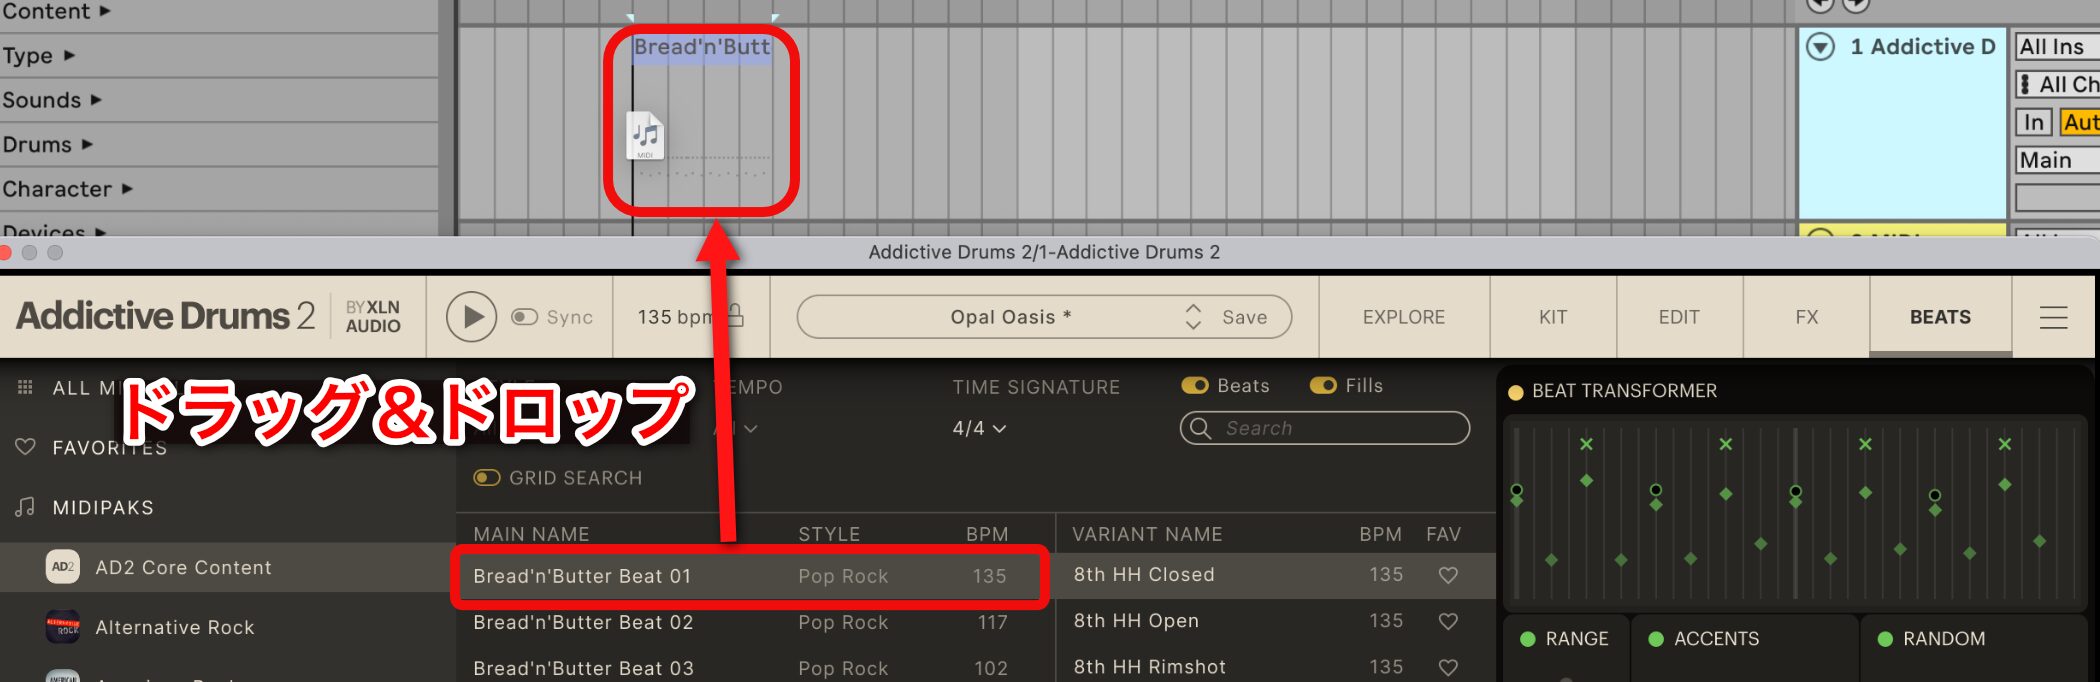
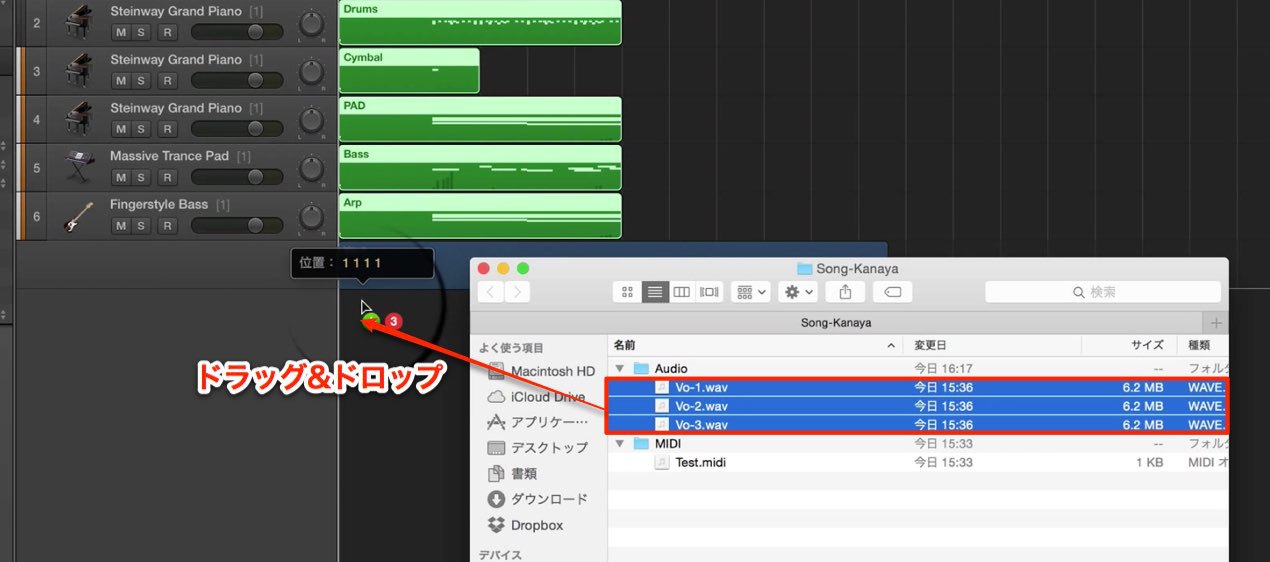
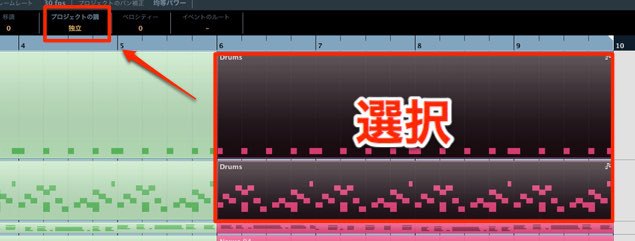
When you find a pattern you like, drag and drop it into your DAW.
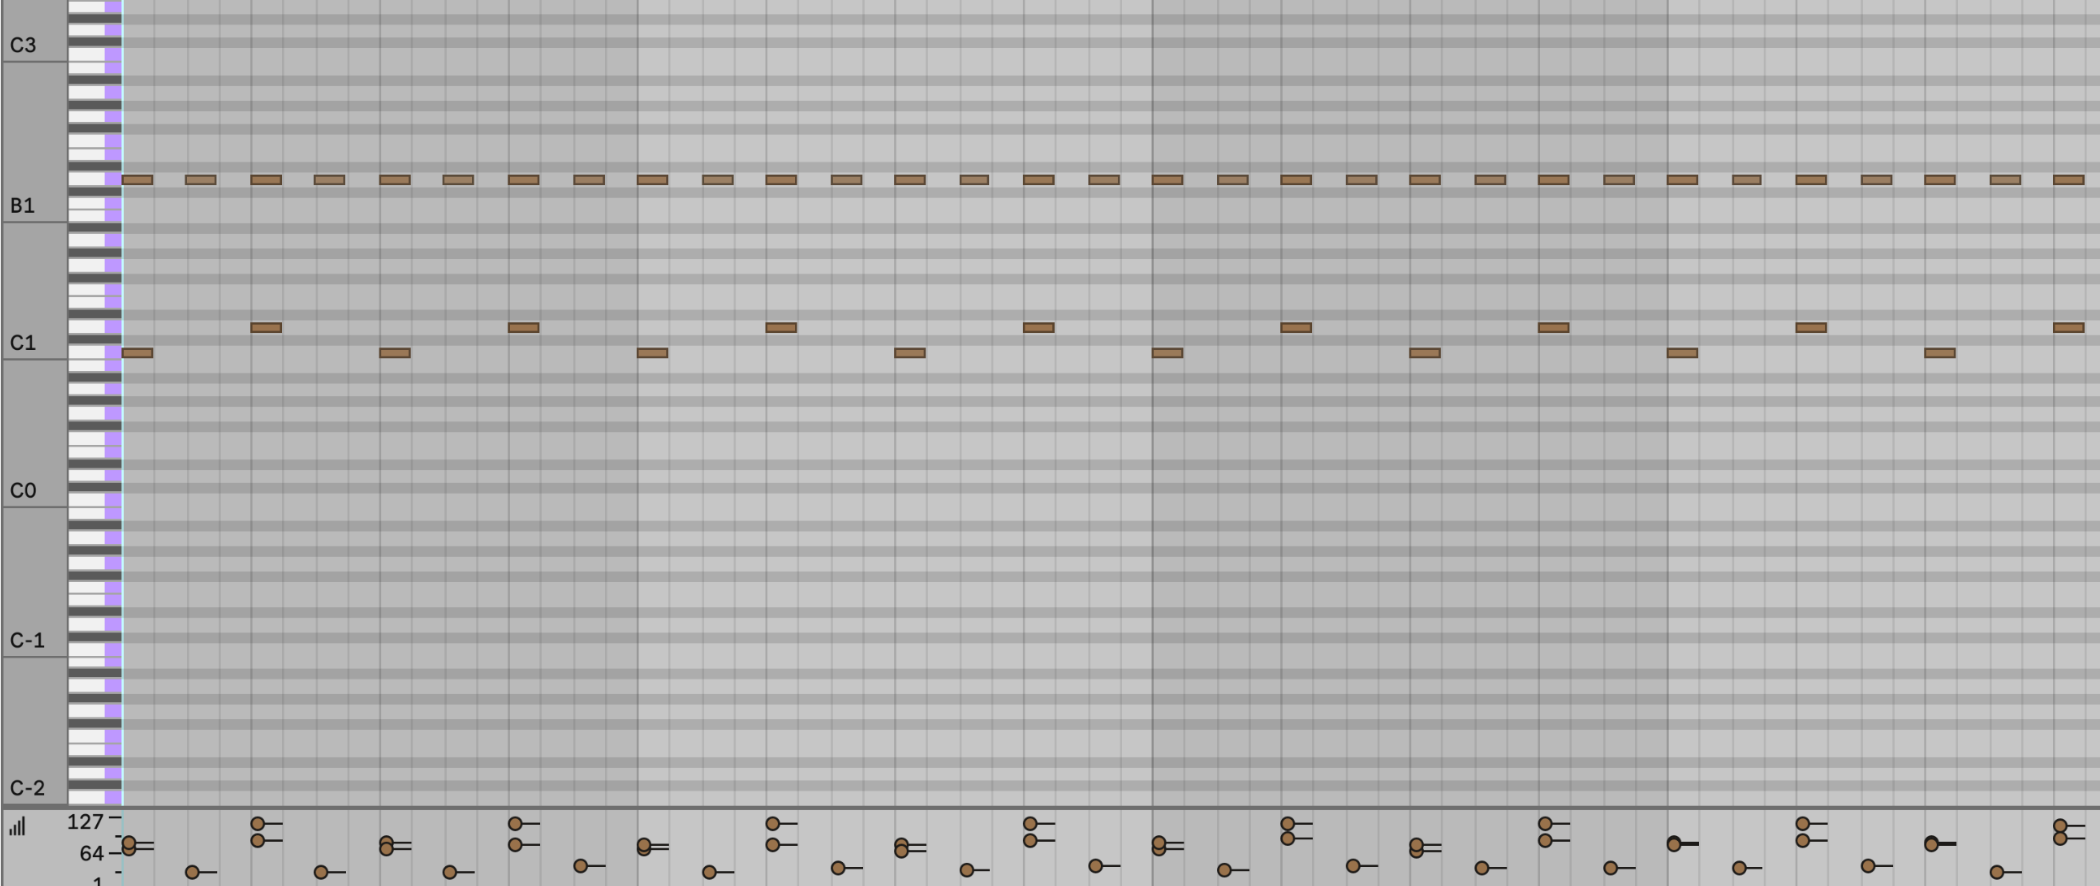
Because it is MIDI, you can edit the pattern in the DAW.
Give it a try!
GRID SEARCH and BEAT TRANSFORMER

Let’s continue with the BEATS screen.
It includes the following powerful features.
- GRID SEARCH: Search by a specified pattern and rearrange patterns.
- BEAT TRANSFORMER: Add further groove to the selected pattern.
Together, these make it efficient to customize patterns to fit a song.
Addictive Drums 2 Video: BEATS — GRID SEARCH & TRANSFORM
GRID SEARCH
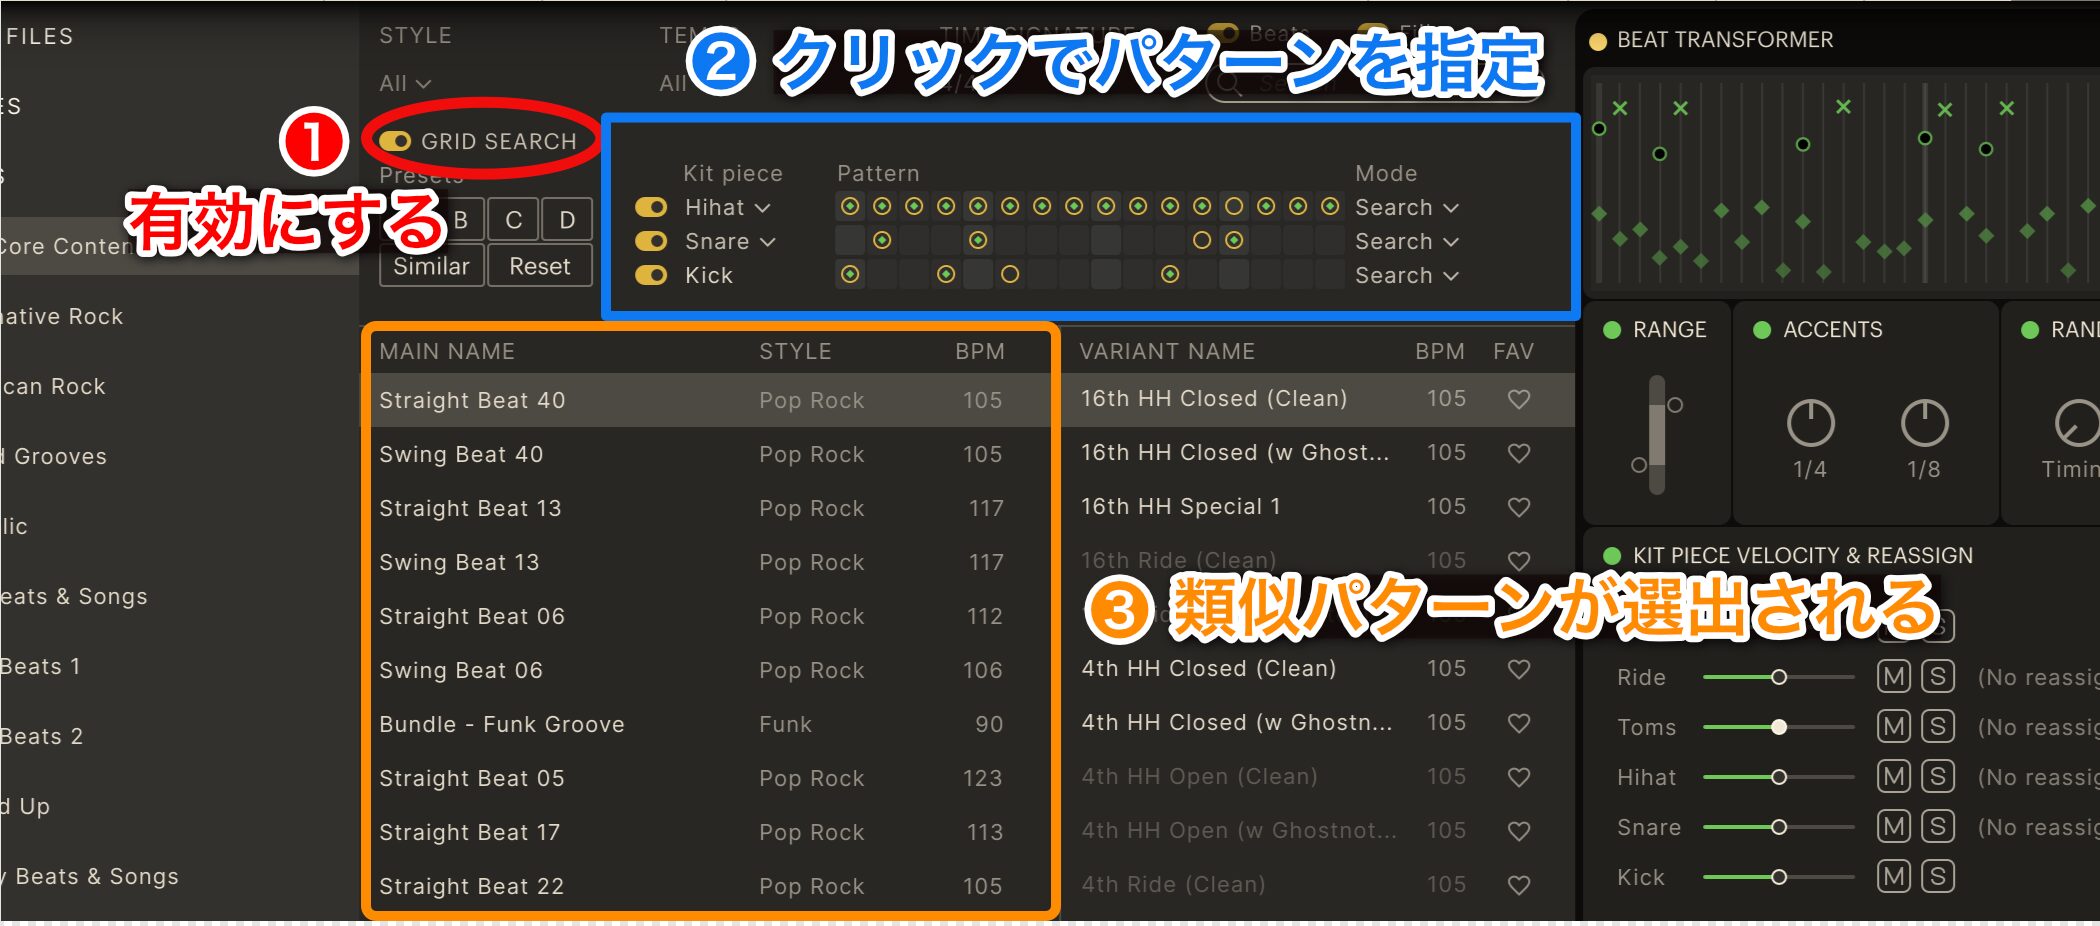
1 (red): Enable GRID SEARCH.
2 (blue): Specify the pattern for each kit piece. You can also specify an individual piece, such as just the kick.
3 (orange): Patterns close to the specified pattern are filtered.
This helps you quickly find the pattern you want.
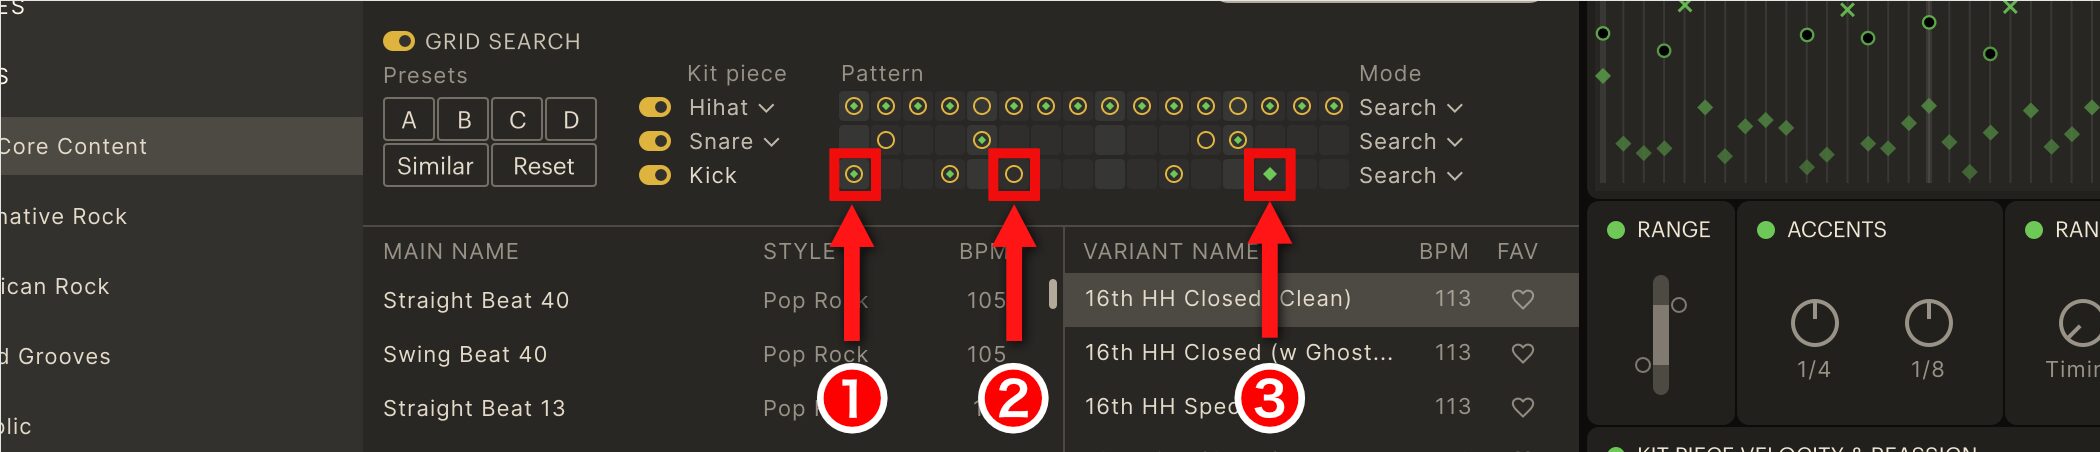
When you select a pattern, you will notice that the Grid Search display changes.
1: Positions where the specified pattern and the selected pattern both play.
2: Positions specified in the search but not played in the selected pattern.
3: Positions not specified in the search but played in the selected pattern.
These indicators show how the patterns compare.
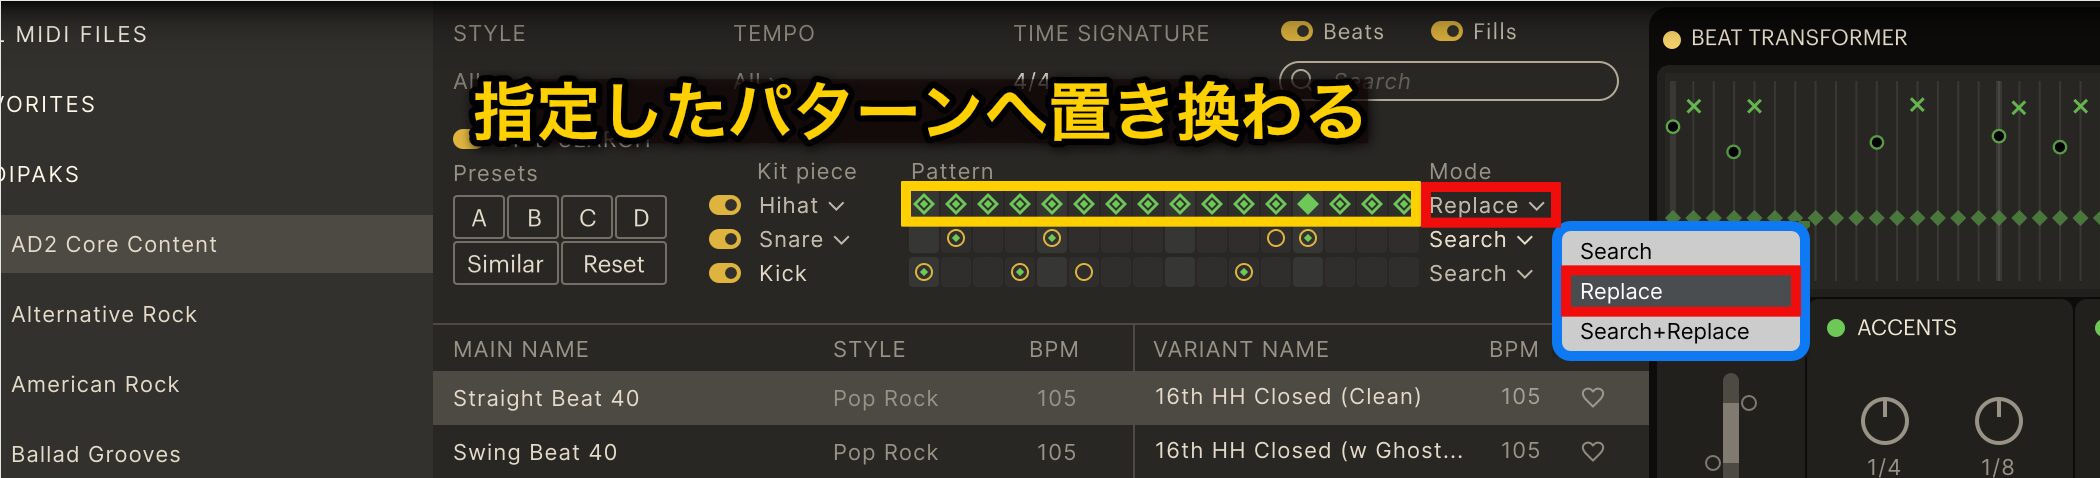
Select a filtered pattern and choose Replace from the Mode menu to replace its performance with the specified pattern.
This is useful, for example, when you like the other pieces but not the kick.
Selecting Search+Replace searches for a pattern and replaces it at the same time.
BEAT TRANSFORMER
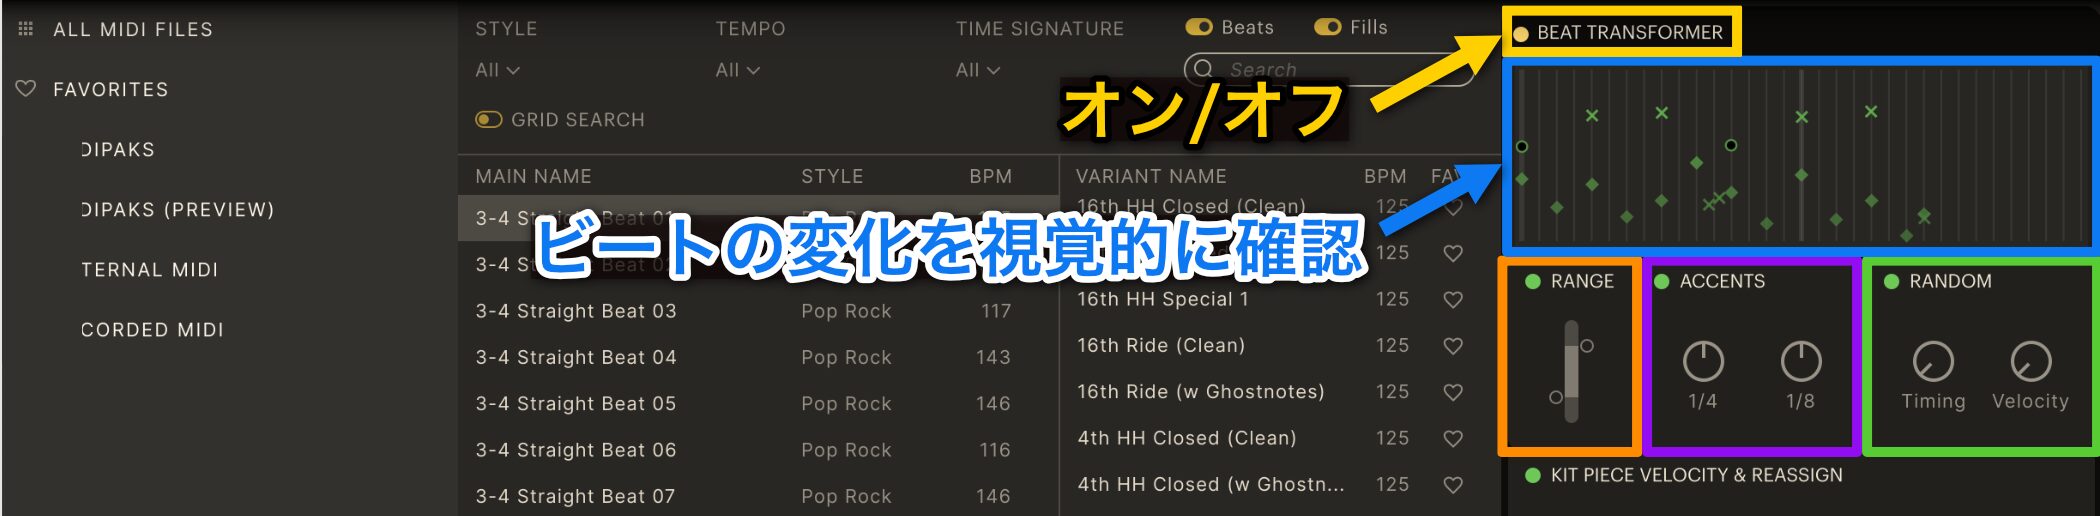
On the right, BEAT TRANSFORMER lets you customize the selected beat to fit the character and coherence of your song.
Click the circular control to toggle between the customized and original beat for comparison.
- RANGE (orange): Adjust the velocity range.
- ACCENTS (purple): Add accents; turning the knob right strengthens quarter- and eighth-note downbeats and weakens offbeats.
- RANDOM (green): Add random variation to timing and velocity for a more human feel.
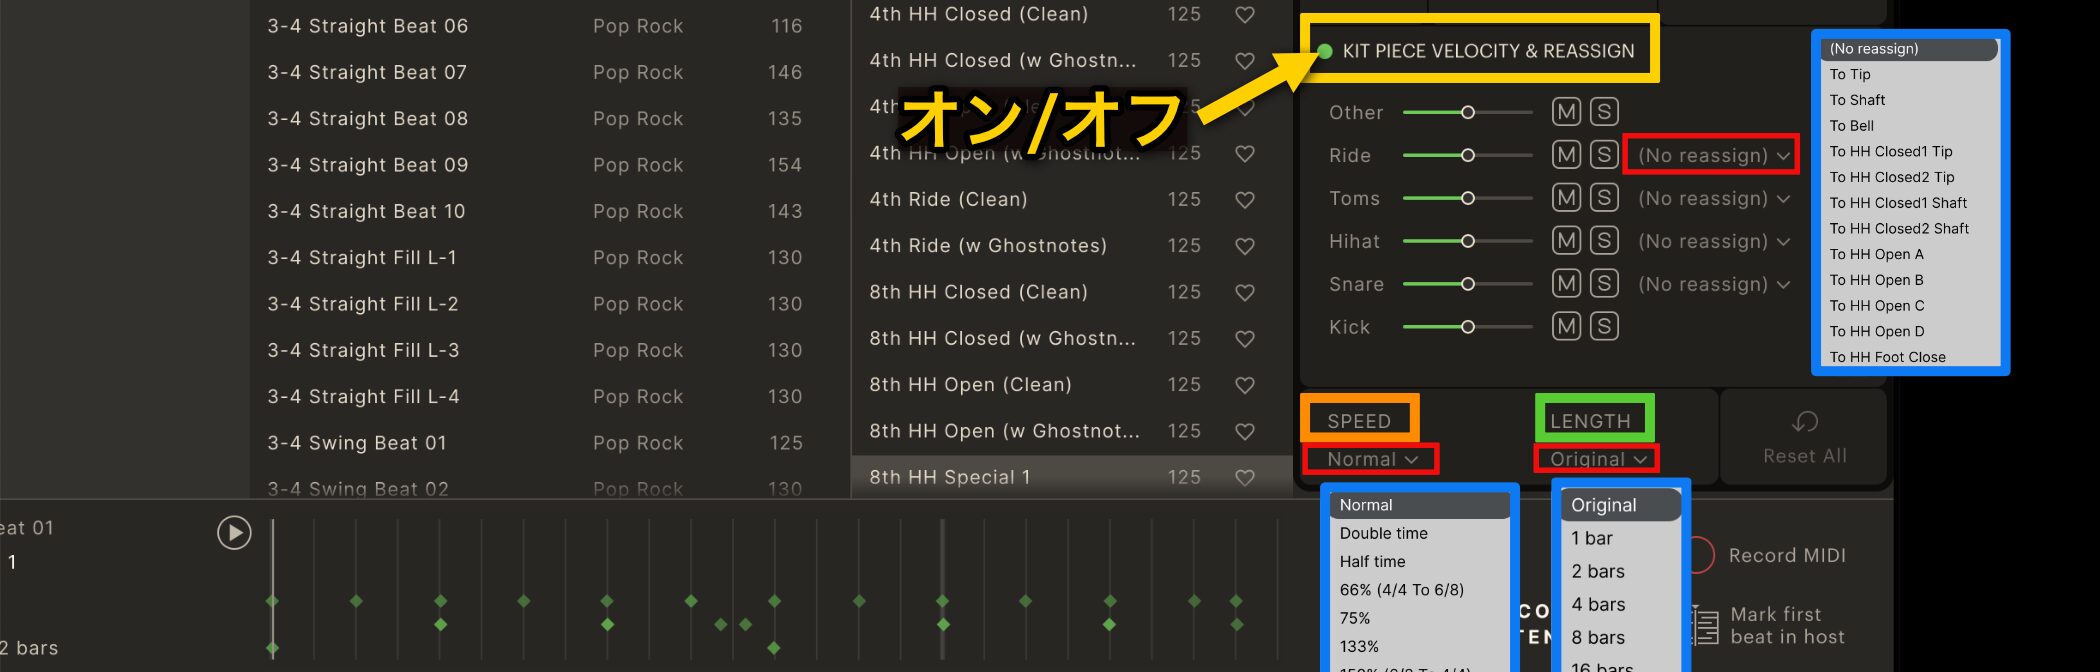
KIT PIECE VELOCITY & REASSIGN provides sliders to adjust each kit piece’s velocity, as well as mute and solo controls.
Click (No reassign) to change articulations.
You can also use SPEED to change the beat tempo to half or double speed, for example, and LENGTH to adjust the beat length.
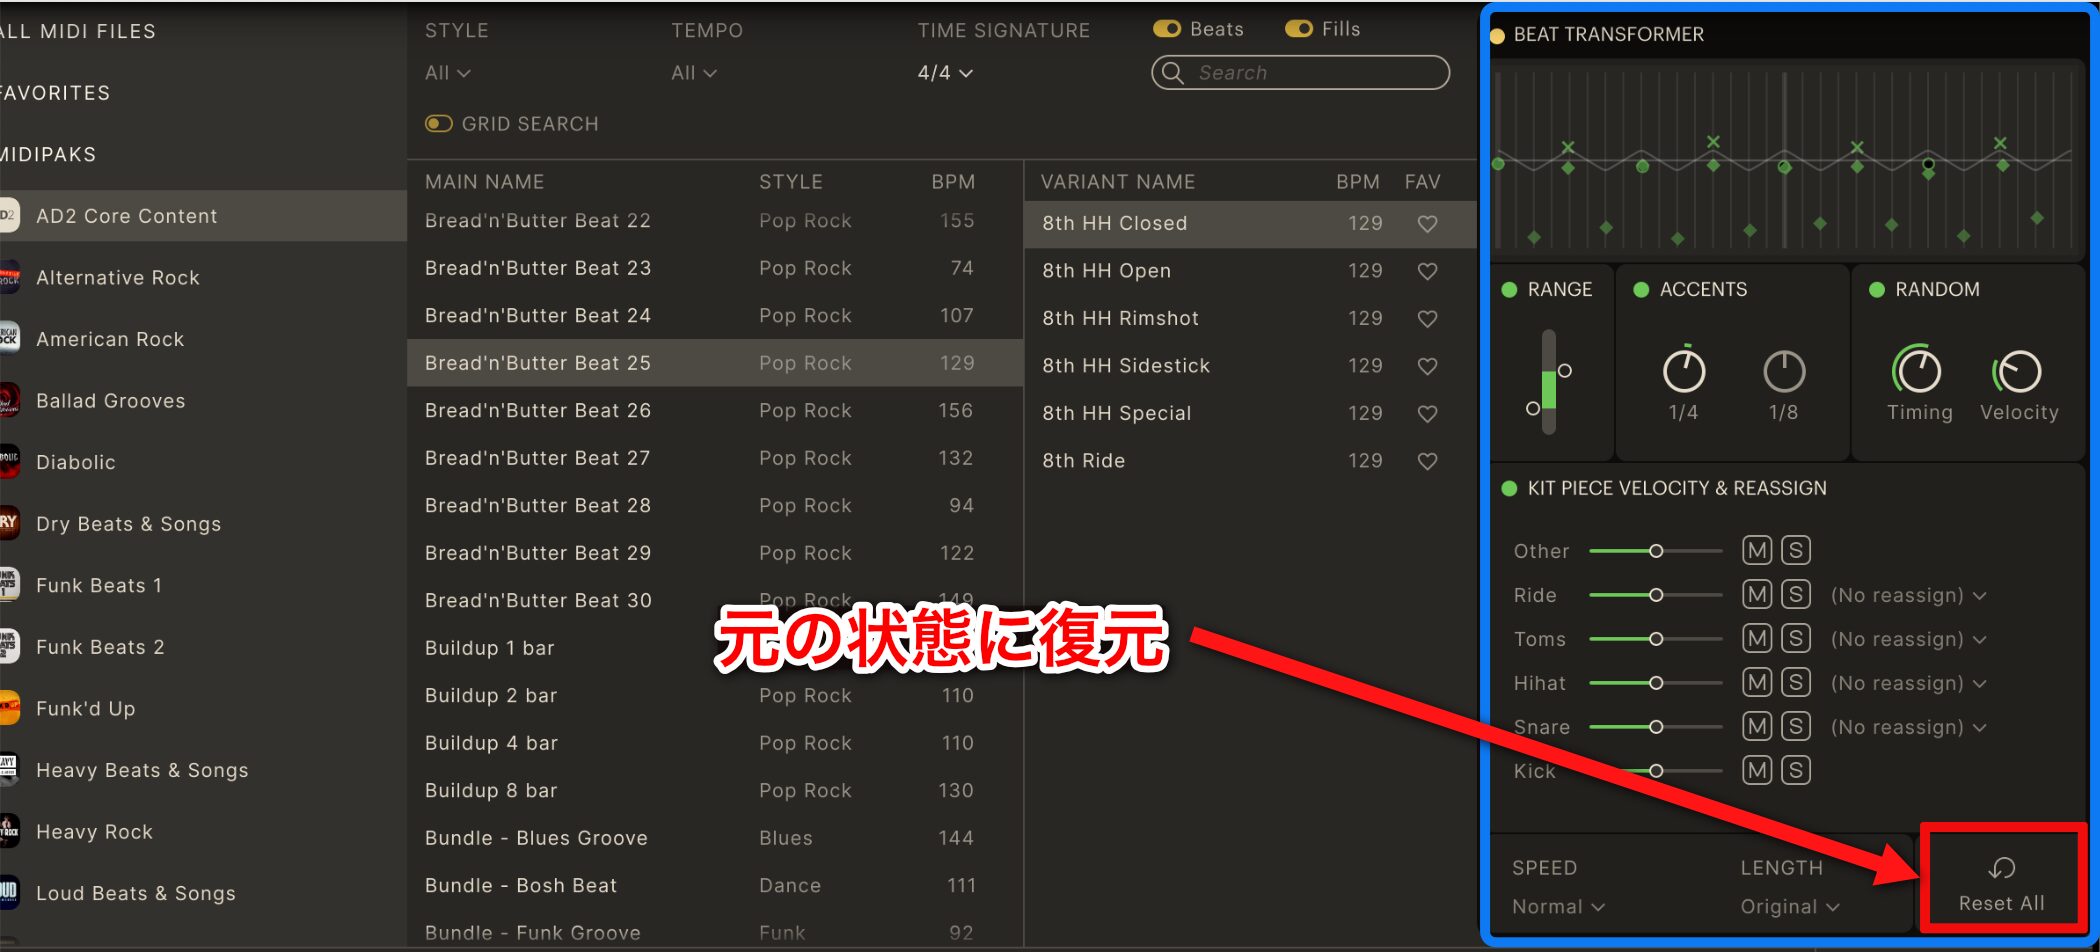
Click Reset All to return all settings to their initial state.
EDIT: Adjusting Cymbals and Pan
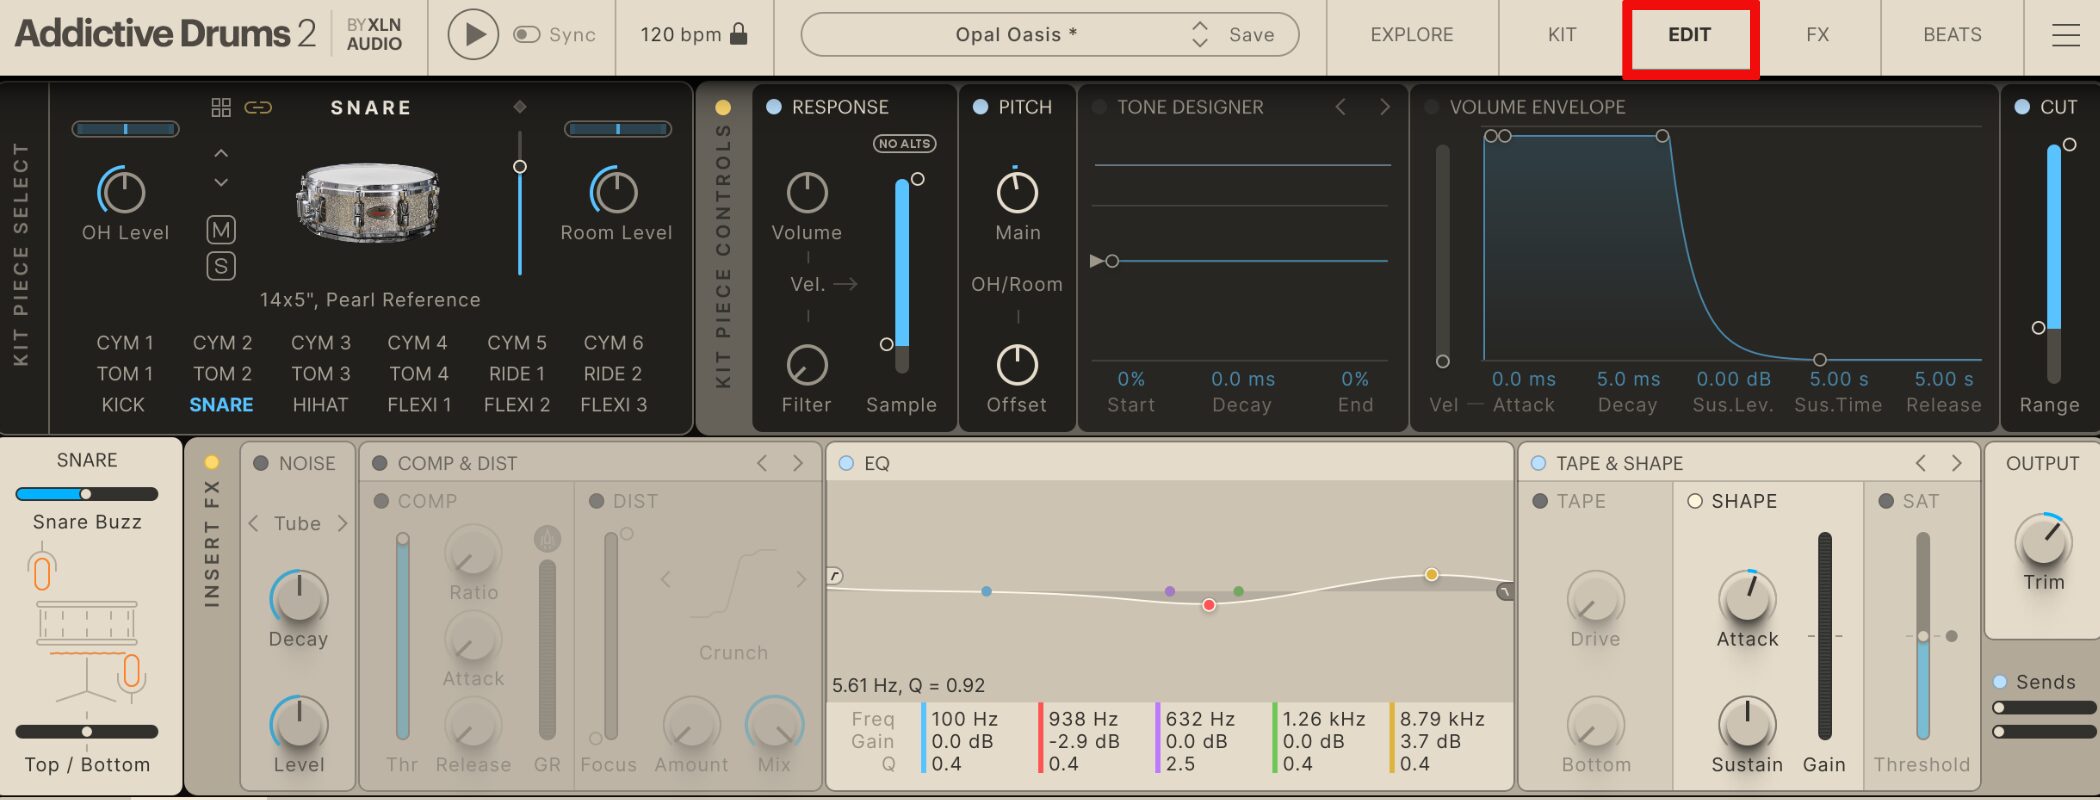
Next, let’s look at the EDIT screen, where you adjust the sound of each kit piece.
First, check the mixer, which is essential for balancing levels.
Addictive Drums 2 Video: EDIT Mode
Adjusting Cymbals
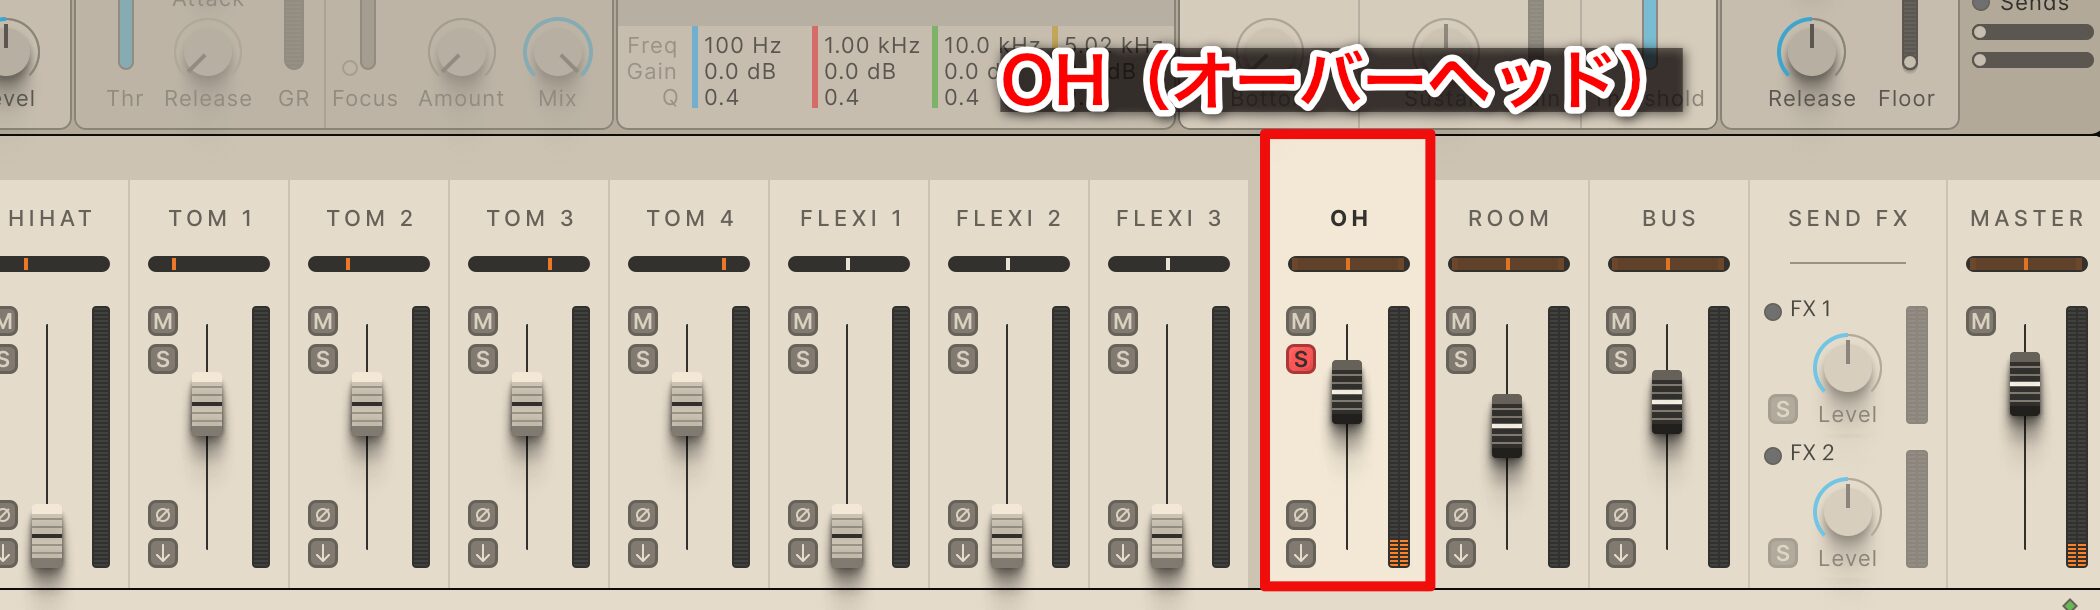
There is no separate cymbal fader.
The OH (overhead) channel carries the cymbals.
However, the OH microphones also capture other kit pieces.
By default, the level is set slightly high.
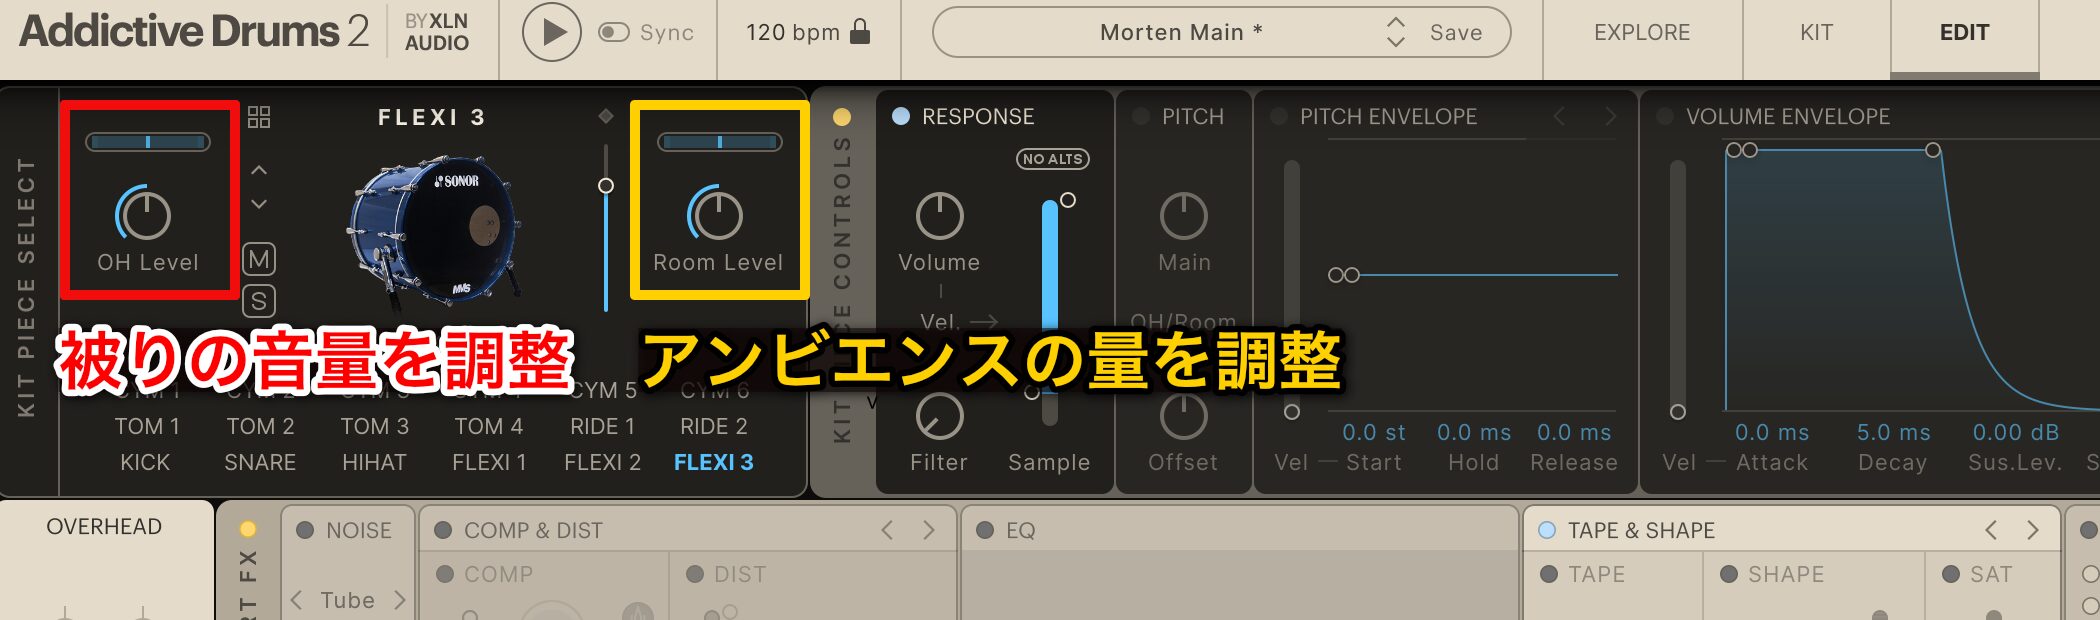
Select each kit piece and adjust OH Level to balance how much of it is picked up in the overheads.
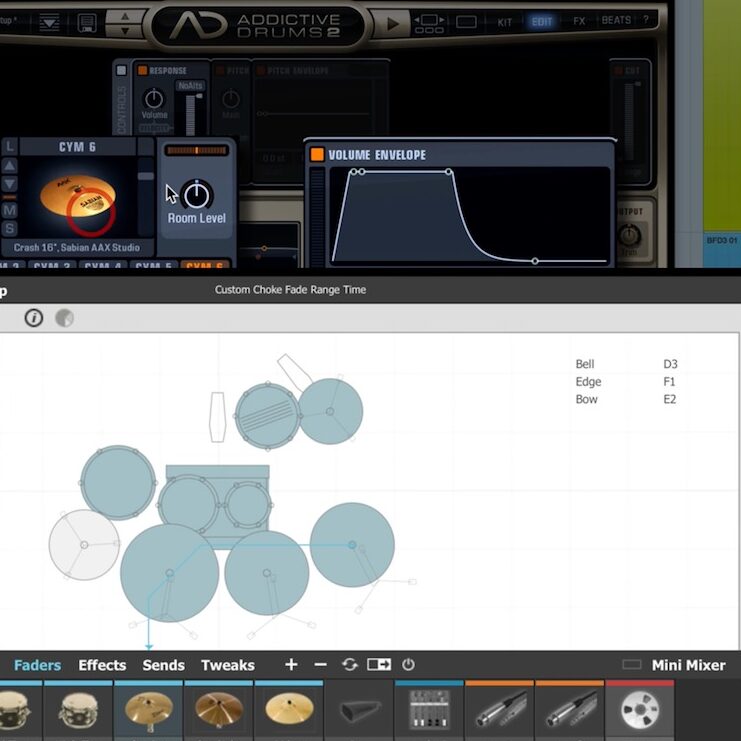
Room Level on the right adjusts the sound’s width and depth.
Adjusting Pan
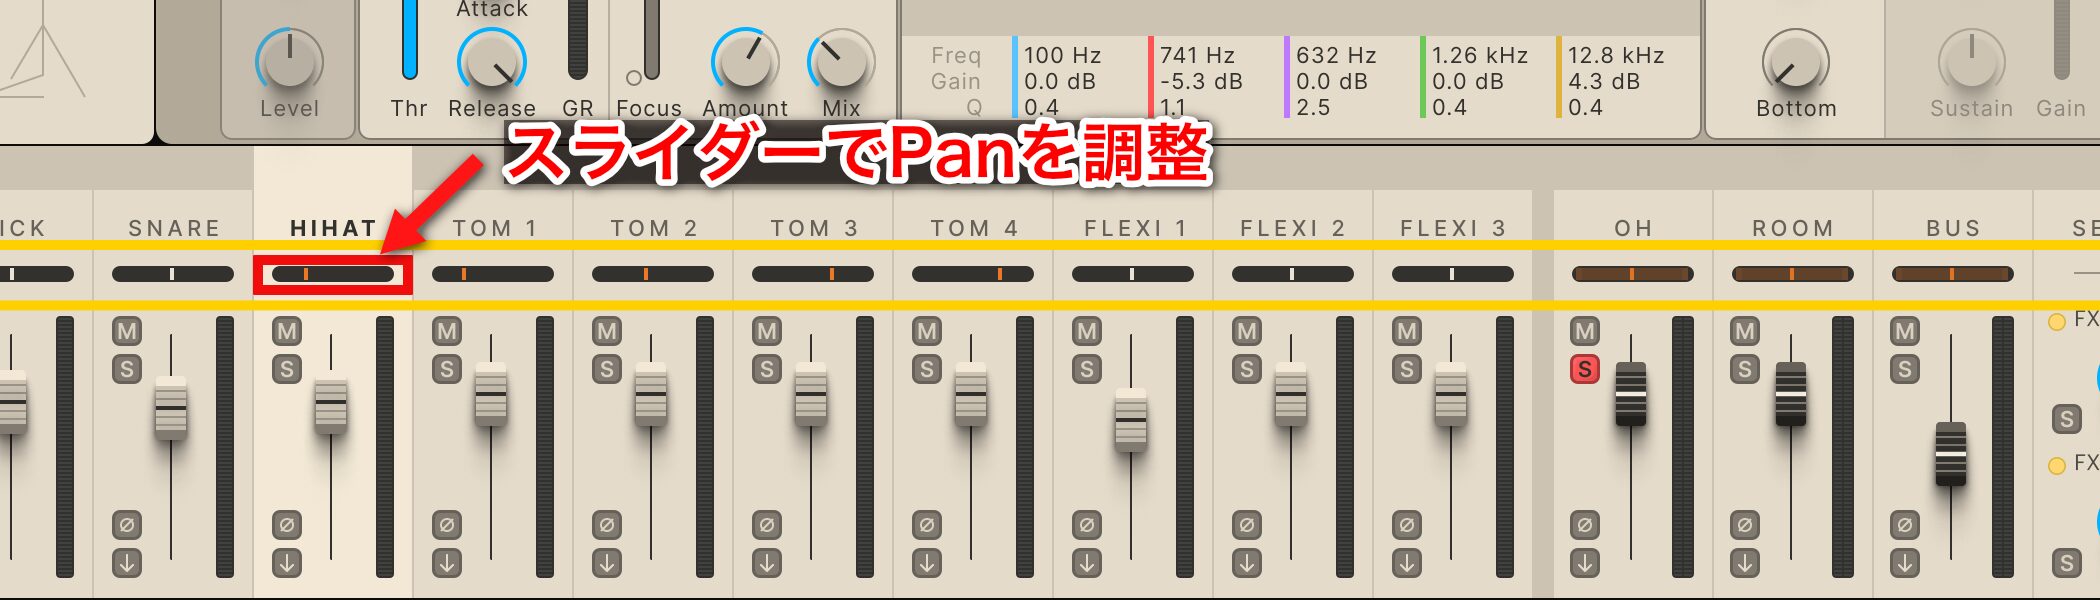
Adjust each piece’s pan in the area outlined in red.
One point needs attention here.
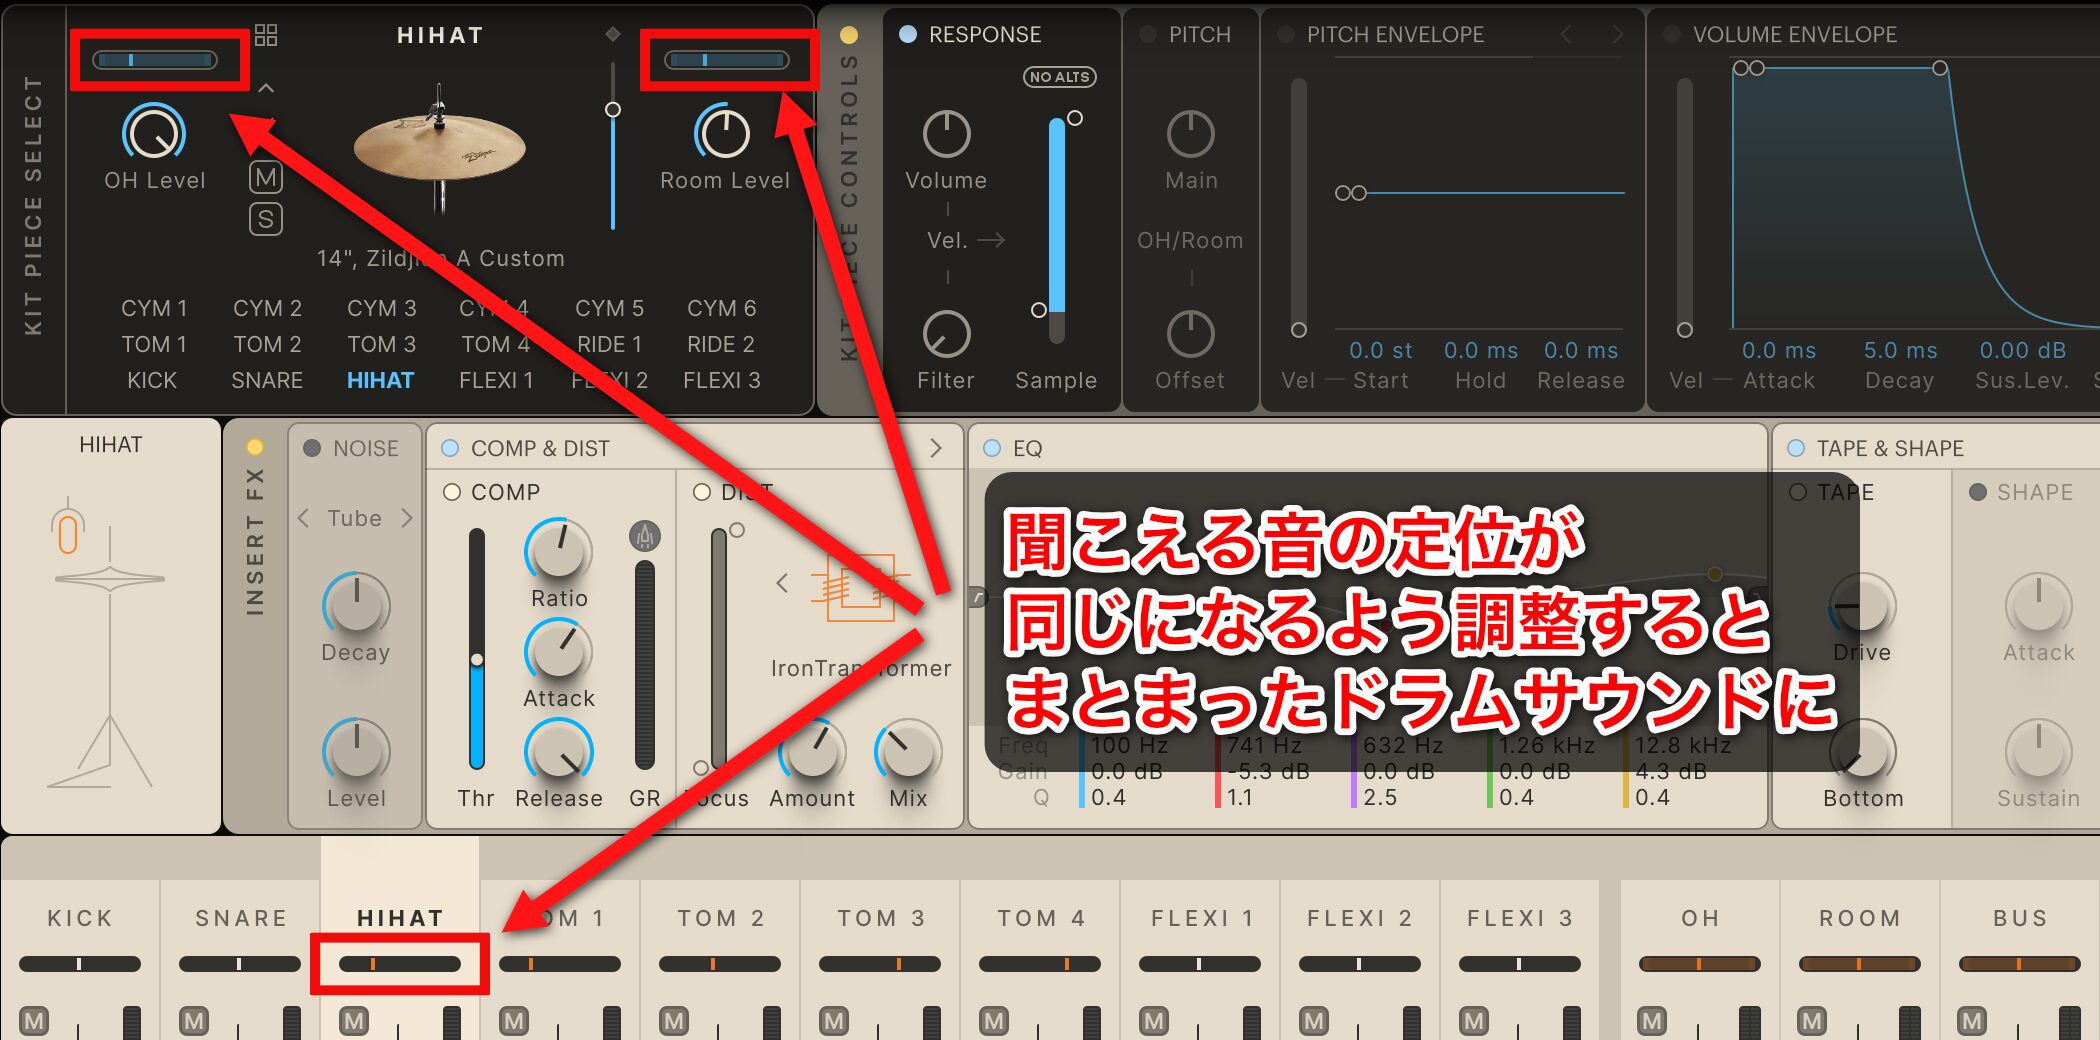
While listening, use the direct kit-piece sound as a reference and align the position of its bleed in the OH and ROOM microphones for a more cohesive drum sound.
EDIT: Adjusting Kit Pieces
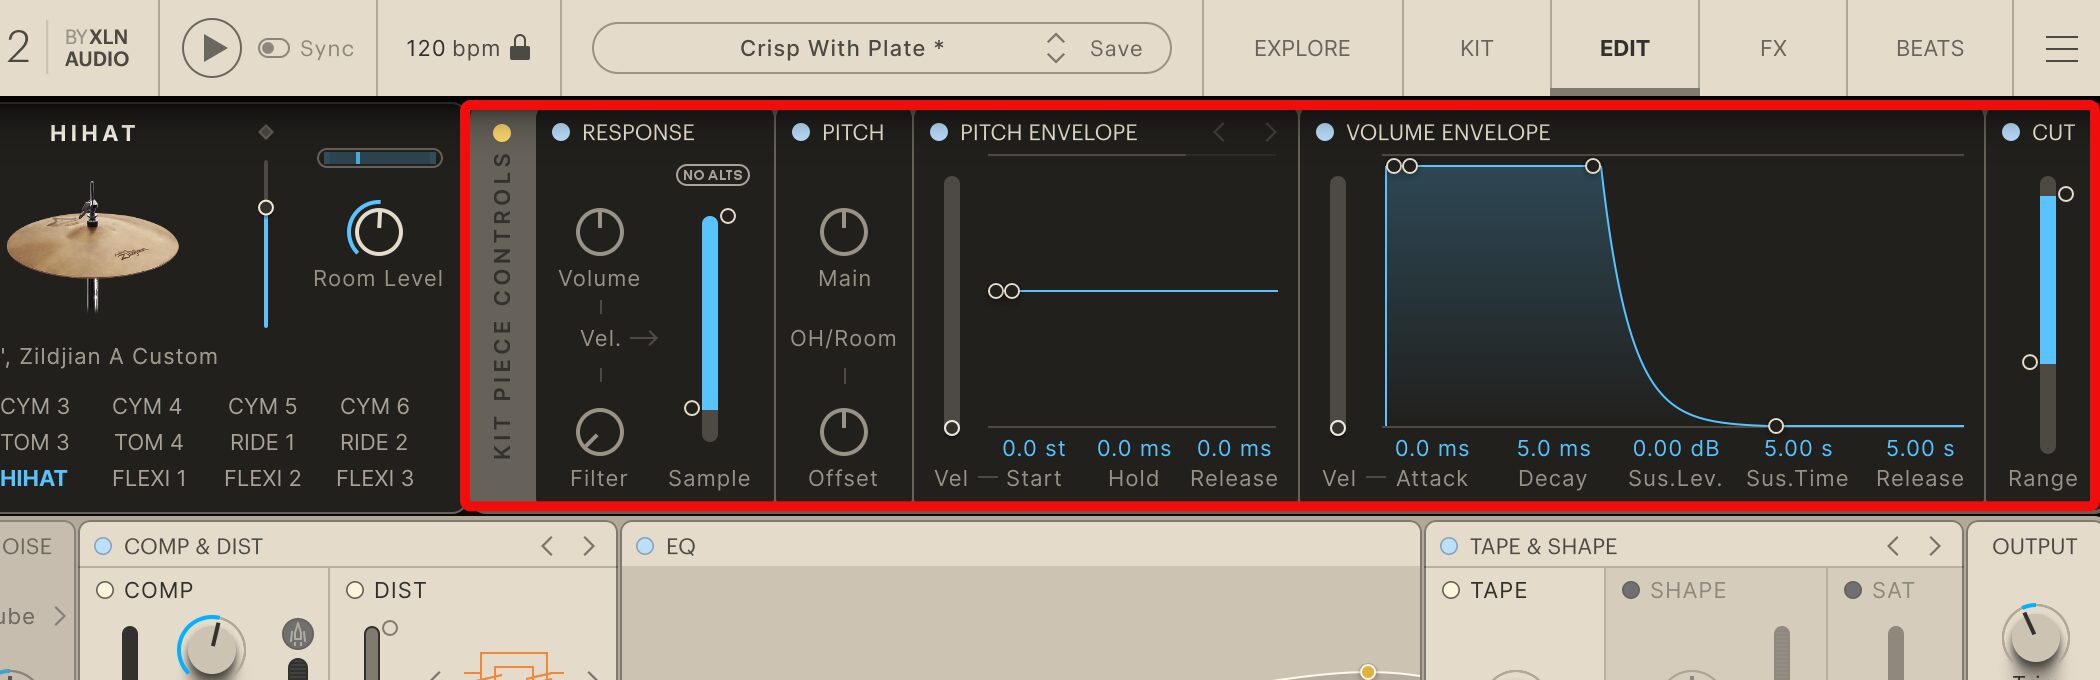
Let’s look further at the EDIT screen.
This is where much of the fun of shaping drum sounds lies.
Fine-tune velocity, pitch and volume to approach your ideal sound.
It takes some work, but can improve the result.
Addictive Drums 2 Video: Editing KIT PIECE
RESPONSE
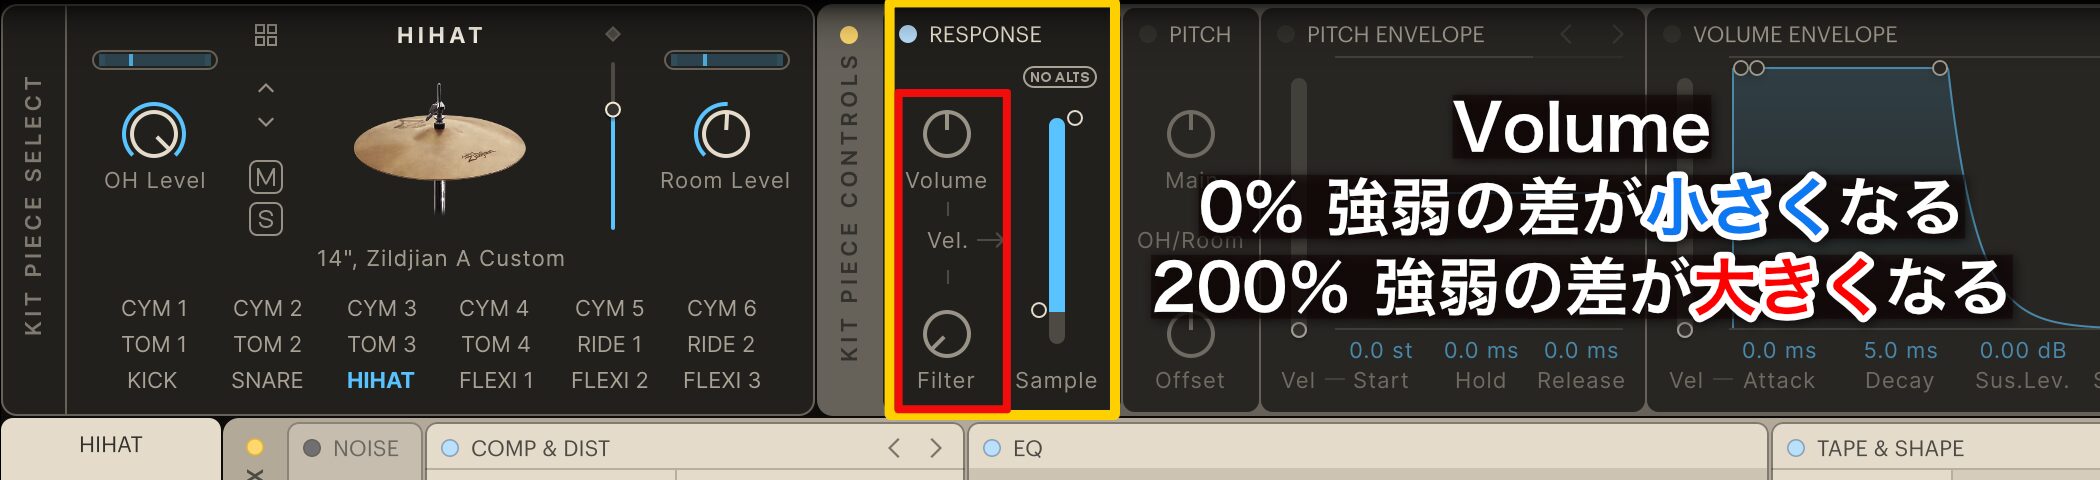
- Volume: Adjust how volume responds to velocity.
Lower values make the volume more consistent and less dependent on velocity.
This is useful when level differences are distracting. - Filter: Set how tone responds to velocity.
Lower values cut more high frequencies at lower velocities.
This is useful if ghost notes stand out unnaturally.
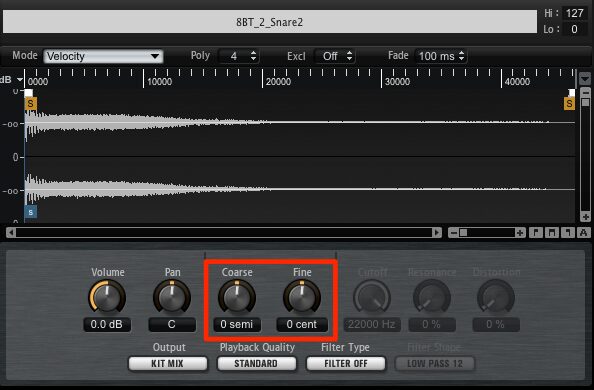
PITCH
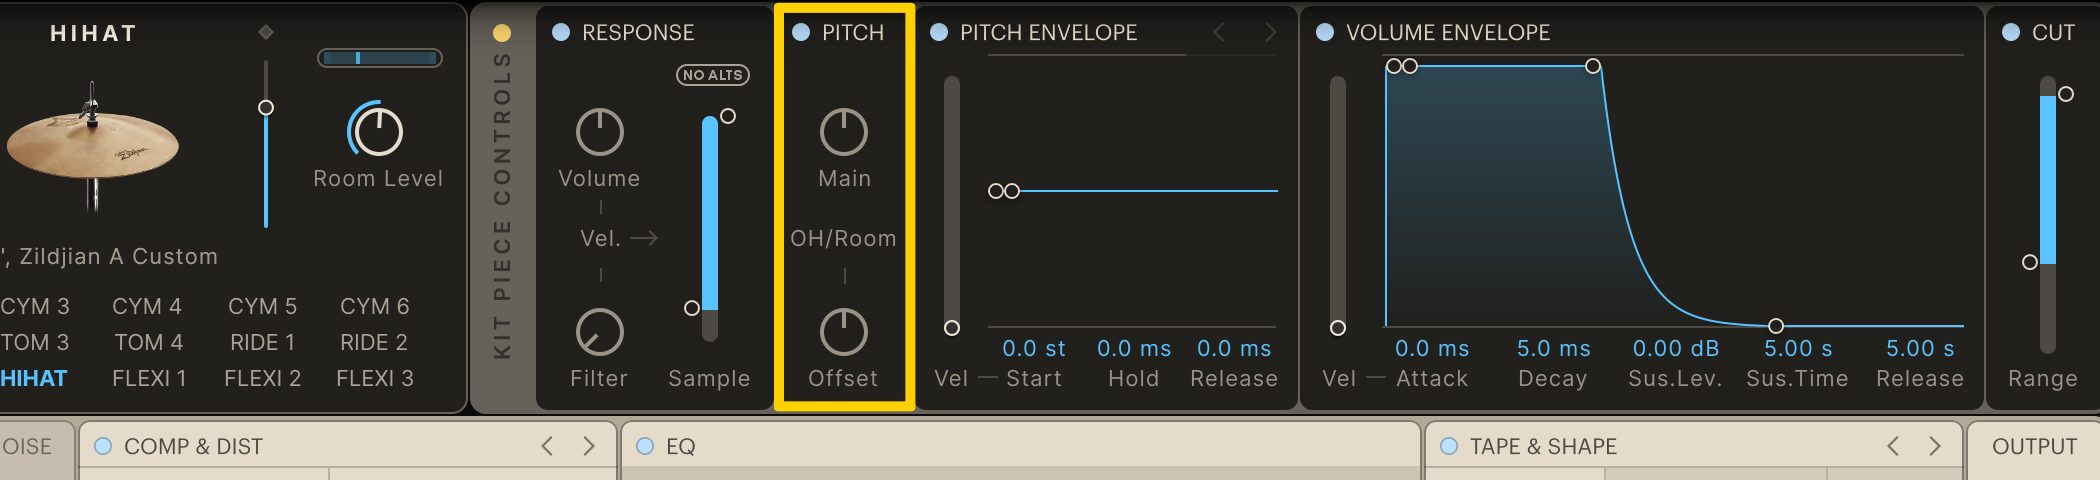
Set the kit piece’s tuning or pitch.
- Main: Adjust the selected kit piece’s pitch in cents.
- OH/Room: Adjust the pitch of its overhead and room microphone sounds in cents.
PITCH ENVELOPE
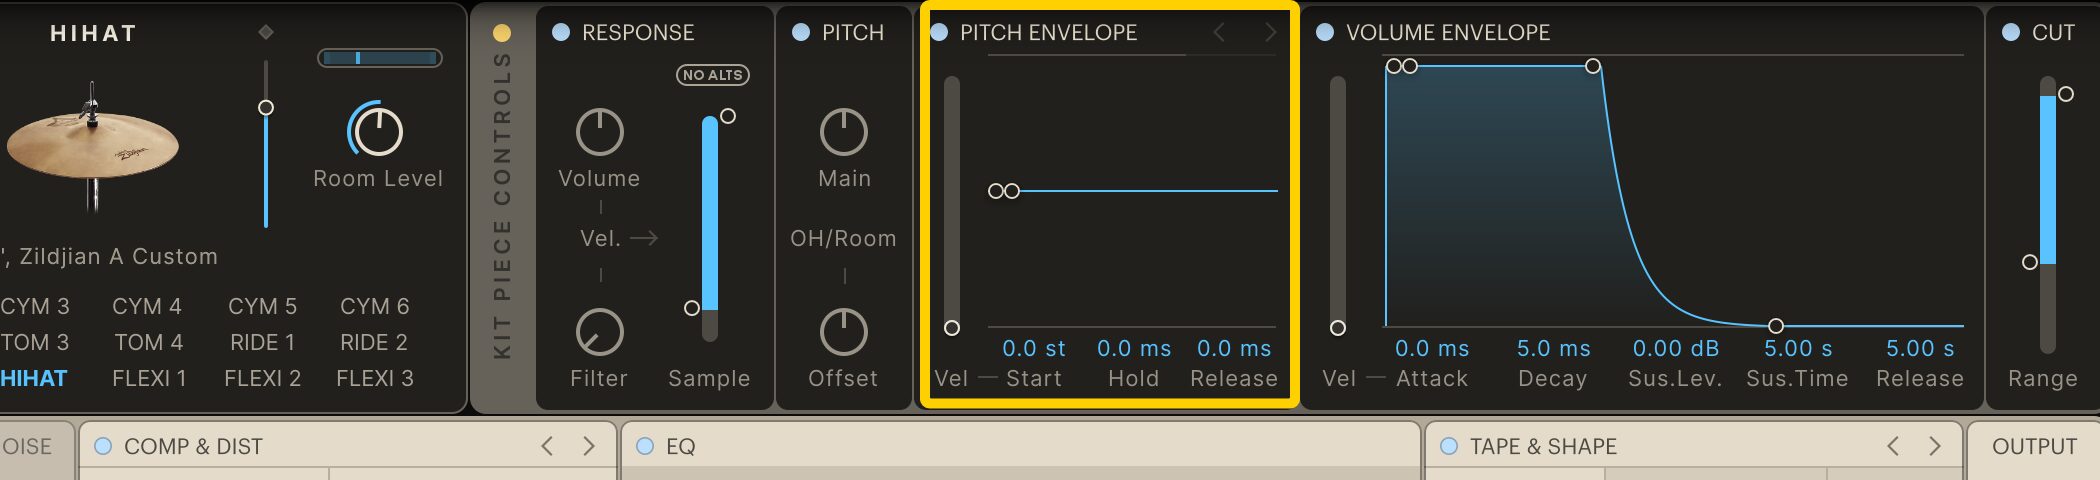
Control how the kit piece’s pitch changes over time from its attack through decay.
- Vel: Set how much velocity affects the pitch-envelope amount.
- Start: Set the pitch at the start of the envelope.
- Hold: Set how long the starting pitch is held.
- Release: Set how long it takes to return to the original pitch.
VOLUME ENVELOPE
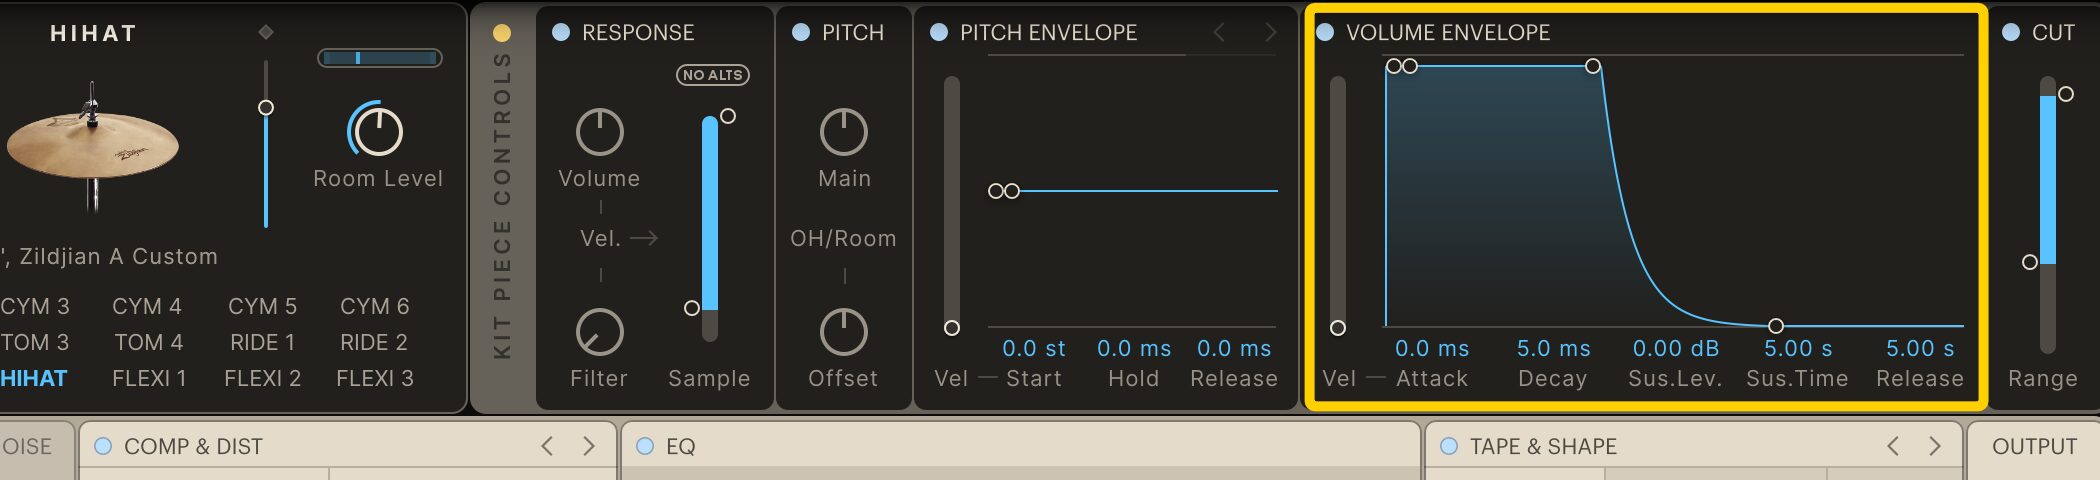
Control how volume changes over time.
Shaping the volume curve can tighten the kit sound and improve the groove.
- Vel: Set how much velocity affects Attack.
- Attack: Set the time it takes the sound to reach its maximum level.
- Decay: Set the time it takes to fall from maximum level to Sus.Lev.
- Sus.Lev.: Set the sustain level.
- Sus.Time: Set how long the sound stays at Sus.Lev.
- Release: Set the time it takes for the sound to fade completely.
While the drums play, shorten Sus.Time and Release to reduce the tail and create a tighter sound.
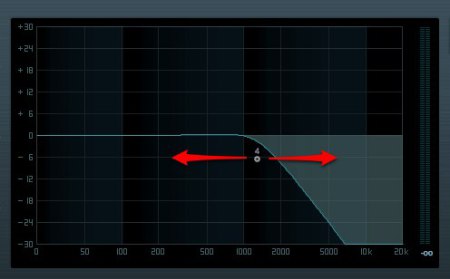
CUT
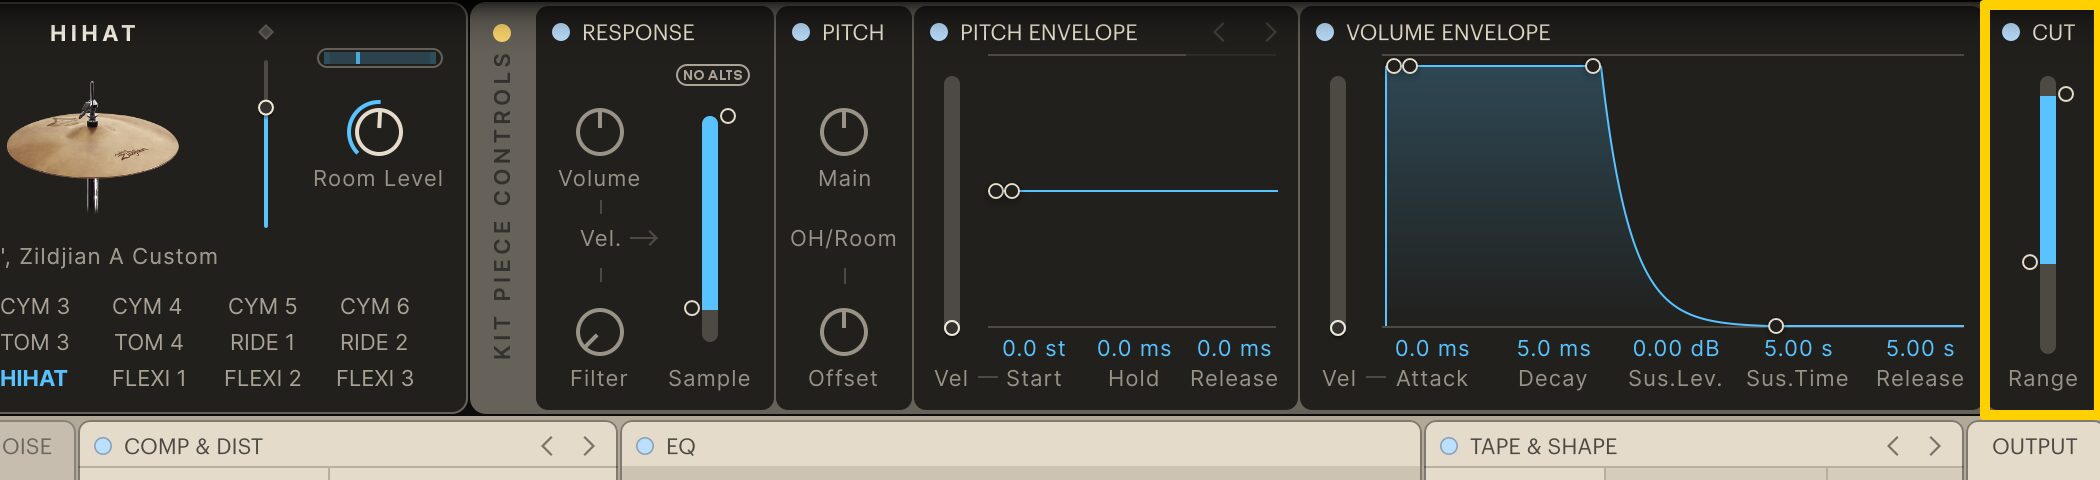
Adjust the high-cut and low-cut frequencies to balance the high and low frequencies.
Moving vertically changes frequency, while moving horizontally changes the distance between the high and low cuts.
Microphone Position
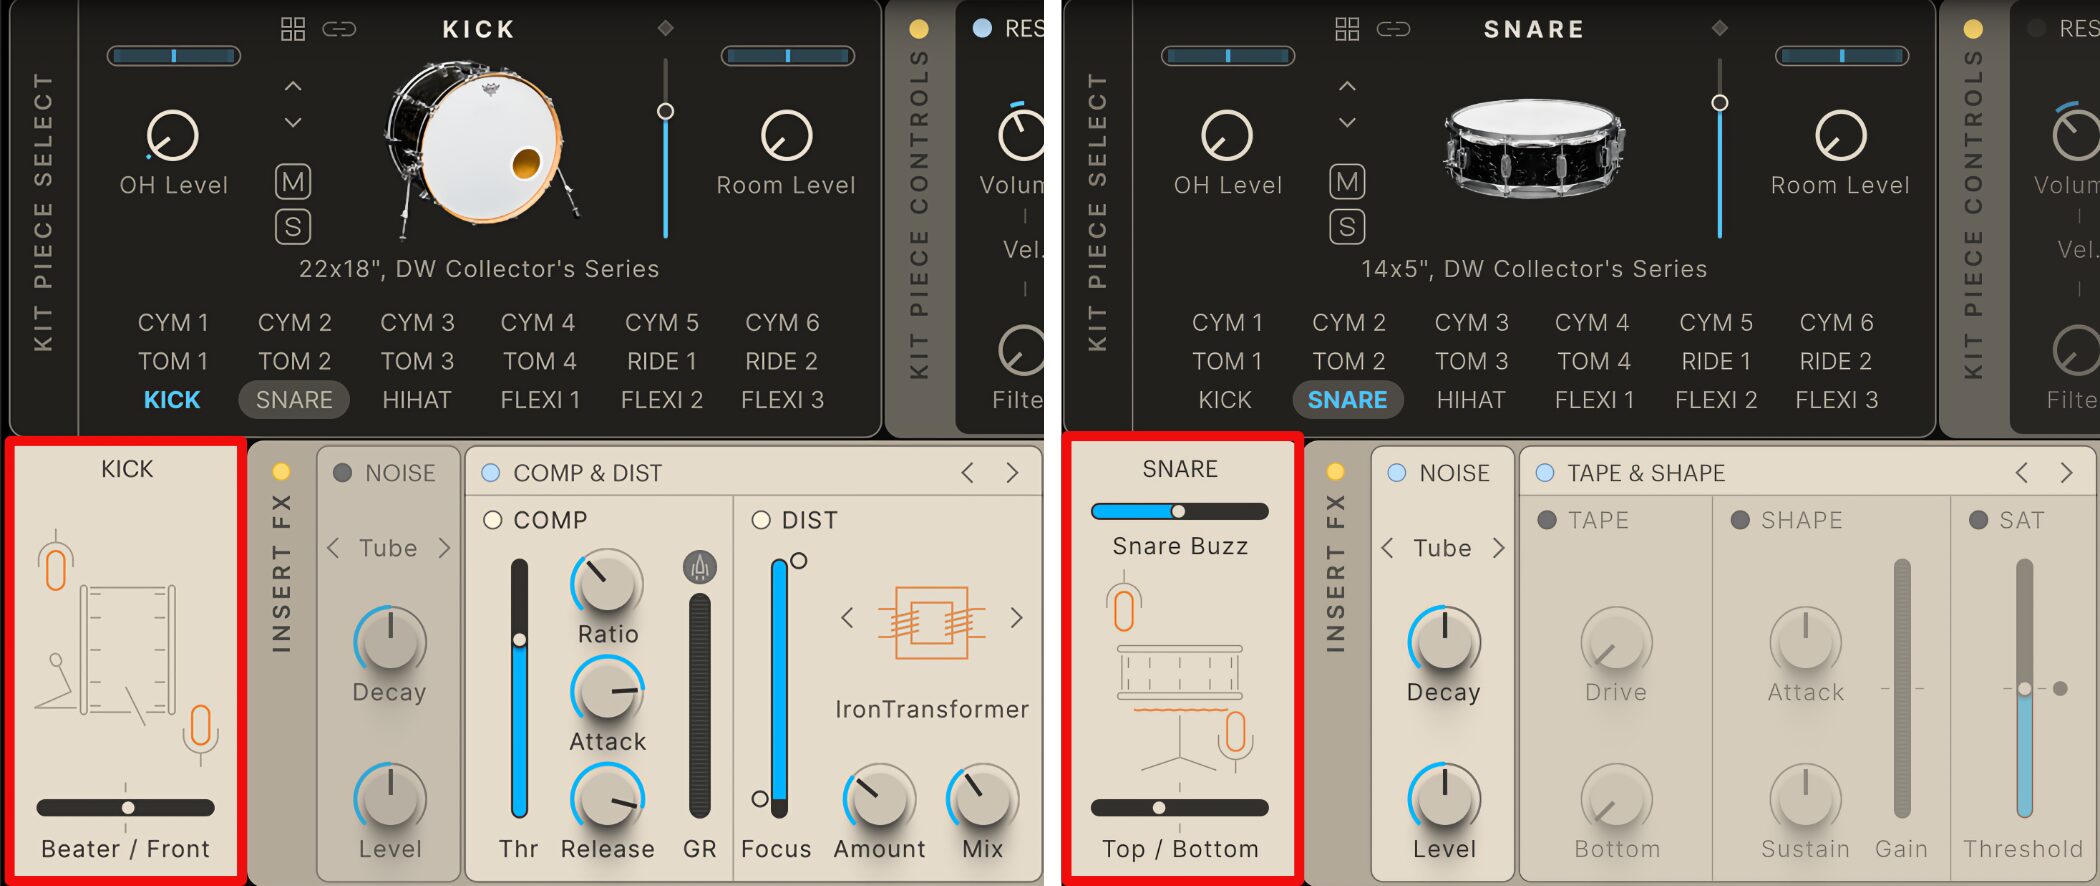
The far left of the middle section in EDIT shows microphone positions, which can be adjusted for some kit pieces.
Kick
- Beater: Emphasize the click of the attack.
- Front: Emphasize the low end.
Snare
- Snare Buzz: Adjust the buzz caused by the snare resonating when kick or toms play; this does not affect the sound when the snare itself is struck.
- Top: Emphasize attack and high frequencies using the microphone on the batter-head side.
- Bottom: Emphasize the snare-wire sound and low frequencies using the microphone under the snare.
Effects and Separate Outputs
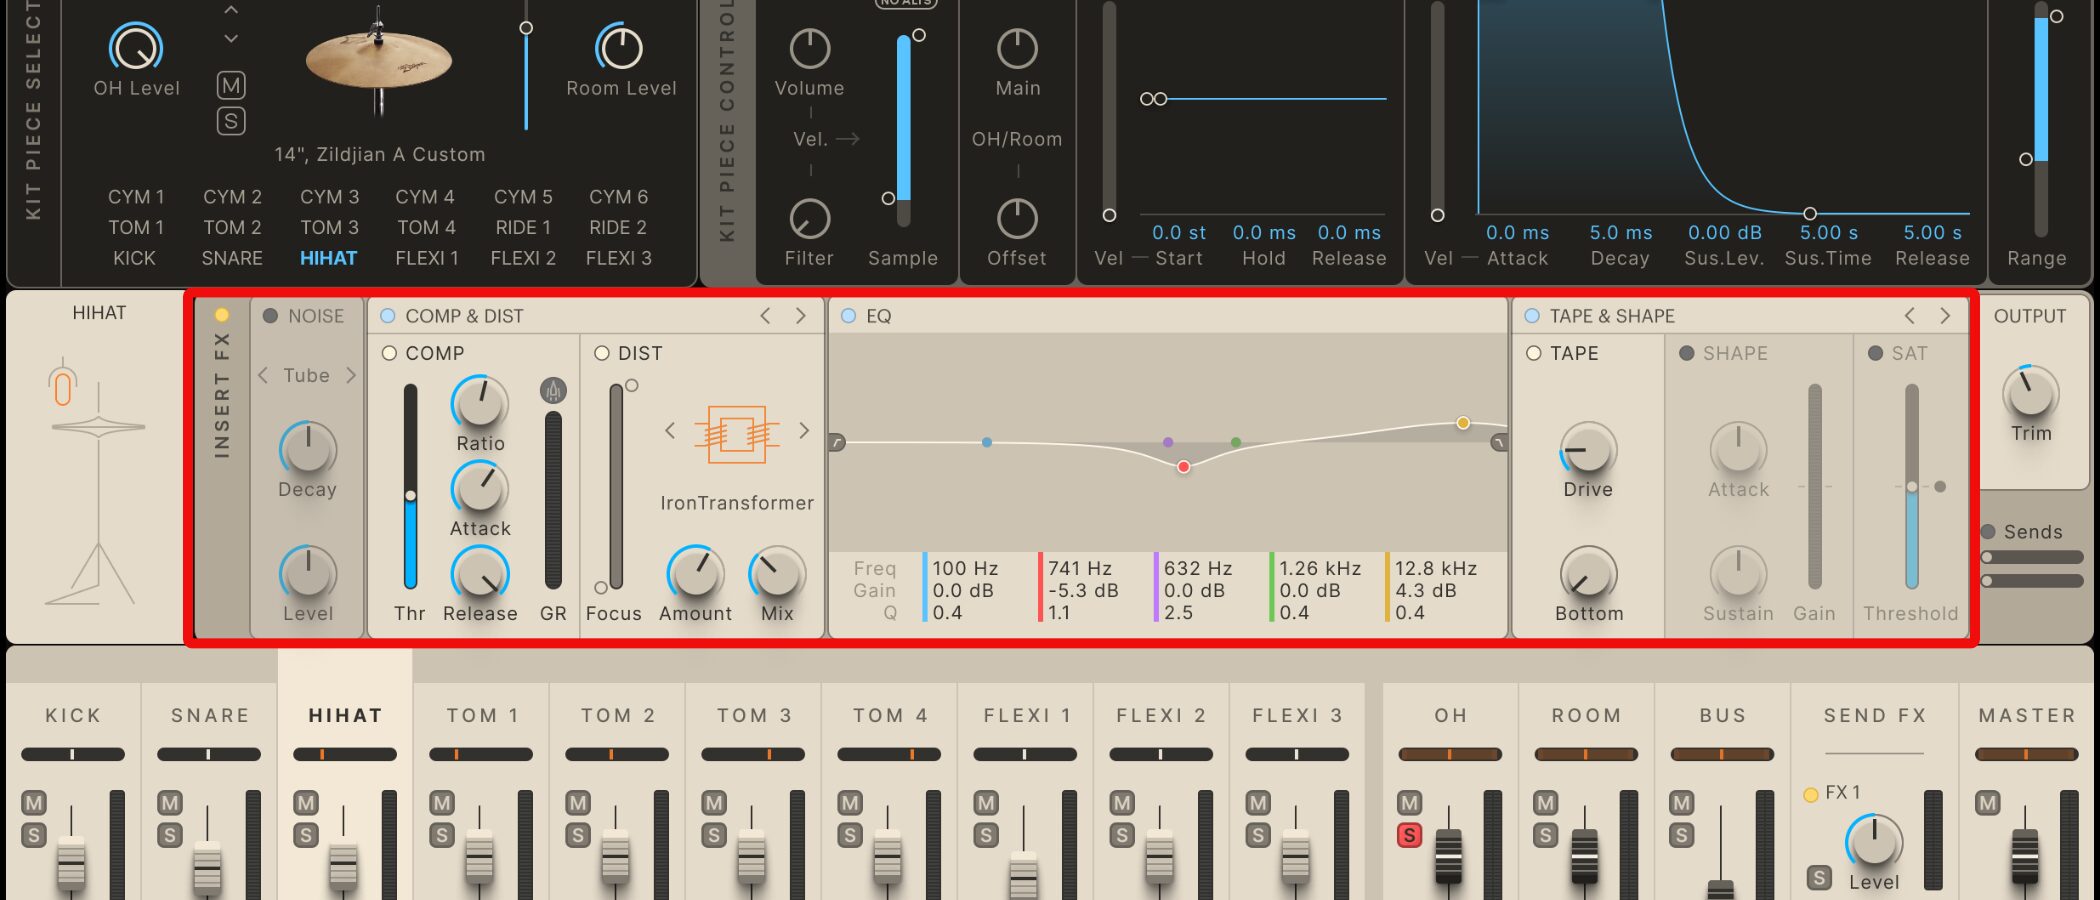
Finally, let’s cover effects and separate outputs, which let you adjust kit pieces individually in the DAW.
Adjust them to suit your genre and desired sound.
Addictive Drums 2 Video: Applying Effects and Using Separate Outputs
Setting Up Separate Outputs
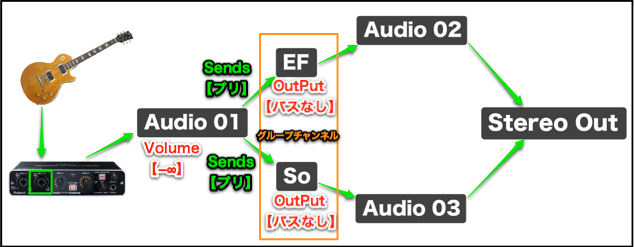
Separate outputs let you adjust kit pieces individually in your DAW.
You can freely control effects, volume, pan, send levels and more.
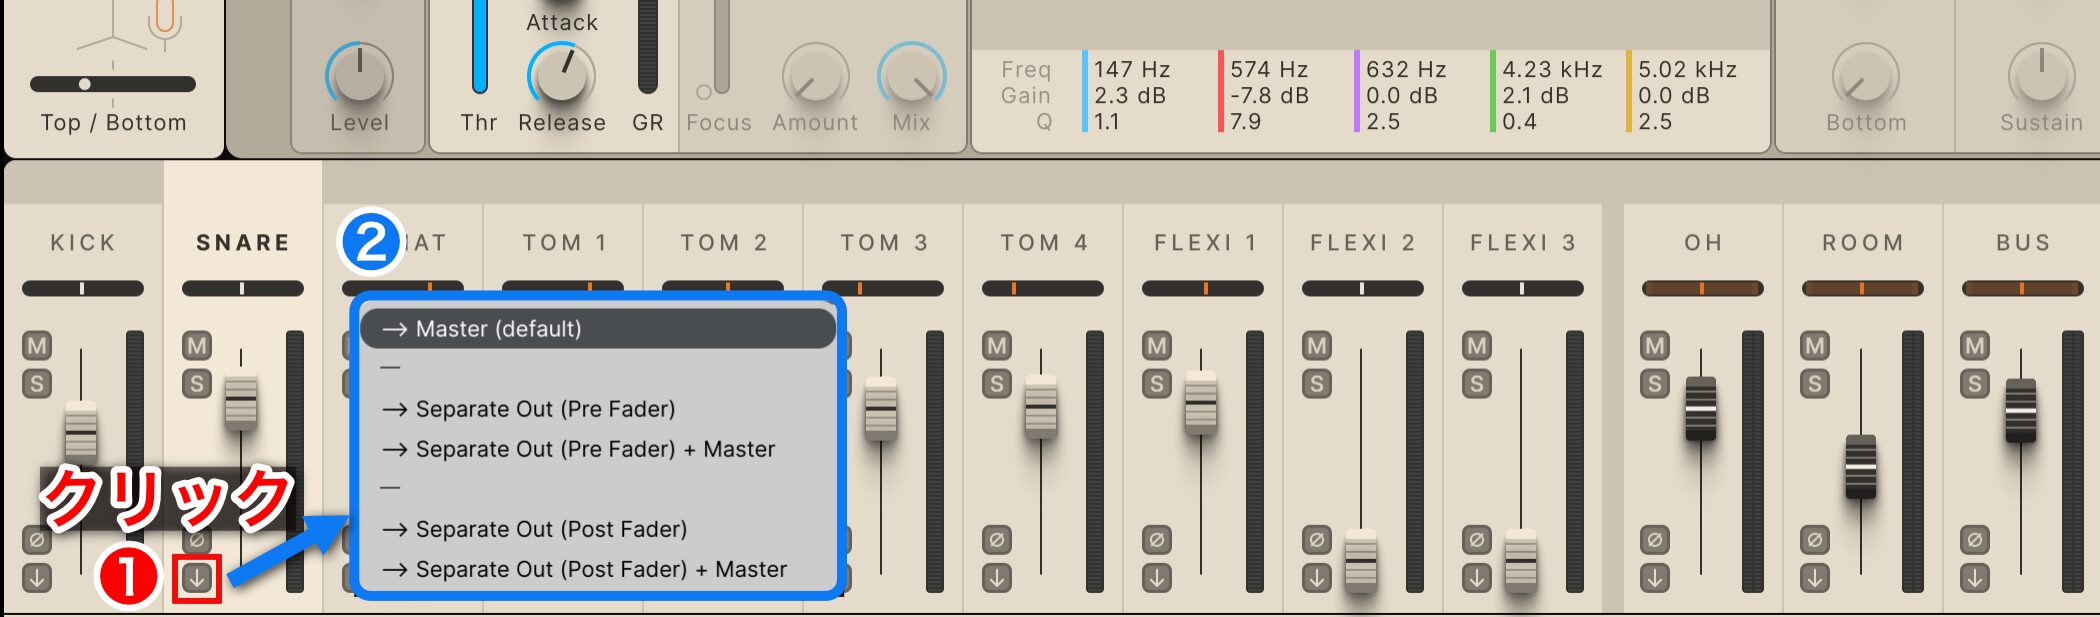
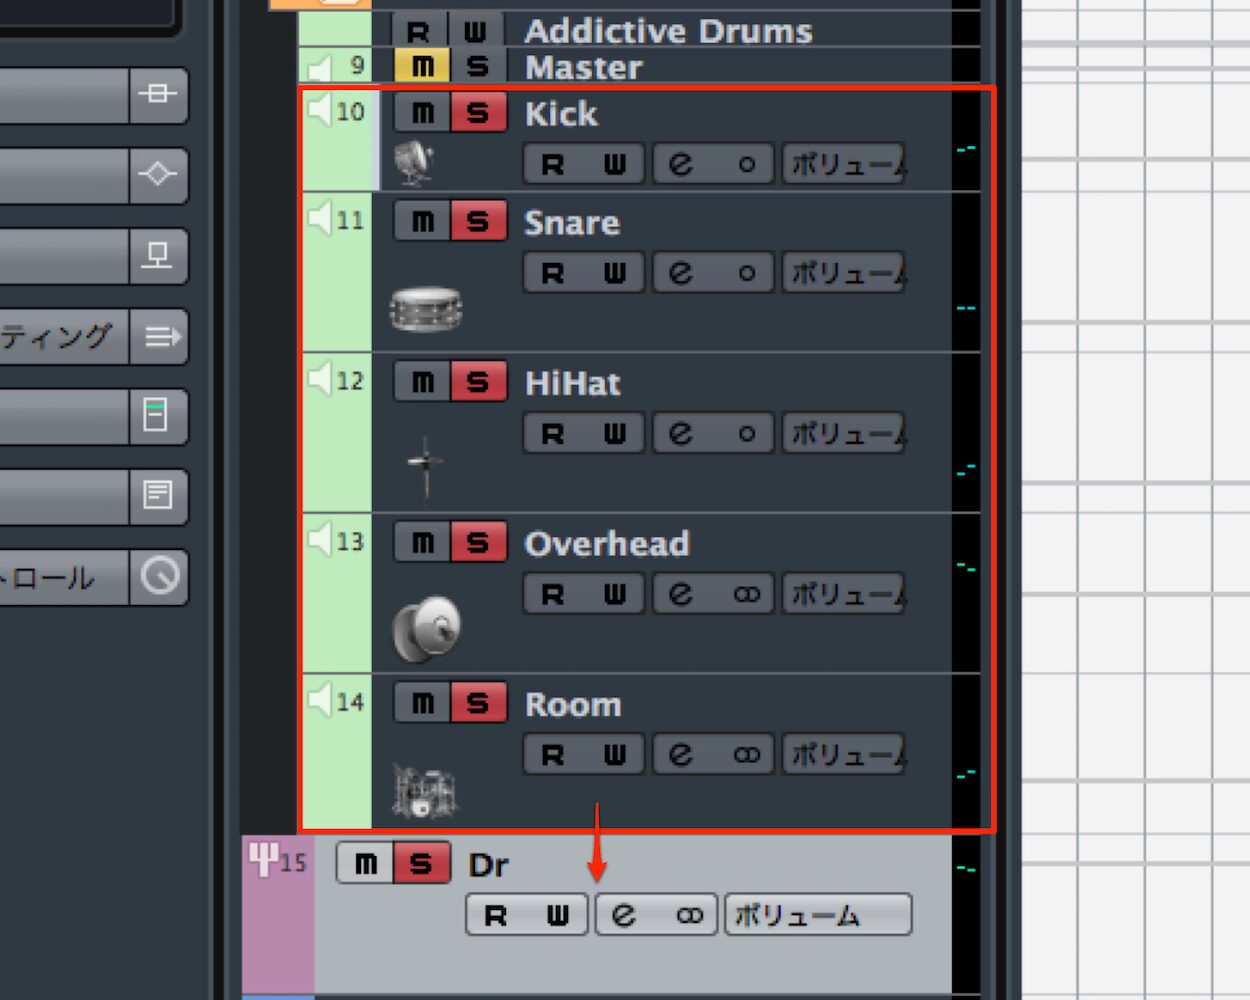
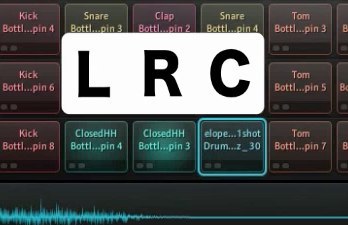
1: Click the area outlined in red on the kit piece you want to route separately. This is normally done for all tracks.
2: Choose the appropriate option from the list.
Pre-Fader outputs a signal at a constant gain regardless of the Addictive Drums channel volume setting, whereas Post-Fader output is affected by the Addictive Drums channel volume setting.
Choosing + Master outputs sound through both the Addictive Drums Master channel and the DAW output.
Setup in Addictive Drums is now complete.
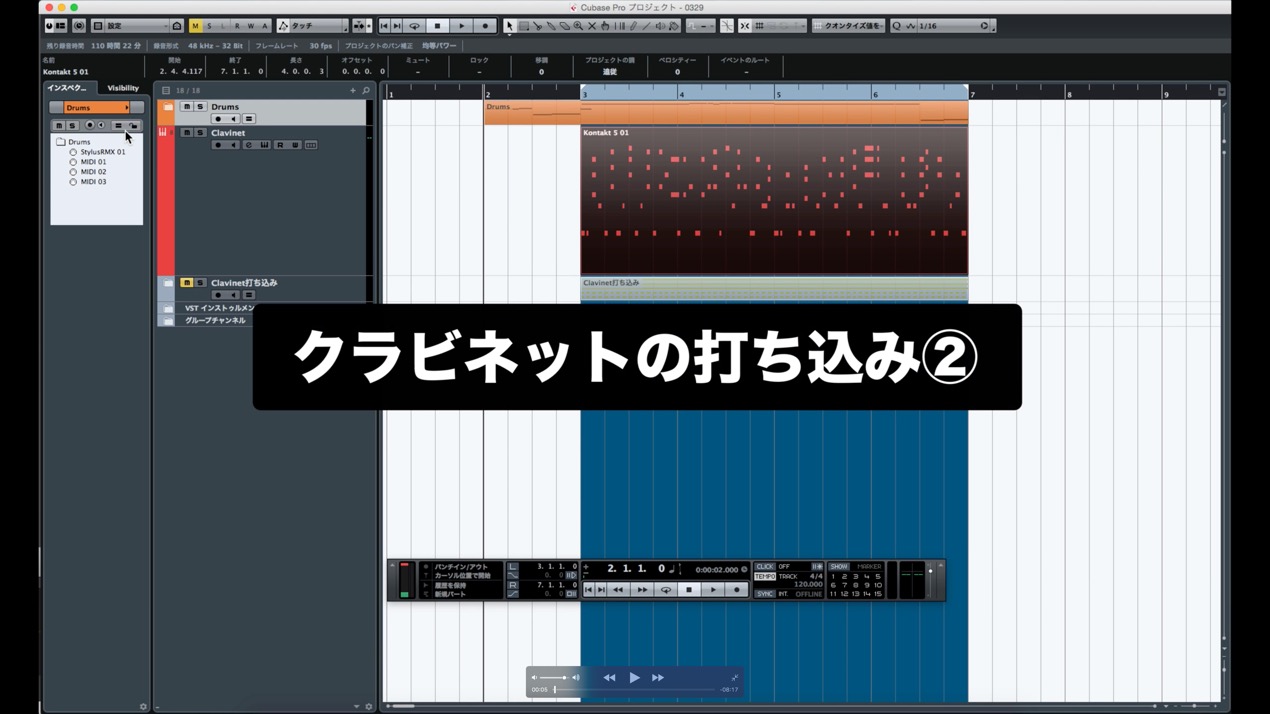
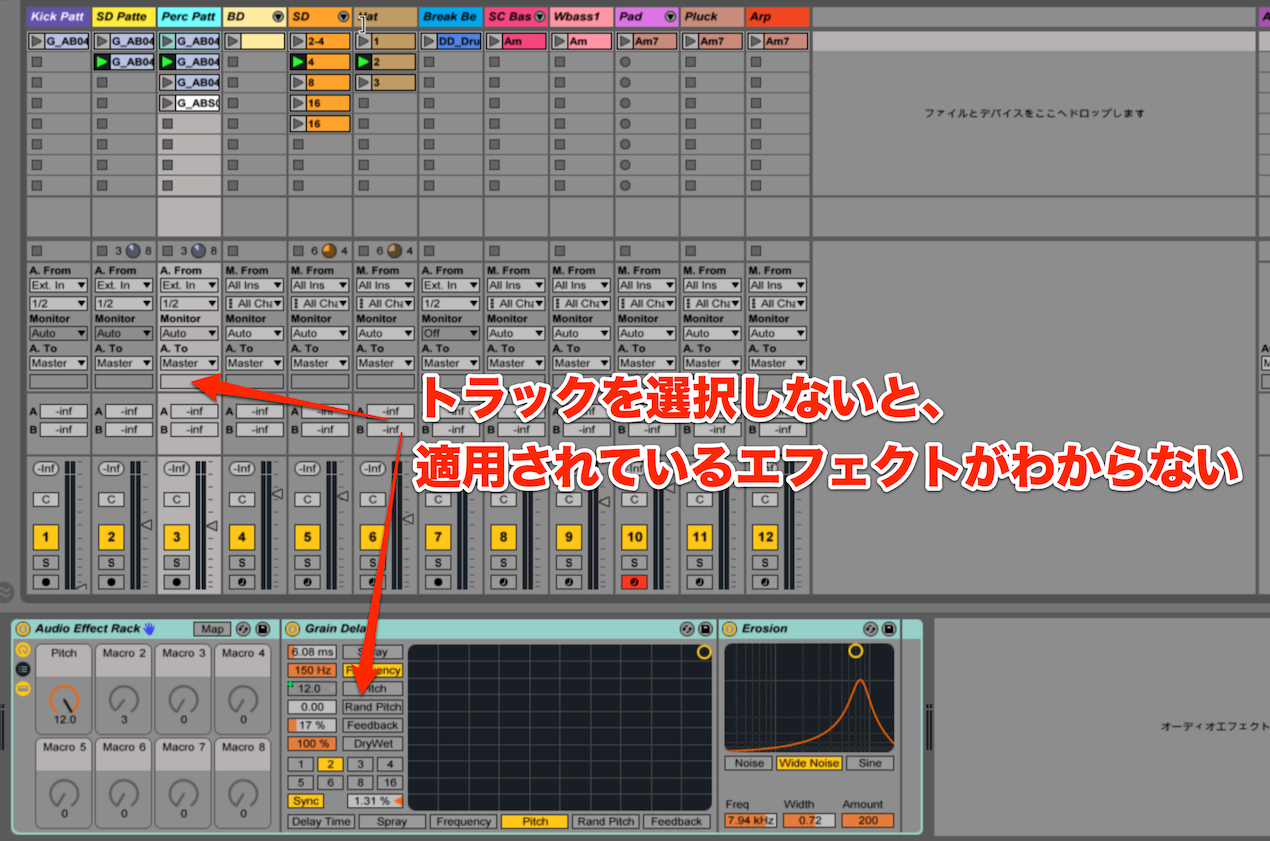
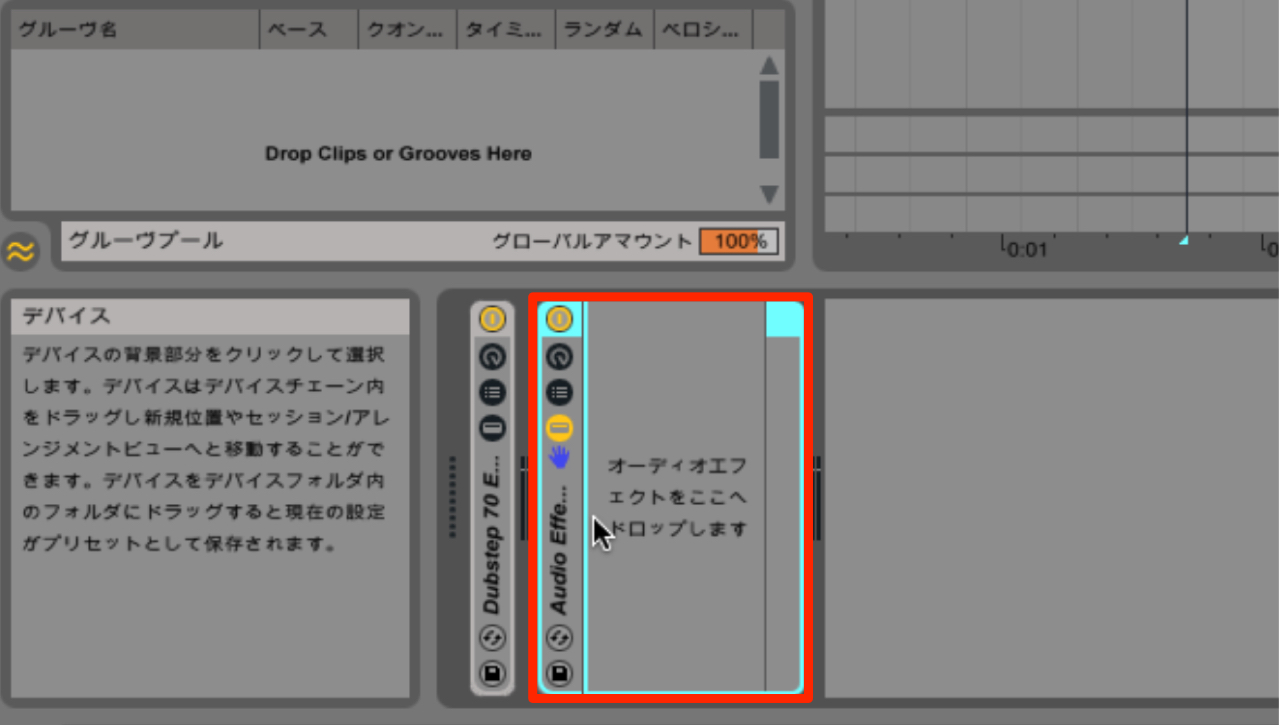
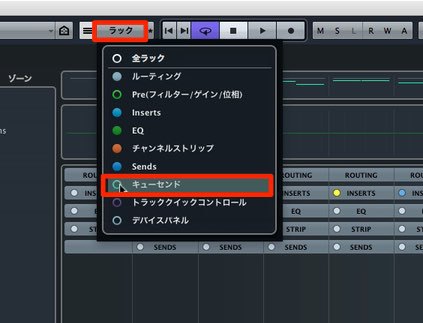
Next, configure separate outputs in your DAW and mix the tracks.
Separate Output Setup by DAW
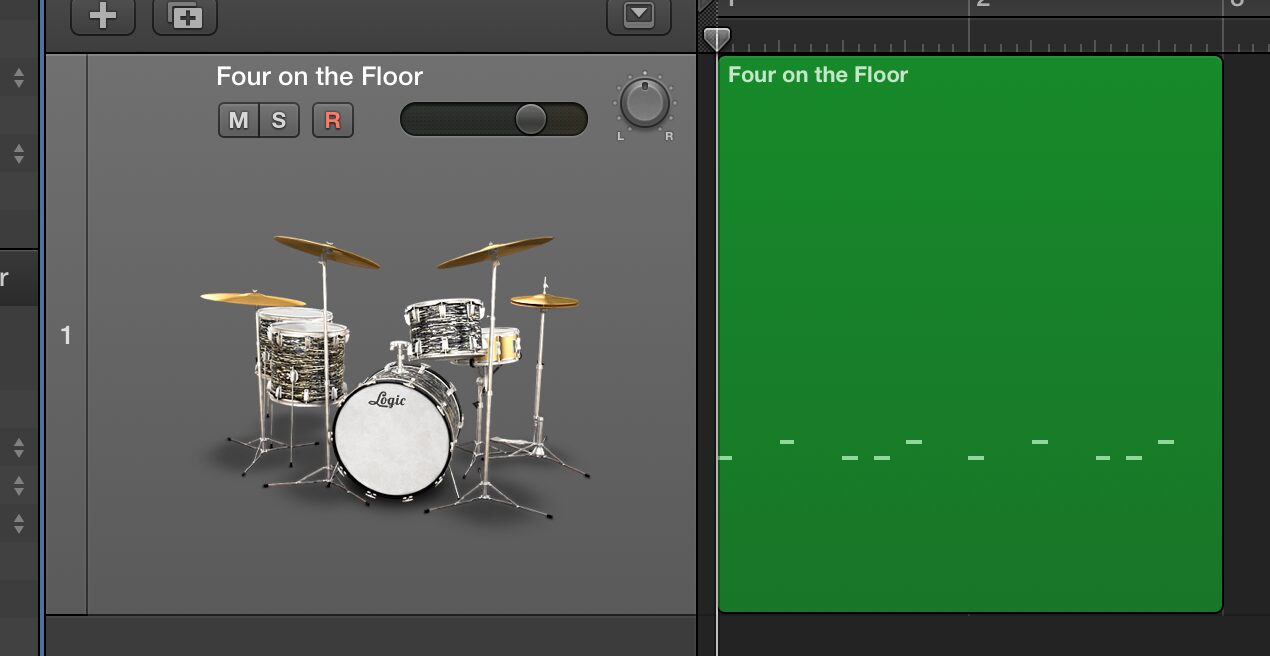
 Logic
 Cubase
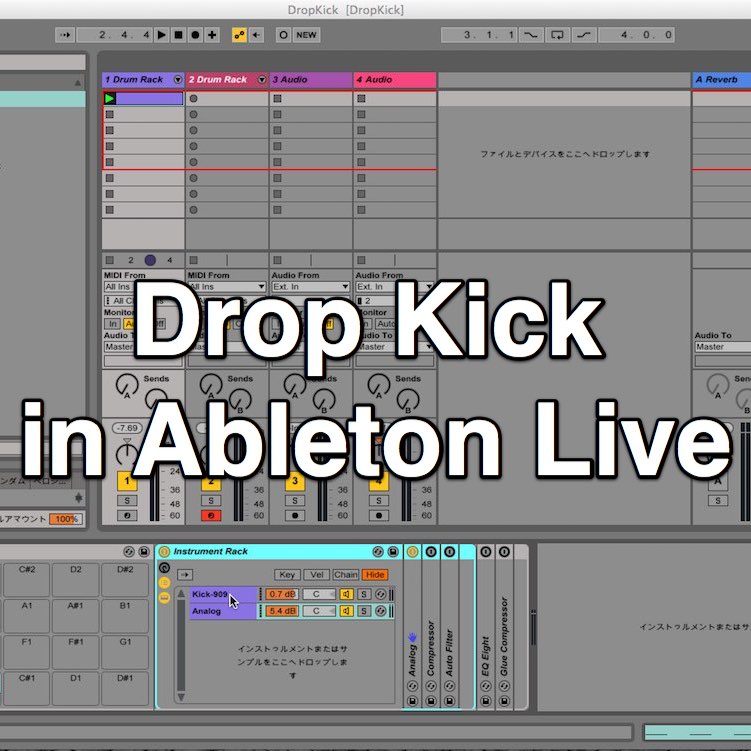
 Ableton Live
 Studio One
 FL Studio
Applying Effects
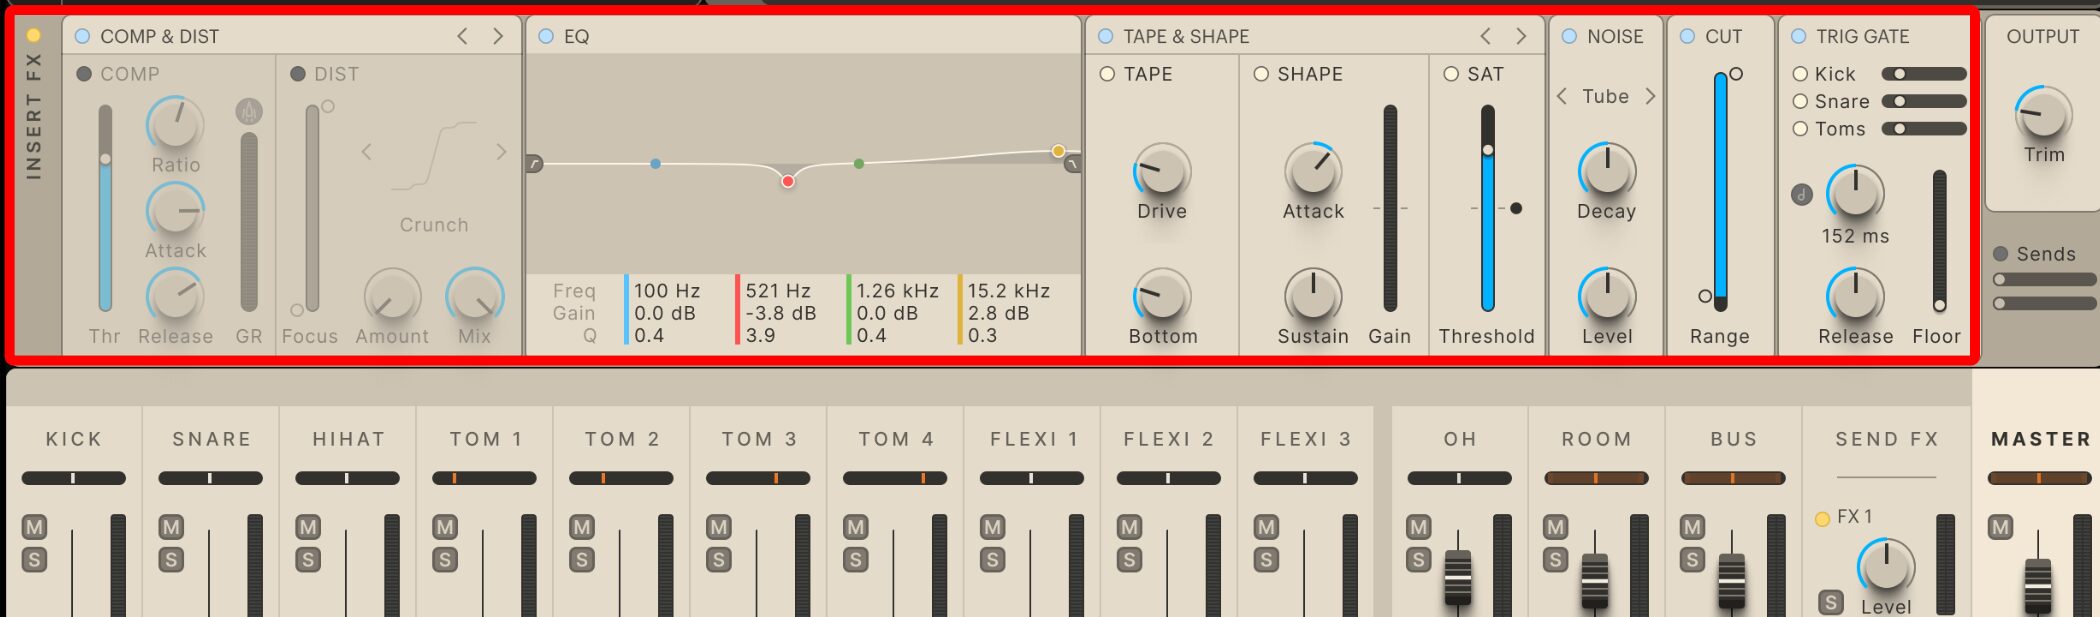
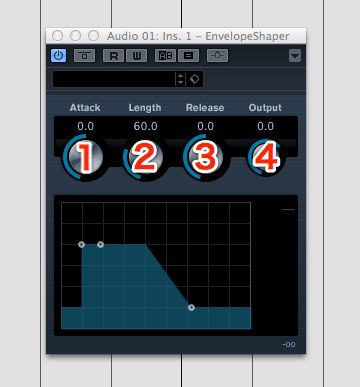
Apply effects to individual kit pieces or the master using INSERT FX in the EDIT screen. The following effects are available.
- Comp & Dist: Adds punch and distortion. Use the left/right arrows to switch to Tape & Shape.
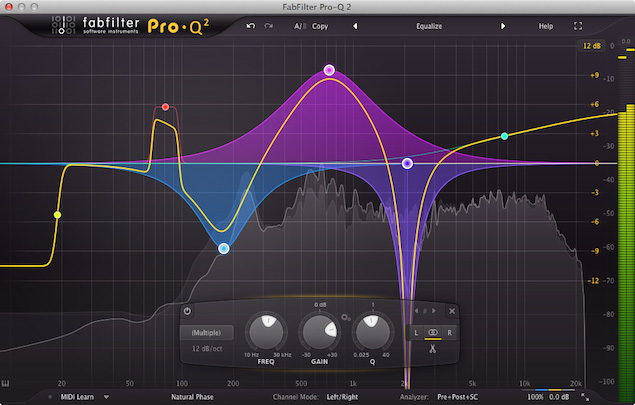
- EQ: Adjusts the frequency balance and cuts unwanted bands. The mono version has five bands and the stereo version four.
- Tape & Shape: Adds tape character and adjusts thickness and loudness. Use the left/right arrows to switch to Comp & Dist.
- Noise: Adds various types of noise.
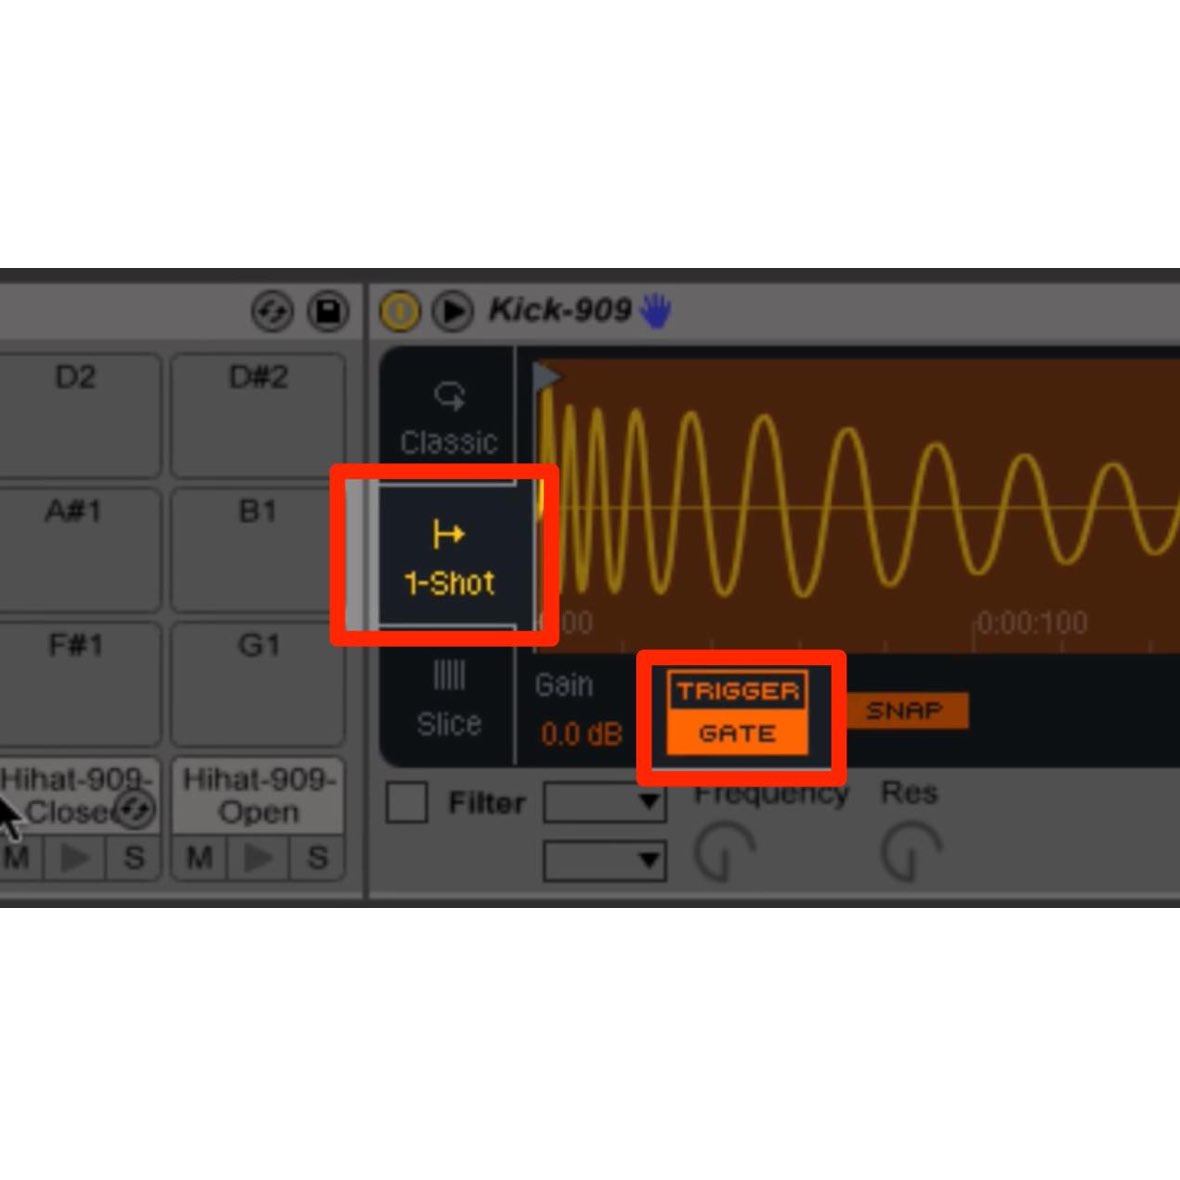
- Trig Gate: Uses MIDI notes as triggers to adjust the length and articulation of a sound in time with a kit-piece hit.
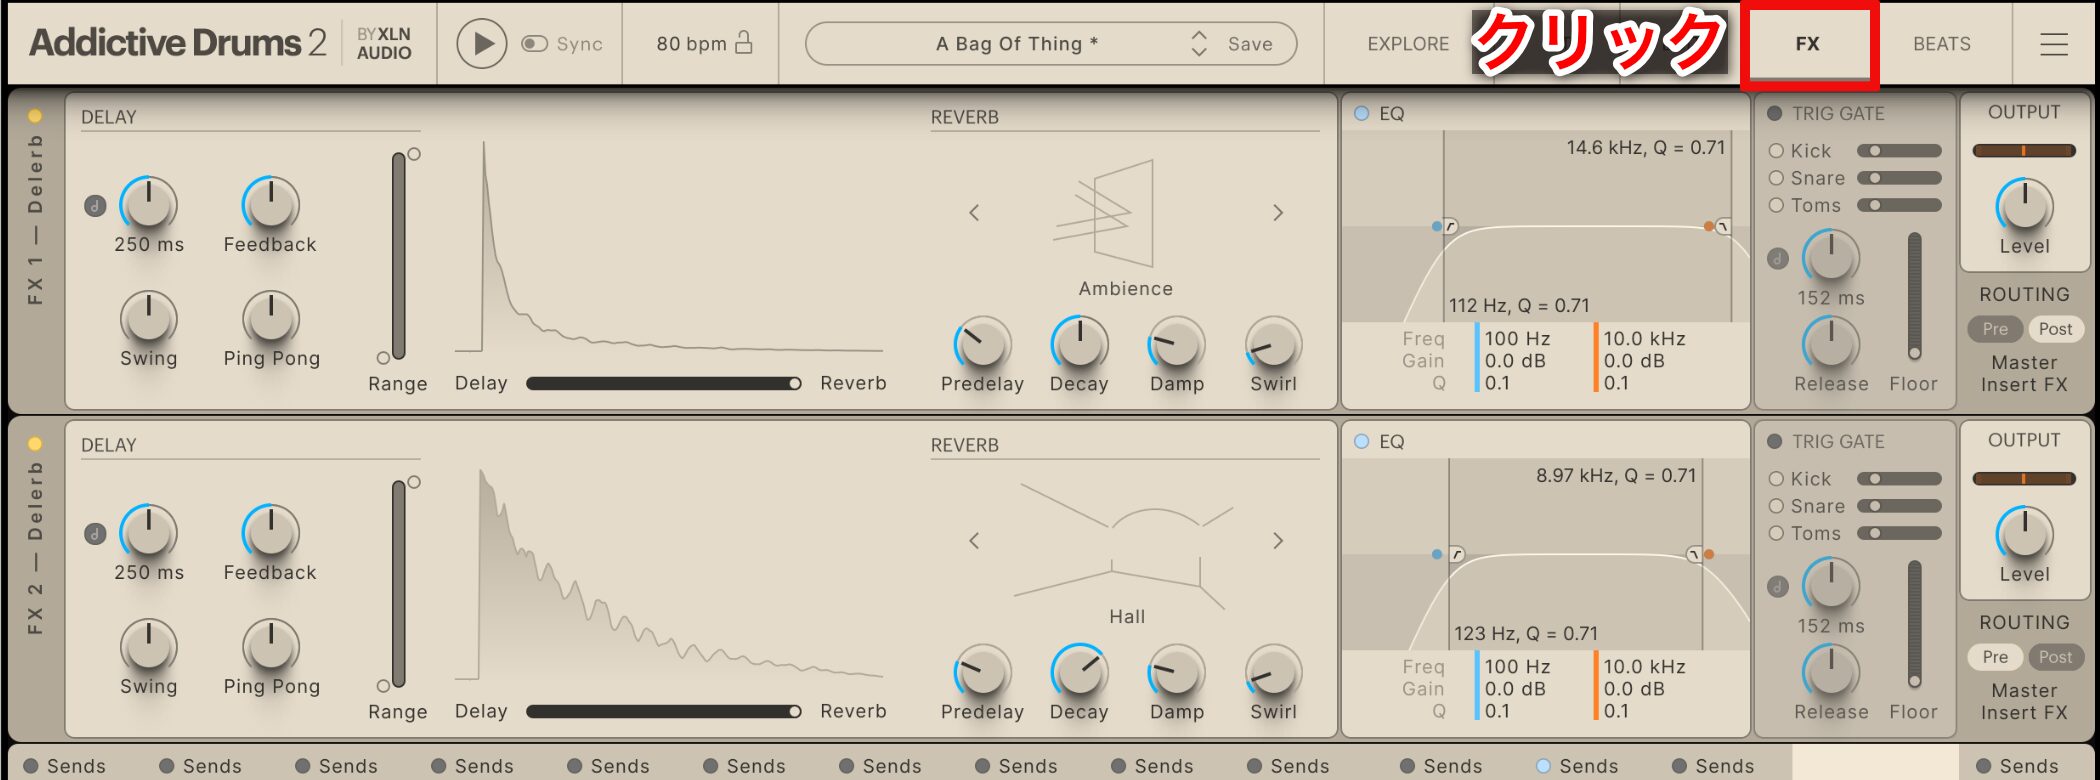
Set reverb and delay on the FX screen.
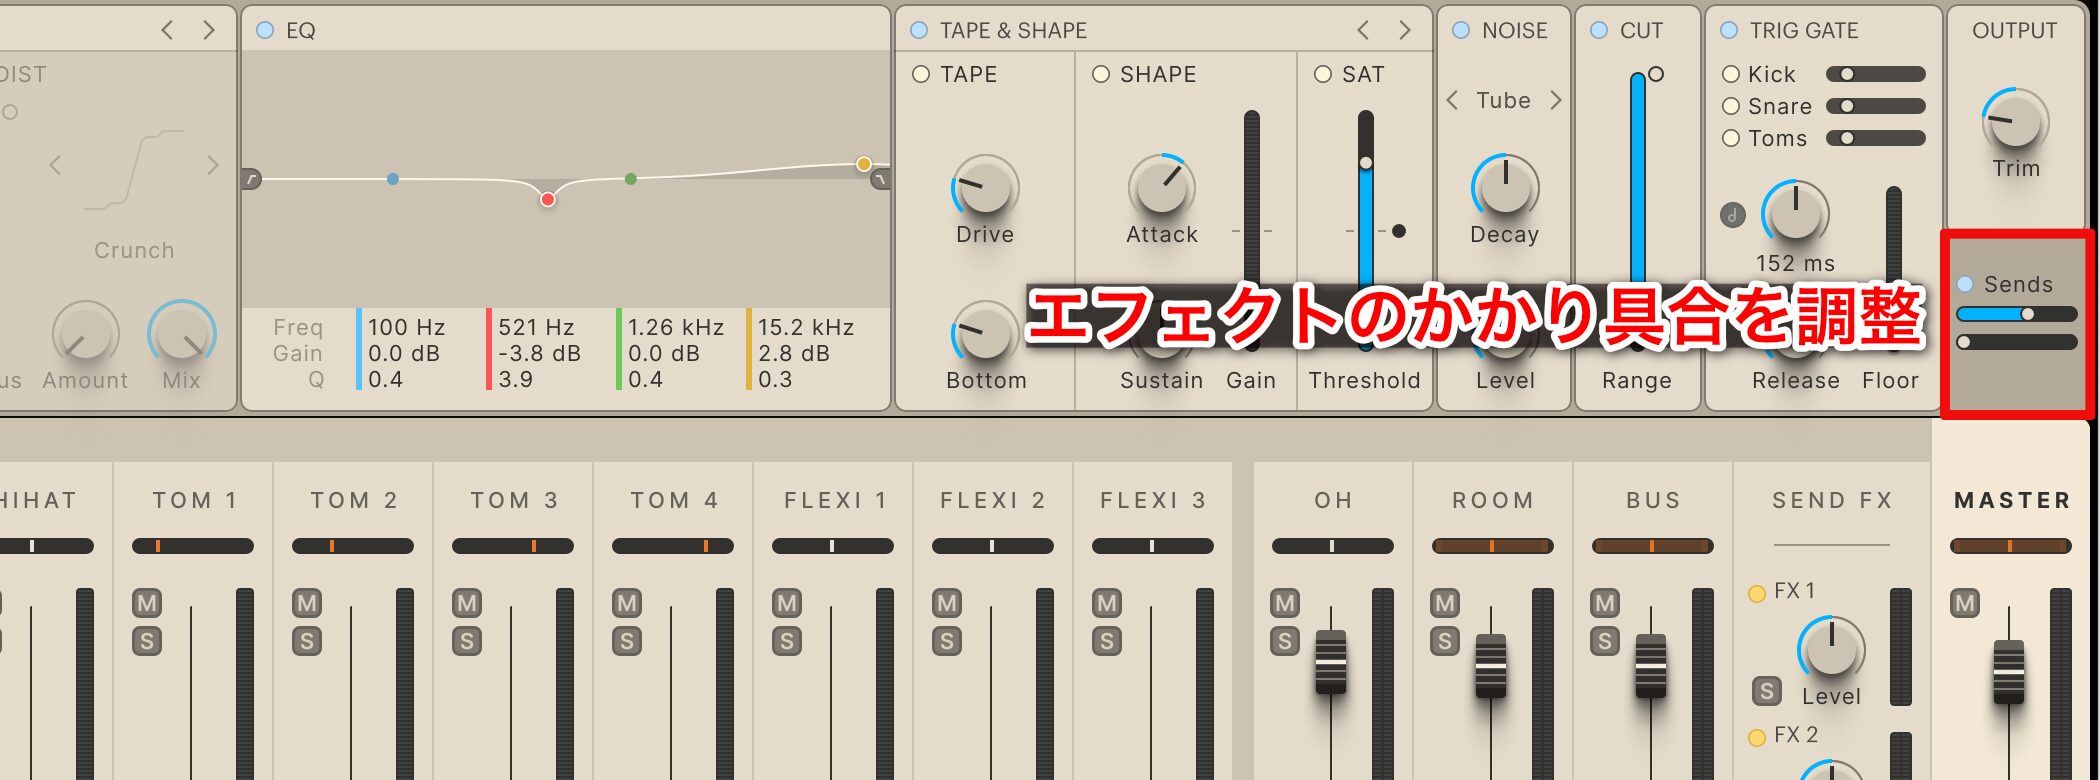
After setting the depth and other parameters to taste, return to EDIT and use each kit piece’s Sends to adjust the amount of effect.
This article explains how to shop there.
Frequently Asked Questions
Q1. How do I select presets in Addictive Drums 2?
Browse the list on the left when the instrument opens and click a play button to audition sounds. Click the preset name to open PRESET BROWSER and filter by genre or drum type.
Q2. Can I use presets from an ADpak I do not own?
Presets you do not own are marked with a headphone icon. You can audition them, but must purchase the ADpak to use them. Preview their sound and character before deciding.
Q3. Where are custom presets saved?
They are saved in USER PRESETS PLAYLIST and can be reused in other DAWs or songs. You can also rename or delete them from PRESET BROWSER.
Q4. Can I search for BEATS by tempo?
Yes. Use TEMPO at the top center of the BEATS screen to filter within ±10 or ±20 of the DAW tempo and find an appropriate pattern quickly.
Q5. Can beginners apply drum patterns easily?
Addictive Drums 2 includes many finished drum patterns. Beginners can load and apply them from the BEATS tab to program drums relatively easily.
NEW ARTICLES
Latest English Articles