ラウドネス・マッチ機能が便利!MetricAB 使い方② Playbackセクション
リファレンス楽曲の再生を効率的に行う

ミキシング・マスタリングの便利ツール「MetricAB」の解説第2回目となります。
ここではリファレンス楽曲の再生を最適化する「Playback」セクションを中心に進めていきます。
MetricAB 便利機能とアナライズセクション 動画解説


製品サイト : https://www.plugin-alliance.com/en/products/adptr_metricab.html
MetricABの再生設定
MetricABには便利な再生機能が多数搭載されています。
Loudness Match機能
作業中の楽曲とリファレンス音源の音量差が大きいと、音質の判断が行いづらくなってしまいます。
このような場合、自動的に音量を調整してくれる「Match機能」が便利です。
ミックス/マスタリング講座 Peak/RMS/Loudnessについて
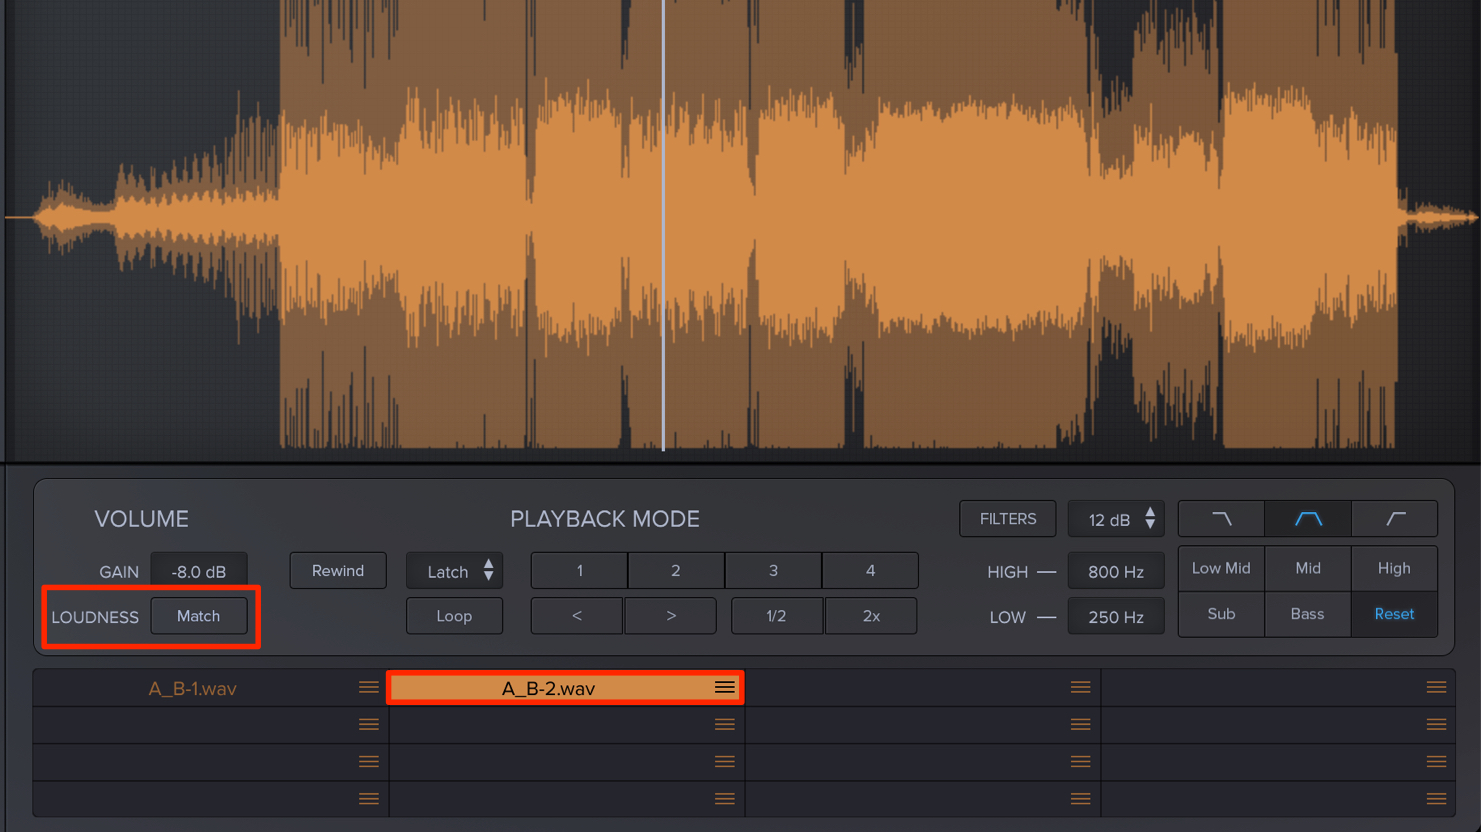
- 1_目的のリファレンス楽曲を選択して「Match」ボタンを押します。
- 2_「Match」ボタンが点滅しますので、このまま楽曲を再生します。
- 3_「Match」ボタンの点滅が止まったら設定が完了です。
現在、制作している楽曲に合わせてリファレンス音源のGainが調整されます。
Cue機能
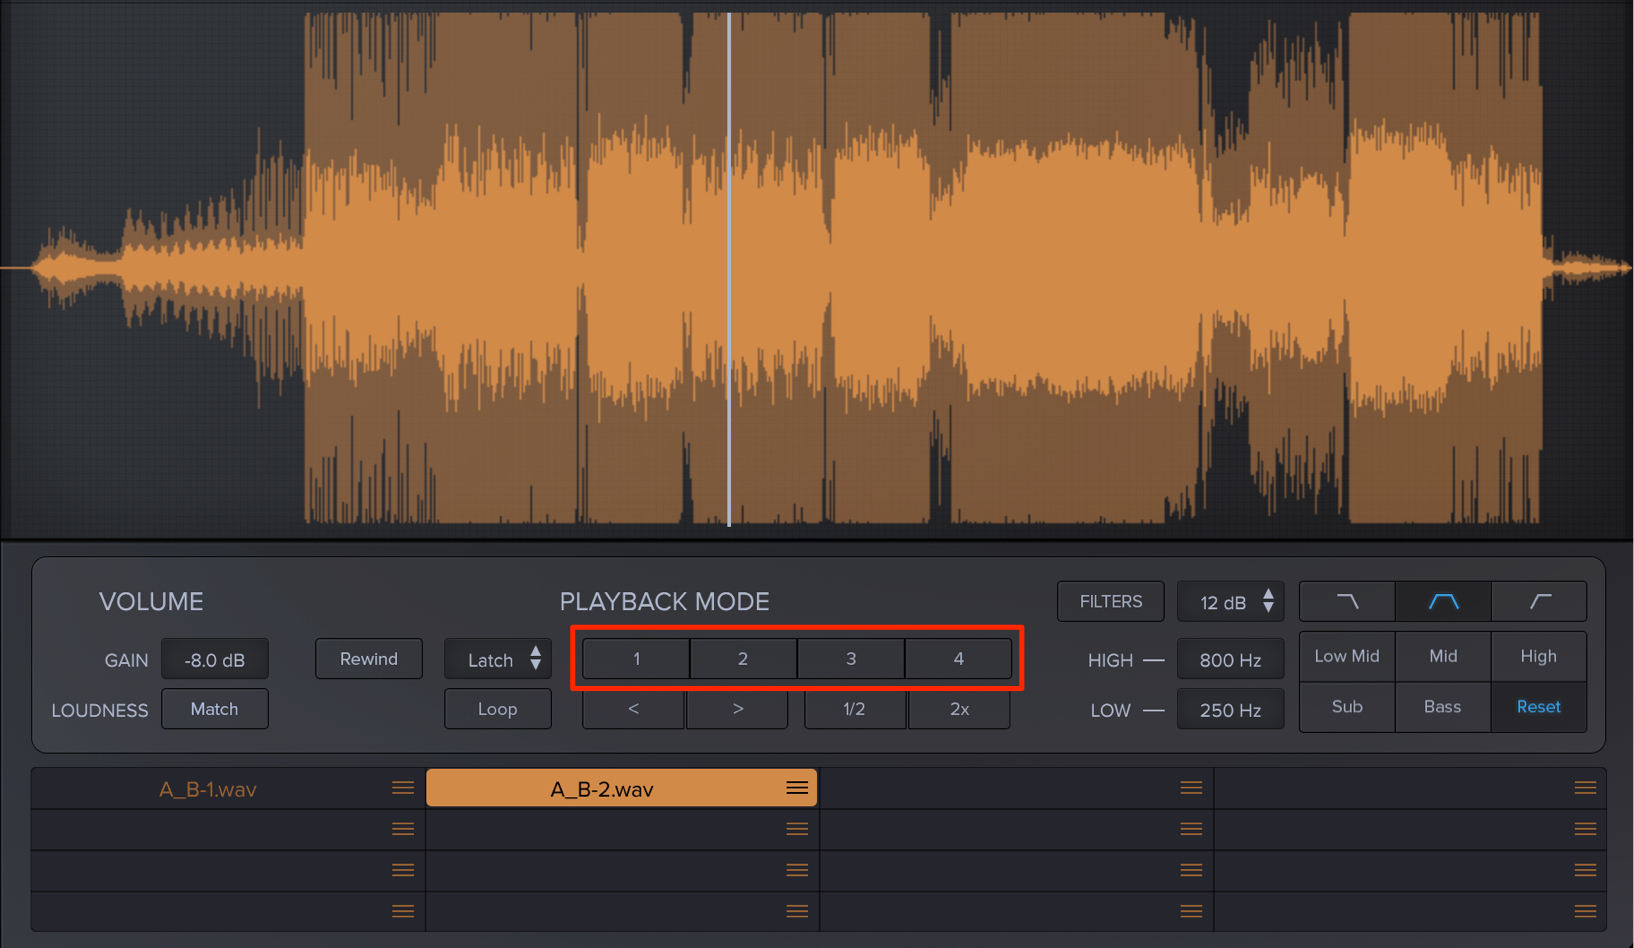
選択しているリファレンス楽曲に対して、最大で4つのCue(マーカー)ポイントを指定することができます。
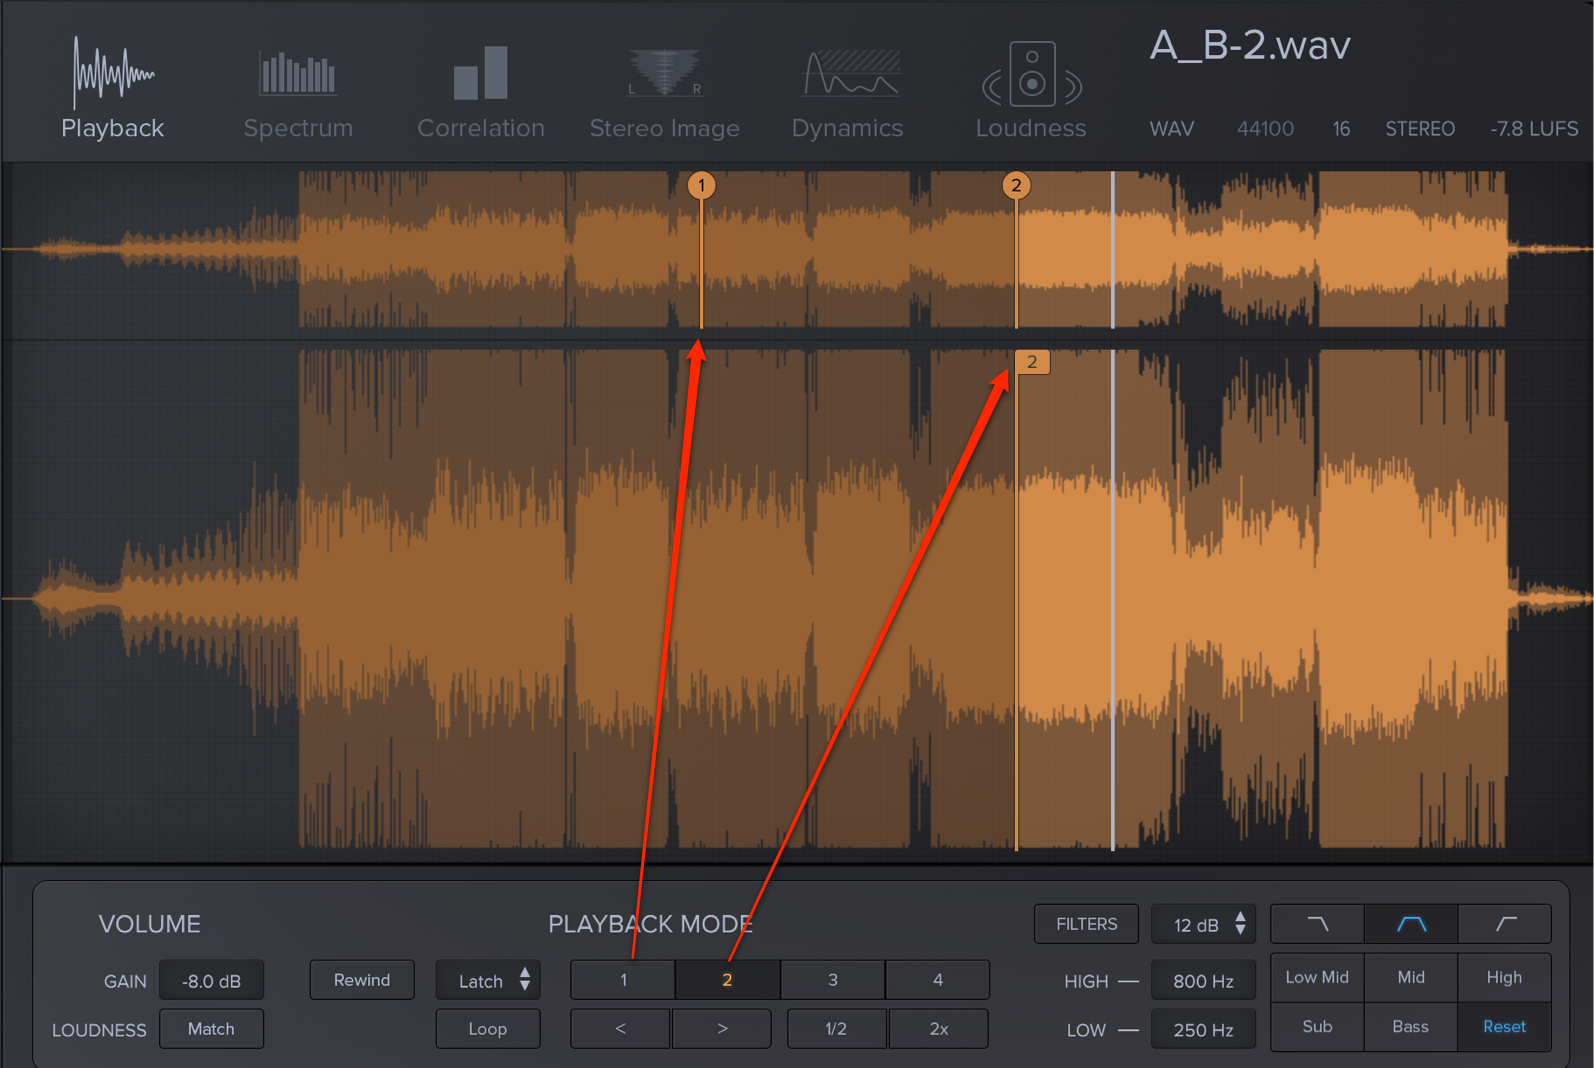
再生カーソルに合わせて「1〜4」のCueボタンを押すだけです。
Cueの登録後、目的のCueボタンを押すとサウンドが再生されるスタート位置を瞬時に移動することができます。
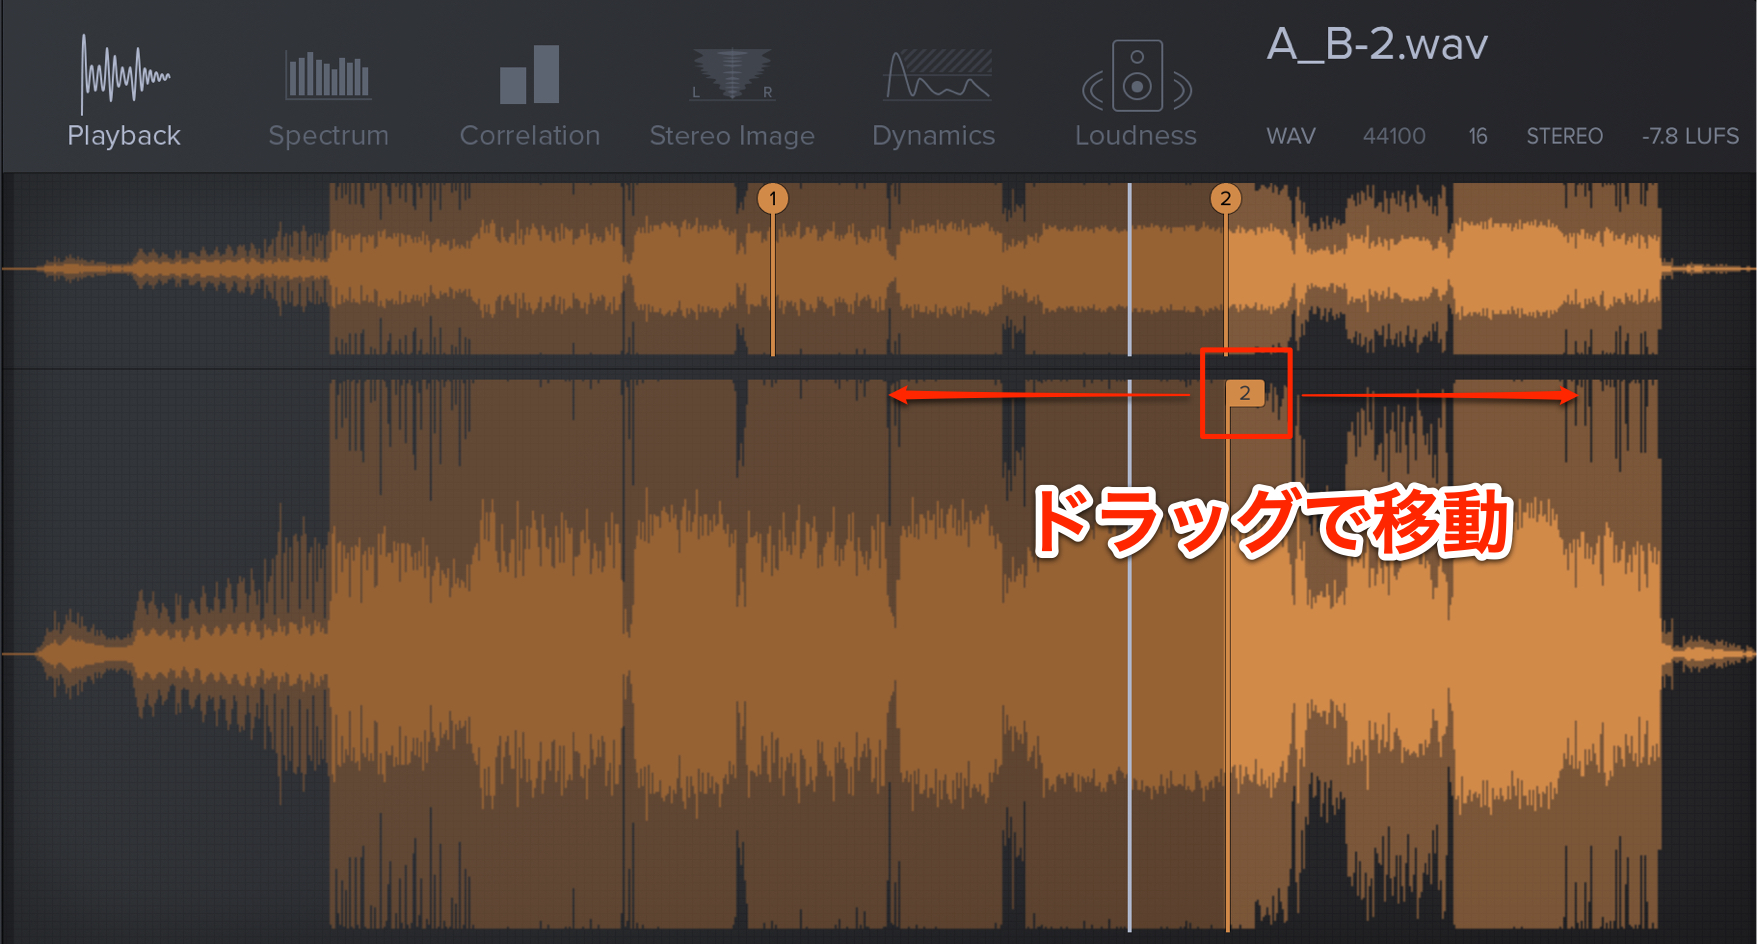
このCueポイントはドラッグで再指定が可能です。
Cueを削除することもでき、
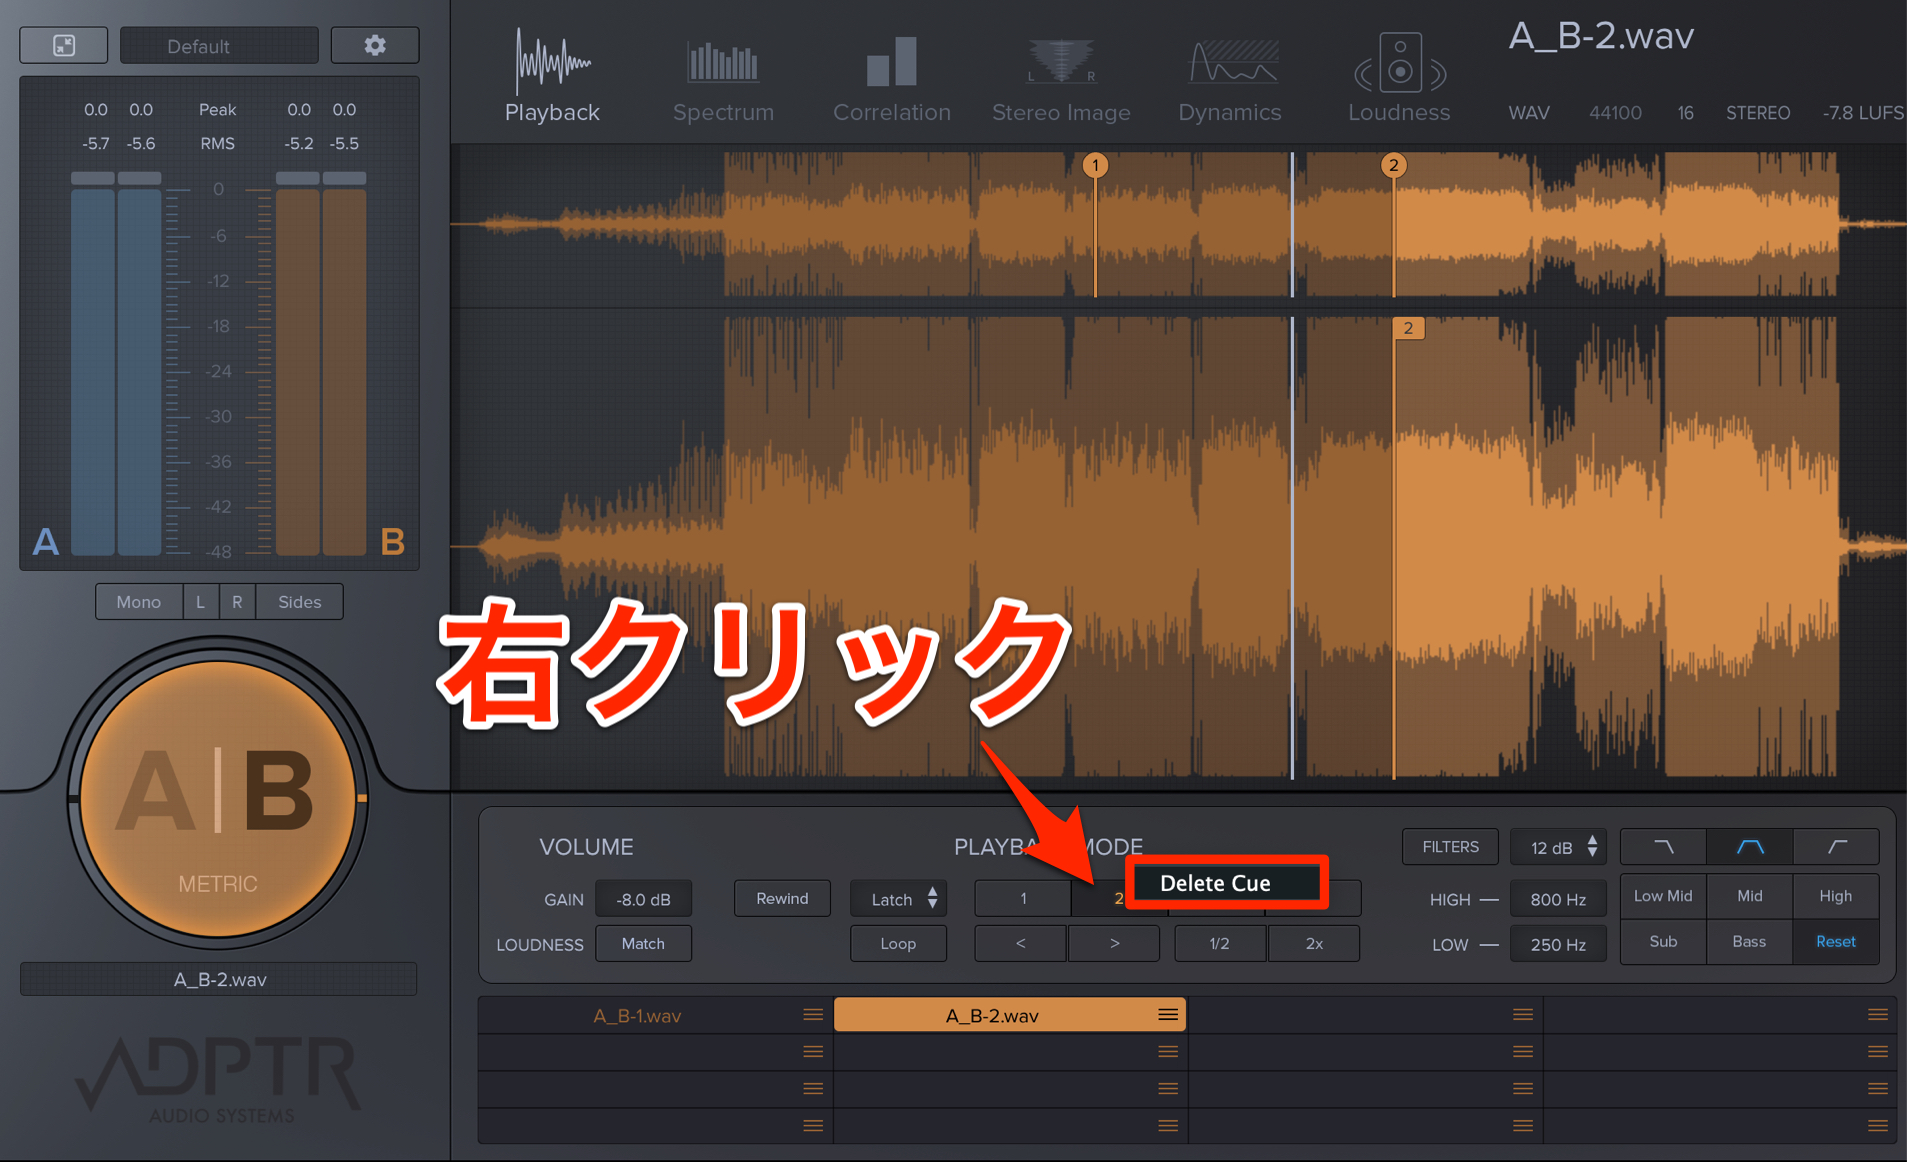
目的のCueを右クリックして表示される「Delete Cue」を選択します。
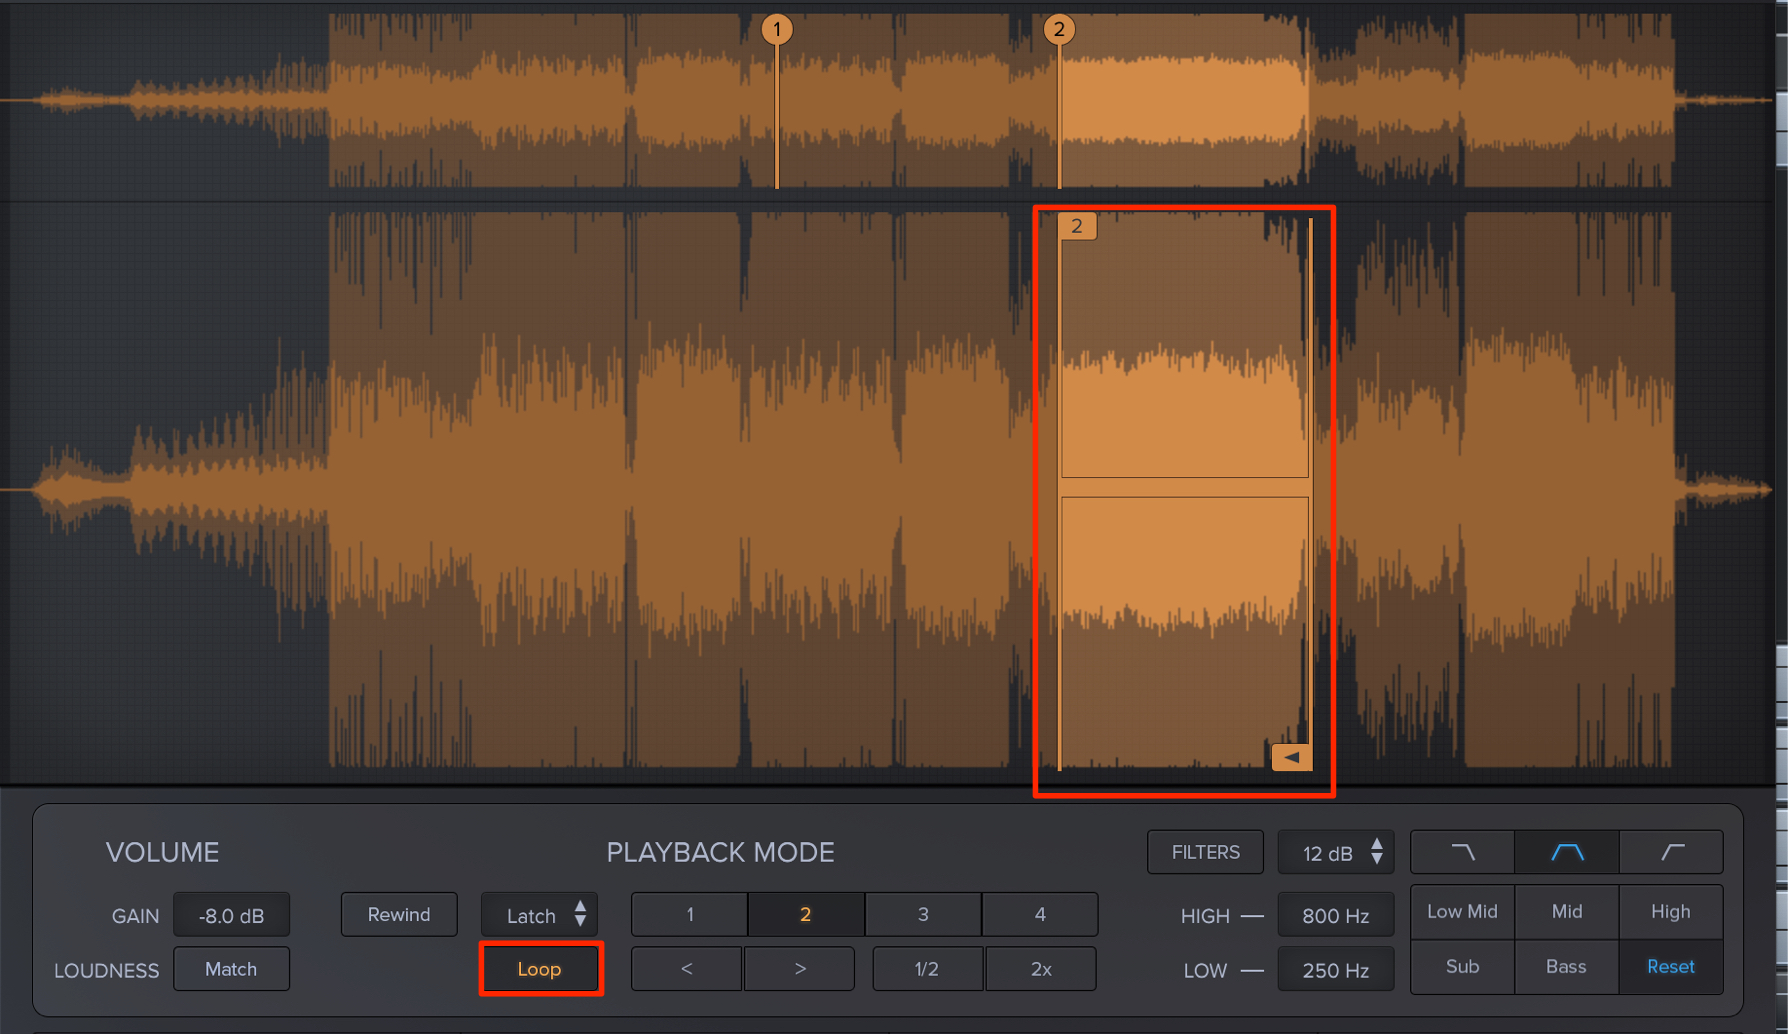
「Loop」ボタンを押すことで、特定の箇所を繰り返し再生することも可能です。
リファレンス音源を部分的に使用したいという際に便利です。
また、このLoopは各4つのCueに対して個別の範囲に設定可能です。
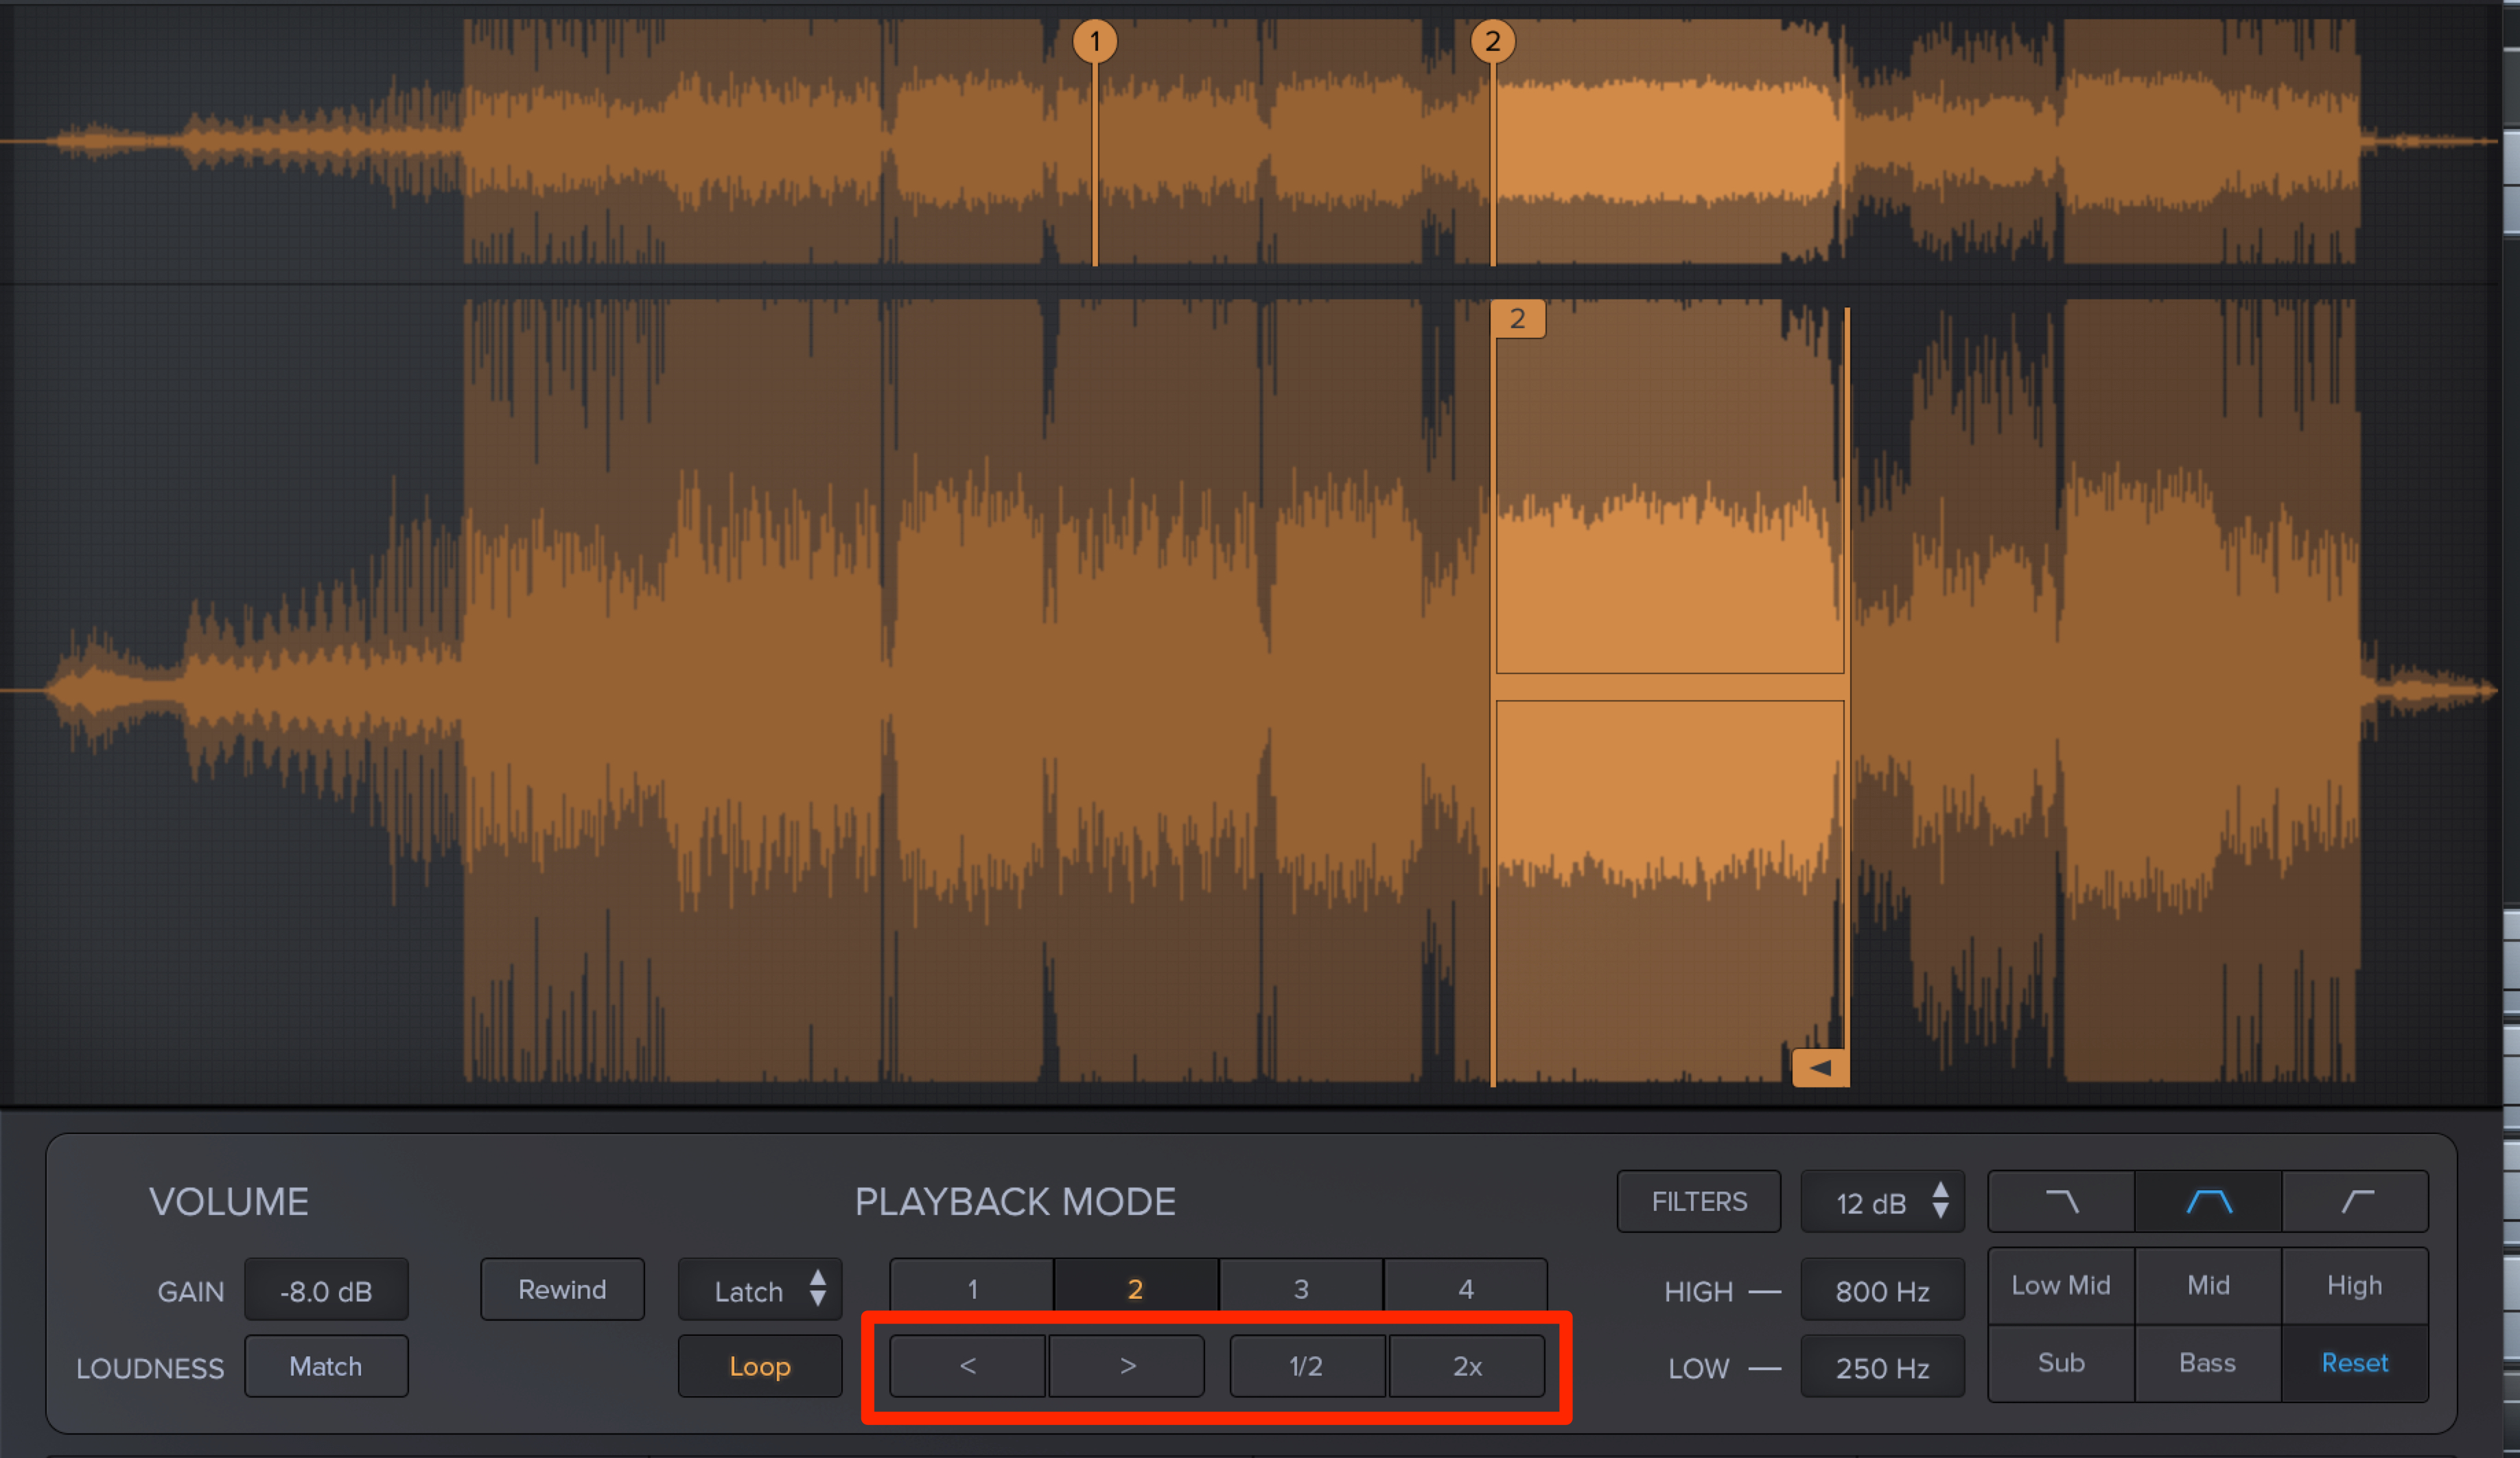
Loop範囲はドラッグを行い変更することもできますが、Loopボタンの右に配置されているボタンから、Cueの移動、範囲の縮小/拡大を設定することも可能です。
Filter機能
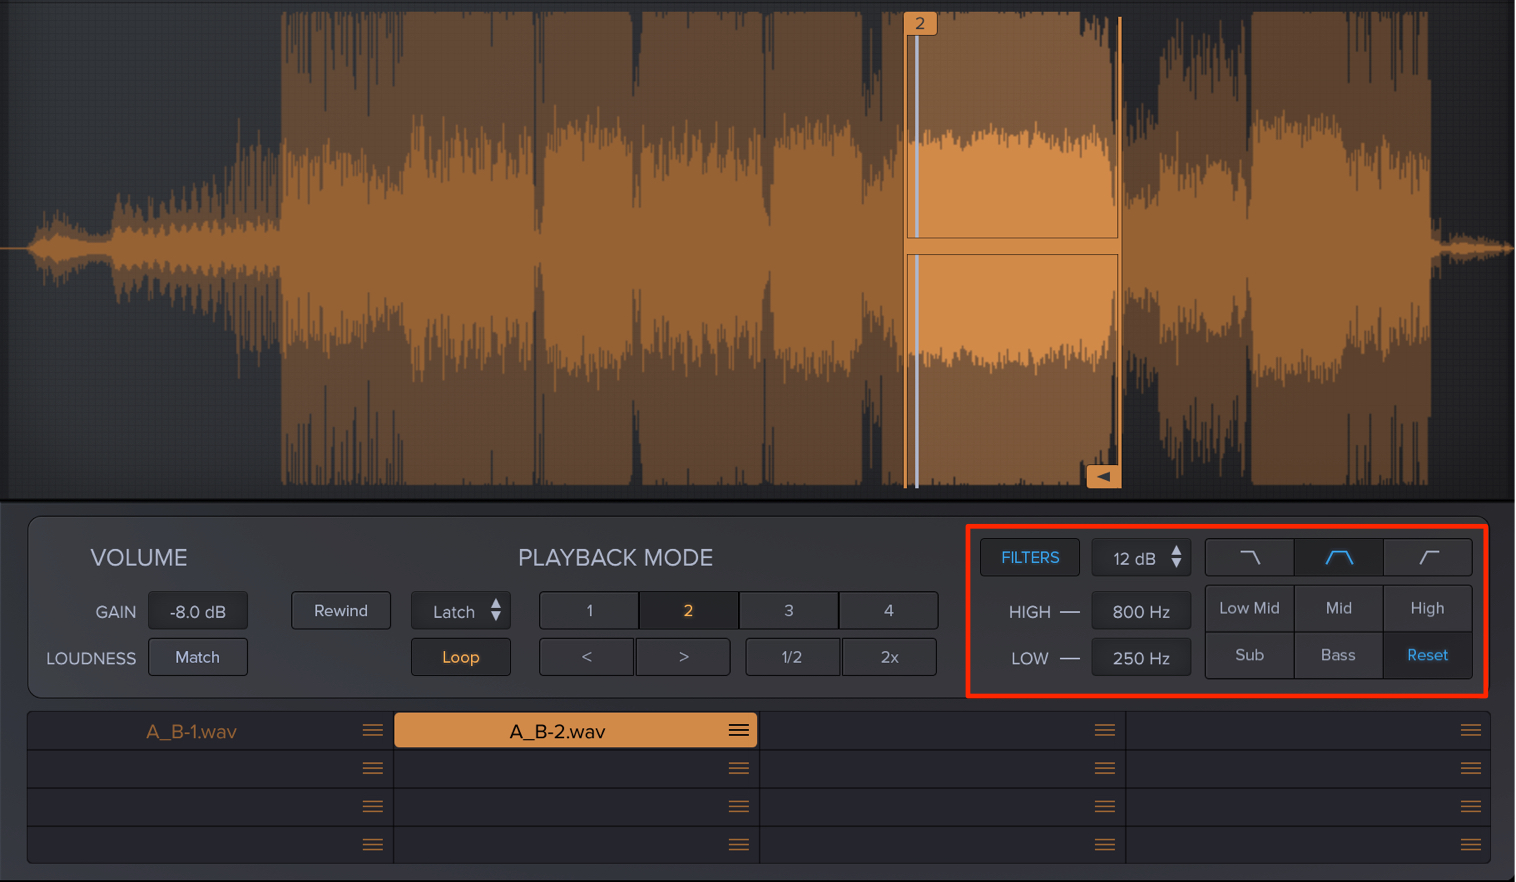
「Filter」機能を使用することで、特定の周波数をカット(目的の周波数のみ)してサウンドを視聴することができます。
このFilter機能は、作業している楽曲/全リファレンス音源に対し同時に適用されます。
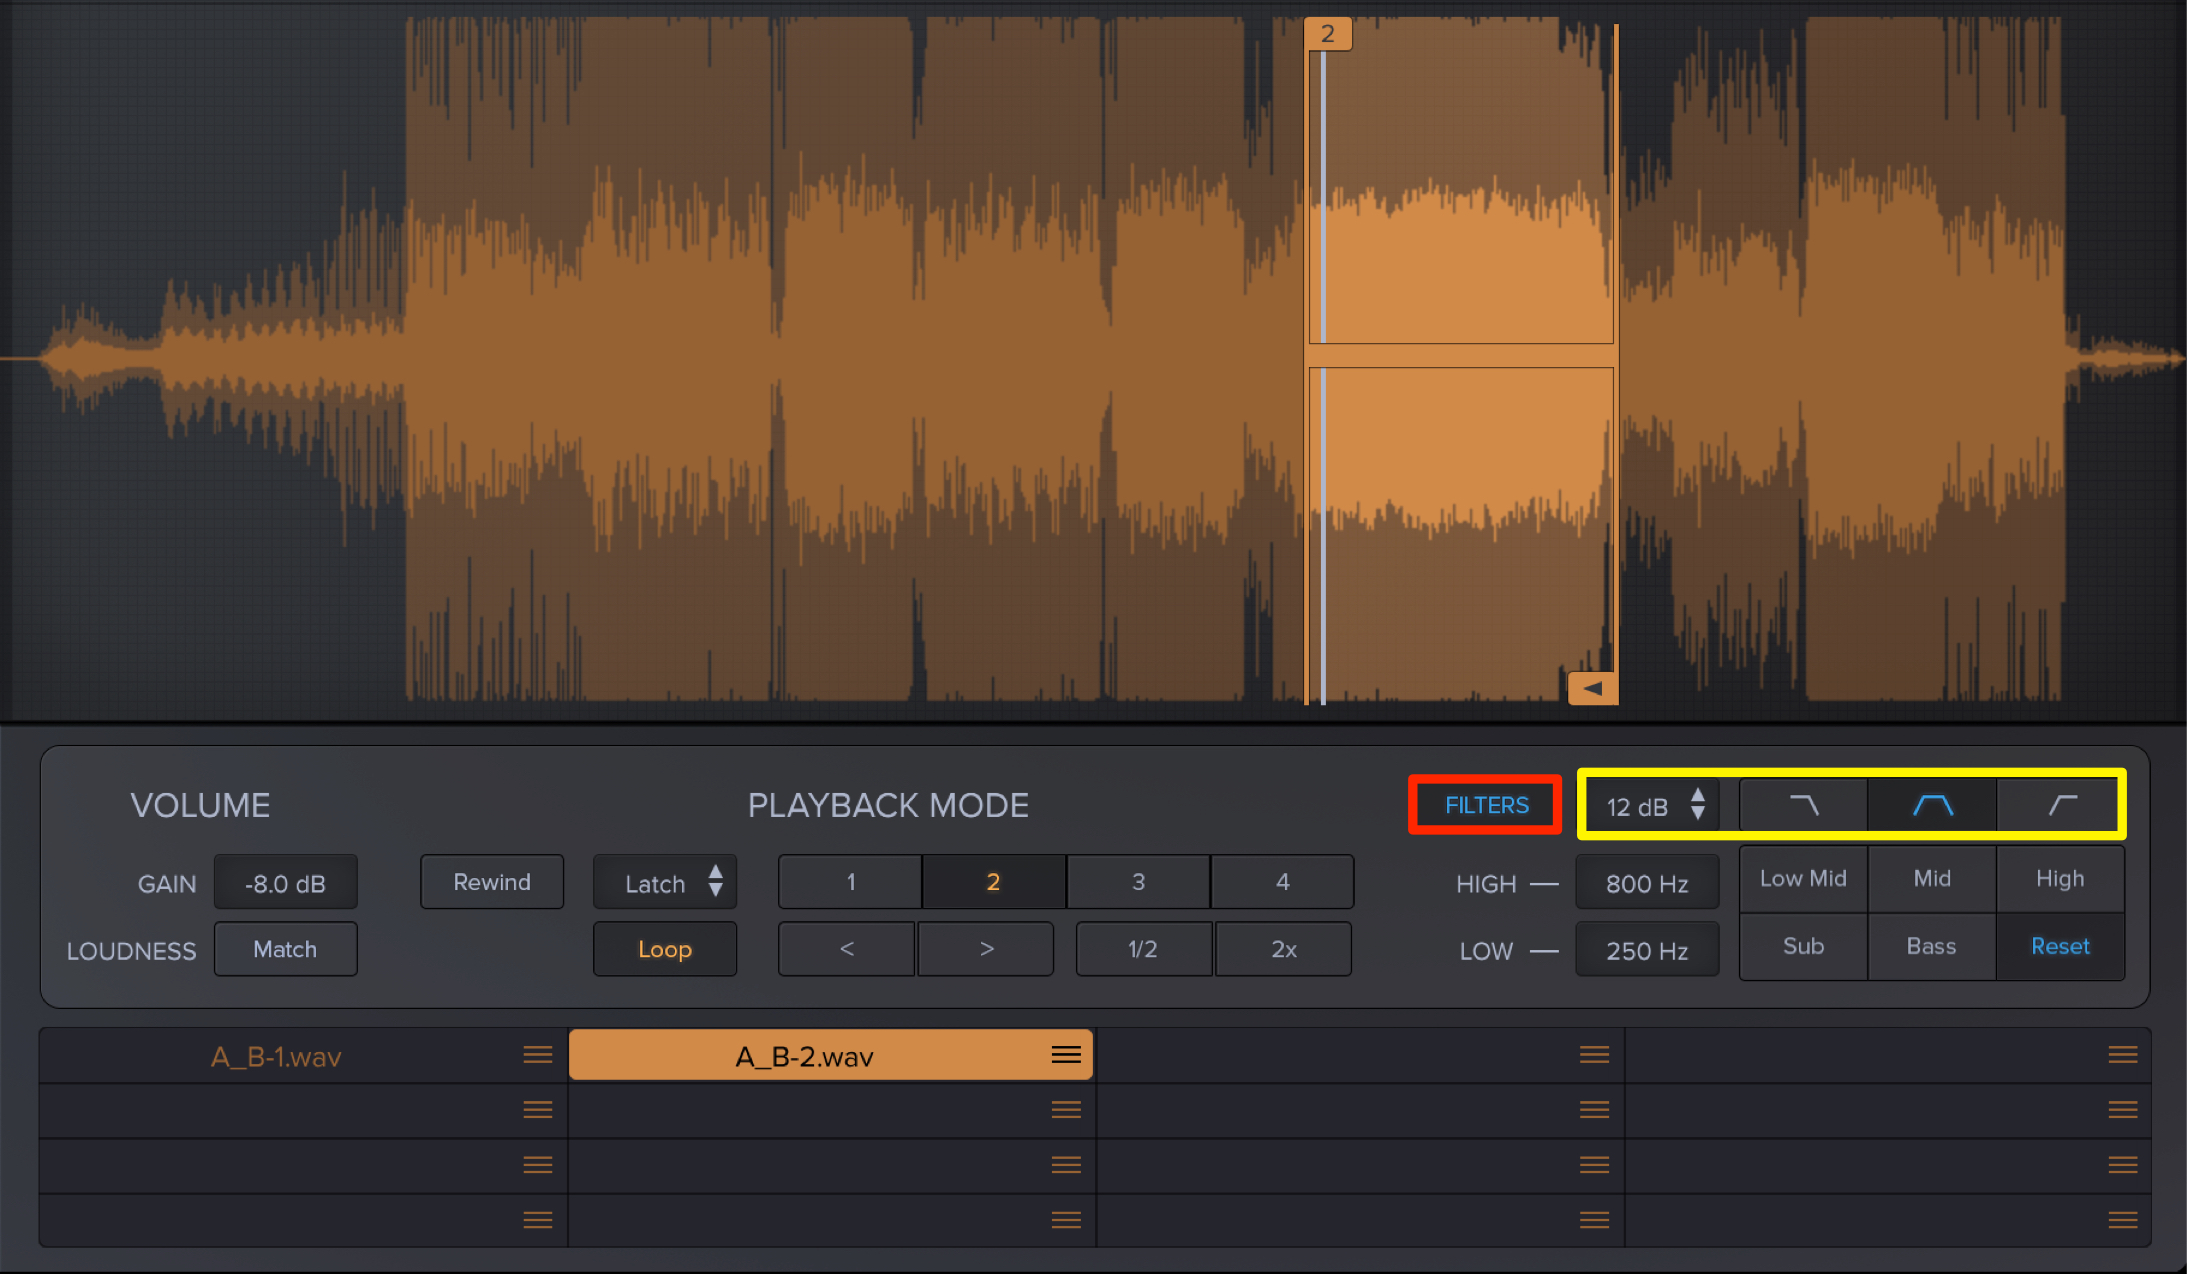
「FILTERS」ボタンをクリックして有効(点灯)にします。
左から下記のような特性があります。
- SLOPE : 12db/24dbから選択します。値が高い方がフィルター効き(カット量)が強くなります
- LOPASS : 高域をカットするフィルタータイプで、低域が残ります
- BANDPASS : 高域と低域をカットするフィルタータイプで中域が残ります
- HIPASS : 低域をカットするフィルタータイプで、高域が残ります
これらと併せてフィルターの帯域設定を行うことができます。
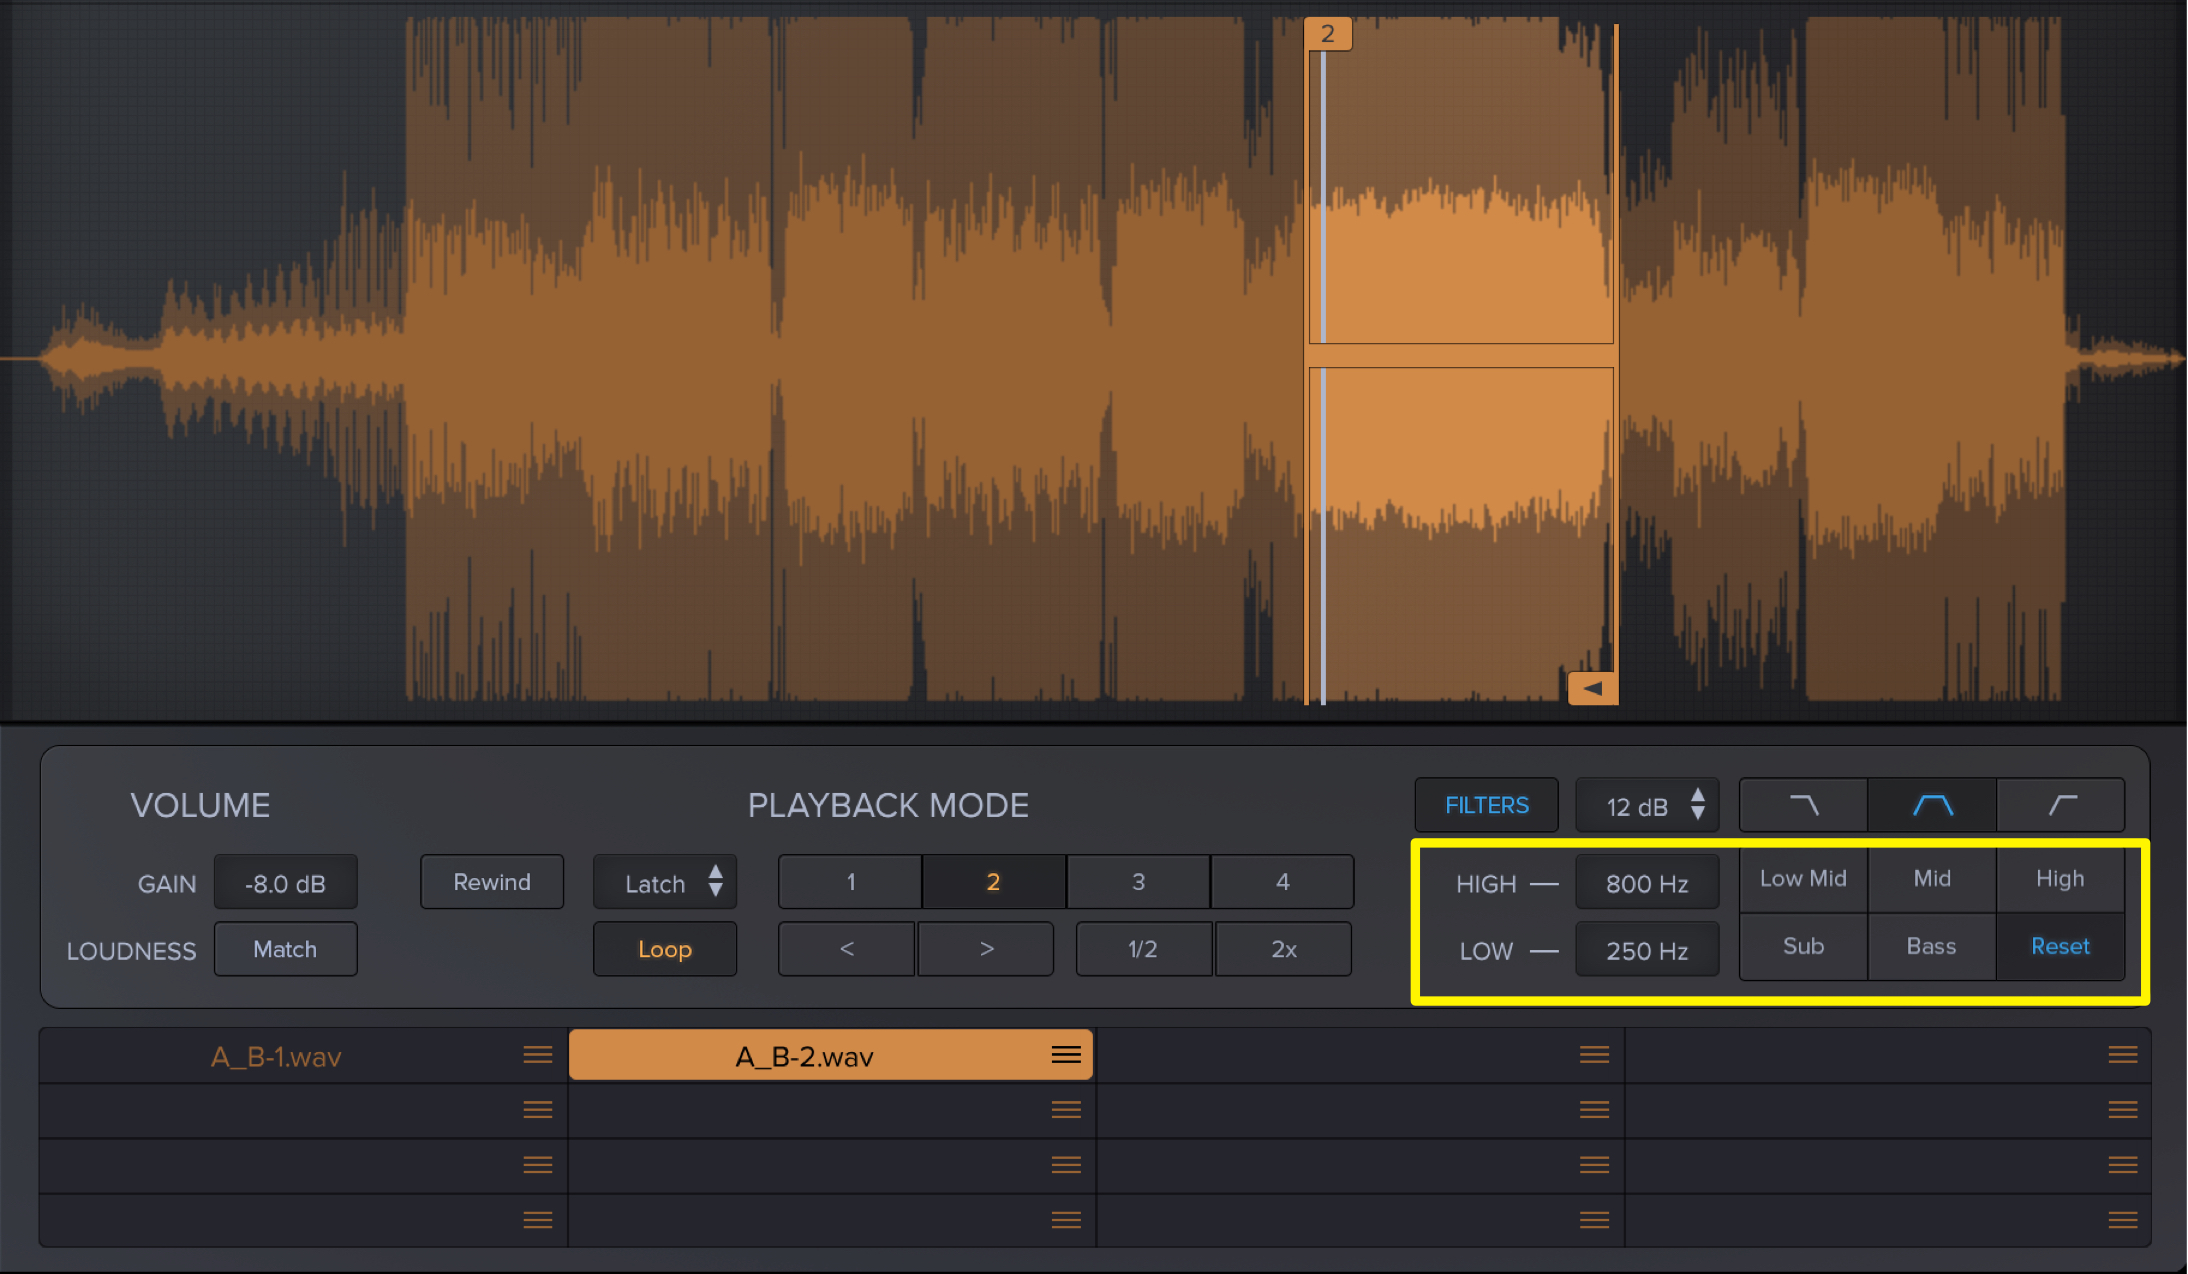
左の「HIGH-LOW」から帯域を指定でき、右のボタンからはこの帯域のプリセットを呼び出せます。
右下に設置されている「Reset」をクリックすると、Filter設定が全て初期値に戻ります。
いかがでしたでしょうか?
製品を快適に使用できるよう、多くの工夫が施されていますね。
正に痒いところに手が届く、モニタリング支援ソフトと言えるのではないでしょうか?
アレンジ段階での楽器やサンプル選択という際にも活躍するプラグインです。
是非お試しください!
製品サイト : https://www.plugin-alliance.com/en/products/adptr_metricab.html
ラウドネス・マッチ機能が便利‼️MetricAB 使い方 2.Playbackセクション
作業中の楽曲とリファレンス音源の音量差が大きいと、音質の判断が難しくなってしまいます😟
このような場合、音量を自動的に調整してくれるLoudness「Match機能」が非常に便利です👌詳細はコチラ:https://t.co/Pp7aew3mcP pic.twitter.com/S0qcWHmjhZ
— SLEEP FREAKS (@SLEEPFREAKS_DTM) 2019年2月17日