Although Logic Pro X 10.3 is a minor update, it stands out for its richer editing features and greatly improved user interface. It includes many features that can greatly speed up production work, such as applying fades to multiple regions at once, rendering audio effects and efficient region management with track alternatives. Mixing freedom is also improved, with buses expanded to 256 and side-chain inputs now supporting software instrument tracks, and because it is a free update available to all users, it is an essential update for Logic X users.
Packed with attractive features you would not expect from a minor update!

Apple has released Logic Pro X 10.3.
Centered on editing features, it offers many handy items that are immediately useful.
The user interface has also been changed significantly, so it is an excellent update that promises improved usability.
Here we carefully select and explain our recommended new features.
If you use Logic X, this update is free.
Logic Pro 10.3 new features explained 1
Selected Questions and Answers from the YouTube Video

Does it have a rhythm correction function?

For MIDI, see the following. https://www.youtube.com/watch?v=c96WKWViUek For audio, you can quantize with the Flex function. https://sleepfreaks-dtm.com/for-advance-logic/audio-to-tempo/
I'm using Logic Pro X 10.3.1, but there's no Track Alternatives item in Configure Track Header. Is it a bug?
Please check the item shown in the image in the preferences. It should then become available. http://d.pr/i/n9W0V/2vpGQ1tF
Is it free?
If you own Logic X, you can update to this version for free.
Logic Pro 10.3 new features explained 2

Interface changes
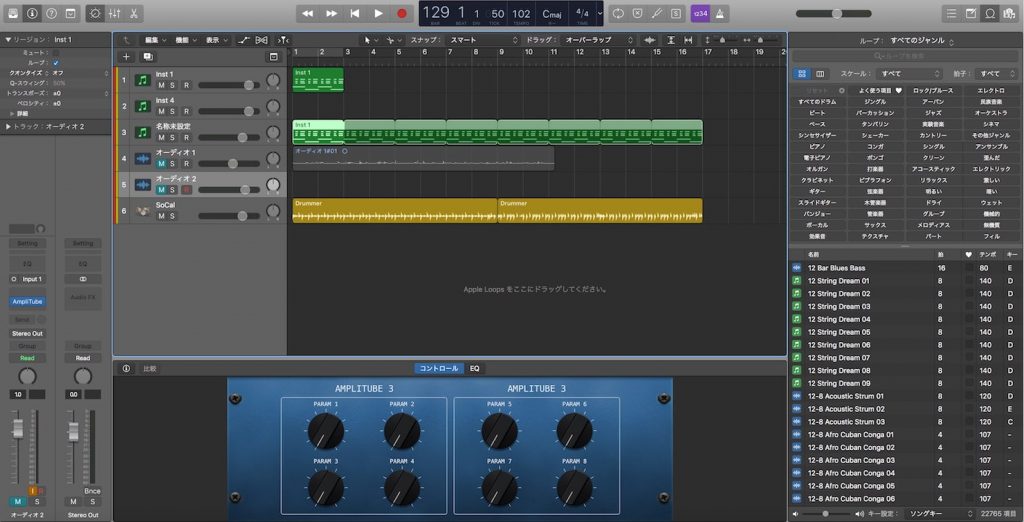
Many design changes have been made to buttons, text, track icons and so on, making the interface very easy to read.
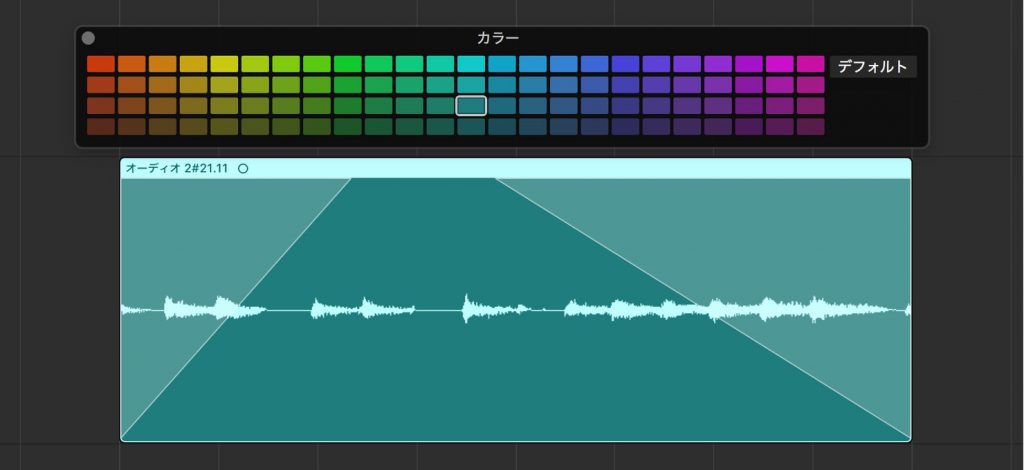
More track and region colors have also been added.
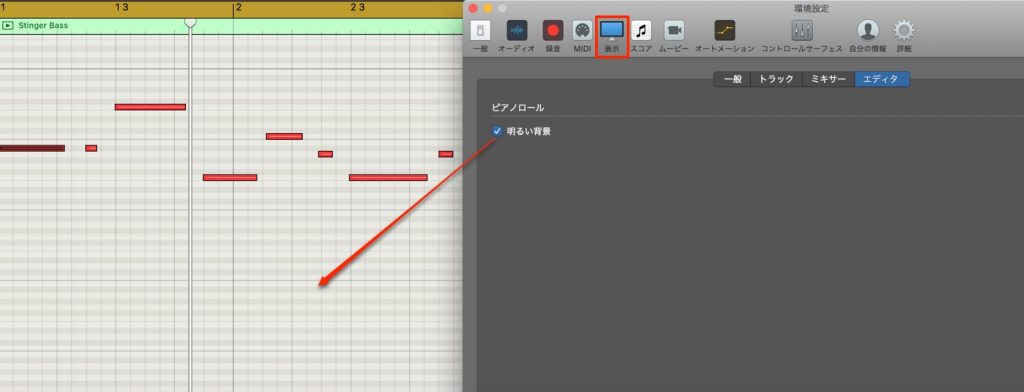
This is not a new feature, but you can change Logic's appearance and colors from "Display" in the preferences.
Customize it to your liking.
Auto horizontal zoom added
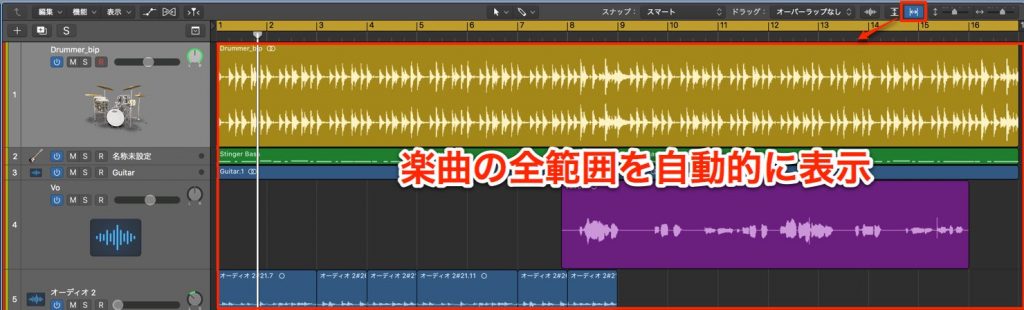
When you light up the zoom icon at the top right of the project, the zoom is automatically adjusted so the whole song fits on the screen.
If you use this operation often, it is convenient to assign a shortcut to it.
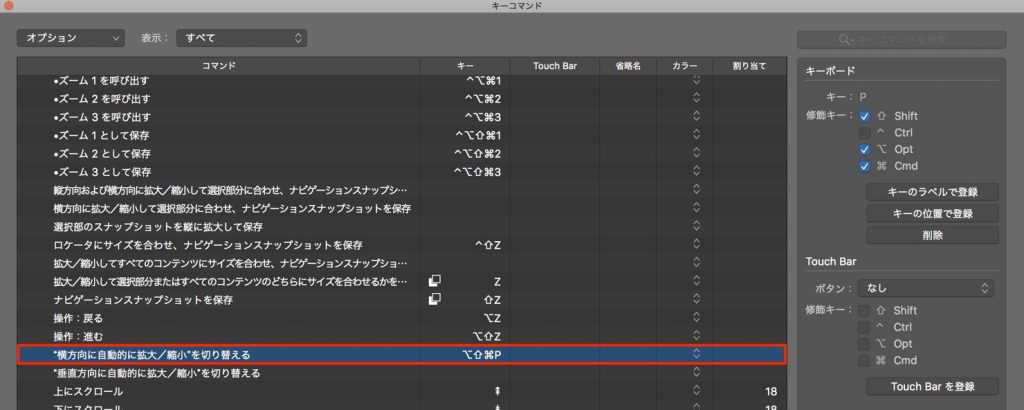
Assign a key command to Toggle "Auto Zoom Horizontally".
Fades can now be applied to multiple regions
You can now apply fades to multiple audio regions at the same time.

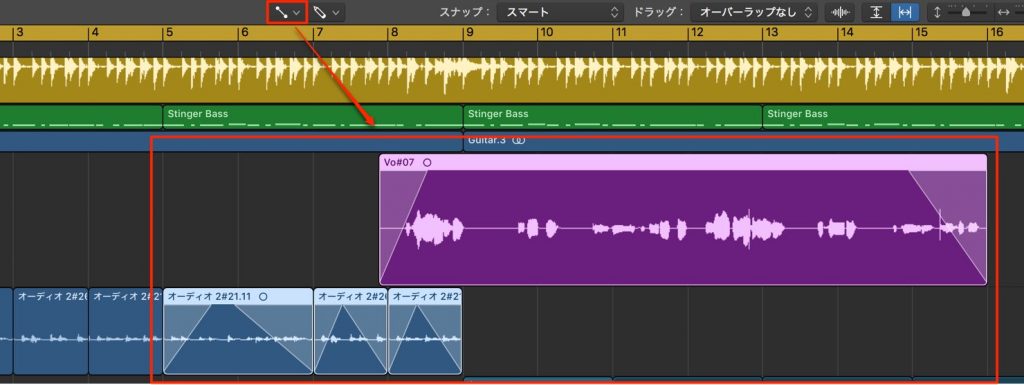
Select multiple audio regions and apply a fade to one of them.
The same fade is then applied to all the selected regions.
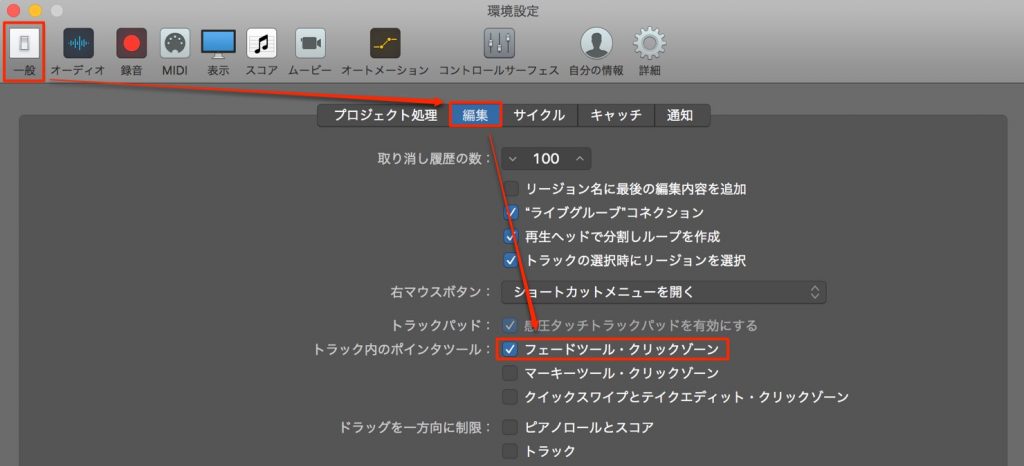
Also, if you check "General" → "Editing" → "Fade Tool Click Zones" in the preferences,
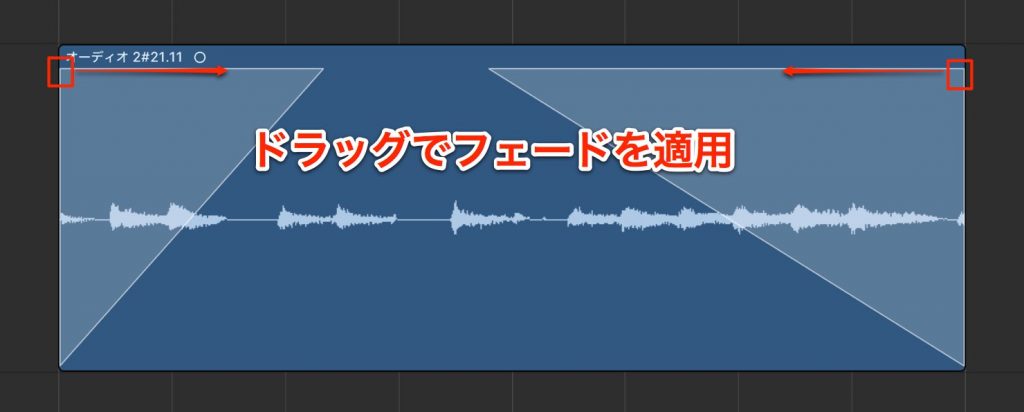
you can apply a fade simply by dragging the top corner of a region.
Rendering effects to audio regions
You can now render the effect result you like into an audio region.
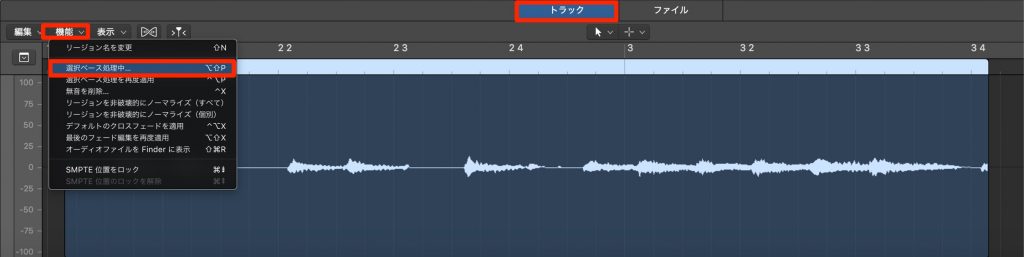
Double-click the audio region to show the Audio File Editor.
Select "Track" → "Functions" → "Selection-Based Processing".

- Apply the effect you like
- Click the preview icon to check the result
- When you get a result you like, press Apply
This flow applies the effect to the selected region.
You can also apply it to multiple regions.

You can apply different effects to "A" and "B" and compare the sounds with one click.
Region contents shown when trimming
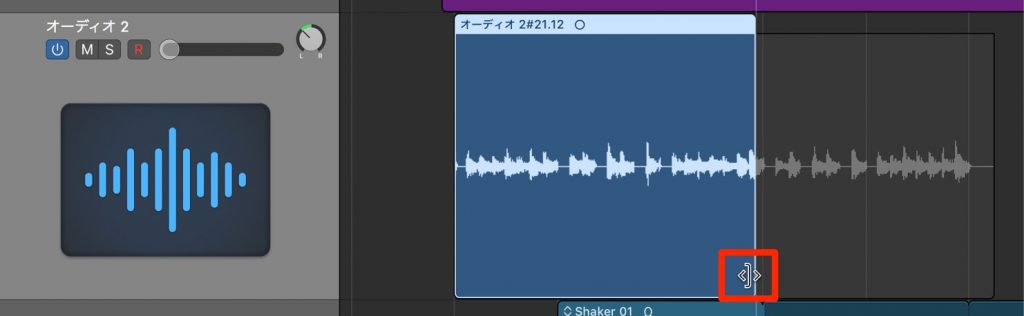
When you trim a region, the original length of the region is shown as a shadow.
This makes it easier to grasp the editing range and improves your efficiency.
Managing regions efficiently with track alternatives
You can now create multiple arrangements of regions for a single track.
You can easily compare recordings or simulate song structures.
First, enable the track alternatives feature.
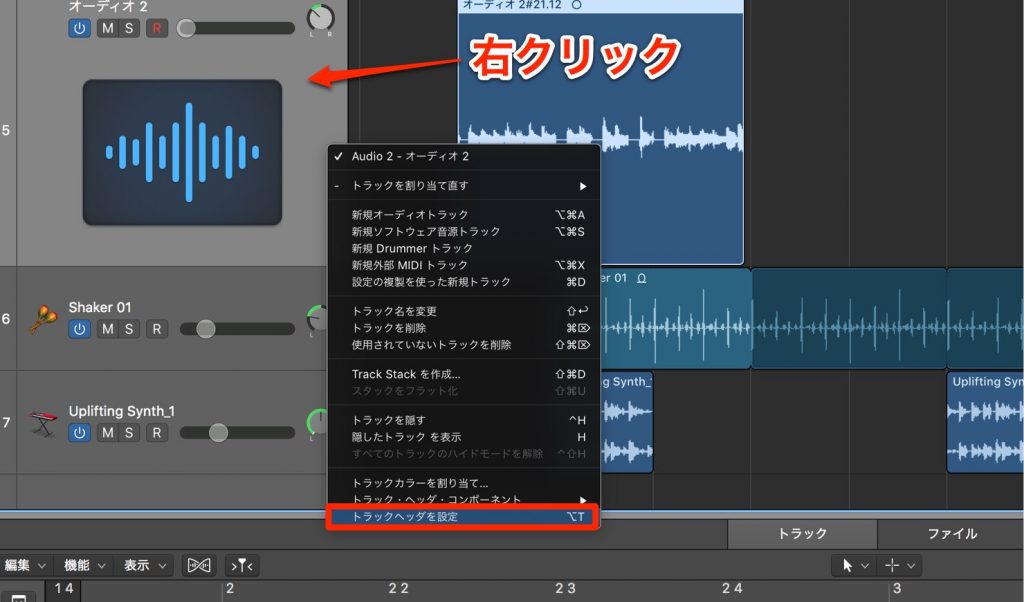
Right-click the track list and select "Configure Track Header".
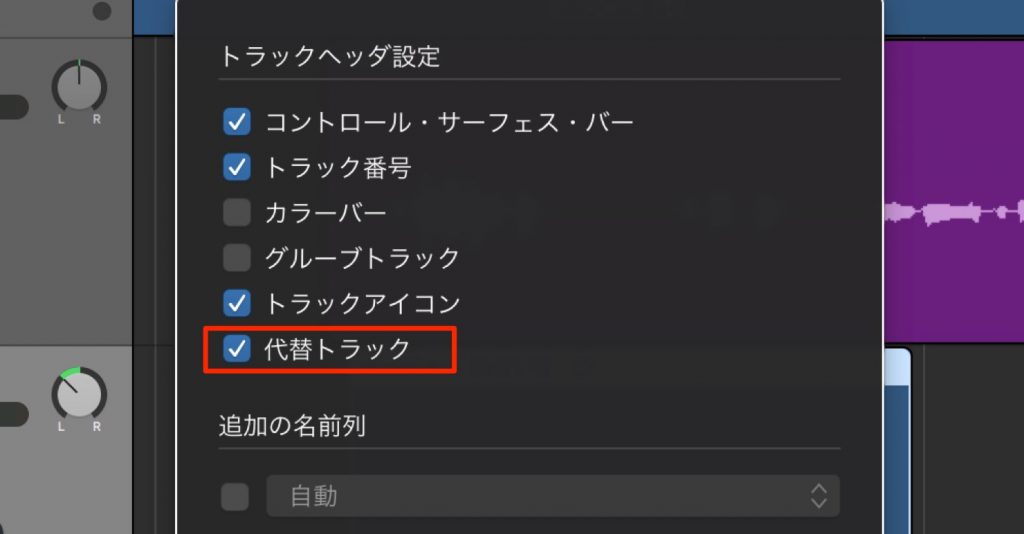
Check "Track Alternatives" to complete the setup.
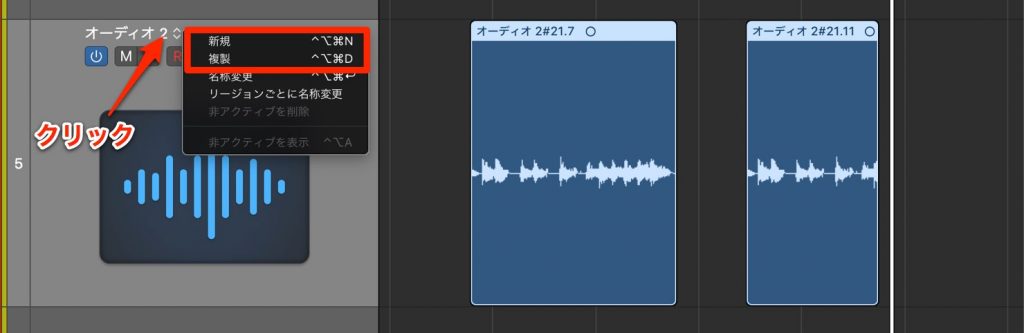
An arrow icon appears to the right of the track name.
Click this icon to add lanes to the track.
- New: creates an empty lane
- Duplicate: creates a lane with the same content as the current lane
Continue working by editing new regions, recording and so on.
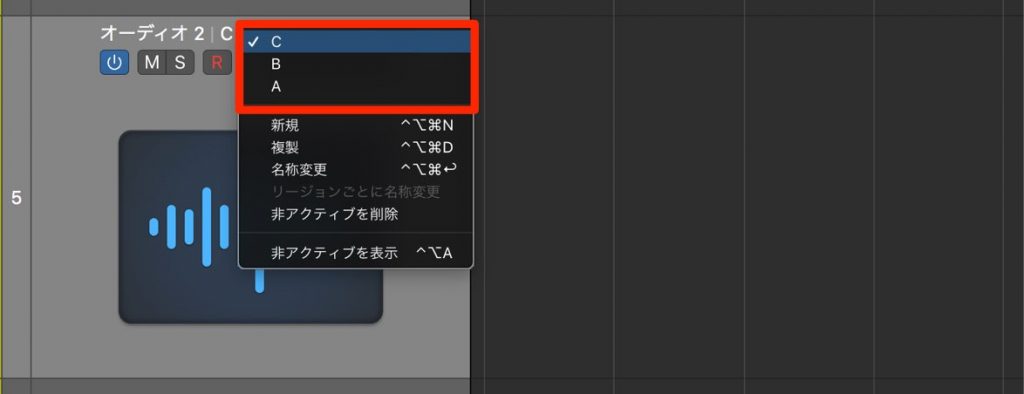
All the lanes you have created remain like this.
Select the lane you want to recall the state you need.
By selecting multiple tracks, you can edit track alternatives on them at the same time.
What if track alternatives don't appear in the menu?
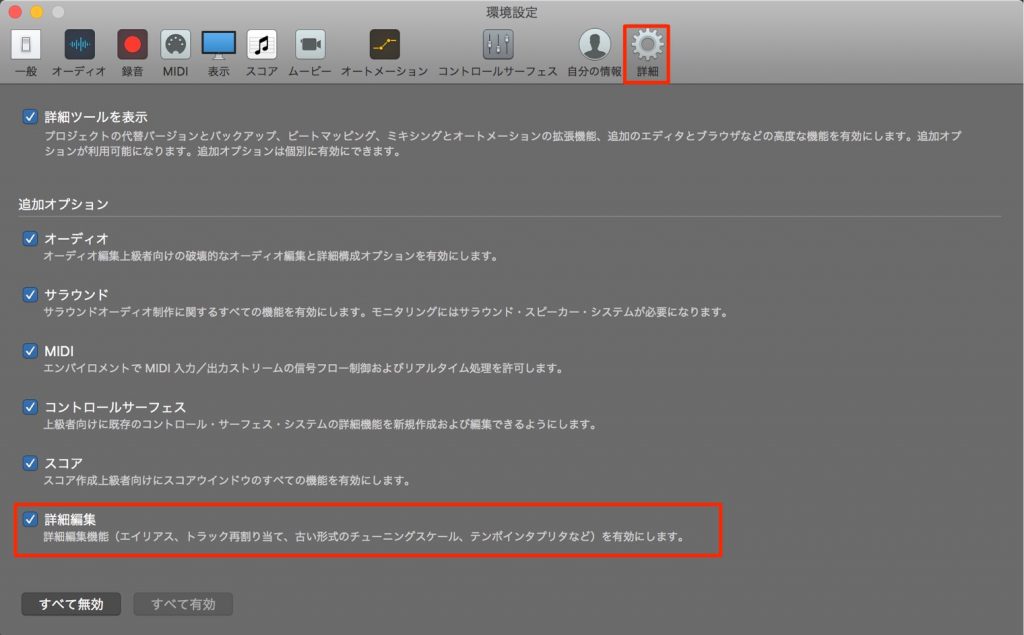
Go to the Advanced tab in the preferences and check the item shown in the image, and track alternatives will appear.
64 bus channels become 256
The bus channels that control sound routing, for bus tracks, send/return and so on, have been expanded to 256 channels.

Even people who use bus channels heavily should no longer run out.
Solid Bus Comp: Glue Your Sound Together with Bus Compression
Route multiple tracks to a single track and apply a compressor to that track. You can finish with a cohesive, unified sound.
Sharing a "Reverb" with Send/Return
Reverb is one of the more CPU-intensive plug-ins. That is where "send/return" comes in. The concept is sharing "one reverb" among multiple tracks.
Software instruments can now be used as side-chain sources
Plug-in side-chain inputs now support software instrument tracks as well.
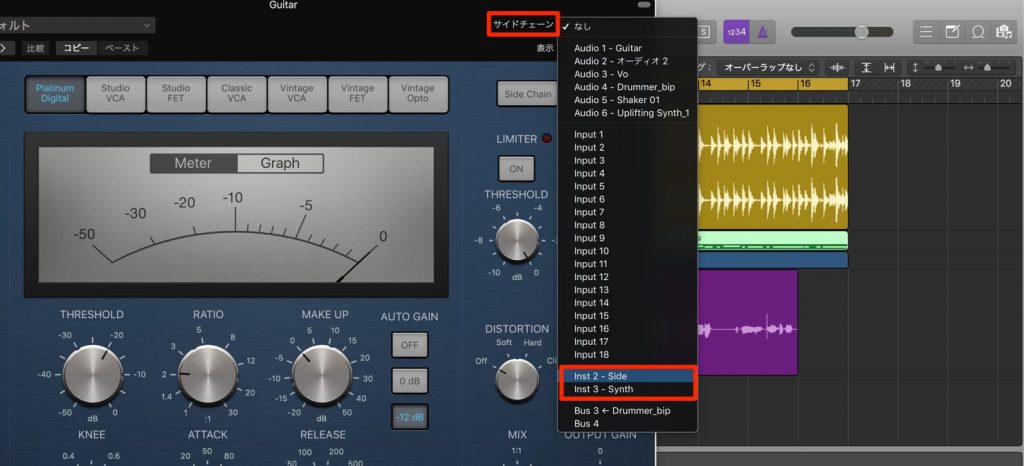
Software instrument tracks are now shown in the side-chain menu like this.
Being able to quickly set up side-chaining from a MIDI kick is very convenient.
Dual mono mode added to plug-ins
Logic's own plug-ins now support dual mono.
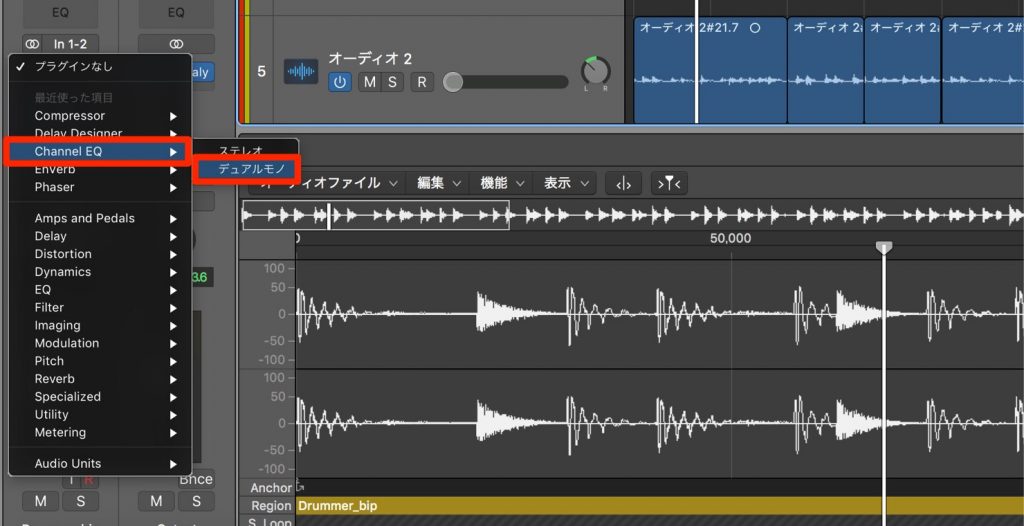
You can select it in plug-ins on stereo tracks.
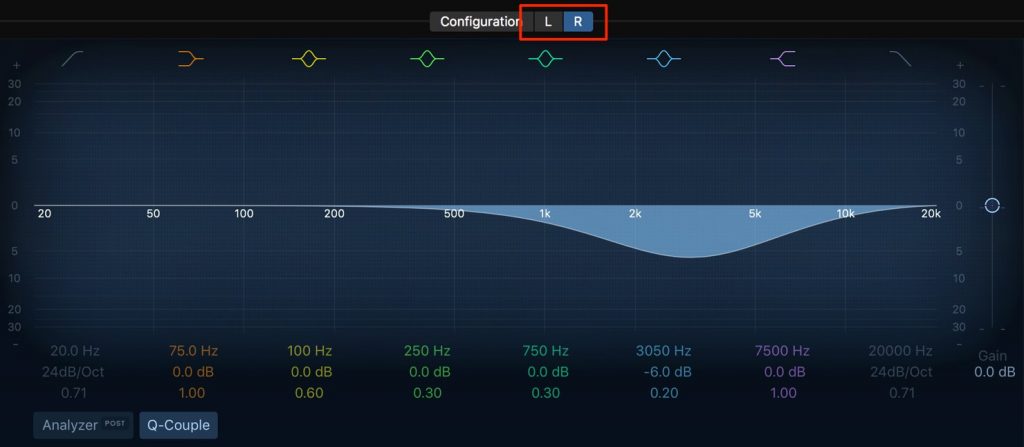
This lets you set L and R individually like this.
You can control it flexibly to suit the material, such as cutting the low end on the left only.

From "Configuration", you can bypass the L and R effects individually.
The mode below lets you switch to "M/S processing" mode, where Mid and Side can be adjusted individually.
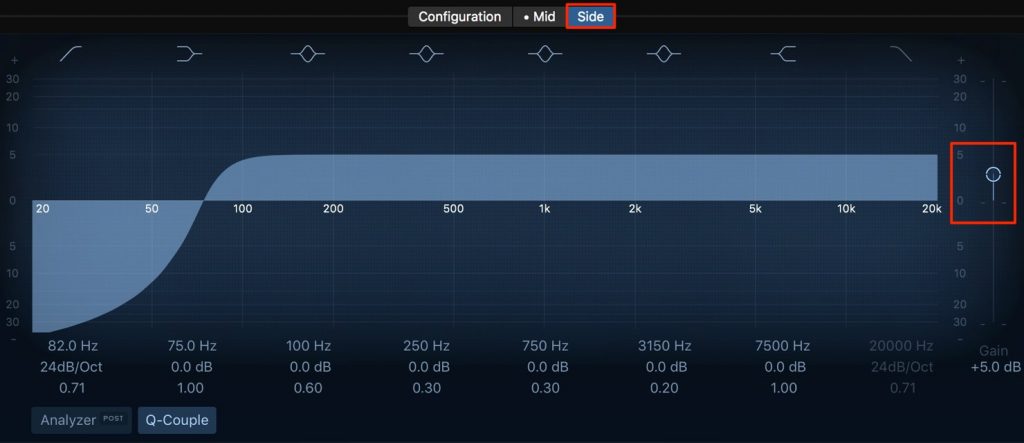
Like this, you can raise the level of only the "Side" to widen the sound or increase loudness.
Stereo pan mode added
"Stereo Pan" has been added to the pan settings for stereo tracks.
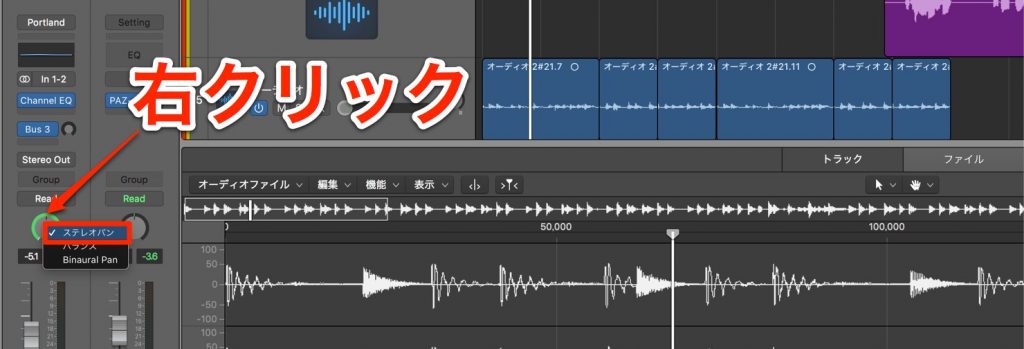
Right-click the pan to switch to "Stereo Pan".
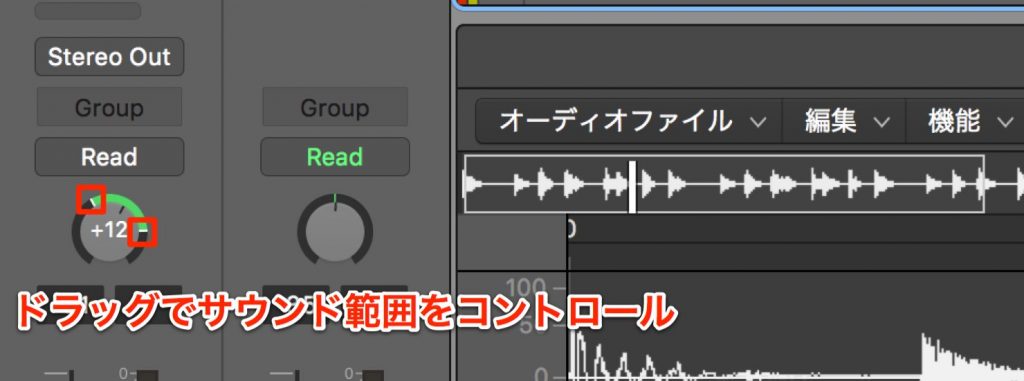
By dragging the left and right points, you can set the sound's range intuitively.
It is a feature that comes in handy in many situations, such as mixing and sound design.
You can easily achieve sound control like this plug-in.
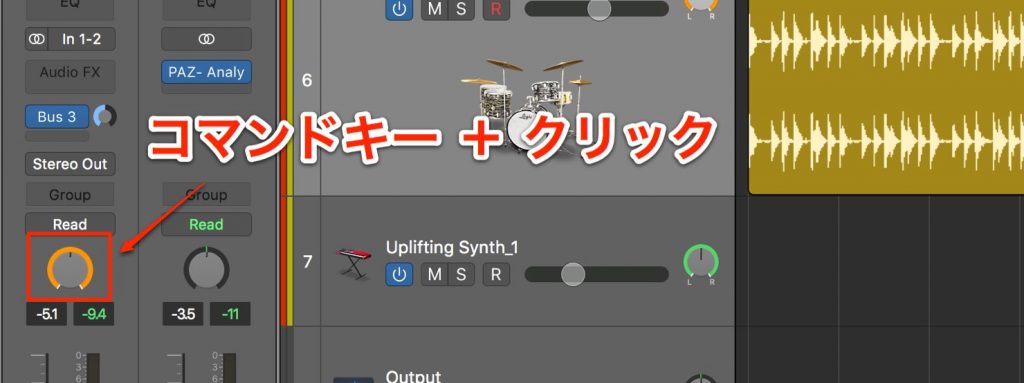
Also, if you "Command + click" the pan, the pan color changes to orange.
This state indicates an inverted state where the L and R positions are swapped.
For example, when using a drum loop, it is very convenient if you want a cymbal panned right to play from the left to balance it with other tracks.
Frequently Asked Questions
Q1. Is Logic Pro X 10.3 a paid update?
No. If you use Logic Pro X, you can update to Logic Pro X 10.3 for free. Just download the latest version from the App Store to start using it.
Q2. How do I apply fades to multiple regions at once?
With multiple audio regions selected, apply a fade to one of them. The same fade is then automatically applied to all the selected regions.
Q3. What is the track alternatives feature mainly used for?
Because you can create multiple arrangements of regions for a single track, you can efficiently compare recordings and simulate song structures. You can easily compare and consider multiple takes and arrangements.
Q4. What are the benefits of expanding the buses to 256 channels?
Because they have been expanded fourfold from the previous 64 channels, limits due to running out of channels are almost eliminated even with complex routing and send/return setups, allowing more flexible sound design.
Q5. What are the benefits of being able to use software instruments as side-chain sources?
You can now set up side-chaining directly from software instrument tracks such as a MIDI kick, making it quicker and easier to implement the club-style technique of automatically changing the volume of bass or synths in response to the kick.
NEW ARTICLES
Latest English Articles