Orb Composer is composition assistant software powered by artificial intelligence, and you can load MIDI files made elsewhere and then apply its automatic performance features. To bring the performance closer to what you have in mind, detailed settings such as Dynamics (changes in intensity), Role (the clip's role), Articulation (playing technique) and Rhythm (rhythm pattern) are important. By combining these settings, you can achieve high-quality orchestral arrangements that reflect the creator's intent rather than mere automatic generation.
Detailed performance settings and MIDI import/export
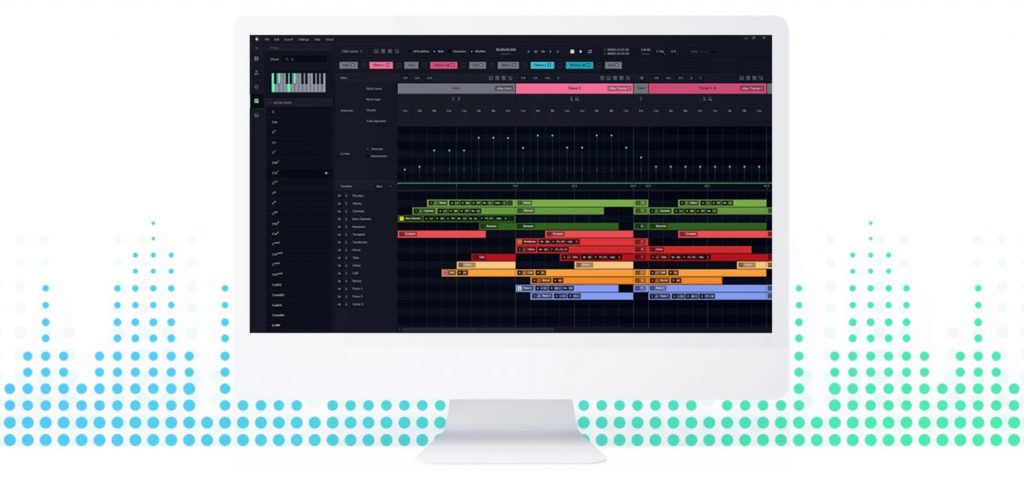
This is the third installment of our guide to "Orb Composer," AI composition assistant software.
In this final article, we'll explain detailed settings that bring the automatic performance closer to what you have in mind, and how to import and export MIDI files.
ORB COMPOSER website: https://www.orb-composer.com
ORB COMPOSER website: https://www.orb-composer.com
Specifying performance nuance
We'll add accompaniment to the melody above.
First we need to decide the chord progression, so use the method explained in the previous part to auto-generate chords and look for a progression you like.
If you already have a chord progression in mind, you can also set it manually.
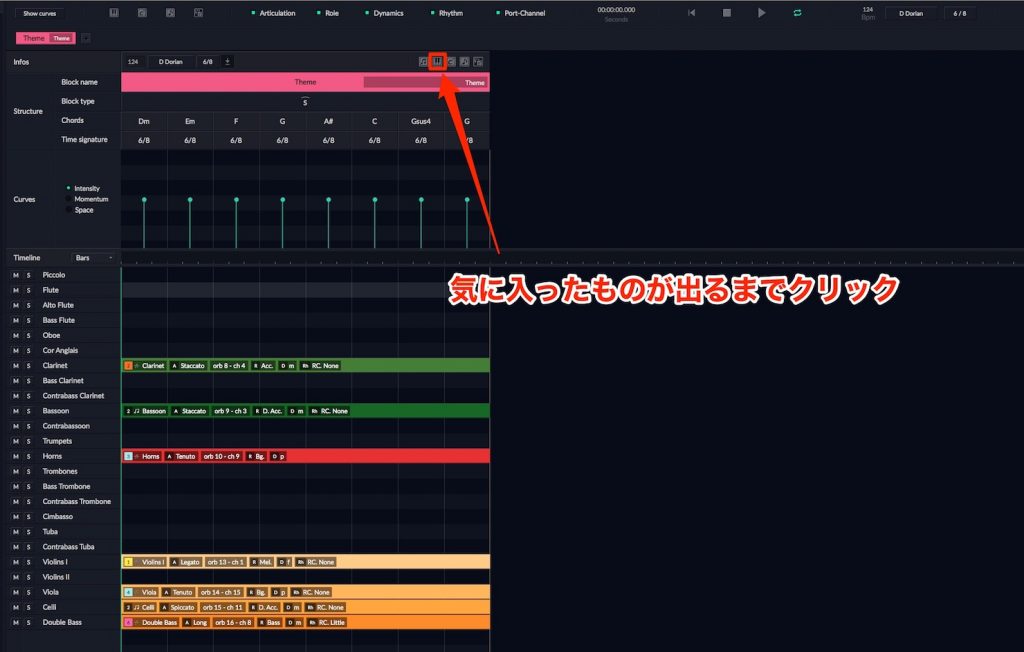
Chord progressions can also be auto-generated.
Click [Create instruments & note for this block] until you get a result close to what you have in mind.
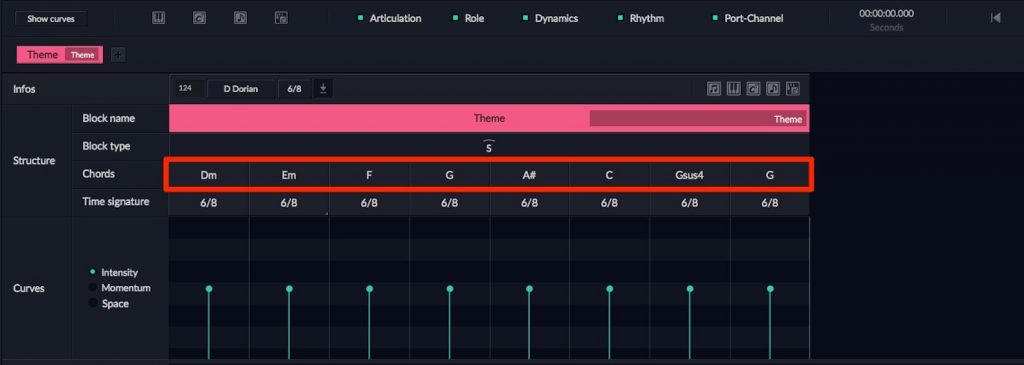
This time we went with a chord progression like this.
Once you specify the chords, the loaded melody is changed to fit them.
From here, let's make detailed settings for each clip.
Setting Dynamics
With the current audio, the part playing the arpeggio felt weak in presence, so we'll set [Dynamics], which controls the intensity of the performance.
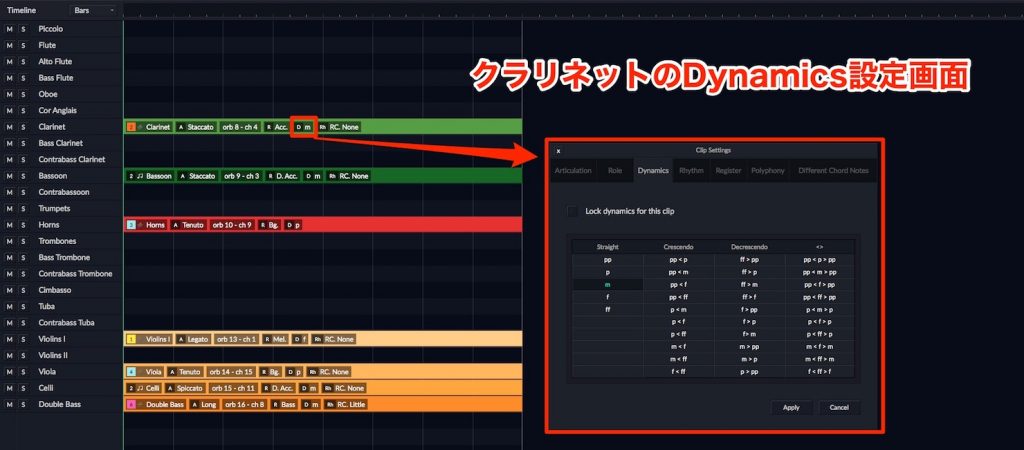
Click the icon labeled [D], and a dialog like this appears.
- [Straight]: played at a constant intensity
- [Crescendo]: gradually gets stronger
- [Decrescendo]: gradually gets weaker
- [<>]: lets you add a change that rises once and then falls
Select the one that suits your purpose from the items grouped into categories like this.
This time we change the clarinet to "p< m >p" so the clip peaks in the middle.
Before
After

*Orb Composer uses MIDI CC1 to control dynamics.
So set CC1 to expression on the software instrument side too, so they're linked.
Setting Role
Next, I'd like to add a flute to the melody part.
What you need to understand when doing this is [Role].
Role indicates the clip's role, and it's the item that specifies what it plays, such as melody, bass or chords.
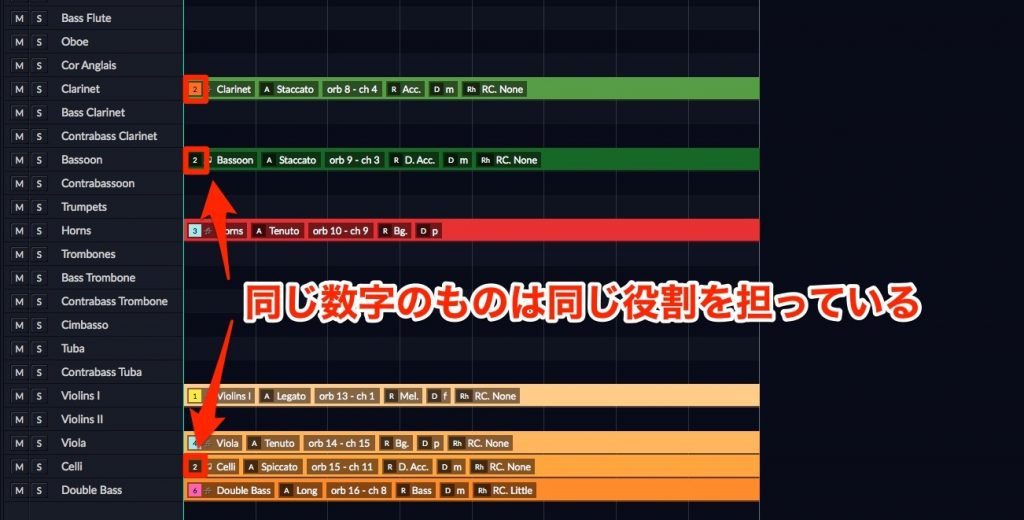
If you look at a clip, a number is shown at the far left; this indicates the Role.
Clips showing the same number are playing the same content in unison.
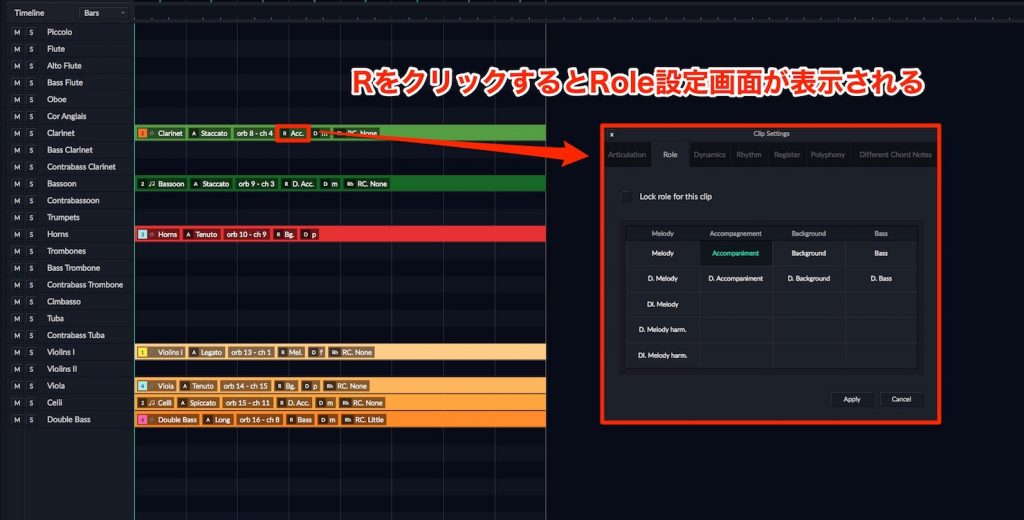
Click the part of the clip labeled [R] to display a dialog where you can change the Role.
- [Melody]: the melody
- [Accompaniment]: accompaniment with rhythmic movement, such as arpeggios
- [Background]: a part that carries the harmony
- [Bass]: the low bass part
- Those prefixed with D or Dl: supporting sub-parts
- Colored: the main part that carries the specified role
- Not colored: a sub-part that accompanies the main part
- [Momentum]: the number of notes.
As you move the value to the right, the phrase gets busier with more notes. - [Complexity]: the complexity of the phrase.
As you move the value to the right, the rhythm and pitch changes of the generated phrase become bigger.
Assign roles with these in mind.
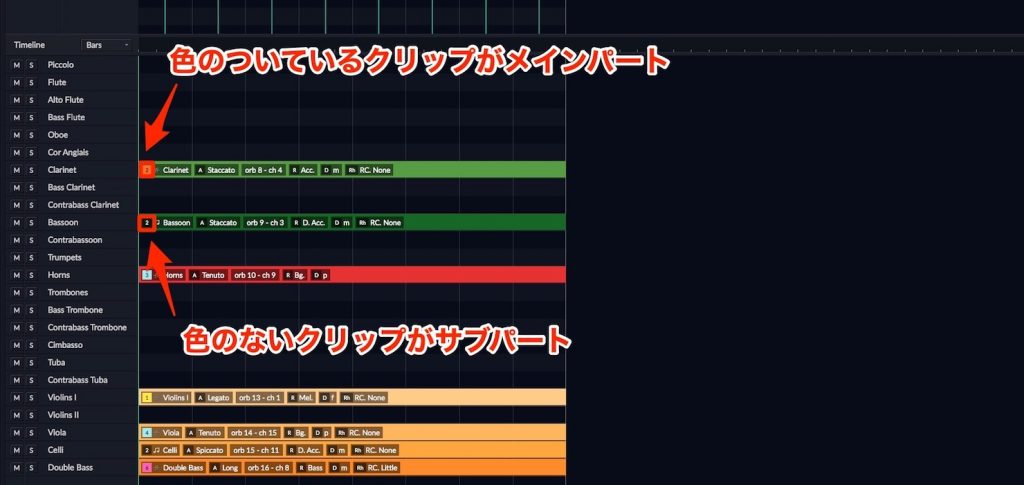
The same number can be created on multiple clips, and there are clips whose number is colored and clips whose number isn't.
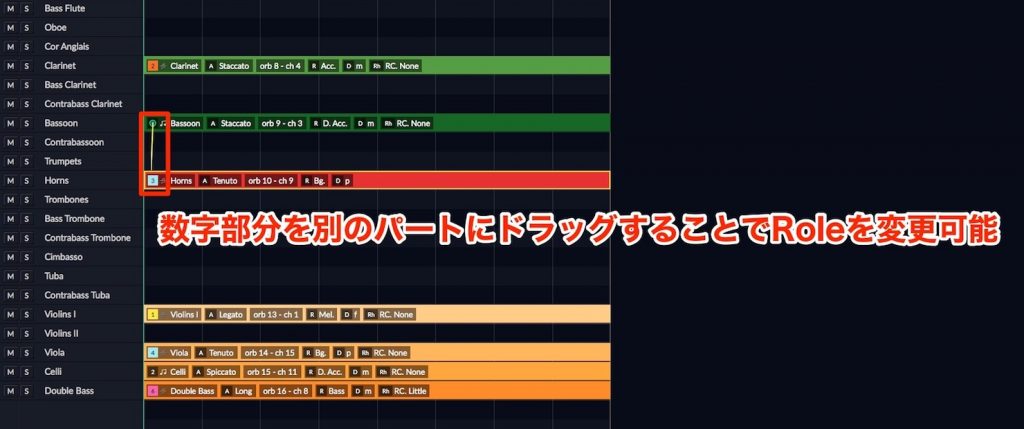
For a sub-part clip whose number isn't colored, you can easily change its Role by dragging the number onto a clip with a different role.
Also, deleting a sub clip doesn't delete the main one, but be careful: deleting the colored main clip also deletes the clips with the same number at the same time.
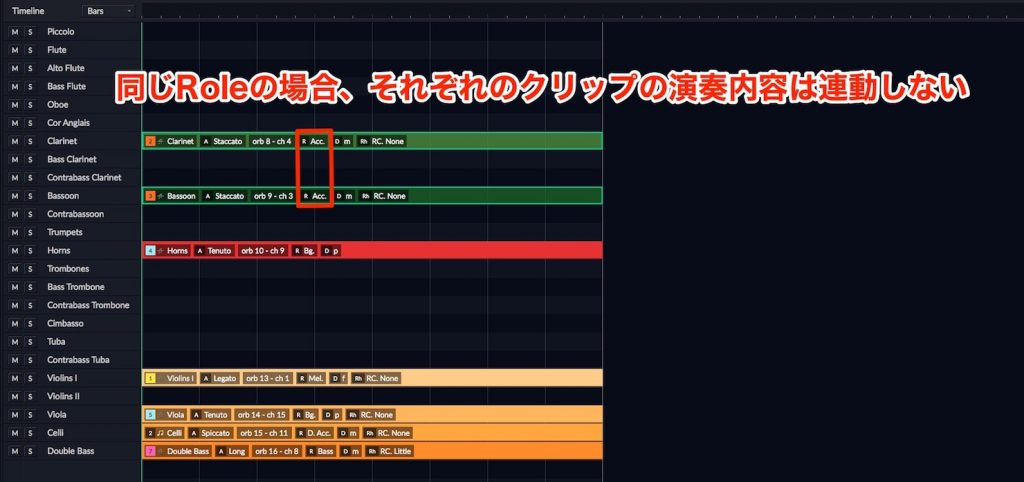
To set up a sub clip, you need to select the version of the Role you want that's prefixed with [D.] or [Dl.].
For example, when creating a bass sub-part, if you set the clip you meant as the sub to [Bass], they'll each play independent bass lines and won't be linked as main and sub.
Be careful about this.
Next, let's add a flute and have it play as a supporting part for the melody.
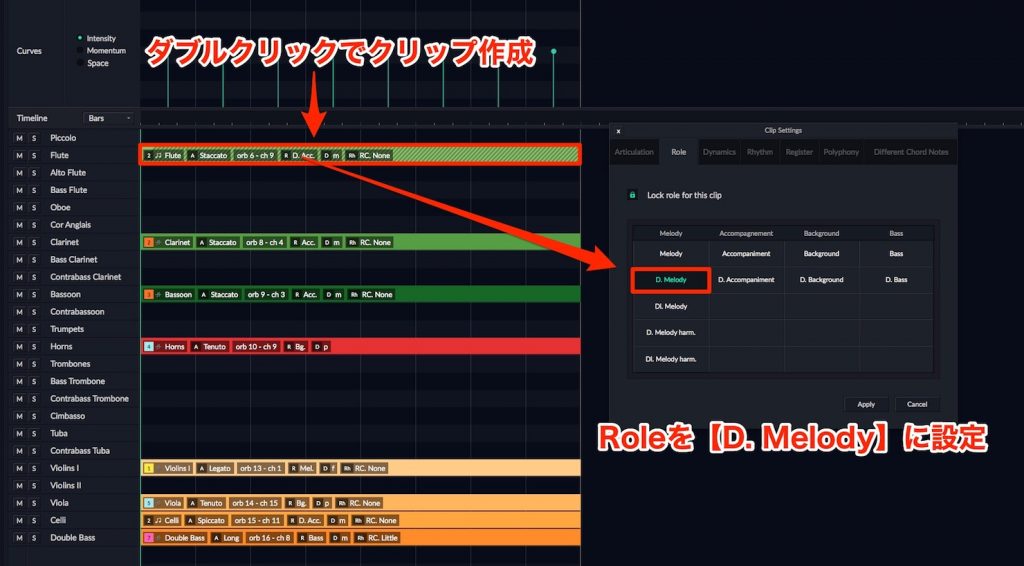
Double-click the flute track and set the Role to [D.Melody].
Now it plays the melody in unison.
Flute alone
Whole song
Setting Articulation
It feels much closer to what I had in mind, but I wanted the bassoon part playing the arpeggio to play more smoothly.
To change performance nuance like this, set [Articulation].
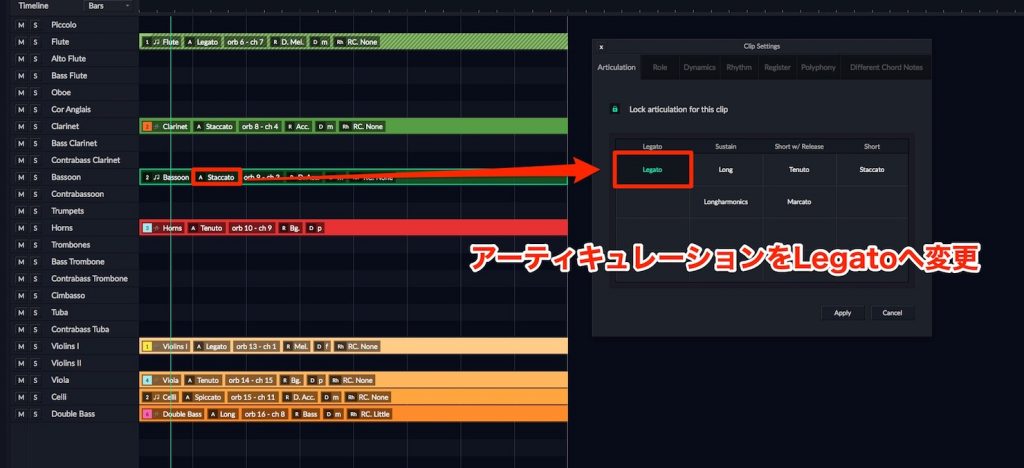
Click the part labeled A, and a dialog appears.
Change this from [Staccato] to [Legato].
Bassoon alone
Whole song
Changing the playing technique changes the impression of the song a lot too.
Setting Rhythm
Right now, the rhythm of the parts playing chords is all long tones.
We'll change this to something more rhythmic.
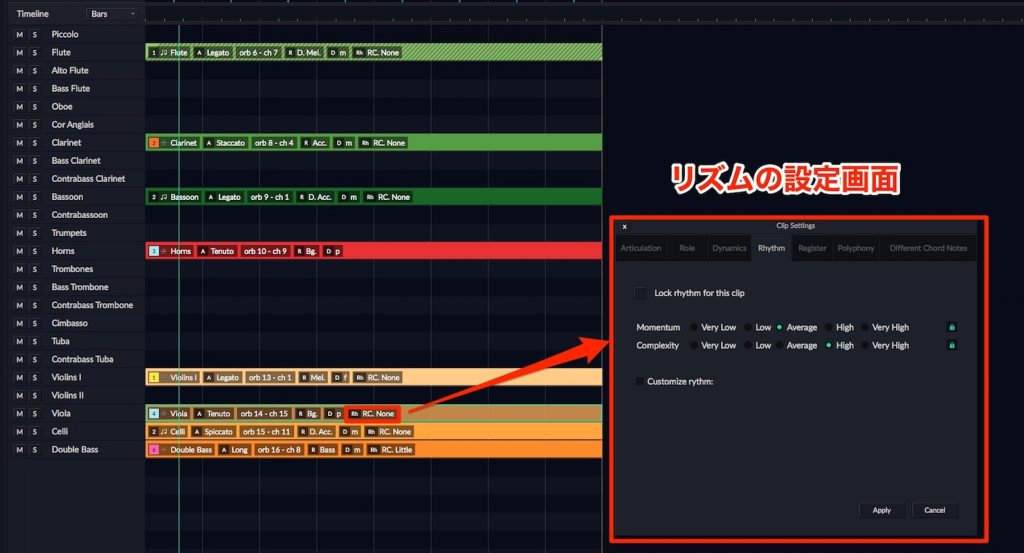
To change the rhythm, click [Rh] in the clip to display the dialog.
This time we change the viola, which plays the chords, to [Momentum] [Average] and [Complexity] [High].
We also adjust the [Articulation] and [Dynamics] explained above to get closer to what we have in mind.
*Rhythm can't be set on sub-parts.
When you change the main part, the sub follows automatically.
Setting Register
[Register] is a parameter for adjusting the pitch range.
The further down you select, the higher the pitch of the performance.
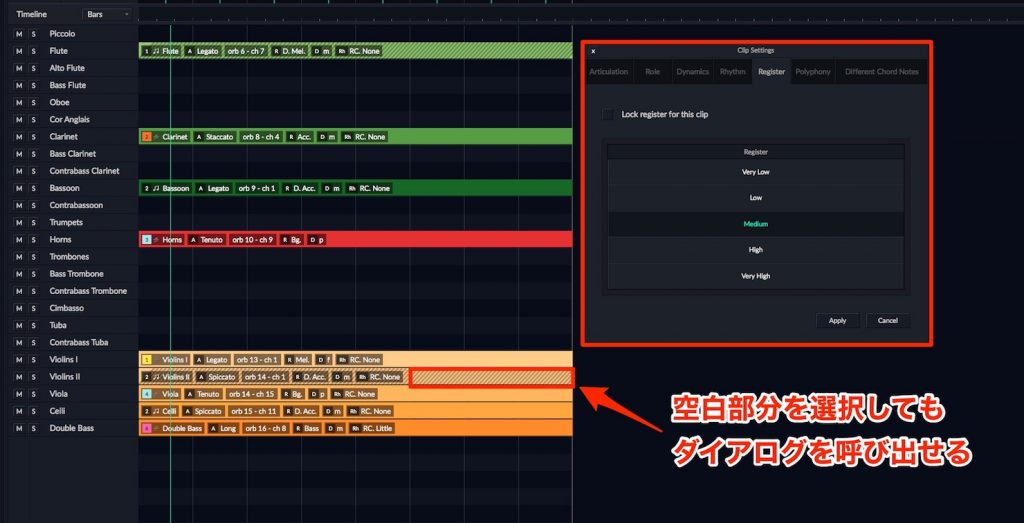
We want the second violin, used to support the melody, to play in unison an octave apart, so we create a new clip and change its Role to [D.Melody].
Once you've set [Dynamics] and [Articulation] to something close to what you have in mind, double-click the clip to display the dialog and set the Register.
The main melody is set to [Medium], so to have it play in a higher range, set it to [High].
Setting Polyphony
If you check the viola part whose [Rhythm] we changed above, a single part is playing five-note chords.
We'll split two of those five notes off to the cello.
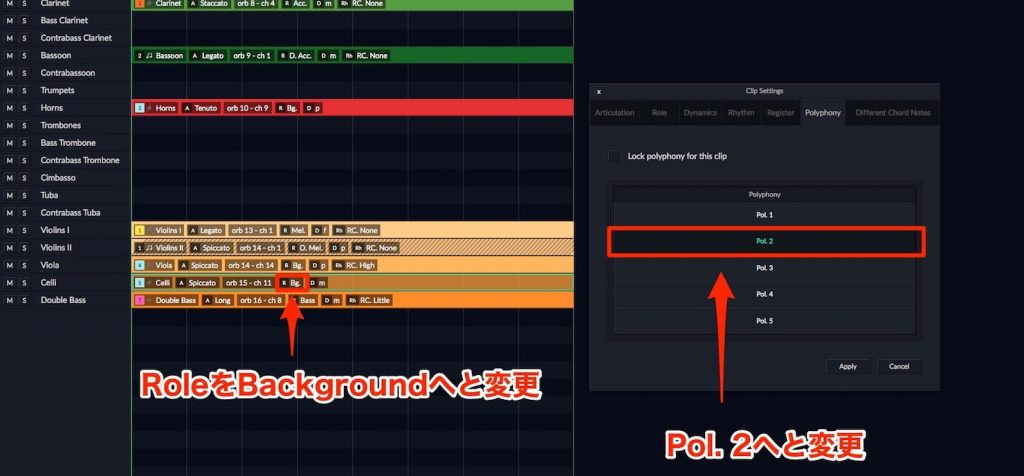
To limit the number of notes in a chord, set it with [Polyphony] in the dialog.
The [Pol.] number is the number of notes in the chord, so set the viola to 3.
To change the [Role] of the cello, which currently supports the arpeggio, to a supporting part for the viola, change it to [Background] and set [Polyphony] to 2.
Then make the settings we've covered so far, such as [Register], [Articulation] and [Rhythm], and you're done.
*If you select [D.Background] as the viola's supporting part, [Polyphony] will follow the main [Role].
You need to set it as an independent Background part.
Setting Different Chord Note (DCN)
[Different Chord Note (DCN)] can be set only on Accompaniment.
For performances such as arpeggios, it specifies how many of the notes that make up the chord to use.
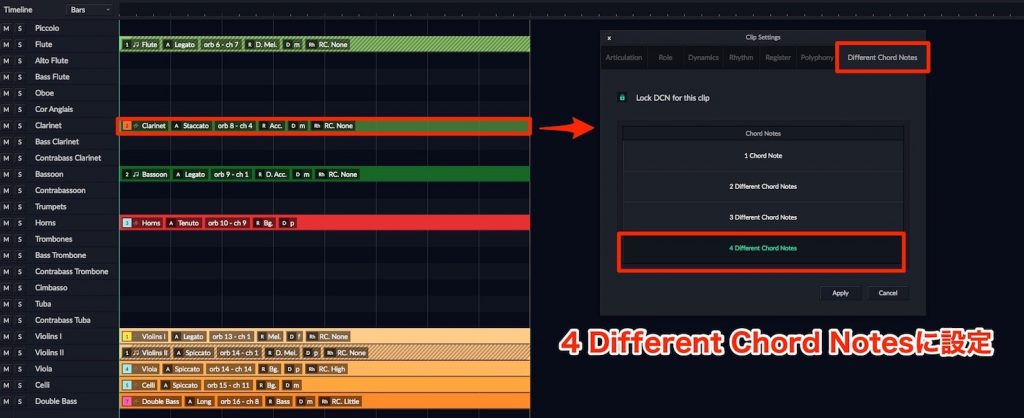
If you set [DCN] to 1, only one chord tone is used in the phrase, so the same note keeps sounding.
This time, let's change the clarinet's arpeggio from 3 to 4.
That completes the work. Let's listen to the finished version.
This is the result.
Exporting MIDI files
Let's export a MIDI file so this performance can be edited in a DAW.
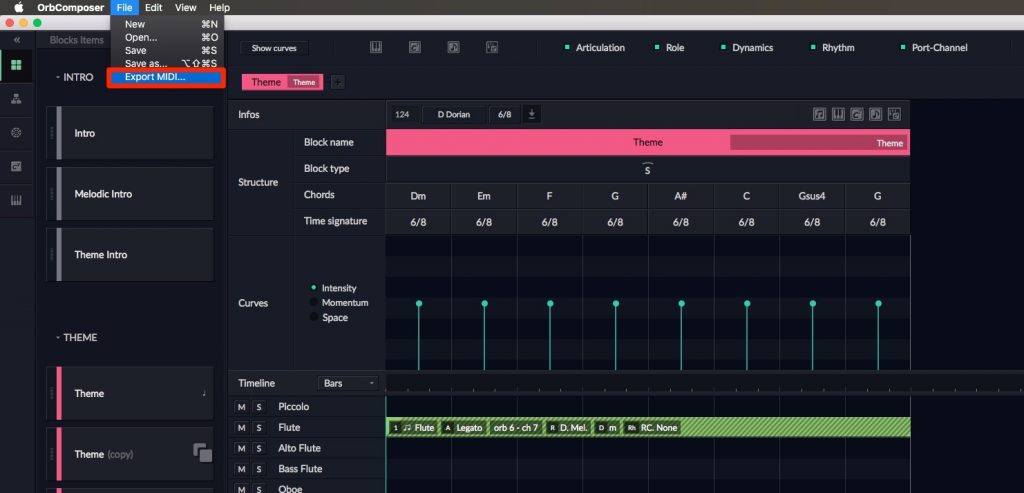
From the menu, select [File] → [Export MIDI], name the song and export it.
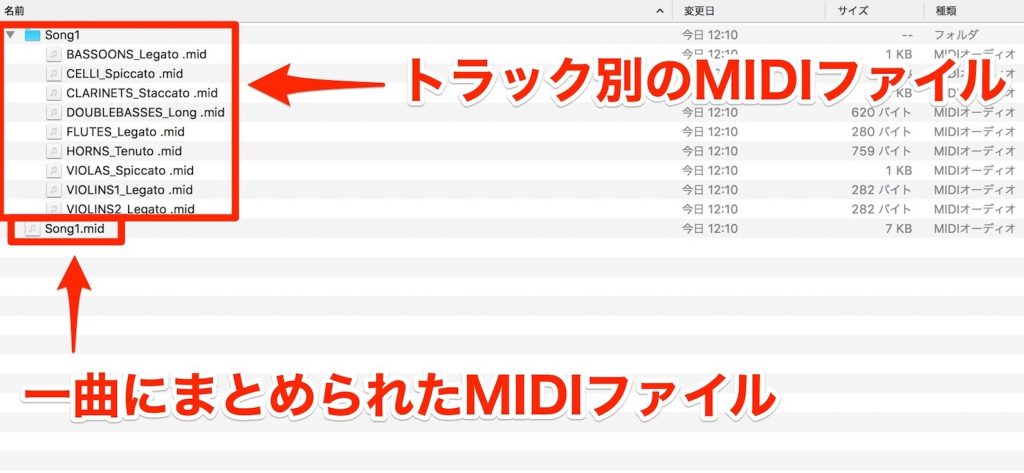
When importing the MIDI file into your DAW, you can choose between the whole song combined and split into separate tracks.
By understanding the role of each function, I think you can create songs closer to what you have in mind.
As a sketchpad for making demos, or as a support tool for orchestral arranging beginners, be sure to try the product demo at this opportunity.
ORB COMPOSER website: https://www.orb-composer.com
Orb Composer Pro: 399 euros
Orb Composer Artist: 149 euros
Version 1.1 has also been released
- Auto-update of clip curves
- Chord inversion
- Copy & paste of clips
- Copy & paste of clips and chords
- Added 3/8 and 1/4 time signatures
- Empty template
- Various other minor bug fixes
- 1How to Use ORB COMPOSER: Overview and Setup
- 2How to Use ORB COMPOSER: Creating a Song
- 3How to Use ORB COMPOSER: Advanced
- 4ORB COMPOSER 1.5 New Features
- 5How to Use the Evolved Orb Producer Suite
- 6Orb Producer Suite 2.0: New Features and How to Use It
ORB COMPOSER website: https://www.orb-composer.com
Frequently asked questions
Q1. Can I bring my own melody into Orb Composer?
Yes. Create your original melody as a MIDI file and import it from the block icon in the theme. However, many orchestral instruments are monophonic, so melodies that avoid chords work better.
Q2. Why choose Roles prefixed with "D." or "Dl."?
"D." and "Dl." are role settings for sub-parts, used when setting up supporting instruments that accompany a main part. This creates a structure where the main and sub-parts are linked and play the same content.
Q3. Why is MIDI CC1 used for Dynamics?
Orb Composer uses MIDI CC1 for Dynamics control, and by setting CC1 to expression on the software instrument side too, the dynamics you set are accurately reproduced in your DAW.
NEW ARTICLES
Latest English Articles