The plate and chamber reverb plugins included in Waves Abbey Road Collection can help you achieve professional mixes. Plate reverb is well suited to giving vocals presence, and its distinctive texture can be shaped with the Damper, predelay, and DRIVE controls. Chamber reverb, meanwhile, is commonly applied in small amounts to individual instruments to help the tracks blend together. Combining plates and chambers lets you recreate the historic sound of Abbey Road Studios in a modern DAW, opening up a wider range of possibilities for music production.
Historic Reverb Sounds That Remain Versatile Today
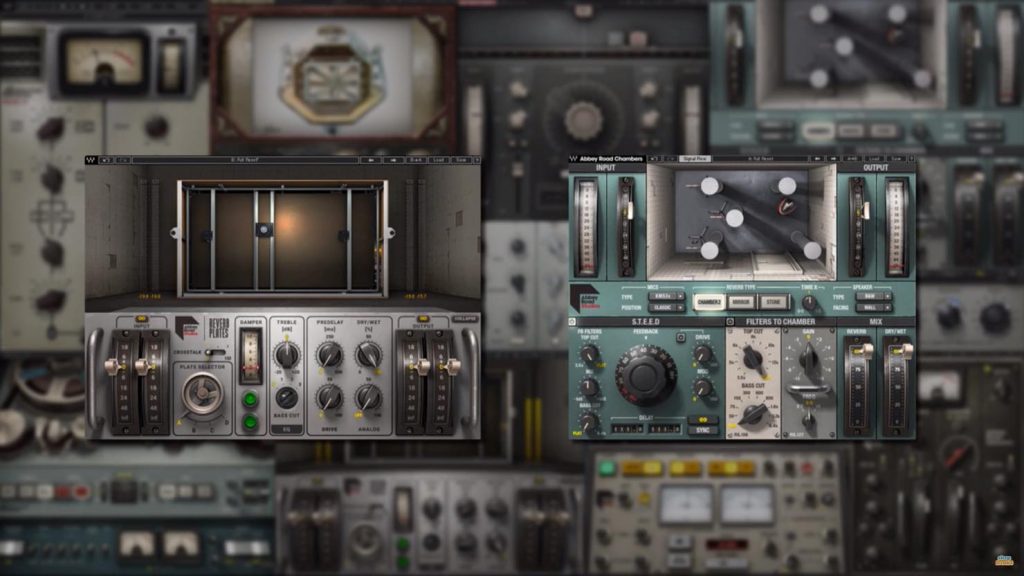
In this second installment of our Abbey Road Collection tips, we'll explore two reverb plugins included in the bundle—Abbey Road Reverb Plates and Abbey Road Chambers—and explain where each one works well.
Let's take a closer look at each plugin.
Better Mixing Tips: Waves Abbey Road Collection, Part 2 — Reverb Video
Buy the product: Waves Abbey Road Collection
Abbey Road Reverb Plates
What Is Plate Reverb?
The term “plate reverb” appears in the presets of many reverb plugins. Originally, it referred to a device that produces reverberation by making a sheet of steel vibrate.
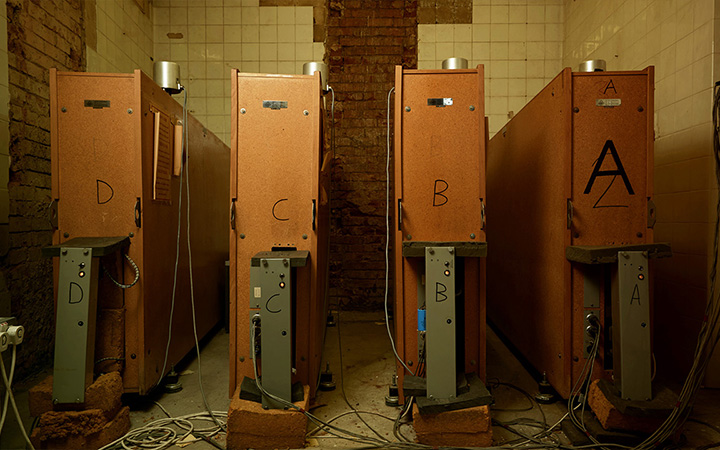
Digital reverb came later, followed by technologies such as convolution reverb. Although the technology continues to advance, the distinctive texture of plate reverb has become a category in its own right, living on in the presets of many reverb processors.
During the 1960s and 1970s, pioneering bands such as the Beatles and Pink Floyd frequently used Abbey Road Studios' four distinctive EMT 140 plate reverb units. Abbey Road Reverb Plates meticulously models these historic Abbey Road plate reverbs.
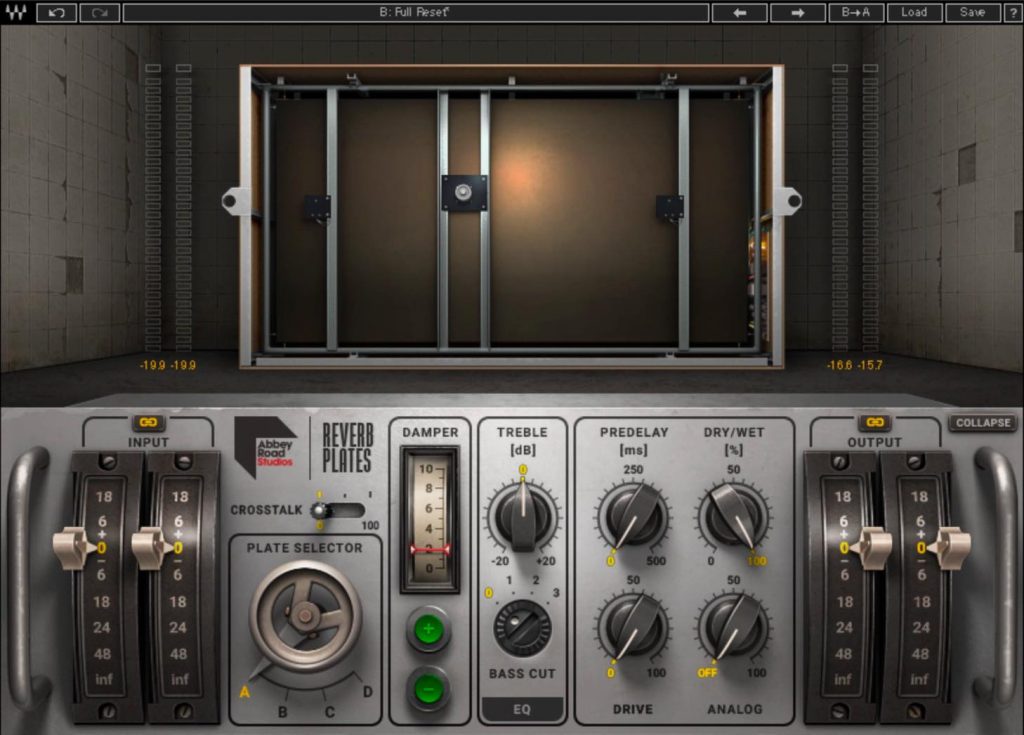
One reason plate reverb remains so widely valued is the distinctive presence that only a plate can provide. It differs from reverbs designed to realistically recreate a space, so it is often used on vocals and other sources as part of shaping their sound.
Choosing a Plate and Adjusting Damper
Abbey Road Reverb Plates lets you choose from four plates.
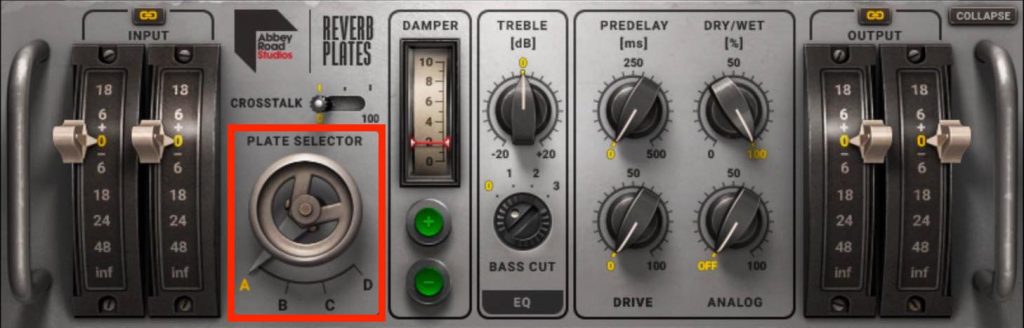
Each has different characteristics, including how the reverberation trails off.
Adjust your plate choice together with Damper, the control corresponding to reverb time.
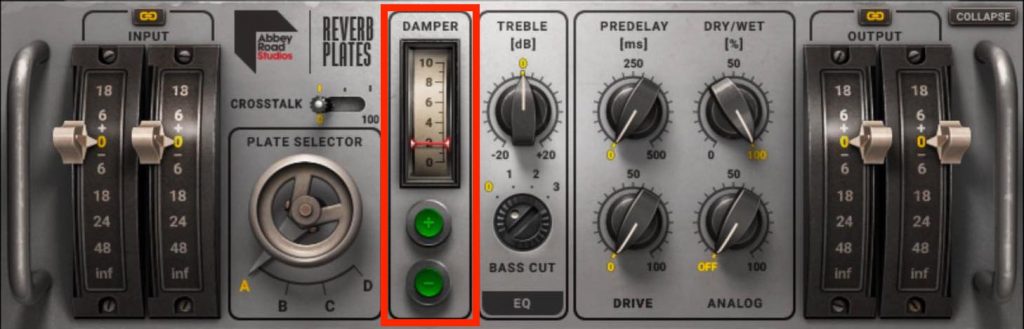
Damper does not display an exact time. Instead, it offers 11 settings, numbered 0–10.
Adjust the strength of the reverb—the send level—at the same time. A useful approach is to start with a generous send level, then lower it until you reach the point where the reverb no longer draws too much attention to itself.
Adjusting the EQ
The EQ section provides TREBLE for high-frequency adjustment and BASS CUT for low-cut filtering. It's convenient to be able to do this within a single plugin.
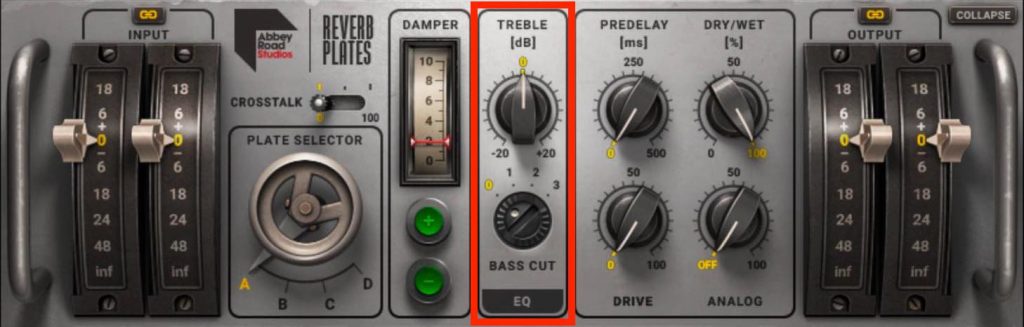
TREBLE is a 4 kHz high-shelf filter with a ±20 dB adjustment range. BASS CUT provides three cut settings within the 10 Hz–1 kHz range.
On vocals, the low end can easily become heavy, so a little low-cut filtering is a common starting point. Adjust the highs to suit the song: boost them for more clarity and presence, or reduce them for a softer sound.
Adjusting PREDELAY and DRIVE
Next is PREDELAY, which delays the onset of the reverb.
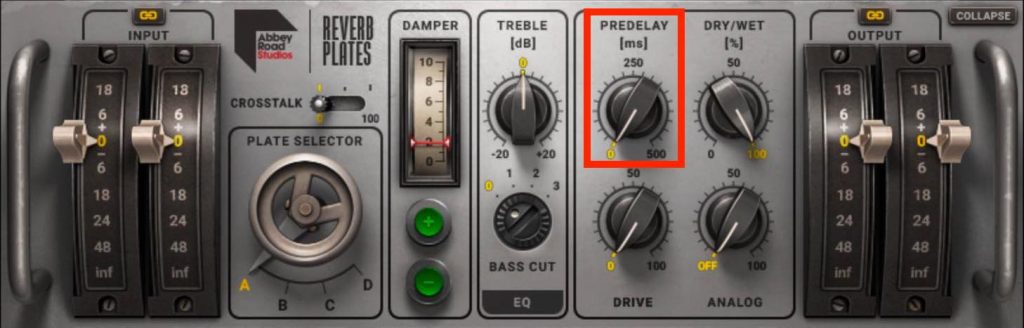
On vocals, a slight delay is often used to keep the initial attack clear.
Too much delay can upset the rhythmic feel. Start with a longer setting and gradually reduce it until it sounds natural. Even a slight delay can noticeably change the atmosphere and create a sense of depth.
Another control worth adjusting is DRIVE. As its name suggests, it adds distortion to the reverberated signal.
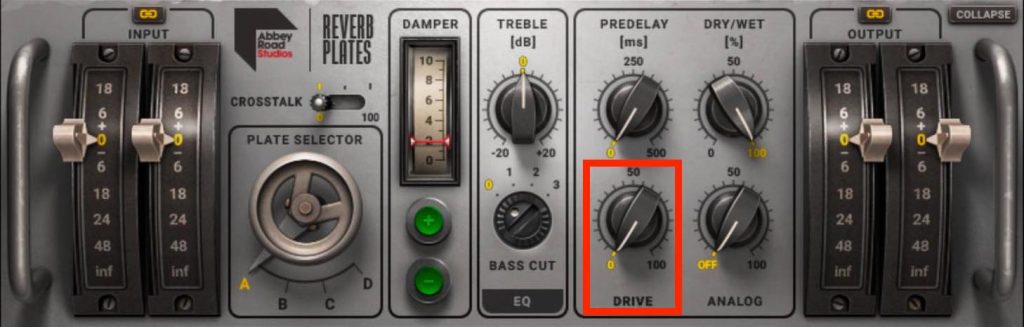
Too much can sound noticeably gritty, but a moderate amount can make the reverb feel denser.
It also increases the reverb's level, so you may want to lower Output slightly to compensate.
The Analog knob adds hum noise. Unless you have a specific reason to use it, you can leave it OFF.
Using a Stereo Imager
Here's a small tip that applies to plate reverb in general.
It also relates to the Chambers processing we'll add later: try narrowing the plate's stereo image slightly.
When shaping a lead vocal in particular, bringing the reverb closer to the center can focus the effect and give it a distinct place alongside other reverbs.
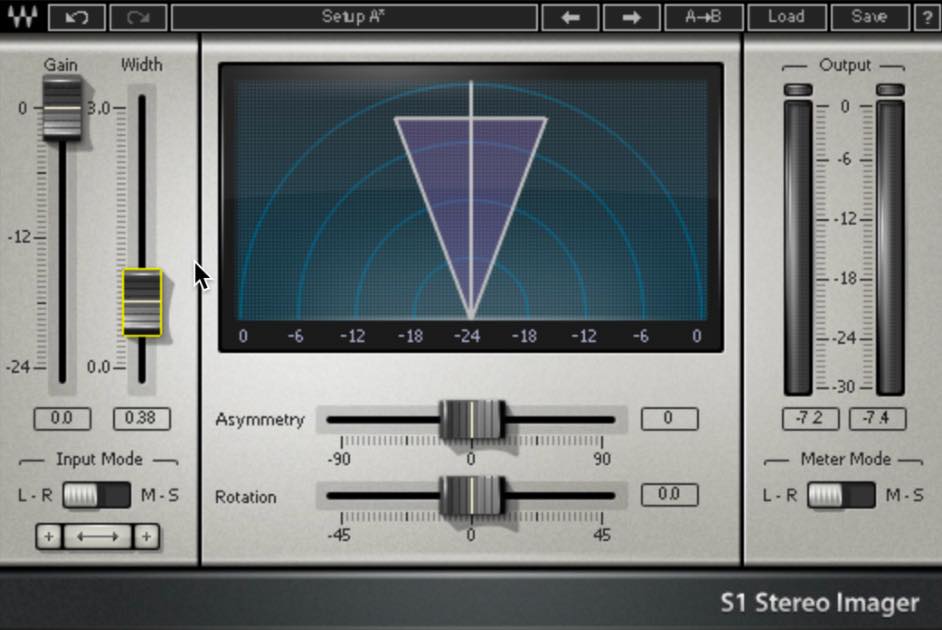
To do this, insert a stereo imager after the reverb plugin, then reduce its Width setting.
Some genres call for completely mono reverb, but you should be able to find the right width by balancing it against the positions of the other tracks and reverbs.
Abbey Road Chambers
What Is Chamber Reverb?
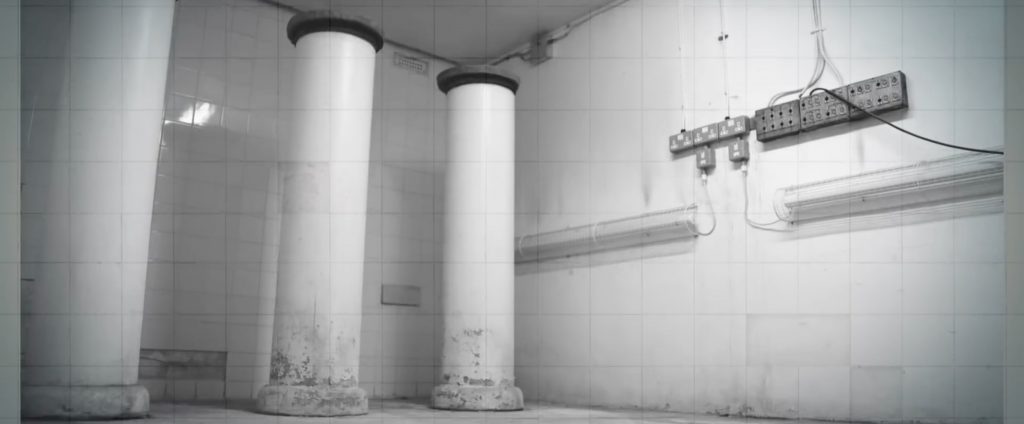
Abbey Road Chambers simulates the process used in the echo chamber installed at Abbey Road Studios' Studio Two: a speaker plays the source signal into the room, and microphones capture the room's reflections to create reverb.
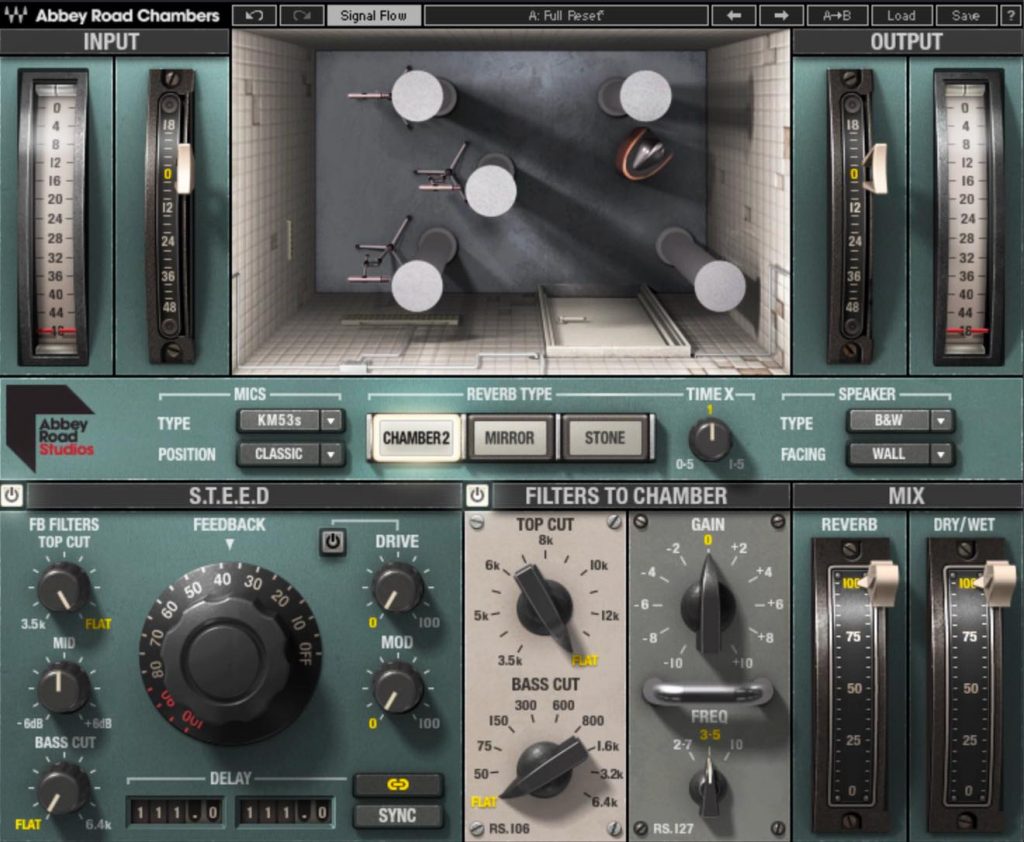
In a sense, this is one of the most basic ways to create reverb. However, choosing different rooms, microphones, and speakers allows you to create a variety of sound fields.
The plugin also includes a delay module called S.T.E.E.D, high- and low-pass filters, and a high-frequency EQ, making it convenient to shape the reverb further.
Applying Chamber Reverb
Room-based reverbs like this are primarily used in small amounts across different tracks to help the mix blend together.
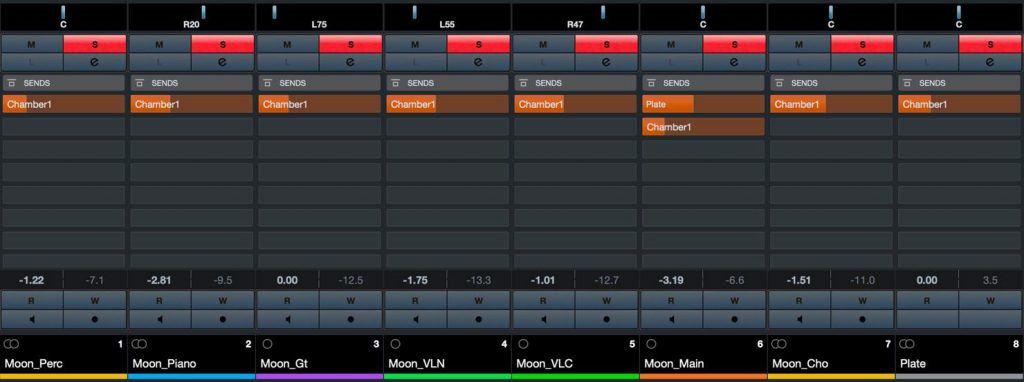
Percussion and drums generally need less, so their sound doesn't become too blurred.
This example song has no bass part, but bass is generally left without reverb.
Apply a moderate amount to chordal instruments such as piano and guitar, keeping the reverb from becoming too prominent in the overall mix.
Instruments playing melodic phrases in the upper midrange, such as the strings in this example, can take relatively more reverb. Be careful, though: too much will push the sound farther back in the mix.
If the vocal already has a substantial amount of plate reverb, add only a little chamber reverb to help it sit with the other tracks.
Also send a small amount from the plate reverb track to the chamber, helping the two reverbs blend together.
Backing harmonies can take slightly more chamber reverb to contrast with the lead vocal and place them a little farther back.
Setting REVERB TYPE, Microphones, and Speakers
Start with REVERB TYPE, which selects the room itself.
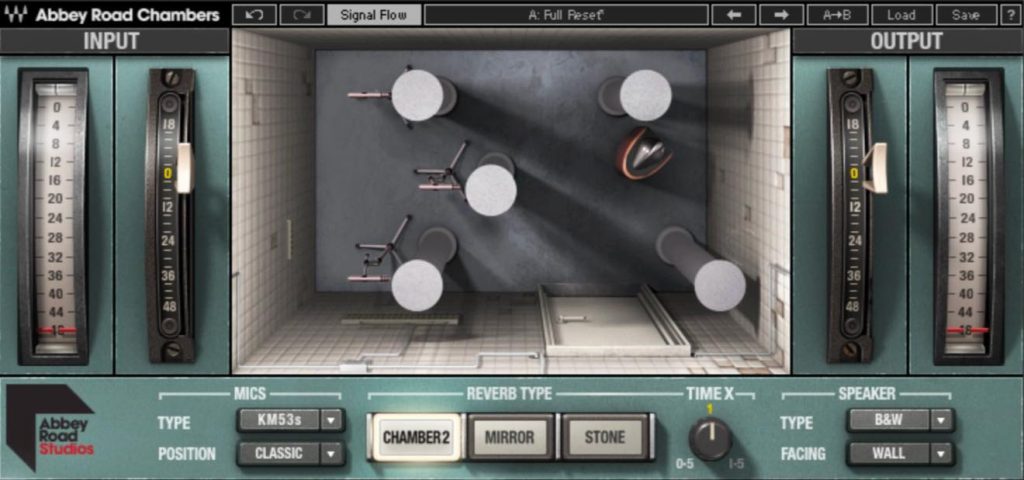
CHAMBER2 is the plugin's signature echo chamber. It has a soft sound with somewhat pronounced low mids and feels suitable for a wide range of uses.
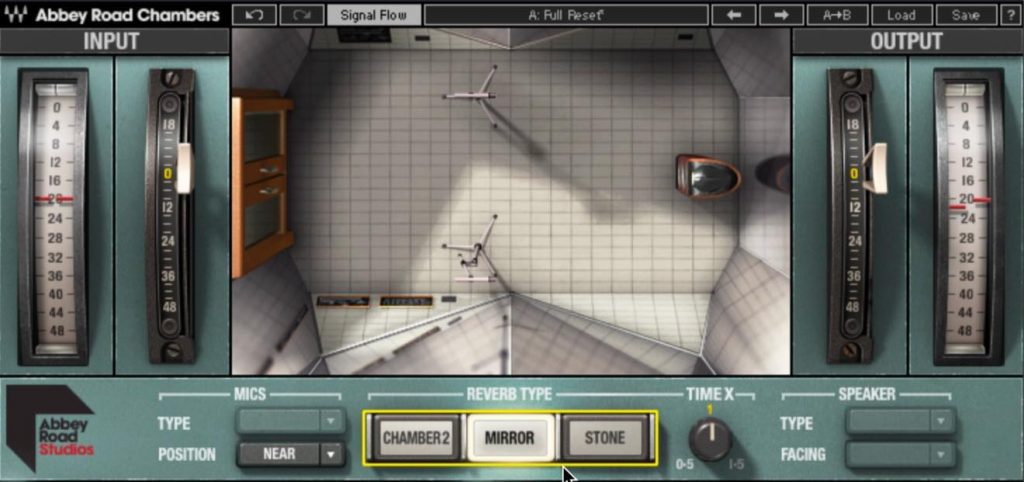
MIRROR is a mirrored room with a bright, metallic character. Its relatively restrained low mids give it a clean sound. It could also work on vocals in place of a plate.
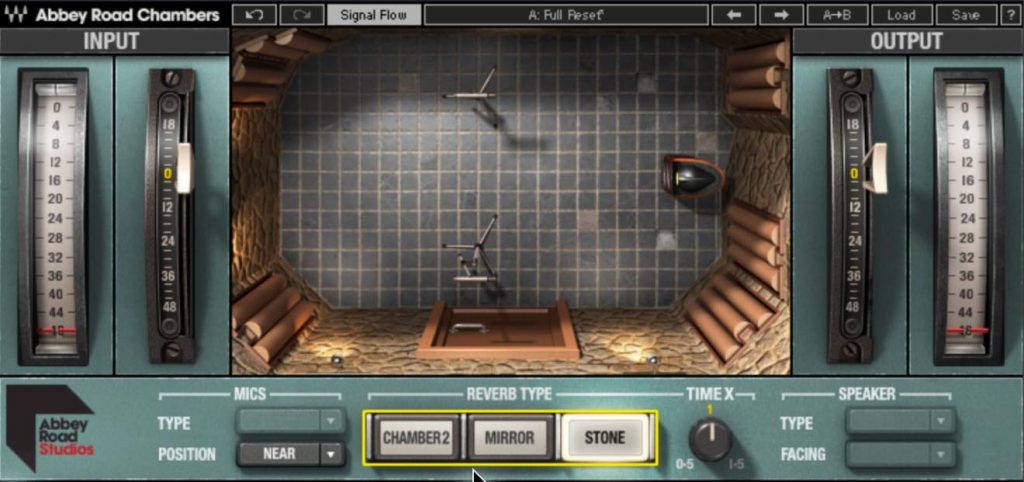
STONE sounds reminiscent of a dead room. Its compact reverb could work well as a drum room, for example.
Once you've chosen a TYPE, move on to the microphone, speaker, and time settings.
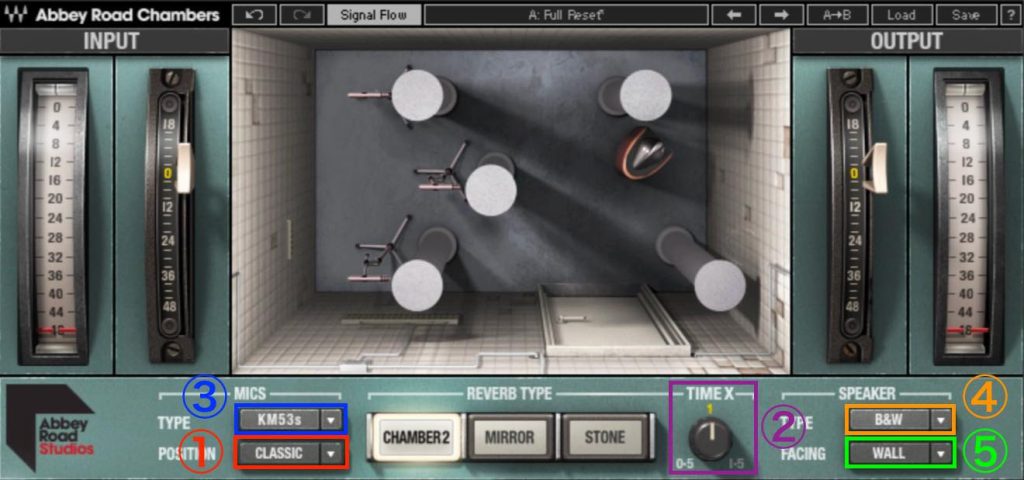
- 1. Microphone position: Choose WALL, CLASSIC, or ROOM. You can also change the position by clicking inside the room illustration. WALL emphasizes reflections and low frequencies. ROOM is closer to the speaker and sounds comparatively clean. CLASSIC sits between the two and seems to offer a balanced sound. For MIRROR and STONE, the choices are NEAR and FAR.
- 2. Reverb length: A physical echo chamber normally doesn't let you change its reverb time, but the plugin adds flexibility. You can adjust the reverb time from 0.5 to 1.5 times the original length.
- 3. Microphone type (CHAMBER2 only): The Neumann sounds slightly brighter, while the Schoeps sounds flat and natural.
- 4. Speaker type (CHAMBER2 only): The Altec seems to have a narrower frequency range focused on the upper mids. Choosing it may save some work if you're after a lighter reverb. The B&W sounds flatter and leaves more room for further shaping.
- 5. Speaker direction: WALL produces a relatively understated sound dominated by reflections. ROOM offers a richer sense of the room, with a distinctive midrange character.
Setting the FILTER Section
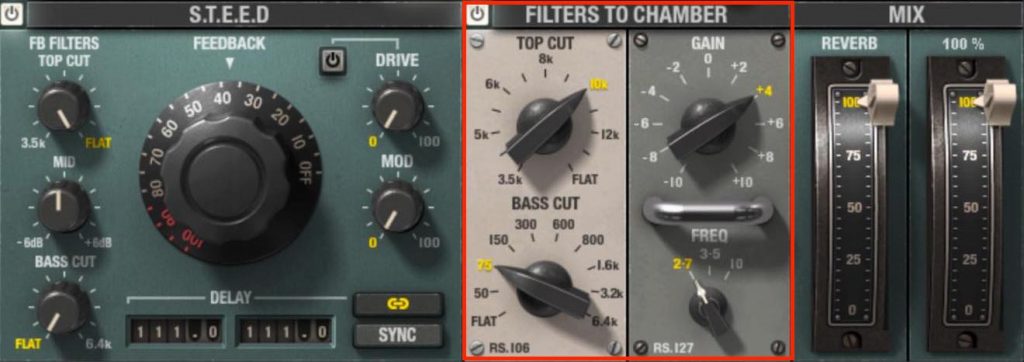
As its name suggests, TOP CUT is a high-cut filter, with an adjustable cutoff frequency. BASS CUT is a low-cut filter whose cutoff frequency can also be adjusted.
Next to these is a bell EQ. Choose 2.7 kHz, 3.5 kHz, or 10 kHz and adjust the gain within a ±10 dB range.
For the usual low-cut treatment, find the point that keeps low-frequency movement from becoming too heavy. Avoid cutting too much, or you may lose the character of the reverb. High frequencies can also get in the way when using reverb to blend tracks, so roll off some of the top end as well. The bell EQ affects the sound more gently than EQ on the source track, making it useful for subtly boosting a particular frequency range.
Setting S.T.E.E.D
S.T.E.E.D stands for “Send, Tape, Echo, Echo, Delay” and is essentially a tape-delay module. With longer delay times, it's safer to avoid applying it to rhythm-section tracks or sources with strong transients.
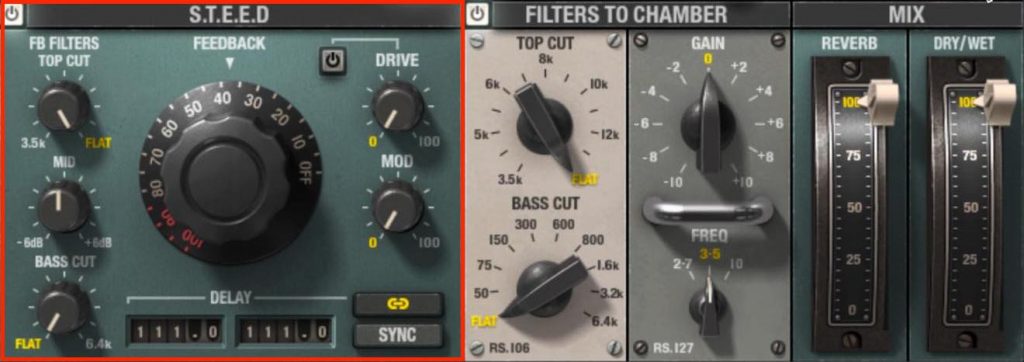
Inside Abbey Road Chambers, the reverb follows S.T.E.E.D, so in this setup the reverb is applied only to the delayed signal. Choose settings that help it blend without becoming too sluggish—for example, STONE as the TYPE. To use it as a pure delay, turn the REVERB slider all the way down.
Then adjust FEEDBACK and DELAY time to suit the tracks you're processing. In the FILTER section, a suitable amount of TOP CUT can smooth the feedback and help it blend into the mix.
Finally, try adding the analog character of tape delay with DRIVE and MOD. A little distortion can help the delay sit with the backing track. Keep MOD subtle enough that you don't notice the pitch movement—think of it as a finishing touch.
This installment covered Abbey Road Reverb Plates and Abbey Road Chambers from Abbey Road Collection. Both offer more flexibility than you might expect and should suit a wide range of sources. Try using their different strengths to bring these sounds into your mixes.
Product URL: https://bit.ly/3c1pfeK
These tips cover practical techniques for applying the Abbey Road Reverb Plates and Abbey Road Chambers reverb plugins to a song.
> Better Mixing Tips #8: Waves Abbey Road Collection, Part 2 — Reverb
📝 Article: https://t.co/89Y5m93ThL
🎥 YouTube: https://t.co/lCqQf5n037 pic.twitter.com/vhQLqLuFmV
— SLEEP FREAKS (@SLEEPFREAKS_DTM) January 25, 2020
Frequently Asked Questions
Q1. Which tracks benefit most from plate reverb?
It is particularly useful for shaping lead vocals. Rather than realistically recreating a space, plate reverb adds presence and texture, making it well suited to bringing out a vocal's depth and character. Adjusting its stereo placement with a stereo imager can make it even more effective.
Q2. How should I adjust the Damper parameter in Abbey Road Reverb Plates?
Damper offers 11 settings from 0 to 10 and controls the reverb's decay time. Adjust it gradually together with your plate choice until the reverb length suits the song. Start with a generous send level and lower it toward the point where the reverb no longer draws too much attention to itself.
Q3. Should I apply the same amount of chamber reverb to every track?
No. It's important to vary the amount by track. Drums and percussion generally need less, melodic instruments such as strings can take relatively more, and bass is usually left without reverb. Adjust the amount on each track to help the overall mix blend together.
NEW ARTICLES
Latest English Articles