
The distinctive reverb treatment often used on lead synths in EDM can be achieved with a sidechain technique. With this method, reverb remains only in the gaps between the lead synth's notes, while the attacks of the notes stay clear. After adjusting the reverb with a send/return, you place a sidechain compressor after the reverb on the AUX track and set the original lead synth as the trigger, giving you a refined sense of space that doesn't spoil the beat. Choosing a compressor that can handle fast attacks, such as an FET type, is the key to better sound.
Use sidechaining to get a distinctive reverb sound
This time, we introduce how to apply the distinctive reverb often heard on lead synths in EDM tracks.
Its characteristic is a sound in which reverb remains only in the gaps between the lead synth's notes.
First, compare these three audio examples:
DRY with no reverb, normal reverb, and processed reverb.
(The first two bars are the lead synth only; the last two bars are lead synth + beat.)
DRY with no reverb
With normal reverb
With processed reverb
To get this effect, we use a technique called "sidechaining", which we have explained several times before.

Routing setup
If you know the basics of send/return and sidechaining, the setup is very easy.
First, set up the routing as shown in the diagram below.

- 1. Adjust the lead synth with a send reverb until you like the sound
- 2. On the AUX track where the reverb is inserted, place a sidechain compressor after the reverb
- 3. Set the sidechain compressor's trigger to the original lead synth and adjust until you like the sound
How to apply send/return in each DAW

 Logic
 Cubase
 Ableton Live
 Studio One
 FL Studio
How to apply sidechaining in each DAW
Compressor settings
Next, set up the compressor that receives the sidechain.

- Set RATIO as high as possible
- Set ATTACK to the fastest setting
- Adjust Release according to the BPM and the lead phrase
*The image example uses about 100 ms (1/16 at 128 BPM), but this is only a guideline.
Set it for each song while checking by ear how much reverb is applied.
The type of compressor you choose is also important.
With the default compressor included with a DAW,
the start of the sound often isn't squashed even with the fastest attack.
That's why we recommend
using a compressor with a fast attack response, such as the FET-style compressors now included as standard in many DAWs.
Below are comparison examples processed with a typical standard DAW compressor and with an FET-style compressor included with a DAW.
Take a listen.
You can hear that with the standard compressor, a little reverb remains at the start of the lead synth notes.
Standard compressor
FET-style compressor
Tip
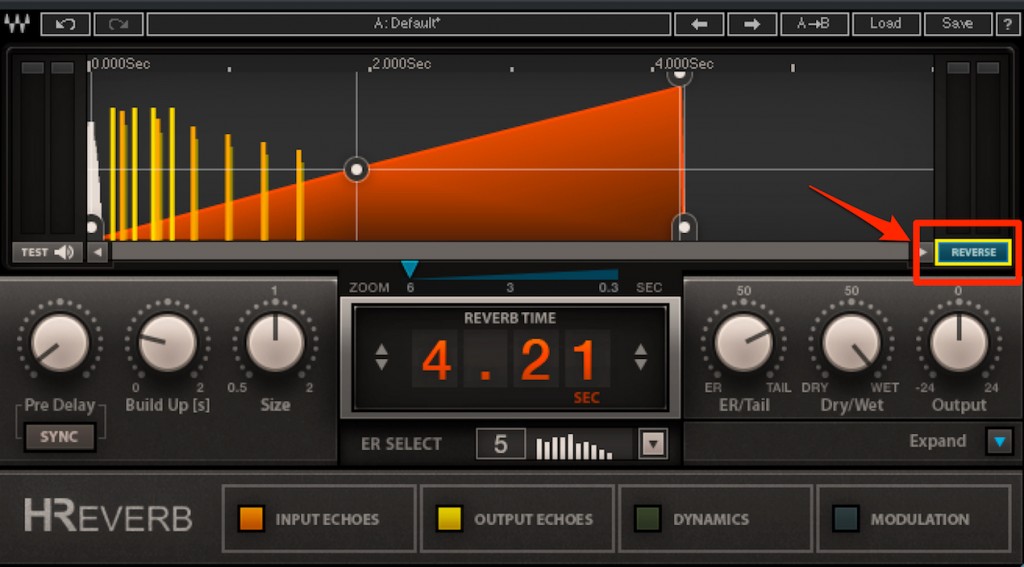
Using a reverb with a reverse function lets you get a more complex effect with a different flavor.
Frequently asked questions
Q1. Can beginners set up sidechain reverb processing?
Yes. If you have basic knowledge of send/return and sidechaining, the routing setup is relatively easy. Since the method for each DAW is explained, you can set it up by following the steps for your software.
Q2. Why is the choice of compressor important?
The standard compressors included with DAWs have slow attack times, so reverb remains even at the start of the lead notes. Using a fast-responding compressor such as an FET type lets you place the reverb precisely in the gaps between notes.
Q3. What are guideline settings for RATIO, ATTACK, and RELEASE?
Set RATIO as high as possible and ATTACK to the fastest setting. Adjust RELEASE according to the BPM and lead phrase; at 128 BPM, 1/16 (about 100 ms) is a guideline, but adjust it by ear for each song.
NEW ARTICLES
Latest English Articles











