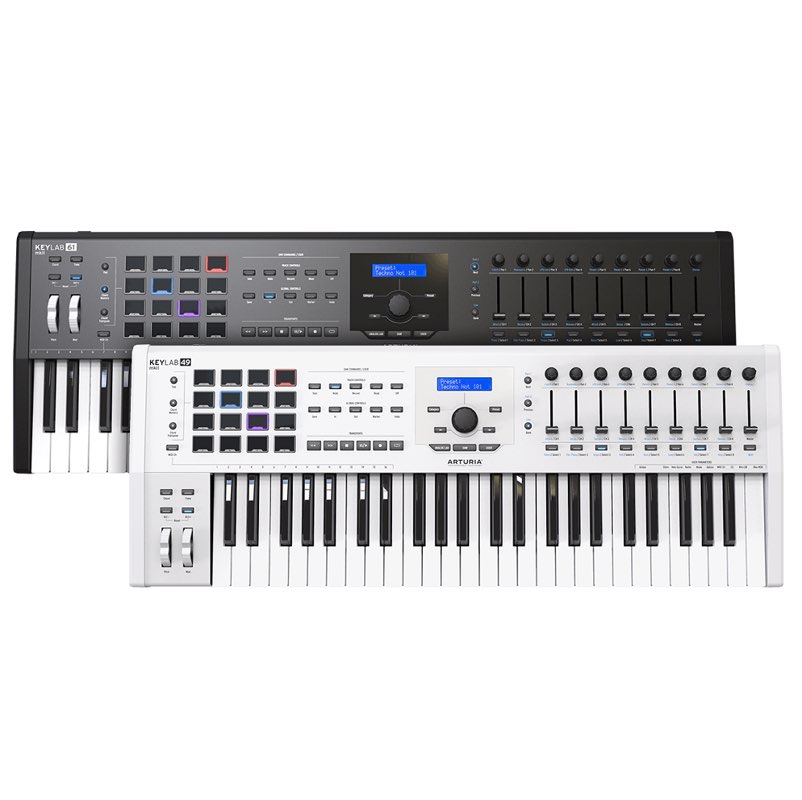
With the included software "MIDI Control Center", the ARTURIA KeyLab MKII lets you freely customize controllers such as faders, rotary encoders and pads. This customization lets you set pad layouts and CC numbers to suit the DAW and synthesizers you use, dramatically increasing its flexibility as a MIDI controller. Up to 10 custom presets can be stored on the KeyLab MKII and switched easily by drag and drop, greatly streamlining your production workflow.
Freely Customize Each Controller on the KeyLab MKII
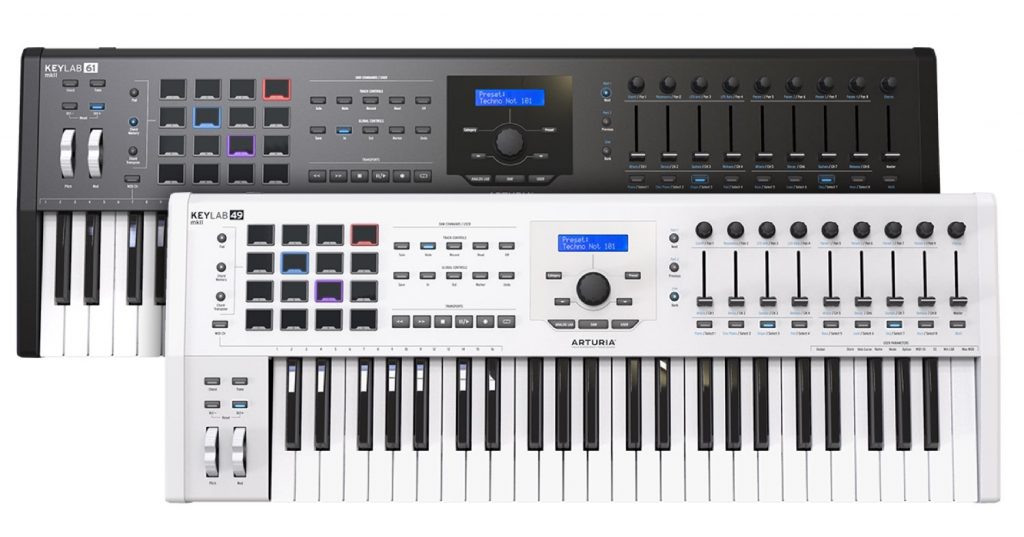
In this final chapter, we explain how to customize the faders, rotary encoders and pads on the ARTURIA KeyLab MKII as MIDI controllers.
These settings dramatically increase your flexibility when using the product as a MIDI controller.

These customizations can also be set from the hardware itself, but for fast and efficient customization, we strongly recommend using "MIDI Control Center".
Custom settings created in MIDI Control Center can be saved without limit and loaded into the Arturia KeyLab MkII as needed.
Downloading MIDI Control Center
First, download and install "MIDI Control Center", the software used for customization.

Launch "Arturia Software Center", which you used to download "Analog Lab" and "Piano V2" when you bought the KeyLab MKII.

MIDI Control Center appears here, so download and install it.
Then launch the installed MIDI Control Center.
Customizing with MIDI Control Center
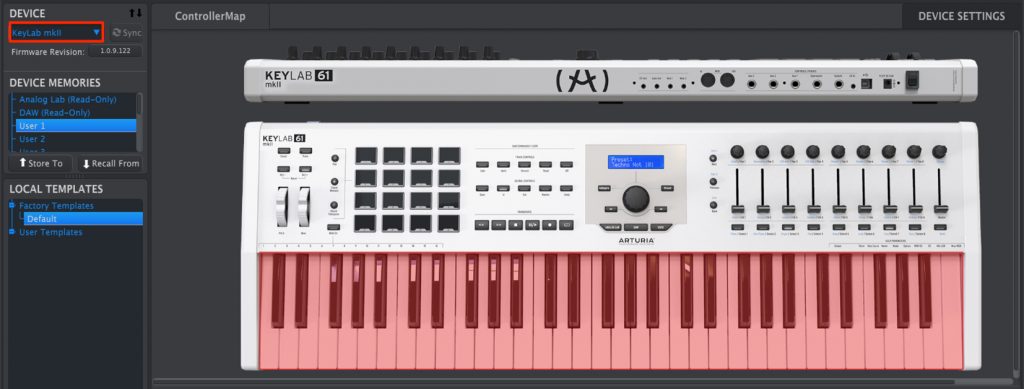
Confirm that the item at the top left is set to "KeyLab mkII".
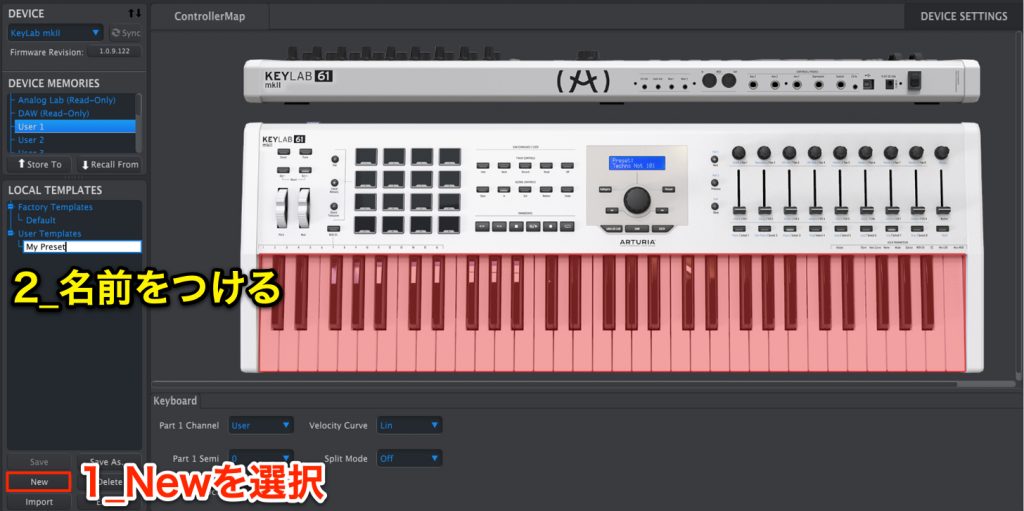
The default settings are currently selected.
Since you can't save customizations to the default settings, click "New" to create a "User Template".
You can double-click it to rename it to something easy to recognize, and create as many preset patterns as you like.
Now that you're ready to customize, let's actually apply settings.
Click the controller you want.
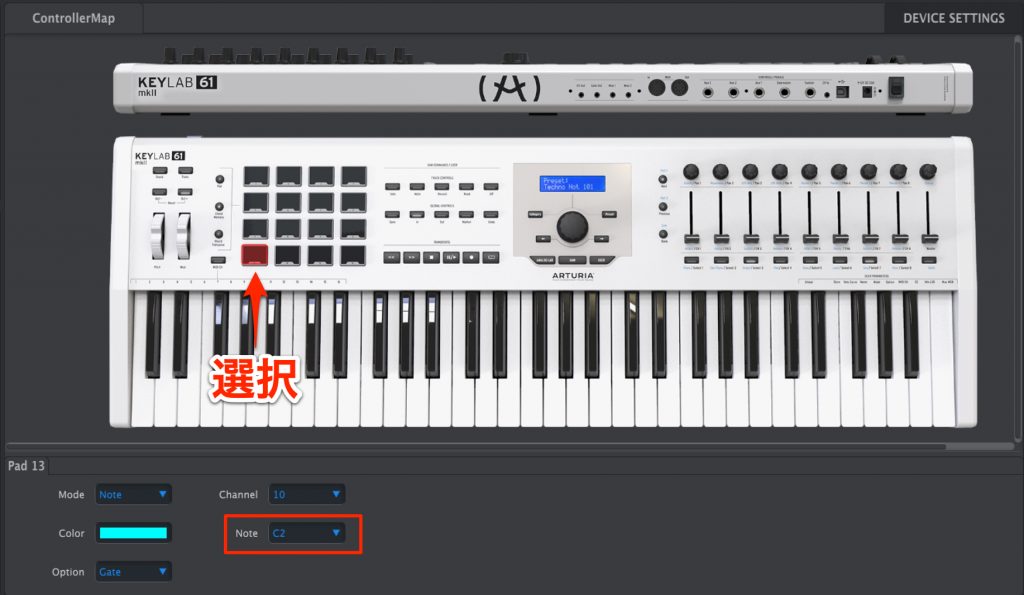
Here we selected Pad 13 at the bottom left. Its current information is shown below.
The note it plays is currently "C2", but by changing this to the note you want, you can create a pad layout that matches your software instrument.
Next, let's check the faders.
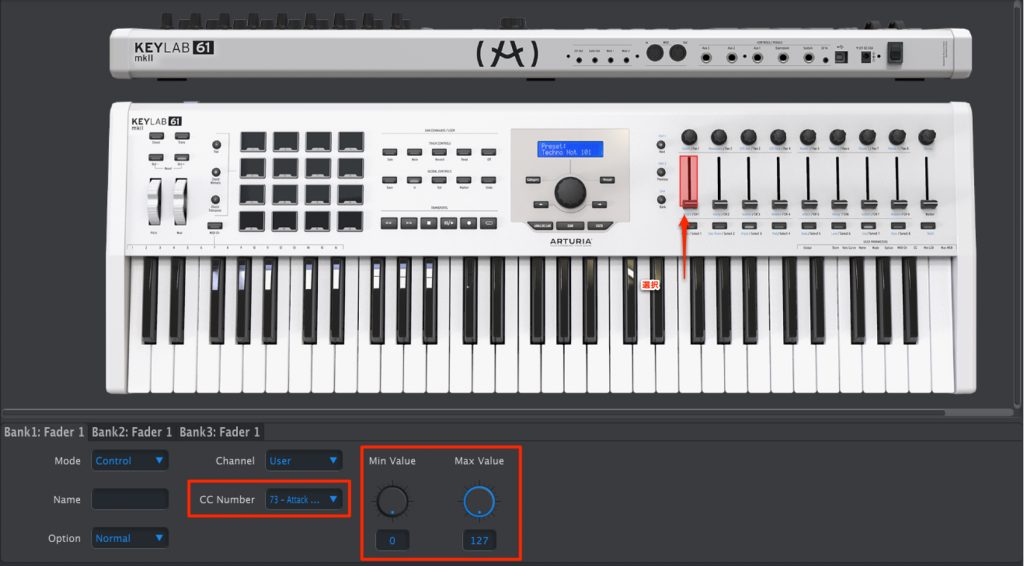
You can specify the control change you want to use from "CC Number".
Change it to the number assigned in the synthesizer or DAW you use.
Then, on the right, you can set the range of movement from "Min/Max Value".
This is handy when you don't want a parameter to go below or above a certain point, or when you want to fine-tune values precisely.
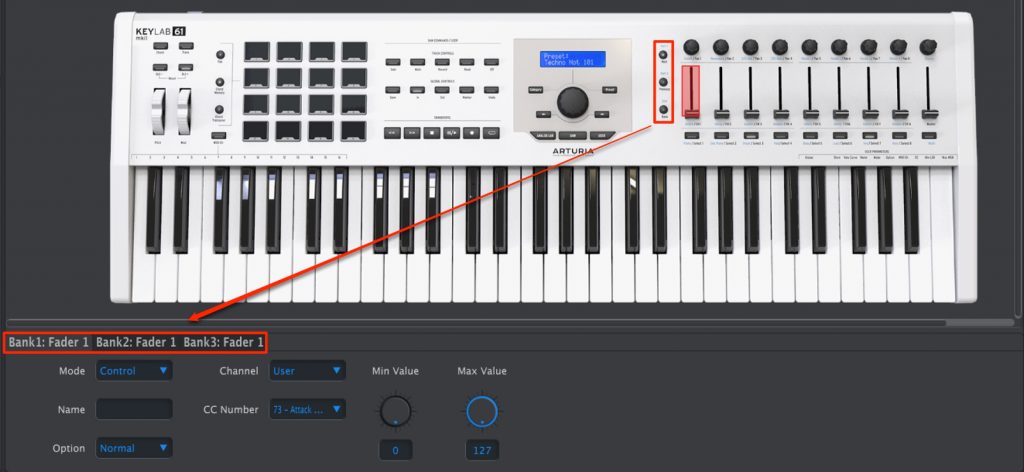
With "Bank" at the top, you can prepare three settings and switch between them with the buttons shown in the image.
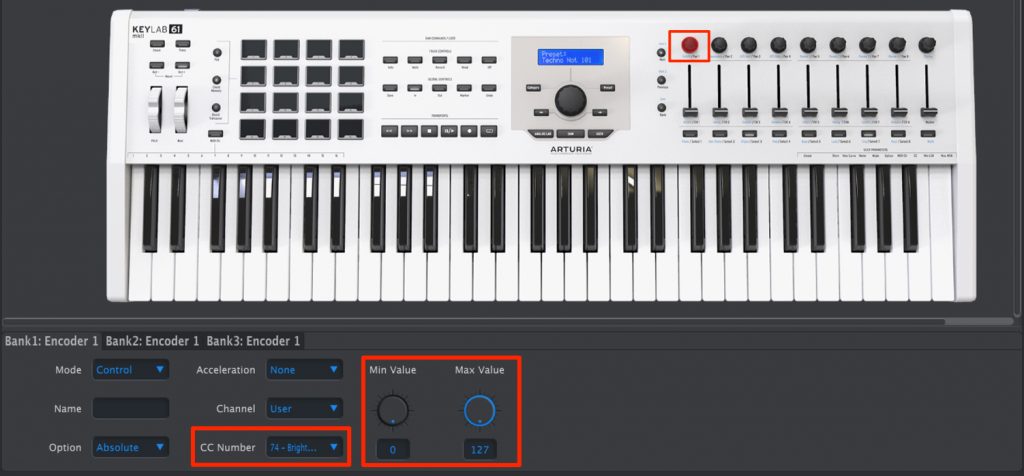
The rotary encoders can be set in the same way as the faders.
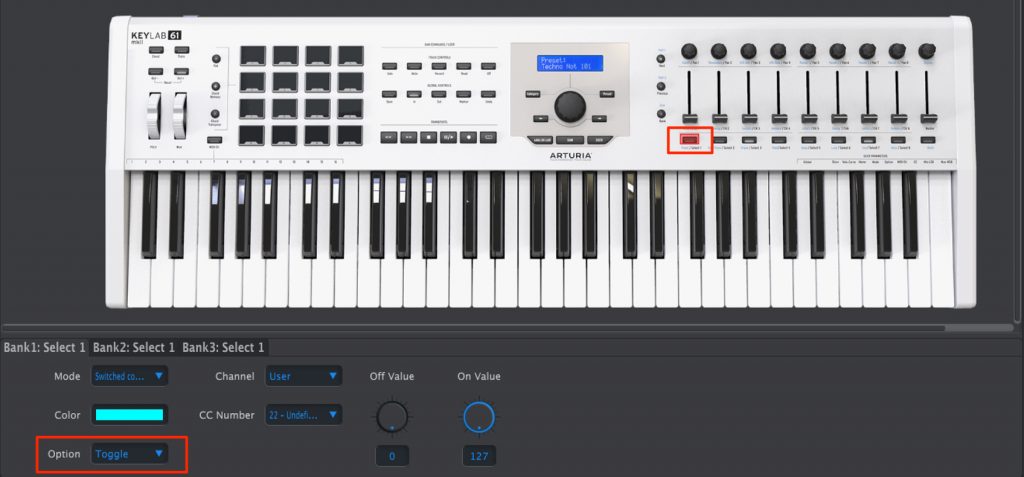
The Select switch is suited to controlling on/off choices when used in "Toggle" mode.
For example, a plug-in's bypass button.
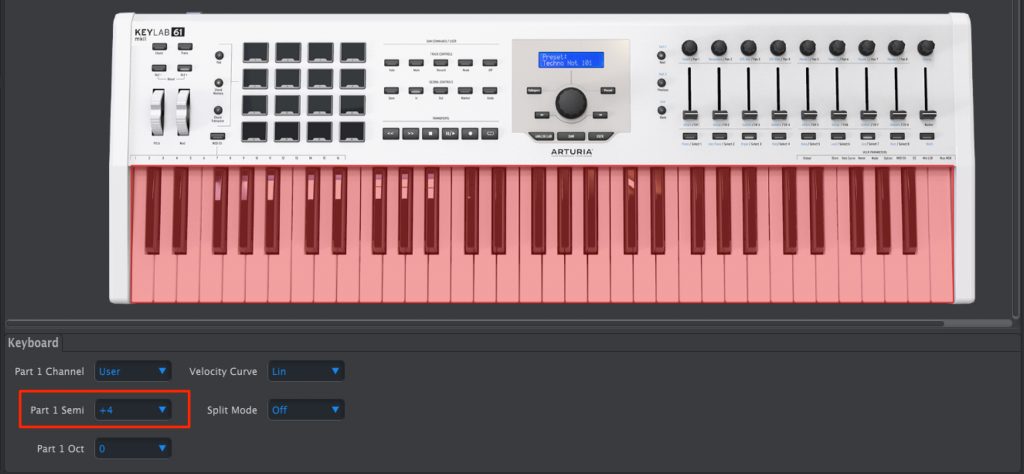
For the keyboard, you can transpose the base note in semitones with "Semi".
For example, with "+4", pressing C on the keyboard plays "E", four semitones higher.
Notes are assigned to the keys to the left and right with this E as the base.
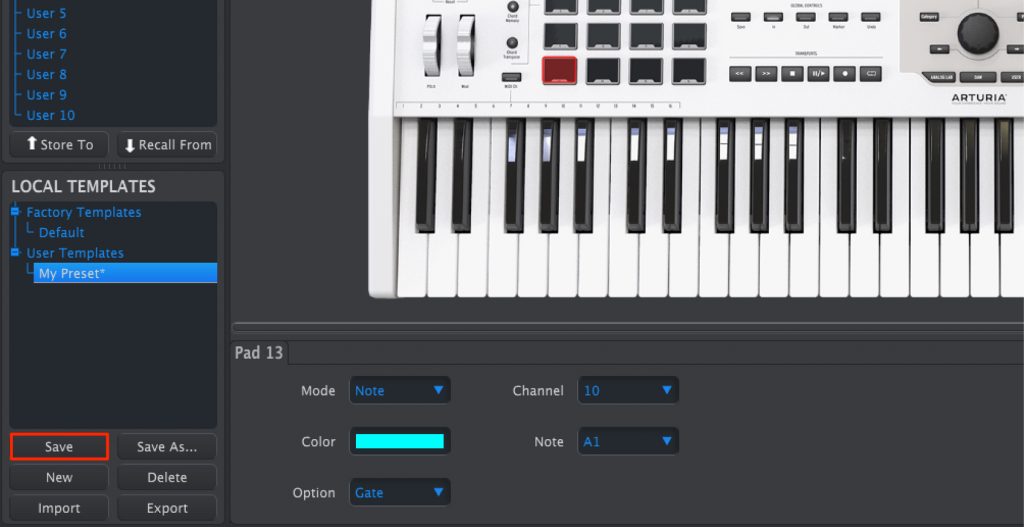
Once you've finished these MIDI settings, press "Save" to save this state.
Applying Your Custom Settings to the KeyLab MkII
The KeyLab MKII can hold up to 10 custom settings.
Customizing as above doesn't apply the results by itself, so let's apply them.
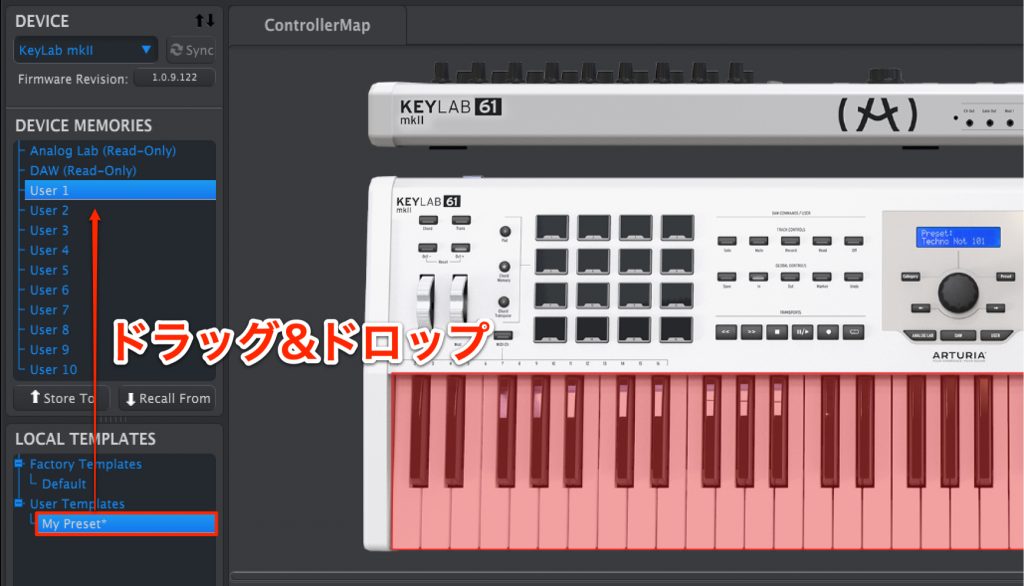
Drag and drop the custom preset you created onto any preset slot (User 1–10).
Here we applied it to User 1. That completes the setup.
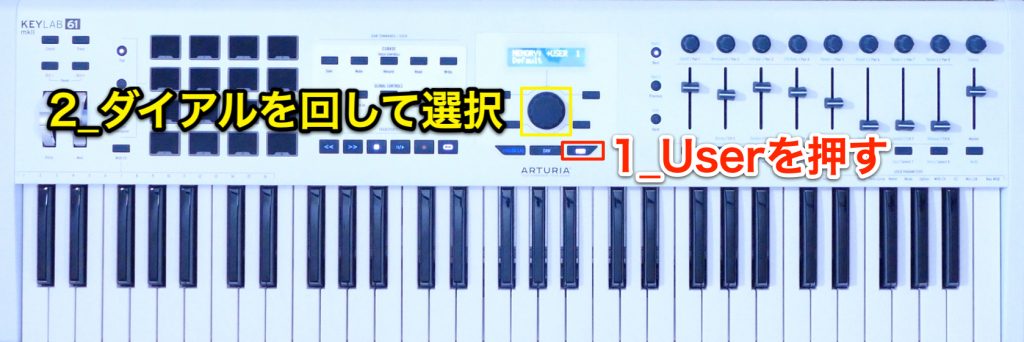
Press the "USER" button on the KeyLab MkII.
Turn the dial to select User 1–10, and the custom settings you created are applied.
What If I Want to Reset User 1–10 to Default?
Sometimes you may want to reset your custom settings and return to the initial state.
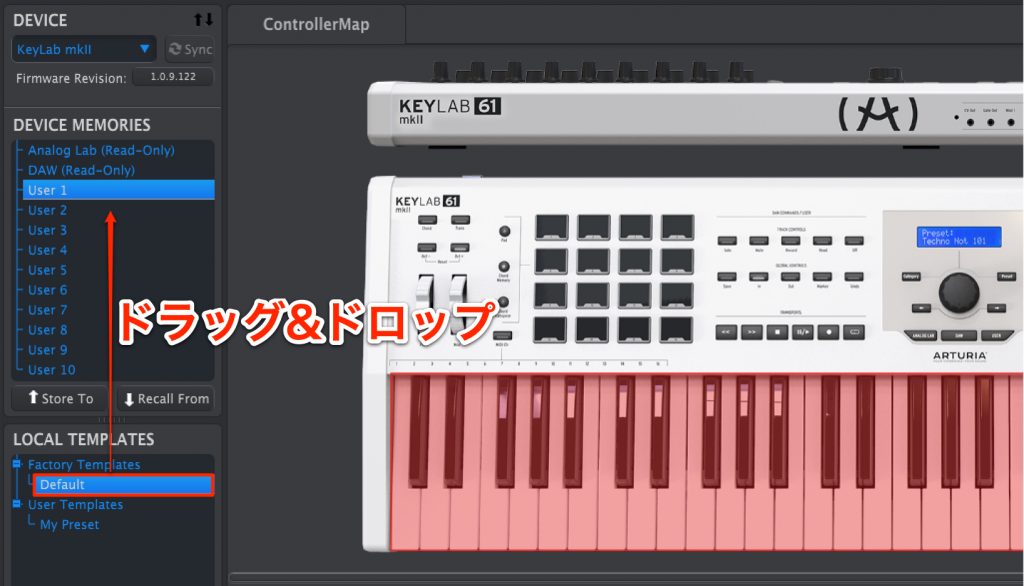
Drag and drop "Default" onto the User slot (1–10) you want.
The selected preset returns to its initial state.
What did you think?
With this customization, it also excels as a capable MIDI controller.
That concludes our guide to the ARTURIA KeyLab MKII.
We hope we've conveyed that it's a powerful product that goes beyond an ordinary MIDI keyboard, specializing in DAW production and supporting your composing.
Be sure to bring it into your workflow and create great work!
- 1DAW Integration, Transpose and Chord Functions
- 2Playing the Pads, Working with Analog Lab and DAW Mixer Control
- 3Customizing the MIDI Controllers with MIDI Control Center (this article)
Go to the product page Contact: KORG / KID Customer Support TEL: 0570-666-569
Frequently Asked Questions
Q1. Where can I download MIDI Control Center?
You can download and install it from "Arturia Software Center", which you downloaded when you bought the KeyLab MKII. If you already have an account, you can access it right after logging in.
Q2. How many custom settings can be stored on the KeyLab MKII?
Up to 10 custom settings (User 1–User 10) can be stored. You can use different presets for different DAWs or projects.
Q3. Why change the pads' note numbers?
Customizing the pad layout to match the software instrument or drum program you use allows more intuitive and efficient playing and production.
Q4. What is the faders' "Min/Max Value" setting used for?
It's used to limit a parameter's range of movement or to achieve fine adjustments. For example, it's handy when you want to adjust only a specific frequency range.
Q5. Can I reset custom settings to the initial state?
Yes. Drag and drop "Default" onto the User slot (1–10) you want, and the selected preset is reset to its initial state.
NEW ARTICLES
Latest English Articles