Dithering in FL Studio is an important process you can use when exporting audio files. Just select Export from the File menu, specify the target resolution in WAV bit depth when exporting in WAV format, and check Dithering. Dithering reduces quantization noise and minimizes quality loss when converting from a higher bit depth to a lower one, but note that you should avoid it when exporting at the same bit depth you produced in. It helps you optimize the mastering process.
Using Dithering in FL Studio
This article branches off from "Dithering" in the Mixing category.
Dithering is very easy to do.
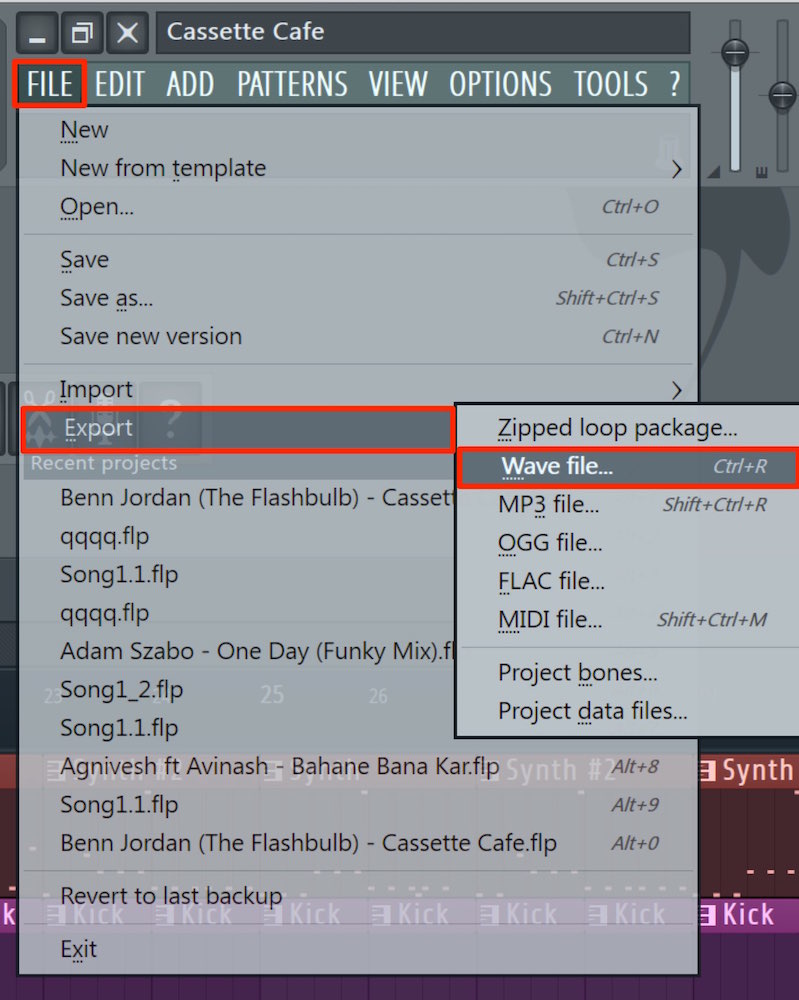
As with a normal song export, select "File" > "Export" > "Wave file."
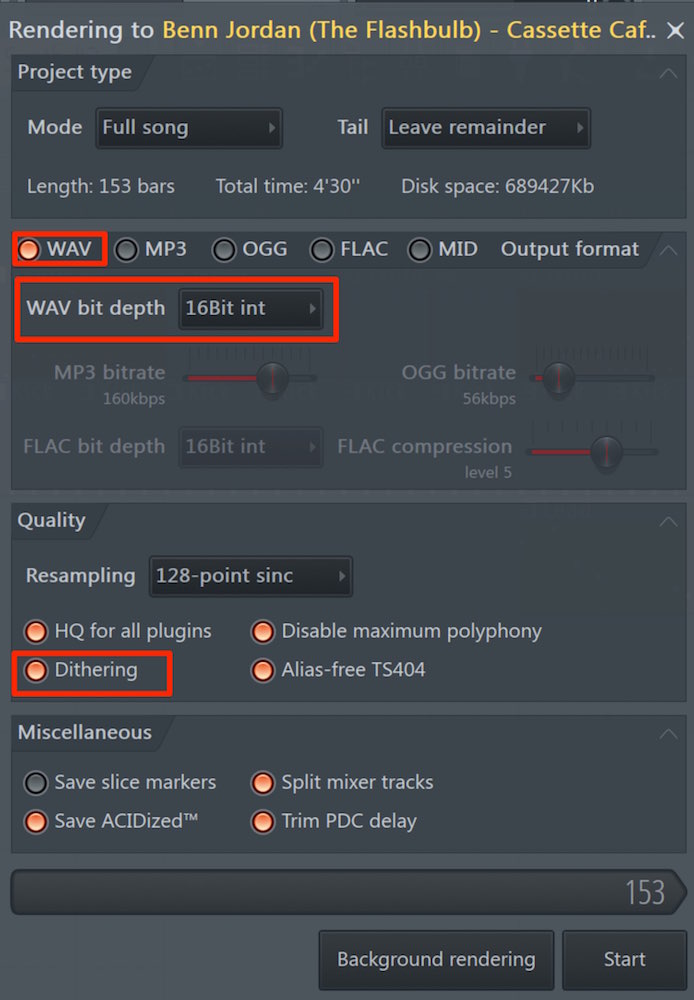
Specify the resolution in "WAV bit depth."
Check "Dithering" and export.
Dithering is now applied.
Note that if the bit depth you use for production is the same as the export bit depth,
export without using dithering.
Otherwise the sound will be degraded.

Frequently Asked Questions
Q1. What is the best bit depth when using dithering in FL Studio?
Use it when converting to a lower resolution than the bit depth used in production. For example, it's effective when converting from 32-bit float to 16-bit. Avoid it when exporting at the same bit depth, as dithering will degrade the sound.
Q2. What effect does applying dithering have?
It reduces the quantization noise that occurs when lowering the bit depth. Especially when mastering to 16-bit, it minimizes quality loss and achieves a more natural, high-quality sound.
Q3. Is dithering necessary for iTunes distribution?
When mastering for iTunes distribution, you may need to convert to a bit depth that meets the platform's requirements. Using dithering in that case helps maintain the best sound quality.
NEW ARTICLES
Latest English Articles