FL Studio's automation function is an important feature that automatically changes any parameter in a song over time, such as volume, pan, synth knobs and effect parameters. It is essential for professional music production, from fade-outs and adjusting reverb depth to moving sound effects left and right and adjusting vocal levels. This article gives a practical explanation covering how to create automation clips, how to add, delete and copy points, how to adjust curves, and even how to set up parameters in plug-ins that are not supported directly, so users from beginners to intermediate level can master automation.
Add movement to any parameter, including synths and effects
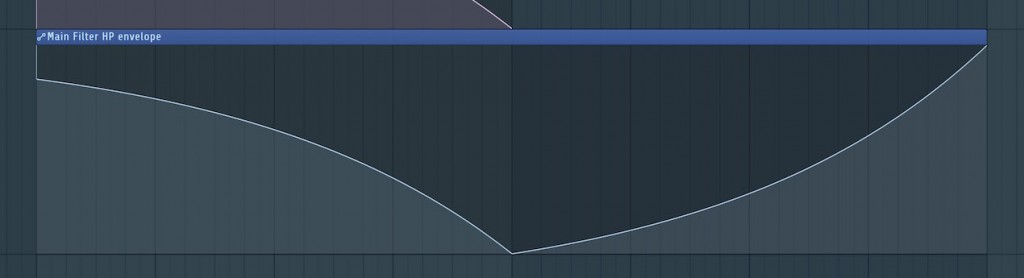
Automation is an indispensable function in arranging and mixing.
Including track volume and pan, as well as synth and effect knobs,
you can make any parameter change automatically during the song.
- A fade-out that gradually ends the song
- An arrangement where the reverb gradually gets deeper
- Sound effects that move left and right
- Smoothing the vocal volume so it blends into the song
You can achieve so many different effects that the list is endless.
Here we explain how to record automation.
Creating an automation clip
Here, let's record automation using volume as an example.
You can also set up fade-ins and fade-outs.
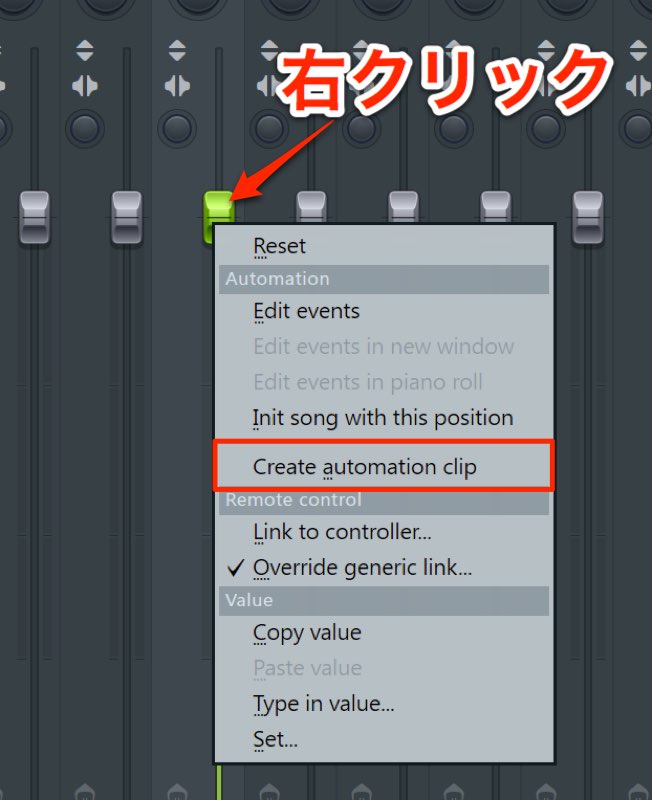
Right-click the parameter you want to record automation for,
and select "Create automation clip".
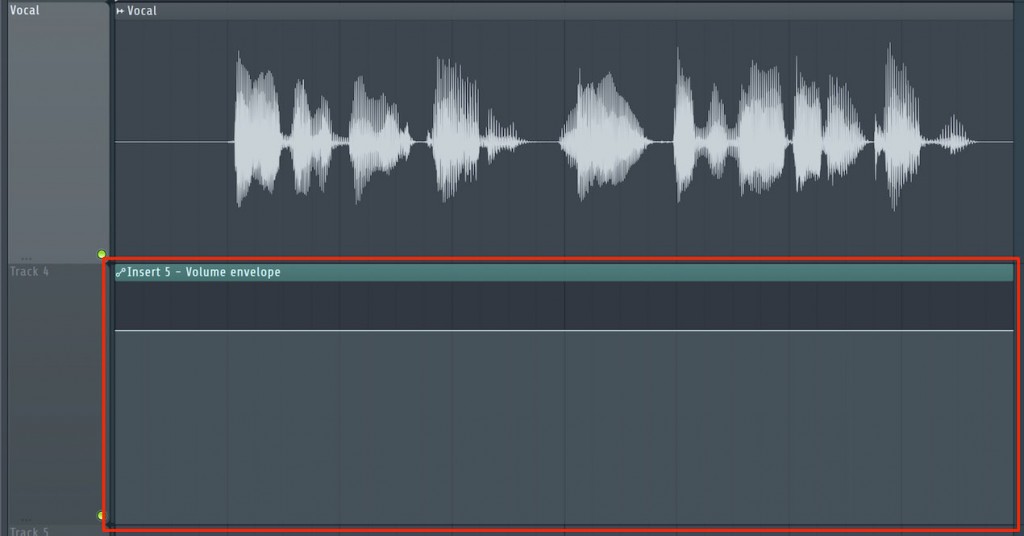
An automation clip is created like this.
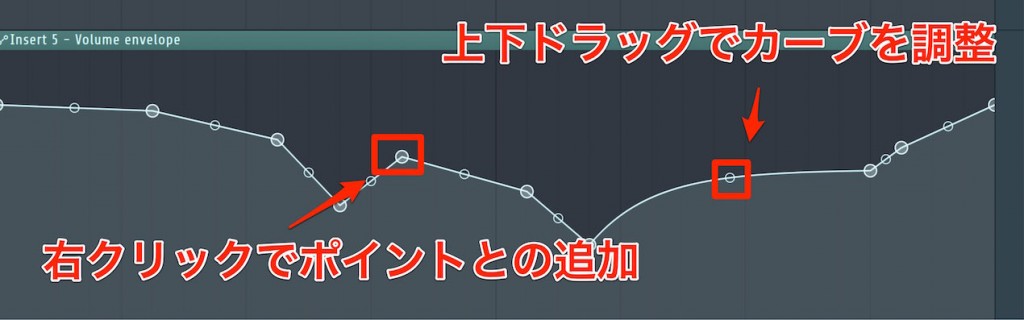
Add points to specify the movement.
- Right-click to add a point
- Drag left or right to move a point
- Drag up or down to adjust the curve
Deleting points
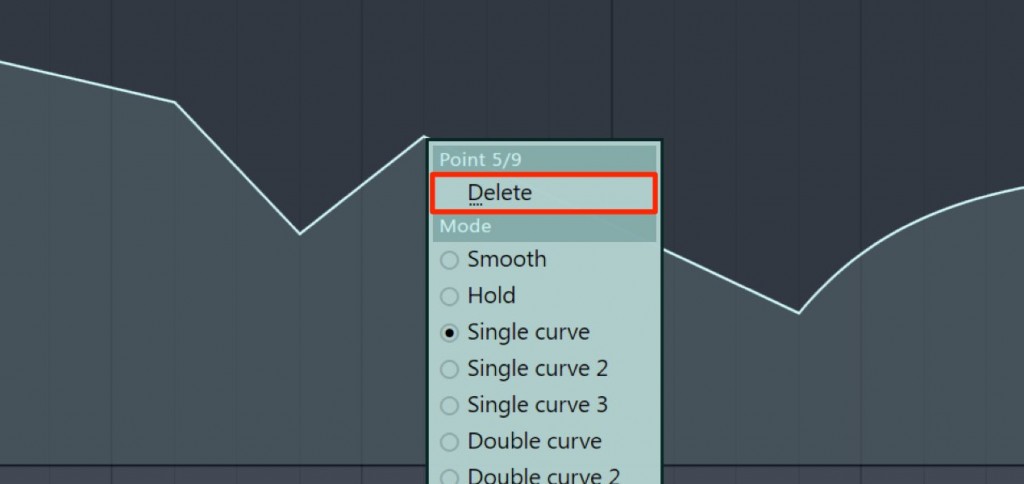
Right-click a point,
and choose "Delete" from the menu that appears to delete it.
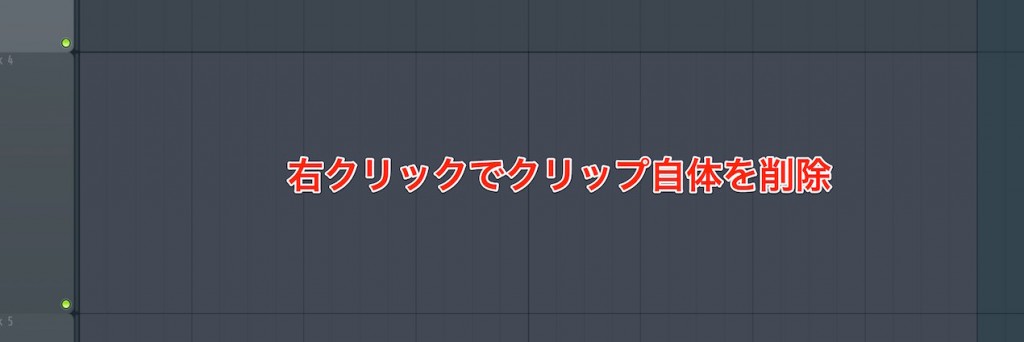
Right-clicking the clip lets you delete the whole automation.
Duplicating clips
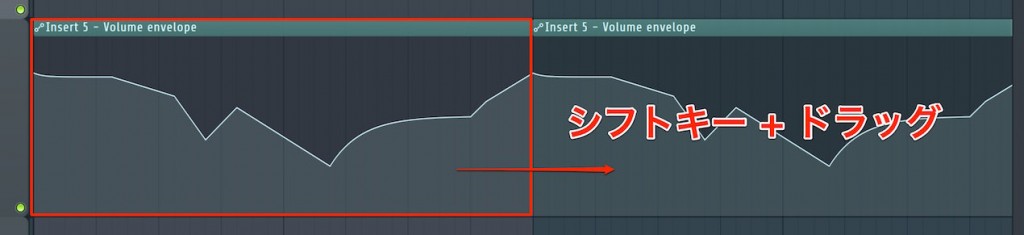
Just like normal clips, you can duplicate them with "Shift key + drag".
Temporarily disabling automation
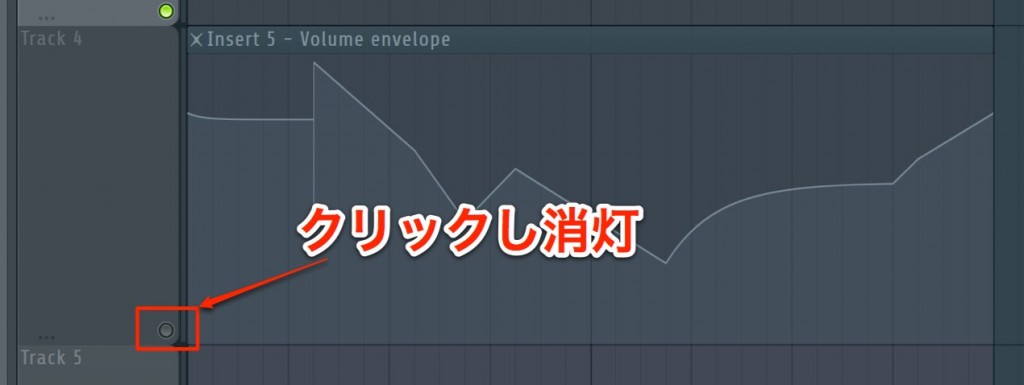
Mute the track itself, or mute the clip with the mute tool.
The benefit is that you can re-enable the clip at any time.
Using various automation curves
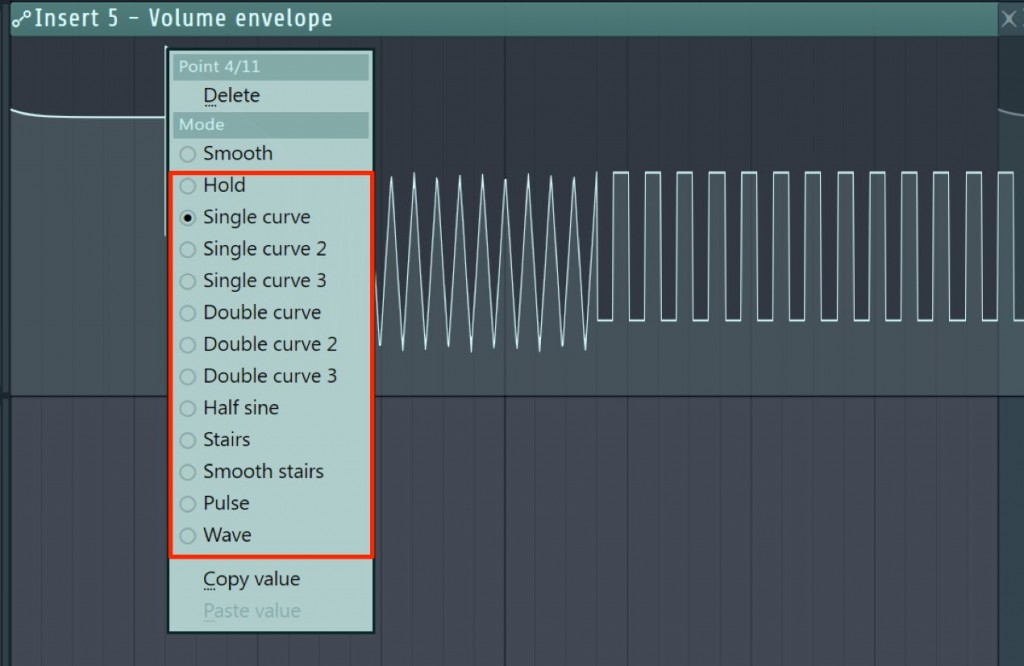
Right-clicking a point lets you change the automation curve.
There are also regular, patterned shapes, so please take a look.
For products that do not support automation clips
With plug-ins and software synths you have purchased separately,
you may not be able to create an automation clip by right-clicking.
Let's look at how to deal with this.
Here we use "Omnisphere 2" as an example.
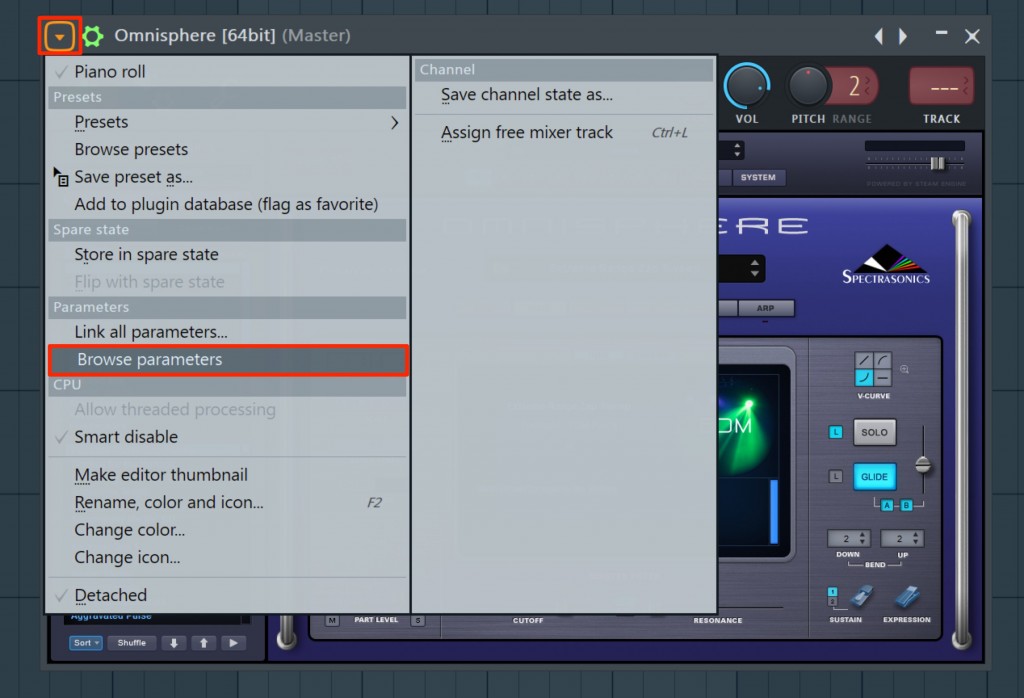
Click the top left of the plug-in and select "BROWSE parameters".
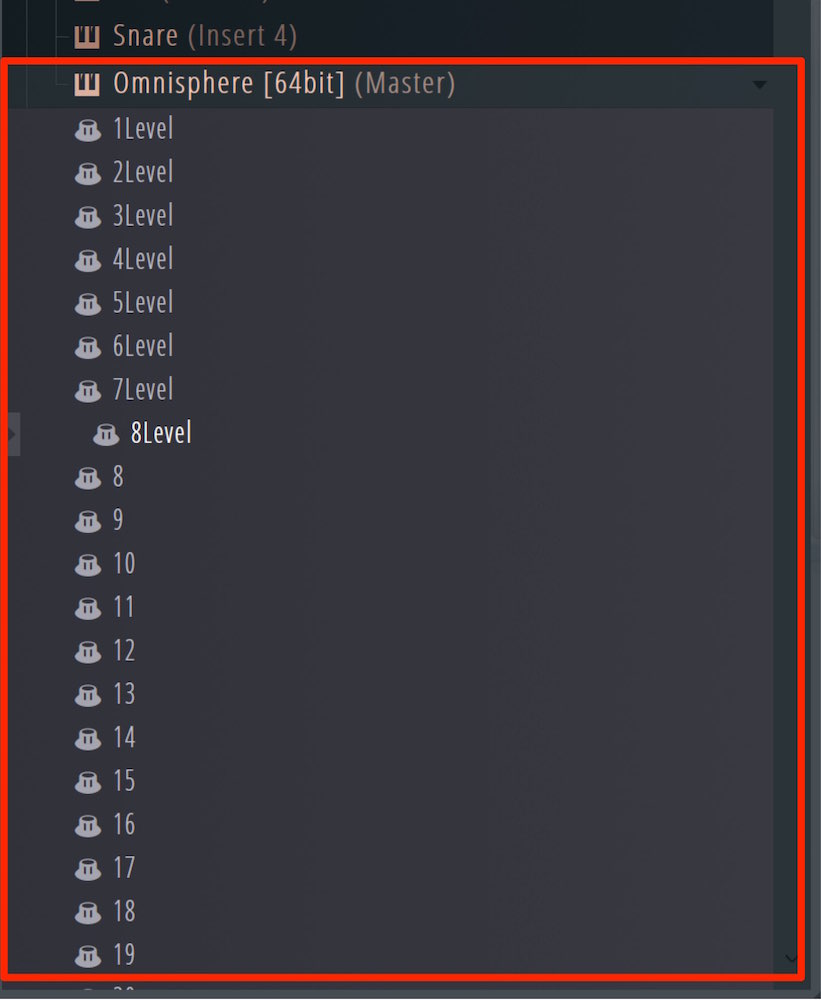
A list of parameters appears.
If the one you want is in this list, use it; if not,
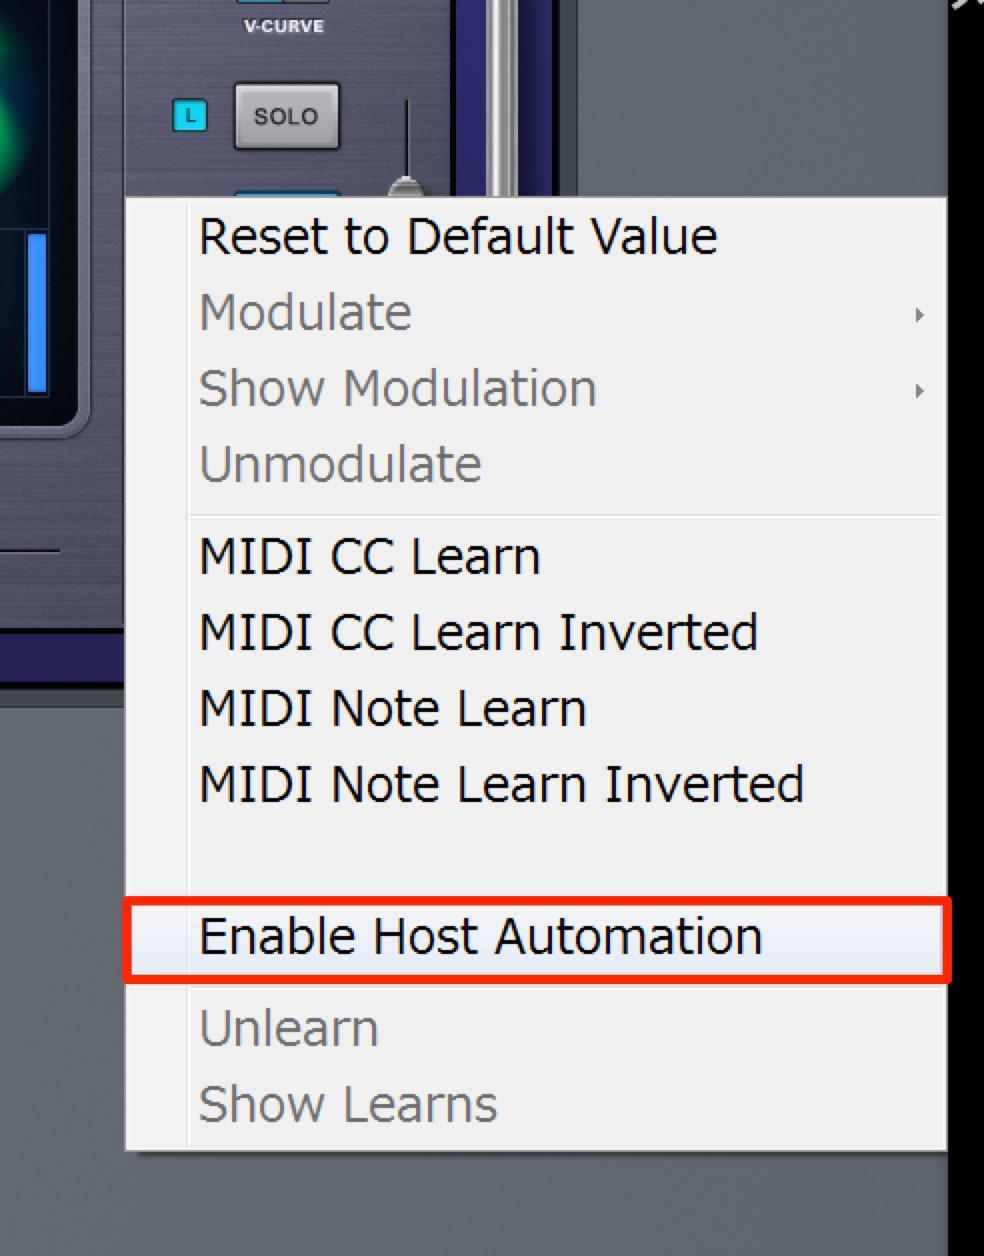
right-click the knob you want and select "Enable Host Automation".
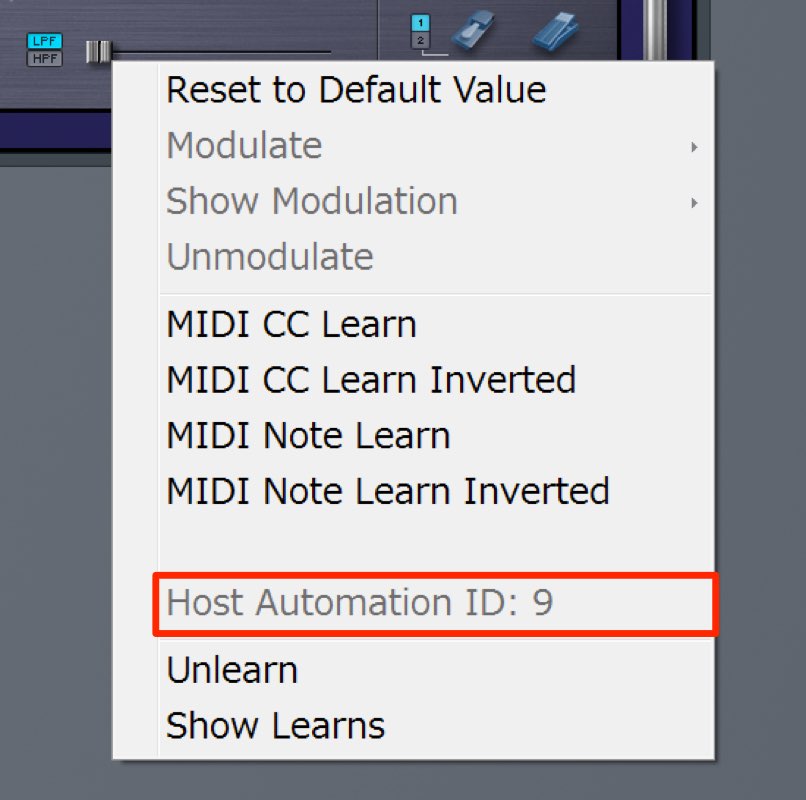
If you right-click the parameter again to check, you will see that a number has been assigned.
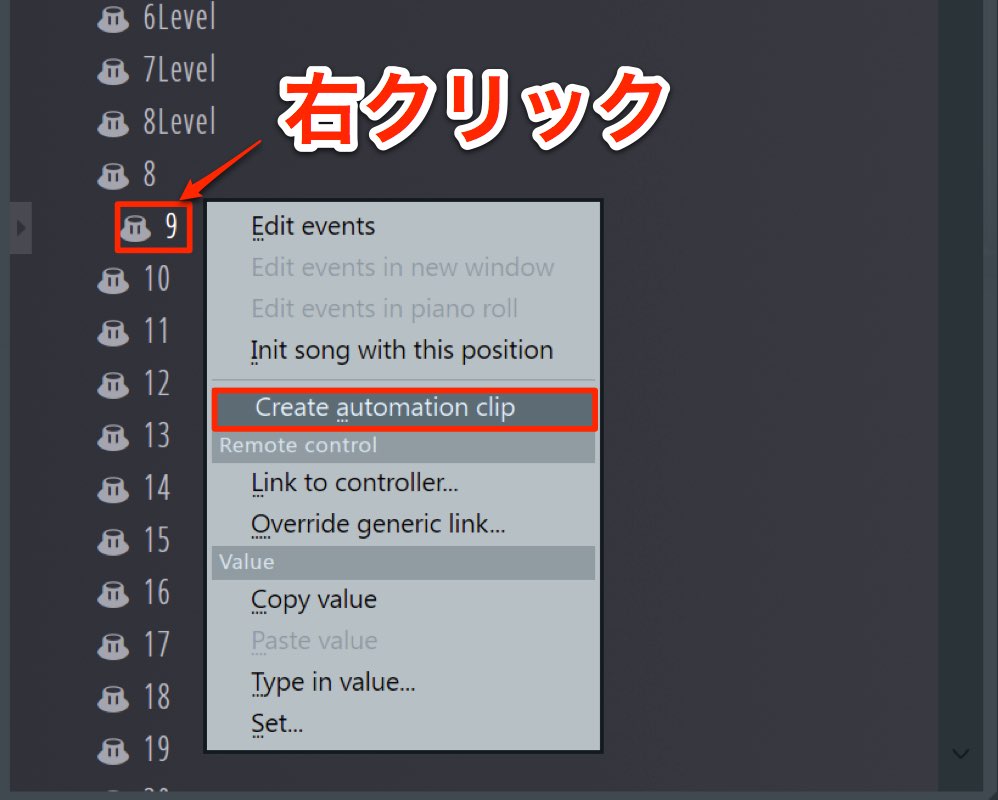
Then right-click the same assigned number and choose "Create automation clip".

Frequently Asked Questions
Q1. How do I create an automation clip in FL Studio?
Right-click the parameter you want to add movement to (such as volume or pan) and select "Create automation clip". Then right-click on the clip to add points, and drag left or right to set positions and up or down to adjust curves, so you can set any movement you like.
Q2. What should I do if I cannot create automation for a third-party plug-in synth?
Select "BROWSE parameters" from the top left of the plug-in to display the parameter list, then right-click the knob you want and select "Enable Host Automation". This assigns a number to the parameter, and you can create an automation clip from that number.
Q3. Can I temporarily disable automation I have created without deleting it?
Yes. You can temporarily disable automation by muting the track itself or muting the clip with the mute tool. The benefit is that you can easily re-enable the clip at any time.
NEW ARTICLES
Latest English Articles