
Cubase 10 improves the foundations with support for high-resolution displays and tempos up to 360 BPM, while MixConsole recall and an enhanced Media tab significantly improve professional music-production workflows. Six new sound sets, simpler side-chain routing, and the Distroyer distortion plug-in provide a wealth of creative features. Together, these additions improve efficiency and creative flexibility, making this a practical upgrade for music producers at every level.
New Plug-ins, Sound Libraries, and Improvements Large and Small
Welcome to the second installment of our guide to the highlights of Cubase 10.
This time, we will walk through a range of improvements and new features.
There is plenty to explore, including MixConsole recall and the new Distroyer plug-in, so be sure to follow the series through to the final installment, Part 3.
Let's take a closer look.
Cubase 10 New Features, Part 2 — Video
Download the Cubase 10 Song Project Here!
Lyrics and vocals: 3SECONDS Lisa Briar Rose (@3secondslb) / Music and arrangement: L75-3 (@l75_3)
Follow us on Twitter for music-production tips and tutorials.
- 1Cubase 10 New Features: The Evolution of VariAudio
- 2Cubase 10 New Features: MixConsole Recall, New Plug-ins, and More
- 3Cubase 10 New Features: Audio Alignment, Groove Agent SE 5, and More
High-Resolution Display Support and a Higher Tempo Limit
First, let's look at support for high-resolution displays.
Cubase 10 officially supports HiDPI, 4K, and Retina displays.
The interface looks great and offers better visibility when making detailed edits.

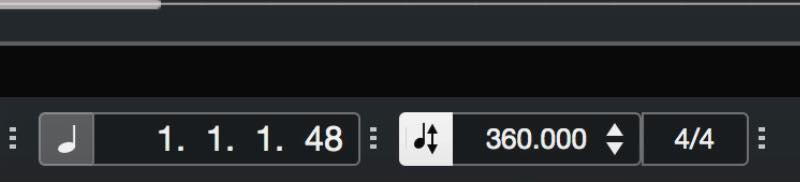
Another less obvious change is that you can now set the tempo as high as 360 BPM.
Redesigned Right-Click Menus
The right-click menus have been redesigned.
Right-click an empty area without an event to access selection and zoom commands, along with the option to export an audio mixdown.
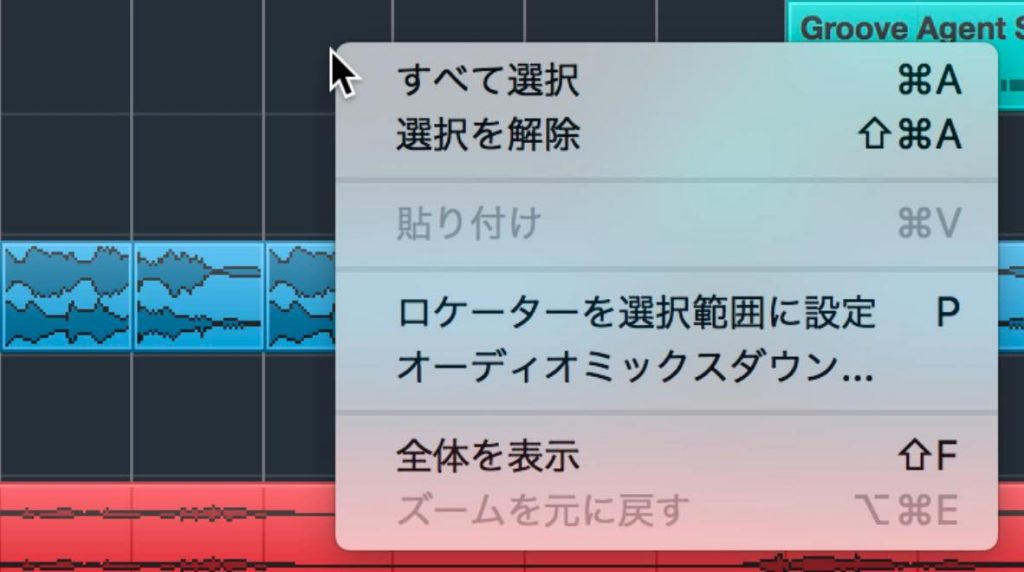
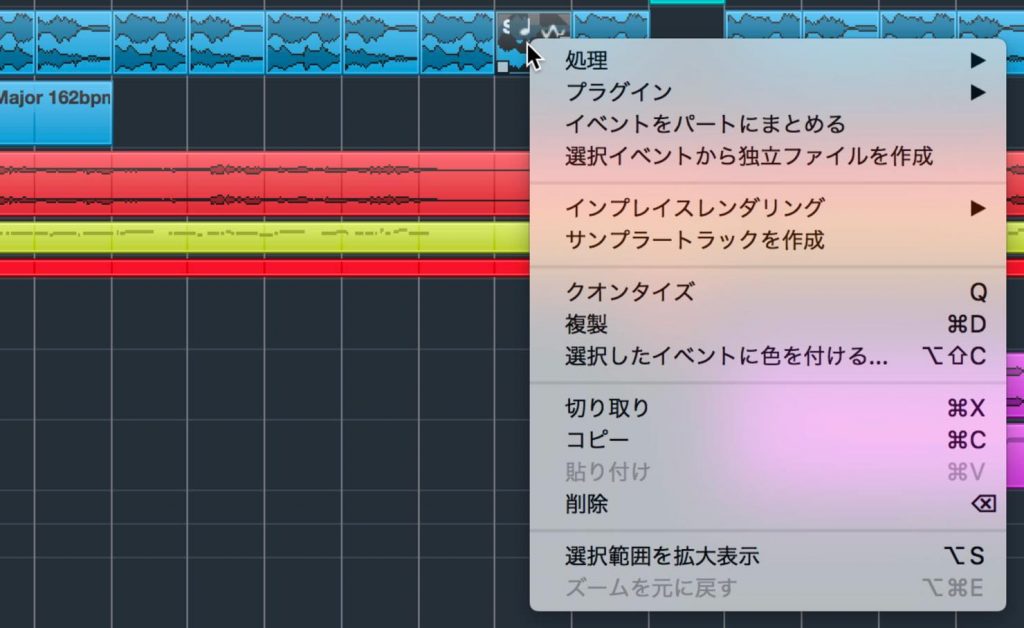
Right-click an audio event to display commands specifically for audio.
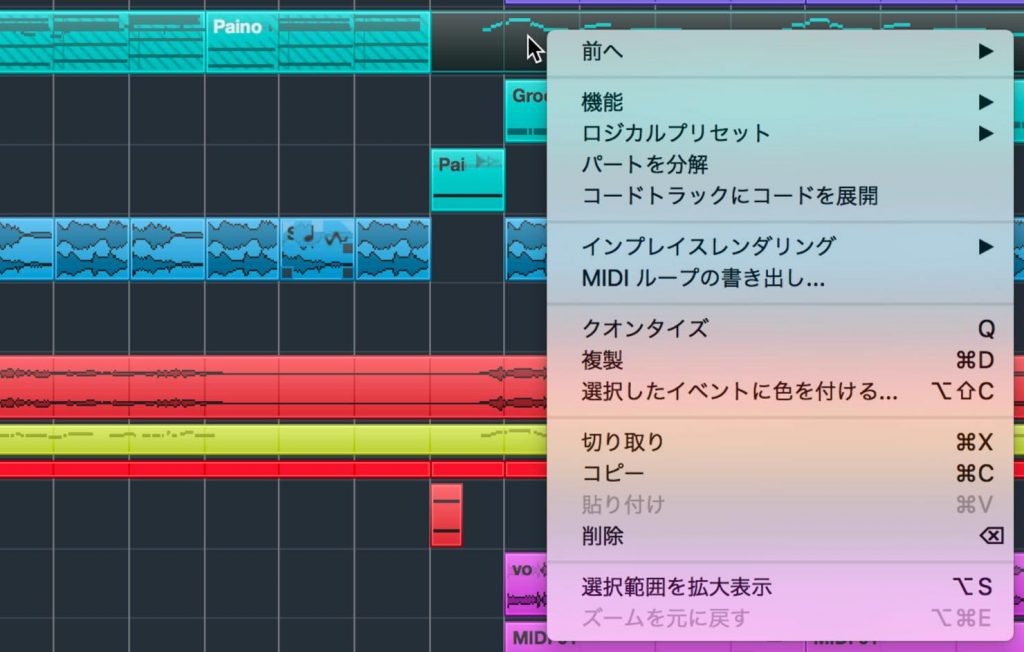
Right-click a MIDI event to display commands specifically for MIDI.
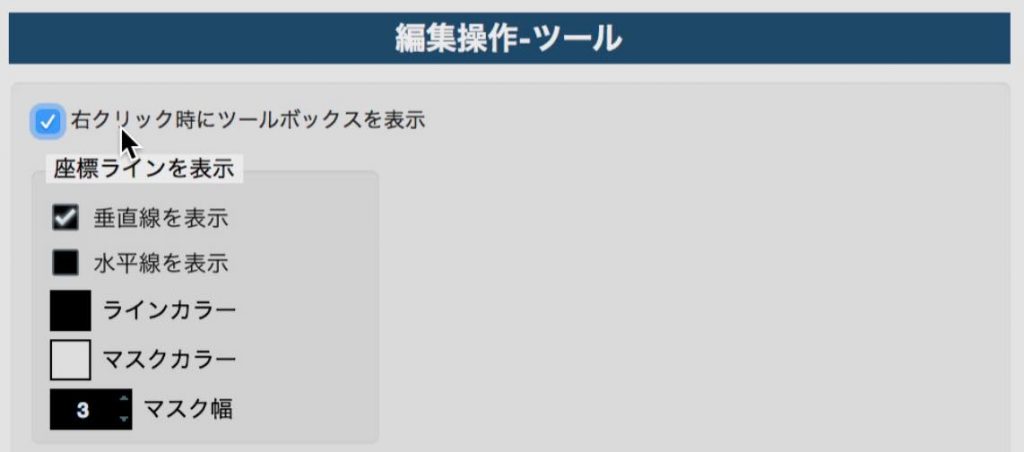
If you have enabled “Pop-up Toolbox on Right-Click” under Editing > Tools in Preferences, hold Command on Mac or Ctrl on Windows while right-clicking to display these menus.
Changes to the Media Tab
A VST Effects section has been added to the Media tab in the right zone.
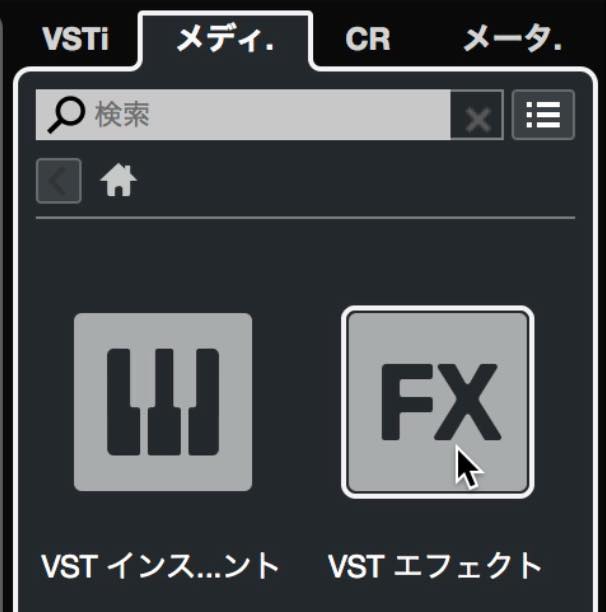
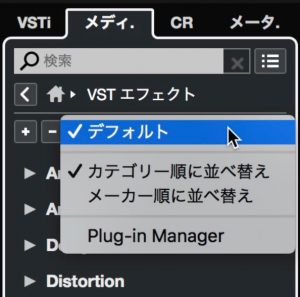
Open it to see the VST effect categories. Click “Default” at the upper right to change how they are organized, for example by category or vendor.
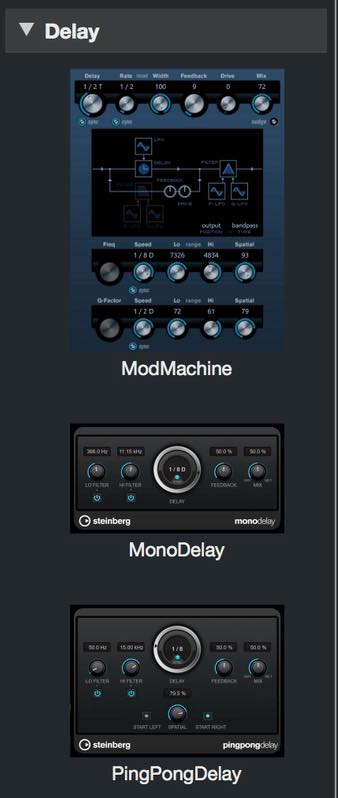
Expand a category or vendor to see images of the effect interfaces.
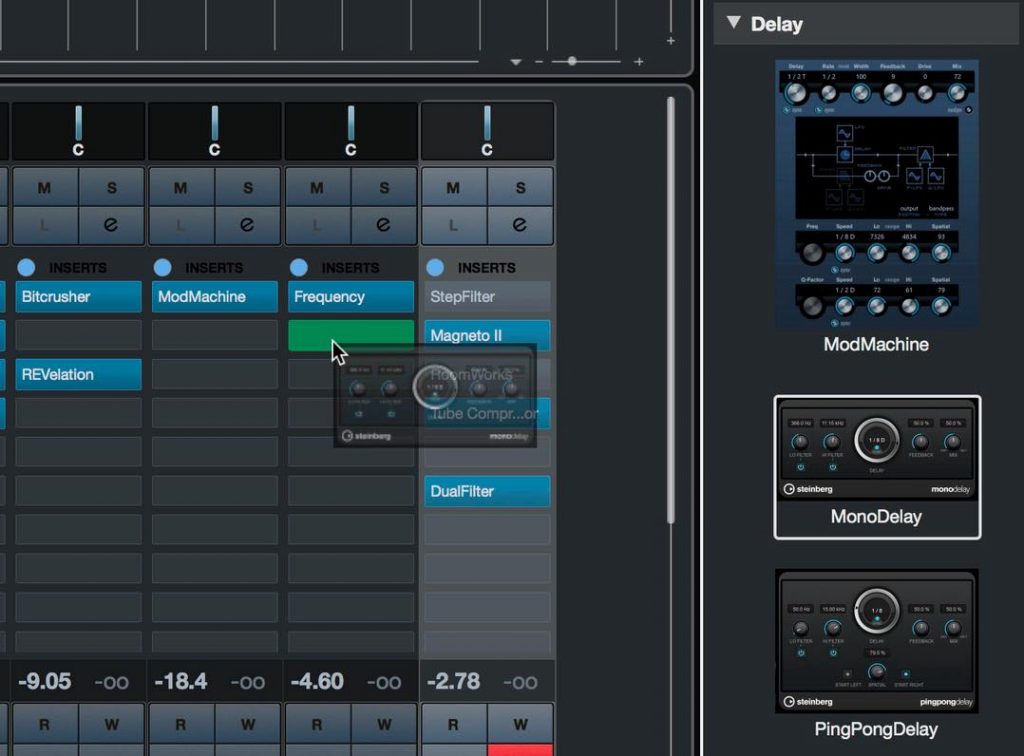
Drag an effect onto a track's insert slot to apply it.
Use this icon to show or hide the interface images.
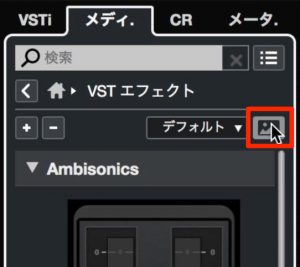
Third-party plug-ins do not show interface images by default. Open the plug-in and click its camera icon to add an image to the list.
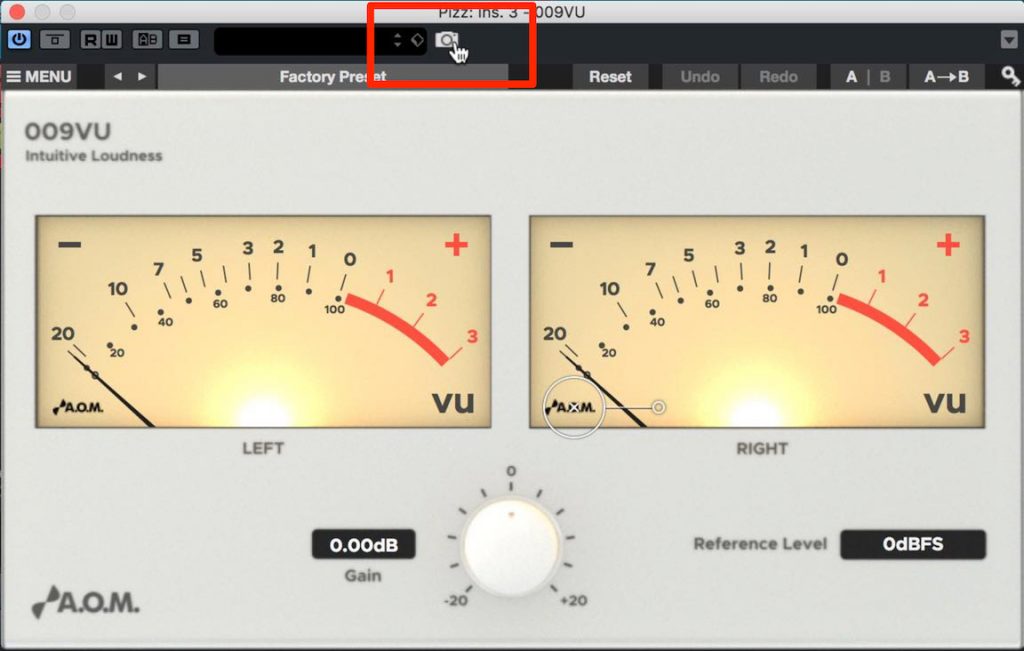
These features also apply to the existing VST Instruments section: you can change the sorting, show or hide images, and use images of third-party instruments.
New Loops & Samples Sound Sets and Inserting Part of a Sample
New sound sets have been added to Loops & Samples.
The six sets are “Analog Techno,” “Block Buster,” “Hip Hop Vault,” “Mystic Spaces,” “Raw Ambience,” and “Soul Assembly.”
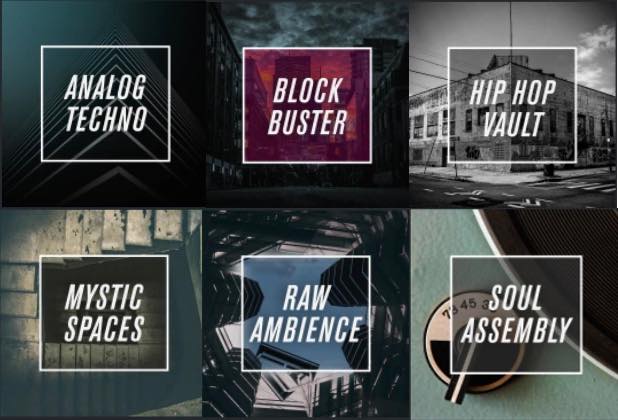
Each sound set was created specifically for Cubase 10 by professional producers or sound designers. All of the sounds are royalty-free.
You can also now use just part of a sample, a feature available across all samples.
Move the pointer near the top of the preview waveform until it turns into a pencil, then select the section you want.
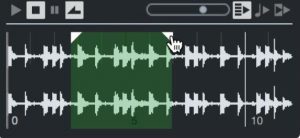
Drag and drop to insert only the selected section.
This also works with samplers such as Groove Agent.
MixConsole Recall
Next, let's look at the MixConsole.
A camera icon has been added at the upper left. This is the Snapshot feature, which saves the current mixer settings in their entirety as a recallable history.
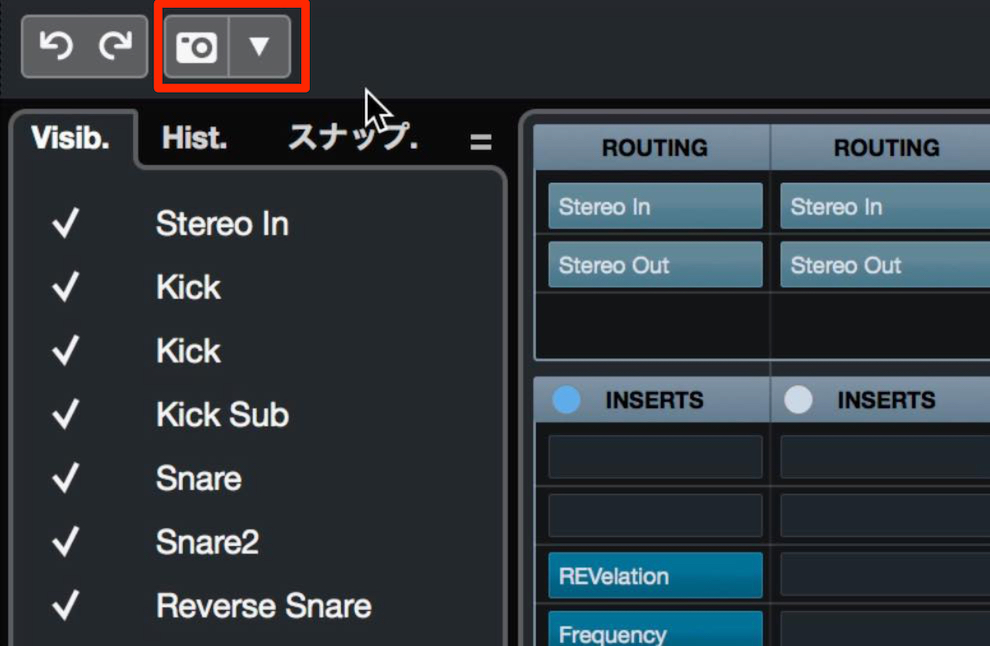
Click the camera icon to save a snapshot, and use the down-arrow button on its right to recall it.
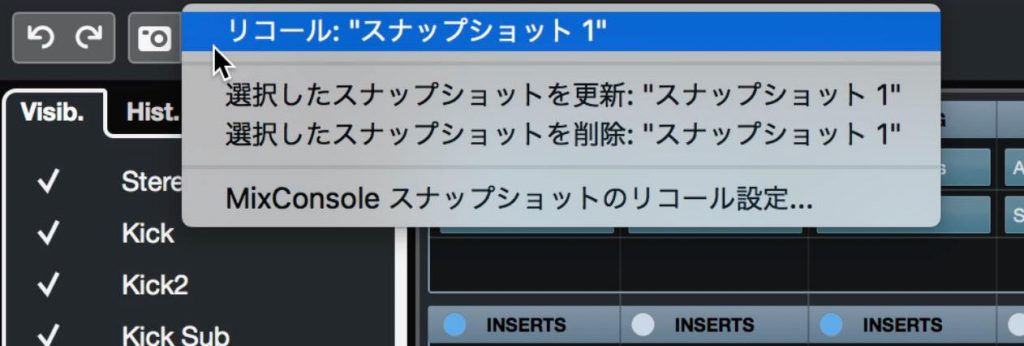
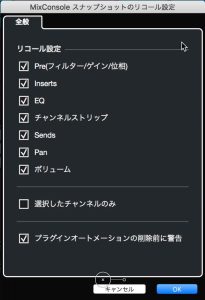
The menu also lets you update or delete snapshots and configure what is recalled.
In the recall settings, you can choose which console settings and channels to restore, as shown here.
The snapshot history also appears in the left zone of the MixConsole window, where you can recall snapshots as well.
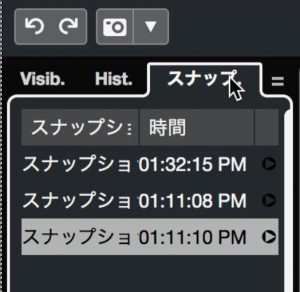
The time each snapshot was saved is displayed, making them easier to manage as the list grows.
Channel Latency Display
You can now display channel latency in the MixConsole.
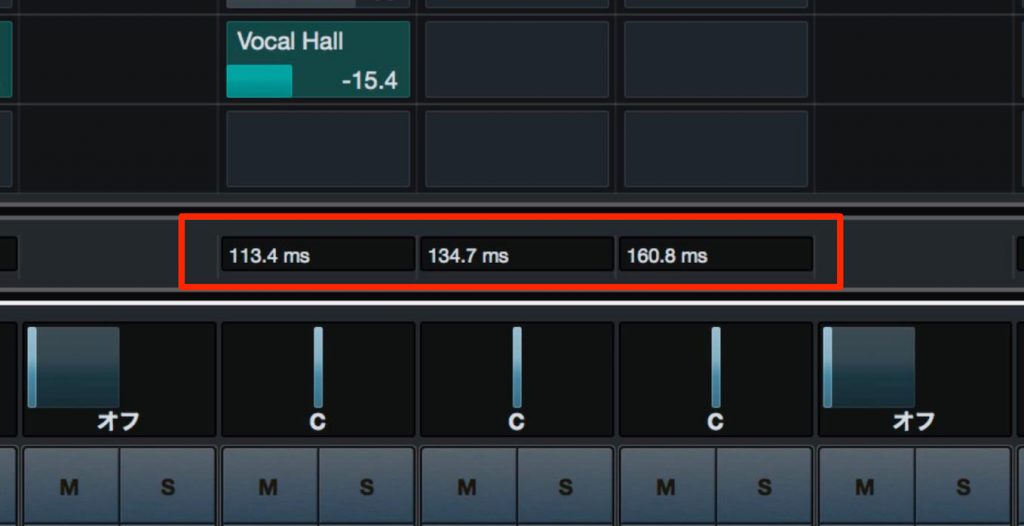
Enable it in “Set up Window Layout” at the upper right of the MixConsole.
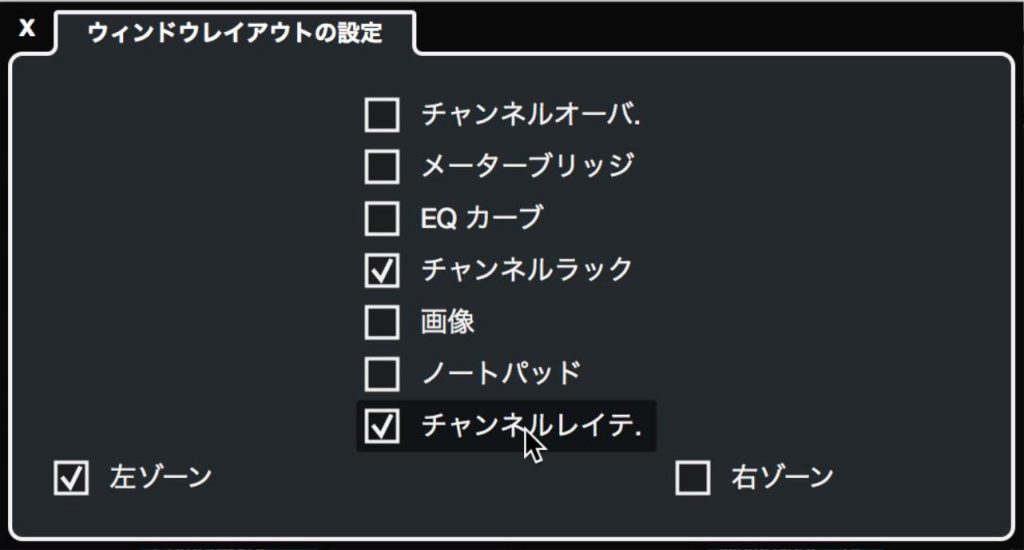
Latency is automatically compensated, so the displayed value represents the amount of compensation. You can also regard it as a rough indication of the CPU load for each channel.
Redesigned Channel Strip
The MixConsole's channel strip has been substantially redesigned, particularly in the Channel Settings window.
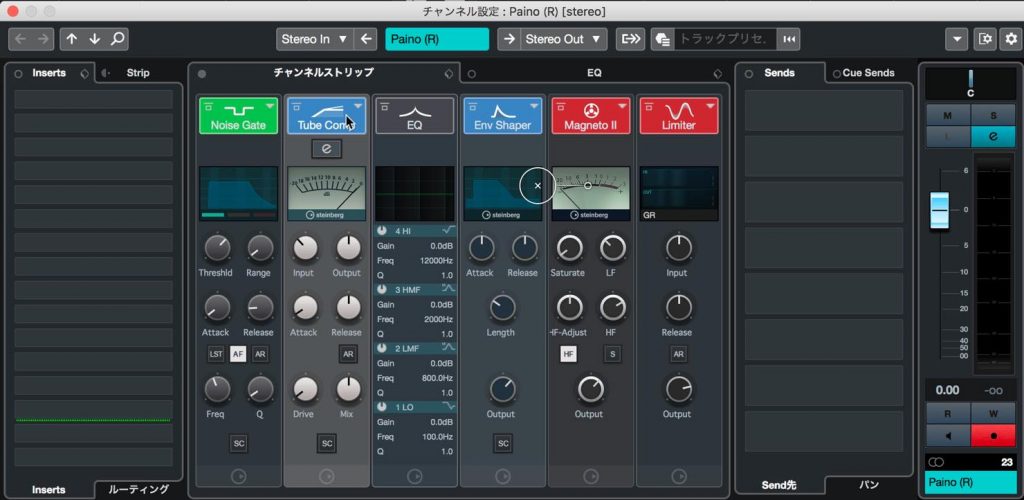
Graphical displays similar to those found in VST plug-ins have been added, making the controls easier to use.
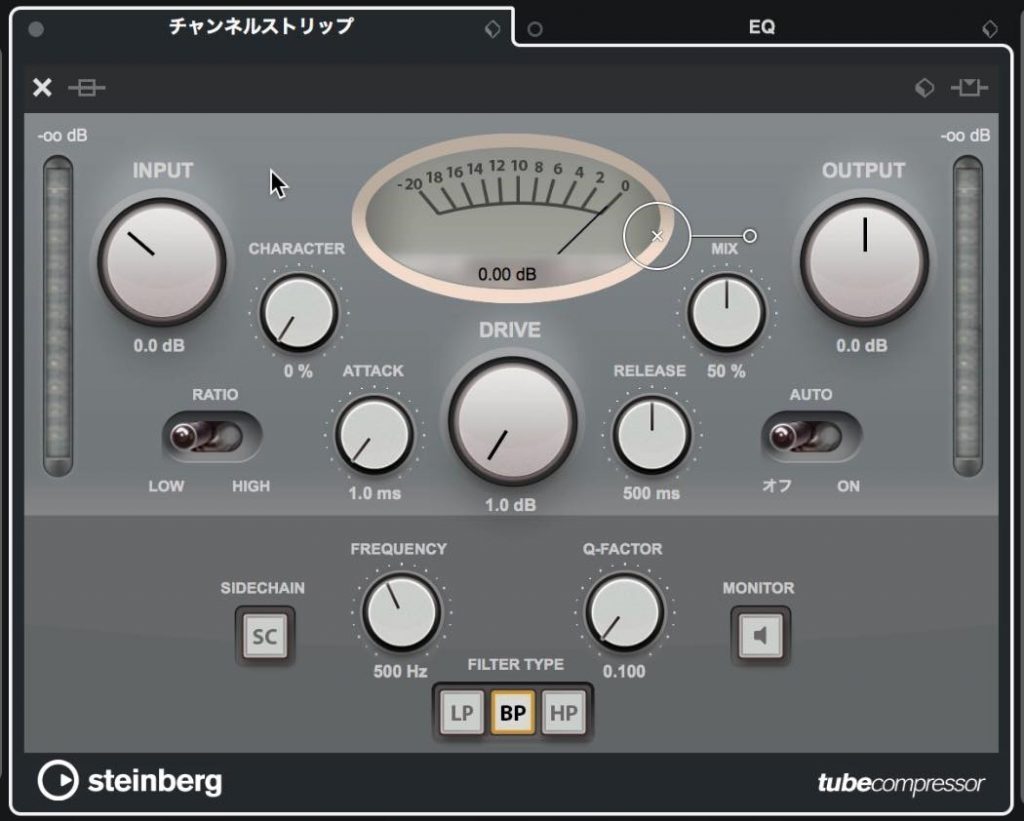
For the compressor, click the “e” button to open an expanded view for more detailed adjustments. Click “×” to return from this view.
Managing Plug-in Windows
Plug-in window management has also been improved.
You may often find yourself with many plug-in windows open, as shown here, and closing them one by one can be tedious.
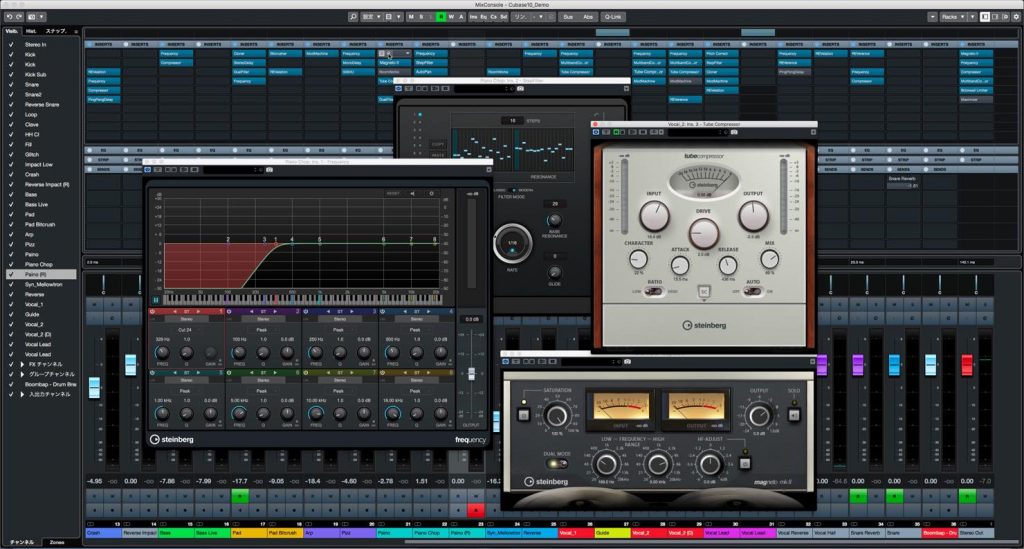
From the Window menu at the top, select “Hide Plug-in Windows” or “Close All Plug-in Windows” to hide or close them all at once.
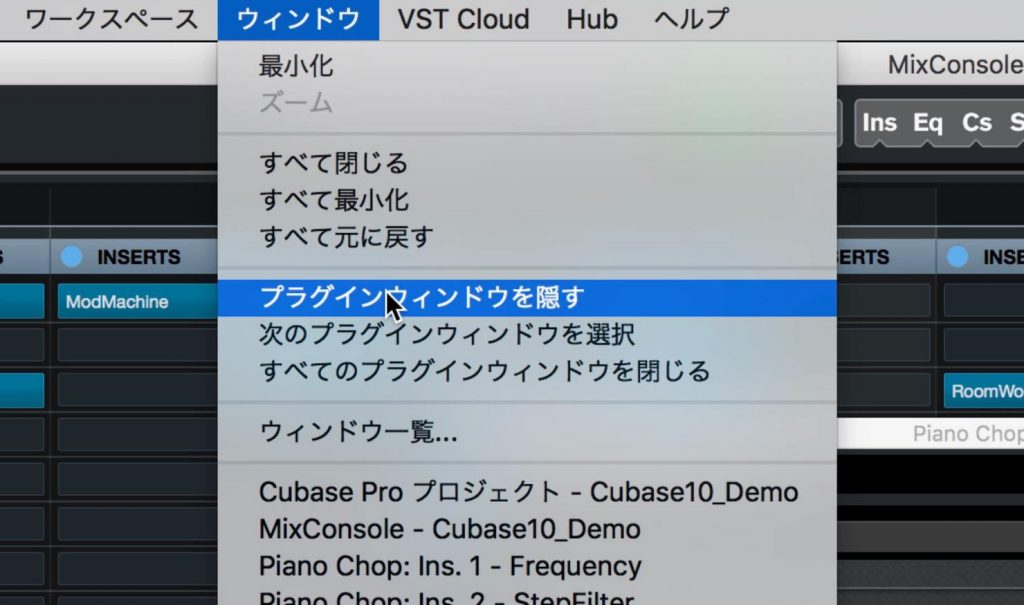
If you hide them, you can show them again with the corresponding Show command.
You can also cycle through them using “Select Next Plug-in Window.”
Simpler Side-Chain Setup
Another plug-in-related improvement is the way you set up side-chains.
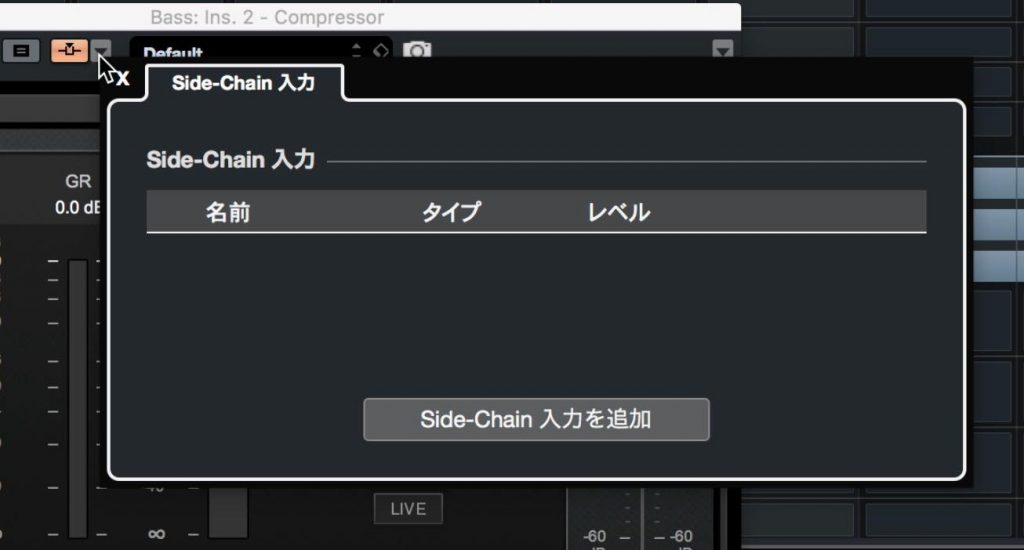
Previously, you had to enable the plug-in's side-chain and then create a send from the source channel. You can now configure this entirely from the plug-in receiving the side-chain signal.
Click the down-arrow button beside the side-chain activation button, then click “Add Side-Chain Input” in the pop-up.
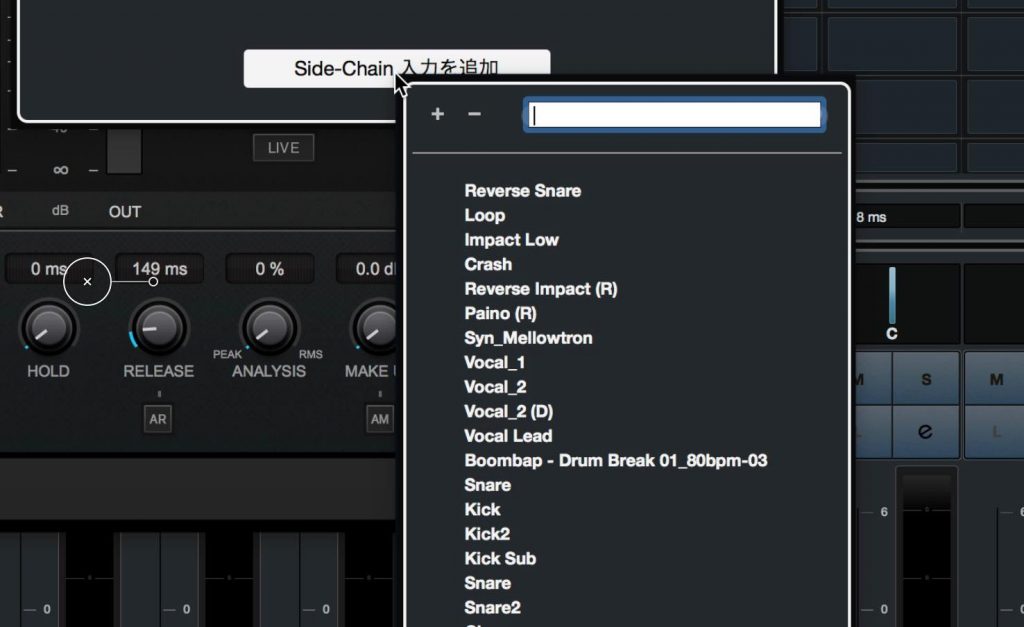
A list of available tracks appears. Select the track you want.
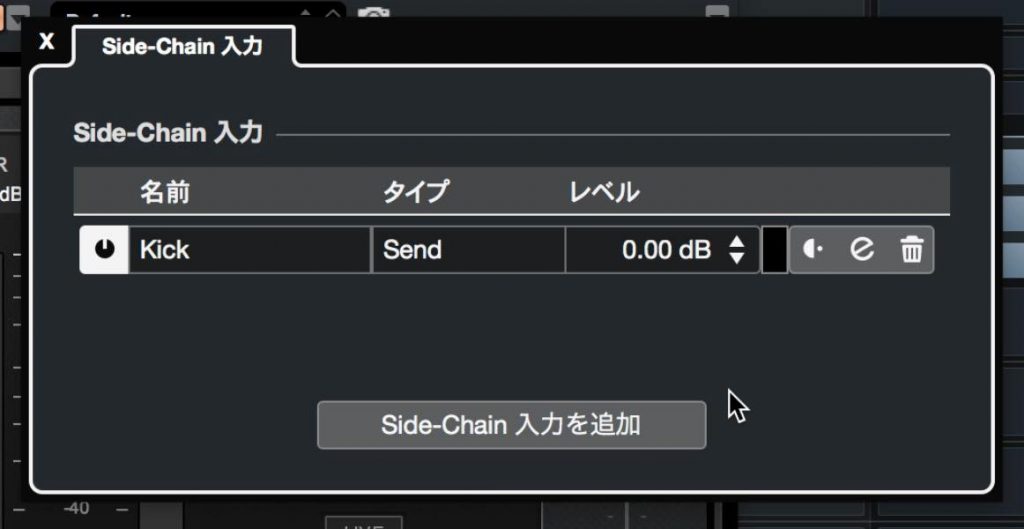
Then set the send level and choose pre- or post-fader operation. It is a very quick process.
The Distroyer Distortion Plug-in
Let's also look at a new plug-in: the Distroyer distortion effect.
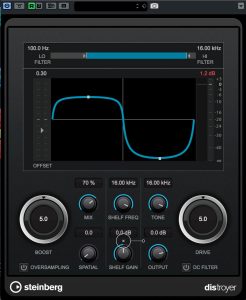
Its flexible controls let this single plug-in cover a wide variety of distortion needs.
One distinctive feature is the waveform display, which changes as you adjust the distortion character with the Drive knob. You can also fine-tune the distortion by changing the offset.
Set the amount of distortion blended into the signal with Mix, and shape the sound with a range of controls including shelving EQ, tone, and filters.
It should prove useful for everything from aggressive distortion to subtle harmonic enhancement.
For more details, watch the video near the beginning of this article.
New REVerence Presets
The REVerence convolution reverb now includes impulse responses captured from vintage reverbs, along with presets that use them.
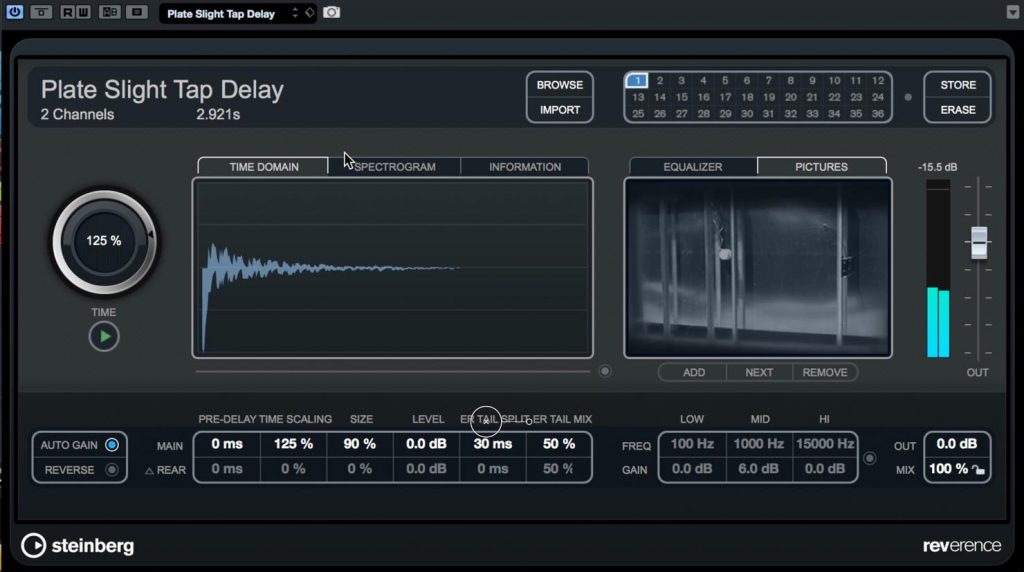
Search for “Vintage” in REVerence's preset window to find the new presets.
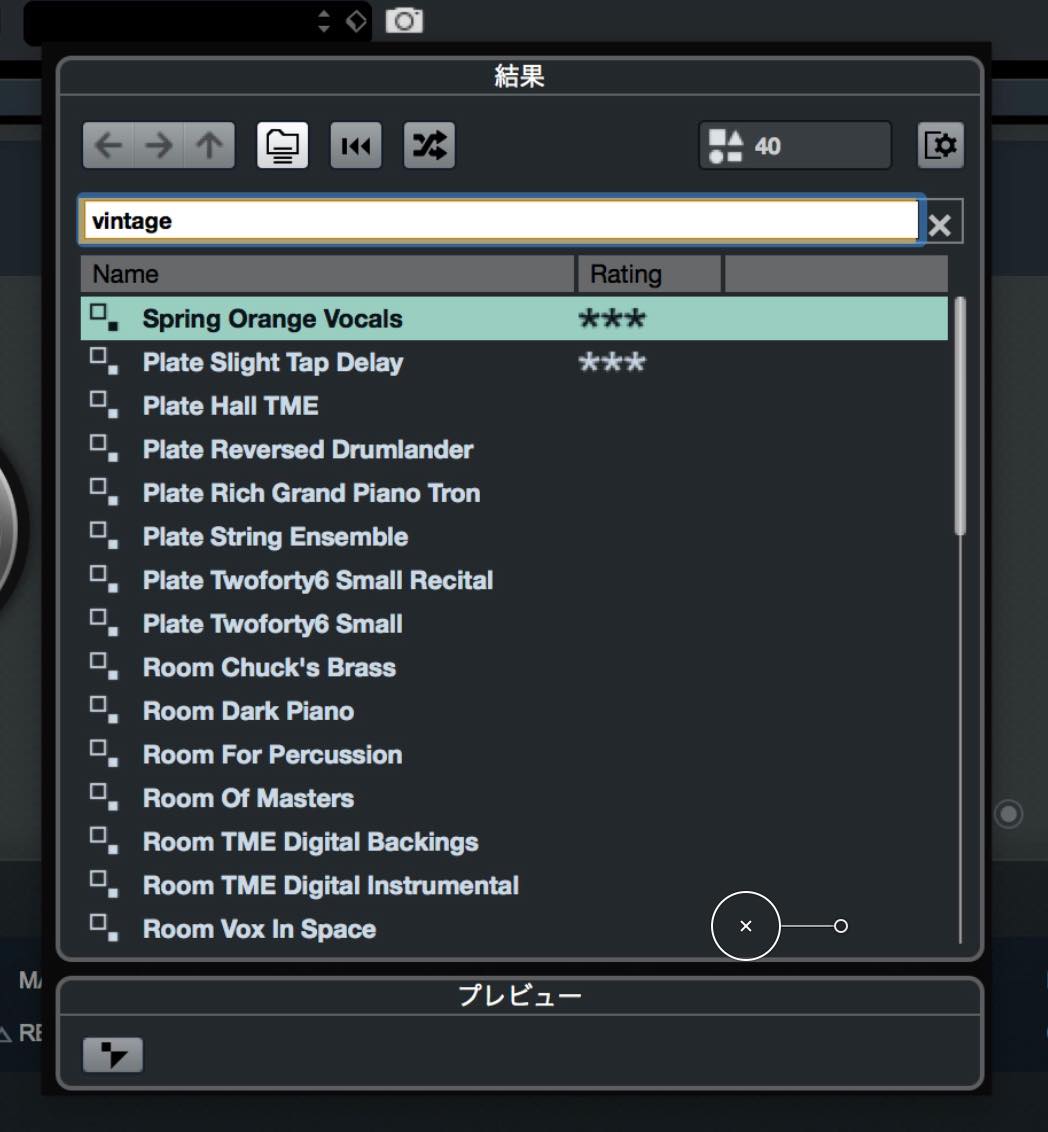
These impulse responses were captured from prized vintage reverb units, both analog and digital, with a focus on plate and spring reverbs.
To hear them in action, watch the video near the beginning of this article.
We have covered many new features in this installment, but there are still more to come.
We will continue in the next article, so stay tuned!
Steinberg Distributor — Resources from Yamaha Music Japan Co., Ltd.
- Yamaha Music Japan MPP (YouTube) https://www.youtube.com/user/SteinbergJapan
- MPP (Twitter) https://twitter.com/SteinbergJP
- Sound Roster Music Production Show (Fresh!) https://freshlive.tv/ymjsoundroster
Product Page: https://bit.ly/2UiQvP5
Frequently Asked Questions
Q1. What is the MixConsole recall feature in Cubase 10?
Snapshots let you save all of the current mixer settings as a history. Save with the camera icon and recall with the down-arrow button. This is useful when working with multiple versions of a mix.
Q2. How has side-chain setup become easier?
Previously, you had to create a send from the source channel. In Cubase 10, you can select a track directly by opening the plug-in's down-arrow menu and choosing “Add Side-Chain Input,” greatly simplifying the process.
Q3. Which new sound sets have been added?
The six sets are “Analog Techno,” “Block Buster,” “Hip Hop Vault,” “Mystic Spaces,” “Raw Ambience,” and “Soul Assembly.” They contain royalty-free samples designed by professional producers.
Q4. Can I use Cubase 10 on a 4K display without problems?
Yes. Cubase 10 officially supports HiDPI, 4K, and Retina displays, improving visibility and making detailed editing more comfortable.
NEW ARTICLES
Latest English Articles











