When Native Instruments products crash while installing with Native Access, the cause is often your computer's sleep settings. This article explains in detail how to disable sleep on both Mac and Windows, greatly reducing the risk of failed installs by preventing the display and hard disk from shutting off automatically. It offers a practical, effective solution for producers who want to set up large instrument libraries essential for DTM, such as Komplete, without stress.
For those whose installs keep stalling because the software keeps crashing

Native Instruments products are used by many people doing DTM.
I think many consider Komplete in particular a must-have for production.
Komplete bundles many products, and downloading and installing them is managed with a dedicated application called "Native Access."

Every instrument's sounds are high quality, so the sound libraries inevitably end up large.
As a result, depending on your internet speed and computer specs, setup can take half a day or more.

Basically, when you launch "Native Access" and press the install button, products are downloaded and installed automatically, so I think many people press the button before going out or going to bed and leave it.
A few hours later, you check your computer and...
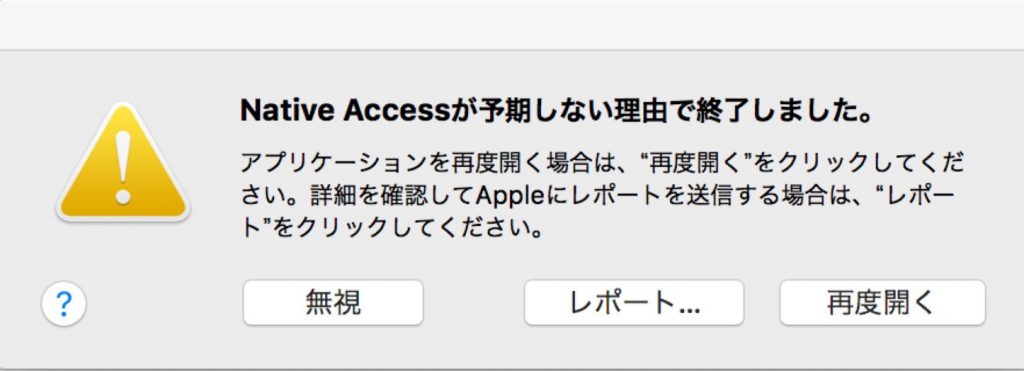
Native Access has crashed...
Products installed before the software crashed can be used without problems, but if it crashed early in the install, hardly anything will have been installed.
There's a setting that makes this kind of trouble less likely, so let me introduce it.
Preventing the error
The cause is related to your computer's sleep settings.
Sleep is a feature that automatically turns off the display or stops the hard disk when the computer hasn't been used for a set time.
Disabling sleep reduces the chance of the error above.
The setup differs between Mac and Windows, so here are the steps for each.
For Mac
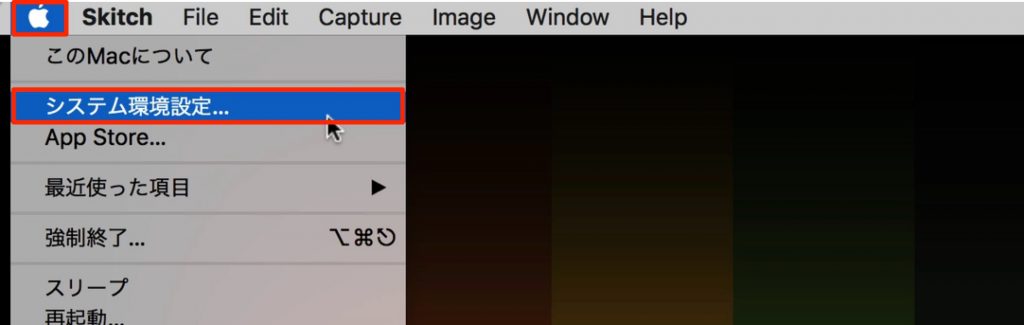
Open "System Preferences" from the Apple menu.
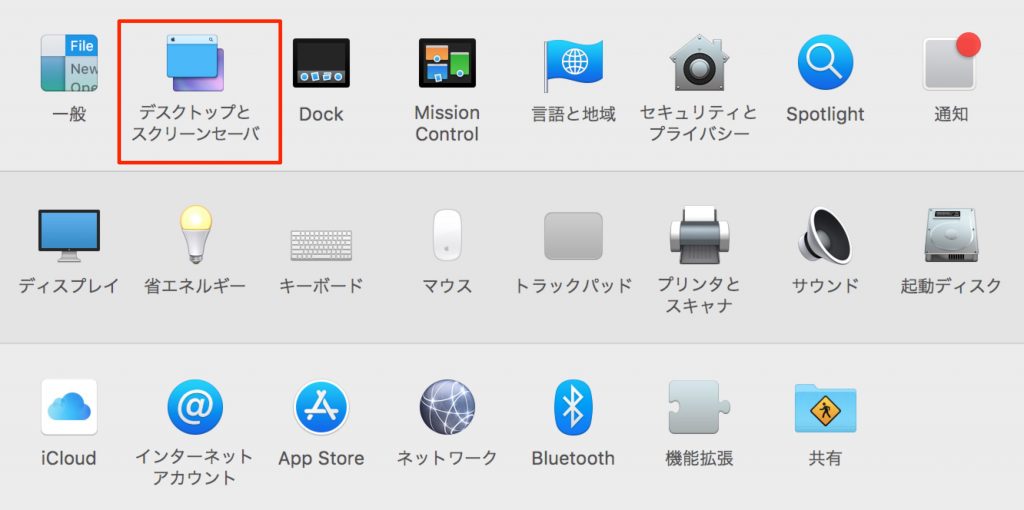
Select "Desktop & Screen Saver."
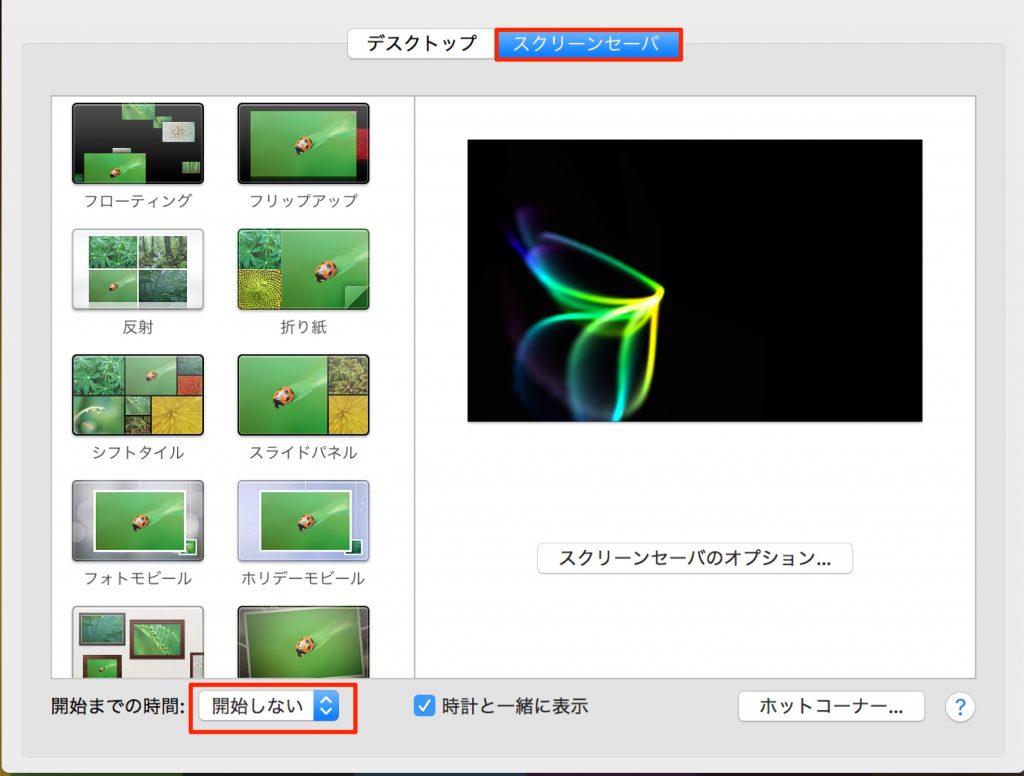
Under "Start after," select "Never."
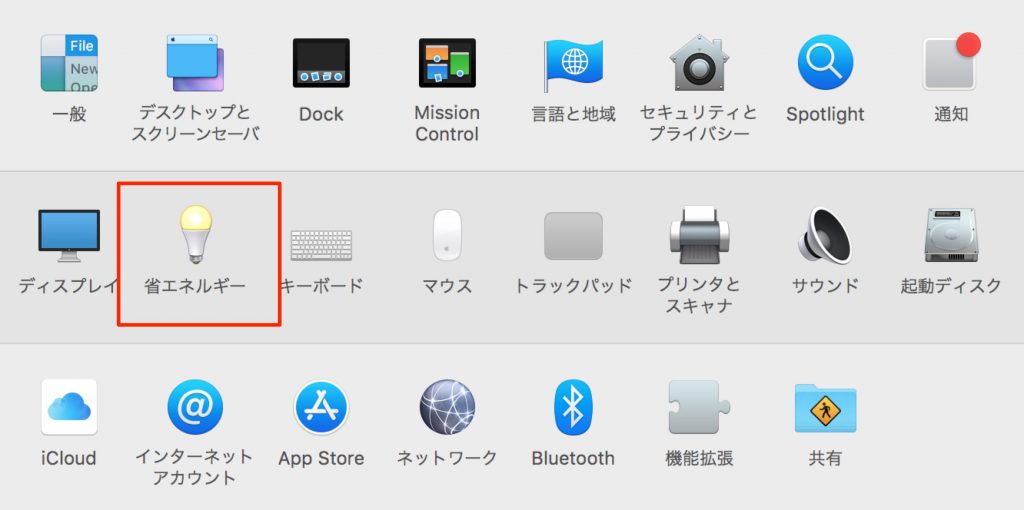
Next, select "Energy Saver."
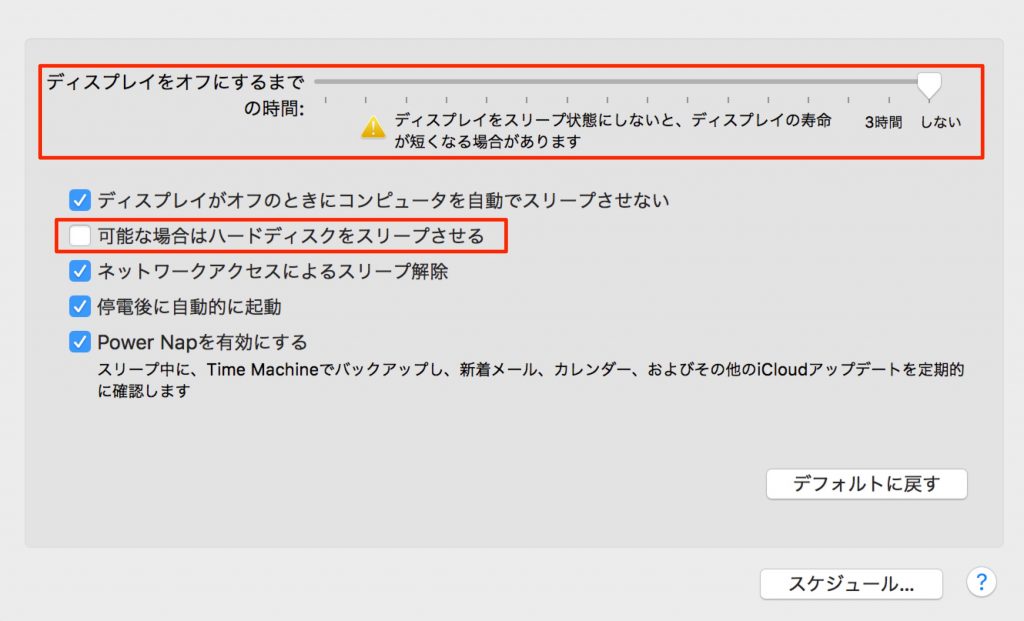
Set "Turn display off after" to "Never" and uncheck "Put hard disks to sleep when possible."
That completes the setup.
For Windows
Go to the Control Panel.
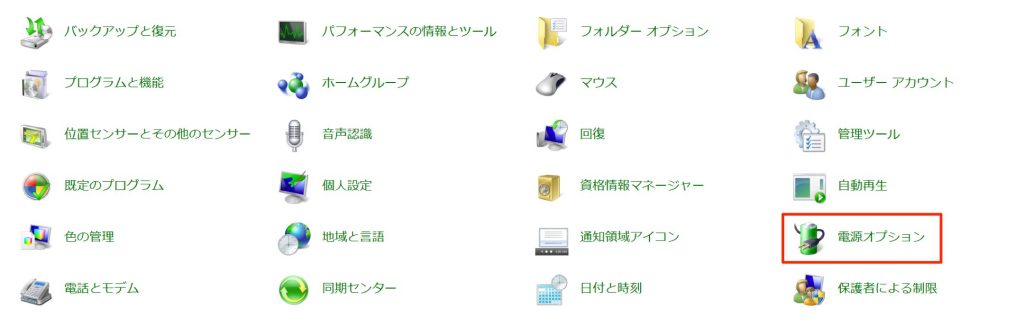
Select "Power Options."
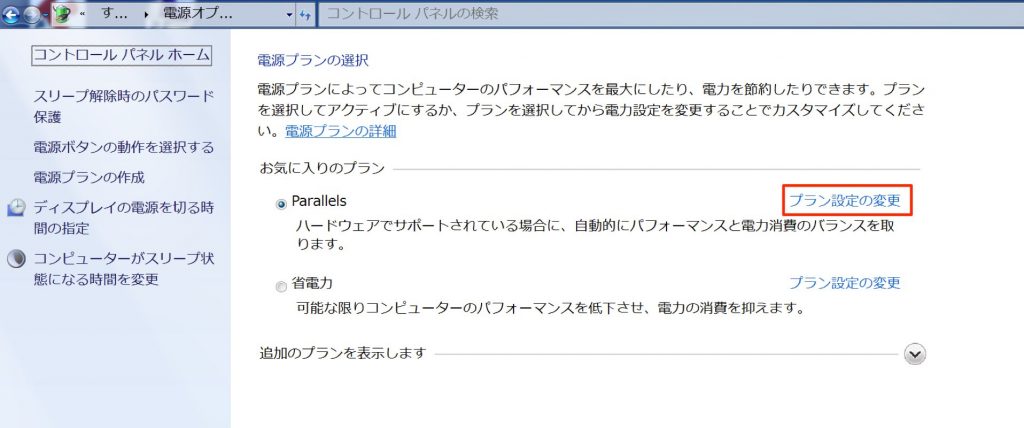
Select "Change plan settings."
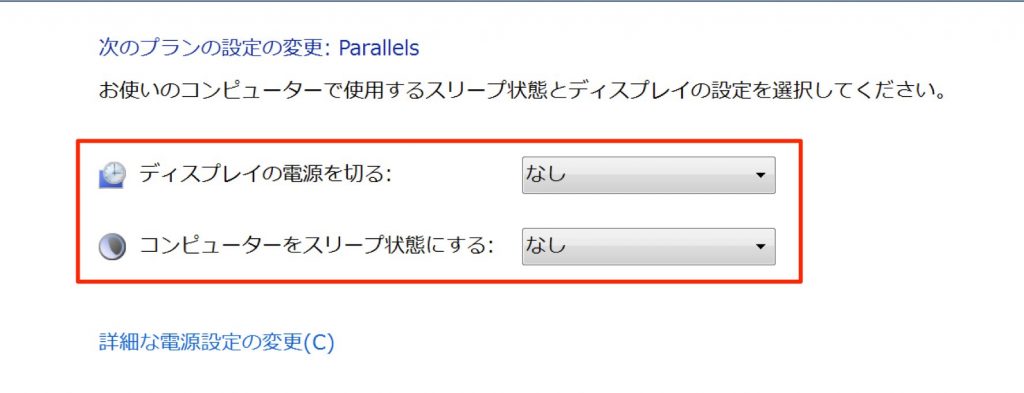
Set "Turn off the display" and "Put the computer to sleep" to "Never."
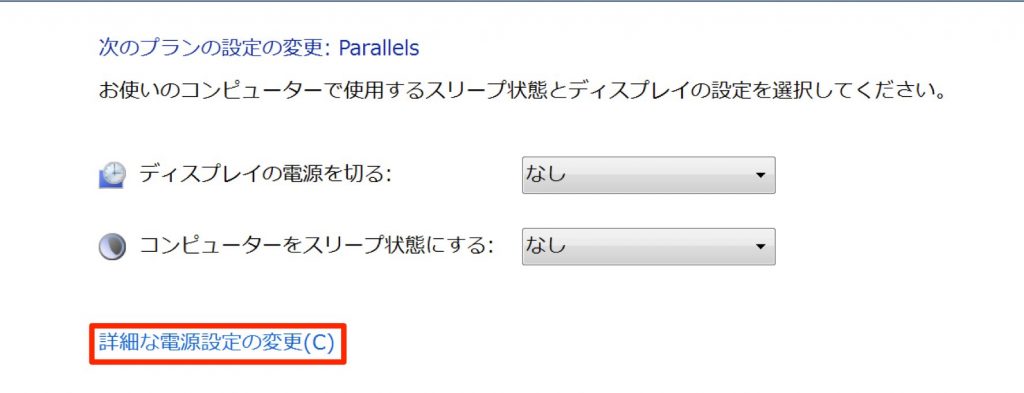
Next, select "Change advanced power settings."

Set the time for "Turn off hard disk after" under "Hard disk" to "0 minutes (Never)."
If you're installing products to an external hard disk,

under "USB settings," set "USB selective suspend setting" to "Disabled."
That completes the setup.
On both Mac and Windows, once the install has finished successfully, don't forget to return the settings to how they were if needed.
Frequently asked questions
Q1. What causes errors during installs with Native Access?
The main cause is your computer's sleep settings being enabled. If there's no activity for a set time, the display and hard disk shut off automatically, interrupting the install process.
Q2. How do I disable sleep on a Mac?
Open System Preferences from the Apple menu, select "Never" in Desktop & Screen Saver, set the display to turn off "Never" in Energy Saver, and uncheck hard disk sleep.
Q3. What should I do if the install still fails on Windows after disabling sleep?
If you're using an external hard disk, set USB selective suspend to "Disabled" under "USB settings" in the Control Panel's power settings.
Q4. Do I need to restore the sleep settings after the install finishes?
Yes, after the install finishes we recommend restoring the original settings as needed. Sleep helps reduce power consumption, so it's best to keep it enabled normally.
NEW ARTICLES
Latest English Articles