
Punch-in recording in Ableton Live lets you efficiently fix imperfect sections that occur when recording a whole song in one pass. This article explains how to re-record a specific range of bars and timing techniques for recording on your own. You will learn the steps for punching in and out and how to adjust clip boundaries to set the exact recording range, a skill you can use to partially re-record vocals, guitar, and many other instruments.
Recording a Specific Section
In the previous article, we explained audio recording.
Unlike a loop of a few bars,
recording an entire song in one pass is very difficult.
"The pitch in the chorus is flat," "the rhythm drifted":
there will be parts you want to record again.
That is where punch-in recording comes in.
You can re-record just part of a recorded take.
How to Punch-In Record
If you understood recording in the previous article, you will have no trouble following along.

As in the previous article,
turn on the record button of the track you want to record.
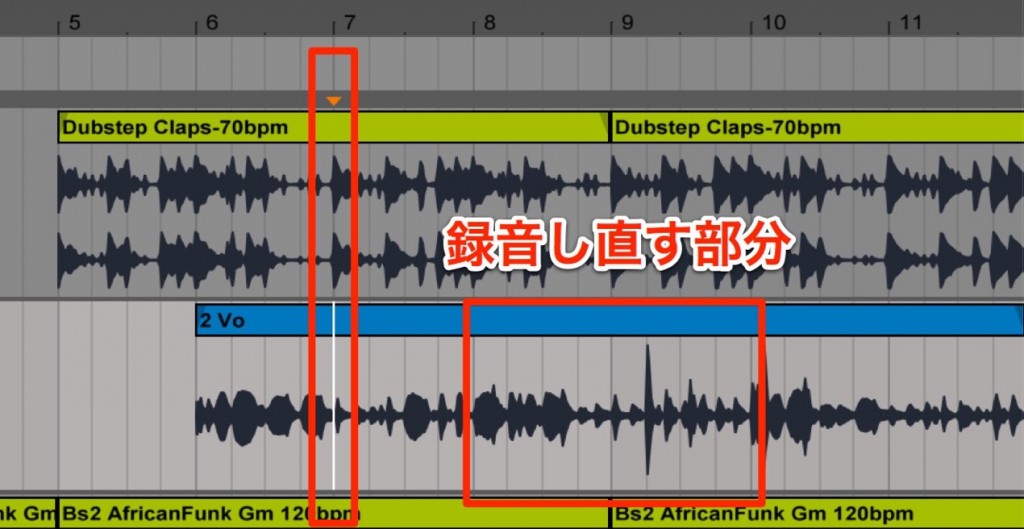
The section we want to punch in on
is the two bars from bar 8 to bar 10.
Place the playback position a little before that.

Start playback as usual.
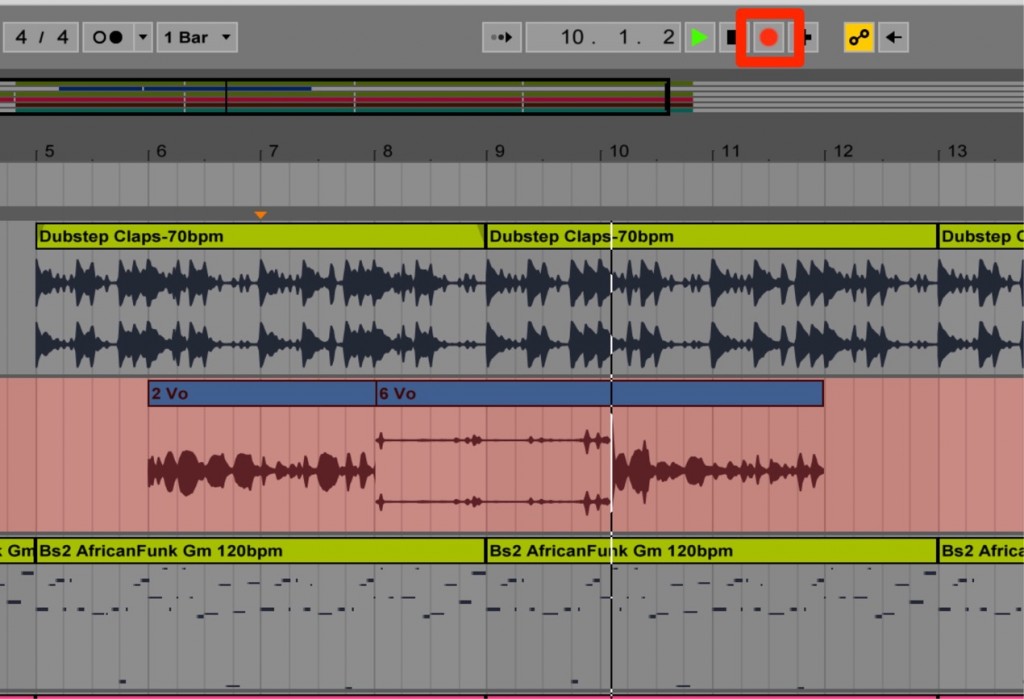
When playback reaches bar 8, where you want to punch in,
click the record button to turn it on.
Recording starts from that point.

When you have finished recording,
click the record button again to turn it off.
Recording stops.
This is called punching out.
*In the example above, the recorded take is left blank so that it is easy to see.
What If You Are Punch-In Recording on Your Own?
At this point, one concern probably comes to mind.
"When I'm recording on my own, I can't punch in and out in time"
is the problem.
In that case,
it is fine to punch in early and punch out late.
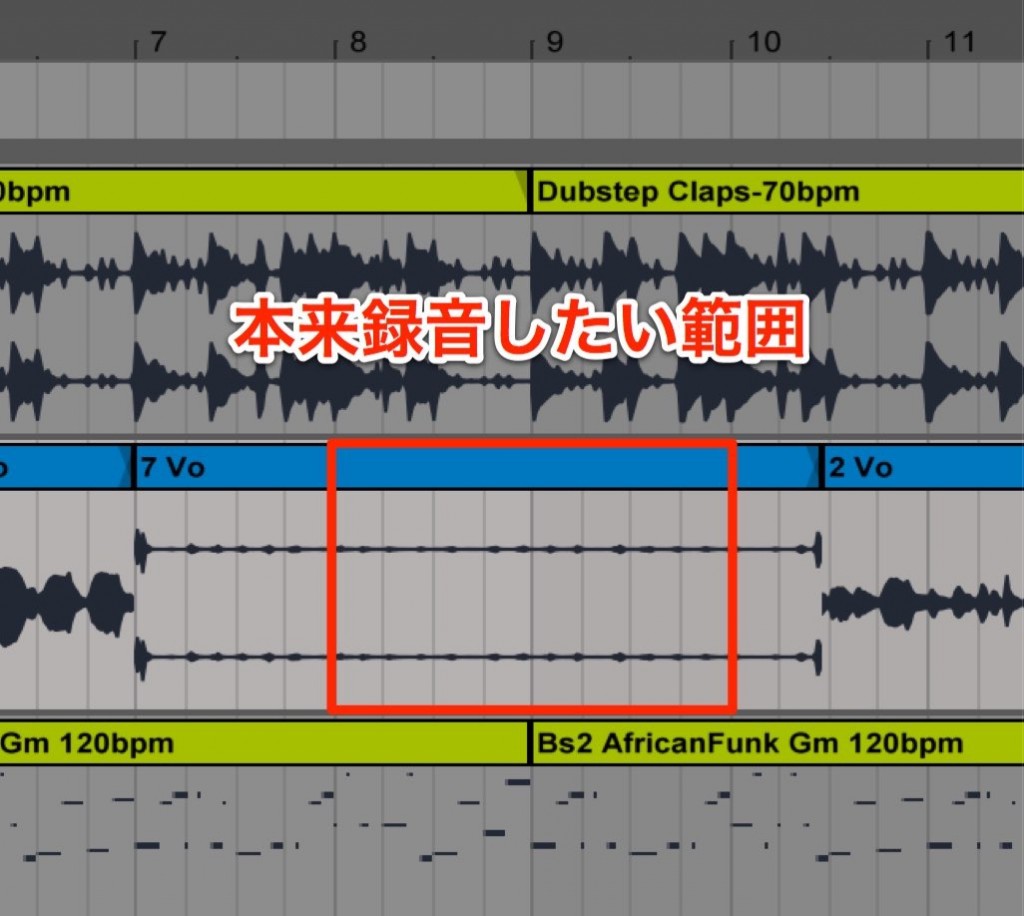
After recording a wider range than you need,
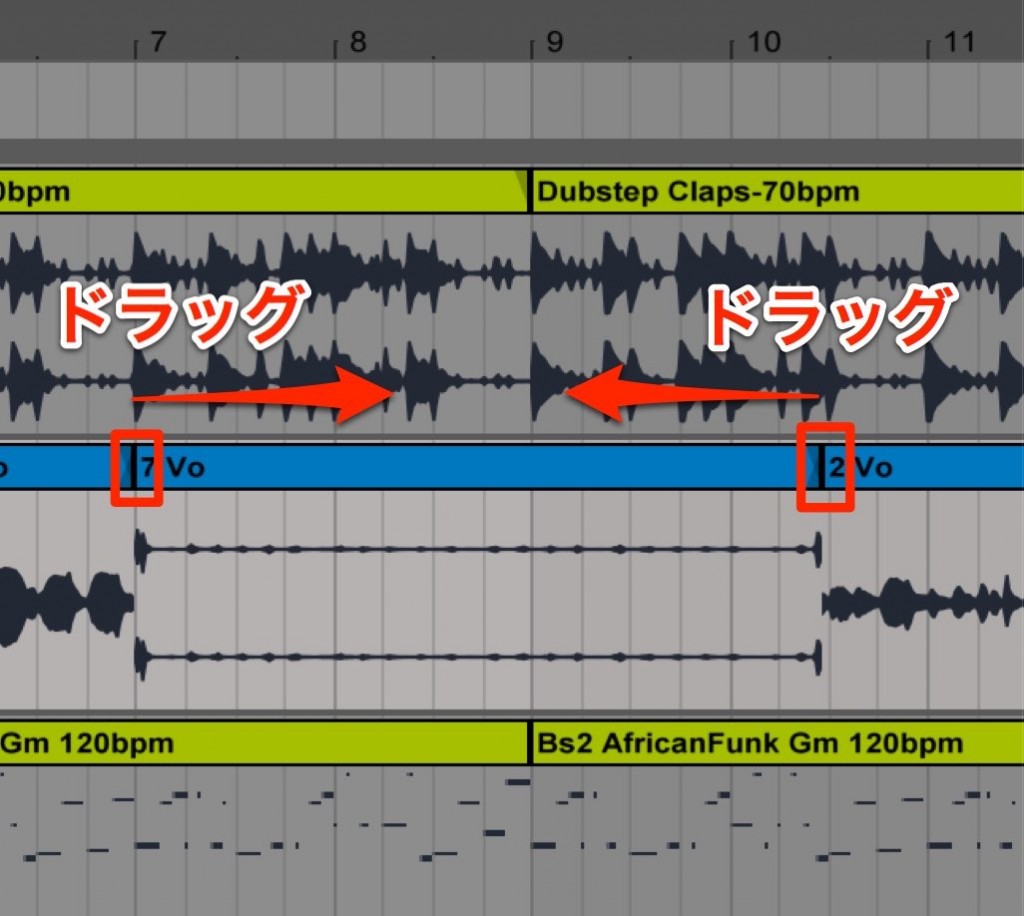
drag the area of the clip outlined in red to adjust it,
setting the range of the performance before and after the punch-in.
Optimizing Audio Recording Latency
Frequently asked questions
Q1. What is punch-in recording?
It is a function for re-recording only a specific part of a take you have already recorded. You do not need to re-record the whole song, so you can efficiently fix only the parts you want, such as off-pitch sections or places where the rhythm slipped.
Q2. What if it is hard to time the punch-in and punch-out on my own?
Record a wider range than you need, then drag the area of the clip outlined in red to adjust the performance range. Recording the section generously matters more than perfect timing.
Q3. What should I prepare before punch-in recording?
Turn on the record button of the track you want to record and place the playback position a little before the section you want to fix. Then start playback as usual, and when you reach that section, click the record button to start recording.
NEW ARTICLES
Latest English Articles











