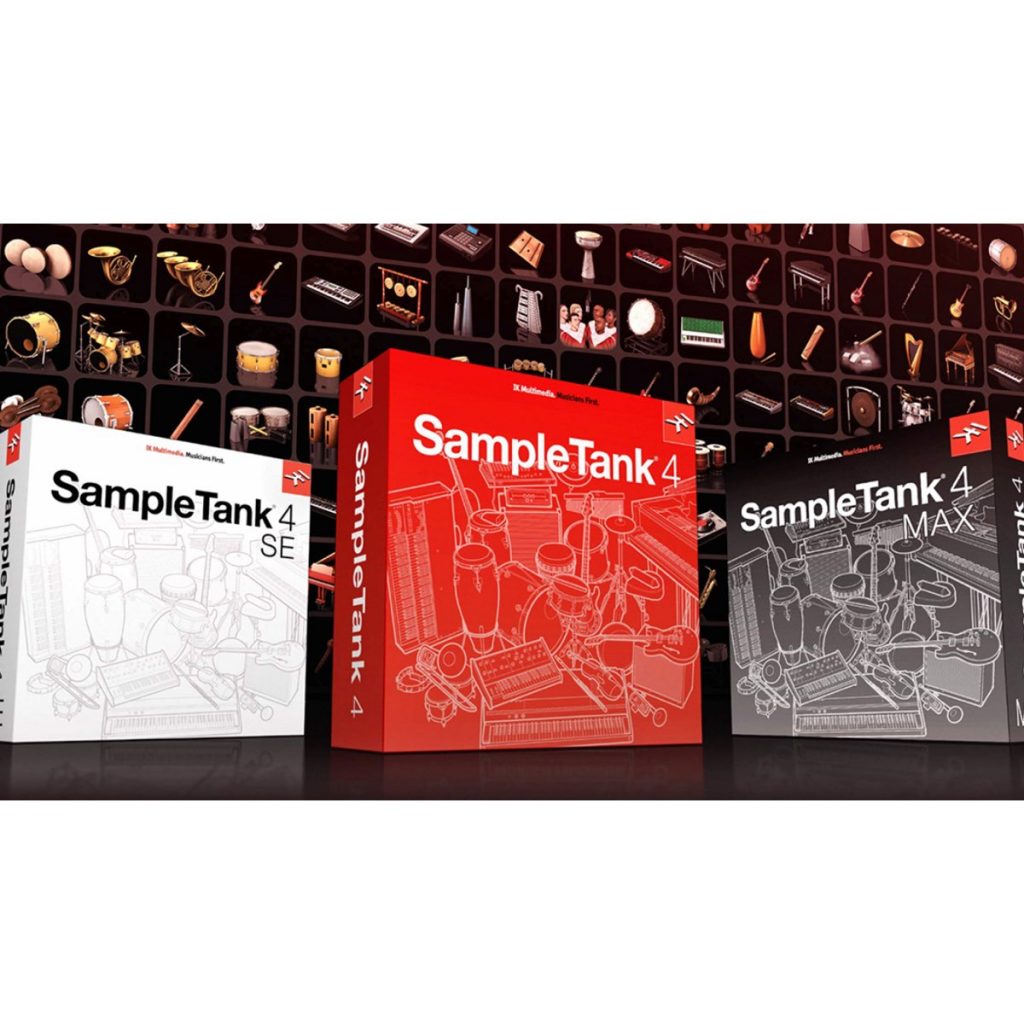
SampleTank 4 is IK Multimedia's all-in-one instrument software, with 6,000 to 8,000 instruments and a sound library of more than 100 GB. This article explains in detail how to install this professional music production instrument, covering the points where users tend to get stuck, from downloading the installer to managing roughly 200 GB of sound files and authorizing the license. By learning practical techniques such as using an external HDD and specifying folders, you'll be able to install and run SampleTank 4 smoothly.
How to Manage Sounds and Authorize SampleTank 4
Recently, IK Multimedia released its long-awaited all-in-one instrument "SampleTank 4".
It's a powerful software instrument that comes with every kind of sound and handles a wide range of musical genres.
When you buy the product, it comes with a huge sound library, but some of you may find these sounds won't fit on your HDD...
Here we explain how to download SampleTank 4, install and manage its sounds, and authorize the license. (A SampleTank 4 tutorial video is also planned.)
IK Multimedia's "Facebook notes: support information links" also summarizes points to watch during installation, so it's worth checking.
Installing the SampleTank 4 Sounds
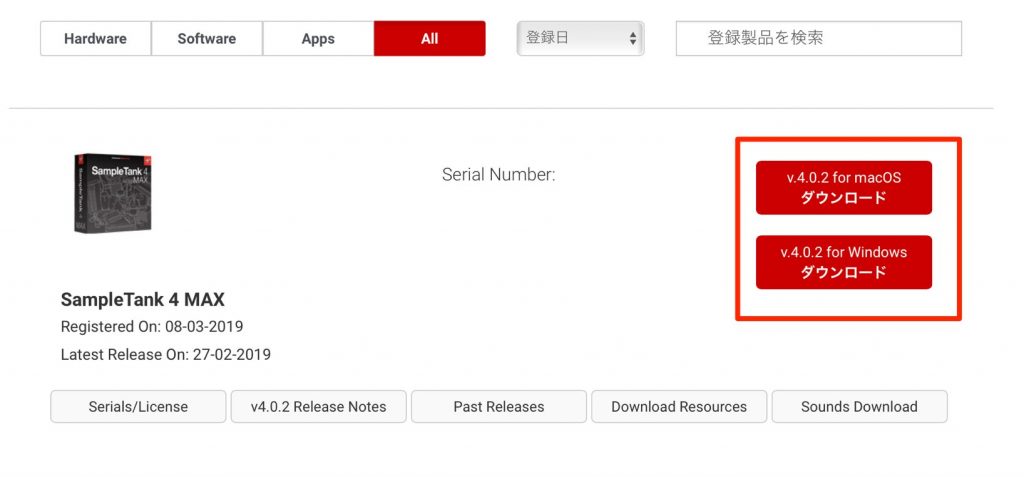
First, download the installer for your computer.

Install the SampleTank 4 application itself on your system drive (the C drive on Windows).
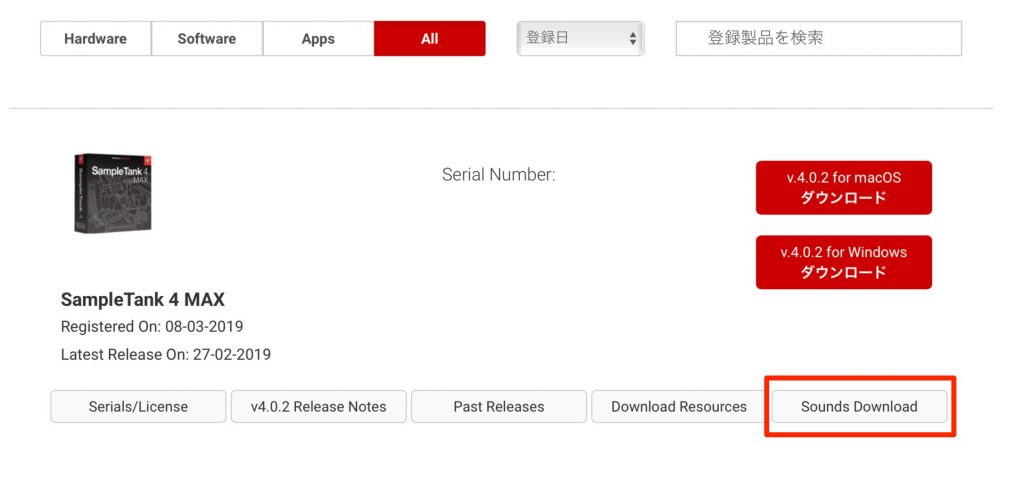
Next, download the huge library of included sounds.
Click "Sounds Download".
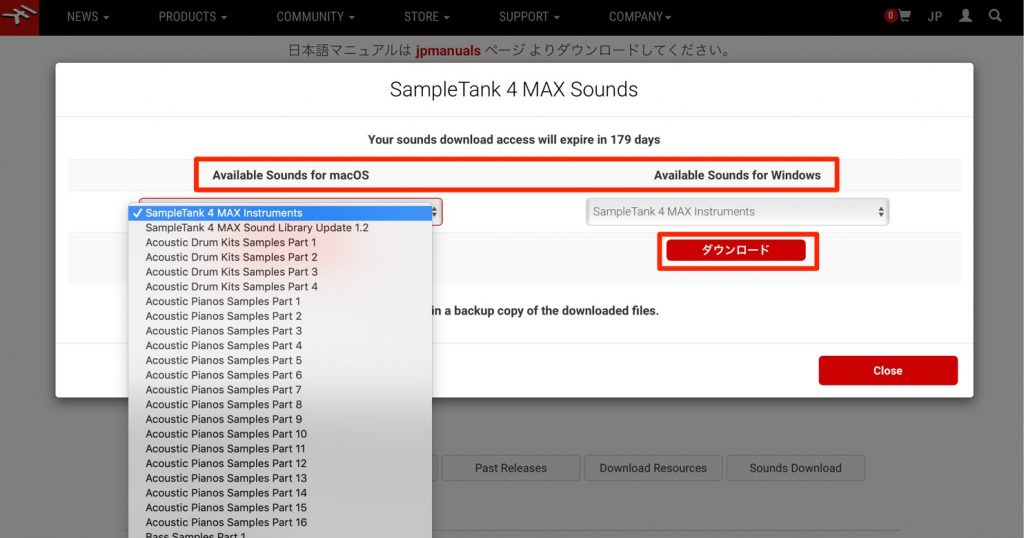
Download the sounds for your computer (Mac/Windows).
Select each item shown and download them one by one with the "Download" button.
Watch the File Size When Downloading
Downloading all of these sounds requires about 200 GB of space.
Many of you probably won't have enough space on your main hard drive.
With the later sound installation in mind as well, it's a good idea to have an external hard drive ready.
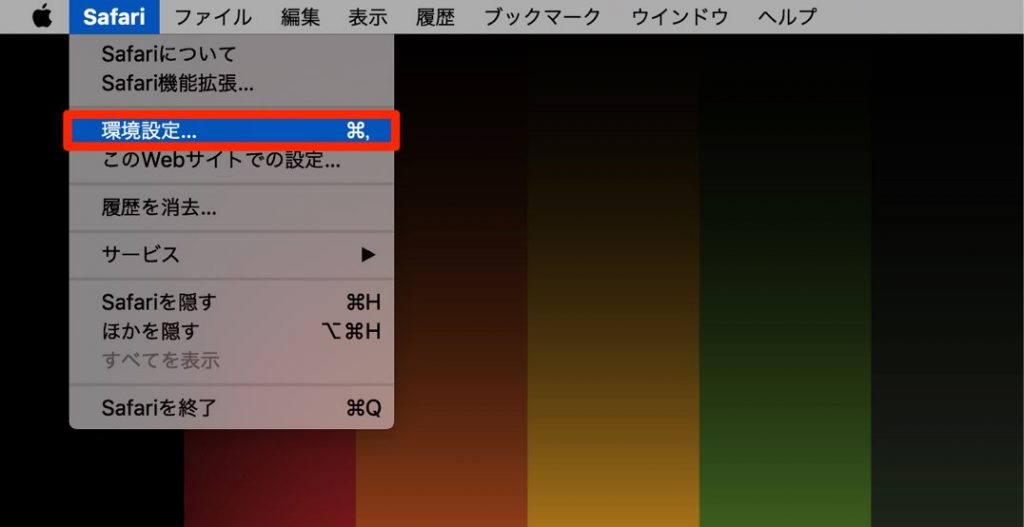
In your browser, you can specify where downloaded files are saved.
Click "Preferences" and
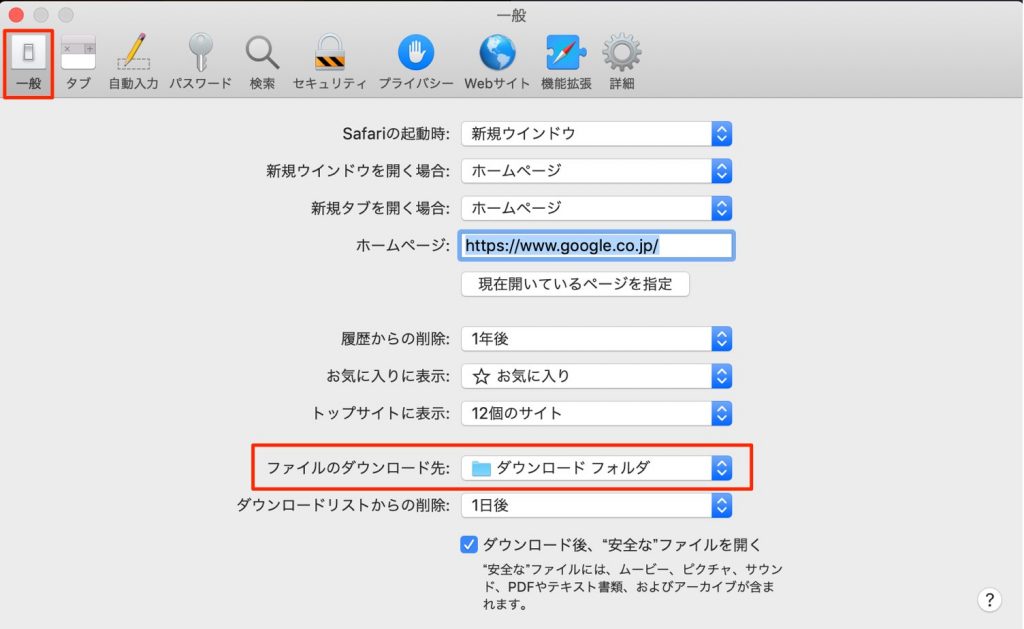
set the download location to a folder on your external HDD.
Now all the sound installers will be downloaded to the external HDD you specified.
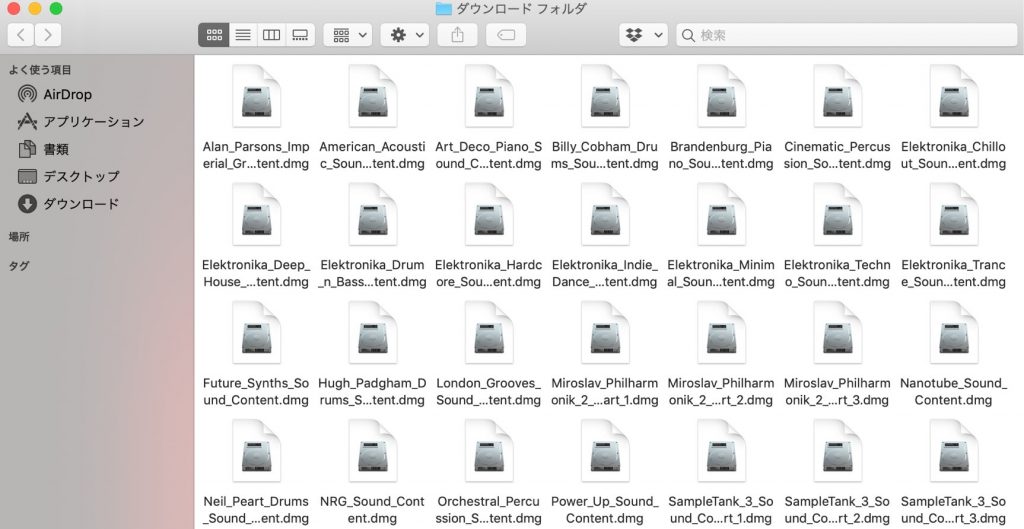
After downloading all the sounds, install them one by one...
To be safe, install "SampleTank_4_MAX_Instruments_Installer_Part1" first and "SampleTank_4_MAX_Sound_Library_Update_1_2 (its current name)" last.
As you launch and proceed through the installer,
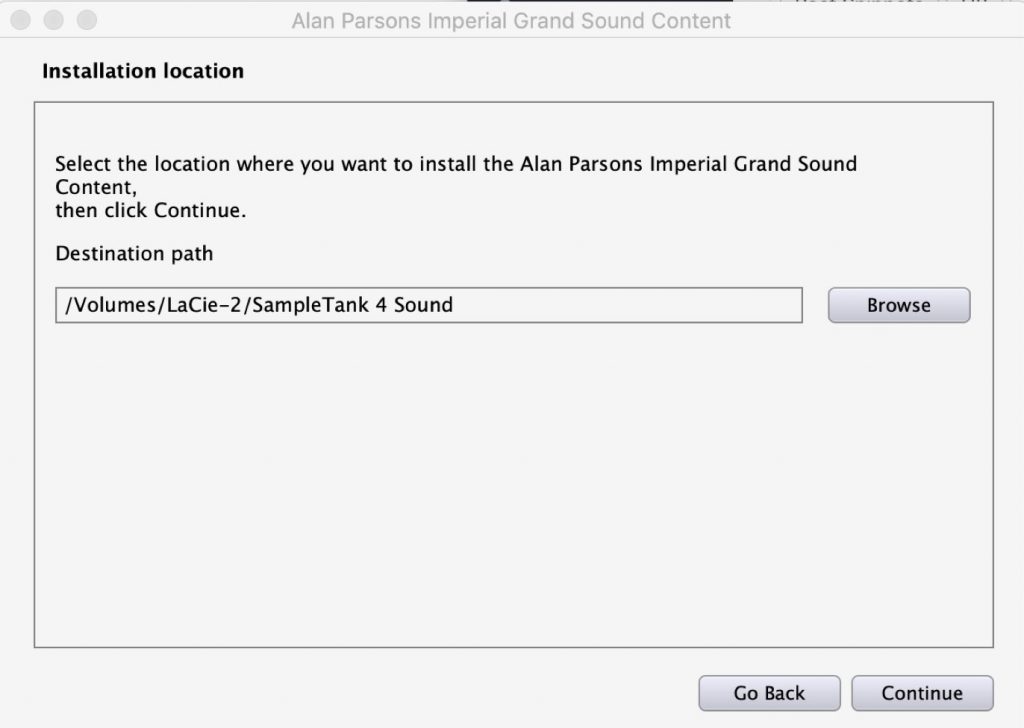
you'll be asked where to install the sounds.
At this point, create a folder with any name you like, such as "SampleTank 4 Sound", on your external HDD and specify it as the install location.
For the second and later sounds, the folder used above is specified by default.
Just keep installing without overthinking it.
You can also delete the sound installers once they've been installed.
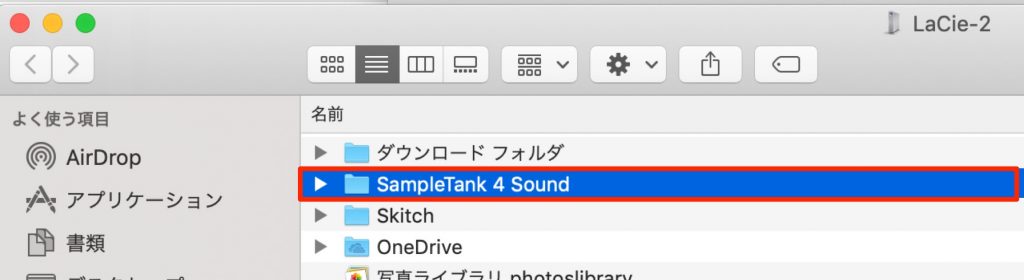
There's a time limit on downloading the sounds, so we recommend keeping a separate backup of the sound folder.
Simply copying the whole folder to another HDD is fine.
What If Sounds Won't Load in SampleTank 4?

From the preferences icon in SampleTank 4, check whether the folder where you installed the sounds is specified.
If it isn't, add it with "ADD".
Once the folder is specified (or after you specify it), click "Rescan Instruments" at the bottom left.
How Do I Use SampleTank 4 on a New Computer?
When you start using SampleTank 4 on a new computer, for example after replacing your computer, you don't need to download and install the sounds above again.
Just download and install the SampleTank 4 application itself,

then add the sound folder saved on your external HDD with "ADD" from the preferences icon in SampleTank 4.
Then click "Rescan Instruments" at the bottom left.
License Authorization
Once these installations are finished, authorize SampleTank 4 to make it ready to use.
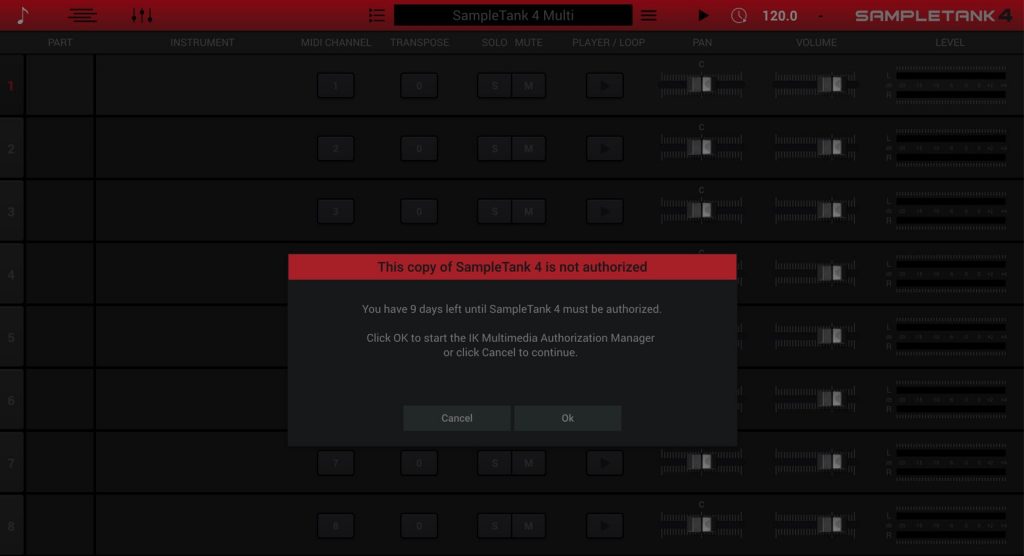
When you launch the product, a screen like this appears, so press "OK".
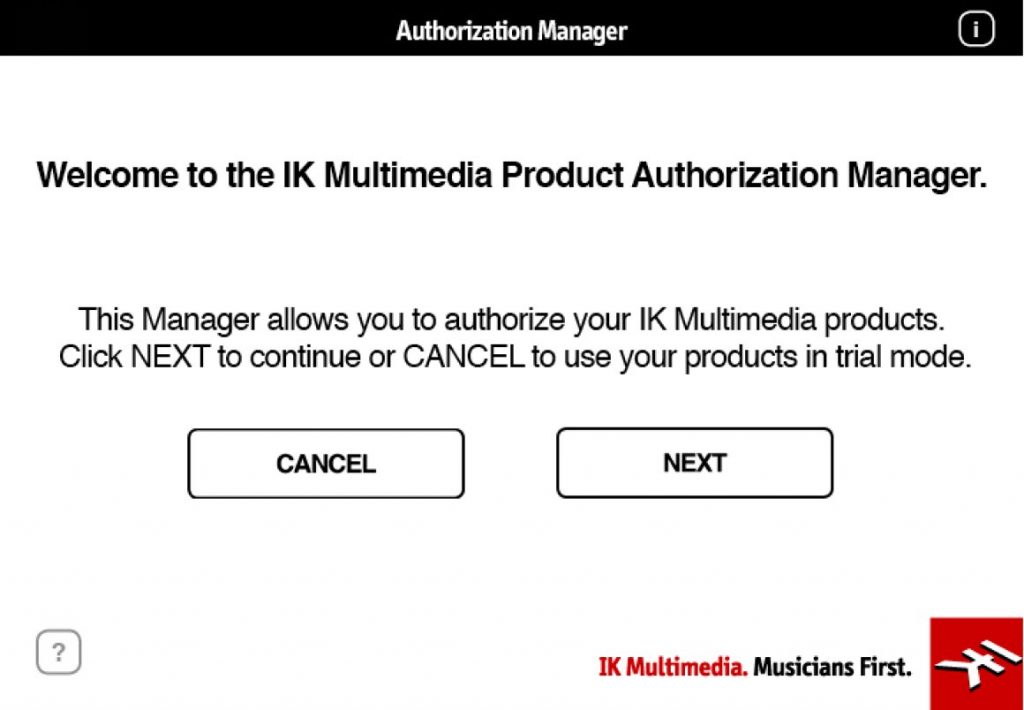
"Authorization Manager" starts, so proceed with "NEXT".
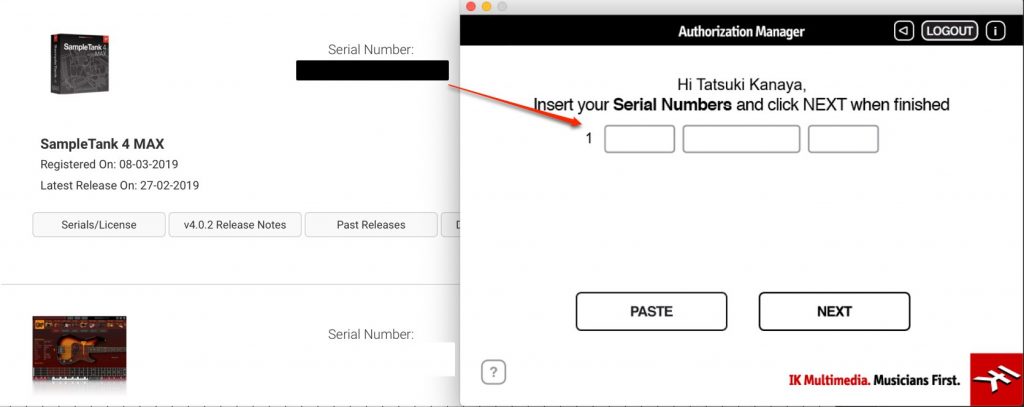
Enter the serial number shown on the website and continue.
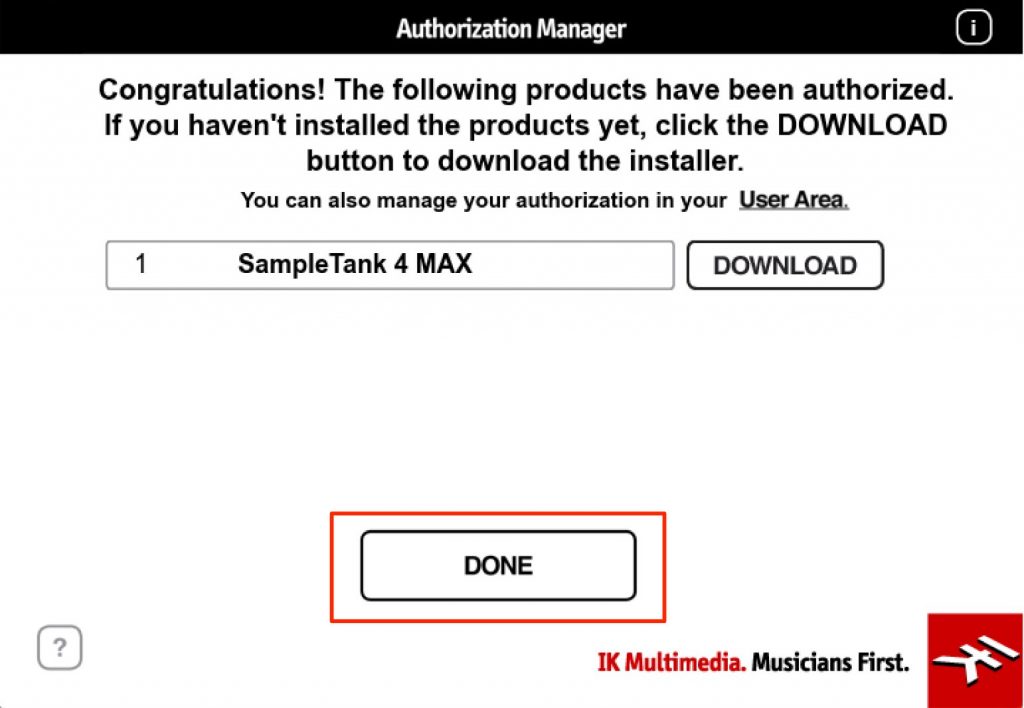
Click "DONE" to finish authorization. You can now use the product.
It Can Also Be Purchased from beatcloud, the Japanese Distributor

"SampleTank 4" contains a well-balanced library of more than 100 GB in total, including 70 GB of new sounds, and 6,000 instruments
IK Multimedia SampleTank 4 | beatcloud
IK Multimedia SampleTank 4 Crossgrade | beatcloud
(The crossgrade is for owners of a paid IK product priced at €99.99 or more in the IK Online Store)

"SampleTank 4 MAX" contains a library of more than 250 GB in total, including 200 GB of new sounds, and 8,000 instruments. It's the top-tier edition, the flagship of SampleTank 4
IK Multimedia SampleTank 4 MAX | beatcloud
IK Multimedia SampleTank 4 MAX Crossgrade | beatcloud
(The crossgrade is for owners of a paid IK product priced at €99.99 or more in the IK Online Store)
The field trip isn't over until you're home,
and SampleTank isn't over until the installation is finishedUp to 8,000 instruments! You get a rich sound library of more than 250 GB, plus a lot of patience.
How to download, manage sounds for and authorize IK Multimedia "SampleTank 4" https://t.co/uqVpx2nuEc
- SLEEP FREAKS (@SLEEPFREAKS_DTM) March 9, 2019
Frequently Asked Questions
Q1. How many GB do I need to download the entire SampleTank 4 sound library?
For SampleTank 4 MAX, you need more than 250 GB in total. Typical computer storage isn't enough, so buying an external hard drive is recommended. You can manage it efficiently by specifying the external HDD in your browser settings when downloading.
Q2. Do I need to download the sounds again to use SampleTank 4 on a new computer?
No. After installing the SampleTank 4 application, just add the sound folder from your external HDD in the preferences and click "Rescan Instruments". This also lets you avoid the restriction of the download time limit.
Q3. What should I do if SampleTank 4 doesn't recognize the sounds?
From the preferences icon in SampleTank 4, check that the folder where you installed the sounds is specified correctly. If it isn't, add it with the "ADD" button, then click "Rescan Instruments" at the bottom left to rescan, which should solve it.
NEW ARTICLES
Latest English Articles