
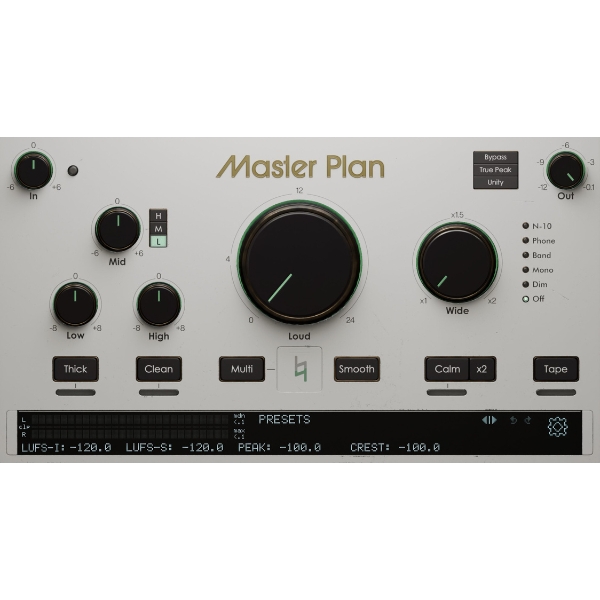
MASTER PLAN is an innovative mastering plug-in developed by Musik Hack LLC that brings the complex mastering process into a simple interface. It offers advanced features such as loudness optimization with an intuitive Loud knob, a 3-band EQ and stereo widening, while remaining easy for beginners to handle. With a variety of tone-enhancing functions such as Thick, Clean, Multi, Smooth, Calm and Tape, and precise comparison tools such as Bypass and Unity gain matching, you can achieve professional-quality mastering. A rich selection of presets covers a wide range of music genres.
An Innovative Plug-in for Pro-Level Mastering
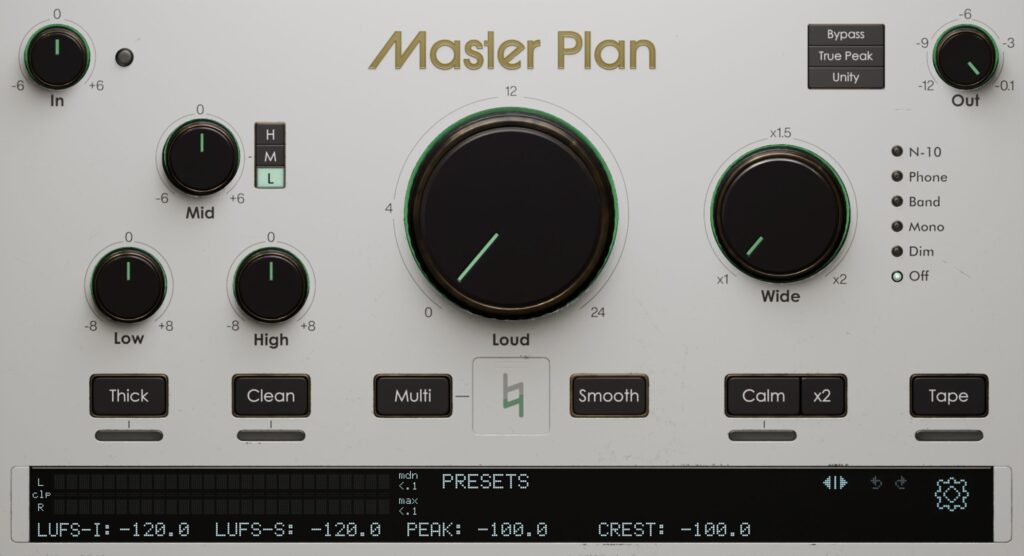
Mastering is the final stage of music production.
An innovative plug-in that simplifies this complex process while delivering professional sound quality: that is MASTER PLAN, developed by Musik Hack LLC.
This article explains the features of MASTER PLAN and how to use it in an easy-to-understand way.
A Fusion of Simplicity and Advanced Functionality
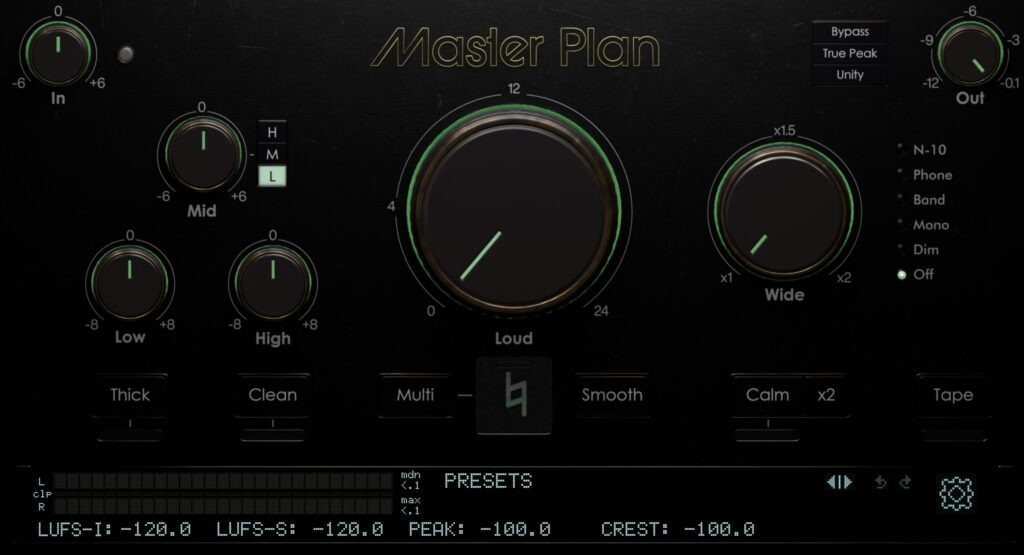
MASTER PLAN combines an easy-to-use interface with advanced tone-shaping functions.
Its main features are as follows.
- Intuitive interface
- Innovative loudness optimization technology
- 3-band EQ and stereo widening
- A variety of tone-enhancing functions
- High-precision level management and effect comparison
- A rich selection of presets
First, please listen to the sound using MASTER PLAN.
The processed version uses the "MP Master" preset from MASTER PLAN.
Every preset gives a highly transparent overall result with restrained compression.
It seems applicable to a wide range of music genres while preserving the song's original texture.
A Design Focused on Ease of Use
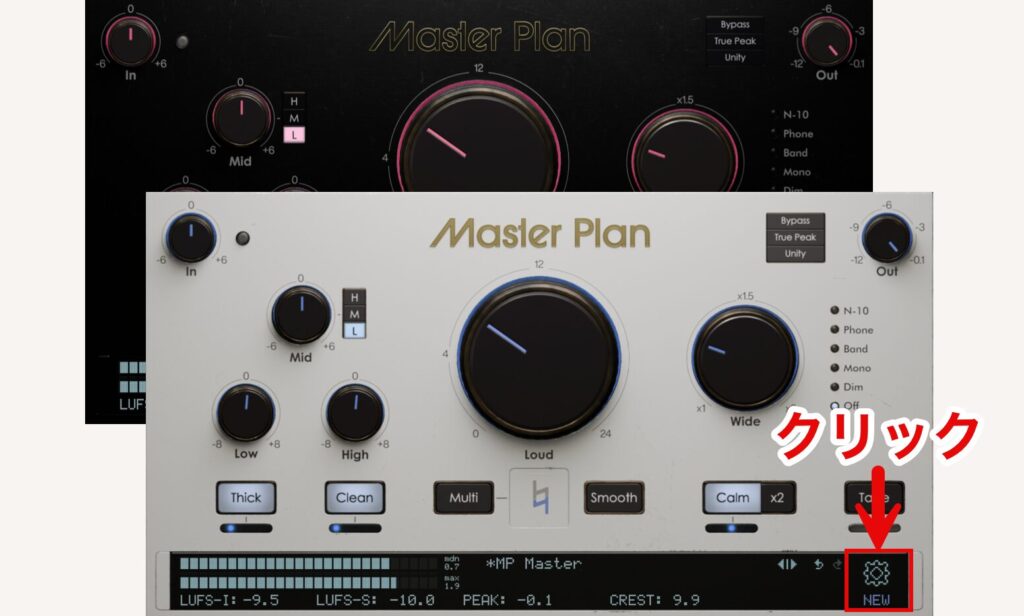
The MASTER PLAN interface has several features you can customize to suit your preferences and purpose.
Click the gear icon at the bottom right to access the settings screen.
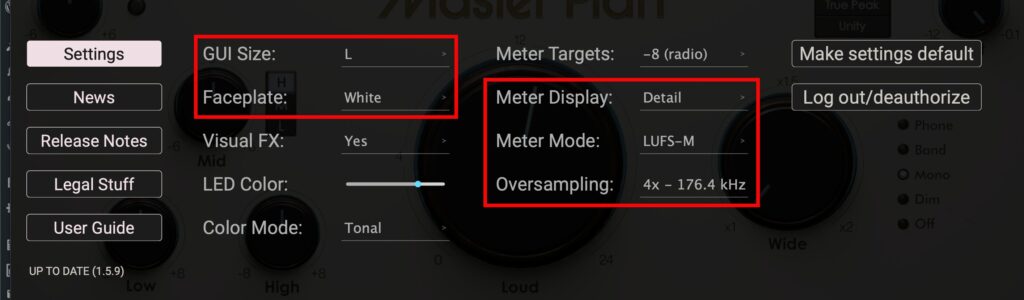
- GUI Size: the interface size can be adjusted in four steps (S, M, L, XL) to suit various working environments.
- Faceplate: you can choose dark mode or light mode for excellent visibility.
- Meter Display: shows or hides the volume meters; detail mode also lets you check when clipping occurs.
- Meter Mode: switches between normal mode (peak or LUFS-M values, maximum 0 dB) and LUFS-M Targeted mode (displays the selected LUFS value as the maximum).
- Oversampling: choose the oversampling factor from off, 2x, 4x and 8x; higher factors allow higher-quality processing but increase CPU load.
Innovative Loudness Optimization, EQ and Stereo Widening
The core function of MASTER PLAN is an innovative technology that raises loudness to the maximum without compromising sound quality.
Loudness Optimization
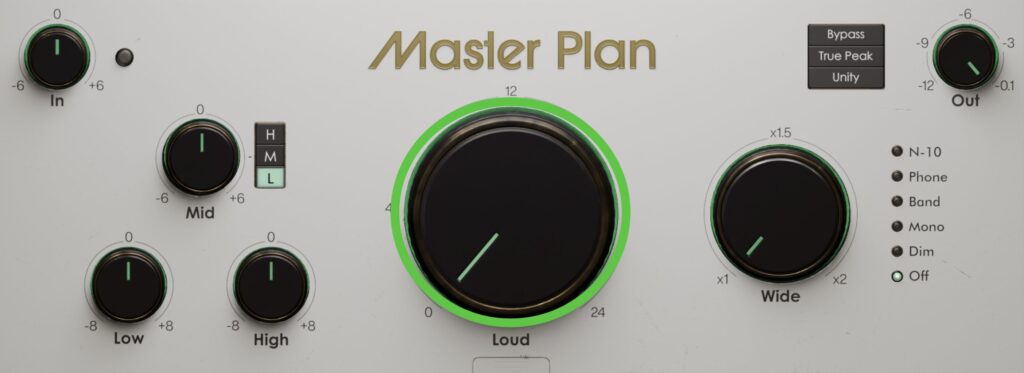
The Loud knob, which uses a special limiter/clipper circuit, lets you achieve a loudness increase of more than +4 dB just by turning it.
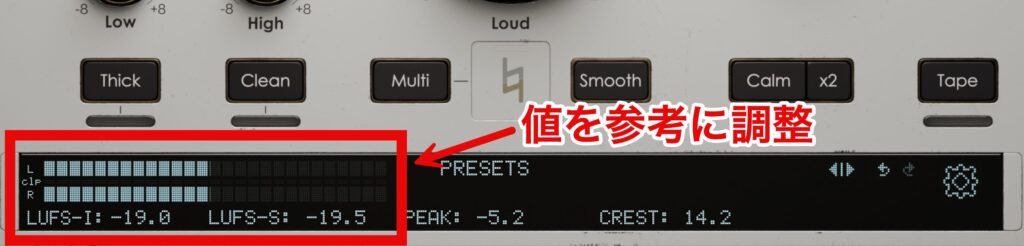
Adjust the Loud knob with reference to the LUFS-S (Short Term) and LUFS-I (Integrated) values.
LUFS (Loudness Units relative to Full Scale) is the standard unit for measuring loudness and is widely used in broadcasting and streaming services.
Adjusting LUFS according to your intent lets you maintain consistency and balance in loudness.
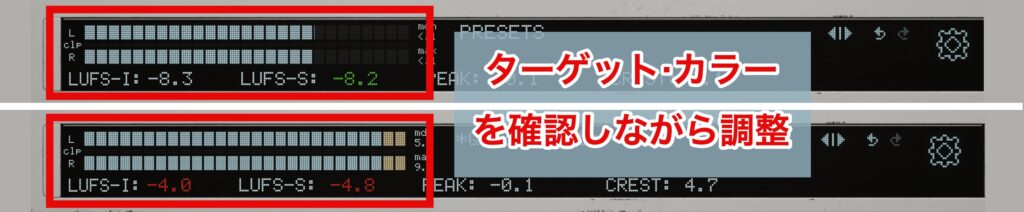
The appropriate LUFS value varies mainly by distribution platform, but you can also adjust the sound while checking the target color indicator.
In general, it is recommended to set it so that the value stays white or green, and to readjust if it turns red.

Clicking the "Loud" label switches the function on and off, so you can check the effect of Loud instantly.
Tone Controls (Low, Mid, High)
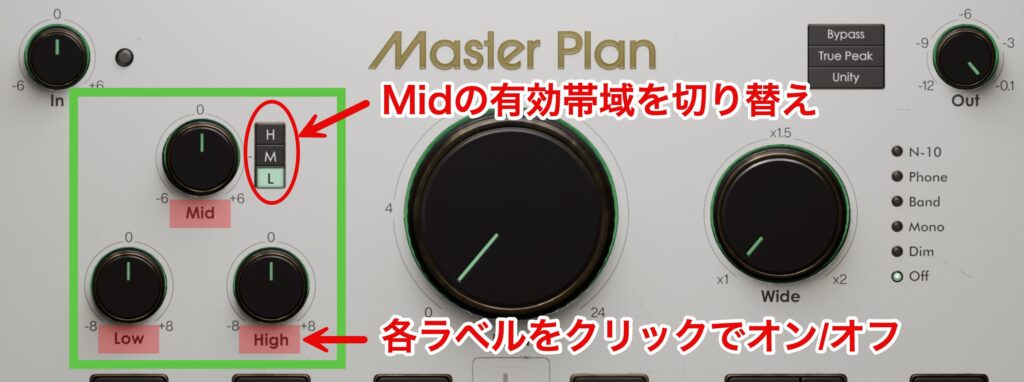
The intuitive 3-band EQ controls let you adjust the frequency balance quickly.
First adjust Low and High to taste, then use Mid as needed.
Click each label to switch it on and off, and the "L, M, H" buttons let you adjust Mid in more detail.
Stereo Image Widening
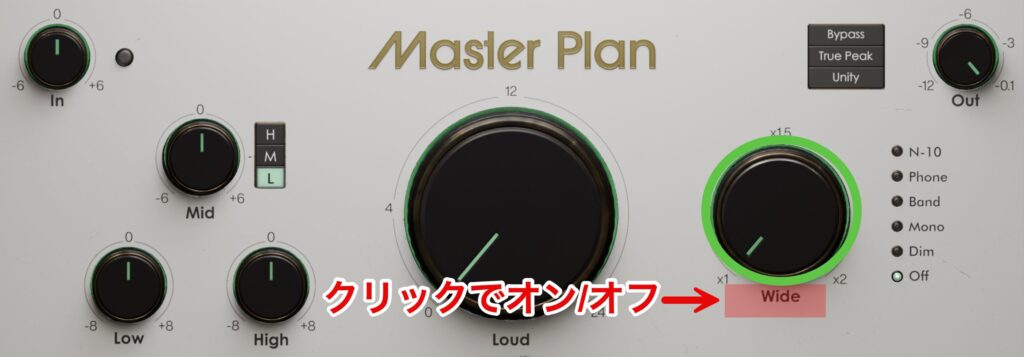
The Wide knob controls the spread of the sound.
The basic approach is to raise it until the image sounds clear, and back it off if it becomes too spacious.
Click the "Wide" label to switch it on and off.
A Variety of Tone-Enhancing Functions
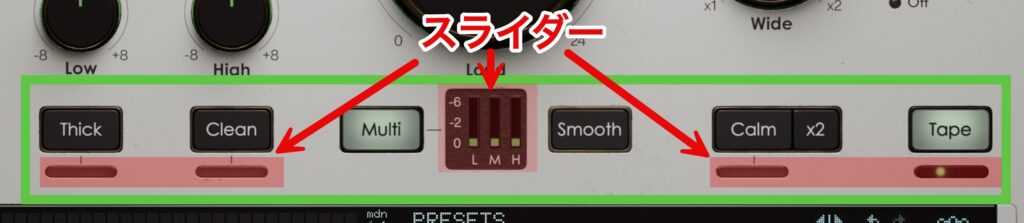
In addition to the main knobs, it also offers the following tone-enhancing functions.
- Thick button: adds analog-style saturation for warmth and body.
- Clean button: removes muddiness in the low end; effective when the bass is murky.
- Multi button: works as a multiband compressor, with each band adjustable via the "L, M, H" sliders.
- Smooth button: gently adjusts dynamics to give the mix cohesion.
- Calm button: controls harsh high-frequency transients.
- Tape button: reproduces the texture of analog tape; effective for tightening the lows and taming the highs.
These functions can be enabled with one click, and each slider lets you fine-tune the amount of effect.
High-Precision Level Management and Effect Comparison
Comparing sounds and making precise adjustments are essential for effective mastering.
MASTER PLAN has three important functions that support this process.
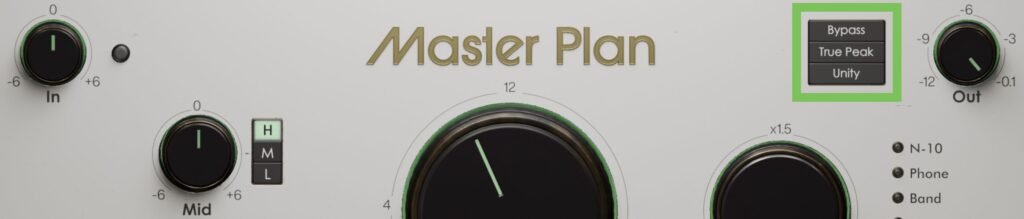
Bypass
Switch the effect on and off without delay to instantly compare the sound before and after processing.
Toggling this control resets the meter readings, so using it after each adjustment lets you clearly understand the effect of what you applied.
True Peak Processing
This is a function that measures and controls momentary level changes with high precision that normal sampling cannot capture.
When on, it measures with 4x precision and handles sharp percussive sounds in particular more naturally.
When off, it uses the standard level measurement method, which is suitable when used together with an external true peak limiter.
This function lets you prevent digital clipping while preserving the dynamics of the music.
Unity (Gain Matching)
This is a function that suppresses level changes caused by the effect, so you can accurately monitor changes in the texture of the sound.
Turning it on lets you objectively judge changes in texture without being misled by changes in level.
We recommend keeping it on while shaping the sound, and turning it off at the finishing stage or when checking the final level.
In particular, it is important to always turn it off before bouncing the track.
Presets for Effective Mastering
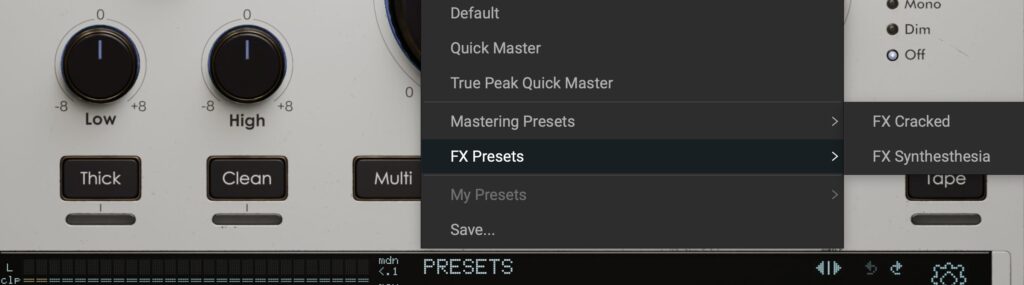
MASTER PLAN comes with a rich selection of presets for different purposes.
These presets are designed so that you can easily try different mastering styles.
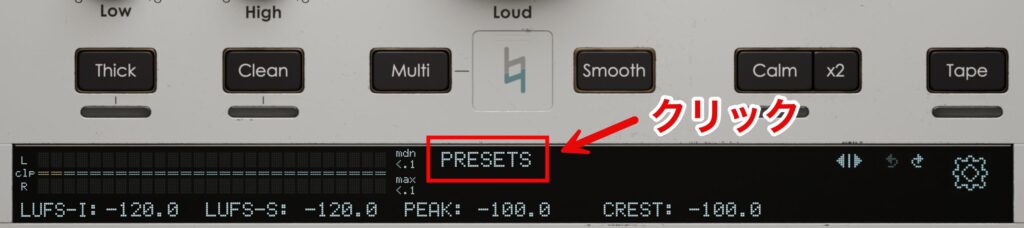
To choose a preset, click "PRESETS" at the bottom of the interface.
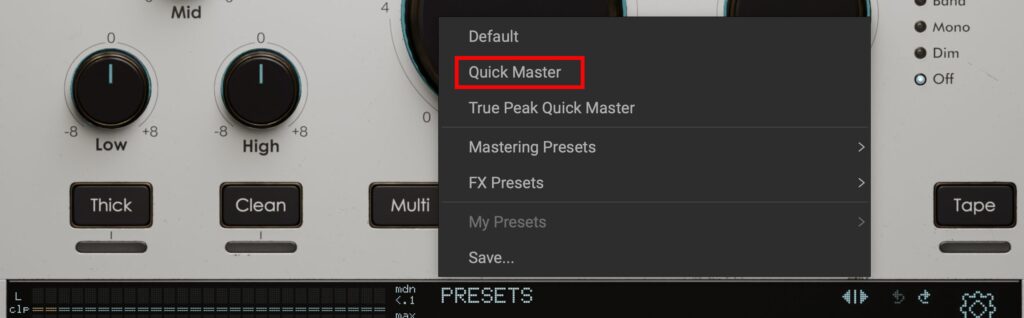
The "Quick Master" preset is the ideal initial setting when you start using it.
To get started quickly, choose QuickMaster.

Use the arrows ◀|▶ at the right end to switch presets quickly.

The buttons to the right of Prev/Next let you undo the last operation or redo an undone operation.
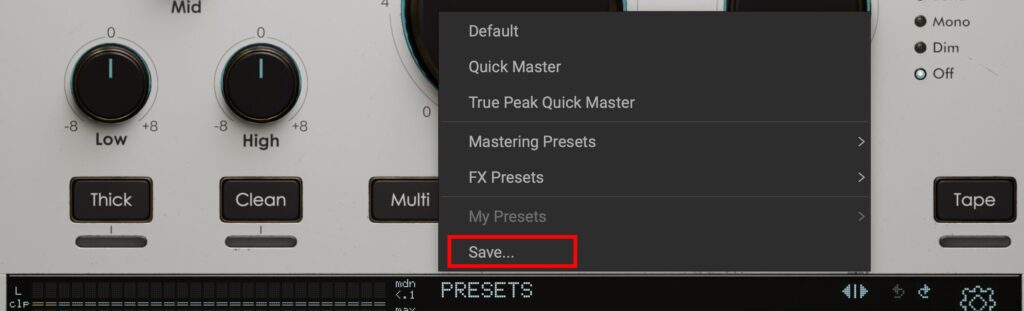
You can also save custom presets by choosing "Save…" from the menu.
When you select a preset, the other settings load while the current loudness is maintained.
Also, the Loud, Unity and In settings are not changed (unless set to 0), so you can easily compare presets.
What did you think?
MASTER PLAN has many features, but you do not need to use every control to get a polished sound.
We recommend starting by adjusting the four controls Loud, Wide, Low and High to build a solid foundation.
The article below explains how to install MASTER PLAN.
Add it to your music production workflow and experience professional sound quality!

Frequently Asked Questions
Q1. Which DAWs can MASTER PLAN be used in?
MASTER PLAN is provided in common plug-in formats (VST, AU, AAX, etc.) and can be used in most major DAWs (Logic Pro, Cubase, Ableton Live, etc.). Please check the product page for detailed compatibility information.
Q2. Can beginners to mastering make good use of MASTER PLAN?
Yes. MASTER PLAN has an intuitive interface and a rich selection of presets, and is designed so that even beginners can easily achieve pro-level mastering. Functions can be enabled with one click, and each parameter can be fine-tuned.
Q3. What is LUFS, and why is it important in mastering?
LUFS stands for "Loudness Units relative to Full Scale" and is an internationally standardized unit of loudness as perceived by the human ear. Streaming services such as YouTube and Spotify and broadcasting specify particular LUFS values, so adjusting LUFS when mastering ensures consistent loudness across distribution platforms.
Q4. Is there a way to reduce CPU load?
You can adjust the oversampling setting. Changing the factor to "off" in the settings screen minimizes CPU load. However, higher factors allow higher-quality processing, so it is effective to adjust it by work stage, such as using a high factor only when bouncing.
Q5. What should I do if I cannot hear the effect of the Loud knob?
Switch Bypass on and off to compare the sound before and after processing directly. It is also important to check the LUFS-S and LUFS-I values and whether the meter color (white, green or red) is within the target. We also recommend turning on Unity gain matching so you can focus on changes in texture without being misled by changes in level.
NEW ARTICLES
Latest English Articles











