In music production with FL Studio, placing the patterns you have made in the Playlist is an important step in moving from the loop-based Channel rack to an actual song structure. This article explains the basics of using the Playlist, how to place patterns, how to manage clips and how to organize instruments using tracks, so readers can learn the foundations for efficient arranging and fine adjustments. It also carefully covers pitfalls that beginners often fall into, such as checking the playback mode switch.
The Playlist: assembling patterns to build a song
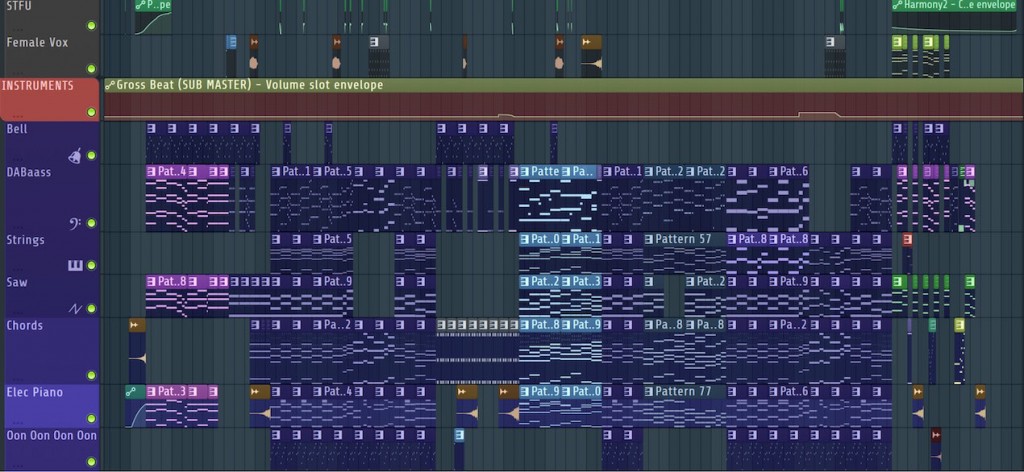
Once you understand patterns and can create them,
it is finally time to start assembling the song.
Let's learn how to build a song by placing each pattern in the Playlist.
Understanding the Playlist
First, let's open the Playlist.
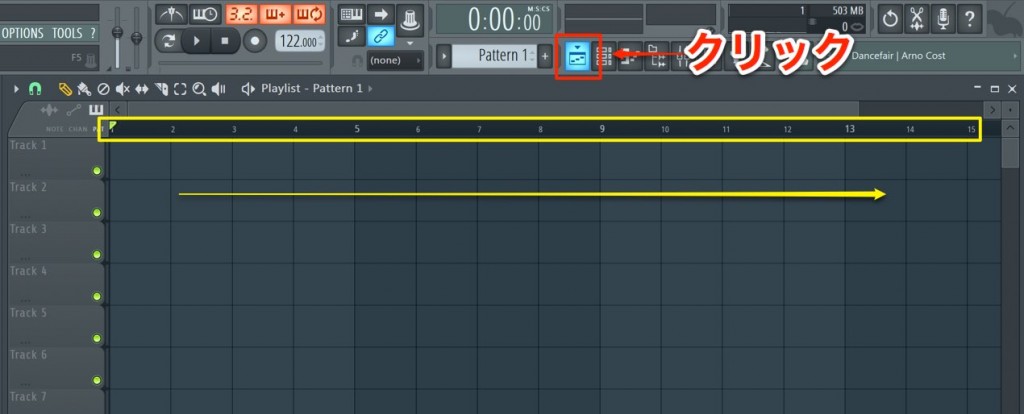
Click the Playlist icon to display it.
The Channel rack so far has been based on loop playback,
but the Playlist simply flows from left to right.
Bar numbers corresponding to time are also shown.
This is where you place the patterns you have created.
Placing patterns
Let's place a pattern in the Playlist.
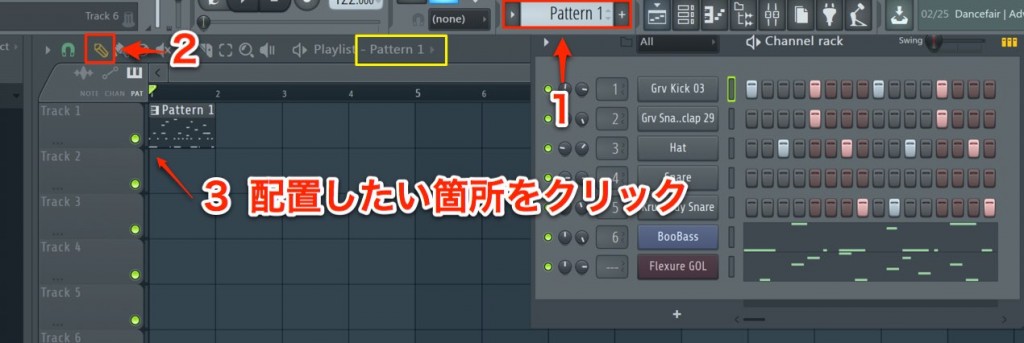
- 1_Call up the pattern you want to place
You can also select the pattern to place from the area outlined in yellow - 2_Select the Draw tool (pencil) icon
- 3_Click where you want to place it
The pattern has now been placed.
Note that a placed pattern (container) is called a "clip".
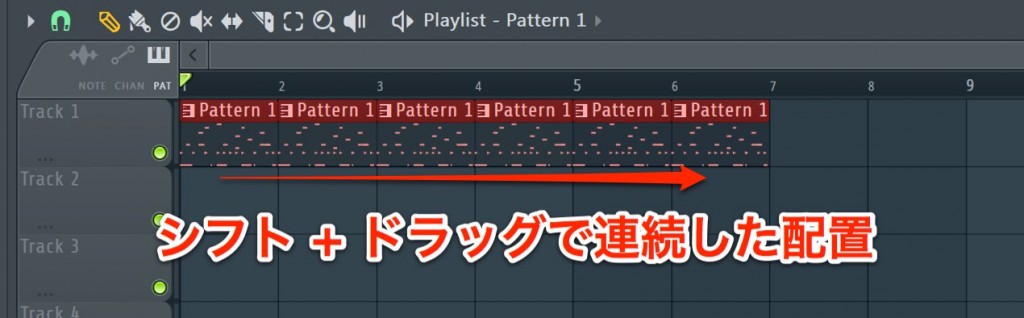
You can also place patterns one after another with "Shift key + drag".
Deleting clips
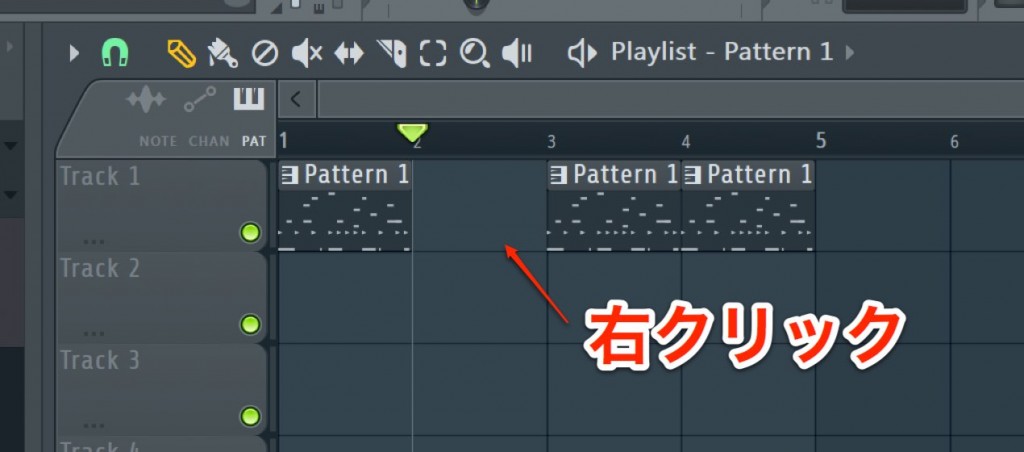
To delete a placed clip, right-click the clip.
About tracks
Next time, we will edit the placed clips to create the song's development,
so let's prepare for that now.
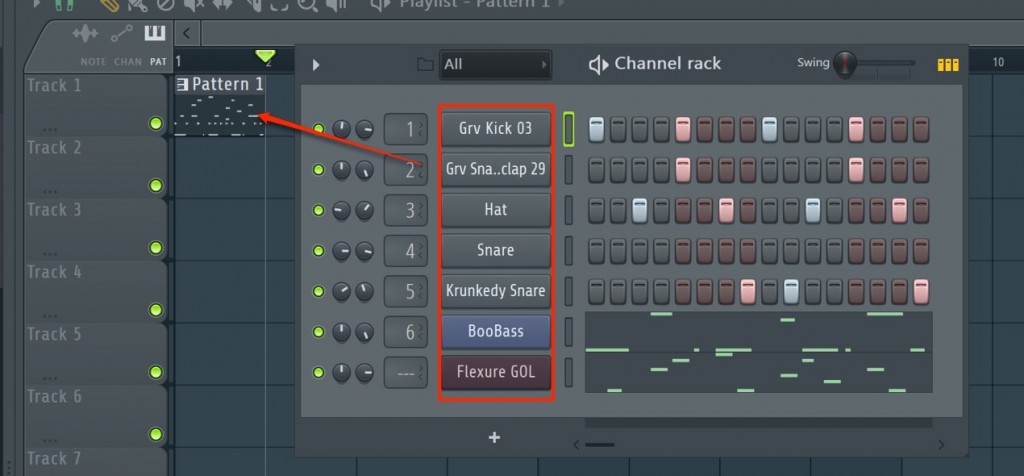
In the current state, all the instruments in the pattern are treated as one clip,
which may make them harder to edit later.
This is where "tracks" come in.

Tracks are arranged vertically like this.
Placing each instrument (channel) on a different track
lets you make finer arrangements and adjustments quickly.
Let's split each instrument into a different pattern.
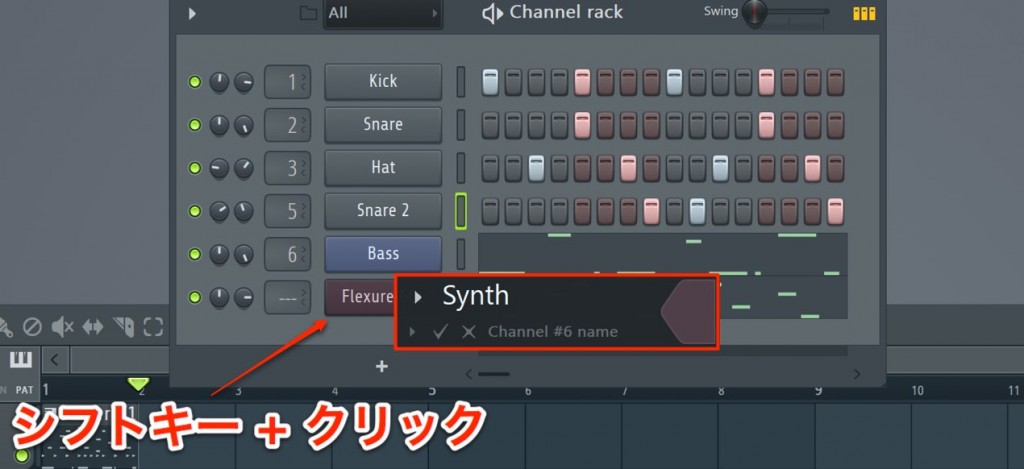
It is easier to understand if you give them names.
You can quickly rename by "Shift key + clicking" the place you want to name.
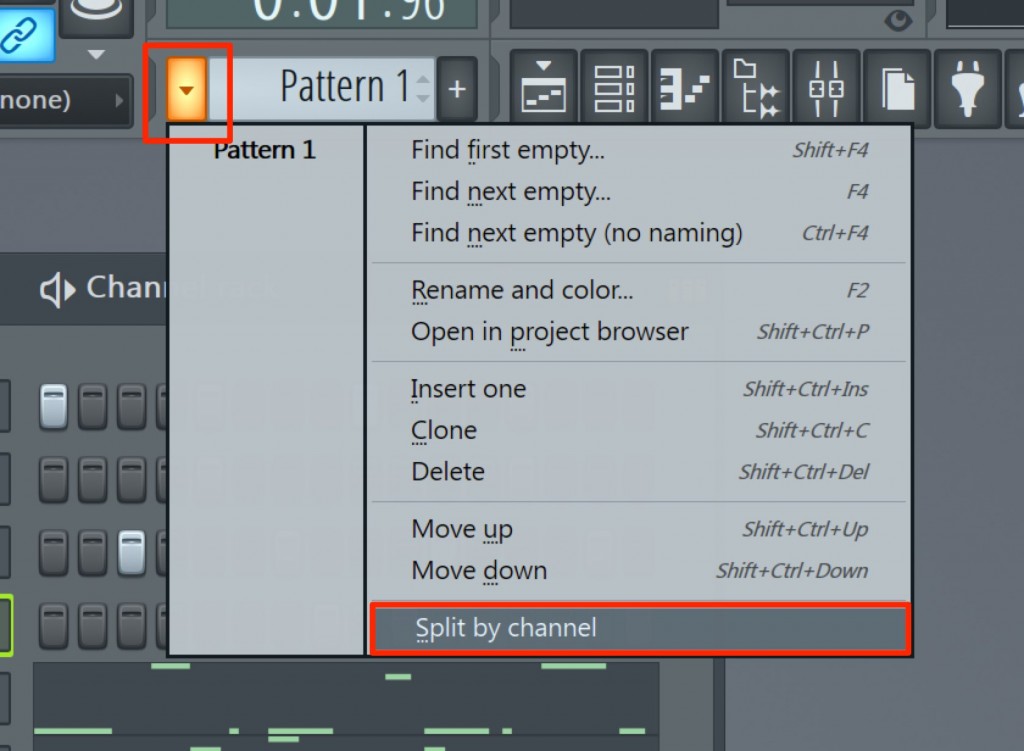
Select "Split by channel" from the pattern menu.
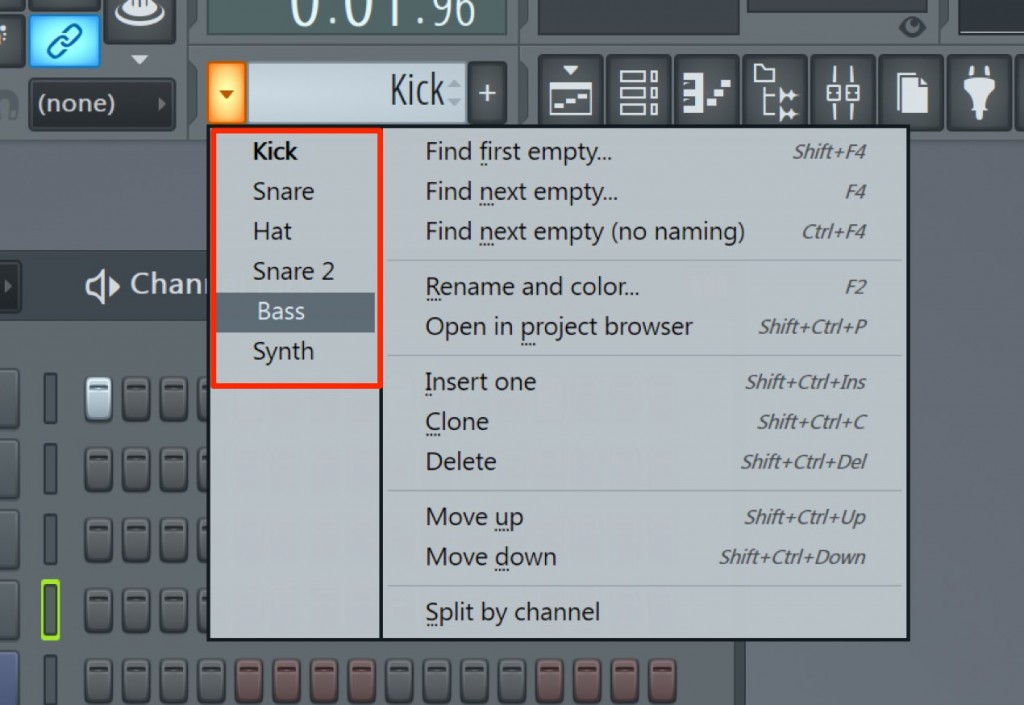
The channels are split into separate patterns.
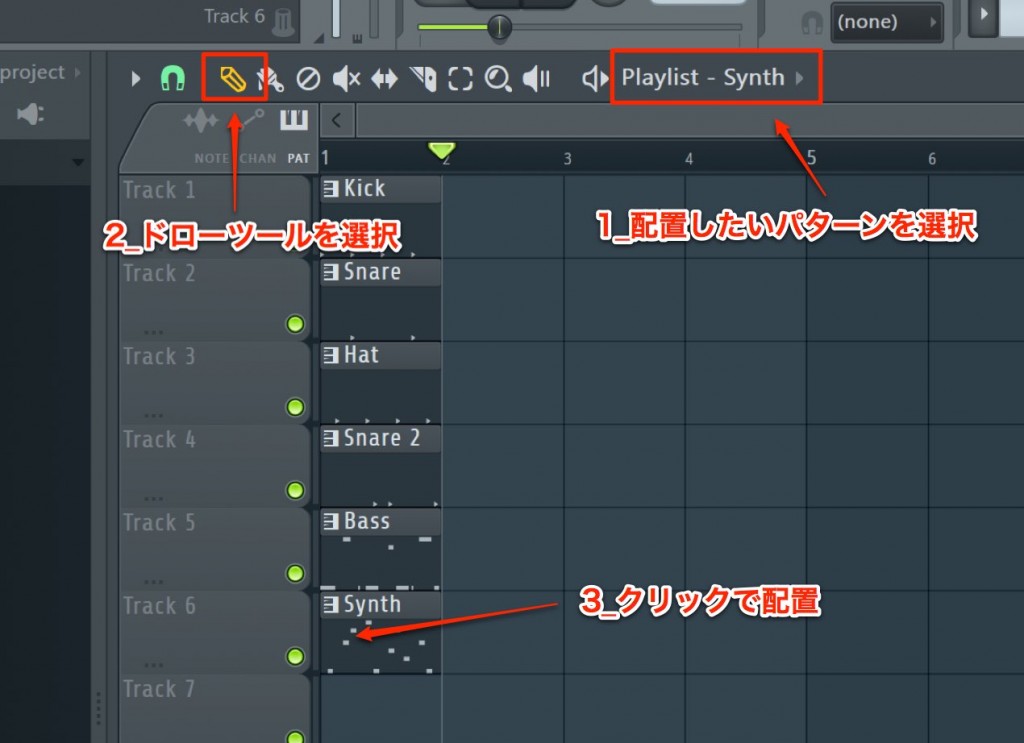
Let's place each pattern in the same way as above.
- 1_Call up the pattern you want to place
- 2_Select the Draw tool (pencil) icon
- 3_Click where you want to place it
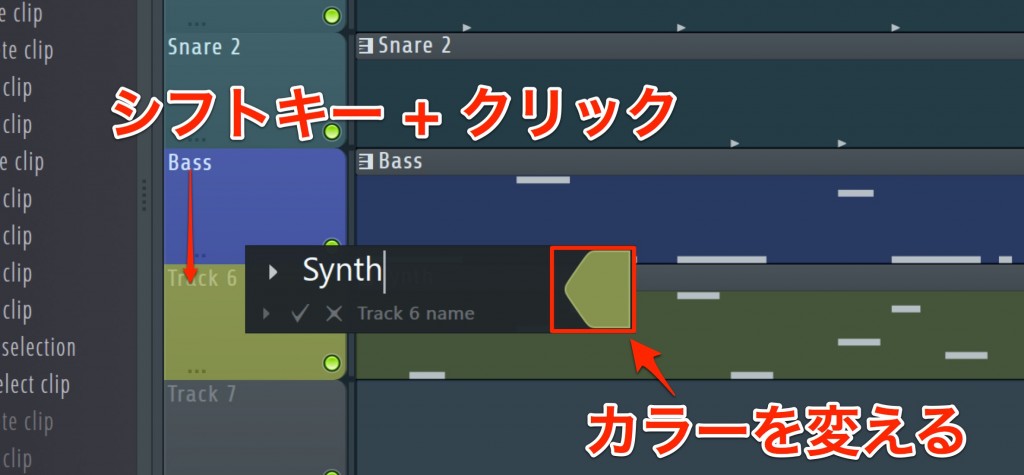
Tracks can be renamed in the same way.
We also set colors by instrument type to make them easier to tell apart.
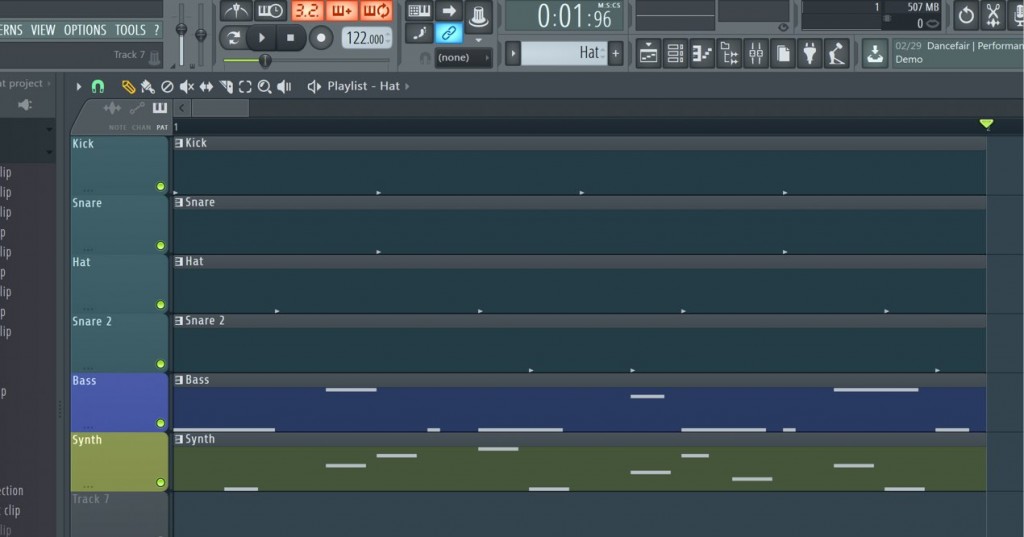
Once the setup is done, it looks like this.
Checking the playback mode
There is an important point before editing.
That is the "playback mode".
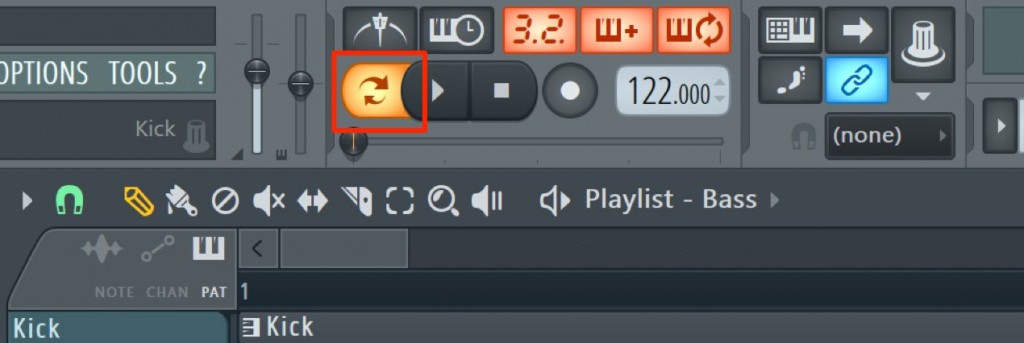
This goes back quite a while, but when playing the Channel rack,
we turned on the button outlined in red in the image above.
This button switches between pattern playback and Playlist playback.
So when playing the Playlist, you need to turn this off.
If playback does not work properly, be sure to check this part.
Next time, we will move on to editing the placed clips to structure the song.

Frequently Asked Questions
Q1. What is the difference between the Playlist and the Channel rack?
The Channel rack plays patterns in a loop, while the Playlist flows from left to right along the timeline. Combining patterns placed in the Playlist lets you build the structure of the whole song.
Q2. What should I do if I want to delete a placed pattern right away?
You can delete a pattern (clip) placed in the Playlist by right-clicking it. Because it is easy to undo, you can adjust the song structure through trial and error.
Q3. Why use tracks?
Placing patterns on a different track for each instrument lets you edit and adjust each instrument individually. This enables finer arrangements and quick adjustments to volume and effects.
Q4. What should I check when the song does not play?
When playing the Playlist, you need to turn off the Channel rack playback button and switch to the Playlist playback mode. If playback does not work well, check this part first.
NEW ARTICLES
Latest English Articles