FL Studio's loop recording function is a handy feature that lets you record the same section over and over and choose the best take. In this article you will learn how to operate loop recording, how to adjust the recording level to maintain good sound quality, and why the S/N ratio matters. Readers can learn practical techniques for setting audio interface gain and reducing noise, with the benefit of setting up a professional recording environment.
Record the same section many times and use the best take
In the previous section, we explained the basics of audio recording.
It shares many concepts with MIDI recording, so it should not have felt difficult at all.
This time we explain a function that makes audio recording even more convenient: "loop recording".
As the name suggests, it is a function that records the same section many times while looping it.
You do not need to start and stop playback for each take, so
the benefit is that you can concentrate on recording until you get a good take.
Loop recording
The preparation for recording is the same as in the previous sections.
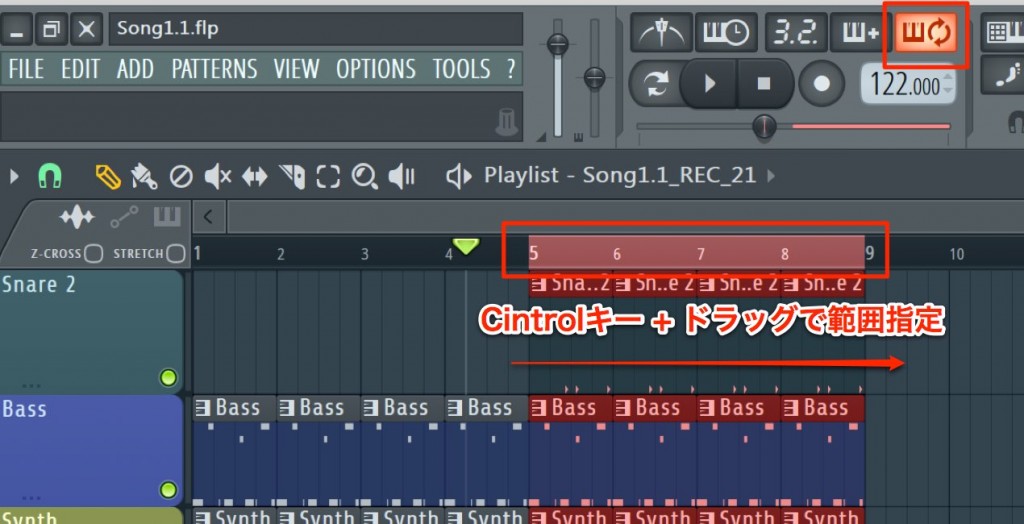
When everything is ready and you start recording, turn on the "loop icon" above the tempo display,
and "Control key + drag" on the ruler to specify the loop recording range.
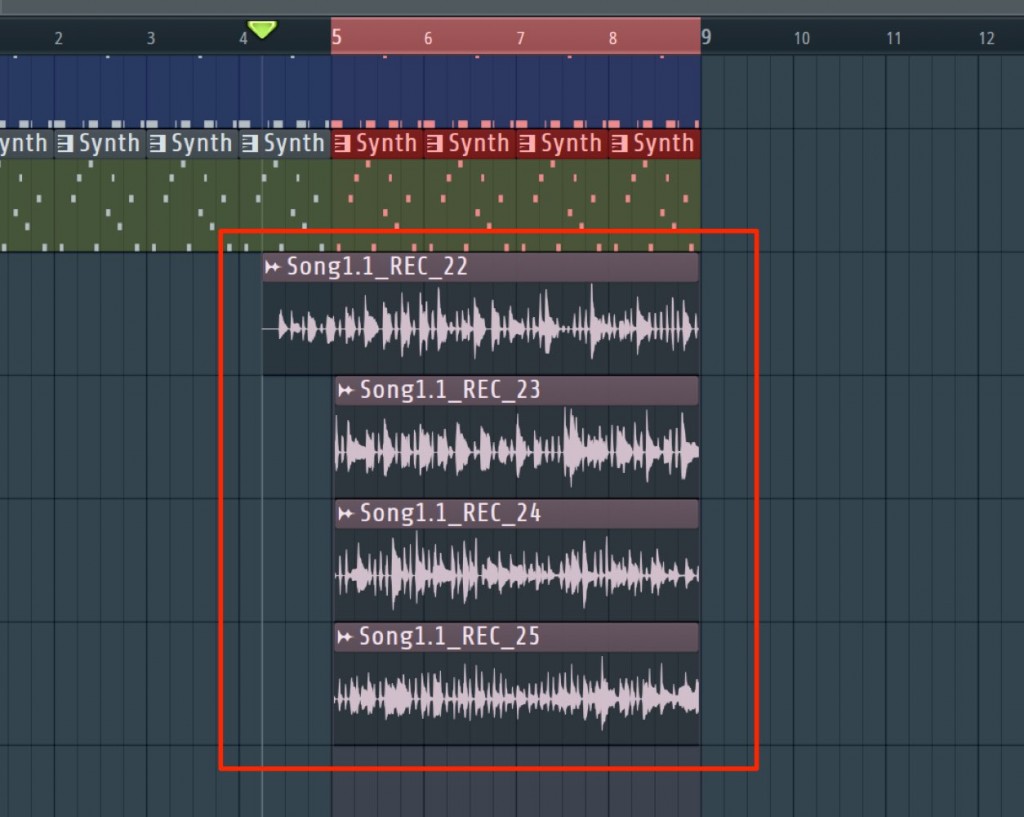
Recorded takes keep piling up until you stop.
When you are done, check each one and delete all but the takes (clips) you need.
Recording with good sound quality
What you need to watch out for when recording is the recording level.
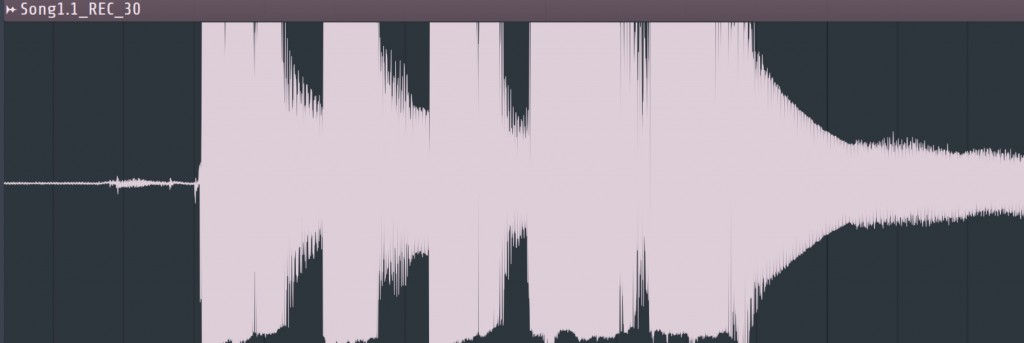
If the waveform goes beyond the "ceiling and floor" of the clip like this, it is no good.
The sound distorts and the quality drops considerably, so
lower the "gain" on the "audio interface" to adjust it.
S/N ratio explained
To improve recording quality,
you need to keep noise as low as possible and record the actual sound loud (improve the S/N ratio).
Tips for vocal recording
The article below explains what you need and the techniques for vocal recording.


Frequently Asked Questions
Q1. I cannot find the loop icon above the tempo display for loop recording in FL Studio
The loop icon is in the tempo display panel. After turning it on, specify the loop range by Ctrl + dragging on the ruler. If the function is still not enabled, check your recording settings.
Q2. What should I do if the waveform goes beyond the ceiling and floor of the clip?
Lower the gain on your audio interface to adjust the input level. When the waveform goes beyond the clip, the sound distorts and the quality drops considerably, so it is important to record at an appropriate level.
Q3. How can I improve the S/N ratio?
It is important to record the actual sound as loud as possible while keeping noise as low as possible. You can improve the S/N ratio by improving your microphone environment, adjusting gain and watching the level meter properly.
NEW ARTICLES
Latest English Articles