In music production with FL Studio, editing clips effectively in the Playlist lets you turn loop material into an arrangement with development. By learning basic editing techniques such as copying with Shift + drag, deleting with a right-click and using the mute tool, you can easily add variation to a song. An important point to note is that Playlist and pattern editing are linked, so using the "Make unique" function to make a specific clip independent lets you edit part of it without affecting anything else. Combining these techniques lets you make the most of FL Studio's powerful arrangement features.
Control clips to add development to your song
In the previous section, we explained basic editing of clips in the Playlist.
Here, let's apply what we have learned so far to create the development of a song.
Adding just a little creativity to loop material makes it sound much more like a song,
so you should enjoy learning to edit.
Copying
First, copy a one-bar phrase to fill eight bars.
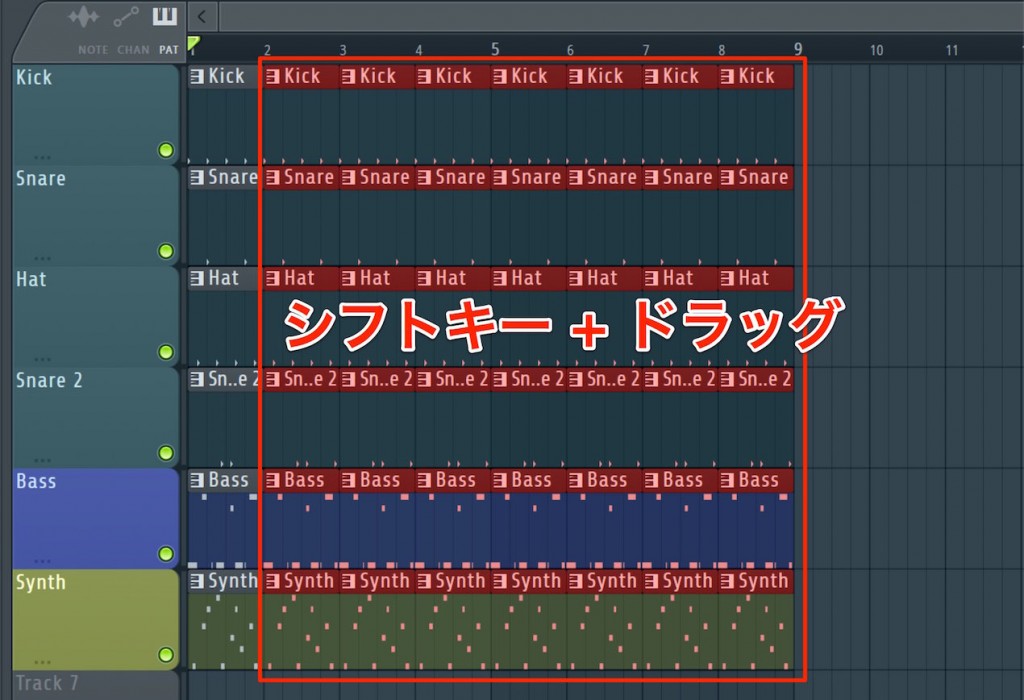
You can easily duplicate it with "Shift + drag".
At the moment, it simply repeats over eight bars like this.
Deleting and the mute tool
Let's add variation by removing the rhythm in the first half.
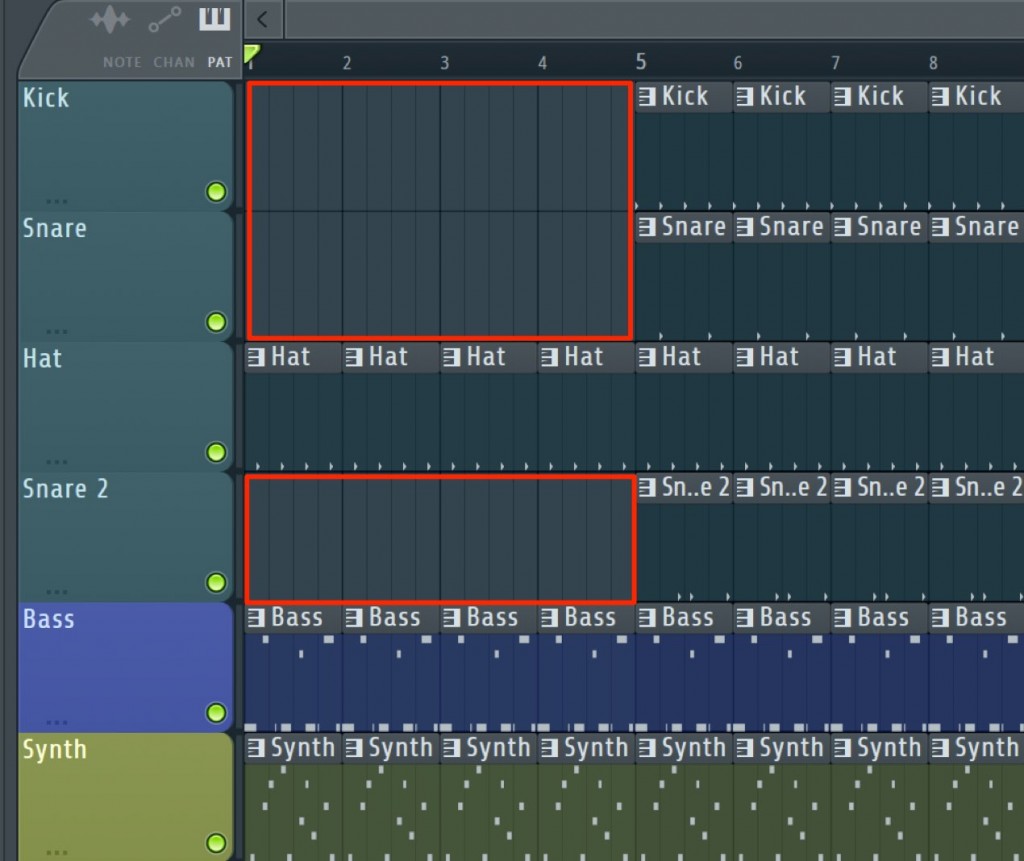
We deleted the drum parts other than the hi-hat with a right-click.
Let's check the sound.
It adds variation easily.
Taking parts out and bringing them back like this is used frequently when arranging song sections.
When you want to take out some clips, a handy function is "muting clips".
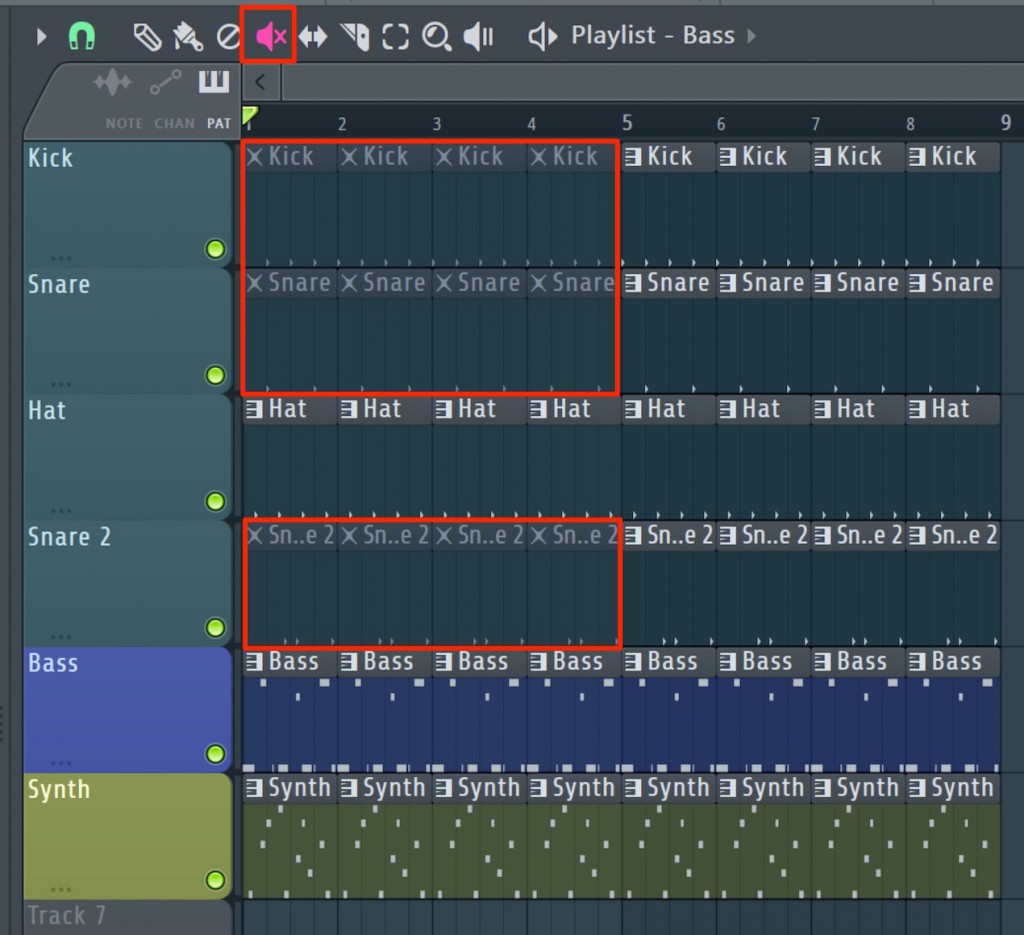
After selecting the "mute tool", click the clip you want,
and the clip is grayed out and treated the same as deleted (it makes no sound).
Clicking the clip again with the "mute tool" restores it.
As you work on an arrangement, you will often want to put something back the way it was,
so rather than deleting completely, it is a good idea to silence it temporarily with the mute tool.
The most important caution when editing the Playlist
Here, let's make sure you understand the most important caution when editing.
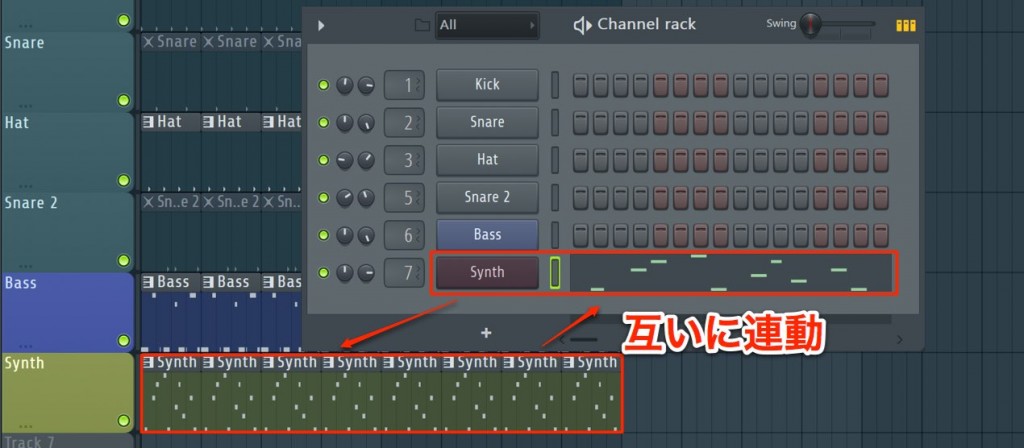
We placed clips in the Playlist from patterns, and the editing of the two is linked.
- Editing the content of a clip in the Playlist changes the content of the pattern.
- Changing the content of a pattern changes the content of all its clips in the Playlist.
If you do not edit with this in mind, unexpected places may change,
which can cause problems.
So what should you do when you want to edit part of a pattern? Let's explain with an example.
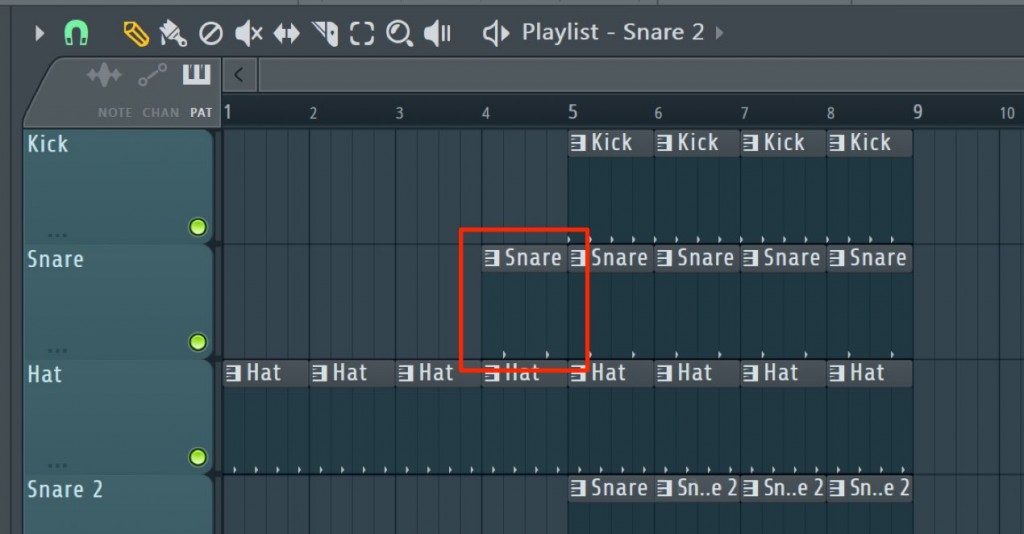
Suppose you want to add a snare fill at the halfway point of the eight bars.
If you change this clip, the same change is applied to all the snare clips.
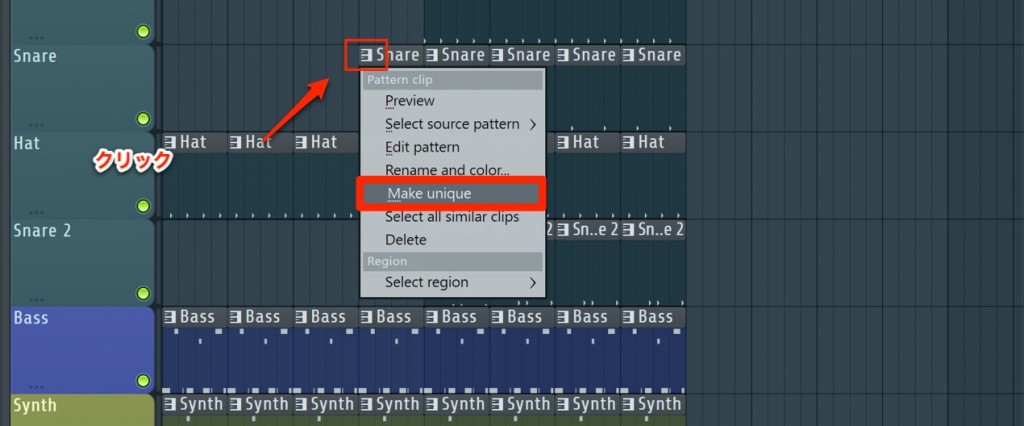
Click the keyboard icon of the clip you want to change and select "Make unique".
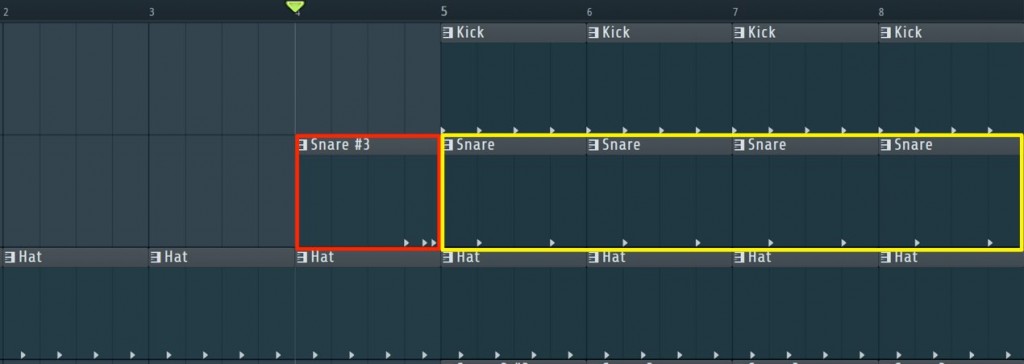
Now you can edit the clip independently like this.
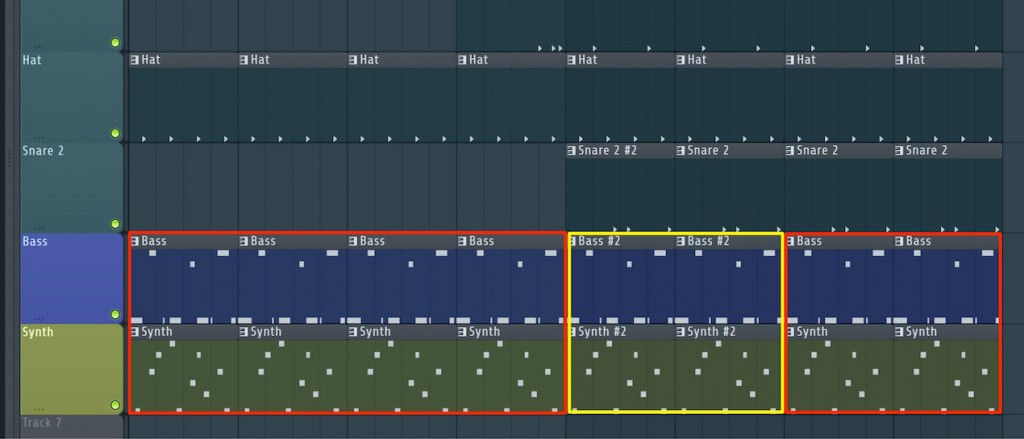
In the same way, we made the pitched tracks "Bass" and "Synth" unique
and changed some of their pitches in the Piano roll.
Being able to edit and arrange song sections in this flow is what makes FL Studio so appealing.
In the next section, let's learn about recording audio.

Frequently Asked Questions
Q1. What is an easy way to duplicate clips in FL Studio?
You can easily duplicate a clip with Shift + drag. This lets you quickly copy a one-bar phrase across several bars to build the basic structure of a song.
Q2. What is the relationship between Playlist editing and pattern editing?
Editing the content of a clip in the Playlist changes the pattern, and conversely, changing a pattern changes all its clips in the Playlist in the same way. It is important to edit with this linked relationship in mind.
Q3. When should I use the "Make unique" function?
When several clips share the same pattern, selecting "Make unique" makes only a specific clip independent, so you can edit or change part of it without affecting the others.
Q4. What is the difference between the mute tool and deleting?
The mute tool silences the sound temporarily, so you can easily restore it later. Deleting removes it completely, so using the mute tool is more efficient while experimenting with an arrangement.
NEW ARTICLES
Latest English Articles