This article explains how to export and import Standard MIDI Files (SMF) in Studio One. It introduces three ways to export MIDI events, from saving a specific phrase individually to exporting a whole song and intuitive drag and drop, so you can handle any situation flexibly. Importing is just as simple: drag a MIDI file into the track list and an instrument track is created automatically. This streamlines reusing phrases across projects and sharing material in collaborations, greatly improving your DTM productivity.
Exporting MIDI Events from a Song
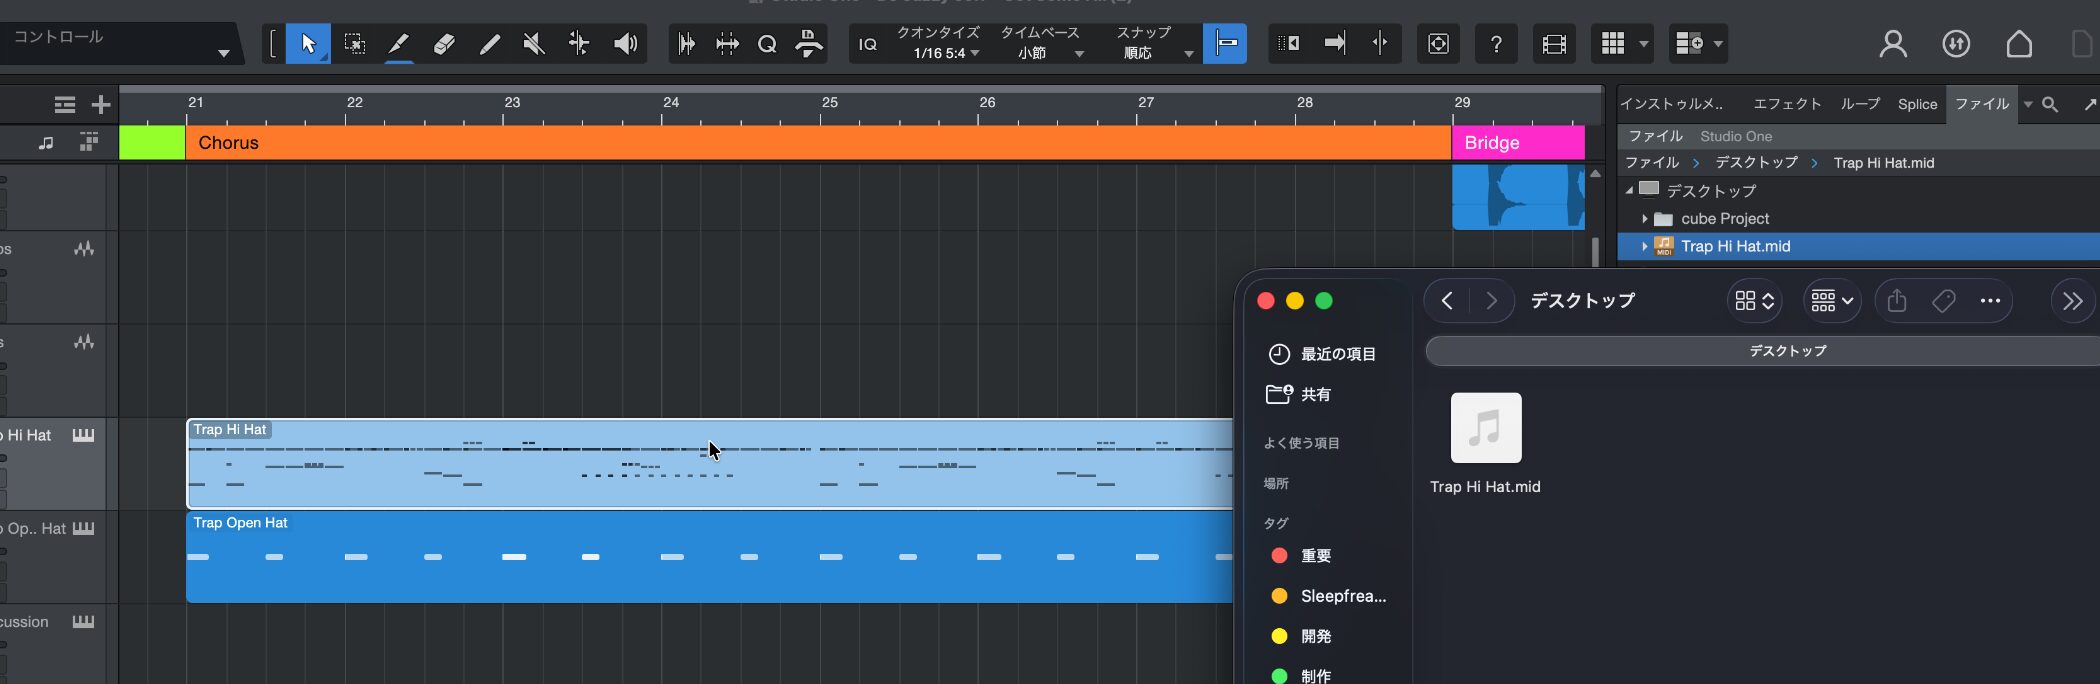
We explain how to export the MIDI data you created in Studio One as a file so you can reuse it in other songs or in a different DAW (music production software).
- You want to save a favorite drum pattern so you can recall it any time
- You want to give a collaborator just the MIDI data so they can play it with the instruments of their choice
- You want to reuse a phrase you made in a different song project
Exporting MIDI files is useful in many situations like these.
A file containing this MIDI data is generally called a "MIDI file" or an "SMF (Standard MIDI File)".
Because it contains no sound information, its file size is very small.
About SMF (Standard MIDI Files)

How to Export MIDI Files
Studio One offers several export methods depending on your purpose.
Method 1: Exporting a Specific MIDI Event as a File
This is handy when you want to save just a specific phrase or pattern individually.
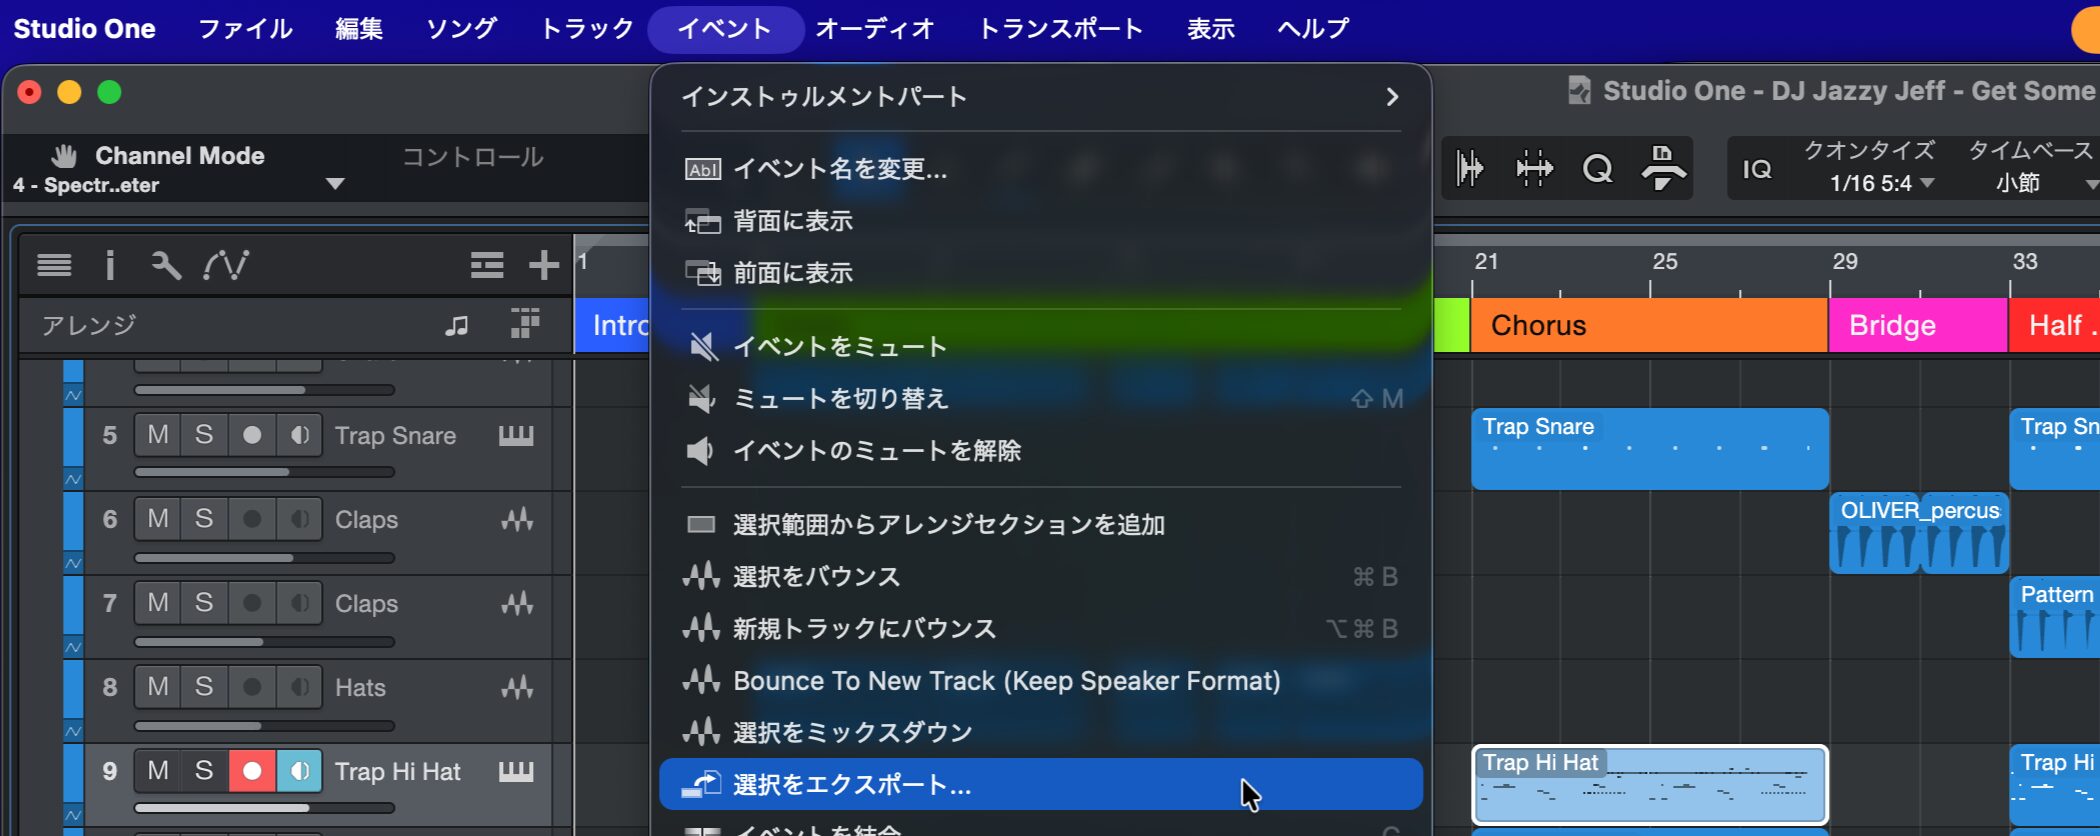
Select the MIDI event you want to export and click "Export Selection..." from the "Event" menu at the top of the screen.
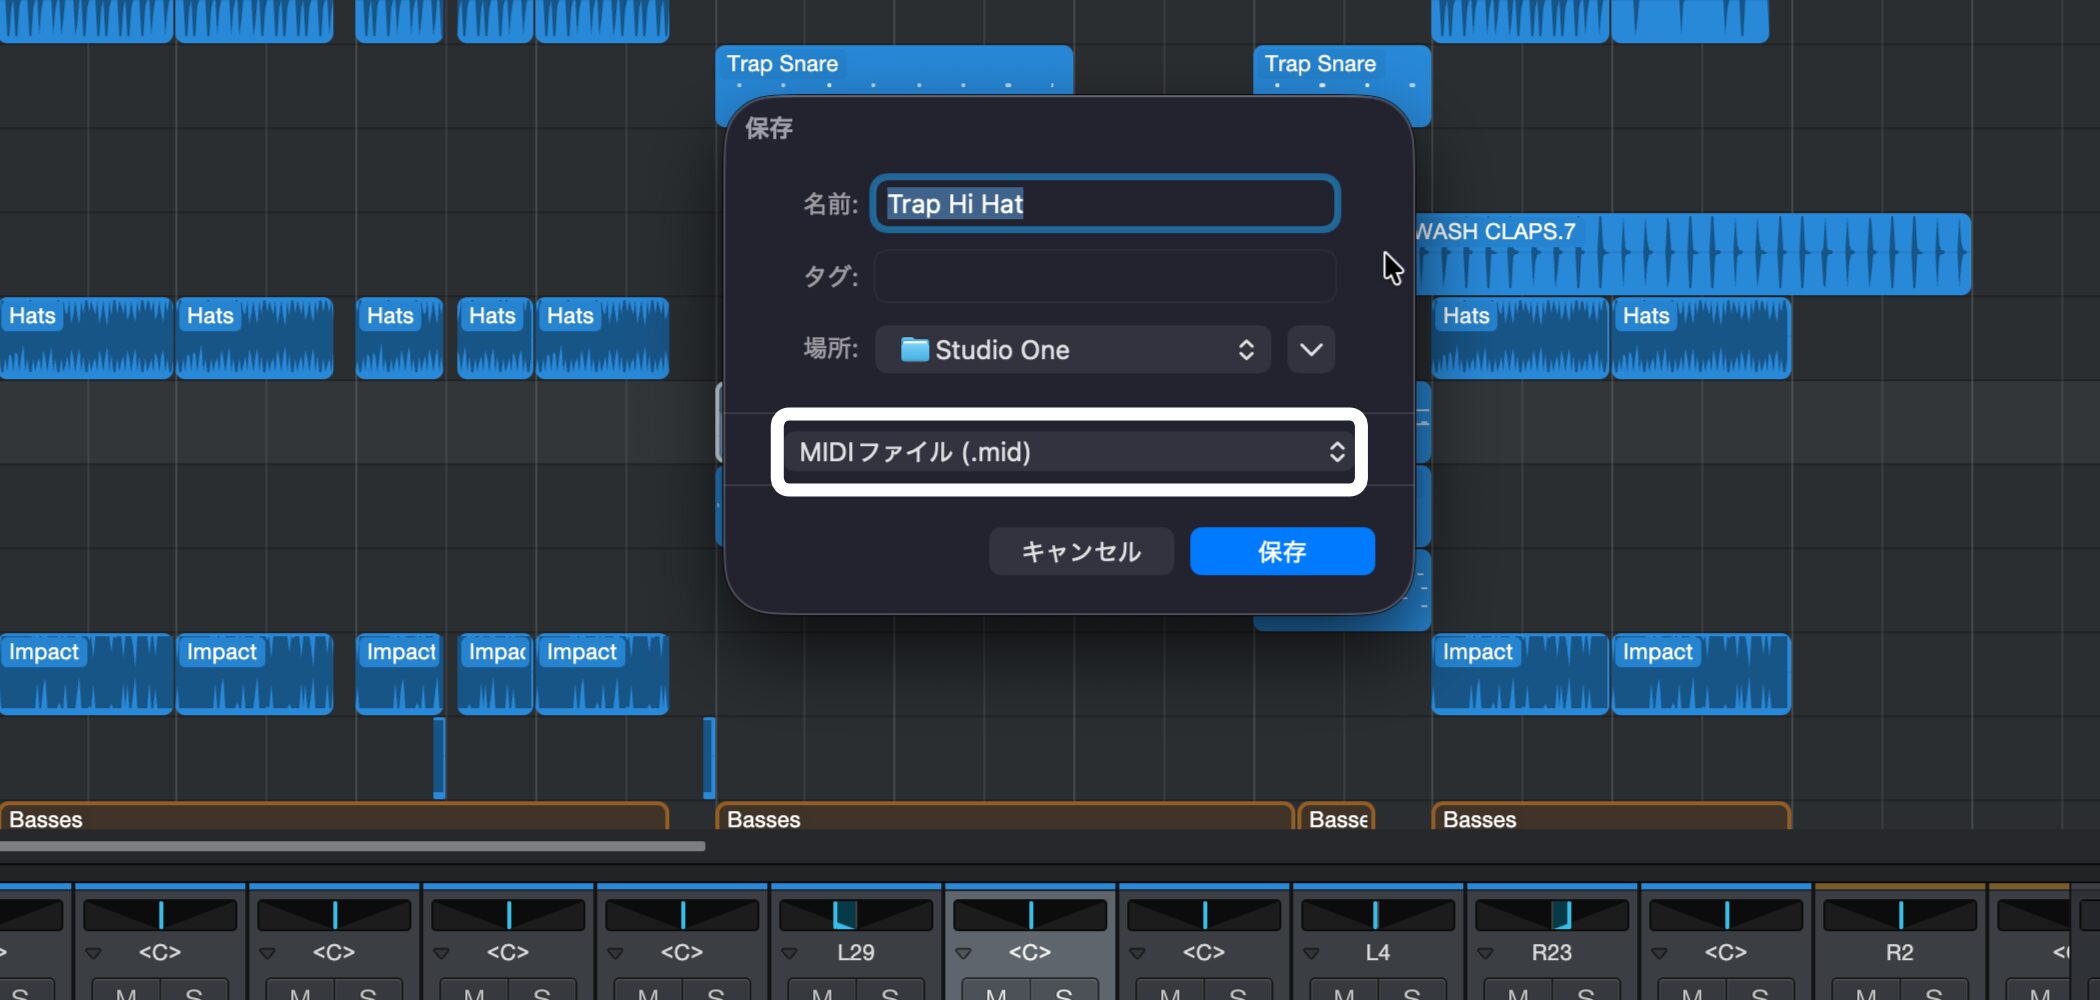
When the save window appears, specify the file name and location, choose "MIDI File (.mid)," and save.
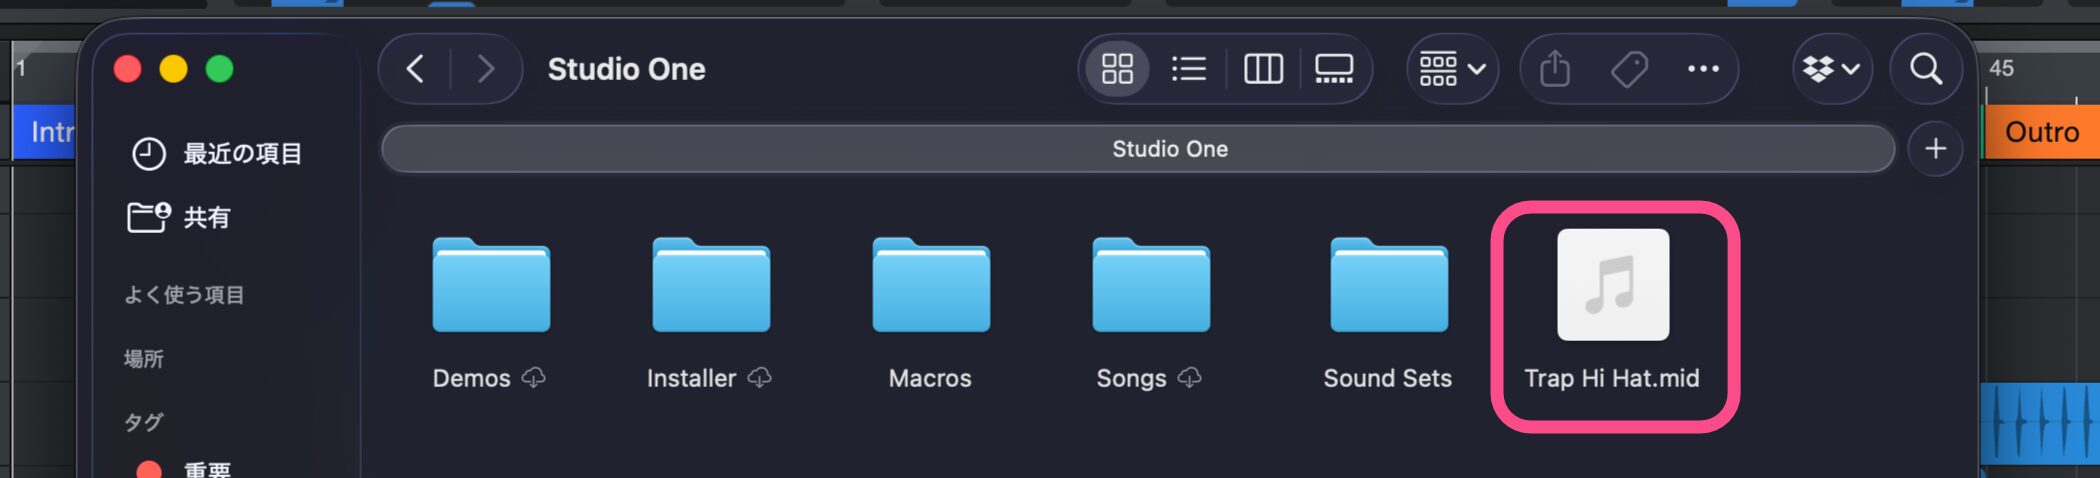
The selected event is now exported as an individual MIDI file.
Method 2: Exporting All the MIDI Events in a Song as a File
This method exports the MIDI information from all tracks together as one file.
It is very useful when moving a project to another DAW.
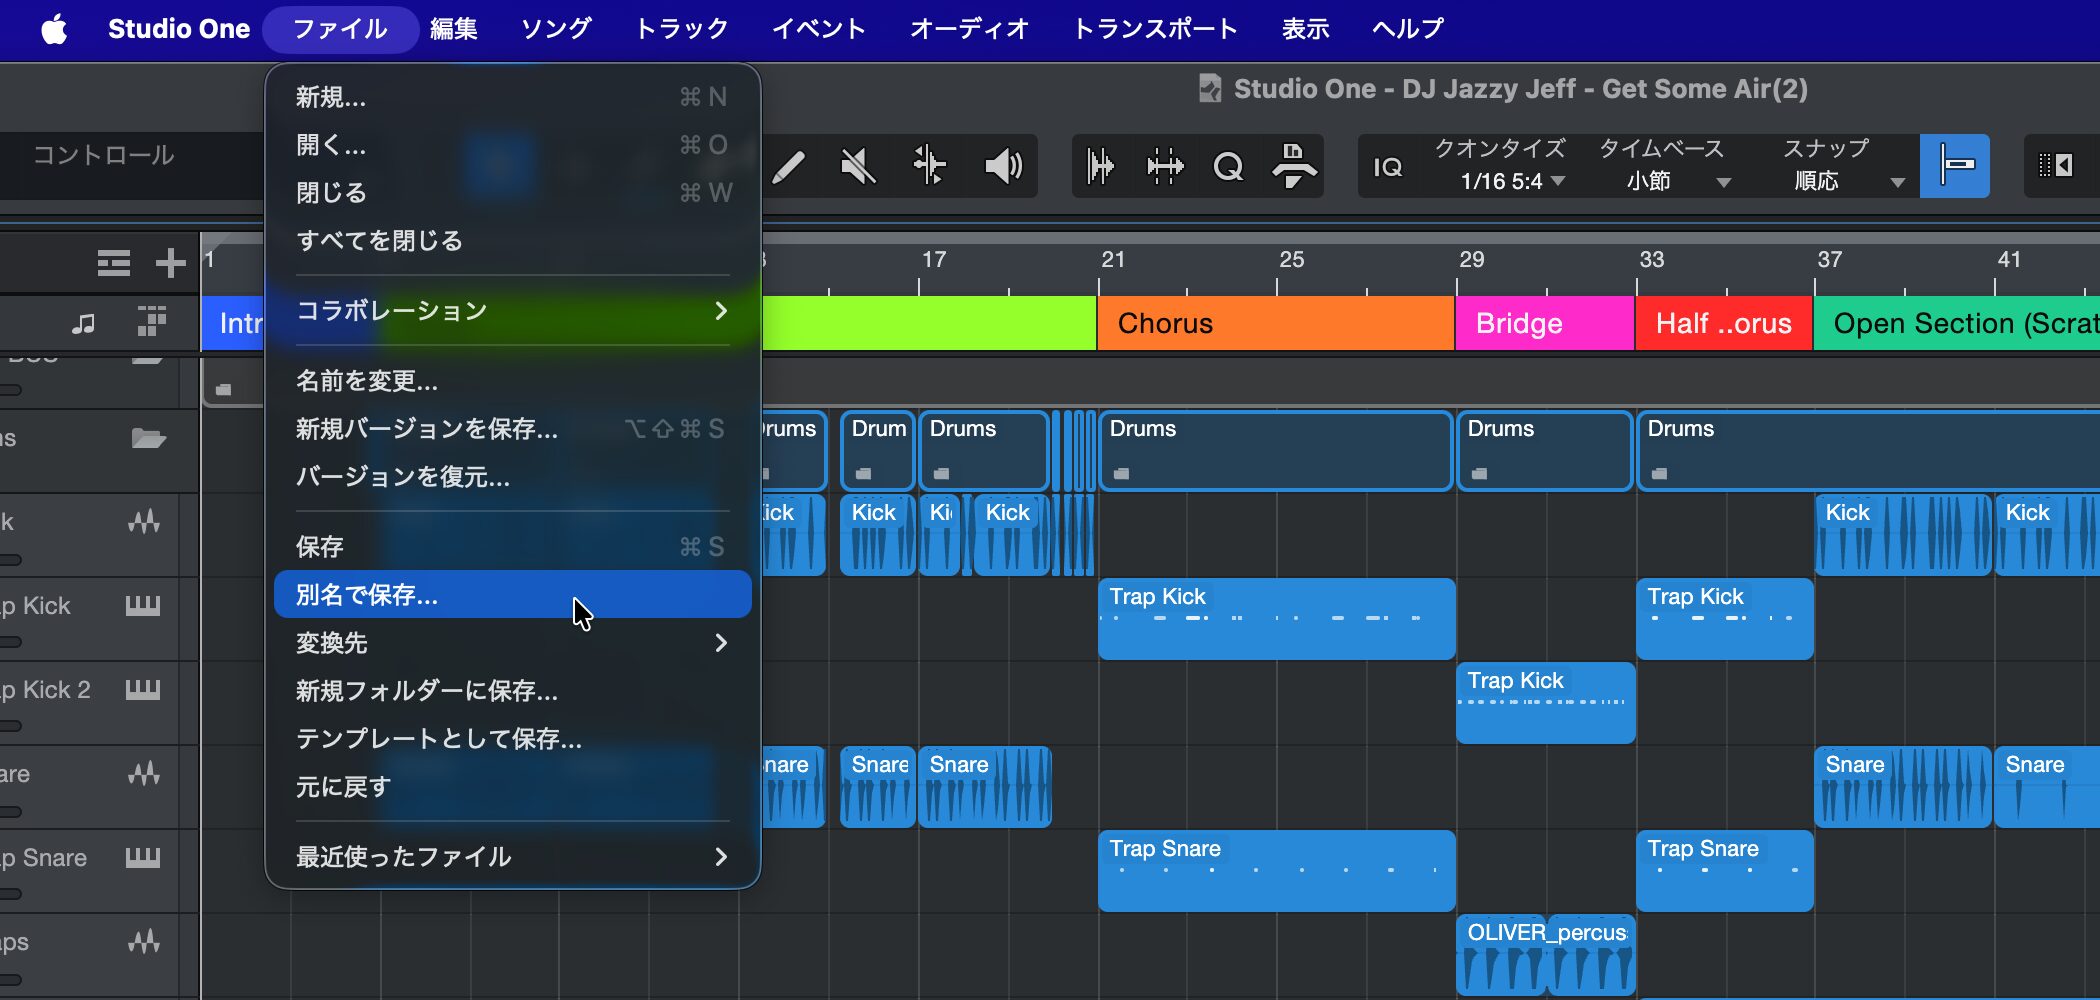
Choose "Save As..." from the "File" menu at the top of the screen.
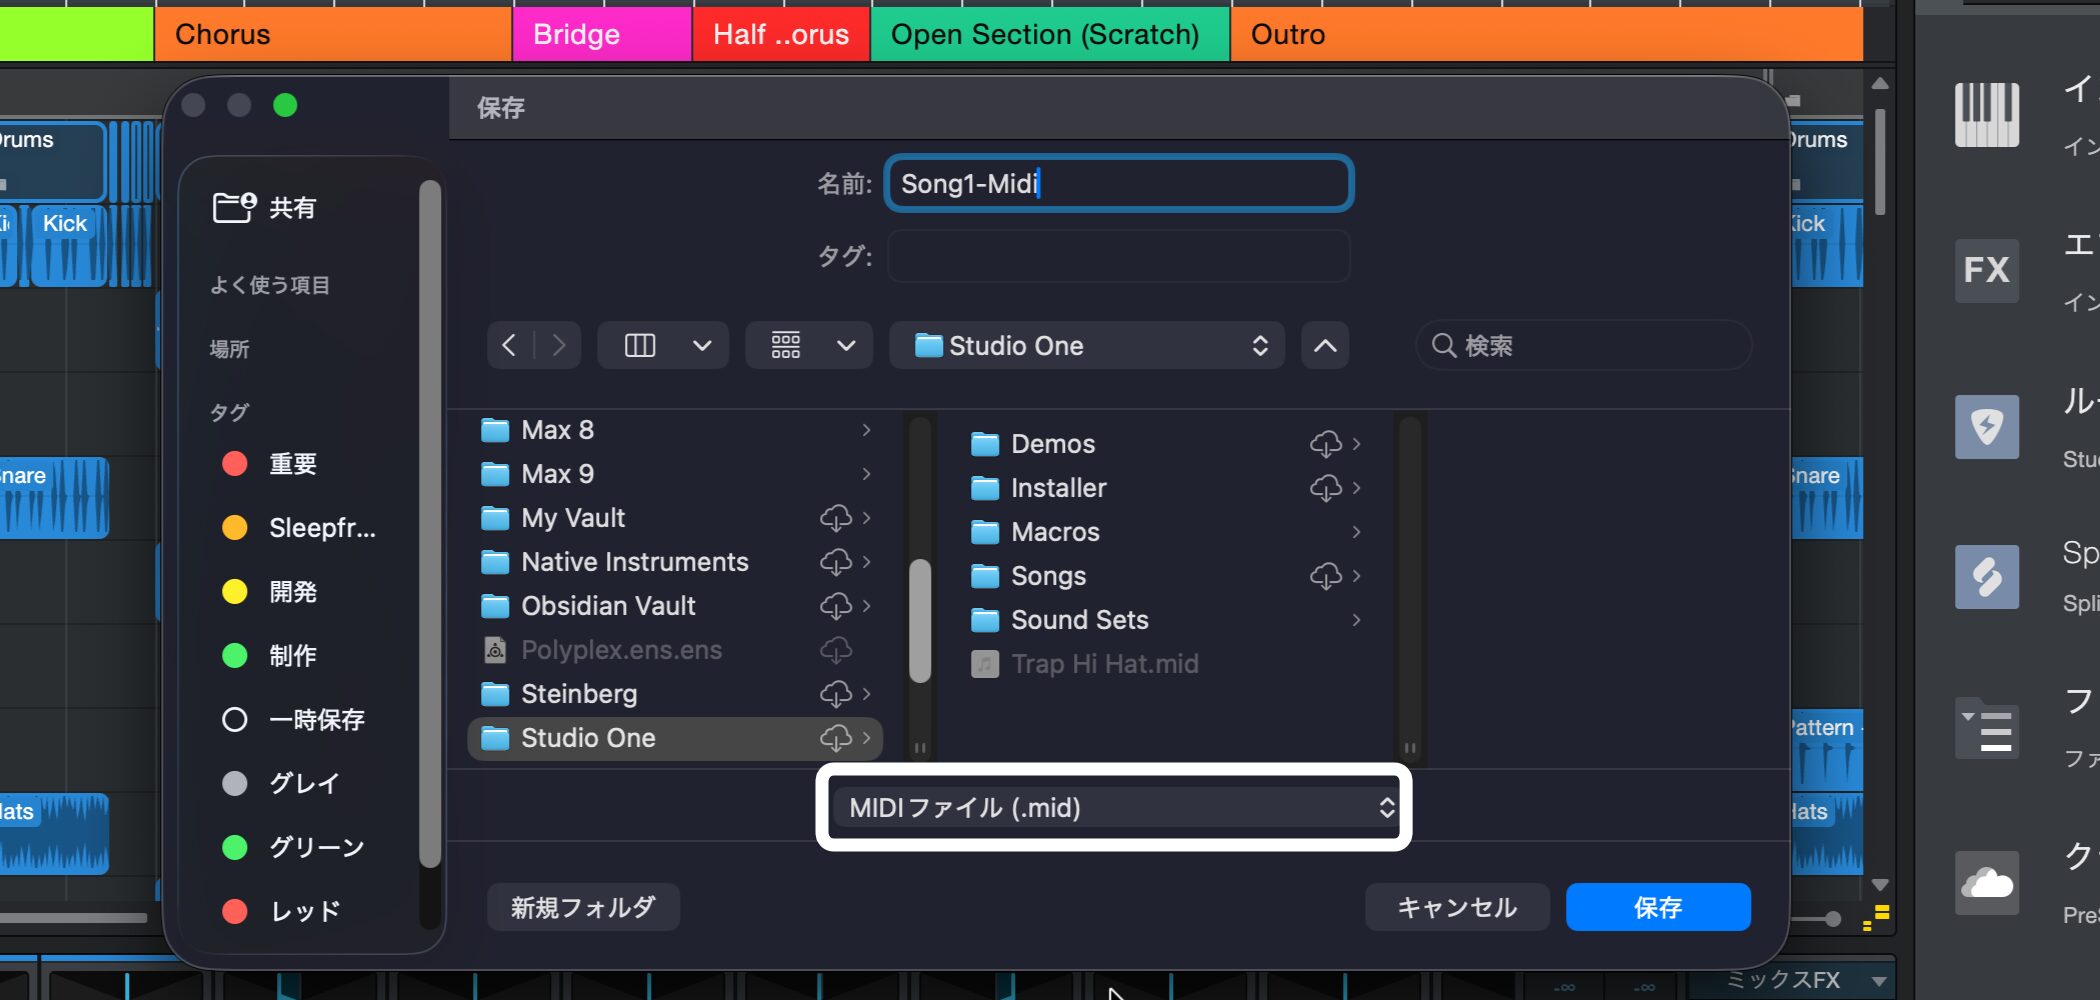
When the save window appears, specify the file name and location, choose "MIDI File (.mid)," and save.
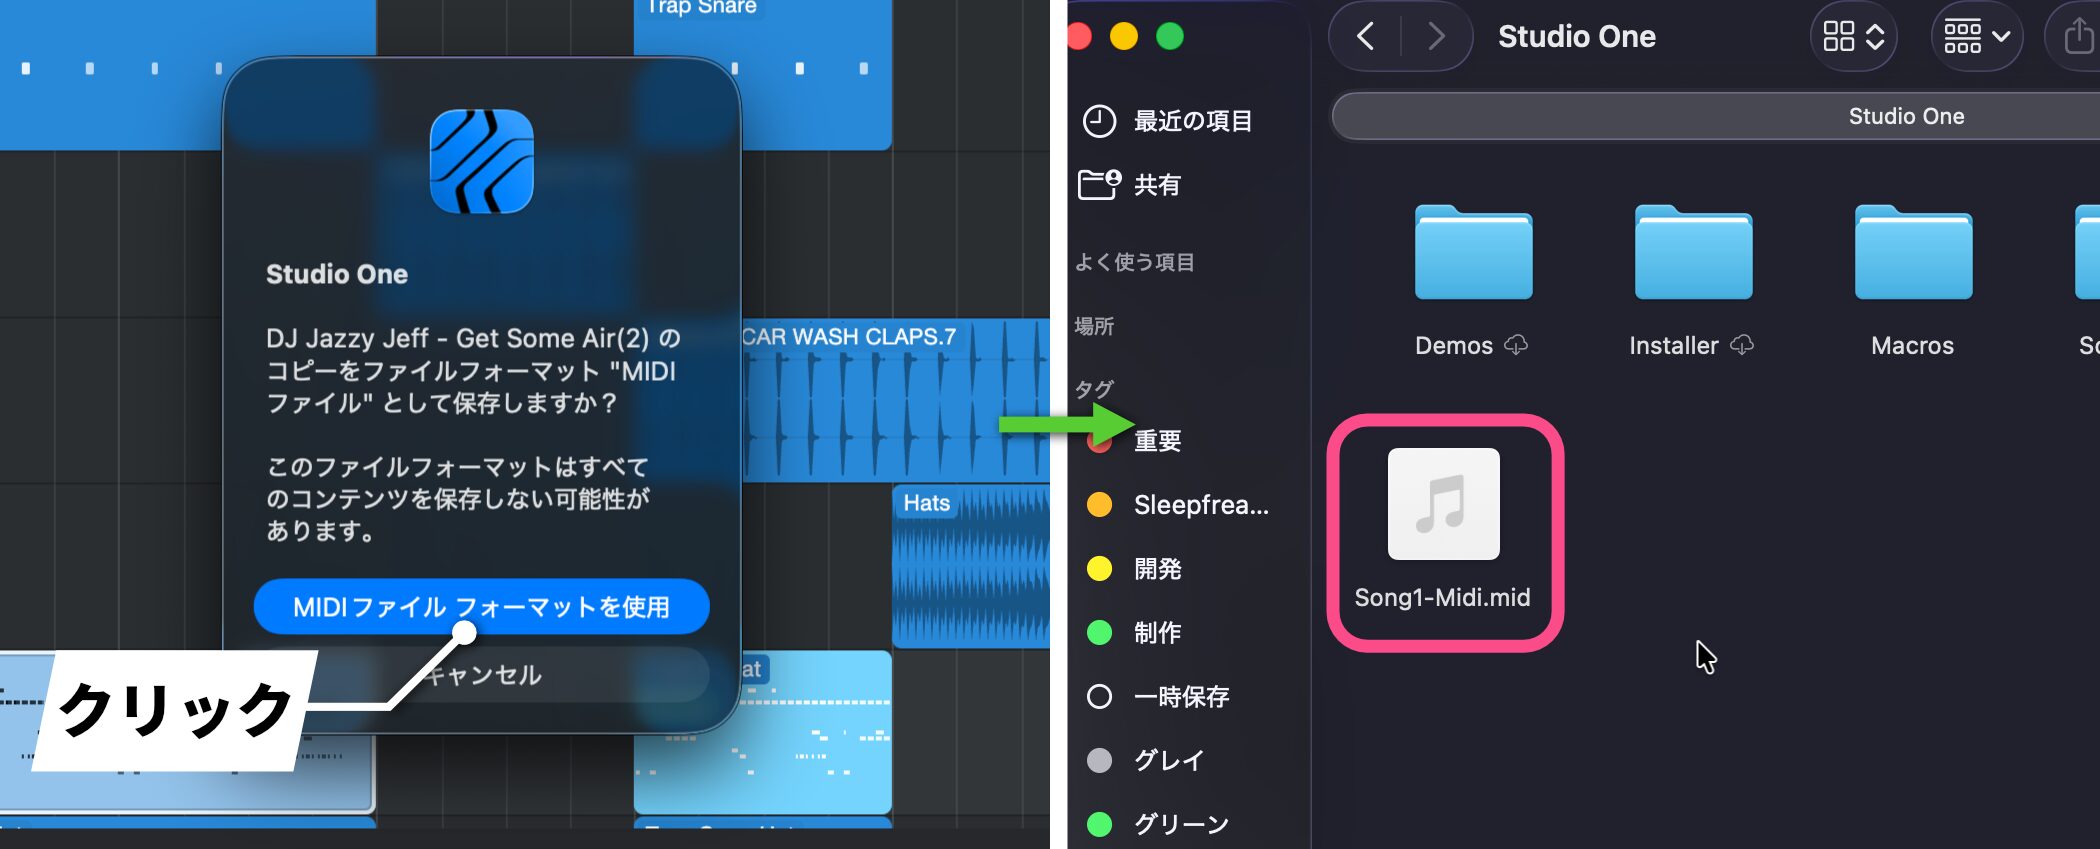
In the next window, click "Use MIDI File Format," and a MIDI file is created in the location you specified.
Method 3: Saving by Dragging and Dropping into the Browser
This is a very intuitive method unique to Studio One.
It is ideal for building a library of phrases you use often.
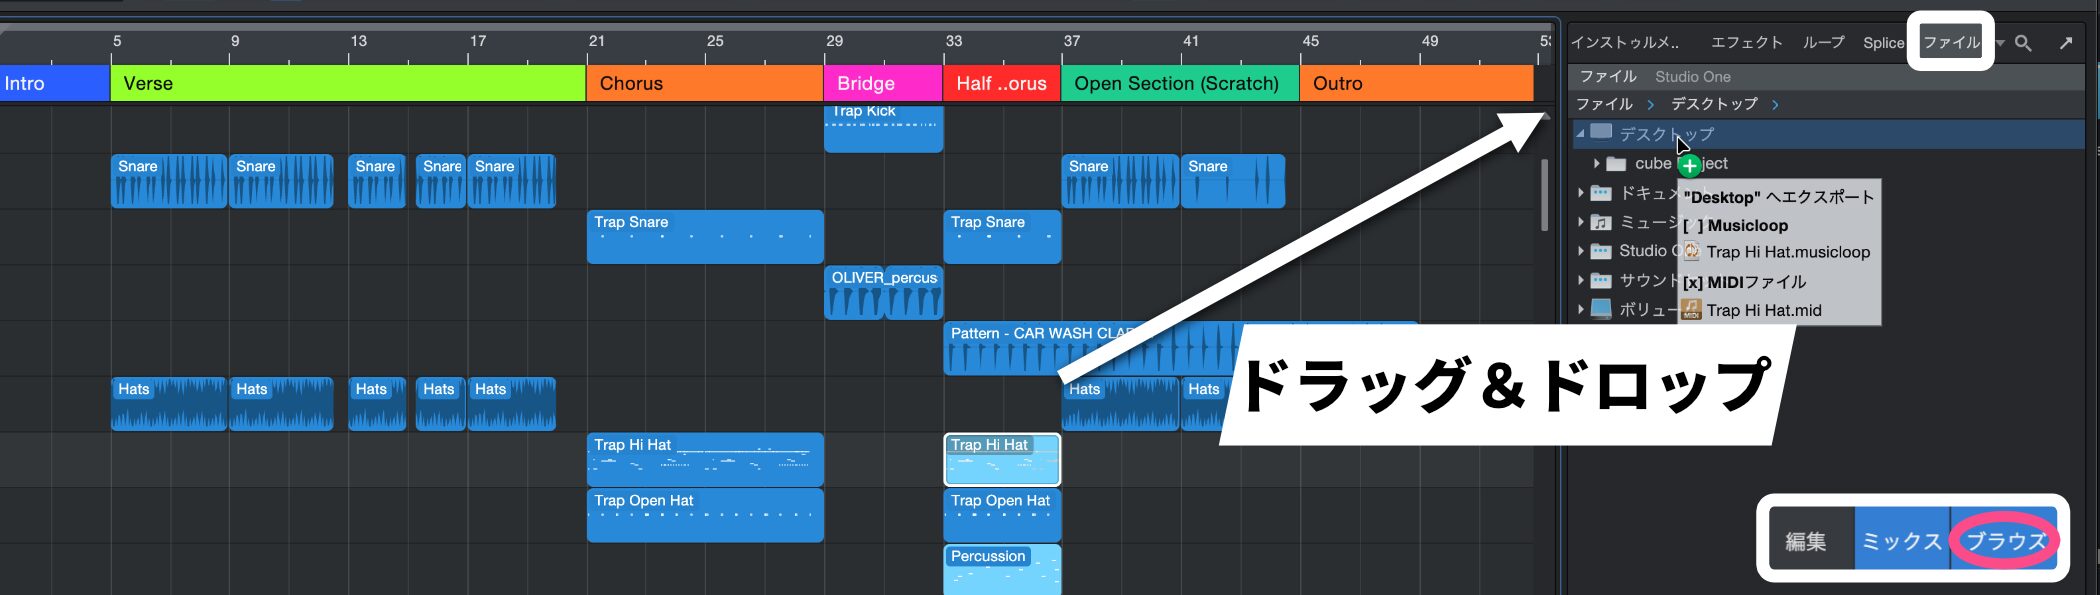
Click the MIDI event you want to save and drag and drop it into any folder on the "Files" tab of the "Browse" section on the right side of the screen.
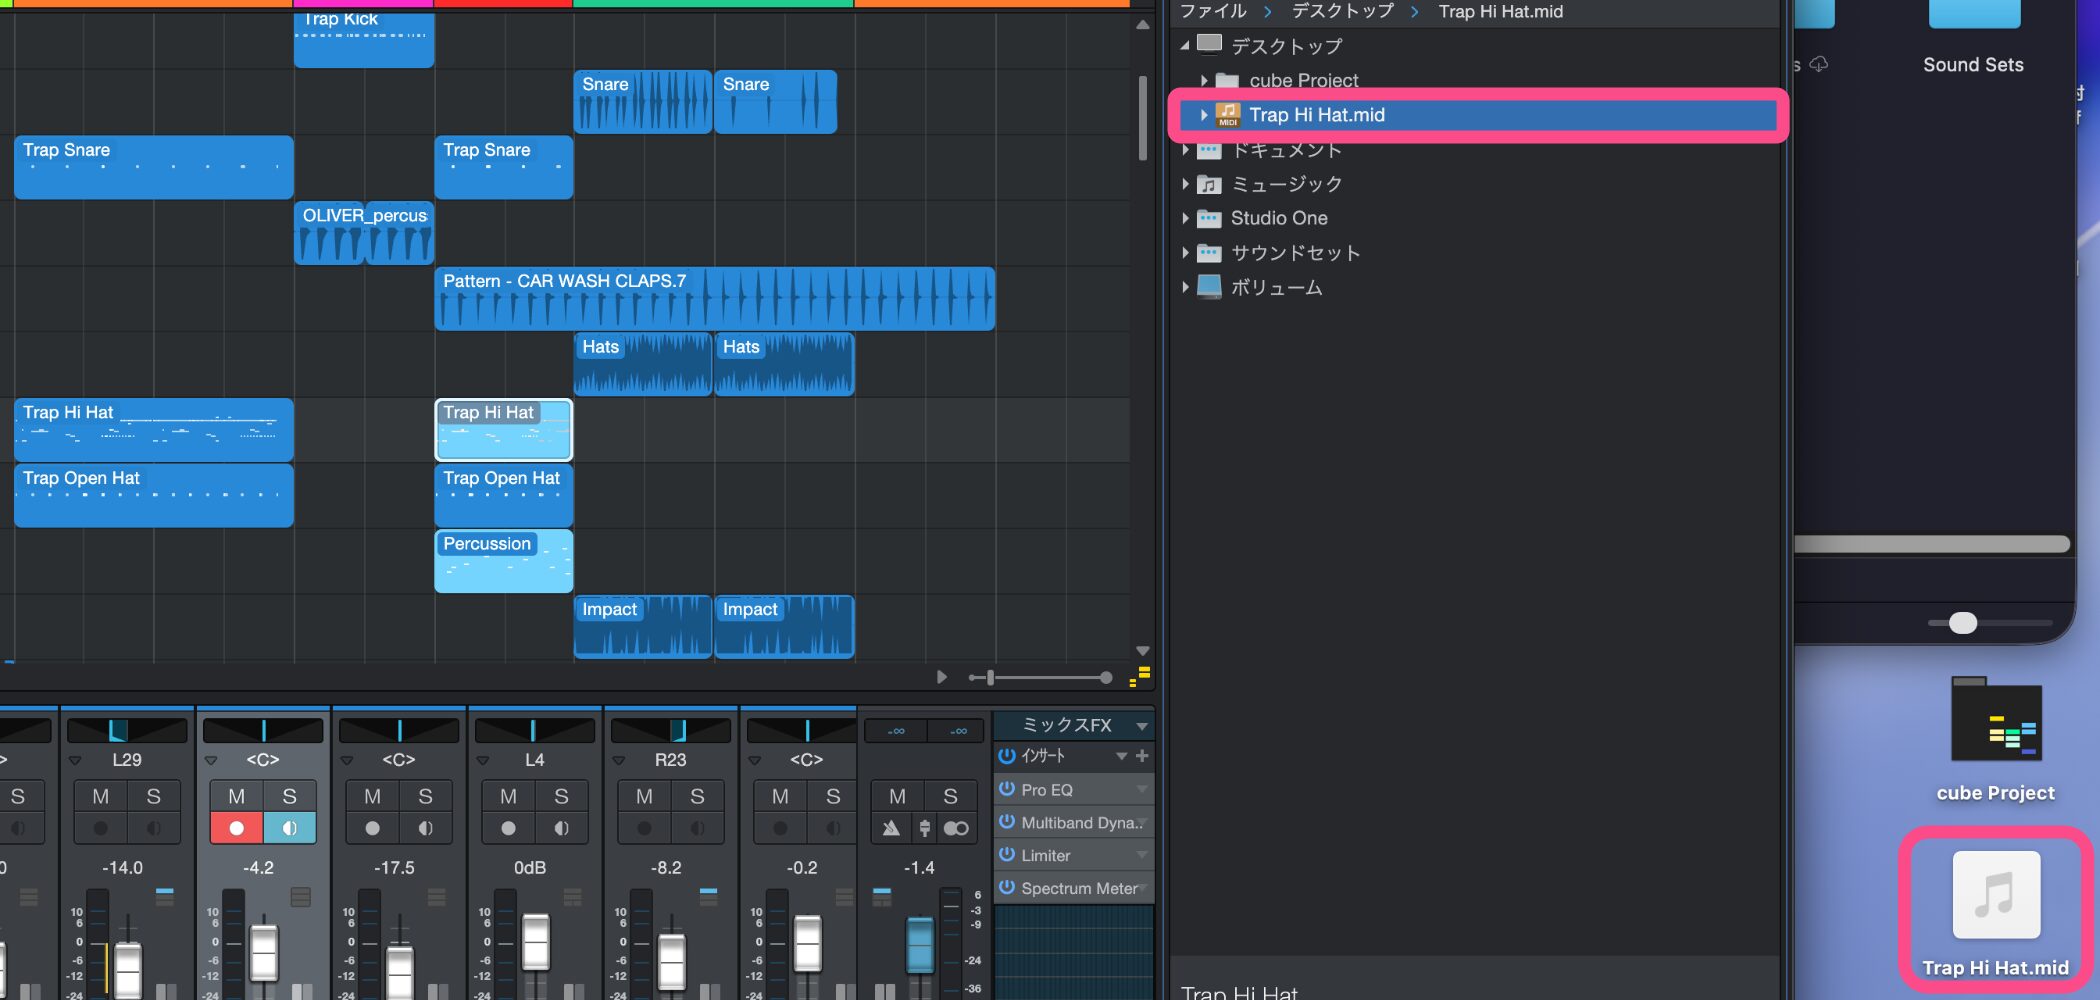
That's all it takes to save it as a MIDI file.
How to Import MIDI Files
Importing a MIDI file you made or obtained into a Studio One song is very easy.
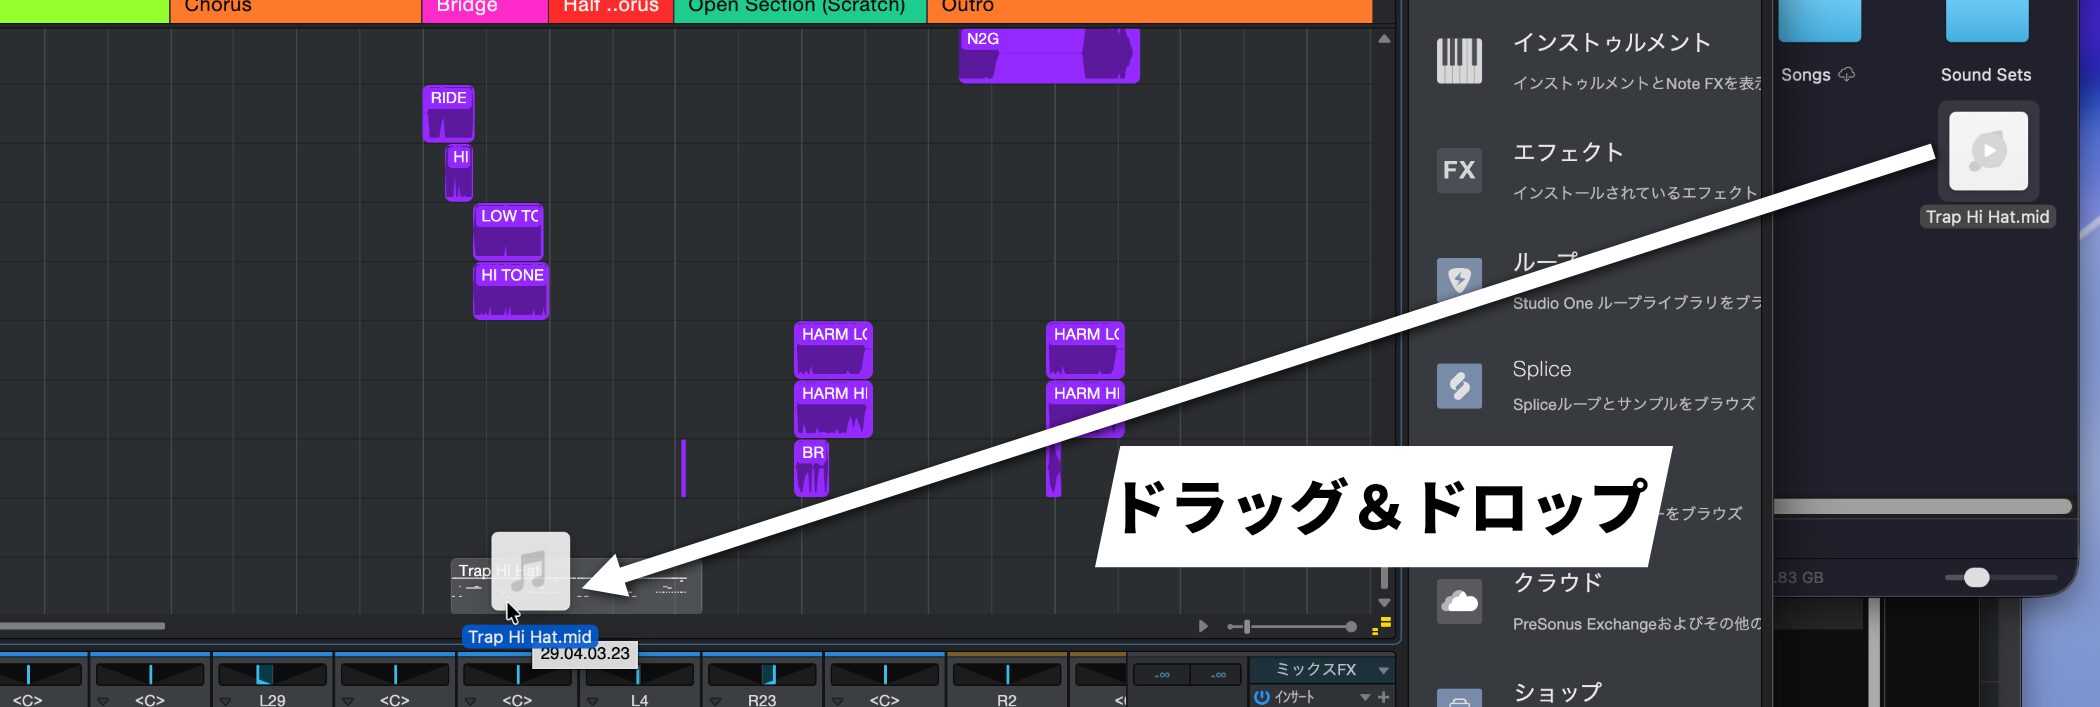
Find the MIDI file you want to import in a folder on your computer or in Studio One's Browse, and drag and drop it into Studio One's track list or arrange view.
That alone imports the MIDI file, and an instrument track is created automatically, ready to play.

Frequently asked questions
Q1. Can MIDI data saved in Studio One be used in another DAW?
Yes. MIDI files exported as SMF can be imported into almost any DAW, including Logic Pro, Cubase, and Ableton Live. Because they contain no sound information, you will need to assign instruments again.
Q2. Which method do you recommend for saving drum patterns to reuse in multiple songs?
Method 3, dragging and dropping into the browser, is the most efficient. If you build a library of phrases this way, you can easily recall them any time and use them in other songs.
Q3. Why are MIDI files so small?
MIDI files contain no sound information and record only note and performance data, so their file size is very small. This makes sharing and backing them up easy.
Q4. Is there anything to watch out for when giving MIDI data I made to someone else?
MIDI files themselves contain no copyright information, so it is important to agree on terms of use and give clear permission. We also recommend agreeing in advance on whether commercial use is allowed.
NEW ARTICLES
Latest English Articles