
In Studio One, you can automate not only volume and pan but every knob on plugins such as EQ, compressors, and reverbs. Automating plugin parameters lets you edit with more detail and expression, for example deepening the reverb or adding distortion in just one part of a song. Parameters are easy to add from the "Add/Remove Parameters" menu, and after that you record automation in the usual way, so it is a feature everyone from DTM beginners to advanced users can make use of.
You Can Automate Every Knob on Studio One's Plugins
Not just volume and pan:
you can also apply automation to plugins such as EQ, compression, and reverb.
Applying automation to plugin values
opens up possibilities such as deepening the reverb or adding distortion in just part of a track.
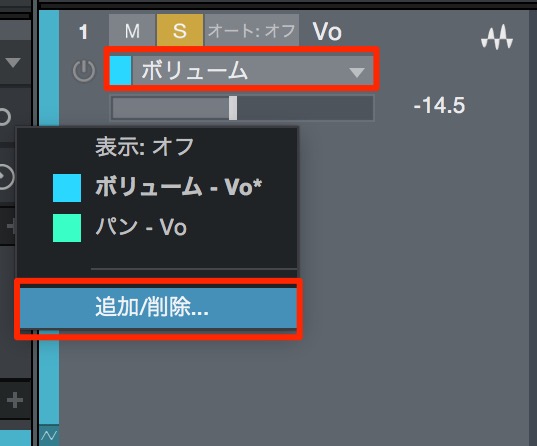
↑ Click the area of the plugin outlined in red
and select "Add/Remove Parameters" from the menu.
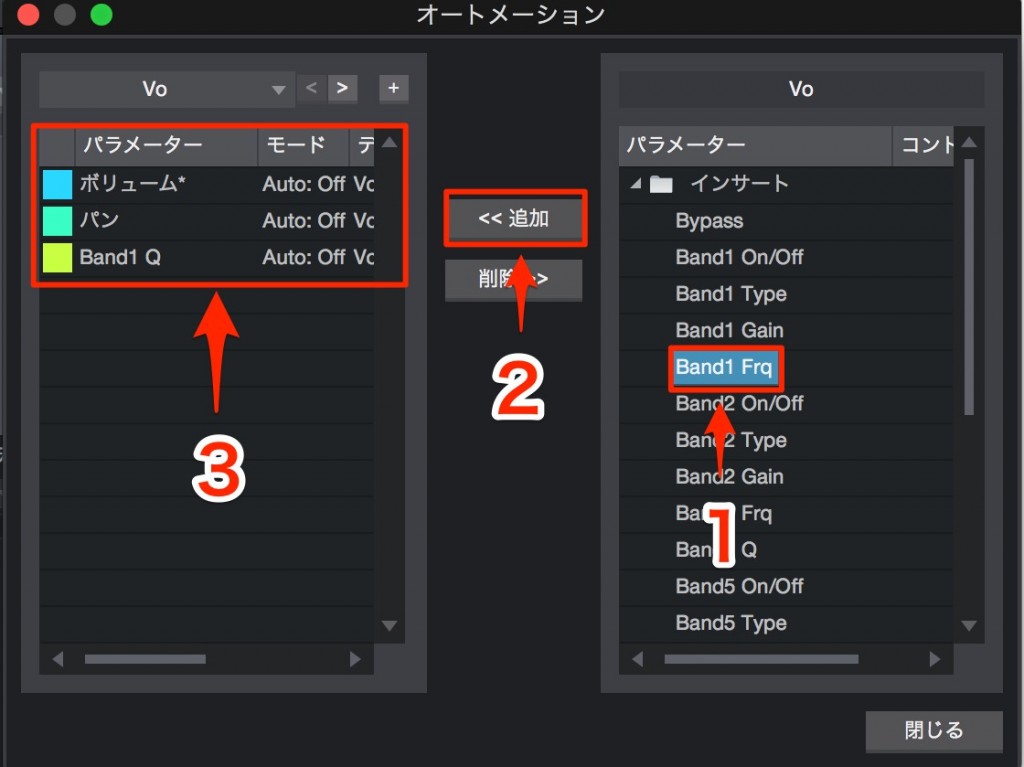
↑ The window for adding automation opens.
- 1_Select the effect parameter you want to add.
- 2_Click "Add."
- 3_The parameters you added, now available for automation recording, are shown.
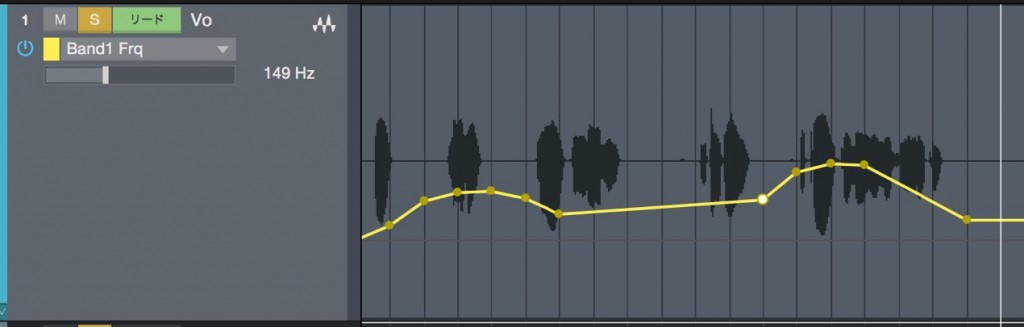
↑ The effect parameters you added can now be displayed.
Then just write automation as usual.

Frequently asked questions
Q1. Which plugin knobs can be automated in Studio One?
You can automate the parameters of almost any plugin, including EQ, compressors, and reverbs. Set it up by selecting "Add/Remove Parameters" from the area outlined in red on the plugin window.
Q2. What are the benefits of plugin automation?
Because you can change the amount of an effect in specific parts of a song, it enables more dynamic and expressive sound design. For example, you can make detailed adjustments such as deepening the reverb only in the chorus.
Q3. What are the specific steps after adding automation?
Select the effect parameter you want to add and click "Add," and it becomes available for automation recording. After that, just record the knob movements in the same way as normal automation.
NEW ARTICLES
Latest English Articles











