
Logic Pro's humanize function is an important technique for fixing the robotic regularity of step programming and adding a human feel. By slightly randomizing timing, velocity, and note length, it eliminates the monotony of repeated phrases and keeps listeners engaged to the end. It is especially effective on drum hi-hats, and settings of around 10 to 20 give natural variation that can dramatically improve the quality of your song.
What Is Humanize?
Normally, step programming is placed exactly on the bar or beat.
When a phrase such as a drum pattern is used repeatedly,
listeners start to find the repetition monotonous.
That is where Humanize comes in handy.
As the name suggests, it adds a human touch.
In short, it shifts notes slightly earlier or later at random.
Of course, large changes
would break up the phrase itself, so the key is to keep the differences subtle.
It keeps listeners engaged to the end and prevents monotony.
Randomize/Humanize Explained
- Logic X
- Logic 8/9
Logic X: How to Use Humanize

Select the region you want to humanize,
then choose "Window" → "Open MIDI Transform" from the top menu.
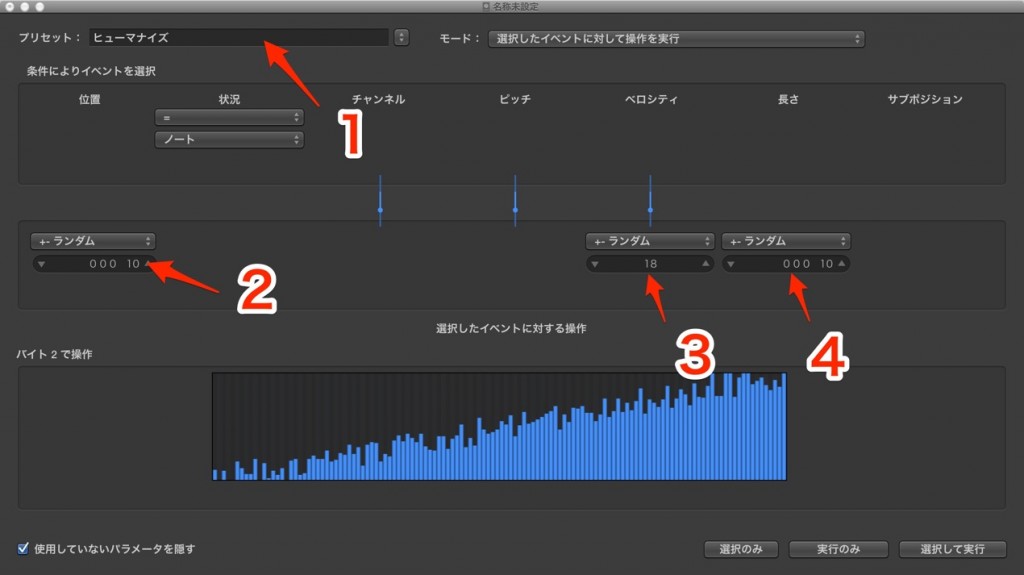
1_Select Humanize
Choose "Humanize" from the menu.
2_Set how far notes shift_Position
The larger the number, the stronger the randomness.
We recommend starting at around 10 to 20 and adding more while listening.
3_Set the volume_Velocity
Use as needed. It works well on hi-hats.
4_Note length
Also use as needed. Drums have no real concept of note length, so
choose "Thru" from the options to turn off humanizing for length.
After setting the above, choose "Select and Operate."
Humanize is now applied to the region.
Logic: How to Use Humanize

(Click to enlarge)
↑ Select the region you want to humanize,
then choose "Window" → "Transform" from the top menu.

(Click to enlarge)
↑ The Transform window opens
1_Select Humanize
2_Set how far notes shift_Position
The larger the number, the stronger the randomness.
We recommend starting at around 10 to 20 and adding more while listening.
3_Set the volume_Velocity
Use as needed. It works well on hi-hats.
4_Note length
Also use as needed. Drums have no real concept of note length, so
choose "Thru" from the options to turn off humanizing for length.
5_Select and Operate
Humanize is applied to the region.
This time, we applied humanize to the drum hi-hat.
With this method, humanize is also applied to the kick and snare,
so after applying humanize, we quantized the kick and snare
to return them to exact positions.
As a result, humanize is applied only to the hi-hat.
- Logic X
- Logic 8/9
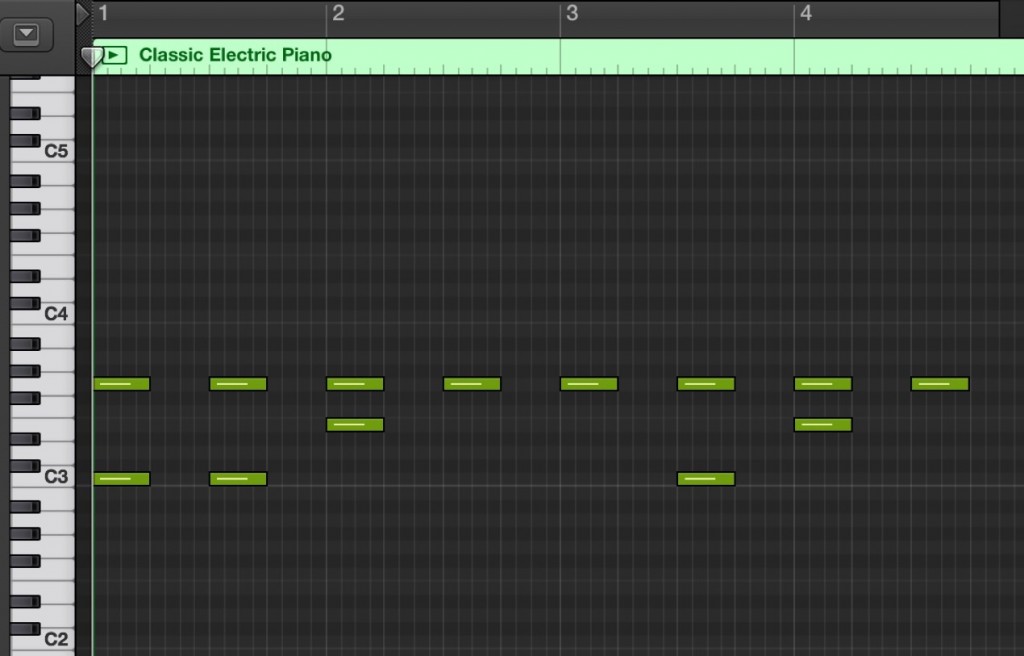
Comparing the Results
- Before
- After
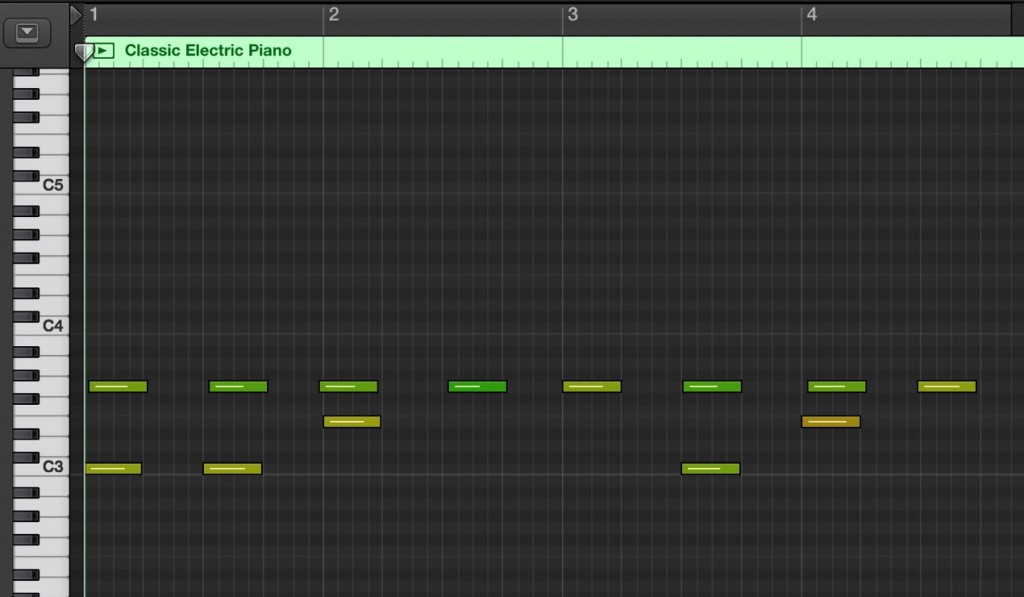
Results vary by song and instrument, so listen many times and adjust until it sounds natural.

Frequently asked questions
Q1. What is the difference between humanize and quantize?
Quantize corrects off-timing notes to exact grid positions. Humanize, on the other hand, intentionally adds subtle timing offsets, playing the opposite role. Use humanize when you need a natural human feel and quantize when you need precision.
Q2. What is a good guideline for the humanize position setting?
The recommended value is 10 to 20. The larger the number, the stronger the randomness, but too large a value breaks up the phrase. The best approach is to increase the value gradually while listening.
Q3. Can I apply humanize to all the drum elements at once?
It will be applied to multiple elements, but if the kick and snare need exact timing, you can quantize those elements again after applying it so that humanize affects only the hi-hat.
Q4. Is the velocity setting required when applying humanize?
It is not required; use it as needed. It is especially effective on hi-hats, as it adds volume variation for a more natural feel.
NEW ARTICLES
Latest English Articles











