
When using software synths in a DAW such as Cubase, combining multiple instruments in one synth can greatly reduce CPU usage. Using HALion Sonic as an example, this article explains concretely how to handle multiple sounds in one software synth with MIDI channels. It covers the setup for both Cubase 7 and earlier and Cubase 7.5 and later, making it a general technique you can also apply to commercial instruments such as Kontakt and Omnisphere, and useful knowledge for more efficient and stable DTM production.
Extremely Effective for Saving CPU
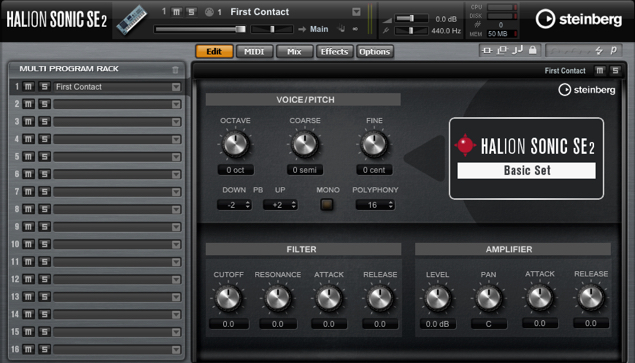
One thing you cannot do without when using a DAW is software synths.
They can produce all kinds of sounds, from piano and drums to ethnic instruments,
and let you combine instruments however you like.
On the other hand,
the number of software synths inevitably grows,
and CPU usage often gets in the way of your work.
To solve this problem, many products
let you load multiple instruments inside a single software synth.
This way,
even when you use several instruments, such as piano, bass, guitar, and synths,
a single software synth is enough, saving a great deal of CPU.
How to Use Multiple Sounds in One Software Synth in Cubase
- Cubase 7 and earlier
- Cubase 7.5 and later
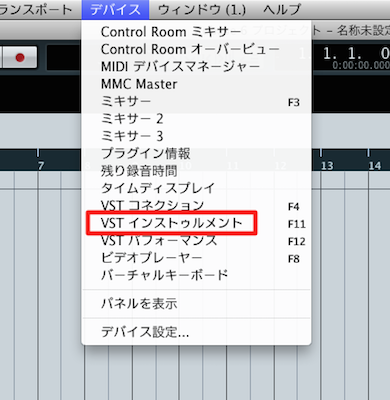
↑ From the menu bar, select "Devices" → "VST Instruments."
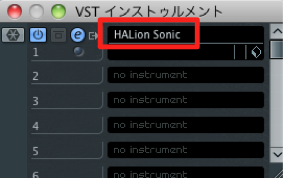
↑ Load HALion Sonic.
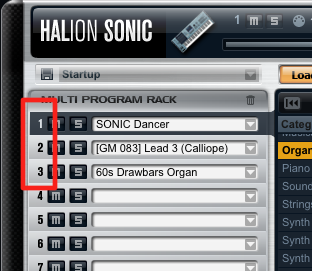
↑ This is the HALion Sonic screen.
After loading several instruments, look at the area outlined in red.
These are called "MIDI channels," the numbers that control each instrument.
Keep track of which instrument is assigned to which number.

↑ Create as many MIDI tracks as the number of sounds loaded in the software synth.
In this case, three.
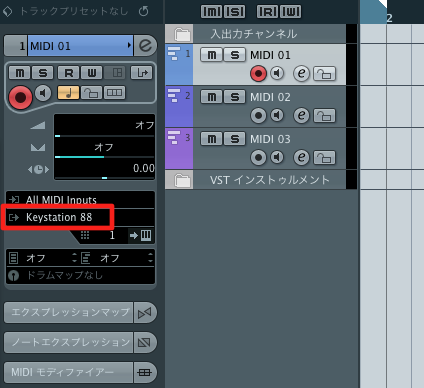
↑ Select a MIDI track you created
and click the MIDI output outlined in red.
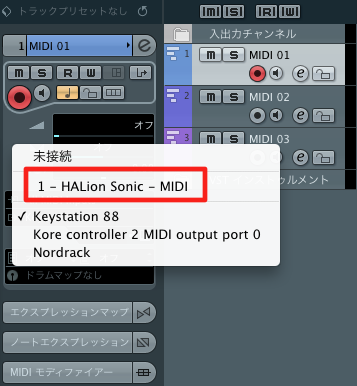
↑ From the menu that appears, select the HALion you created above.
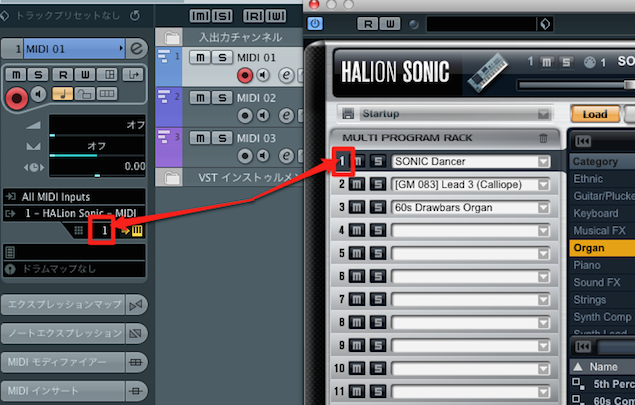
↑ Match the MIDI channel outlined in red to the sound's channel in HALion Sonic.
Repeat this for each MIDI track.
The MIDI channels go up to 2, 3, and so on.
You can now program each instrument on its own MIDI track.
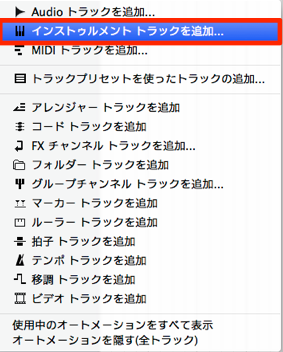
Add an instrument track.
Here, we use HALion Sonic SE, included with Cubase, as an example.
Selected questions and answers from the YouTube video

Thank you so much; I upgraded to Cubase 10 and didn't know how to operate it! However, I can no longer route Addictive Drums 2 to multiple outputs the way you explained before (for Cubase 7.5 and earlier), and I'm stuck. I've looked at every site and video but can't find the answer... If possible, could you tell me how to set up multiple outputs for Addictive Drums 2 in Cubase 10?

You can set up multiple outputs simply by activating the outputs from this area. https://app.box.com/s/yhokyn1lac5h31wdioq692wzkga4q6br
- VST: Cubase, Studio One, Live, FL Studio, etc.
- VST3: If your DAW supports VST3, choose this; the VST install above is not needed
- AU (Mac only): Logic Pro
- AAX: Pro Tools
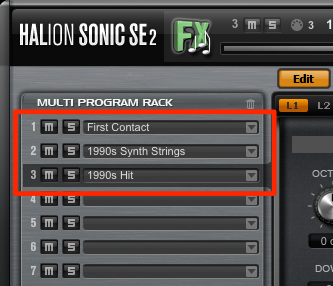
Load the instruments you will use.
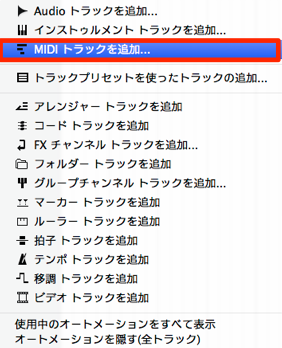
Create as many MIDI tracks as the number of sounds you will use.
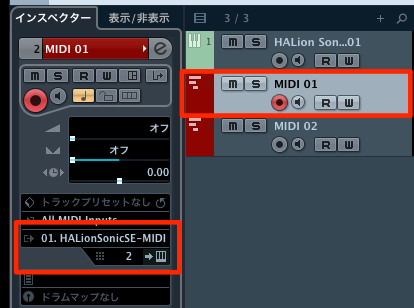
Select a MIDI track you created
and set the area outlined in red in the Inspector on the left.
- Select the instrument you want to play
- Specify the instrument's MIDI channel
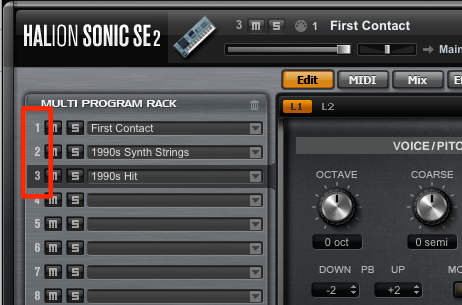
In HALion Sonic SE, the area outlined in red shows the MIDI channel.
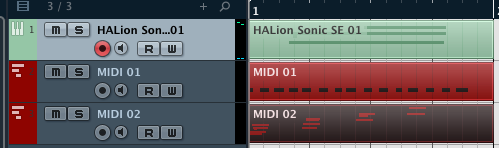
You can now program and play a different sound on each MIDI track.
- Cubase 7 and earlier
- Cubase 7.5 and later
This time we used HALion Sonic,
but you can also use this with commercial instruments such as "Kontakt," "Trilian," and "Omnisphere."
Frequently asked questions
Q1. How much CPU can I save by using multiple sounds in one software synth?
Combining multiple instruments in one synth greatly reduces CPU usage compared with loading separate synths. The amount varies with the type of synth and the number of instruments, but it improves things enough that your work can continue without problems.
Q2. What is the difference between a MIDI channel and a MIDI track?
A MIDI channel is a number for assigning different instruments within a software synth. A MIDI track, on the other hand, is an independent track in Cubase for programming and playing a particular instrument, linked to a specific synth and MIDI channel through its MIDI output.
Q3. Can I use the same method with software synths other than HALion Sonic?
Yes, the same method applies to commercial instruments such as Kontakt, Trilian, and Omnisphere. Check each software synth's MIDI channels and match them in Cubase's settings to use multiple sounds.
NEW ARTICLES
Latest English Articles











