With Cakewalk's SONAR ending and users needing to move to other DAWs, this article explains how to migrate data to Studio One. It introduces the process of exporting audio tracks as WAVE files and MIDI tracks as a MIDI file, then importing each into Studio One. It explains in detail points to watch out for when migrating, such as preventing garbled track names, handling automation settings, resetting mixer information and setting the tempo manually, making it a practical guide for DTM users switching DAWs smoothly.
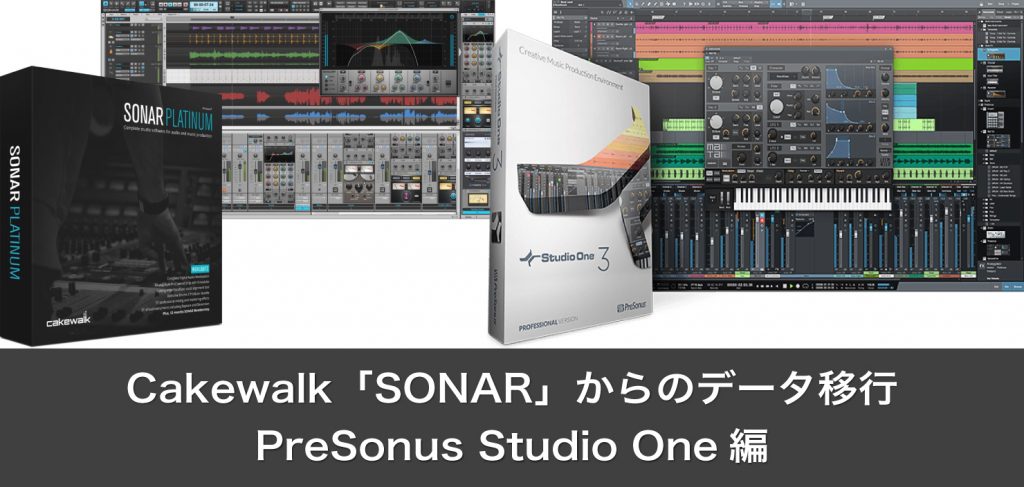
With SONAR's development ending, users will effectively have to consider moving to another DAW sooner or later.
Here we'll introduce a simple way to migrate a SONAR project file, the song file you made in SONAR, to a Studio One song file.
Here, we'll assume a typical song project file in SONAR containing a mix of
- audio tracks
- MIDI tracks (including synth tracks and instrument tracks)
.
First, in the SONAR project file, export
audio tracks by bouncing each track to its own WAVE file
MIDI tracks as a MIDI file
in these formats,
then import each into a Studio One song file.
Here are things to watch out for in advance when exporting.
- If track names use double-byte characters such as Japanese, they may become garbled when exported, so change them to track names using only alphabet characters at this point.
- If you want the audio files to reflect automation including volume, pan and effects, bounce the tracks with export settings that include them; but if you'll apply volume, pan and effect processing again in Studio One after migrating, you need to export the audio with settings that exclude them.
- MIDI files generally contain performance data and basic MIDI controller information (volume, pan, expression and so on). They don't include instrument or sound data, so you'll need to set these up again in Studio One after migrating.
- Console (mixer) data basically can't be migrated. Either remix from scratch in the Studio One song file, or note down information about plug-ins you can use in both and apply them.
- When you import the MIDI data into Studio One, tempo information and the like aren't applied, so you need to note it down in advance and set the tempo again in Studio One.
Exporting MIDI track data
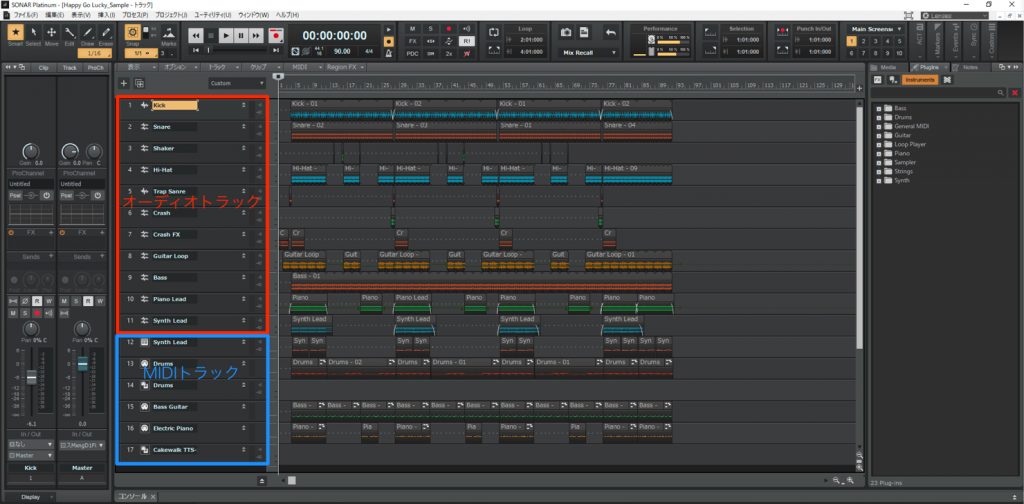
First, to migrate the data in the MIDI tracks from the SONAR project file, export it as a Standard MIDI File (SMF).
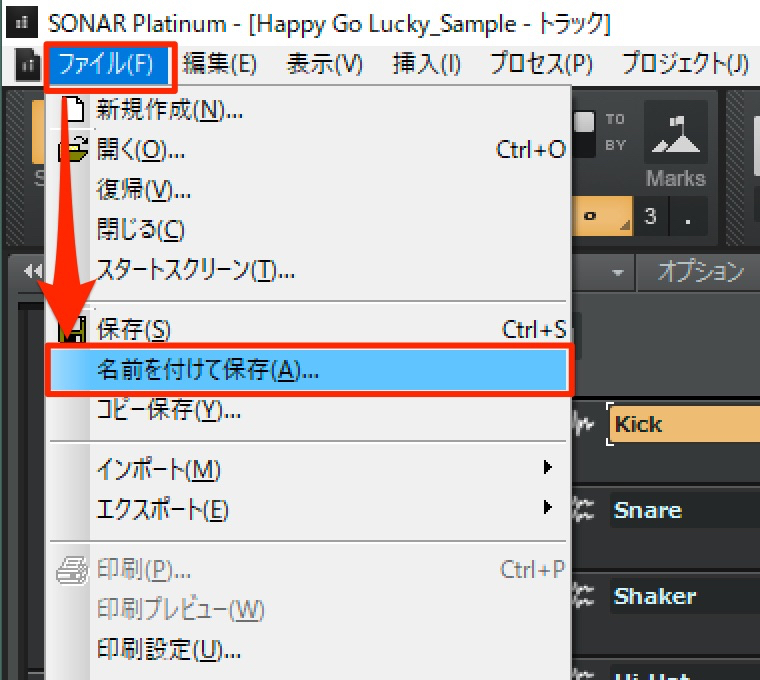
From the menu bar, select "File" → "Save As."
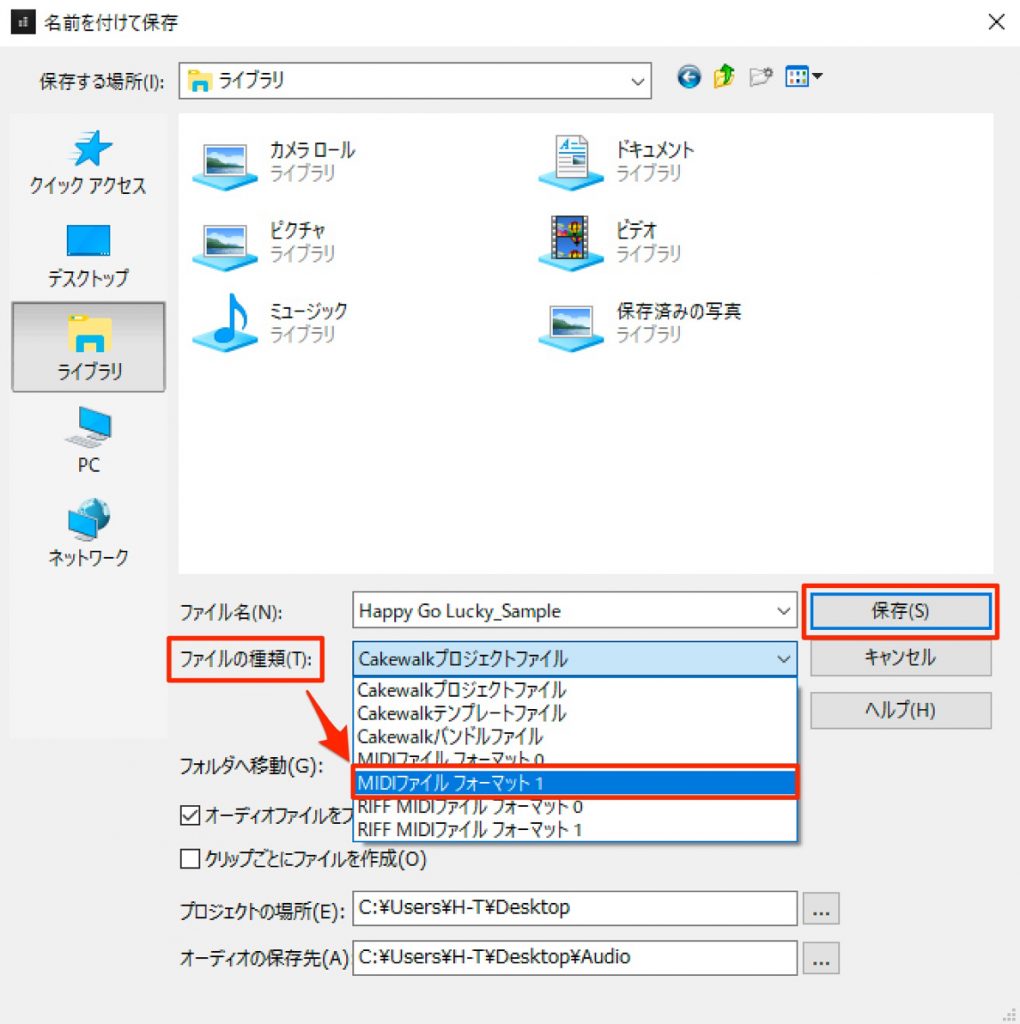
Under file type, select MIDI file format 1 and click Save.
For the difference between format 0 and 1, see here.


Dialogs appear cautioning you about copyright and noting that audio data isn't included, but you can select "Yes" for all of them. Continuing on saves the MIDI file.
Exporting audio track data
Next, to migrate the audio track data, export every audio track as stems (solo) to individual audio files.
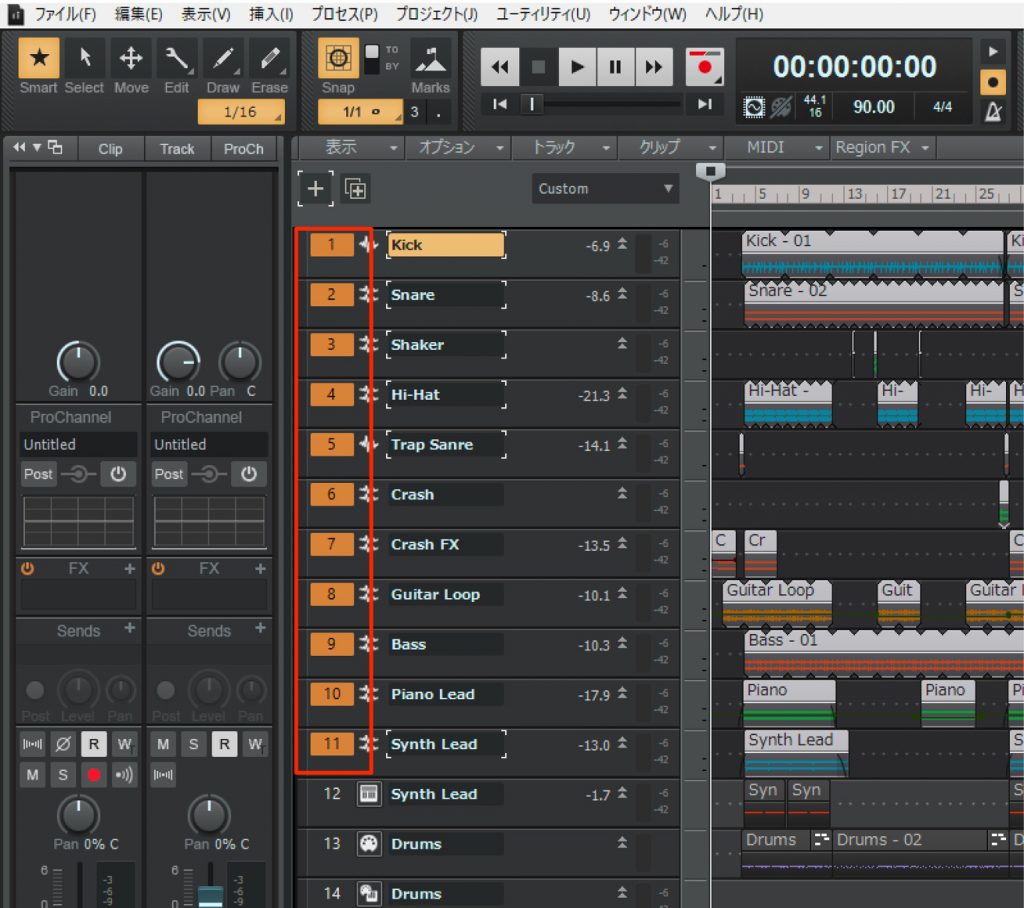
Select all the audio tracks to export.
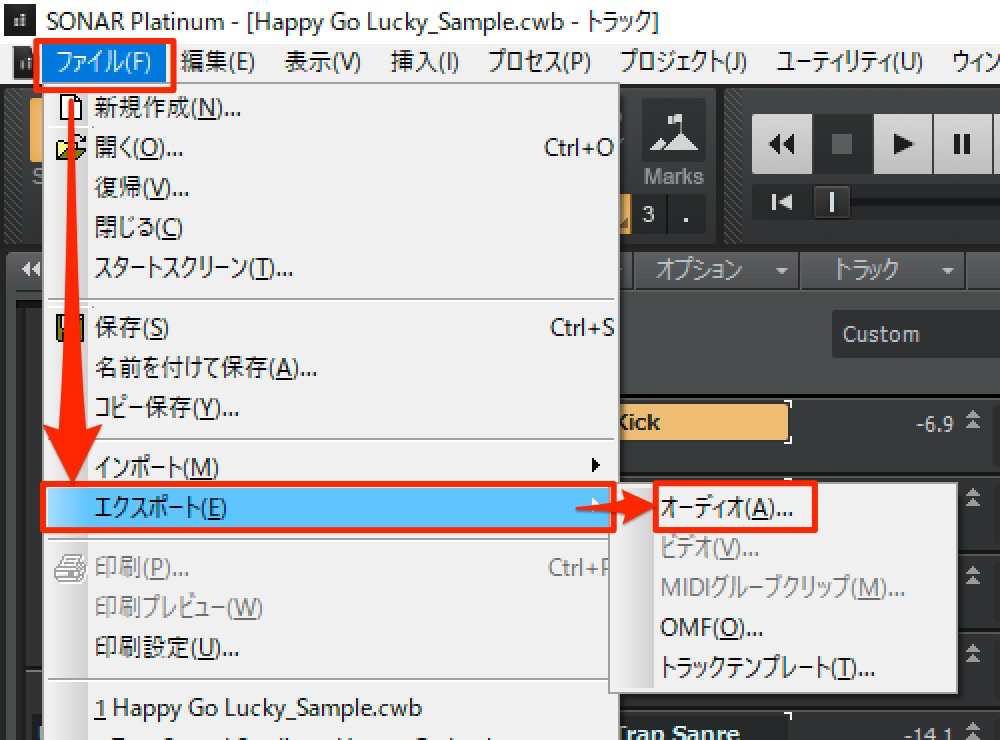
From the menu bar, select "File" → "Export" → "Audio."
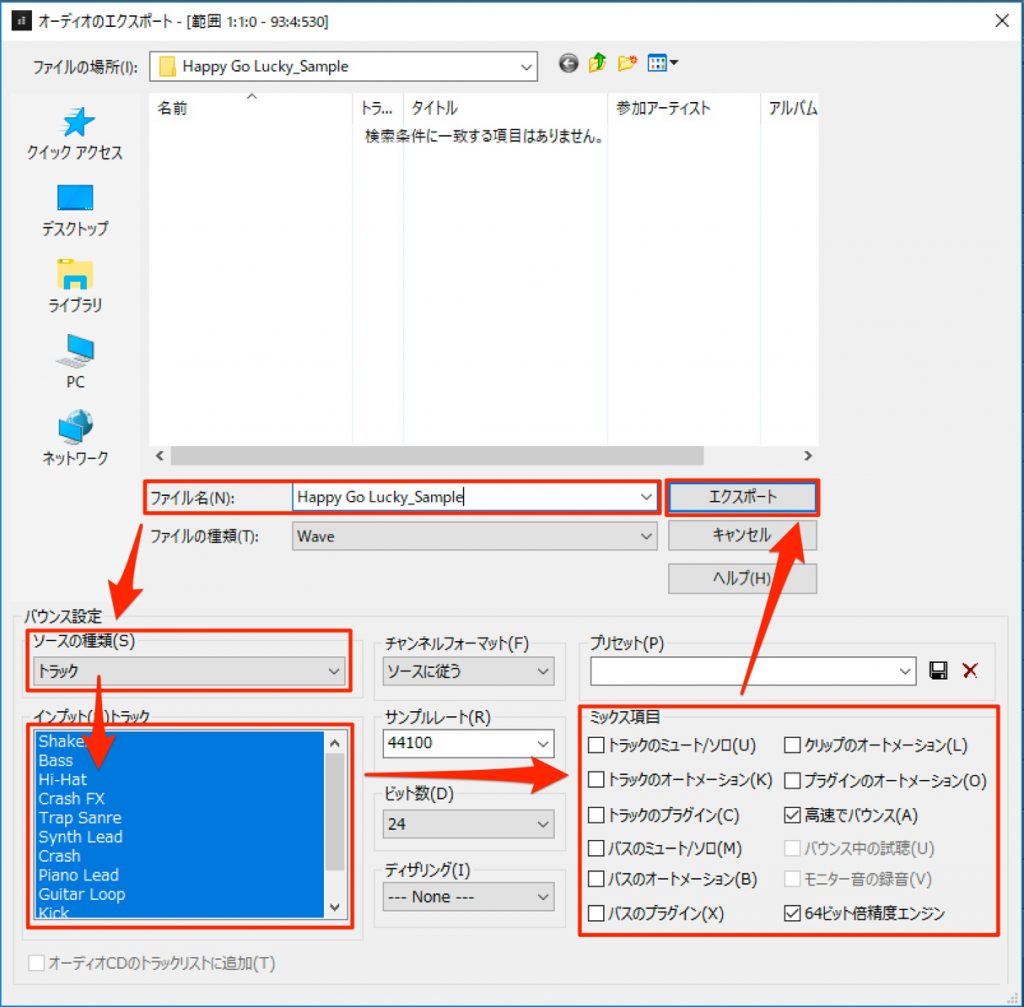
Decide the "File name" for the audio files.
Choose "Tracks" under "Source Category," and confirm that all the selected audio tracks are selected in the input tracks below.
As for "Mix Enables" on the right, check anything you need when bouncing, or if you want to edit in Studio One, check only the minimum items.
Check where the exported audio files will be saved and click "Export."
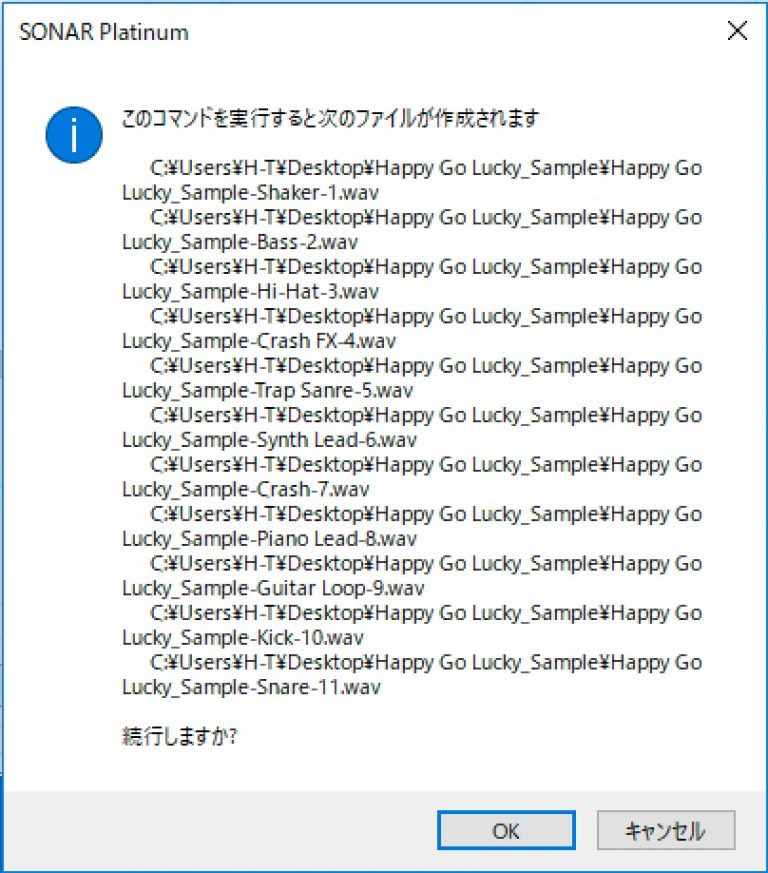
You're asked to confirm that audio files will be created, so click "OK."
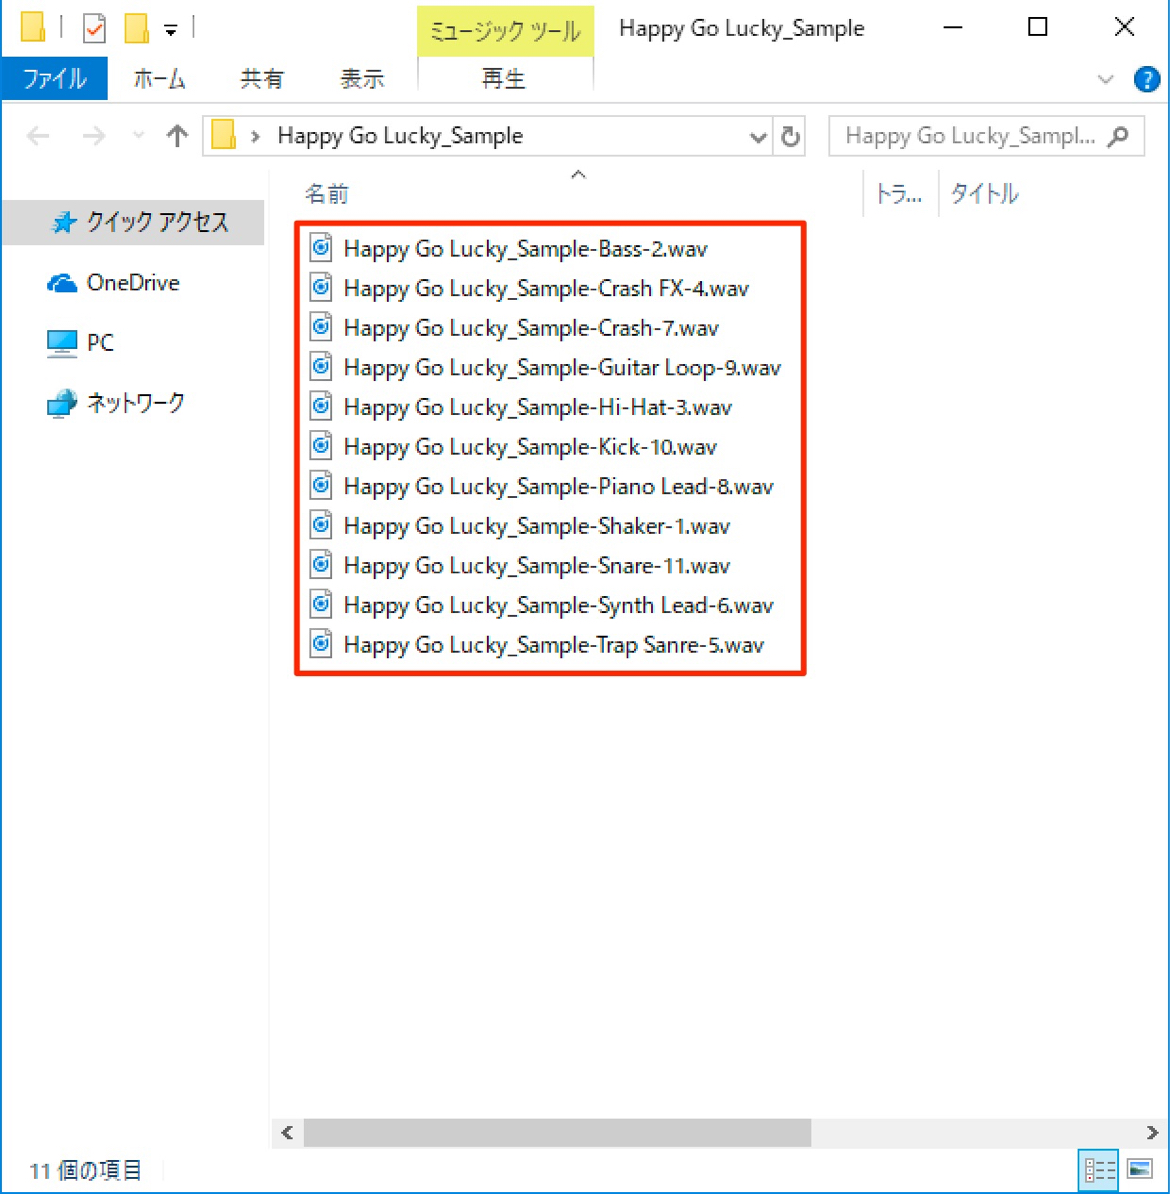
The data from all the selected audio tracks has been exported as individual audio files (WAVE files).
Importing the MIDI track data
Import the MIDI exported from SONAR into Studio One.
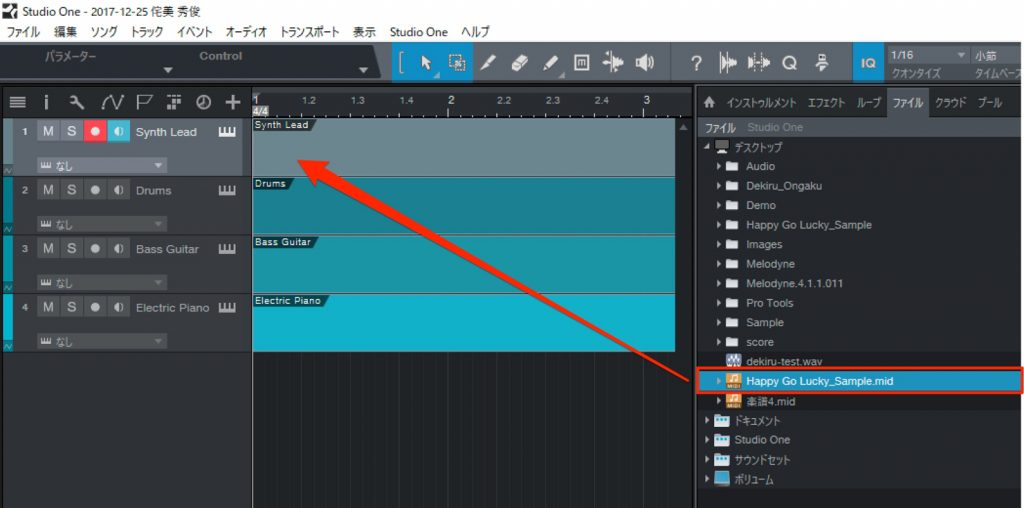
Select the MIDI file you exported earlier and drag and drop it directly to place it.
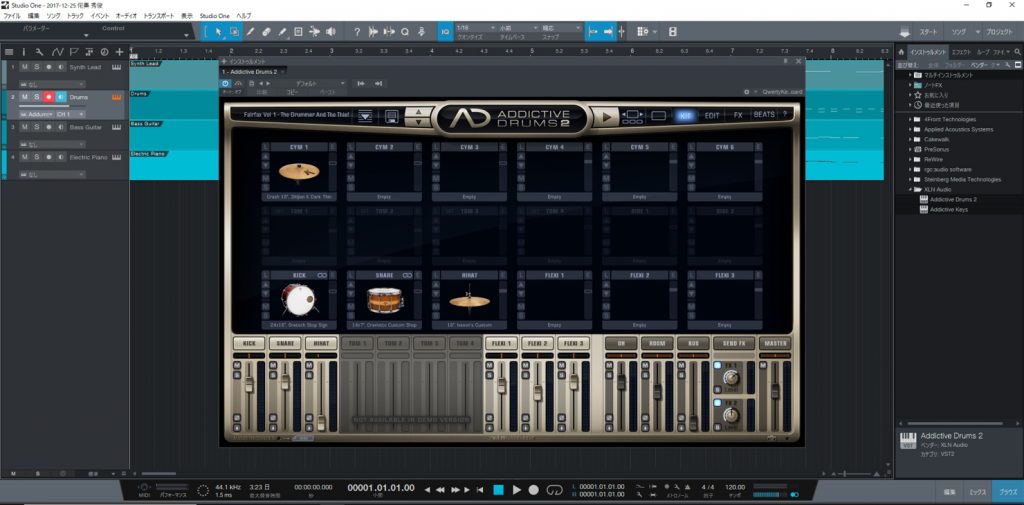
Set up the sound for each MIDI track again in Studio One.
If the instrument can be used in both SONAR and Studio One, such as a VST instrument,
you can also assign the same instrument and sound as in SONAR.

Set the tempo and so on that you noted down.
Importing the audio track data
Next, import the audio track data.
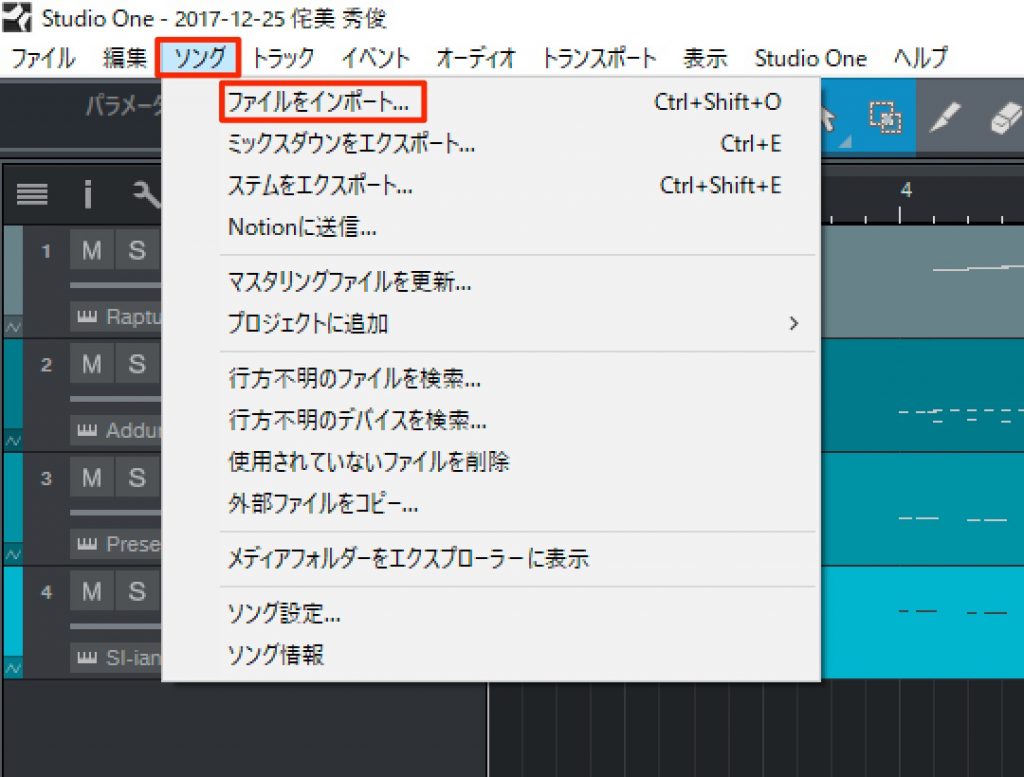
From Studio One's menu bar, select "Song" → "Import File."
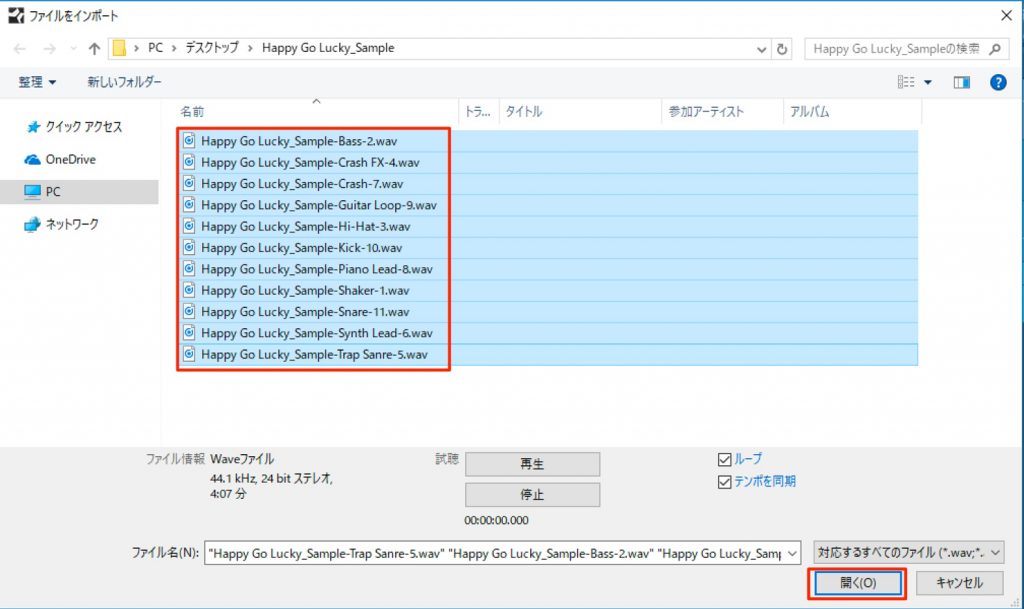
Select the folder where you saved the audio data earlier, select all the audio files
and click "Open."
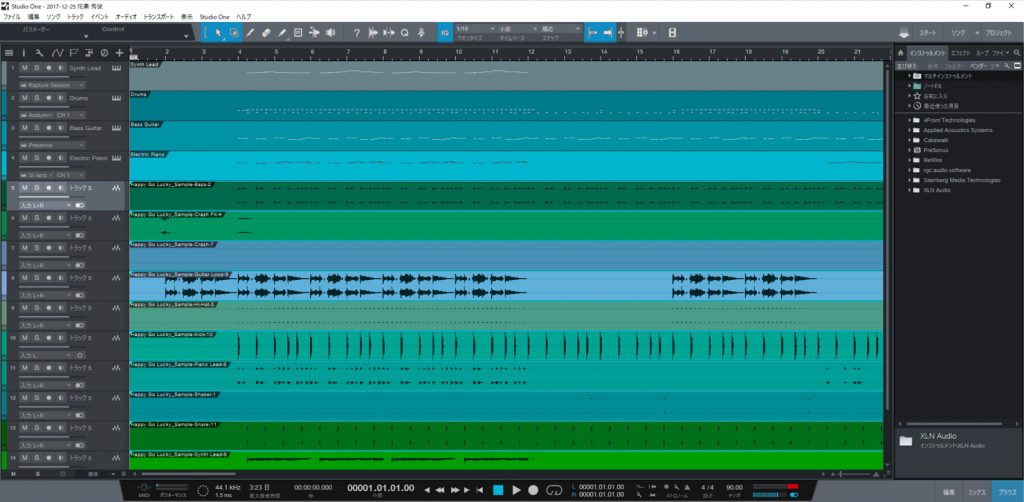
The audio tracks and the audio data they contain have been imported.
Change the track order and so on as needed.
The MIDI data and audio data should now be largely migrated, so continue with mixing work including effects to complete the data migration.
Mastering Studio One 3 Professional
"Studio One 3 Professional" is also explained on our YouTube channel and in our articles, so please make use of them.
How to use Studio One 3
How to Use Studio One: Beginner
Lesson articles needed by beginners with Studio One for DTM. You can check basic usage in videos. Also supports the latest version, Studio One 3! Beginners, please make use of this introductory content.
How to Use Studio One: Advanced
A collection of content for intermediate and advanced Studio One users. Also supports the latest version, Studio One 3! Once you've mastered the basics of Studio One, use this course to improve your skills further.
Frequently asked questions
Q1. When migrating from SONAR to Studio One, can all project data be migrated as is?
No. Audio and MIDI data can be migrated, but mixer settings and console information can't. You need to mix again in Studio One.
Q2. When exporting a MIDI file, is SONAR's sound information saved too?
No. MIDI files contain only performance data and basic MIDI controller information. Instrument and sound data aren't included, so you need to set them up again in Studio One.
Q3. What problems occur if my track names use Japanese?
They may become garbled on export. It's recommended to change track names to alphabet characters only beforehand.
Q4. What should I do if I want to migrate the volume and effect information of audio tracks?
If you want to reflect volume, pan and effects, bounce the tracks with settings that include them and export. However, if you'll re-edit in Studio One, you need to export with settings that exclude them.
NEW ARTICLES
Latest English Articles