The equalizer (EQ) is an essential effect in DTM that plays many roles, from adjusting the tone of a track to separating sounds and shaping them. The foundation of EQ is understanding frequency bands: lows from 20 Hz to 200 Hz, mids from 200 Hz to 3 kHz, and highs above 3 kHz, each with different characteristics. By understanding the three EQ types (peak, shelf, and high cut/low cut) and the three knobs (frequency, gain, and Q), you can mix effectively. In EQ adjustments, which are central to mixing, the keys are cutting the sub-lows and removing unneeded bands.
EQ, an Essential Effect for Every Track (Basics)
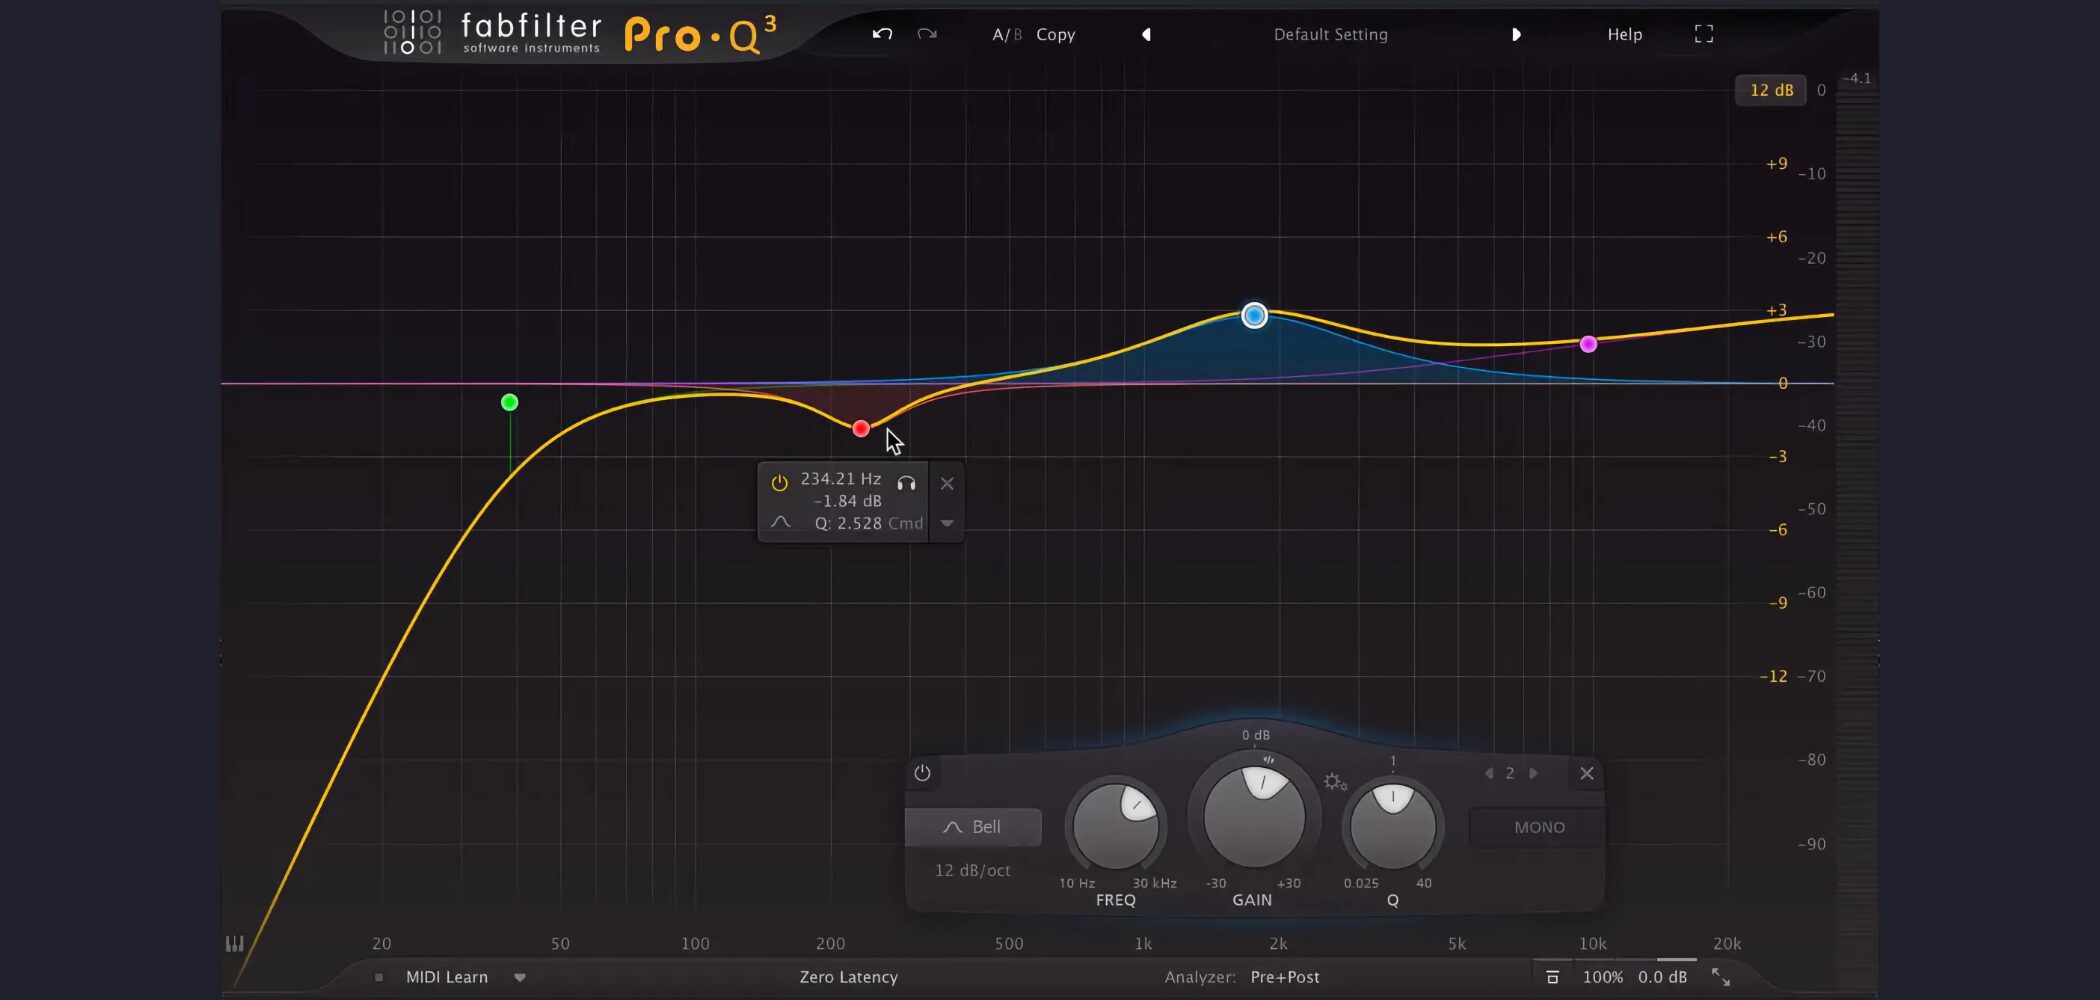
"EQ" is short for "equalizer," an effect with a very wide range of uses, such as:
- Fine-tuning a track's tone to match the world of the song
- Separating tracks so each is easier to hear
- Changing the tone drastically to design sounds
It is used for all of these.
When mixing, it is applied to almost every track.
Here we explain the basic knowledge you will always need when adjusting EQ.
EQ Basics: Frequency Ranges
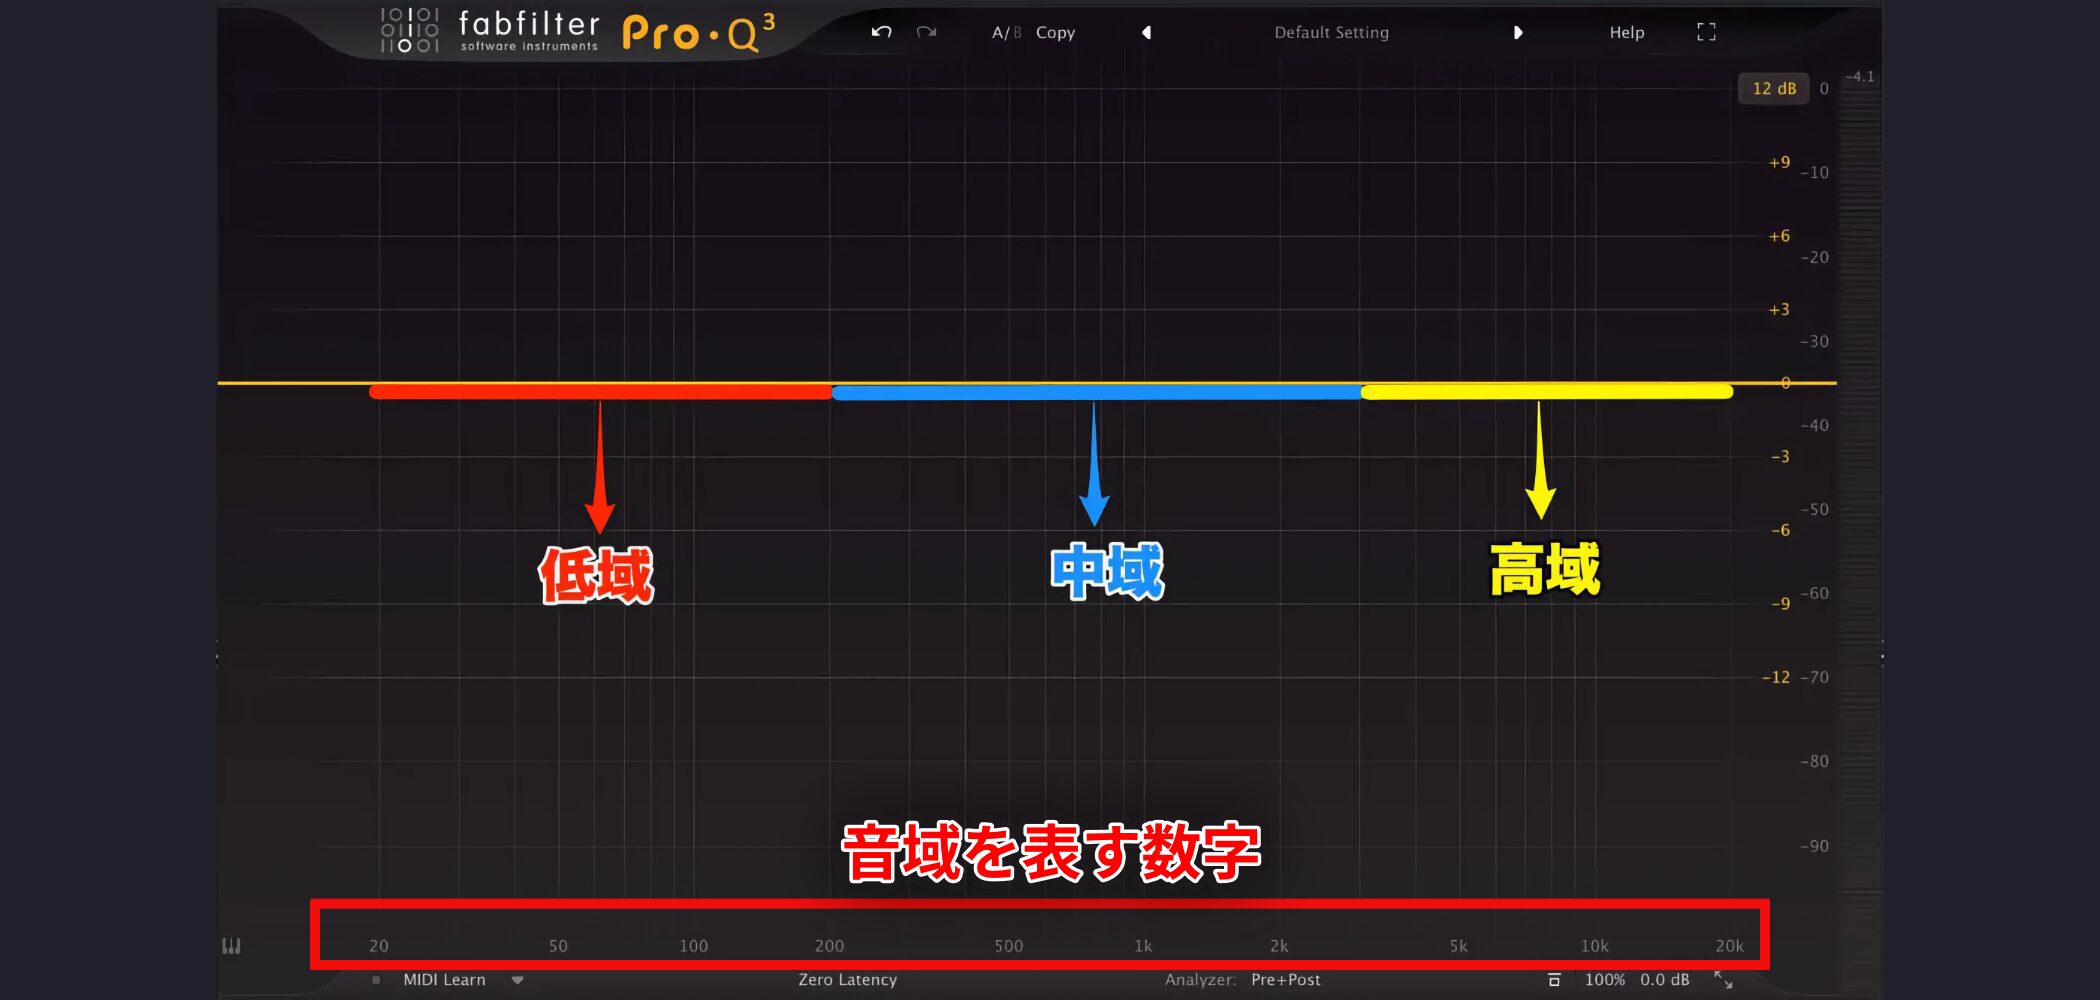
There are many EQs out there, but the basic concept is the same for all of them.
The left side is the lows, and moving to the right you go through the mids to the highs.
Every EQ is marked with numbers representing frequency.
- 20 to 200 Hz: lows
- 200 Hz to 3 kHz: mids
- Above 3 kHz: highs
There is no strict definition, but it is good to remember these roughly.
Video: Frequency
Characteristics of Each Band
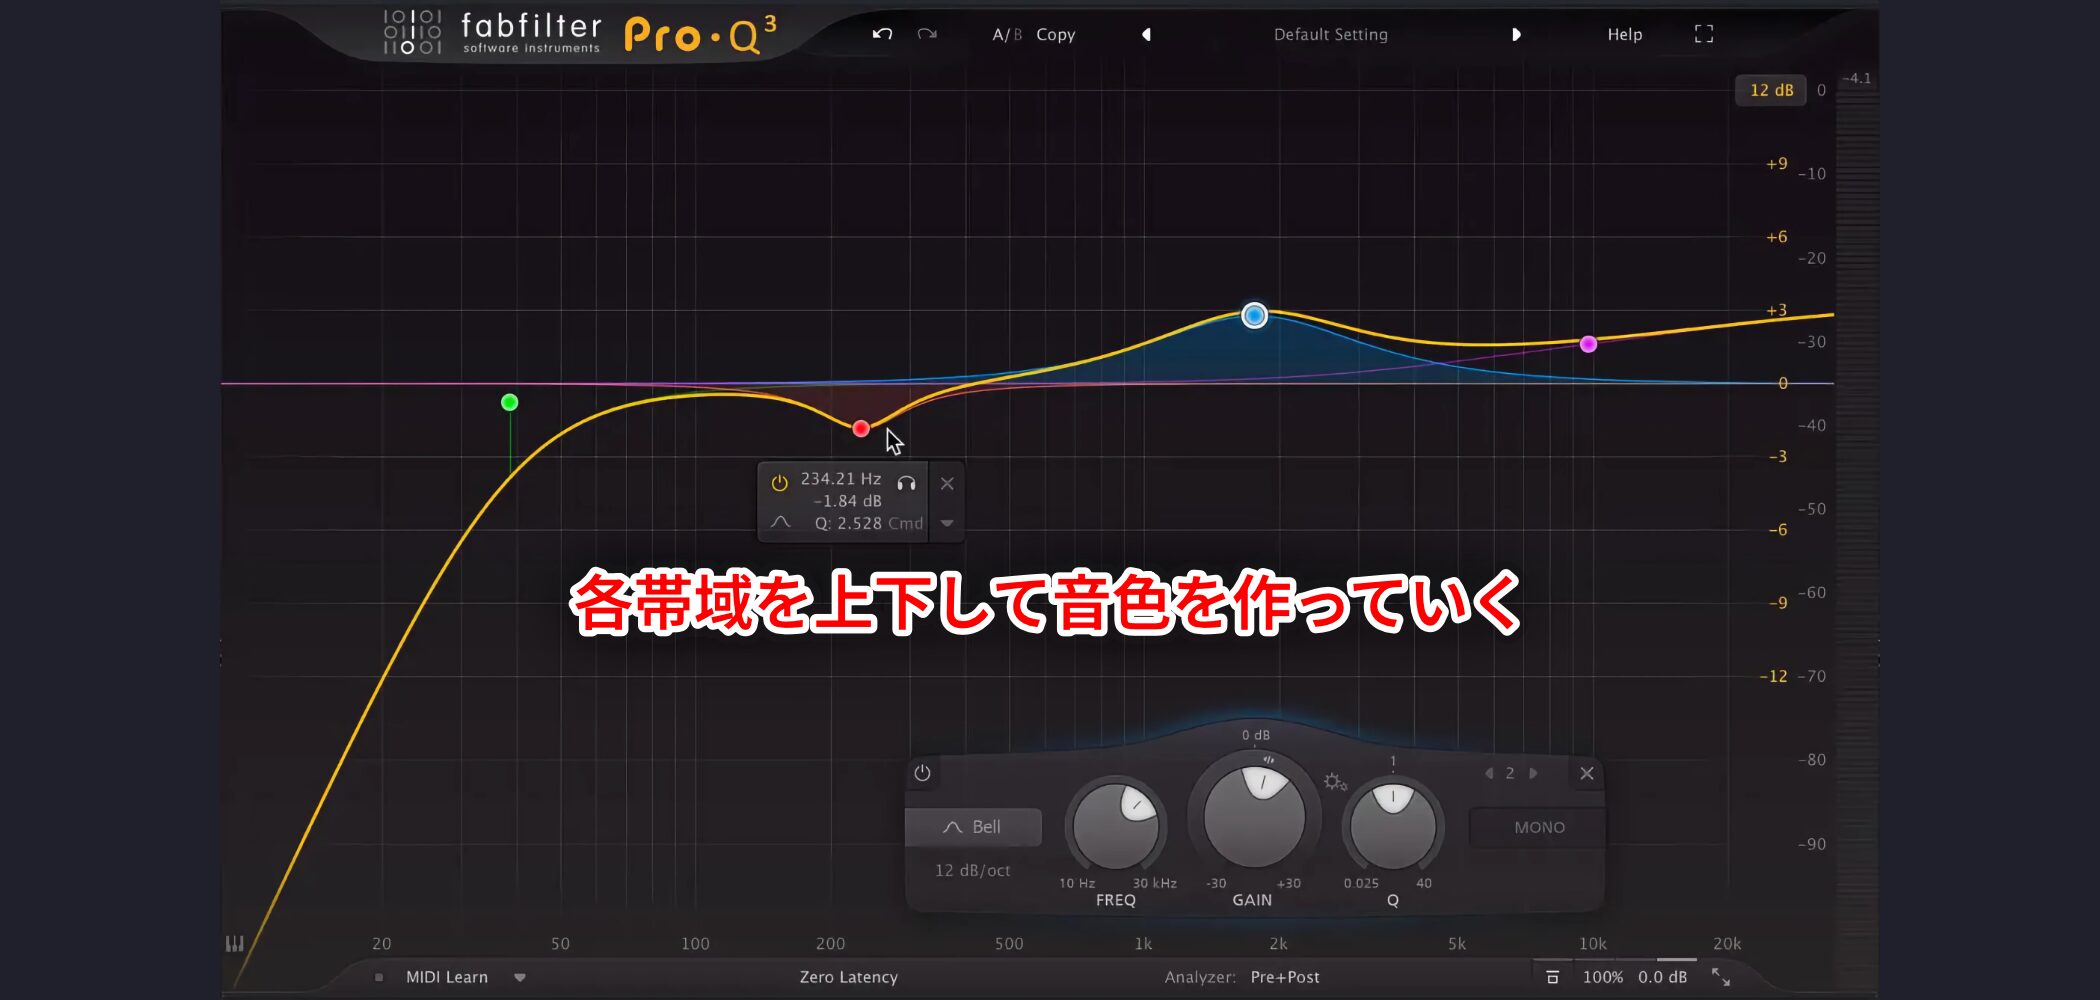
You shape the sound by raising and lowering each band.
Lows
You can adjust a sound's presence and sense of loudness.
Kick drums and bass contain a lot of low-frequency content.
Mids
You can give a sound its personality and character.
This is the band the human ear is most sensitive to.
Many instruments, such as the human voice, guitar, and keyboards, contain a lot of this content.
Songs tend to accumulate a lot in this band, and how you handle it is where your skill shows.
Highs
You can give a sound clarity and sparkle.
If you listen to older songs, you will probably notice they have few highs and sound muffled.
This is because equipment at the time made it difficult to reproduce highs.
Today, high-frequency reproduction has advanced, making "hi-fi" sound possible.
The Three EQ Types (Types)
Next, we explain the three EQ types.
Learn these together with the basics above, and you will have EQ fundamentals down!!
Peak (Bell)
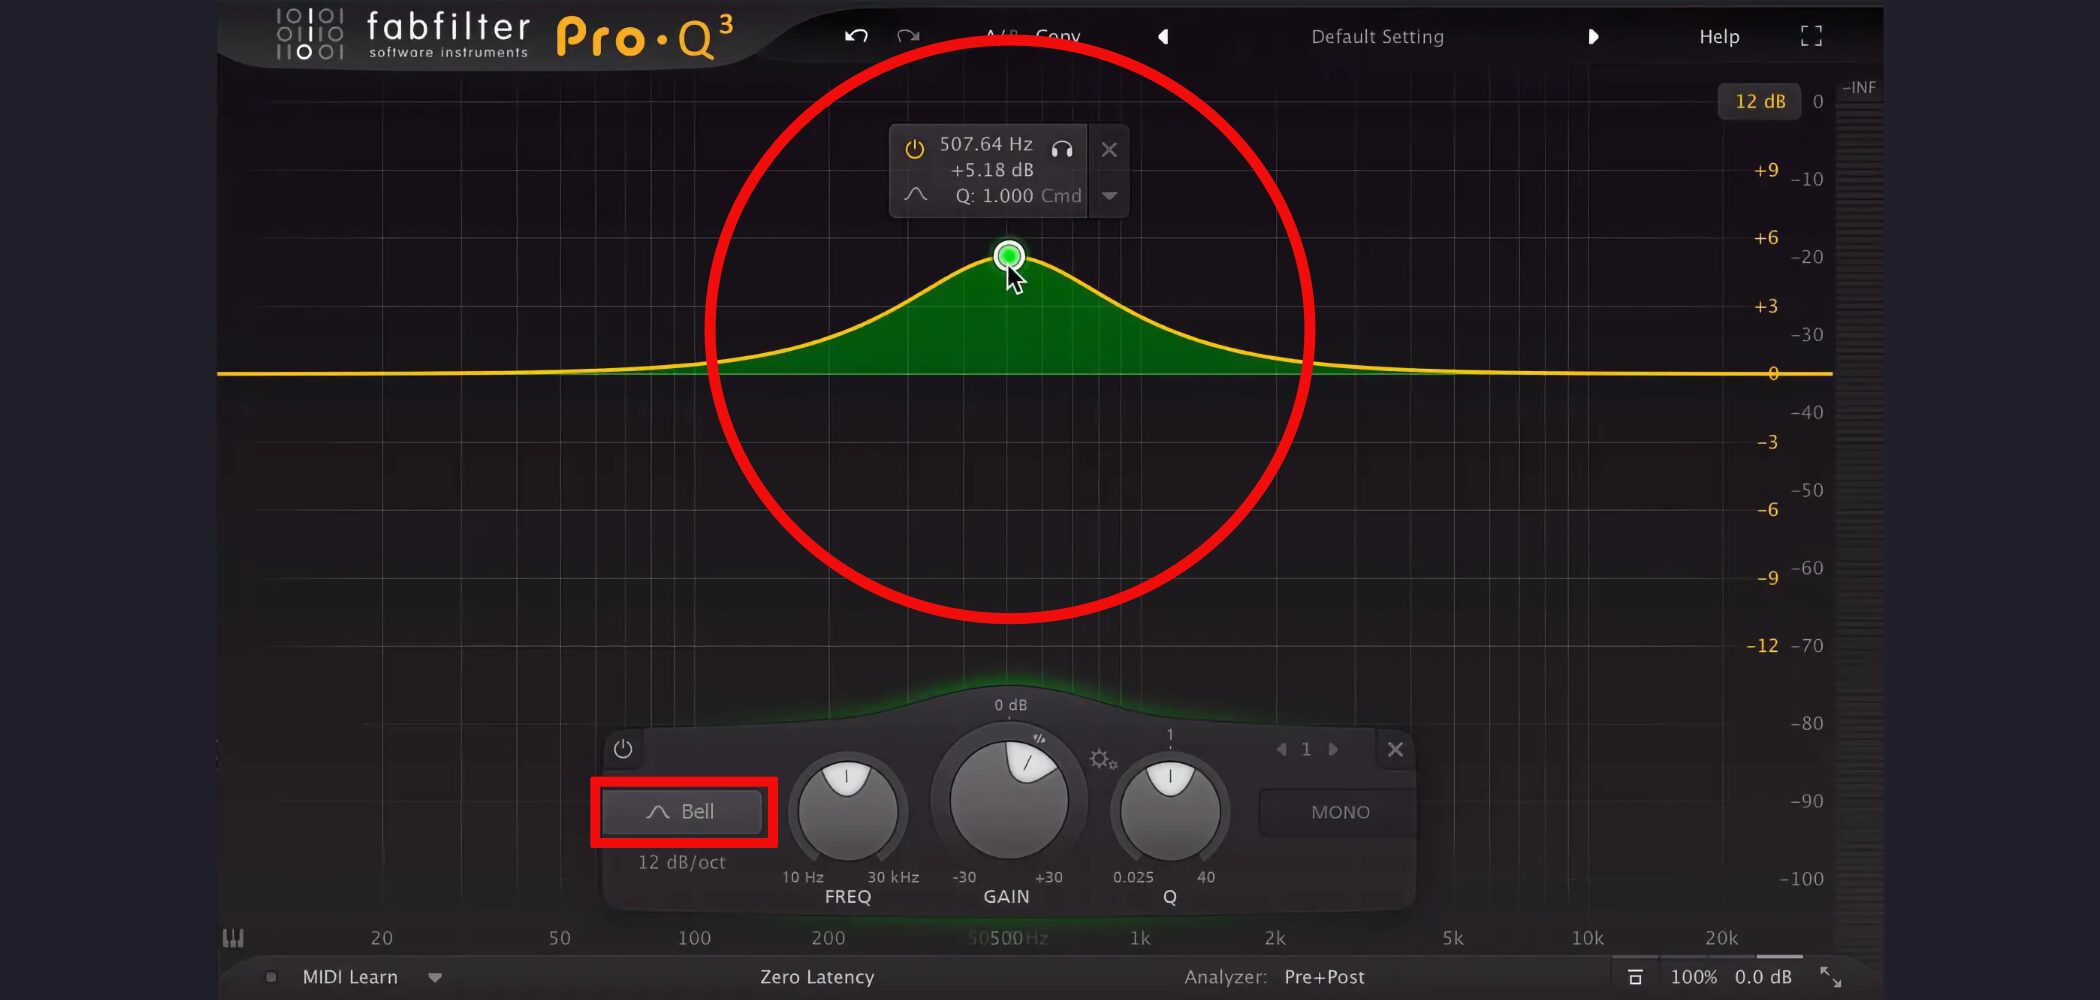
This is the most orthodox type and the one used most often.
You can raise or lower any point you like, allowing flexible sound shaping.
Frequency sets the position,
Q sets the width of the curve,
and Gain sets the size of the curve.
Shelf
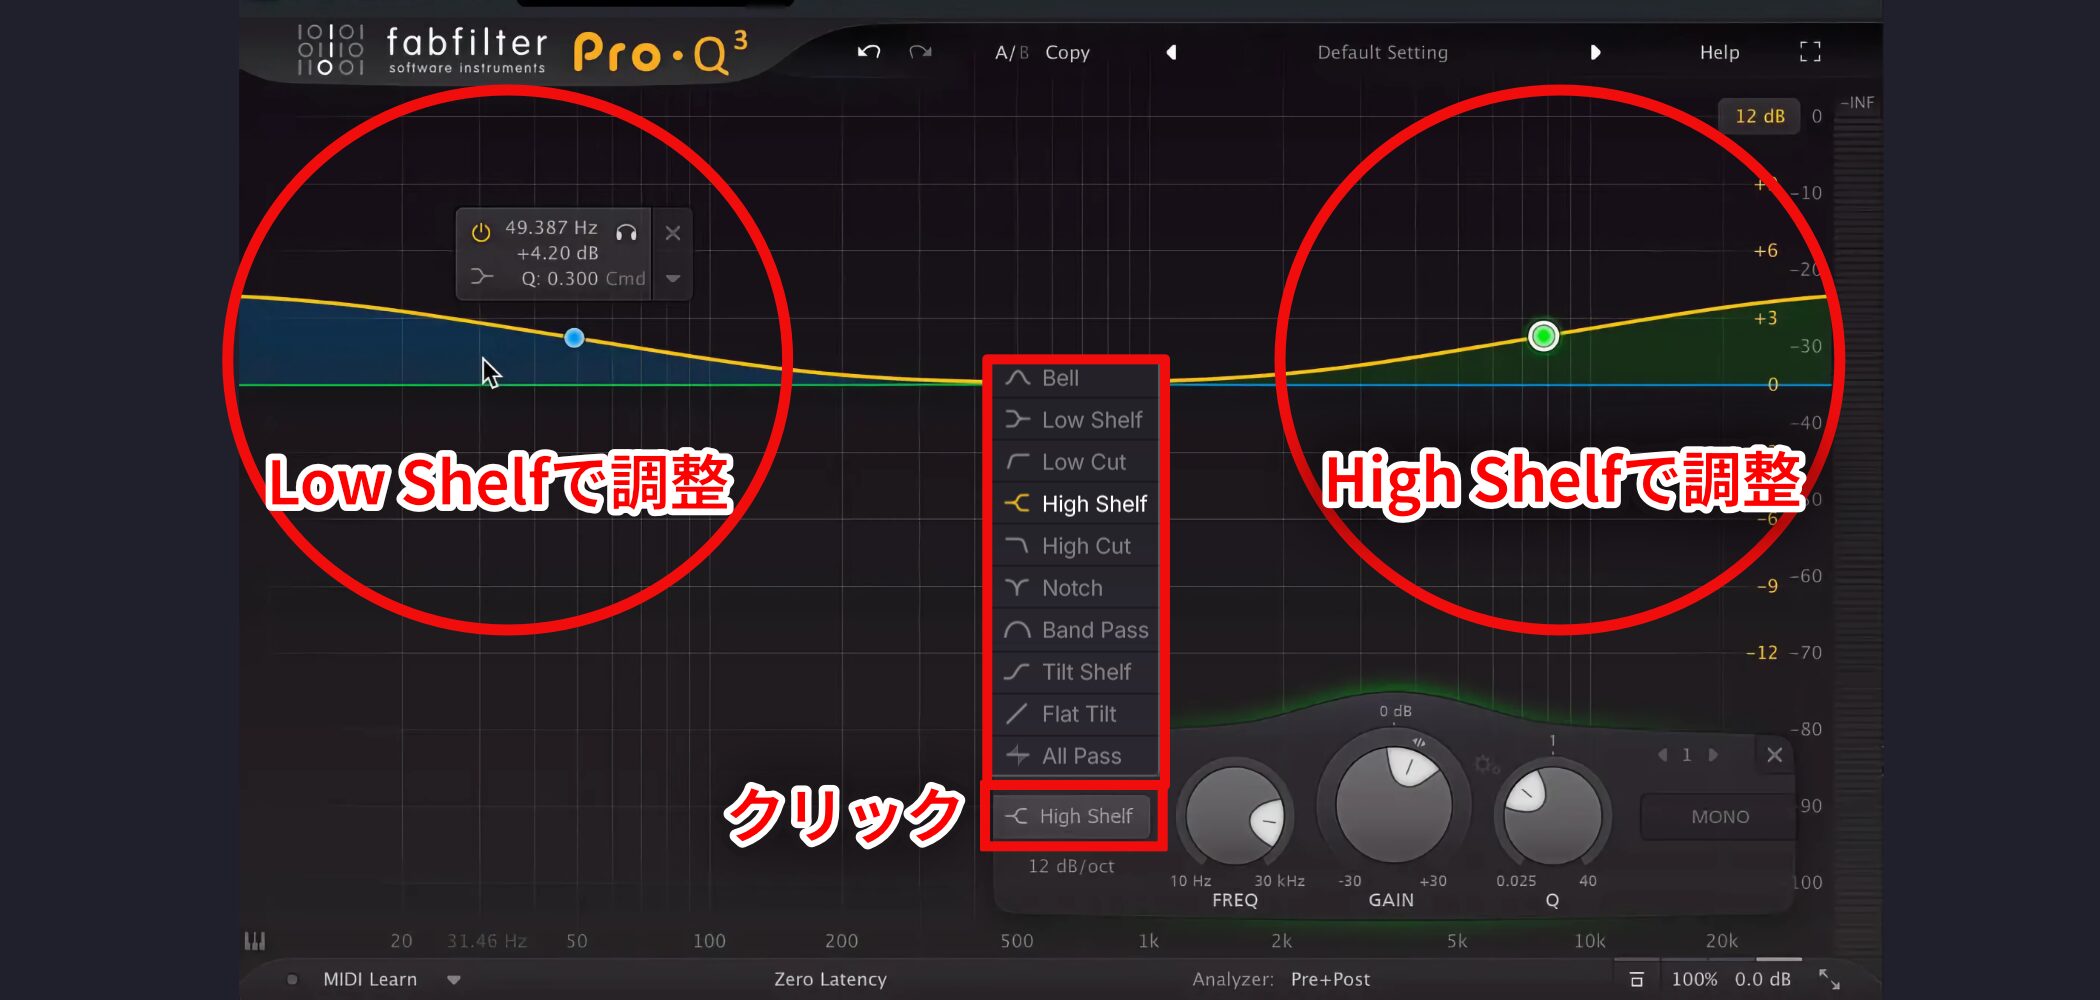
There are low and high shelves.
Choose the point you like, and use "Low Shelf" to adjust the lows or "High Shelf" to adjust the highs all at once.
Use it to boost or cut the lows or highs over a wide range.
Frequency sets where the shelf begins,
Q sets the slope (in some cases, a boost or cut in the opposite direction occurs near where the shelf begins),
and Gain sets the size of the shelf.
High Cut (Low-Pass) and Low Cut (High-Pass)
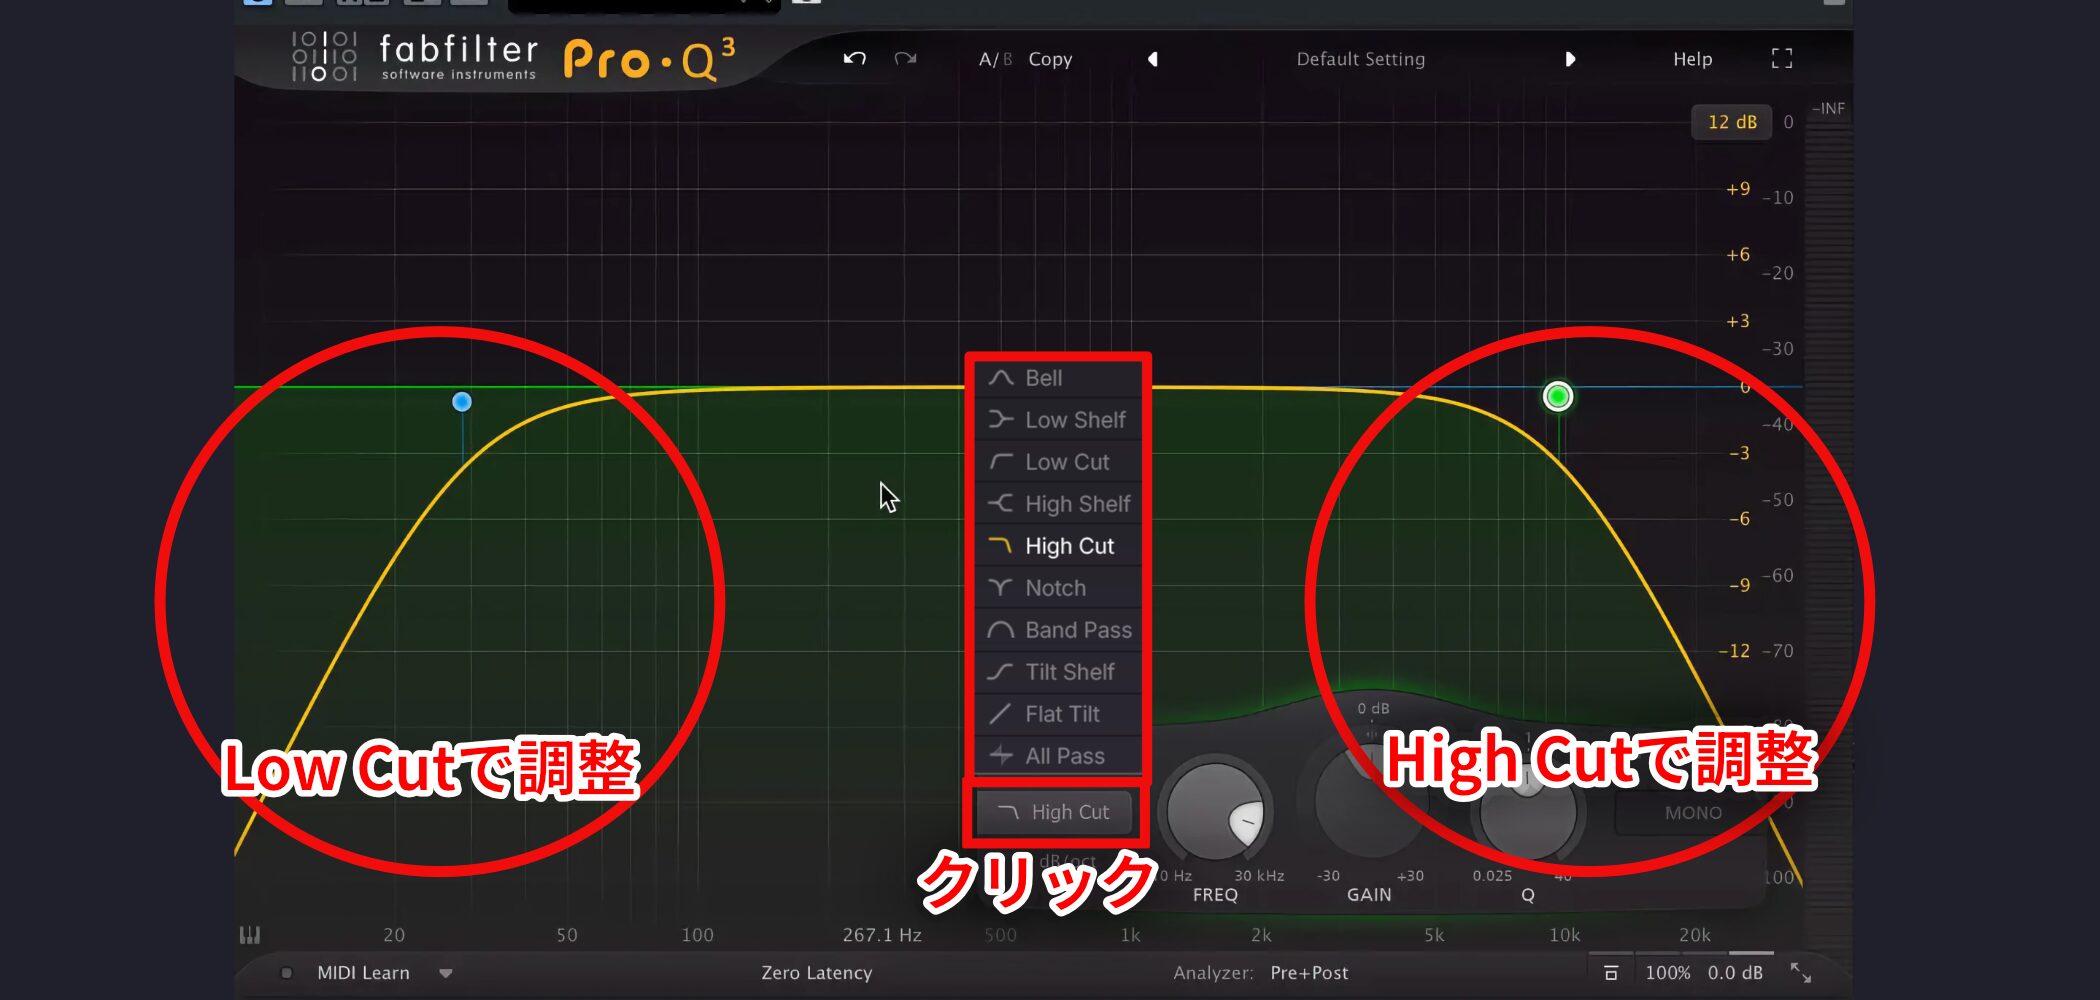
Use these to sharply cut the band beyond a specified point.
There are two types: "Low Cut (high-pass)," which cuts the lows,
and "High Cut (low-pass)," which cuts the highs.
- Cutting low-frequency content to clean up the song, or cutting harsh highs
- Actively using them for sound design
Frequency sets where the cut begins,
Q or "oct/dB" sets the slope of the cut,
and Gain fine-tunes the area where the cut begins.
Understanding the Three Main EQ Knobs (Knobs)
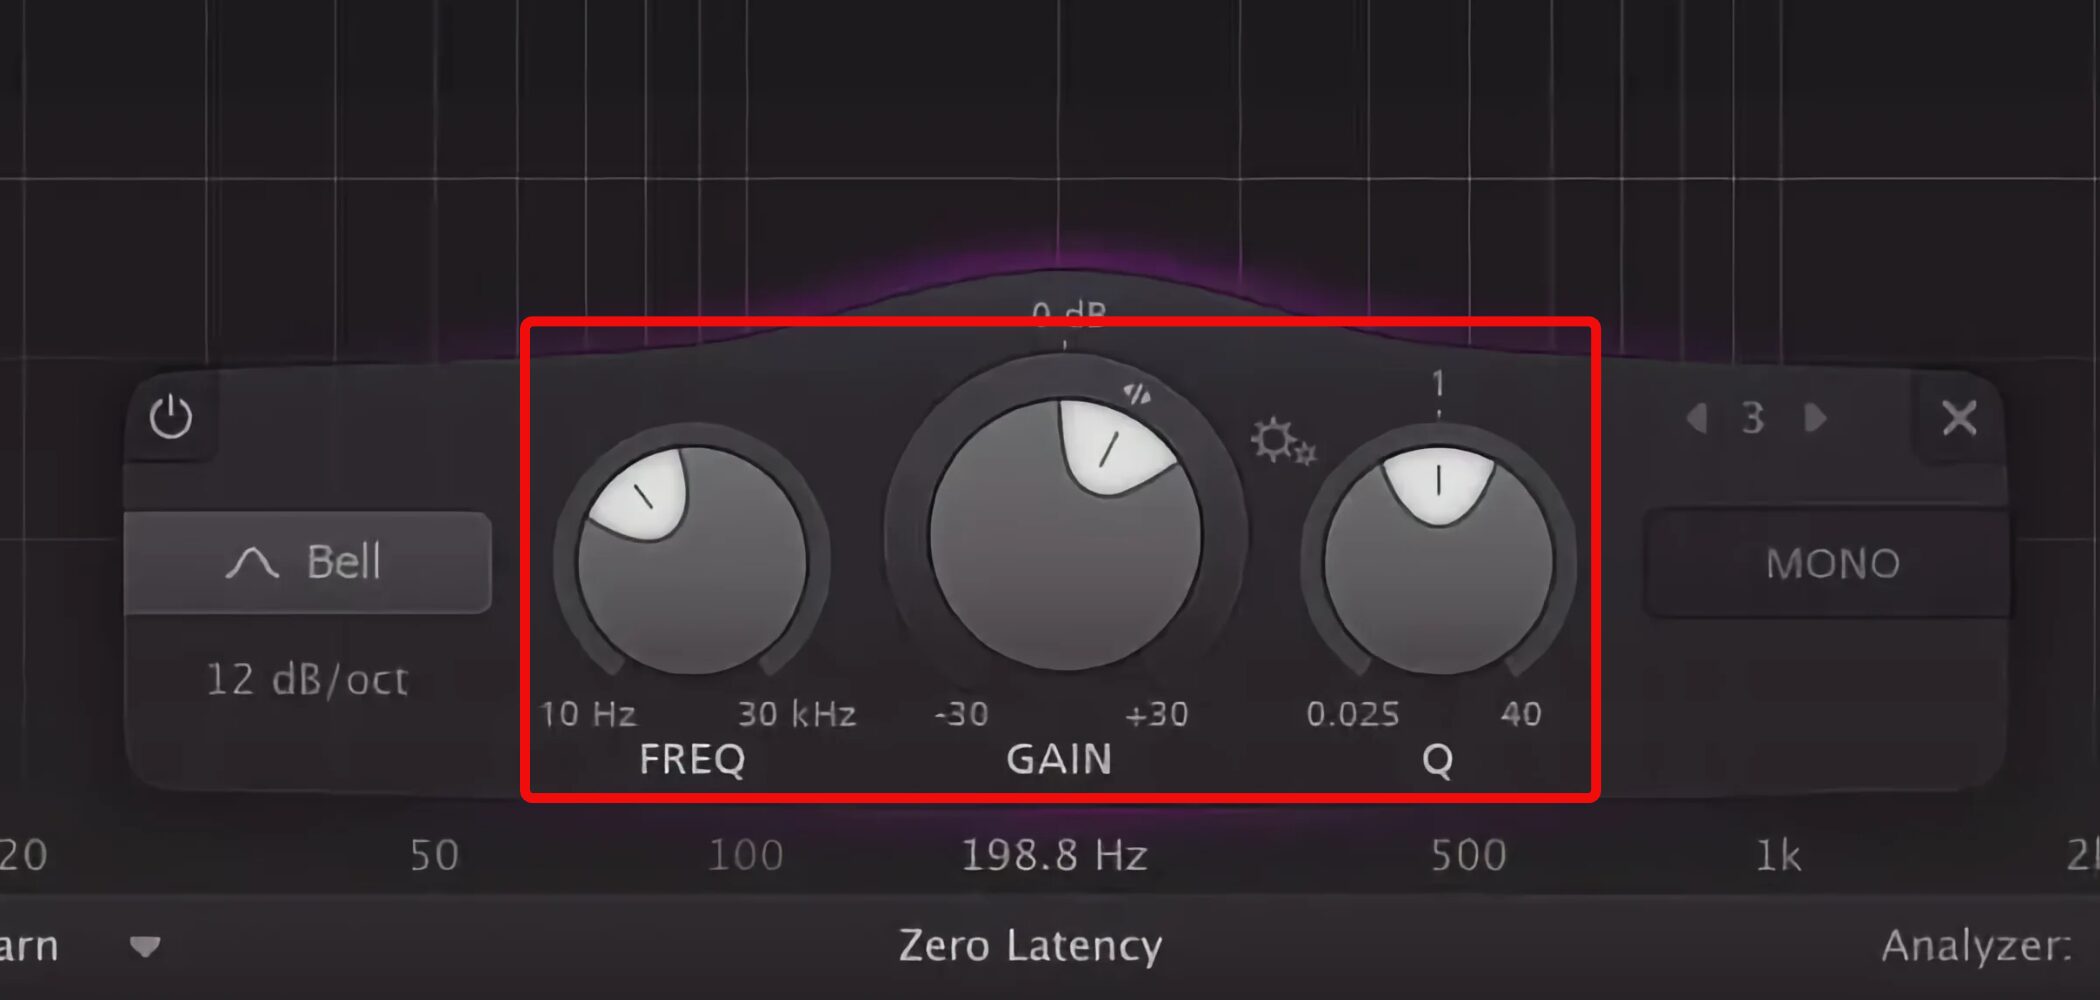
Many types of EQ are released by various manufacturers, but here we introduce the three knobs common to every EQ and what they do.
Understanding them makes it easier to create the sound you are aiming for, so be sure to master them!!
Frequency
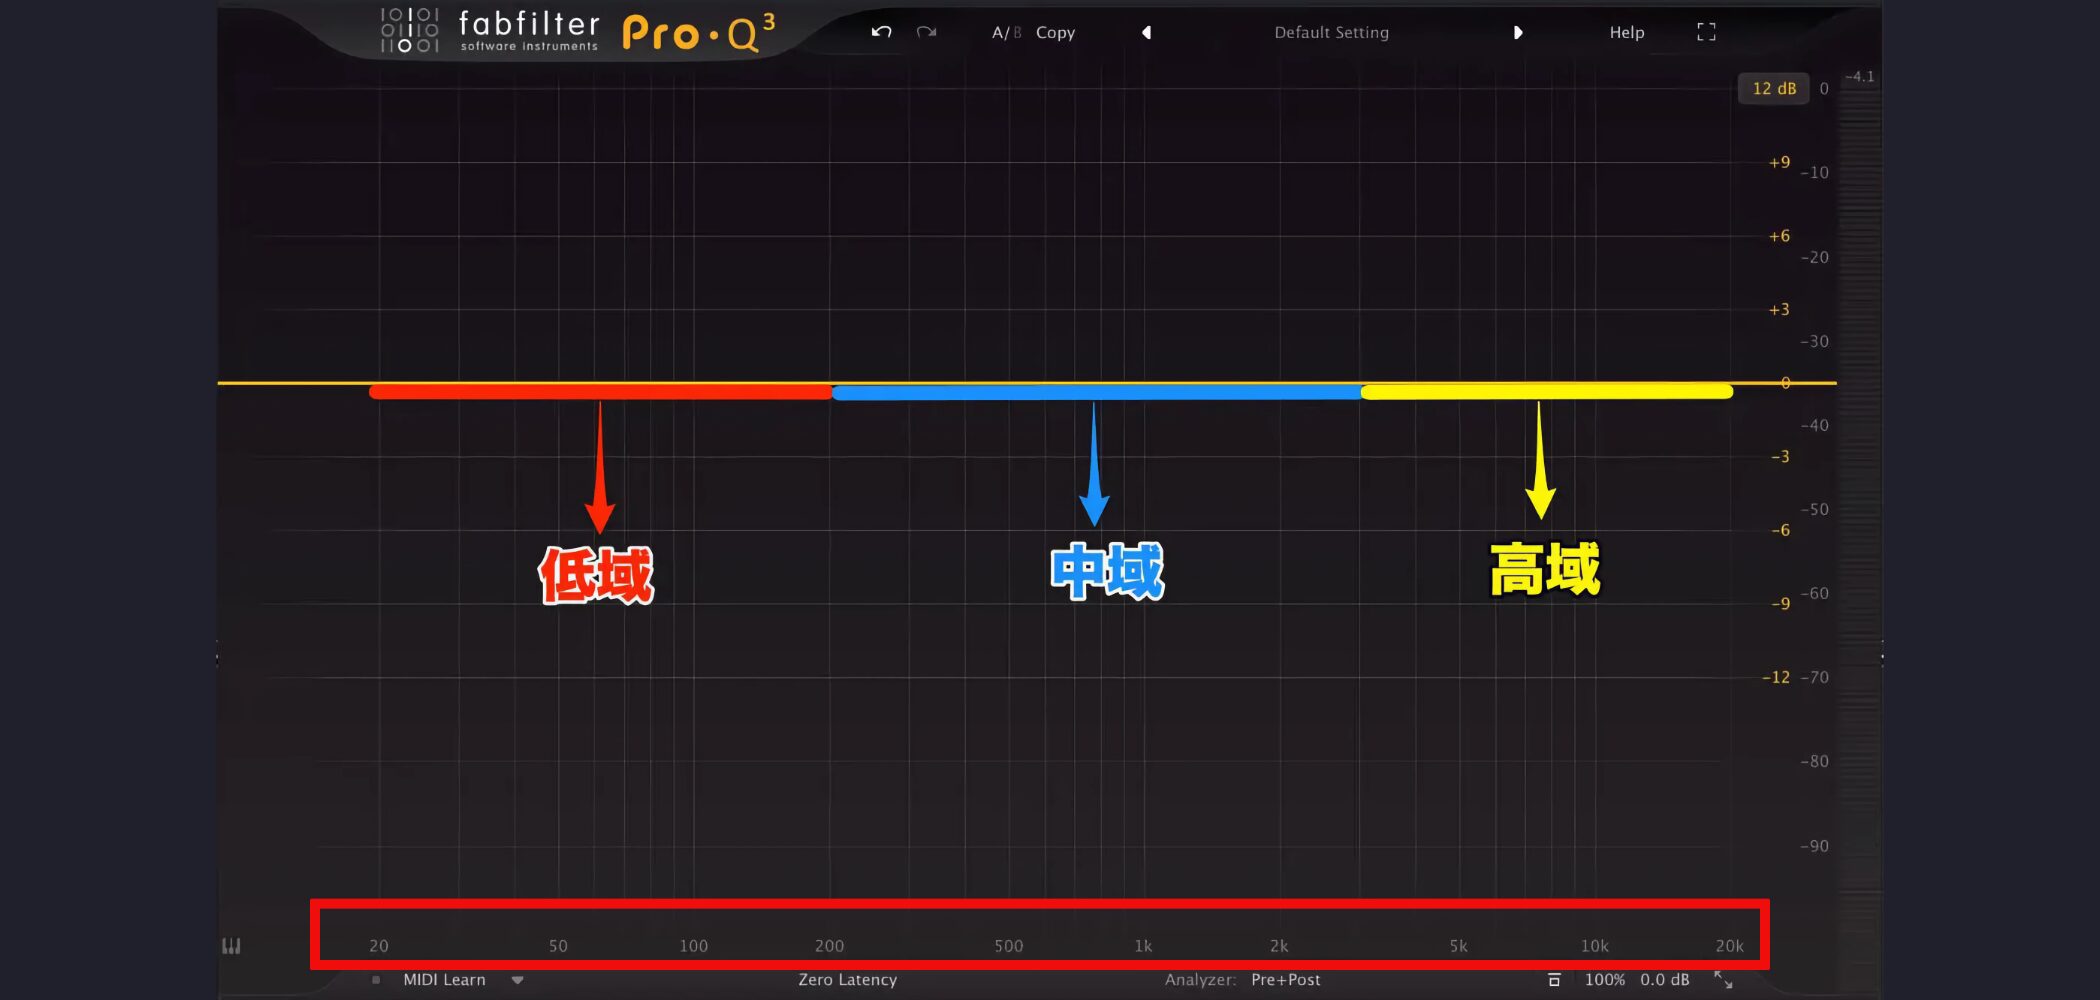
As described in the basics above, which band between 20 Hz (lows) and 20 kHz (highs) to adjust is decided by Frequency.
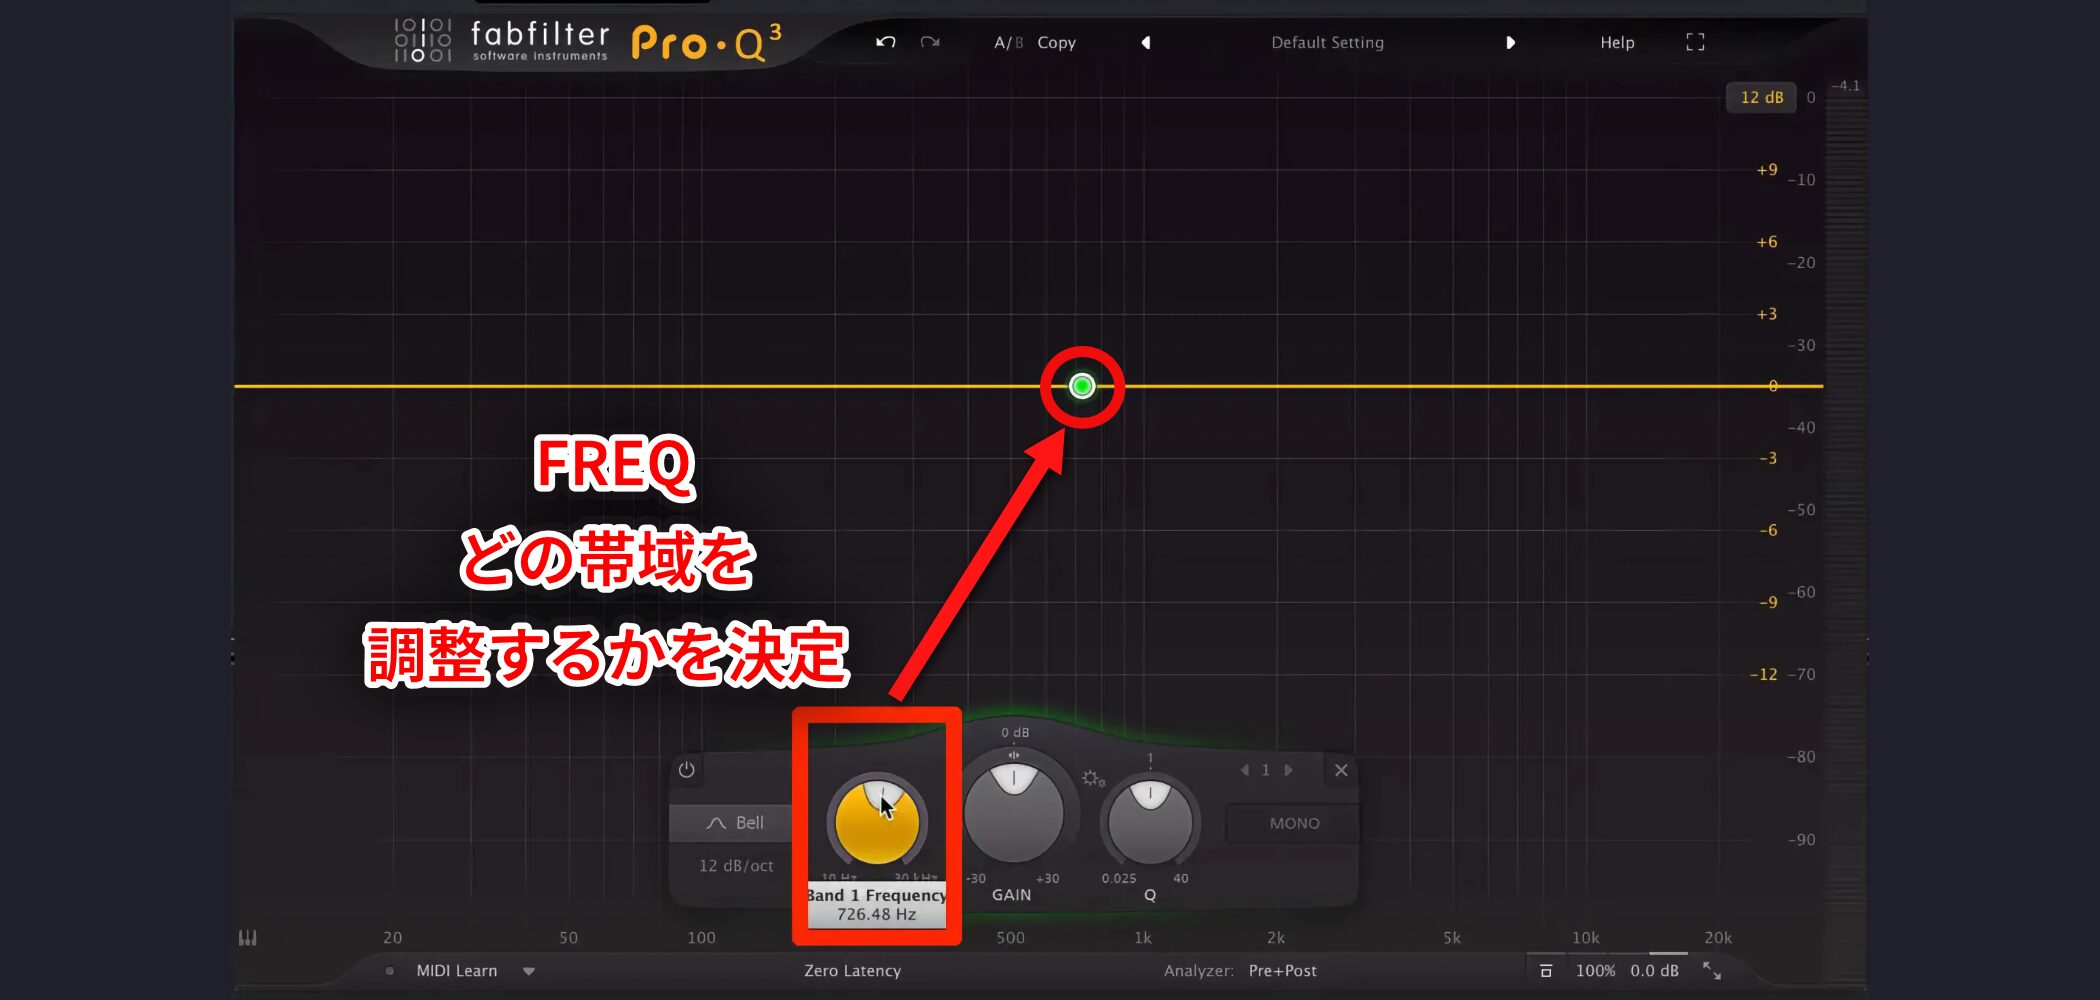
In the image above, the target is the midrange around 726 Hz.
Gain
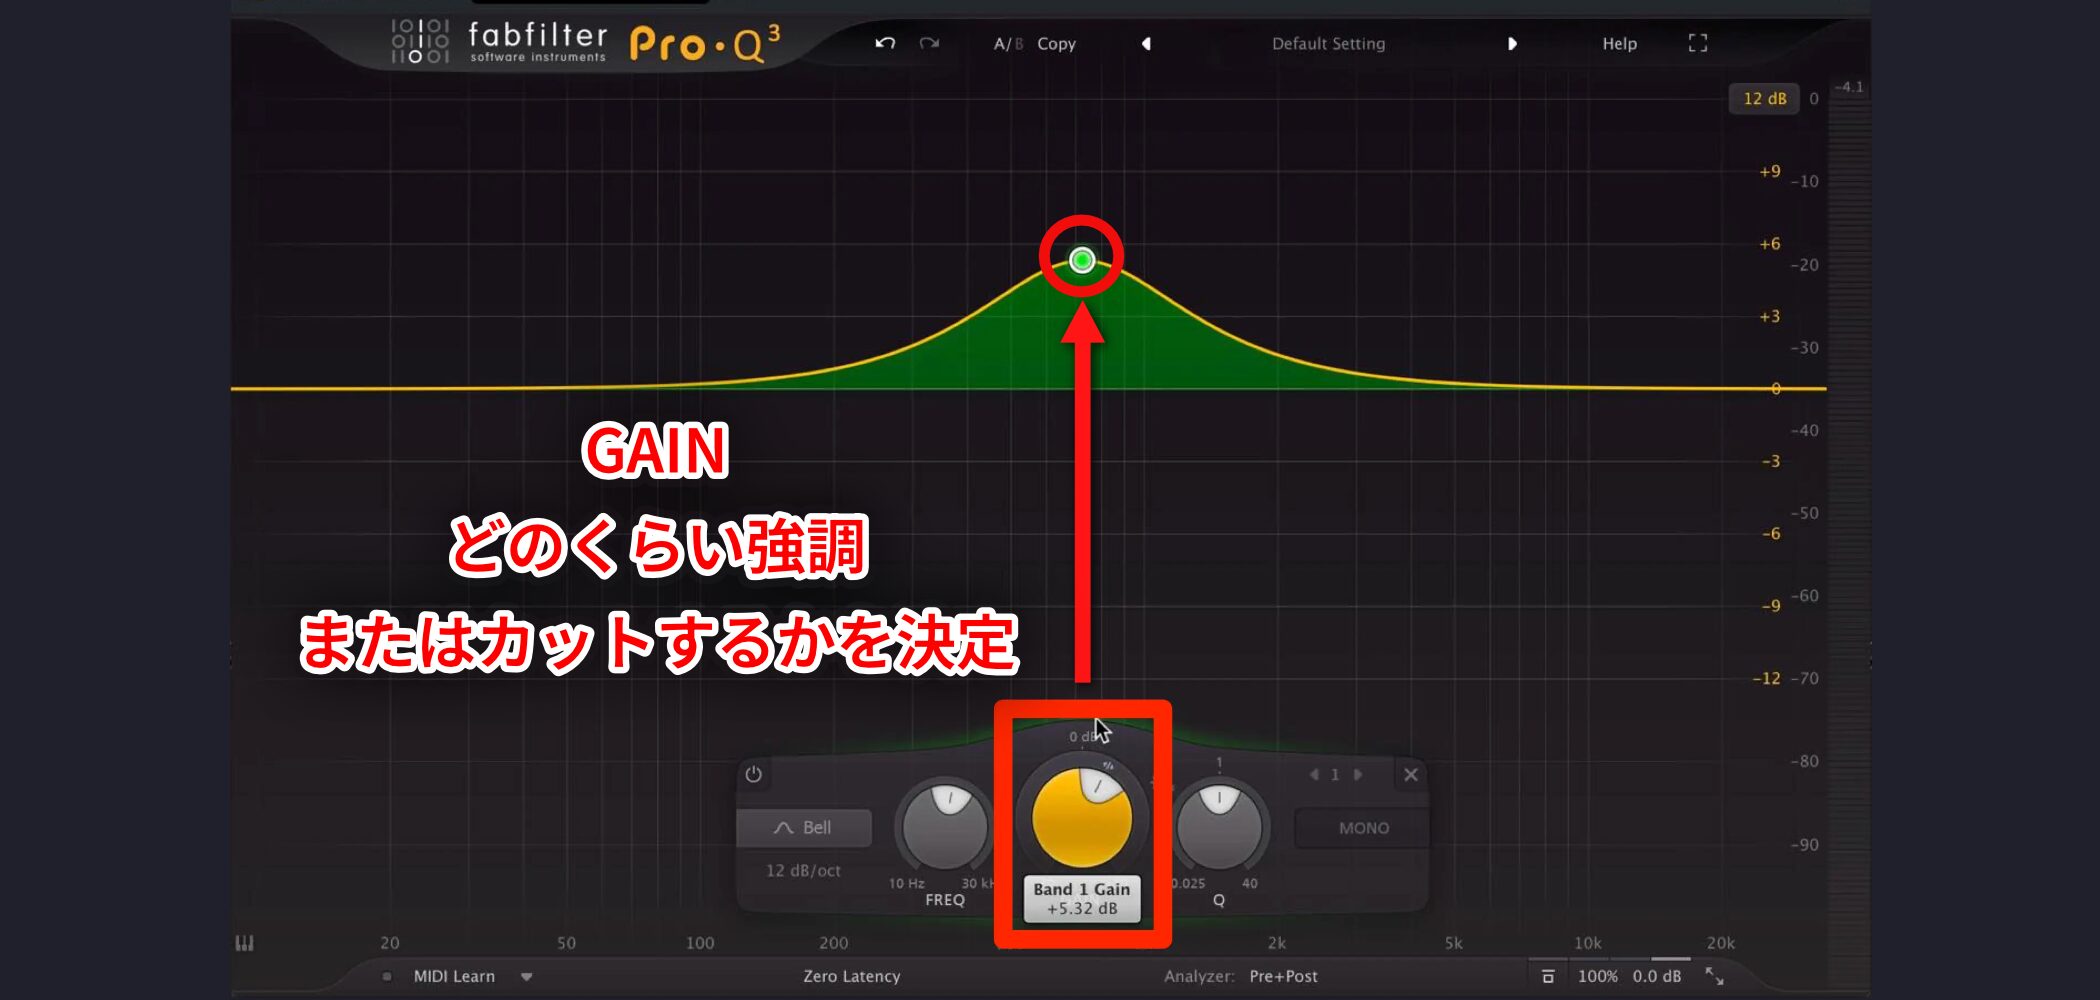
How much to boost or cut the range set with Frequency is determined by Gain.
It is expressed in dB (decibels), a unit familiar from track volume adjustments.
In the image above, 5.32 dB is boosted to emphasize the range.
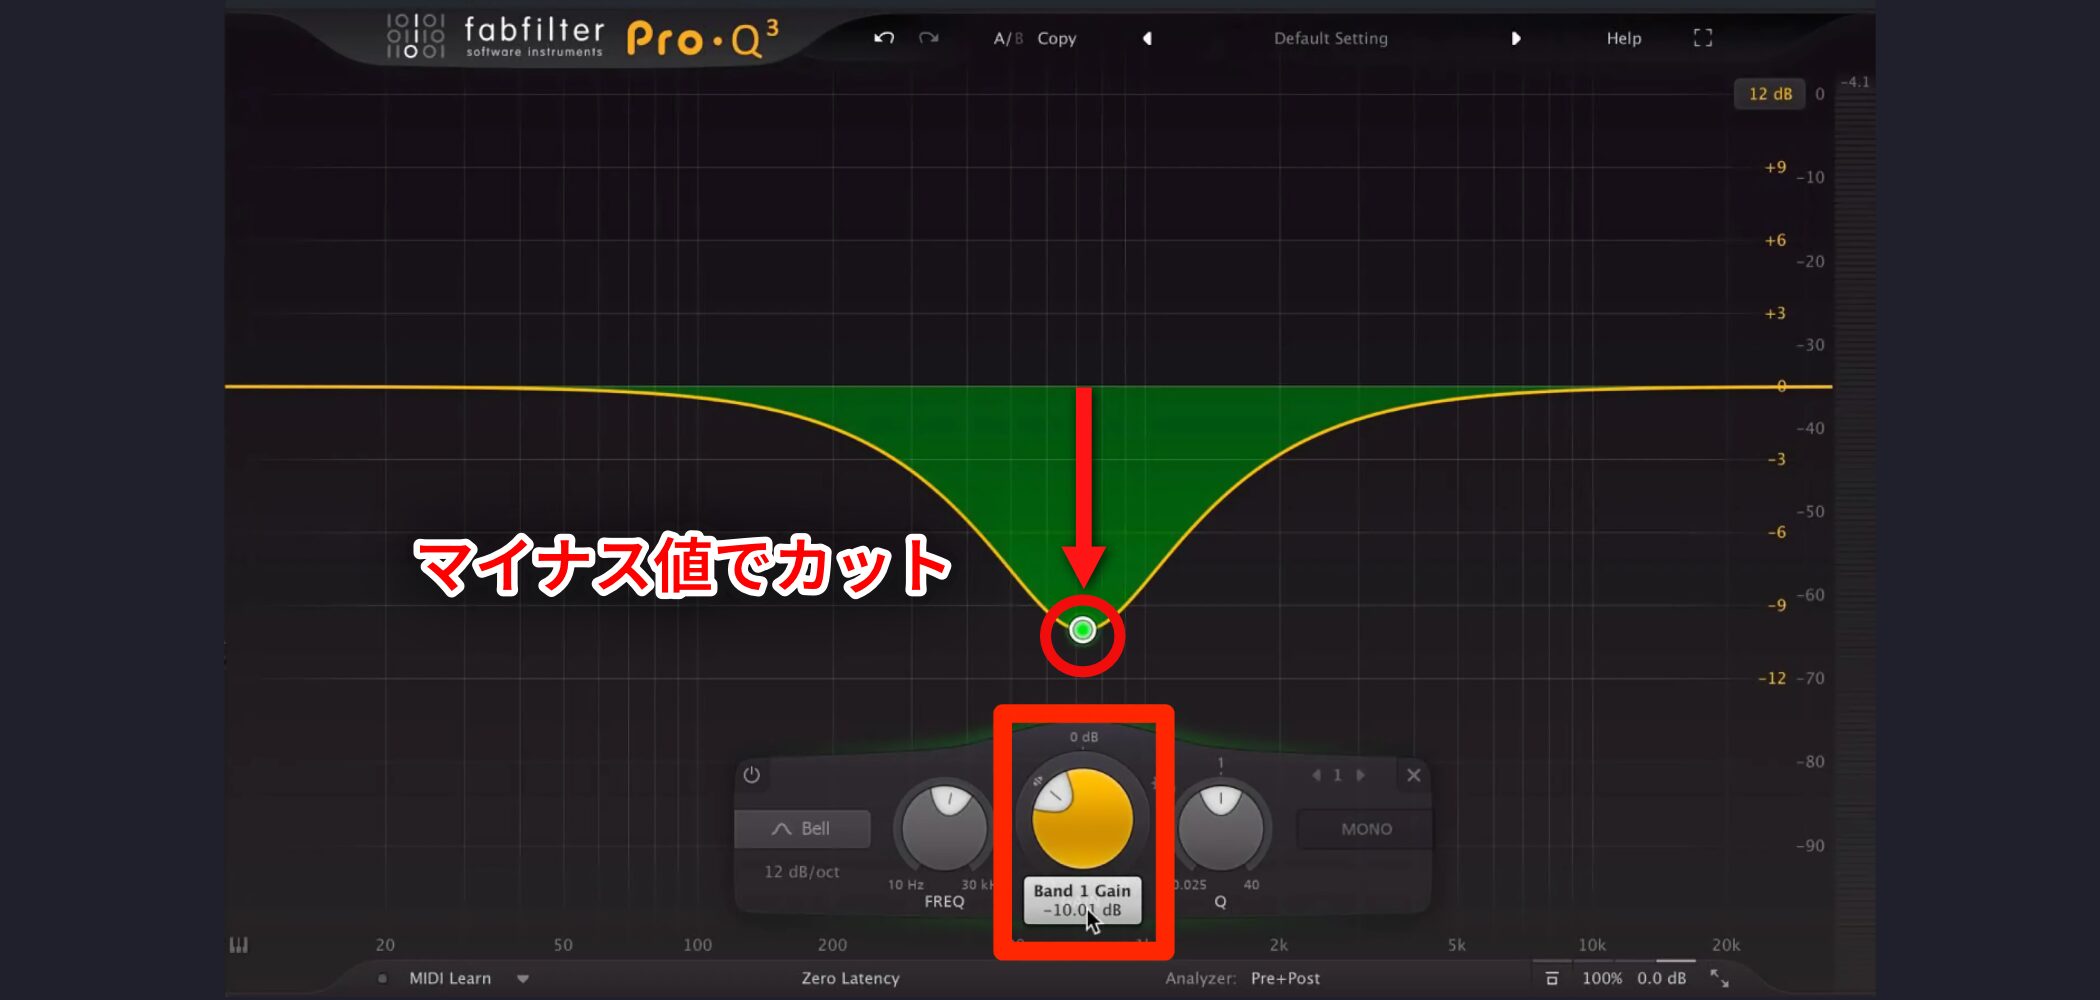
Not only can you boost a range, you can also set a negative value to cut unneeded ranges.
Q
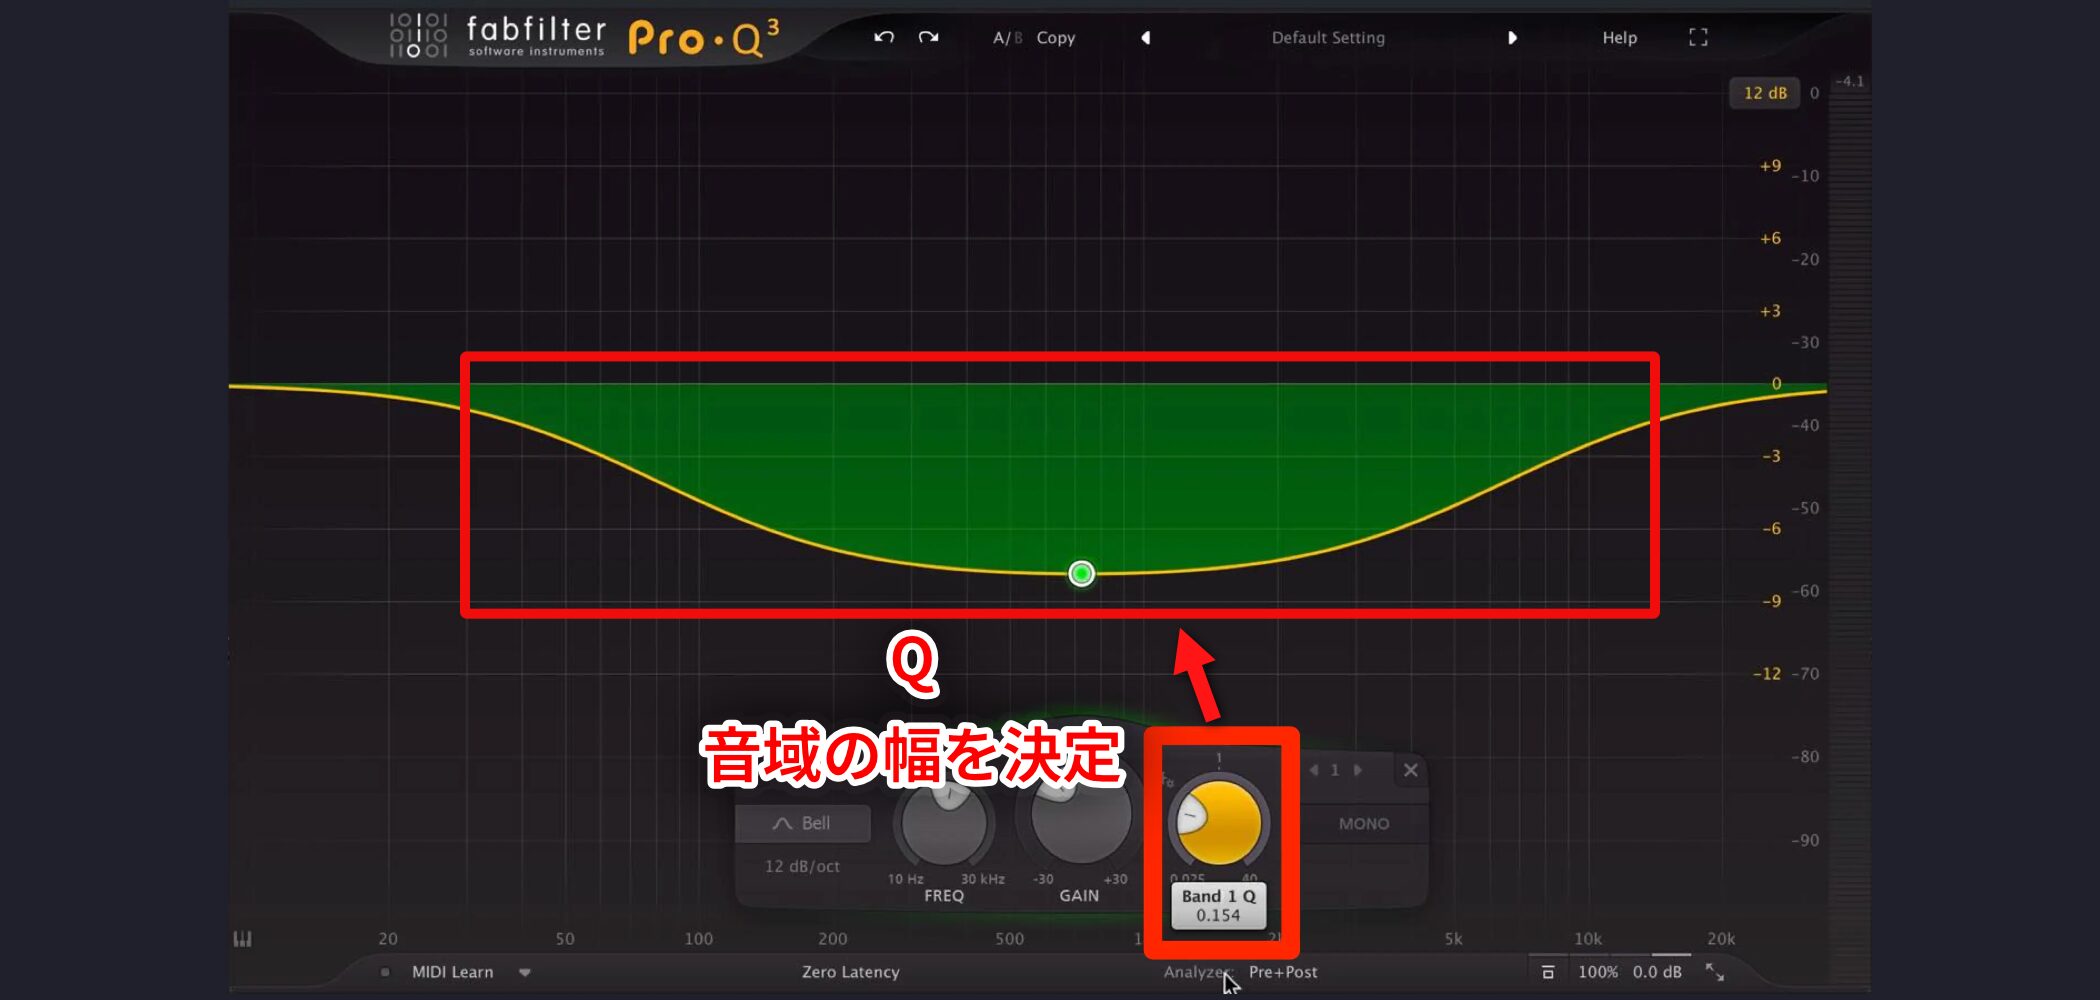
Q determines the width of the range adjusted with Gain.
This lets you adjust a targeted spot precisely without affecting the surrounding ranges.
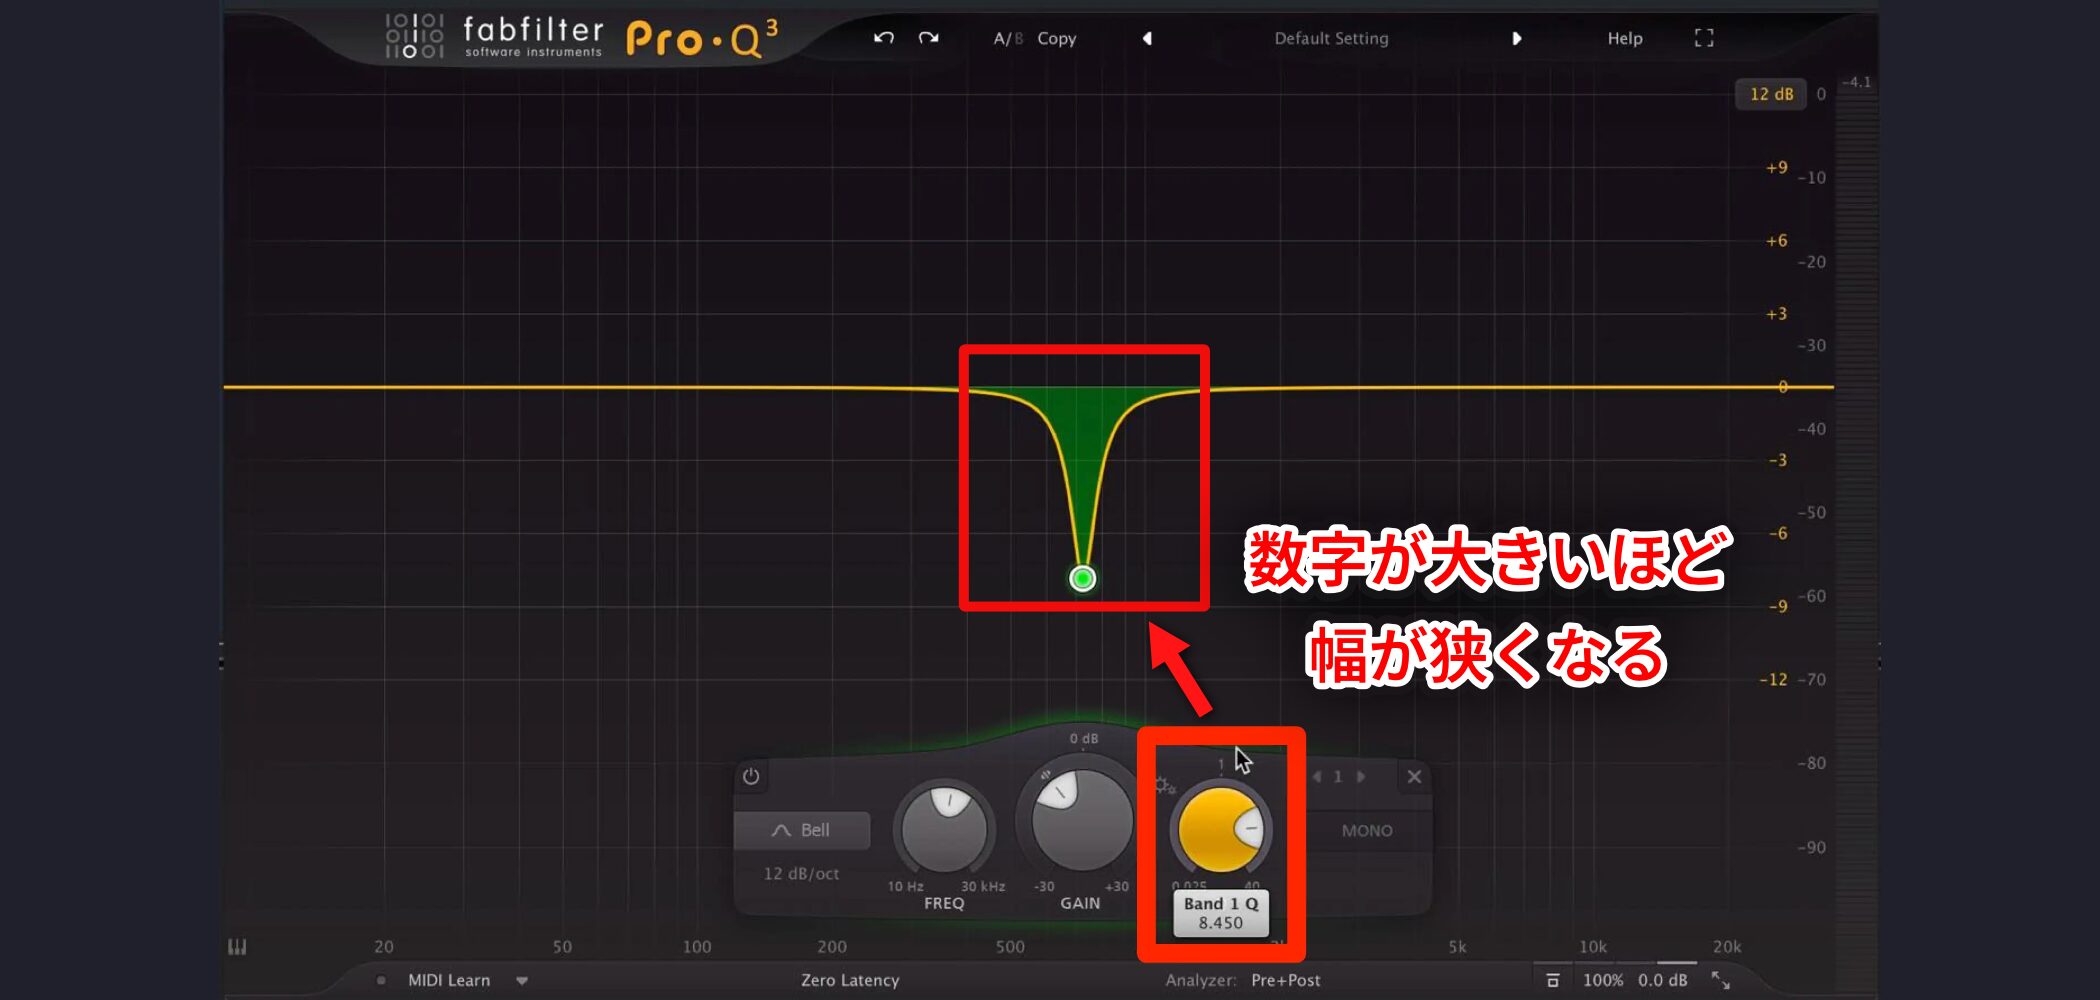
A higher number narrows the width, and a lower number widens it.
Shaping Sound with Several Sets of the Three Knobs
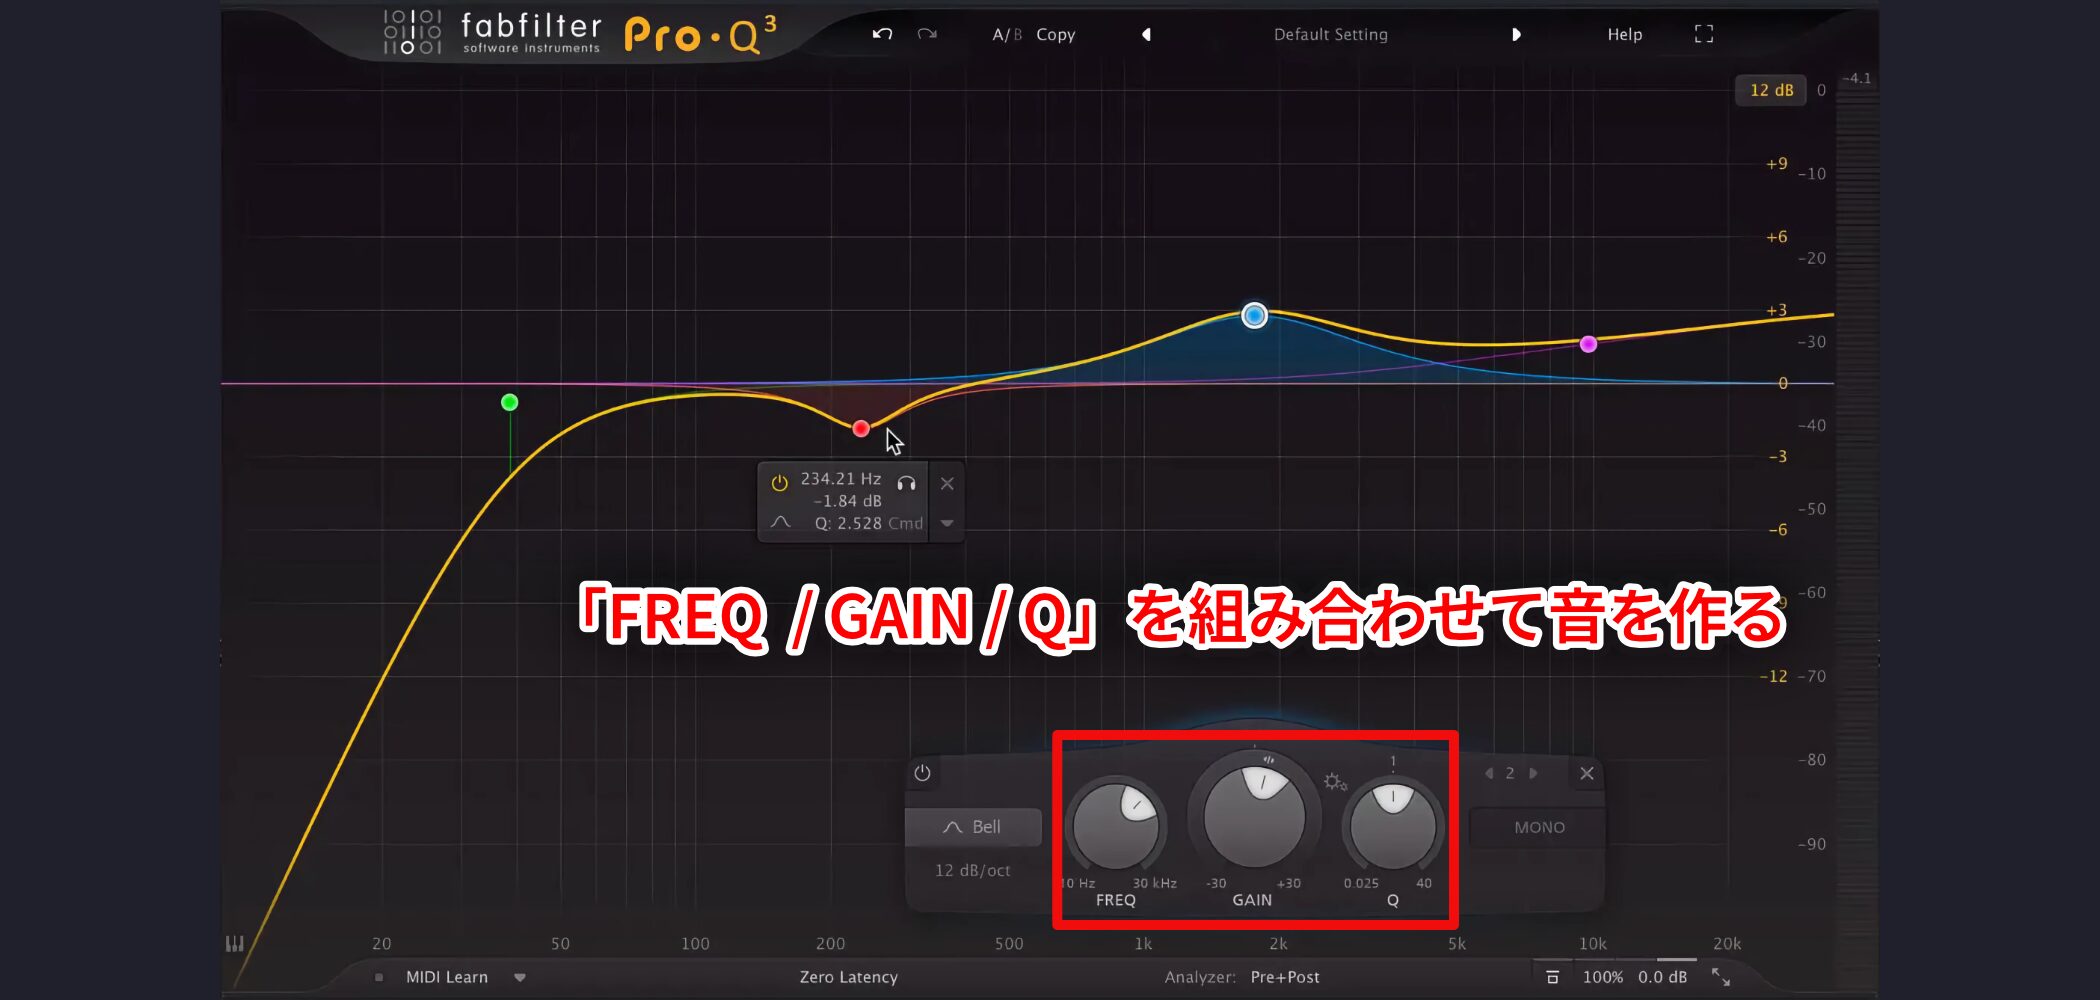
Most EQs have several sets of these three knobs, and you combine them to shape the sound.
EQ at the Center of Mixing (Adjustment Techniques)
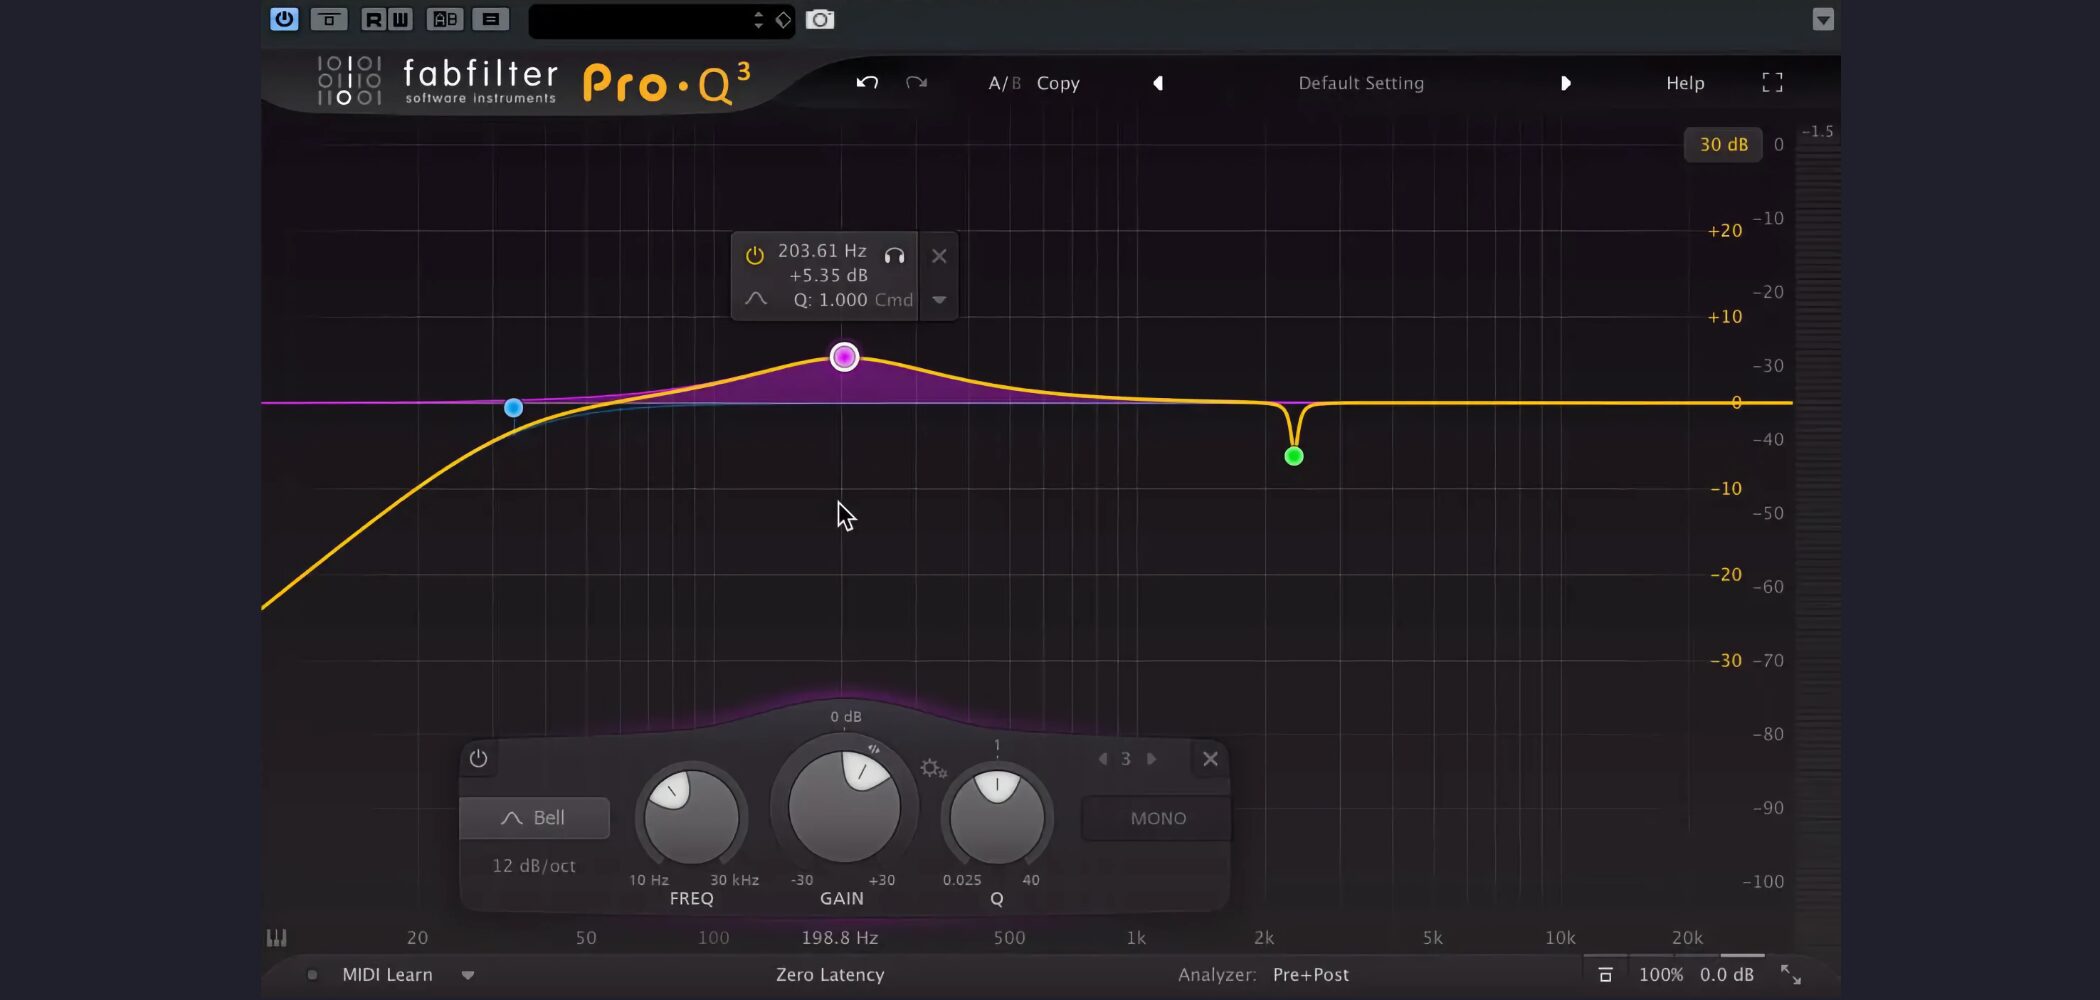
The core tasks in mixing are adjusting EQ, compression, and volume, and EQ is also found on audio systems and guitar amps.
EQ is used to change and refine tone; in DTM, you apply it to each track to create the tone you want.
However, until you get the hang of it, it is hard to know how to set it.
In a word, anything goes (lol).
If it sounds good, it is good.
But that would end the discussion, so let's look at a few tips!!
Tip 1: Cut the Sub-Lows
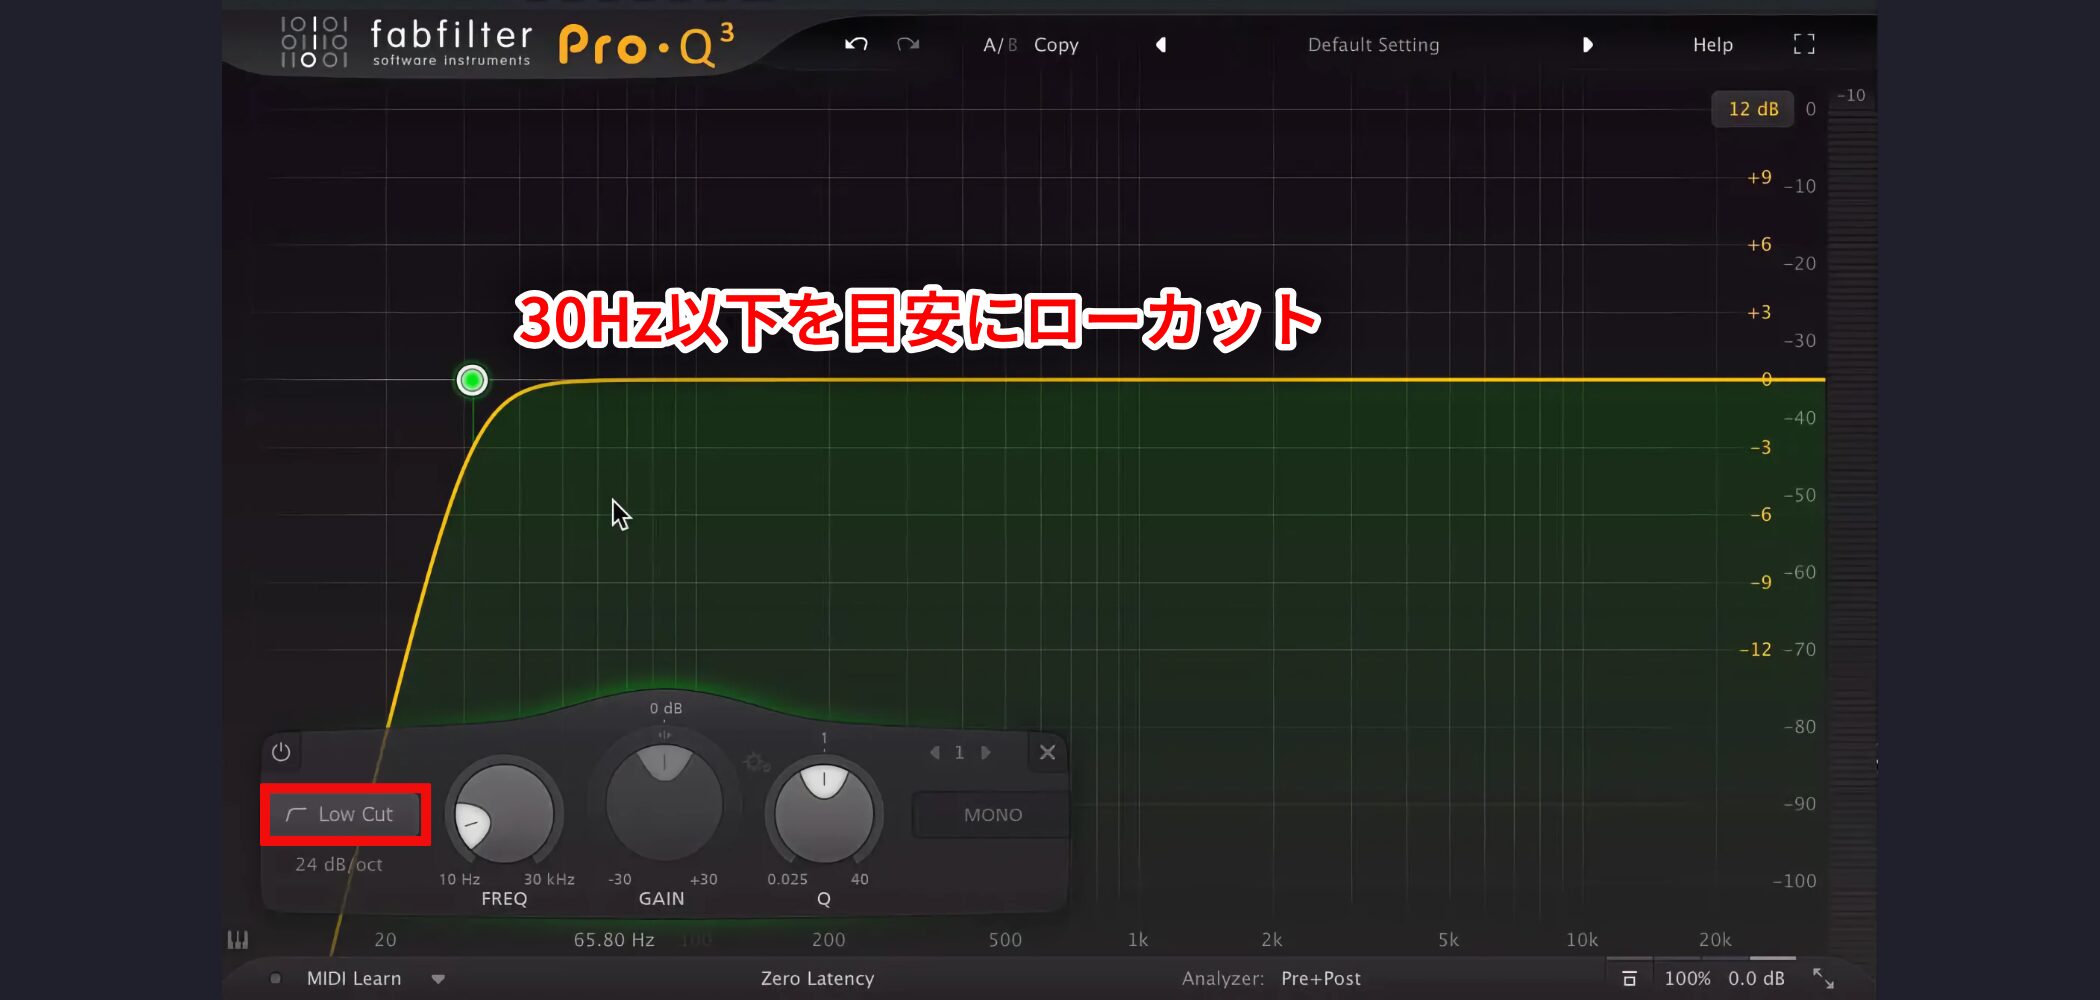
Apply a low cut at around 30 Hz or below, a range that is hard for the human ear to hear.
This band is hard for humans to hear, but it gets in the way when raising loudness, so cutting it is standard practice.
*Depending on the sound, this can have an effect, so check carefully as you do it.
Tip 2: Find and Cut Excess Points
EQ tends to make people focus on boosting, but as in Tip 1, the idea of cutting is extremely important.
Cutting unneeded bands avoids clashes between sounds and gives you a clean, cohesive mix.
So, how do you find unneeded ranges? Let's explain the method.
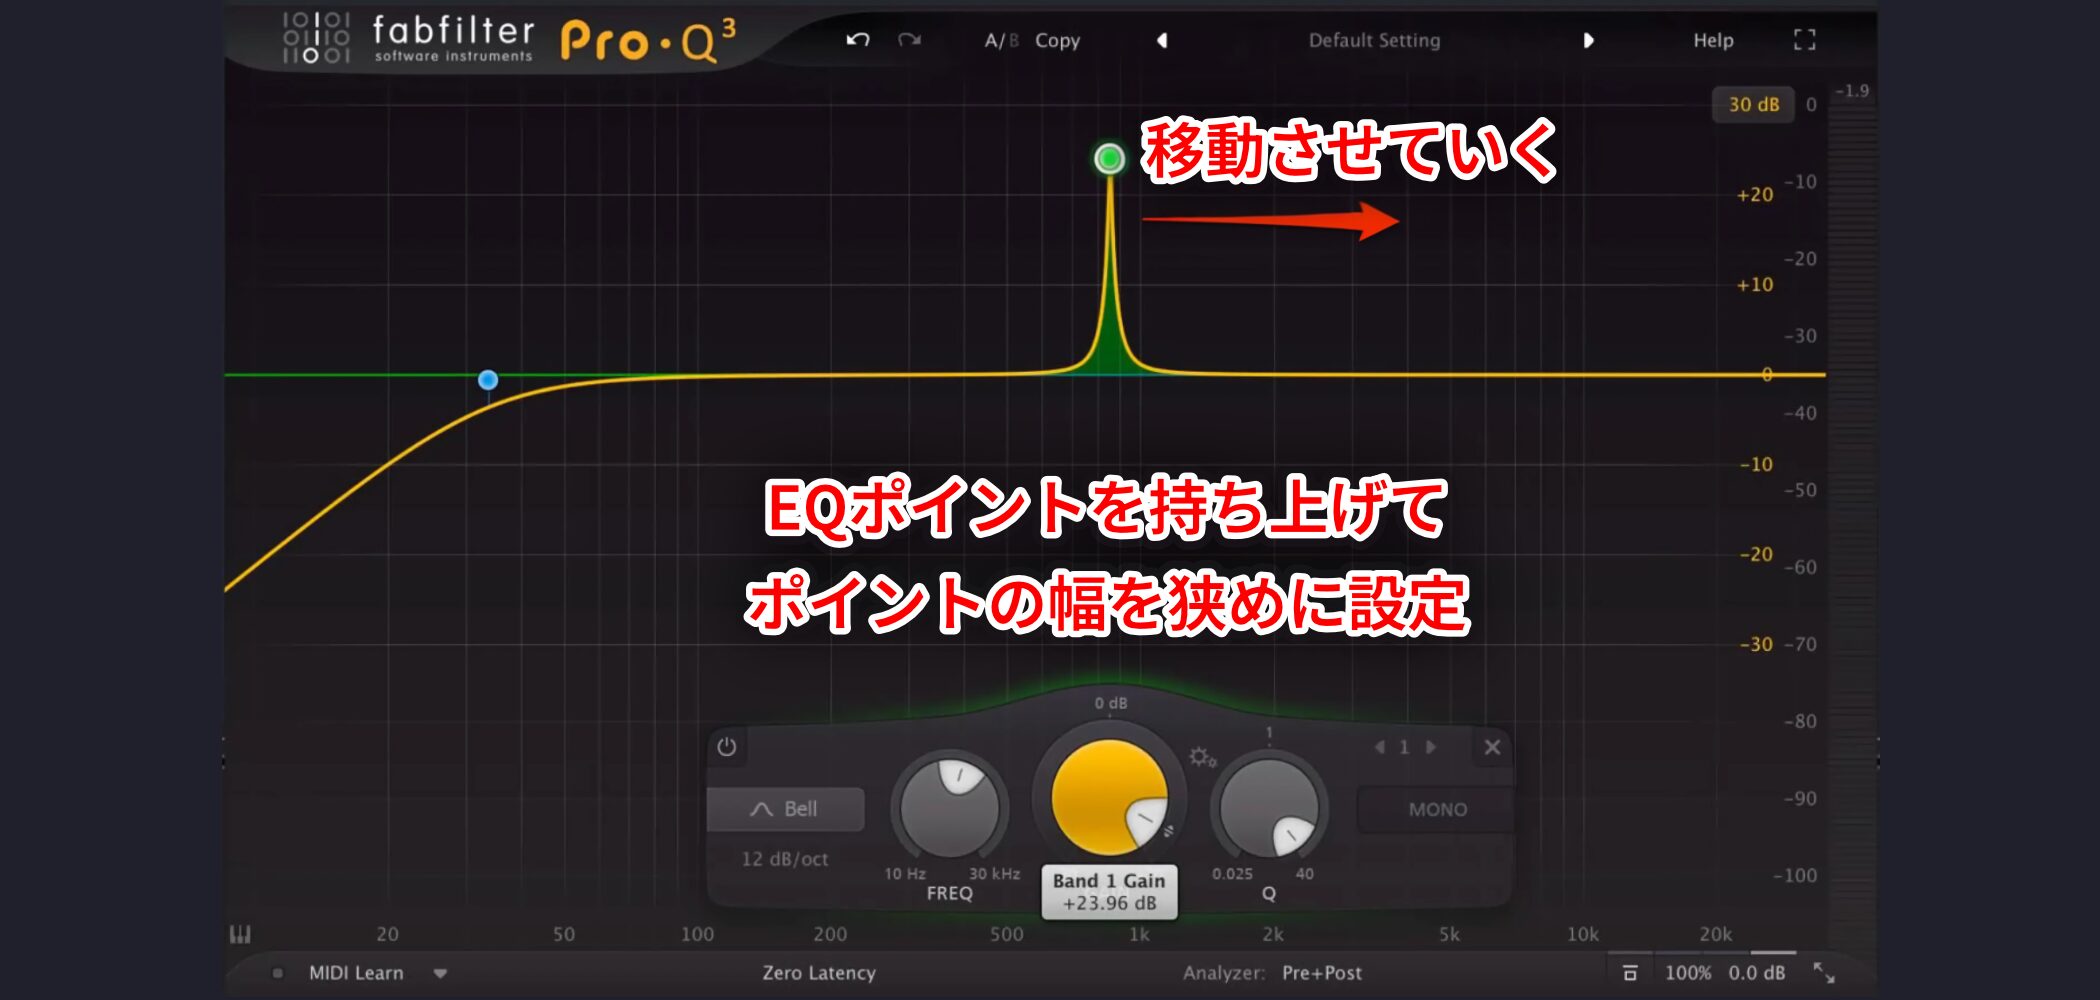
Look at the image above.
Raise an EQ point all the way up like this and make the Q (the width of the point) narrow.
Then, as you move this point gradually to the right, you will find spots that are clearly harsh.
When you find such a point, cut that area.
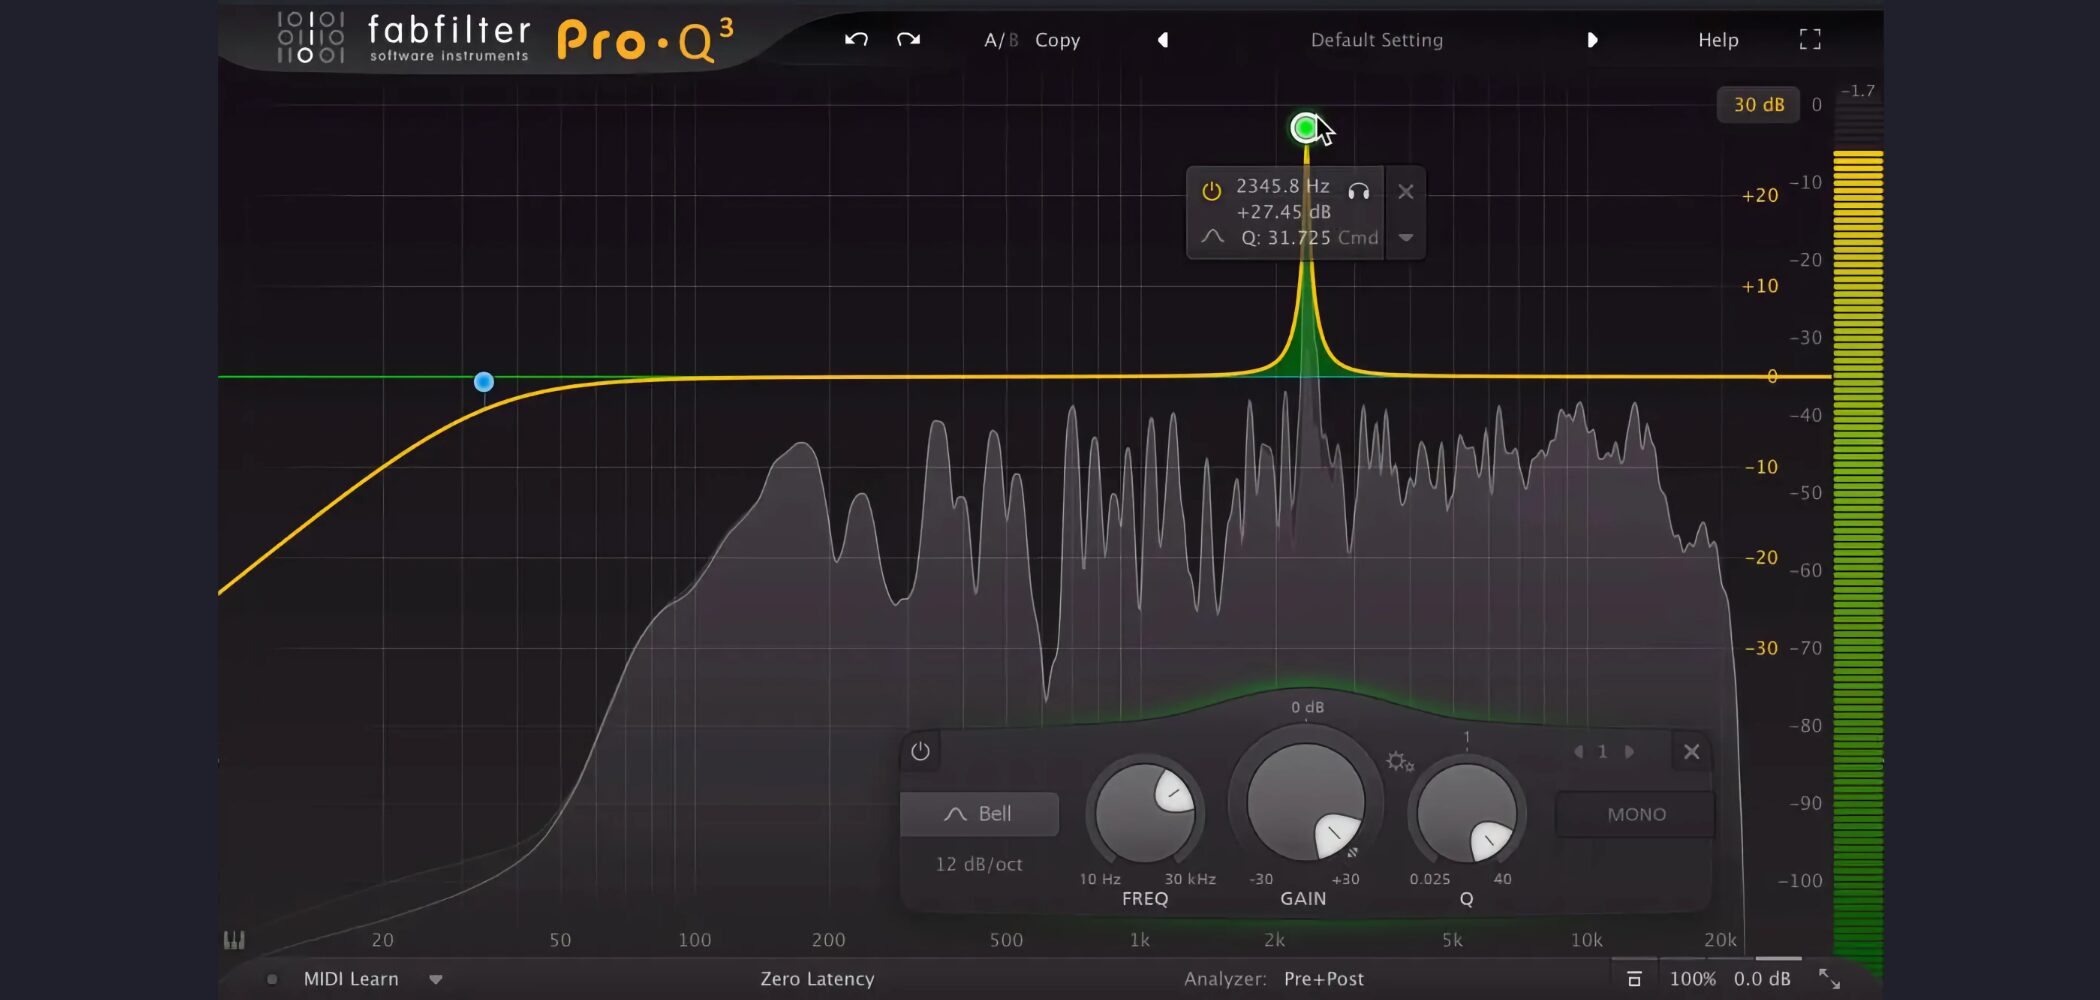
A harsh point has been found.
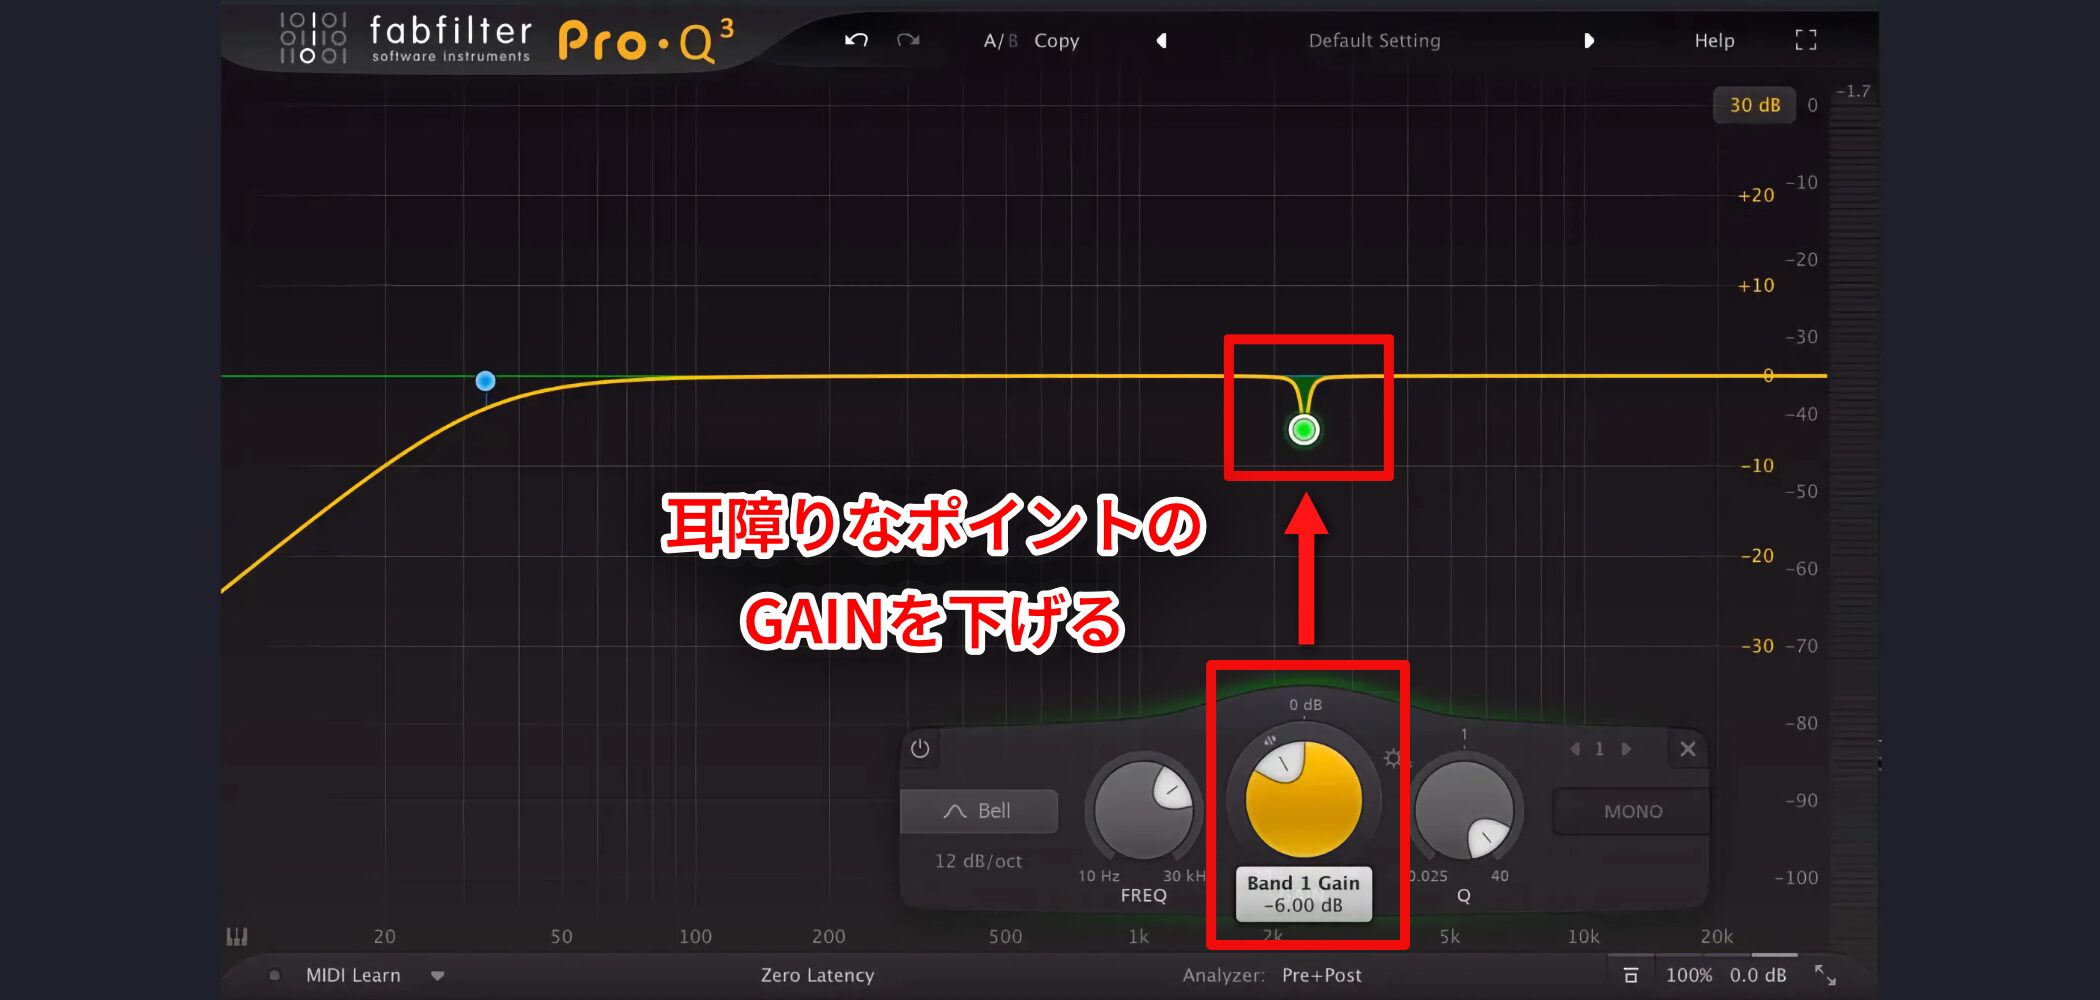
Lower the Gain (volume) at that point.
This time we cut only one spot, but cutting several is also fine.
In fact, that will probably be the more common case.
The sound becomes much cleaner, the compressor works better, and loudness improves as well.
Tip 3: Check the Change with Bypass
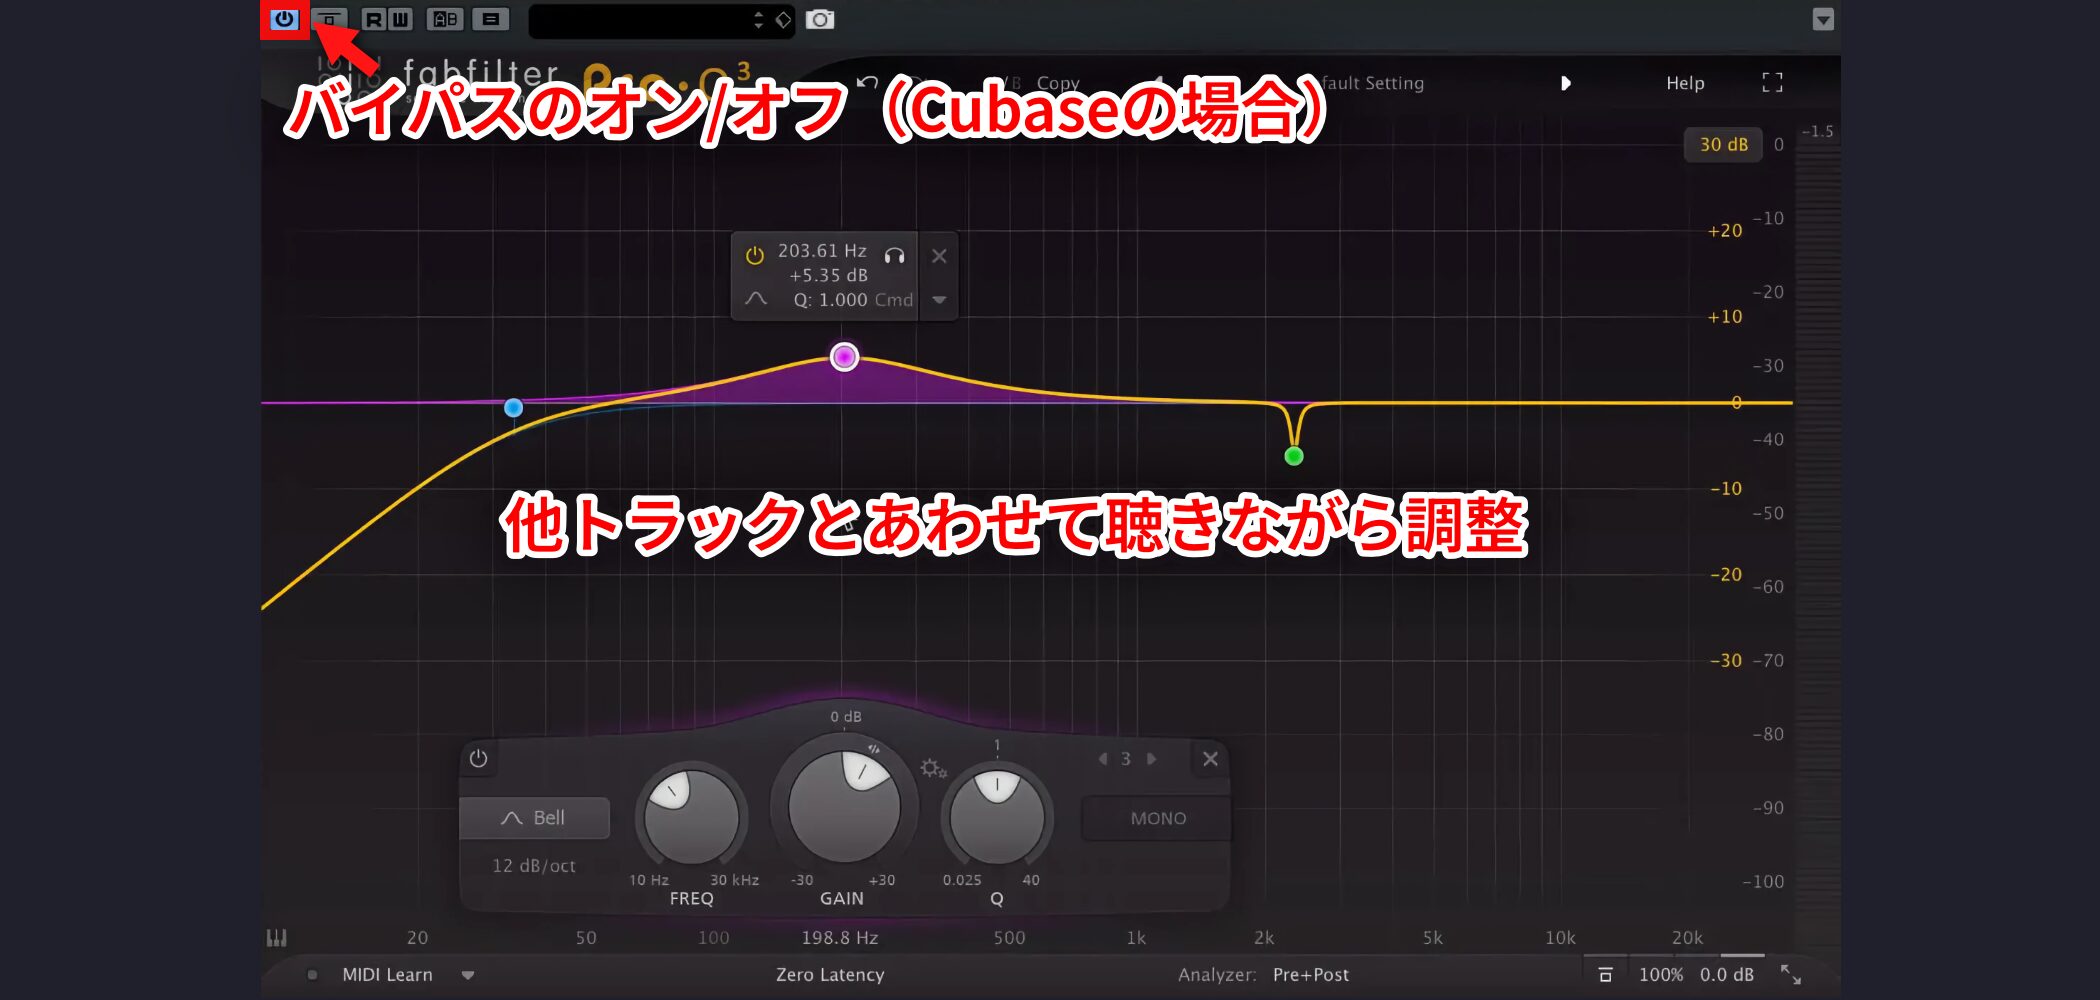
Once you have adjusted the unneeded bands, raise EQ points to give the sound personality and character!
This part is entirely up to your taste. Make a cool sound, but do not focus on just one track: adjust while listening together with the other tracks.
Also, DAWs generally have a "bypass" function that temporarily disables the EQ, letting you compare the sound before and after EQ, so use bypass to check that the sound is really improving as you go.
Frequently asked questions
Q1. Which is more important in EQ, boosting or cutting?
Cutting is extremely important. Cutting unneeded bands avoids clashes between tracks and gives you a clear, cohesive mix. Thinking in terms of cutting rather than boosting is the key to improving your EQ.
Q2. How do I use the roles of each band?
The lows adjust loudness and presence, the mids personality and character, and the highs clarity and sparkle. The human ear is sensitive to the mids, so handling the mids is where your mixing skill shows.
Q3. Why cut the sub-lows?
Sub-lows below 30 Hz are hard for the human ear to hear, but they get in the way when raising loudness, so removing them with a low cut is standard practice. This makes the overall mix easier to balance.
Q4. Which EQ type should beginners start with?
The peak (bell) type is the most orthodox and most frequently used, so we recommend starting with it. It allows flexible sound shaping and makes the basics easy to master.
NEW ARTICLES
Latest English Articles