
Released by Solid State Logic in 2023, UF1 is a compact DAW control surface with a motorized fader, four V-Pots, a jog wheel and displays. This hands-on guide covers transport, track selection, automation, configurable commands and SSL plug-in integration. Its DAW-specific profiles and considered layout impressed us in the original review. The operations below reflect the software and DAW setup demonstrated at that time; available functions can vary with the integration and software version.
A Powerful DAW Controller from SSL
Solid State Logic (SSL), also known for its growing range of plug-ins, has released the UF1 DAW control surface.
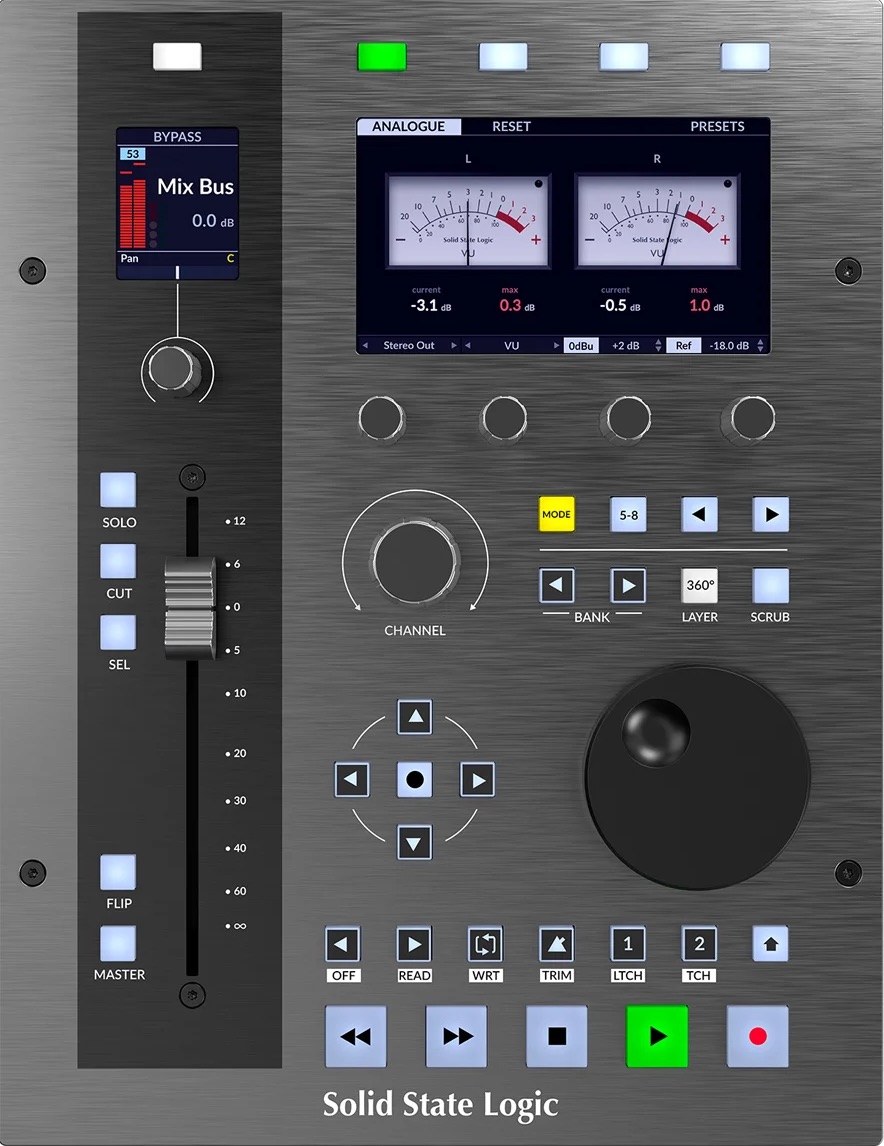
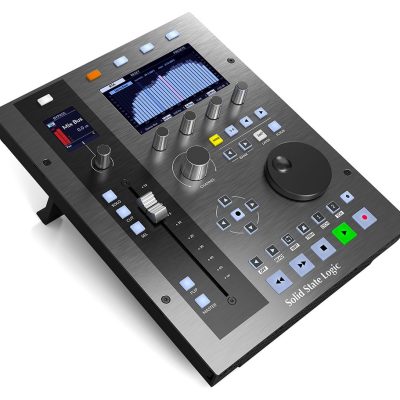
Beyond its premium appearance, its carefully considered controls made it one of the most accomplished DAW controllers we had tried at the time of this review.
- Dimensions quoted in the original review: 205 × 265.9 × 62.5 mm.
- Weight: 1.8 kg
This article takes a detailed look at how to use SSL UF1.
If you have not completed setup or are unsure about the configuration, our separate guide covers the full process. Read it first if needed.
Contents
- 1Transport Controls
- 2Track Control with the Motorized Fader
- 3Writing Automation with the Fader
- 4Controlling Volume with the Four V-Pots
- 5Focus Mode: An Alternative to the Mouse Wheel
- 6Instant Access to the Master Track
- 7Assigning Commands and Shortcuts to Buttons
- 7.1Running Your Assigned Commands
- 7.2Editing Other Parameters with the Soft Keys
- 8Using the Meters
- 8.1Displaying Metering on UF1
- 9Integration with Plug-in Mixer
- 9.1Operating Plug-in Mixer
Using SSL UF1
Let's get straight into UF1's controls.
Work through them one at a time.
Transport Controls
These are the familiar transport controls found on a DAW control surface.
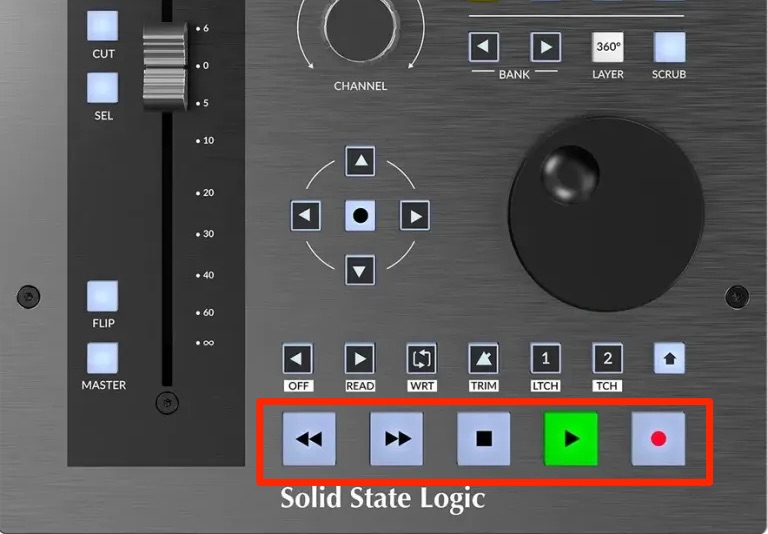
Frequently used tasks include playback, recording and moving along the timeline.
The buttons' appearance matches their functions, making them easy to identify.
The DAW-specific profiles also helped provide stable operation in our test.
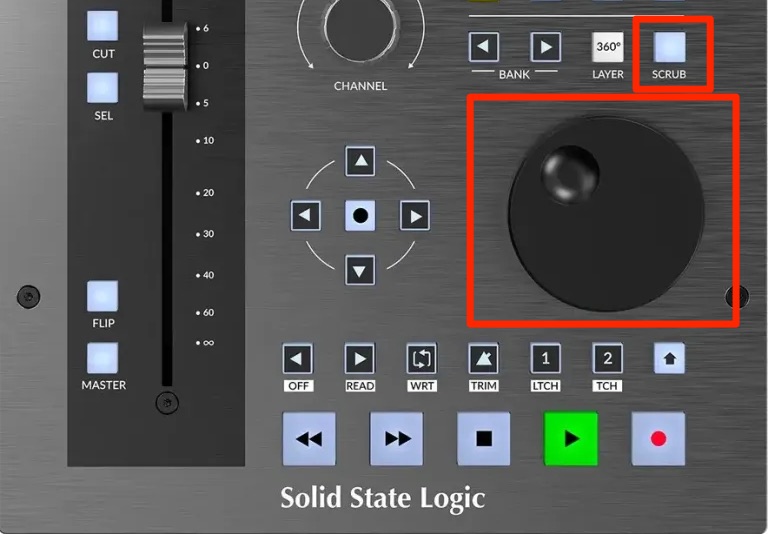
You can turn the jog wheel to move along the timeline. With Scrub enabled, you can audition audio while scrubbing.
This is useful for locating edit points or checking a small section for noise.
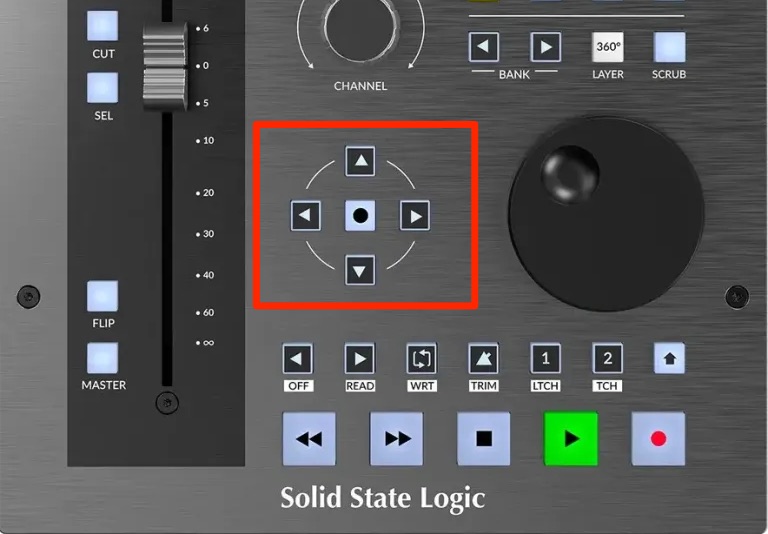
In the DAW shown here, the up/down cursor keys select tracks, while left/right selects events on a track.
When the center button is lit, the cursor controls switch to zoom functions.
Track Control with the Motorized Fader
Next, let's look at the motorized fader and the controls around it.
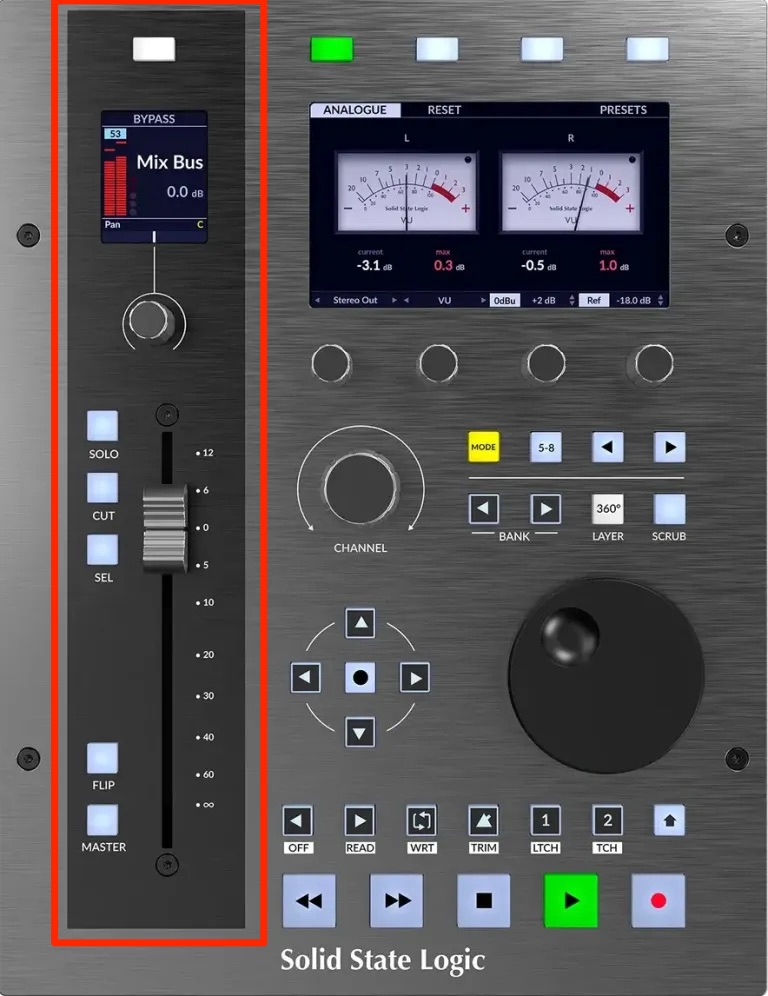
To control a track from this section, select its target on UF1; this target can be independent of the track selected in the DAW.
There are two selection methods.
1. Selecting with Fader Sel Mode
Use the encoder to choose a track directly.
This is convenient when there are relatively few tracks.
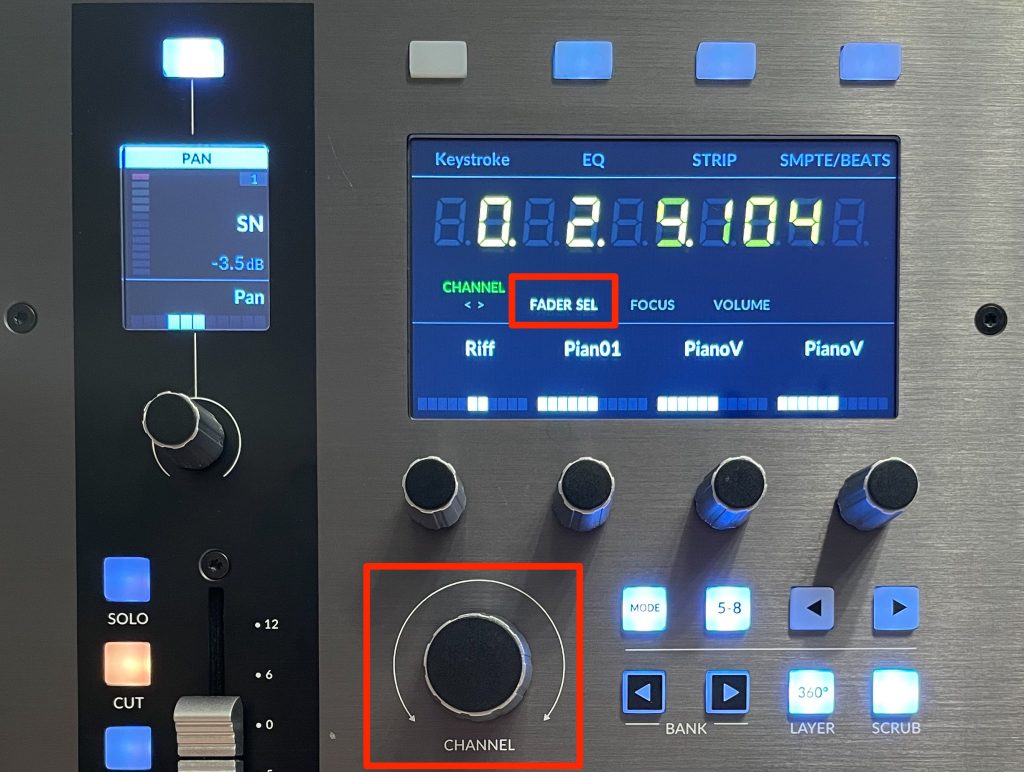
Press the Channel encoder, choose Fader Sel, then press the encoder again to confirm.
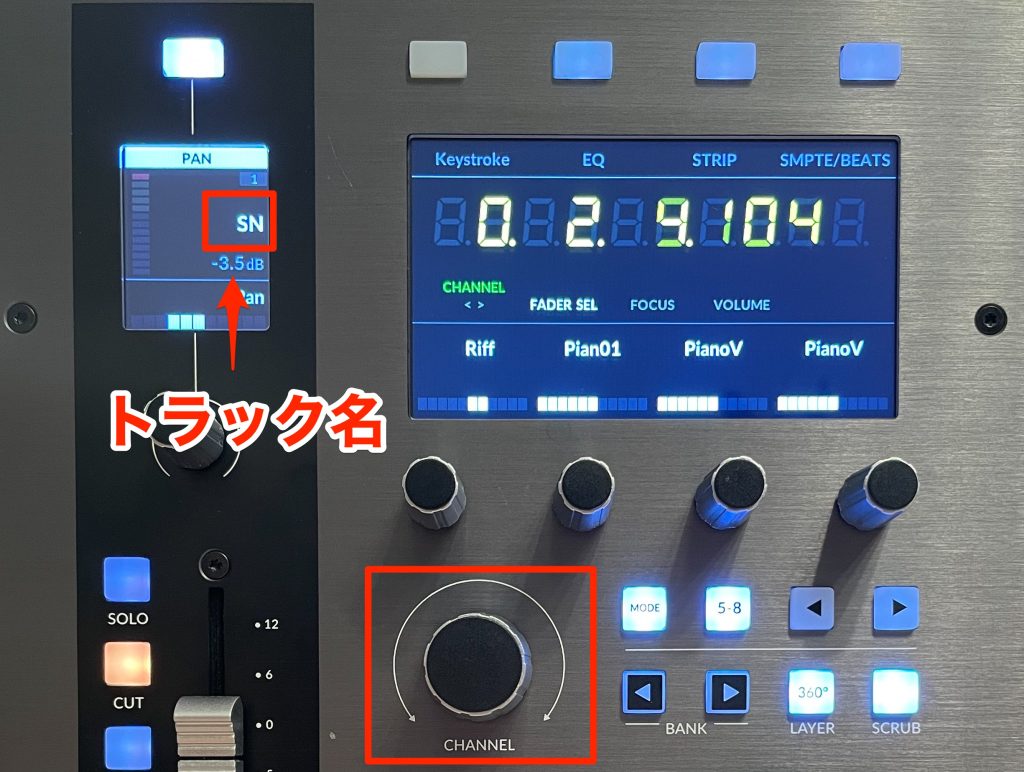
Turn the encoder to change the target track. Its name appears on the display.
This is the track the fader section will control.
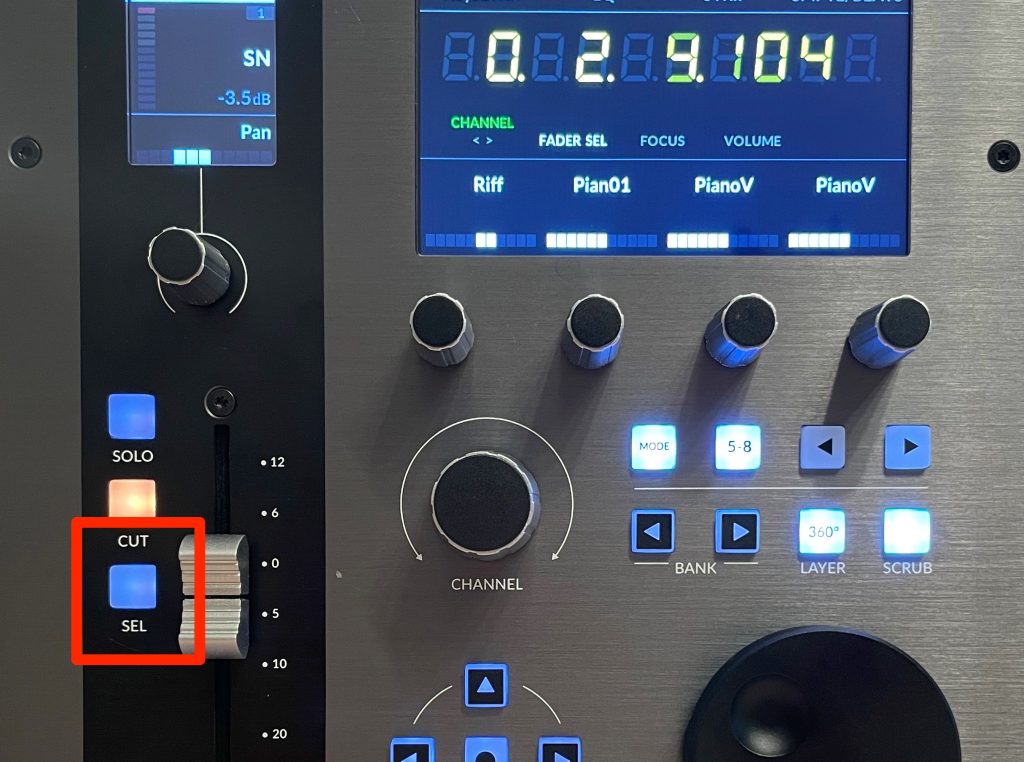
Press Sel beside the fader to select that track in the DAW as well.
2. Selecting with < > Mode
This method is useful with many tracks, allowing you to choose while watching the DAW's track list.
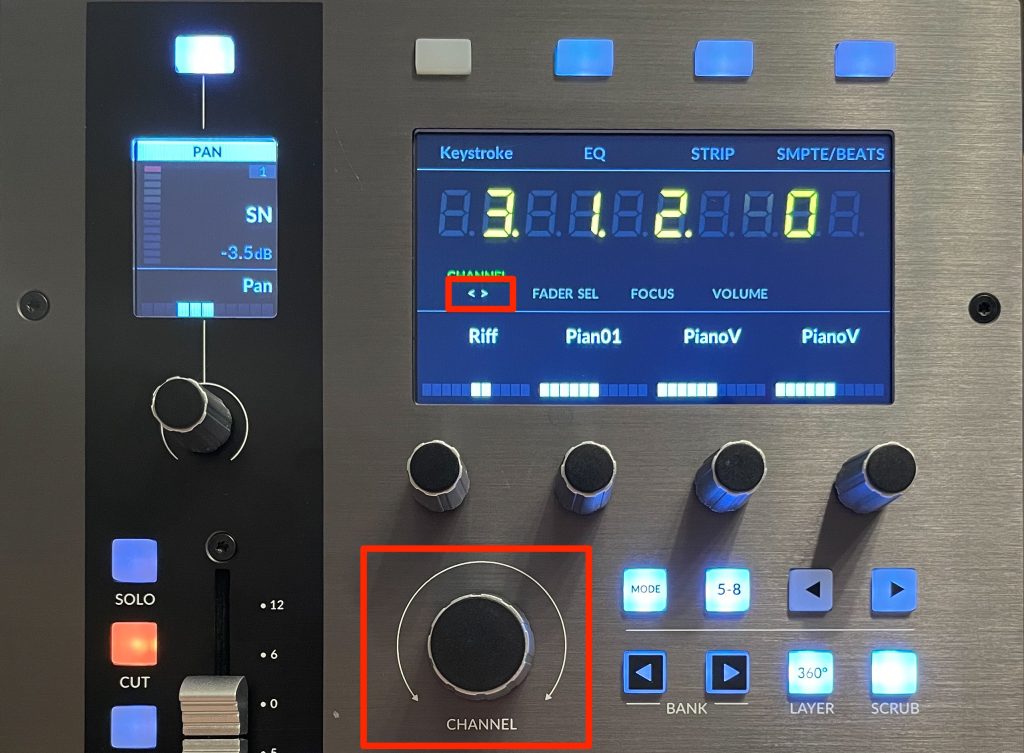
Press the Channel encoder, choose < >, then press again to confirm.
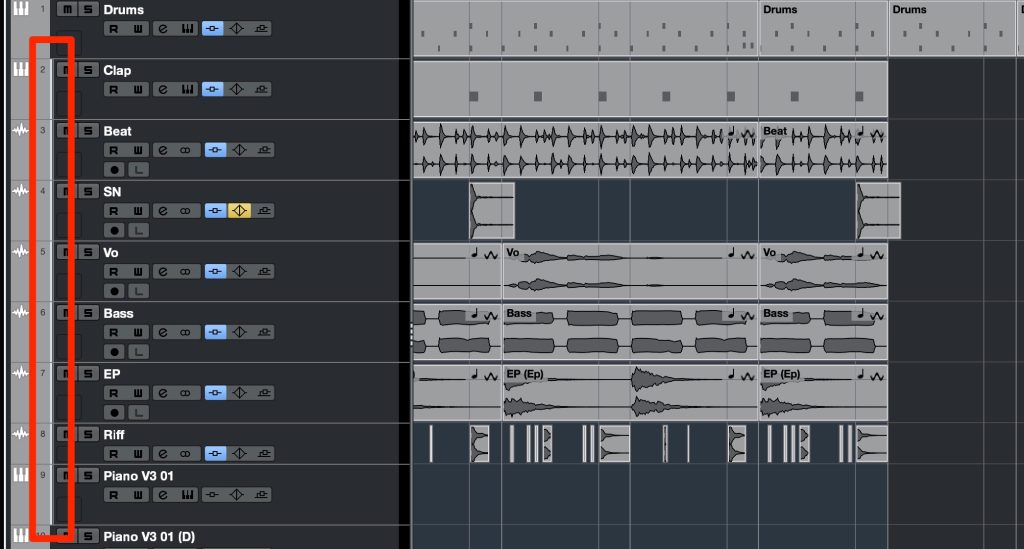
A white outline appears in the DAW track list in this example.
Here it is in the edit window, covering a bank of up to eight tracks.
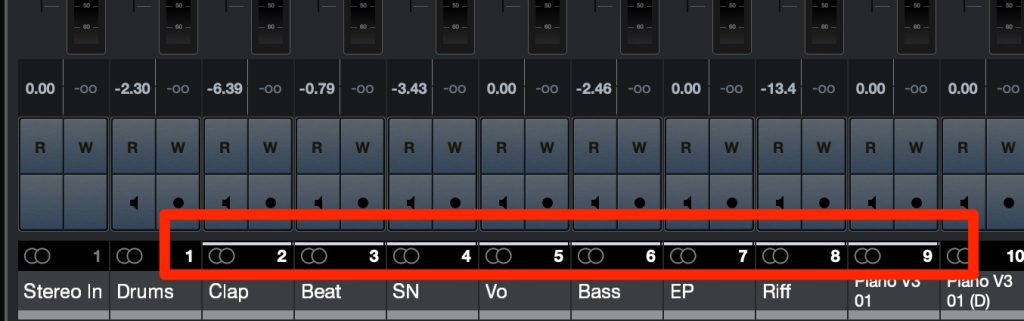
The same bank indication appears in the mixer window.
Turn the encoder to move this outlined bank.
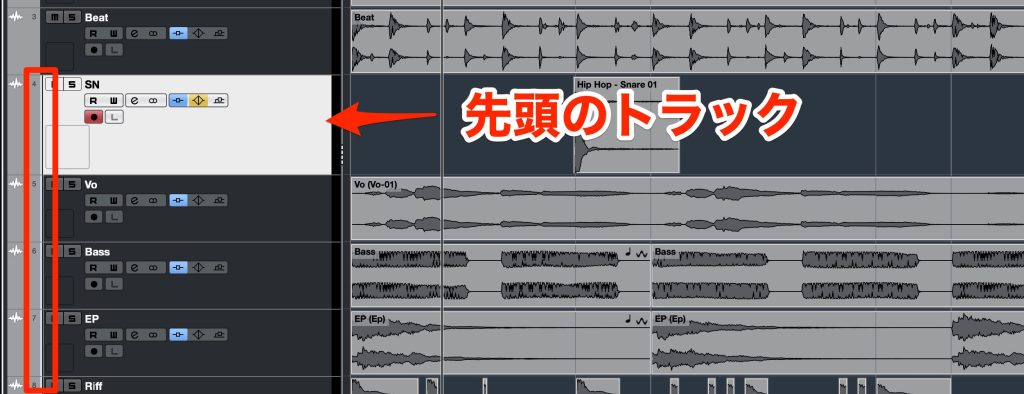
By default, the first track in the outlined bank becomes the control target.
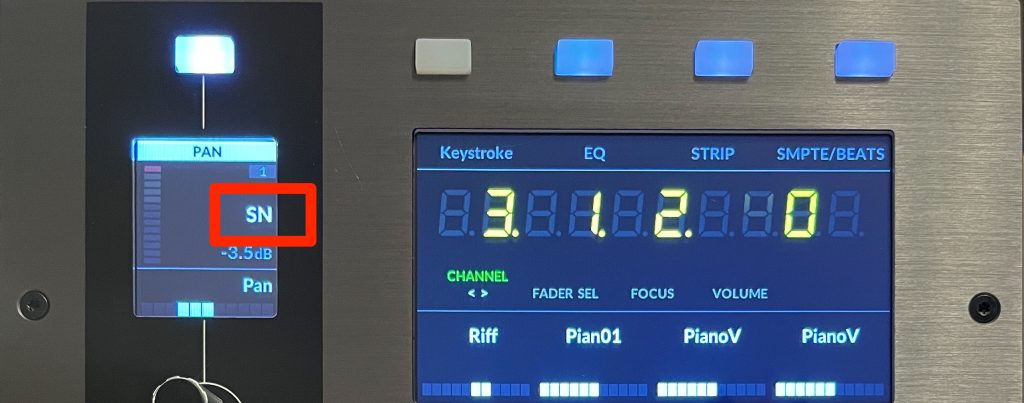
Its name also appears on the display.
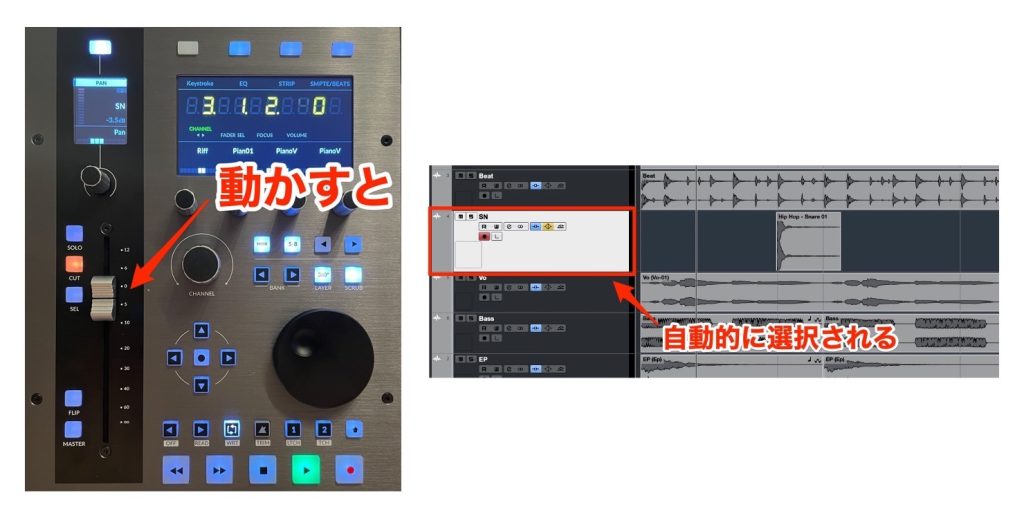
In this integration, selecting a bank in < > mode and operating the motorized fader or related controls also selects the corresponding DAW track.
This is useful when performing other edits discussed later.
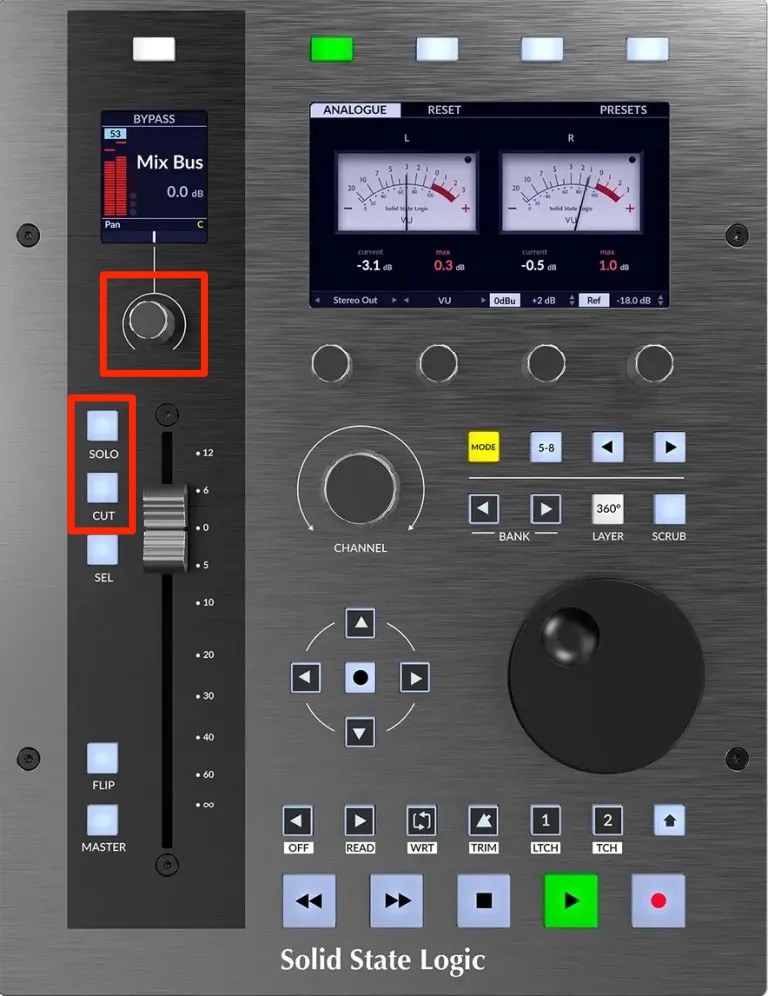
Alongside the fader, you can adjust pan and toggle mute or solo.
A Point to Watch
If the first track in the bank is not the current target, or you want to control another track within it,
switch to Fader Sel and choose the desired position, such as the first or third track.
Returning to < > mode retains that position within subsequent banks in the workflow shown here.
Writing Automation with the Fader
Writing automation is one of the main benefits of a physical fader.
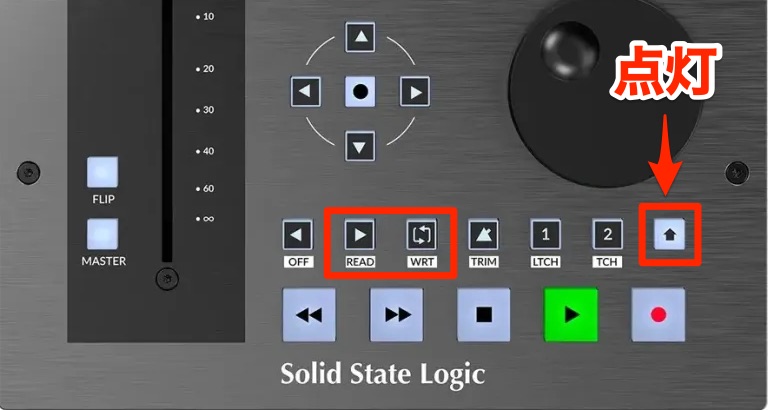
Enable Shift in the secondary transport section to access the demonstrated Read, Write and Off automation-mode controls for the DAW-selected track.
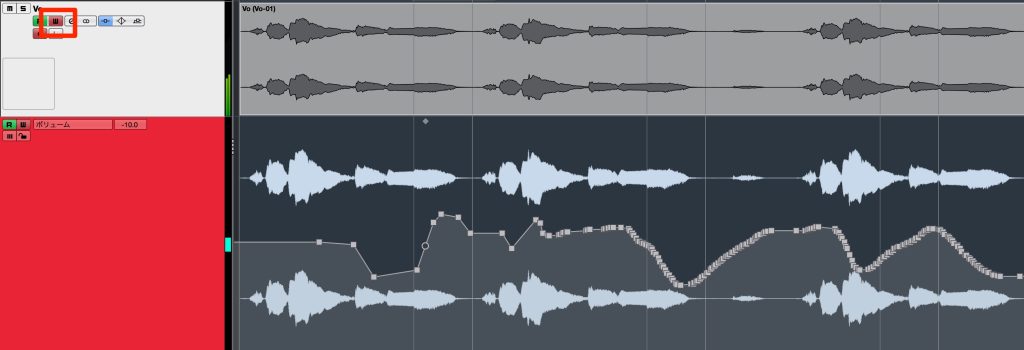
Set the target track to Write and start DAW playback.
Then move UF1's fader as desired.
The fader can control more than volume, including pan and other assigned parameters.
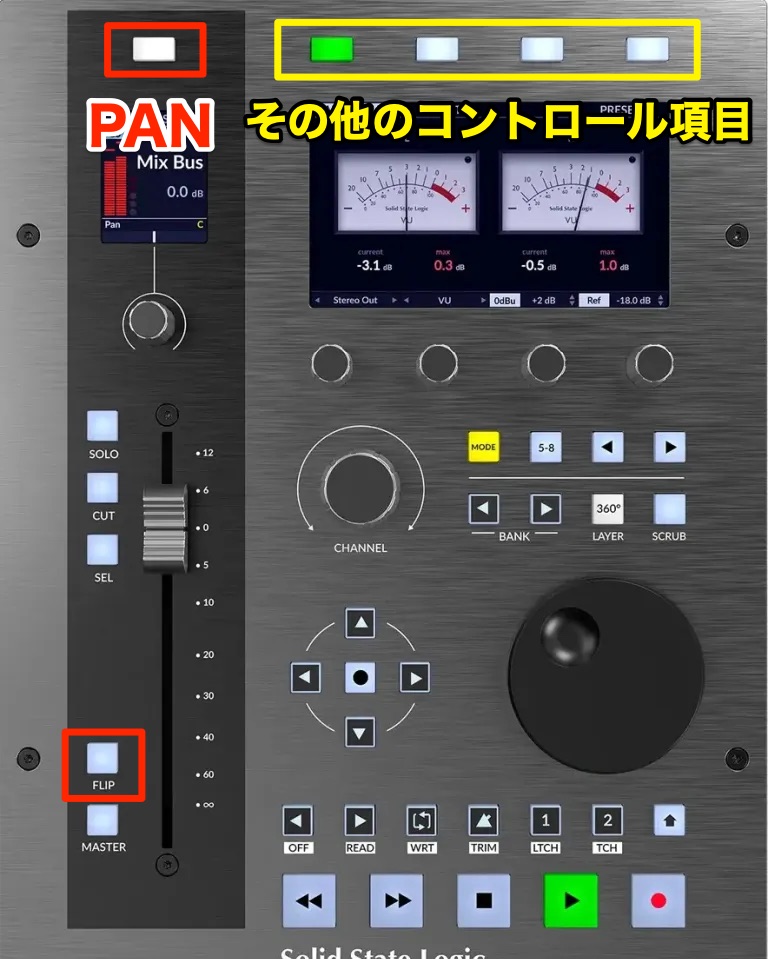
Select the control you want to adjust—Pan, highlighted in red here—then press Flip.
The selected function, Pan in this example, is assigned to the fader.
As with volume, you can record the fader's movements as automation.
Controlling Volume with the Four V-Pots
The fader is not the only way to control track levels.
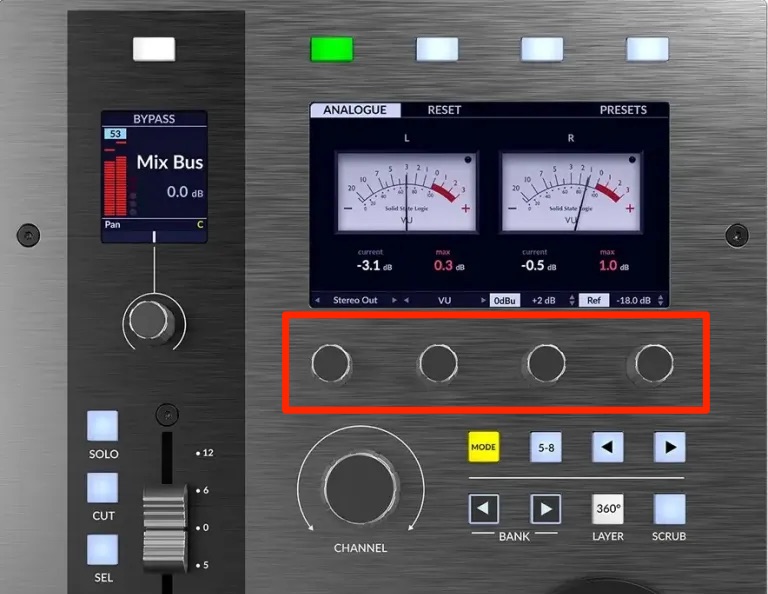
The four V-Pots can also change levels and write automation.
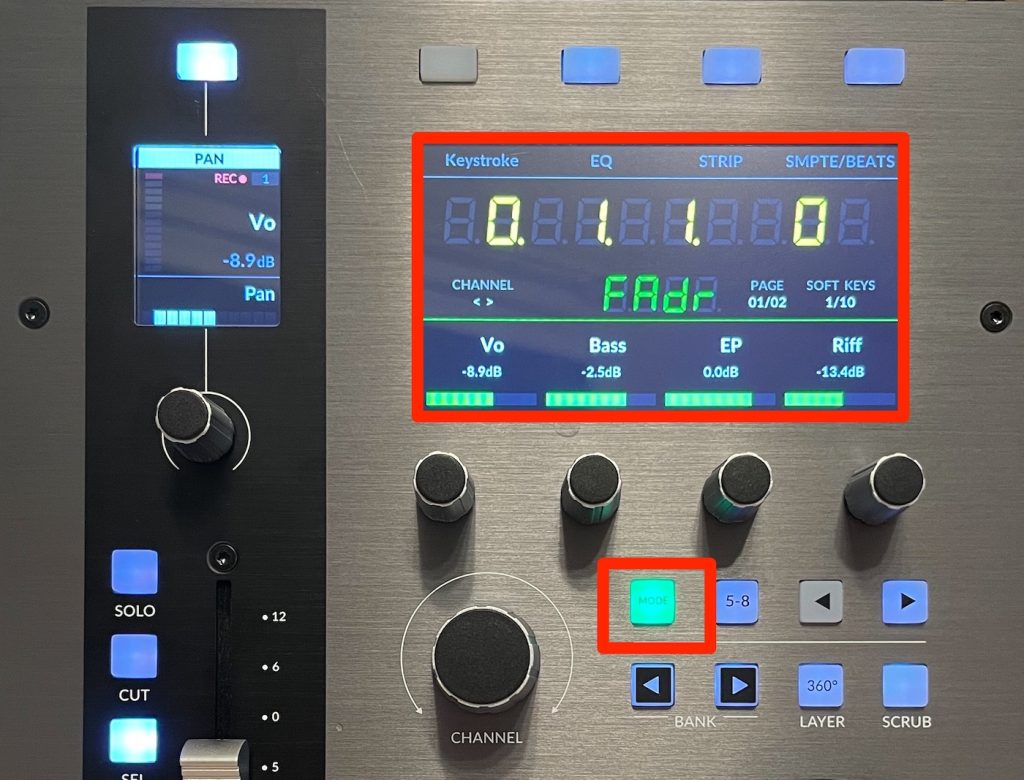
Press Mode to enter Fader mode.
The indicators turn green and the display shows “FAdr.”
The target tracks are the eight channels in the DAW's outlined bank.
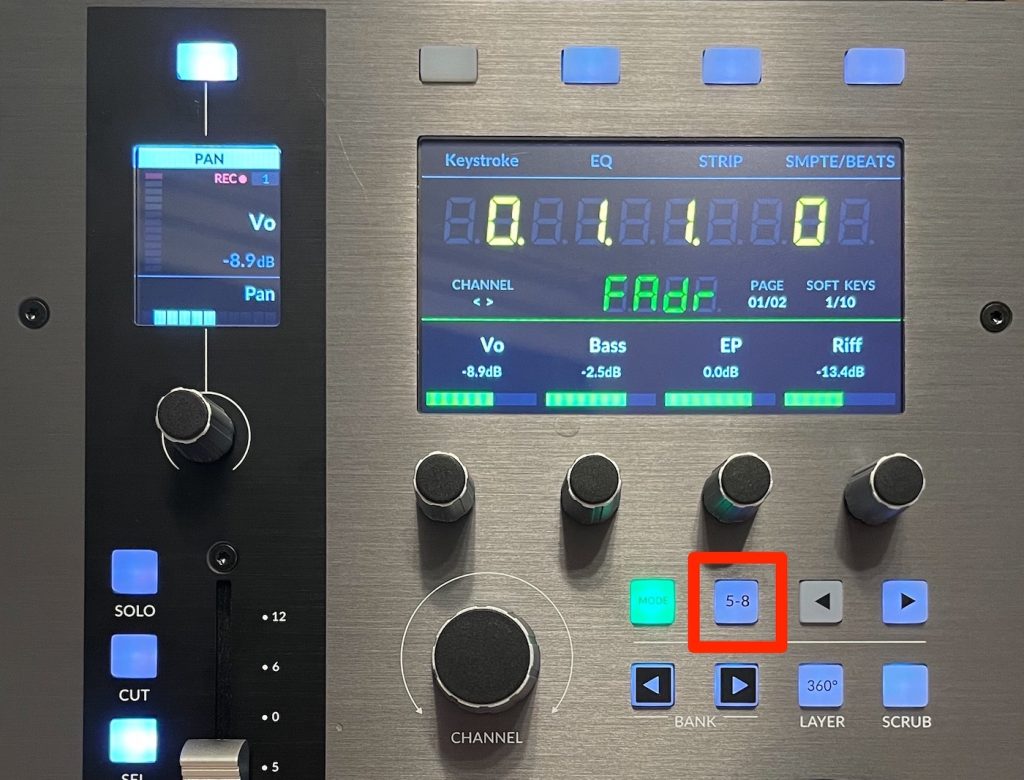
The four V-Pots control channels 1–4. Enable 5–8 to switch them to the latter four channels, 5–8.
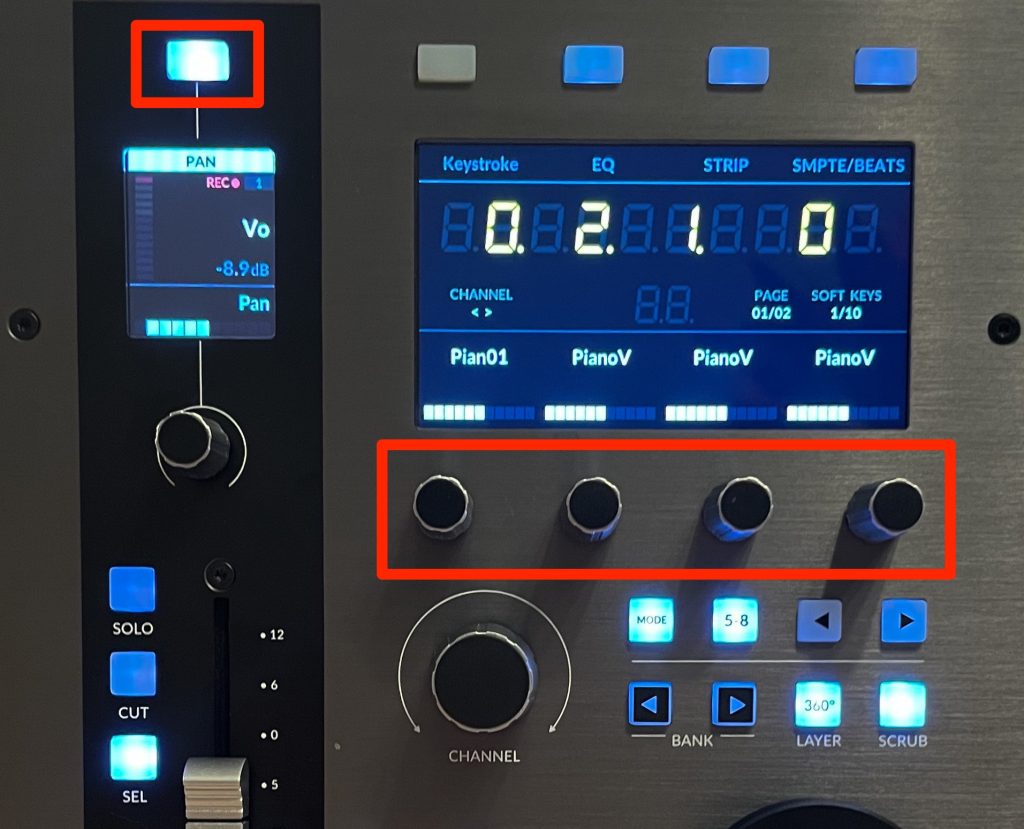
When pan control is active instead, the V-Pots can adjust pan.
V-Pot movements can also be recorded as DAW automation.
A Point to Watch
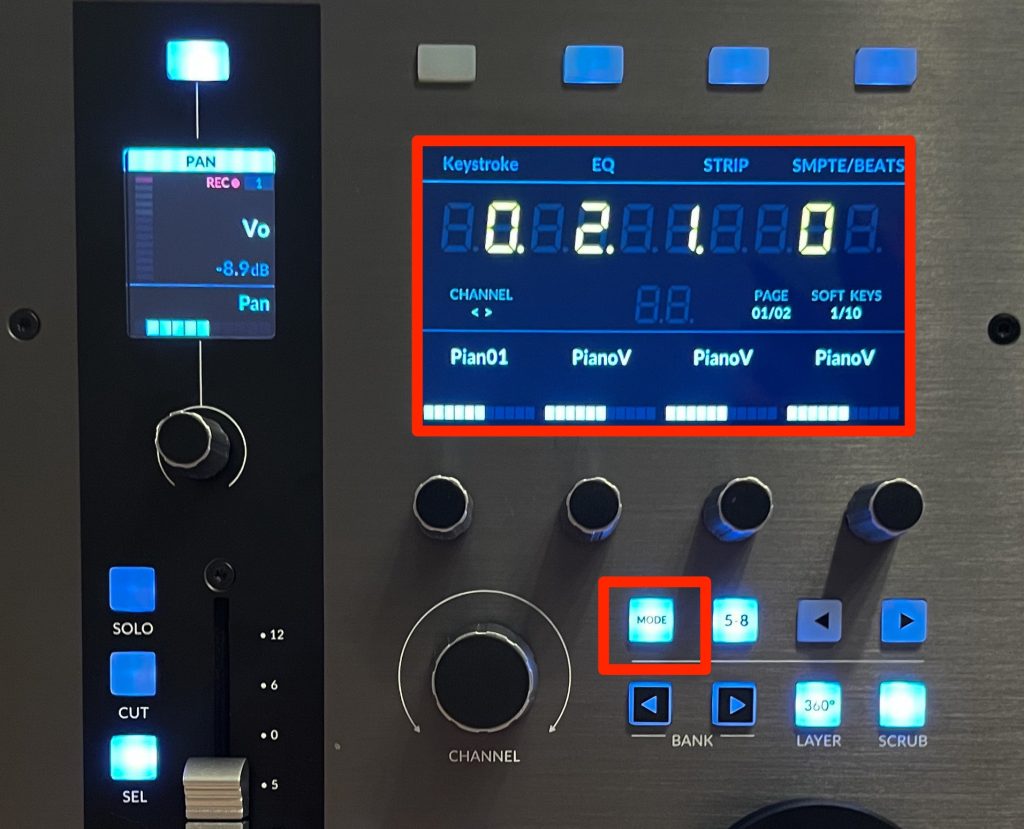
In Fader mode, the V-Pots control volume faders only, indicated by green highlighting and “FAdr.”
To control other parameters, press Mode to leave Fader mode. The illustrated alternative uses yellow indicators.
Focus Mode: An Alternative to the Mouse Wheel
This mode lets the encoder adjust the knob or parameter under the mouse pointer in your DAW.
Think of it as performing mouse-wheel adjustments from UF1.
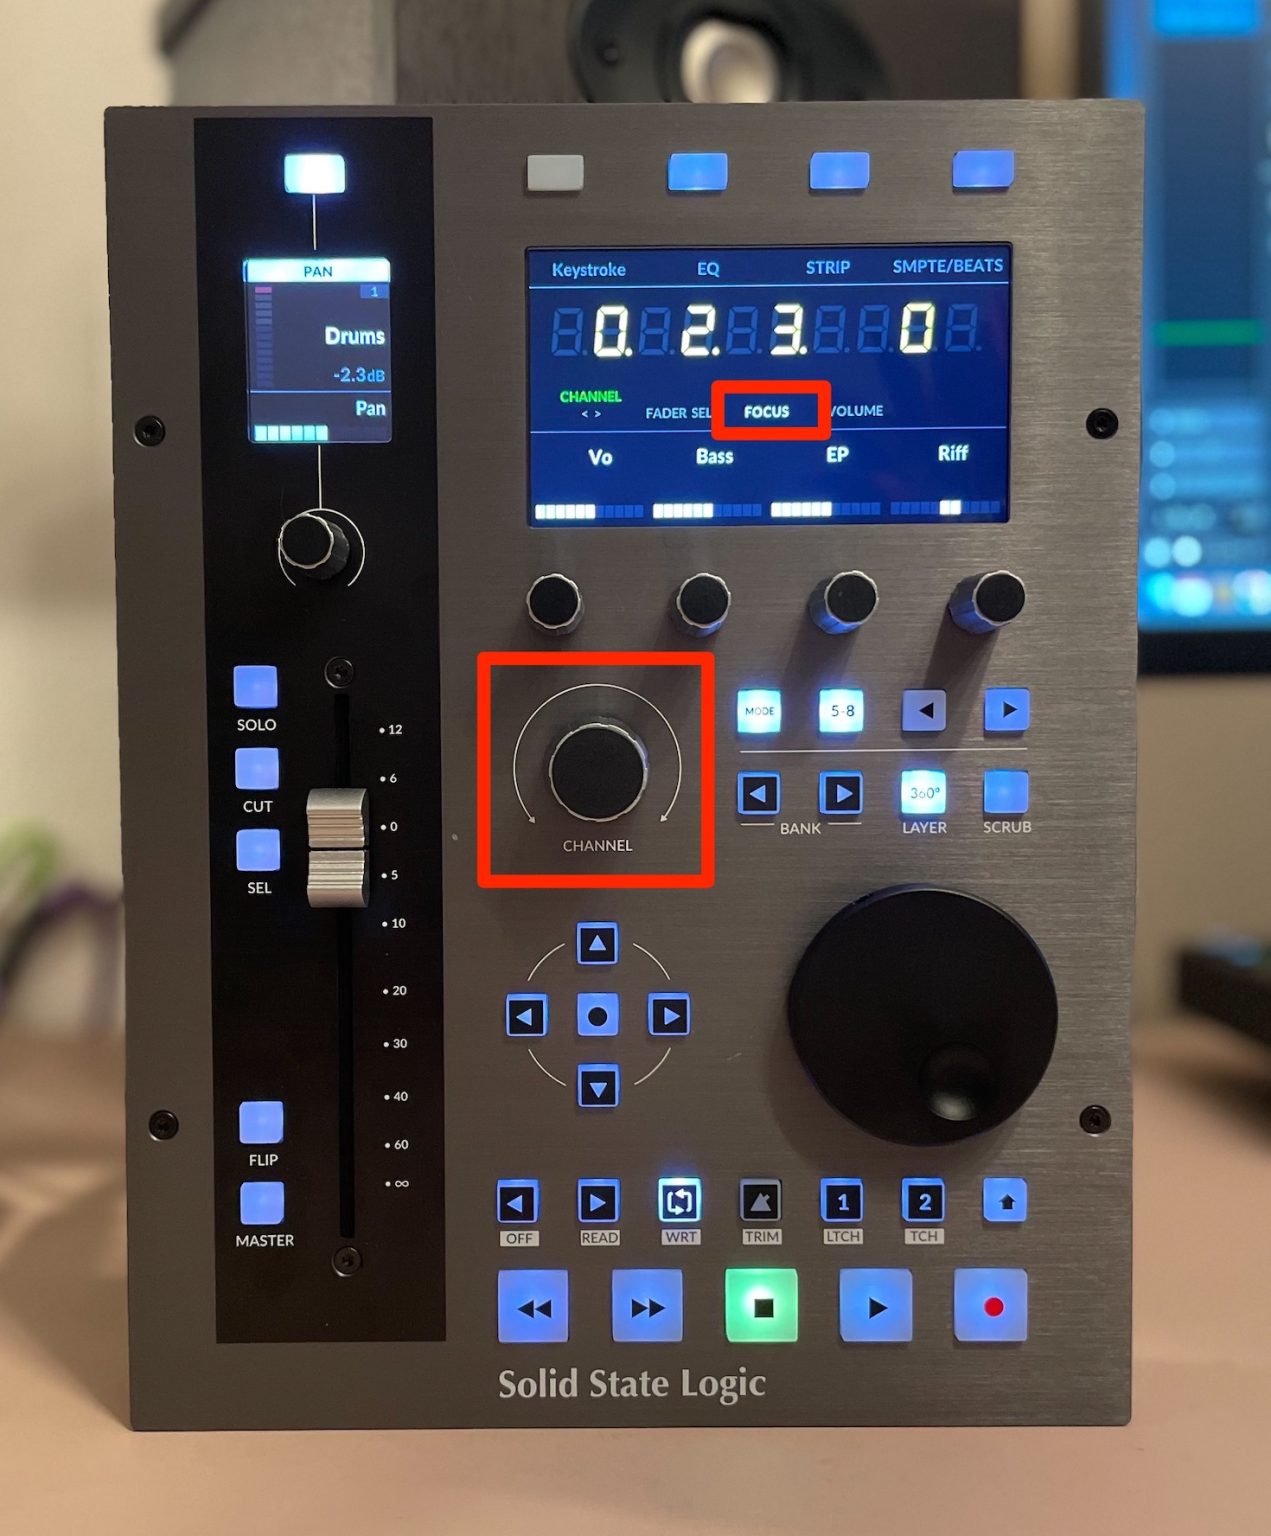
Press the Channel encoder, choose Focus, then press again to confirm.
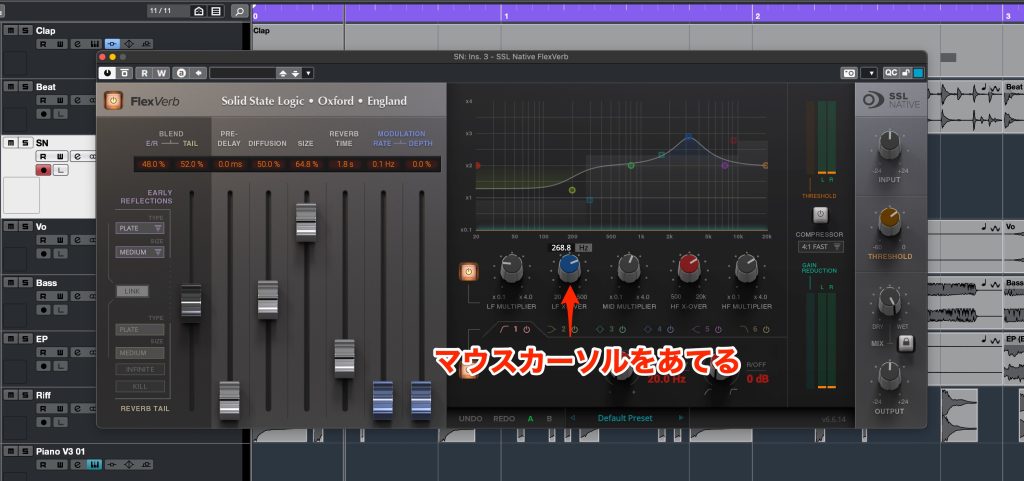
Move the mouse pointer over the desired control and turn the encoder.
We found this comfortable for making fine, precise changes.
Note: adjustment sensitivity depends on the computer's mouse-scroll settings.
Instant Access to the Master Track
During composition and mixing, you will often need the master track.
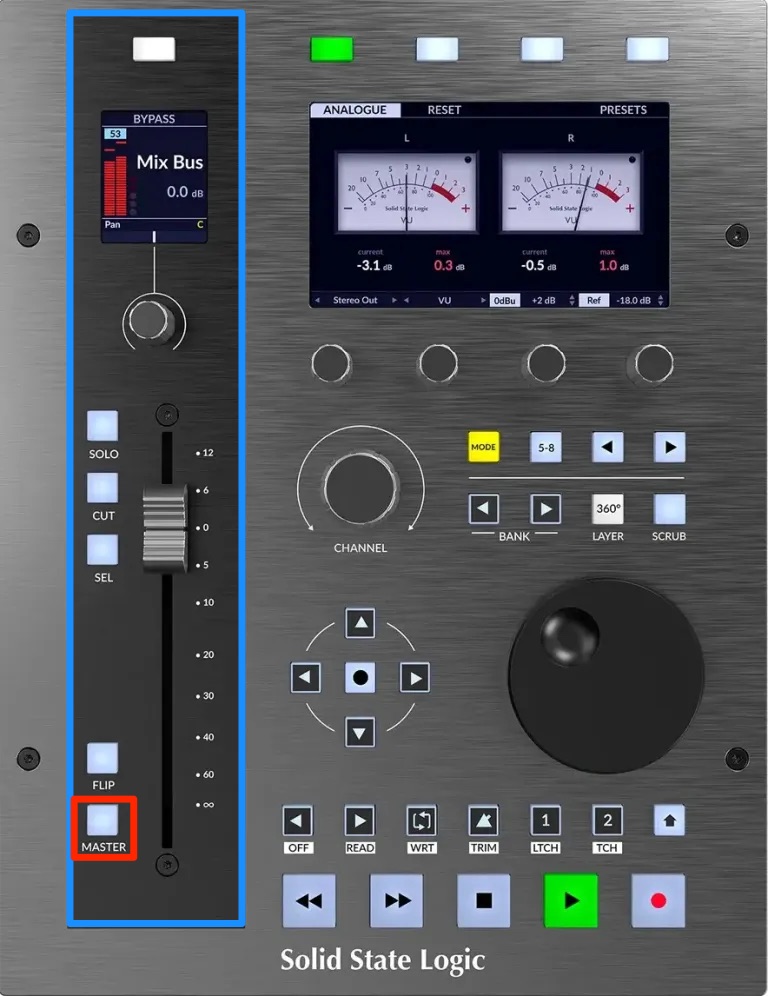
Enable Master to make the fader section control it directly, independently of the current track target in the demonstrated integration.
Assigning Commands and Shortcuts to the Four Soft Keys
Assign your preferred commands or keyboard shortcuts to the soft keys.
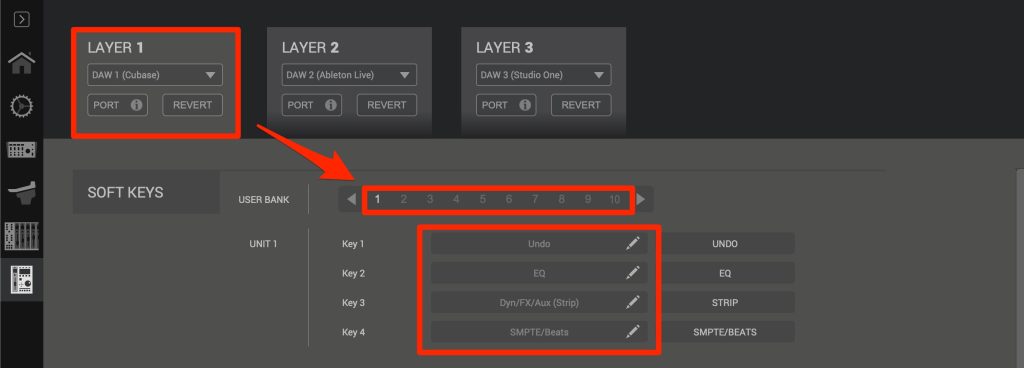
Select your DAW in SSL 360° to configure them.
There are ten pages of four assignments, providing 40 slots in the setup shown here.
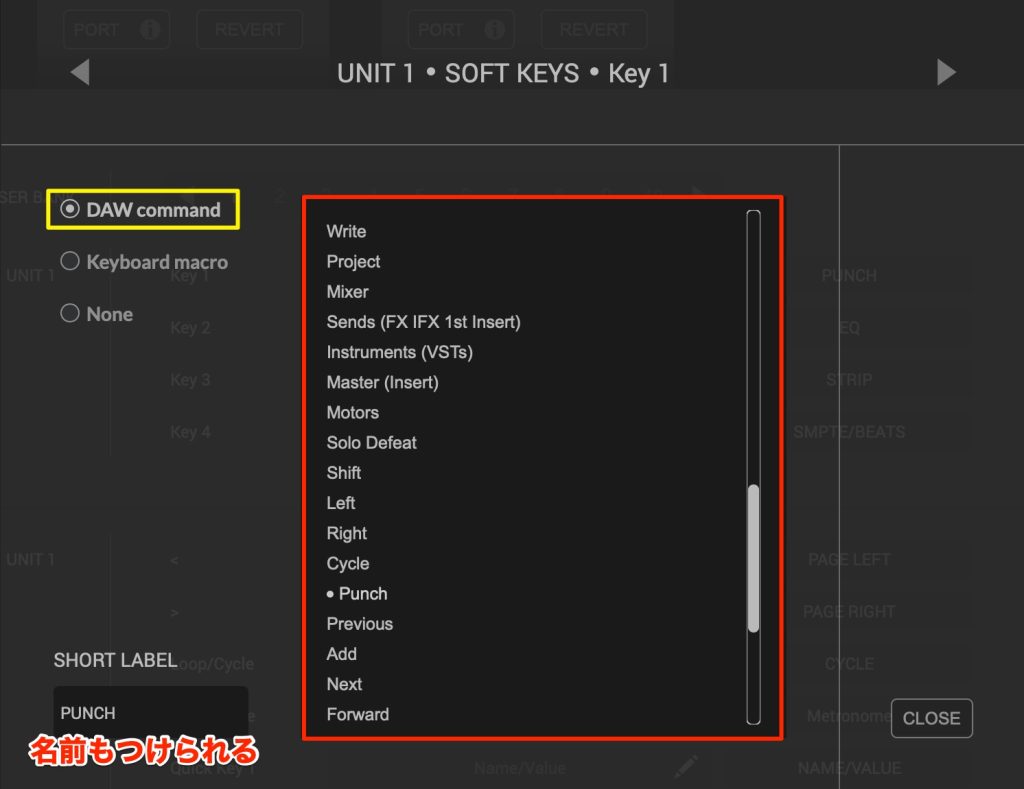
Under DAW Command, choose from the supplied commands.
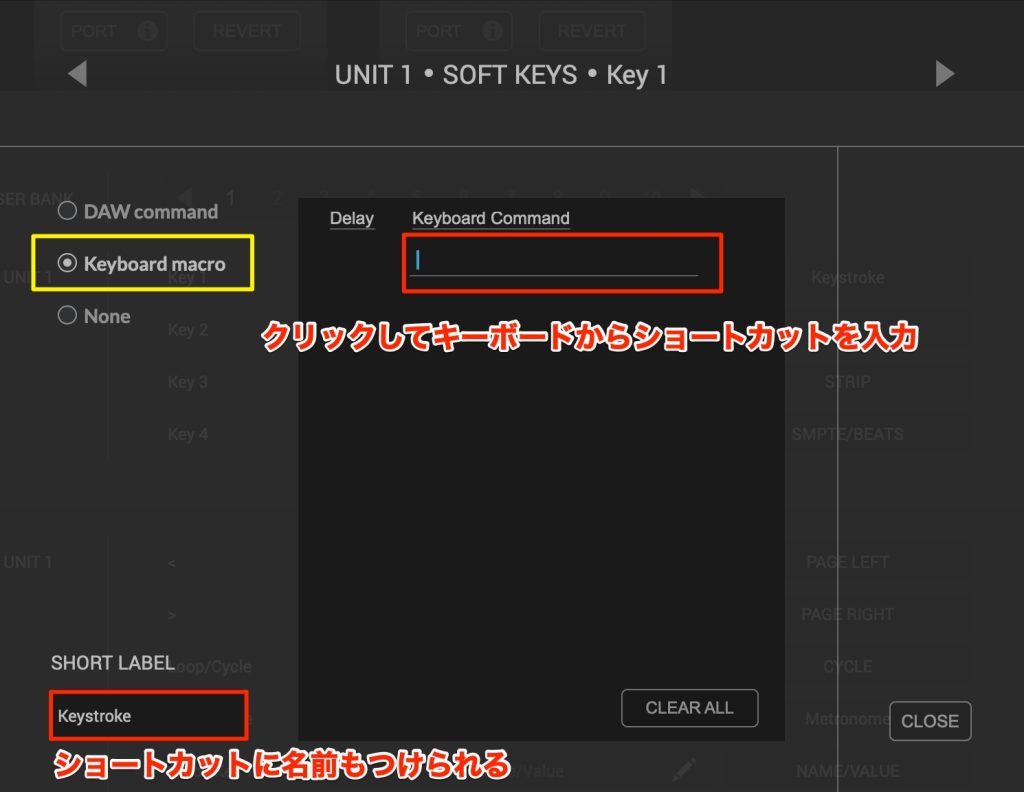
Keyboard Macro lets you assign keyboard shortcuts.
Press the desired key combination on your computer keyboard.
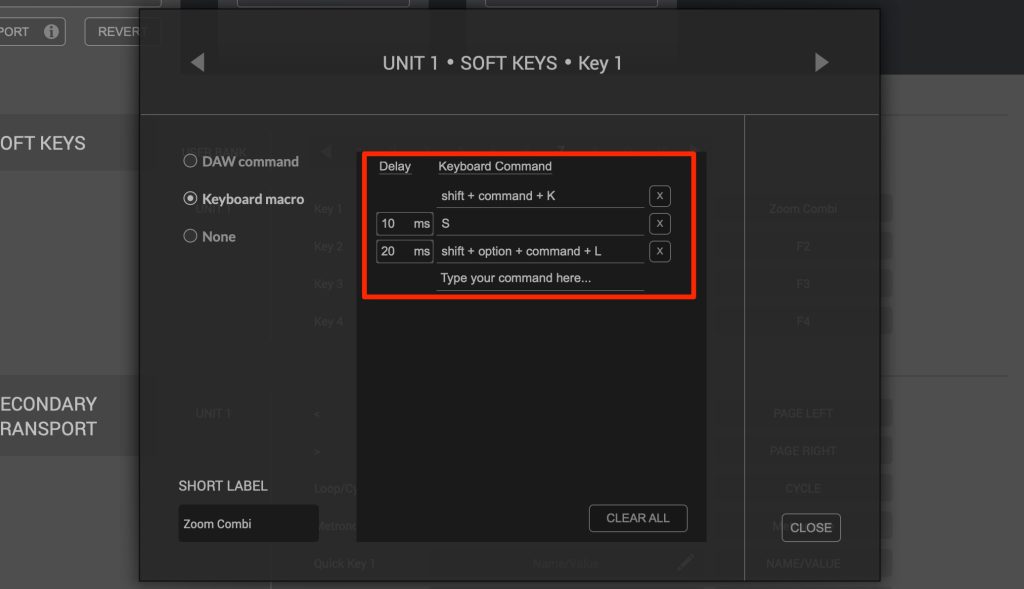
A particularly useful feature is that one key can trigger multiple shortcuts.
This lets a single press run a sequence of actions, potentially speeding up repetitive production tasks.
Delay sets the interval before the next shortcut runs, in milliseconds.
It gives the previous action time to finish before the next one begins.
Customization also extends to
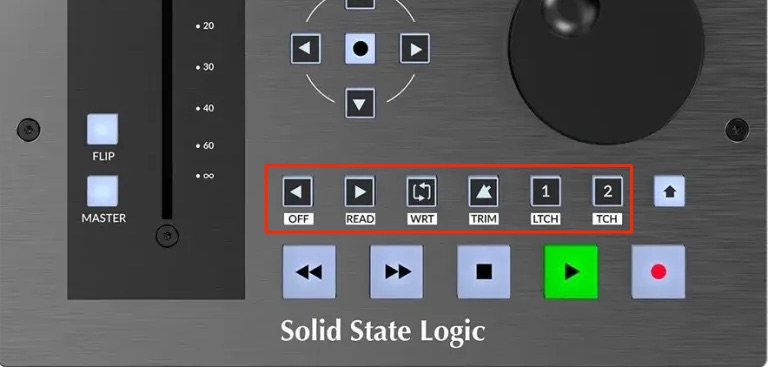
the transport buttons and footswitch
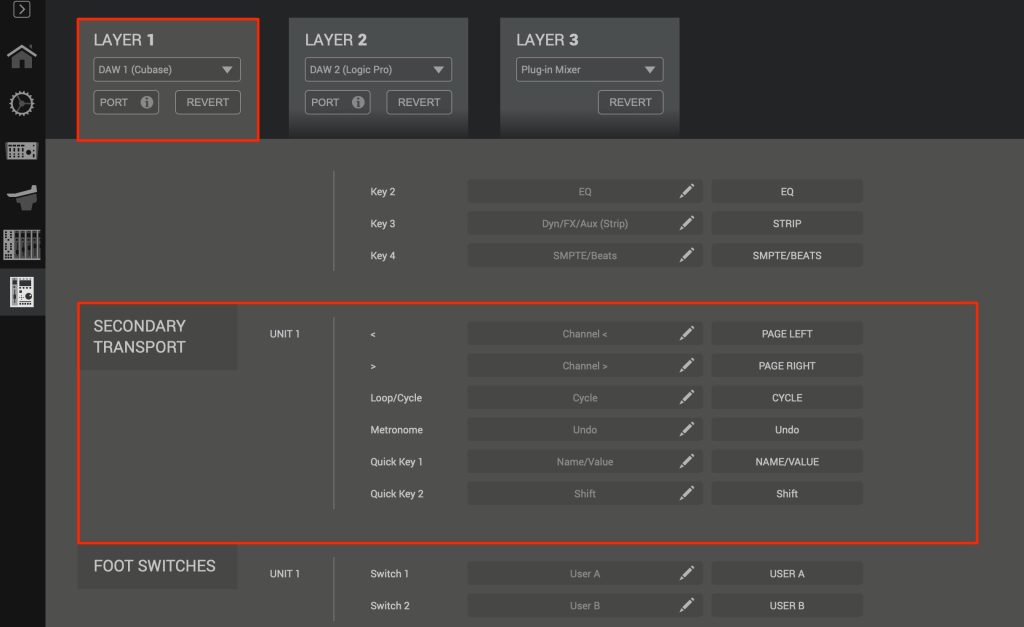
.
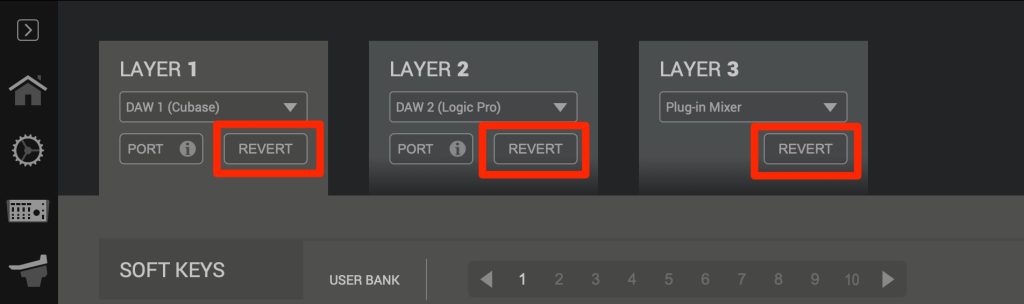
Assign the desired command or shortcut to each control in the same way. Revert restores its default assignment.
This makes it easy to experiment and return to the starting point.
Note: some Mac configurations require additional keyboard settings.
Those settings are covered in our setup guide.
Running Your Assigned Commands
Use the soft keys to run the commands configured above.
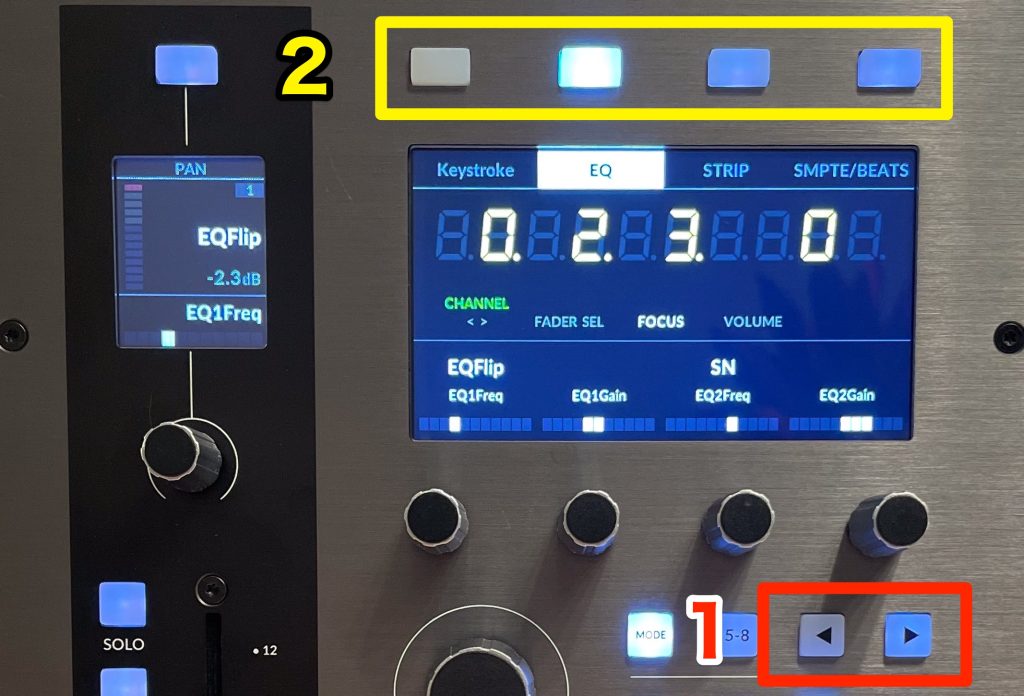
Use the left/right page controls to move through pages 1–10; the four assignments on each page map to the four soft keys.
The command names are also displayed.
Press the appropriate soft key to run a command.
Note: these edits apply to the track selected in the DAW.
Editing Other Parameters
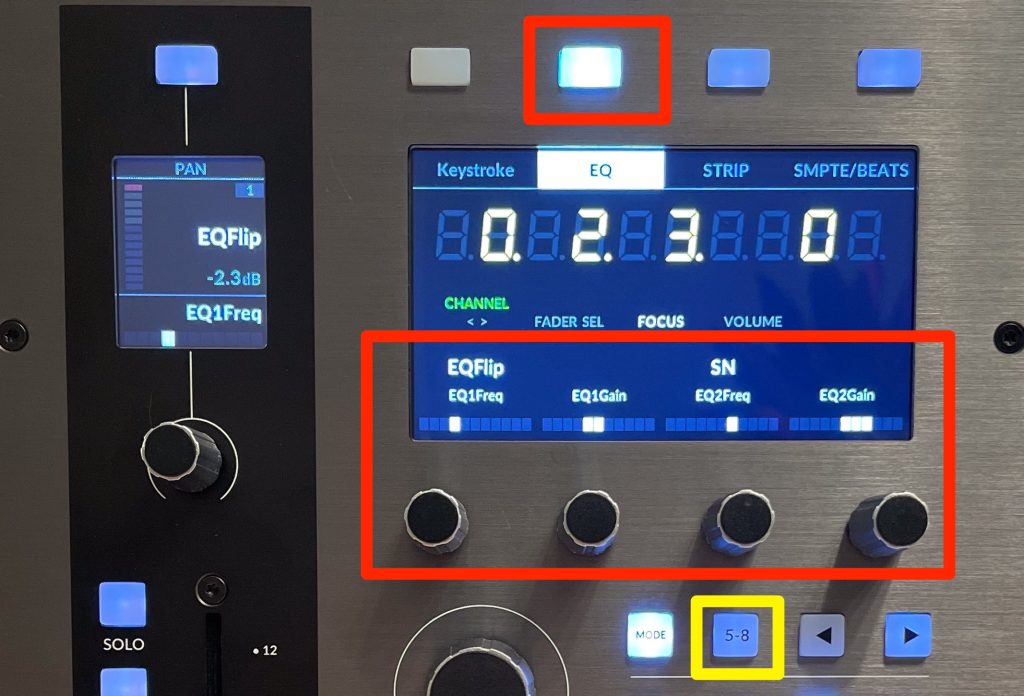
Depending on the selected function, pressing a soft key assigns more detailed controls to the four V-Pots.
This does not apply to simple one-shot actions such as Undo.
Note: these edits apply to the track selected in the DAW.
For example, select EQ to adjust the DAW's built-in EQ parameters with the V-Pots in the demonstrated integration.
Press 5–8 to access the next group of parameters, such as moving from EQ bands 1–2 to bands 3–4.
You can also press a V-Pot to reset its parameter to the default value.
A Point to Watch
In Fader mode, the V-Pots control volume faders only, indicated by green highlighting and “FAdr.”
To control other parameters, press Mode to leave Fader mode. The illustrated alternative uses yellow indicators.
Using SSL Meter
Displaying the meter plug-in on the hardware is another key feature.
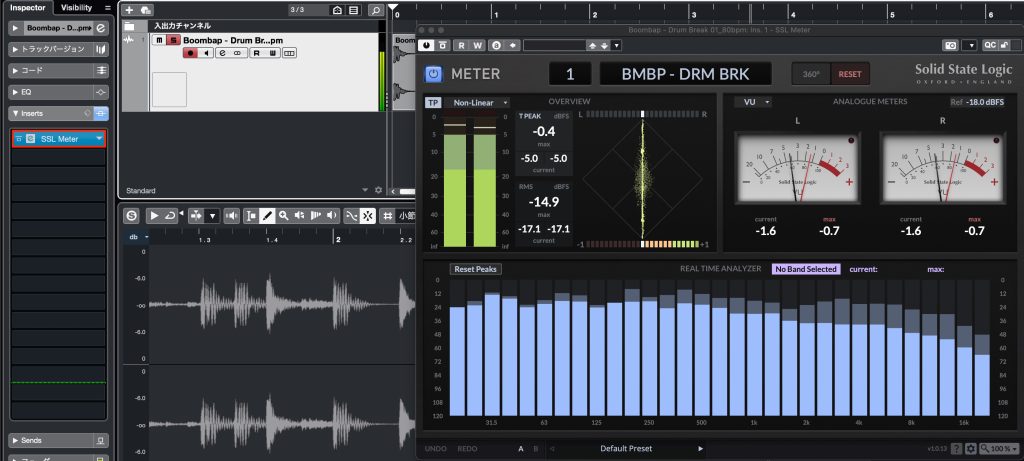
To show metering on UF1, insert SSL Meter on the DAW track you want to measure.
As explained in our setup guide, the reviewed UF1 package includes a license for the Meter plug-in.
The meter's position in the signal chain affects what it measures, so pay attention to its insert point.
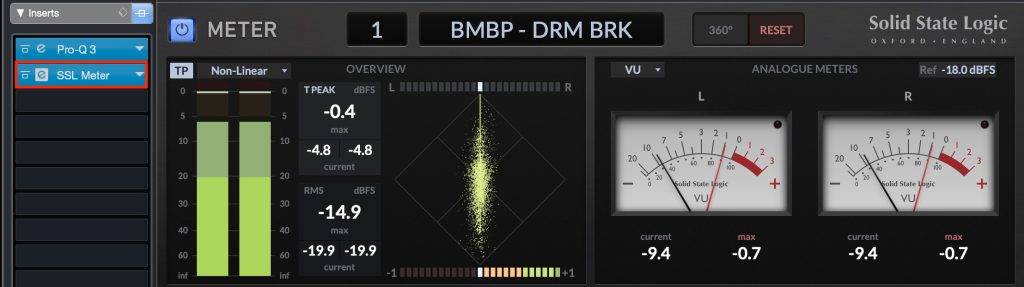
In this example, the meter measures the signal after Pro-Q 3.
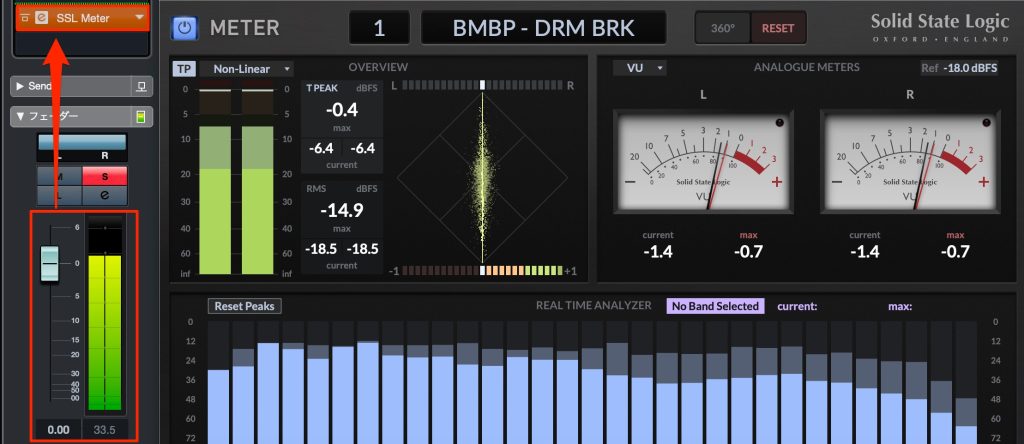
Here it is post-fader, so the displayed result also reflects the track fader's level setting.
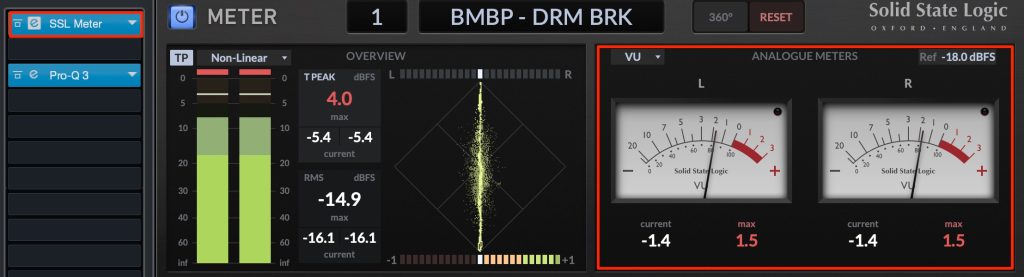
Placing Meter at the beginning of the effects chain can make its VU display useful for gain staging.
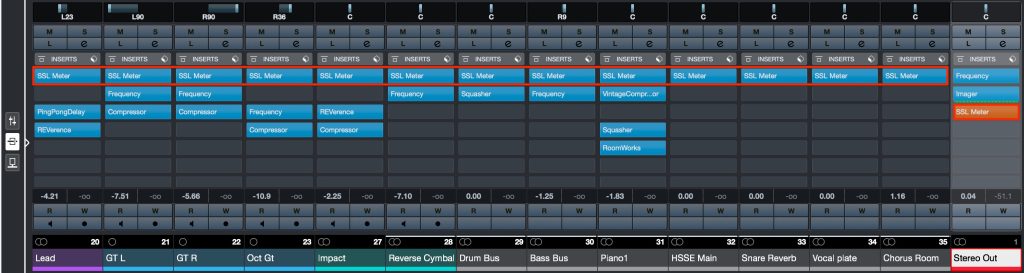
You can also place an instance on every track and the master, as shown.
Gain Staging Video
Displaying Metering on UF1
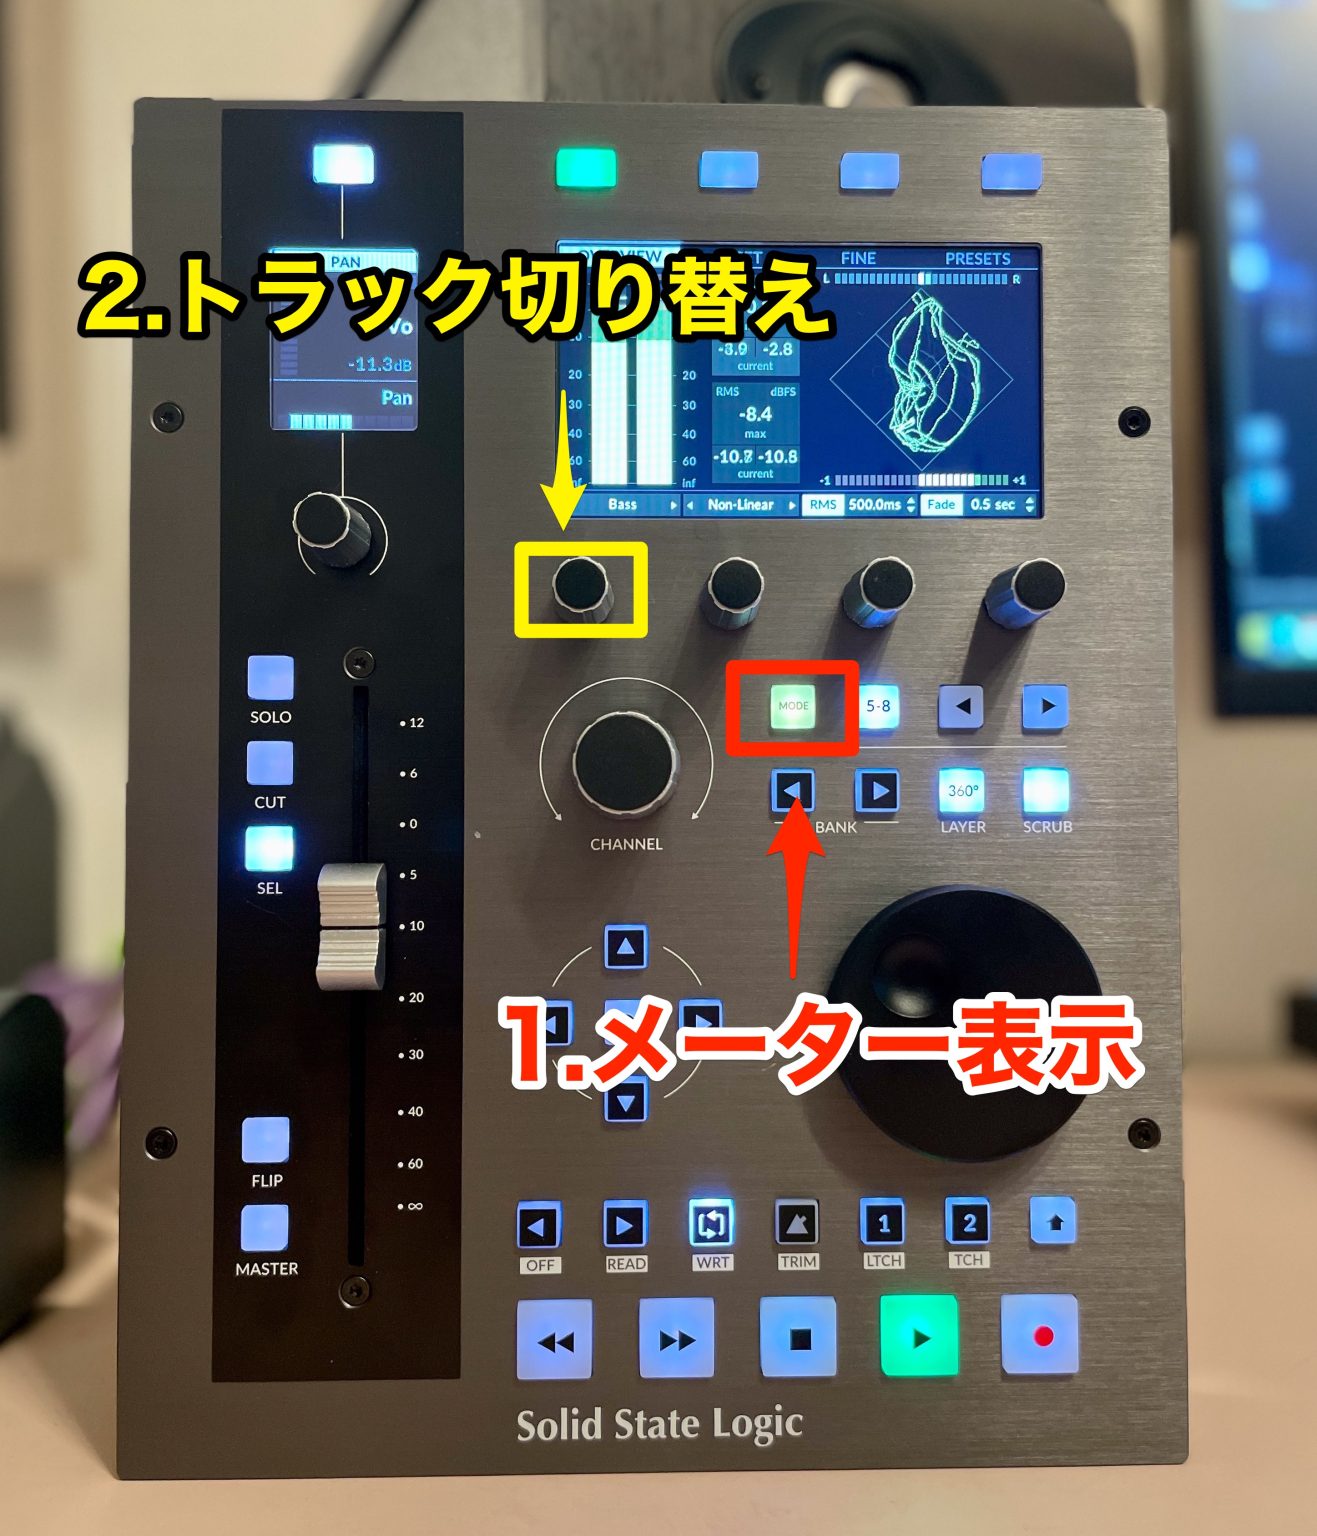
Press Mode to switch to the meter display.
Use the four V-Pots to select a track and adjust meter settings. The left-hand V-Pot selects the displayed track in this example.
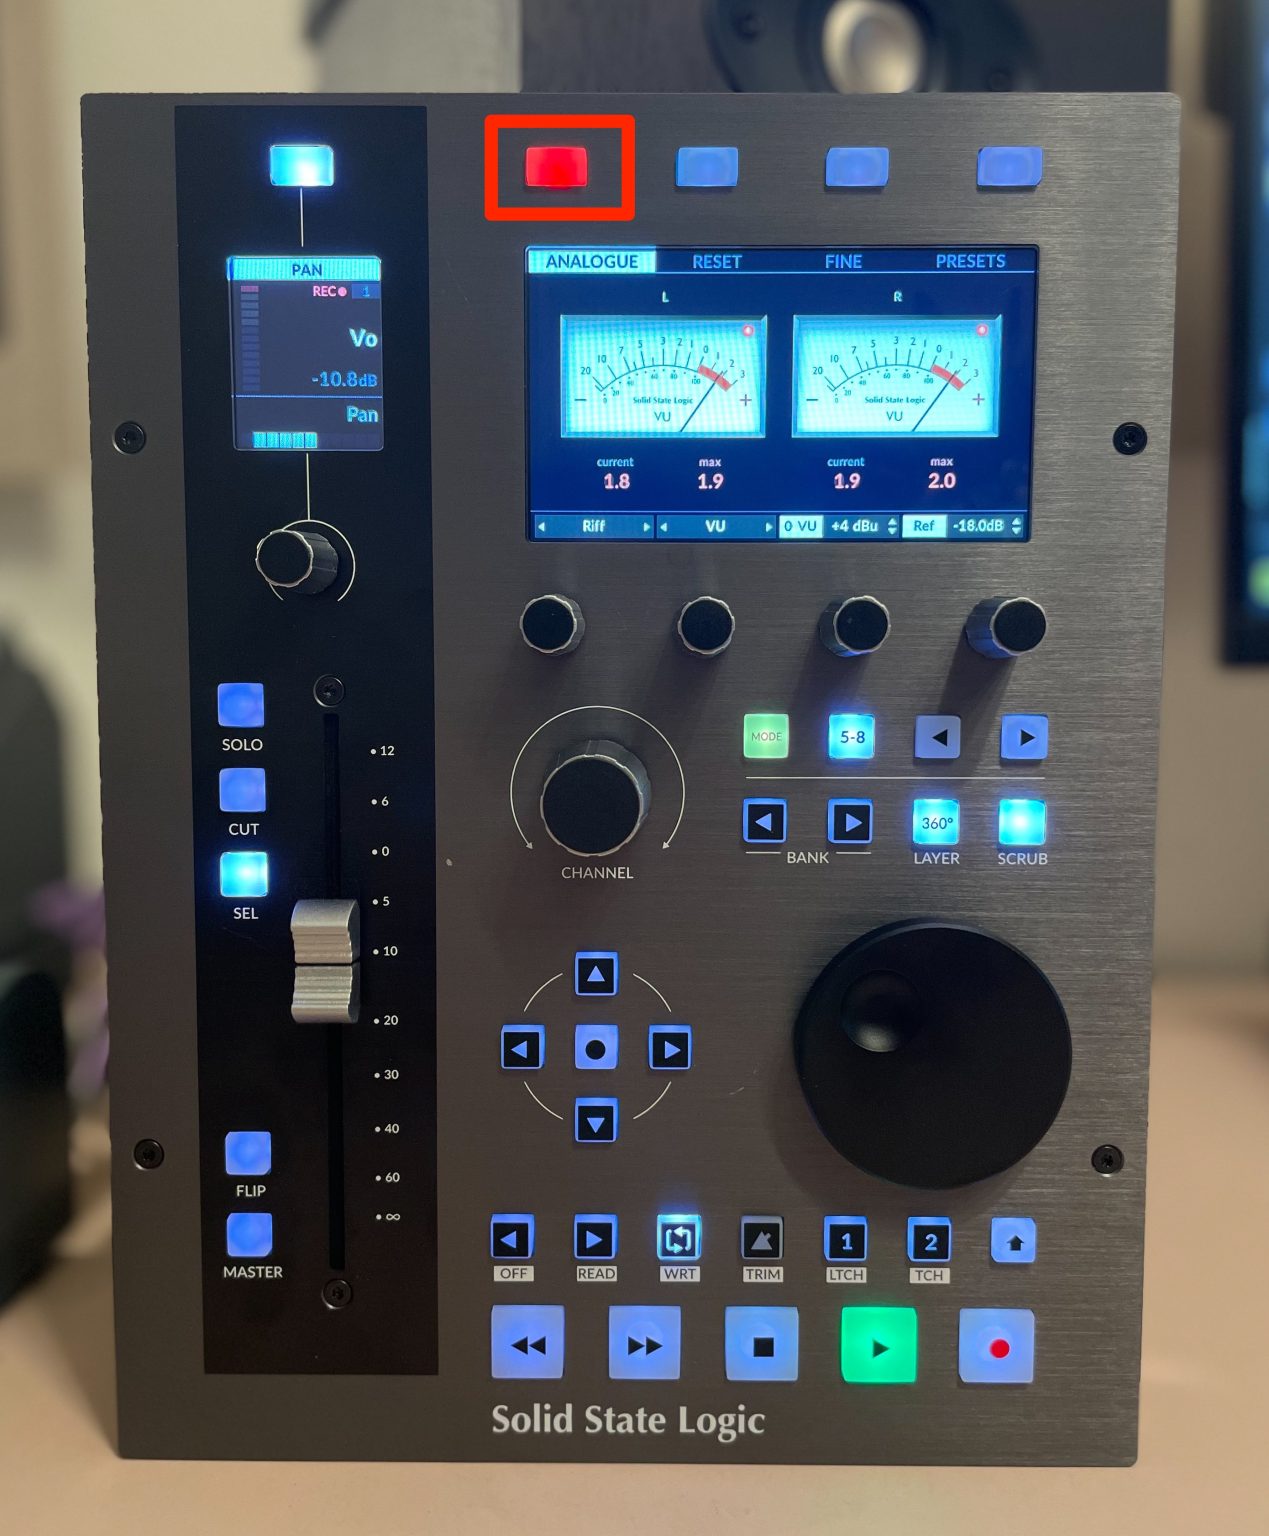
The left soft key chooses the meter type, including VU metering.
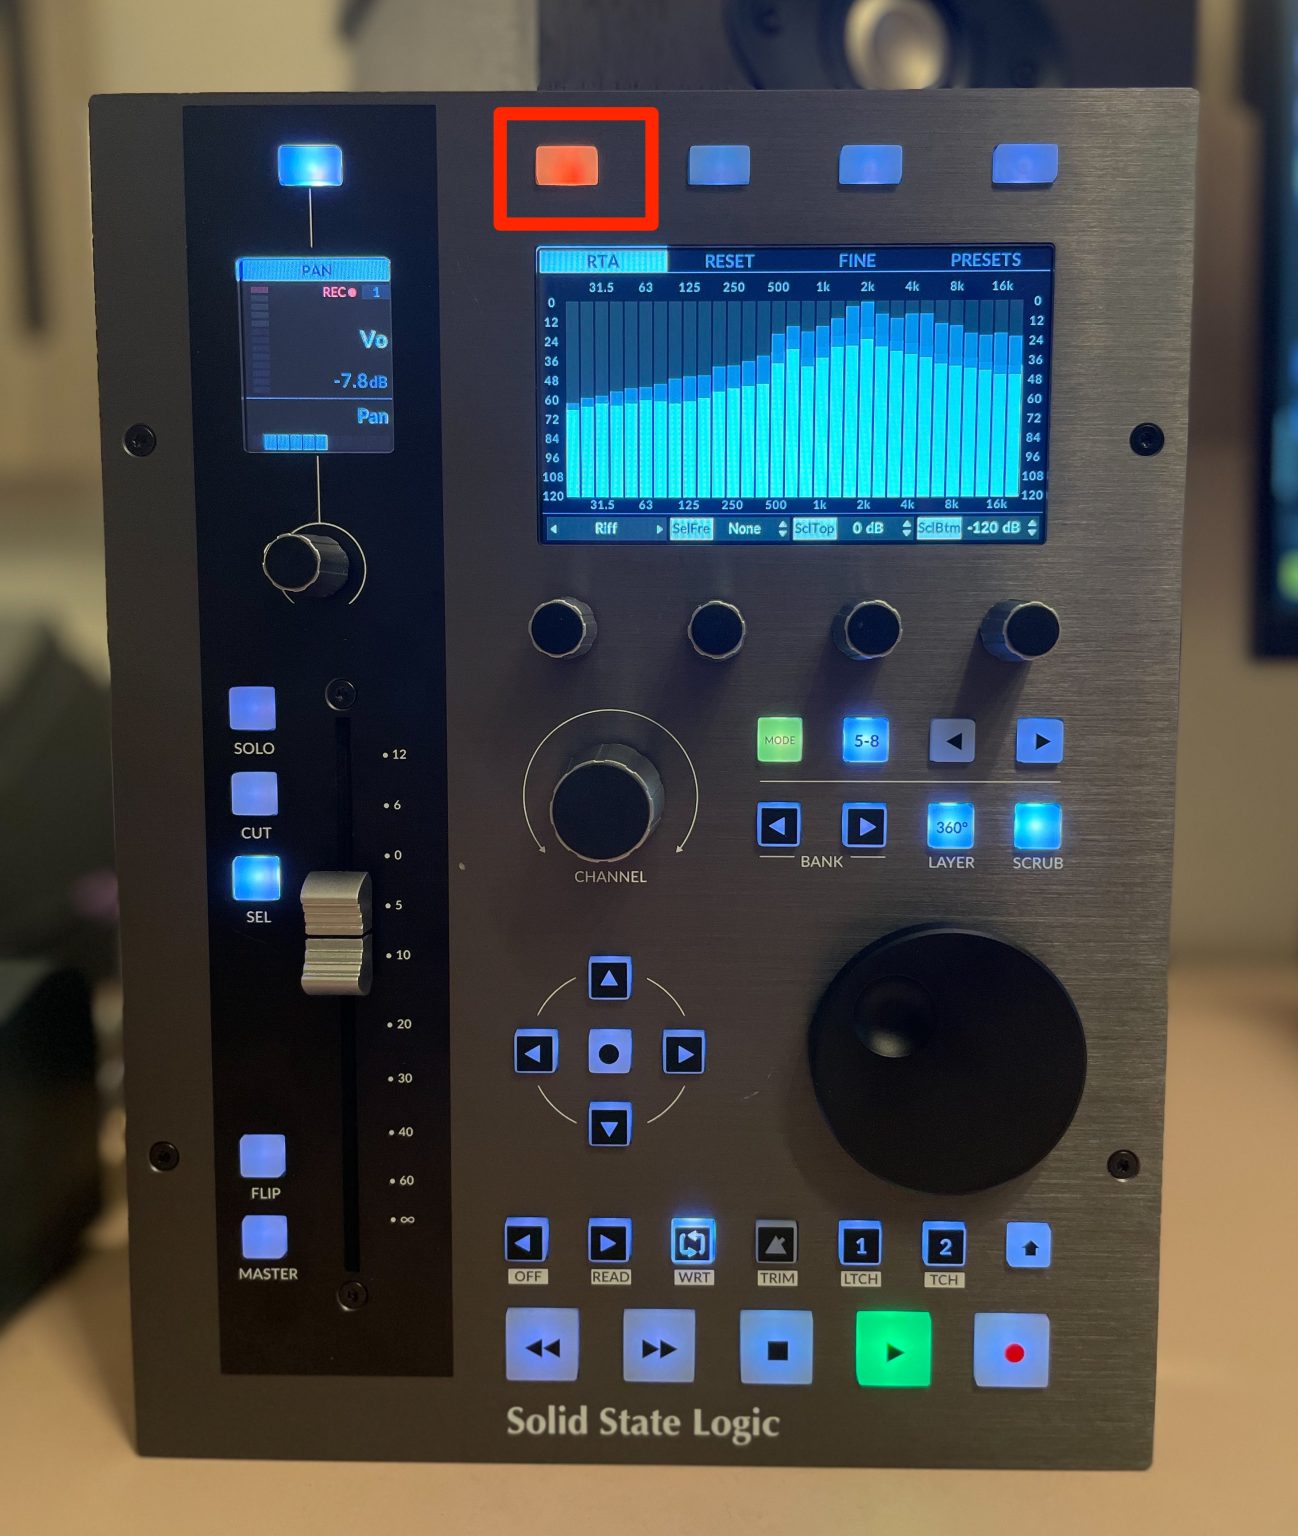
A spectrum display is also available. The original 2023 article described loudness metering as a planned addition; consult the current SSL Meter documentation for the features in your version.
The display is sharp, and its metering source can be selected independently of the track you are controlling, so you can keep an eye on the master while working elsewhere.
Mac-Specific Format Note

For the integration shown here, in a DAW that supports VST3 and AU, such as Live or Studio One, use the relevant SSL plug-ins in VST3 format rather than AU. Check current SSL guidance if your software version differs.
Integration with Plug-in Mixer
SSL 360° includes Plug-in Mixer, which shows supported SSL plug-ins together in a mixer-style window for viewing and editing.
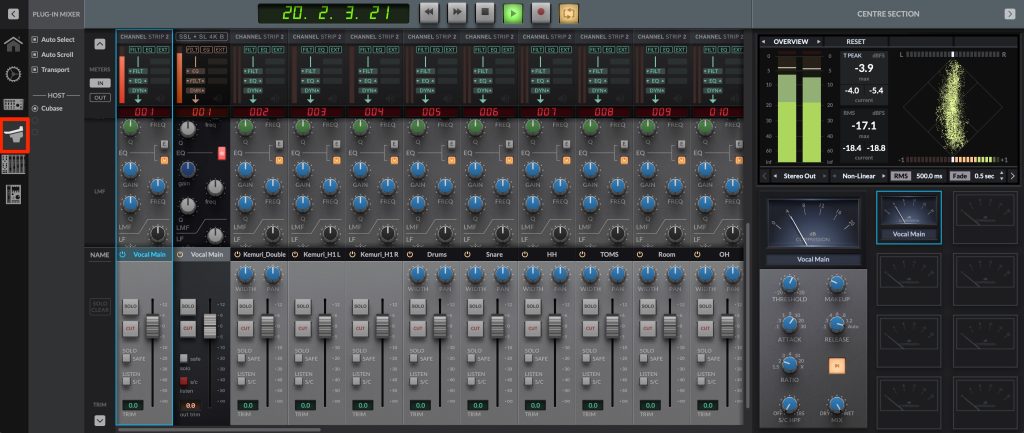
It provides an experience reminiscent of working at a mixing console.
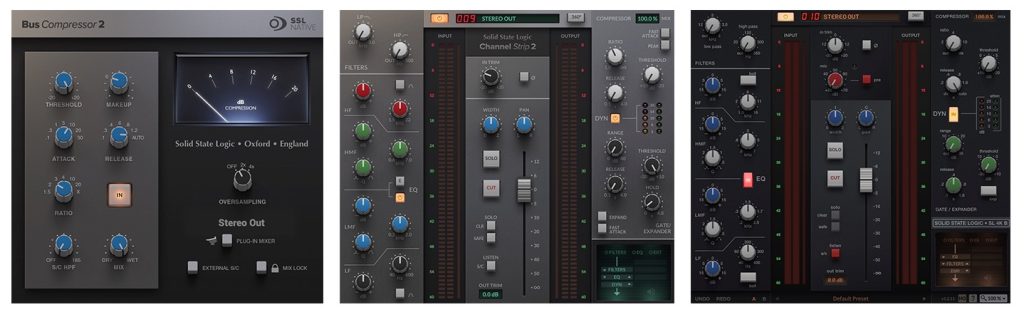
Alongside the meter plug-in discussed above, the original review covers Channel Strip Plug-in 2 Bus Compressor 2 4K B v1 as supported plug-ins.
These were included in the SSL Complete Subscription described in our setup guide at the time of the review. Check the current subscription contents and licensing conditions.

As with Meter, insert a compatible plug-in on the track you want to appear in Plug-in Mixer. Here, we use Channel Strip Plug-in 2.
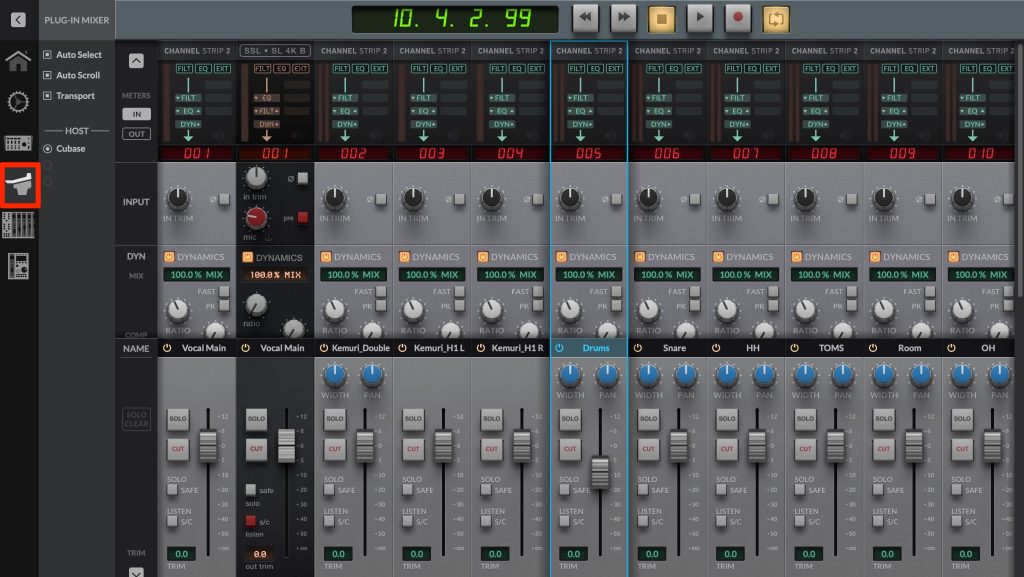
The inserted plug-in appears automatically in the mixer and can be edited there.
Mac-Specific Format Note
For the integration shown here, in a DAW that supports VST3 and AU, such as Live or Studio One, use the relevant SSL plug-ins in VST3 format rather than AU. Check current SSL guidance if your software version differs.
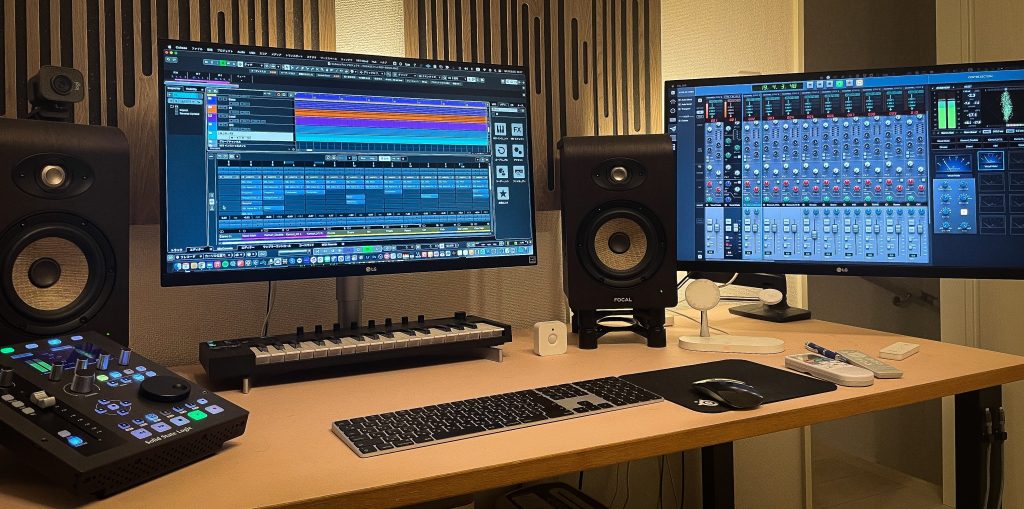
The integration with the DAW tracks also worked well with two displays: the DAW on one screen and Plug-in Mixer on the other.
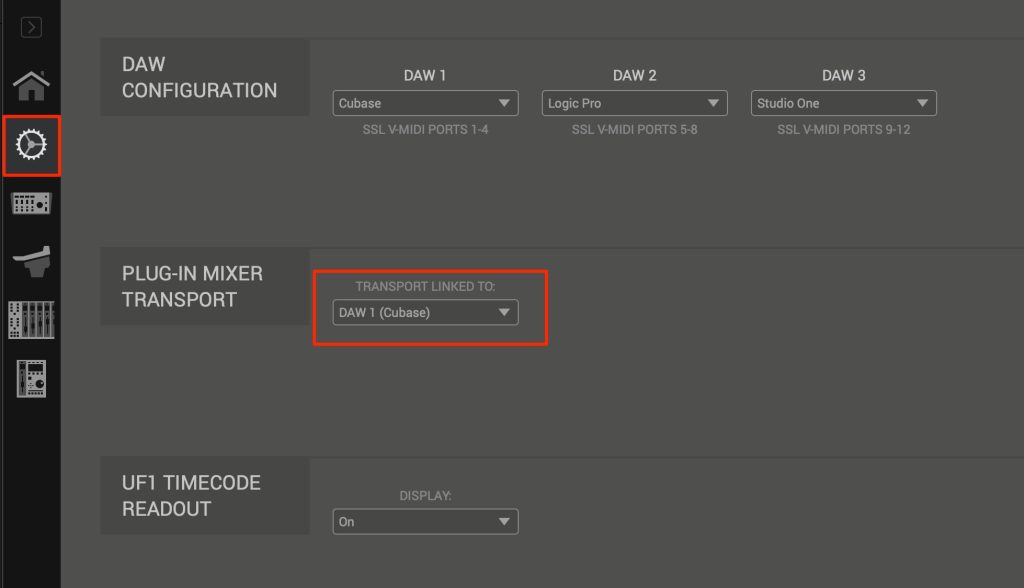
In the transport preferences, select the DAW you want to control to enable playback, stop and timeline navigation from the Plug-in Mixer window.
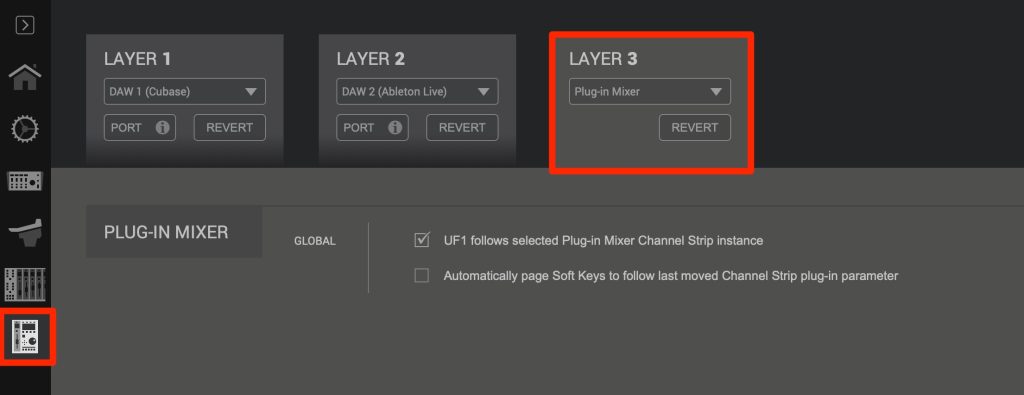
Assign Plug-in Mixer to a layer in SSL 360° to control Plug-in Mixer from the UF1 hardware.
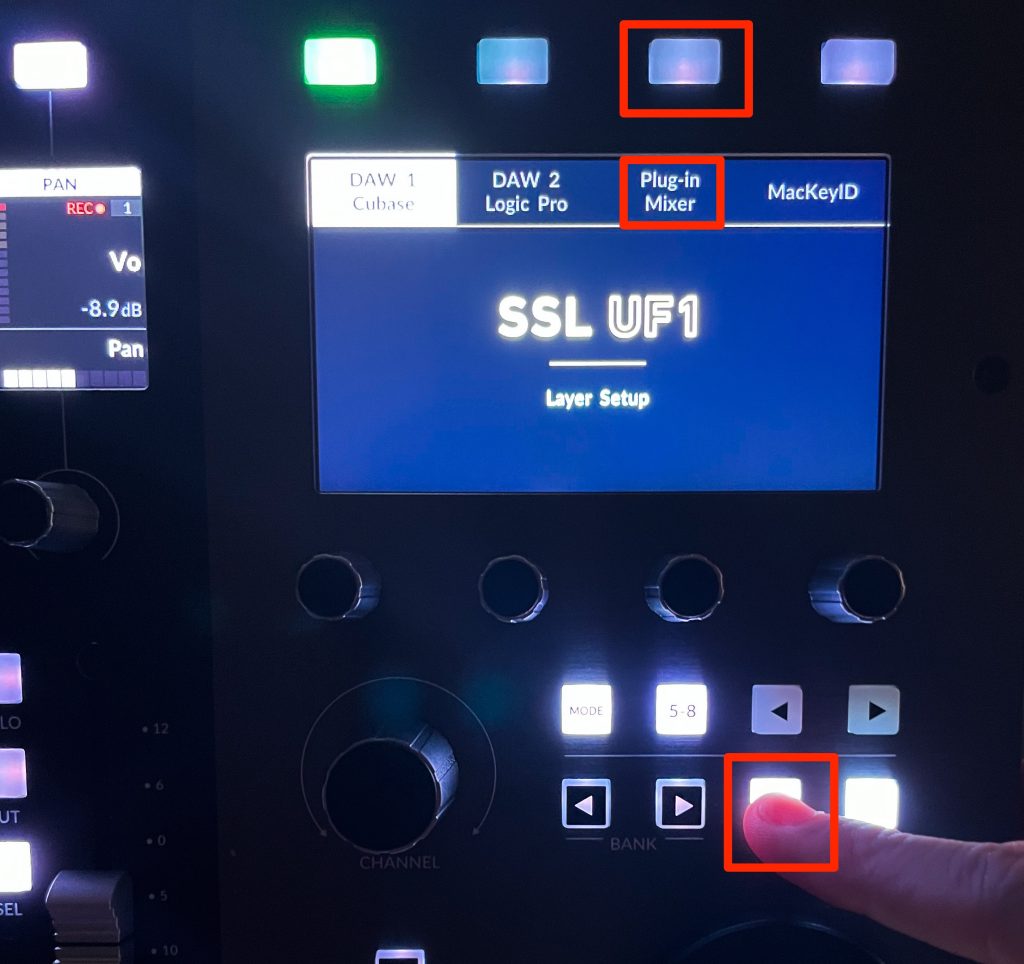
Hold 360° and press the number of the layer assigned to Plug-in Mixer.
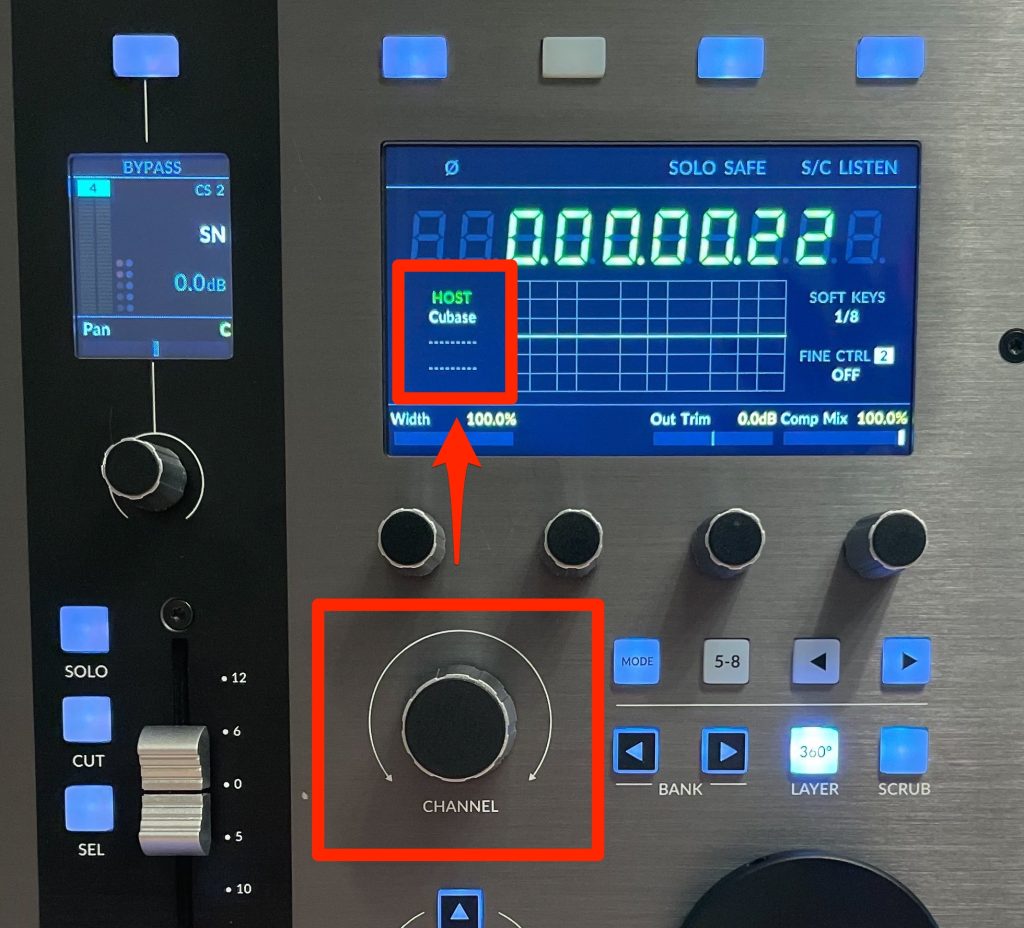
If multiple DAWs are open, press the Channel encoder and select which DAW to control, then press again to confirm.
You are now ready to work.
Operating Plug-in Mixer
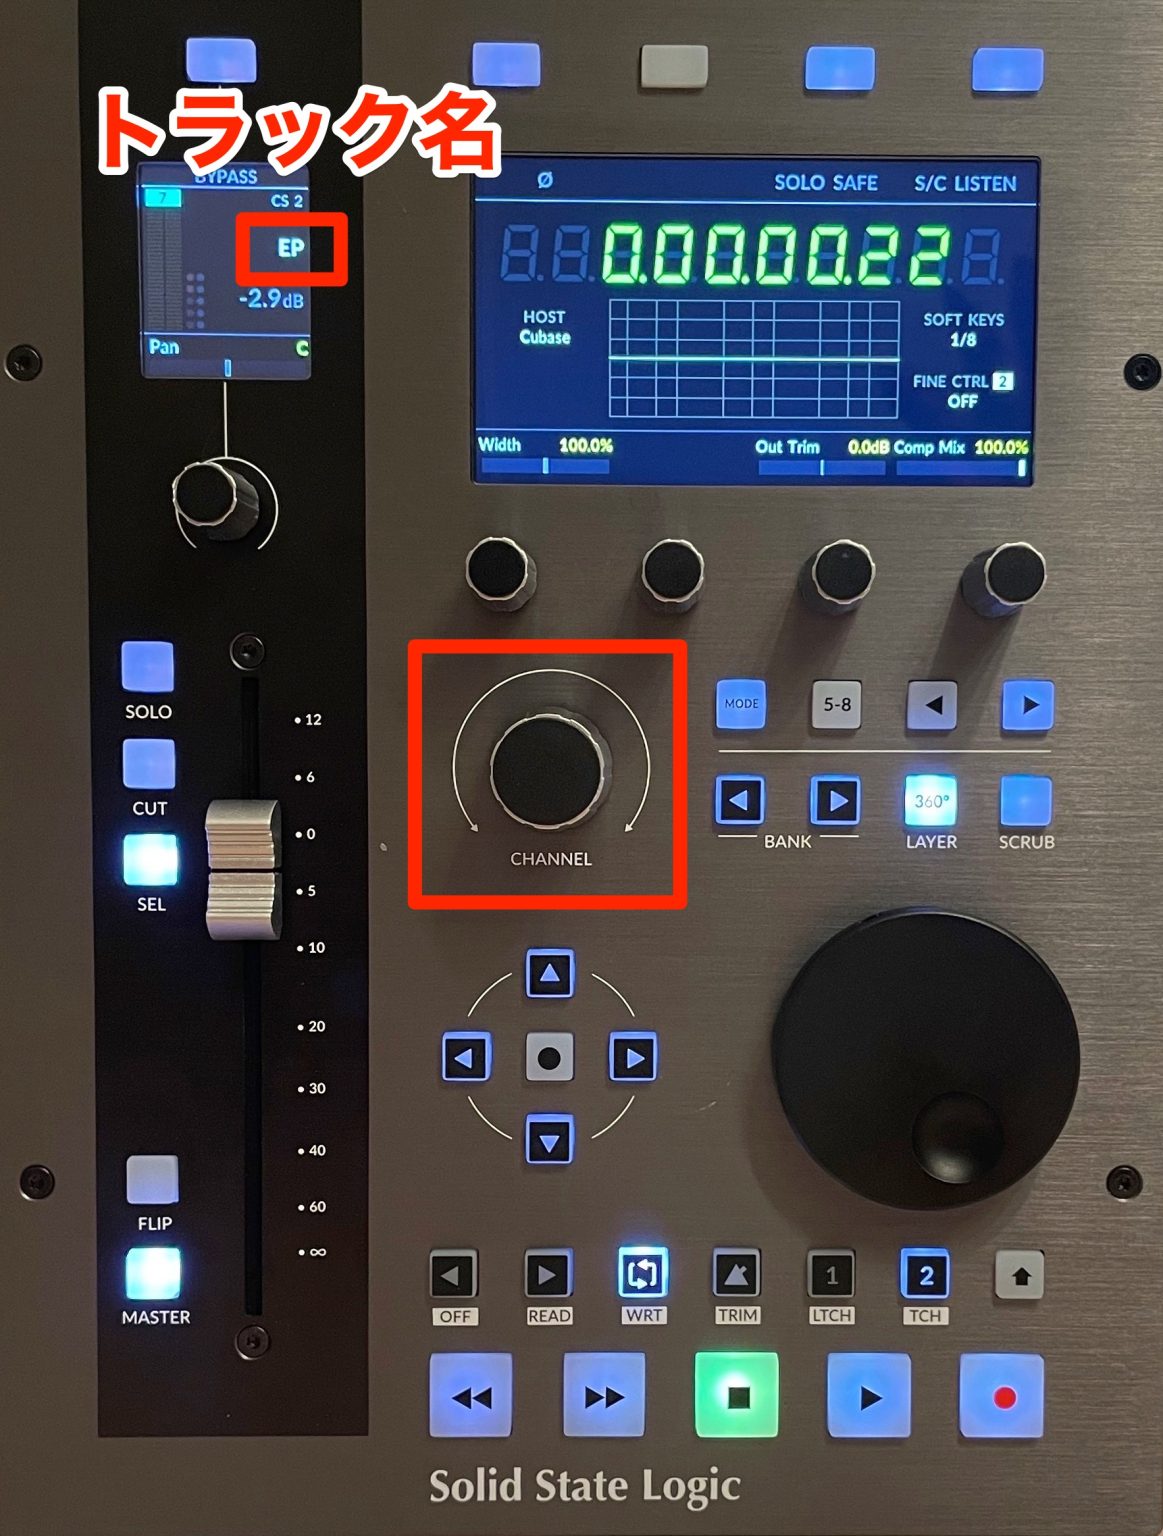
Turn the Channel encoder to select the target track.
Its name appears on the display.
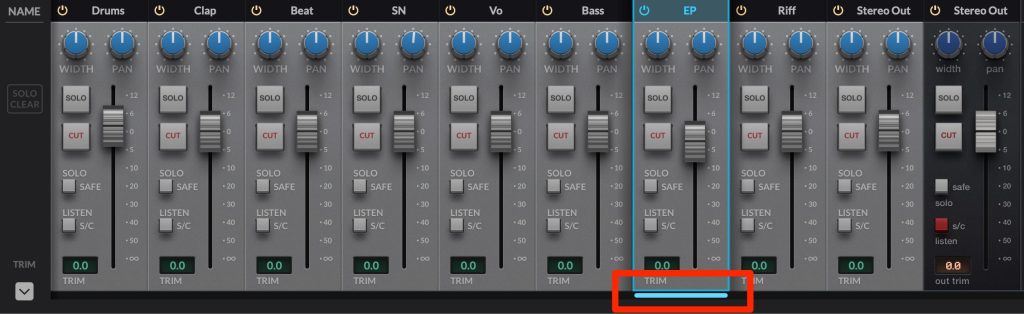
A line beneath the channel in the mixer indicates the selection.
This is the track you will edit.
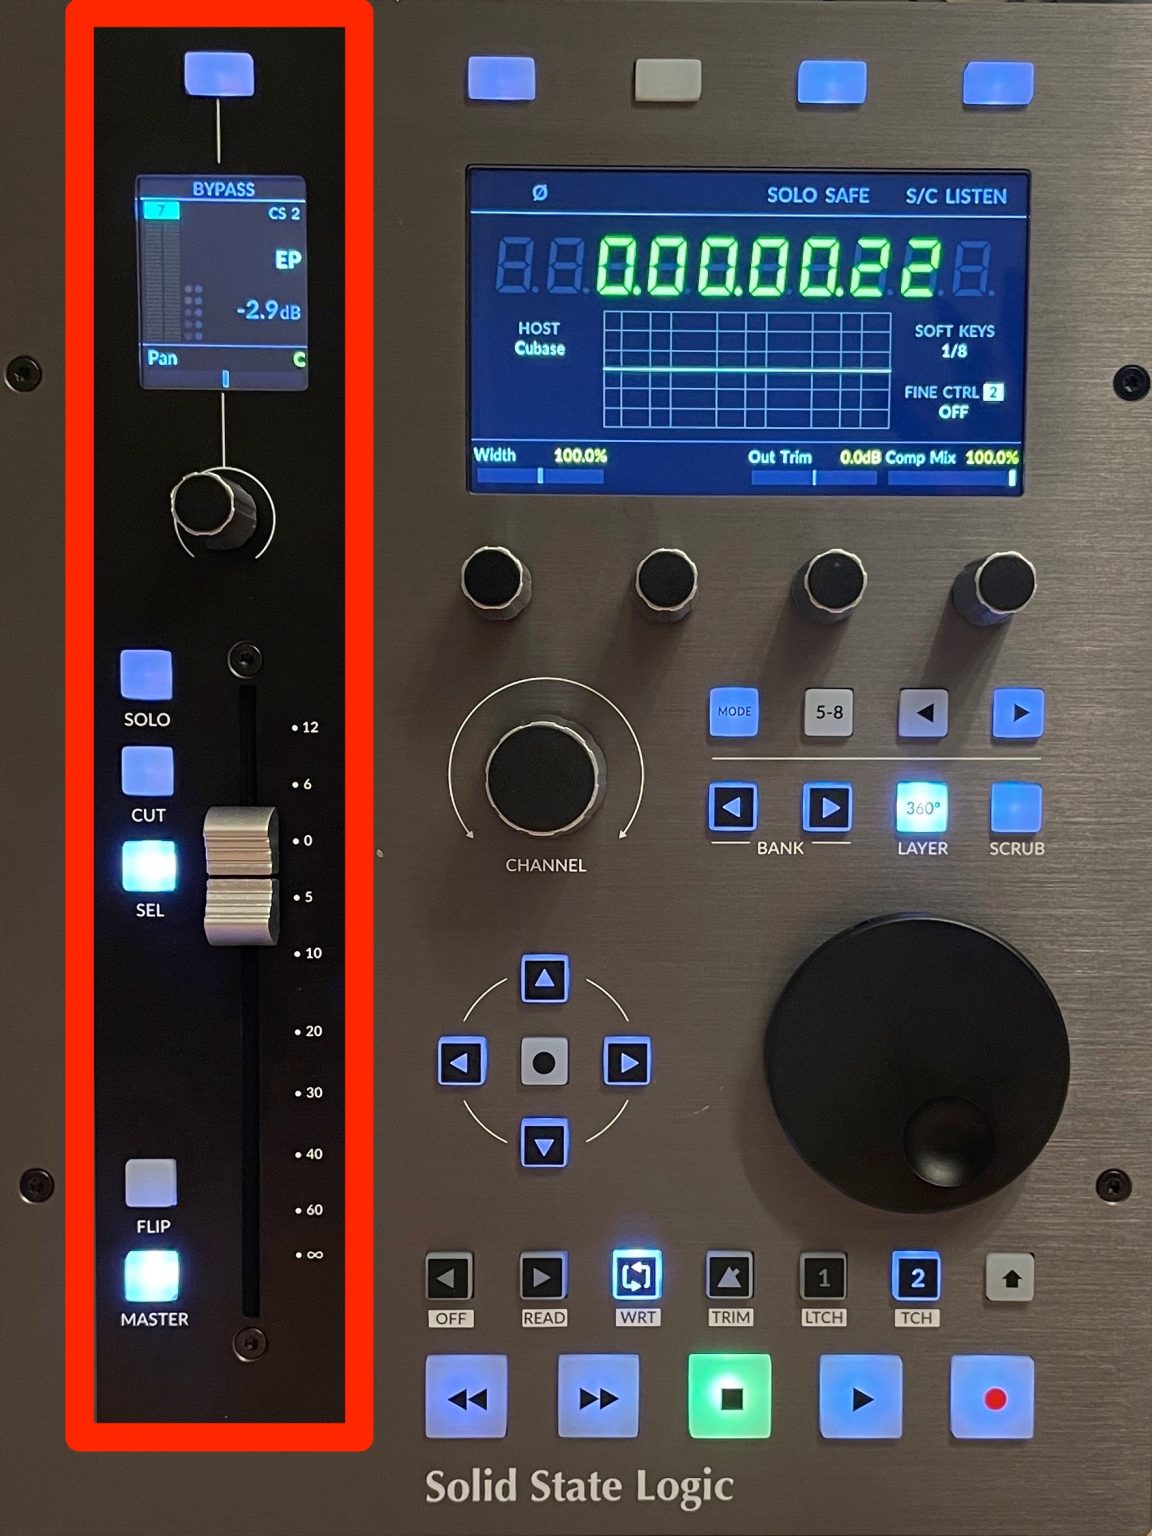
Control its volume, pan, mute and solo.
As in DAW mode, you can also access the master directly.
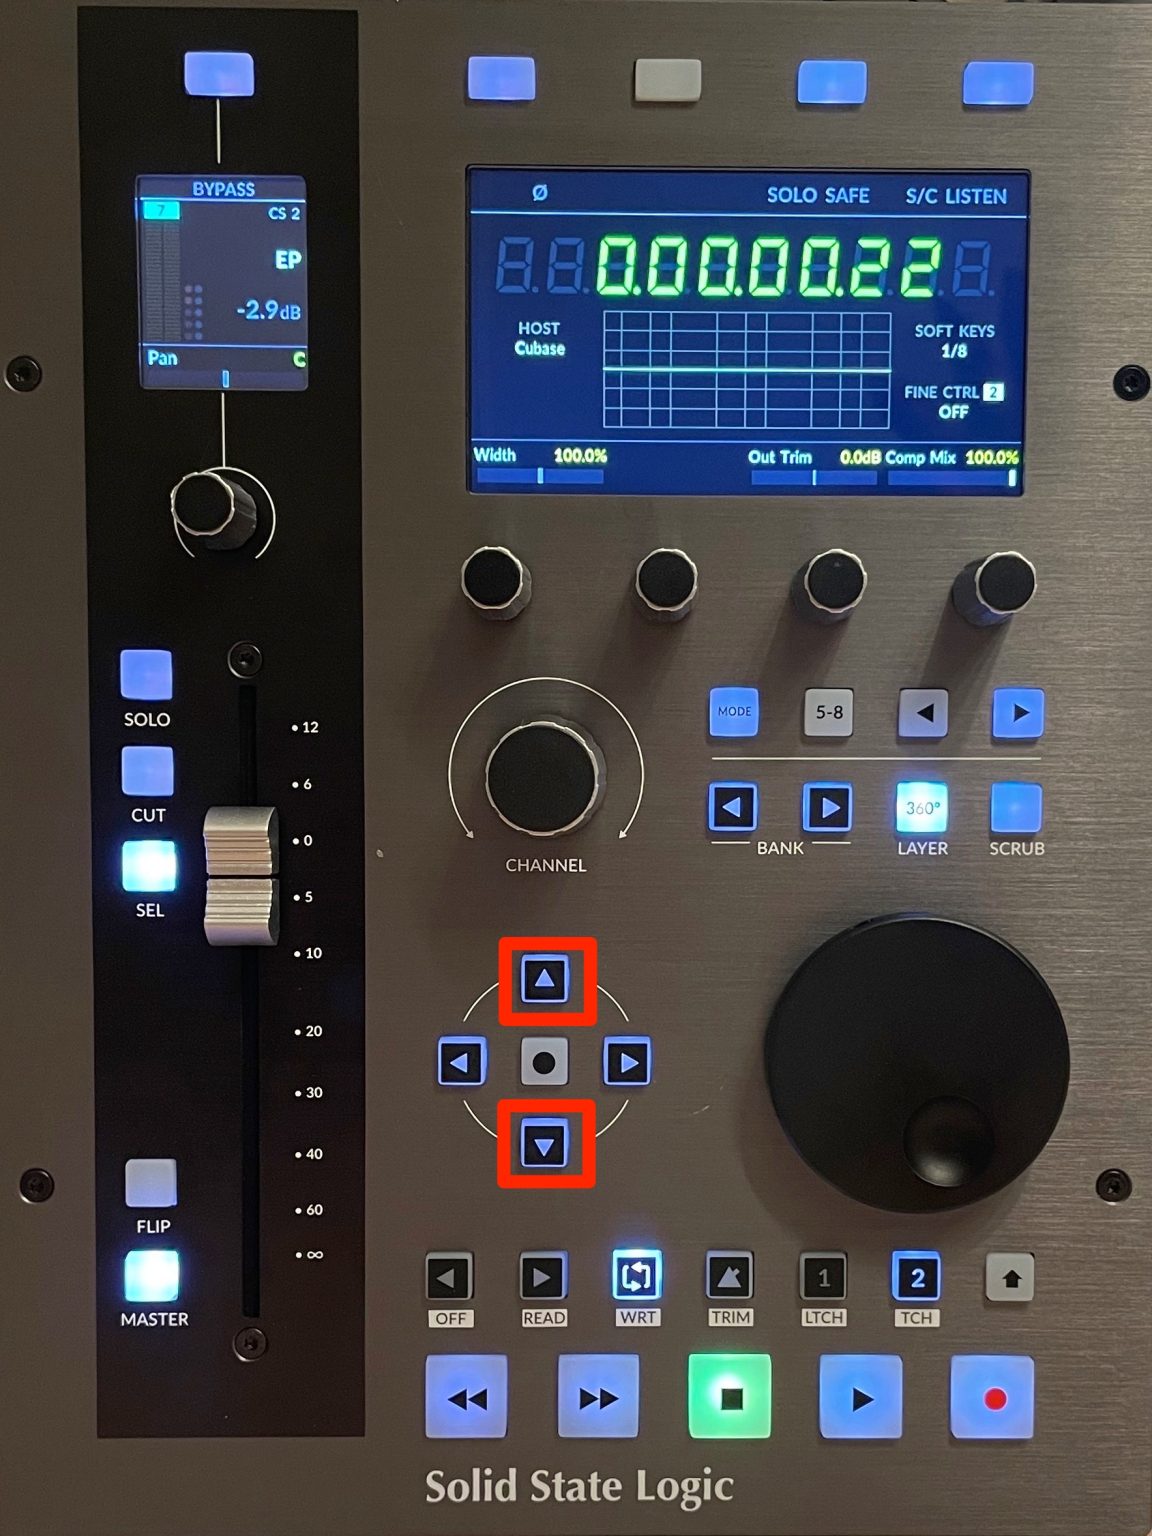
Use the up/down cursor keys to move between parameter areas such as EQ and compression.
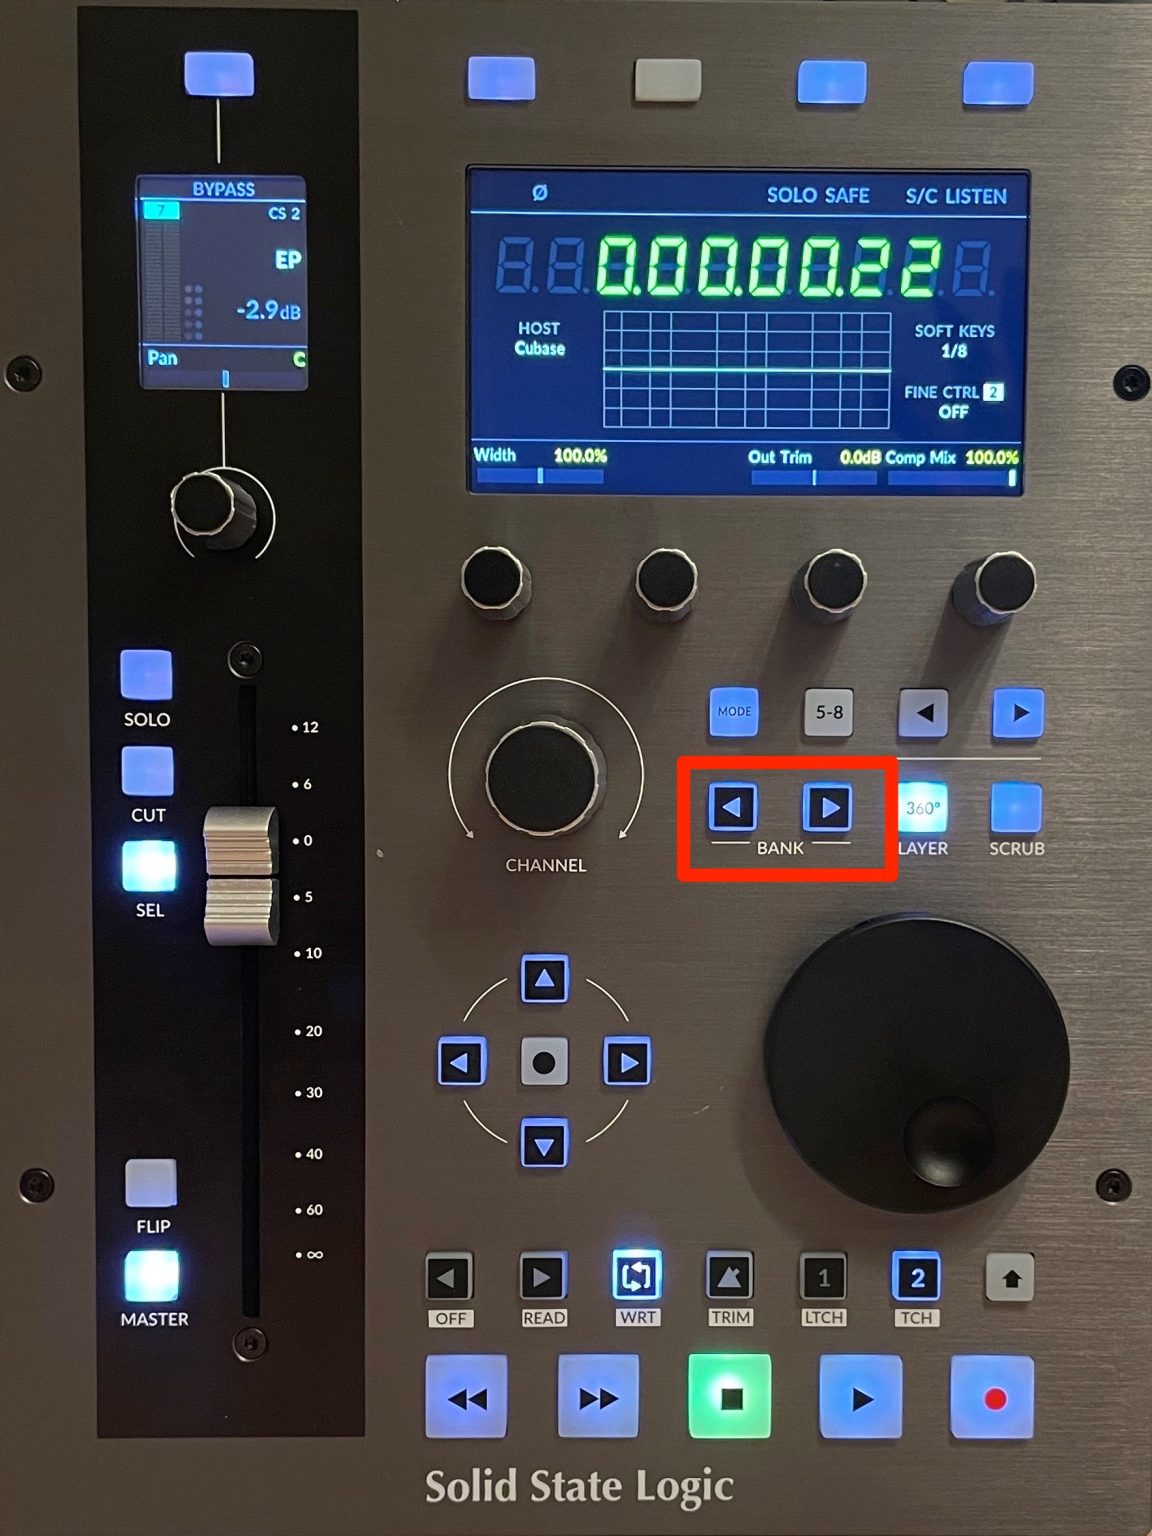
Use the left/right Bank controls to jump between the first and last mixer channels in the demonstrated workflow.
Mode switches between metering and plug-in views, as in DAW control.
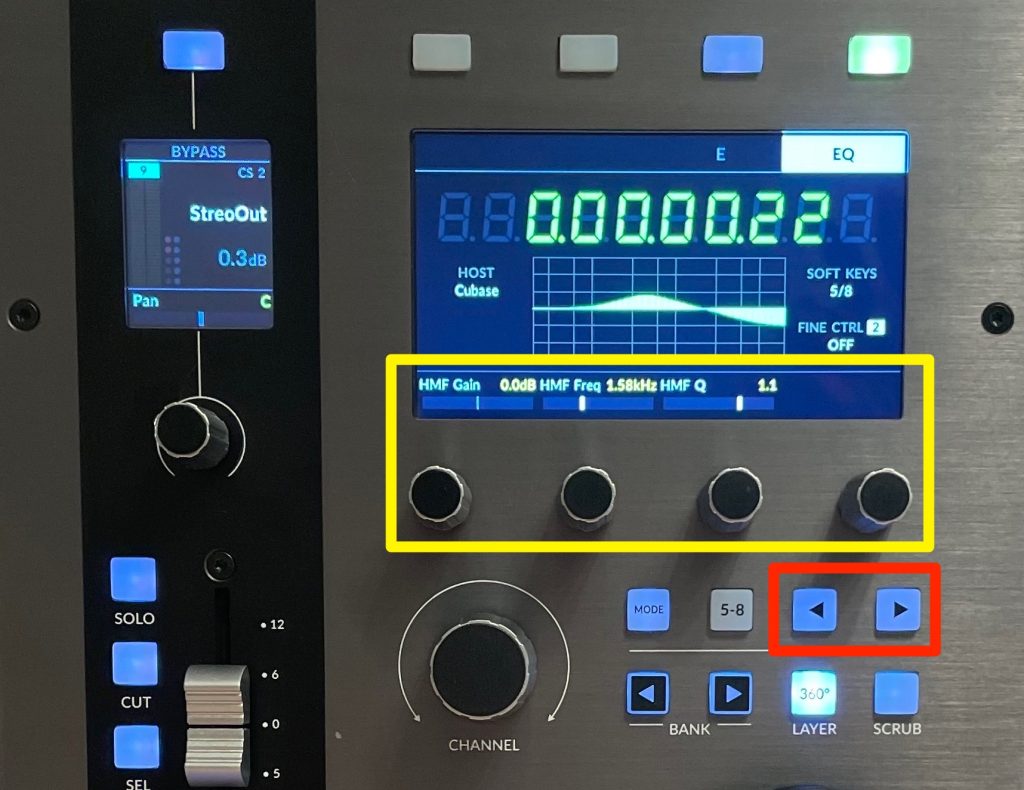
Use < > to choose an effect section for the selected track.
Its available parameters are then assigned to the V-Pots.
You can also press a V-Pot to reset its parameter to the default value.
What Did We Think?
From its appearance and features to plug-in integration and thoughtful details,
we found UF1 a satisfying product that lived up to the SSL name in our review.
The original review also looked forward to planned feature updates.
If you want to develop your DAW setup or move to a more capable controller, UF1 is worth considering.
Frequently Asked Questions
Q1. Which DAWs can I use with SSL UF1?
UF1 provides DAW-specific profiles. Choose the appropriate DAW and configure its integration during setup. We found the profile-based operation stable in the reviewed environment. Consult SSL's current compatibility list for your particular DAW and version; controls can differ between integrations.
Q2. What can I do with the motorized fader?
Control volume and, through Flip, other supported parameters such as pan. You can record those movements as automation. The surrounding controls also provide functions such as mute and solo. The available assignments depend on the current mode and DAW integration.
Q3. How should I select tracks in a large project?
Use < > mode to move the outlined bank of up to eight tracks while watching the DAW's track list. Choose the fader target within that bank using Fader Sel when needed. The single motorized fader controls its selected target; the four V-Pots access two groups of four channels in the bank.
NEW ARTICLES
Latest English Articles











