

This article explains "Loopback," software that lets you freely control sound routing on a Mac, and how to use it for music production and online streaming. Free tools such as Soundflower have become unstable with macOS updates, while Loopback is introduced as paid virtual sound routing software with high stability and sound quality. Through practical examples such as setting up multiple virtual devices, working with a DAW, processing audio in video meetings such as Zoom, delivering clear audio in online streams and recording meetings, it shows how producers can flexibly manage audio input and output on a Mac.
Virtual Sound Routing Software That Also Shines in Online Streaming

Recently, we have often received requests and questions like "I want to freely set up the sound on my Mac."
- I want to play the sound of Mac apps or my DAW in web meetings (including online streams)
- I want to record the sound playing from my computer in my DAW
- I want to set the best sound settings for each piece of software

URL: https://rogueamoeba.com/loopback/
Here, we explain "Loopback," high-quality virtual sound routing software that can handle requests like these.
We previously explained the free software combination "LadioCast" + "Soundflower," which lets you route sound for free.

However, with macOS version updates, there have been reports that Soundflower does not work well or is unstable.
"Loopback," explained here, is paid software, but it clears these problems and excels in stability and sound quality.
*The trial version is designed to intentionally degrade the sound quality after 20 minutes of use.
Now, let's move on to explaining the product.
Setting Up Loopback

Go to the official website and download the product.

After downloading, install the product.
Once the installation is complete, set up Loopback.
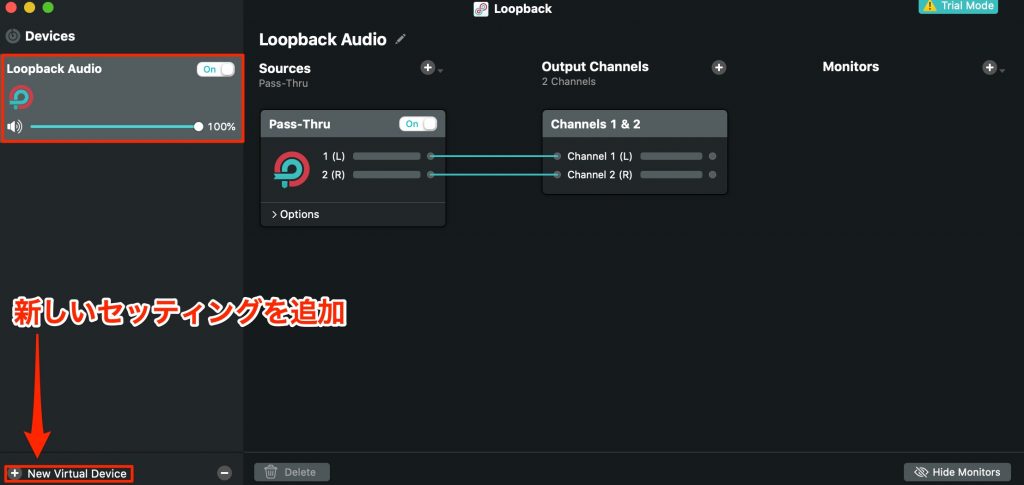
A device is provided on the left, so register the applications or DAWs whose sound you want to record to this device.
You can also create multiple setups with "New Virtual Device."
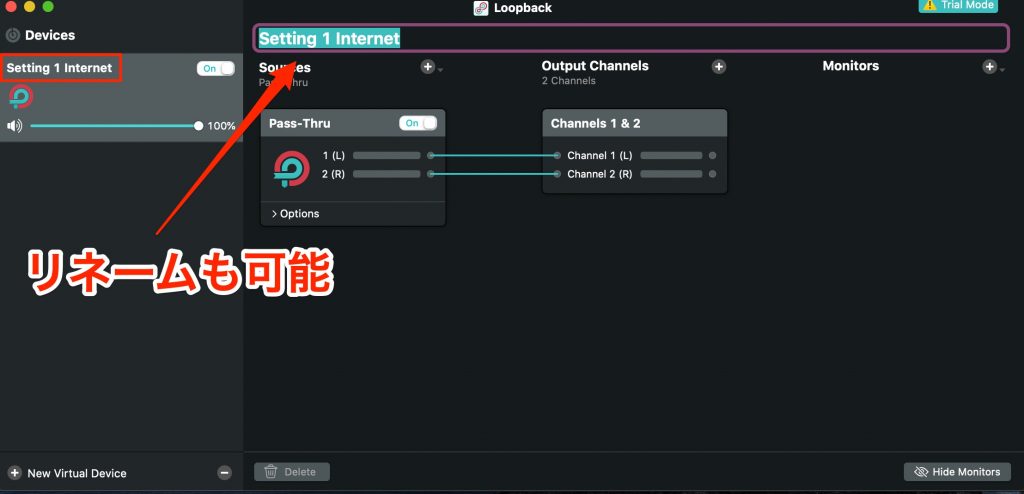
You can give a name to the device you created.
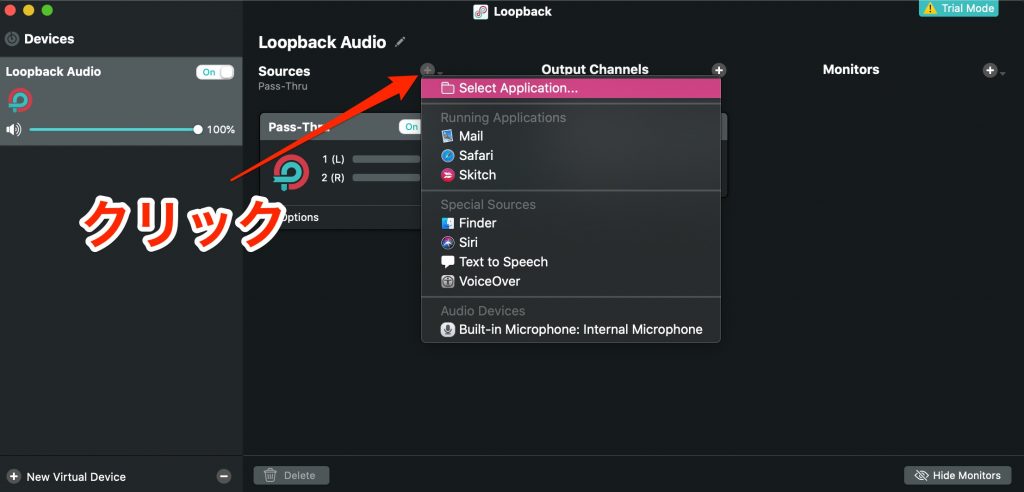
Press "+" in the "Sources" section to select the applications to record.
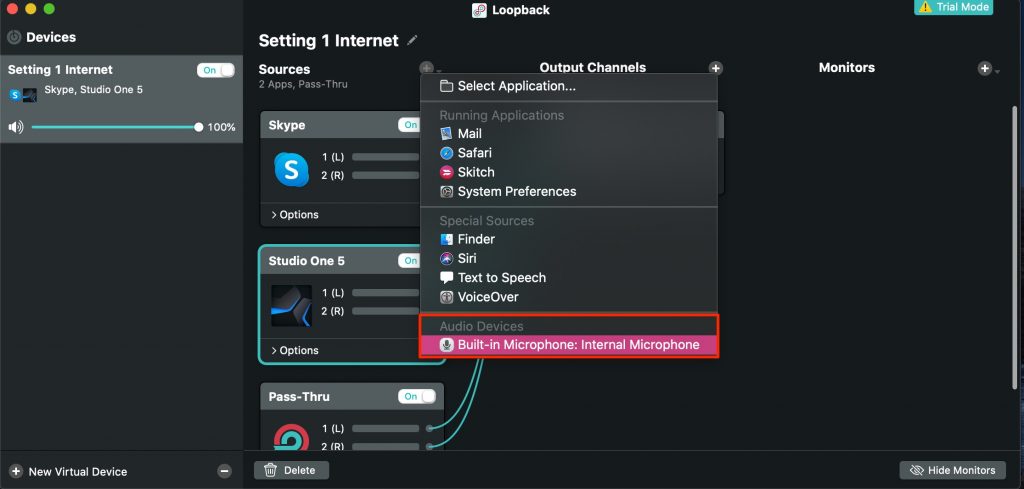
You can also specify "the computer's built-in microphone" or "a microphone connected to an audio interface."
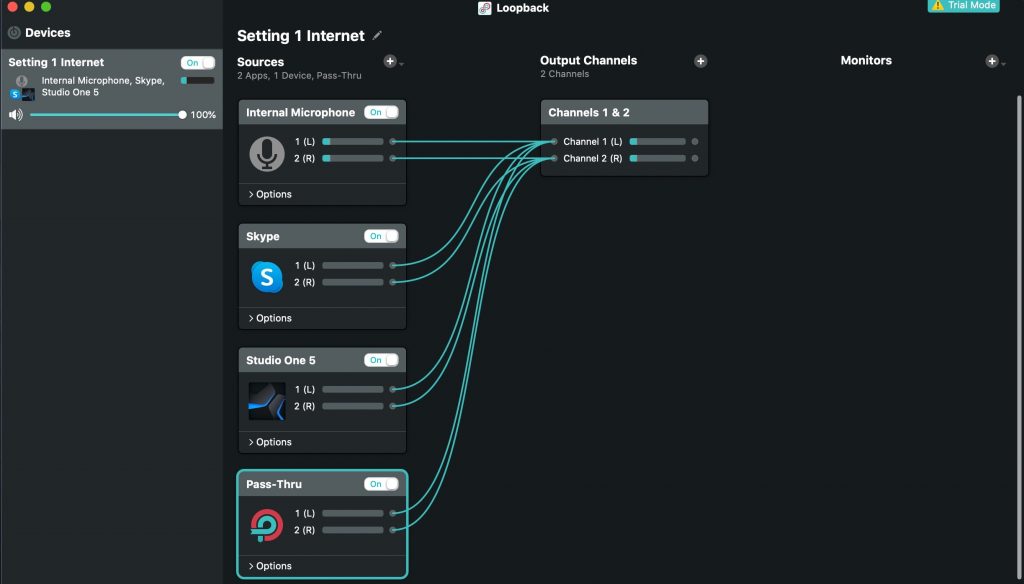
This image shows a device after registering multiple pieces of software.
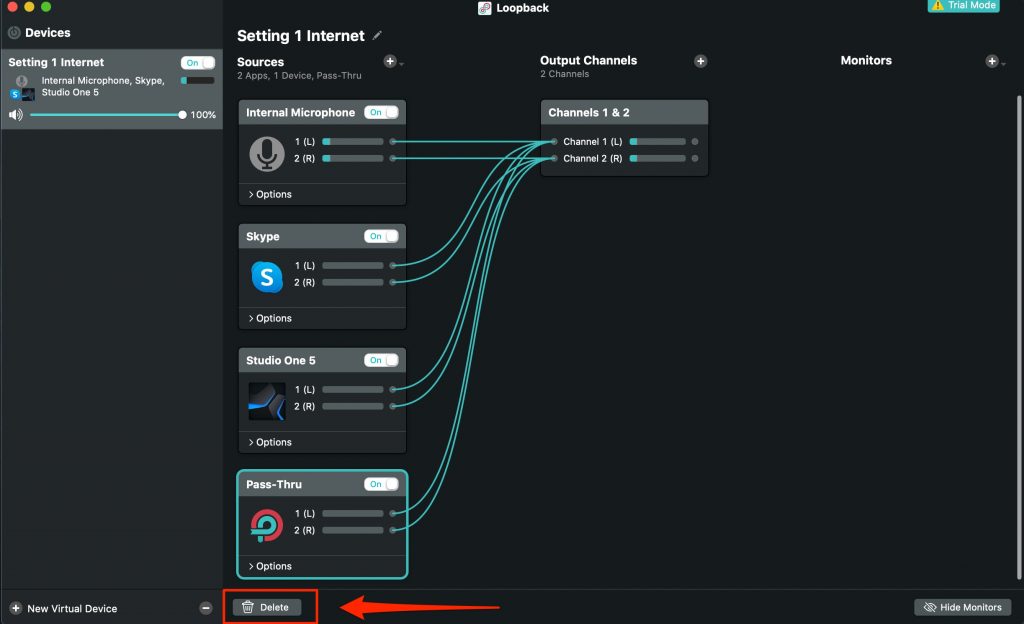
Unneeded applications and inputs can be removed by selecting them and choosing "Delete."
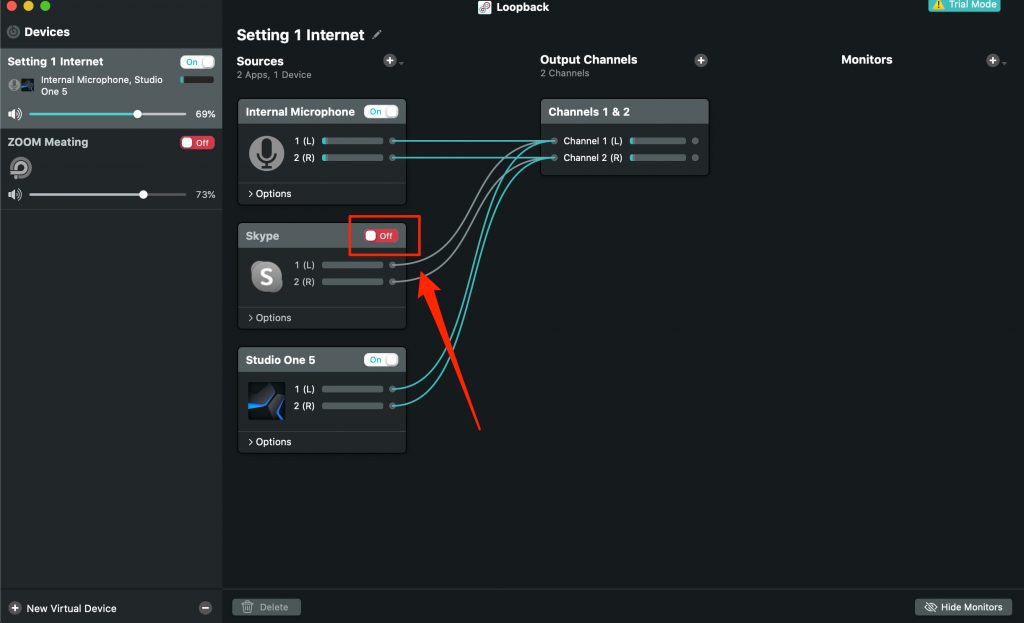
You can also temporarily turn off an application's sound.
Depending on the software and microphone device, you may get feedback or hear your own voice coming back.
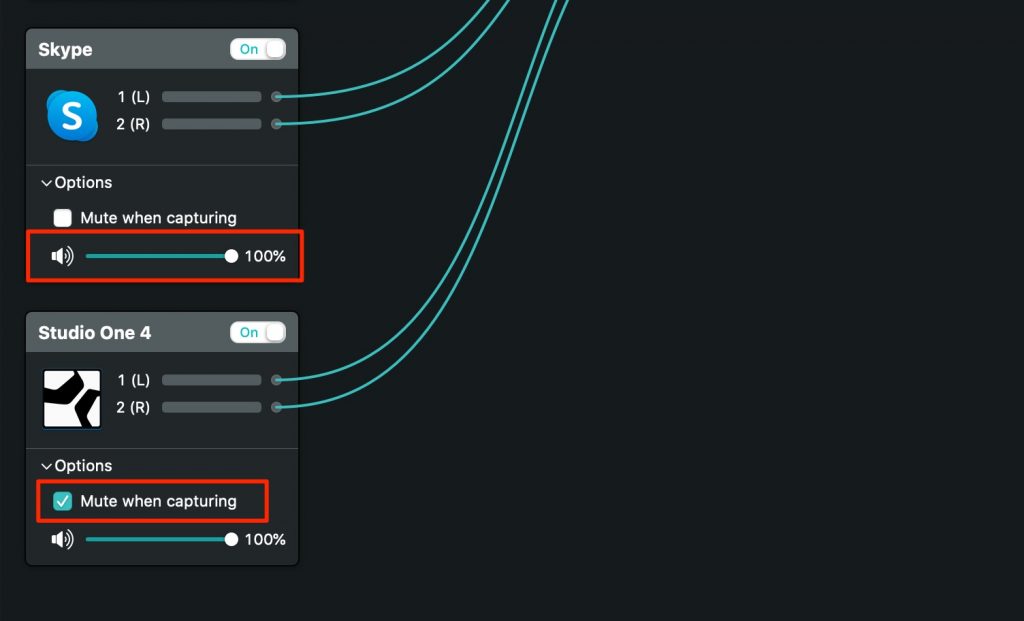
In that case, checking "Mute when capturing" in "Options" solves it.
You can also easily adjust the volume balance of each application and input device.
With these steps, the setup is complete.
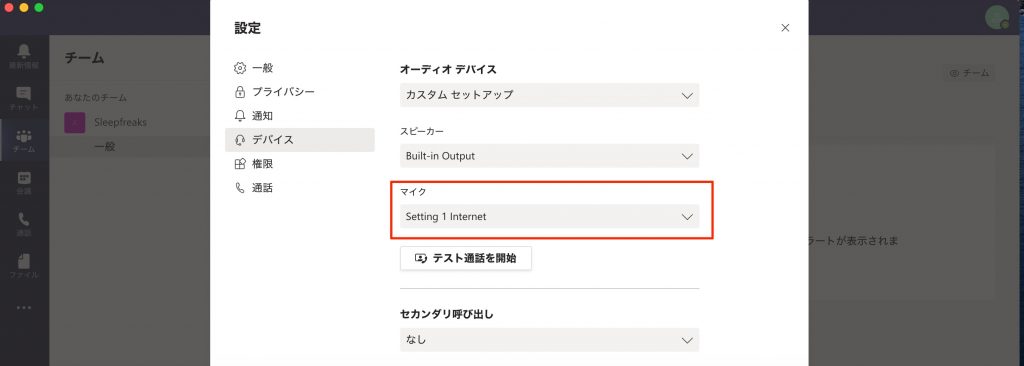
By assigning the input of online meeting software to the device you created, as shown, you can send (output) the sound of the applications and microphones registered above all together.
Also, in the Mac's own settings,
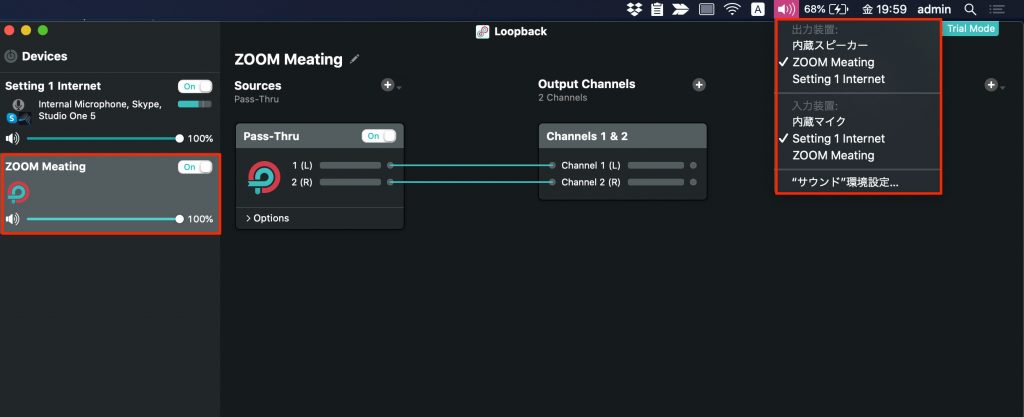
the names of the devices you registered appear in the Mac's inputs and outputs like this, so you can select the device you want.
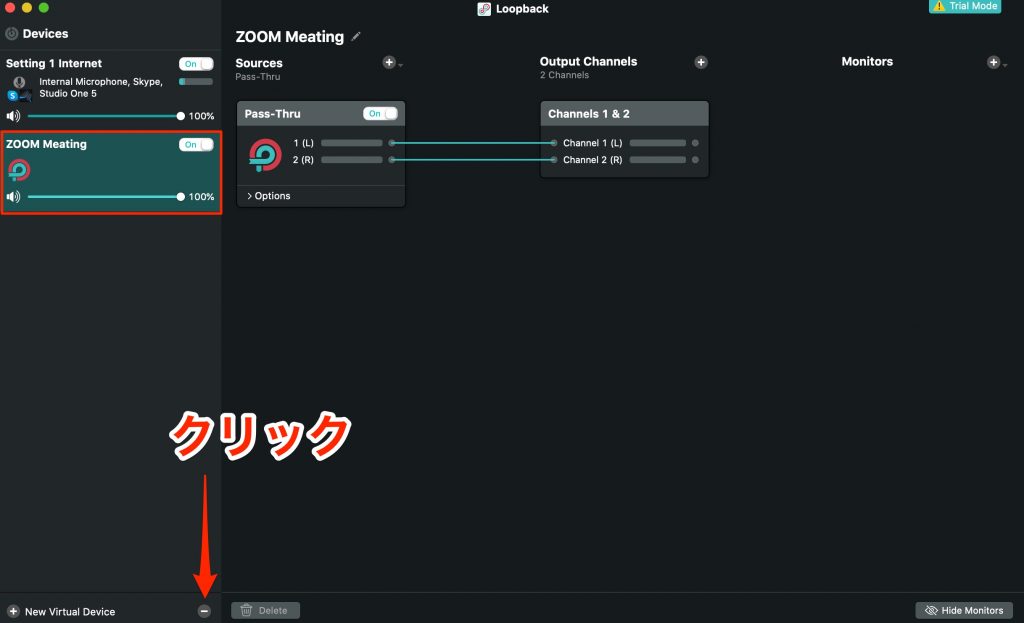
As mentioned at the beginning, you can register multiple devices; select a device you no longer need and press the "-" button to delete it.
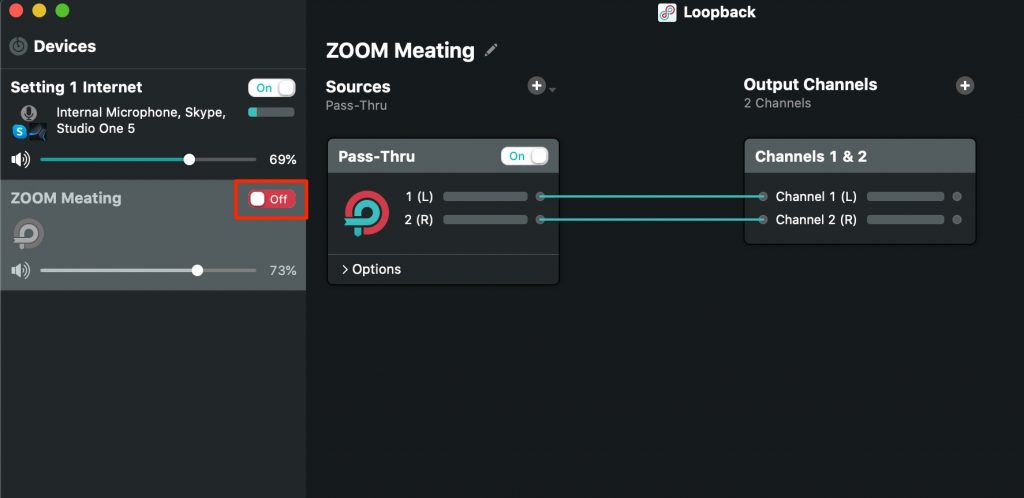
You can also keep the settings and temporarily disable (hide) the device.
This is also very convenient.
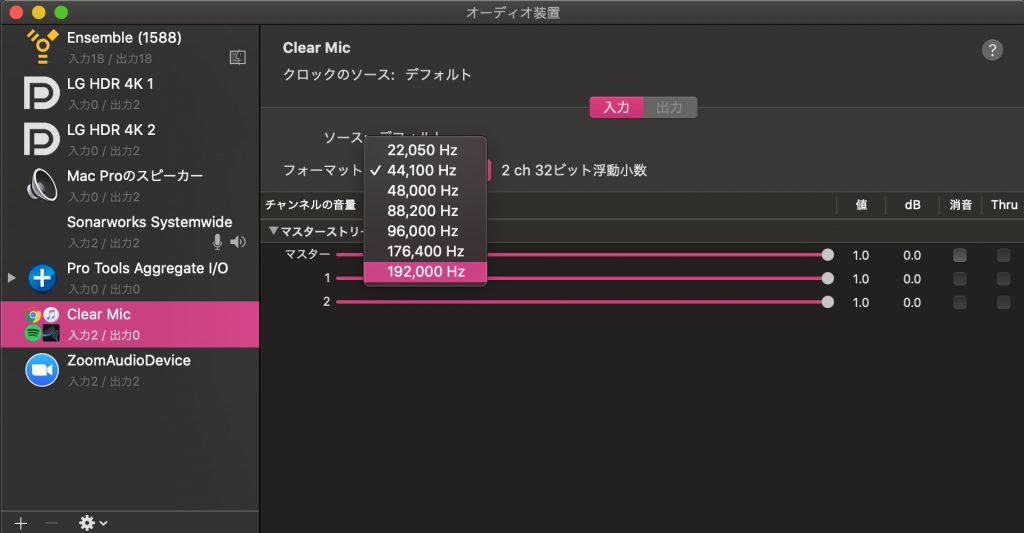
You can also change the sampling rate from "Applications" > "Utilities" > "Audio MIDI Setup."
It is also great that it supports up to 192,000 Hz!
Sound Routing Use Cases
Now that you have a rough overview, here are some practical use cases.
Depending on your ideas, it can be used for all kinds of purposes.
Delivering Clear Audio in Online Calls and Streams
These are settings for delivering your voice cleanly to others in online meetings on ZOOM, YouTube streams and so on.
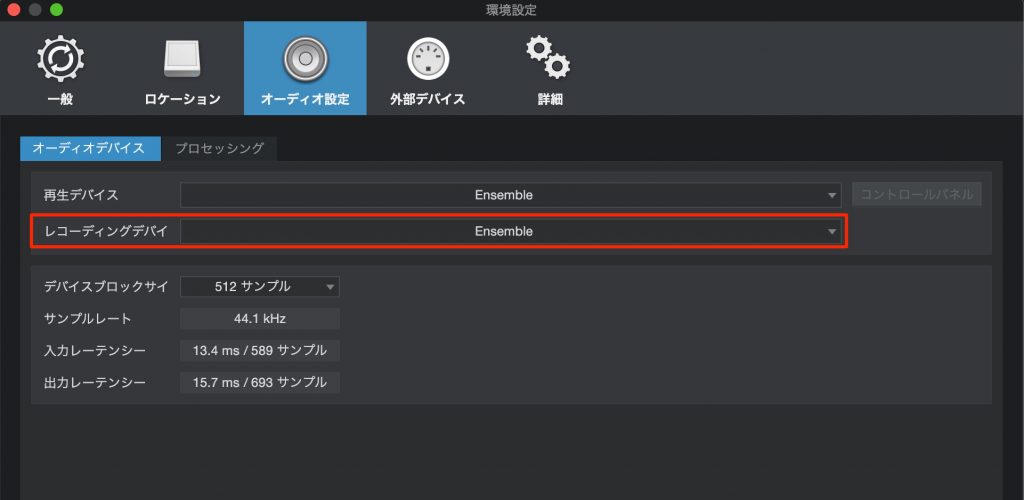
Set the microphone connected to your audio interface as the DAW's input.
*Studio One is used as the example DAW.
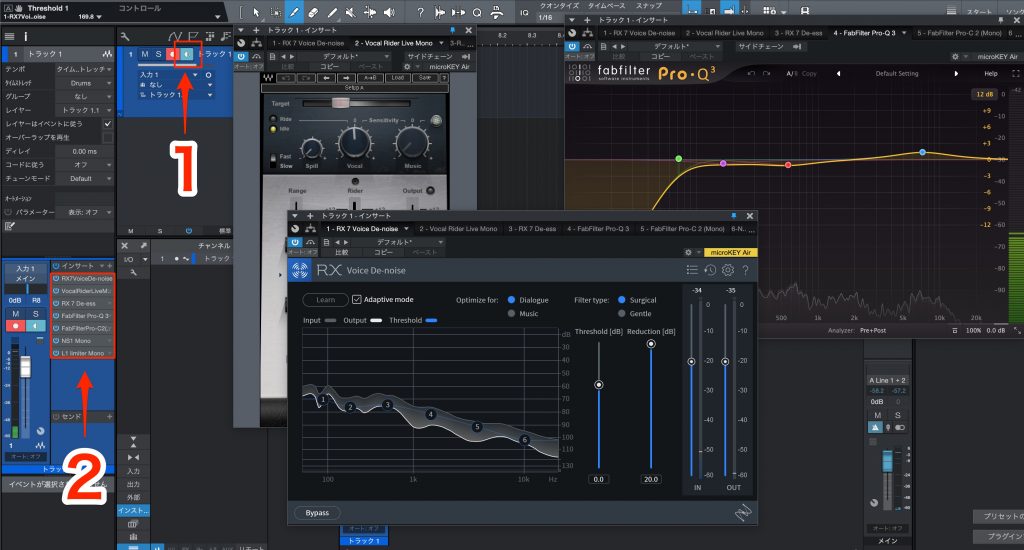
Create an audio track and enable input monitoring for the microphone.
While listening, apply effects such as noise removal, EQ, compression and limiting.
This completes the DAW side of the setup.
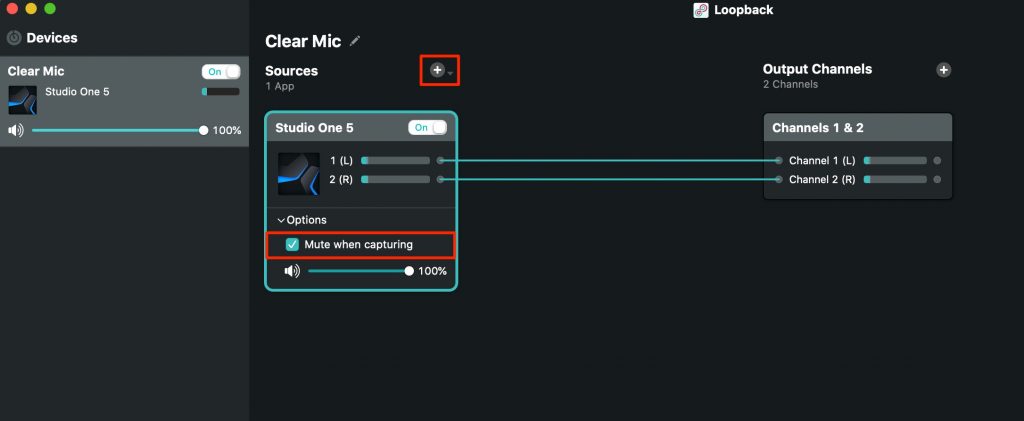
In Loopback, add Studio One (the DAW software).
To avoid hearing your own voice come back, enable "Mute when capturing" in Options.
This completes the setup.
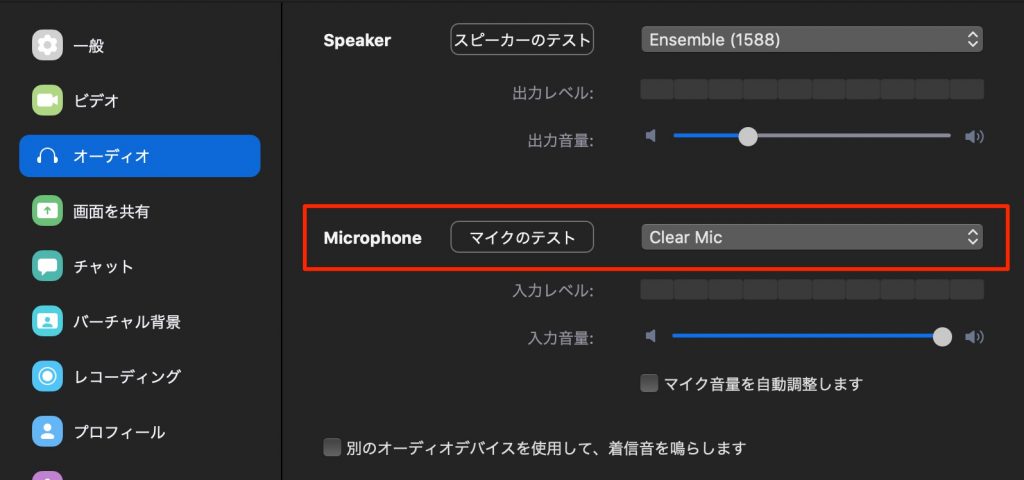
Just assign the microphone input of the meeting app (here, ZOOM) to the Loopback device you created.
You can use it with Skype, Google Meet and others in the same way.
If you also want to let the other party hear music or application sounds, it looks like this.
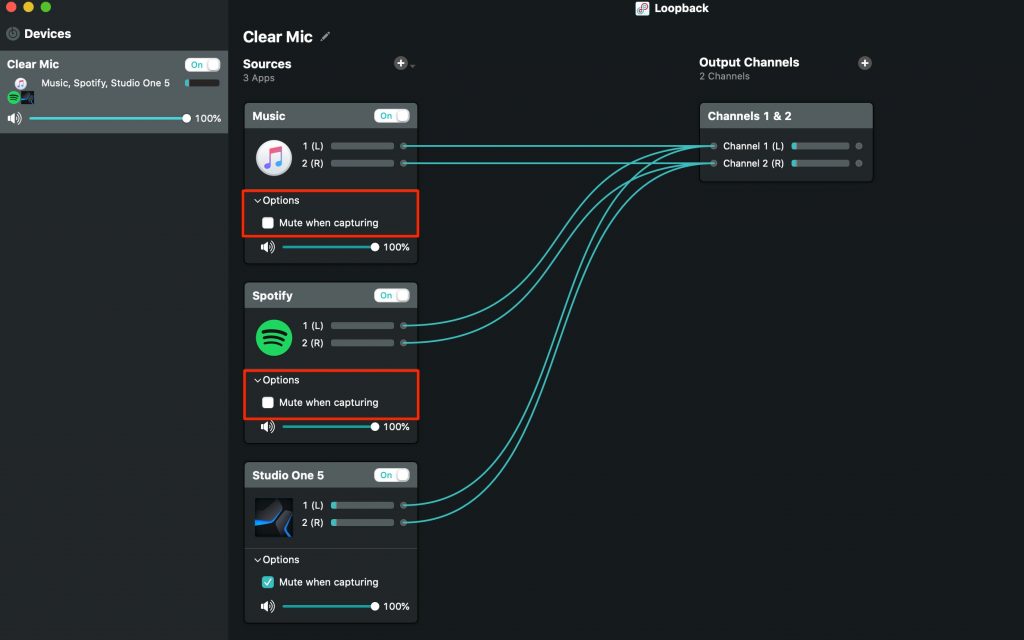
Just add Apple's "Music" or "Spotify."
In most cases, you will want to hear the music yourself as well (monitoring).
In that case, disable "Mute when capturing" in Options.
This way, your own voice does not come back, but you can hear the sound of the specified music app.
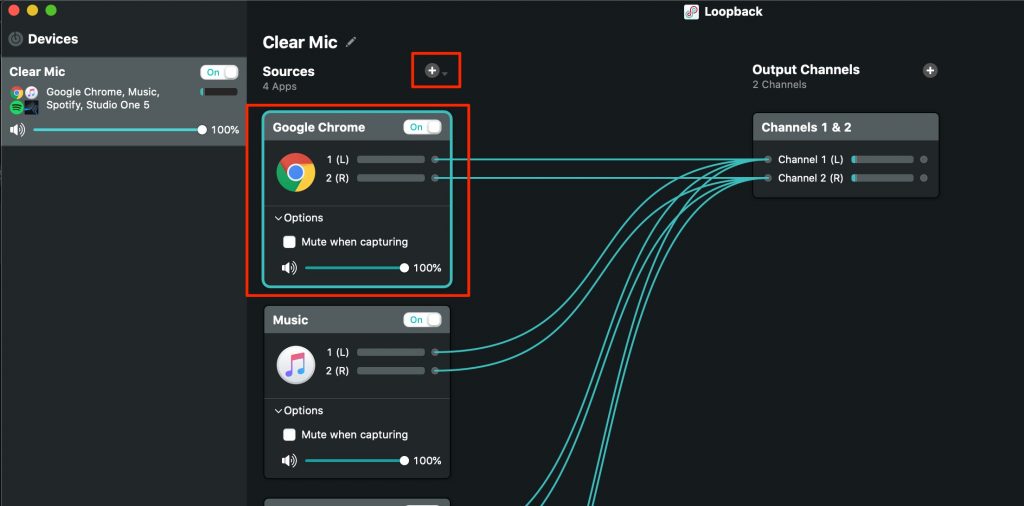
Adding a web browser to this also sends sounds played in the browser, such as YouTube, to the other party.
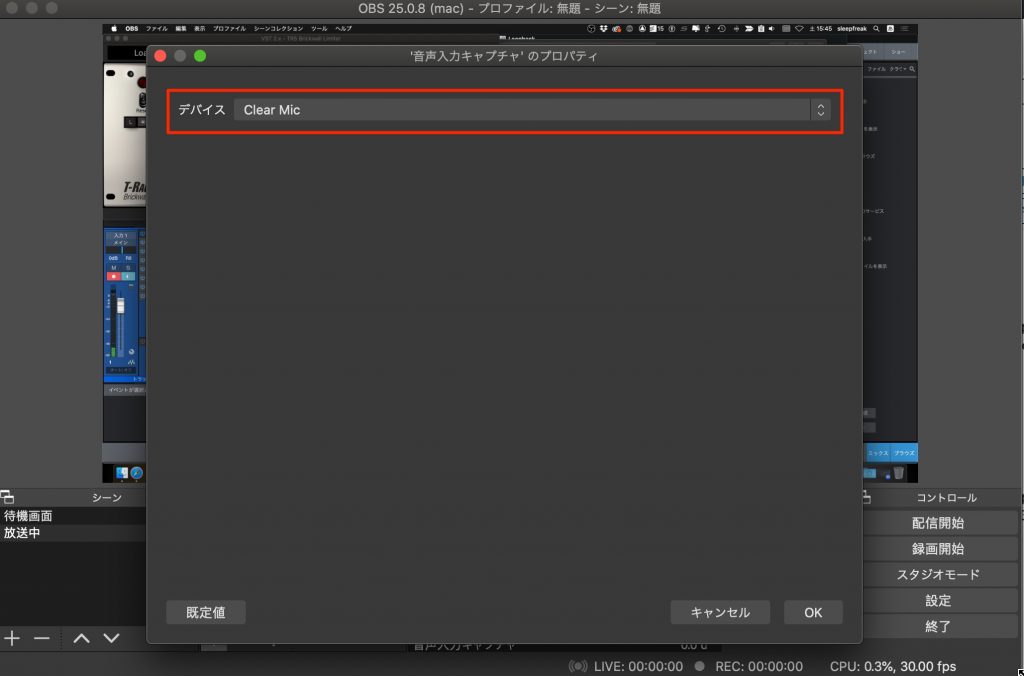
Of course, it can also be used in "OBS" for streaming to YouTube and elsewhere.
Recording Meetings
You can also record conversations in online meetings and sound output from your PC to keep a record.
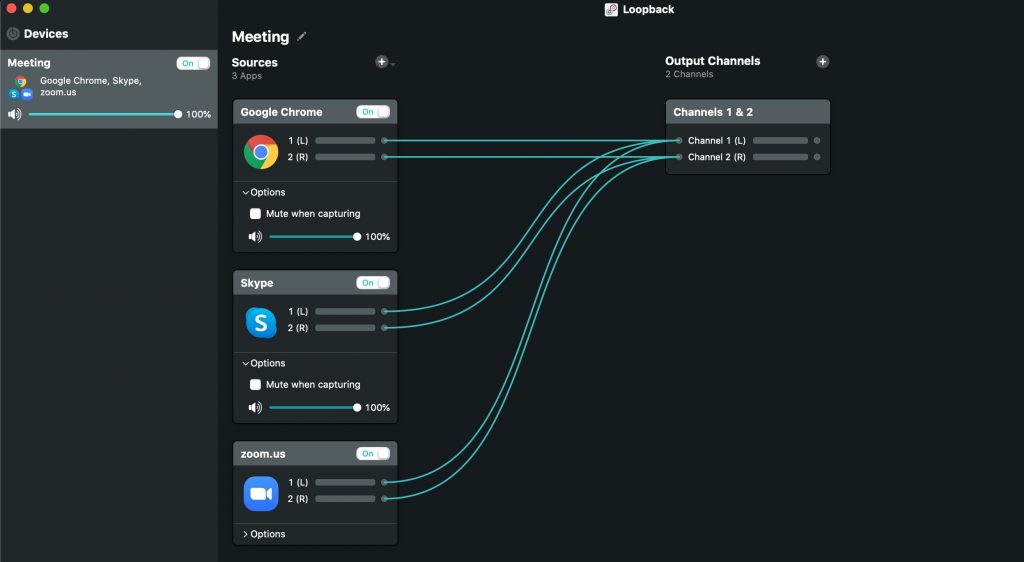
Add the applications whose calls you want to record, like this.
If you also want to record your own voice, don't forget to add the microphone device.

The simplest way to record is to use "QuickTime Player," which comes with the Mac.
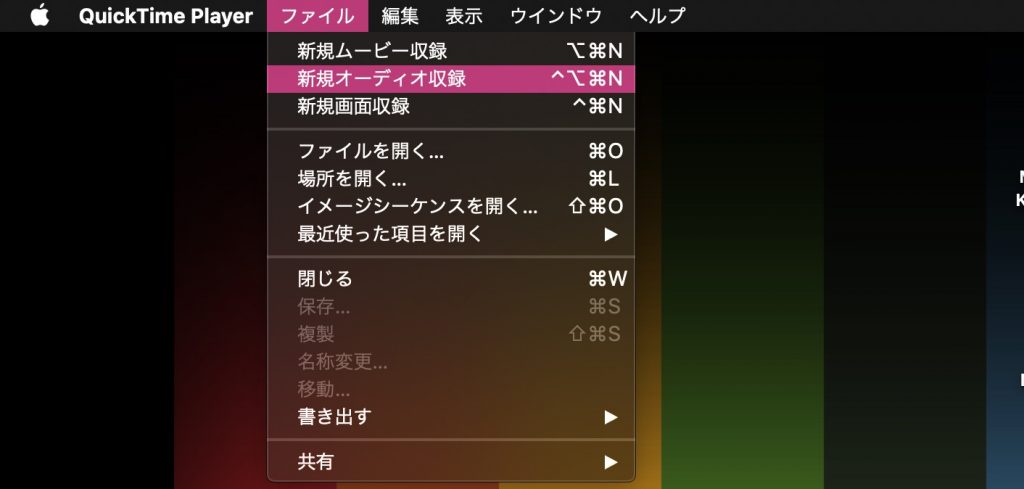
Launch QuickTime Player and select "File" > "New Audio Recording" from the top menu.
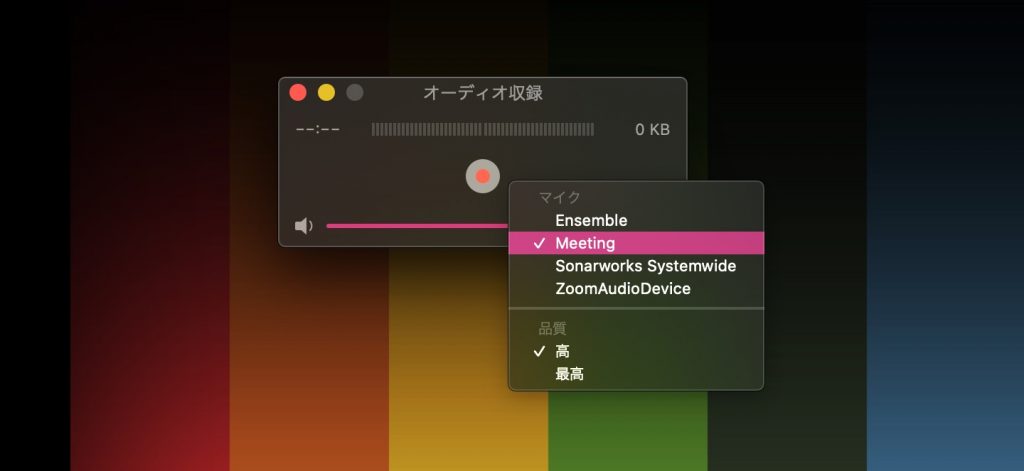
From the REC button in the window that appears, select the device you created.
Then just record, and all the sound is captured.
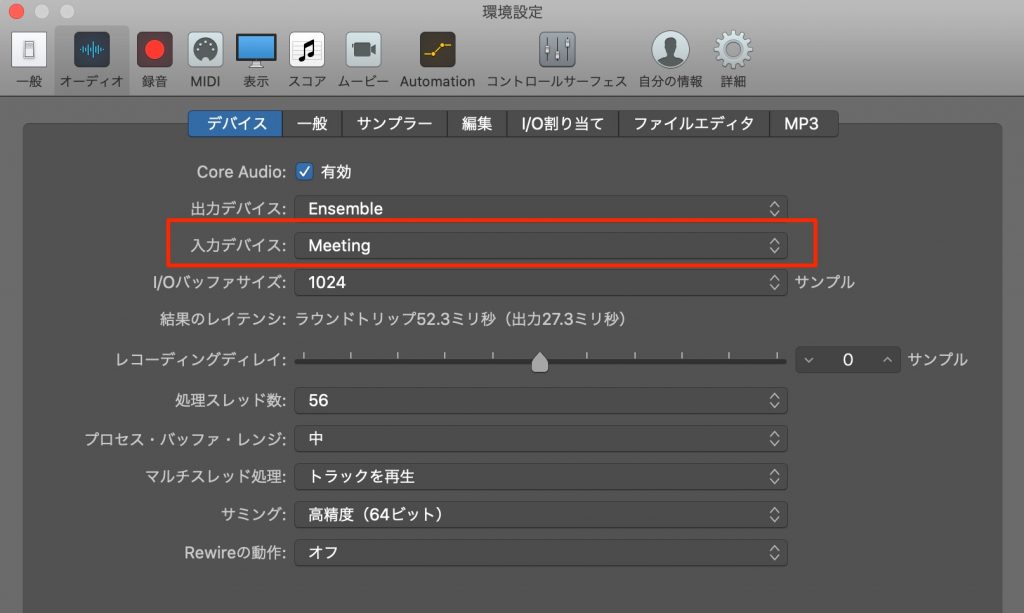
Recording into a DAW is also easy.
Just assign the sound input to the Loopback device.
Then record the sound to an audio track in real time.
Using It as a Dummy Audio Input
Many Apple computers have a built-in microphone, and some software automatically selects it, so audio input can happen unintentionally.
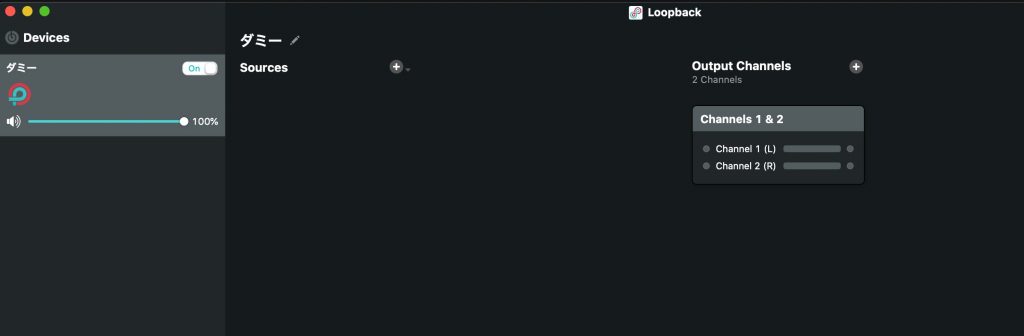
In some cases it is handy to create a dummy device with no sound input like this and assign it to software or the computer's input.
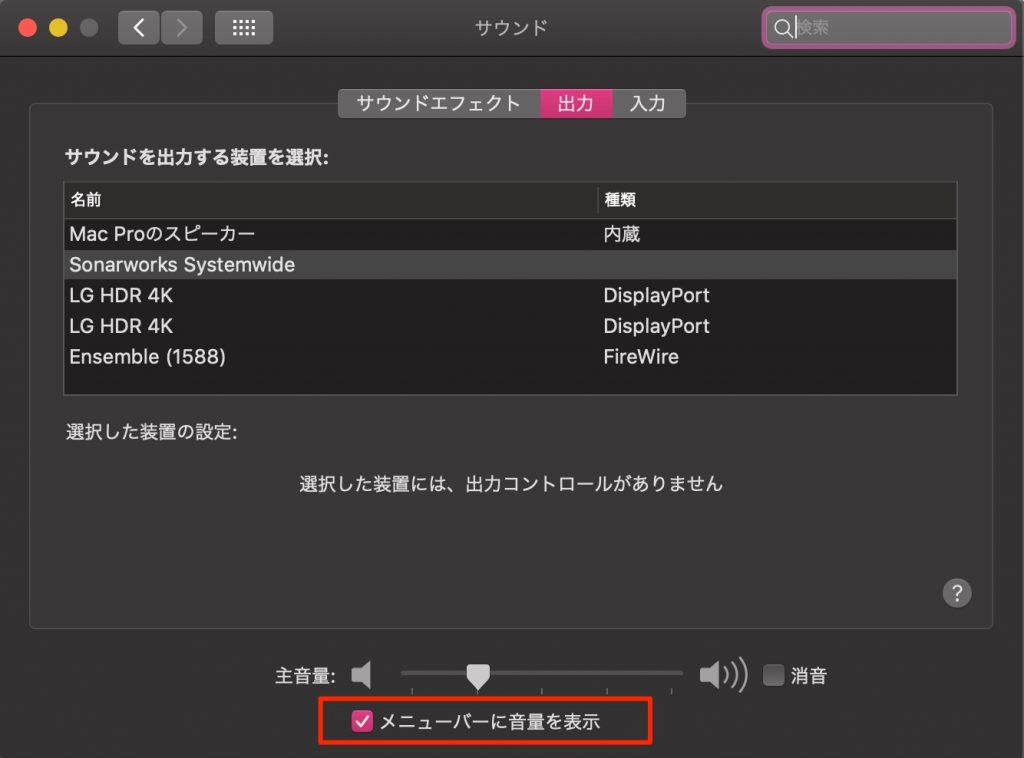
If you open "Sound" in the Mac's System Preferences and check "Show volume in menu bar,"
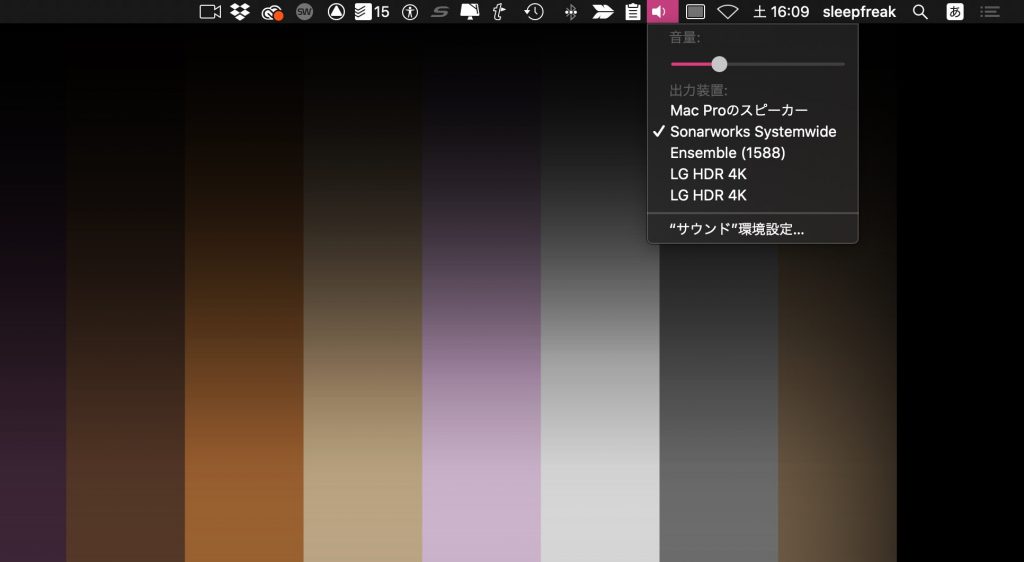
you can conveniently control the output device and volume from the speaker icon in the top menu.
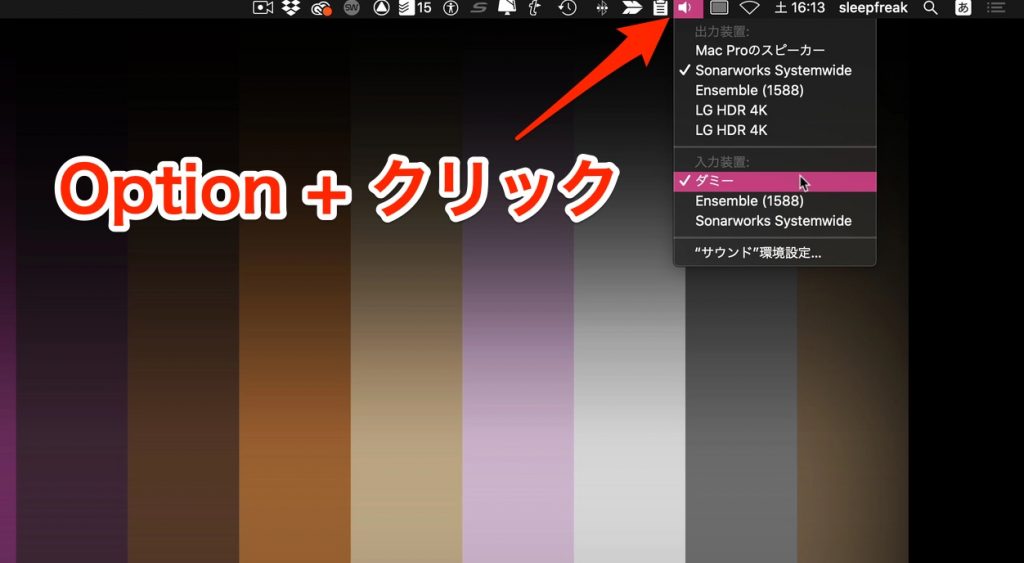
You can also select the input device by Option-clicking the speaker icon.
Setting it to the "dummy" created above means that, apart from some individual applications, no input will come from the built-in microphone.
What did you think?
It is excellent software that lets you finely customize the sound of any software you like.
A trial version is also available, so if you want complete control over sound routing on your Mac, be sure to try it.
Frequently Asked Questions
Q1. How do I send my DAW's sound to a Zoom stream on a Mac?
Add the DAW you use in Loopback and create a virtual device. Then just assign Zoom's microphone input to this device to stream the DAW's audio. Enabling "Mute when capturing" in the options prevents feedback of your own voice.
Q2. Why should I switch from Soundflower?
There are many reports that Soundflower becomes unstable with macOS version updates, whereas Loopback excels in stability and sound quality. It is paid, but Loopback is better suited to a professional production environment.
Q3. Can I record the audio of online meetings?
Yes. Using QuickTime Player is the simplest way, and if you want to record into a DAW, you can assign the input to the Loopback device and record in real time.
Q4. What is the benefit of 192 kHz support?
192 kHz is support for the highest-quality audio sampling rate. It can be changed in Audio MIDI Setup, enabling high-quality production and streaming and a professional music production environment.
NEW ARTICLES
Latest English Articles











