
Ableton Live's Transpose function is a tool for instantly changing the key of MIDI clips. It comes in handy when you want to match a vocalist's range or change the feel of a song. Instead of transposing every track by hand, you simply select the clips and drag the area outlined in red. Note, however, that drum tracks have no pitch, so applying Transpose changes every drum sound and breaks the music. Understanding how to use it correctly will make your DTM production much more efficient.
What Is Transpose?
Transpose is a key-change function that, for example, changes a song in the key of C to E.
- The song you made does not fit the vocalist's key
- You want to change the feel of the song
It is useful in cases like these.
You could take the brute-force approach and transpose every track by hand,
but with the Transpose function, you can change the key of your MIDI clips in an instant.
How to Use Transpose in Live
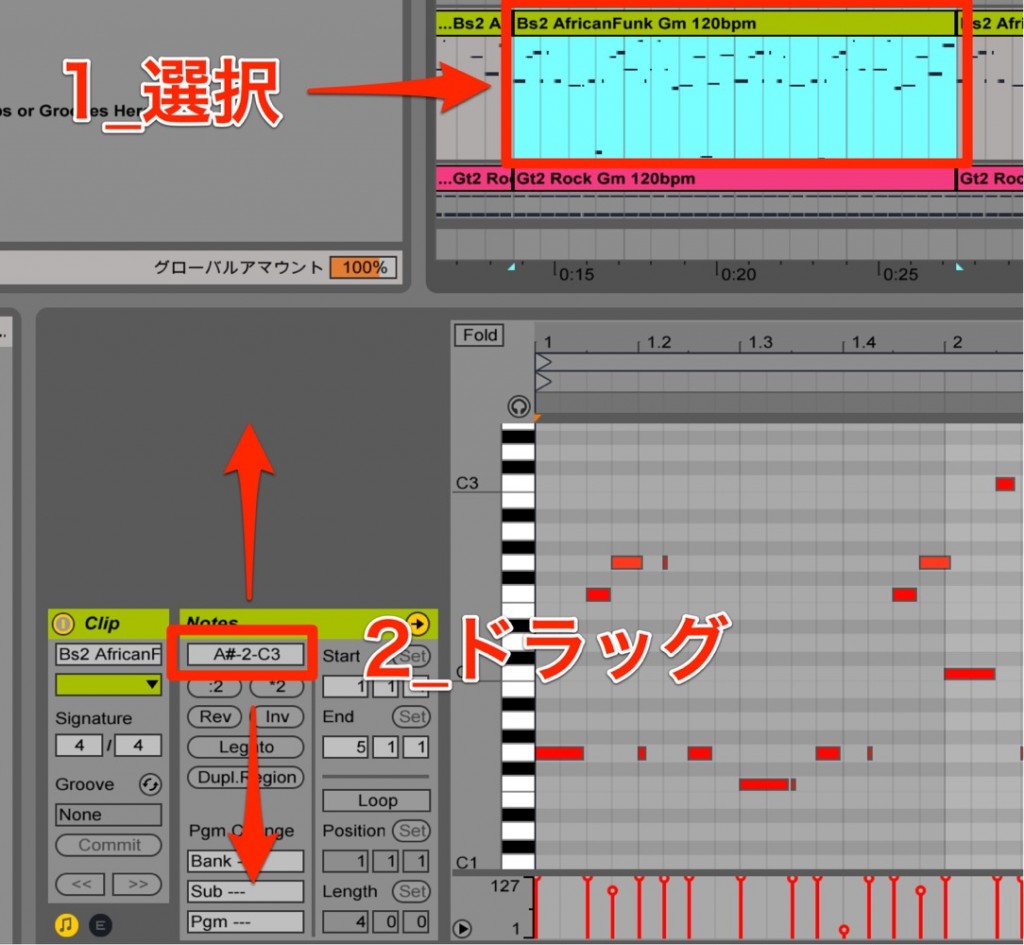
- 1_Select the clips you want to transpose
- 2_Drag the area outlined in red up or down to transpose
*Drum tracks have no concept of pitch, so do not use Transpose on them.
If you apply it, every kit sound will change, and the result will be a disaster.
Frequently asked questions
Q1. What are the steps for using Transpose in Ableton Live?
Just select the MIDI clips you want to transpose and drag the area outlined in red up or down. You can transpose several tracks at once, which is far more efficient than transposing by hand.
Q2. What happens if I transpose a drum track?
Drum tracks have no concept of pitch, so applying Transpose changes every kit sound and the song falls apart. It is important not to use it on drum tracks.
Q3. When is Transpose needed?
It is useful when you want to match a song to a vocalist's key or change the feel of an existing song. It greatly expands your freedom in music production.
NEW ARTICLES
Latest English Articles











