The Wavetable synthesizer, a new feature in Ableton Live 10, is a powerful tool essential for modern sound design. This article explains in detail everything from the basics of Wavetable, which has multiple oscillators, envelopes, LFOs and filters, to practical sound editing techniques. By combining Wave Position control, adding change over time with envelopes and LFOs, and expressive features such as Glide and unison, you can intuitively create a wide variety of sounds such as leads and basses. The detailed parameter view also improves efficiency, enabling a wide range of users from beginners to experienced producers to achieve advanced sound design.
Wavetable: a powerful synth essential for today's sound
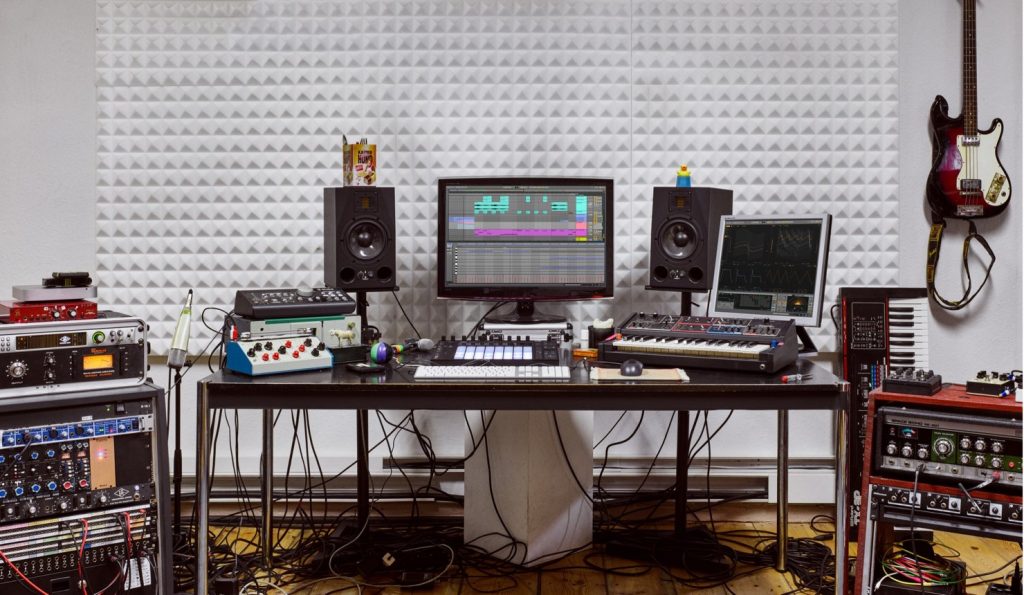
The Wavetable synthesizer is newly included in Ableton Live 10.
With the synthesis method behind much of today's mainstream sound now built in as standard, more aggressive sound design is possible.
A wavetable is an oscillator with short loop samples (waveforms) arranged at random. You can play a specified sample sound, or enjoy a sound that changes as it moves between samples; it's an oscillator well suited to dynamic sound design.
In this article we'll explain how to use the Wavetable synthesizer.
How to use the Wavetable synth
Selected questions and answers from the YouTube video

A question: when I import a sample into Wavetable, it shows "Raw." What is this? I've been looking it up, but all I find is that it splits it into 1024-sample waveforms, so I don't really understand.

It means the loaded sample is split at fixed intervals (1024 samples) to generate the sound. If you don't apply it, the splitting of the sound is adjusted automatically, generating a smoother sound.
Launching Wavetable
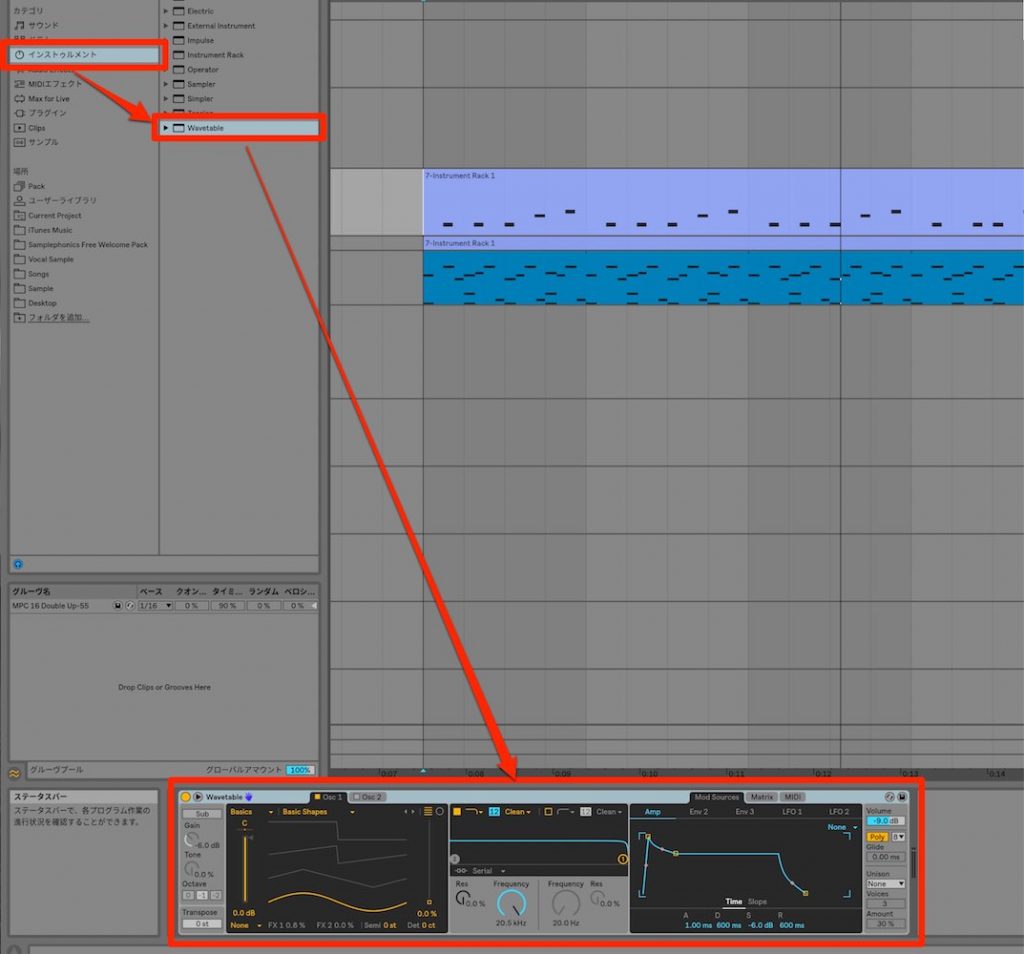
Just drag and drop "Wavetable" from Instruments onto a MIDI track.
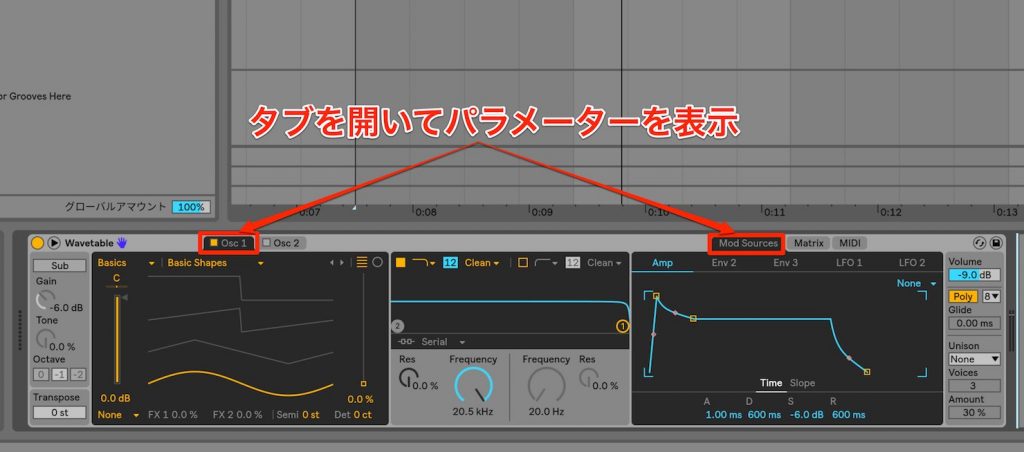
By default, you adjust each parameter by opening the tabs "Osc 1," "Osc 2," "Mod Sources," "Matrix" and "MIDI," but it's a bit hard to get an overview.
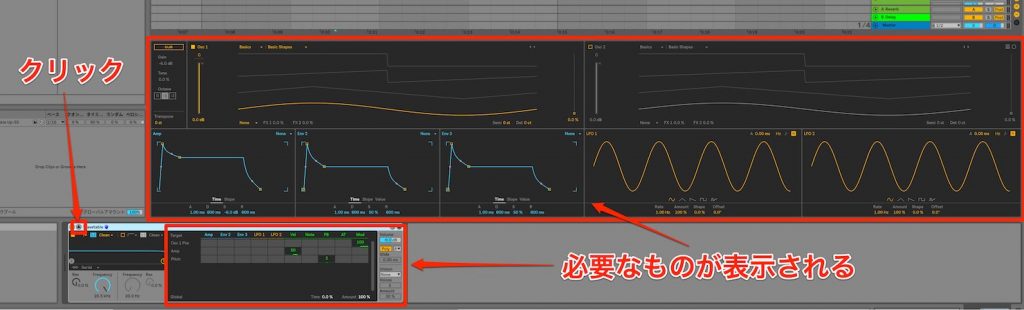
Clicking the triangle icon next to the device activator button shows the detailed parameters at the top.
You no longer need to open items in tabs, which improves your efficiency.
Wavetable's parameters
Wavetable is designed very simply.
Let's go through the parameters on it.
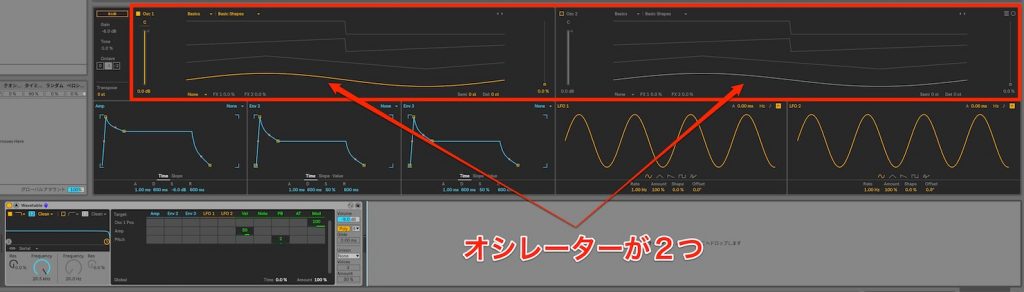
Two oscillators,
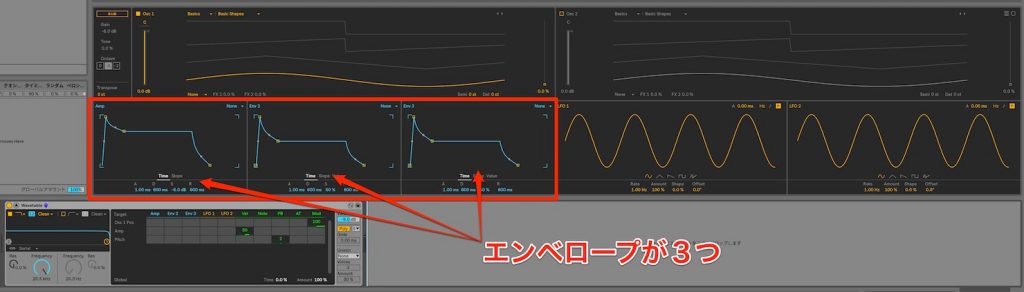
three envelopes, including the one applied to the master Amp,
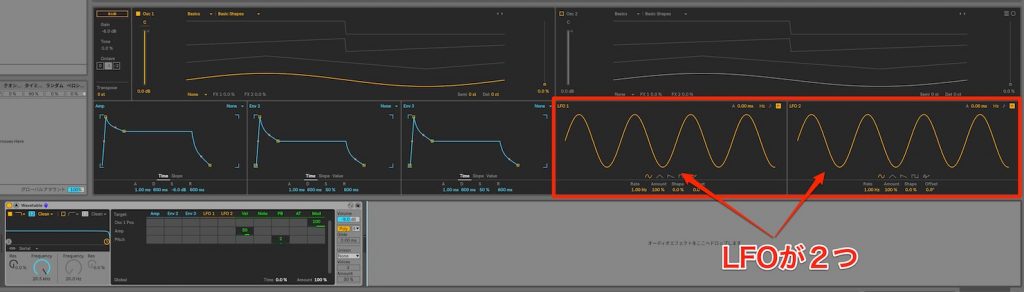
two LFOs,
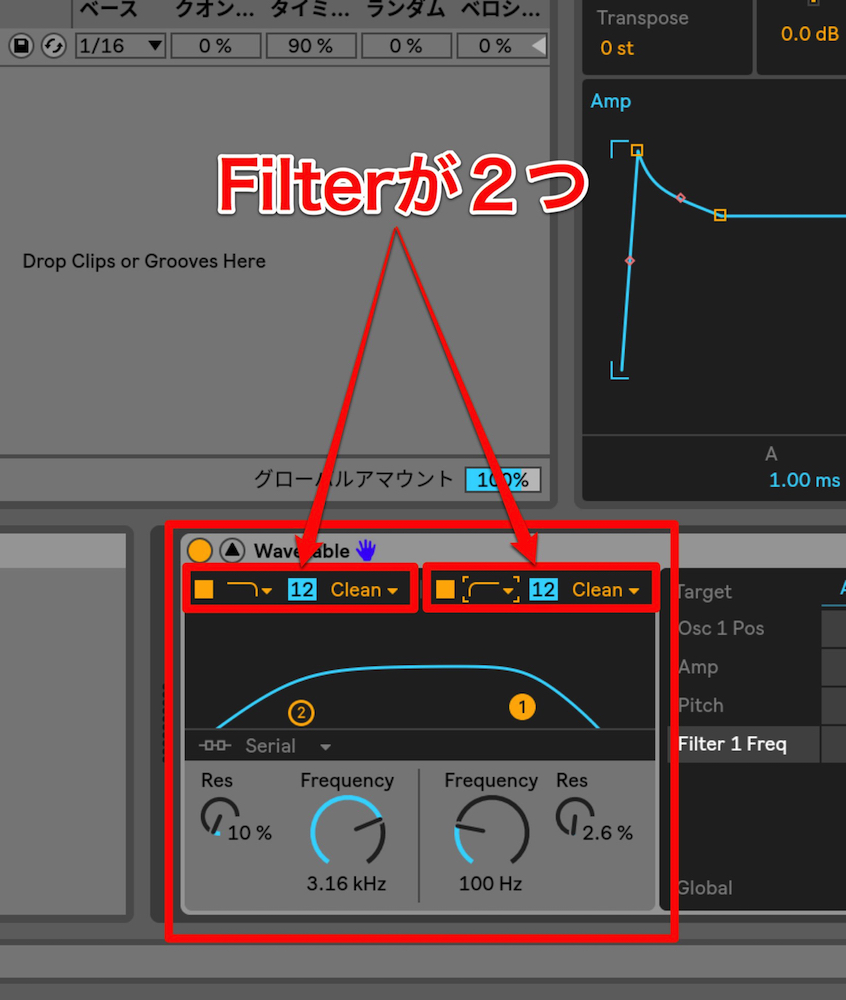
and two filters.
You set where the Envs and LFOs are applied in the Matrix next to the Filter,
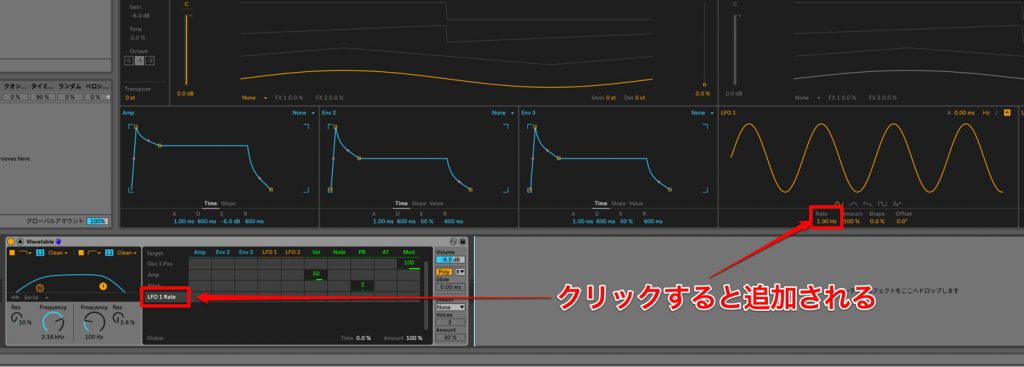
and clicking a parameter adds it to the Matrix.
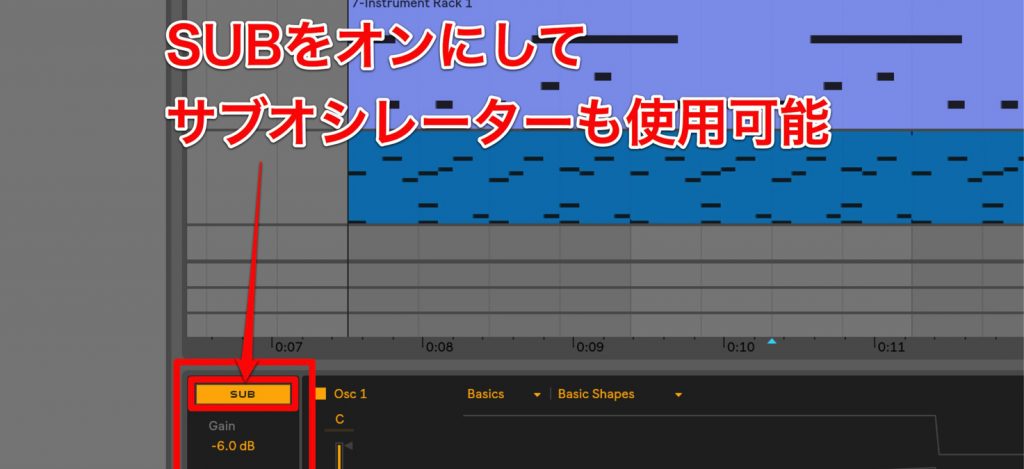
Turning on "SUB" at the top left also lets you use the sub-oscillator.
Now let's actually make some adjustments.
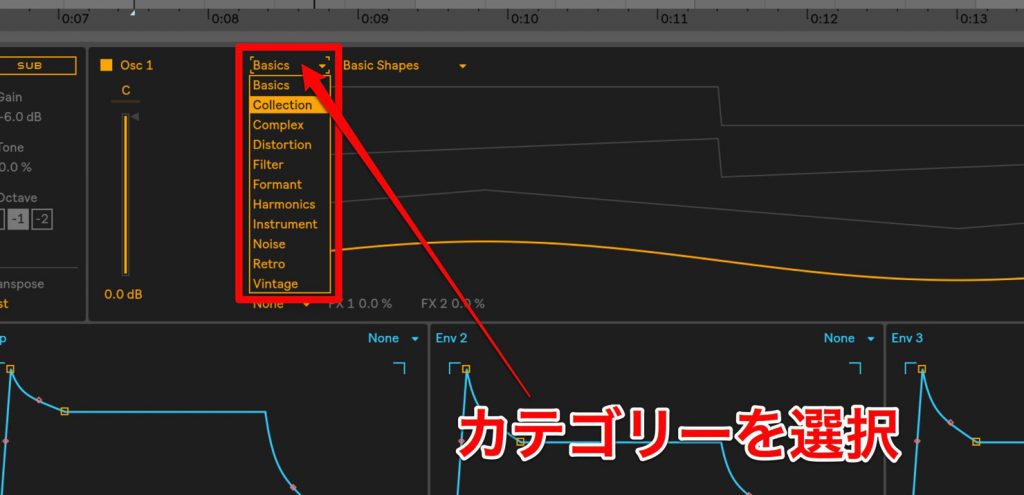
On the left side of the upper area where the waveform is displayed, select the Wavetable category.
This time, let's choose "Collection."
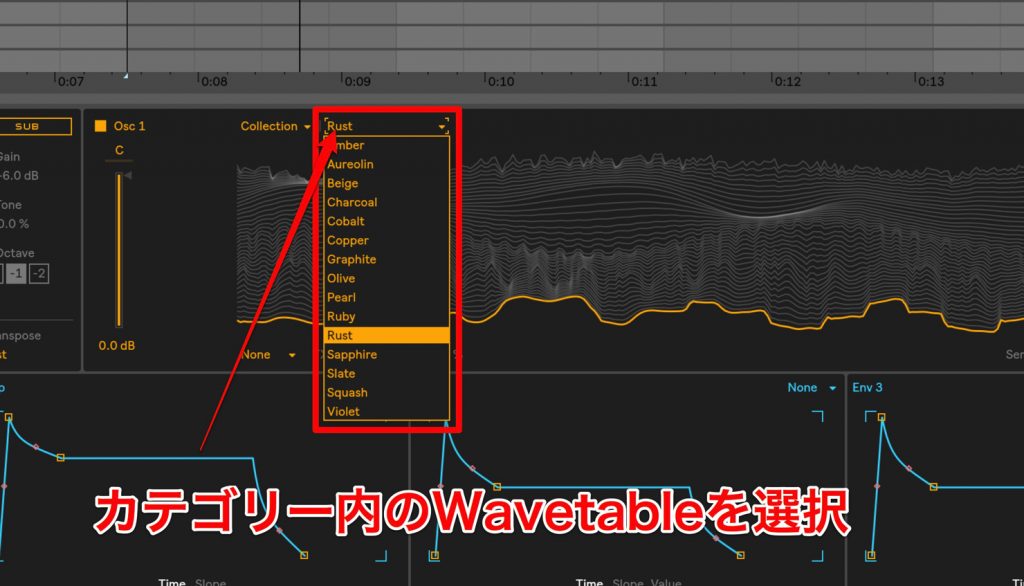
Next to it, select a "Wavetable" within the category.
This time I chose "Rust."
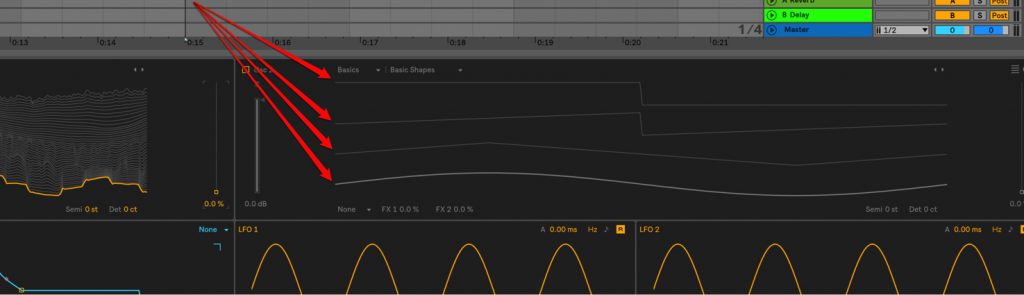
The selected "Rust" contains lots of tables.
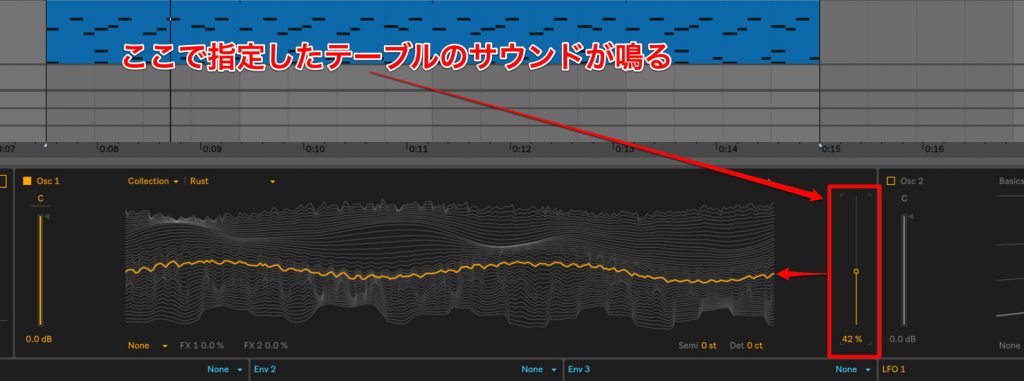
It works so that the table specified with "Wave Position," next to the waveform, is what sounds.
The envelopes are intuitive and easy too.
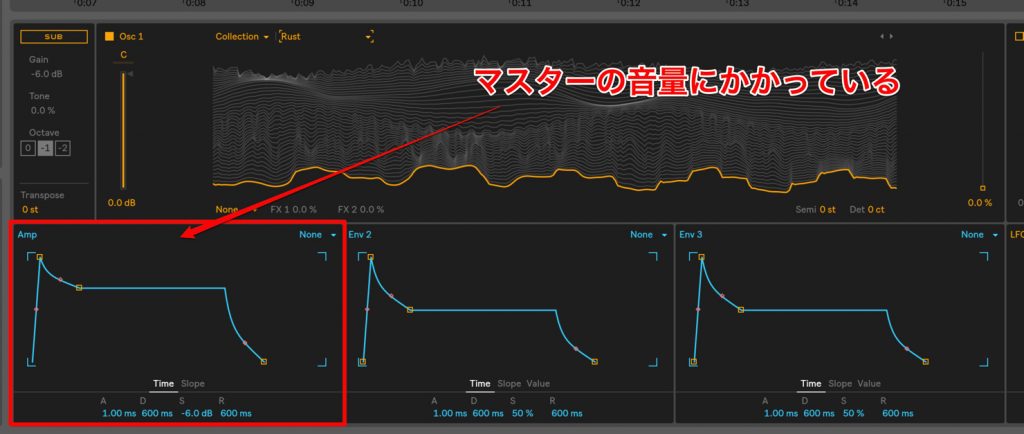
The envelope labeled Amp is applied to the master volume.
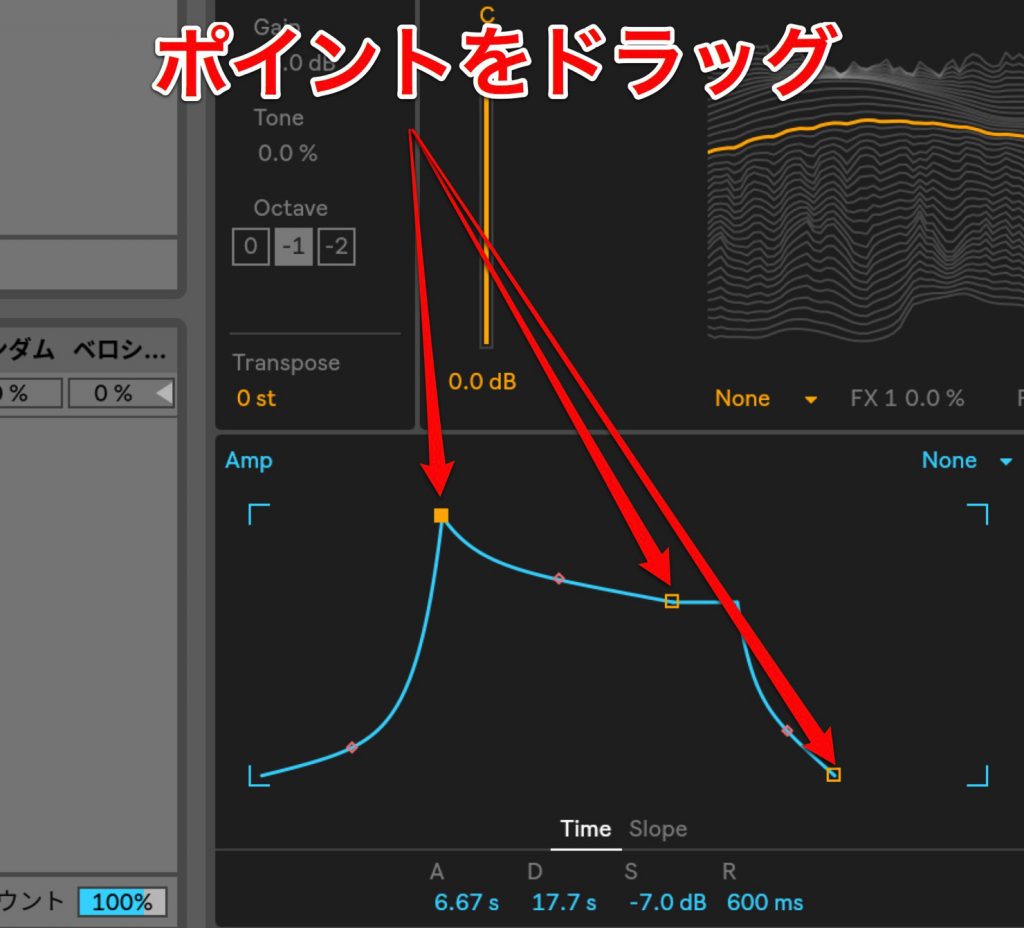
Just drag the ADSR points.
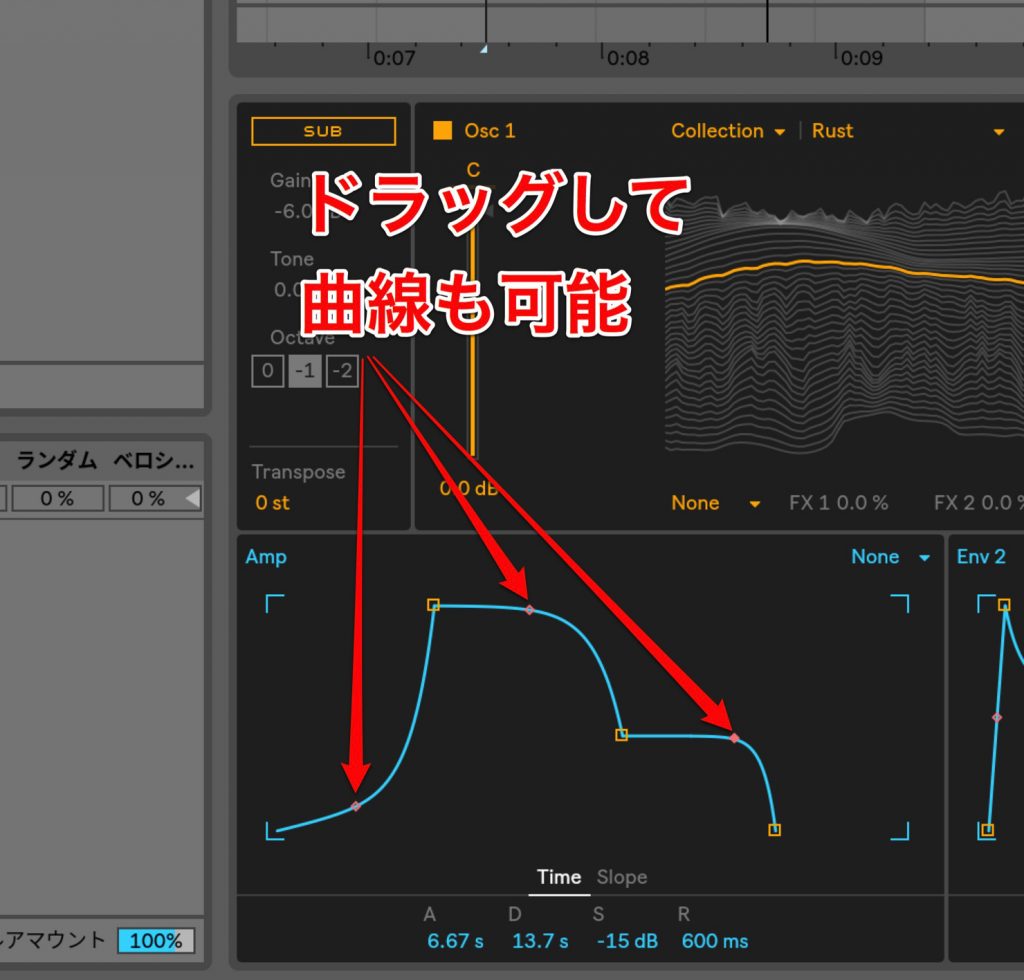
You can also draw curves by dragging the orange dots between the points.
This is very handy.
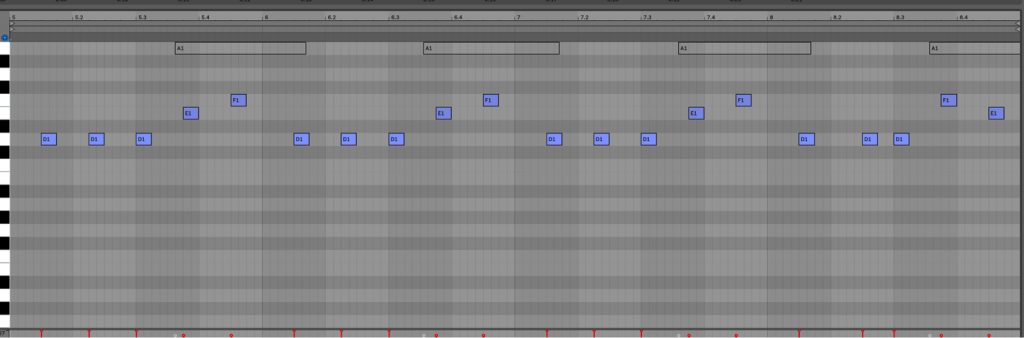
This time I prepared MIDI notes like these.
Let's make the sustained sound not decay and delay the attack slightly.
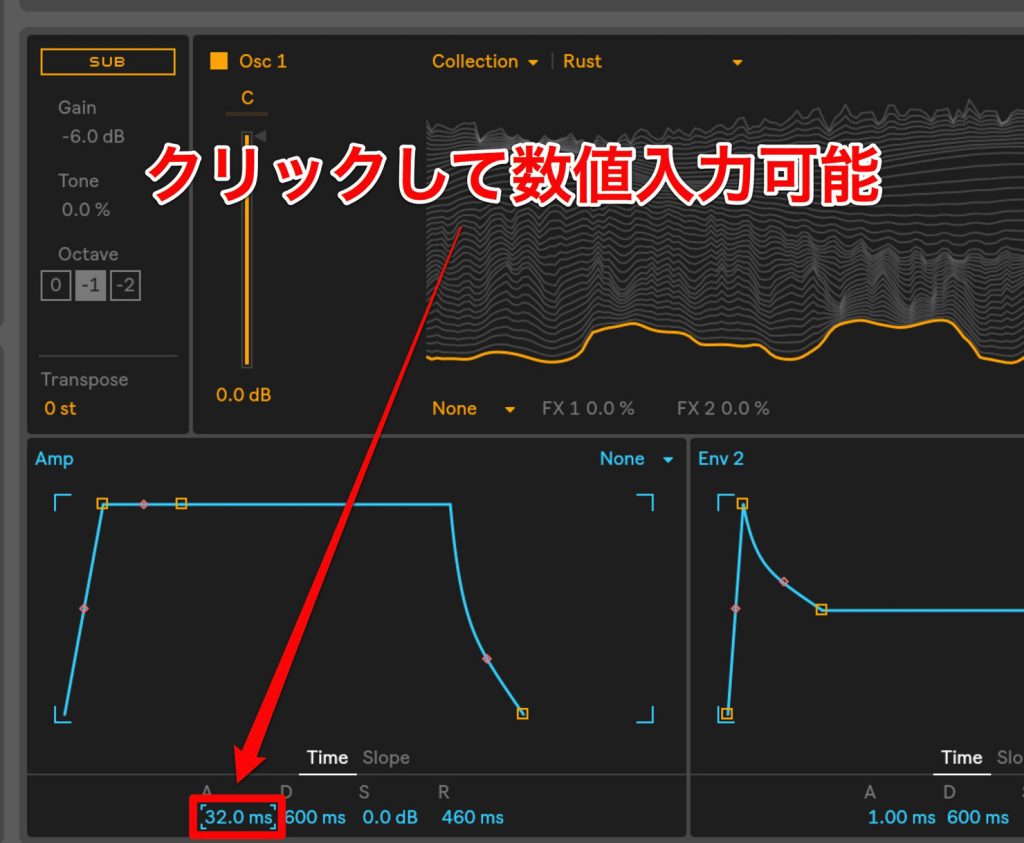
Clicking the ADSR values below the envelope lets you type in values.
Here I set them to these values:
A to "32"
S to "0"
R to "460"
Next, let's move the Wave Position using "Env2."
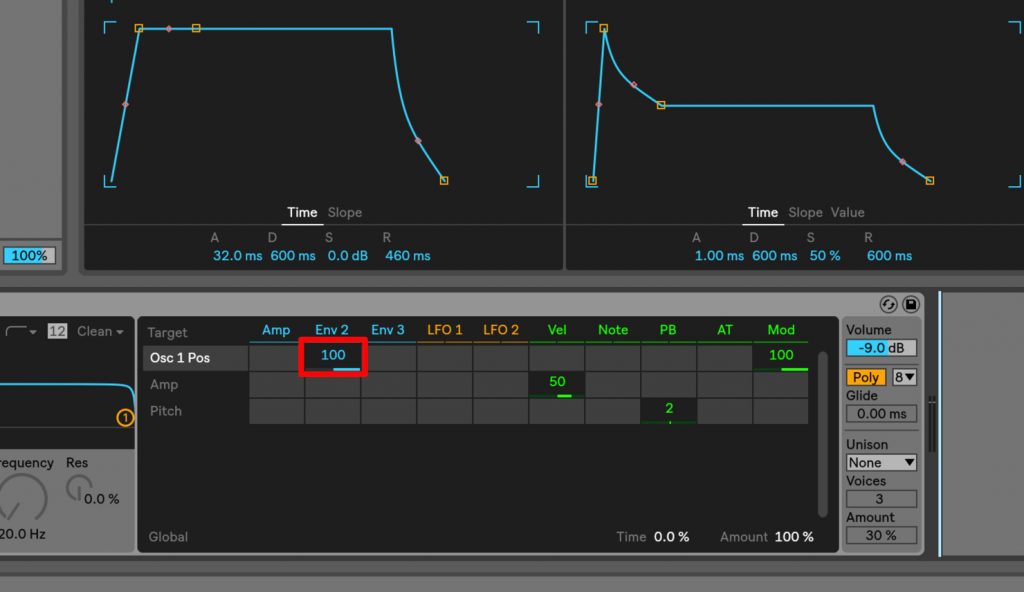
Drag the cell in the Matrix where "Osc 1 Position" and "Env 2" intersect to set the amount.
Plus is a positive value, and minus is a negative value.
This time let's set it to plus 100.

Starting from the position set by "Wave Position," it reaches 100% over the attack time, then returns to the sustain position over the decay time.
It's easier to understand if you change the values while playing.
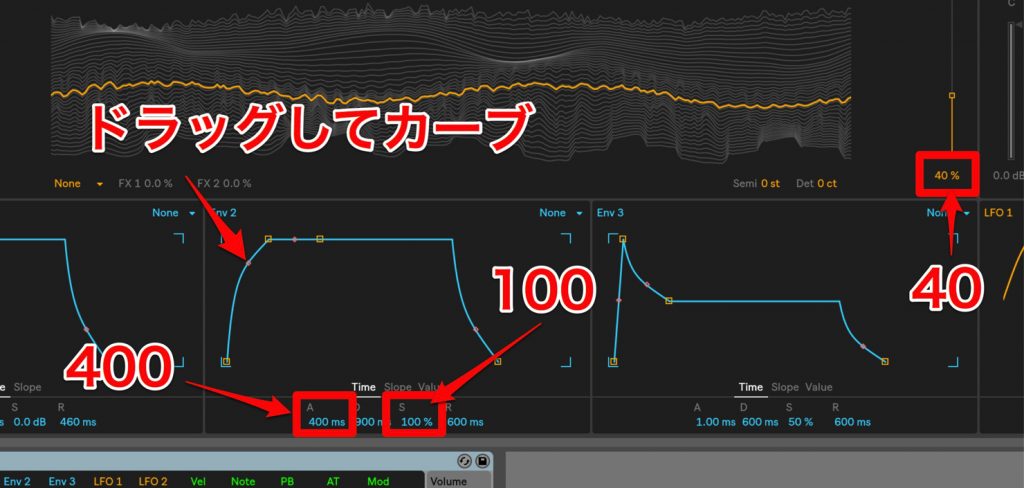
This time I set it up like this.
Let's mix in "Osc 2" as well.
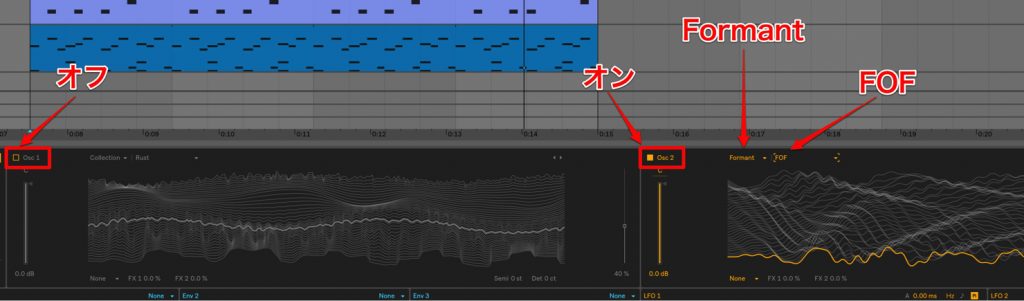
To make sound editing easier, turn "Osc 1" off and "Osc 2" on.
I chose "Formant" for the category and "FOF" for the Wavetable.
Let's apply the same Env2 as above to the "Wave Position" of Osc 2 too.
Whether the Matrix amount is plus or minus, and where the Wave Position is, completely changes how the sound comes across.
Try changing these while playing, too.
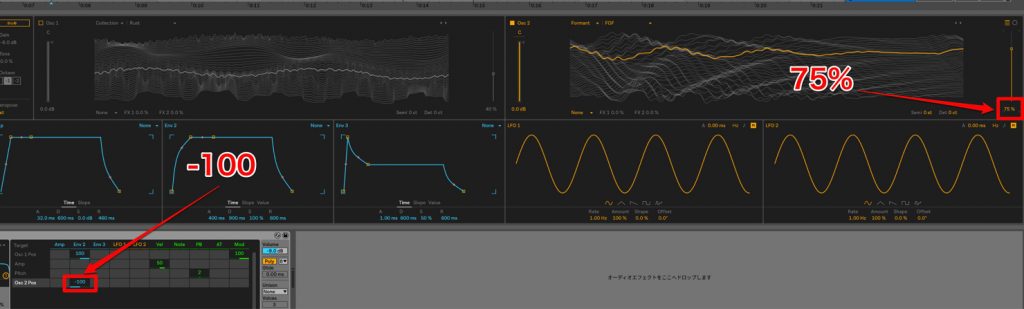
This time I set the Matrix to "-100" and the Wave Position to "75%."
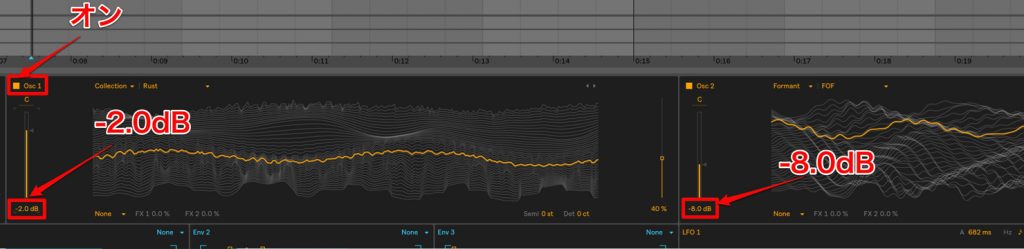
After setting up Osc 2, turn Osc 1 on and balance the volumes.
I set Osc 1's volume to -2.0dB
and Osc 2's volume to -8.0dB.
Now turn on SUB to add low-end.
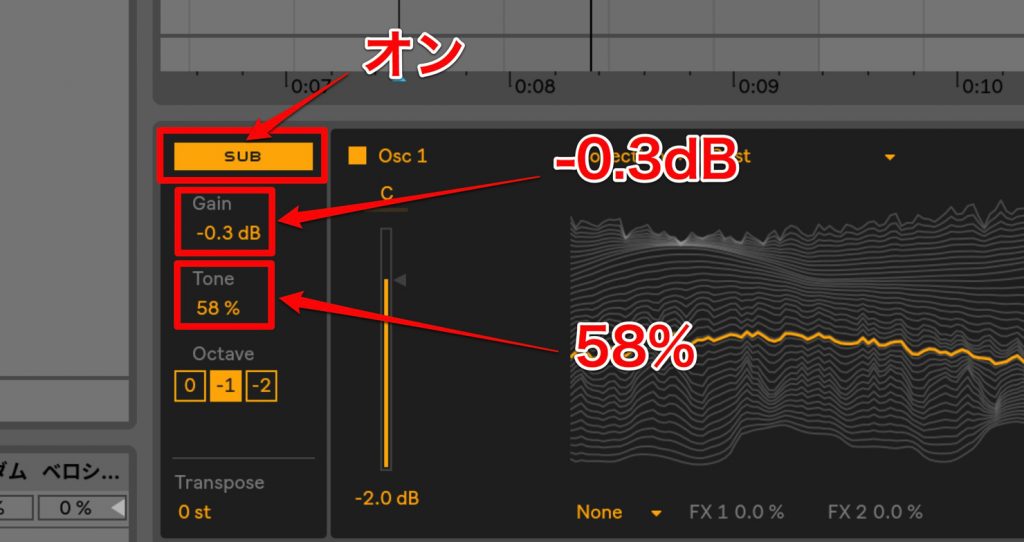
Raising the volume with Gain and raising Tone adds harmonics to the low-end.
Octave lets you choose -1 or -2 octaves.
This time I set Gain to -0.3 dB
and Octave to -1.
Tone feels good at around 58%.
Glide is essential for leads and basses.
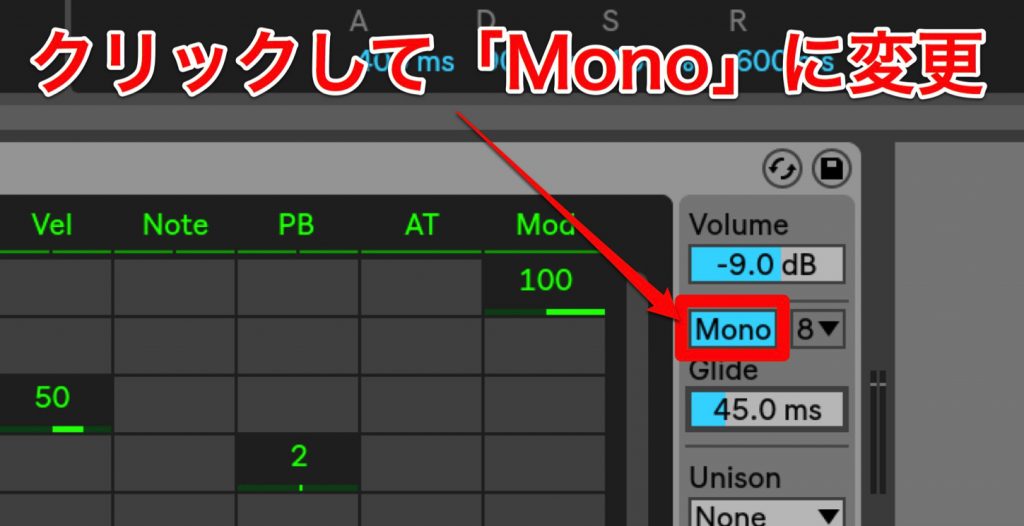
Click "Poly" next to the Matrix and change it to "Mono."
Now even if notes overlap, the next note takes priority and plays monophonically (one note at a time).
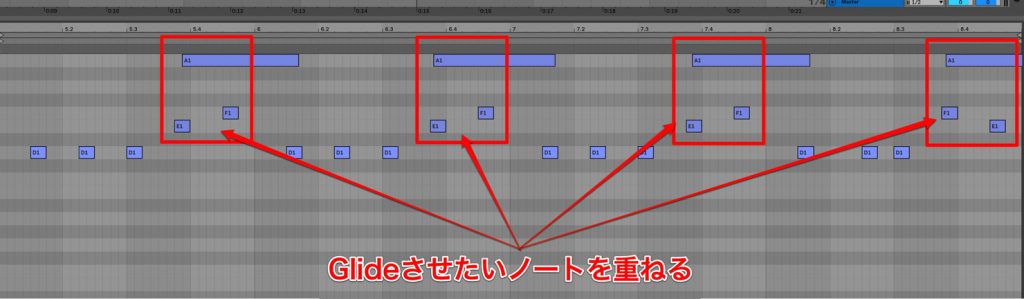
Next, overlap the notes where you want the glide.
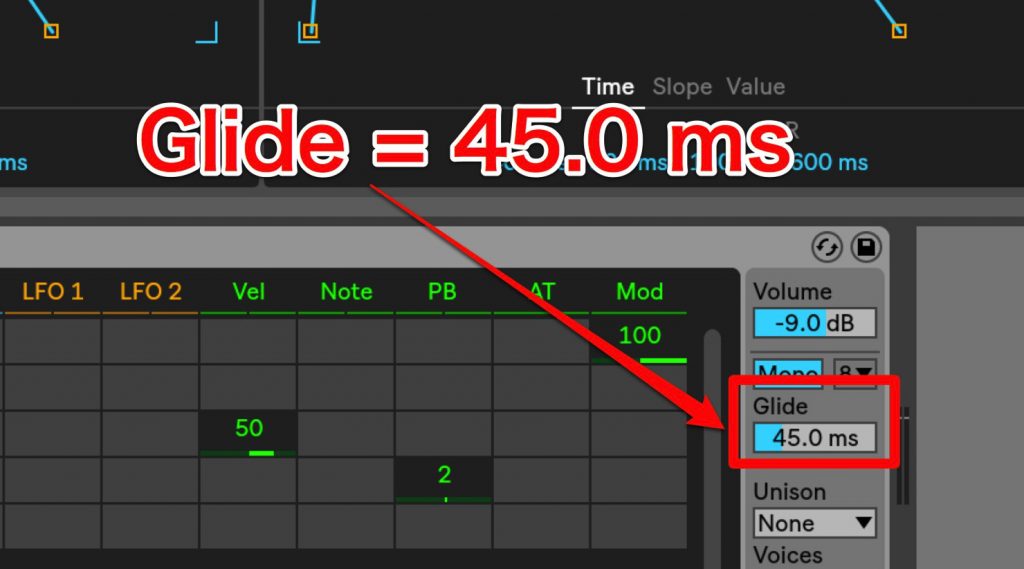
Then adjust Glide to set how long the pitch transition takes.
This depends on nuance and tempo, so adjust it while listening to the sound.
Here I set it to 45.
Of course, Unison is included too.
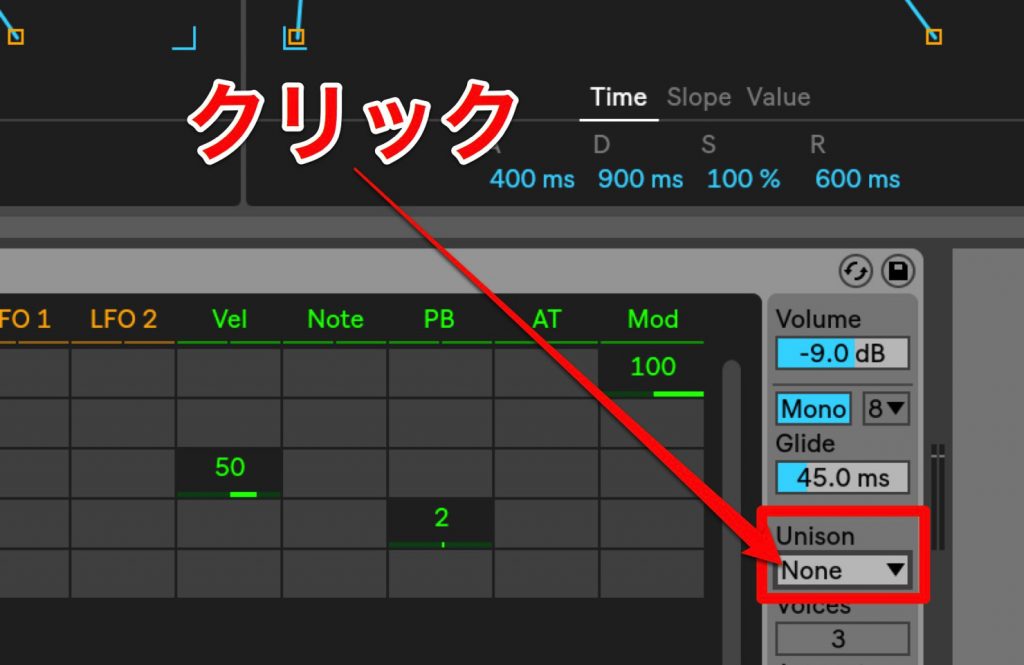
Click the "Unison" section.
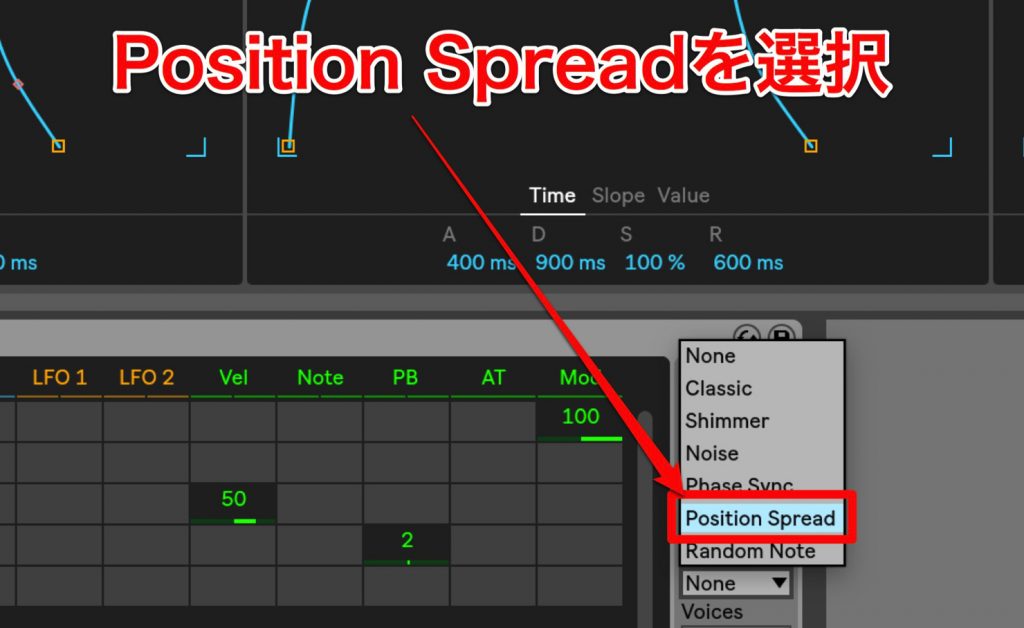
There are six Unison Modes.
This time I chose "Position Spread," which spreads the voices evenly by a fixed amount.
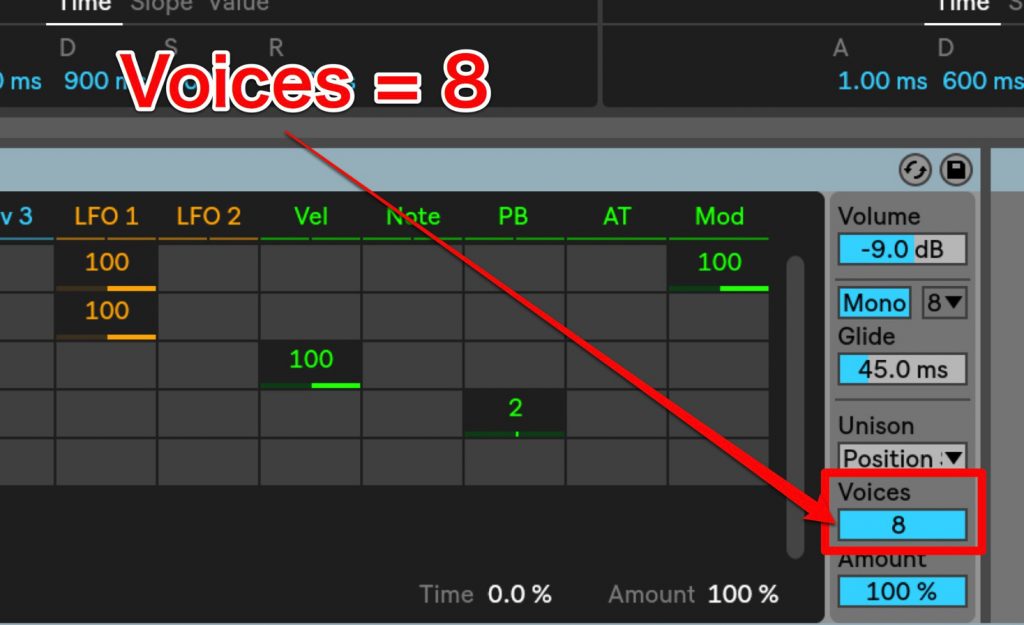
Voices sets how many play at the same time.
You can increase it up to 8, so I set it to the maximum of 8.
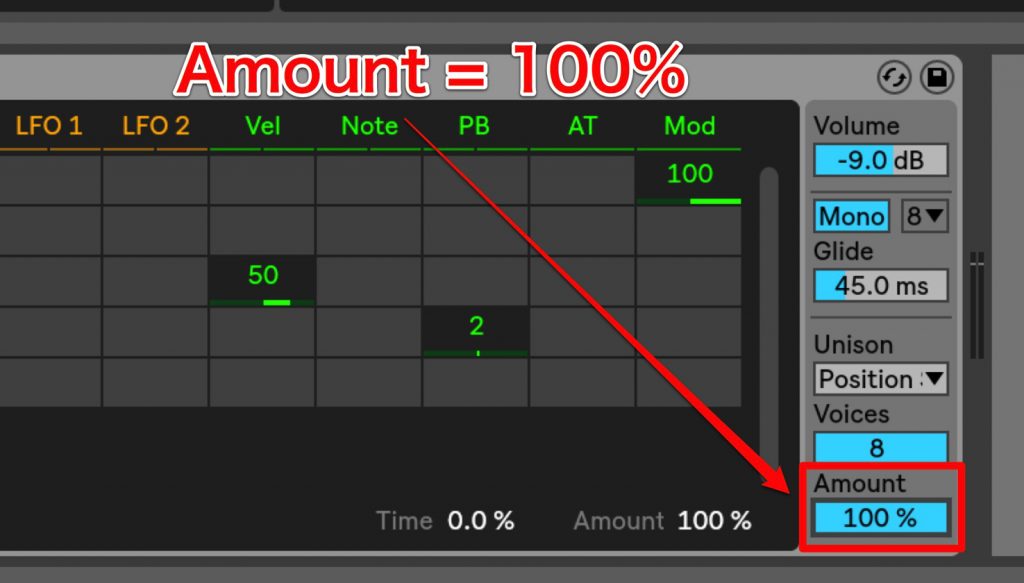
Amount adjusts the strength of the Unison effect.
This time I set it to 100%.
From here, let's add movement to the sound using an LFO.
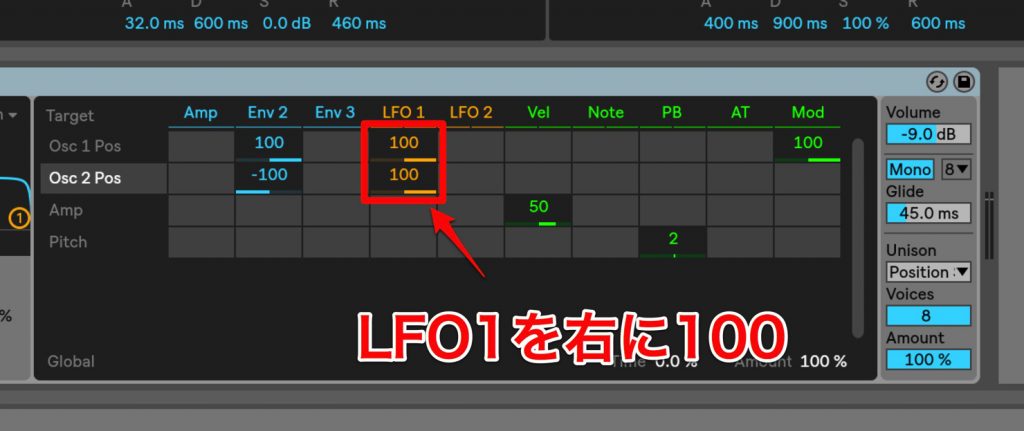
In the Matrix, change the cells where "Osc 1 Position" and "Osc 2 Position" intersect with "LFO 1."
This time I set them to 100, to the right.
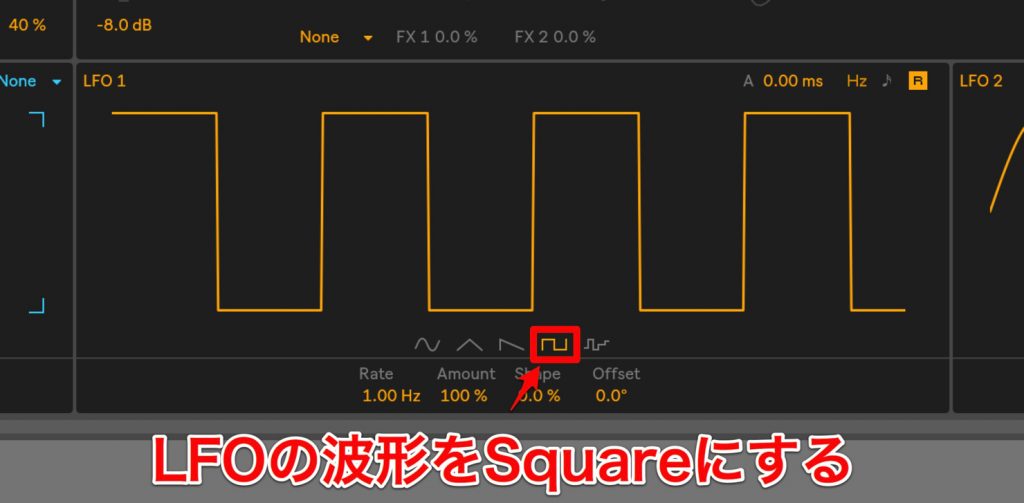
You can choose from five waveforms at the bottom of the LFO.
This time I selected "Square."
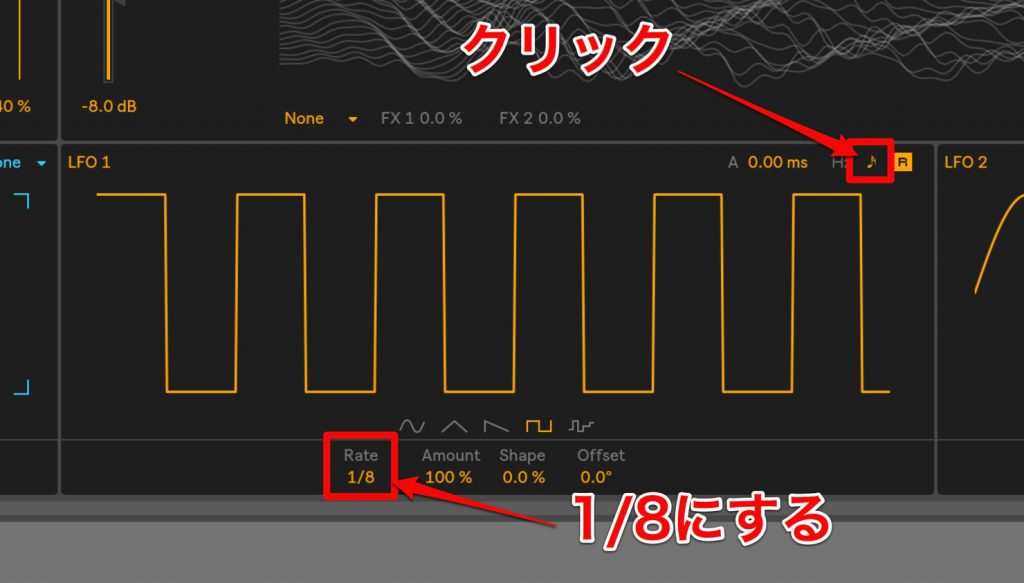
Clicking the note icon at the top right syncs the LFO rate to Live's tempo.
I set the Rate below to 1/8 (eighth notes).
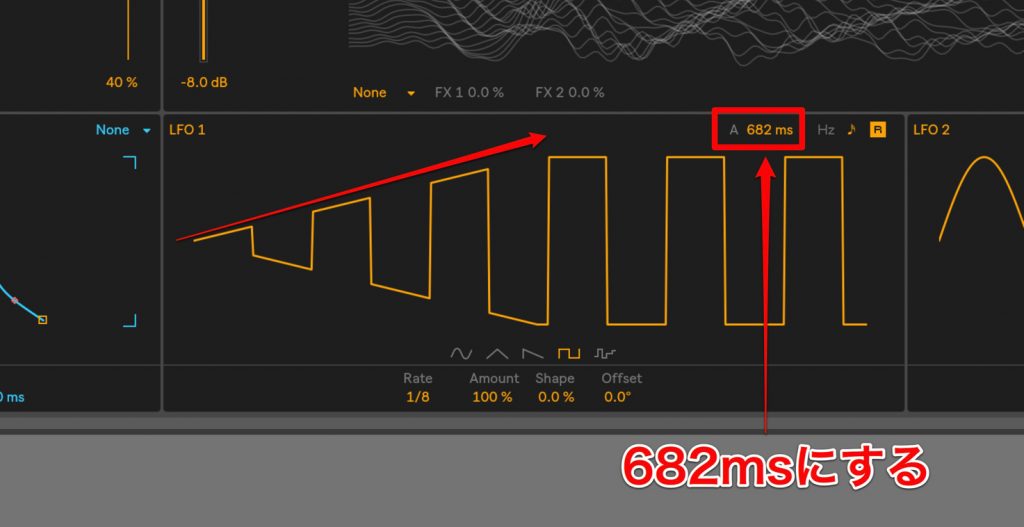
Slowing the "A" (LFO Attack) at the top right makes the LFO effect apply gradually.
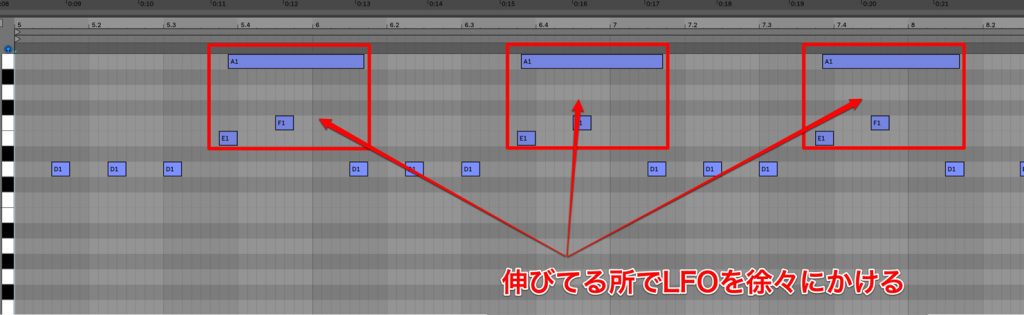
This time I set it to 682ms so the LFO applies strongly on long notes.
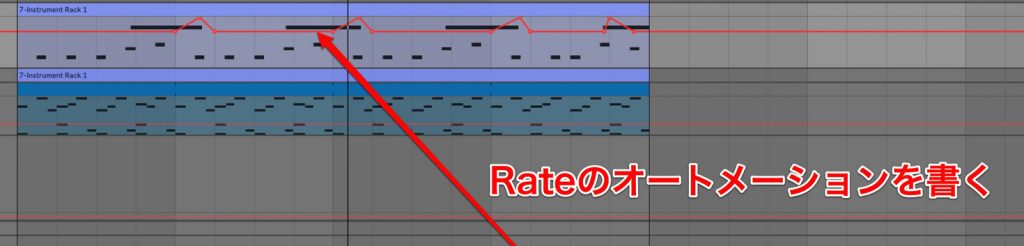
It's also fun to write automation for the Rate like this.
Utility: reining in the width below a set frequency
As an addition in Live 10, Utility has been updated.
It includes a feature called "Bass Mono."
It's a groundbreaking, wonderful feature that makes everything below a specified frequency mono.
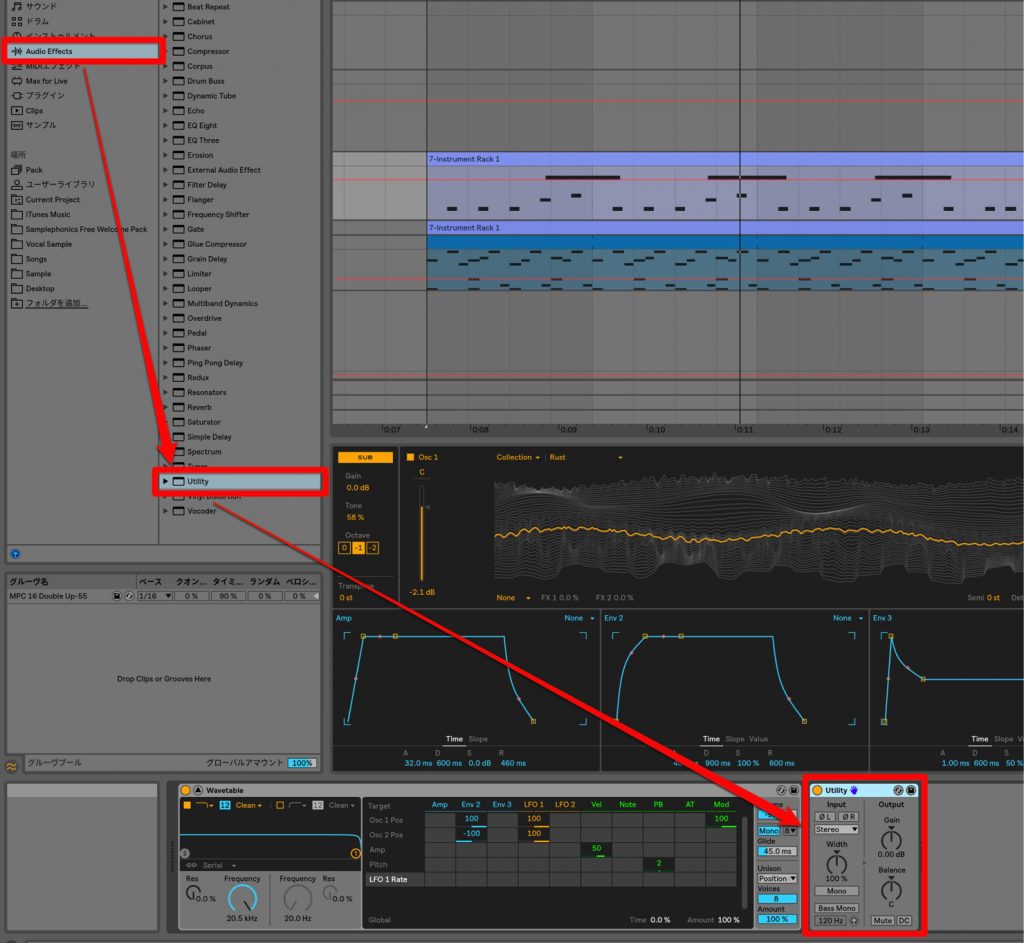
Drag and drop "Utility" from Audio Effects.
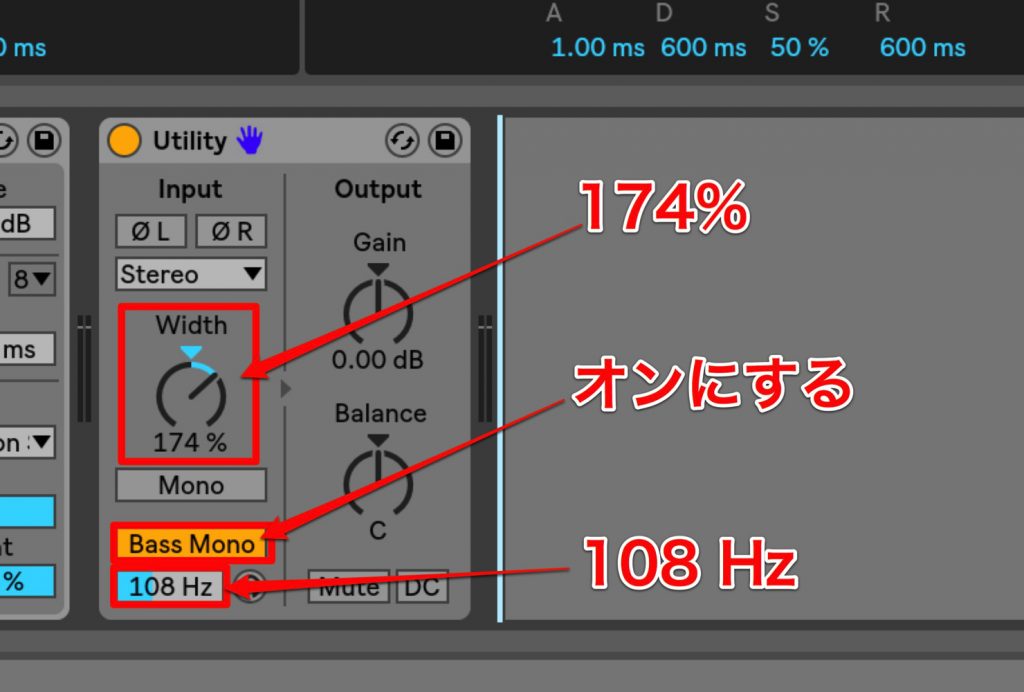
Turn on "Bass Mono" and this time let's make everything below 108Hz mono.
Let's widen the other frequencies with "Width" above.
Doing this keeps the low end solidly in the center while the rest gets a sense of stereo width.
It's a very useful plug-in.
What did you think?
Wavetable can be operated intuitively. It's really appealing. Tweak it as hard as you like; Wavetable won't break.
Try out all kinds of settings and pursue even better sound design.
Frequently asked questions
Q1. What are the features of the Wavetable synth in Ableton Live 10?
Wavetable is an oscillator with multiple waveforms arranged at random, and you can create dynamic changes in sound by controlling the Wave Position. It has two oscillators, three envelopes, two LFOs and two filters, and lets you set up modulation flexibly in the Matrix.
Q2. How does Wave Position work?
Wave Position plays the multiple tables within the selected Wavetable at a specified position. Combined with envelopes and LFOs, the sound changes as it moves through the waveforms at the attack, creating more expressive sonic effects.
Q3. When is Glide useful?
Glide works in Mono mode and smoothly connects the pitch transitions between notes. For lead and bass sounds, it lets you play a phrase with natural pitch transitions, and adjusting the value to match the nuance and tempo achieves the ideal expression.
NEW ARTICLES
Latest English Articles