Vengeance Sound Avenger - How to use - Using Wavetable
Using the powerful Wavetable Editor for sound design
 Product URL : http://sonicwire.com/product/A3178
Wavetable is a must in the current electro music scene.
Avenger contains a powerful Wavetable Editor, and even without an LFO, you can create rhythmic synth sounds without any hassle.
Lets take a look at some ways to edit.
Avenger – Using Wavetable – Tutorial video
- 1Basics and reading presets
- 2Editing drum patches and sequences
- 3OSC control (waveform, voice, portamento)
- 4Using the wavetable
- 5Sound design with the LFO
- 6Sound control with the arpeggiator/macro
- 7Individual outputs for oscillators
Bringing up Wavetable presets
Wavetable presets are already set up.
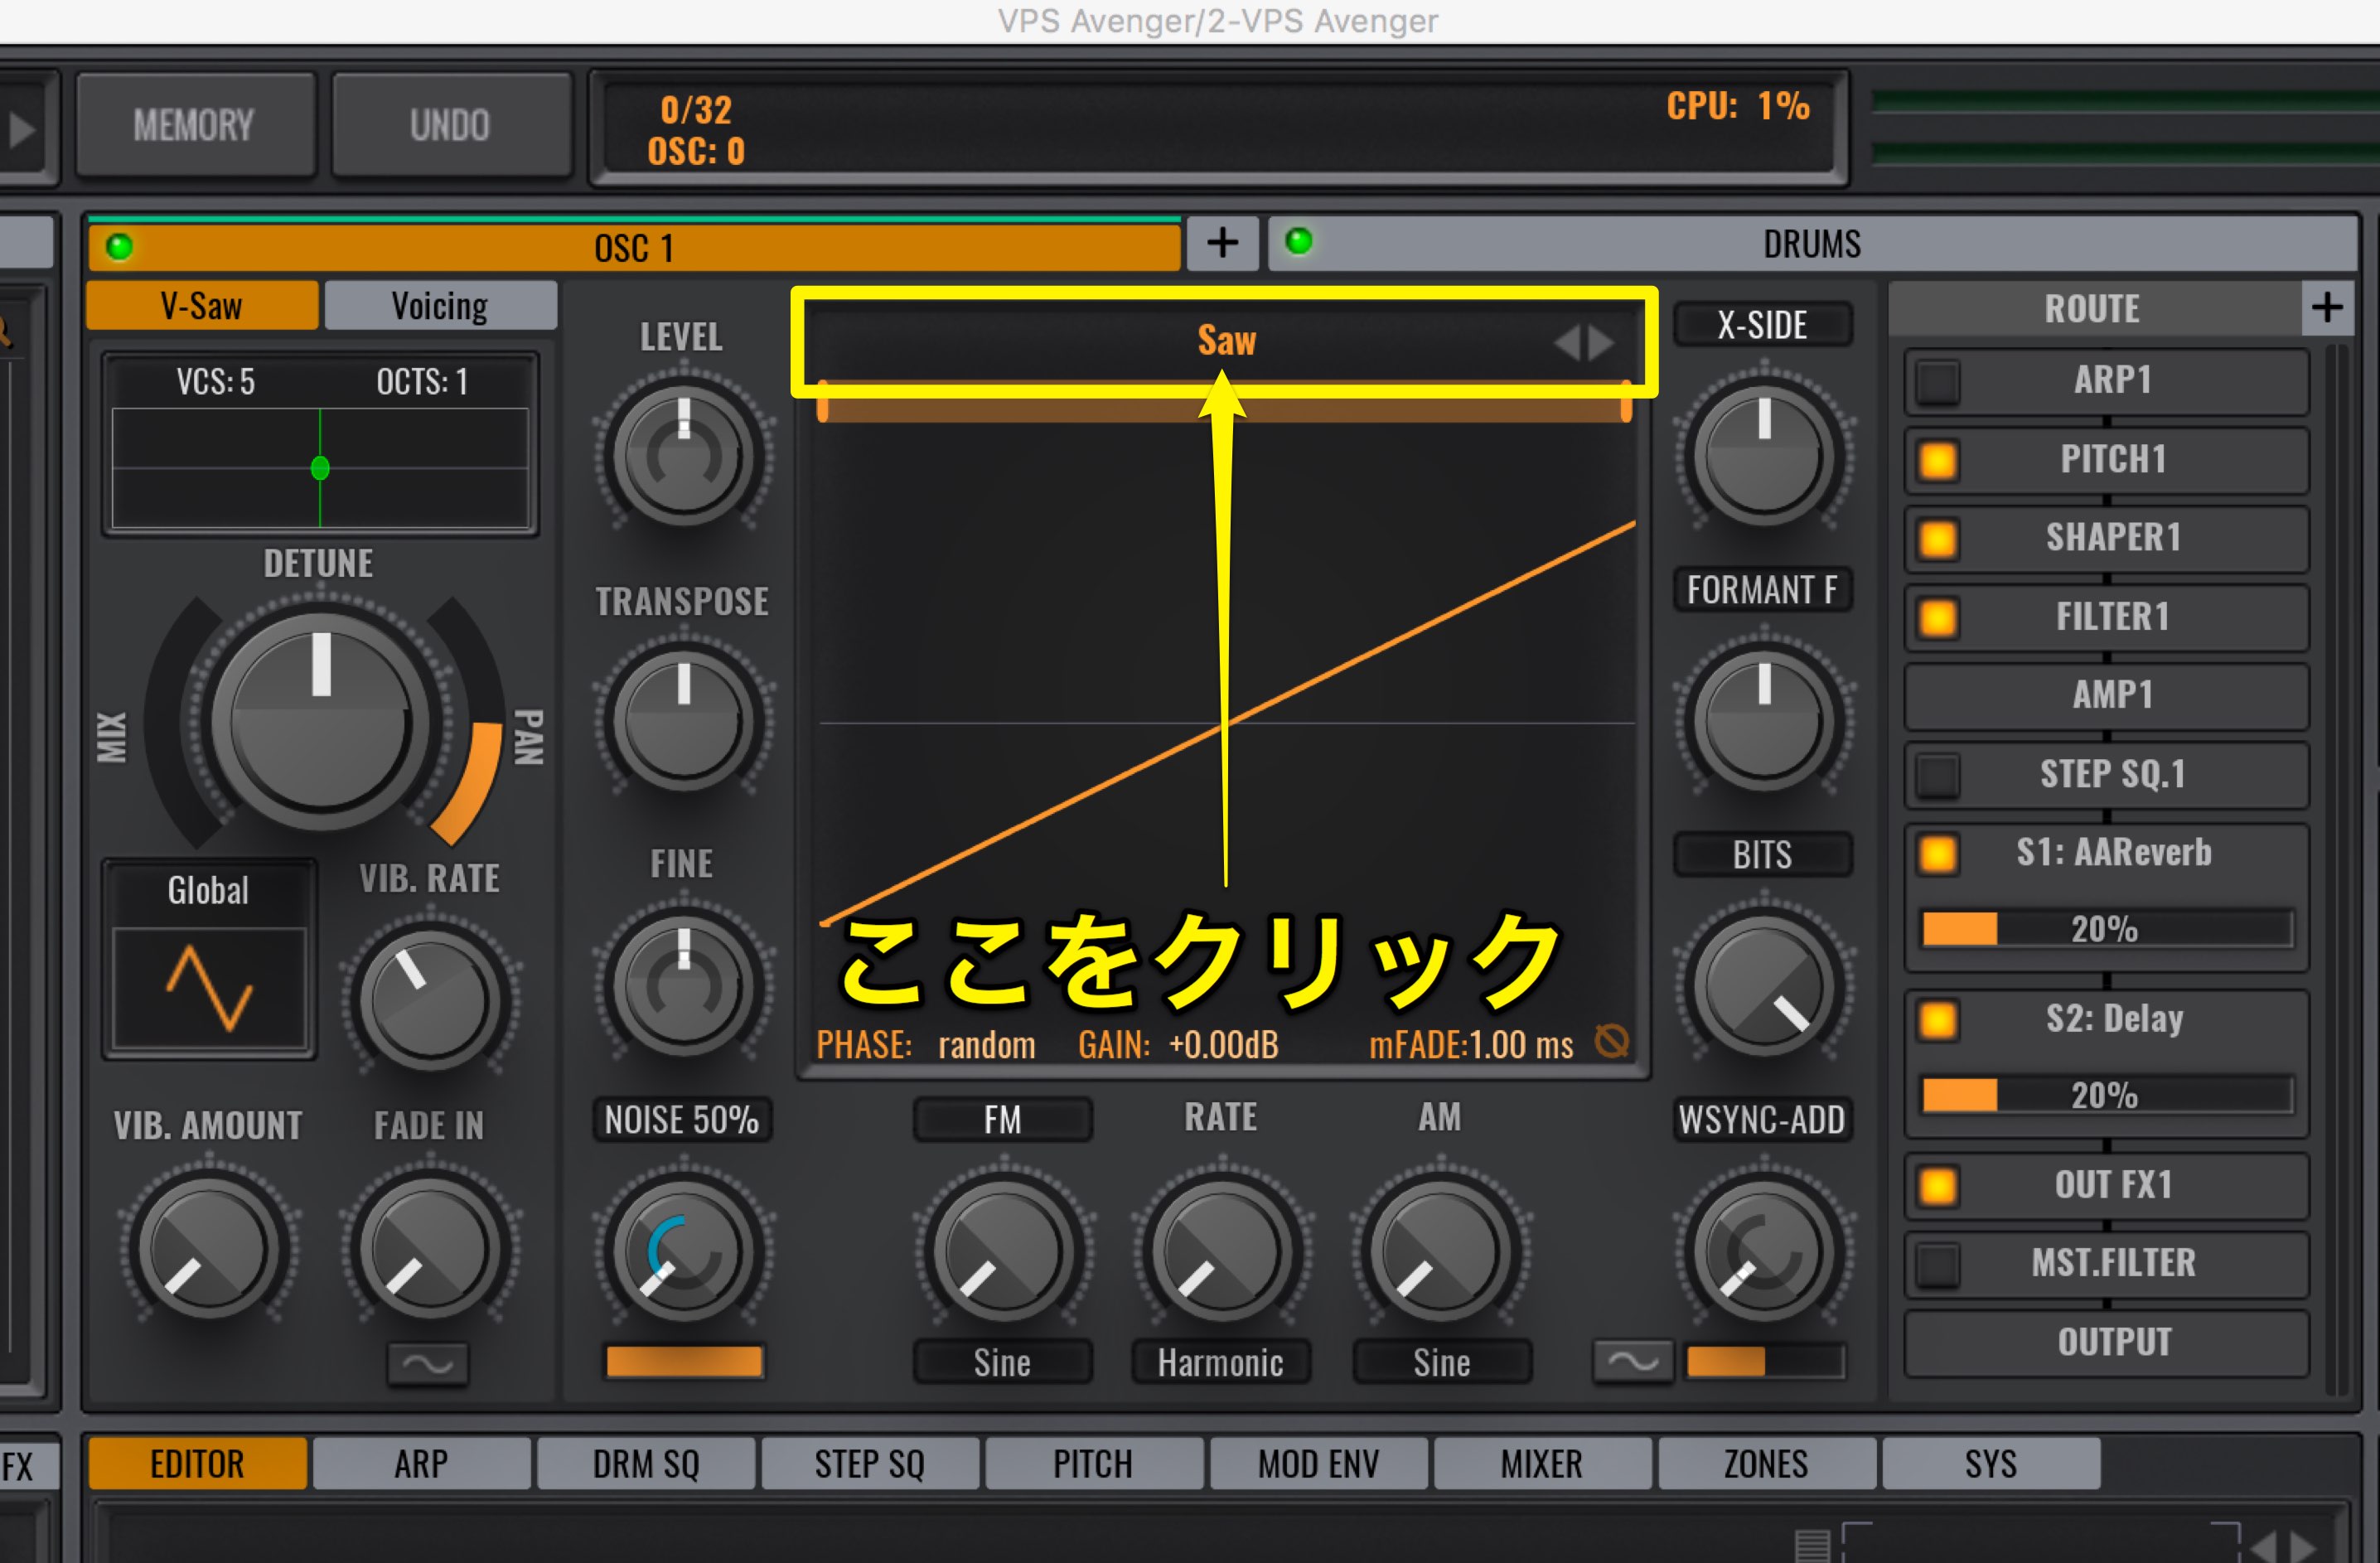
Click on the area labelled “Saw” to bring up a preset.
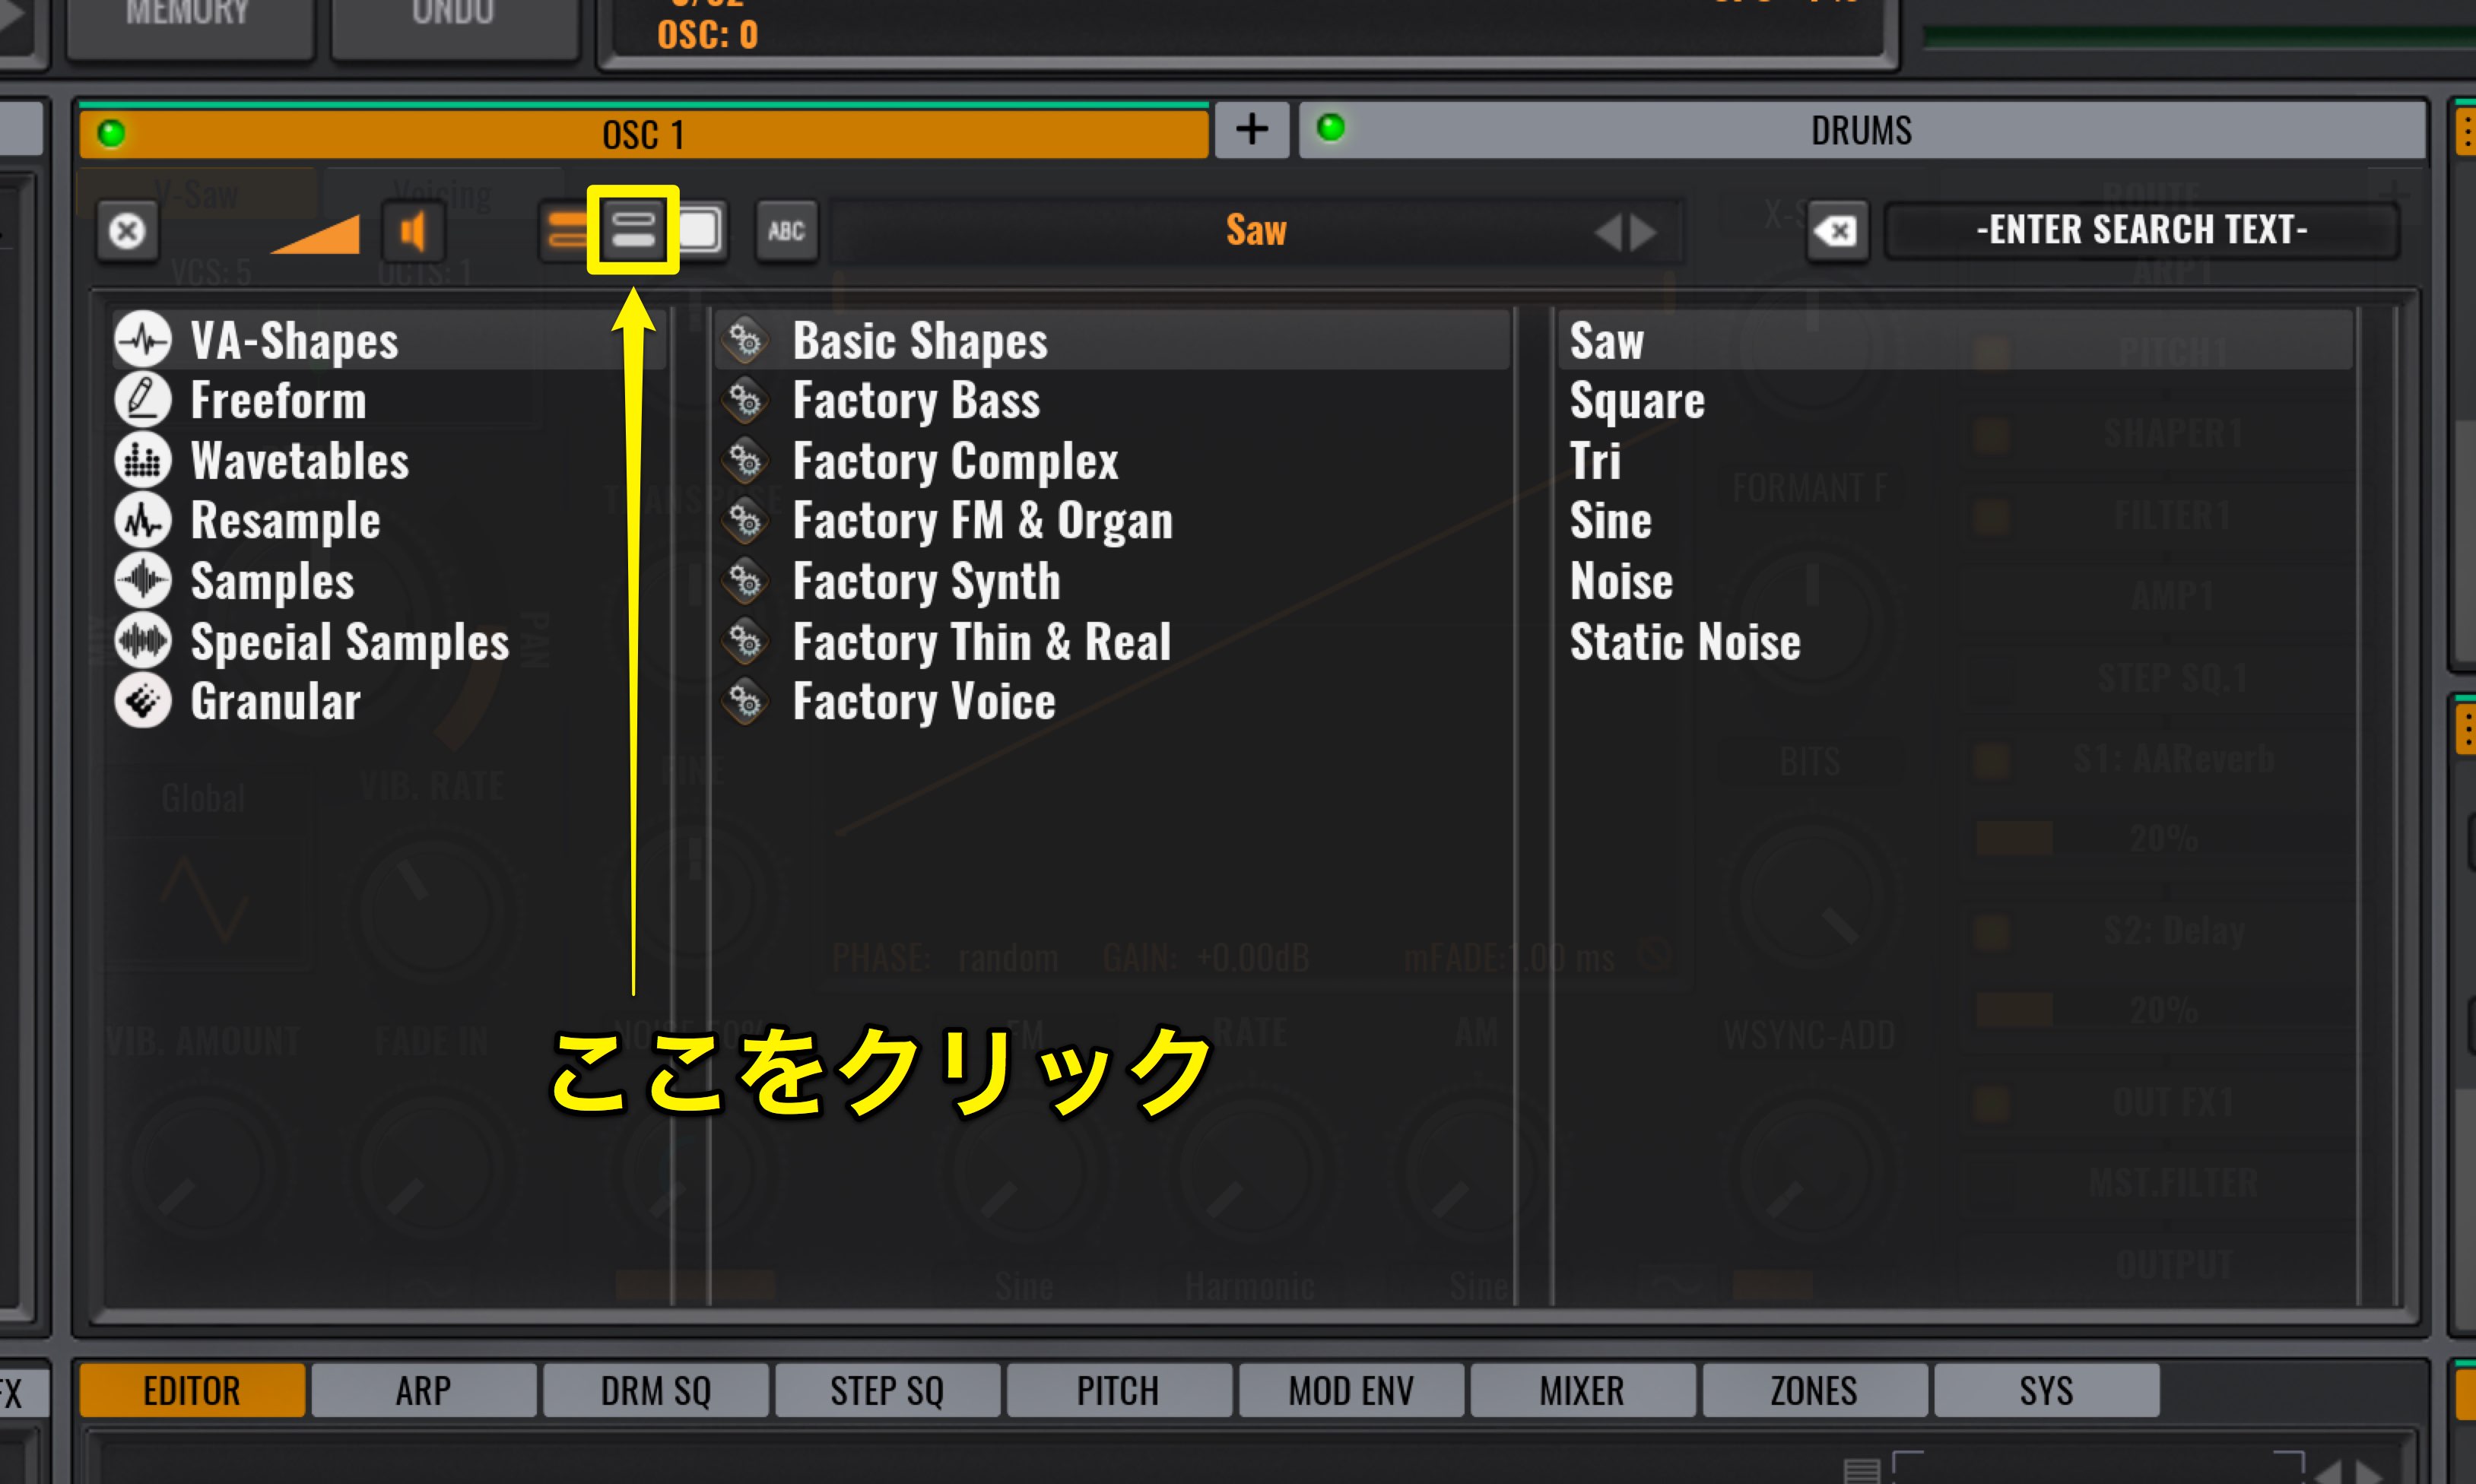
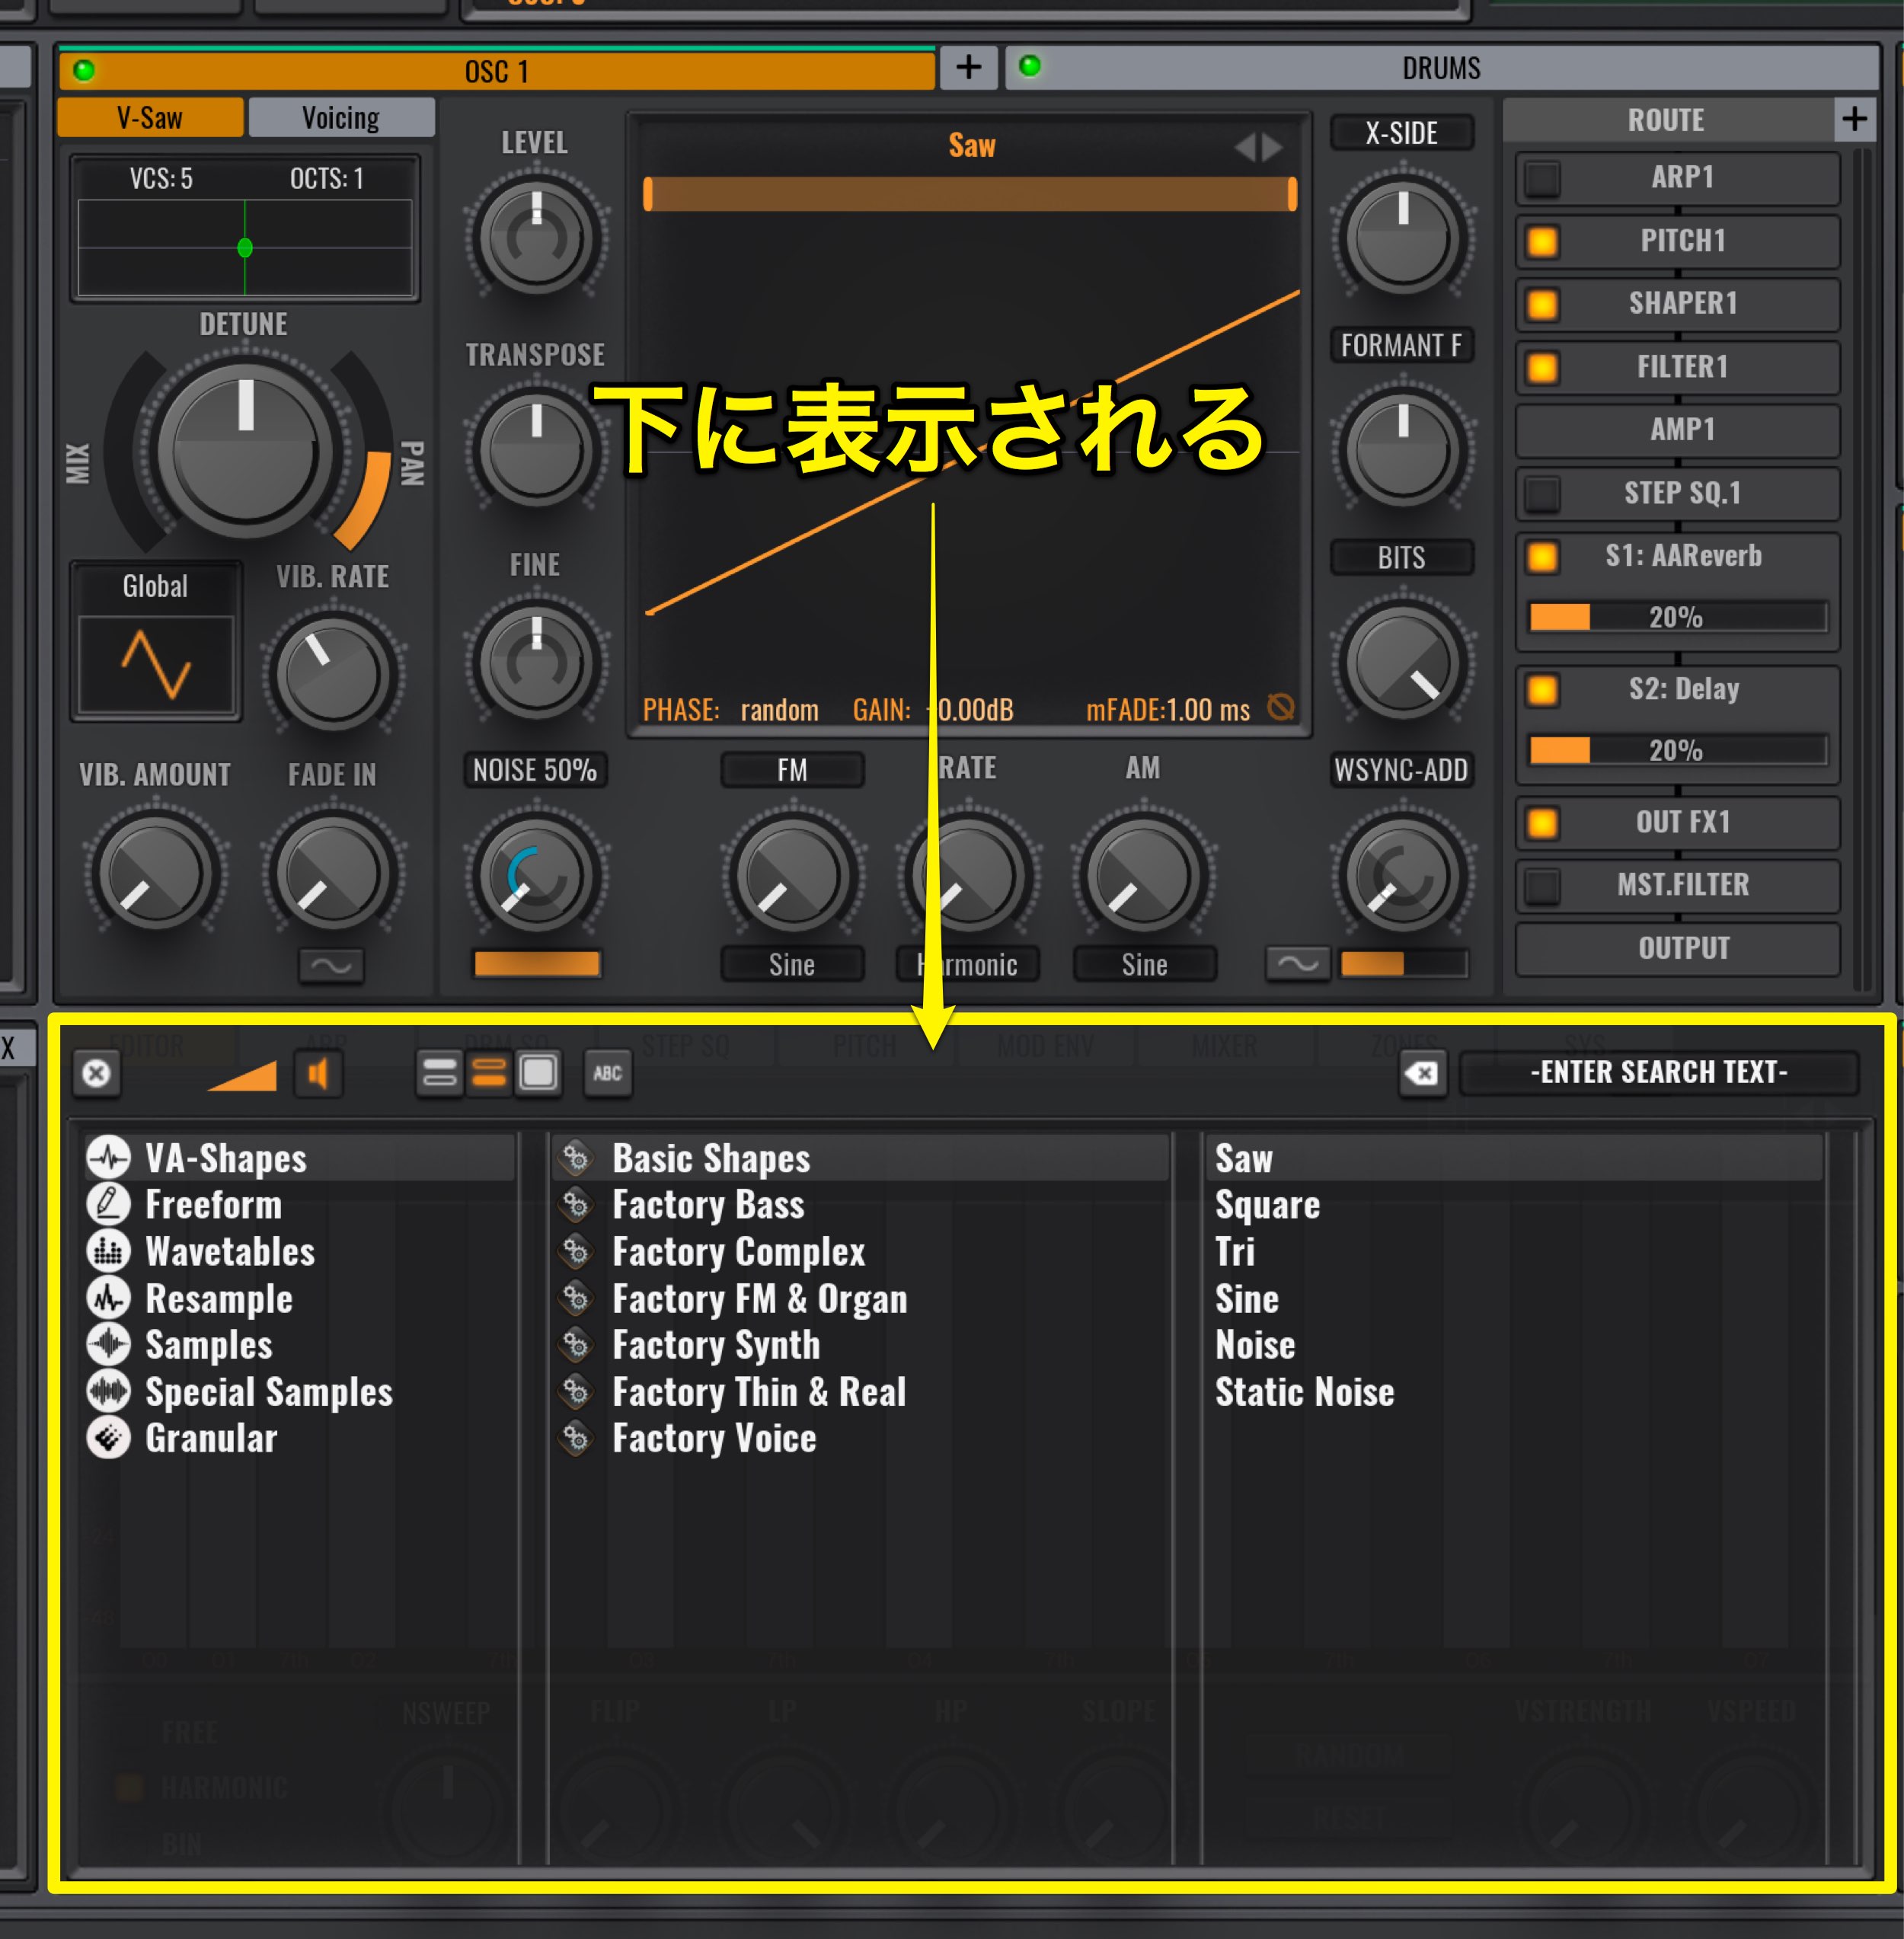
Previously there was a pull-down menu, but the updated version has a different layout.
Lets bring up a waveform first.
Click on the second button on the left with two horizontal lines.
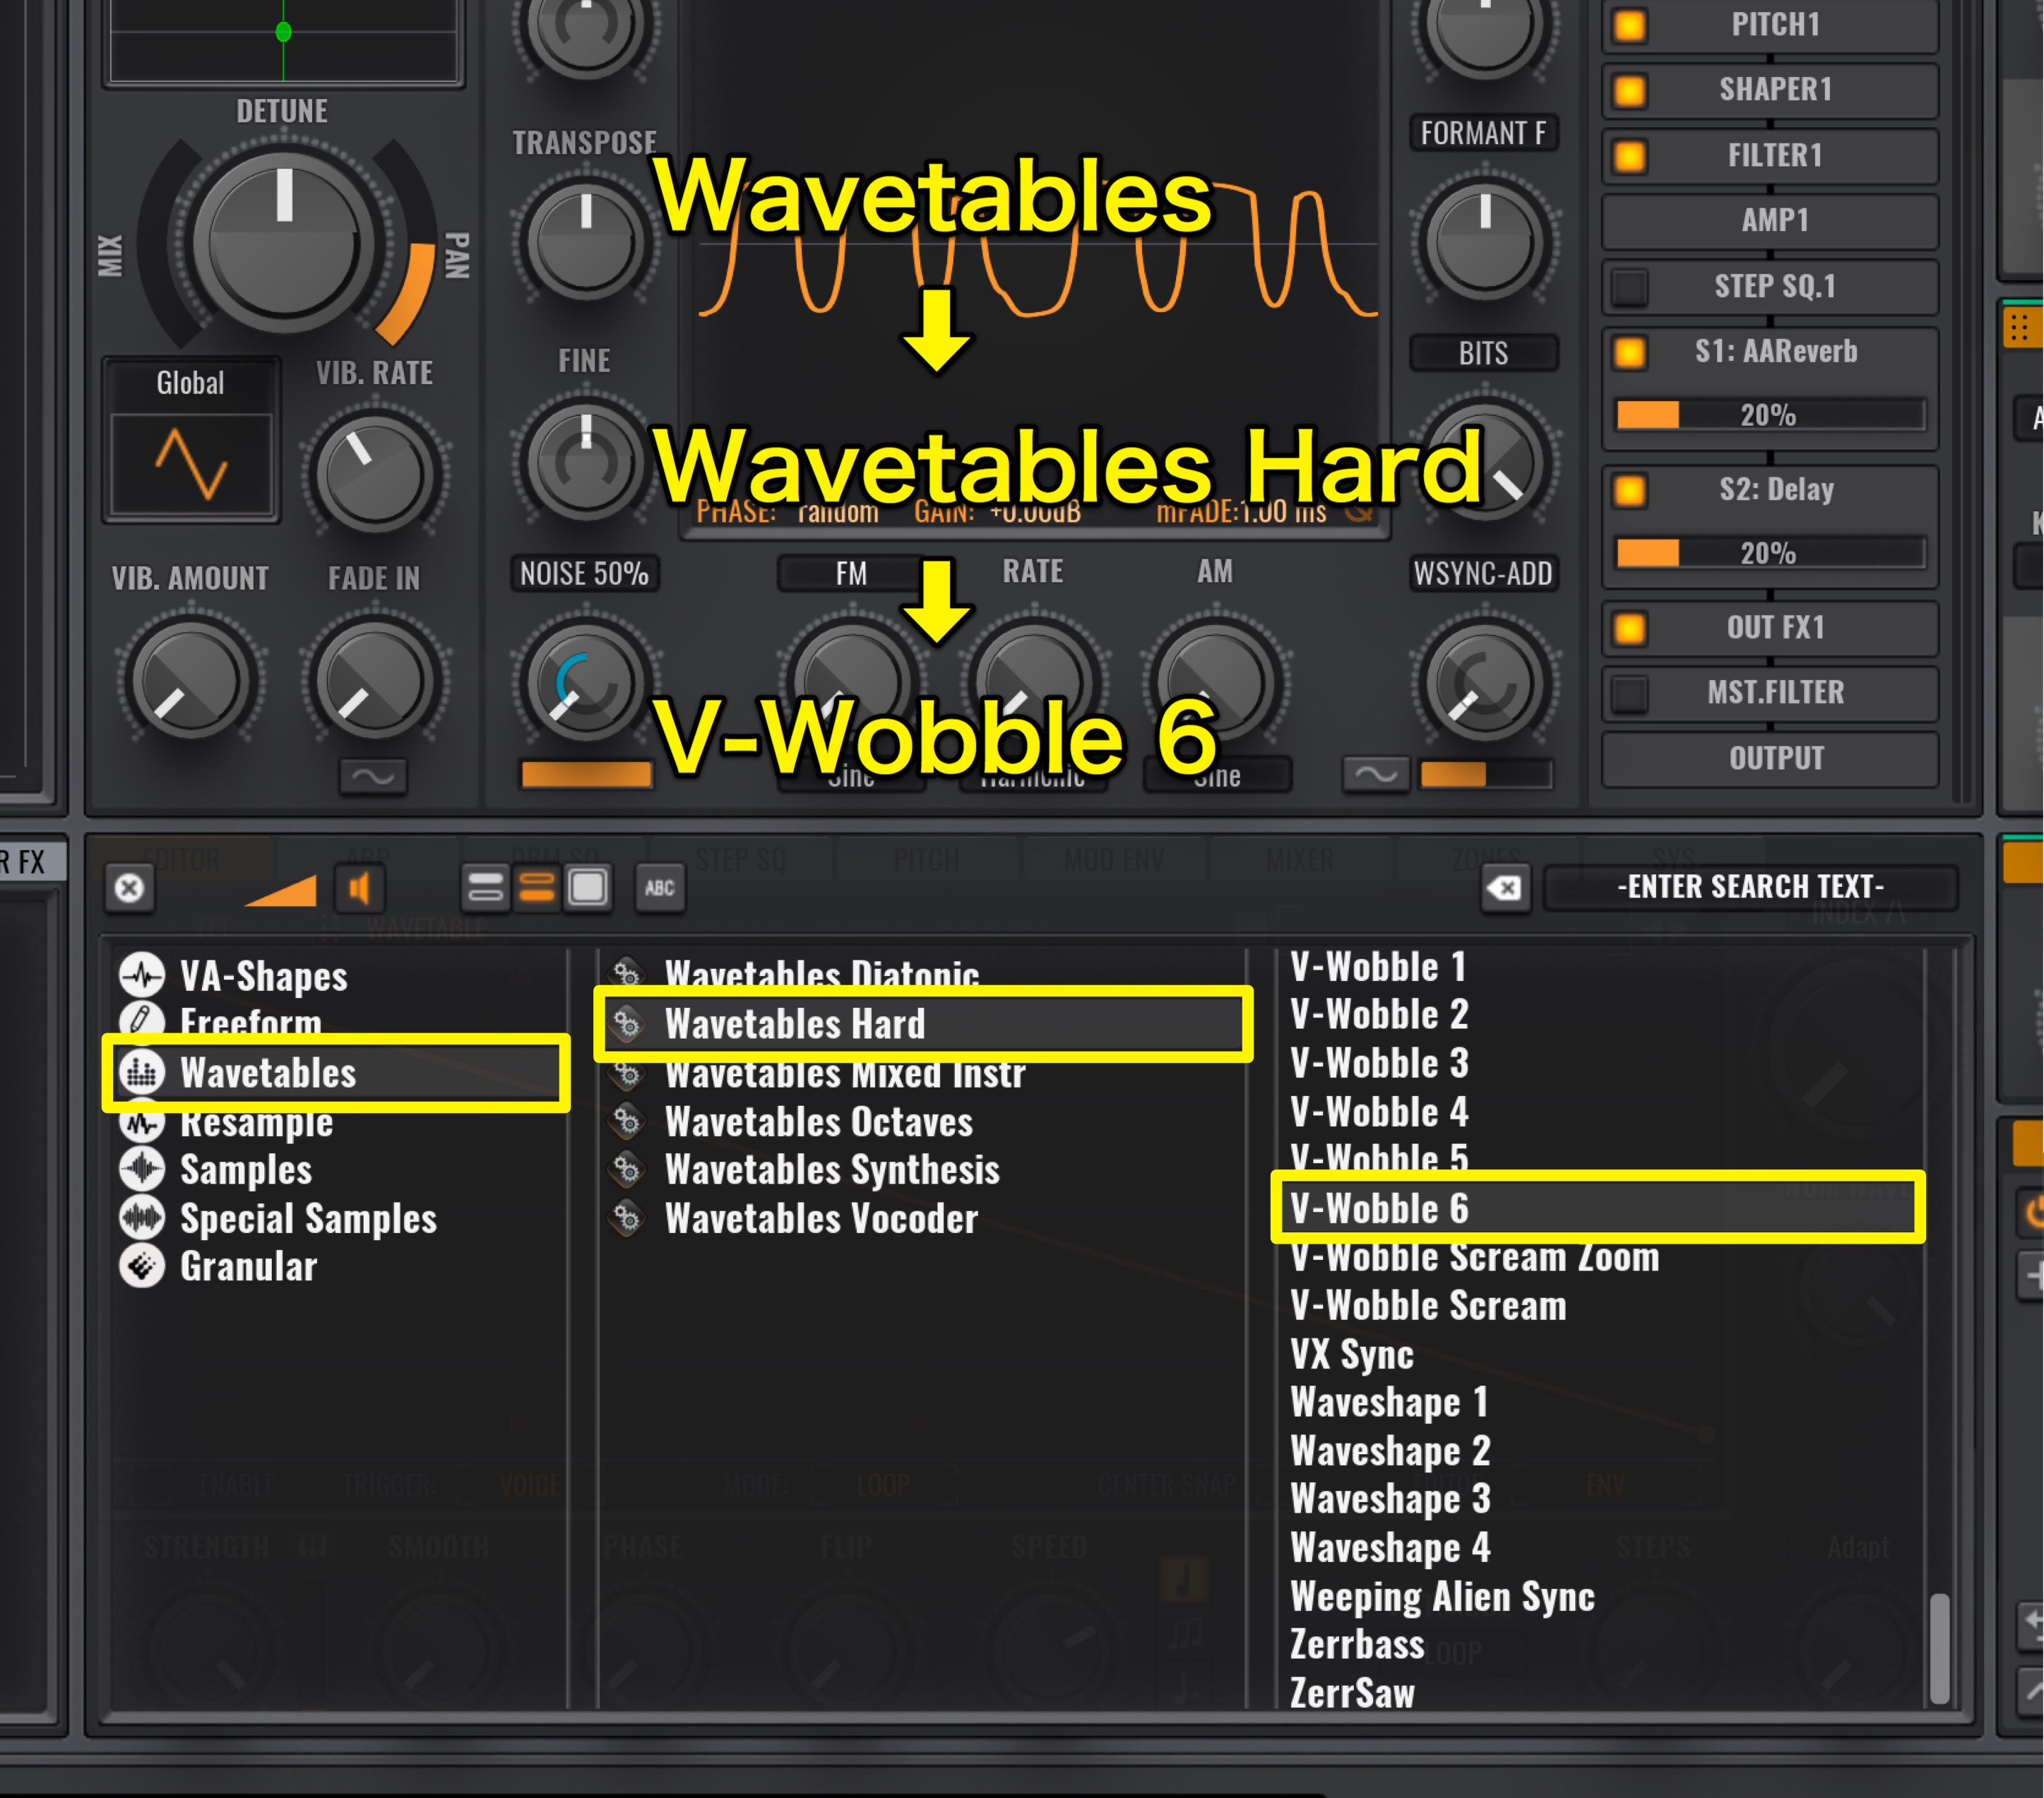
By selecting Wavetables, you can search for presets.
Double click on the preset name to bring it up.
We have selected “Wavetables Hard’s V-Wobble 6.”
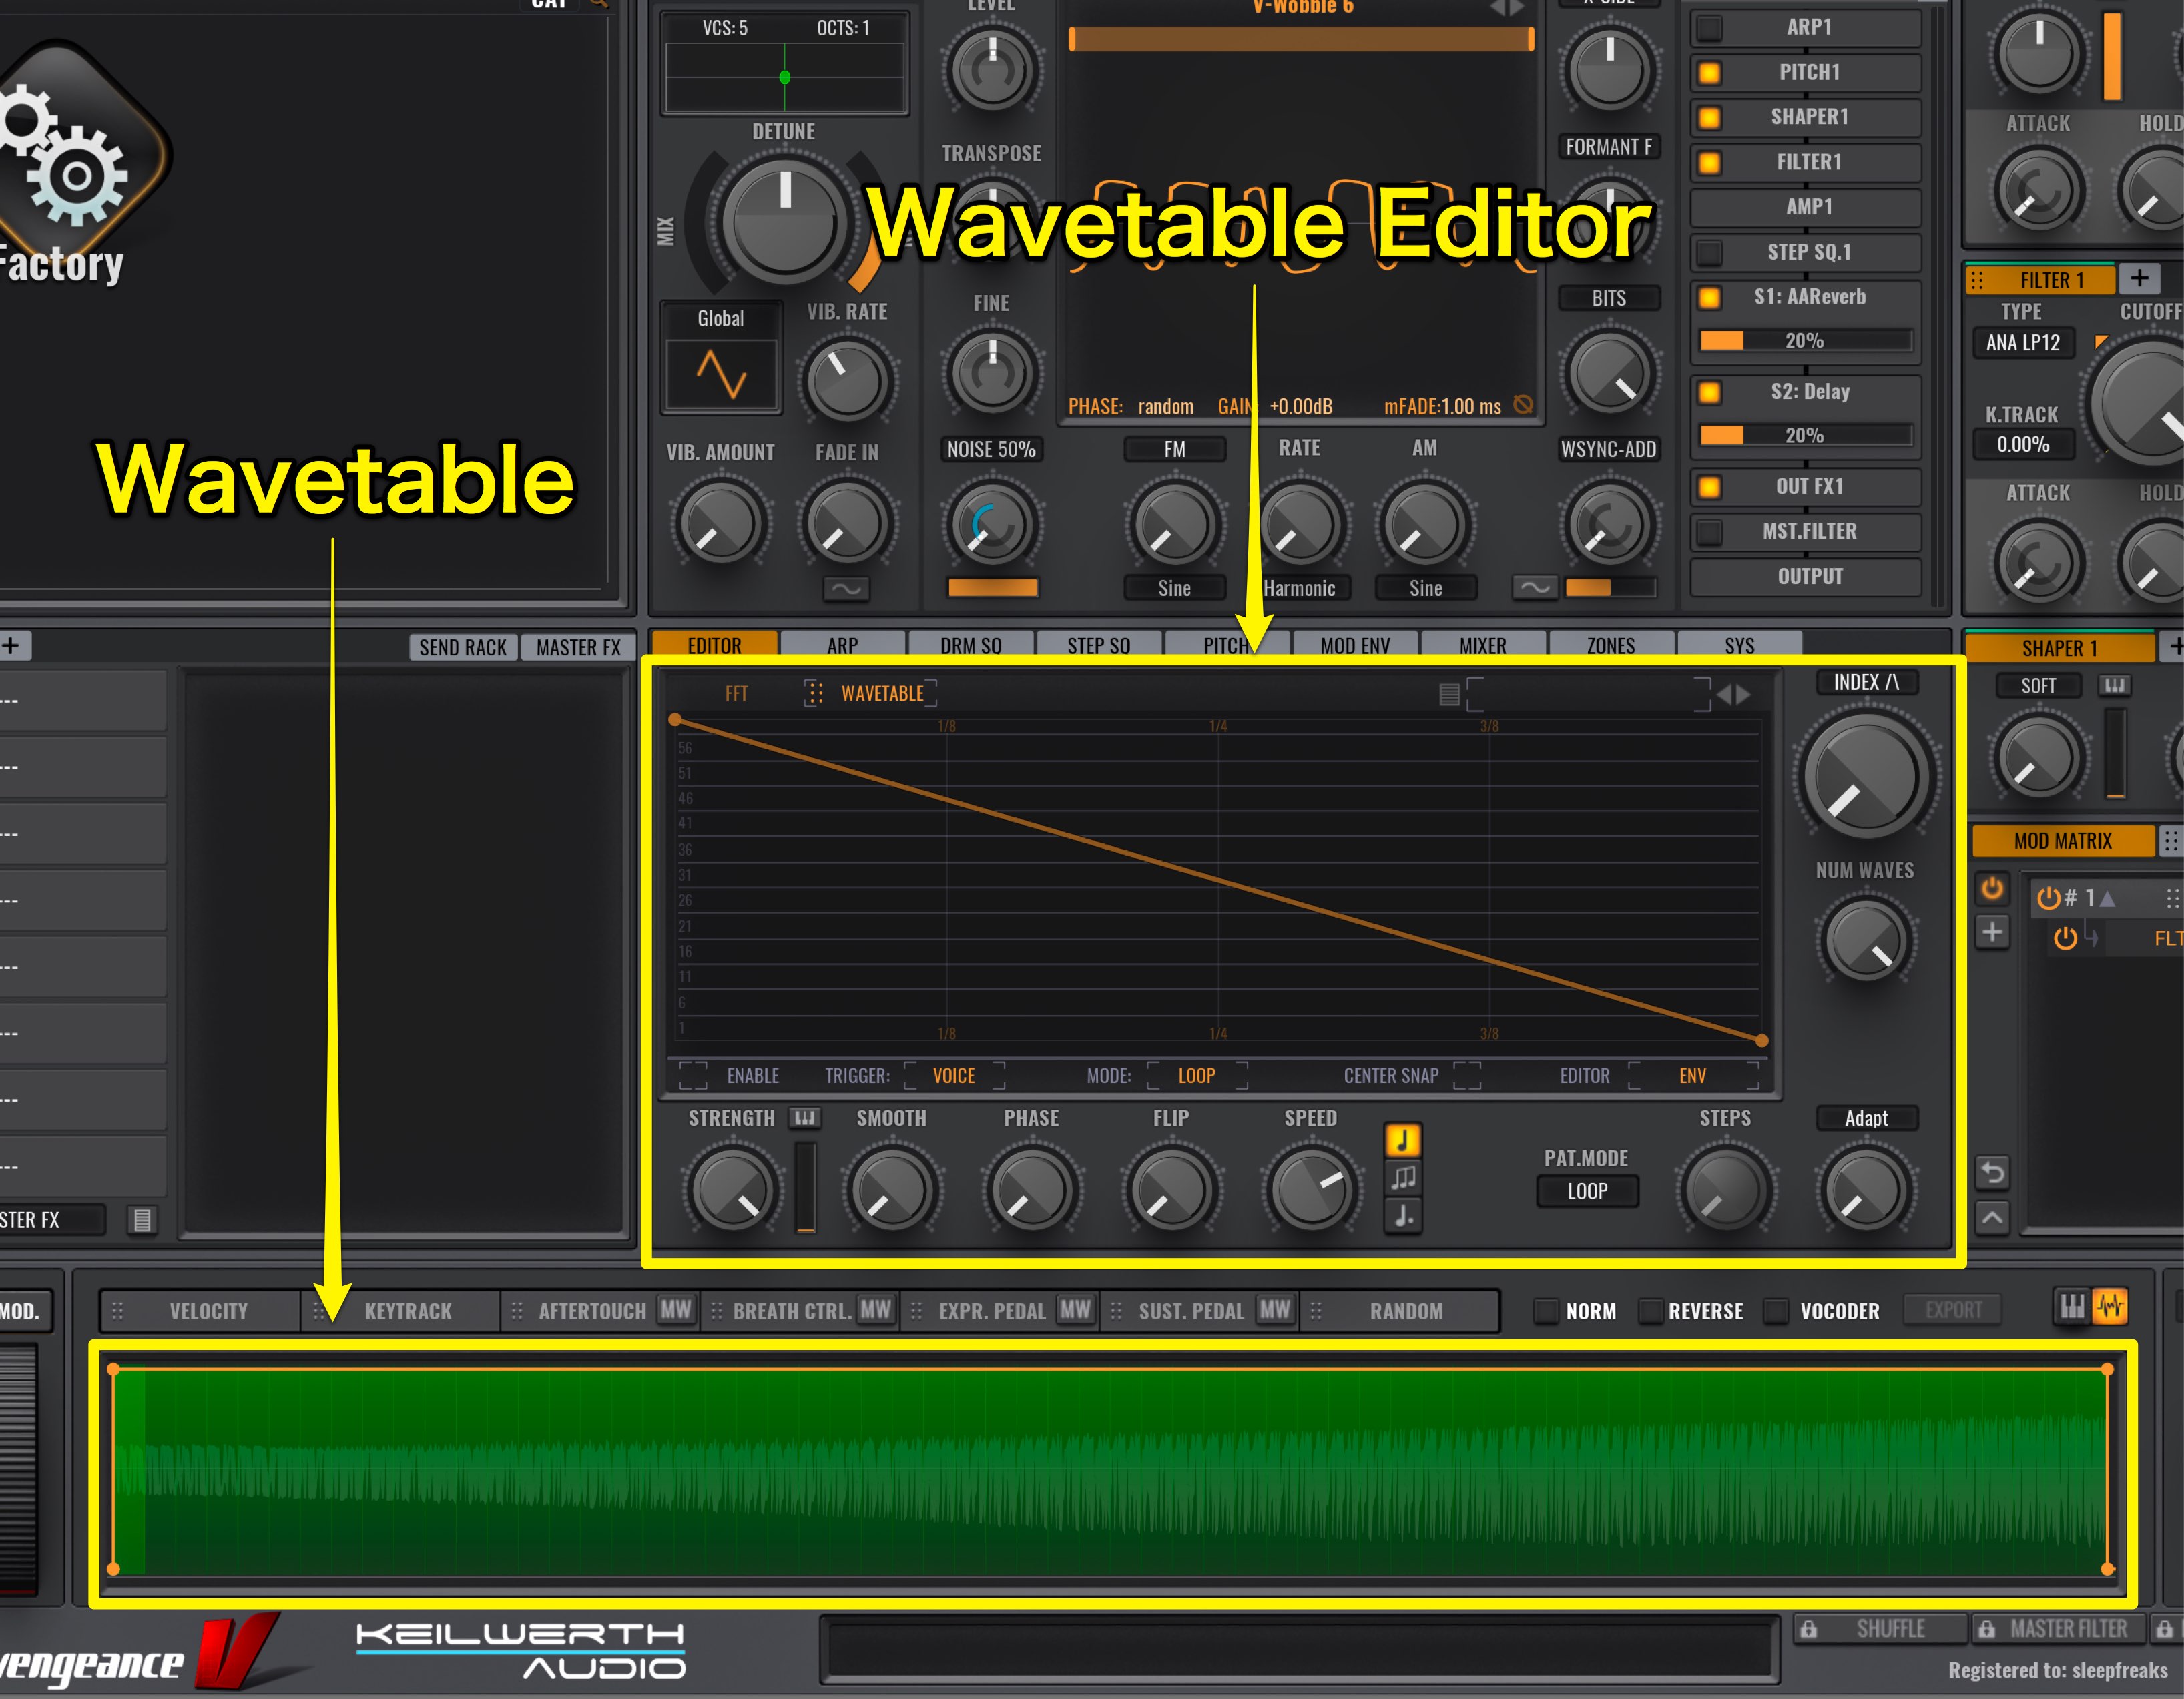
Wavetable Editor will open, and Wavetable will show up below.
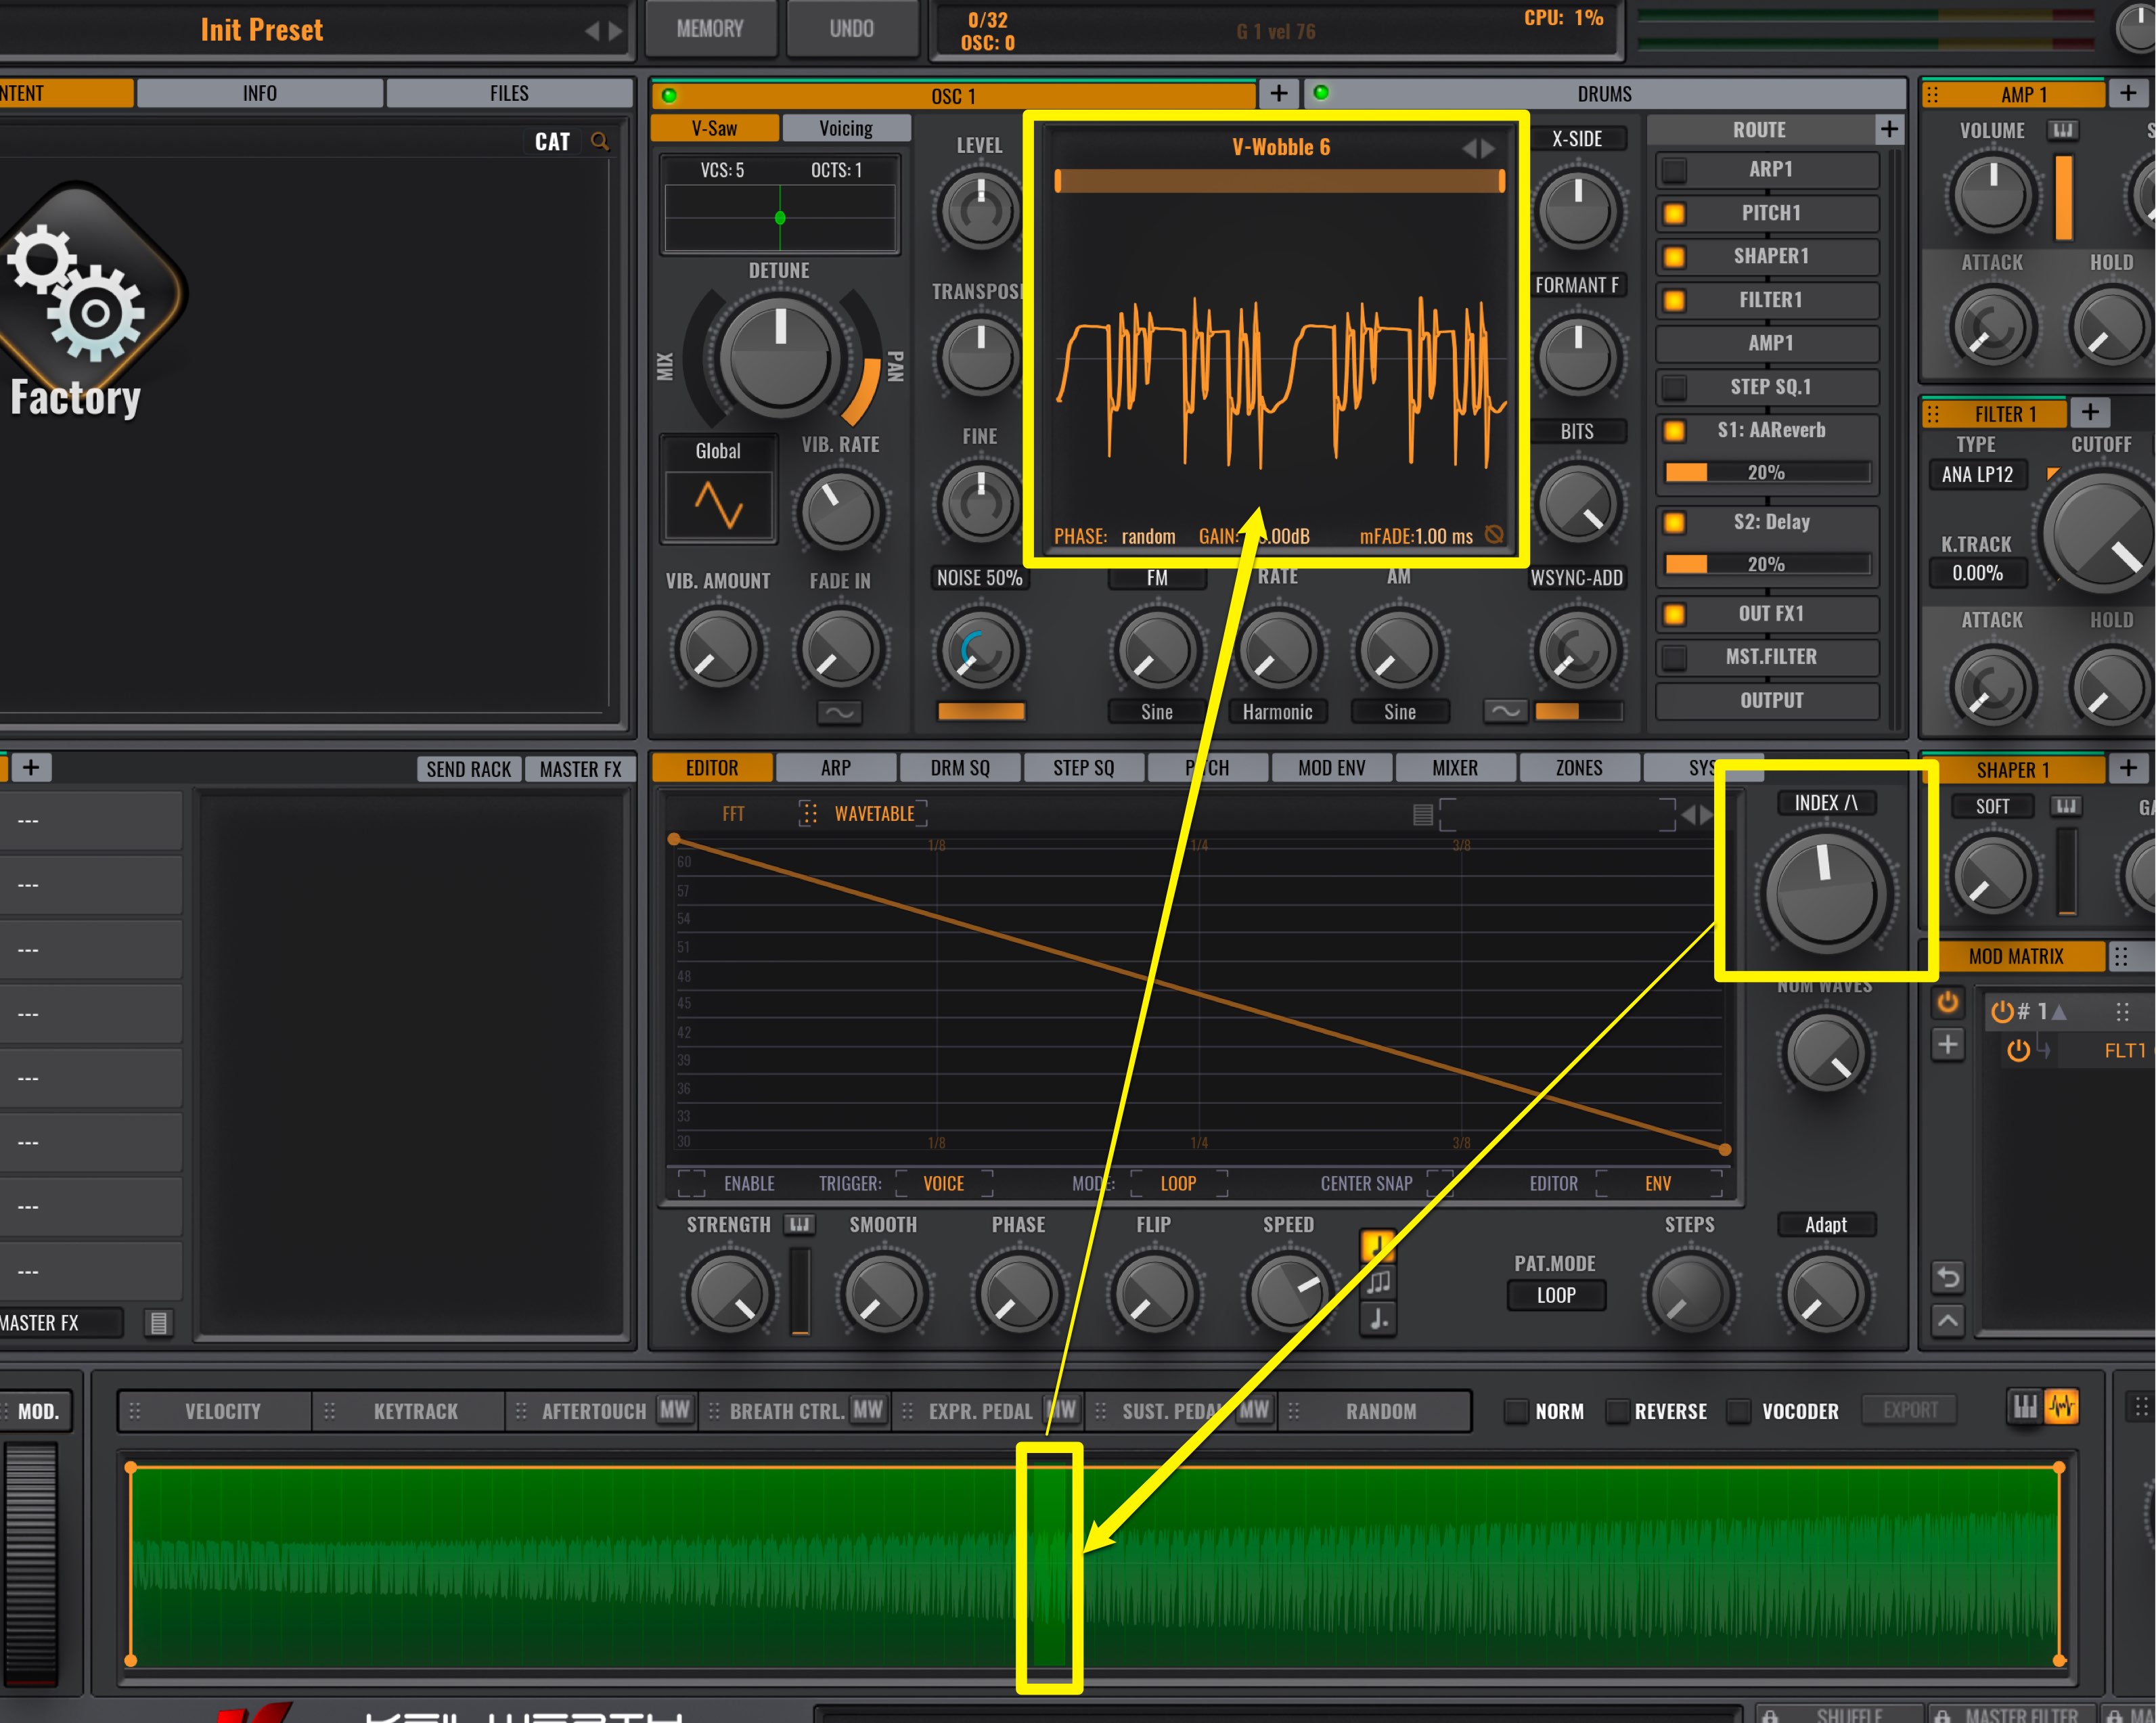
Move the INDEX knob, to select what area is played.
For most synths, this INDEX knob would control modulation parameters such as LFO to give movement to the sound.
However, in Avenger’s case, the Wavetable Editor allows for easy edits.
Wavetable Editor’s envelope
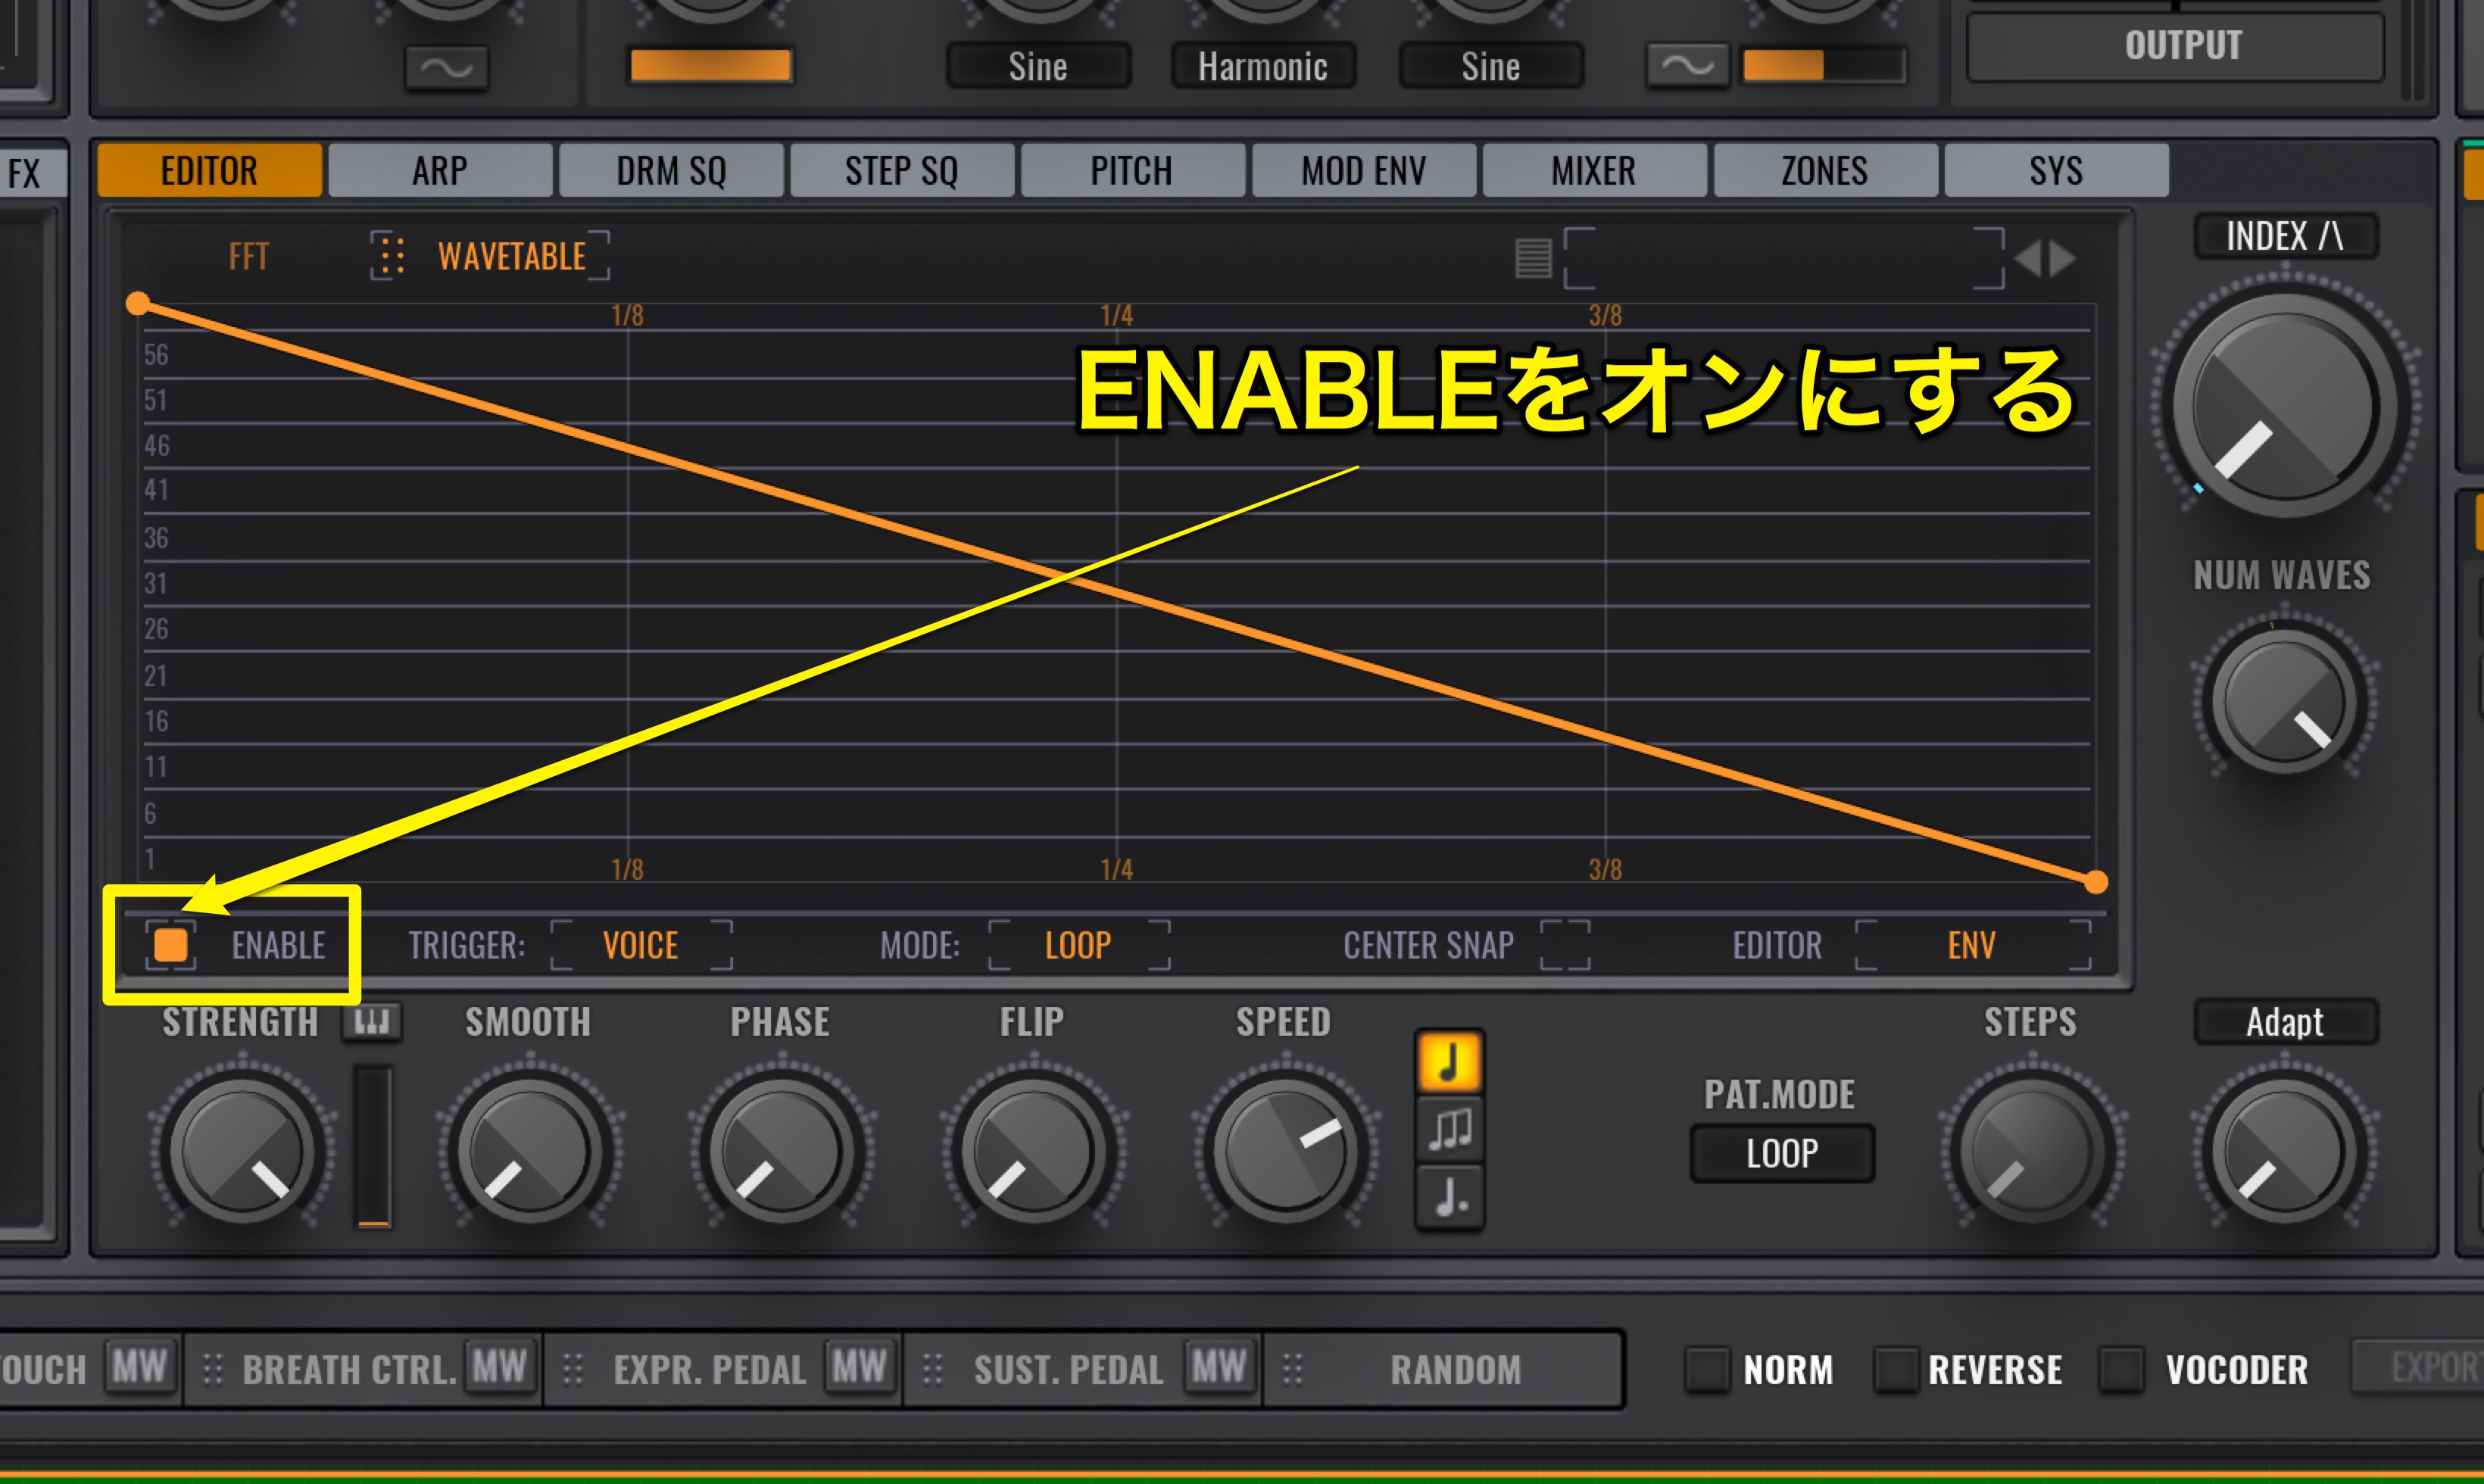
To activate the Wavetable Editor, just turn the ENABLE switch on.
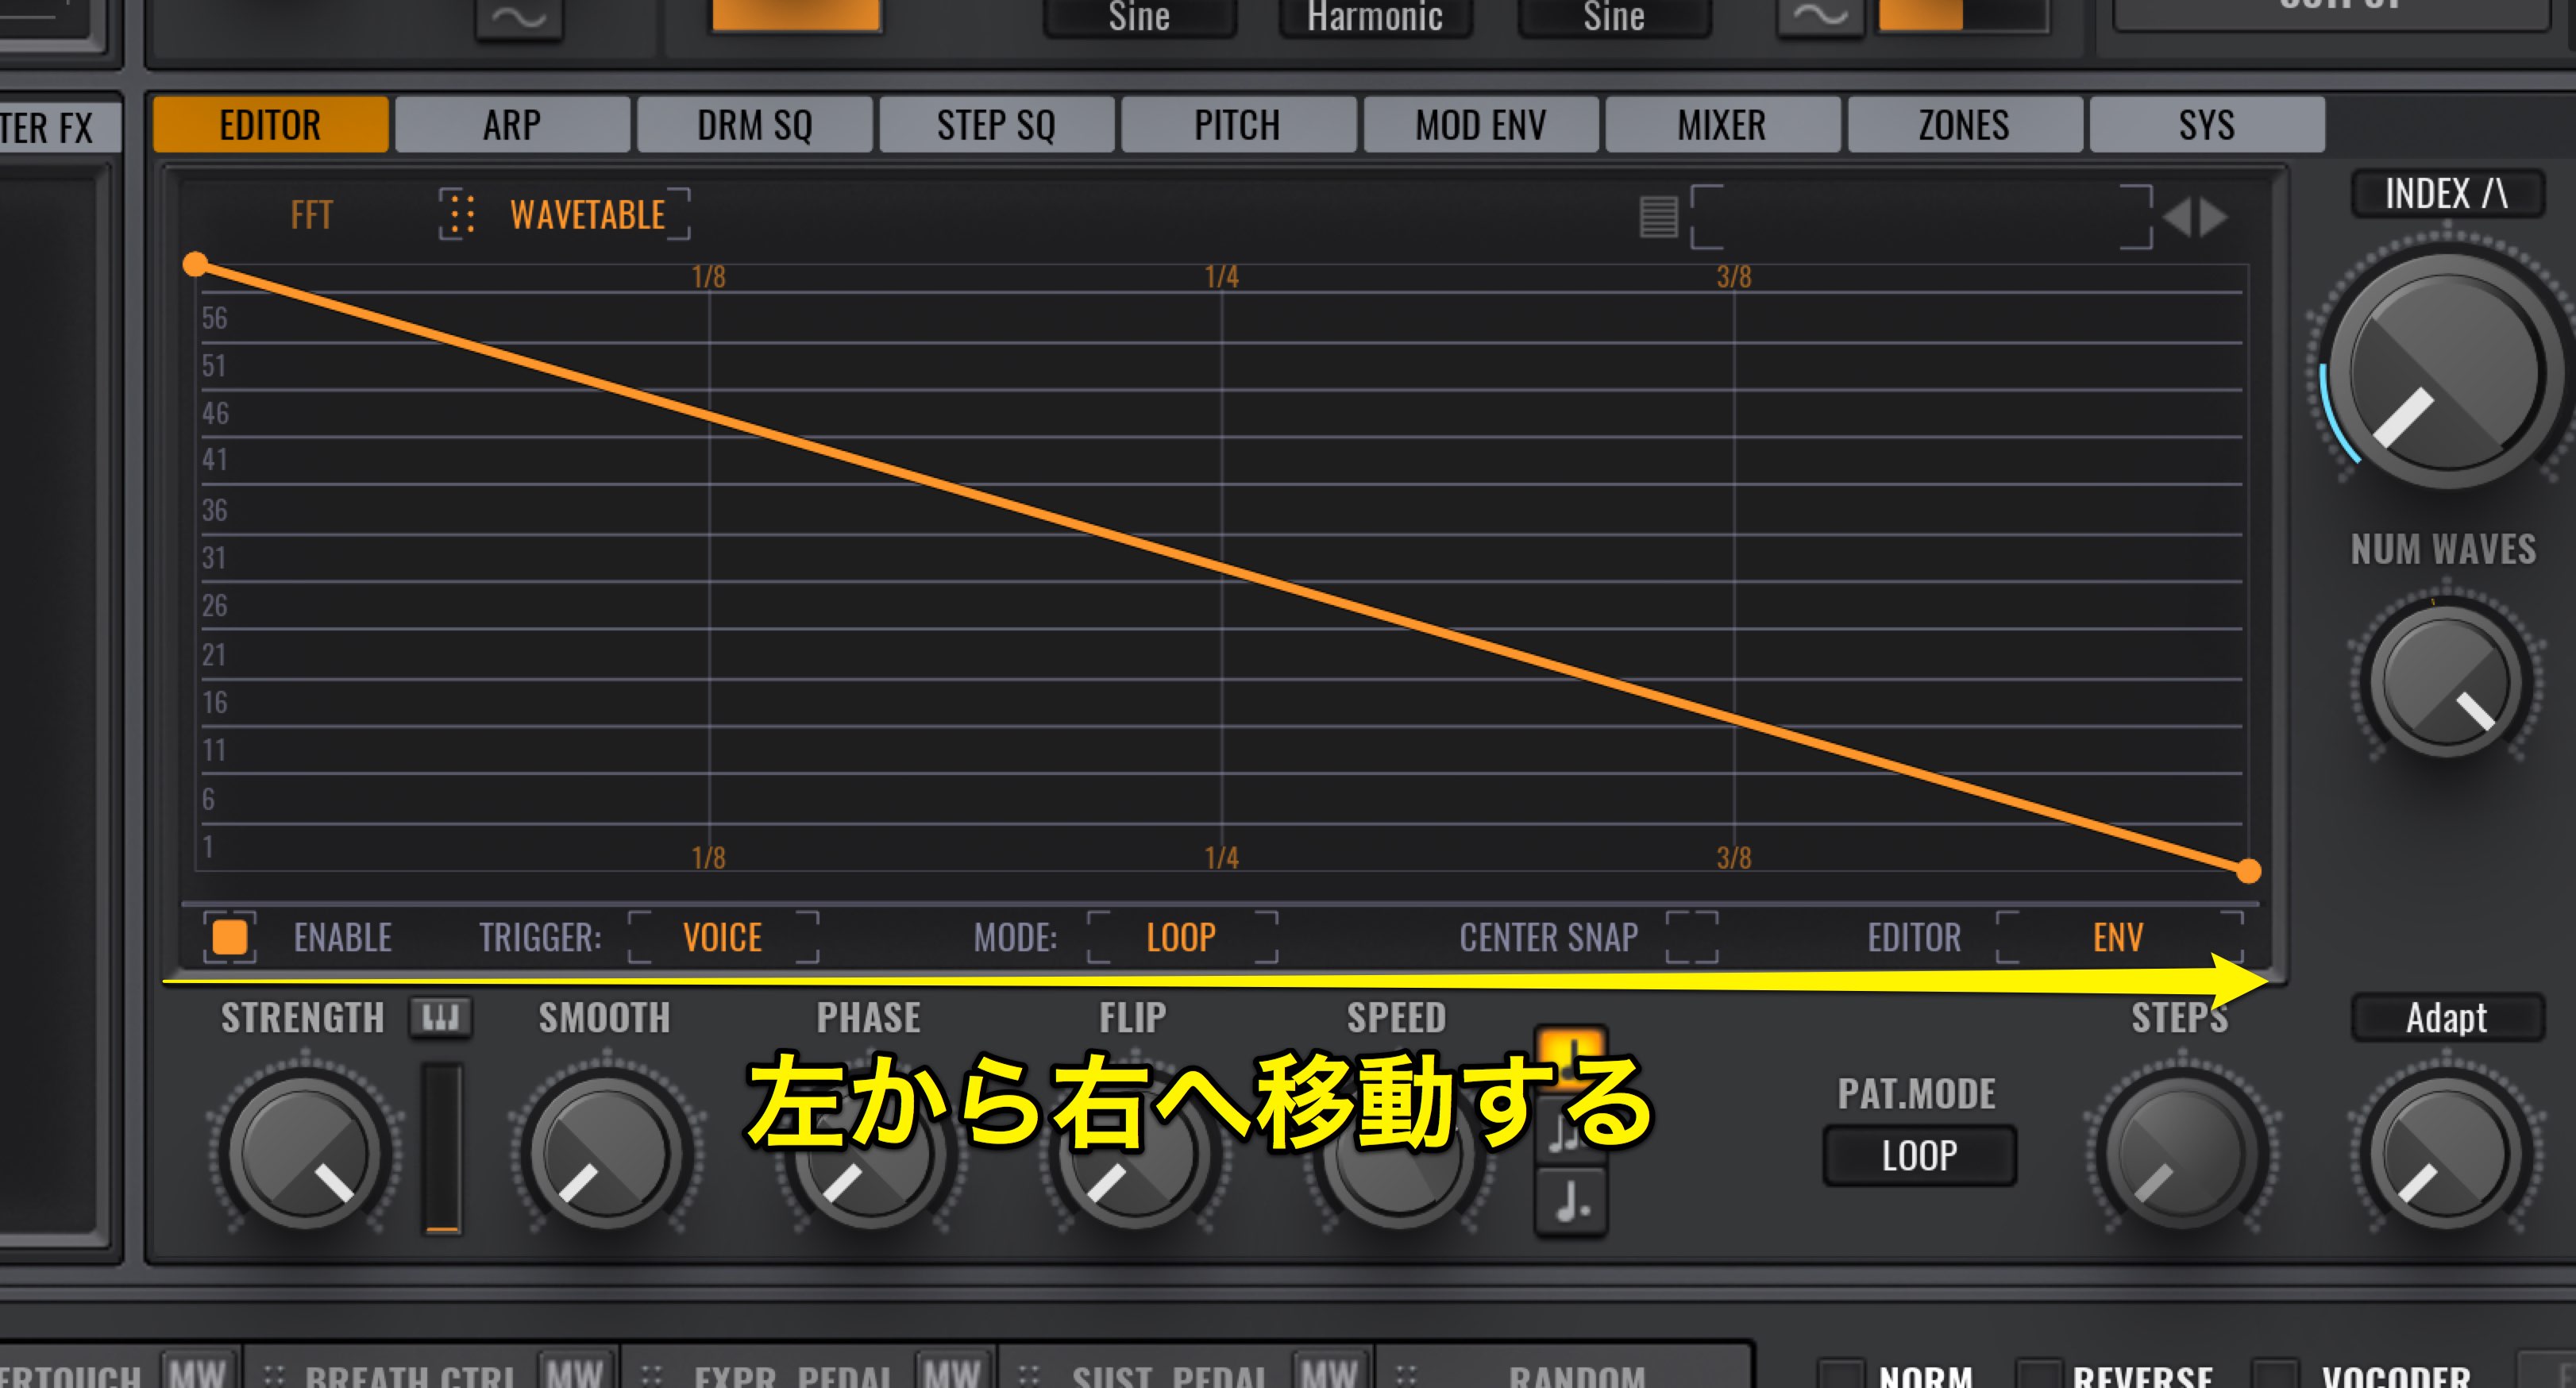
The line in the middle of EDITOR is the envelope, moving from the left to the right.
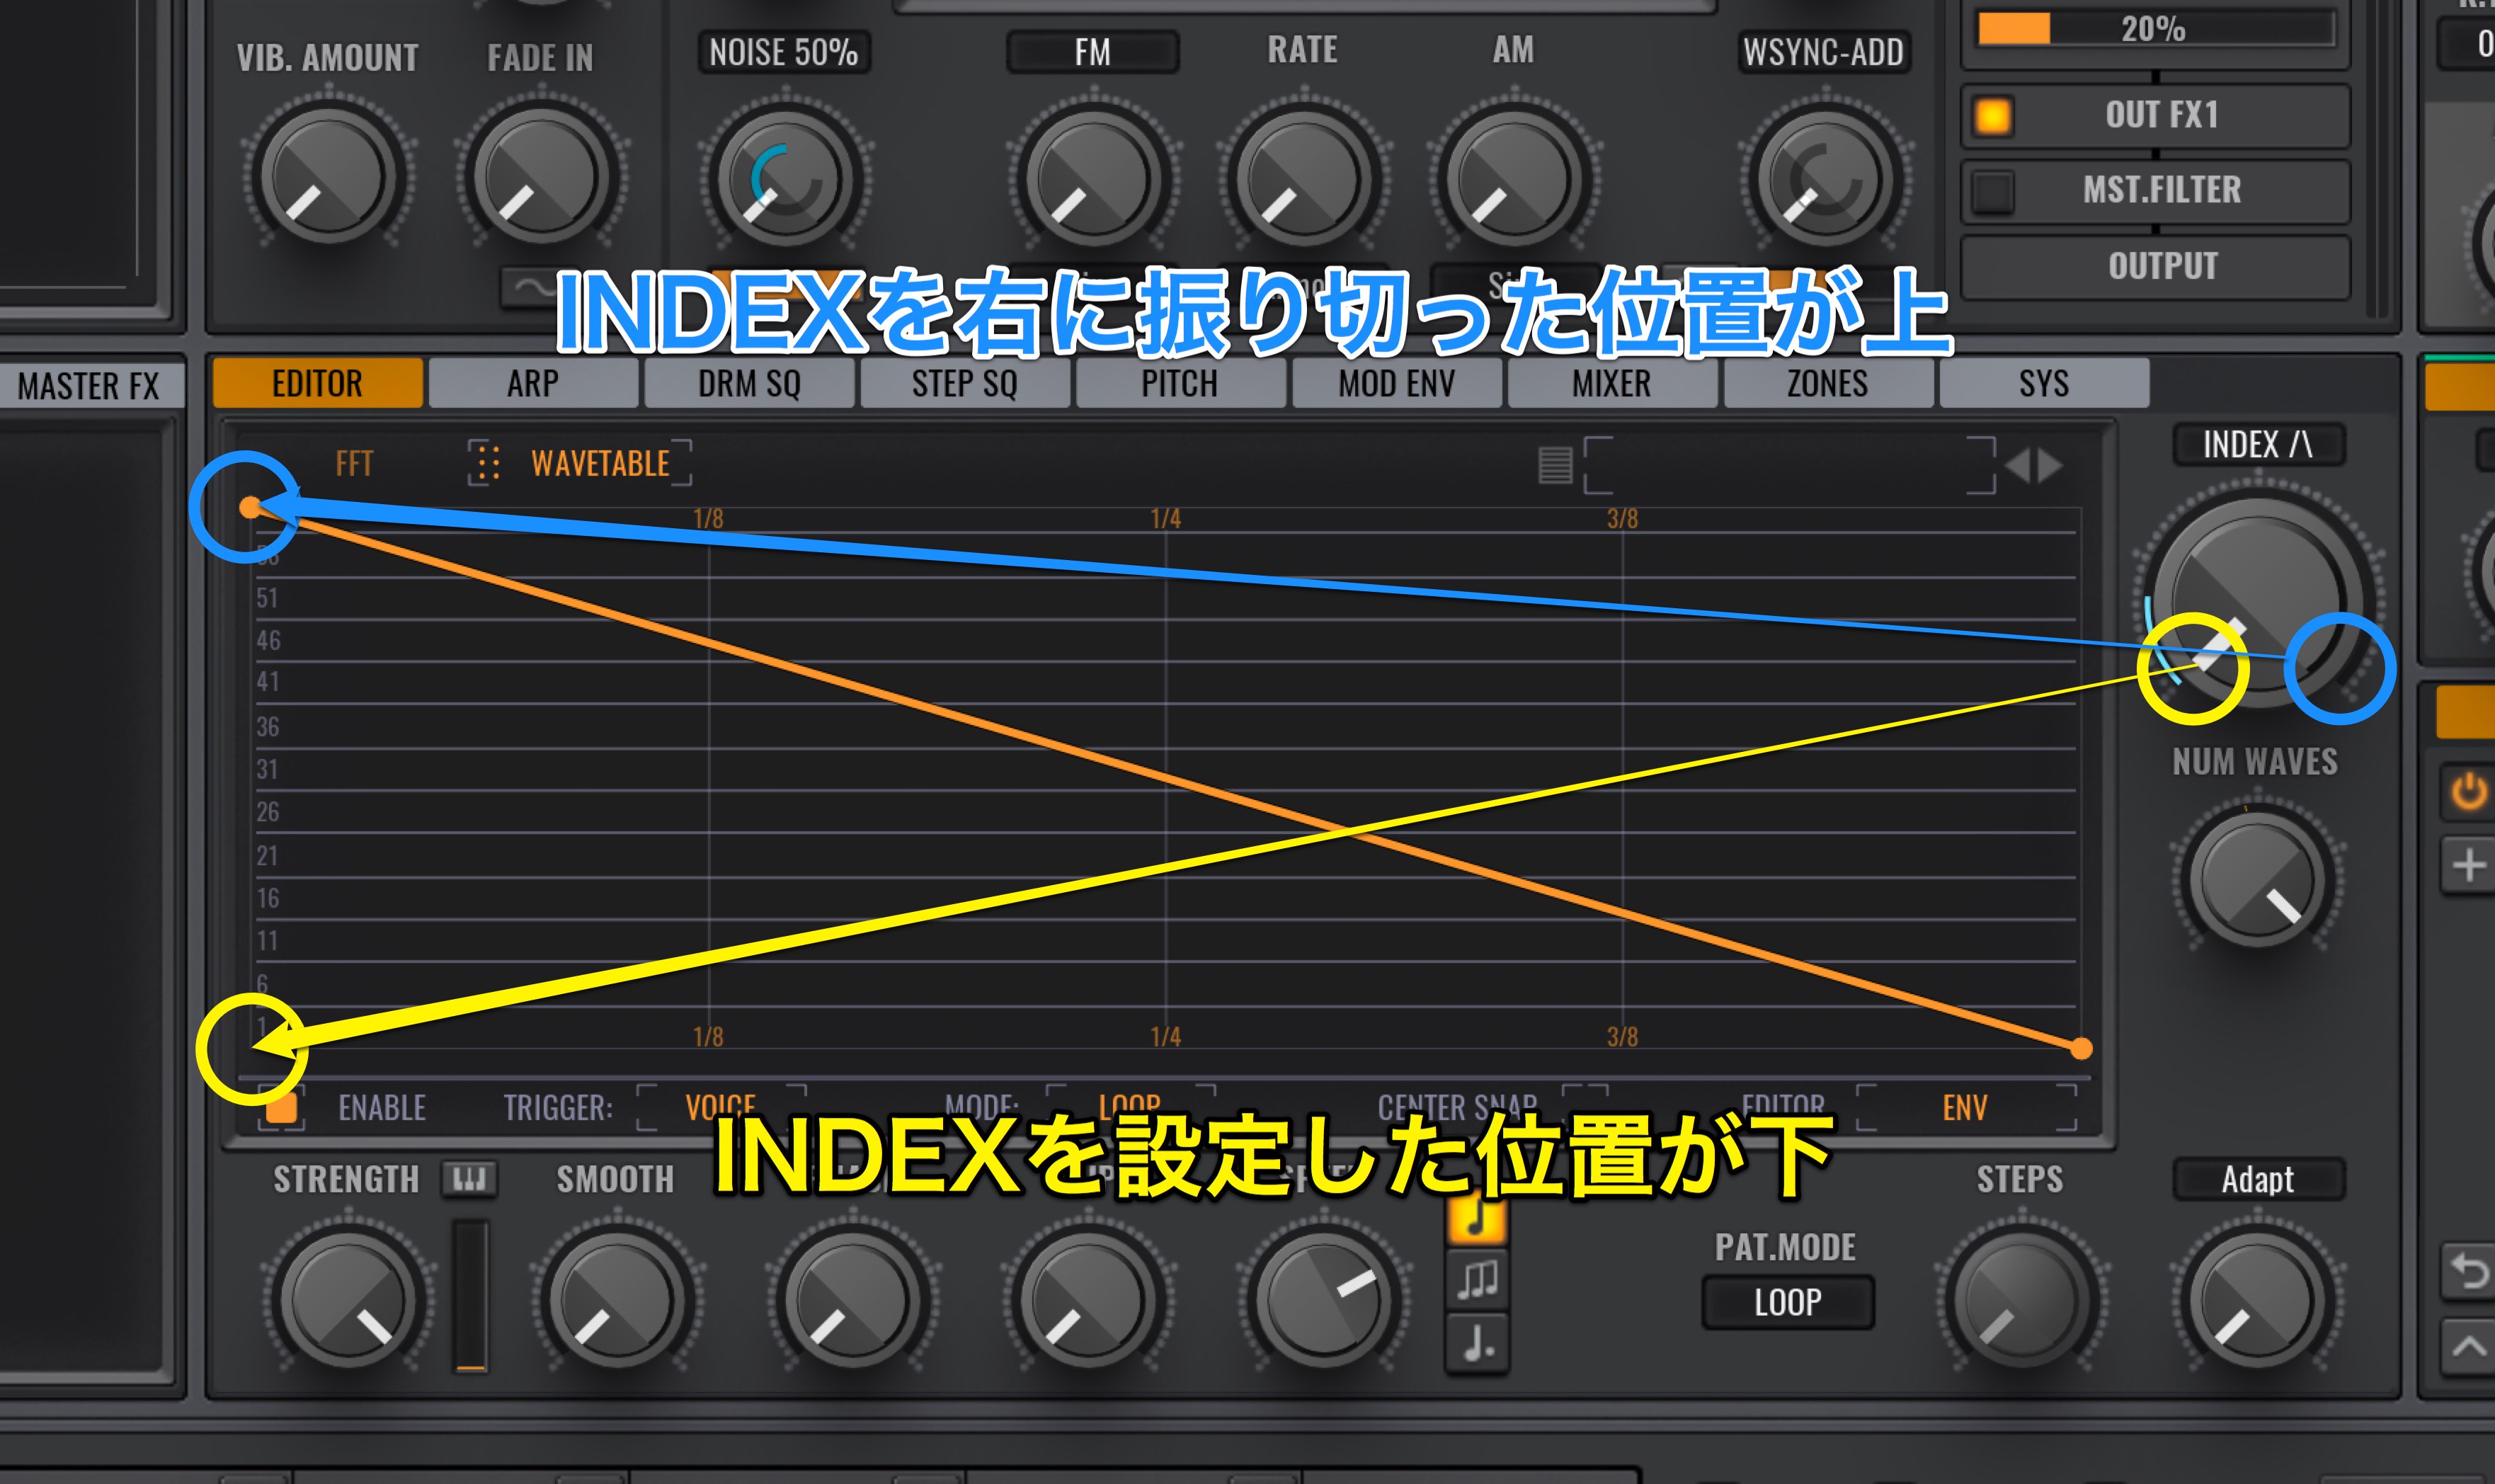
On vertical access of the envelope, the lowest setting on INDEX is the bottom, and the INDEX spun all the way to the right is top.
As a default the INDEX starts at the right, and gradually returns to the to the setting you set.
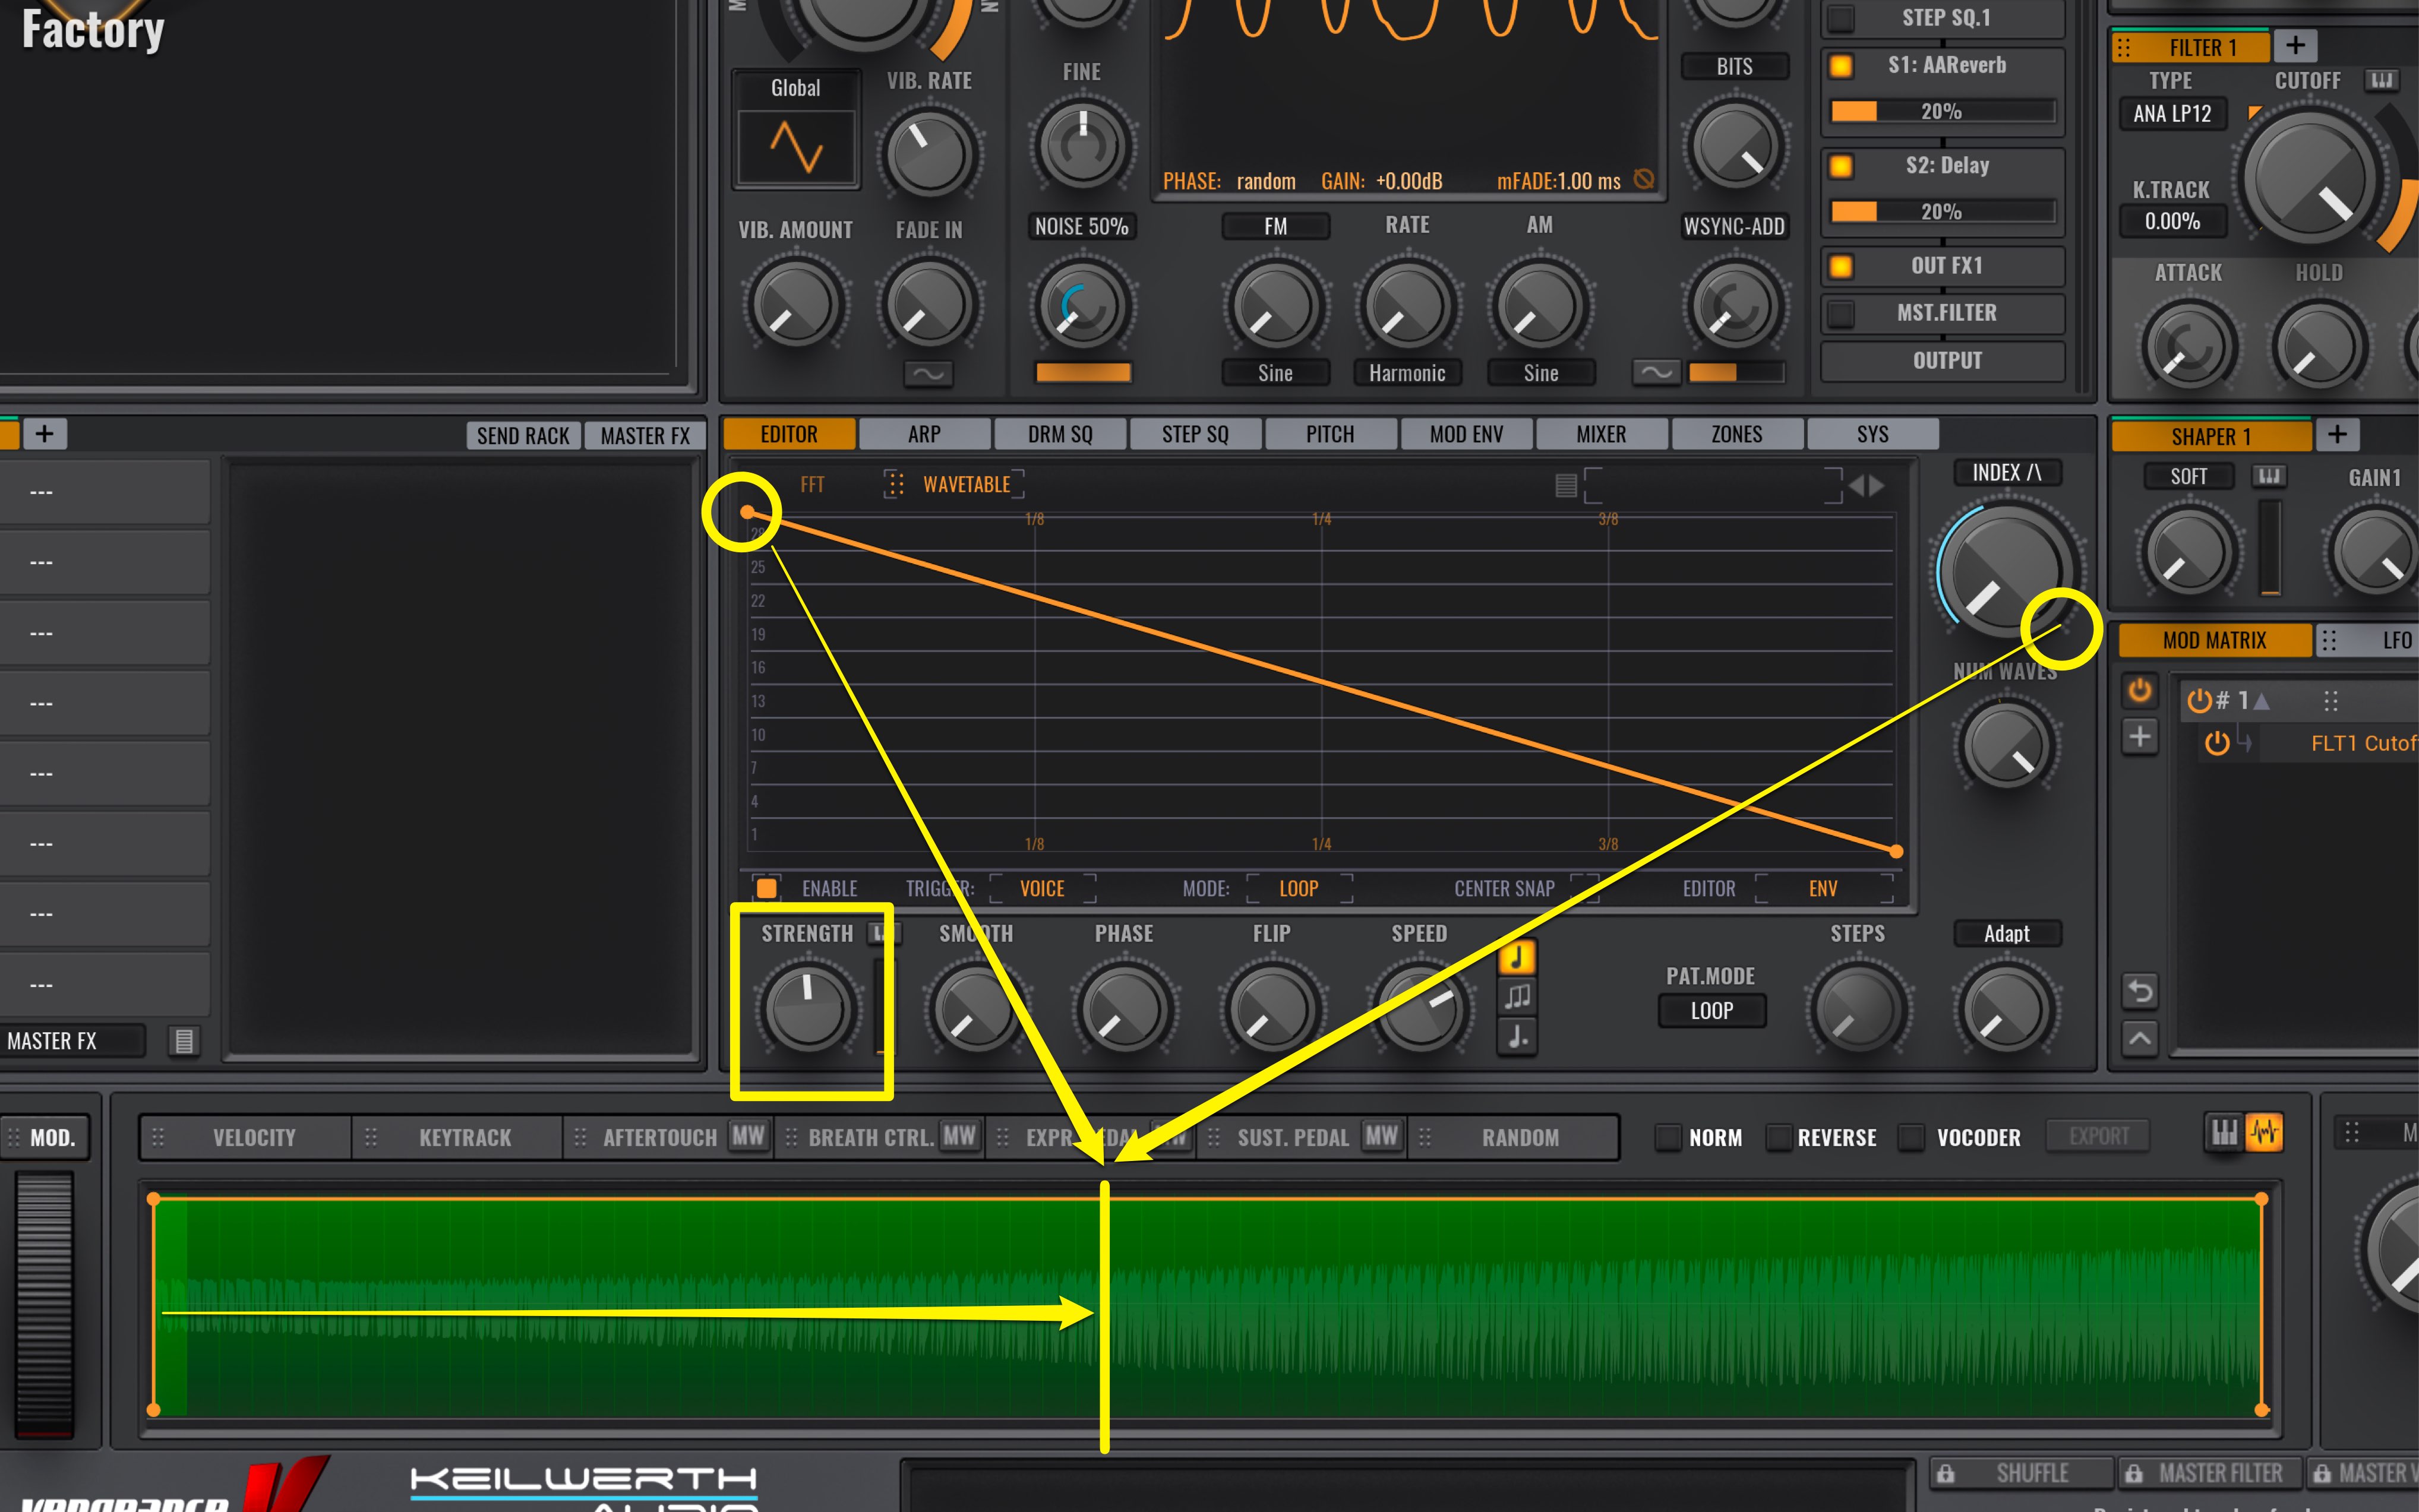
The position of Wavetable when INDEX is on the far right, can also be changed through the STRENGTH knob below.
The default is turned all the way to the right, and is set this way for all Wavetable settings.
By turning this to the left, the length that Wavetable reads becomes shorter.
If you turn it all the way to the left, there is no movement, hence there will be no change in sound.
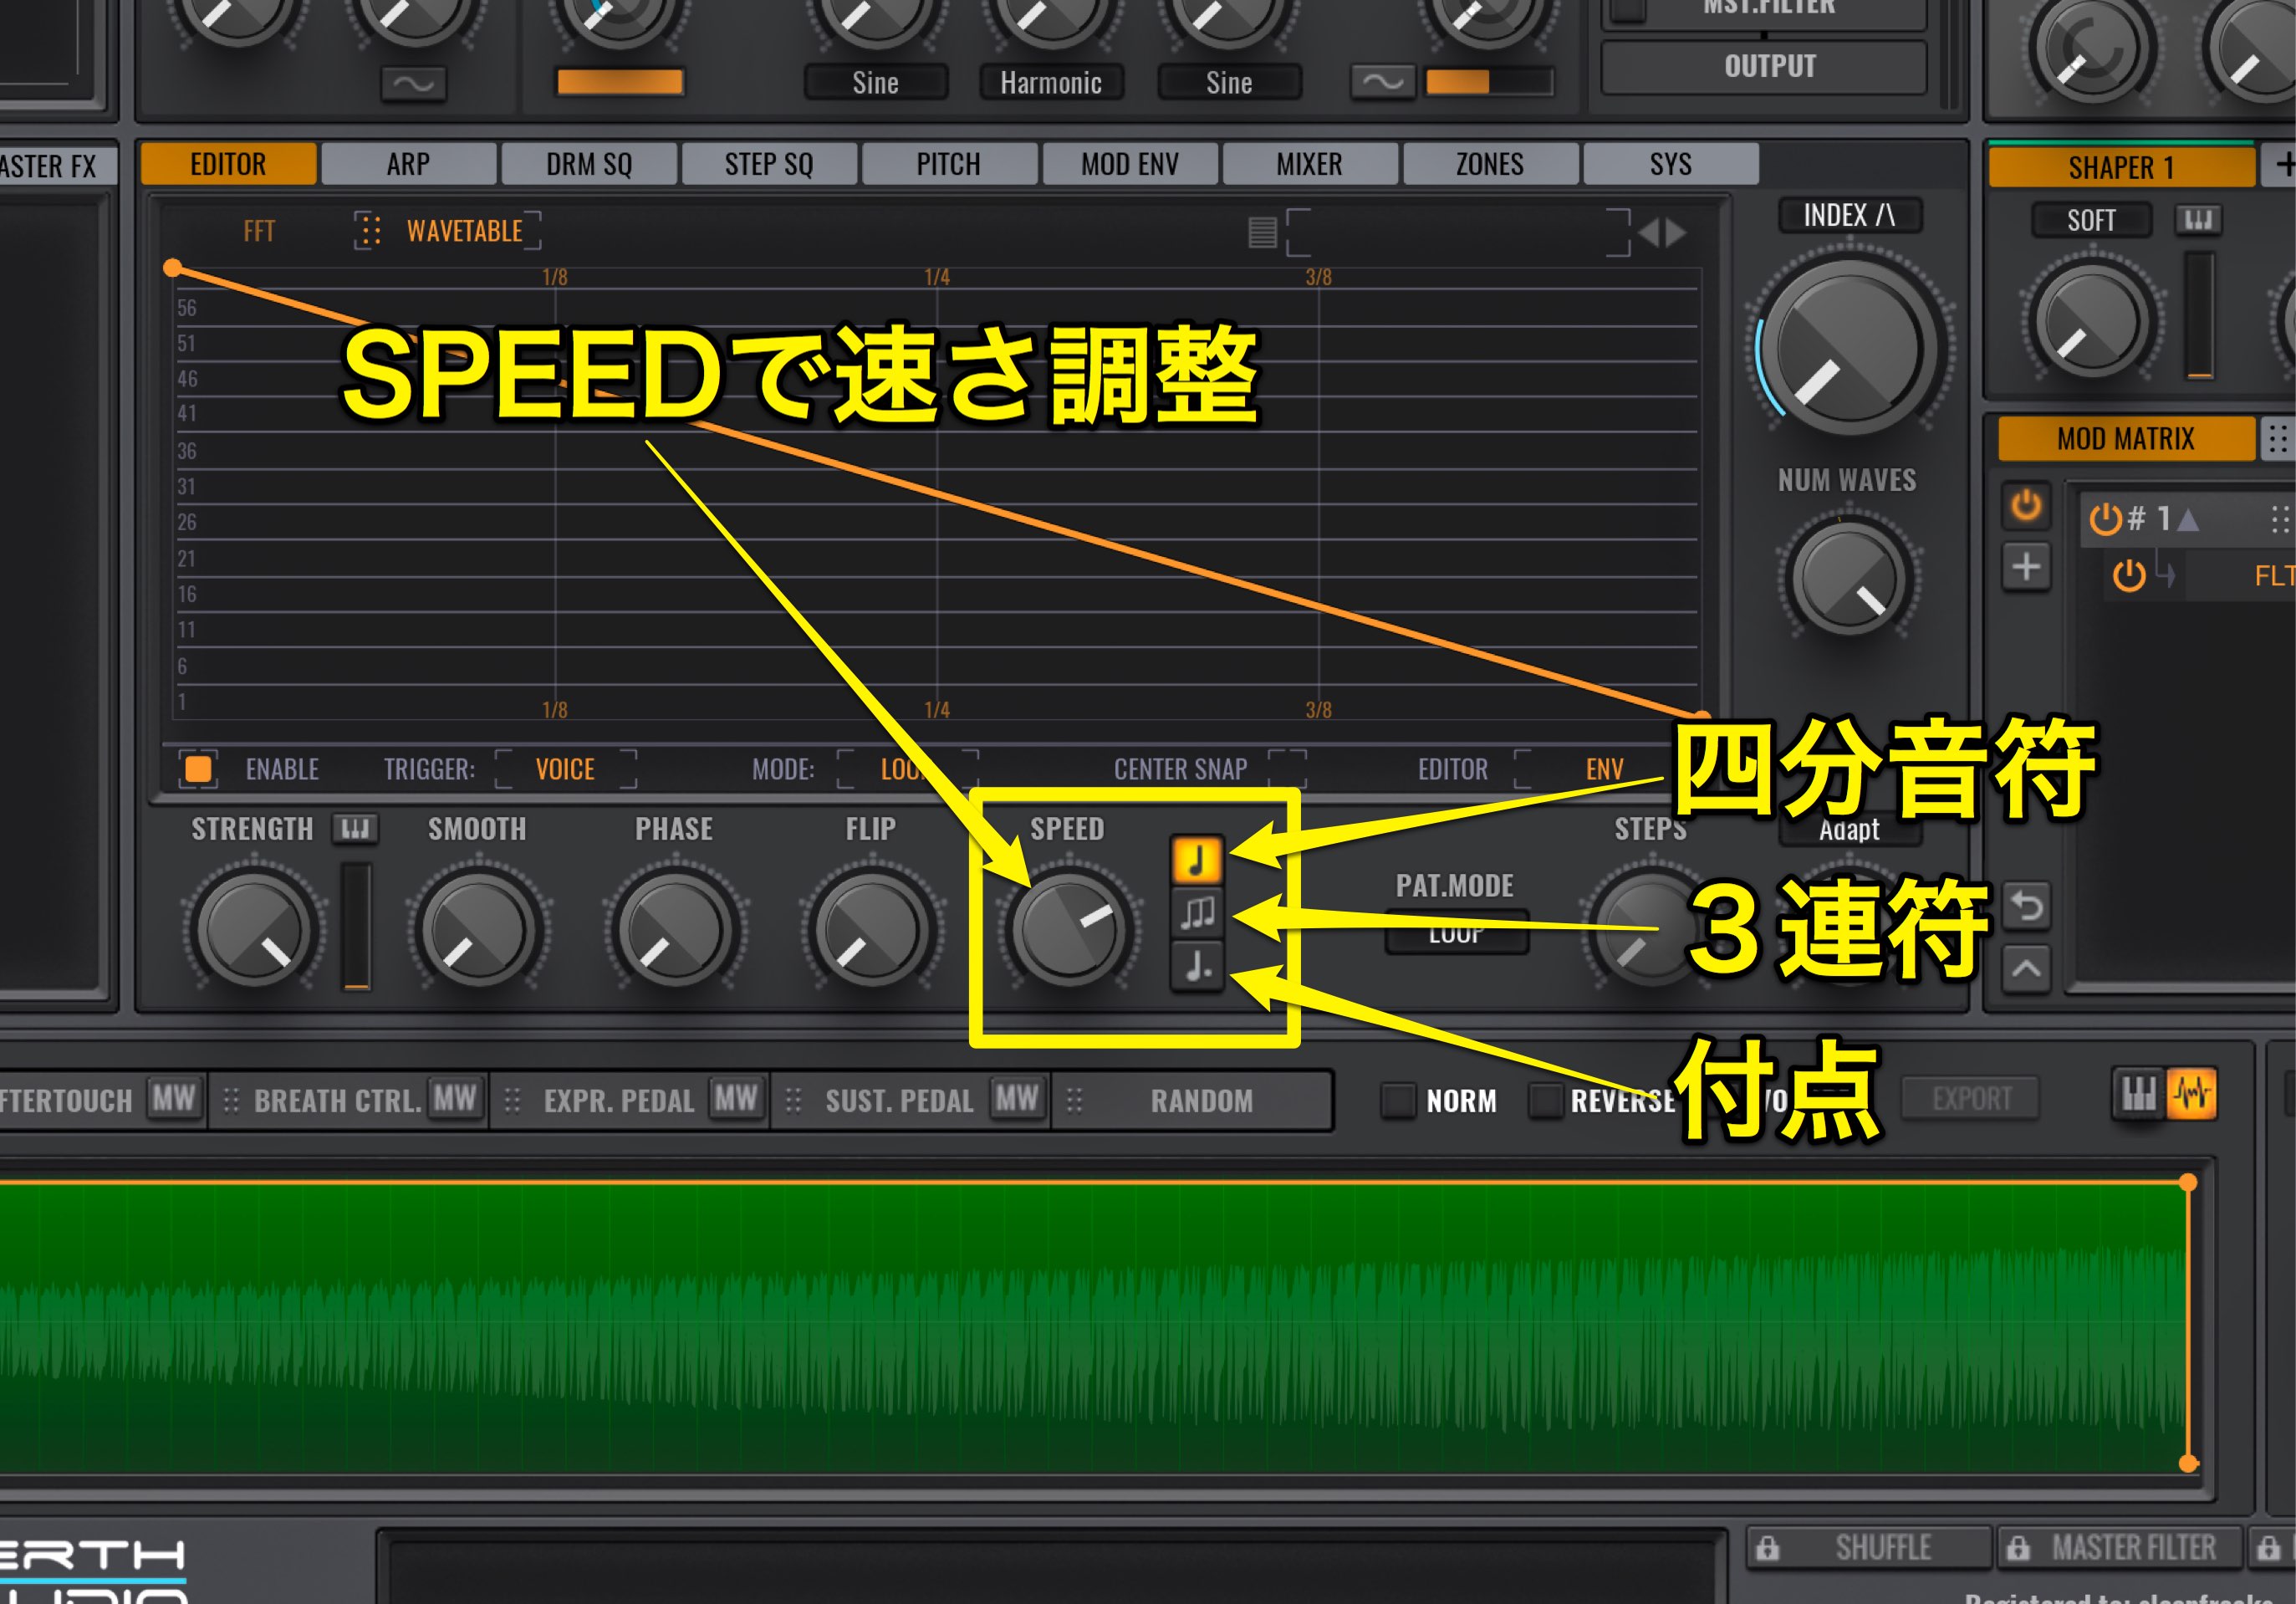
You can adjust the envelope speed from the SPEED knob.
The default is in quarter notes, and is set to the tempo in your DAW.
By adjusting the SPEED, you can change the speed from quarter, eighth, sixteenth, and so on.
It also works for dotted notes and triplets, making it very compatible for a wide variety of genres.
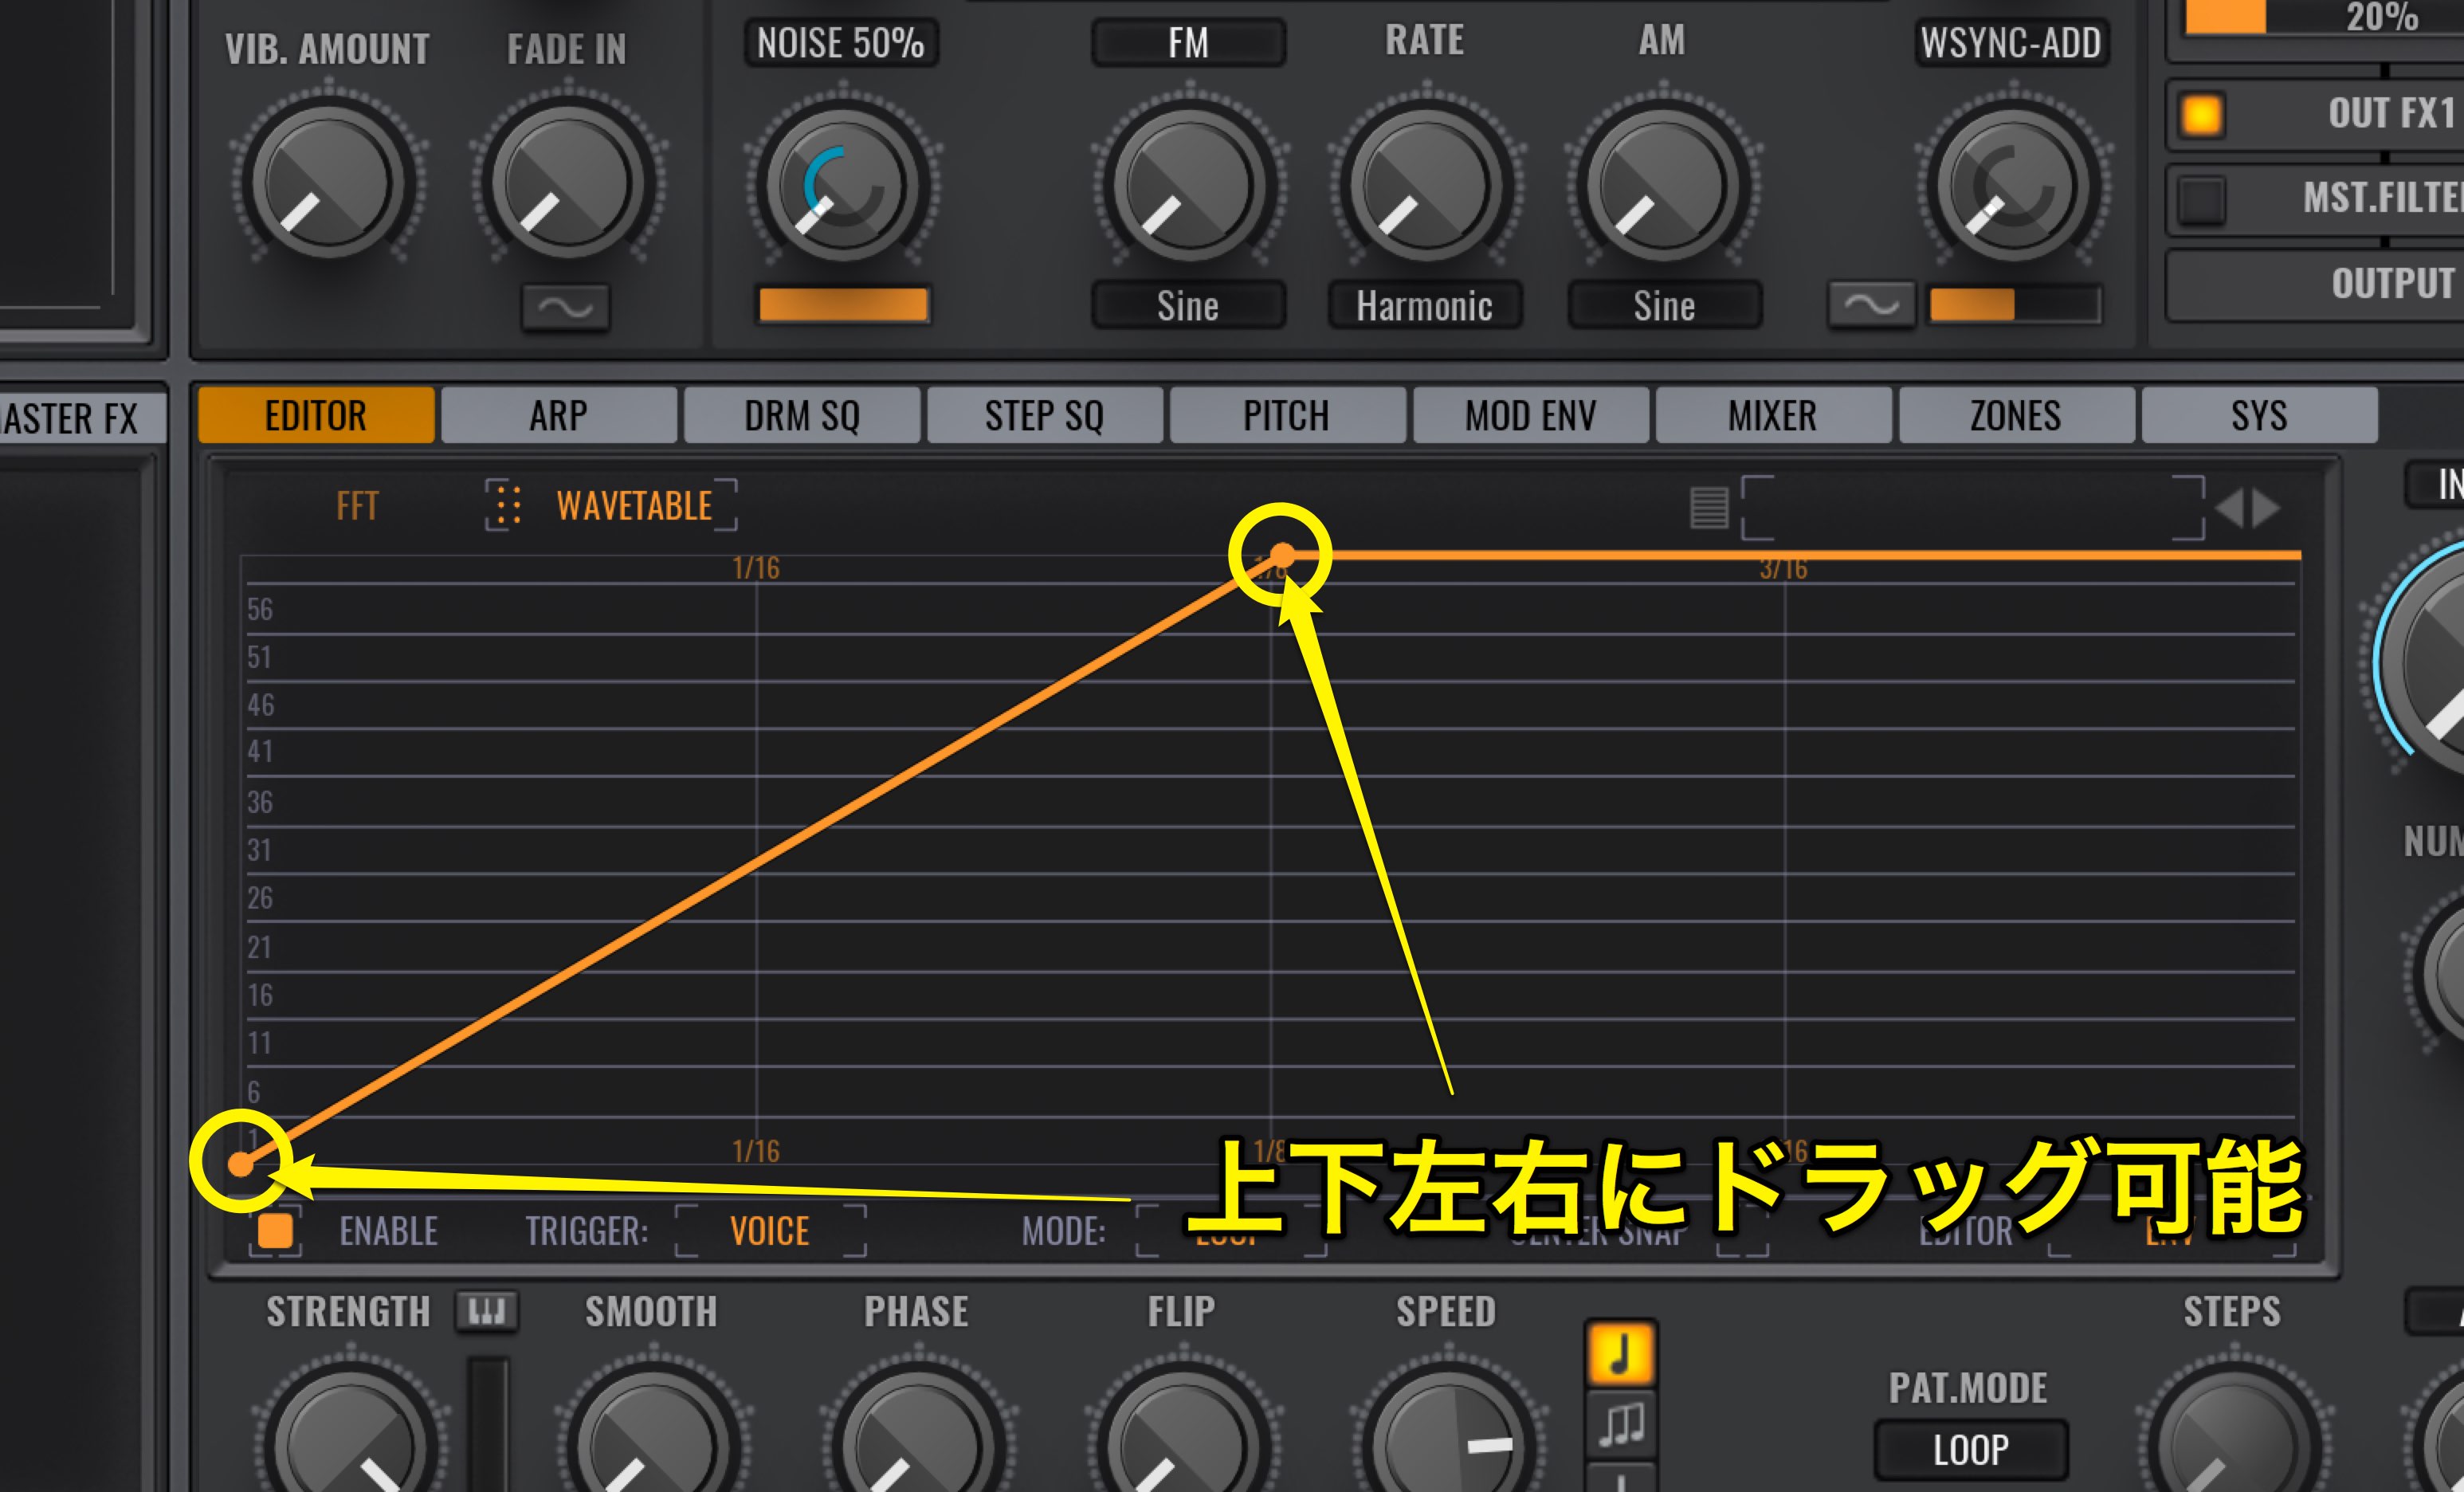
The envelope point can be moved up/down/left/right.
It’s good to have the phrase played while making small edits to the nuances.
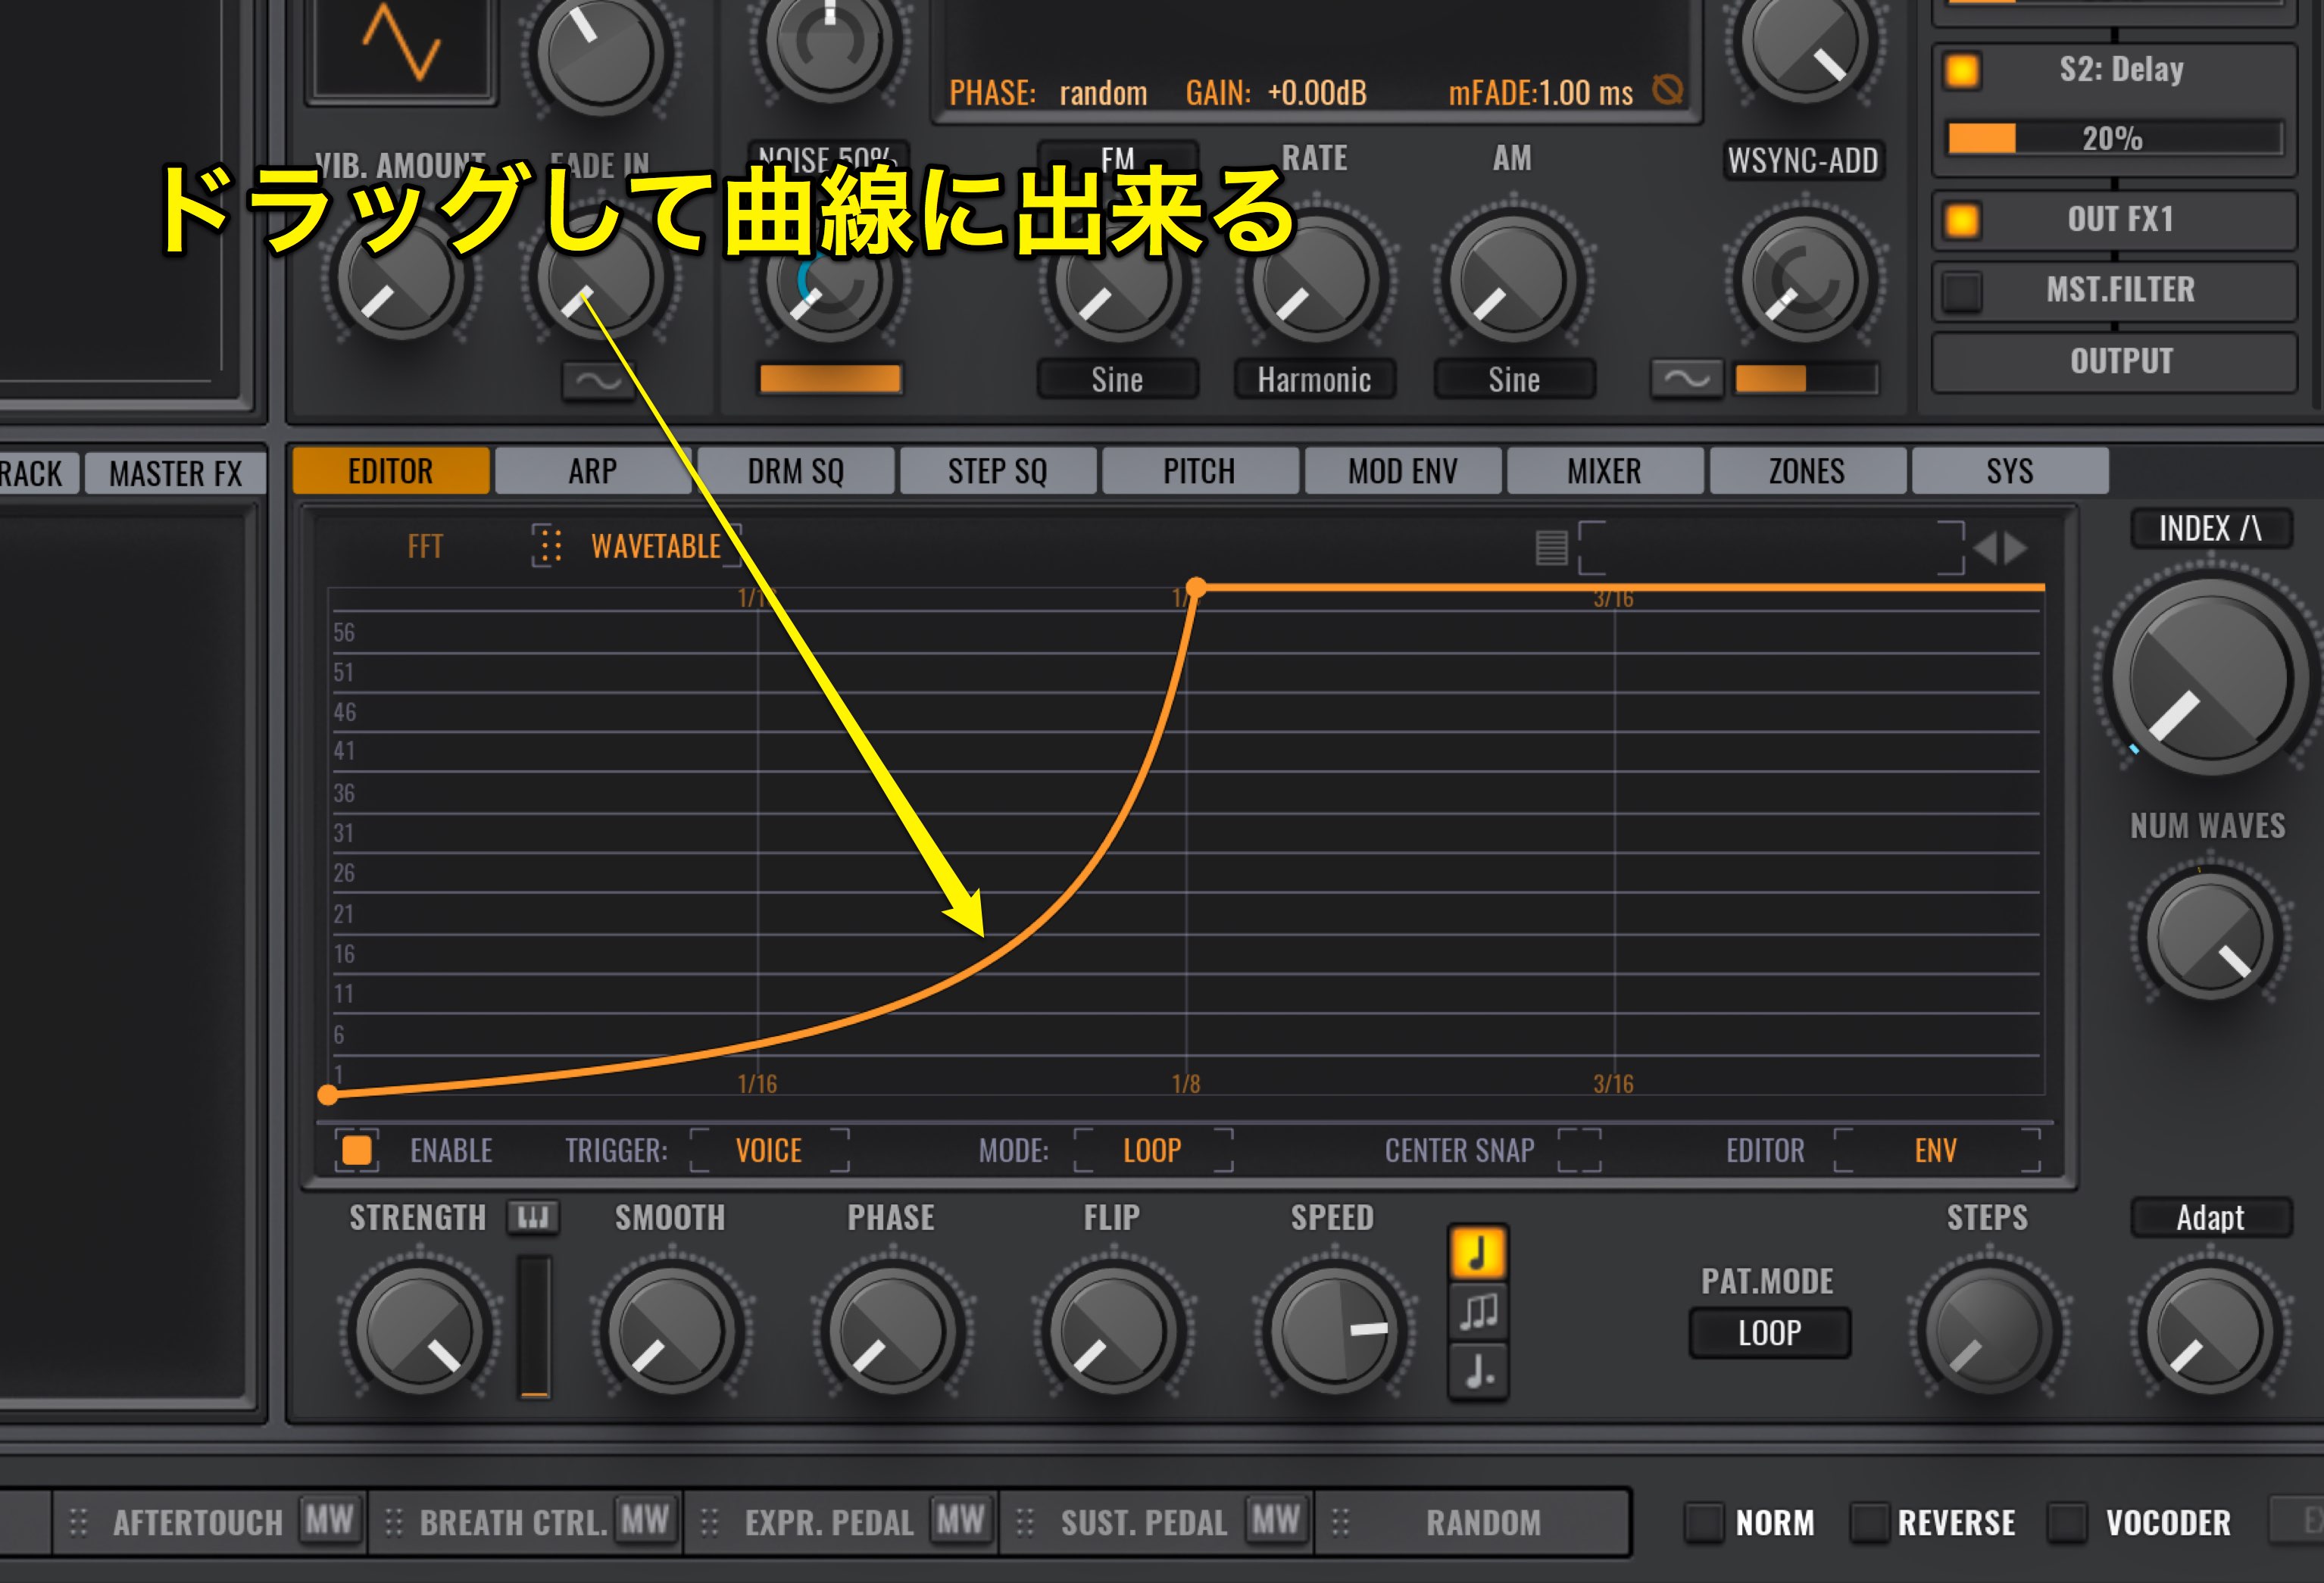
Also, by dragging a straight line, you can curve it as well.
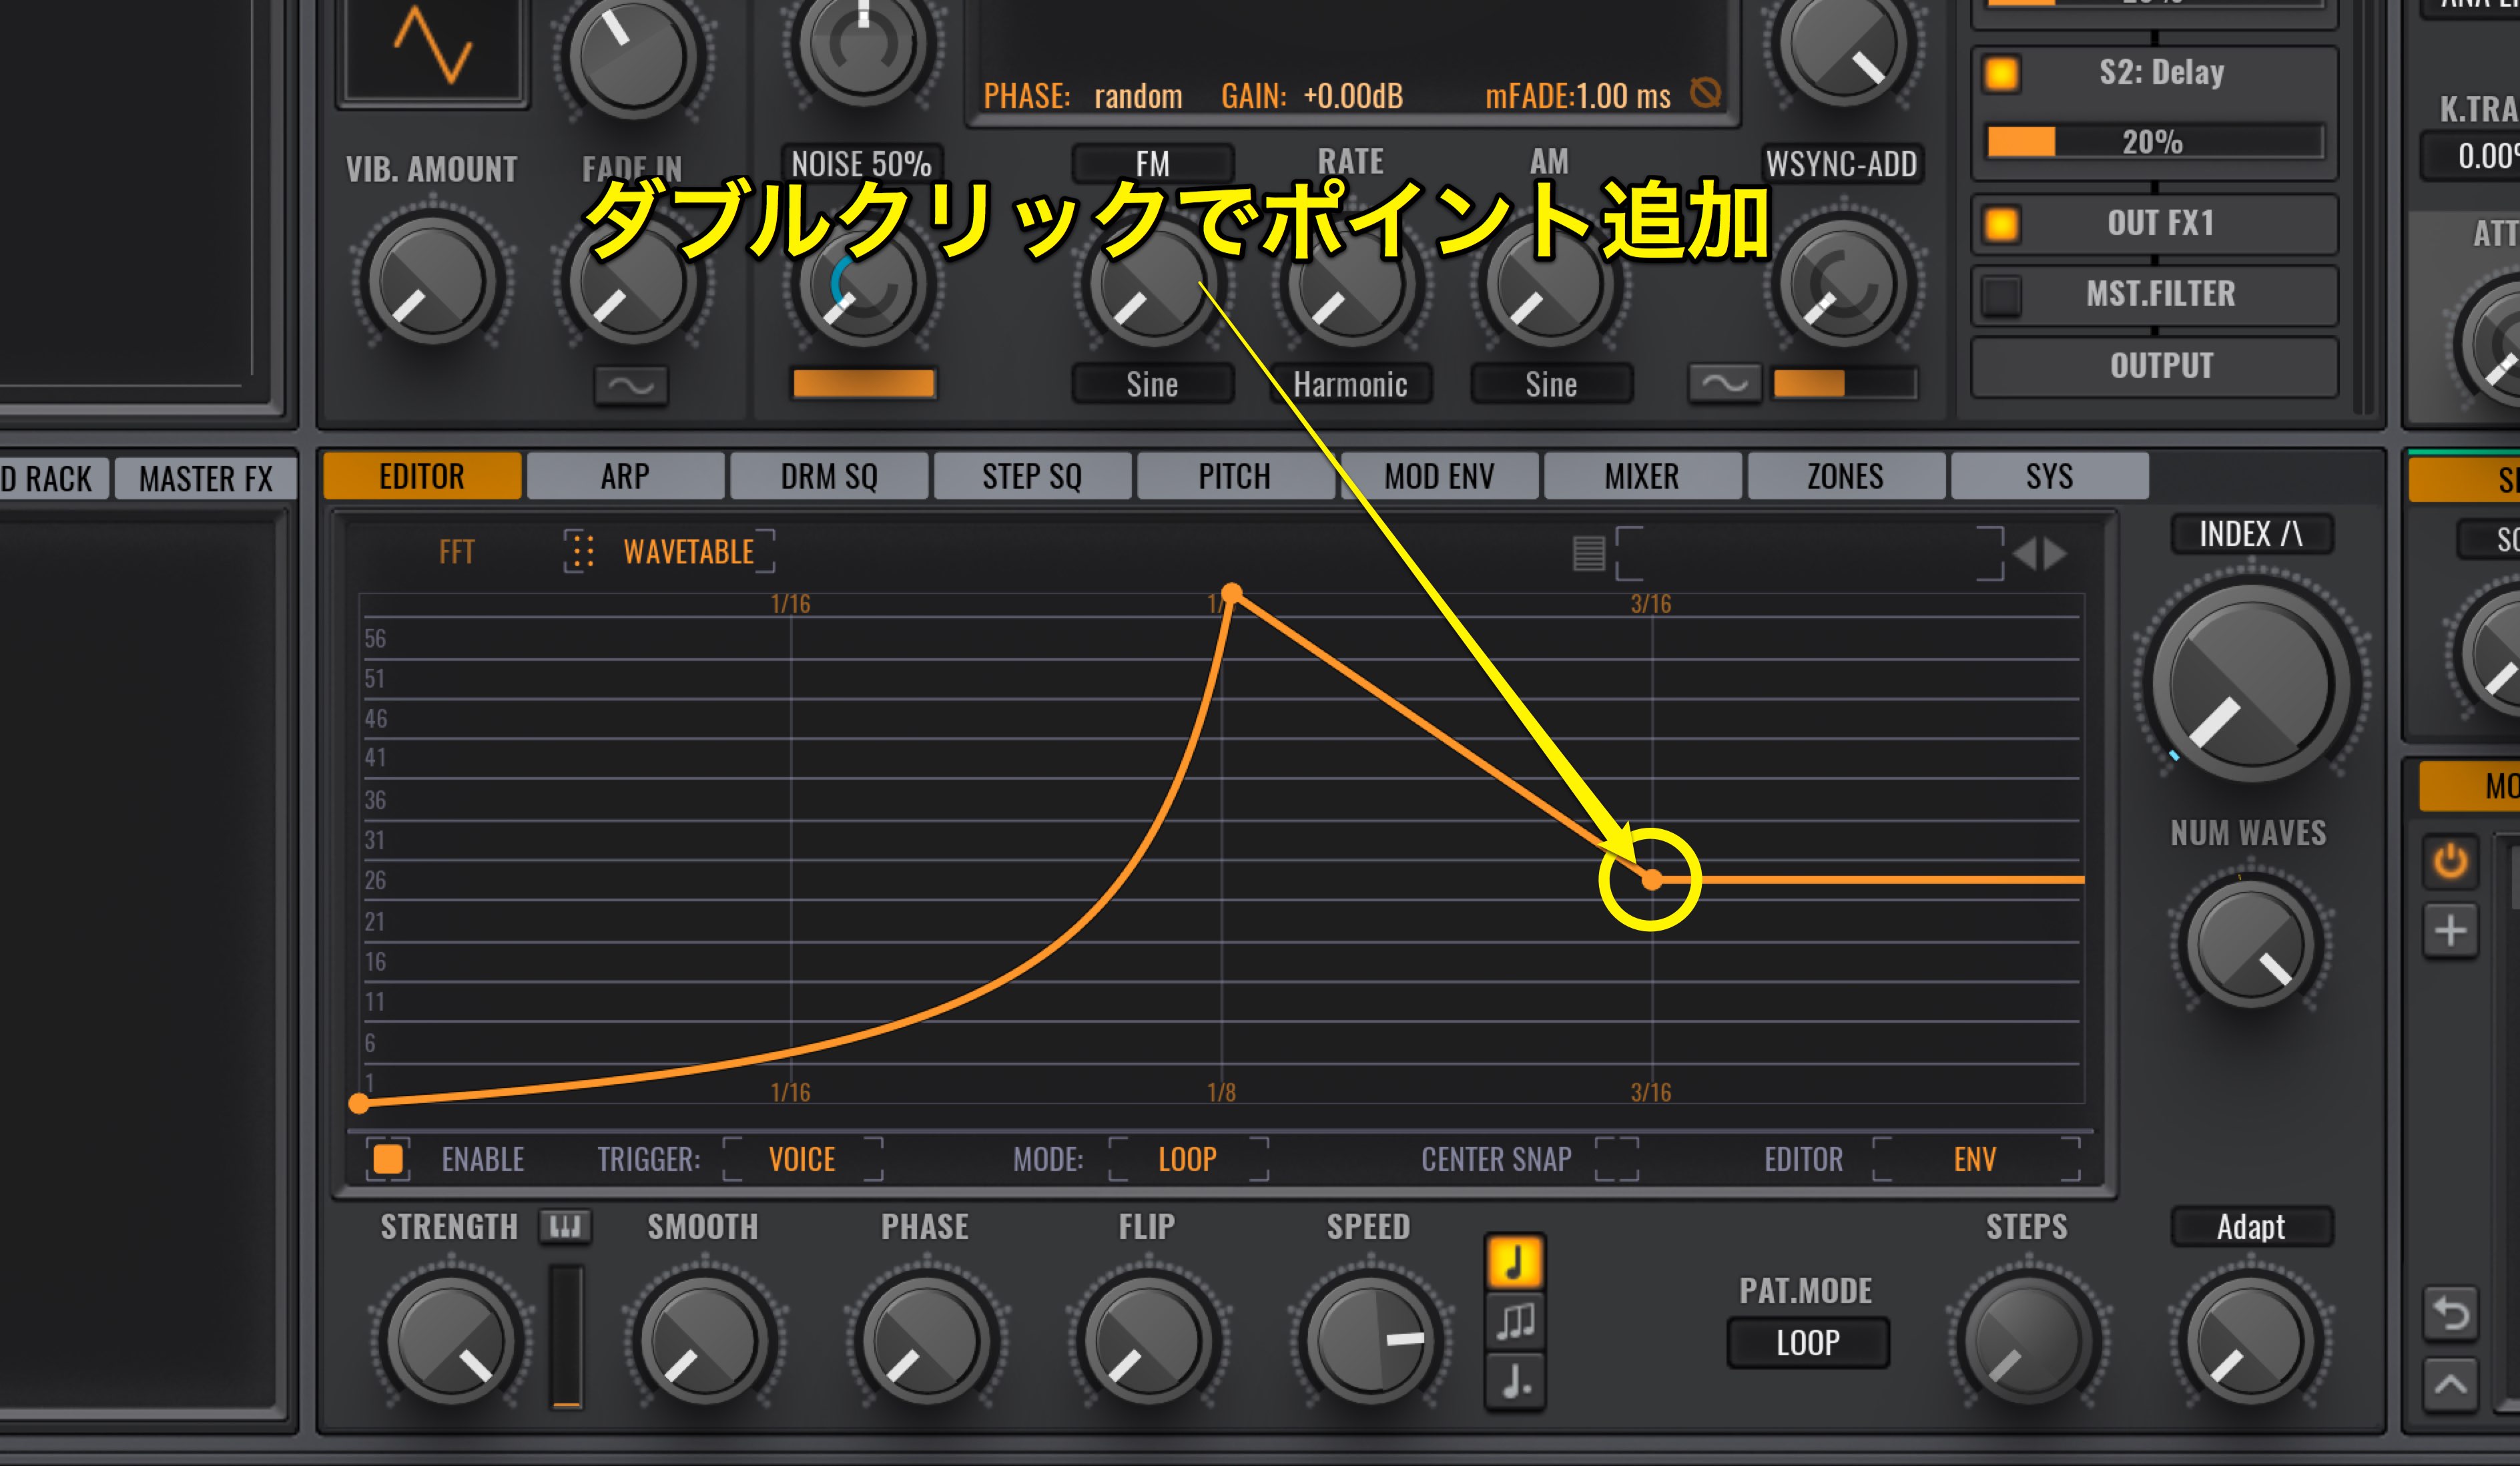
By double clicking on a line you can add a new point.
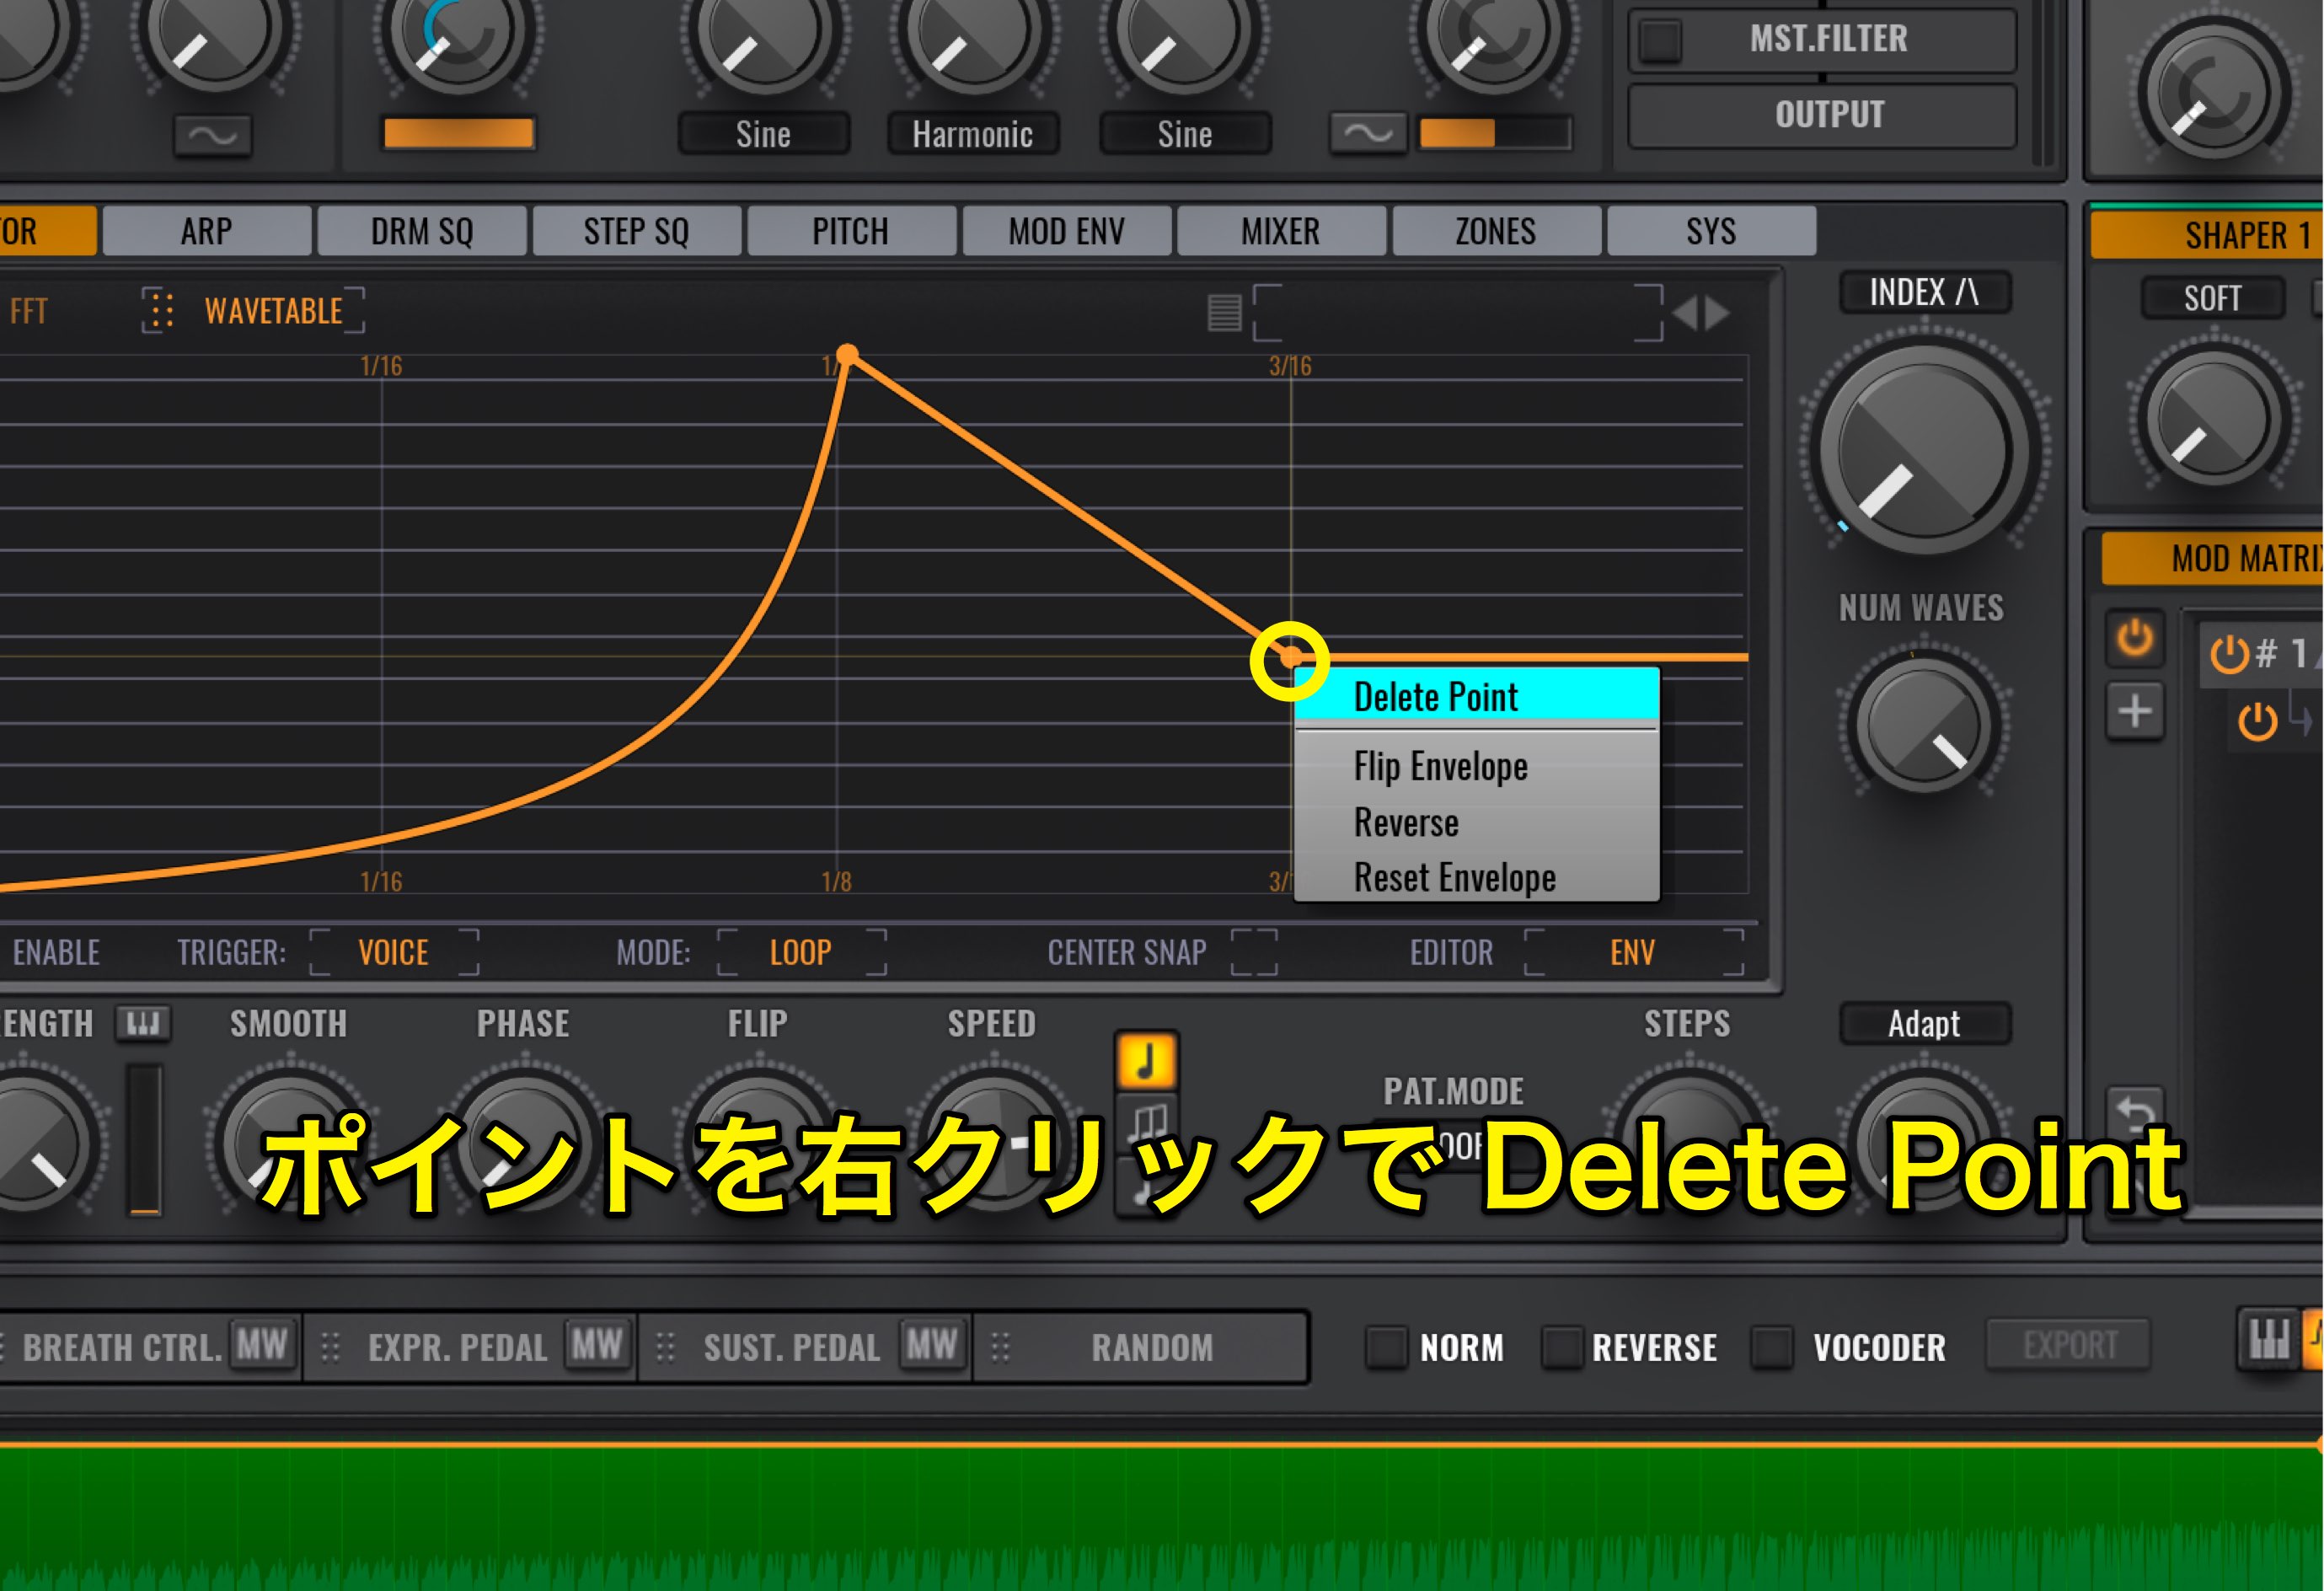
To delete a point, right click on the point you want removed and select Delete Point.
Wavetable Editor sequence and modulation
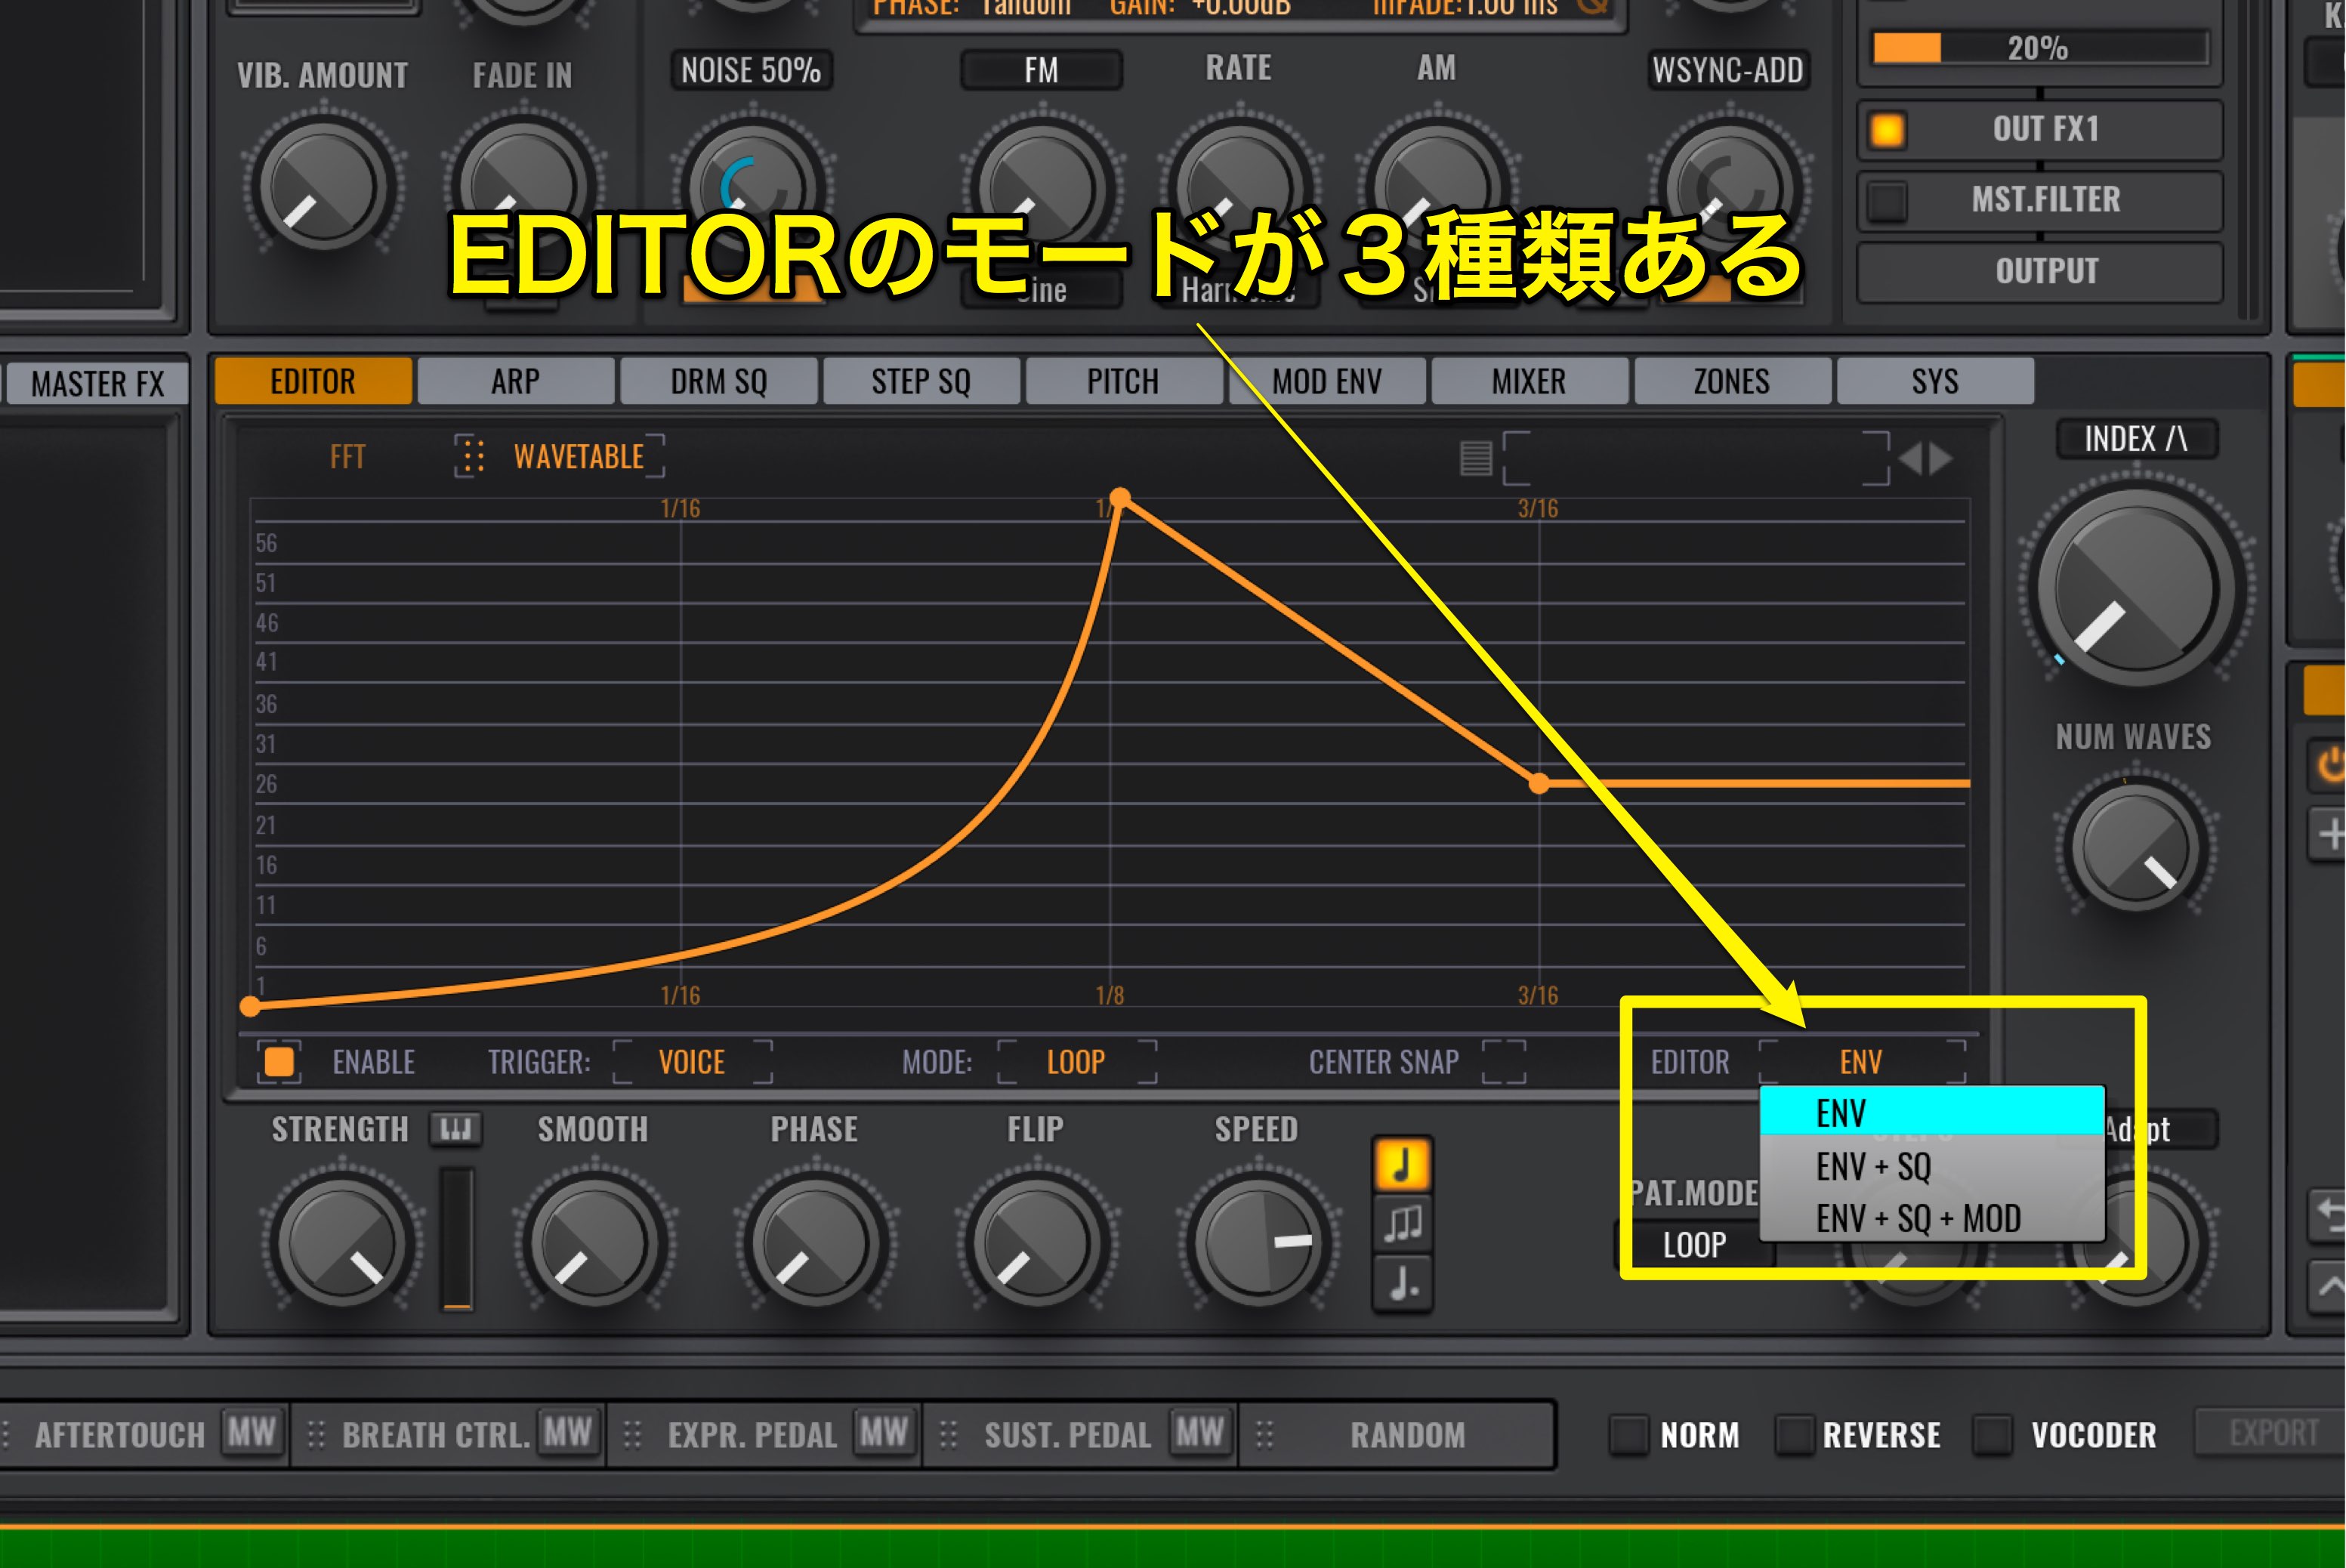
By clicking on “ENV,” you can change the editor mode.
- ENV
- ENV+SQ
- ENV+SQ+MOD
These 3 types are available, and up until now we had utilized the ENV mode.
Lets try out the “ENV+SQ” mode next.
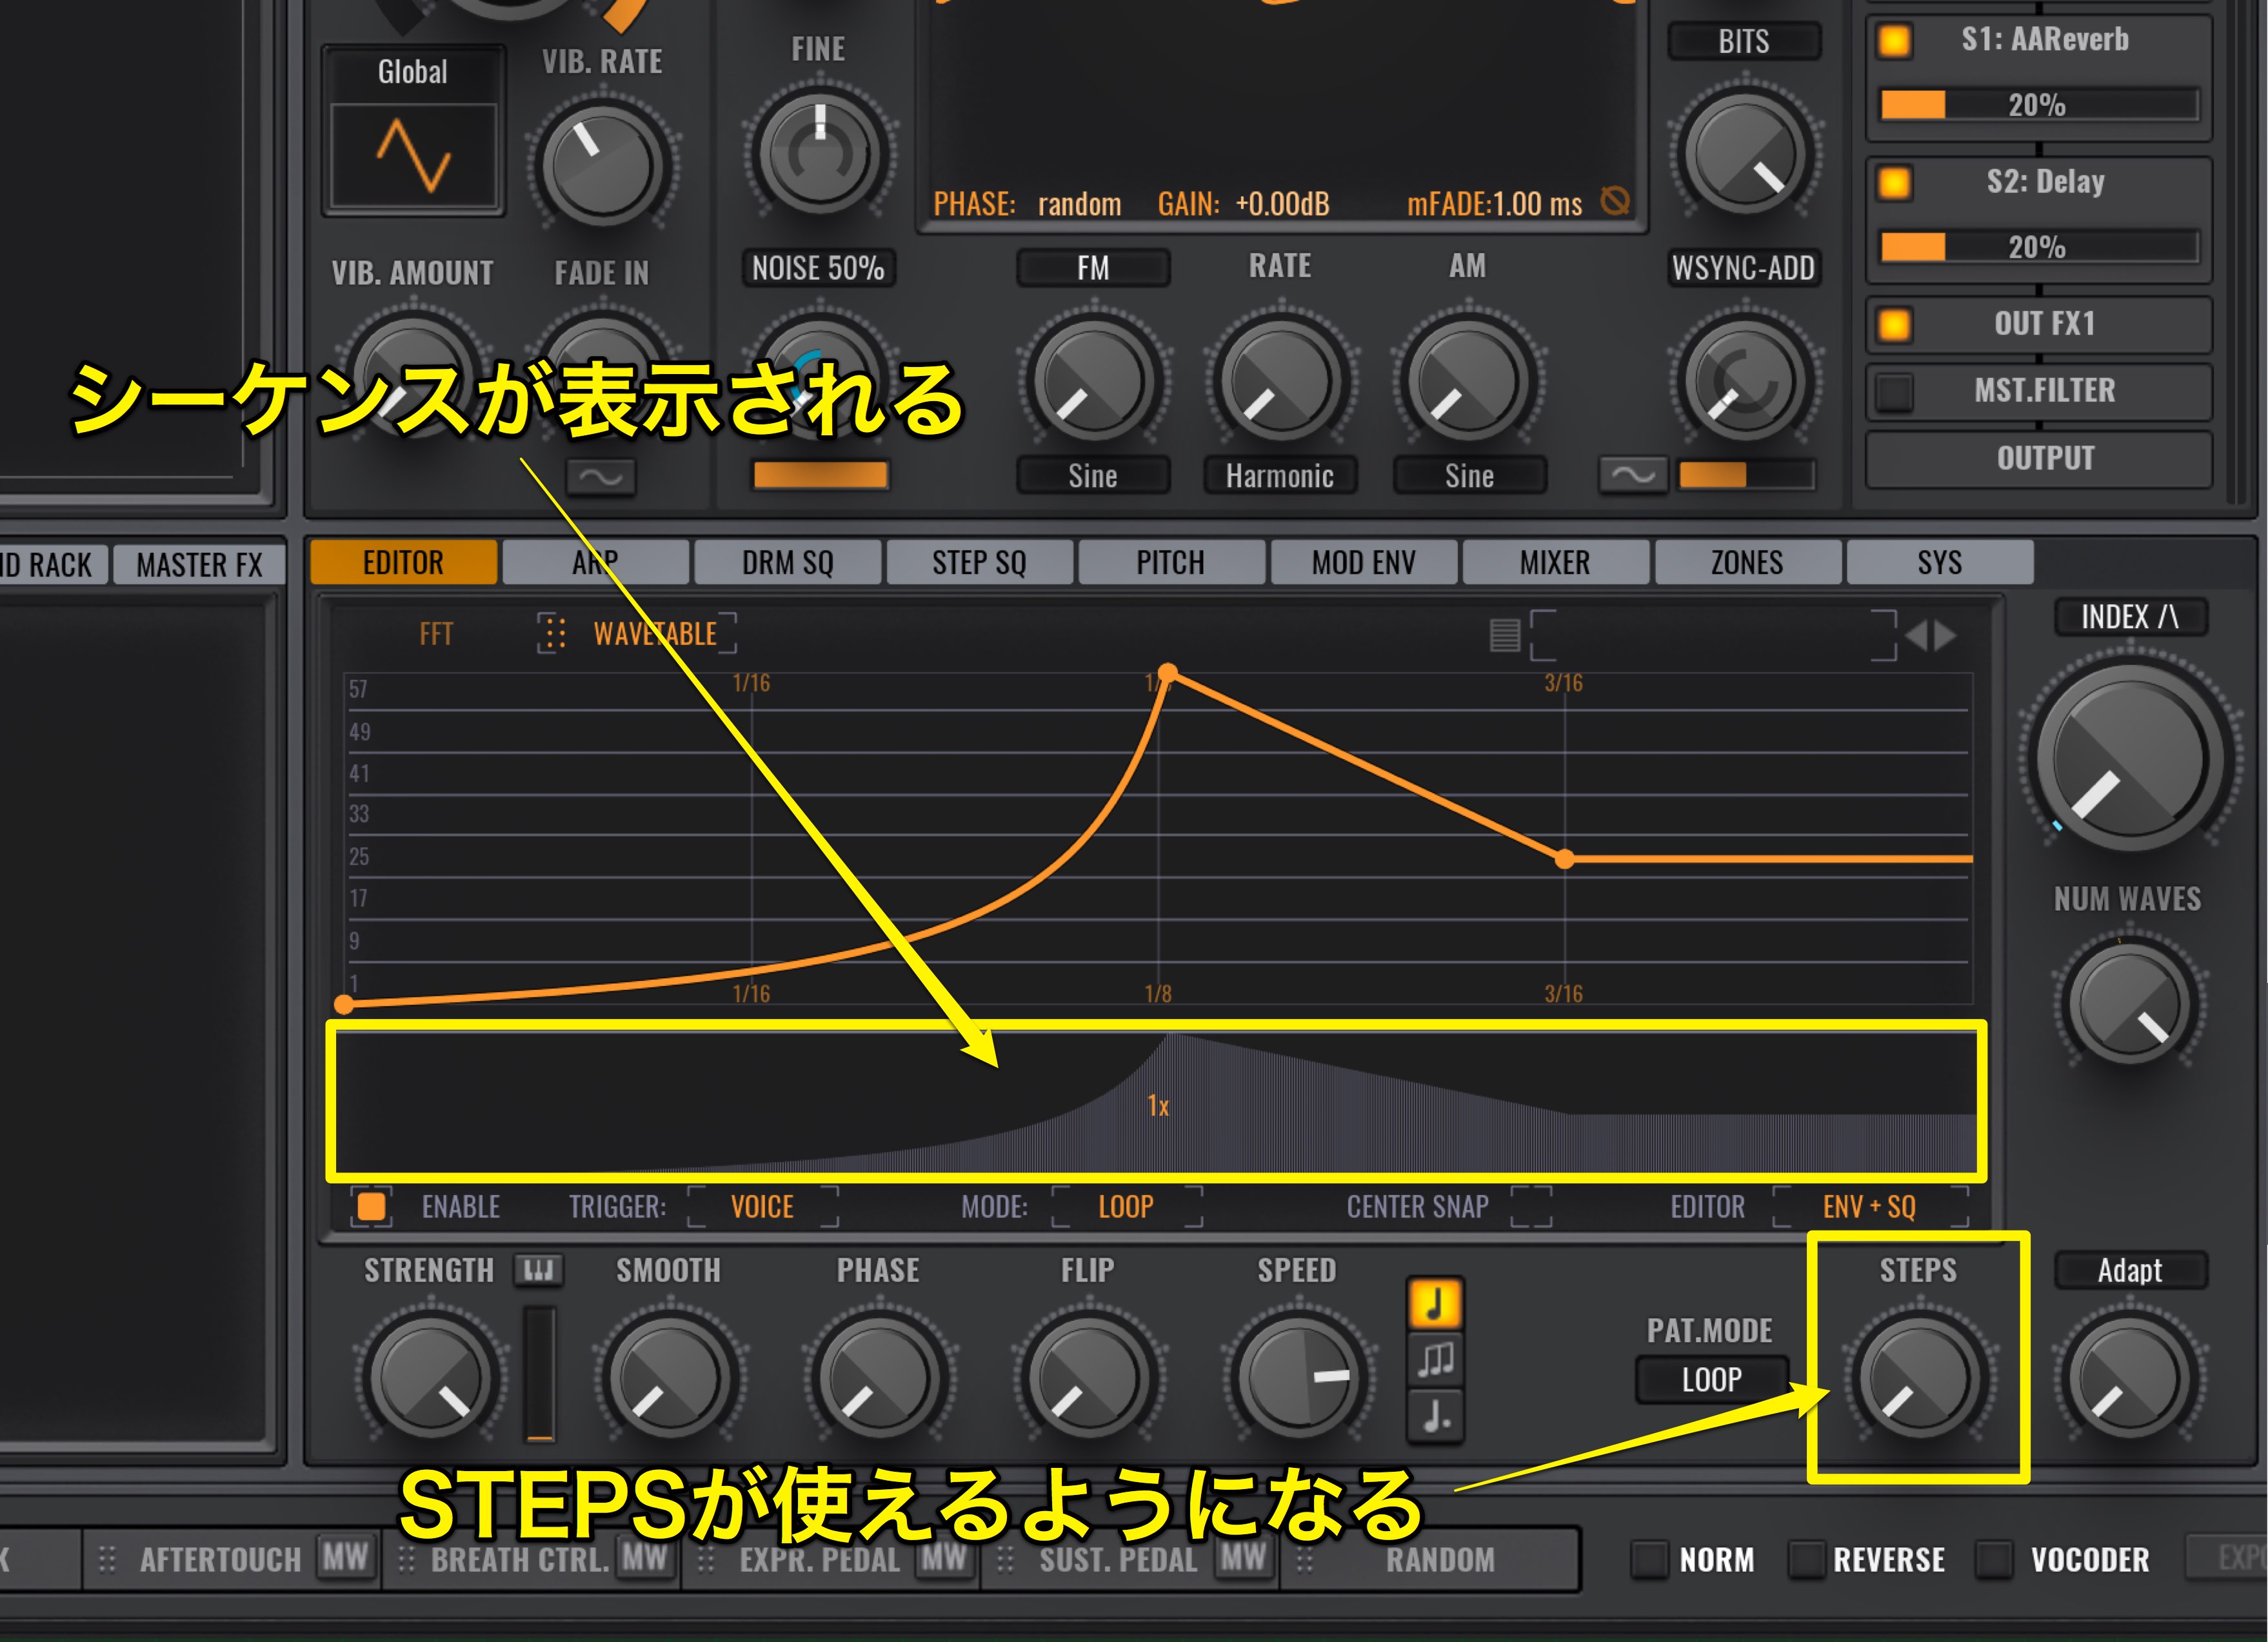
Beneath the envelope, a “SQ_sequence” will appear.
Similar to an envelope, the sequence moves from the left to the right.
As the envelope above moves along, the sequence steps are added, adding for move complex nuances in the sound.
The STEPS setting on the bottom right can also be selected.
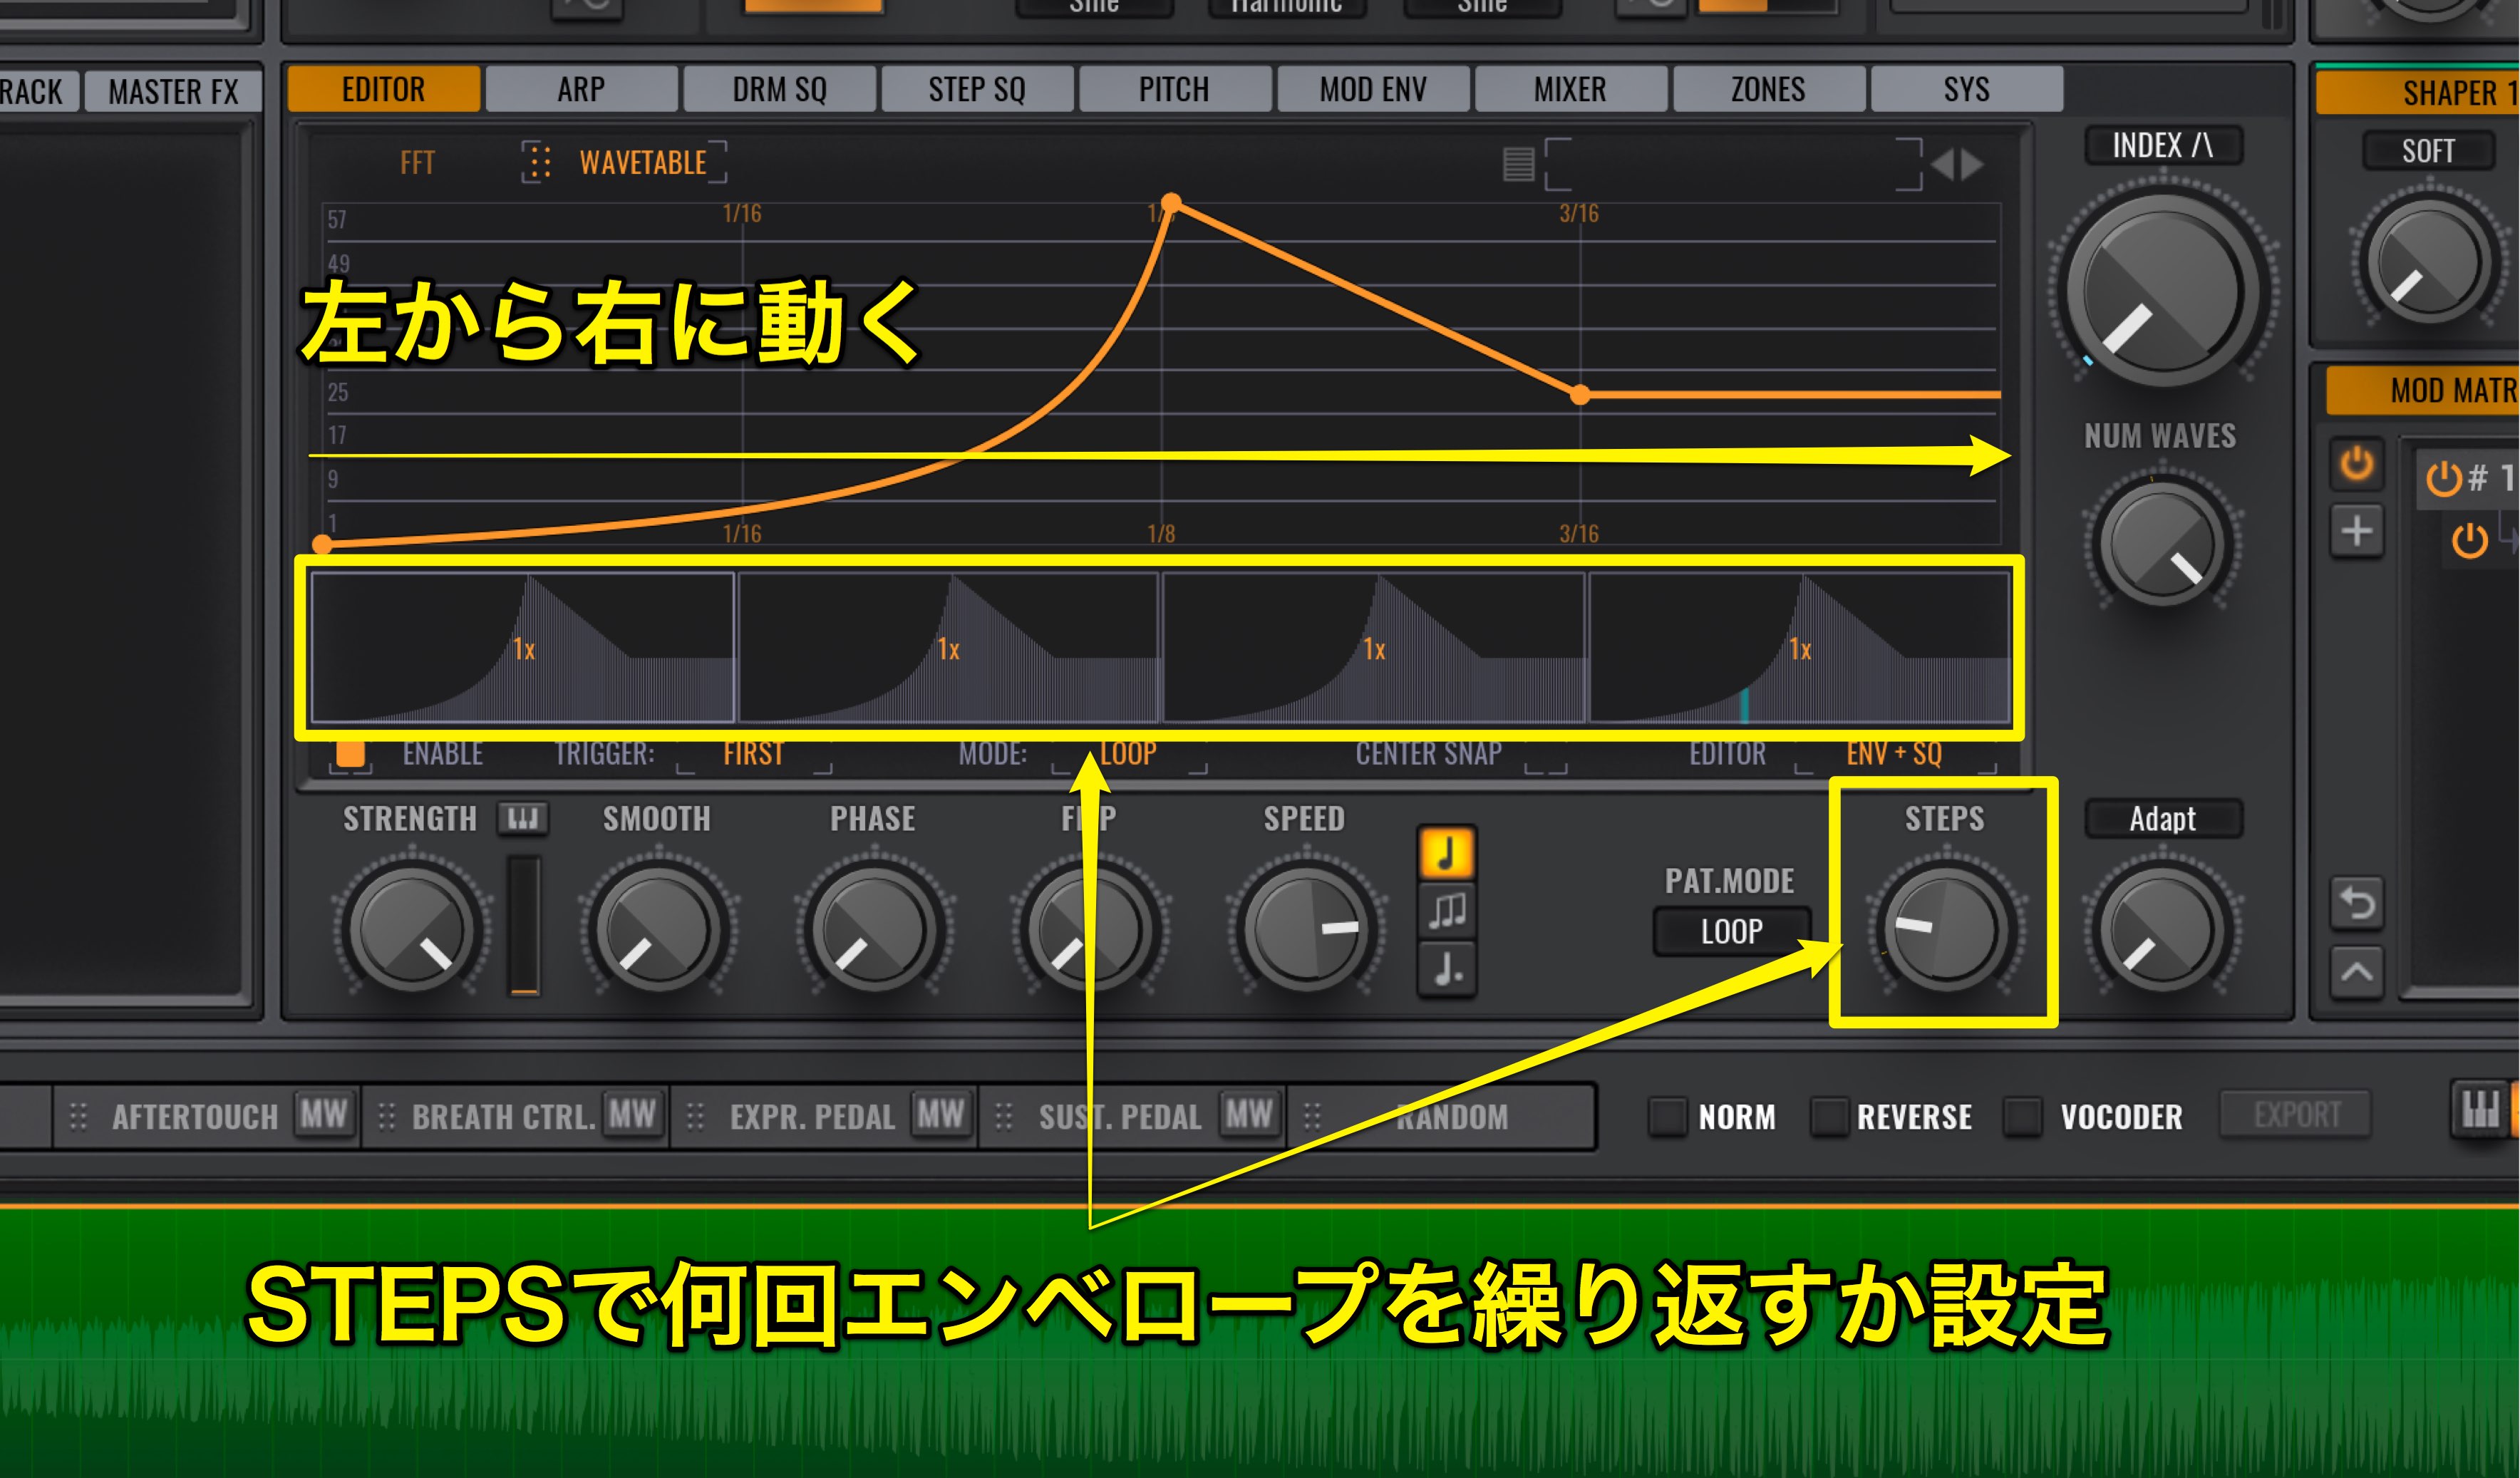
You can use STEPS to repeat the envelope settings.
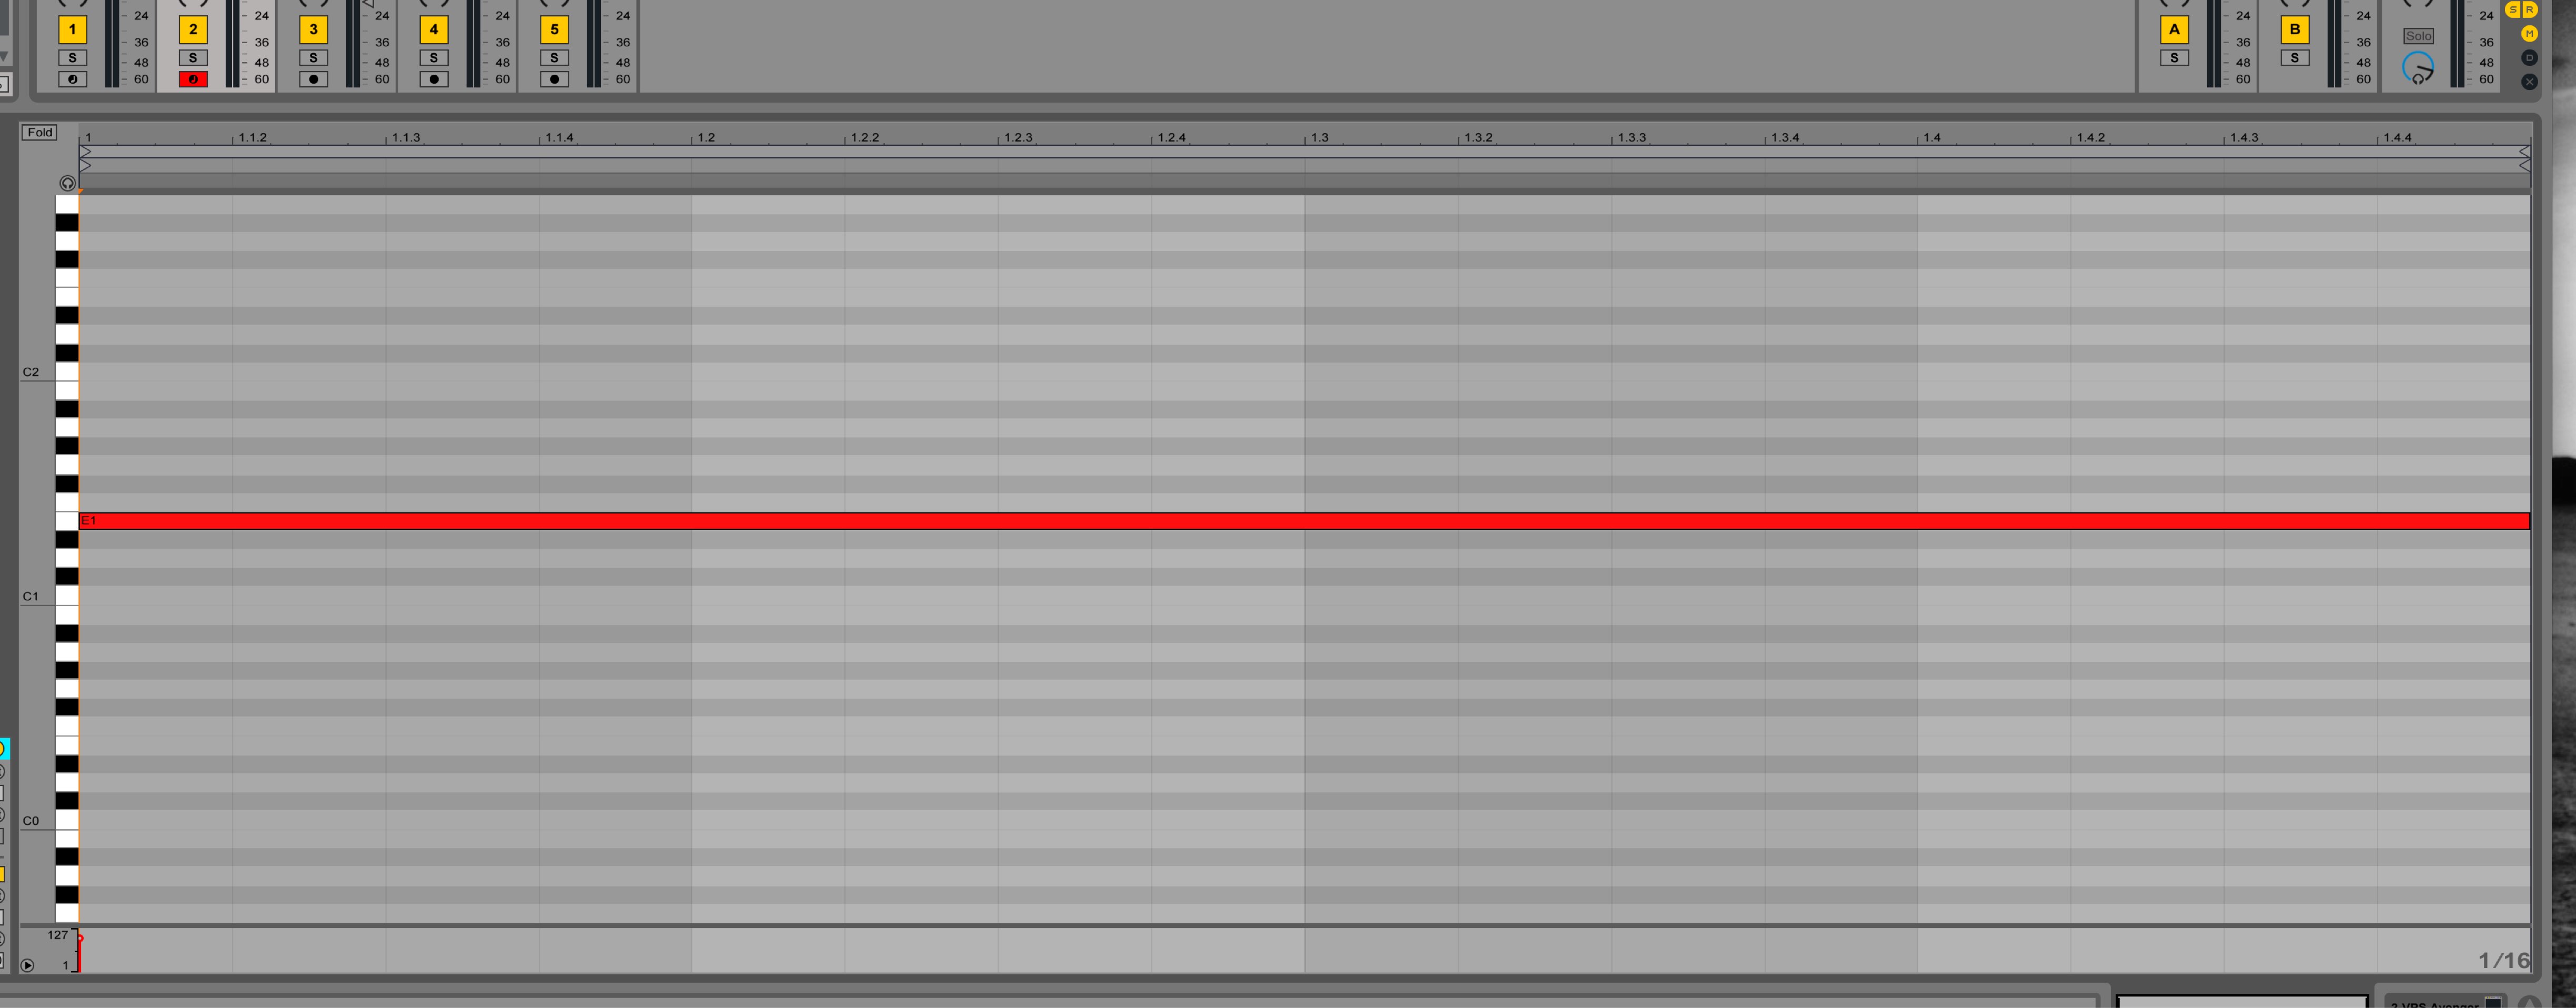
At the moment we have 1 bar worth of notes sequenced, and STEPS moves from left from right; however –
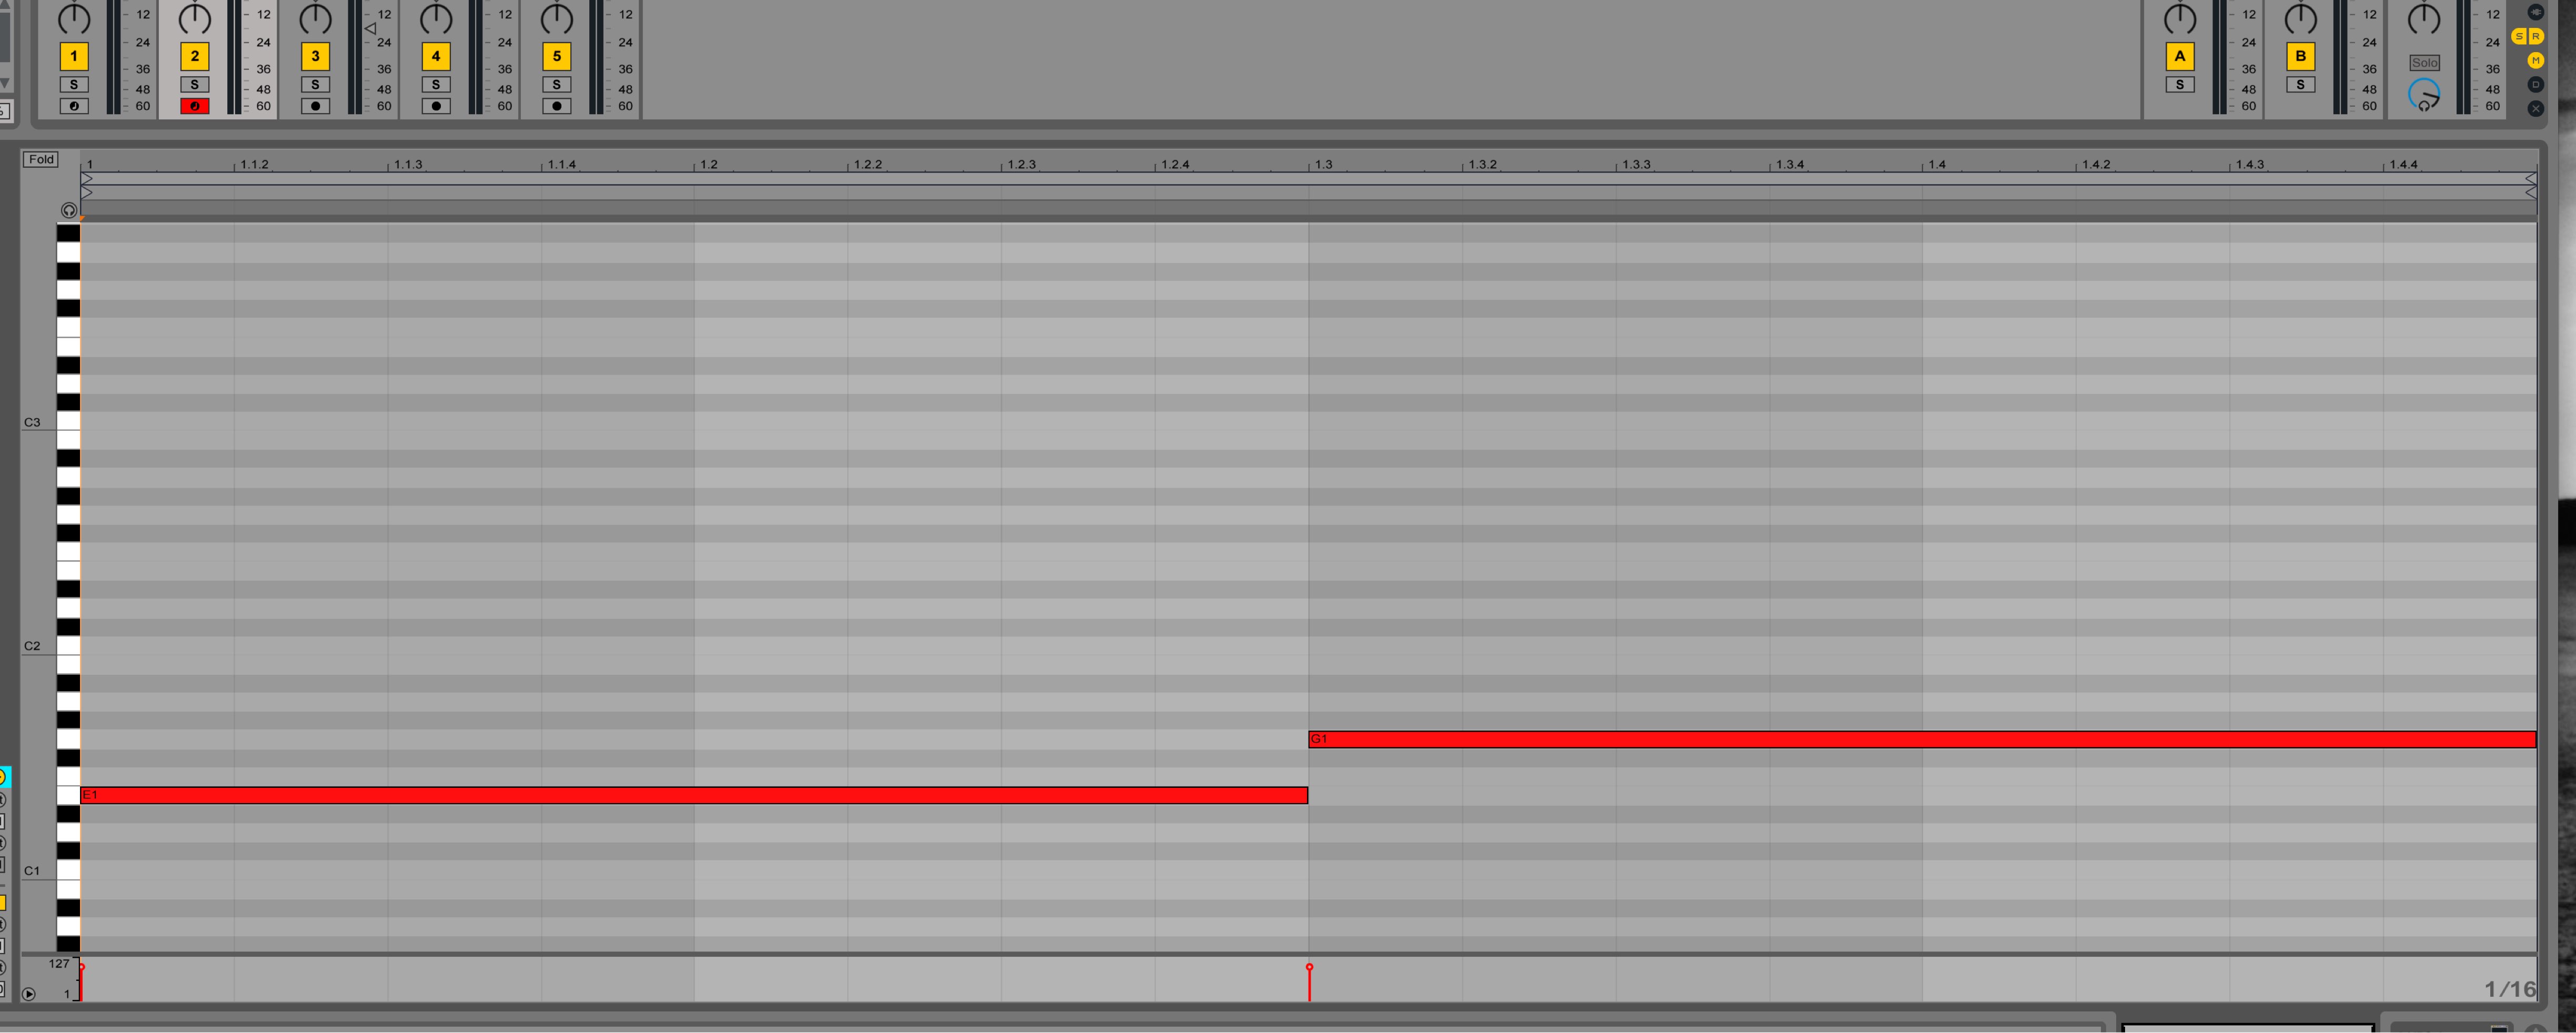
When a new note is played into the sequence, the STEPS movement returns to the top again.
Depending on the situation, it might not end up with the sound you want.
Lets set it up so that even if a new note is played, the sequence plays out until the end.
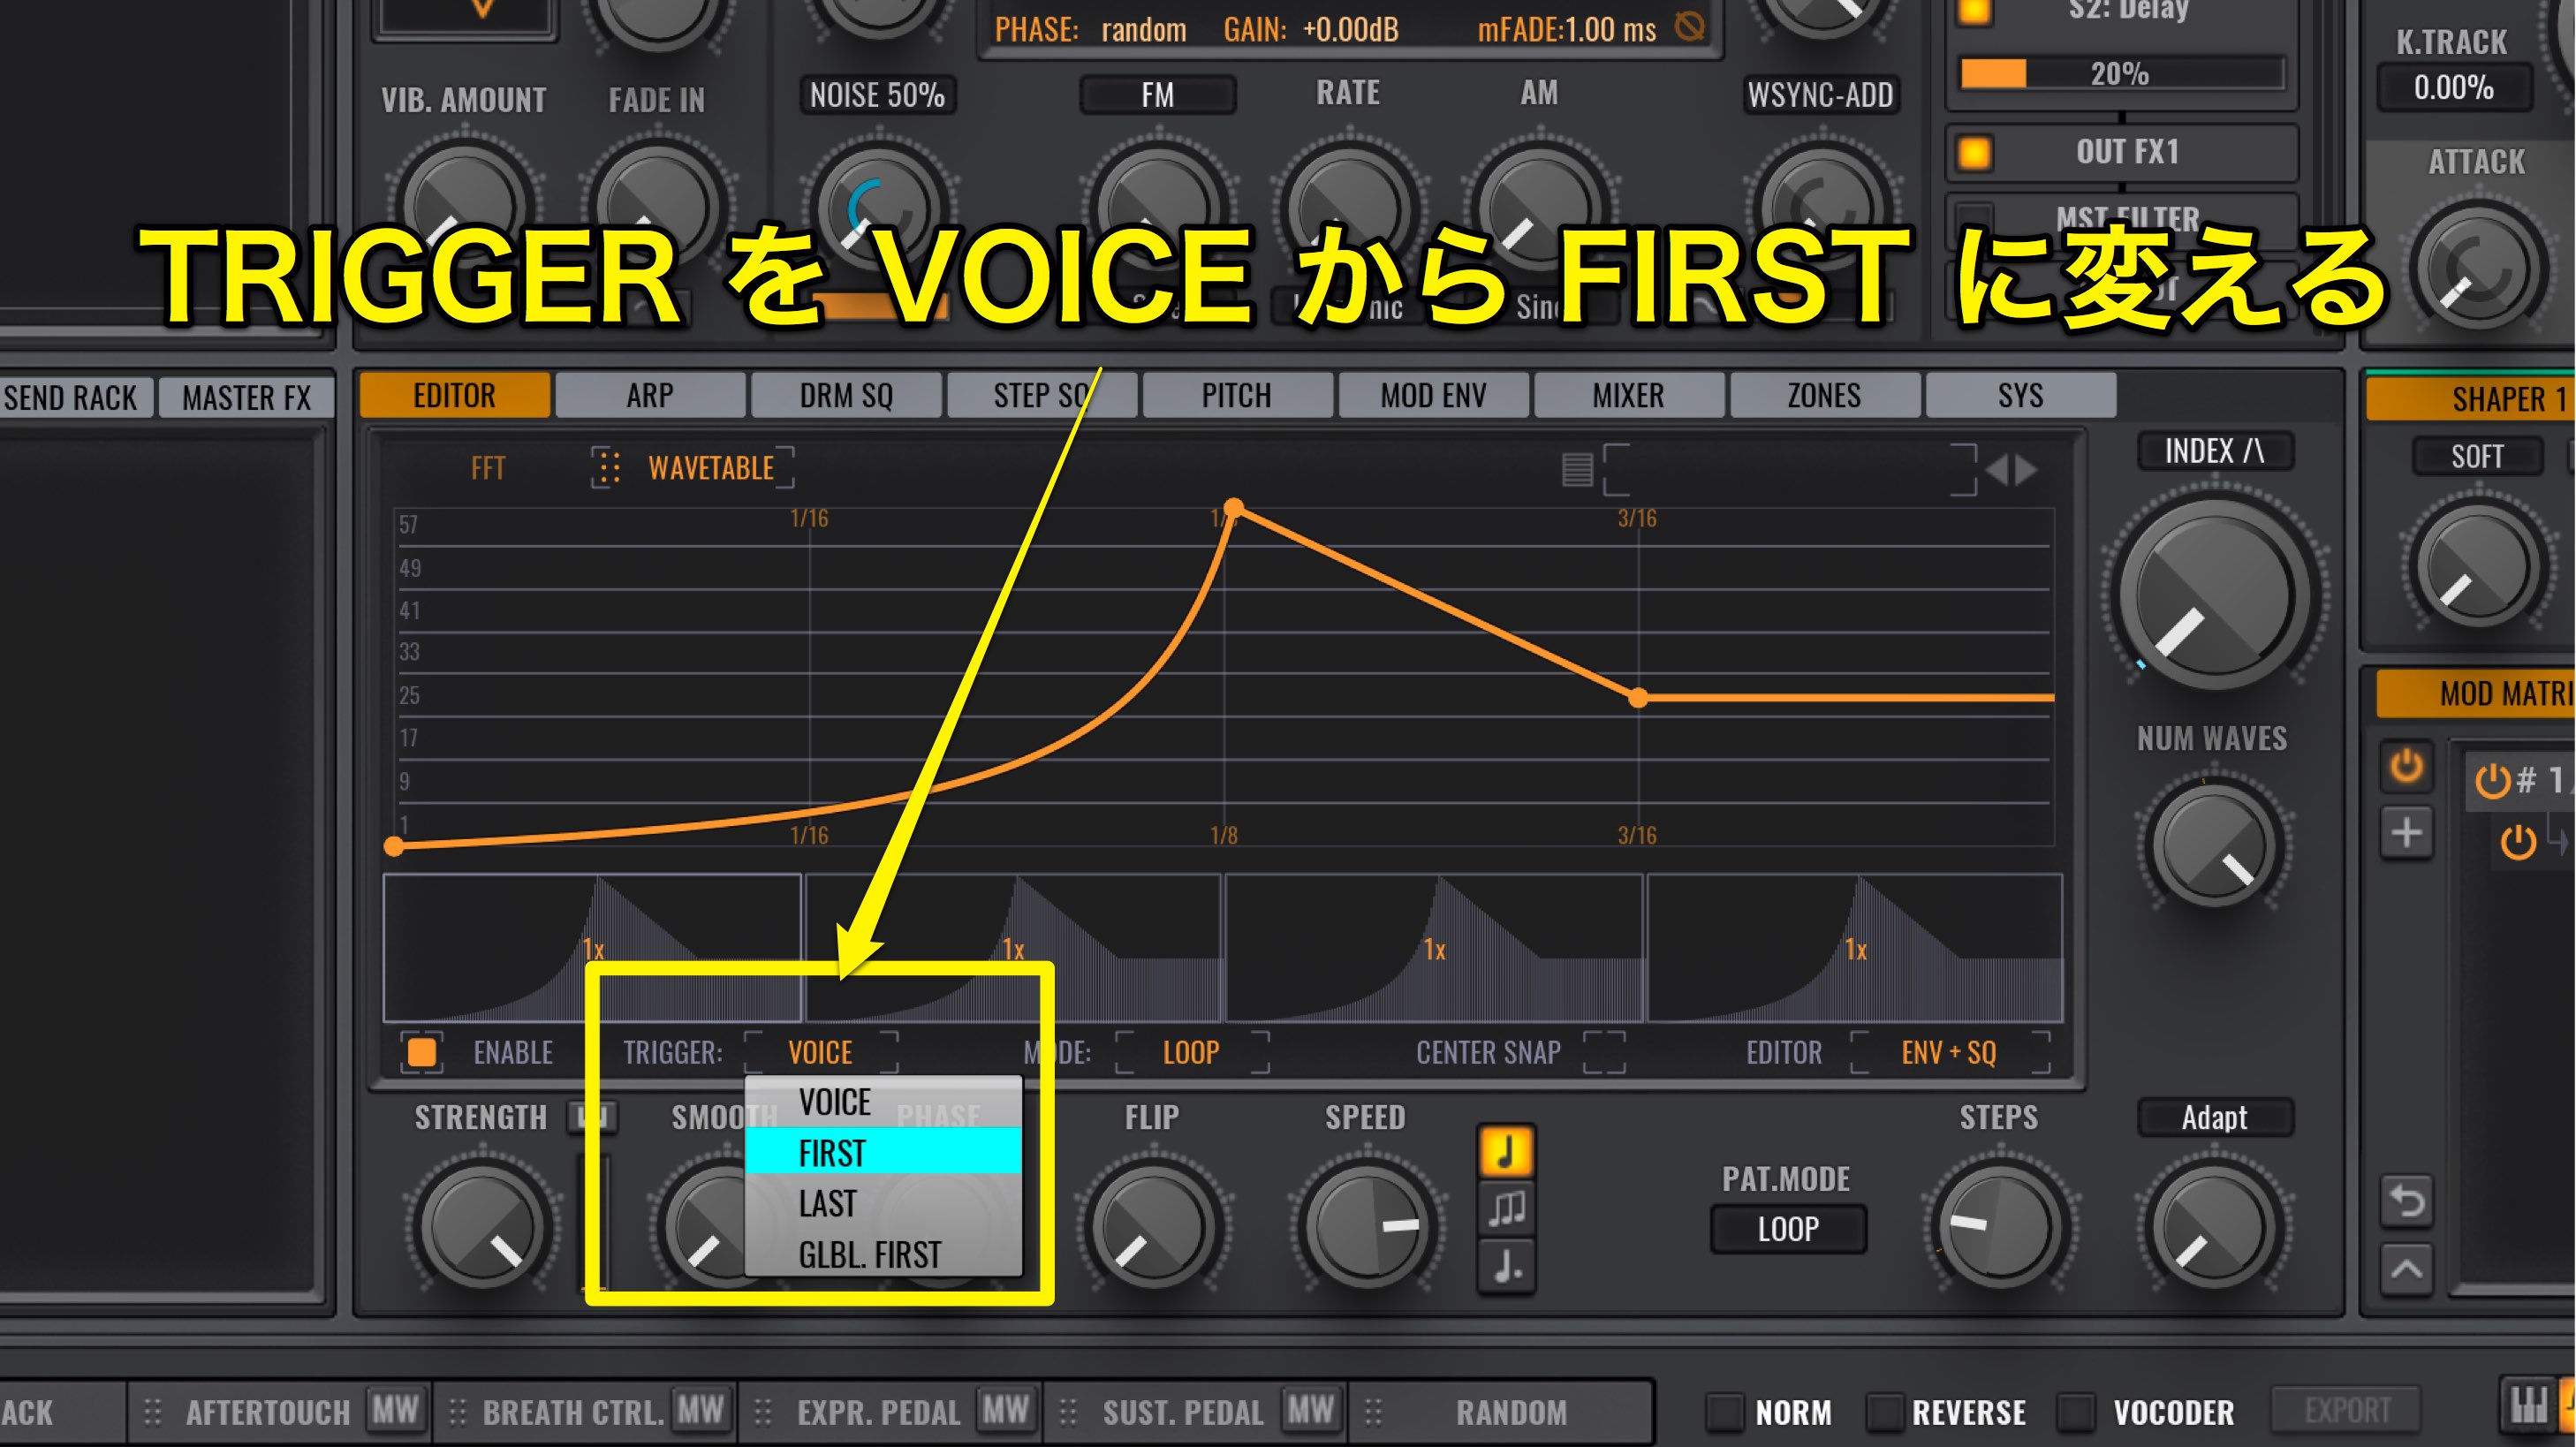
Just change the TRIGGER from VOICE to FIRST.
Even if a new note is played, the sequence movement won’t reset to the beginning.
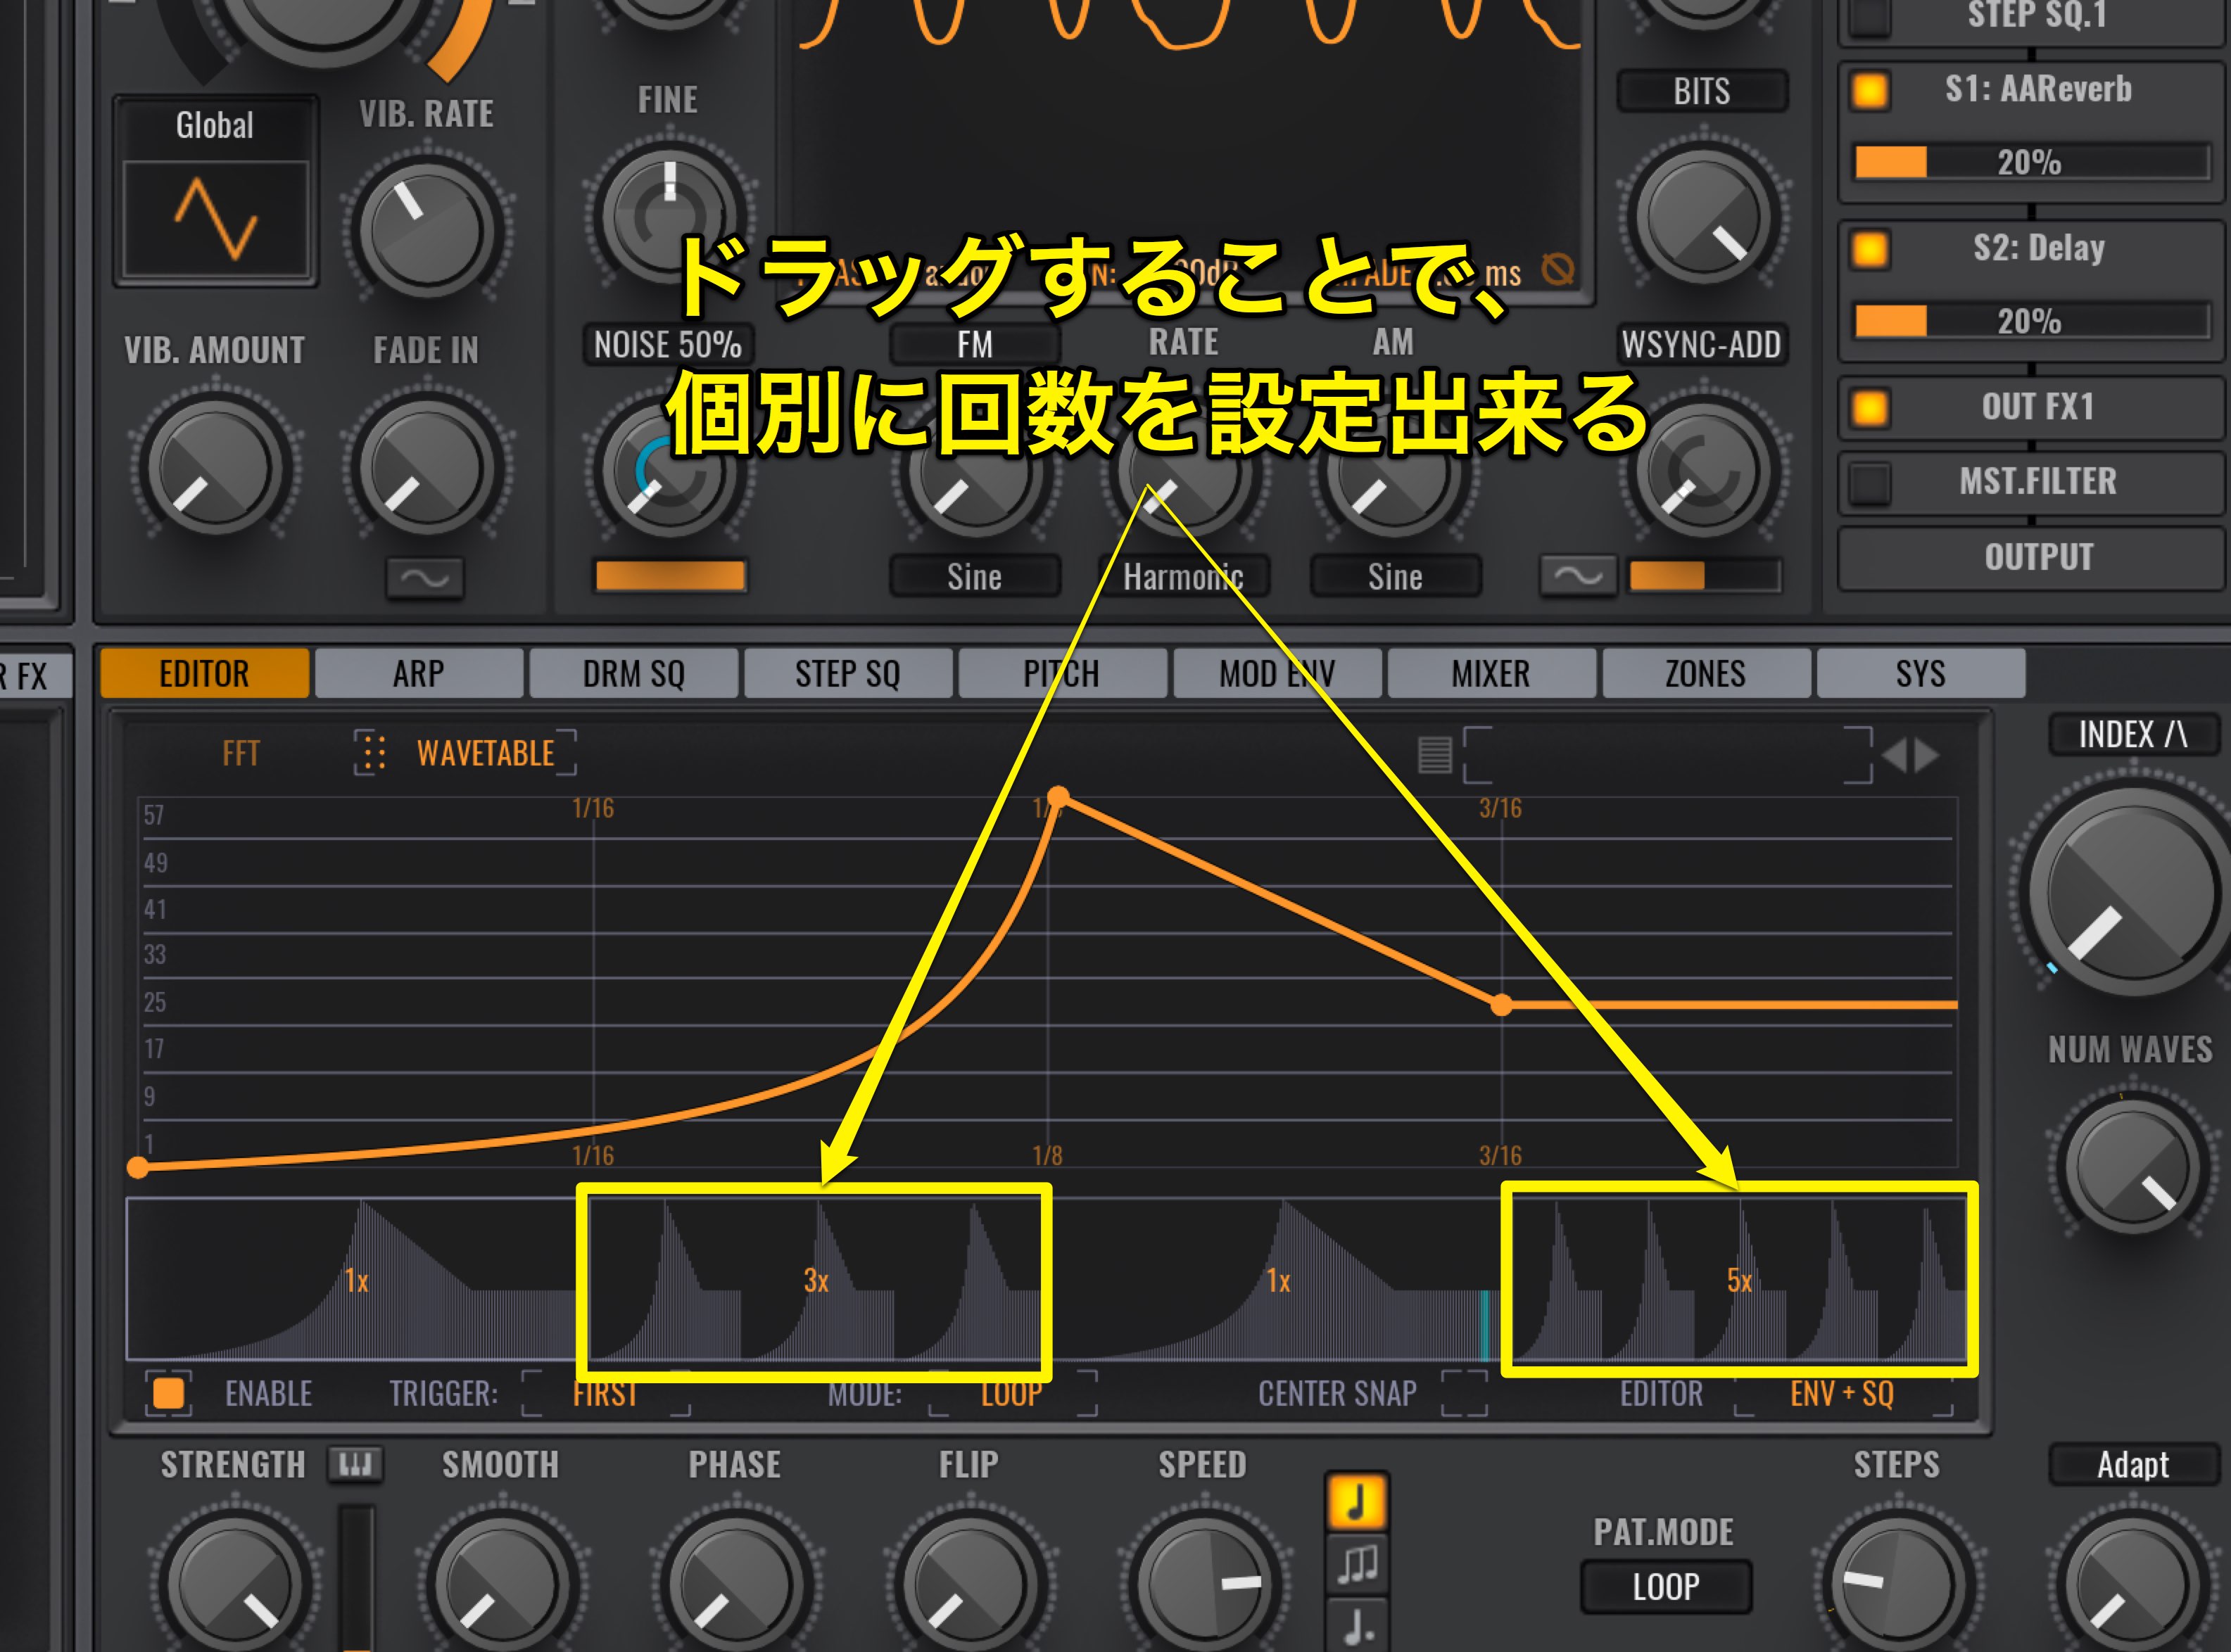
By dragging a sequence added in STEPS up/down, you can increase the individual number of repeats as well.
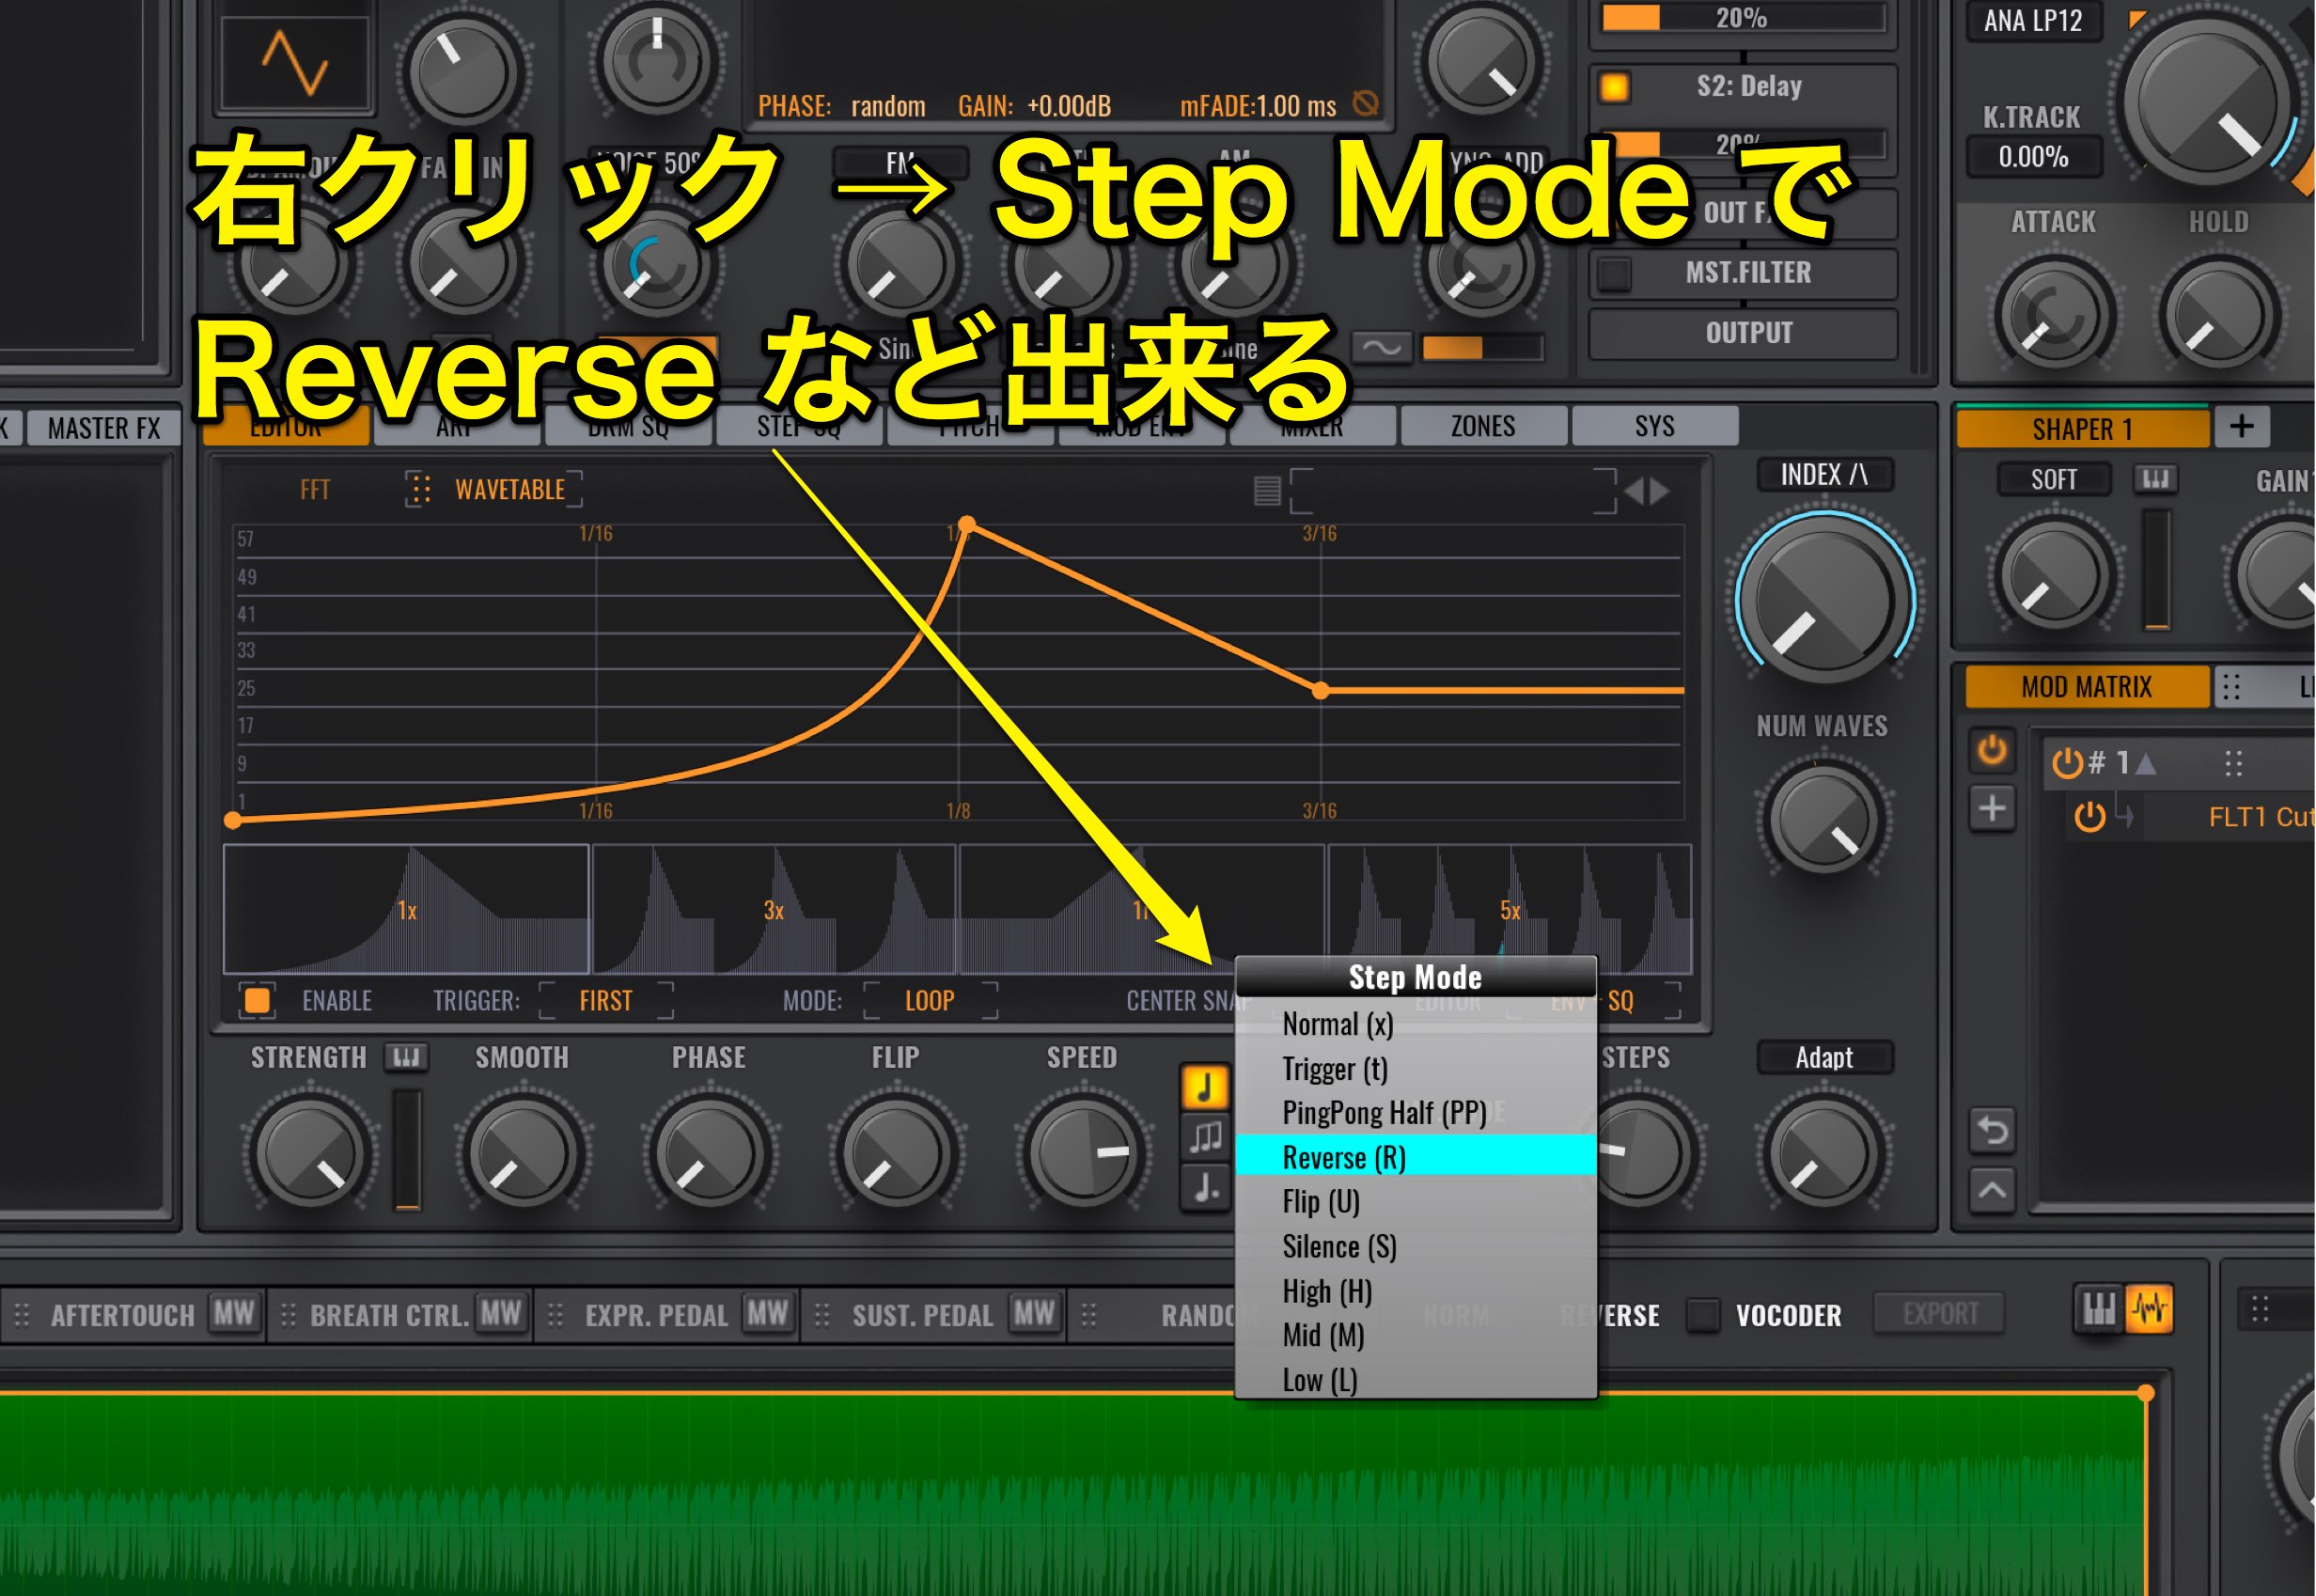
You can also right click on the sequence, and select Reverse from Step Mode.
Lastly, lets take a look at “ENV+SQ+MOD.”
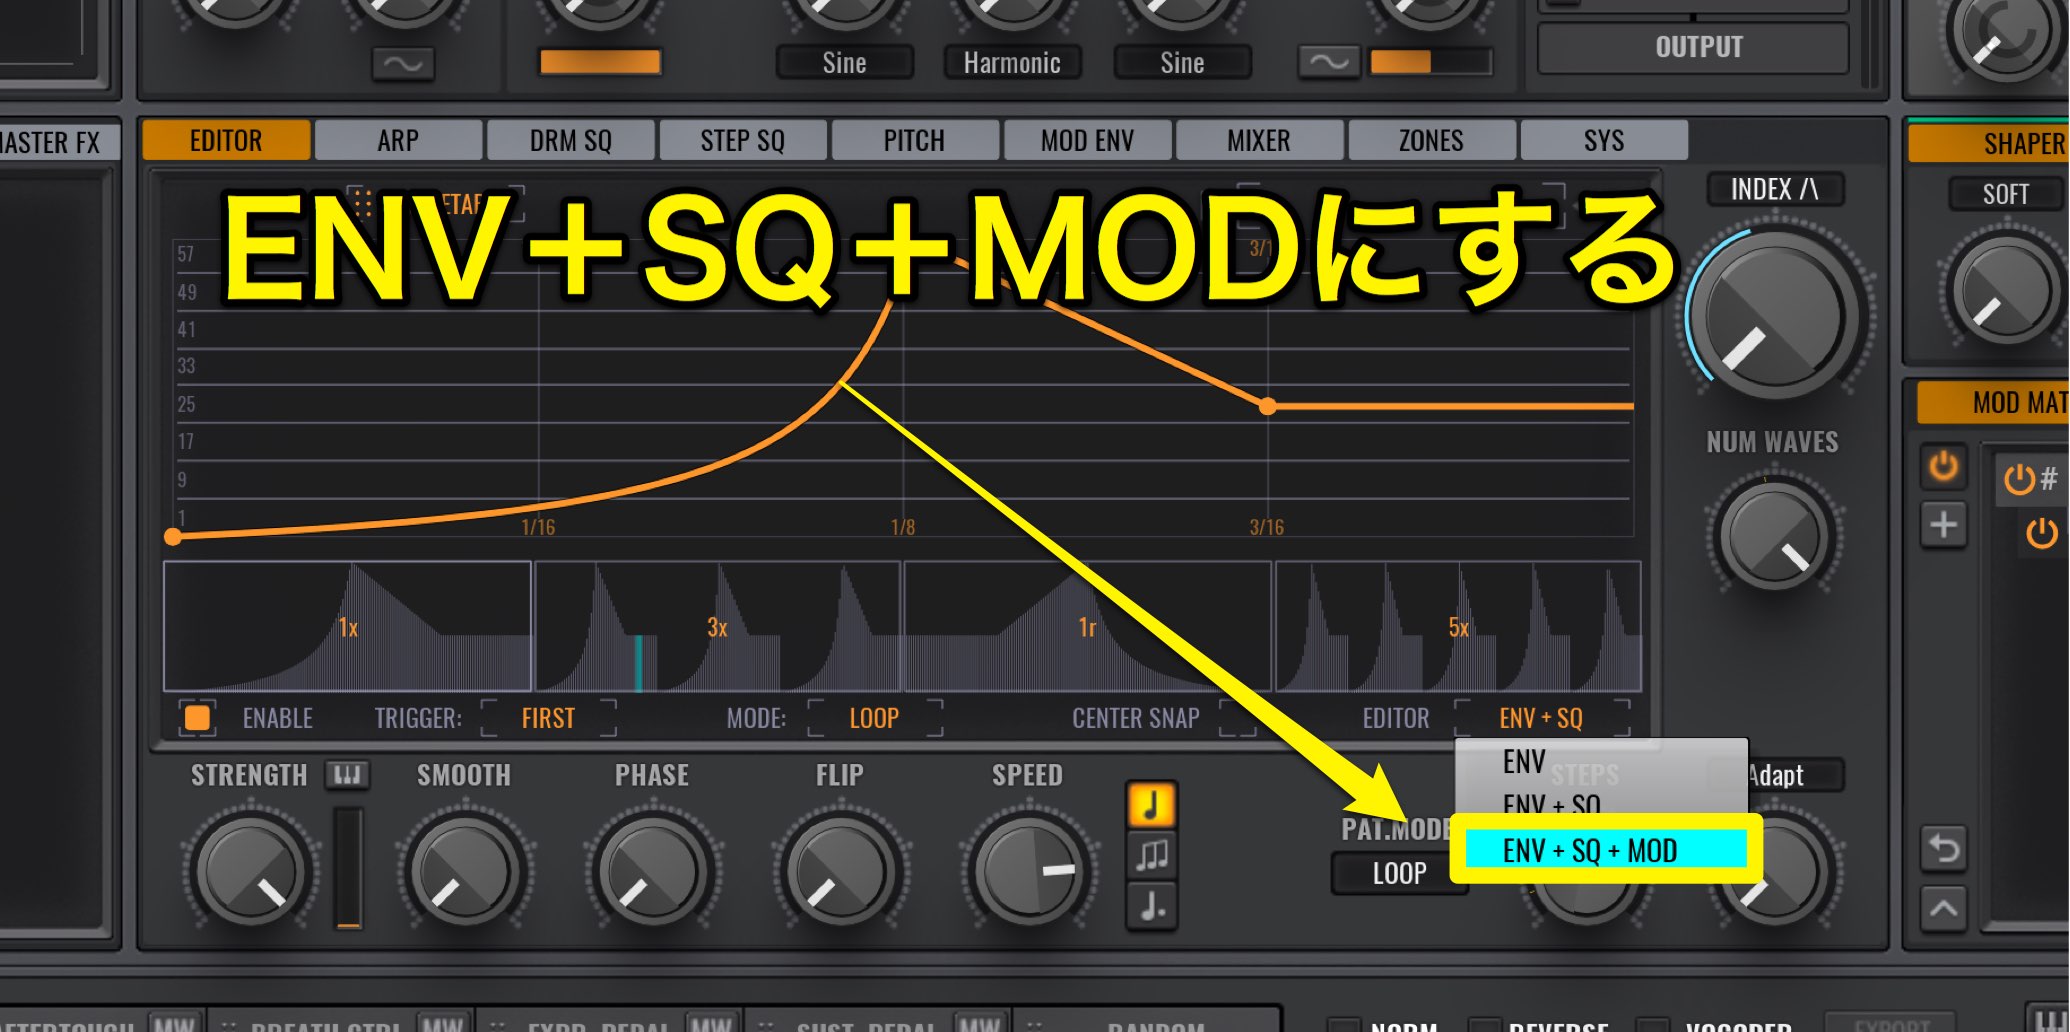
Change the EDITOR mode to “ENV+SQ+MOD.”
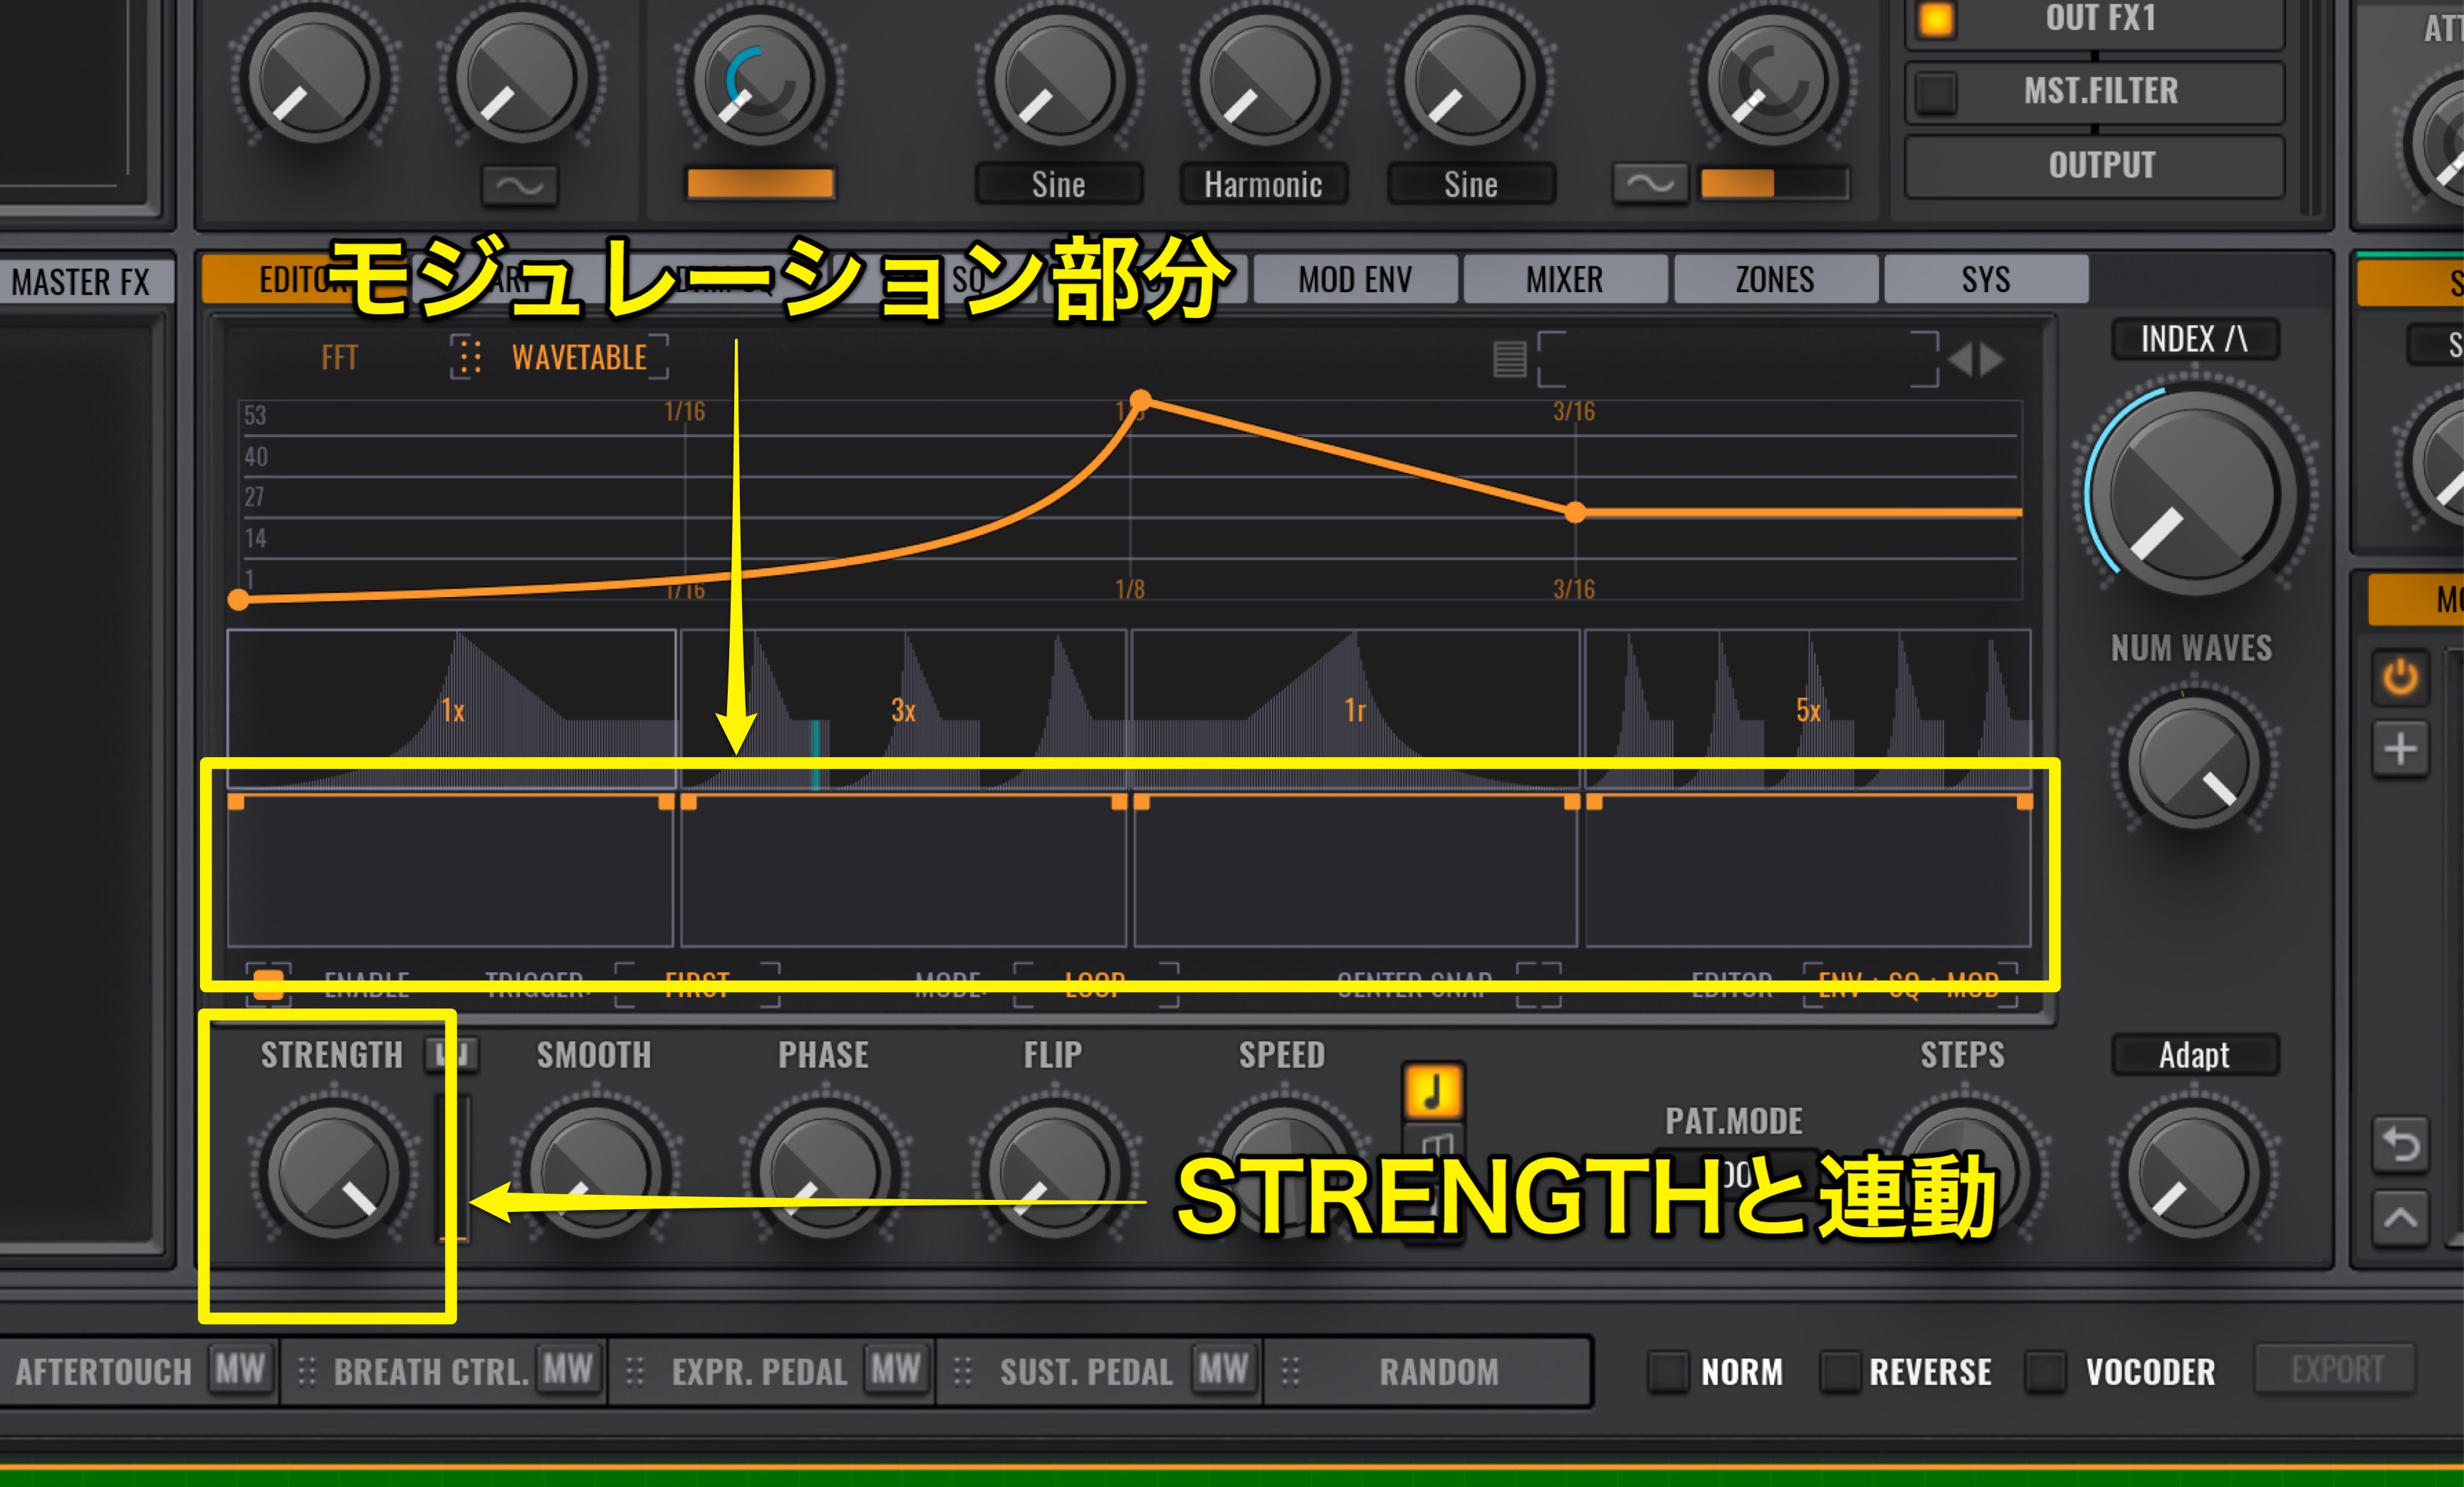
Underneath the sequence, “MOD_modulation” will appear.
This modulation is synced to the STRENGTH parameter.
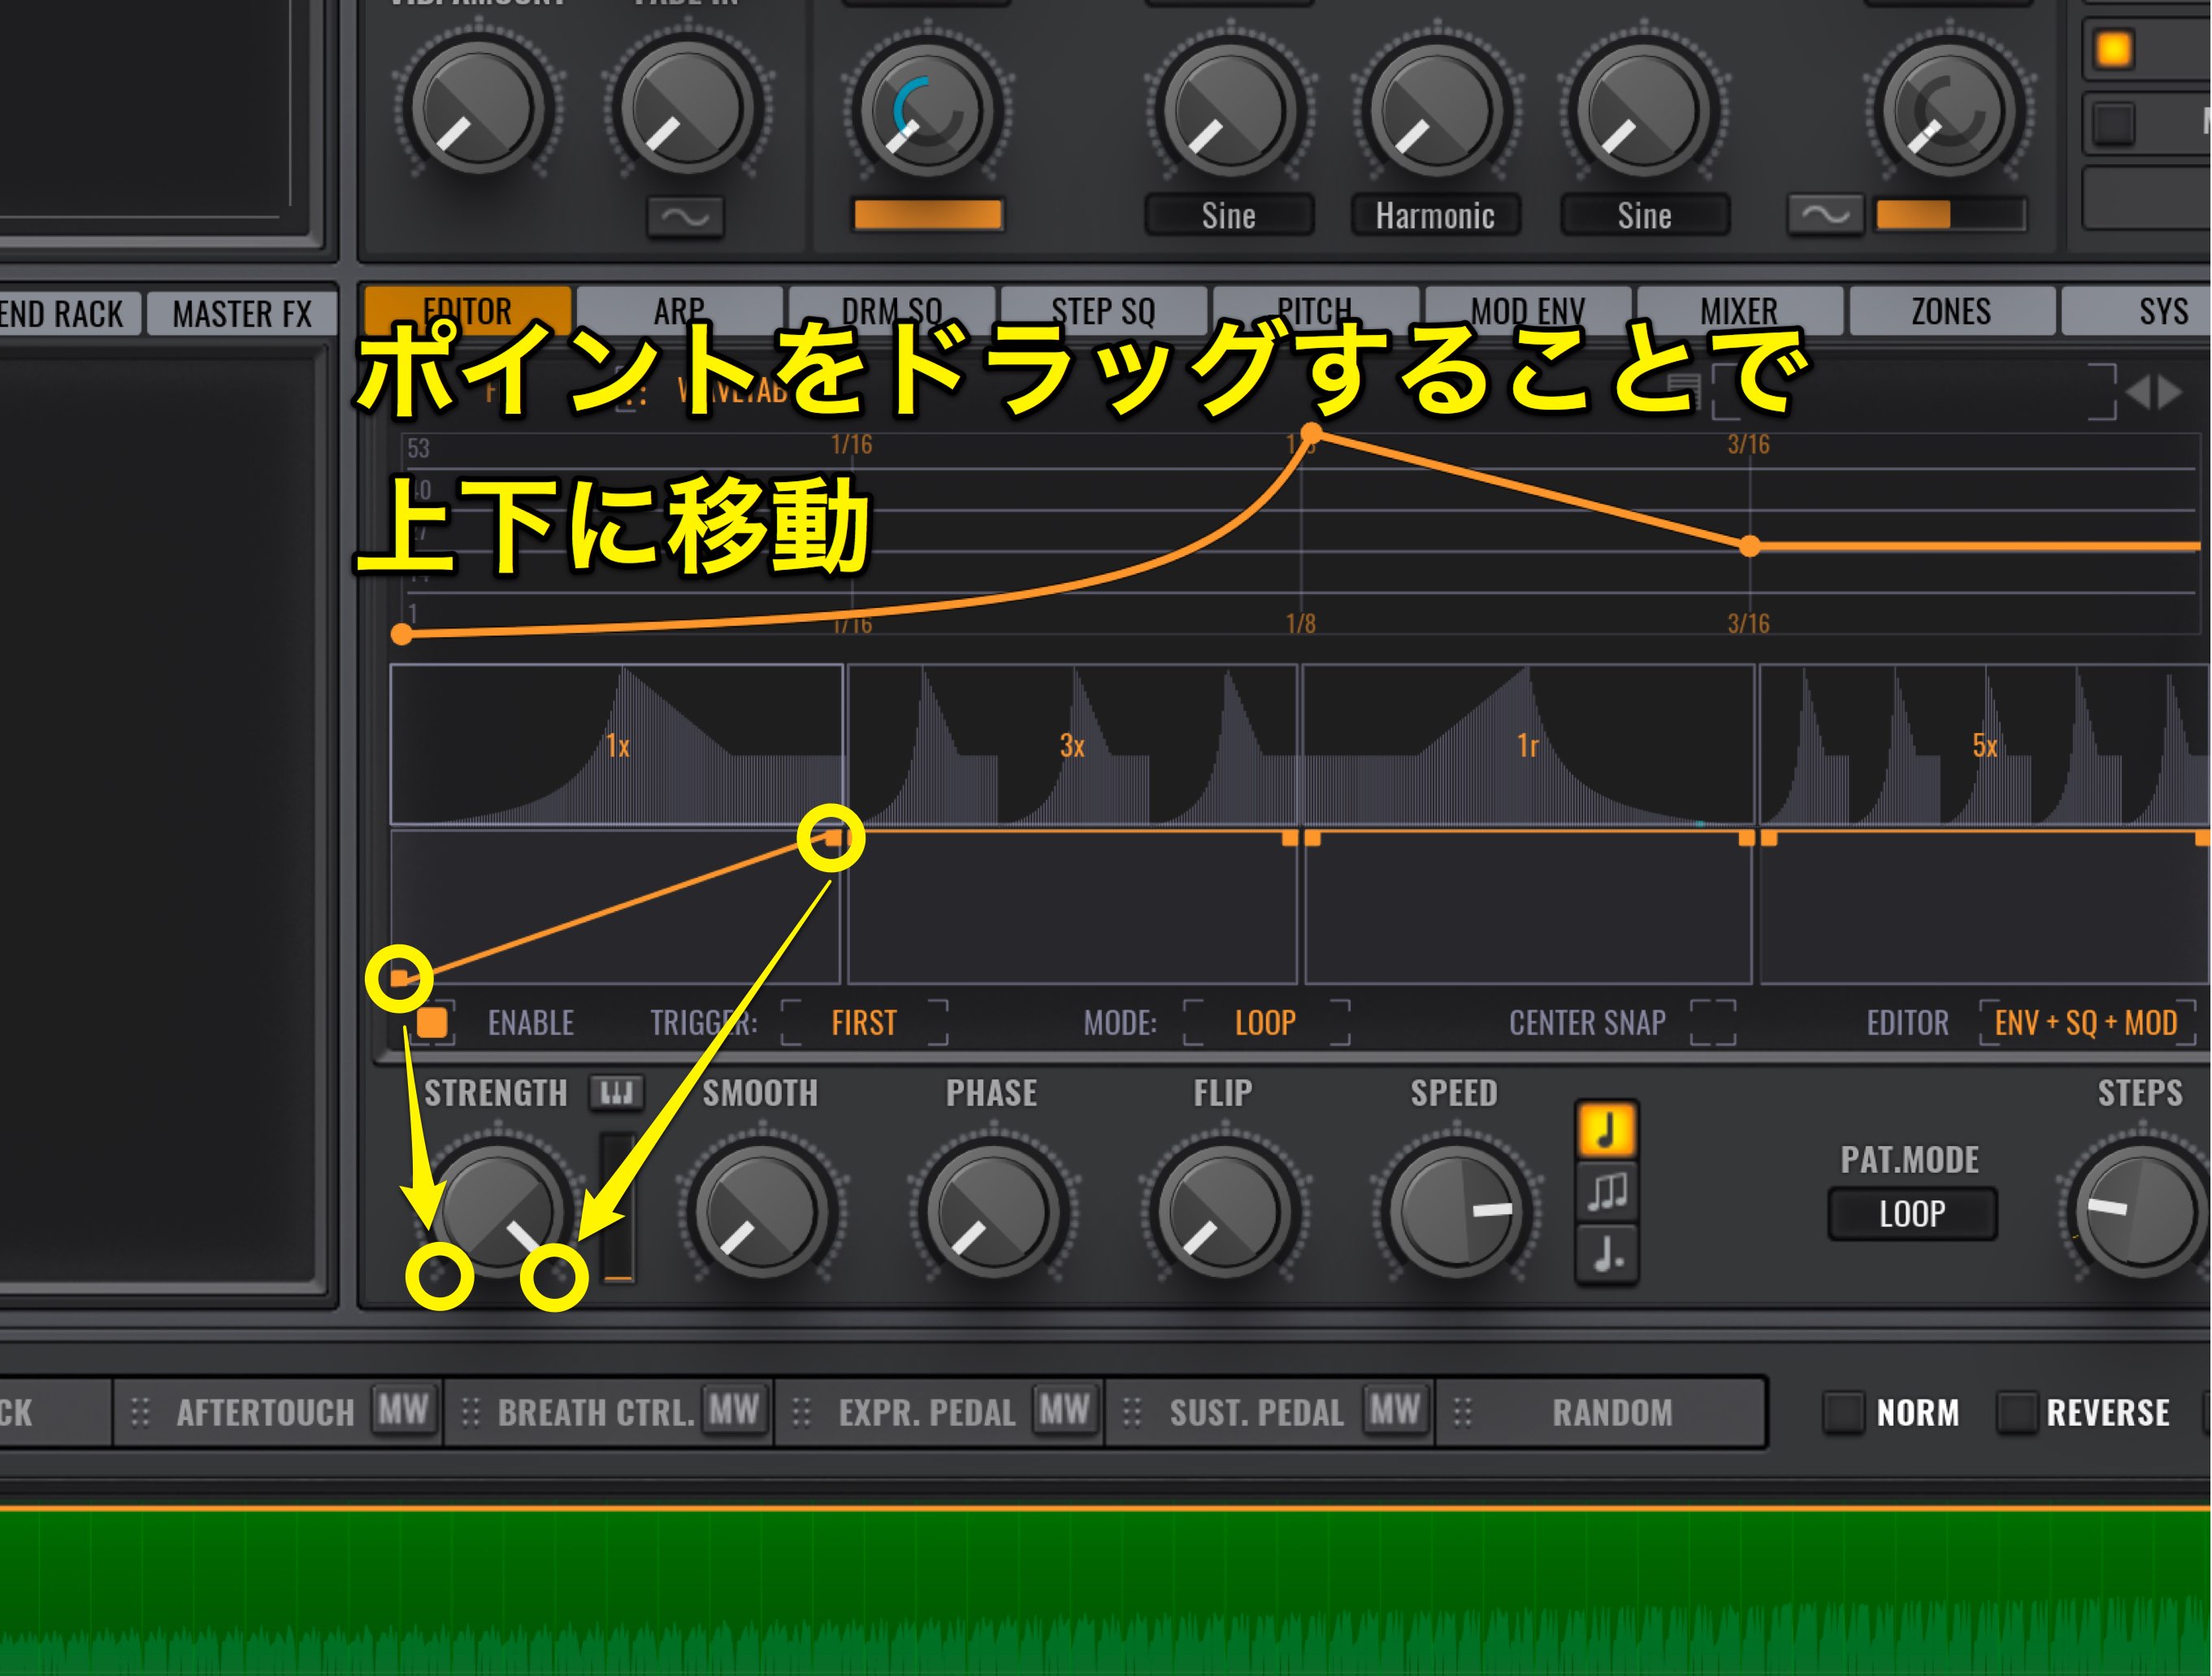
You can drag the orange point up/down.
With STRENGTH turned all the way to the right, when the point is on the bottom the STRENGTH is turned left, and when the point is at the top the STRENGTH is turned right.
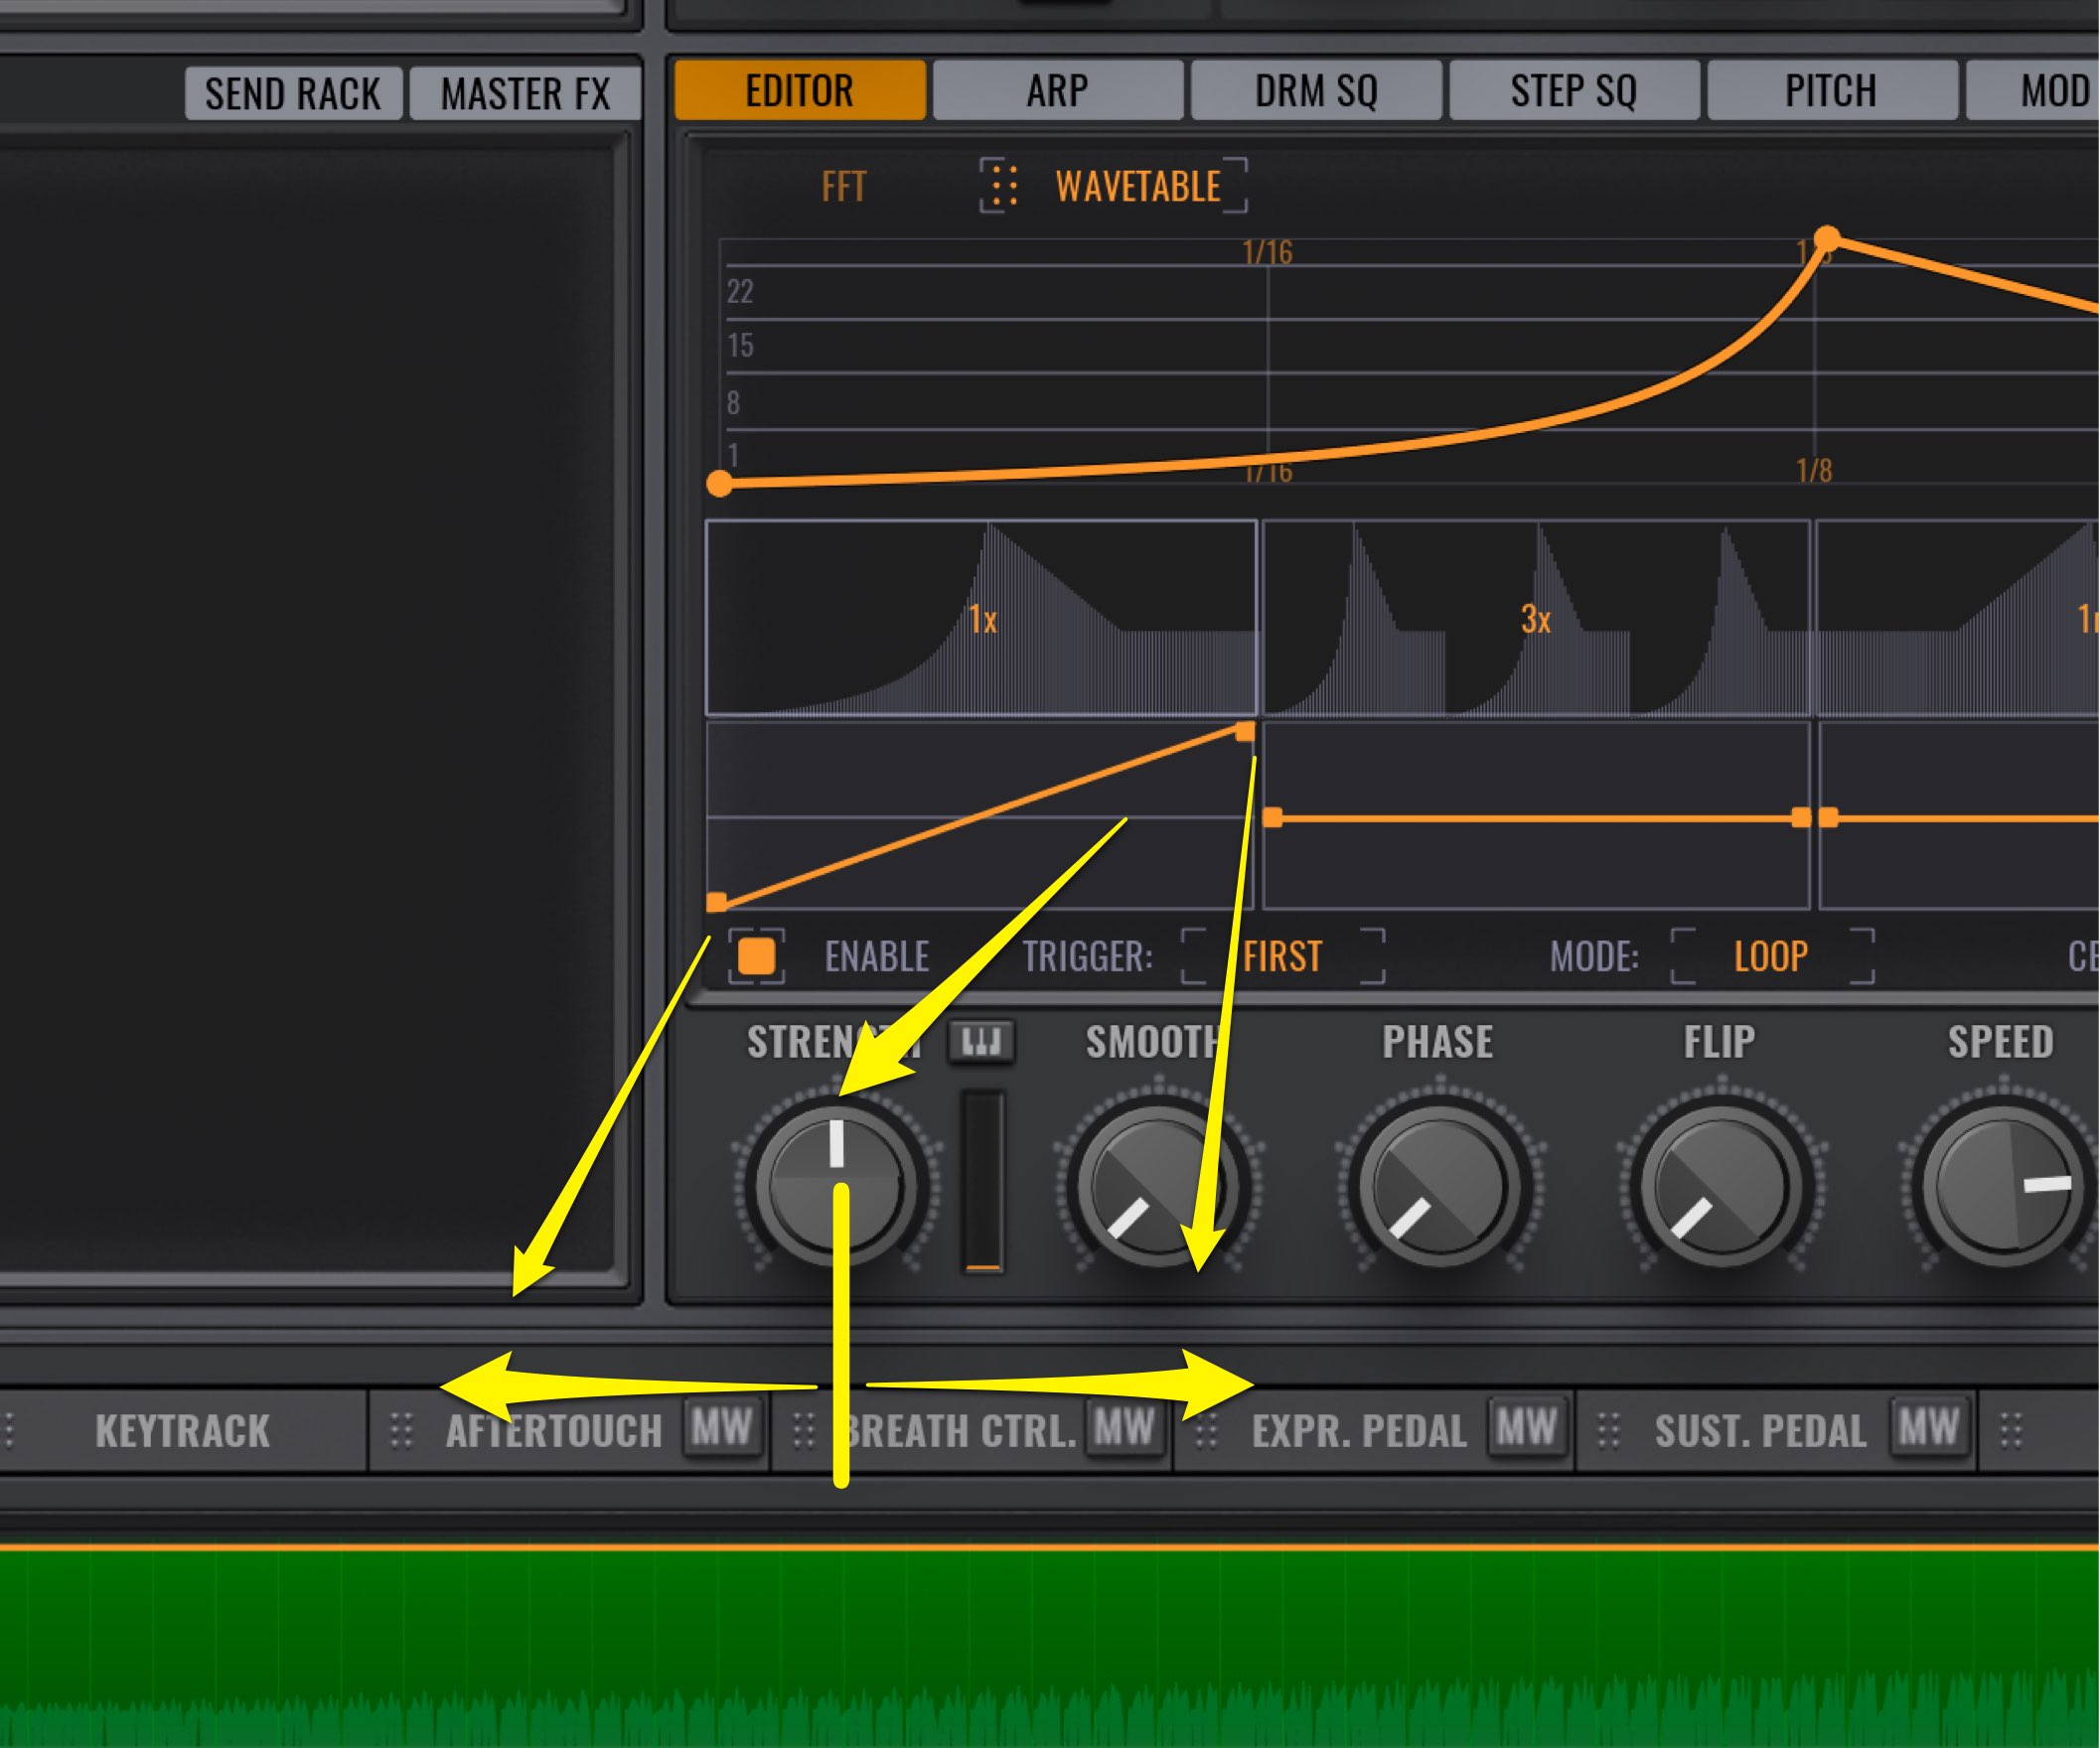
When STRENGTH is moved, a grey line appears.
This line implies where the STRENGTH is set.
By placing the points above and below the grey line, this indicates how much it will move in reference to the STRENGTH setting.
With this you can create more complex movements.
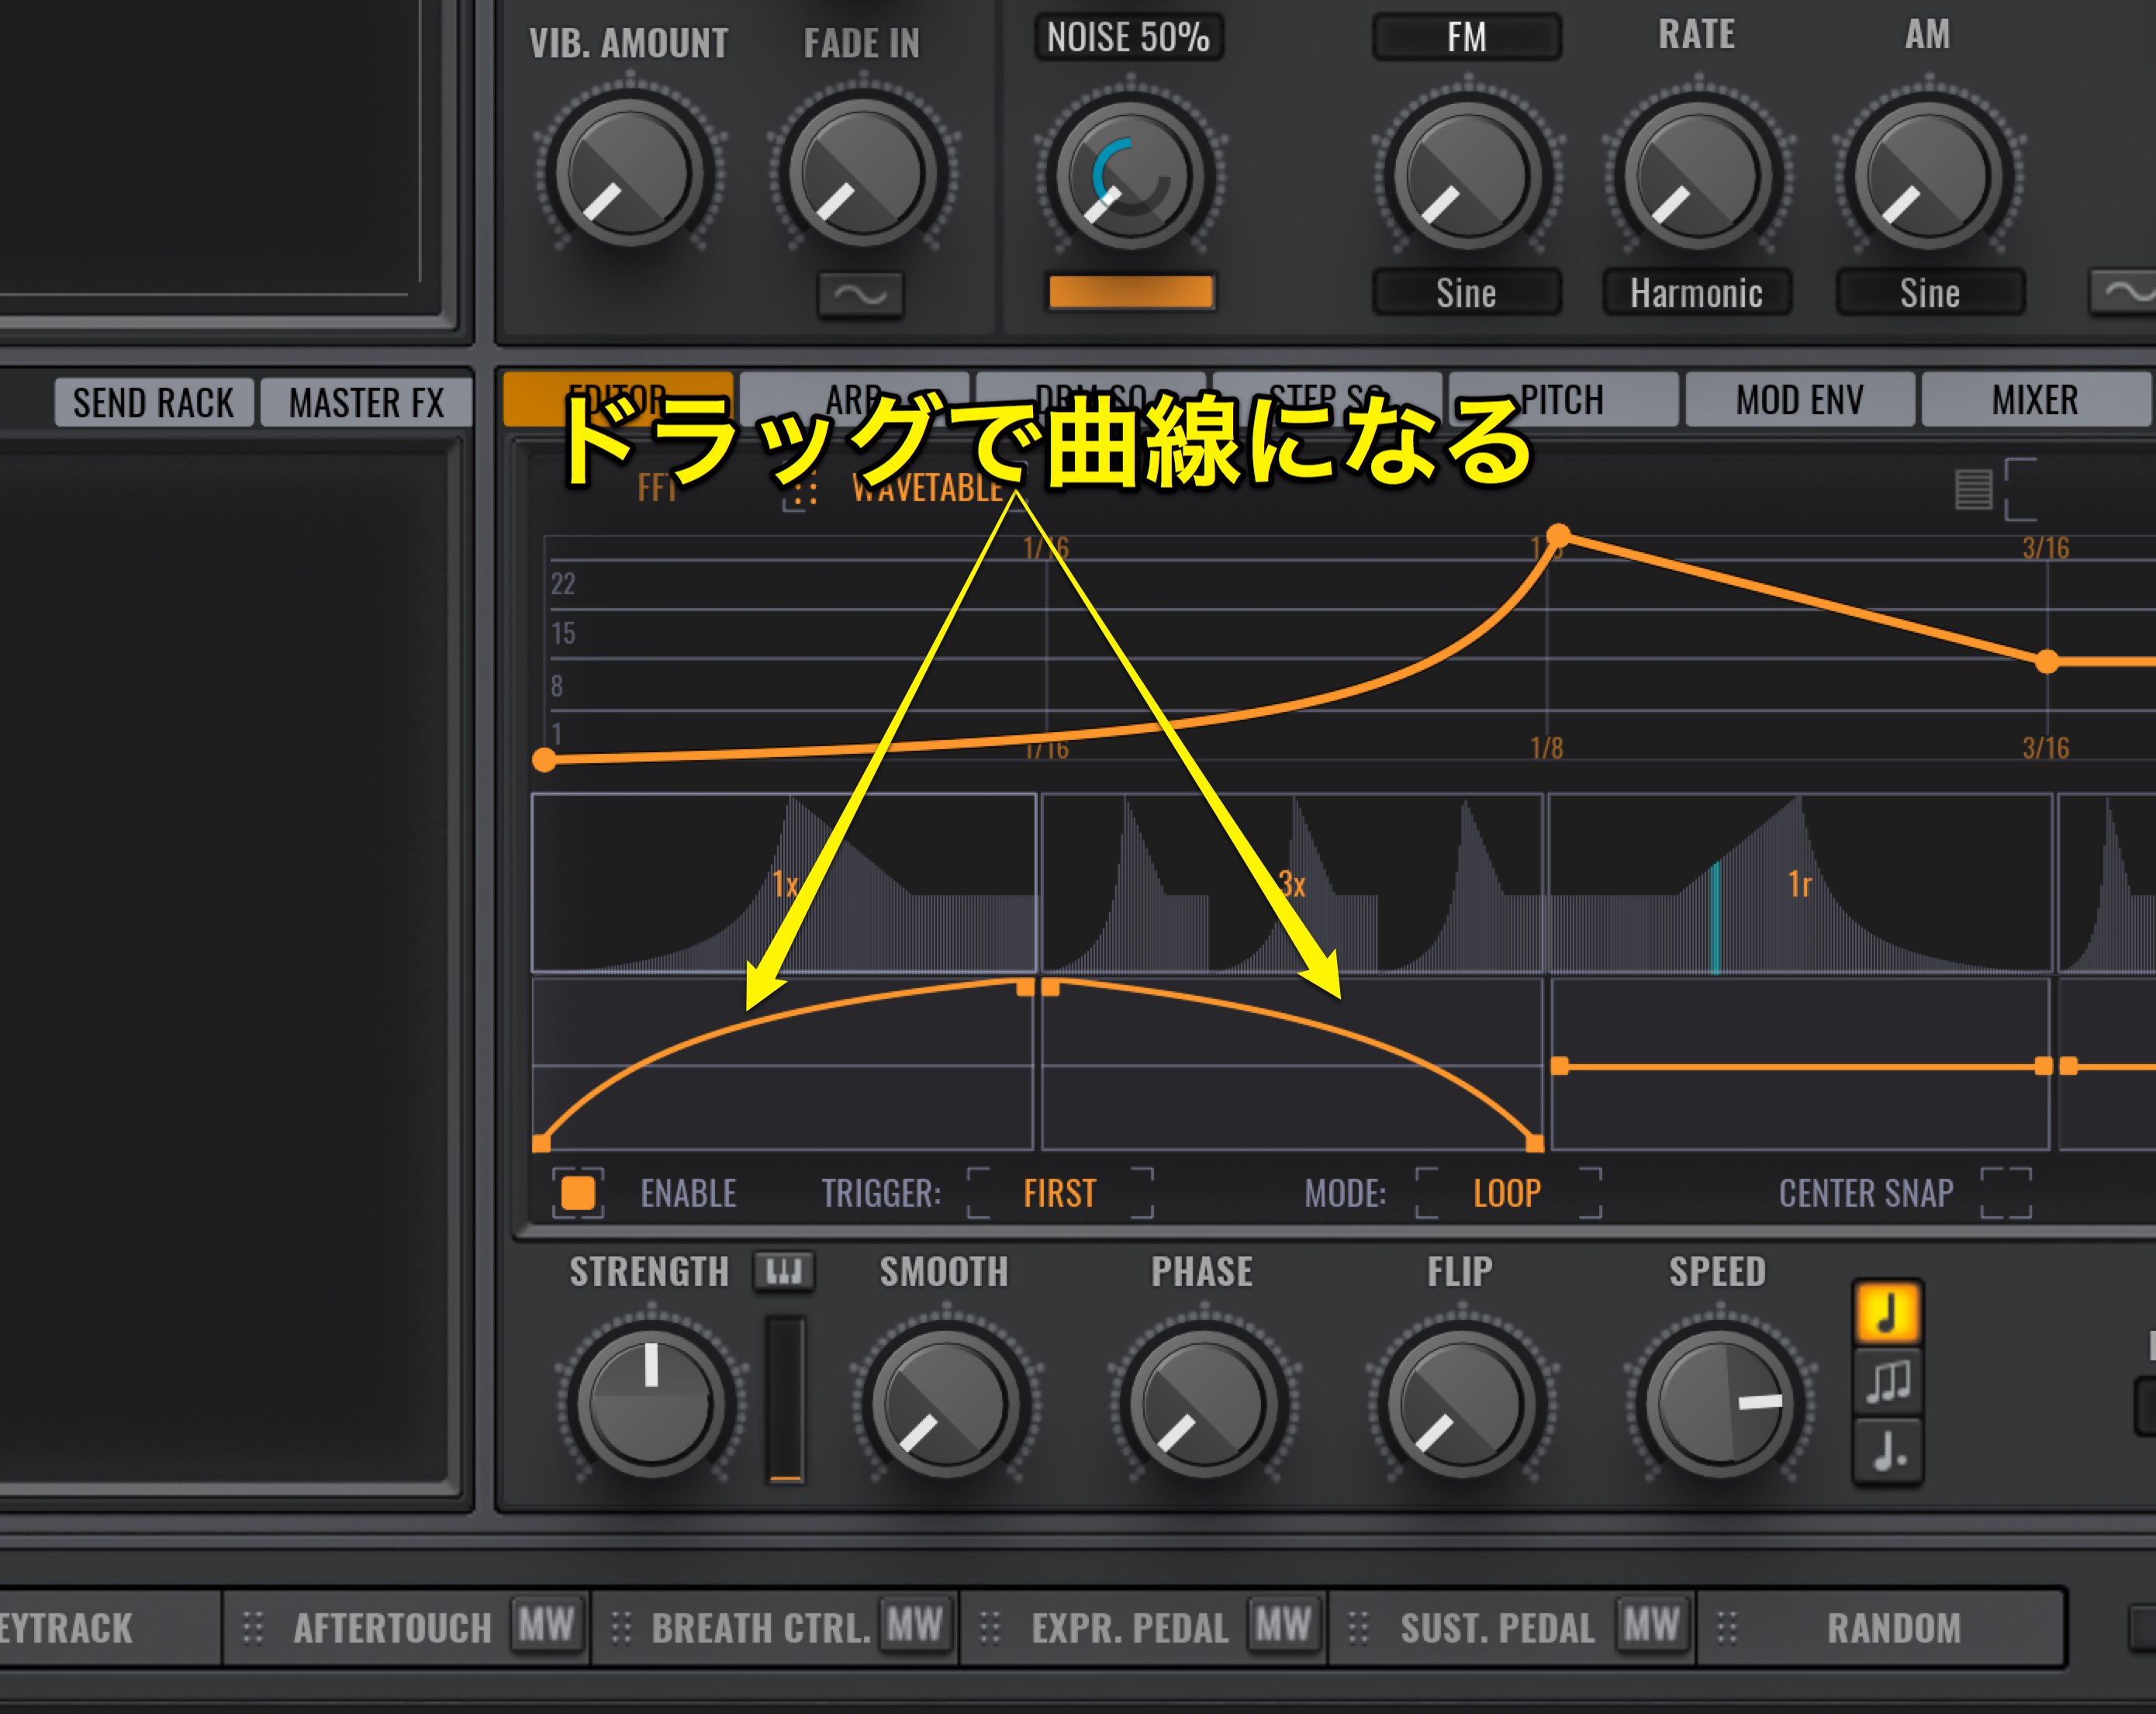
Same as the envelope, you can drag on a straight line to curve it as well.
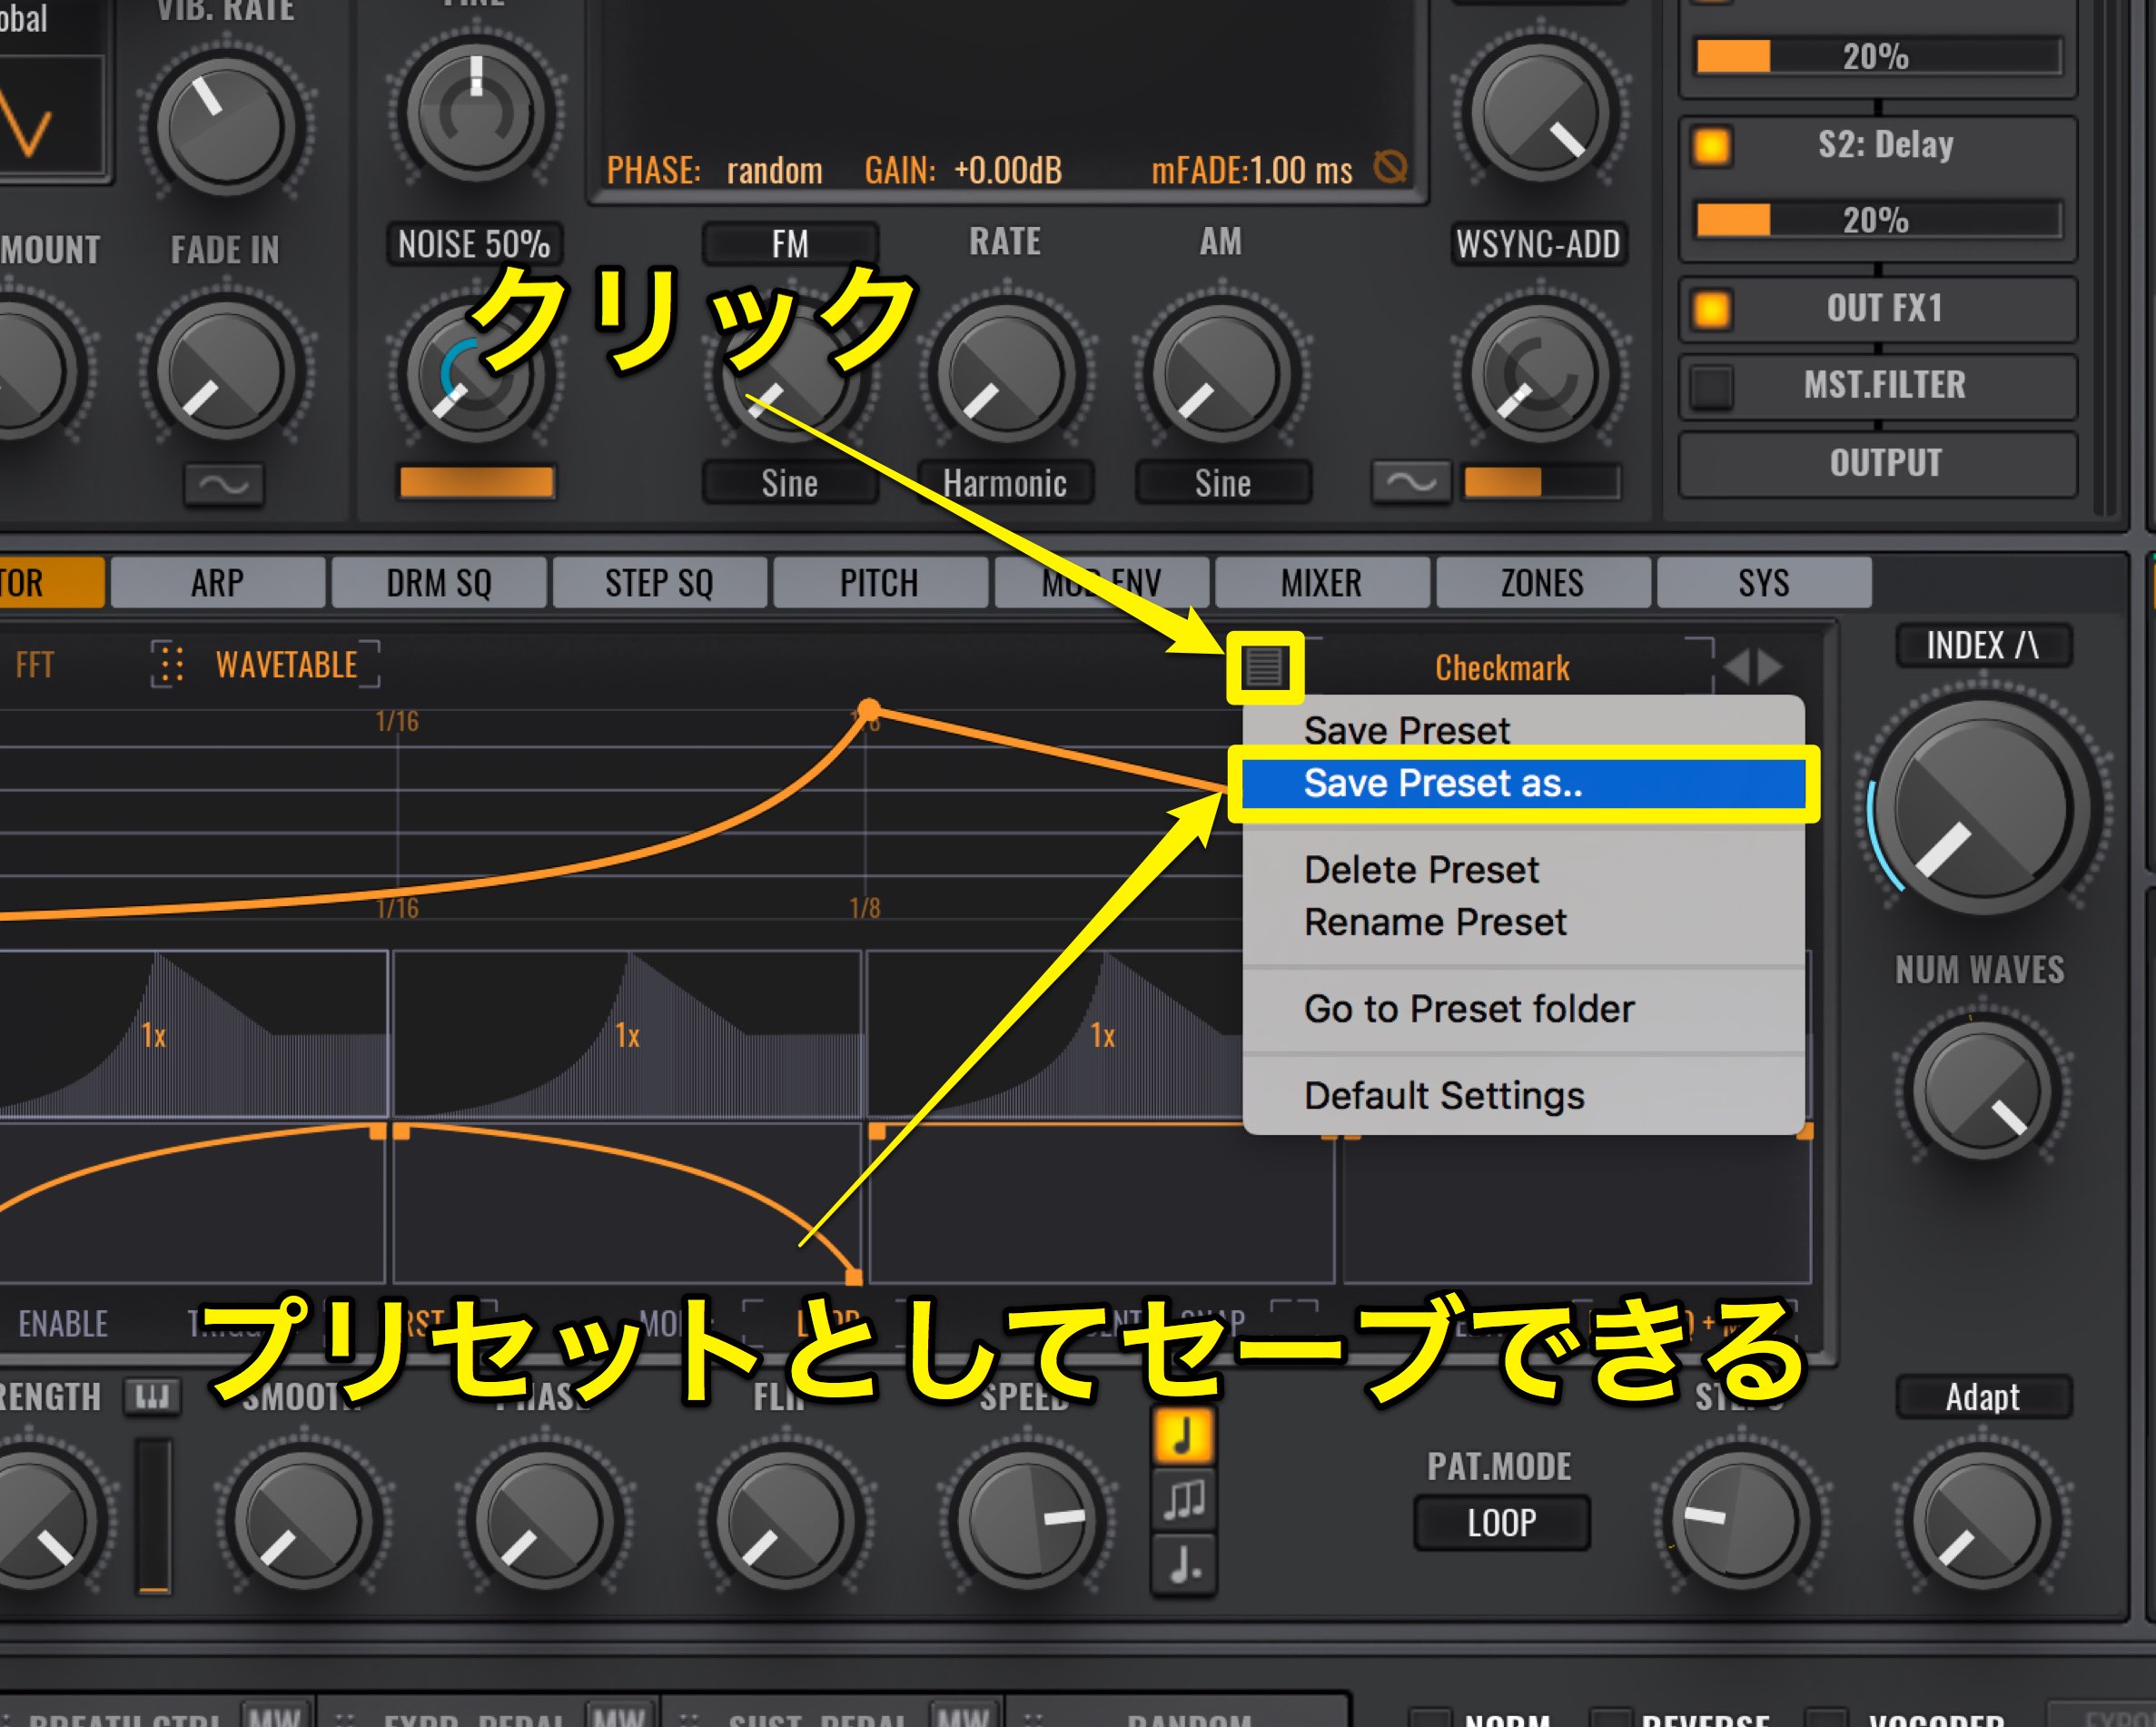
You can also save the sounds you make as a preset.
Click on the square area and select “Save Preset as…”
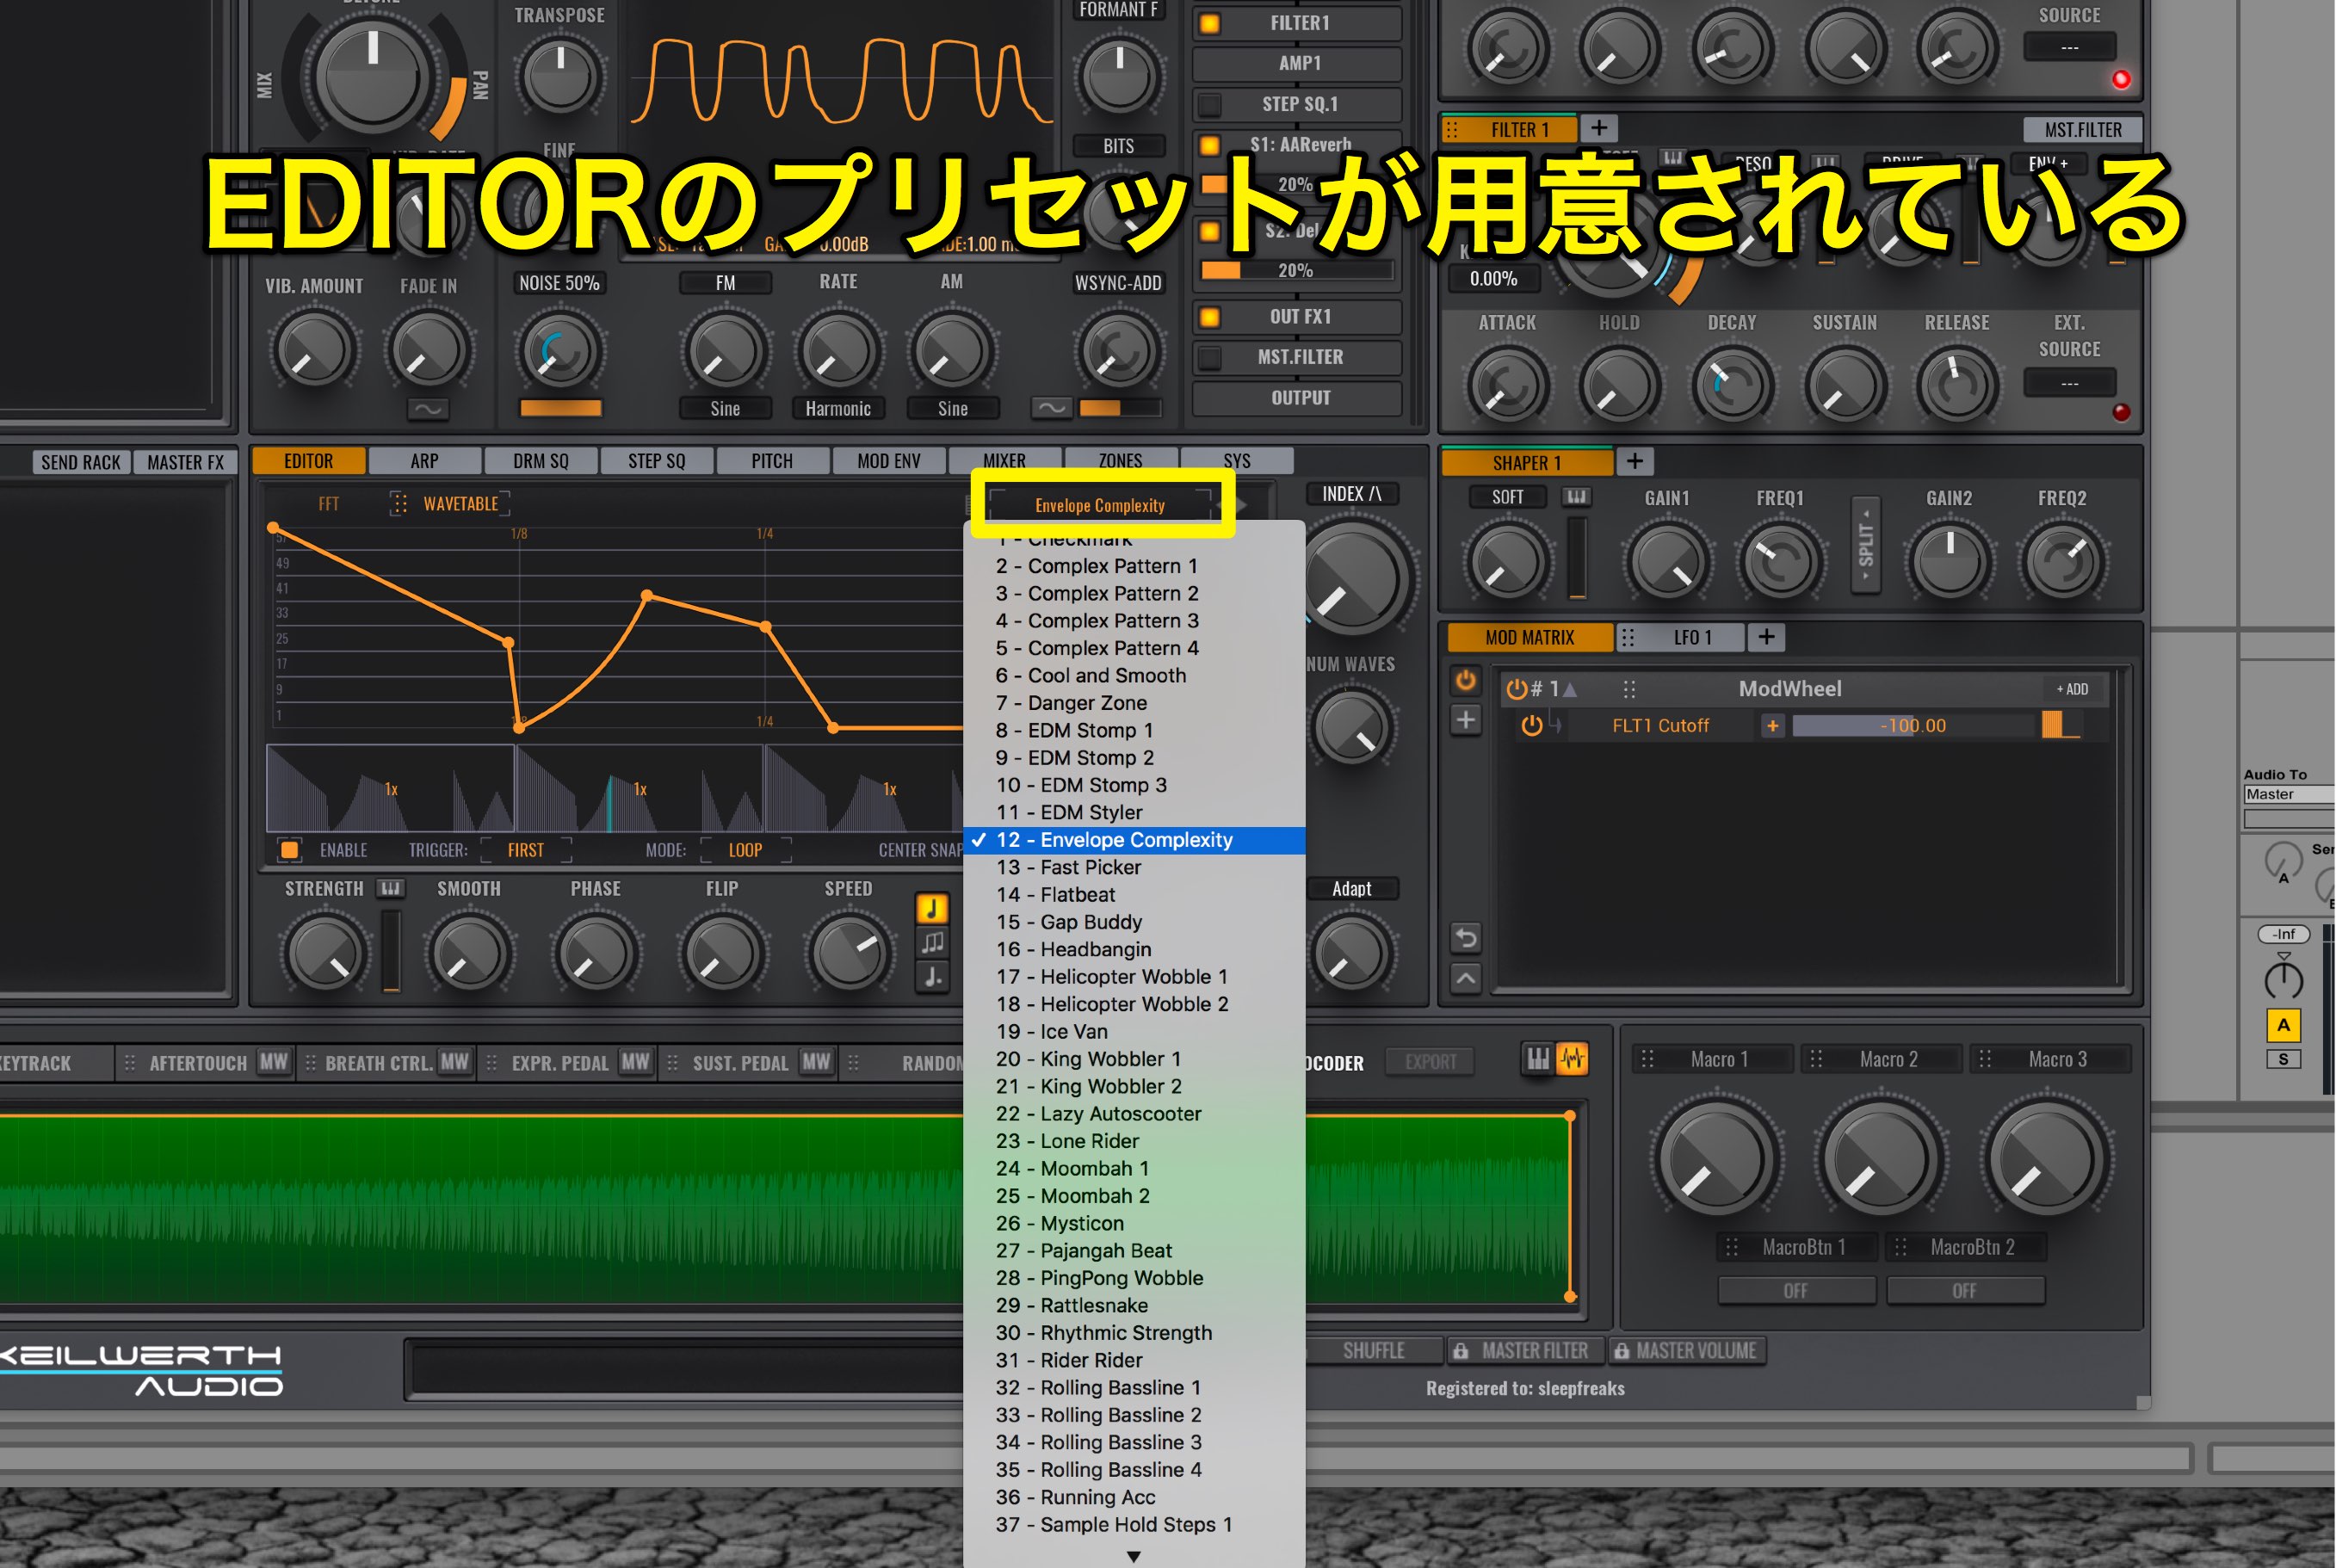
By clicking next to it you can call back the EDITOR preset.
By using the Wavetable Editor, you can create complex and evolving sounds.
This is a function rather unique to Avenger; please try it out in your own music!


