
reFX Nexus 3 Tutorial - New Features 2
Packed with Features to help Create Awesome Phrases
reFX has finally released Nexus 3.
This time we will be looking at the newly evolved “arpeggiator”, “trancegate”, and “effects section” which allow you to easily create great sounds.
Nexus 3 New Feature 2 – Video Access
Product URL: https://refx.com
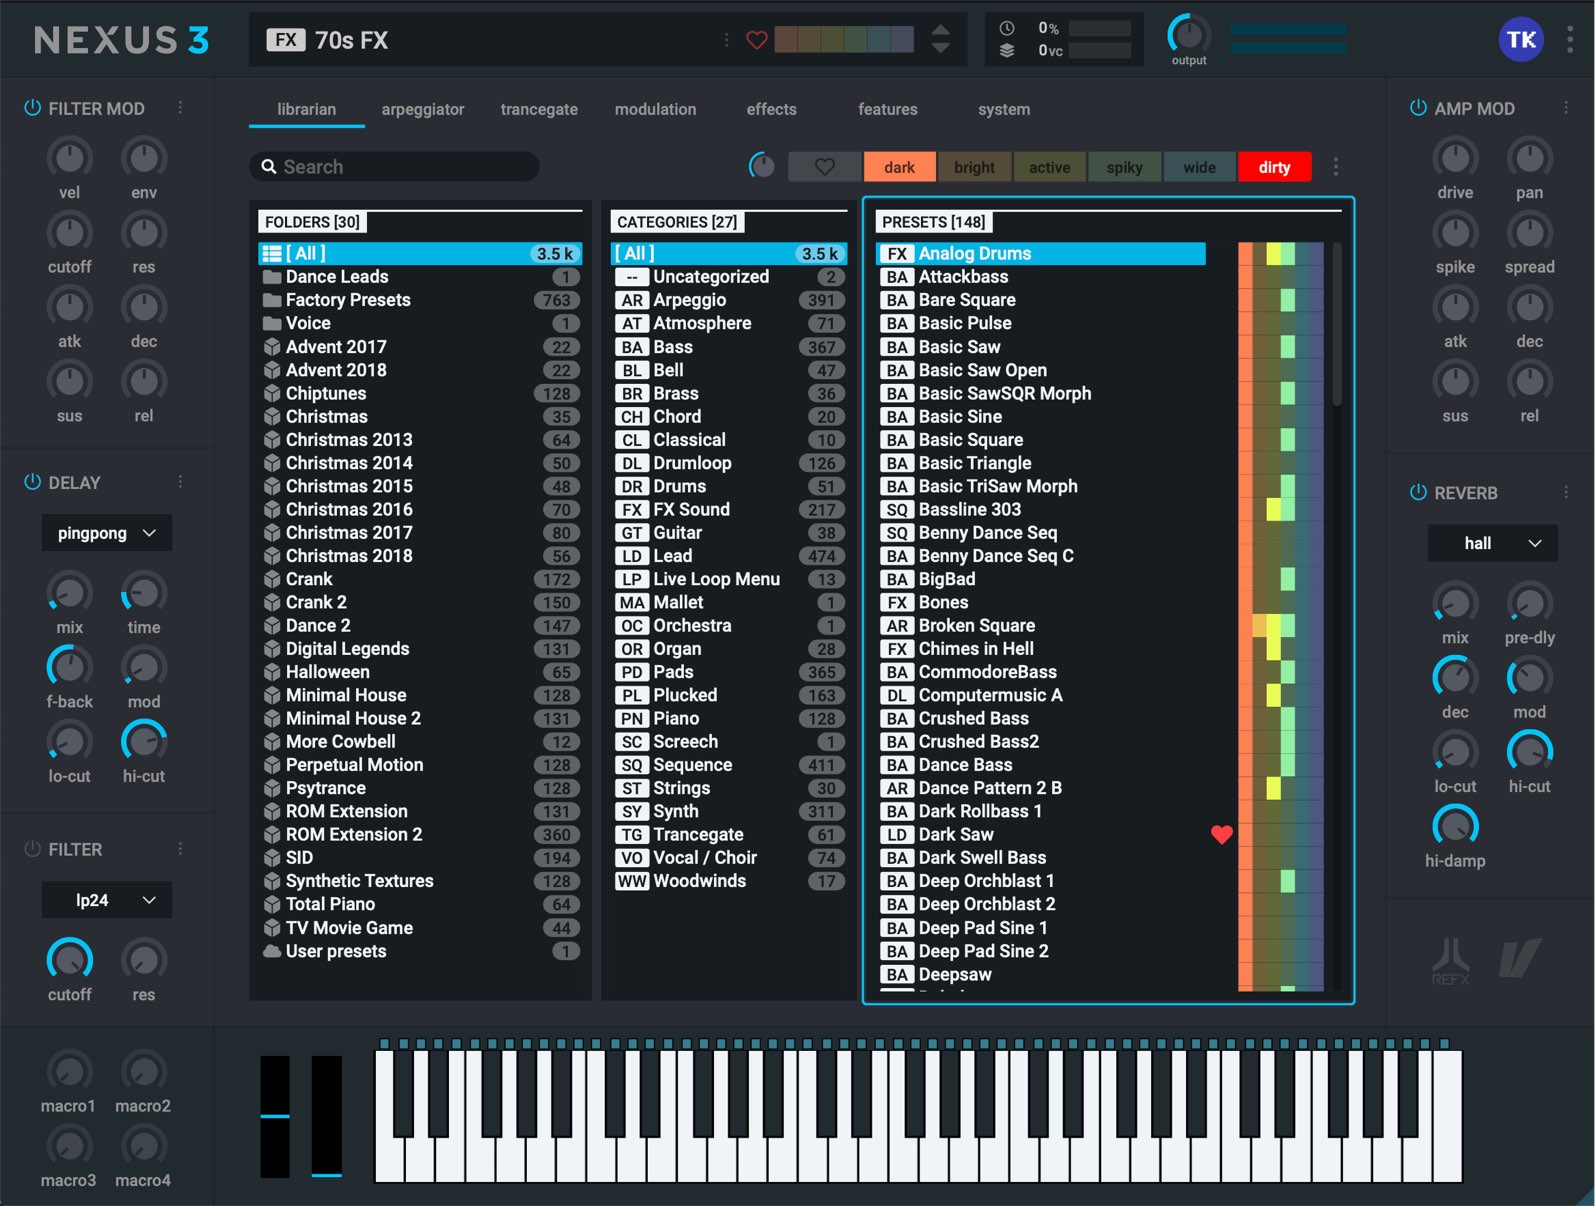
Nexus 3’s Arpeggiator
An arpeggiator takes MIDI notes in haromnies and arranges their timing to create a phrase.
It is a feature included in many synths, and is a classic method of sound creation used in various genres.
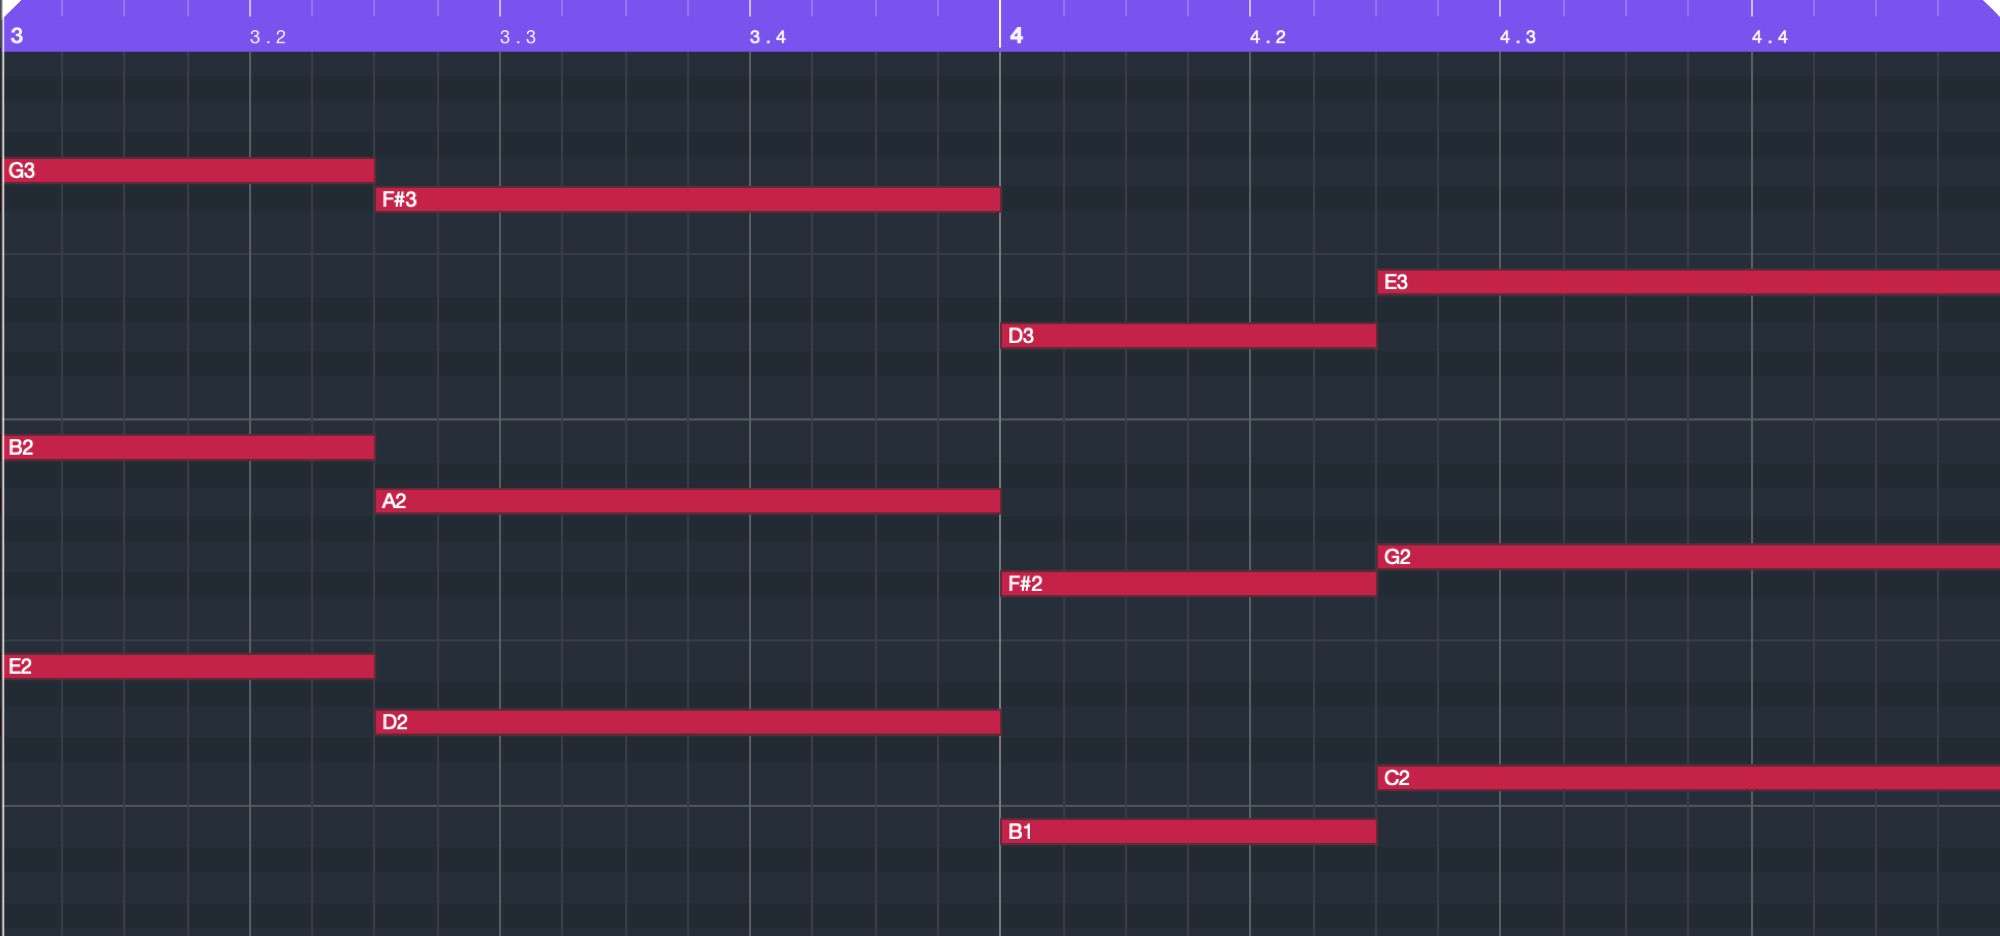
Generally we will sequence in MIDI harmonies like so.
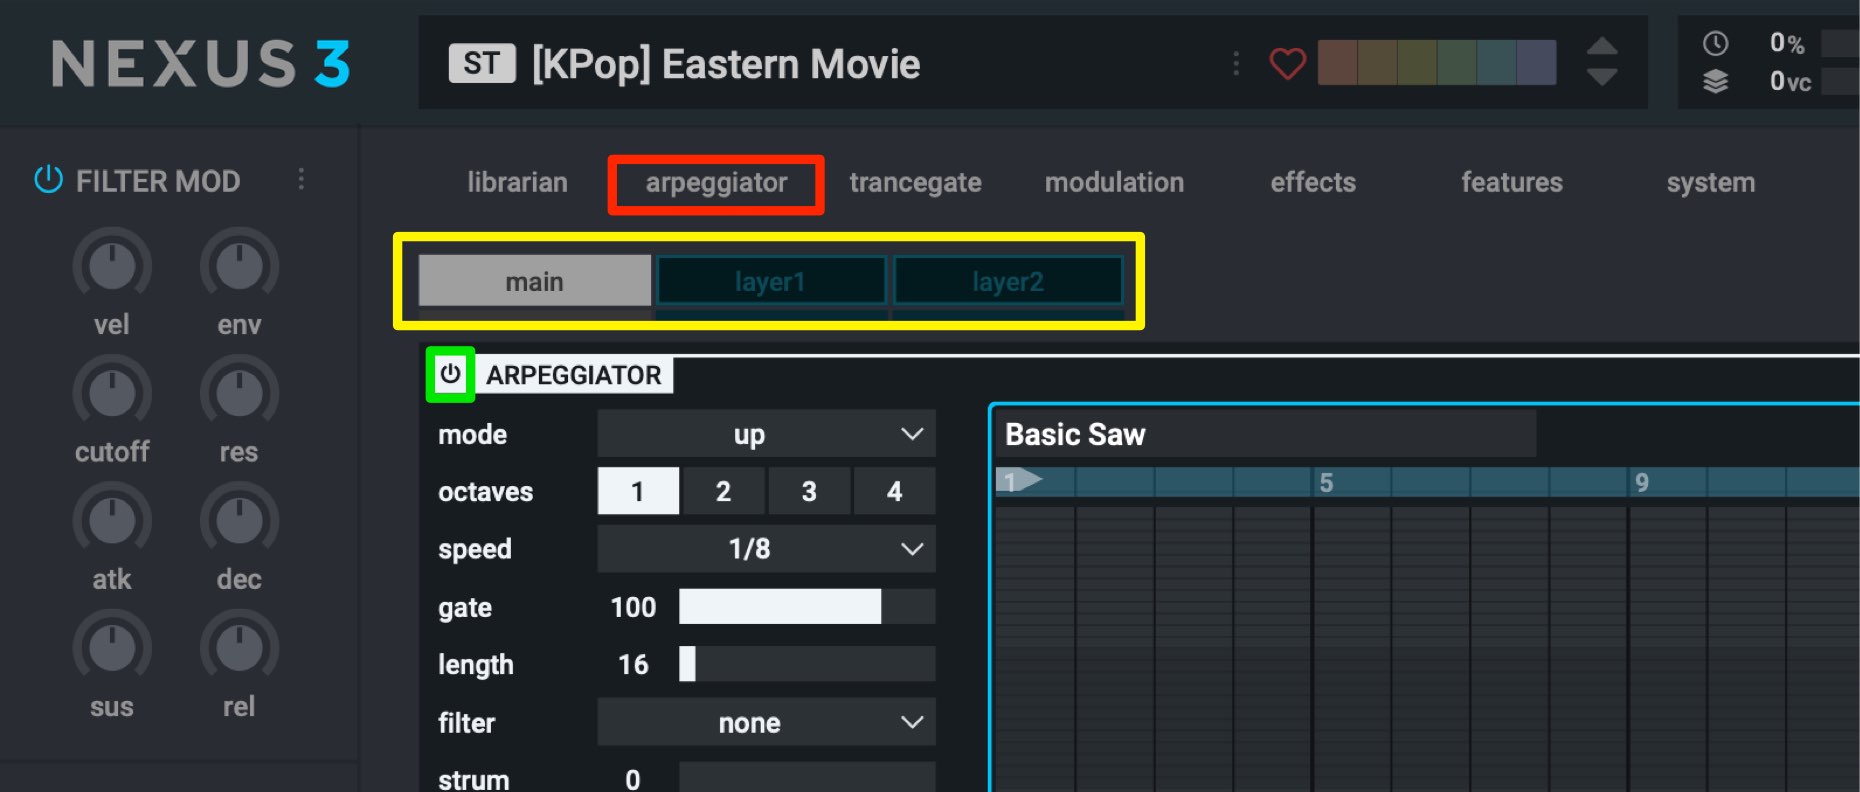
Select the “arpeggiator” menu.
You can also use the arpeggiator on individual “layer”s as well.
FOr this example, we will be using it on “main” which applies it to all layers.
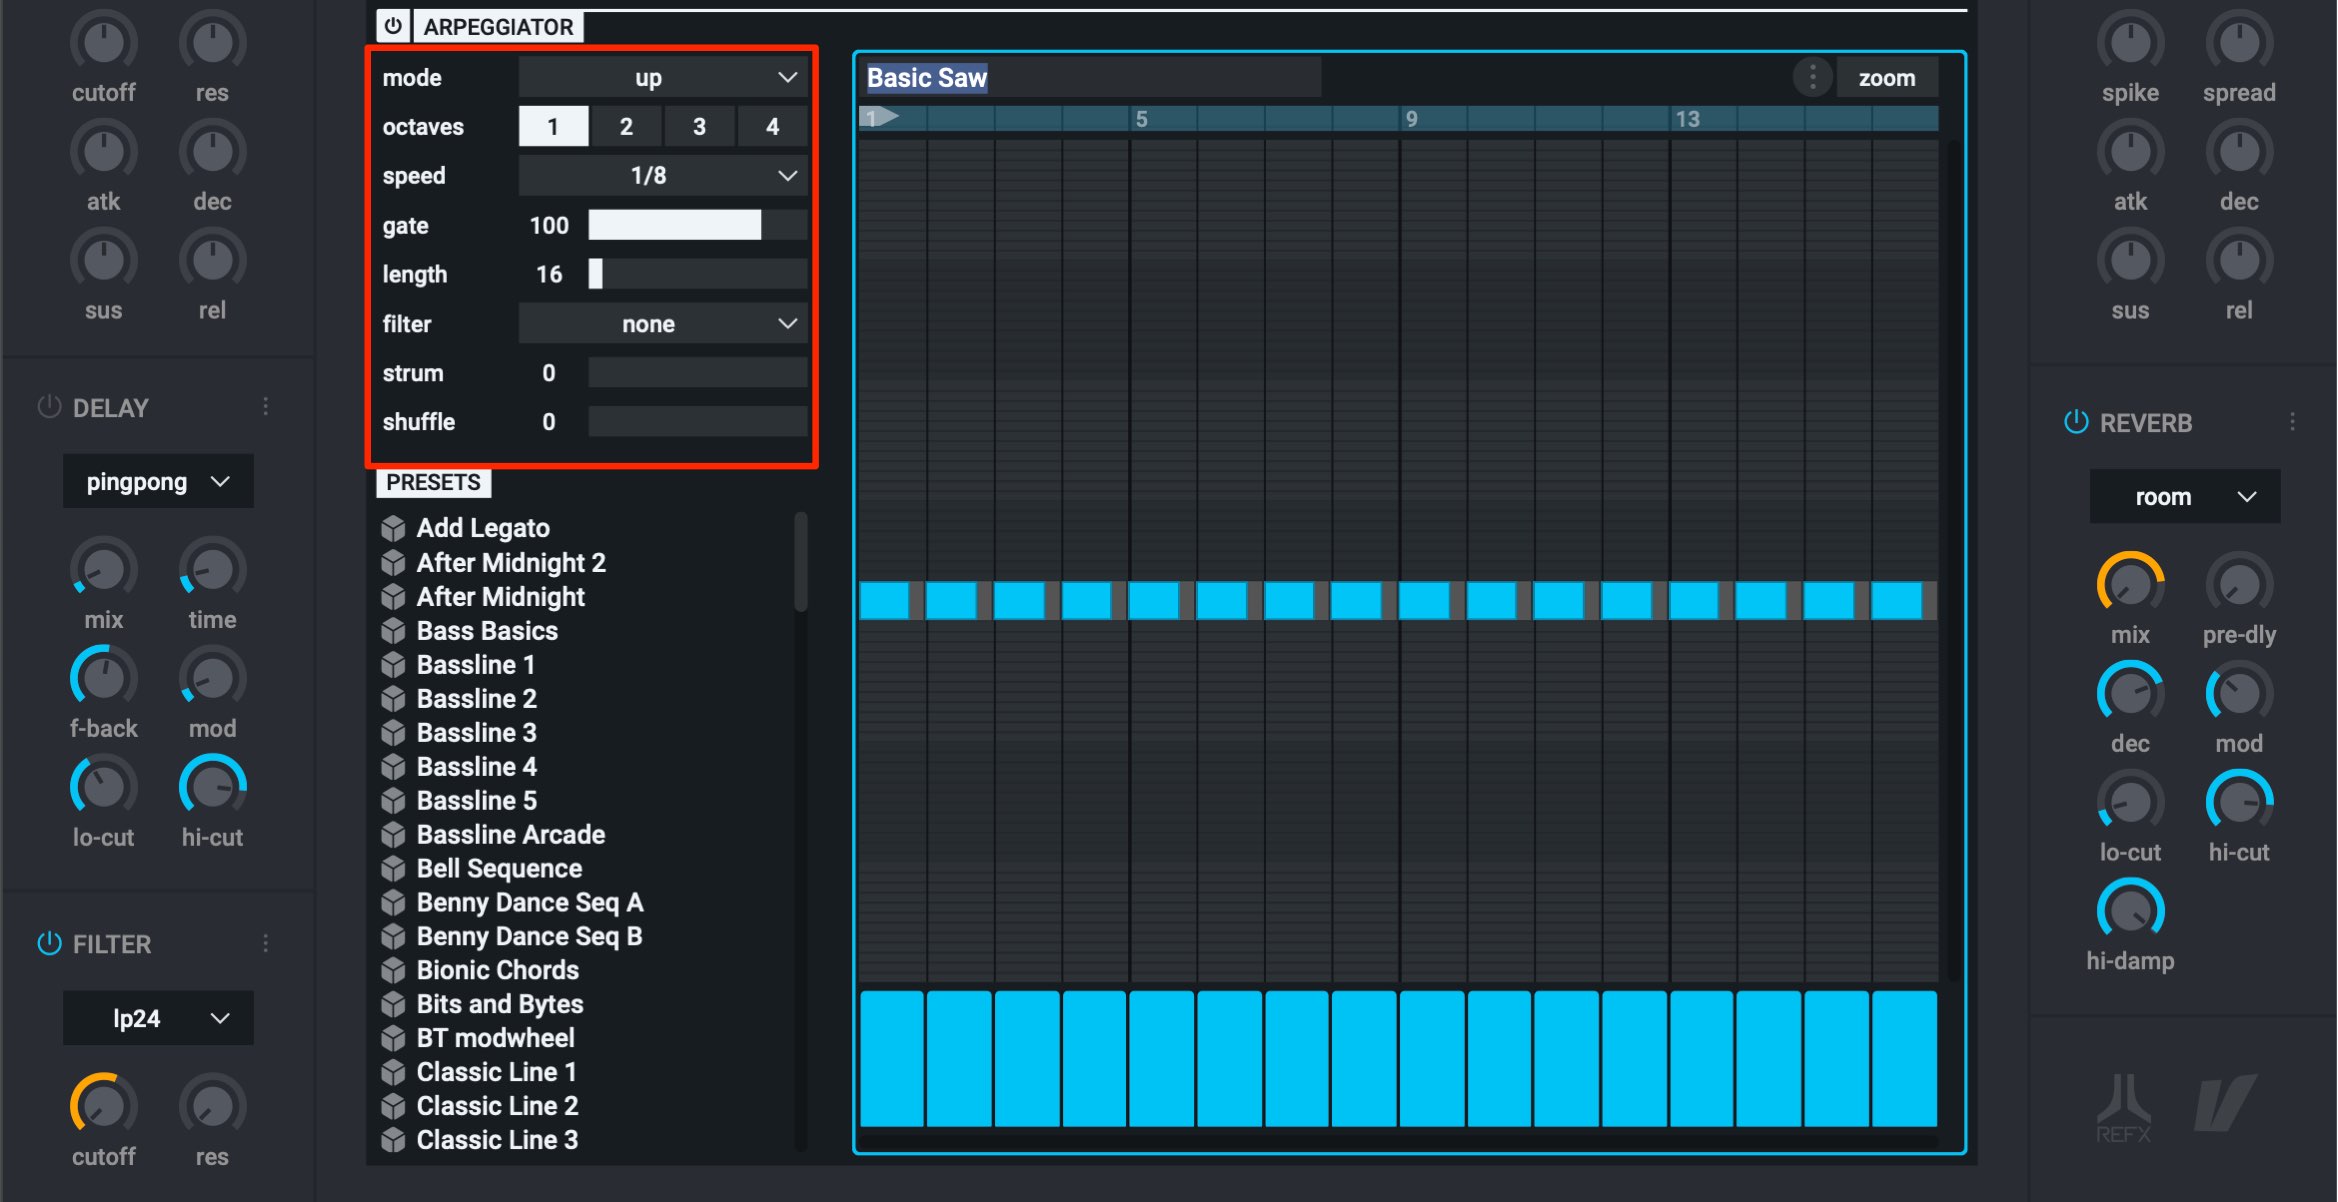
Now we will set up the arpeggiator:
- mode : Changes the movement of the note pitches
- octaves : Changes the octave span of the note
- speed : Changes the speed of the phrase
- gate : Changes the length of the notes
- length : Changes the length of the phrase
- filter : Applies criteria for notes and narrows them down
- strum : When poly is selected in “mode”, you can shift the timing of the notes to create a guitar stroke like sound
- shuffle : When 16th/32nd note divisions are selected, you can add a shuffle/bounce like feel to the pattern (not applied when 8th is selected)
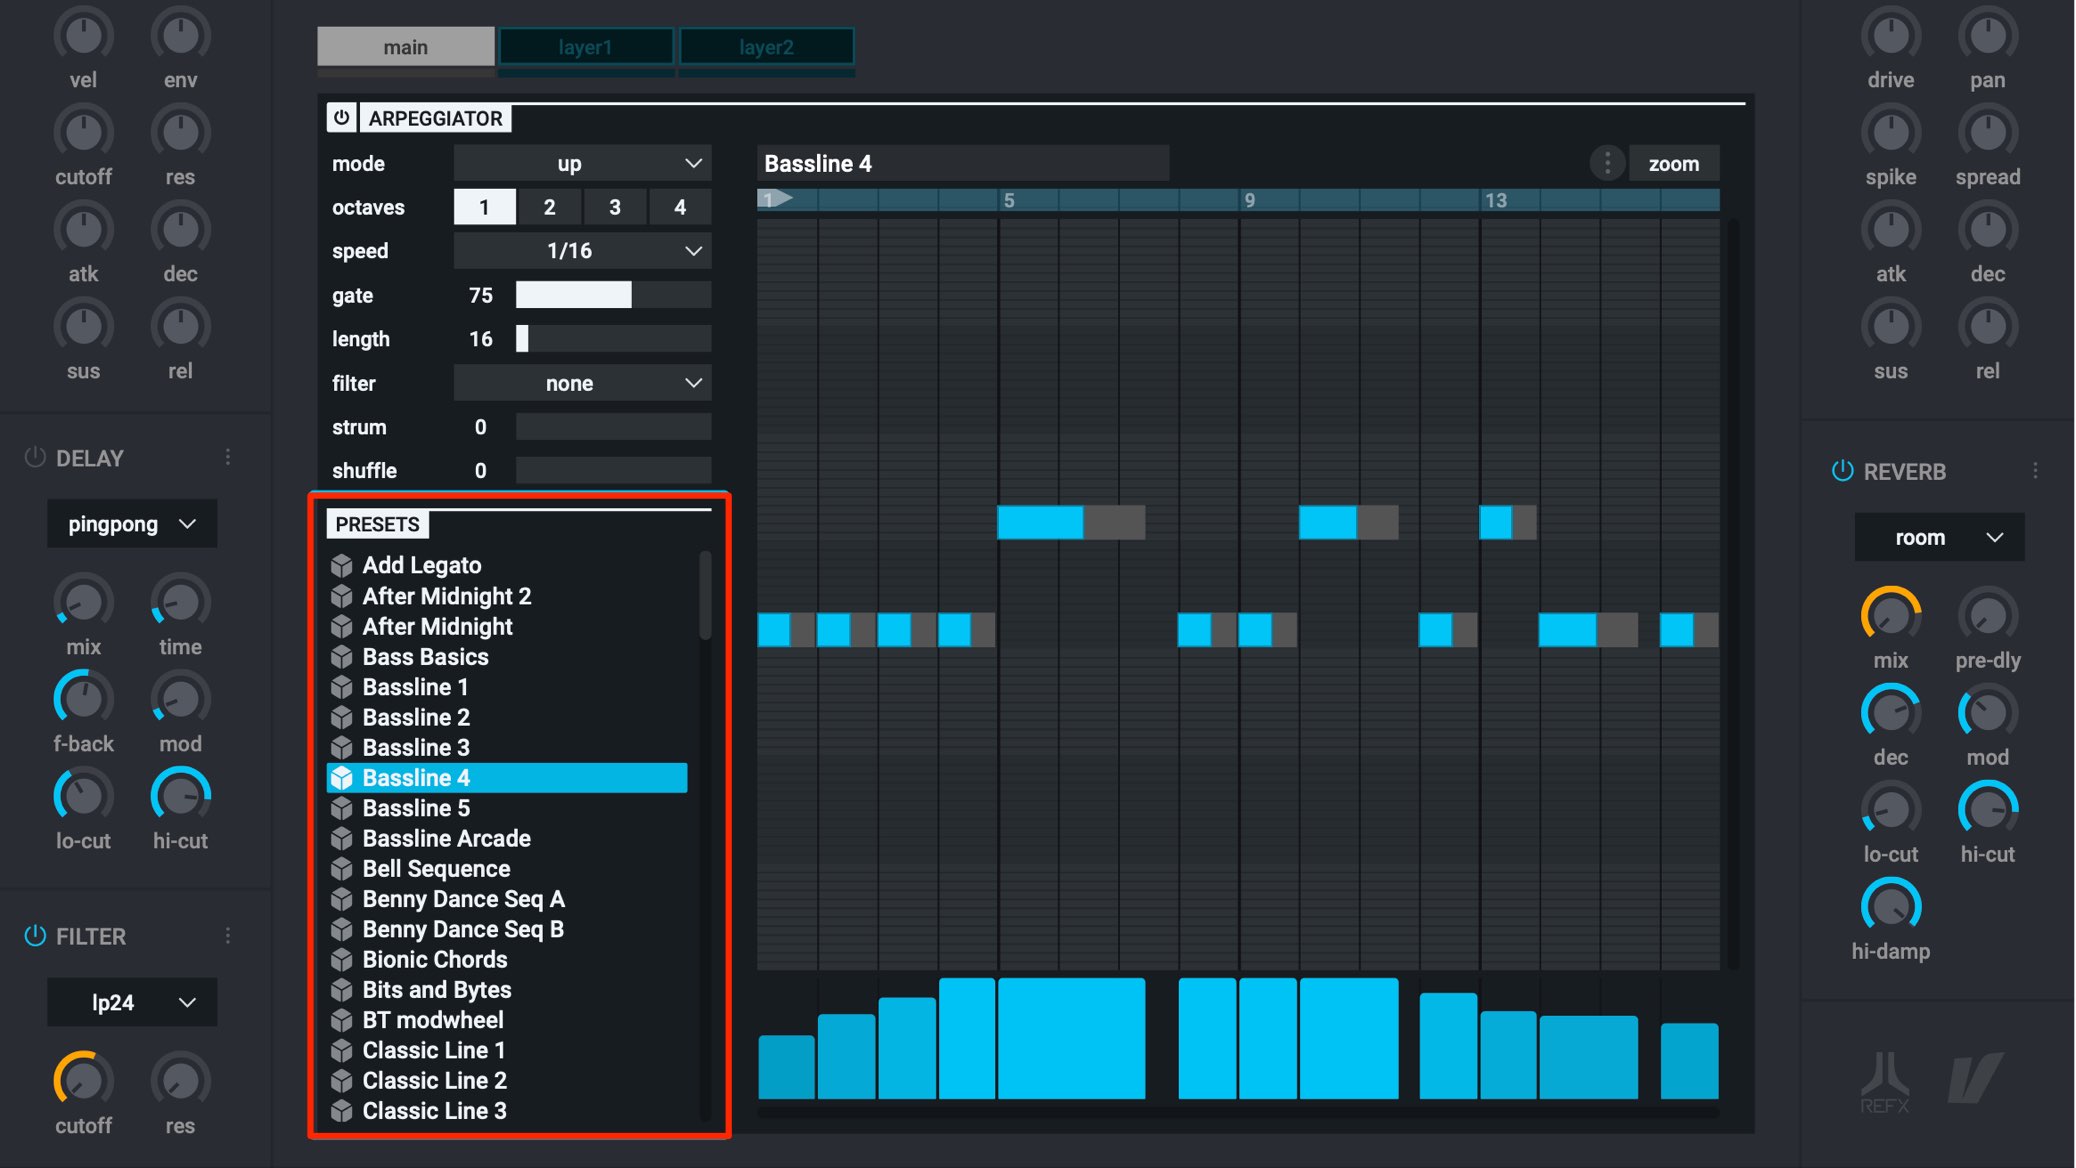
There are various presets provided, allowing to quickly access great patterns.
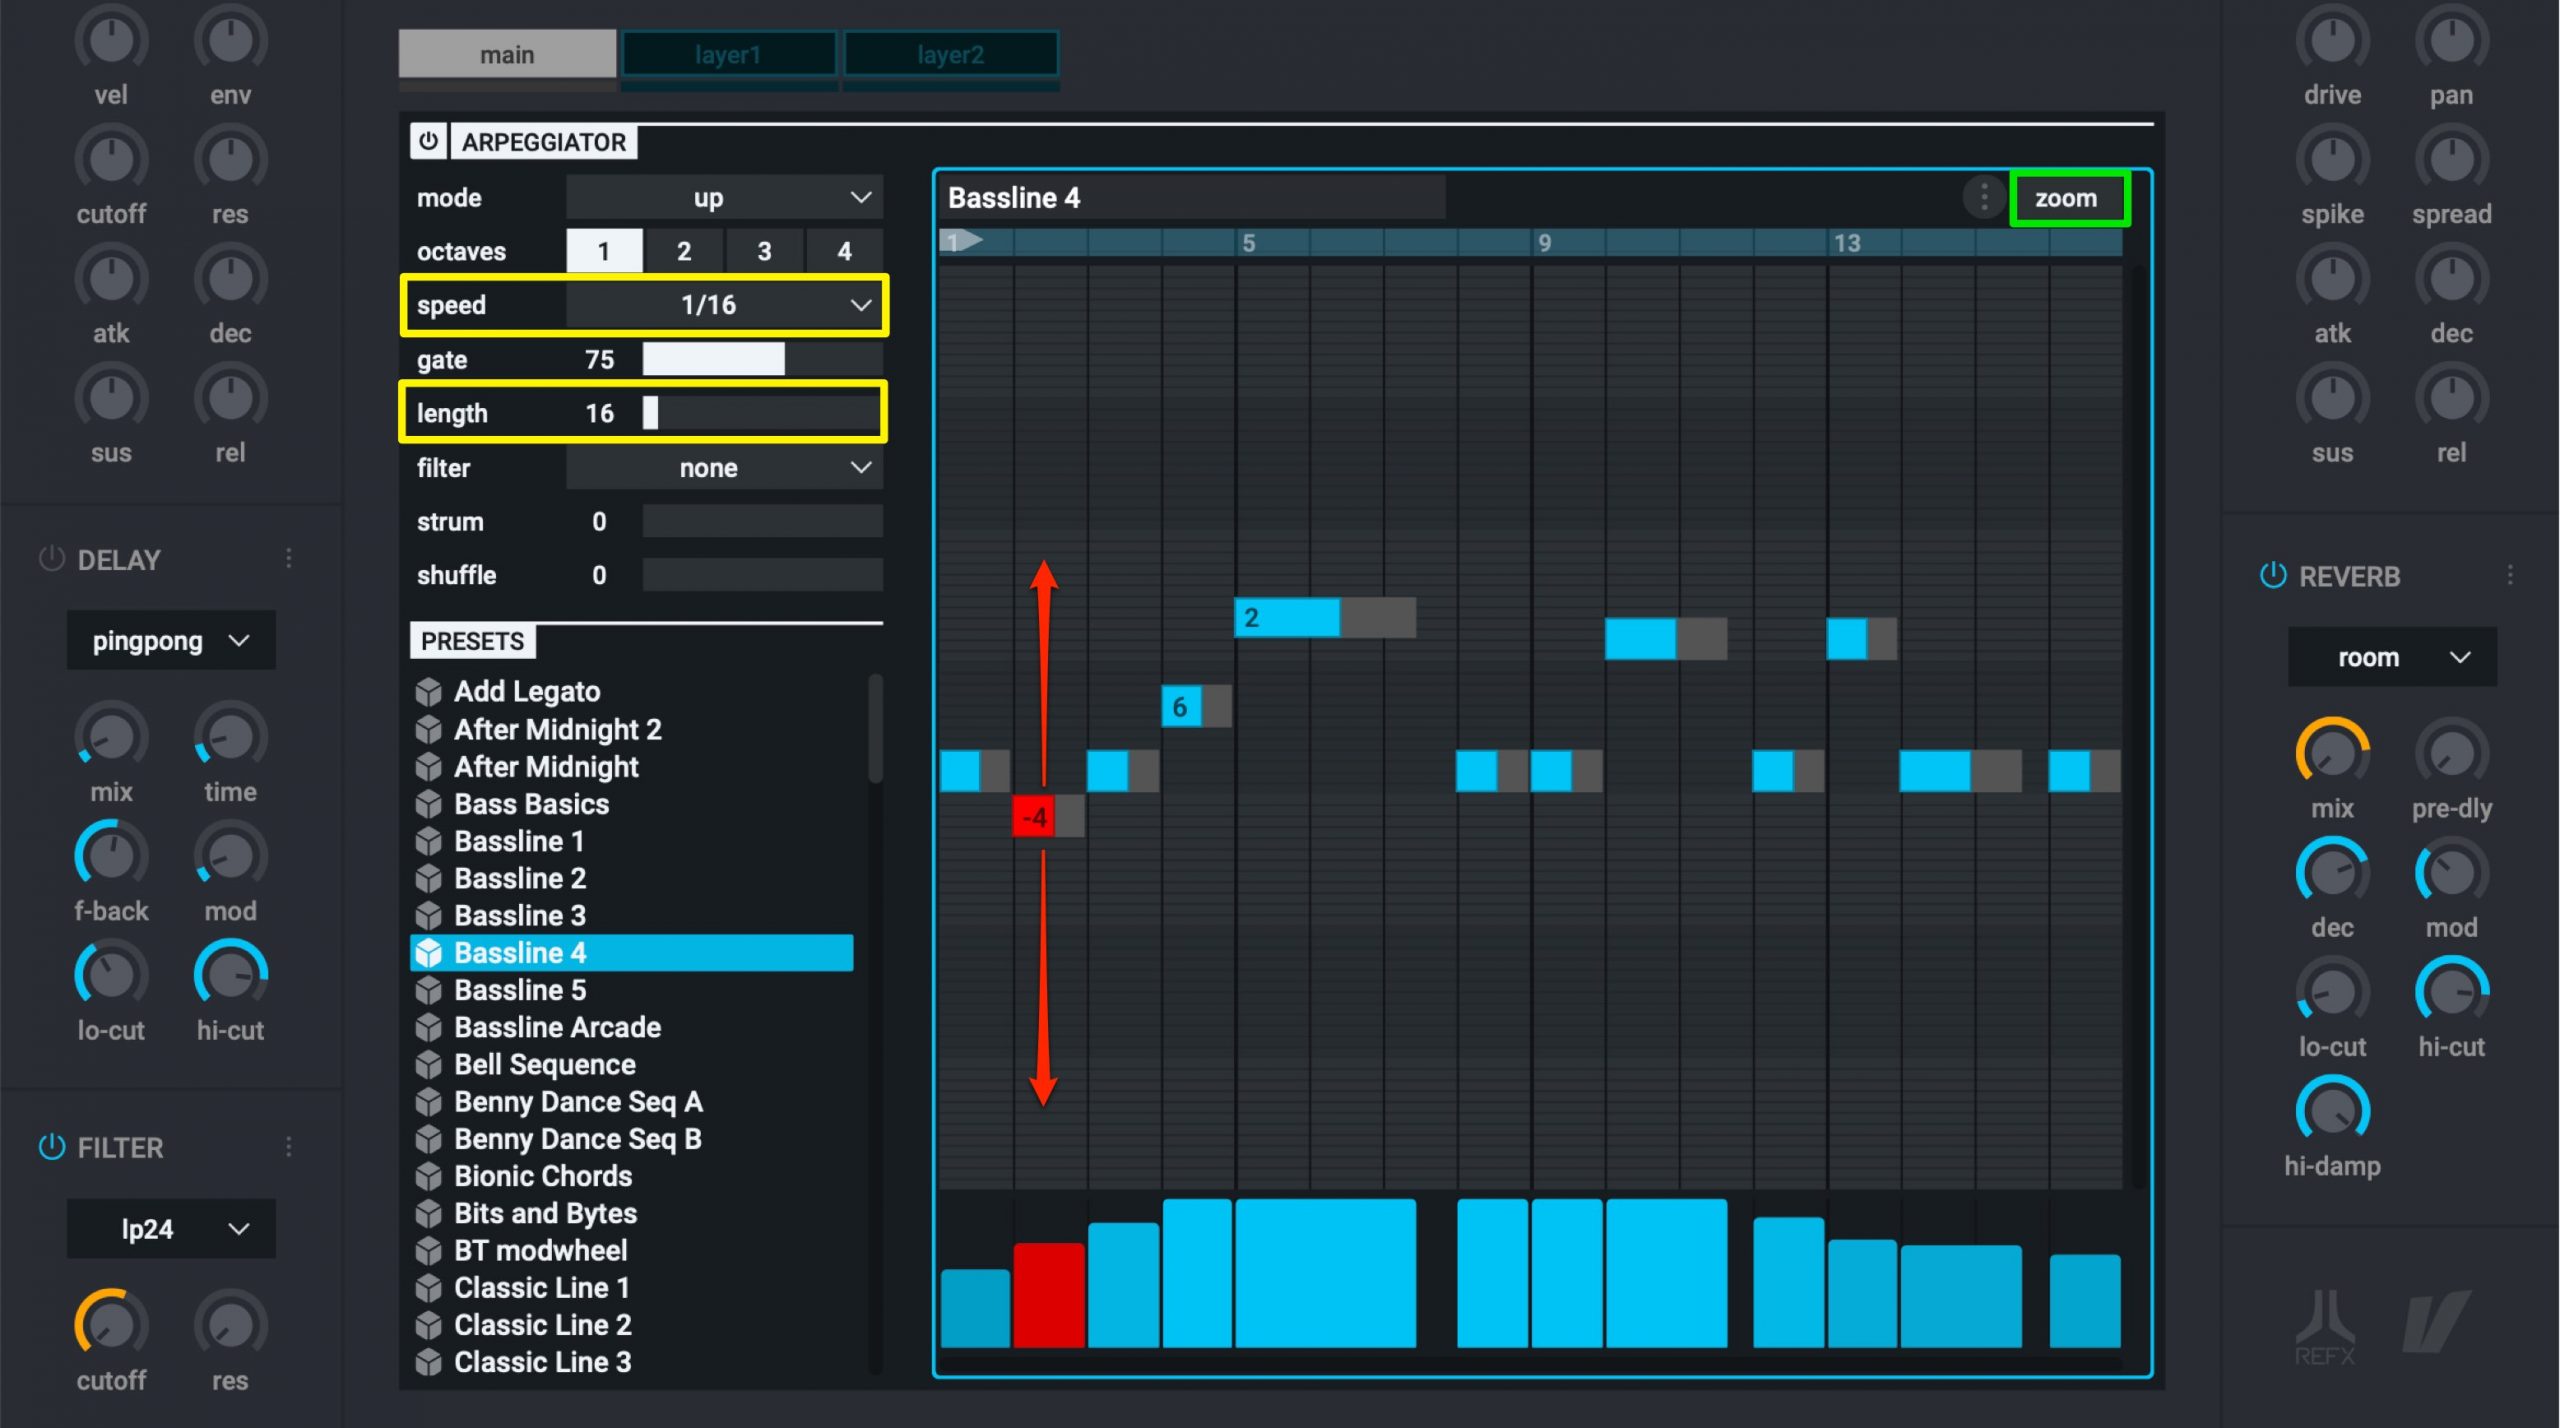
By dragging a note up/down, you can change the pitch of the phrase.
It moves in half-step increments.
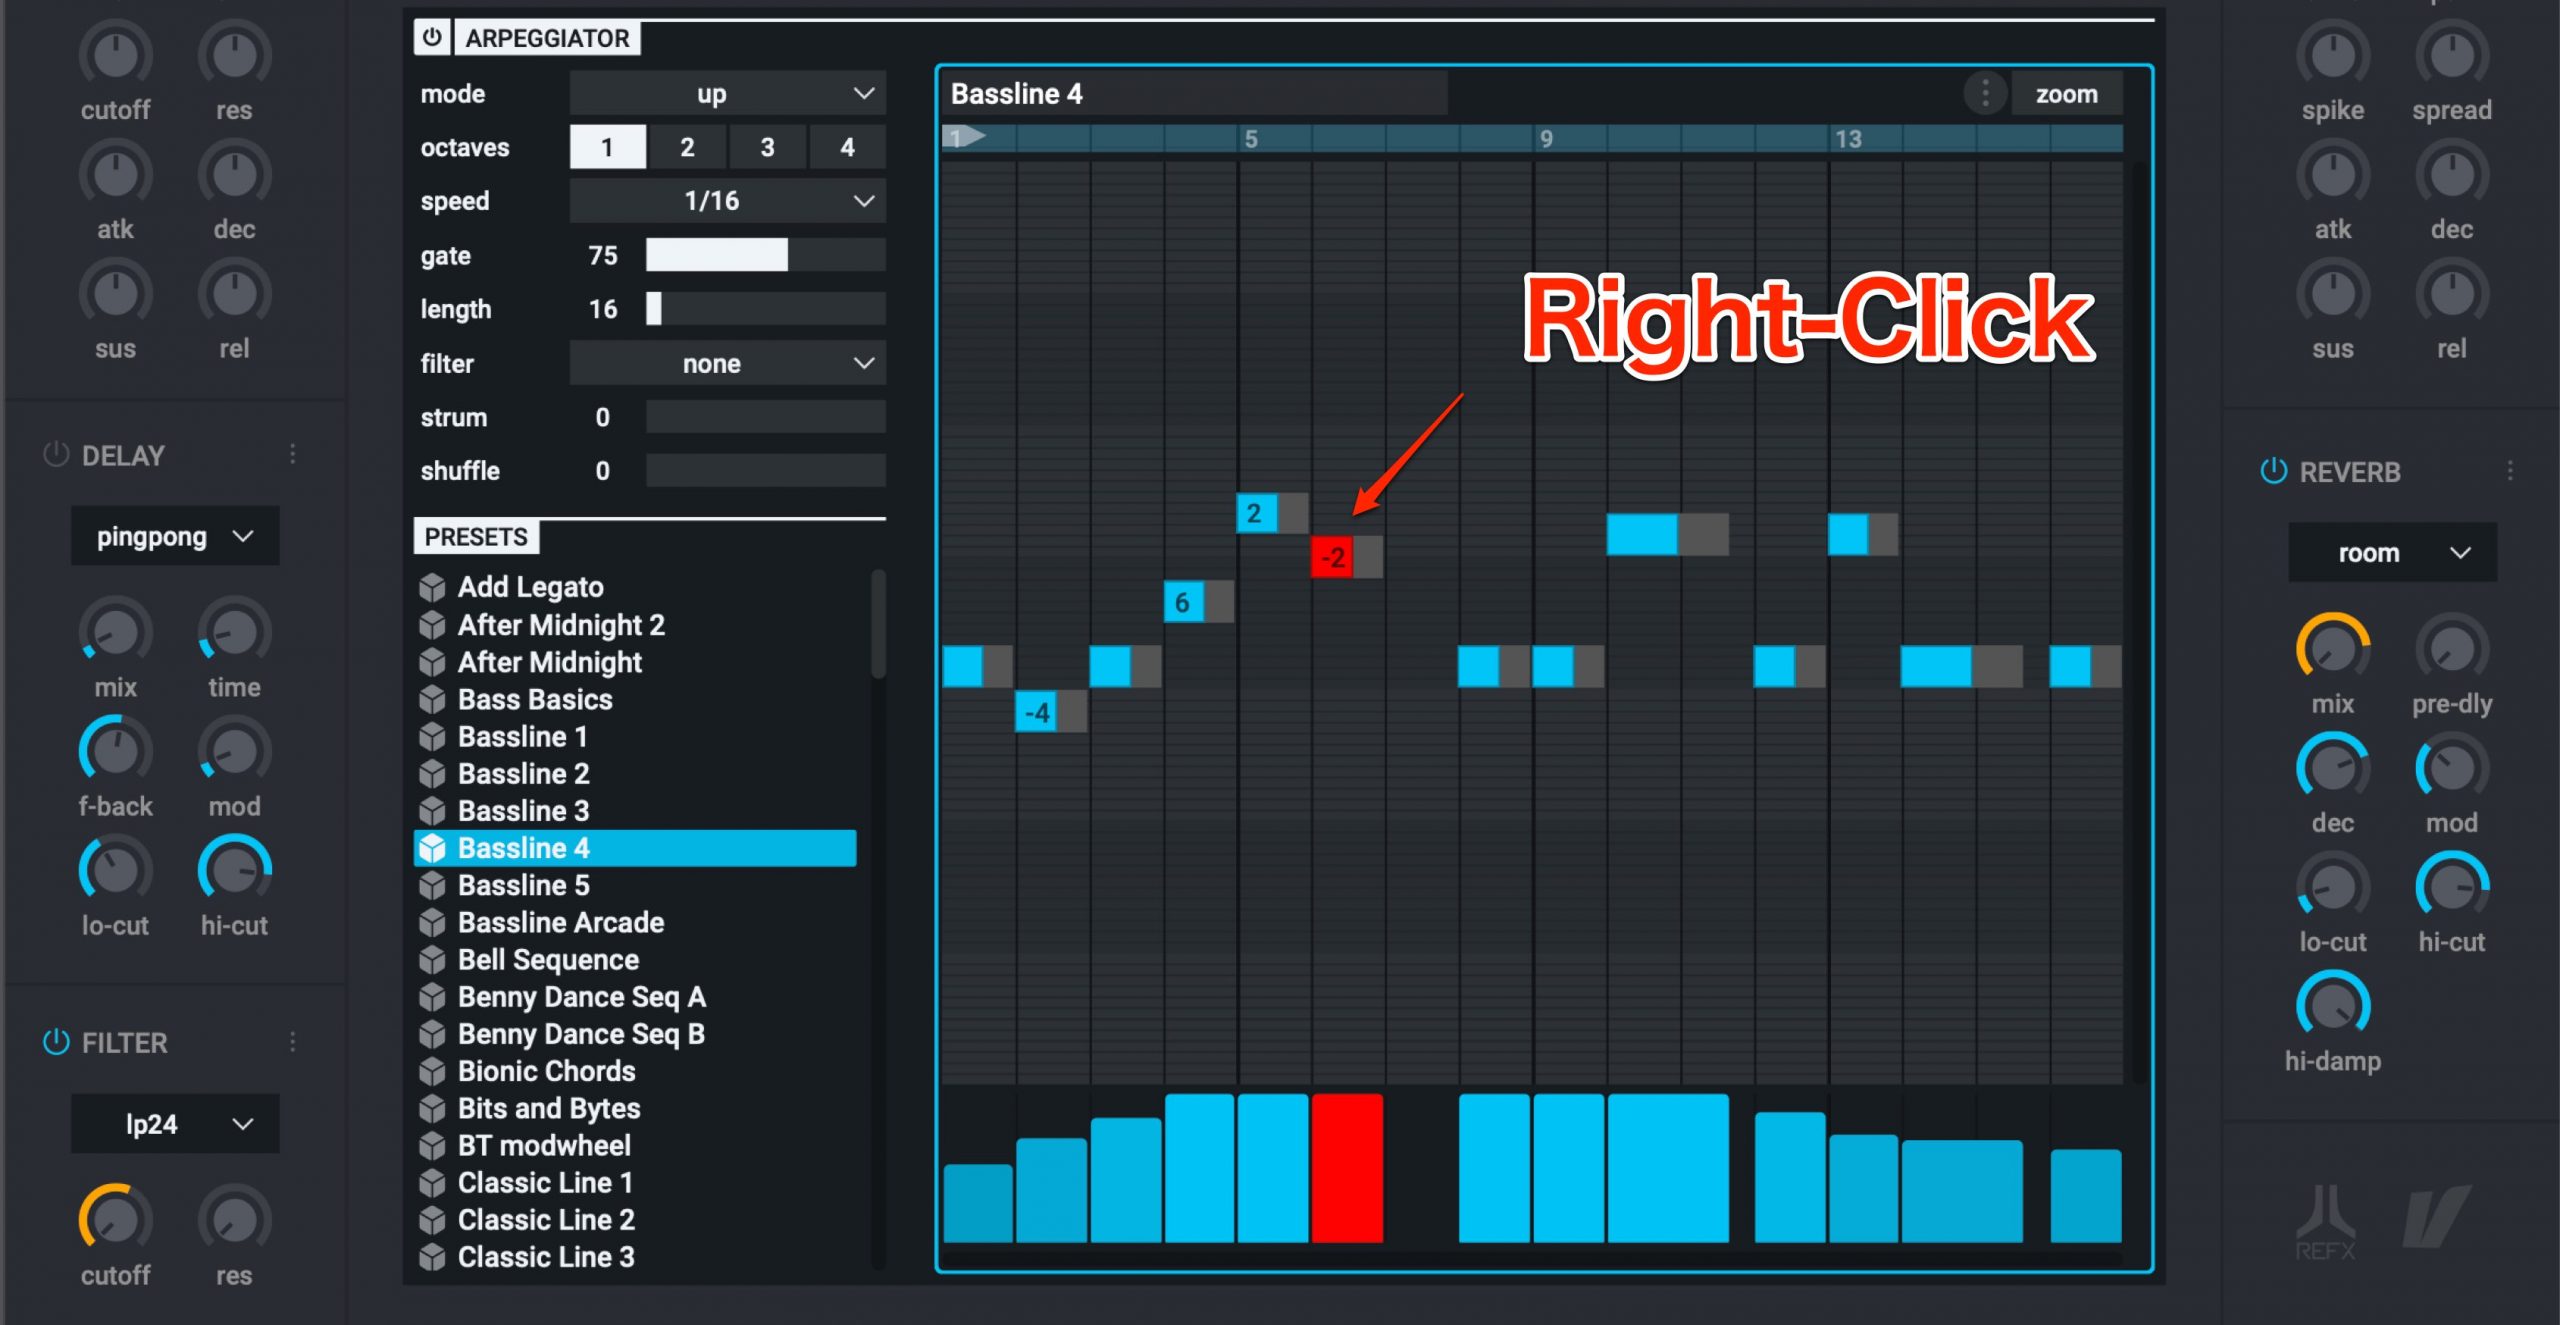
Right click to delete an existing note, or right click an empty area to create a new note.
By dragging the end of a note, you can adjust the note length as well.
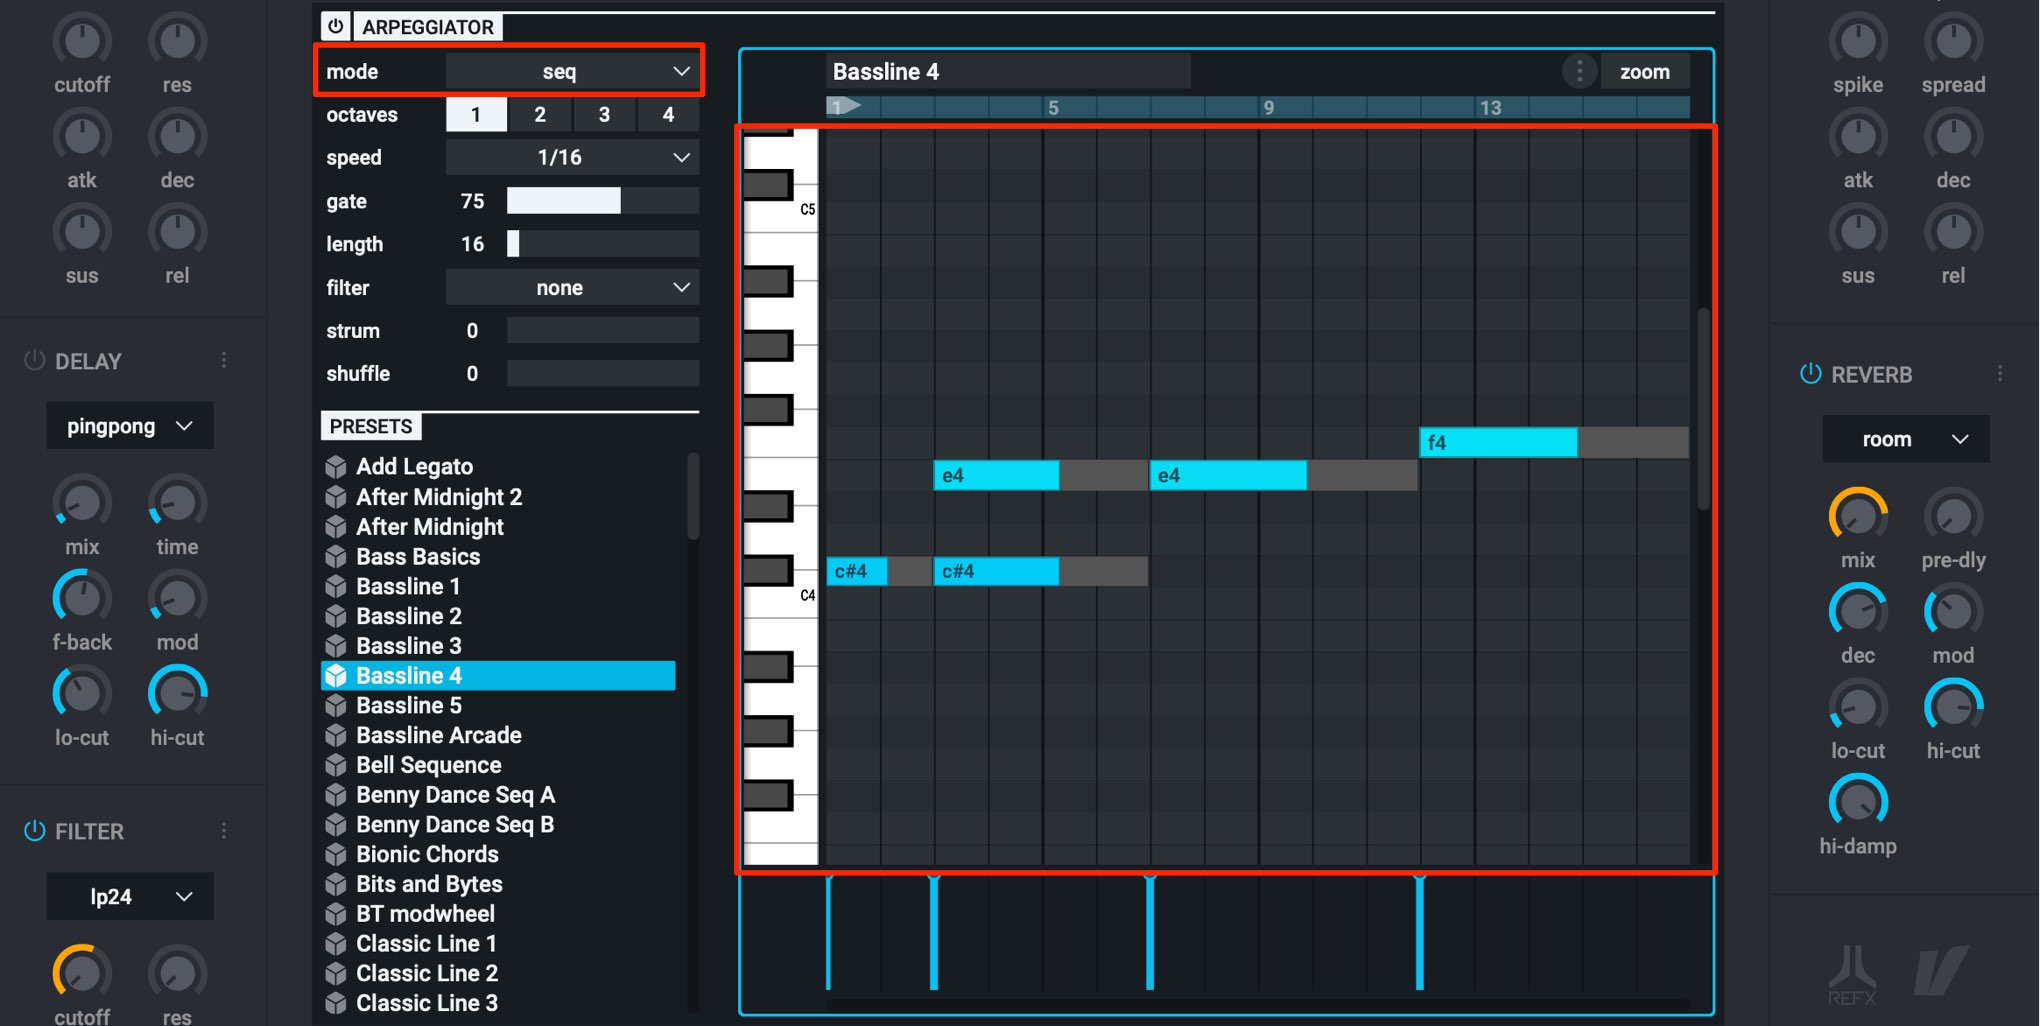
By changing “mode” to “seq”, you can sequence in phrases in a format similar to a piano roll in a DAW.
This is great for making riffs as well.
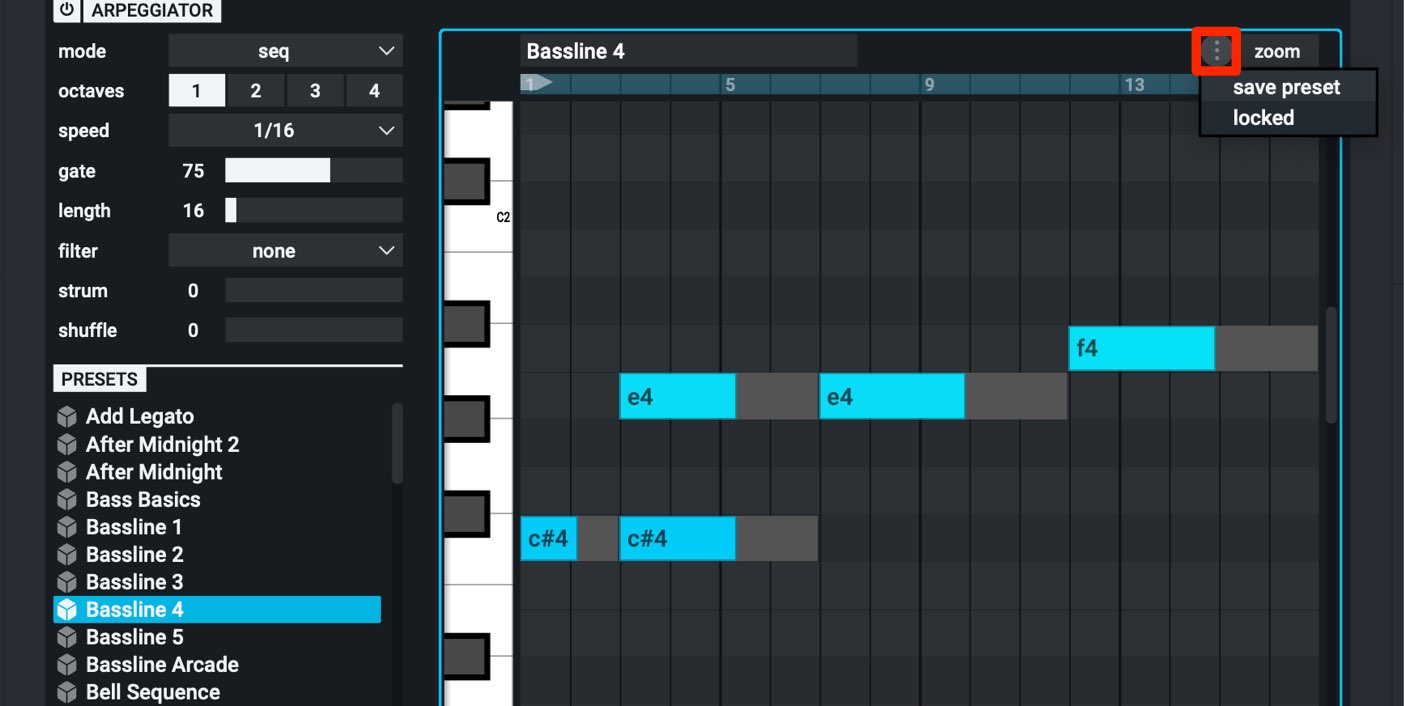
You can save your custom patterns using “save preset” to access them in other projects.
By selecting “locked”, you can keep the arpeggiator settings even when the sound preset is changed, allowing you to keep your phrases and just change the underlying sounds.
Nexus 3’s Trancegate
Like the arpeggiator, “Trancegate” allows you to create rhythms and edits just by having an extended MIDI note.
You can easily create rhythmic patterns and is a great way to improve your workflow.
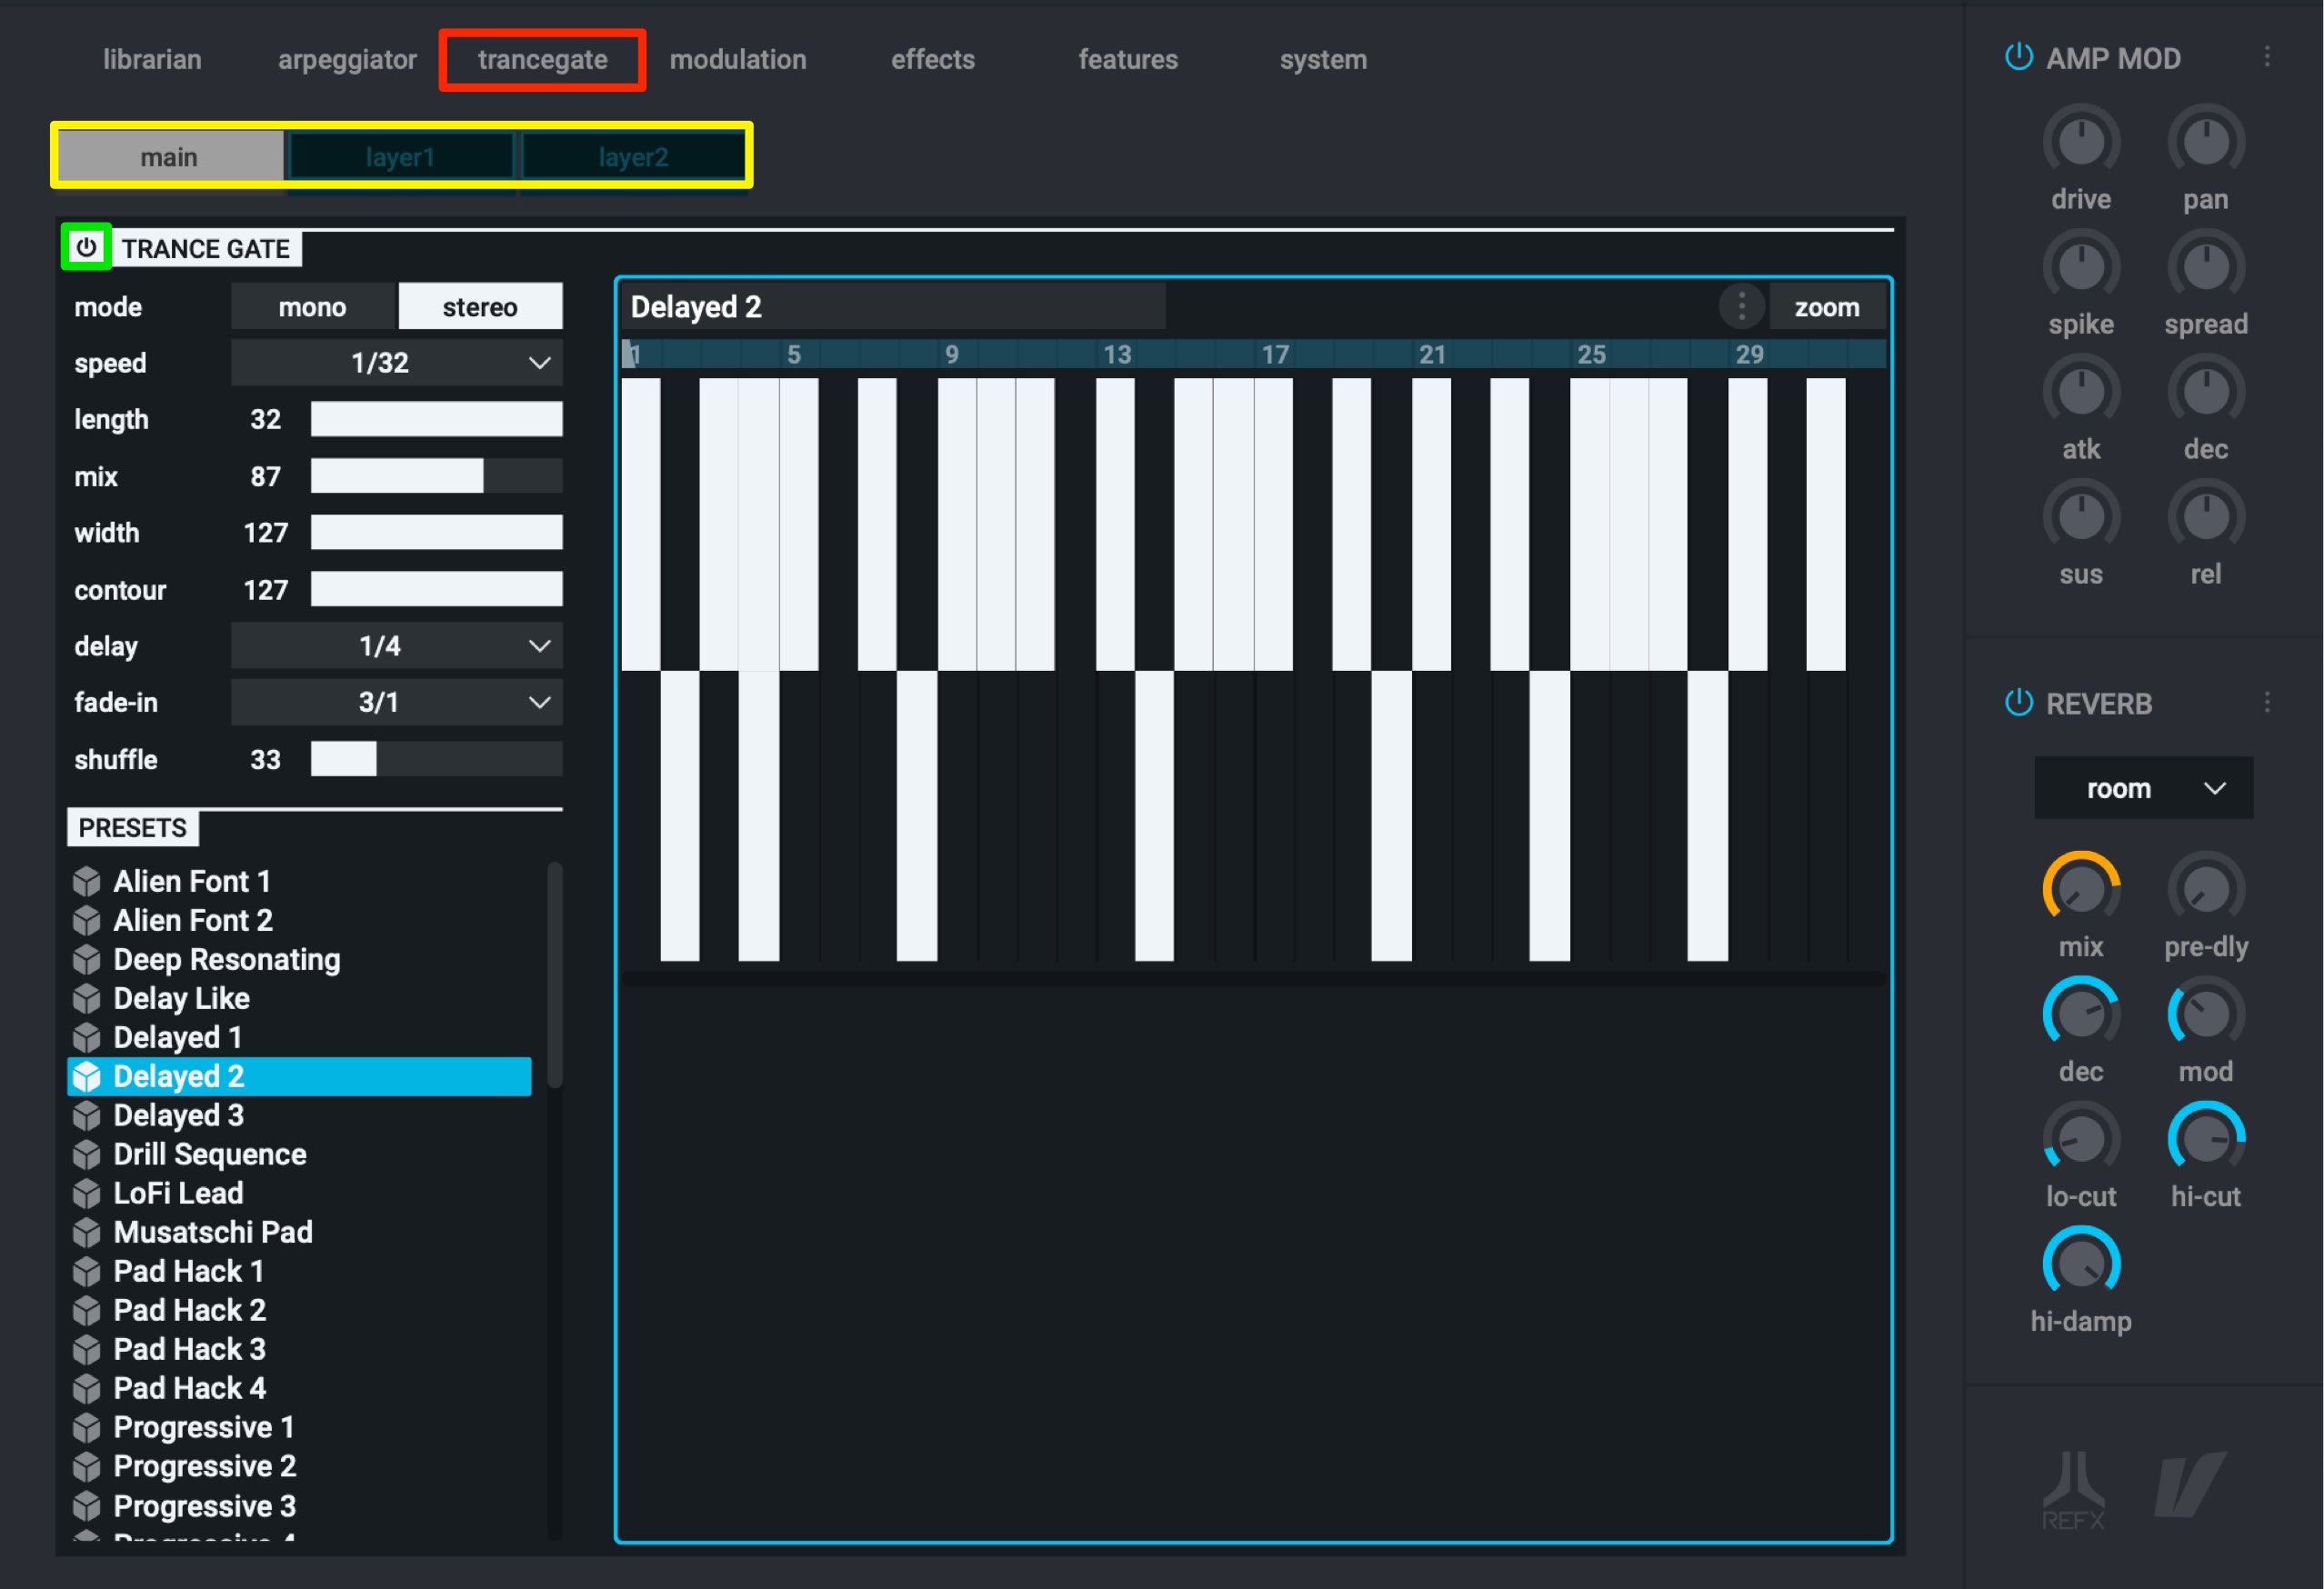
Select the “trancegate” tab, and like with the arpeggiator, select the layer you wish to apply it to (main will apply trance gate to all layers).
Turn the power button on to activate trancegate.
- mode : Change between stereo/mono. Stereo allows you to have different patterns on the left/right
- speed : Changes the speed of the gate pattern by subdivision
- length : Changes the length of the gate pattern
- mix : Adjusts the volume of the sound before/after the gate is applied. Only the gated sound is heard when at 100
- width : Adjusts the spread of the sound
- contour : Adjusts the attack of the gated phrase
- delay : Creates a time lag before the gate effect is activated. This is adjusted in subdivisions. The sequenced MIDI note will play normally until the gate is activated
- fade-in : Creates a gradual gate effect adjusted in subdivisions.
- shuffle : Adds triplet style swing/bounce to the gated rhythm to create groove
Because many presets are vailable (in yellow), you may find an interesting pattern that you didn’t know would fit your track.

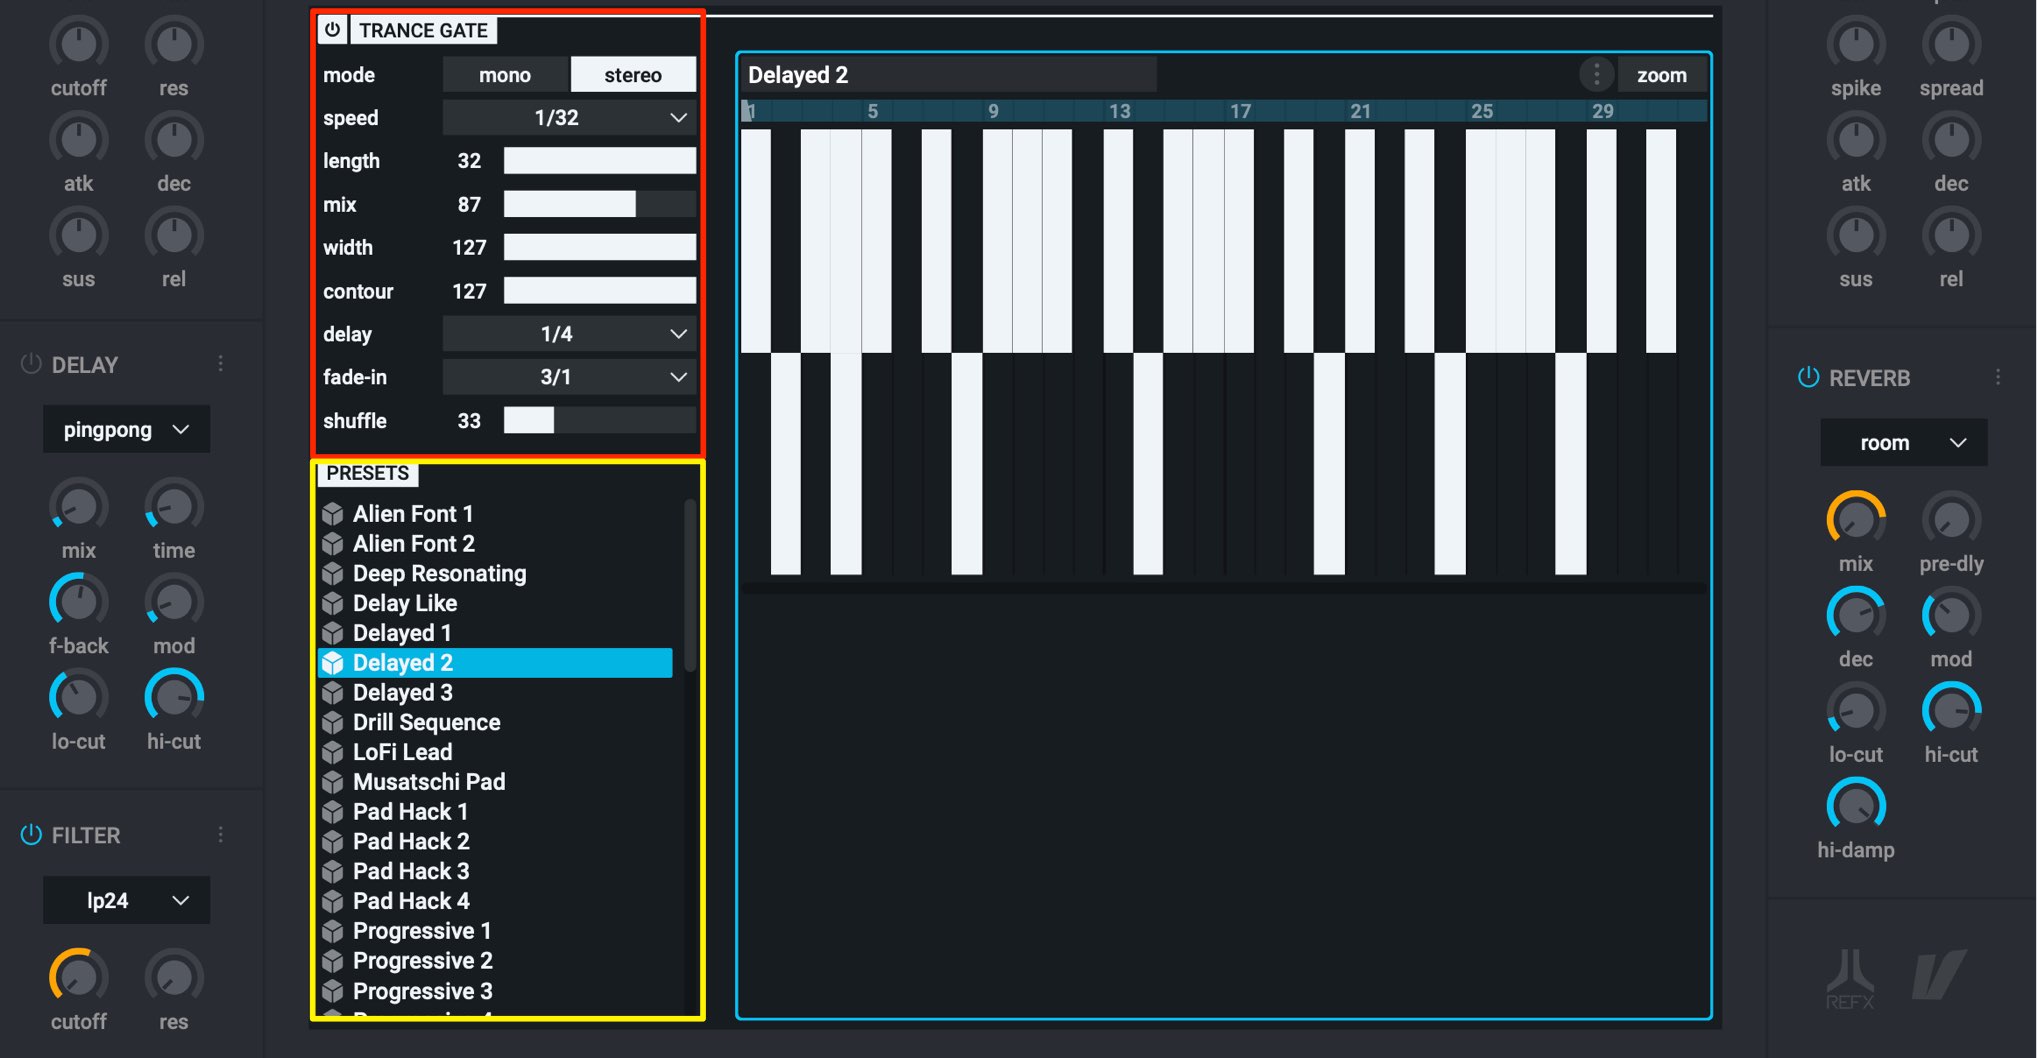
You can edit the gate patterns as well.
Right click on an existing gate to delete it, or right click an empty area to create a new one.
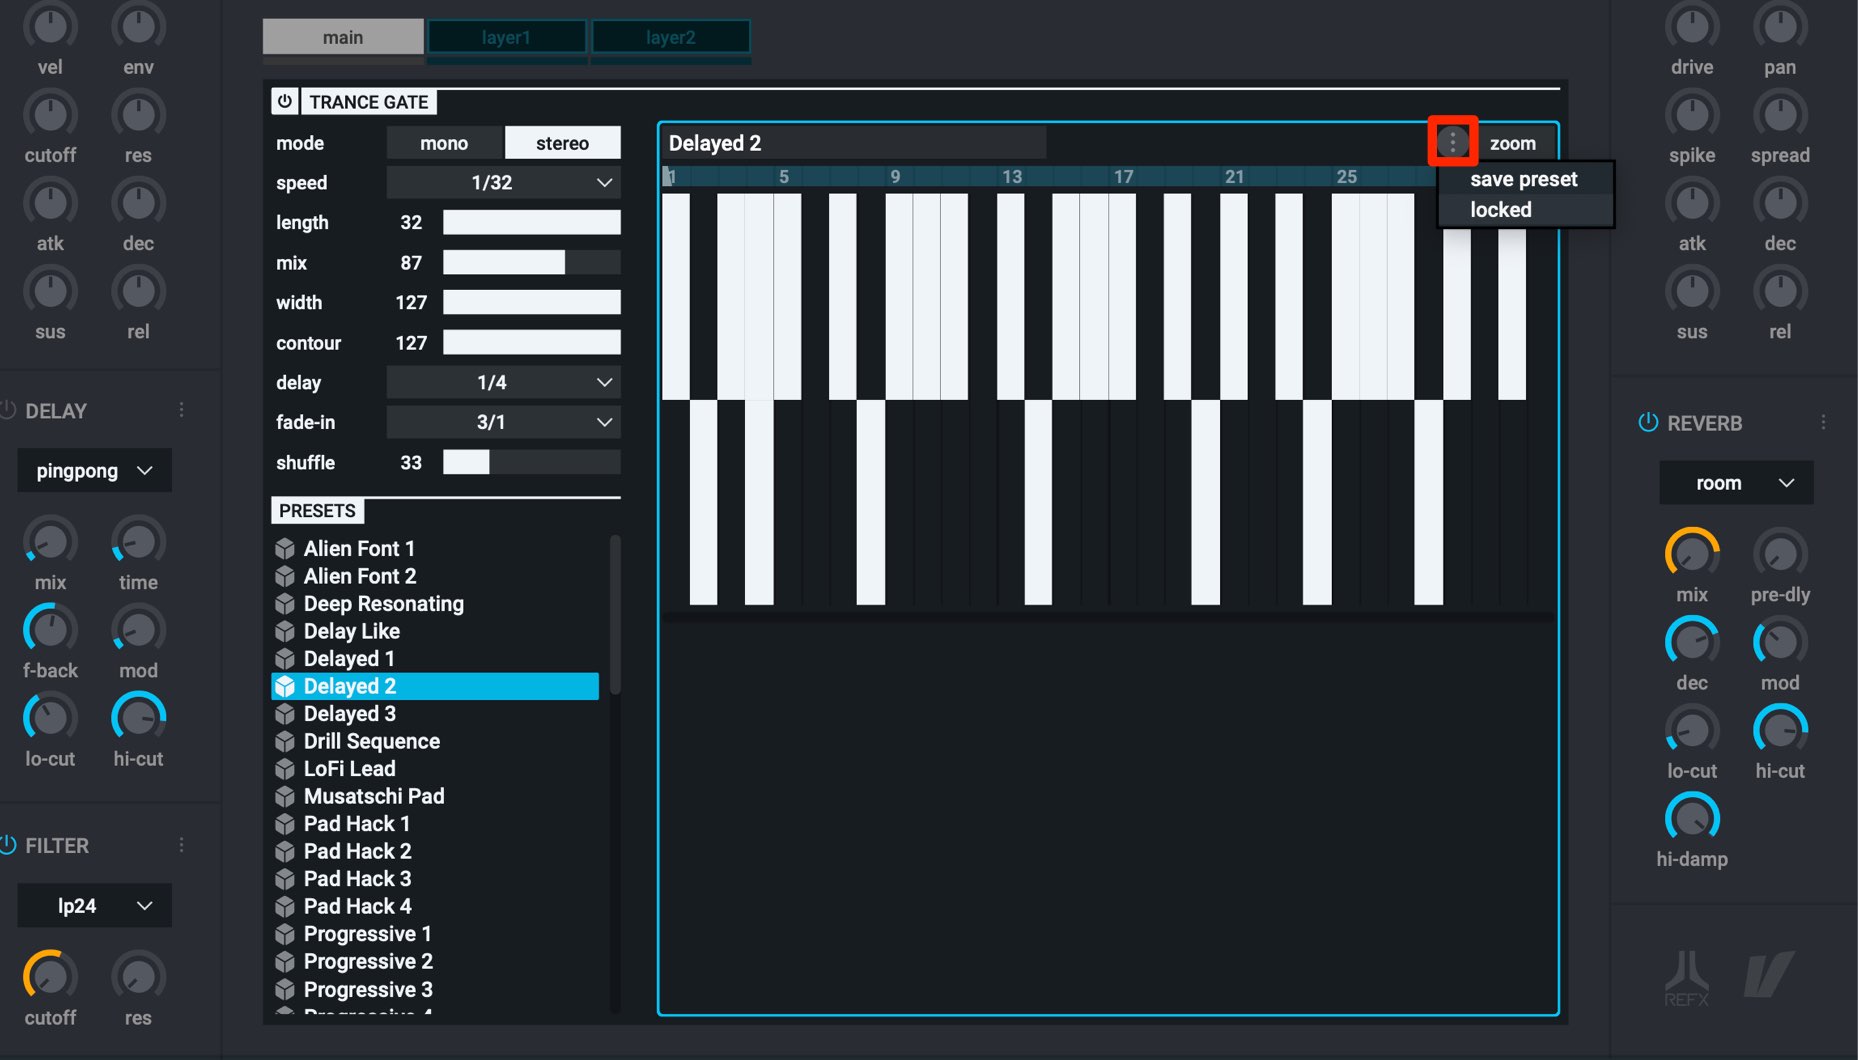
You can save your custom patterns using “save preset” to access them in other projects.
By selecting “locked”, you can keep the gate settings even when the sound preset is changed, allowing you to keep your phrases and just change the underlying sounds.
Nexus 3’s Effects Section
There have been changes/improvements to the effects section as well, making it easier to use than ever.
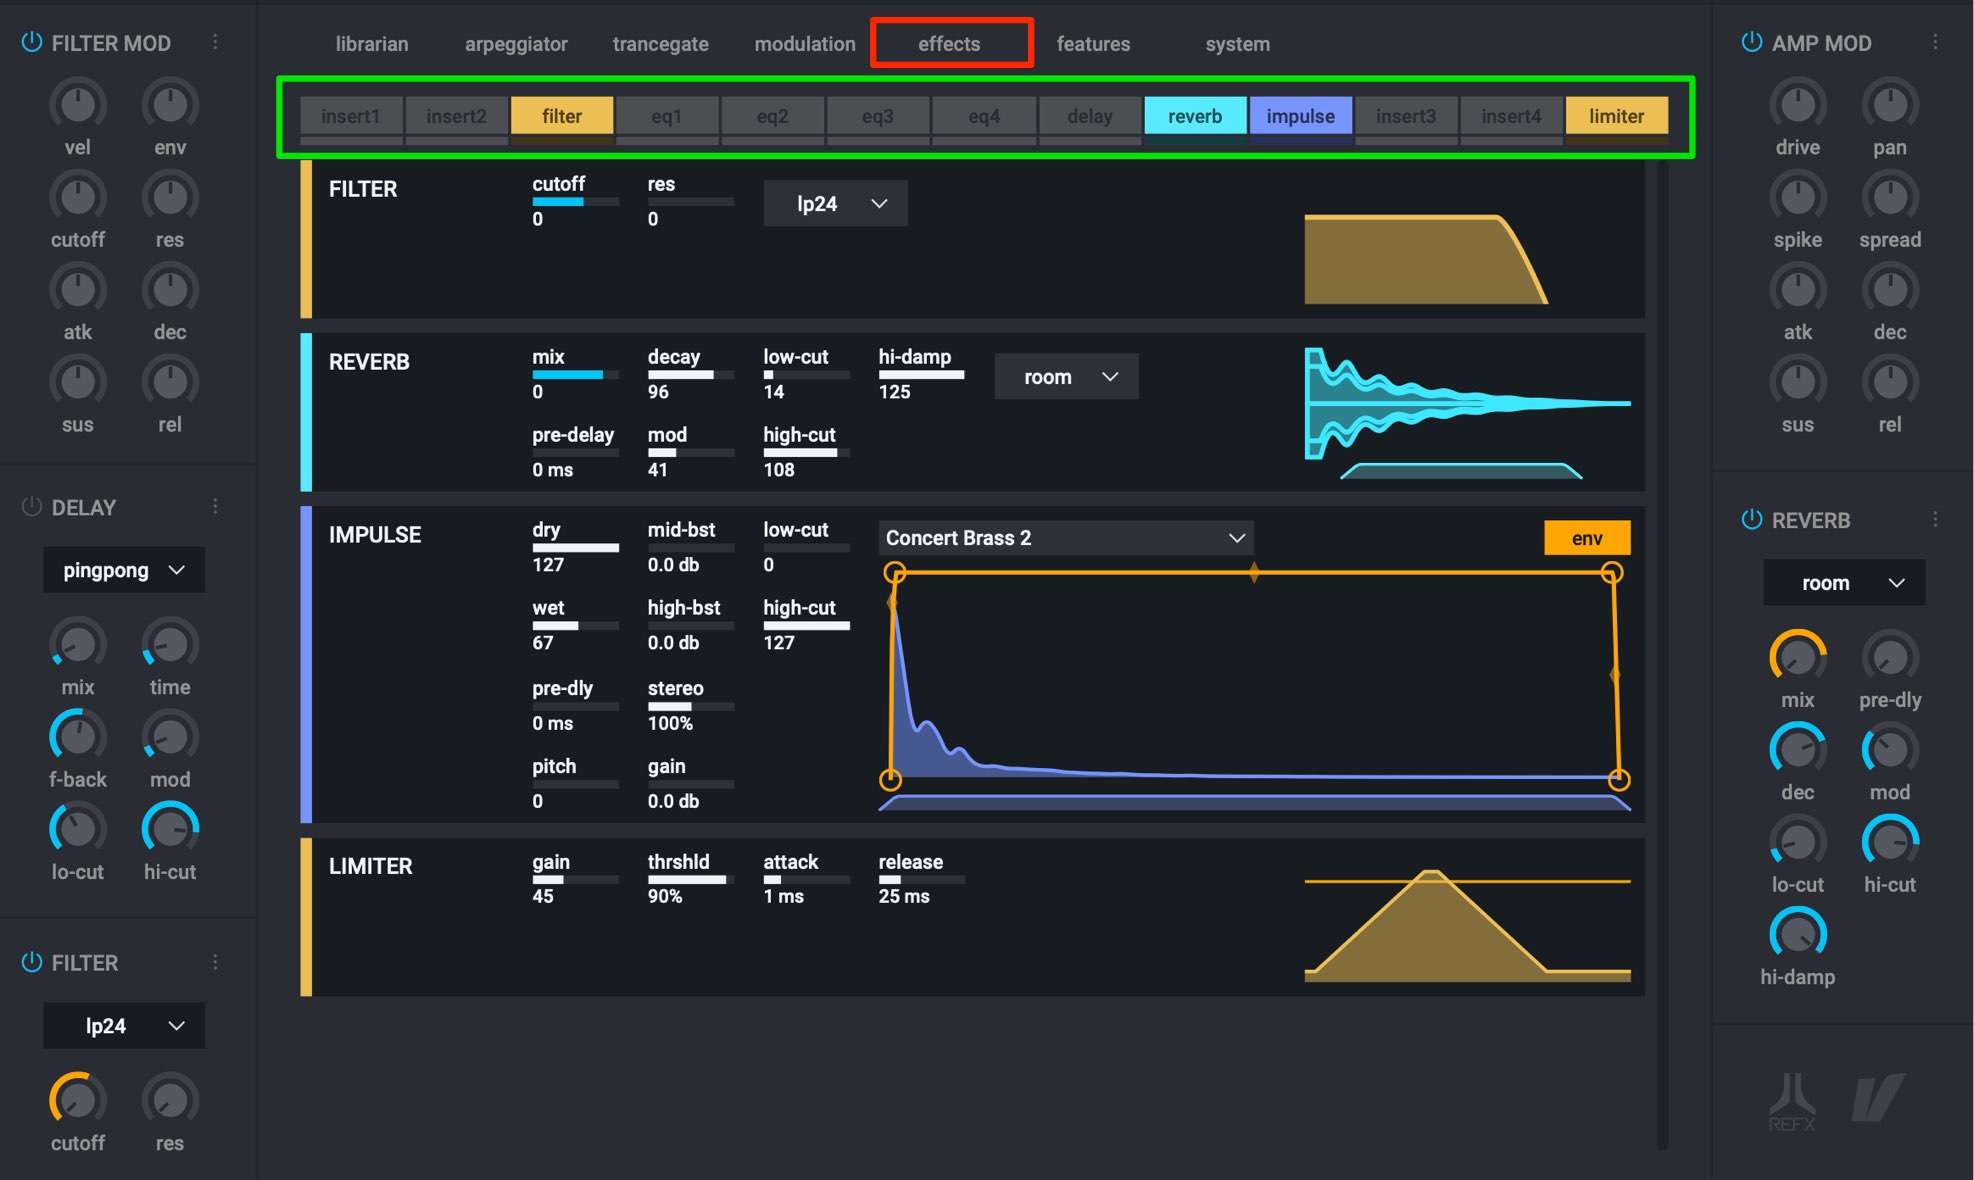
Click on the “effects” tab to access the effect section.
Click on the effect you want to apply to turn it on.
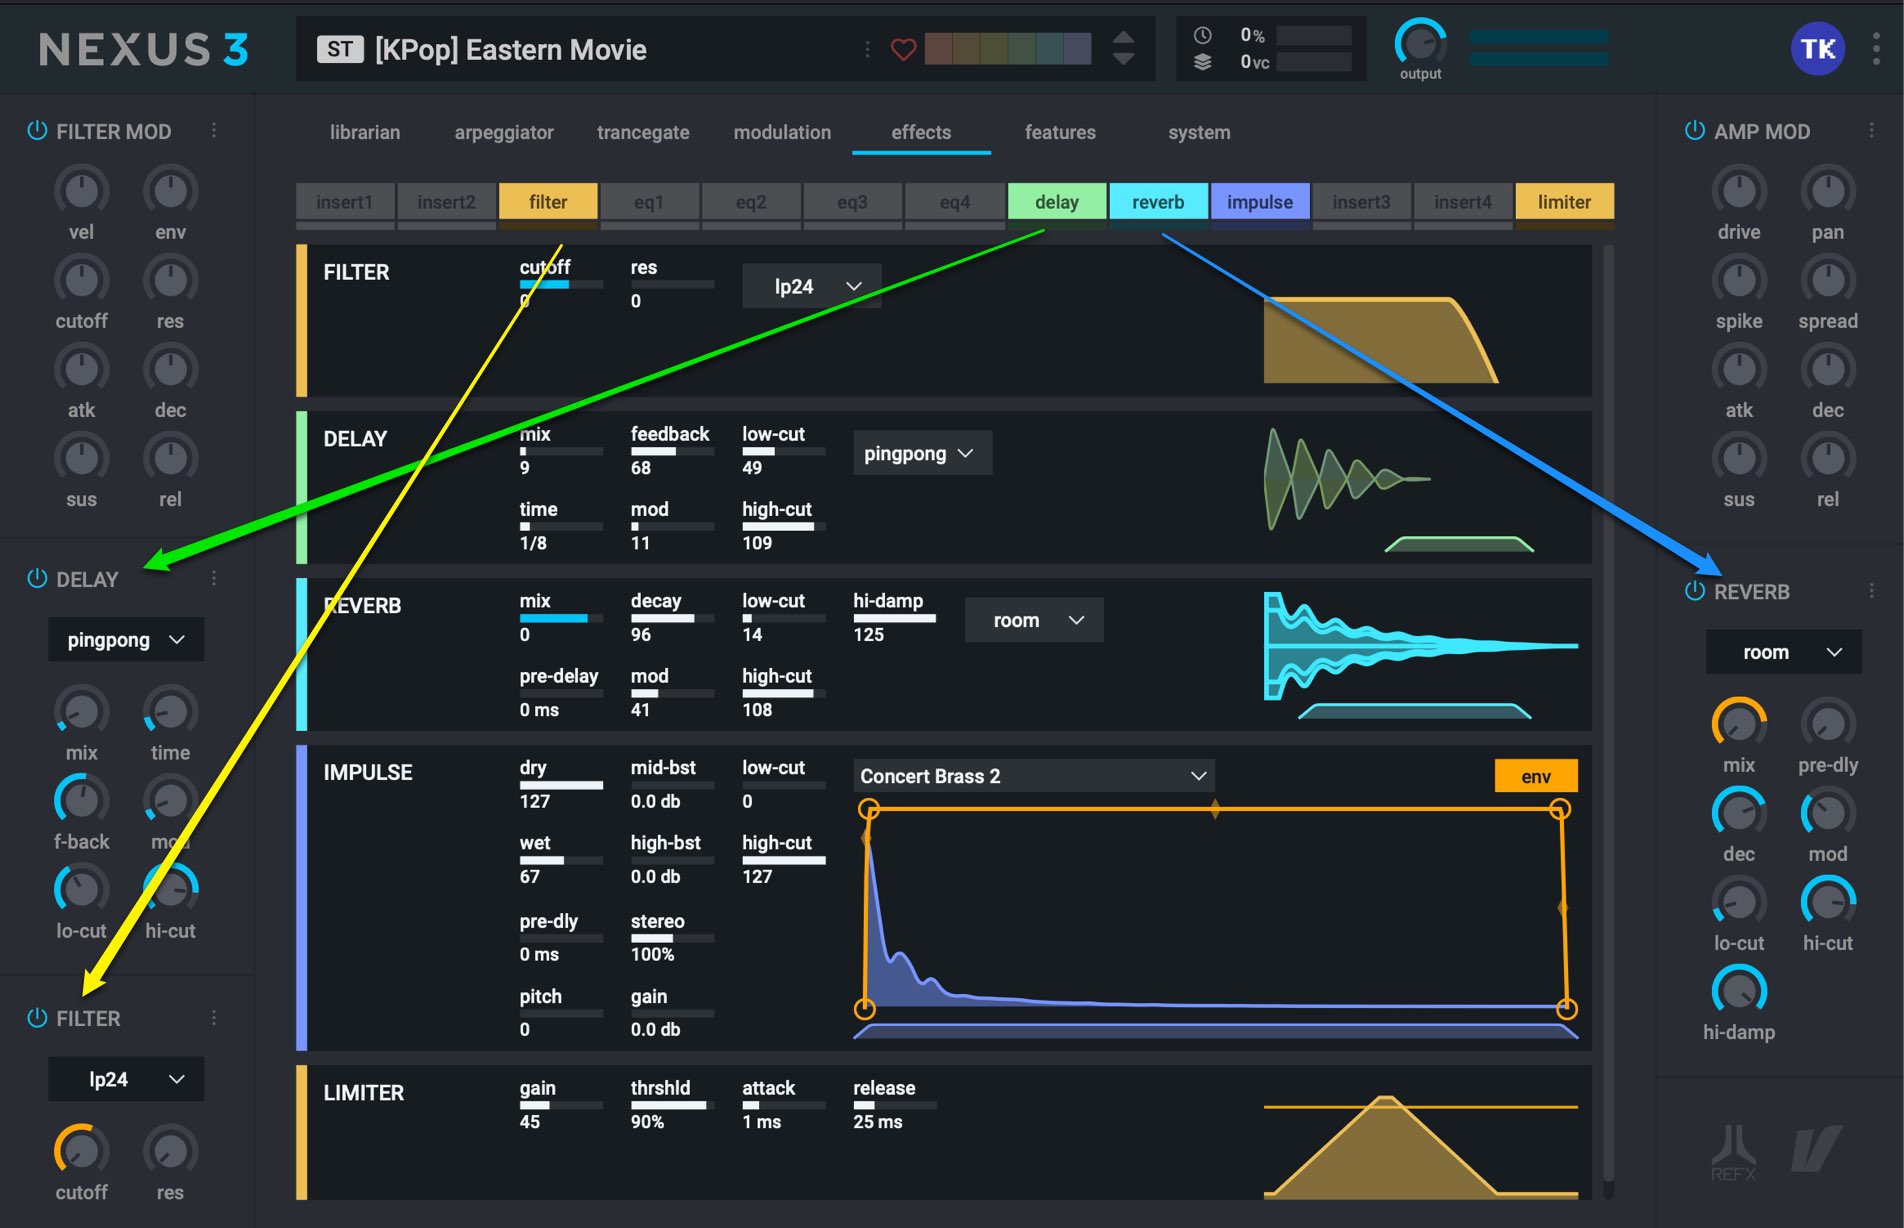
“Reverb” “Delay” and “Filter” are linked with the panels on the side.
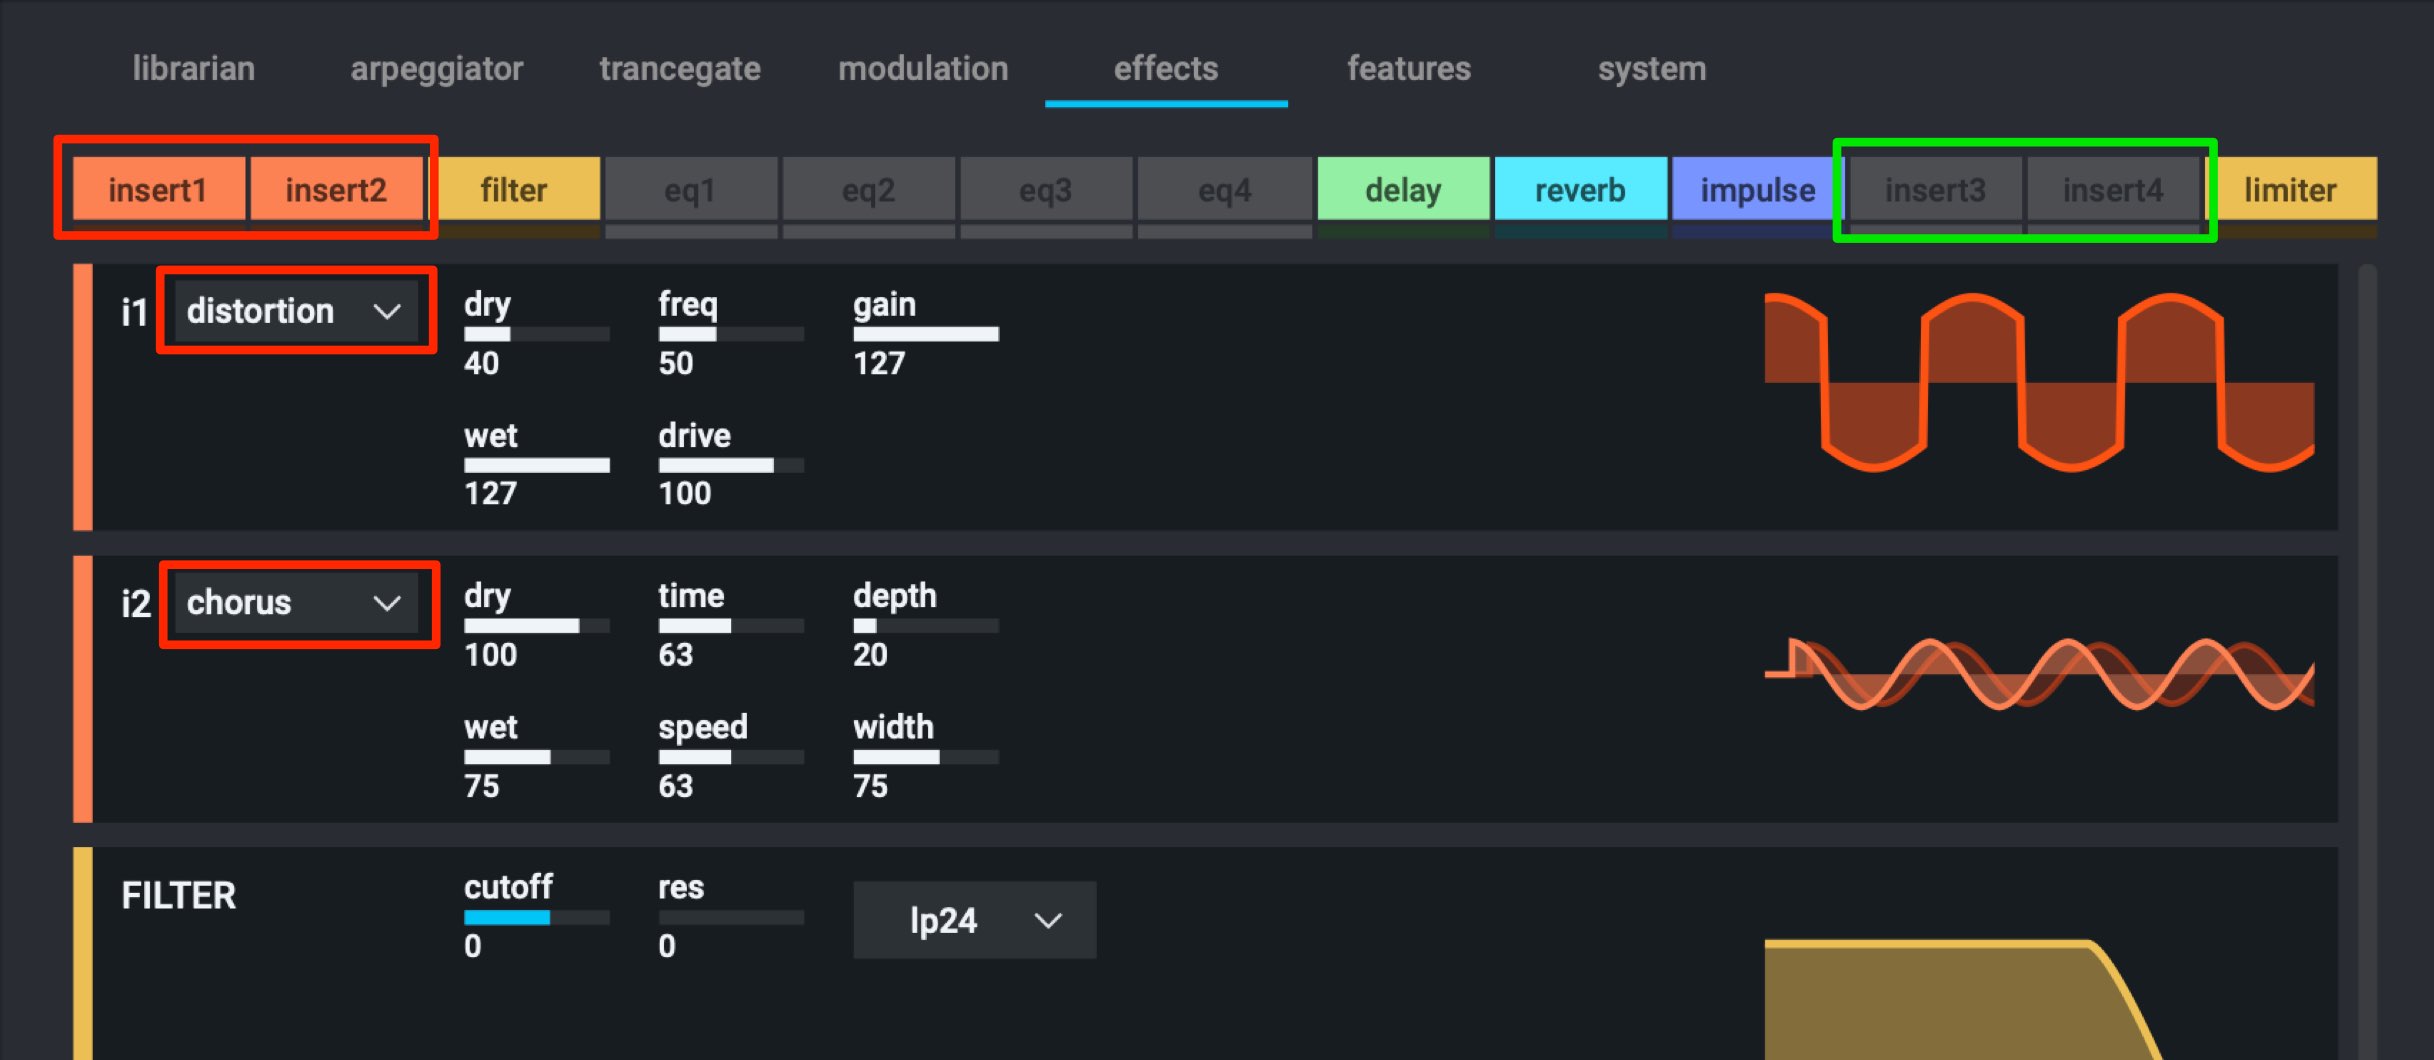
There are multiple effect types that can be selected from the insert effects, allowing you to mix and match to create various sounds.
These features are great when you can’t think of a phrase, or want to get your hands on some classic phrases.
We highly recommend trying out this great tool in your next production!
Product URL: https://refx.com